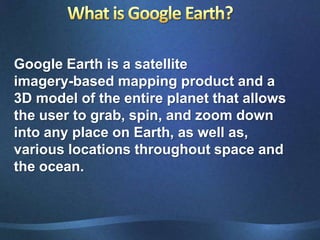
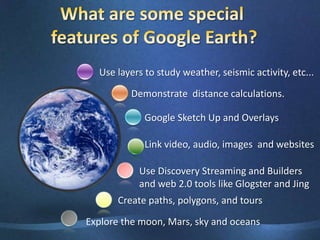
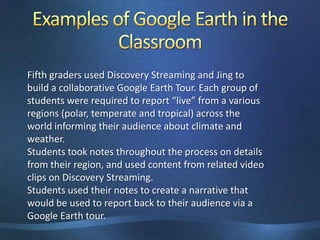
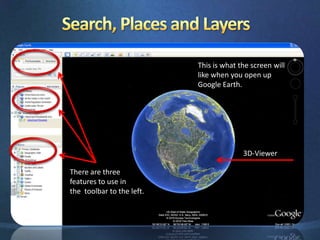
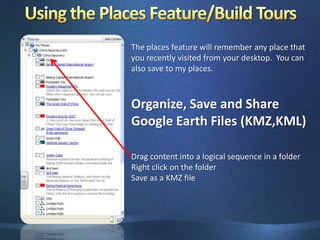
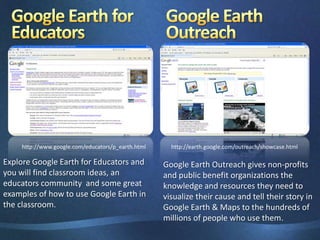
Presented By:Adam Controy and Andrew Santaceciliahttps://ktiadam.wikispaces.comWhat is Google Earth?Ways to Use Google Earth in the Classroom  Classroom ExamplesLayers of Learning with Google Earth	Tools and Layers
What is Google Earth?Google Earth is a satellite imagery-based mapping product and a 3D model of the entire planet that allows the user to grab, spin, and zoom down into any place on Earth, as well as, various locations throughout space and the ocean.
What are some specialfeatures of Google Earth?Use layers to study weather, seismic activity, etc...Demonstrate  distance calculations. Google Sketch Up and OverlaysLink video, audio, images  and websitesUse Discovery Streaming and Buildersand web 2.0 tools likeGlogster and JingCreate paths, polygons, and toursExplore the moon, Mars, sky and oceans
Why Use GE in the Classroom?To give teachers opportunities:To provide a sense of reality and purpose for learning within the K-12   classroomTo engage and excite learnersTo help learners conceptualize, visualize, share, and communicate information about the world and scienceTo provide cross-curricular learning optionsTo create active, exploratory, and empowering learning environmentsTo give students opportunities:to exhibit their learning to othersto use emerging technologies and digital toolsto communicate their research in a personally meaningful way (Web 2.0 )to view their world from a more connected, global perspectiveto enhance map reading and navigation skills
Examples of Google Earth in the Classroom Fifth graders used Discovery Streaming and Jing to build a collaborative Google Earth Tour. Each group of students were required to report “live” from a various regions (polar, temperate and tropical) across the world informing their audience about climate and weather.Students took notes throughout the process on details from their region, and used content from related video clips on Discovery Streaming.Students used their notes to create a narrative that would be used to report back to their audience via a Google Earth tour.
Examples of Google Earth in the Classroom First grades explore a virtual field trip in which students visit each continent to learn about different frogs. Through interactive activities, Discovery Streaming videos & assignments, and various Web 2.0 applications, the students are learning as they create and share products that demonstrate their knowledge on the frogs from each continent.
Google Earth and Discovery Student Adventures
Search, Places and LayersThis is what the screen willlike when you open upGoogle Earth.3D-ViewerThere are three features to use inthe  toolbar to the left.
Three Ways to Fly1. Enter the location name	- Spelling Counts	-  Do not use "The"	-  Examples to try		a. Eiffel Tower		b. Niagara Falls		c. Statue of Liberty2. Paste in coordinates  from    Wikipedia or another source    Eiffel Tower     48° 51' 29" North, 2° 17' 40"3. Enter City, Country	- Then try adding layers		a. 3-D Building Warehouse		b. Geographic Web		c. Google Earth Community
Using the Places Feature/Build ToursThe places feature will remember any place that you recently visited from your desktop.  You can also save to my places.Organize, Save and Share Google Earth Files (KMZ,KML)Drag content into a logical sequence in a folderRight click on the folderSave as a KMZ file
Make a FolderRight click on My Places
Add a folder
Name the folderExplore, Search, and DiscoverGoogle EarthIn the Earth Gallery you will find many tours, animations and sketch-ups created by people from around the world.  Use the search engine or the links to the left to explore the Earth Gallery
Using the Layers FeatureThe Layers feature in Google Earth provides a variety of data points of geographic interest that you can select to display over your viewing area. This includes points of interest (POIs) as well as map, road, terrain, and building data. Some layers act as a folder that contain categories of data. These layers are indicated by a plus sign. Click on the plus sign to view the sub-categories for each layer.
Five Fun Layers Found by a Fourth GraderNational Geographic Ocean Atlas
State of the Ocean
Discovery Network
NASA
Gigapan PhotosThe Tool BarRecord a TourAddPolygonsRulerSunlight across theLandscapeAddImage OverlayPrintPlacemarkersEarthSkyMarsMoonShow HistoricalImageryView inGoogle MapsAddPath
Adding a PlacemarkClick on the "Placemark" icon in the toolbarA flashing placemarker will appear.  You can drag this to the location where you want to mark.Right click on the placemarker, a box will come up for you to write a description.  You will want to give your placemarker a title.  This is also where you would write in information for your students, questions, etc, link websites or embed code.
Adding a Polygon or PathClick on the "Polygon or Path" icon in the toolbarA flashing marker will appear.  You can drag this from location to location to create a polygonal shape.Double click on the Polygon, a box will come up for you to write a description.  Free-Form shapeClick once, hold, and drag. The cursor changes to an up-arrow to indicate that you are using free-form mode. As you drag the cursor around the 3D viewer, the outline of the shape follows the path of your cursor. If you are drawing a path, a line appears as a result, and if you are drawing a polygon, a shape evolves from the path of your cursor, always connecting the beginning and ending points. Regular shapeClick and release. Move the mouse to a new point and click to add additional points.
Adding ImagesClick  "add image overlay“ and this box will appear.Give your picture a title.Then click on browse to locate any saved files in the computer.  Below, you can add a description of your photo for your students.  This is also a place where you can ask questions, prompt their thinking, or embed video or sound.
Adding Video1.  Link videos from Discovery Streaming, or any other website. 2.  Embed video by pasting HTML code into your placemark's properties
Embedding Images in a PlacemarkOpen up your web browser and find an image, copyright free of course (try using Creative Commons or, Flickr)Find the URL for the picture you would like to embed in t the Placemark. Copy the URL into the description section.Now we need to do a little HTML coding:  Copy this code <imgsrc=“URL”>Go back and click on the placemark.  You should see the image embedded in the placemark
Creating the “Floating Object”Screen OverlayHall Davidson from the Discovery Educator Network shared this code on his blog.  You can find his blog at Discoveryeducatornetwork.com ( media matters blog)Download the KTIADAM.kmz file from this wiki.Click the file to open it in Google Earth.It should save to your Temporary Places. Click on it and from	file, select Save Places As.  Save it as a KML, NOT KMZ.Open a Word document and then open the KTIADAM.kml file.Replace file name KTI Adam with your file nameReplace href with the URL for your pictureSave the file. You will get warning messages. (Ignore them)Find the file.  Click on it (don’t launch it.)  Rename it. 	Change the extension to .kmz.  Open it in Google Earth.

Google earth

  • 1.
    Presented By:Adam Controyand Andrew Santaceciliahttps://ktiadam.wikispaces.comWhat is Google Earth?Ways to Use Google Earth in the Classroom Classroom ExamplesLayers of Learning with Google Earth Tools and Layers
  • 2.
    What is GoogleEarth?Google Earth is a satellite imagery-based mapping product and a 3D model of the entire planet that allows the user to grab, spin, and zoom down into any place on Earth, as well as, various locations throughout space and the ocean.
  • 3.
    What are somespecialfeatures of Google Earth?Use layers to study weather, seismic activity, etc...Demonstrate distance calculations. Google Sketch Up and OverlaysLink video, audio, images and websitesUse Discovery Streaming and Buildersand web 2.0 tools likeGlogster and JingCreate paths, polygons, and toursExplore the moon, Mars, sky and oceans
  • 4.
    Why Use GEin the Classroom?To give teachers opportunities:To provide a sense of reality and purpose for learning within the K-12 classroomTo engage and excite learnersTo help learners conceptualize, visualize, share, and communicate information about the world and scienceTo provide cross-curricular learning optionsTo create active, exploratory, and empowering learning environmentsTo give students opportunities:to exhibit their learning to othersto use emerging technologies and digital toolsto communicate their research in a personally meaningful way (Web 2.0 )to view their world from a more connected, global perspectiveto enhance map reading and navigation skills
  • 5.
    Examples of GoogleEarth in the Classroom Fifth graders used Discovery Streaming and Jing to build a collaborative Google Earth Tour. Each group of students were required to report “live” from a various regions (polar, temperate and tropical) across the world informing their audience about climate and weather.Students took notes throughout the process on details from their region, and used content from related video clips on Discovery Streaming.Students used their notes to create a narrative that would be used to report back to their audience via a Google Earth tour.
  • 6.
    Examples of GoogleEarth in the Classroom First grades explore a virtual field trip in which students visit each continent to learn about different frogs. Through interactive activities, Discovery Streaming videos & assignments, and various Web 2.0 applications, the students are learning as they create and share products that demonstrate their knowledge on the frogs from each continent.
  • 7.
    Google Earth andDiscovery Student Adventures
  • 8.
    Search, Places andLayersThis is what the screen willlike when you open upGoogle Earth.3D-ViewerThere are three features to use inthe toolbar to the left.
  • 9.
    Three Ways toFly1. Enter the location name - Spelling Counts - Do not use "The" - Examples to try a. Eiffel Tower b. Niagara Falls c. Statue of Liberty2. Paste in coordinates from Wikipedia or another source Eiffel Tower 48° 51' 29" North, 2° 17' 40"3. Enter City, Country - Then try adding layers a. 3-D Building Warehouse b. Geographic Web c. Google Earth Community
  • 10.
    Using the PlacesFeature/Build ToursThe places feature will remember any place that you recently visited from your desktop. You can also save to my places.Organize, Save and Share Google Earth Files (KMZ,KML)Drag content into a logical sequence in a folderRight click on the folderSave as a KMZ file
  • 11.
    Make a FolderRightclick on My Places
  • 12.
  • 13.
    Name the folderExplore,Search, and DiscoverGoogle EarthIn the Earth Gallery you will find many tours, animations and sketch-ups created by people from around the world. Use the search engine or the links to the left to explore the Earth Gallery
  • 14.
    Using the LayersFeatureThe Layers feature in Google Earth provides a variety of data points of geographic interest that you can select to display over your viewing area. This includes points of interest (POIs) as well as map, road, terrain, and building data. Some layers act as a folder that contain categories of data. These layers are indicated by a plus sign. Click on the plus sign to view the sub-categories for each layer.
  • 15.
    Five Fun LayersFound by a Fourth GraderNational Geographic Ocean Atlas
  • 16.
  • 17.
  • 18.
  • 19.
    Gigapan PhotosThe ToolBarRecord a TourAddPolygonsRulerSunlight across theLandscapeAddImage OverlayPrintPlacemarkersEarthSkyMarsMoonShow HistoricalImageryView inGoogle MapsAddPath
  • 20.
    Adding a PlacemarkClickon the "Placemark" icon in the toolbarA flashing placemarker will appear. You can drag this to the location where you want to mark.Right click on the placemarker, a box will come up for you to write a description. You will want to give your placemarker a title. This is also where you would write in information for your students, questions, etc, link websites or embed code.
  • 21.
    Adding a Polygonor PathClick on the "Polygon or Path" icon in the toolbarA flashing marker will appear. You can drag this from location to location to create a polygonal shape.Double click on the Polygon, a box will come up for you to write a description. Free-Form shapeClick once, hold, and drag. The cursor changes to an up-arrow to indicate that you are using free-form mode. As you drag the cursor around the 3D viewer, the outline of the shape follows the path of your cursor. If you are drawing a path, a line appears as a result, and if you are drawing a polygon, a shape evolves from the path of your cursor, always connecting the beginning and ending points. Regular shapeClick and release. Move the mouse to a new point and click to add additional points.
  • 22.
    Adding ImagesClick "add image overlay“ and this box will appear.Give your picture a title.Then click on browse to locate any saved files in the computer. Below, you can add a description of your photo for your students. This is also a place where you can ask questions, prompt their thinking, or embed video or sound.
  • 23.
    Adding Video1. Link videos from Discovery Streaming, or any other website. 2. Embed video by pasting HTML code into your placemark's properties
  • 24.
    Embedding Images ina PlacemarkOpen up your web browser and find an image, copyright free of course (try using Creative Commons or, Flickr)Find the URL for the picture you would like to embed in t the Placemark. Copy the URL into the description section.Now we need to do a little HTML coding: Copy this code <imgsrc=“URL”>Go back and click on the placemark. You should see the image embedded in the placemark
  • 25.
    Creating the “FloatingObject”Screen OverlayHall Davidson from the Discovery Educator Network shared this code on his blog. You can find his blog at Discoveryeducatornetwork.com ( media matters blog)Download the KTIADAM.kmz file from this wiki.Click the file to open it in Google Earth.It should save to your Temporary Places. Click on it and from file, select Save Places As. Save it as a KML, NOT KMZ.Open a Word document and then open the KTIADAM.kml file.Replace file name KTI Adam with your file nameReplace href with the URL for your pictureSave the file. You will get warning messages. (Ignore them)Find the file. Click on it (don’t launch it.) Rename it. Change the extension to .kmz. Open it in Google Earth.

Editor's Notes

  • #13 Andrew will share some of the KML files that can be found here.
  • #14 Adam will talk about what the layers are
  • #15 Andrew will share 5 fun science layers….. One should be Discovery Network