Glucometer In-Service 2017
•Download as PPTX, PDF•
2 likes•1,452 views

This document provides instructions for using the TRUE METRIXTM PRO blood glucose monitoring system, including: 1) The objectives are to provide policies/procedures for equipment use, quality control testing, and staff training verification. 2) The system is intended for quantitative glucose testing using capillary or venous whole blood samples. 3) Quality control testing should be performed according to the schedule and using the control solutions, to ensure accurate results.

More Related Content
What's hot
What's hot (20)
Viewers also liked
Viewers also liked (20)
Similar to Glucometer In-Service 2017
Similar to Glucometer In-Service 2017 (20)
Recently uploaded
Recently uploaded (20)
Glucometer In-Service 2017
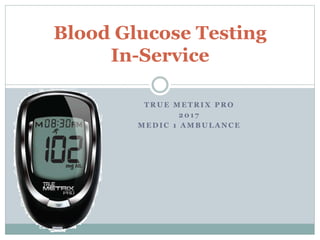
- 1. T R U E M E T R I X P R O 2 0 1 7 M E D I C 1 A M B U L A N C E Blood Glucose Testing In-Service
- 2. Objectives Provide a policy/procedure Manufacturer’s instructions for use of the equipment Calibration (if the glucometer requires calibration) Storage of reagents used for quality control checks A log demonstrating that quality control checks have been completed Proof of initial staff training on the glucometer. Successful completion this training serves as proof of training. Proof of initial competency verification of staff utilizing the glucometer. Competency will be tested upon your successful completion of this online training.
- 3. Intended Use Statement The TRUE METRIX™ PRO Blood Glucose Monitoring System is intended for the quantitative determination of glucose in human whole blood taken from the fingertip or forearm (capillary) or from the vein (venous). The system is not to be used for neonates. The system is intended for multiple-patient use in professional healthcare settings.
- 4. Components Meter Control Solution Test Strips Test Strip Vial
- 5. Meter Function Display Screen Shows test results, messages, user prompts, information Strip Release Button Releases test strip after testing for disposal Test Port Insert TRUE METRIX™ PRO Test Strip here, contact blocks facing up
- 6. Test Strip Design DETECT Sample Environment • An electrode pair on the test strip detects hematocrit • An internal unit in the meter detects temperature Sample Size • System triggers proper fill detection eliminating errors due to improper sample size Control • Detects control solution and automatically identifies ANALYZE Environmental and Physiological Factors • Every system analyzes the testing environment for hematocrit and temperature, which could impact or influence the accuracy of results • Testing outside of specified operating temperature range is marked by an error code – eliminating incorrect results CORRECT Hematocrit/Temperature Variables • Employs a Proprietary Dynamic Adaptive Algorithm, which incorporates: – Active hematocrit correction – Temperature compensation • Combined, this algorithm corrects results based on the testing environment • Ensures proven accuracy and confidence in results
- 7. Control Solution What Is Control Solution? Control solution is a red liquid containing a known amount of glucose. Test Principle: Use control solution instead of blood to make sure your system is working. Storage and Handling: Control solution must be stored upright, tightly sealed, at 36°F-86°F, room temperature. DO NOT REFRIGERATE OR FREEZE 3 Levels of Control Solution Use ONLY TRUE METRIX™ Control Solution to perform Control Tests.
- 8. Control Test Control Test Use ONLY TRUE METRIX™ Control Solution to check the performance of the system. It is important to perform control tests with more than one level of control solution to assure that the system is working properly and testing technique is good. Three levels of TRUE METRIX™ Control Solution (Levels 1-3) are available. Contact Medic 1 Operations Manager in obtaining different levels of control solution. Control Test(s) should be performed: Before using the system for the first time. For practice to ensure that testing technique is good. When opening a new vial of test strips. If results seem unusually high or low based on the patient’s condition. If test strip vial has been left open or exposed to extreme heat, cold or humidity. Whenever a check on the performance of the system is needed. If meter damage is suspected (meter was dropped, crushed, wet, etc.). Ranges printed on the test strip vial label are for Control Test results only. These ranges are not suggested levels for blood glucose. DO NOT drink control solution.
- 9. Quality Control Testing Quality Control Testing is used to detect errors that may occur due to test system errors, product defects, adverse environmental conditions and variance in operator performance. Ongoing Quality Control Testing is also used to detect any performance issues of the system over time. Medic 1’s Quality Control Testing Policy and Procedure adhere to the manufacturer’s instructions for use and regulatory guidelines. TRUE METRIX™ PRO is a no-coding system, which means the meter does not have to be coded to each lot of test strips. To assure accurate and reliable results, TRUE METRIX™ PRO offers two kinds of Quality Control Tests. These tests ensure that the TRUE METRIX™ PRO System is working properly and the user’s testing technique is good.
- 10. Quality Control Testing Use ONLY TRUE METRIX™ Control Solution to perform Control Tests. Write date opened on control solution label. Discard if either 3 months after first opening or after the date printed next to the EXP on the bottle label has passed, whichever comes first. Control Test ranges are printed on the TRUE METRIX™ PRO Test Strip vial label. Date Opened
- 11. Quality Control Testing Automatic Self Test An Automatic Self-Test is performed by the meter each time a test strip is inserted correctly into the Test Port. Insert a test strip into Test Port. The meter is working properly if: the full Display appears, then the time appears in the upper part of the Display, and then, the Drop Symbol begins to blink. If an error message appears in the Display, the meter will not perform a test. The glucometer must be returned to Medic 1 Operations Manager.
- 12. Quality Control Testing Control Test Use ONLY TRUE METRIX™ Control Solution to check the performance of the system. It is important to perform Control Tests with more than one level of control solution to assure that the system is working properly and testing technique is good. Three levels of TRUE METRIX™ Control Solution (Levels 1-3) containing known amounts of glucose are available. Control Test(s) should be performed: Before using the system for the first time. For practice to ensure that testing technique is good. When opening a new vial of test strips. If results seem unusually high or low based on the patient’s condition. If strip vial has been left open or exposed to extreme heat, cold or humidity. Whenever a check on the performance of the system is needed. If meter damage is suspected (meter dropped, crushed, wet, etc.). Ranges printed on the test strip vial label are for Control Test results only and are not suggested levels for your blood glucose. DO NOT drink control solution.
- 13. Quality Control Testing How to Perform a Control Test Use the Quality Control Record Form located in TexCom labeled Glucometer Control Testing Log to record Control Test results. 1. Allow control solution, vial of test strips and meter to adjust to room temperature 68°F-77°F. 2. Check dates on control solution label and test strip vial label. Write date first opened on control solution bottle. Do not use control solution if 3 months past written opened date or after EXP date printed on control solution bottle label, whichever comes first. Do not use test strips 4 months past written opened date or after EXP date printed on test strip vial label, whichever comes first. Discard out-of-date products and use new products. 3. Gently swirl or invert control solution to mix. DO NOT SHAKE!
- 14. Quality Control Testing How to Perform a Control Test, cont. 4. Remove one test strip from vial. Close test strip vial immediately. Use test strip quickly after removal from vial. 5. Insert test strip into Test Port. Meter turns on. Note: If test strip has been out of the vial too long before testing, an error message appears upon insertion of the test strip into the meter. Release and discard old test strip. Use new test strip for testing. 6. Wait until Drop Symbol appears in Display. Keep test strip in meter until testing is finished. Note: If test strip is removed before testing is finished, an error message appears. Release and discard old test strip. Test with new test strip. Contact Blocks Face Up
- 15. Quality Control Testing How to Perform a Control Test, cont. 7. With cap removed, turn control solution bottle upside down. Gently squeeze one drop of control solution onto a clean tissue. Wipe off bottle tip with the tissue. 8. Gently squeeze a drop of control solution onto a small piece of unused aluminum foil or clear plastic wrap. Dispose after use. 9. With test strip still in meter, touch edge of Sample Tip to top of control solution. Allow drop to be drawn into test strip. Remove test strip from drop when meter beeps. 10. Dashes appear across the Display to show meter is testing. Note: If meter does not beep or begin testing soon after drawing up sample, release and discard test strip. Repeat test with new test strip. If problem persists, see the Troubleshooting. 11. Compare result to Control Test range printed on test strip vial label for control solution level you are using. If result is in range, system can be used for testing blood. If result does not fall within range, repeat test using a new test strip. Note: Control Test result shows the Control Symbol in the Display
- 16. Quality Control Testing How to Perform a Control Test, cont. If Control Test result is outside range, test again. If result is still outside range, the system should not be used for testing blood. 12. After result is shown, Strip Release Button flashes. Hold meter with test strip pointing down. Press Strip Release Button to release and discard test strip in appropriate container. Meter turns off. Note: Removing test strip before result displays cancels the test. An error message appears and the result is not stored in Memory. Retest with a new test strip and do not remove before result is displayed.
- 17. Blood Glucose Testing Type of Blood Sample Information Fresh, capillary whole blood from the fingertip or forearm is the recommended sample to be used for testing blood glucose. Capillary forearm sampling must not be used when the blood glucose levels are rapidly changing Venous blood samples may also be used for testing on the TRUE METRIX™ PRO Blood Glucose Monitoring System. If using venous blood for testing, careful consideration must be taken when collecting and handling the venous sample Follow the Medic 1 policy and procedure for obtaining samples for testing blood glucose levels. Always wear clean gloves prior to testing to decrease risk of direct contact with blood. Never use arterial or neonatal blood samples. Never use clotted blood, plasma or serum as a sample for testing on the meter.
- 18. Blood Glucose Testing How to Perform a Blood Glucose Test The TRUE METRIX™ PRO is a no-coding system, which means the meter does not have to be coded to each lot of test strips. 1. To obtain a blood sample for blood glucose testing, follow the Medic 1’s policy and procedure for handling blood and biohazard safety (contaminated biological materials and sharps). 2. Check dates on test strip vial being used. Do not use test strips 4 months past written opened date or after date printed on test strip vial label, whichever comes first. 3. Remove one test strip from vial. Close vial immediately. Use test strips quickly after removal from vial. Note: Use test strips quickly after removal from the vial. Test strips that have been left out of the vial too long before use will give an error message. If error message displays, release and discard the old test strip and test with a new test strip.
- 19. Blood Glucose Testing How to Perform a Blood Glucose Test, cont. 4. With meter off, insert test strip Contact End (blocks facing up) into Test Port. Meter turns on. Keep test strip in meter until testing is finished. Note: Removing the test strip before the result is displayed cancels the test. An error message appears. Retest with a new test strip and do not remove the test strip from the meter before the result is displayed. 5. Wait until the Drop Symbol appears in the Display. 6. With test strip still in meter, touch Sample Tip of test strip to top of blood drop from sample obtained in Step 1 and allow blood to be drawn into test strip. Remove Sample Tip from blood drop immediately after the meter beeps and dashes appear across meter Display. Note: If meter does not beep and show dashes in the Display soon after touching the sample to the Sample Tip, release and discard the test strip. Repeat the test with a new test strip and a new sample.
- 20. Blood Glucose Testing How to Perform a Blood Glucose Test, cont. How to Perform a Blood Glucose Test, cont. 7. After the test is finished, the Test Strip Release Button flashes and the result is displayed. 8. Hold the meter with the test strip pointing down. Press the Strip Release Button to release and discard the test strip into the appropriate container. Meter turns off. Result is stored in Memory with date and time. 9. Discard all biohazard materials into appropriate container. Wash hands after taking off gloves. 10. Record the result as required by Medic 1. Note: If blood glucose test result is greater than 240 mg/dL and the Ketone Test Alert is turned on, the Ketone Test Alert Symbol appears in the Display with the result. When a Ketone Test Alert Symbol appears, it does not mean that ketones have been detected in patient’s blood. The Ketone Test Alert is a reminder to perform a ketone test as prescribed in the treatment plan.
- 21. Replacement Return ANY non-functioning glucometer to the Medic 1 Operations Manager for immediate replacement. When Operations Manager is not available, contact your supervisor for replacement.
- 22. Cleaning & Disinfecting Cleaning removes blood and soil from the meter. Disinfecting removes most, but not all possible infectious agents (bacteria or virus) from the meter, including blood- borne pathogens. Clean and disinfect immediately after getting any blood on the meter or if meter is dirty. Meter should be cleaned and disinfected between patients. Do not clean the meter during a test. Clean and disinfect the meter before allowing anyone else to handle them.
- 23. Cleaning & Disinfecting To Clean & Disinfect the Meter 1. Wash hands thoroughly with soap and water. Wear a clean pair of gloves. 2. Make sure meter is off and a test strip is not inserted. With ONLY an EPA approved disinfectant product, rub the entire outside of the meter using 3 circular wiping motions with moderate pressure on the front, back, left-side, right-side, top and bottom of the meter. Repeat as needed until all surfaces are visibly clean. Using fresh wipes, ensure that the outside surfaces of the meter remain wet for 2 minutes. NEVER put meter in liquids or allow any liquids to enter the test port. 3. Let meter air dry thoroughly before using to test. 4. Verify that the system is working properly by performing an Automatic Self-Test. 5. Properly dispose of gloves and wipes after cleaning. Wash hands after removing gloves.
- 24. Storage TRUE METRIX™ PRO System Store the system (meter, control solution, test strips) in carrying case to protect from liquids, dust and dirt. Store the system in a dry place at temperatures between, 40°F-86°F. DO NOT FREEZE. Allow System to sit at room temperature for 10 minutes before testing TRUE METRIX™ PRO Test Strips Store test strips in original vial only. Do not transfer old test strips into new vial or store test strips outside of vial. Write the date first opened on test strip vial. Discard unused test strips from vial if either 4 months after first opening or after date printed next to EXP on vial label has passed, whichever comes first. Use of test strips past expiration dates may give incorrect results. Discard out of date test strips and use new test strips. Close test strip vial immediately after removing one test strip. Store in a dry place at temperatures between, 40°F – 86°F. DO NOT FREEZE. Do not reuse test strips. Do not bend, cut or alter test strips in any way. TRUE METRIX™ Control Solution Write the date first opened on control solution bottle label. Discard if either 3 months after first opening or after date printed next to EXP on vial label has passed, whichever comes first. After use, wipe bottle tip using a clean, dry cloth and recap tightly. Store at temperatures between, 36°F-86°F. DO NOT FREEZE.
- 25. Limitations of Use Please read all product Instructions for Use carefully before referencing or using this guide. Use only TRUE METRIX™ PRO Blood Glucose Test Strips and TRUE METRIX™ Control Solution with the TRUE METRIX™ PRO Meter. Do not leave test strips or control solution where the storage temperature printed on vial label may be exceeded. Perform control tests before performing a blood glucose test for the first time. Perform control tests with more than one level of control solution. Three levels of TRUE METRIX™ Control Solution are available for control tests. Contact Medic 1 Operations Manager to obtain control solution and procedure/policy. TRUE METRIX™ PRO is an in vitro (outside the body) quantitative system that is used for point-of-care testing of human whole blood only.
- 26. Limitations of Use The most accurate results are obtained using fresh, capillary whole blood from the fingertip or forearm. Venous whole blood drawn using only sodium heparin tubes may be used. Mix well before use. Do not use venous whole blood collected in sodium fluoride (grey top) vacutainer tubes for testing, as this may cause false low results. Capillary blood from the forearm may be used. Check with the doctor or healthcare professional to see if forearm testing may be used for glucose testing on the patient. Results from the forearm are not always the same as results from the fingertip. Use fingertip instead of forearm: Within 2 hours of eating, exercise, or taking insulin; If the patient’s blood glucose may be rising or falling rapidly or their results often fluctuate; If the patient is ill or under stress; If the glucose result may be low or high; If symptoms of low or high glucose levels are not evident. Alternate site (forearm) testing should not be used to calibrate continuous glucose monitors (CGMs). Alternate site (forearm) testing should not be used for insulin dose calculations. Do not use for the diagnosis of or screening for diabetes mellitus or for measuring blood glucose in newborns.
- 27. Limitations of Use When comparing results between TRUE METRIX™ PRO and a laboratory system, TRUE METRIX™ PRO blood tests should be performed within 30 minutes of laboratory test. If a patient has recently eaten, finger-stick results from the TRUE METRIX™ PRO System can be up to 70 mg/dL higher than venous laboratory results.5 Diabetes experts have suggested that glucose meters should agree within 15 mg/dL of a laboratory system when the glucose concentration is less than 75 mg/dL, and within 20% of a laboratory system when the glucose concentration is 75 mg/dL or higher. The device has not been validated for use in the critically ill. Capillary blood glucose levels in critically ill patients with reduced peripheral blood flow may not reflect the true physiological state. Reduced peripheral blood flow may result from the following conditions (for example): shock, severe hypotension, severe dehydration, hyperglycemia with hyperosmolarity, with or without ketosis. Testing at altitudes up to and including 10,200 feet will not affect accurate results. Hematocrit levels between 20% and 70% will not affect accurate results.