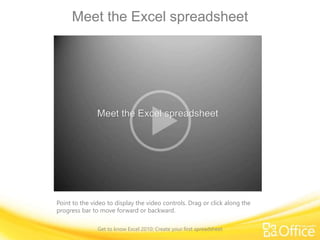
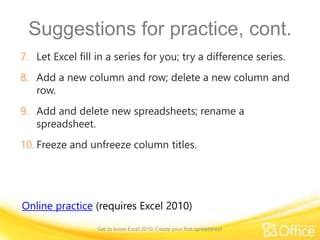
Microsoft
®
Excel
®
2010 Training
Get to know Excel 2010:
Create your first spreadsheet
Course contents
• Overview: All about the basics
• Lesson: Includes seven instructional movies
• Suggested practice tasks
• Test
• Quick Reference
Get to know Excel 2010: Create your first spreadsheet
Overview: All about the basics
Are you new to Excel? If so, this course
will introduce you to the basics, starting
with how to create a spreadsheet and
do basic math in Excel.
You’ll also learn how to add and delete
columns and rows; keep column titles in
sight as you scroll; and prepare a
spreadsheet for printing.
Get to know Excel 2010: Create your first spreadsheet
Course goals
• Create a new spreadsheet.
• Add, subtract, multiply, and divide in a
spreadsheet; enter and format column titles.
• Let Excel fill in some information for you.
• Add or delete columns, rows, and spreadsheets.
• Keep column titles in sight as you scroll down a
spreadsheet.
• Select some printing options.
Get to know Excel 2010: Create your first spreadsheet
Meet the Excel spreadsheet
Point to the video to display the video controls. Drag or click along the
progress bar to move forward or backward.
Get to know Excel 2010: Create your first spreadsheet
Do basic math in Excel
Point to the video to display the video controls. Drag or click along the
progress bar to move forward or backward.
Get to know Excel 2010: Create your first spreadsheet
Create column titles (be kind to your readers)
Point to the video to display the video controls. Drag or click along the
progress bar to move forward or backward.
.
Get to know Excel 2010: Create your first spreadsheet
Let Excel type for you (sometimes)
Point to the video to display the video controls. Drag or click along the
progress bar to move forward or backward.
Get to know Excel 2010: Create your first spreadsheet
Get more (or less) columns, rows, spreadsheets
Point to the video to display the video controls. Drag or click along the
progress bar to move forward or backward.
Get to know Excel 2010: Create your first spreadsheet
Keep column titles in sight as you scroll
Point to the video to display the video controls. Drag or click along the
progress bar to move forward or backward.
.
Get to know Excel 2010: Create your first spreadsheet
Prepare to print
Point to the video to display the video controls. Drag or click along the
progress bar to move forward or backward.
Get to know Excel 2010: Create your first spreadsheet
Suggestions for practice
1. Type some simple formulas to add, subtract, multiply,
and divide. Then add numbers by using AutoSum, try a
math shortcut, and get an average.
2. Copy a formula.
3. Create titles and adjust column width.
4. Format titles.
5. Change a column’s width manually; center the titles.
6. Fill in some text, try AutoComplete, and see what to do
if Excel guesses incorrectly.
Get to know Excel 2010: Create your first spreadsheet
Suggestions for practice, cont.
7. Let Excel fill in a series for you; try a difference series.
8. Add a new column and row; delete a new column and
row.
9. Add and delete new spreadsheets; rename a
spreadsheet.
10. Freeze and unfreeze column titles.
Online practice (requires Excel 2010)
Get to know Excel 2010: Create your first spreadsheet
Test question 1
To do math in Excel, start by typing which of the
following? (Pick one answer.)
1. Parentheses
2. Numbers
3. An equal sign.
Get to know Excel 2010: Create your first spreadsheet
Test question 1
Whether you do the typing, or let Equal create formulas for
you, math always begins with an equal sign.
To do math in Excel, start by typing which of the
following?
Answer:
3. An equal sign.
Get to know Excel 2010: Create your first spreadsheet
Test question 2
To add a new column, click a cell in the column to the left
of where you want the new column. (Pick one answer.)
1. True.
2. False.
Get to know Excel 2010: Create your first spreadsheet
Test question 2
To add a new column, click a cell in the column to the left
of where you want the new column.
Answer:
2. False.
Get to know Excel 2010: Create your first spreadsheet
Test question 3
To add a new row, click a cell in the row immediately
below where you want the new row. (Pick one answer.)
1. True.
2. False.
Get to know Excel 2010: Create your first spreadsheet
Test question 3
You’re in the right row. Then on the Home tab, in the Cells
group, click the arrow under Insert, and click Insert Sheet
Rows.
To add a new row, click a cell in the row immediately
below where you want the new row.
Answer:
1. True.
Get to know Excel 2010: Create your first spreadsheet
Test question 4
To delete a column or a row, you click in the column or
row you want to delete. Then what? (Pick one answer.)
1. Press the Delete button.
2. On the Home tab, in the Cells group, click the Format
button.
3. On the Home tab, in the Cells group, click the Delete
button.
Get to know Excel 2010: Create your first spreadsheet
Test question 4
Then click Delete Sheet Columns, or Delete Sheet Rows.
To delete a column or a row, you click in the column or
row you want to delete. Then what?
Answer:
3. On the Home tab, in the Cells group, click the Delete
button.
Get to know Excel 2010: Create your first spreadsheet
Test question 5
To print a spreadsheet, what do you do first? (Pick one
answer.)
1. Click the File tab.
2. Right-click in a cell.
3. Click the Home tab.
Get to know Excel 2010: Create your first spreadsheet
Test question 5
Then click Print on the left side of the window. You can set
the printing options, see how your spreadsheet will look in
Print Preview, and then click the Print button when you’re
ready.
To print a spreadsheet, what do you do first?
Answer:
1. Click the File tab.
Get to know Excel 2010: Create your first spreadsheet
Test question 6
You want to type the days of the week. To get Excel to
type the list for you, type the first day and move the
cursor to the lower-right corner of the cell. Then what?
(Pick one answer.)
1. Wait until the cursor turns into a white plus sign.
2. Right-click the lower-right cell corner.
3. Wait until the cursor turns into a black plus sign.
Get to know Excel 2010: Create your first spreadsheet
Test question 6
Then click and drag to fill in the list. Release the mouse
button when you finish.
You want to type the days of the week. To get Excel to type the list for you, type
the first day and move the cursor to the lower-right corner of the cell. Then what?
Answer:
3. Wait until the cursor turns into a black plus sign.
Get to know Excel 2010: Create your first spreadsheet
Quick Reference Card
For a summary of the tasks covered in this course, view the
Quick Reference Card.
Get to know Excel 2010: Create your first spreadsheet

Excel 2010 training presentation create your first spreadsheet (revised)

  • 1.
    Microsoft ® Excel ® 2010 Training Get toknow Excel 2010: Create your first spreadsheet
  • 2.
    Course contents • Overview:All about the basics • Lesson: Includes seven instructional movies • Suggested practice tasks • Test • Quick Reference Get to know Excel 2010: Create your first spreadsheet
  • 3.
    Overview: All aboutthe basics Are you new to Excel? If so, this course will introduce you to the basics, starting with how to create a spreadsheet and do basic math in Excel. You’ll also learn how to add and delete columns and rows; keep column titles in sight as you scroll; and prepare a spreadsheet for printing. Get to know Excel 2010: Create your first spreadsheet
  • 4.
    Course goals • Createa new spreadsheet. • Add, subtract, multiply, and divide in a spreadsheet; enter and format column titles. • Let Excel fill in some information for you. • Add or delete columns, rows, and spreadsheets. • Keep column titles in sight as you scroll down a spreadsheet. • Select some printing options. Get to know Excel 2010: Create your first spreadsheet
  • 5.
    Meet the Excelspreadsheet Point to the video to display the video controls. Drag or click along the progress bar to move forward or backward. Get to know Excel 2010: Create your first spreadsheet
  • 6.
    Do basic mathin Excel Point to the video to display the video controls. Drag or click along the progress bar to move forward or backward. Get to know Excel 2010: Create your first spreadsheet
  • 7.
    Create column titles(be kind to your readers) Point to the video to display the video controls. Drag or click along the progress bar to move forward or backward. . Get to know Excel 2010: Create your first spreadsheet
  • 8.
    Let Excel typefor you (sometimes) Point to the video to display the video controls. Drag or click along the progress bar to move forward or backward. Get to know Excel 2010: Create your first spreadsheet
  • 9.
    Get more (orless) columns, rows, spreadsheets Point to the video to display the video controls. Drag or click along the progress bar to move forward or backward. Get to know Excel 2010: Create your first spreadsheet
  • 10.
    Keep column titlesin sight as you scroll Point to the video to display the video controls. Drag or click along the progress bar to move forward or backward. . Get to know Excel 2010: Create your first spreadsheet
  • 11.
    Prepare to print Pointto the video to display the video controls. Drag or click along the progress bar to move forward or backward. Get to know Excel 2010: Create your first spreadsheet
  • 12.
    Suggestions for practice 1.Type some simple formulas to add, subtract, multiply, and divide. Then add numbers by using AutoSum, try a math shortcut, and get an average. 2. Copy a formula. 3. Create titles and adjust column width. 4. Format titles. 5. Change a column’s width manually; center the titles. 6. Fill in some text, try AutoComplete, and see what to do if Excel guesses incorrectly. Get to know Excel 2010: Create your first spreadsheet
  • 13.
    Suggestions for practice,cont. 7. Let Excel fill in a series for you; try a difference series. 8. Add a new column and row; delete a new column and row. 9. Add and delete new spreadsheets; rename a spreadsheet. 10. Freeze and unfreeze column titles. Online practice (requires Excel 2010) Get to know Excel 2010: Create your first spreadsheet
  • 14.
    Test question 1 Todo math in Excel, start by typing which of the following? (Pick one answer.) 1. Parentheses 2. Numbers 3. An equal sign. Get to know Excel 2010: Create your first spreadsheet
  • 15.
    Test question 1 Whetheryou do the typing, or let Equal create formulas for you, math always begins with an equal sign. To do math in Excel, start by typing which of the following? Answer: 3. An equal sign. Get to know Excel 2010: Create your first spreadsheet
  • 16.
    Test question 2 Toadd a new column, click a cell in the column to the left of where you want the new column. (Pick one answer.) 1. True. 2. False. Get to know Excel 2010: Create your first spreadsheet
  • 17.
    Test question 2 Toadd a new column, click a cell in the column to the left of where you want the new column. Answer: 2. False. Get to know Excel 2010: Create your first spreadsheet
  • 18.
    Test question 3 Toadd a new row, click a cell in the row immediately below where you want the new row. (Pick one answer.) 1. True. 2. False. Get to know Excel 2010: Create your first spreadsheet
  • 19.
    Test question 3 You’rein the right row. Then on the Home tab, in the Cells group, click the arrow under Insert, and click Insert Sheet Rows. To add a new row, click a cell in the row immediately below where you want the new row. Answer: 1. True. Get to know Excel 2010: Create your first spreadsheet
  • 20.
    Test question 4 Todelete a column or a row, you click in the column or row you want to delete. Then what? (Pick one answer.) 1. Press the Delete button. 2. On the Home tab, in the Cells group, click the Format button. 3. On the Home tab, in the Cells group, click the Delete button. Get to know Excel 2010: Create your first spreadsheet
  • 21.
    Test question 4 Thenclick Delete Sheet Columns, or Delete Sheet Rows. To delete a column or a row, you click in the column or row you want to delete. Then what? Answer: 3. On the Home tab, in the Cells group, click the Delete button. Get to know Excel 2010: Create your first spreadsheet
  • 22.
    Test question 5 Toprint a spreadsheet, what do you do first? (Pick one answer.) 1. Click the File tab. 2. Right-click in a cell. 3. Click the Home tab. Get to know Excel 2010: Create your first spreadsheet
  • 23.
    Test question 5 Thenclick Print on the left side of the window. You can set the printing options, see how your spreadsheet will look in Print Preview, and then click the Print button when you’re ready. To print a spreadsheet, what do you do first? Answer: 1. Click the File tab. Get to know Excel 2010: Create your first spreadsheet
  • 24.
    Test question 6 Youwant to type the days of the week. To get Excel to type the list for you, type the first day and move the cursor to the lower-right corner of the cell. Then what? (Pick one answer.) 1. Wait until the cursor turns into a white plus sign. 2. Right-click the lower-right cell corner. 3. Wait until the cursor turns into a black plus sign. Get to know Excel 2010: Create your first spreadsheet
  • 25.
    Test question 6 Thenclick and drag to fill in the list. Release the mouse button when you finish. You want to type the days of the week. To get Excel to type the list for you, type the first day and move the cursor to the lower-right corner of the cell. Then what? Answer: 3. Wait until the cursor turns into a black plus sign. Get to know Excel 2010: Create your first spreadsheet
  • 26.
    Quick Reference Card Fora summary of the tasks covered in this course, view the Quick Reference Card. Get to know Excel 2010: Create your first spreadsheet

Editor's Notes

  • #2 [Notes to trainer: If Excel is new to your students, you’ve all come to the right place. Students already familiar with Excel or who are moving from an earlier version to Excel 2010 can try the Office.com course titled “Make the switch to Excel 2010” (http://office.microsoft.com/en-us/excel-help/make-the-switch-to-excel-2010-RZ101809963.aspx). This presentation must be viewed in PowerPoint 2010. If you don’t have PowerPoint 2010, the videos included in the presentation will not play. If you don’t have PowerPoint 2010, download the PowerPoint Viewer to view these files (http://www.microsoft.com/downloads/details.aspx?displaylang=en&FamilyID=cb9bf144%2D1076%2D4615%2D9951%2D294eeb832823). If the yellow security bar appears at the top of the screen in PowerPoint, or if a Codec Unavailable message appears in the video playback window, the presentation might have opened in Protected View. To enable video playback, in the yellow security bar at the top of the PowerPoint window, click Enable Editing.  For detailed help in customizing this template, see the very last slide. Also, look for additional lesson text in the notes pane of some slides.]
  • #6 [Note to trainer: If you have trouble playing this video, for instance if a Codec Unavailable message appears in the video playback window, the presentation might have opened in Protected View. To enable video playback, in the yellow security bar at the top of the PowerPoint window, click Enable Editing. Note that even with Protected View turned on, video should play correctly in Slide Show view.]
  • #7 [Note to trainer: If you have trouble playing this video, for instance if a Codec Unavailable message appears in the video playback window, the presentation might have opened in Protected View. To enable video playback, in the yellow security bar at the top of the PowerPoint window, click Enable Editing. Note that even with Protected View turned on, video should play correctly in Slide Show view.]
  • #8 [Note to trainer: If you have trouble playing this video, for instance if a Codec Unavailable message appears in the video playback window, the presentation might have opened in Protected View. To enable video playback, in the yellow security bar at the top of the PowerPoint window, click Enable Editing. Note that even with Protected View turned on, video should play correctly in Slide Show view.]
  • #9 [Note to trainer: If you have trouble playing this video, for instance if a Codec Unavailable message appears in the video playback window, the presentation might have opened in Protected View. To enable video playback, in the yellow security bar at the top of the PowerPoint window, click Enable Editing. Note that even with Protected View turned on, video should play correctly in Slide Show view.]
  • #10 [Note to trainer: If you have trouble playing this video, for instance if a Codec Unavailable message appears in the video playback window, the presentation might have opened in Protected View. To enable video playback, in the yellow security bar at the top of the PowerPoint window, click Enable Editing. Note that even with Protected View turned on, video should play correctly in Slide Show view.]
  • #11 [Note to trainer: If you have trouble playing this video, for instance if a Codec Unavailable message appears in the video playback window, the presentation might have opened in Protected View. To enable video playback, in the yellow security bar at the top of the PowerPoint window, click Enable Editing. Note that even with Protected View turned on, video should play correctly in Slide Show view.]
  • #12 [Note to trainer: If you have trouble playing this video, for instance if a Codec Unavailable message appears in the video playback window, the presentation might have opened in Protected View. To enable video playback, in the yellow security bar at the top of the PowerPoint window, click Enable Editing. Note that even with Protected View turned on, video should play correctly in Slide Show view.]
  • #14 [Note to trainer: With Excel 2010 installed on your computer, you can click the link in the slide to go to an online practice. In the practice, you can work through each of these tasks in Excel 2010, with instructions to guide you. Important: If you don’t have Excel 2010, you won’t be able to access the practice instructions.]
  • #17 16
  • #19 18
  • #21 20
  • #23 22
  • #25 24
  • #28 Using This Template This Microsoft PowerPoint® template has training content about creating your first spreadsheet in Microsoft Excel® 2010. Its content is adapted from the Office.com Training course called “Get to know Excel 2010: Create your first spreadsheet.” PowerPoint version: The template must be viewed in PowerPoint 2010. If you don’t have PowerPoint 2010, the videos included in the presentation will not play. If you don’t have PowerPoint 2010, download the PowerPoint Viewer to view these files (http://www.microsoft.com/downloads/details.aspx?displaylang=en&FamilyID=cb9bf144%2D1076%2D4615%2D9951%2D294eeb832823). Video playback: If the yellow security bar appears at the top of the screen in PowerPoint, or if a Codec Unavailable message appears in the video playback window, the presentation might have opened in Protected View. To enable video playback, in the yellow security bar at the top of the PowerPoint window, click Enable Editing. Slide layouts: Each slide has a custom layout. To apply the custom layout to a new slide, right-click the slide thumbnail, point to Layout, and click the layout from the Layout gallery. To alter the layouts, open master view and alter the specific master layout in that view. You can find the layout’s title by pointing to its thumbnail. Animations: Custom animation effects are applied throughout the presentation. These include Float In (Up or Down option), Fade, and Zoom. To alter animation effects, click the Animations tab, and use the Add Animation gallery and Timing options. Effect Options gives you choices about the effect; click Animation Pane on the Animations tab to work with multiple animations. Transitions: One transition, Doors, is used to emphasize sections of the slide show. It’s applied on the Course Contents slide, Lesson slide, and the first test slide. Hyperlinks to online course: The template contains links to the online version of this training course. The links take you to the hands-on practice session for each lesson and to the Quick Reference Card that is published for this course. Please take note: You must have Excel 2010 installed to view the hands-on practice sessions. If you don’t have Excel 2010, you won’t be able to access the practice instructions. Headers and footers: The template contains a footer that has the course title. To add footers such as the date or slide numbers, click the Insert tab, and click Header & Footer.