Downloaded 80 times
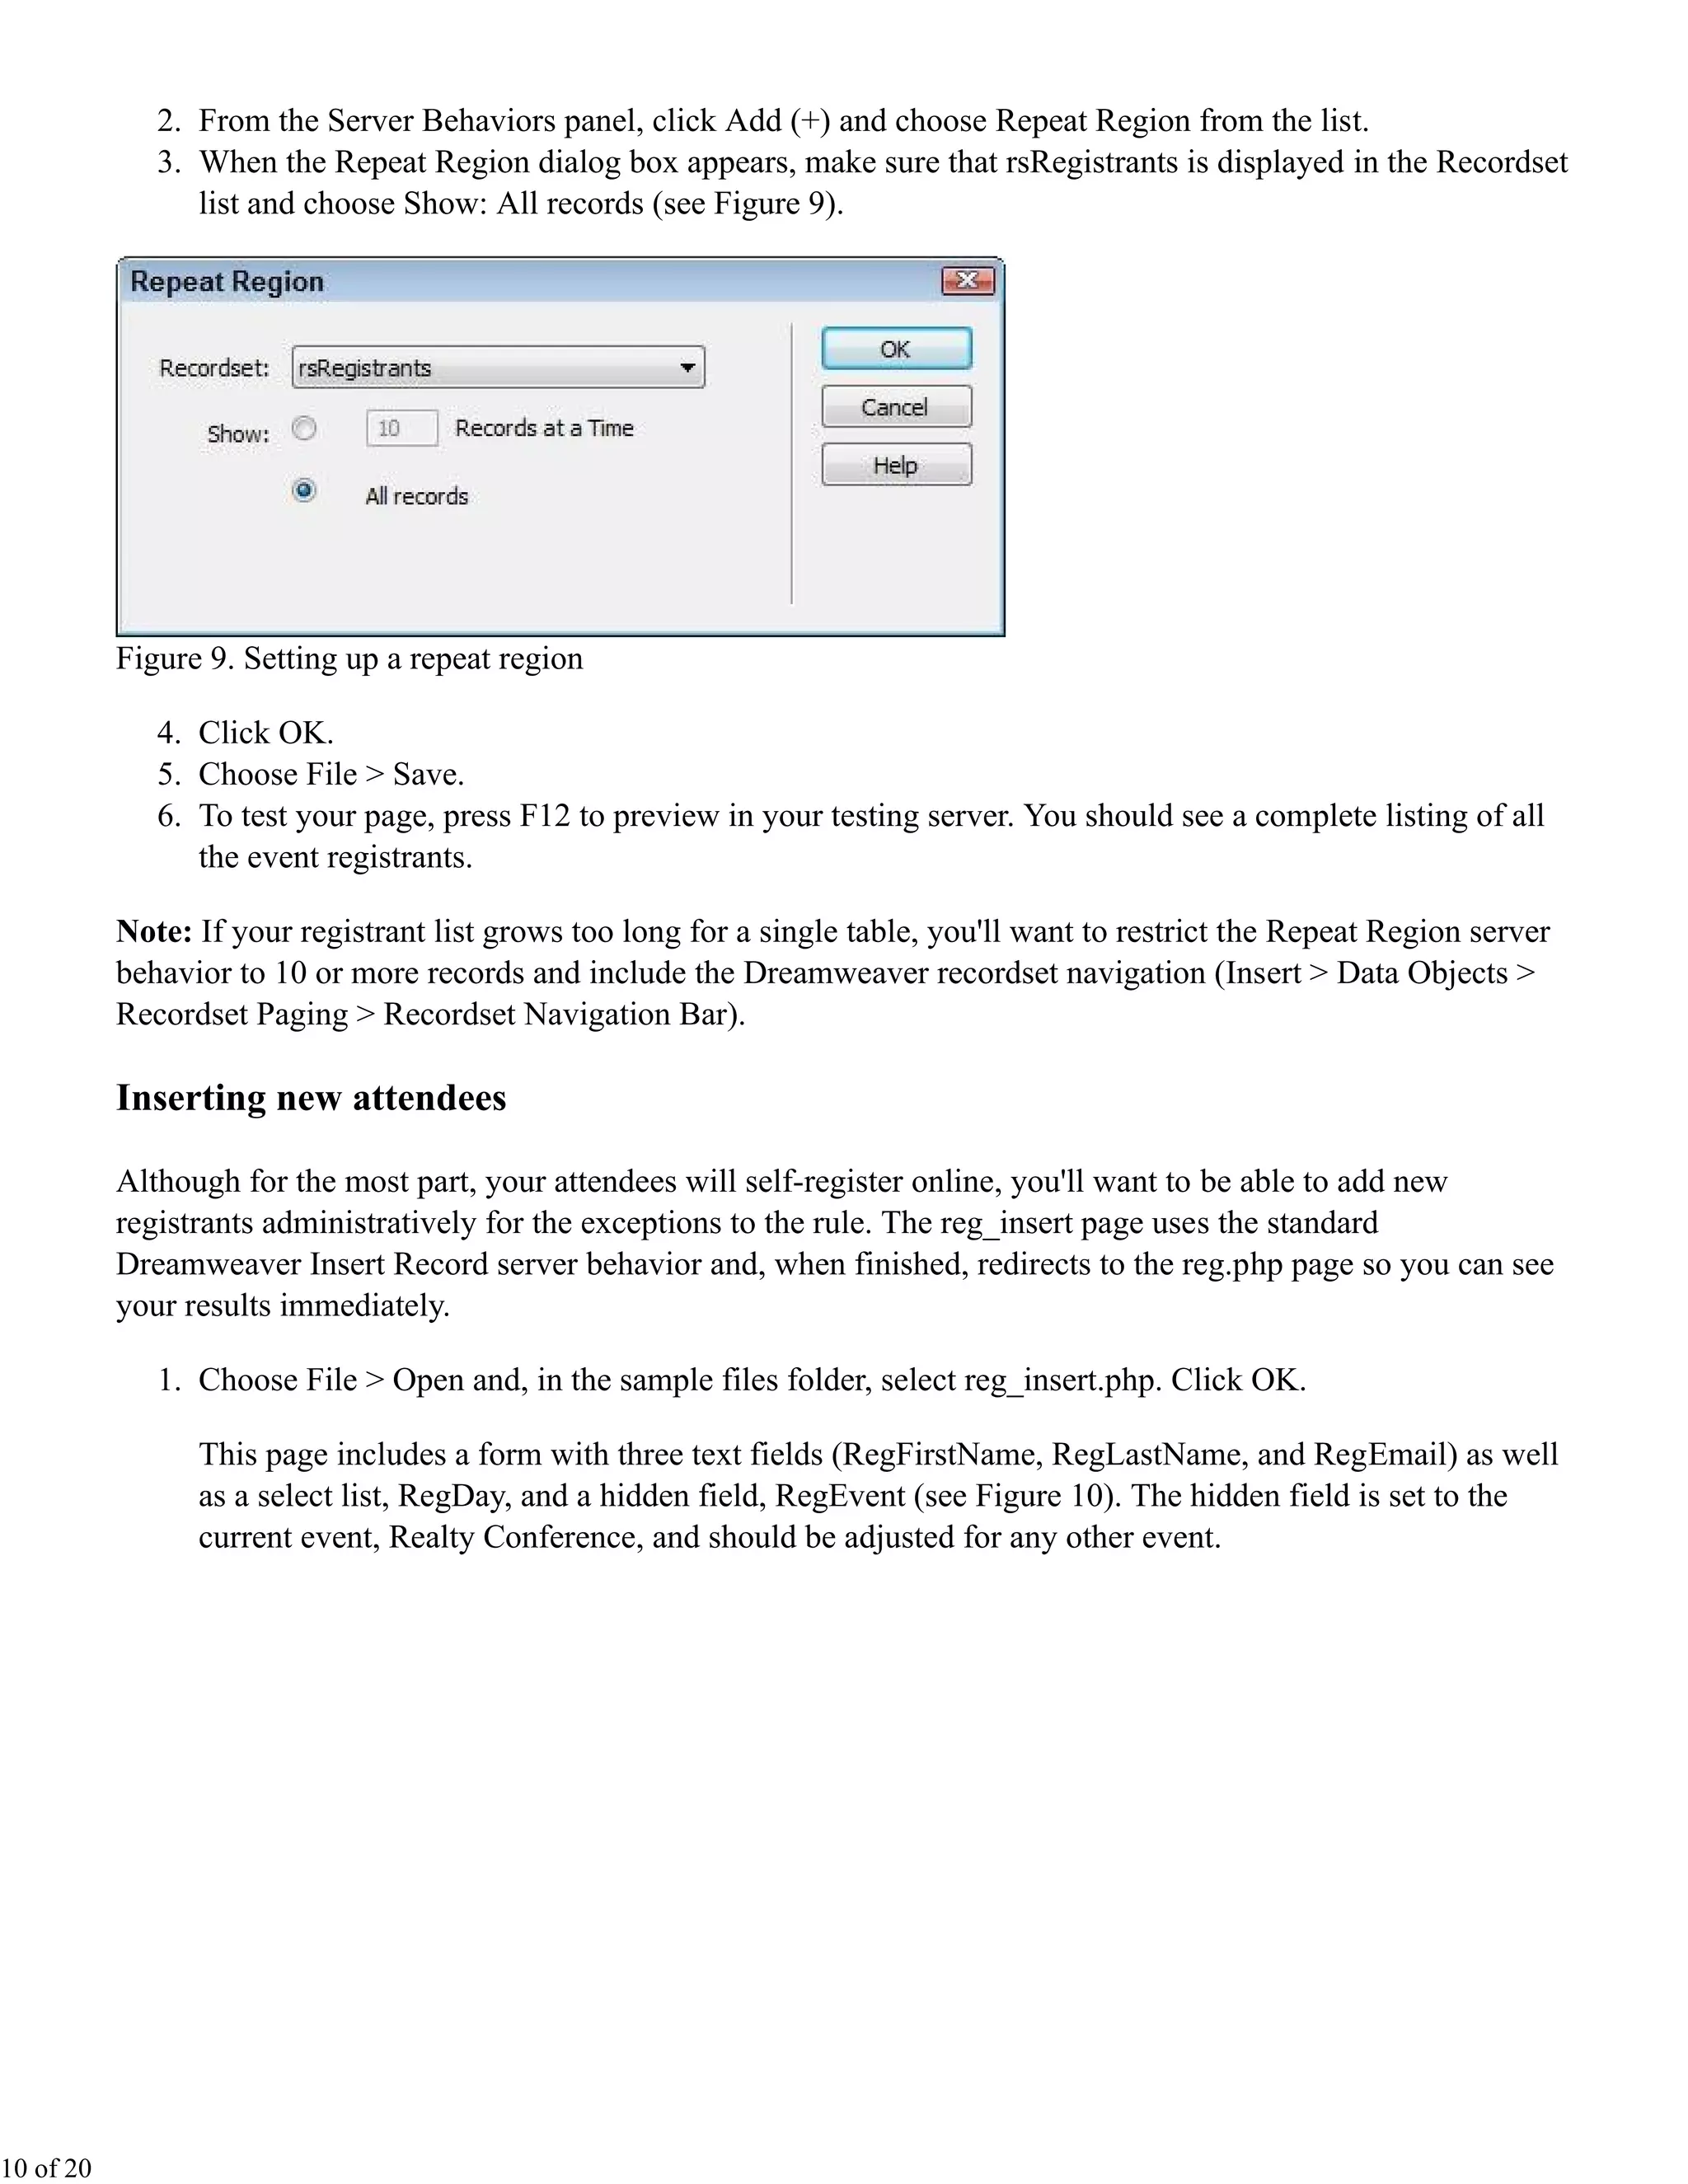
![Figure 7. Setting up the registrant recordset on the page
If you were to preview the page now and the first registrant had chosen to register for both days of the event,
you'd see a -1 in the Days Registered column. To make that data a bit more informative, you have to do a
minor bit of hand-coding.
3. Select the rsRegistrants.RegDay dynamic text and switch to Code view. Change the selected code
from:
<?php echo $row_rsRegistrants['RegDay']; ?>
to:
<?php echo ($row_rsRegistrants['RegDay'] == "-1" ? "Both" : $row_rsRegistrants['RegDay']);
?>
I've highlighted the new code in red to make it easy to see the changes. This type of code is called a
conditional or ternary statement and is basically a condensed if-then series of statements. Translated to
English, this code would read, "If this RegDay value is equal to -1, then print Both, otherwise, print the value
itself."
4. Save your page.
Next, you'll add the links to the action keywords in the final column of the table.
Linking to actions
8 of 20](https://image.slidesharecdn.com/event-registration-system-part-2-120522002427-phpapp01/75/Event-Registration-System-Part-2-8-2048.jpg)

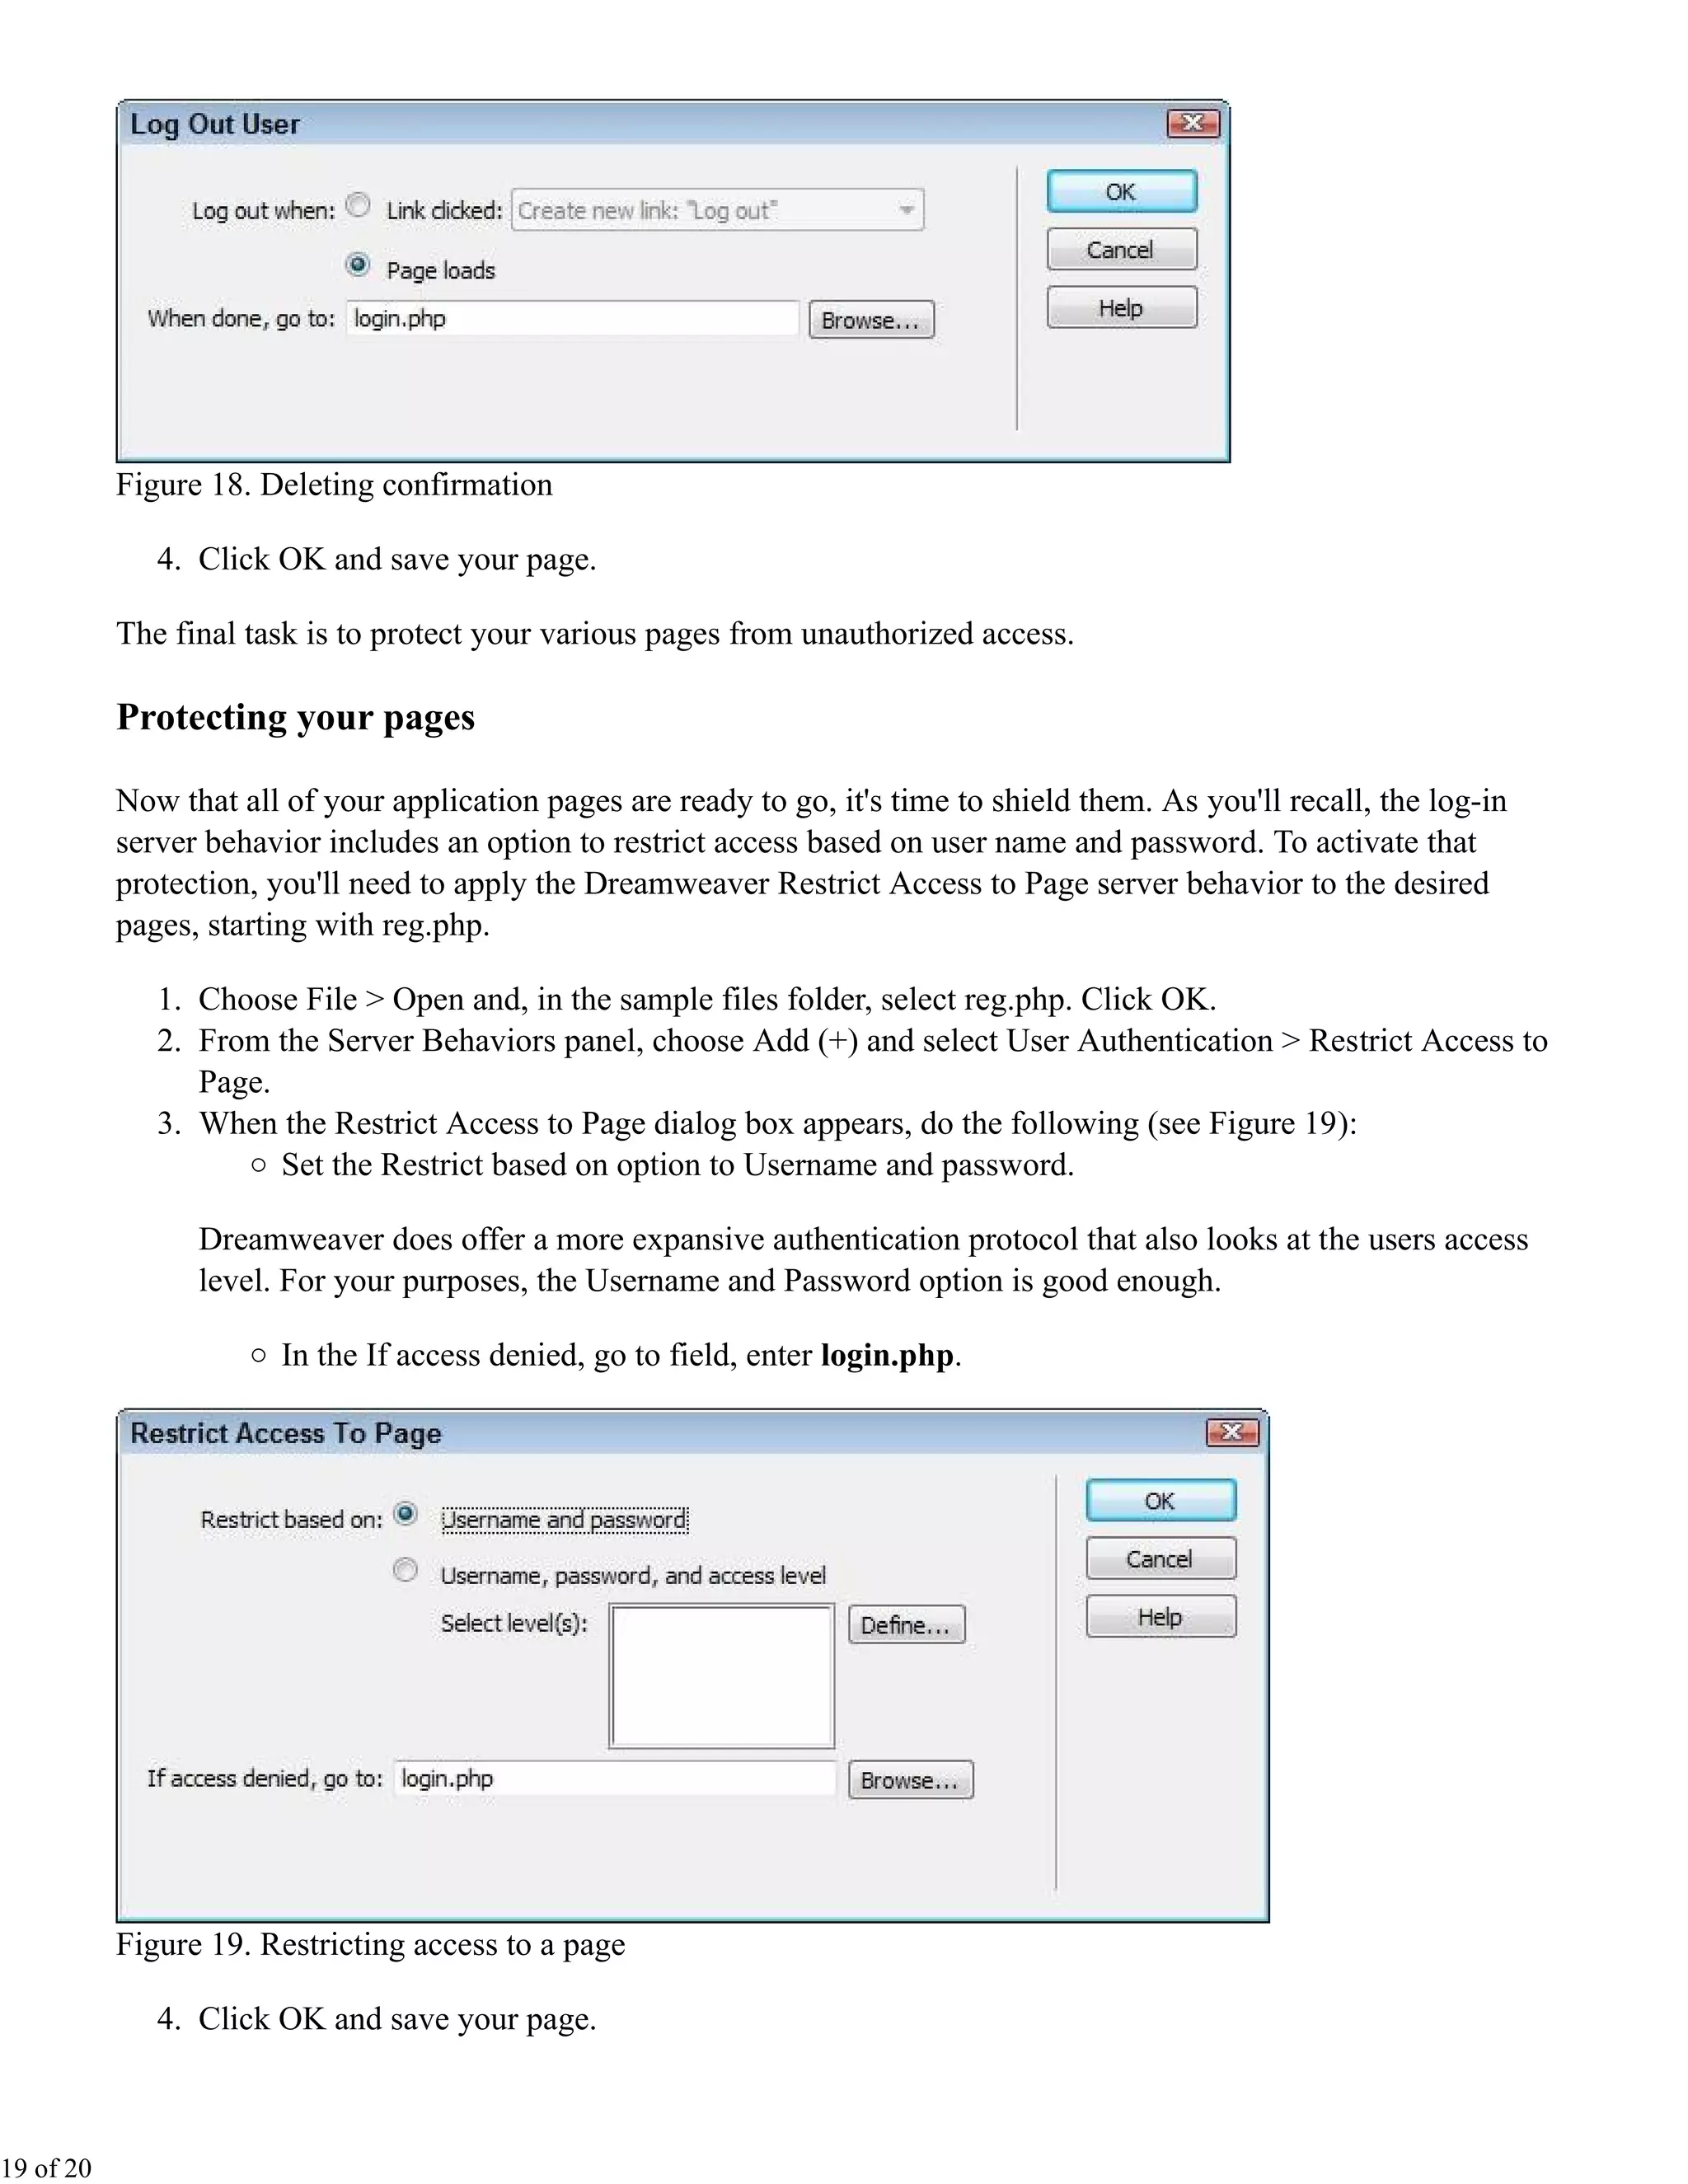
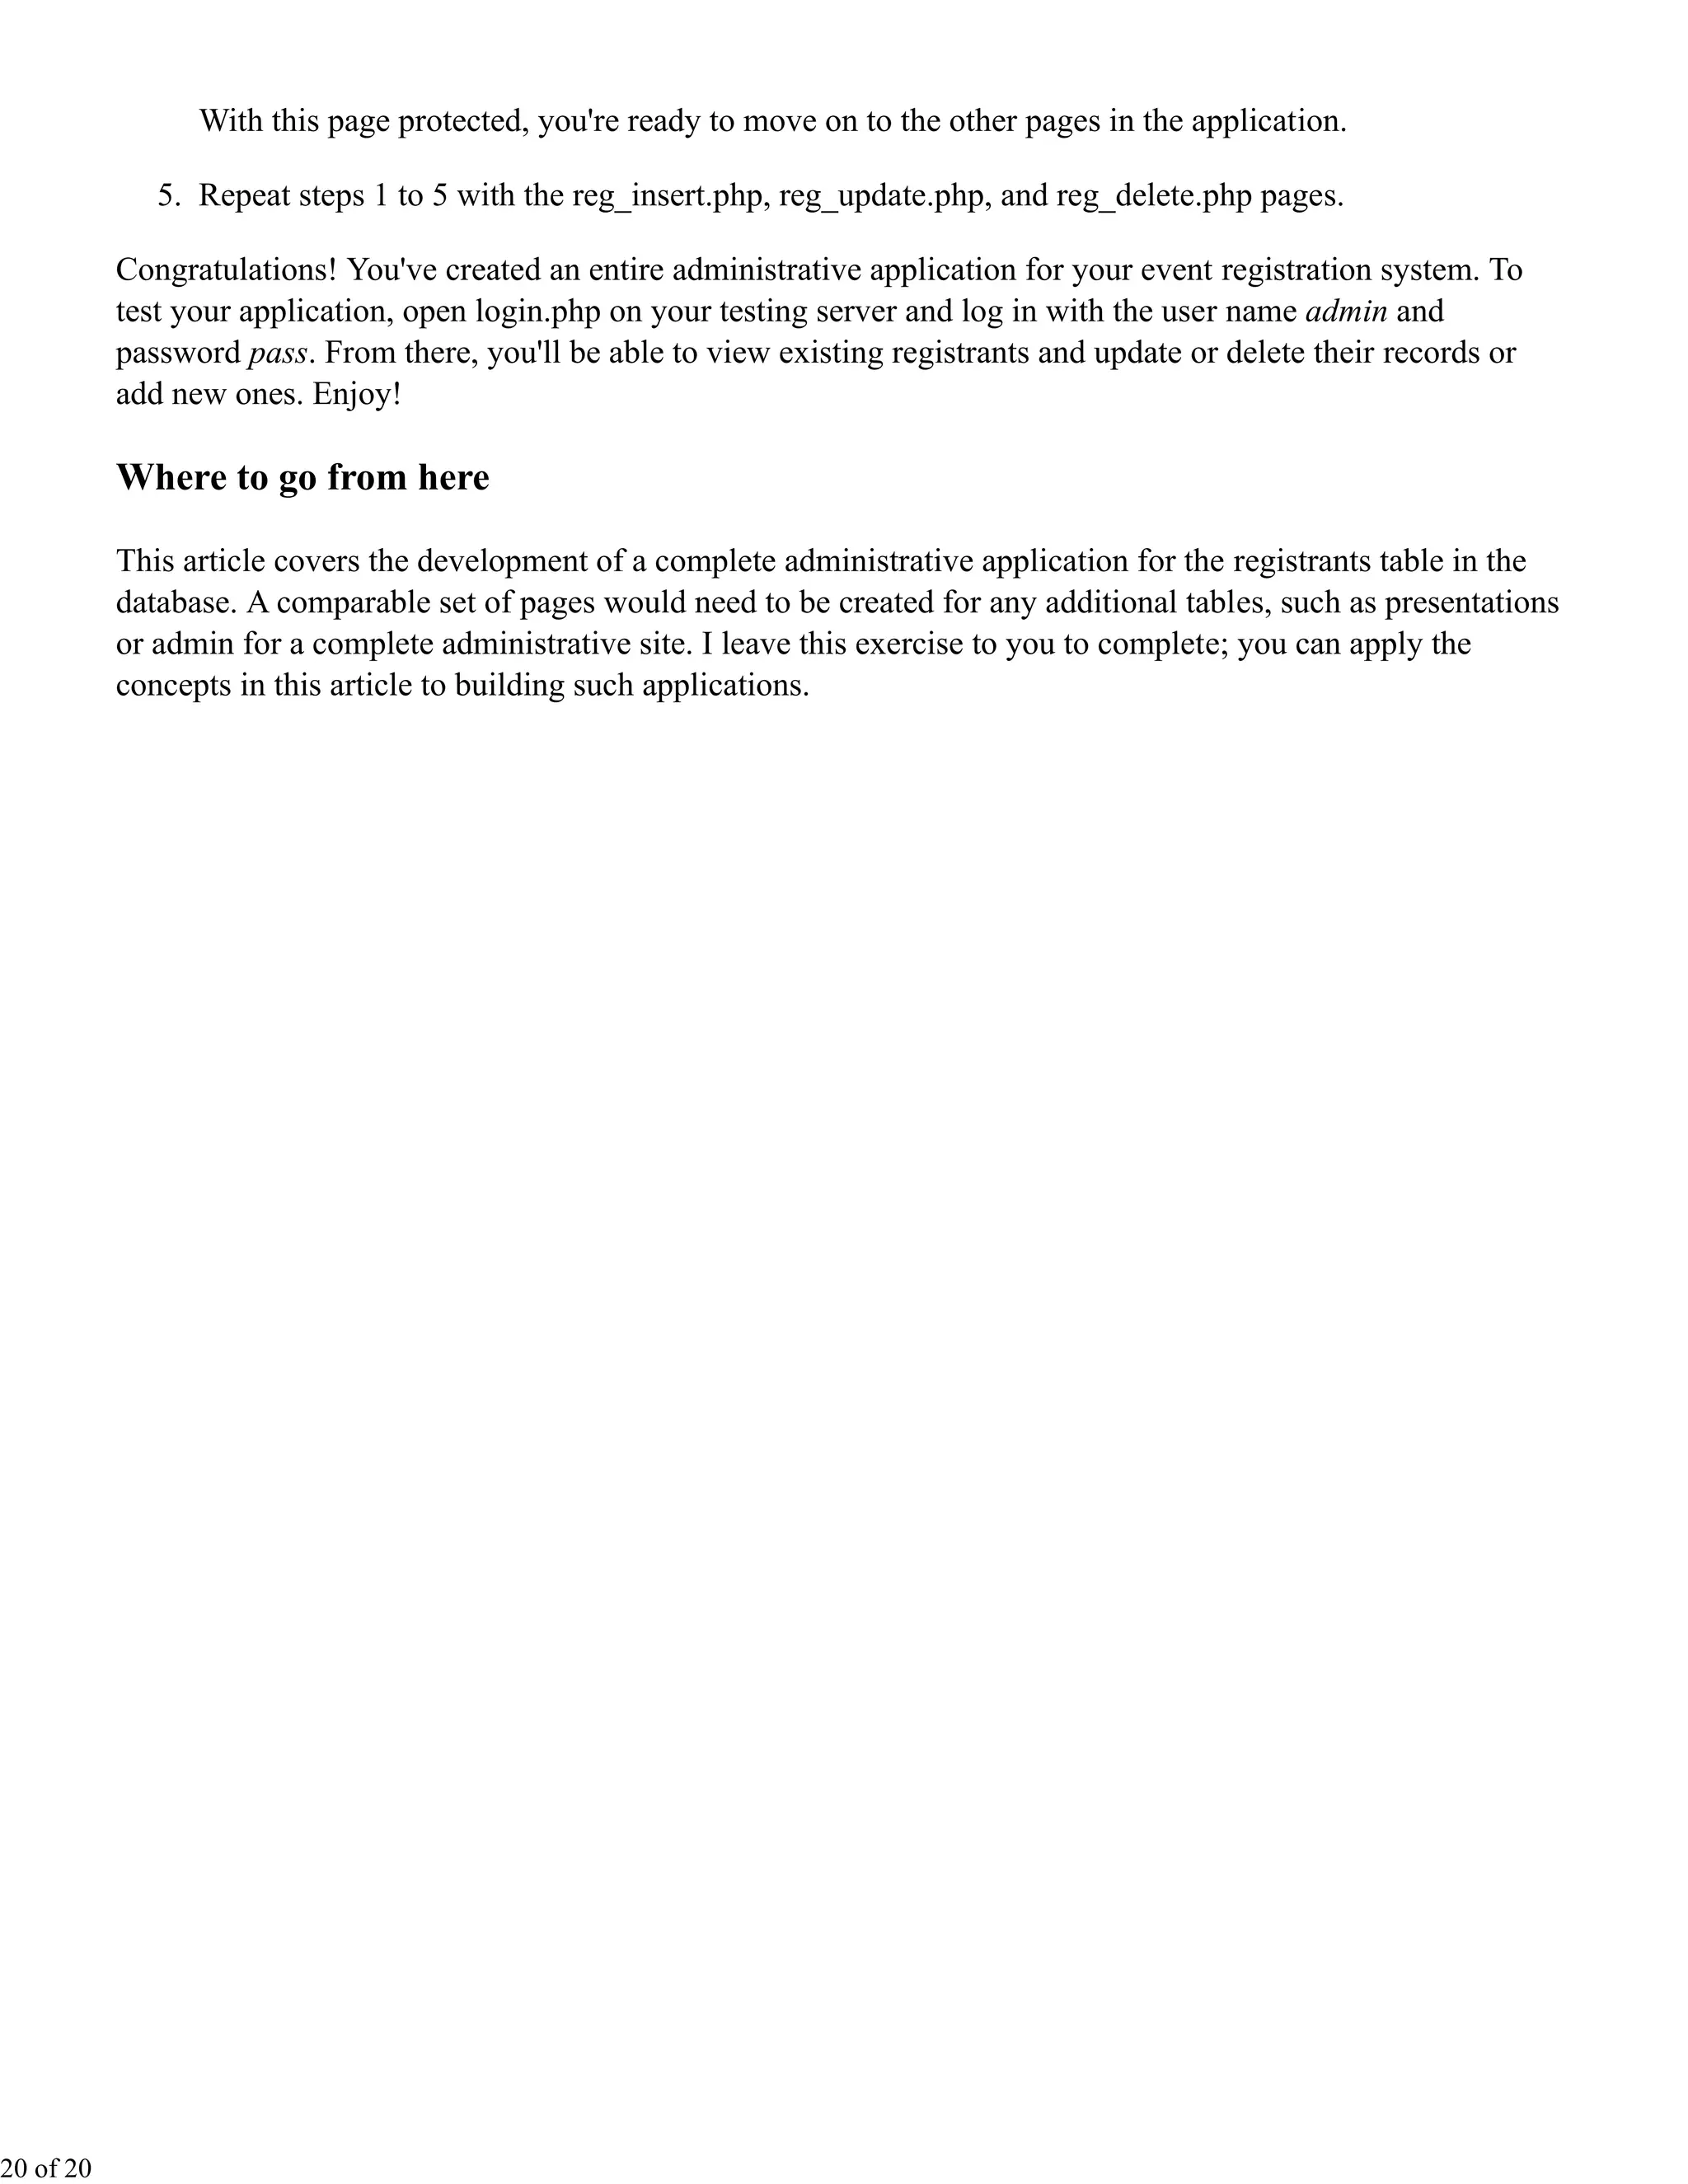

The document provides a detailed guide on building the back end of an event registration application in PHP using Dreamweaver. It covers creating administrative pages for managing registrants, including login functionality, displaying registrations, and handling inserts, updates, and deletions of attendee records. Additionally, the document explains database schema, establishing connections, and implementing security measures for the application.