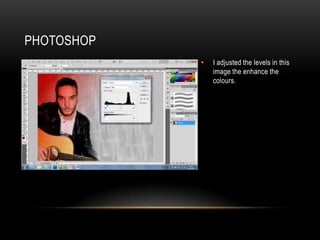
Amy Lea
WHAT HAVE YOU LEARNT ABOUT
TECHNOLOGIES FROM THE PROCESS OF
CONSTRUCTING THIS PRODUCT?
PHOTOSHOP QUARKXPRESS SLIDESHARE
SCRIBD
DIGITAL SLR CAMERA
PREZI POWERPOINT
BLOGGER
DAFONT
BLOGGER
• I have used blogger to upload all my work to. I have learnt how to upload images to my blog and this has
impacted my project as the images make it more visual. I have learnt how to embed scribd documents,
prezi’s, power points through slide share and videos through YouTube.
• I used blogger to upload rough sketches of my magazine pages and also for my production blog post for
which I uploaded screen grabs of the production of my magazine pages and text.
www.amyleamedia.bl
ogspot.co.uk
• I used the online programme Prezi to display my ideas/work in a different way.
• I completed the tasks ‘Analysis of double page spread articles’ and ‘article research’.
• Through using Prezi I presented my work in a creative way including images and text.
• www.prezi.com
PREZI
• I created power points to display some of my work. Any power points that I created I then
embedded onto my blog by using slide share. The tasks that I used power point for were;
researching the market place, audience research analysing the results, planning
production and magazine photographs.
POWERPOINT AND SLIDE SHARE
My power point… My power point embedded onto
my blog through slide share.
• I have used microsoft word to type up my questionnaire, publication plan and double page
spread interview.
• I then used www.scribd.com to upload them and embed them onto my own blog.
MICROSOFT WORD AND SCRIBD
DAFONT.COM
• I used the website dafont.com to download
different fonts to use in my magazine.
• I did this by choosing a font I liked and thought
would suit my magazine and then clicking
download.
• A pop-up then came up and I clicked open.
• I then opened the highlighted file by double clicking
it.
• Next, I clicked install and then was able to use the
font in photoshop, quarkxpress, powerpoint and
word document.
• I used a Canon 110d to take the images for my magazine.
• This is the same camera as I used to take the images for
my preliminary magazine however I feel I learnt how to use
it better when it came to taking my images for the final
product.
• I learnt how to adjust the shutter speed and aperture to
enable me to take an image using the full features of the slr.
• Using the manual zoom I framed the subjects of my images
better and this is something I also learnt how to do during
the process.
DIGITAL SLR CAMERA
PHOTOSHOP
• I used photo shop to create the front cover page of my magazine. I learnt how to use it
briefly in the prelim task and created this cover page…
PHOTOSHOP
• I used this tool to select different items on
the layer.
• This is the marquee tool. I used this to select
an area on my page
• This is the lasso tool, polygonal lasso tool
and magnetic lasso tool which I used to cut
around the people in my images to remove
the backgrounds.
• I used the crop tool to crop my images when
editing them.
• I used the eye dropper tool to select a colour
I have previously used when colouring a new
shape or new text. It enabled me to get the
exact same colour.
I used this clone stamp tool to edit the
background in some of my images.
I used the gradient tool to fill one of the
shapes on my contents page. I coloured
it with a red and blue gradient.
I have also used the fill bucket tool to fill
a shape with a colour.
• I used this tool to add text. I used fonts from
dafont.com and fonts already on photo shop.
• I used this tool to add shapes to my pages.
PHOTOSHOP
PHOTOSHOP
• I edited some images in
photo shop.
• I adjusted the
brightness/contrast, levels,
curves and exposure in
some images.
PHOTOSHOP
• I adjusted the levels in this
image the enhance the
colours.
PHOTOSHOP
• Here is an example of an image I have edited in photo shop…
PHOTOSHOP
• I used the text tool to add this text…
PHOTOSHOP
• I used the shape tool to create these
shapes…
PHOTOSHOP
• I changed the opacity on these shapes so
you could still see the background through
them…
PHOTOSHOP
I created the union jack background in photo
shop using the shape tool and rotating them and
added it as a layer to make the background.
PHOTOSHOP
I used photo shop to create this puff in the style of a
peeling sticker. I used the ellipse tool and cut away
a section of it using the selection tool and then
layered it over. I added text using the text tool in my
downloaded font KG BLESS YOUR HEART’ from
dafont.com and I warped the text to bulge out.
QUARKXPRESS

Evaluation 6

  • 1.
    Amy Lea WHAT HAVEYOU LEARNT ABOUT TECHNOLOGIES FROM THE PROCESS OF CONSTRUCTING THIS PRODUCT?
  • 2.
    PHOTOSHOP QUARKXPRESS SLIDESHARE SCRIBD DIGITALSLR CAMERA PREZI POWERPOINT BLOGGER DAFONT
  • 3.
    BLOGGER • I haveused blogger to upload all my work to. I have learnt how to upload images to my blog and this has impacted my project as the images make it more visual. I have learnt how to embed scribd documents, prezi’s, power points through slide share and videos through YouTube. • I used blogger to upload rough sketches of my magazine pages and also for my production blog post for which I uploaded screen grabs of the production of my magazine pages and text. www.amyleamedia.bl ogspot.co.uk
  • 4.
    • I usedthe online programme Prezi to display my ideas/work in a different way. • I completed the tasks ‘Analysis of double page spread articles’ and ‘article research’. • Through using Prezi I presented my work in a creative way including images and text. • www.prezi.com PREZI
  • 5.
    • I createdpower points to display some of my work. Any power points that I created I then embedded onto my blog by using slide share. The tasks that I used power point for were; researching the market place, audience research analysing the results, planning production and magazine photographs. POWERPOINT AND SLIDE SHARE My power point… My power point embedded onto my blog through slide share.
  • 6.
    • I haveused microsoft word to type up my questionnaire, publication plan and double page spread interview. • I then used www.scribd.com to upload them and embed them onto my own blog. MICROSOFT WORD AND SCRIBD
  • 7.
    DAFONT.COM • I usedthe website dafont.com to download different fonts to use in my magazine. • I did this by choosing a font I liked and thought would suit my magazine and then clicking download. • A pop-up then came up and I clicked open. • I then opened the highlighted file by double clicking it. • Next, I clicked install and then was able to use the font in photoshop, quarkxpress, powerpoint and word document.
  • 8.
    • I useda Canon 110d to take the images for my magazine. • This is the same camera as I used to take the images for my preliminary magazine however I feel I learnt how to use it better when it came to taking my images for the final product. • I learnt how to adjust the shutter speed and aperture to enable me to take an image using the full features of the slr. • Using the manual zoom I framed the subjects of my images better and this is something I also learnt how to do during the process. DIGITAL SLR CAMERA
  • 9.
    PHOTOSHOP • I usedphoto shop to create the front cover page of my magazine. I learnt how to use it briefly in the prelim task and created this cover page…
  • 10.
    PHOTOSHOP • I usedthis tool to select different items on the layer. • This is the marquee tool. I used this to select an area on my page • This is the lasso tool, polygonal lasso tool and magnetic lasso tool which I used to cut around the people in my images to remove the backgrounds. • I used the crop tool to crop my images when editing them. • I used the eye dropper tool to select a colour I have previously used when colouring a new shape or new text. It enabled me to get the exact same colour. I used this clone stamp tool to edit the background in some of my images. I used the gradient tool to fill one of the shapes on my contents page. I coloured it with a red and blue gradient. I have also used the fill bucket tool to fill a shape with a colour.
  • 11.
    • I usedthis tool to add text. I used fonts from dafont.com and fonts already on photo shop. • I used this tool to add shapes to my pages. PHOTOSHOP
  • 12.
    PHOTOSHOP • I editedsome images in photo shop. • I adjusted the brightness/contrast, levels, curves and exposure in some images.
  • 13.
    PHOTOSHOP • I adjustedthe levels in this image the enhance the colours.
  • 14.
    PHOTOSHOP • Here isan example of an image I have edited in photo shop…
  • 15.
    PHOTOSHOP • I usedthe text tool to add this text…
  • 16.
    PHOTOSHOP • I usedthe shape tool to create these shapes…
  • 17.
    PHOTOSHOP • I changedthe opacity on these shapes so you could still see the background through them…
  • 18.
    PHOTOSHOP I created theunion jack background in photo shop using the shape tool and rotating them and added it as a layer to make the background.
  • 19.
    PHOTOSHOP I used photoshop to create this puff in the style of a peeling sticker. I used the ellipse tool and cut away a section of it using the selection tool and then layered it over. I added text using the text tool in my downloaded font KG BLESS YOUR HEART’ from dafont.com and I warped the text to bulge out.
  • 20.