Network Topologies, Cabling and Switch Installation
•Download as DOC, PDF•
13 likes•9,666 views

The document discusses the Telnet protocol, which provides a standard method for connecting terminal devices at one site to processes at another site. It describes the key components of Telnet, including the Initial Connection Protocol (ICP) for establishing connections, the Network Virtual Terminal (NVT) specification, and Telnet control signals. Specific control signals like DATA MARK and BREAK are also defined.

Recommended
More Related Content
What's hot
What's hot (20)
Viewers also liked
Viewers also liked (16)
Similar to Network Topologies, Cabling and Switch Installation
Similar to Network Topologies, Cabling and Switch Installation (20)
More from Vivek Kumar Sinha
More from Vivek Kumar Sinha (20)
Recently uploaded
Recently uploaded (20)
Network Topologies, Cabling and Switch Installation
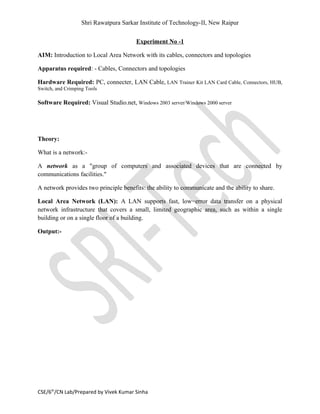
- 1. Shri Rawatpura Sarkar Institute of Technology-II, New Raipur Experiment No -1 AIM: Introduction to Local Area Network with its cables, connectors and topologies Apparatus required: - Cables, Connectors and topologies Hardware Required: PC, connecter, LAN Cable, LAN Trainer Kit LAN Card Cable, Connectors, HUB, Switch, and Crimping Tools Software Required: Visual Studio.net, Windows 2003 server/Windows 2000 server Theory: What is a network:- A network as a "group of computers and associated devices that are connected by communications facilities." A network provides two principle benefits: the ability to communicate and the ability to share. Local Area Network (LAN): A LAN supports fast, low−error data transfer on a physical network infrastructure that covers a small, limited geographic area, such as within a single building or on a single floor of a building. Output:- CSE/6th /CN Lab/Prepared by Vivek Kumar Sinha
- 2. Shri Rawatpura Sarkar Institute of Technology-II, New Raipur Network Topologies:- • A topology refers to the manner in which the cable is run to individual workstations on the network. • The configurations formed by the connections between devices on a local area network (LAN) or between two or more LANs • There are three basic network topologies (not counting variations thereon): the bus, the star, and the ring. • It is important to make a distinction between a topology and architecture. A topology is concerned with the physical arrangement of the network components. In contrast, an architecture addresses the components themselves and how a system is structured (cable access methods, lower level protocols, topology, etc.). An example of architecture is 10baseT Ethernet which typically uses the star topology. Bus Topology:- A bus topology connects each computer (node) to a single segment trunk. A ‘trunk’ is a communication line, typically coax cable, that is referred to as the ‘bus.’ The signal travels from one end of the bus to the other. CSE/6th /CN Lab/Prepared by Vivek Kumar Sinha
- 3. Shri Rawatpura Sarkar Institute of Technology-II, New Raipur A terminator is required at each end to absorb the signal so it does not reflect back across the bus. • In a bus topology, signals are broadcast to all stations. Each computer checks the address on the signal (data frame) as it passes along the bus. If the signal’s address matches that of the computer, the computer processes the signal. If the address doesn’t match, the computer takes no action and the signal travels on down the bus. • Only one computer can ‘talk’ on a network at a time. A media access method (protocol) called CSMA/CD is used to handle the collisions that occur when two signals are placed on the wire at the same time. • The bus topology is passive. In other words, the computers on the bus simply ‘listen’ for a signal; they are not responsible for moving the signal along. • A bus topology is normally implemented with coaxial cable. Output: Star Topology: • All of the stations in a star topology are connected to a central unit called a hub. – The hub offers a common connection for all stations on the network. Each station has its own direct cable connection to the hub. In most cases, this means more cable is required than for a bus topology. However, this makes adding or moving computers a relatively easy task; simply plug them into a cable outlet on the wall. • If a cable is cut, it only affects the computer that was attached to it. This eliminates the single point of failure problem associated with the bus topology. (Unless, of course, the hub itself goes down.) • Star topologies are normally implemented using twisted pair cable, specifically unshielded twisted pair (UTP). The star topology is probably the most common form of network topology currently in use. Output: CSE/6th /CN Lab/Prepared by Vivek Kumar Sinha
- 4. Shri Rawatpura Sarkar Institute of Technology-II, New Raipur Ring Topology:- • A ring topology consists of a set of stations connected serially by cable. In other words, it’s a circle or ring of computers. There are no terminated ends to the cable; the signal travels around the circle in a clockwise (or anticlockwise) direction. • Note that while this topology functions logically as ring, it is physically wired as a star. The central connector is not called a hub but a Multistation Access Unit or MAU. (Don’t confuse a Token Ring MAU with a ‘Media Adapter Unit’ which is actually a transceiver.) • Under the ring concept, a signal is transferred sequentially via a "token" from one station to the next. When a station wants to transmit, it "grabs" the token, attaches data and an address to it, and then sends it around the ring. The token travels along the ring until it reaches the destination address. The receiving computer acknowledges receipt with a return message to the sender. The sender then releases the token for use by another computer. Each station on the ring has equal access but only one station can talk at a time. Output: Cabling:- CSE/6th /CN Lab/Prepared by Vivek Kumar Sinha
- 5. Shri Rawatpura Sarkar Institute of Technology-II, New Raipur • Coaxial Cable – Thinnet looks like regular TV cable. It is about 1/4 inch in diameter and is very flexible and easy to work with. – Thicknet is about 1/2 inch in diameter and not very flexible. Thicknet is older and not very common anymore except as a backbone within and between buildings. Coax transmits at 10 Mbps.. • Twisted Pair. Twisted pair looks like telephone wire and consists of insulated strands of copper wire twisted together. There are two versions of twisted pair cable: – Shielded Twisted Pair (STP). STP is commonly used in Token Ring networks – Unshielded Twisted Pair (UTP). UTP is used in Ethernet networks. Transmission rates vary between 10-100-1000-10000 Mbps. • Fiber-Optic Cable. Fiber-optic cable consists of a thin cylinder of glass surrounded by glass cladding, encased in protective outer sheath. Fiber-optic cable is very fast (over 1Gbps). It can transmit over long distances (2 km +) but is expensive. Output: CSE/6th /CN Lab/Prepared by Vivek Kumar Sinha
- 6. Shri Rawatpura Sarkar Institute of Technology-II, New Raipur CSE/6th /CN Lab/Prepared by Vivek Kumar Sinha
- 7. Shri Rawatpura Sarkar Institute of Technology-II, New Raipur Experiment No -2 AIM: Installation of Switch. Hub their cascading and network mapping Hardware Required: PC, connecter, LAN Cable, LAN Trainer Kit LAN Card Cable, Connectors, HUB, Switch, and Crimping Tools Software Required: Visual Studio.net, Windows 2003 server/Windows 2000 server THEORY: The Model S71650 16-port Switch is a 16-port 10/100Mbps Fast Ethernet switch. This switch supports the advanced features for current switch design. This switch can auto detect 10/100Mbps speed, full/half duplex mode, MDI/MDI-X connection and provides an option for one 100BaseFX expansion module port. This feature provides the user a simple way to complete the network connection with the switch. The Model S71650 16-port Switch provides console management functions. You can configure VLAN, trucking and port configuration from the console which provides more flexible network management and configuration functions. The Model S71650 16-port Switch supports 4 priority transmit queues per port and long Ethernet packets of up to 1522 bytes for QoS function for advanced network applications. 1.1 Package Contents o One 16-port Switch o One AC power cord o Two rack-mount kits and screws o This user's guide o One console cable INSTALLATION CSE/6th /CN Lab/Prepared by Vivek Kumar Sinha
- 8. Shri Rawatpura Sarkar Institute of Technology-II, New Raipur Where to Place the 16-port Switch This 16-port Switch can be placed on a flat surface (your desk, shelf or table). Place the 16-port Switch at a location with these connection considerations in mind: o The switch configuration does not break the rules as specified in Section 3. o The switch is accessible and cables can be connected easily to it. o The cables connected to the switch are away from sources of electrical interference such as radio, computer monitor, and light fixtures. o There is sufficient space surrounding the switch to allow for proper ventilation (the switch may not function according to specifications beyond the temperature range of 0 to 50 degrees C). You can also install this 16-port Switch in a 19" rack with rack-mount kits as shown below: Configure the Network Connection:- Connecting Devices to the 16-port Switch o Use Category 3 or 5 twisted-pair Ethernet cable when connecting 10BaseT devices to the switch (cable pin assignments defined in Appendix A) o Use Category 5 (straight-through) twisted-pair Ethernet cable when connecting 100BaseTX devices to the switch (cable specifications defined in Appendix B) o Always limit the cable distance to 100 meters (328 ft) as defined by IEEE specification o If your switch has a FX port, you can connect long distance fiber optic cable to the switch. CSE/6th /CN Lab/Prepared by Vivek Kumar Sinha
- 9. Shri Rawatpura Sarkar Institute of Technology-II, New Raipur o Because this switch supports Auto MDI/MDI-X detection, you can use normal straight through cable for both workstation connection and hub/switch cascading. Connecting to Another Ethernet Switch/Hub This 16-port Switch can be connected to existing 10 Mbps or 100 Mbps hubs/switches. Because all of the TP ports on the 16-port Switch are Auto MDI/MDI-X, you can connect from any TP port of the 16-port Switch to the MDI or MDI-X port of another hub/switch with Straight Through or crossover cables.) Application Example A switch can be used to overcome the hub-to-hub connectivity limitations as well as improve the overall network performance. Switches make intelligent decisions about where to send network traffic based on the destination address of the packet. As a result, the switch can significantly reduce unnecessary traffic. The example below demonstrates the switch ability to segment the network. The number of nodes on each segment is reduced thereby minimizing network contention (collisions) and boosting the available bandwidth per port. CSE/6th /CN Lab/Prepared by Vivek Kumar Sinha
- 10. Shri Rawatpura Sarkar Institute of Technology-II, New Raipur Output: CSE/6th /CN Lab/Prepared by Vivek Kumar Sinha
- 11. Shri Rawatpura Sarkar Institute of Technology-II, New Raipur Experiment No-3 AIM: Case Study of Ethernet (10 base 5, 10 base 2, 10 base T) Hardware Required: PC, connecter, LAN Cable, LAN Trainer Kit LAN Card Cable, Connectors, HUB, Switch, and Crimping Tools Software Required: Visual Studio.net, Windows 2003 server/Windows 2000 server Appratus Required: 10BASE-2 (Thin Ethernet) 10BASE-2 Quick Overview IEEE-norm 802.3 Maximum speed 10 Mbps Cable RG58 Connectors BNC Terminators 50 ohm Max. length of a segment 185m/607ft Max. number of taps per segment 30 Max. amount of stations per network 1024 Min. distance between taps 0.5m/1.65ft Max. number of repeaters 4 Topology Bus CSE/6th /CN Lab/Prepared by Vivek Kumar Sinha
- 12. Shri Rawatpura Sarkar Institute of Technology-II, New Raipur THEORY: Maximum Topology 10Base-2 is a bus topology. The cable runs from computer to computer, like a daisy-chain. All devices are connected to the cable through a T-connector. The tranceiver is on the ethernet card in the device. This means that no cable is allowed between the T-connector and the device. A complete 10BASE-2 network (one collision domain) may consist of five segments interconnected by four repeaters. Only three of those five segments may have network devices connected to them (populated). The other two segments function as Inter Repeater Links (IRLs) and their only function is to extend the network. This allows for a maximum of 925m/3035ft (5x185m) of network cable if you stick to 10Base-2 cable. For larger distances you need 10Base- 5 or fiber optic repeaters or bridges or routers. Hardware Required: 10Base-5 (Thick Ethernet) 10Base-5 Quick Overview IEEE-spec 802.3 Max. speed 10 Mbps Cable Standard Ethernet Coax Cable Connectors N-type Terminators 50 ohm Max. length of a segment 500m/1640ft Max. number of taps per segment 100 Max. number of stations per network 1024 Min. distance between taps 2.5m/8.3ft Max. length of tranceiver cable 50m/164ft Max. number of repeaters 4 CSE/6th /CN Lab/Prepared by Vivek Kumar Sinha
- 13. Shri Rawatpura Sarkar Institute of Technology-II, New Raipur Topology Bus THEORY: Maximum Topology 10Base-5 is a bus topology. A thick coaxial cable runs through the building and stations are attached to this cable by tranceivers. An closer look on cabling can be found below. The maximum amount of repeaters in a network is four. Since a segment may be up to 500 meters the total network length can be 2500 meter. There is little catch in this because 2 of the total of 5 segments may not be occupied. This doesn't matter for the length, but it does for the way you position your computers. The 2 non-occupied segments are only ment for extending the network and are called IRLs (Inter Repeater Links). For larger distances you need fiber optic repeaters or bridges or routers. Hardware Required: 10BASE-T 10Base-T Quick Overview IEEE-spec 802.3 Wire speed 10 Mbps Cable type UTP CAT 3, 4 and 5 Connector type RJ45 Used pins 1 & 2, 3 & 6 Max. length of a segment 100m/328ft Max. number of taps per segment 2 Max. amount of stations per network 1024 Max. amount of repeaters 4 Topology Star CSE/6th /CN Lab/Prepared by Vivek Kumar Sinha
- 14. Shri Rawatpura Sarkar Institute of Technology-II, New Raipur Maximum Topology Theory: A segment is defined as the cable between the hub and a workstation. According to the EIA/TIA this length has a maximum of 100m separated in: 5m from HUB to patchpanel, 90 meters from patchpanel to wall outlet, and 5 meters from wall outlet to the workstation. A complete 10Base-T network (one collision domain) may consist of 4 repeaters between the two far most workstations. Meaning the maximum length of a 10Base-T Network can be 500m/1500ft. To exceed this maximum you need Fiber Optic Repeaters or Bridges or Routers. Experiment No.4 CSE/6th /CN Lab/Prepared by Vivek Kumar Sinha
- 15. Shri Rawatpura Sarkar Institute of Technology-II, New Raipur AIM: Installation and working with Telnet (Terminal Network). Hardware Required: PC, connecter, LAN Cable, LAN Trainer Kit LAN Card Cable, Connectors, HUB, Switch, and Crimping Tools Software Required: Visual Studio.net, Windows 2003 server/Windows 2000 server Theory: The purpose of Telnet Protocol is to provide a standard method of interfacing terminals devices at one site to processes at another site. The Telnet Protocol is built up from three major substructures, first the Initial Connection Protocol (ICP), second the Network Virtual Terminal (NVT), and third the Telnet control signals described herein. Telnet user and server processes follow the ICP to establish connections. The term "Logger" has been associated with the set of processes in the serving system which responds to the ICP and performs the initial interactions e.g. obtain a name and password. The ICP is defined and the initial socket number and byte size parameters are defined in "Current Network Protocols" (NIC #7104). Explanation: TELNET CONTROL SIGNALS NAME CODE MEANING DATA MARK 128 Used to mark a point in the data stream. Used in conjunction with INS. See SYNCH. BREAK 129 User-to-Server: Has the same meaning to the server as the "Break," "Interrupt," or "Attention" button found on many terminals. Server-to-User: Has the same meaning to to use as the "reverse break" used with some terminals. NOP 130 No Operation. NO ECHO 131 User-to-Server: Asks the server not to return Echos of the transmitted data. Server-to-User: States that the server is not sending echos of the transmitted data. Sent only as a reply to ECHO or NO ECHO, or to end the hide your input. ECHO 132 User-to-Server: Asks the server to send Echos of the transmitted data. Server-to User: States that the server is sending echos of the transmitted data. Sent only as a reply to ECHO or NO ECHO. Hide your input 133 The intention is that a server will send this signal to a user system which is CSE/6th /CN Lab/Prepared by Vivek Kumar Sinha
- 16. Shri Rawatpura Sarkar Institute of Technology-II, New Raipur echoing locally (to the user) when the user is about to type something secret (e.g. a password). In this case, the user system is to suppress local echoing or overprint the input (or something) until the server sends a NOECHO signal. In situations where the user system is not echoing locally, this signal must not be sent by the server. INS --- This is the "Interrupt on Send" signal, defined by the Host-to-Host protocol and implemented by the Network Control Program (NCP). See SYNCH. The data transmitted between the user and server programs (and vice versa) is treated as a character stream with embedded control signals. Experiment No.5 AIM: Installation and working with FTP (File Transfer Protocol). CSE/6th /CN Lab/Prepared by Vivek Kumar Sinha
- 17. Shri Rawatpura Sarkar Institute of Technology-II, New Raipur Hardware Required: PC, connecter, LAN Cable, LAN Trainer Kit LAN Card Cable, Connectors, HUB, Switch, and Crimping Tools Software Required: Visual Studio.net, Windows 2003 server/Windows 2000 server Theory: The File Transfer Protocol (FTP) was one of the first efforts to create a standard means of exchanging files over a TCP/IP network, so the FTP has been around since the 1970's. The FTP was designed with as much flexibility as possible, so it could be used over networks other than TCP/IP, as well as being engineered to have the capability with exchanging files with a broad variety of machines. The base specification is RFC 959 and is dated October 1985. There are some additional RFCs relating to FTP, but it should be noted that even as of this writing (December 2001) that most of the new additions are not in widespread use. The purpose of this document is to provide general information about how the protocol works without getting into too many technical details. RFC 959 should be consulted for details on the protocol. Control Connection -- the conversation channel The protocol can be thought of as interactive, because clients and servers actually have a conversation where they authenticate themselves and negotiate file transfers. In addition, the protocol specifies that the client and server do not exchange data on the conversation channel. Instead, clients and servers negotiate how to send data files on separate connections, with one connection for each data transfer. Note that a directory listing is considered a file transfer. To illustrate, we'll just present (an admittedly contrived) example of how the FTP would work between human beings rather than computer systems. For our example, we'll assume we have a client, Carl Clinton, who wishes to transfer files from Acme Mail Service that manages his post office box. Below is a transcript of a phone call between Carl Clinton and Acme Mail Service. Clinton:(Dials the phone number for the mail service) Service:"Hello, this is the Acme Mail Service. How may I help you today?" Clinton:"Hello, this is Carl Clinton. I would like to access mailbox number MB1234." Service:"OK, Mr. Clinton, I need to verify that you may access mailbox MB1234. What is your password?" Clinton:"My password is QXJ4Z2AF." CSE/6th /CN Lab/Prepared by Vivek Kumar Sinha
- 18. Shri Rawatpura Sarkar Institute of Technology-II, New Raipur Service:"Thank you Mr. Clinton, you may proceed." Clinton:"For now, I'm only interested in looking at the bills and invoices, so look at the folder marked "bills" in my mailbox." Service:"OK." Clinton:"Please prepare to have your assistant call my secretary at +1 402 555 1234." Service:"OK." Clinton:"Now call my secretary and tell him the names of all the items in the bills folder of my mailbox. Tell me when you have finished." Server:"My assistant is calling your secretary now." Server:"My assistant has sent the names of the items." Clinton:(Receives the list from his secretary and notices a bill from Yoyodyne Systems.) "Please prepare to have your assistant send to my fax machine +1 402 555 7777." Service:"OK." Clinton:"Now fax a copy of the bill from Yoyodyne Systems." Server:"My assistant is calling your fax machine now." Server:"My assistant has finished faxing the item." Clinton:"Thank you, that is all. Good bye." Server:"Goodbye." Experiment No. 6 AIM: Installation and Computers via serial or Parallel ports and enable the computers to share disk and printer port. Hardware Required: PC, connecter, LAN Cable, LAN Trainer Kit LAN Card Cable, Connectors, HUB, Switch, and Crimping Tools Software Required: Visual Studio.net, Windows 2003 server/Windows 2000 server Theory: CSE/6th /CN Lab/Prepared by Vivek Kumar Sinha
- 19. Shri Rawatpura Sarkar Institute of Technology-II, New Raipur Configuring the Parallel Ports The system programs allow you to view and change parallel port assignments. Go to Viewing Parallel-Port Assignments for the procedures to view and change parallel port assignments. The parallel ports are most often used to communicate with parallel printers; however, parallel communications is an effective method of communicating with a variety of parallel devices. The parallel ports can send and receive data. Although the parallel ports have 25 pins, only eight of them are used to transfer data; the rest are used for status and control functions. Your system is equipped with two parallel ports; one standard port (port B), and one ExpressPrint(*), port (port A). If you are going to use a local printer dedicated to one system only, connect the printer to the standard parallel port. If you are going to share the printer with other computers connected to a network, using the standard parallel port can greatly reduce the speed that the information is sent to your local printer. However, if you attach the shared printer to the ExpressPrint port, the speed won't be affected. Notes: 1. Additional software device drivers are required to enable the high-speed function. Refer to your operating system documentation, or contact your IBM authorized reseller or IBM marketing representative. 2. If you experience a problem with a non-IBM device when attaching it to the parallel port, you might need to set the parallel port DMA (direct memory access) arbitration level to "Disabled". See Changing the Configuration. Parallel-Port Compatibility Mode The sending and receiving of data is called bidirectional communications. You can disable bidirectional parallel communications by using the Change Configuration program. When bidirectional parallel communications are disabled, the parallel port is in the compatibility mode. The term "compatibility" is a bit misleading because it has very little to do with the parallel port being compatible with hardware or software. As used here and in the system- program help messages, it means only that the parallel port operates like the one used in earlier personal computer models. Assigning Parallel Ports Software recognizes parallel ports by their parallel port assignments. No two parallel ports can have the same parallel-port assignment. This is normally handled by the Automatic Configuration program, but you might have special hardware or software that requires you to change these assignments. You can set the parallel ports as Parallel 1, 2, 3, or 4, through the system programs. At the time of shipment, the high-speed parallel port is set as parallel 1, and the standard parallel port is set as parallel 2. Many operating systems and application programs have a setup program that defines the location of the printer and the type of printer attached. Many use LPT (for line printer) to refer to parallel 1. If you are not sure of your parallel-port assignments, you can use the system programs to view them. CSE/6th /CN Lab/Prepared by Vivek Kumar Sinha
- 20. Shri Rawatpura Sarkar Institute of Technology-II, New Raipur Viewing Parallel-Port Assignments To view a parallel-port assignment: 1. Turn on the system. When the F1 prompt appears, press F1. The system programs Main Menu appears. Note: For disk-array models, insert the Reference Diskette into the primary diskette drive, then turn on the system. Or, if the system is turned on already, insert the Reference Diskette and press Ctrl+Alt+Del. 2. Select Set configuration from the Main Menu. 3. Select View configuration. Configuring the Serial Ports The system programs allow you to view and change serial port assignments. Go to Viewing Serial-Port Assignments for the procedures to view and change the serial port assignments. Serial ports provide an effective way of communicating with a variety of serial devices, such as serial plotters and printers. You also can use them to set up communications between two computers, using a null modem, or over telephone lines, using a modem. The serial port sends and receives data 1 bit at a time, as opposed to the parallel port, which sends and receives 8 bits at a time. The serial port can transmit data at speeds ranging from 300 to 345600 bits per second. The bits-per-second measurement is commonly referred to as the baud rate. Your system comes with two 9-pin serial ports. Additional serial ports can be added by installing a serial adapter in one of the expansion slots. Note: If you experience a problem with a non-IBM device when attaching it to the serial port, you might need to set the serial port DMA (direct memory access) arbitration level to "Disabled". See Changing the Configuration. Assigning Serial Ports Software recognizes serial ports from their serial-port assignments. No two serial ports can be set the same. This normally is handled by the Automatic Configuration program, but you might have special hardware or software that requires you to change these assignments. You can set either serial port as Serial 1 through Serial 16 by using the system programs. Many operating systems and application programs have a setup program that defines the location and speed (baud rate) of a modem, or the location and type of serial printer. Many use "COM" (short for "Communications") to refer to the serial ports. For example, COM1 is the equivalent of Serial 1. If you are not sure of your serial-port assignments, you can use the system programs to view them. Viewing Serial-Port Assignments To view a serial-port assignment: 1. Turn on the system. When the F1 prompt appears, press F1. The system programs Main Menu appears. Note: For disk-array models, insert the Reference Diskette into the primary diskette drive, then turn on the system. Or, if the system is turned on already, insert the Reference Diskette and press Ctrl+Alt+Del. 2. Select Set configuration from the Main Menu. 3. Select View configuration. CSE/6th /CN Lab/Prepared by Vivek Kumar Sinha
- 21. Shri Rawatpura Sarkar Institute of Technology-II, New Raipur Experiment No.7 AIM: To connect two Personal Computers with Telephone line. Hardware Required: PC, connecter, LAN Cable, LAN Trainer Kit LAN Card Cable, Connectors, HUB, Switch, and Crimping Tools Software Required: Visual Studio.net, Windows 2003 server/Windows 2000 server Theory: CSE/6th /CN Lab/Prepared by Vivek Kumar Sinha
- 22. Shri Rawatpura Sarkar Institute of Technology-II, New Raipur One method for connecting two computers together to transfer files is by a direct modem to modem connection. Some reasons to do so: the two computers may not have diskette compatibility; one computer may have a modem, but no free serial port; a serial port may be free, but (especially on some modern PC's with Asian made motherboards) the back panel connector may be wired incorrectly; getting two different computers to communicate correctly via serial port connection (i.e., "null-modem") may be difficult; getting files other than text files to transfer via rs-232 may be tricky. A direct modem connection has the advantage that standard terminal programs are designed primarily to work with a modem. Another possibility is that of printing via a fax machine; some PC printers are multi-function: fax/scanner/copier/printer. This is another way an old Mac might access such devices. I have seen this mentioned, but haven't been able to try it yet (I don't yet have a compatible Mac fax program). It might also be possible to use a fax machine as a scanner this way; connect one computer modem to the fax machine. One necessity for a reliable connection of this type is a "line simulator", a device to provide simulation of a telephone line, supplying the line current that modems are designed to work with. For our purposes, a very simple home-made circuit will do the job (you should be able to find most, if not all, of the parts at a Radio Shack store). This connects between two telephone modular jacks, and the two modems plug into the jacks: Basic Circuit: + | | - GREEN----------+---||||---///--+-------------RED | | | R | | 9 to 24V | | | +---||------------+ C .47uF RED-----------------------------------------------GREEN CSE/6th /CN Lab/Prepared by Vivek Kumar Sinha
- 23. Shri Rawatpura Sarkar Institute of Technology-II, New Raipur Note that the resistor value depends on the actual voltage used. For 24V about 1K Ohms max will give at most 24mA (12V @ 500 Ohms, 9V @ 380 Ohms); the resistance of the modem circuit will reduce this slightly (you may need to reduce the resistor value, but if it works with the values mentioned, leave it at that; I'm using 380 Ohms with a voltage input of 14V). The telephone company guarantees about 20mA minimum in an actual phone line, and we want to be about the same minimum. Note also that the battery shown can be replaced by a "wall wart" power supply; most of these are un-regulated (my "9V @ 130mA" plug in DC supply gives about 14V on this circuit when connected to a telepone for testing) and consequently will need an electrolytic capacitor of about 2200 uF across the power supply + and - terminals to reduce the "ripple" voltage (i.e., AC "noise"); be sure to match the polarity of the Electrolytic to the polarity of the power supply. A more elegant solution when using an unregulated power supply is to add a 12 volt regulator such as a 78L12 (or a 7812 if you can't find the low power "L" version) as shown here: 78L12 380 Ohm 1/2 Watt _________ | | +VDC IN >--------+-----|IN + |----+--////--+--------GREEN +_|_ |___GND___| _|_ _|_ -DC IN >--+ _ _ | _ _ .1uF _ _ .47uF | | 10uF | | | RED----------+-----+----------+---------+-----------+ GREEN----------------------------------------------------------RED In the circuits above, the 10uF is a Tantalum, but you can substitute electrolytic. The 0.1uF is ceramic, and the 0.47uF should be an audio grade bypass; I used a polypropelene capacitor here. Make sure the capacitors have voltage rating at least equal to the power supply you use; a voltage regulator needs at least two volts more at its input than its output, so the above needs at least 14 volts in. Most regulators will take up to about 30 volts max on their input, but the greater the differential, the greater the power loss and subsequent heat dissipation in the regulator. The 78L12 is designed for 200mA max, whereas the 7812 is about 1 to 1.5 A max (when used with an adequate heat sink (an aluminum "radiator" designed for this purpose). Once the modems are connected and the terminal programs are up, type AT to be sure you get back "OK" response. Next, type ATX3&C0 (that's C-Zero). C0 may not actually be needed on a PC, but is needed on the Mac; I type the same string at both my PC and Mac without any problems, though. Now, type ATD (the dial command) and enter on one computer; next type ATA and enter on the other. The two computers will connect, and you may now use the terminal to transfer any files. The Mac 68000 faq says Macs can use modem rates up to 56000; I use CSE/6th /CN Lab/Prepared by Vivek Kumar Sinha
- 24. Shri Rawatpura Sarkar Institute of Technology-II, New Raipur 19600 on my Plus and PC because it's the fastest available on the Windows 3.1 terminal program I use on my Win95 PC (Hyperterminal would allow faster rates, but is a little more trouble to use; see the link below "issuing Modem AT commands in Windows 95" for how to use it). Use your favorite terminal program on the Mac. I have downloaded Mac programs (in .hqx or .sit format) and transferred to my Plus with this method without any problem. Experiment No.8 AIM: Installation of UTP, Co-axial cable, Cross cable, parallel cable NIC and LAN card. Hardware Required: PC, connecter, LAN Cable, LAN Trainer Kit LAN Card Cable, Connectors, HUB, Switch, and Crimping Tools Software Required: Visual Studio.net, Windows 2003 server/Windows 2000 server Background Put together a price list for an upcoming cabling project. Gather pricing information for the CSE/6th /CN Lab/Prepared by Vivek Kumar Sinha
- 25. Shri Rawatpura Sarkar Institute of Technology-II, New Raipur horizontal (UTP) cabling. If UTP is not used in the immediate area, substitute shielded products. The items include the following: • 24 - 1 m (3 ft) Category 5 or higher UTP patch cables • 24 - 3 m (10 ft) Category 5 or higher UTP patch cables • 2 - 15 m (50 ft) Category 5 or higher UTP patch cables • 152.4 m (500 ft) UTP compare the price to shielded twisted pair • 152.4 m (500 ft) UTP plenum Step 1 Research cable pricing Use at least three sources for pricing. On the Web try http://www.cdw.com and http://www.google.com. Perform searches from those sites looking for Category 5 jumpers, Category 5 patch, and Category 5 bulk. While the CDW site will give prices quickly, the Google search will turn up many interesting things from custom cable building firms to instructions for building cables. Also refer to networking equipment and supplies catalogs. Step 2 Compile a table of the results Site, Catalog or Store 24 - 1 m (3 ft) Category 5 or higher 24 - 3 m (10 ft) Category 5 or higher 2 - 15 m (50 ft) Category 5 or higher Experiment No.9 AIM: Introduction to Server administration Hardware Required: LAN Cable, LAN Trainer Kit LAN Card Cable, Connectors, HUB, Switch, and Crimping Tools Software Required: Visual Studio.net, Windows 2003 server/Windows 2000 server CSE/6th /CN Lab/Prepared by Vivek Kumar Sinha
- 26. Shri Rawatpura Sarkar Institute of Technology-II, New Raipur Task 1: Determine Which Oracle9iAS Solutions You Require Oracle9iAS offers a variety of solutions you can use to build your application server. These solutions include J2EE and other industry-standard application support, portals, wireless support, caching, business intelligence features, security features, and management tools. Your first task as an administrator is to determine which Oracle9iAS solutions your user community requires. Task 2: Design Your Application Server Designing an application server involves determining which Oracle9iAS features to install and configure, which hosts to use, and which databases (if any) are required to support your application server. Task 3: Install Your Application Server You can install your application server using Oracle Universal Installer, an easy-to-use tool that automatically installs and configures your application server. Task 4: Learn to Use the Administration Tools Oracle9iAS provides a Web-based tool, a Java-based console, and command-line utilities for performing management tasks, including starting and stopping the application server, configuring the application server, deploying applications, and monitoring the application server. These tools provide a centralized interface for managing application servers, as well as the databases in your enterprise. Task 5: Perform Postinstallation Tasks You must perform some setup tasks after every application server installation. These tasks include checking port allocation and configuring certain application server features to use custom-tuned databases. CSE/6th /CN Lab/Prepared by Vivek Kumar Sinha
- 27. Shri Rawatpura Sarkar Institute of Technology-II, New Raipur Task 6: Configure Your Application Server Oracle9iAS is a very flexible platform that offers many options to customize its services. You can change passwords, add functionality, and configure a variety of parameters including security settings, resource limits, logging features, and user privileges. Task 7: Deploy Applications You can easily deploy and redeploy J2EE applications on Oracle9iAS using a Web- based wizard that guides you through configuring, deploying, and securing your application, as well as publishing its Web Services. Task 8: Monitor Your Application Server It is important to monitor your application server to identify configuration problems and performance bottlenecks. Oracle9iAS offers centralized, graphical monitoring tools that characterize the performance of every aspect of your application server. Task 9: Back Up Your Application Server You should back up configuration files, log files, applications, and data on a regular basis. You can back up and restore Oracle9iAS using standard file system and database backup tools and strategies. Task 10: Reconfigure Your Application Server Design Oracle9iAS is a scalable and flexible product that allows you to expand and reconfigure your original application server design to meet changing user requirements and increasing load. Experiment No.10 CSE/6th /CN Lab/Prepared by Vivek Kumar Sinha
- 28. Shri Rawatpura Sarkar Institute of Technology-II, New Raipur AIM: Configuration of DHCP Hardware Required: LAN Cable, LAN Trainer Kit LAN Card Cable, Connectors, HUB, Switch, and Crimping Tools Software Required: Visual Studio.net, Windows 2003 server/Windows 2000 server Theory: DHCP Server Configuration Settings Dynamic Host Configuration Protocol (DHCP) server enables Cisco Unified IP Phones, connected to either the customer's data or voice Ethernet network, to dynamically obtain their IP addresses and configuration information. DHCP uses Domain Name System (DNS) to resolve host names both within and outside the cluster. DHCP Server Configuration Settings Server Information Field Description Host Server Select a host server from the drop-down list of available host servers. Primary DNS IPv4 Address This field specifies primary DNS IPv4 address. Secondary DNS IPv4 Address This field specifies secondary DNS IPv4 address. Primary TFTP Server IPv4 Address (Option 150) You can enable the IP phones to access the TFTP server using DHCP custom option 150. This is the method that Cisco recommends. This field specifies the IPv4 address for primary Trivial File Transfer Protocol (TFTP) server. Secondary TFTP Server IPv4 Address (Option 150) This field specifies the IPv4 address for secondary TFTP server. CSE/6th /CN Lab/Prepared by Vivek Kumar Sinha
- 29. Shri Rawatpura Sarkar Institute of Technology-II, New Raipur Bootstrap Server IPv4 Address This field specifies the address of the server that is used in the next step of the bootstrap process. You can use as the IPv4 address of the TFTP server or as the default value to DHCP server address if the server supplies the next bootstrap service. Domain Name The Domain Name specifies the domain name that you should use when resolving hostname via the Domain Name System. TFTP Server Name (Option 66) You can enable the IP phones to access the TFTP server by using DHCP option 66. Use this field to identify a TFTP server. You can configure only one DNS name or a dotted decimal IP address in this parameter. ARP Cache Timeout This field specifies the timeout in seconds for ARP cache entries. Specify the time as a 32-bit unsigned integer. The default for the Cisco Network Registrar (CNR) DHCP server specifies 60 seconds. IP Address Lease Time The DHCP server uses the information in this field to specify the lease time that it is willing to offer. Specify the time in units of seconds and as a 32-bit unsigned integer. The default for the CNR DHCP server specifies seven days (604,800 seconds). Renewal(T1) Time (sec) This field specifies the time interval from address assignment until the client transitions to the RENEWING state. Typically, set this field to half the value of the IP address lease time. For example, if the IP address lease time is typically set to 60,000 seconds, the renewal time gets set to 30,000 seconds. Rebinding (T2) Time (sec) This field specifies the time interval from address assignment until the client transitions to the REBINDING state. Specify the value in units of seconds and as a 32-bit unsigned integer. Typically, set this field to approximately 75 percent of the value of the IP address lease time. For example, if the IP address lease time is set to 60,000 seconds, the rebinding time typically gets set to CSE/6th /CN Lab/Prepared by Vivek Kumar Sinha
- 30. Shri Rawatpura Sarkar Institute of Technology-II, New Raipur about 45,000 seconds. In Windows, 85 percent of the value of the IP address lease time represents the standard. Activating DHCP Monitor Service You can activate and deactivate DHCP monitor process by using the Serviceability window of Cisco Unified Communications Manager. Use the following procedure to activate the service. Procedure Step 1 From Cisco Unified Serviceability, choose Tools > Service Activation. The Service Activation window displays. Step 2 Choose the Cisco Unified Communications Manager server from the Servers drop-down list box and click Go. Step 3 Choose Cisco DHCP Monitor Service from the Unified CM Services list and click Save. Step 4 The service gets activated, and the Activation Status column displays the status as Activated. Starting DHCP Monitor Service The DHCP Monitor Service starts automatically after it is activated by using Cisco Unified Serviceability. This section describes the procedures to stop or restart the DHCP service. Procedure Step 1 In Cisco Unified Serviceability, choose Tools > Control Center - Feature Services. The Control Center-Feature Services window displays. Step 2 Choose the Cisco Unified Communications Manager server from the Servers drop-down list box and click Go. Cisco DHCP Monitor Service displays in the list under Service Name column, in Unified CM Services. CSE/6th /CN Lab/Prepared by Vivek Kumar Sinha
- 31. Shri Rawatpura Sarkar Institute of Technology-II, New Raipur Step 3 Check the radio button corresponding to Cisco DHCP Monitor Service. Step 4 If you want to restart the Cisco DHCP Monitor Service, click Restart. The service restarts, and the message, Service Successfully Restarted, displays. Step 5 If you want to stop the Cisco DHCP Monitor Service, click Stop. The service stops, and the message, Service Successfully Stopped, displays. Step 6 If you want to start a stopped Cisco DHCP Monitor Service, click Start. The service starts, and the message, Cisco DHCP Monitor Service Restarted Successfully, displays. Finding a DHCP Server Because you might have several servers in your network, Cisco Unified Communications Manager lets you locate specific DHCP servers on the basis of specific criteria. Use the Procedure Step 1 Choose System > DHCP > DHCP Server. The Find and List DHCP Servers window displays. Step 2 To find all records in the database, ensure the dialog box is empty; go to Step 3. To filter or search records: • From the first drop-down list box, select a search parameter. • From the second drop-down list box, select a search pattern. • Specify the appropriate search text, if applicable. Step 3 Click Find. All or matching records display. You can change the number of items that display on each page by choosing a different value from the Rows per Page drop-down list box. Step 4 From the list of records that display, click the link for the record you want to view. Procedure CSE/6th /CN Lab/Prepared by Vivek Kumar Sinha
- 32. Shri Rawatpura Sarkar Institute of Technology-II, New Raipur Step 1 Choose System > DHCP > DHCP Server Step 2 Perform one of the following tasks: • To add a DHCP server, click Add New. • To update a server, find the server by using the procedure in the "Finding a DHCP Server" section. • To copy a server, find the server by using the procedure in the "Finding a DHCP Server" section, select the DHCP server that you want by checking the check box next to the server name, and click the Copy icon. The DHCP Server Configuration window displays. Step 3 Enter the appropriate settings as described. Step 4 Click the Save icon that displays in the tool bar in the upper, left corner of the window (or click the Save button that displays at the bottom of the window) to save the data and to add the server to the database. Deleting a DHCP Server This section describes how to delete a DHCP server from the Cisco Unified Communications Manager database. Procedure Step 1 Find the DHCP server by using the procedure in the "Finding a DHCP Server" section. Step 2 From list of matching records, choose the DHCP server that you want to delete. Step 3 Click the Delete Selected icon that displays in the tool bar in the upper, left corner of the window (or click the Delete Selected button that displays at the bottom of the window) to delete the server. CSE/6th /CN Lab/Prepared by Vivek Kumar Sinha