2. Table of Contents
Introduction
Light Microscopy Vs Electron Microscopy
Microscopic Analysis Techniques
Details of Microscopic Analysis Techniques
Comparison of Different Microscopic Analysis
Techniques
Conclusion
3. Introduction
• Need of Microscopic analysis of ceramics
• To get detailed understanding of the
material's microstructure.
• To identify the factors such as grain
boundaries, defects, and phases.
• To develop processing methods and
compositions to optimize properties
like strength, conductivity, and
thermal stability.
• The microscopic analysis techniques can be
divided into two broad categories:
• Light Microscopy (e.g.: Optical
Microscope)
• Electron Microscopy (e.g.: SEM,
AFM, TEM, etc.)
4. Light Microscopy Vs Electron Microscopy
Parameter Light Microscopy Electron Microscopy
Principle of Operation Uses Visible light Uses a beam of accelerated electrons
Resolution Low ( ~200 nm) High (~0.1nm)
Magnification 2000-2500 times 10000-1000000 times
Sample Preparation Simpler Process More extensive process
Depth of Field Larger depth of field Narrower Depth of field
Applications
Widely used for biological studies,
medical diagnostics, material
sciences, and routine laboratory work
Particularly suited for high-resolution
imaging of subcellular structures,
nanomaterials, surfaces, and interfaces in
materials science, nanotechnology,
biology, and semiconductor research.
6. Details of Microscopic Analysis Techniques:-
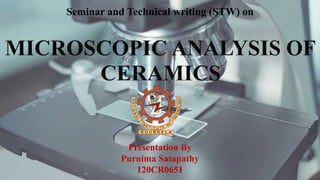
1. Optical Microscopy:
• Working Principle
• Uses visible light and a system of lenses to generate magnified images
of small objects.
• Sample Preparation
• Sample preparation process involves the following steps:
• Cutting of specimen (using low speed diamond saw to cause less
damage to the sample)
• Mounting of specimens (to allow the handling of specimens
without damaging them)
• Grinding (using wet silicon Carbide paper to remove the
damaged layer from the specimen surface)
• Polishing (Using abrasive diamond particles and oily lubricants)
• Etching (used to reveal the microstructure of the sample through
selective chemical attack)
• Application in Ceramic Industry
• Used to examine the microstructures of ceramic materials, including
grain size, distribution, and orientation in a broad way.
• Used for measurement of surface roughness, hardness and tribological
application.
Fig.1: Optical Microscope
7. 2. Scanning Electron Microscopy (SEM):
• Working Principle:
• Scanning Electron Microscope (SEM) scans the surfaces using a beam of electrons moving at low
energy to focus and scan the specimens.
• Electrons from the source propels very fast moving down the optic axis.
• The speed of the electrons are controlled by adjusting the magnetic field (using the condenser lenses) in
the optic axis.
• There is a scanning coil which takes electron beam and scans it on the surface.
• Electrons get reflected or they have some other interactions with the specimen that generates some sort
of detectable signals, which are then picked by the detector and then shown on the screen.
• Sample Preparation:
• SEM is mostly used to study the surface morphology; hence bulk specimens are normally used, and the
sample preparation is simpler than for transmission electron microscopy.
• For effective viewing of a sample in the SEM it is usually necessary for the surface of the specimen to
be electrically conducting.
• For non-conducting samples such as ceramics, polymers and biological materials, the samples are
usually coated with a thin conducting layer (~10nm) of Gold or Carbon (usually this layering is done by
sputtering).
• Care must be taken with the non-conducting samples so that while coating the sample surface with
conducting layer it should not mask the actual surface features.
8. • Application in Ceramic Industry:
• SEM allows for high-resolution imaging of ceramic microstructures, revealing features such as grain
size, shape, porosity, particle size and morphology, and distribution of phases (EDS analysis).
• SEM can be used to examine the surface morphology of ceramic materials, including roughness,
texture, and surface coatings.
Fig.2: Schematic Diagram of SEM
Parts of SEM:
1. Electron Source: This is where electrons are produced under
thermal heat at a voltage of 1-40kV. There are three types of
electron sources that can be used i.e., Tungsten filament,
Lanthanum hexaboride, and Field emission gun (FEG)
2. Lenses: It has several condenser lenses that focus the beam of
electrons from the source through the column forming a narrow
beam of electrons that form a spot called a spot size.
3. Scanning Coil: they are used to deflect the beam over the
specimen surface.
4. Detector: It’s made up of several detectors that can differentiate
the secondary electrons, backscattered electrons, and diffracted
backscattered electrons. The functioning of the detectors highly
depends on the voltage speed, the density of the specimen.
5. The display device (data output devices)
6. Power supply
7. Vacuum system
9. SEM vs FESEM:
Parameters SEM FESEM
Electron Source Tungsten Filament Field Emission Gun
Resolution 1-10nm Below 1 nm
Beam Current Higher Lower
Depth of Field Limited Extended
Vacuum
Requirement
High vacuum
environment
Can work in both
high and low
vacuum
environment
Fig.4: Field Emission Scanning Electron
Microscope (FESEM)
Fig.3: Scanning Electron Microscope (SEM)
10. 3. Transmission Electron Microscope (TEM):
Working Principle:
• The working principle of the Transmission Electron Microscope (TEM) is like the light microscope. The major
difference is that light microscopes use light rays to focus and produce an image while the TEM uses a beam of
electrons to focus on the specimen, to produce an image.
• The condenser lens helps to control the electron speed.
• The electrons go through the specimen and then these are imaged through eye piece.
• Electrons have a shorter wavelength than light. The mechanism of a light microscope is that an increase in
resolution power decreases the wavelength of the light, but in the TEM, when the electron illuminates the
specimen, the resolution power increases increasing the wavelength of the electron transmission. The
wavelength of the electrons is about 0.005nm which is 100,000X shorter than that of light, hence TEM has
better resolution than that of the light microscope, of about 1000times.
• In SEM, the beam of electrons is scanning on the surface of specimen and looking for interactions that are
generated out of it, but in TEM, electrons go right through the specimen and are looked at on the other side.
Sample Preparation:
• The sample should be flat and thin (few nanometres in thickness) so that the electrons transmit through it.
• The sample preparation techniques can be divided into two basic approaches. First is removal of unwanted
material, either by chemical or by mechanical means.
• Second is cutting in which the sample is cleaved along crystallographic planes.
• For electrically conductive materials the process of electropolishing is used to prepare the sample surface.
• For ceramics and polymers, the samples are prepared using mechanical polishing in which a paper of SiC is
used to polish the sample surface.
11. Application in Ceramic Industry:
• TEM is used for microstructural analysis, phase identification, defect analysis, nanostructure characterization,
chemical composition analysis, etc.
Fig.5: Schematic Diagram of TEM
Parts of TEM:
1. Electron Gun: This is the part of the Transmission
Electron Microscope responsible for producing electron
beams.
2. Image Producing System: It’s made up of the objective
lens, a movable stage or holding the specimen,
intermediate and projector lenses. They function by
focusing the passing electrons through the specimen
forming a highly magnified image.
3. Image Recording System: It’s made up of the fluorescent
screen used to view and to focus on the image. They also
have a digital camera that permanently records the images
captured after viewing.
12. TEM VS STEM:
Parameters TEM STEM
Operating
Principle
Transmits a beam of
electrons through a thin
sample.
Scans a focused beam
of electrons across the
sample.
Imaging Method Creates a 2D projection of
sample’s Interior by
capturing the transmitted
electrons that pass through
the sample
Generates images by
scanning a focused
electron beam across
the sample in a raster
pattern.
Resolution Offers higher resolution for
imaging atomic-scale
features in two-dimensional
projections.
Higher resolution than
TEM, especially in
imaging three-
dimensional structures
Sample Thickness Thin samples (less than
200nm thick).
Thicker samples can be
used.
Fig.6: Transmission Electron Microscope
Fig.7: Scanning Transmission Electron
Microscope
13. 4. Atomic Force Microscope (AFM):-
Working Principle:
• The Atomic Force Microscope works on the principle measuring intermolecular forces and sees atoms
by using probed surfaces of the specimen in nanoscale.
• Its functioning is enabled by three of its major working principles that include Surface sensing,
Detection, and Imaging.
• Surface Sensing: AFM uses a cantilever with a sharp tip to scan over the sample surface. As the tip
approaches the surface, attractive forces between the tip and the sample cause deflection of the
cantilever.
• Detection Mechanism: A laser beam is directed onto the back of the cantilever, and its reflection is
detected by a position-sensitive photo-diode (PSPD). The deflection and change in direction of the
reflected beam are tracked and recorded by the PSPD.
• Imaging Process: The AFM scans the cantilever over the sample surface, monitoring the deflection of
the beam caused by variations in surface height. This generates an accurate topographical map of the
sample surface.
Sample Preparation:
• Sample preparation generally involves selecting a suitable substrate, activating and binding the
sample to the substrate, and finally visualizing.
14. • The sample preparation for AFM can be described in following steps:
Substrate
Selection
• Choose
appropriate
substrates
like mica,
silicon, glass,
or metal discs
based on
nanomaterial
size.
Substrate
Preparation
• Process
substrate,
e.g., cleave
mica discs for
a clean
surface.
Activation
• Create charge
on substrate
for chemical
or
electrostatic
bonding,
using
adhesives like
PLL solution.
Adhesion
• Bind substrate
and
nanomaterial,
incubate with
times based on
particle size,
rinse with
deionized water,
and dry with
nitrogen before
visualization.
Optical
Microscope
Inspection
• Prior to AFM
observation,
check sample
dispersion
with an
optical
microscope to
identify areas
with optimal
dispersion for
best results.
15. Application in Ceramic Industry:
• AFM is used for Surface Morphology Characterization, defect analysis, Surface Modification Studies,
Nanomechanical Property Measurements like hardness, elastic modulus, and adhesion strength of ceramic
materials at the nanoscale, Electrical Characterization, Surface Functionalization and Nanopatterning using
techniques like Dip-Pen Nanolithography (DPN) ,etc.
Fig.8: Atomic Force Microscope (AFM)
16. 5. X-Ray Diffraction (XRD):-
Working Principle:
• The working principle of XRD method can be described as follows:
Bombarding of
Monochromatic
X-ray beam on
the sample
Electrons from
the sample
diffract as the X-
rays hit them
The diffracted
rays are captured
by the detector
film
The diffracted
rays form a
pattern on the
detector film
called the X-Ray
diffraction
pattern.
Fig.9: Working Principle of XRD technique
17. • Methods of XRD Technique:
Methods Of XRD Wavelength Angle Specimen
Laue Method Variable Fixed Single crystal
Rotating Crystal
Method
Fixed Variable
(in parts)
Single crystal
Power Method Fixed Variable Powdered
Fig.10: Laue method, Rotating Crystal method, and Powder method of XRD technique
18. Application in Ceramic
Industry:
• It is a nondestructive
technique.
• Used for identify crystalline
phases and orientation.
• Used for measurement of
thickness of thin films and
multilayers.
• Used to determine structural
properties and atomic
arrangement.
Fig.11: XRD Setup
19. Comparison of Different Microscopic Analysis
Techniques
Parameters Optical
Microscope
Scanning
Electron
Microscope
Transmission
Electron
Microscope
Atomic Force
Microscope
X-Ray
Diffraction
Resolution 1μm-1mm 10nm-100mm 0.1nm-10mm
0.1nm-10nm
(0.001nm in
advanced
conditions)
0.1nm-10mm
Depth of Field Limited Nanometer scale
resolution
Sub nanometer
scale
Atomic Scale Crystalline
structure
Sample
preparation
Minimal Extensive Extremely thin
samples
Minimal Crystal form or
powdered form
Applications Grain
characteristics
like pores
Grains and grain
Boundary
Characteristics
Grains and grain
Boundary
Characteristics
Topography
imaging,
nanoscale
mechanical
property mapping
Phase
identification,
crystal structure
determination,
texture analysis
20. CONCLUSIONS:
Optical microscopy offers rapid sample analysis with moderate resolution, making it suitable for observing
overall microstructural features and defects in ceramic materials.
SEM excels in providing high-resolution surface imaging, revealing detailed surface morphology, and
topographical information.
TEM, on the other hand, delves into nanoscale structures, offering unparalleled resolution and the ability to
visualize internal features and interfaces of ceramic materials at atomic levels.
AFM enables precise surface profiling and imaging at the nanoscale, along with the capability to manipulate
individual atoms and molecules, which is particularly beneficial for studying surface roughness, mechanical
properties, and surface interactions in ceramics.
XRD serves as a powerful tool for analyzing the crystallographic structure and phase composition of ceramic
materials, aiding in phase identification, crystallographic orientation, and understanding the nature of defects and
strain within the material.