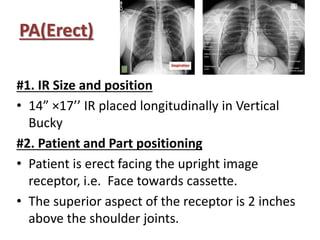
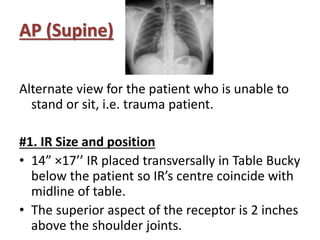
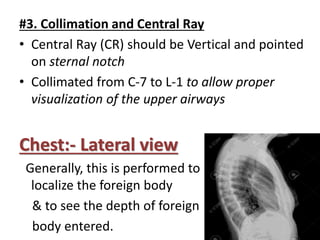
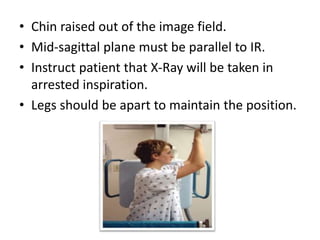
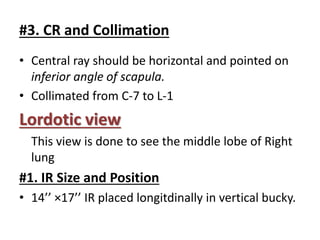
This document describes various chest radiography views including PA, AP, lateral, lordotic, and special views. It provides details on image receptor size and position, patient positioning, central ray direction, and collimation for each view. The views are used to evaluate conditions like pneumonia, tuberculosis, and fractures as well as localize foreign bodies.
2. Views
1. PA (Erect) – Basic view
2. AP (Supine) – Alternate view
3. Lateral View – Additional (Foreign Body)
4. Lordotic View – Right lung’s mid lobe
5. Apicogram – Special View for Apex of lung
*To check Air-Fluid Level
• *PA(Erect)
• *Semi recumbent
• *Lateral Decubitus
• *Dorsal Decubitus
3. PA(Erect)
#1. IR Size and position
• 14” ×17’’ IR placed longitudinally in Vertical
Bucky
#2. Patient and Part positioning
• Patient is erect facing the upright image
receptor, i.e. Face towards cassette.
• The superior aspect of the receptor is 2 inches
above the shoulder joints.
4. • The chin is raised as to be out of the image
field.
• Dorsal aspect of both hands placed on the
Iliac Crest
• Both elbows partially flexed rolling anterior; to
keep scapula away from lung field.
• Shoulders are depressed to move the clavicles
below the lung apices
• Feet slightly apart to maintain standing
balance
5. • Ensure that mid-sagittal plane should coincide
with midline of IR & perpendicular to IR
• Instruct patient that X-Ray will be done in
arrested inspiration
#3. Collimation and Central Ray
• Central Ray (CR) should be horizontal and
pointed on T-7 (at the level of inferior angle of
scapula)
• Collimated from C-7 to L-1 to allow proper
visualisation of the upper airways
6. AP (Supine)
Alternate view for the patient who is unable to
stand or sit, i.e. trauma patient.
#1. IR Size and position
• 14” ×17’’ IR placed transversally in Table Bucky
below the patient so IR’s centre coincide with
midline of table.
• The superior aspect of the receptor is 2 inches
above the shoulder joints.
7. #2. Patient and Part positioning
• Patient in supine position with mid-sagittal plane
become perpendicular to midline of table.
• The chin is raised (if possible) as to be out of the
image field.
• If possible, the hands are placed by the patient's
side.
• Any leads or lines that can be moved should be
transferred out of the image area to improve
image quality.
• Instruct patient that X-Ray will be taken in
arrested inspiration
8. #3. Collimation and Central Ray
• Central Ray (CR) should be Vertical and pointed
on sternal notch
• Collimated from C-7 to L-1 to allow proper
visualization of the upper airways
Chest:- Lateral view
Generally, this is performed to
localize the foreign body
& to see the depth of foreign
body entered.
9. #1.IR Size and position
• 14” ×17’’ IR placed longitudinally in Vertical
Bucky
#2. Patient and Part positioning
• standing upright
• Right side in touch with IR (if Right lateral),
Left side in touch with IR (if Left lateral)
• Arms should placed on head or holding onto
handles
10. • Chin raised out of the image field.
• Mid-sagittal plane must be parallel to IR.
• Instruct patient that X-Ray will be taken in
arrested inspiration.
• Legs should be apart to maintain the position.
11. #3. CR and Collimation
• Central ray should be horizontal and pointed on
inferior angle of scapula.
• Collimated from C-7 to L-1
Lordotic view
This view is done to see the middle lobe of Right
lung
#1. IR Size and Position
• 14’’ ×17’’ IR placed longitdinally in vertical bucky.
12. #2. Patient and part position
• The patient is standing with feet
approximately 10-12 inches away from
the IR, with back arched until upper back,
shoulders and head are against the IR
• The shoulders and elbows are rolled
anteriorly
• The angle formed between the
midcoronal body plane and image
receptor should be approximately 45
degrees
13. #3. Collimation and Central Ray
• Central Ray (CR) should be horizontal and
pointed on the Xiphoid process.
• Collimated from C-7 to L-1 to allow proper
visualisation of the upper airways
• Lateral to the level of the acromio-clavicular
joints
14. Apicogram: Special view
This view is performed to see the apex of lungs
clearly.
#1. IR size and position
• 14’’ ×17’’ IR placed longitudinally in vertical bucky
#2. Patient and part position
• Patient in same positin as in lordotic view.
• Both clavicles goes up to make apices of lung
visible
15. #3. CR and Collimation
• CR angled 15-20 degrees cranially at pointed
at Xiphoid process.
• Collimated from C7-L1
16. Lateral Decubitus View
Patient and Part position
• The patient is laying either left lateral or
right lateral.
• The IR is placed horizontally posterior to
the patient .
• Patient's hands should be raised to avoid
superimposing on the region of
interest, legs may be flexed for balance
17. • Rotation of shoulders or pelvis should be
minimised
• X-ray is taken in full inspiration
CR and collimation
• Horizontal CR at xiphoid process on mid-
sagittal plane
• Collimate superior to the apex and inferior to
the T-12
18. Dorsal Decubitus View
Patient and Part position
• the patient is supine
• the detector is placed landscape of at the
patient's left or right hand side running
parallel to the long axis of the chest
• patient's hands should be raised to avoid
superimposing on the region of interest; legs
may be flexed for balance
19. • x-ray is taken in full inspiration
CR and Collimation
• Horizontal CR on mid coronal plane at
level of T-7
• Collimate superior to the apex and
inferior to the T-12