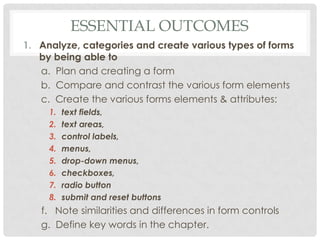
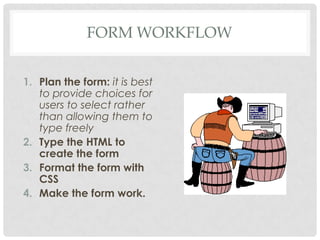
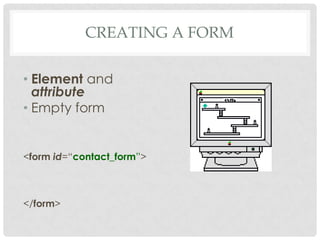
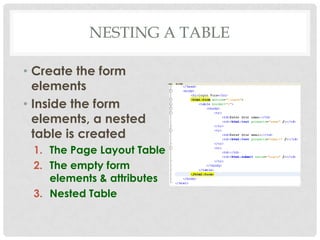
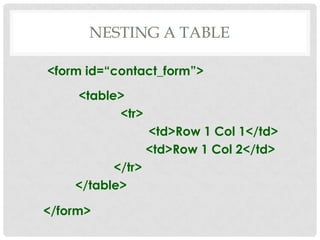
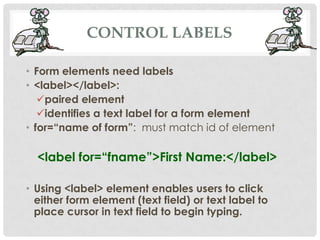
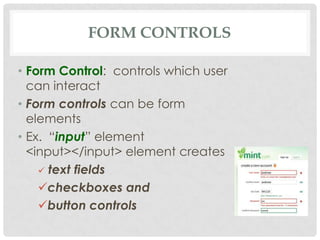
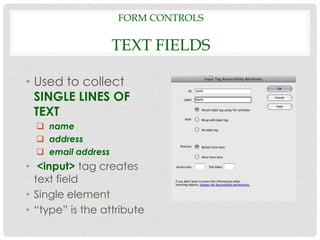
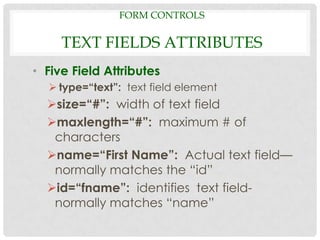
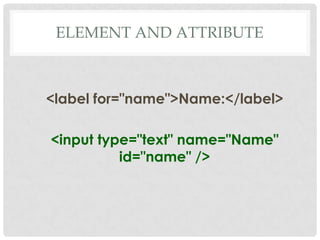
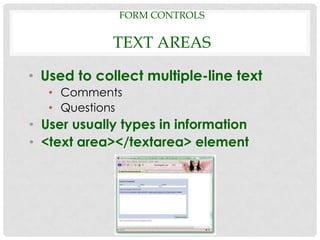
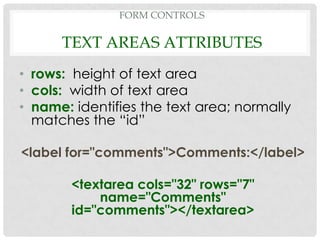
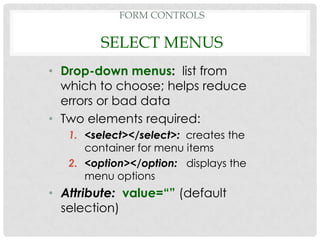
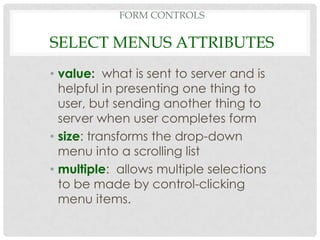
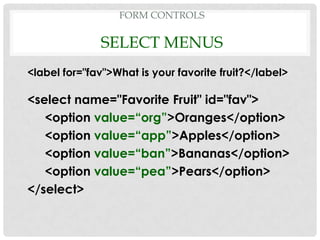
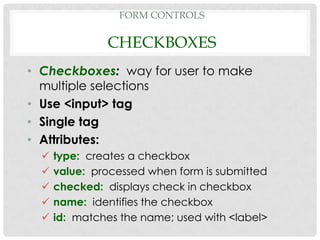
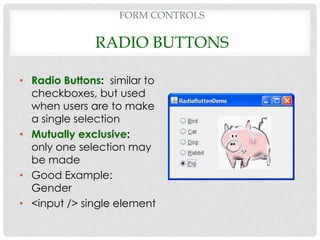
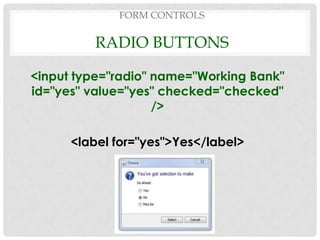
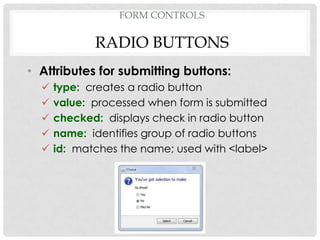
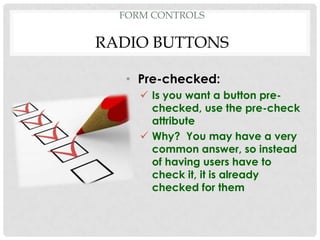
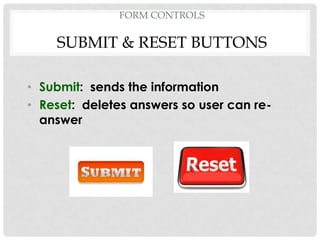
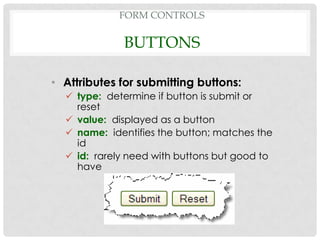
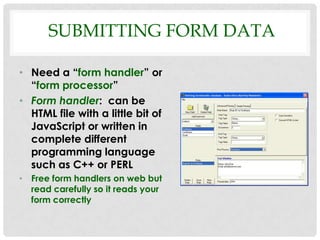
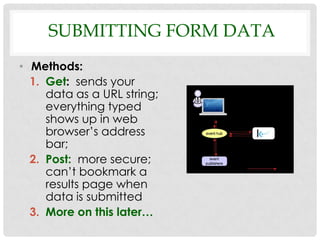
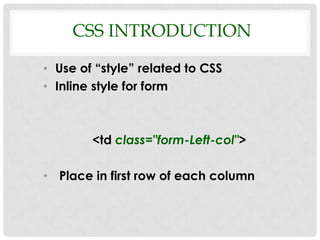
CHAPTER 2
WORKING WITH FORMS
ESSENTIAL OUTCOMES
1. Analyze, categories and create various types of forms
   by being able to
   a. Plan and creating a form
   b. Compare and contrast the various form elements
   c. Create the various forms elements & attributes:
     1.   text fields,
     2.   text areas,
     3.   control labels,
     4.   menus,
     5.   drop-down menus,
     6.   checkboxes,
     7.   radio button
     8.   submit and reset buttons
   f. Note similarities and differences in form controls
   g. Define key words in the chapter.
FORM WORKFLOW


1. Plan the form: it is best
   to provide choices for
   users to select rather
   than allowing them to
   type freely
2. Type the HTML to
   create the form
3. Format the form with
   CSS
4. Make the form work.
CREATING A FORM

• Element and
  attribute
• Empty form


<form id=“contact_form”>


</form>
NESTING A TABLE

• Create the form
  elements
• Inside the form
  elements, a nested
  table is created
 1. The Page Layout Table
 2. The empty form
    elements & attributes
 3. Nested Table
NESTING A TABLE

<form id=“contact_form”>
     <table>
           <tr>
                  <td>Row 1 Col 1</td>
                  <td>Row 1 Col 2</td>
          </tr>
    </table>

</form>
CONTROL LABELS

• Form elements need labels
• <label></label>:
   paired element
   identifies a text label for a form element
• for=“name of form”: must match id of element

  <label for=“fname”>First Name:</label>

• Using <label> element enables users to click
  either form element (text field) or text label to
  place cursor in text field to begin typing.
FORM CONTROLS

• Form Control: controls which user
  can interact
• Form controls can be form
  elements
• Ex. “input” element
  <input></input> element creates
     text fields

    checkboxes and
    button controls
FORM CONTROLS

                    TEXT FIELDS

• Used to collect
  SINGLE LINES OF
  TEXT
   name
   address
   email address
• <input> tag creates
  text field
• Single element
• “type” is the attribute
FORM CONTROLS

     TEXT FIELDS ATTRIBUTES
• Five Field Attributes
   type=“text”: text field element
  size=“#”: width of text field
  maxlength=“#”: maximum # of
   characters
  name=“First Name”: Actual text field—
   normally matches the “id”
  id=“fname”: identifies text field-
   normally matches “name”
ELEMENT AND ATTRIBUTE


<label for="name">Name:</label>

<input type="text" name="Name"
          id="name" />
FORM CONTROLS

             TEXT AREAS

• Used to collect multiple-line text
   • Comments
   • Questions
• User usually types in information
• <text area></textarea> element
FORM CONTROLS

     TEXT AREAS ATTRIBUTES

• rows: height of text
  area
• cols: width of text
  area
• name: identifies the
  text area; normally
  matches the “id”
• id: identifies text
  area; matches name
FORM CONTROLS

      TEXT AREAS ATTRIBUTES
• rows: height of text area
• cols: width of text area
• name: identifies the text area; normally
  matches the “id”

<label for="comments">Comments:</label>

        <textarea cols="32" rows="7"
            name="Comments"
        id="comments"></textarea>
FORM CONTROLS

         SELECT MENUS
• Drop-down menus: list from
  which to choose; helps reduce
  errors or bad data
• Two elements required:
   1. <select></select>: creates the
      container for menu items
   2. <option></option: displays the
      menu options
• Attribute: value=“” (default
  selection)
FORM CONTROLS

SELECT MENUS ATTRIBUTES
• value: what is sent to server and is
  helpful in presenting one thing to
  user, but sending another thing to
  server when user completes form
• size: transforms the drop-down
  menu into a scrolling list
• multiple: allows multiple selections
  to be made by control-clicking
  menu items.
FORM CONTROLS

                 VALUE ATTRIBUTE EX.
                                            Helpful in e-commerce
                                         applications where you want
<   select name=“fruit” id=“fruit”>      to present a friendly product
          <option>Apples</option>             name to users, but if
                                            selected, have the form
          <option>Bananas</option>       process a product ID number
                                                    instead.
</select>

<select name=“fruit” id=“fruit”>
          <option value=“app”>Apples</option>
          <option value=“ban”>Bananas</option>
</select>
FORM CONTROLS

              SELECT MENUS
<label for="fav">What is your favorite fruit?</label>

<select name="Favorite Fruit" id="fav">
   <option value=“org”>Oranges</option>
   <option value=“app”>Apples</option>
   <option value=“ban”>Bananas</option>
   <option value=“pea”>Pears</option>
</select>
FORM CONTROLS

               CHECKBOXES
• Checkboxes: way for user to make
  multiple selections
• Use <input> tag
• Single tag
• Attributes:
     type: creates a checkbox
     value: processed when form is submitted
     checked: displays check in checkbox
     name: identifies the checkbox
     id: matches the name; used with <label>
FORM CONTROLS

          CHECKBOXES
     <input type="checkbox"
name="Blues" id="blues" value="More
             blues" />

  <label for="blues">Blues</label>
FORM CONTROLS

              RADIO BUTTONS

• Radio Buttons: similar to
  checkboxes, but used
  when users are to make
  a single selection
• Mutually exclusive:
  only one selection may
  be made
• Good Example:
  Gender
• <input /> single element
FORM CONTROLS

         RADIO BUTTONS

<input type="radio" name="Working Bank"
id="yes" value="yes" checked="checked"
                    />

      <label for="yes">Yes</label>
FORM CONTROLS

             RADIO BUTTONS
• Attributes for submitting buttons:
     type: creates a radio button
     value: processed when form is submitted
     checked: displays check in radio button
     name: identifies group of radio buttons
     id: matches the name; used with <label>
FORM CONTROLS

RADIO BUTTONS

   • Pre-checked:
      Is you want a button pre-
       checked, use the pre-check
       attribute
      Why? You may have a very
       common answer, so instead
       of having users have to
       check it, it is already
       checked for them
FORM CONTROLS

    SUBMIT & RESET BUTTONS

• Submit: sends the information
• Reset: deletes answers so user can re-
  answer
FORM CONTROLS

             BUTTONS

• Attributes for submitting buttons:
   type: determine if button is submit or
    reset
   value: displayed as a button
   name: identifies the button; matches the
    id
   id: rarely need with buttons but good to
    have
SUBMITTING FORM DATA

• Need a “form handler” or
  “form processor”
• Form handler: can be
  HTML file with a little bit of
  JavaScript or written in
  complete different
  programming language
  such as C++ or PERL
• Free form handlers on web but
  read carefully so it reads your
  form correctly
SUBMITTING FORM DATA
• Methods:
  1. Get: sends your
     data as a URL string;
     everything typed
     shows up in web
     browser’s address
     bar;
  2. Post: more secure;
     can’t bookmark a
     results page when
     data is submitted
  3. More on this later…
CSS INTRODUCTION

• Use of “style” related to CSS
• Inline style for form


        <td class="form-Left-col">

• Place in first row of each column
CHAPTER 2
WORKING WITH FORMS

Chapter 2 class power point

  • 1.
  • 2.
    ESSENTIAL OUTCOMES 1. Analyze,categories and create various types of forms by being able to a. Plan and creating a form b. Compare and contrast the various form elements c. Create the various forms elements & attributes: 1. text fields, 2. text areas, 3. control labels, 4. menus, 5. drop-down menus, 6. checkboxes, 7. radio button 8. submit and reset buttons f. Note similarities and differences in form controls g. Define key words in the chapter.
  • 3.
    FORM WORKFLOW 1. Planthe form: it is best to provide choices for users to select rather than allowing them to type freely 2. Type the HTML to create the form 3. Format the form with CSS 4. Make the form work.
  • 4.
    CREATING A FORM •Element and attribute • Empty form <form id=“contact_form”> </form>
  • 5.
    NESTING A TABLE •Create the form elements • Inside the form elements, a nested table is created 1. The Page Layout Table 2. The empty form elements & attributes 3. Nested Table
  • 6.
    NESTING A TABLE <formid=“contact_form”> <table> <tr> <td>Row 1 Col 1</td> <td>Row 1 Col 2</td> </tr> </table> </form>
  • 7.
    CONTROL LABELS • Formelements need labels • <label></label>: paired element identifies a text label for a form element • for=“name of form”: must match id of element <label for=“fname”>First Name:</label> • Using <label> element enables users to click either form element (text field) or text label to place cursor in text field to begin typing.
  • 8.
    FORM CONTROLS • FormControl: controls which user can interact • Form controls can be form elements • Ex. “input” element <input></input> element creates  text fields checkboxes and button controls
  • 9.
    FORM CONTROLS TEXT FIELDS • Used to collect SINGLE LINES OF TEXT  name  address  email address • <input> tag creates text field • Single element • “type” is the attribute
  • 10.
    FORM CONTROLS TEXT FIELDS ATTRIBUTES • Five Field Attributes  type=“text”: text field element size=“#”: width of text field maxlength=“#”: maximum # of characters name=“First Name”: Actual text field— normally matches the “id” id=“fname”: identifies text field- normally matches “name”
  • 11.
    ELEMENT AND ATTRIBUTE <labelfor="name">Name:</label> <input type="text" name="Name" id="name" />
  • 12.
    FORM CONTROLS TEXT AREAS • Used to collect multiple-line text • Comments • Questions • User usually types in information • <text area></textarea> element
  • 13.
    FORM CONTROLS TEXT AREAS ATTRIBUTES • rows: height of text area • cols: width of text area • name: identifies the text area; normally matches the “id” • id: identifies text area; matches name
  • 14.
    FORM CONTROLS TEXT AREAS ATTRIBUTES • rows: height of text area • cols: width of text area • name: identifies the text area; normally matches the “id” <label for="comments">Comments:</label> <textarea cols="32" rows="7" name="Comments" id="comments"></textarea>
  • 15.
    FORM CONTROLS SELECT MENUS • Drop-down menus: list from which to choose; helps reduce errors or bad data • Two elements required: 1. <select></select>: creates the container for menu items 2. <option></option: displays the menu options • Attribute: value=“” (default selection)
  • 16.
    FORM CONTROLS SELECT MENUSATTRIBUTES • value: what is sent to server and is helpful in presenting one thing to user, but sending another thing to server when user completes form • size: transforms the drop-down menu into a scrolling list • multiple: allows multiple selections to be made by control-clicking menu items.
  • 17.
    FORM CONTROLS VALUE ATTRIBUTE EX. Helpful in e-commerce applications where you want < select name=“fruit” id=“fruit”> to present a friendly product <option>Apples</option> name to users, but if selected, have the form <option>Bananas</option> process a product ID number instead. </select> <select name=“fruit” id=“fruit”> <option value=“app”>Apples</option> <option value=“ban”>Bananas</option> </select>
  • 18.
    FORM CONTROLS SELECT MENUS <label for="fav">What is your favorite fruit?</label> <select name="Favorite Fruit" id="fav"> <option value=“org”>Oranges</option> <option value=“app”>Apples</option> <option value=“ban”>Bananas</option> <option value=“pea”>Pears</option> </select>
  • 19.
    FORM CONTROLS CHECKBOXES • Checkboxes: way for user to make multiple selections • Use <input> tag • Single tag • Attributes:  type: creates a checkbox  value: processed when form is submitted  checked: displays check in checkbox  name: identifies the checkbox  id: matches the name; used with <label>
  • 20.
    FORM CONTROLS CHECKBOXES <input type="checkbox" name="Blues" id="blues" value="More blues" /> <label for="blues">Blues</label>
  • 21.
    FORM CONTROLS RADIO BUTTONS • Radio Buttons: similar to checkboxes, but used when users are to make a single selection • Mutually exclusive: only one selection may be made • Good Example: Gender • <input /> single element
  • 22.
    FORM CONTROLS RADIO BUTTONS <input type="radio" name="Working Bank" id="yes" value="yes" checked="checked" /> <label for="yes">Yes</label>
  • 23.
    FORM CONTROLS RADIO BUTTONS • Attributes for submitting buttons:  type: creates a radio button  value: processed when form is submitted  checked: displays check in radio button  name: identifies group of radio buttons  id: matches the name; used with <label>
  • 24.
    FORM CONTROLS RADIO BUTTONS • Pre-checked:  Is you want a button pre- checked, use the pre-check attribute  Why? You may have a very common answer, so instead of having users have to check it, it is already checked for them
  • 25.
    FORM CONTROLS SUBMIT & RESET BUTTONS • Submit: sends the information • Reset: deletes answers so user can re- answer
  • 26.
    FORM CONTROLS BUTTONS • Attributes for submitting buttons:  type: determine if button is submit or reset  value: displayed as a button  name: identifies the button; matches the id  id: rarely need with buttons but good to have
  • 27.
    SUBMITTING FORM DATA •Need a “form handler” or “form processor” • Form handler: can be HTML file with a little bit of JavaScript or written in complete different programming language such as C++ or PERL • Free form handlers on web but read carefully so it reads your form correctly
  • 28.
    SUBMITTING FORM DATA •Methods: 1. Get: sends your data as a URL string; everything typed shows up in web browser’s address bar; 2. Post: more secure; can’t bookmark a results page when data is submitted 3. More on this later…
  • 29.
    CSS INTRODUCTION • Useof “style” related to CSS • Inline style for form <td class="form-Left-col"> • Place in first row of each column
  • 30.