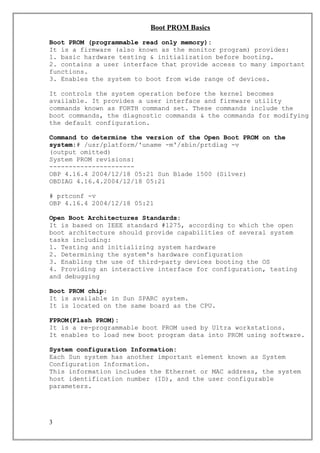
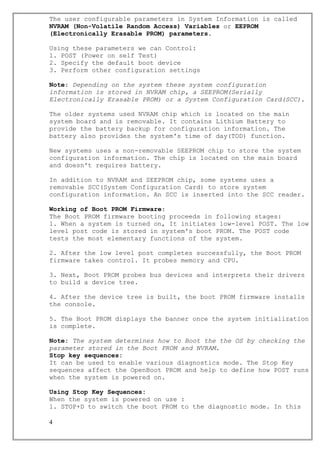
SlideShare a Scribd company logo
Basic Concepts
1. Machine : A hardware device is called as Machine.
2. Host : If we assign any address to a machine to identify it, is called Host.
3. Client : A Host PC which is not able to do the job and sending the request to
some other PC in network to process the job.
4. Server : A PC which is processing the client's request is called "server".
5. Work Station : A Host PC which is able to perform every job by itself.
6. Process : A foreground process which is running on the system is called process.
7. Daemon : It is a background process.
8. Multitasking : Which allow you to perform a multiple task in a single system.
9. Multi User : Multiple users should be able to login to a single system.
10. Distributed system: A group of systems integrated (or interconnected) to perform a job.
11. False Tolerance : A distributed system which, if any one the system is crashed then also if your
able to perform the job successfully is called "False Tolerance".
12. Spanning: If your able to write the data in the multiple disk alternately, simultaneously or
sequentially is called Spanning.
13. Kernel : Communication between Hardware device & user. Kernel nothing but a basic
device driver.
14. Shell : It acts as a interface between the kernel & user.
Few important commands
1. # last: It will give all the information regarding booting, when you shutdown, logged in with time.
2. /etc/ntmp: This file contains record of current logged in user
3. /var/adm/wtmp: it contains record of all logins & log outs for each user
4. /var/adm/lastlog: This file contains the list of the last login records for each user.
Security Administration
Security Administration:
1. /etc/default/passwd
2. /etc/default/login
3. /etc/default/su
4. /etc/nologin
5. /var/adm/loginlog
6. /etc/skel
1
To break a password
How to break a pass word
1. Insert the Solaris OS CD
2. Ok setenv boot-device cdrom
3. Ok boot cdrom -s // single user (or) maintainance mode
4. # TERM = ansi
# export TERM // RAM to kernel
# mkdir /tmp/root/abc
# mount /dev/dsk/c0t0d0s0 /tmp/root/abc
# vi /tmp/root/abc/etc/shadow
/root/xxxxxxxxxxxxxx/pwd
now remove the 13 encoded characters, save & exit
now restart
# init 6
# ok setenv boot-device disk
# ok boot disk
2
Boot PROM Basics
Boot PROM (programmable read only memory):
It is a firmware (also known as the monitor program) provides:
1. basic hardware testing & initialization before booting.
2. contains a user interface that provide access to many important
functions.
3. Enables the system to boot from wide range of devices.
It controls the system operation before the kernel becomes
available. It provides a user interface and firmware utility
commands known as FORTH command set. These commands include the
boot commands, the diagnostic commands & the commands for modifying
the default configuration.
Command to determine the version of the Open Boot PROM on the
system:# /usr/platform/'uname -m'/sbin/prtdiag -v
(output omitted)
System PROM revisions:
----------------------
OBP 4.16.4 2004/12/18 05:21 Sun Blade 1500 (Silver)
OBDIAG 4.16.4.2004/12/18 05:21
# prtconf -v
OBP 4.16.4 2004/12/18 05:21
Open Boot Architectures Standards:
It is based on IEEE standard #1275, according to which the open
boot architecture should provide capabilities of several system
tasks including:
1. Testing and initializing system hardware
2. Determining the system's hardware configuration
3. Enabling the use of third-party devices booting the OS
4. Providing an interactive interface for configuration, testing
and debugging
Boot PROM chip:
It is available in Sun SPARC system.
It is located on the same board as the CPU.
FPROM(Flash PROM):
It is a re-programmable boot PROM used by Ultra workstations.
It enables to load new boot program data into PROM using software.
System configuration Information:
Each Sun system has another important element known as System
Configuration Information.
This information includes the Ethernet or MAC address, the system
host identification number (ID), and the user configurable
parameters.
3
The user configurable parameters in System Information is called
NVRAM (Non-Volatile Random Access) Variables or EEPROM
(Electronically Erasable PROM) parameters.
Using these parameters we can Control:
1. POST (Power on self Test)
2. Specify the default boot device
3. Perform other configuration settings
Note: Depending on the system these system configuration
information is stored in NVRAM chip, a SEEPROM(Serially
Electronically Erasable PROM) or a System Configuration Card(SCC).
The older systems used NVRAM chip which is located on the main
system board and is removable. It contains Lithium Battery to
provide the battery backup for configuration information. The
battery also provides the system's time of day(TOD) function.
New systems uses a non-removable SEEPROM chip to store the system
configuration information. The chip is located on the main board
and doesn't requires battery.
In addition to NVRAM and SEEPROM chip, some systems uses a
removable SCC(System Configuration Card) to store system
configuration information. An SCC is inserted into the SCC reader.
Working of Boot PROM Firmware:
The Boot PROM firmware booting proceeds in following stages:
1. When a system is turned on, It initiates low-level POST. The low
level post code is stored in system's boot PROM. The POST code
tests the most elementary functions of the system.
2. After the low level post completes successfully, the Boot PROM
firmware takes control. It probes memory and CPU.
3. Next, Boot PROM probes bus devices and interprets their drivers
to build a device tree.
4. After the device tree is built, the boot PROM firmware installs
the console.
5. The Boot PROM displays the banner once the system initialization
is complete.
Note: The system determines how to Boot the the OS by checking the
parameter stored in the Boot PROM and NVRAM.
Stop key sequences:
It can be used to enable various diagnostics mode. The Stop Key
sequences affect the OpenBoot PROM and help to define how POST runs
when the system is powered on.
Using Stop Key Sequences:
When the system is powered on use :
1. STOP+D to switch the boot PROM to the diagnostic mode. In this
4
mode the variable "diag-switch?" is set true.
2. STOP+N to set NVRAM parameters to the default value. You can
release the key when the LED starts flashing on the key board.
Abort Sequences:
STOP+A puts the system into command entry mode for the Open Boot
PROM & interrupts any running program. When the OK prompt is
displayed, the system is ready to accept Open Boot PROM commands.
Disabling the Abort Sequences:
1. Edit /etc/default/kbd and comment out the statement
"KEYBOARD_ABORT=disable".
2. Run the command: #kbd -i
once the abort sequence is disabled, it can only be used during the
boot process.
Commonly used Open Boot Prompt (OBP) commands
ok>banner: It displays the system information such as the model
name, the boot PROM version, the memory, the Ethernet addresses,
and the host identification number (ID).
ok>boot: It is used to boot the system
It can be used with following options:
-s : for single user mode. Here only root user is allowed to log
in.
cdrom -s : for booting into single user mode using cdrom
-a: To boot the system in interactive mode
-r: To perform reconfiguration boot. This is used to detect and
create entry for a newly attached device.
-v: To display the detailed information on the console during the
boot process.
ok>help: It is used to list the main help categories of Open Boot
firmware. the help command can be used with specific keyword to get
the corresponding help. For example:
ok> help boot
ok> help diag
ok>printenv: To display the all the NVRAM parameters. This command
displays the default and current values of parameter. It can be
used with single parameters to display the corresponding value.
e.g. printenv auto-boot? : This command displays the value of auto-
boot variable.
e.g. printenv oem-banner? : This command displays the status of
variable oem-banner.
e.g. printenv oem-banner : This command displays customized OEM
banner information.
e.g. printenv oem-logo? : This displays the status of the variable
oem-logo.
e.g. printenv oem-logo : This displays the oem-logo.
e.g. printenv boot-device : It displays the default boot
device.setenv : It is use to assign the value to the environment
variable.
e.g. setenv auto-boot? false : This command sets the value of
5
variable auto-boot to false.
e.g. setenv oem-banner? true : This command sets the value of
variable oem-banner to true. By default its value is false.
e.g. setenv oem-banner <customized message> : This command sets the
customized message for the OEM banner.
e.g. setenv oem-log? true : It sets value of oem-logo? to
true/false.
e.g. setenv oem-logo <logo name> : It sets customized logo name.
e.g. setenv boot-device cdrom/disk/net : It sets the default boot
device. Emergency Open
ok>setenv: It is used for setting NVRAM parameters.
e.g. setenv autoboot? false: This command sets the autoboot?
parameter to false.
ok>reset-all: It functions similar to power cycle, and rclears all
buffers & registers, and execute a powered off/power on command.
ok>set-defaults: It is used to reset all parameter values to
factory defalut. To restore a particular parameter to its default
setting use set-default command followed by parameter name.
e.g. set-default auto-boot?
Note: The set-default command can only be used with those
parameters for which the default value is defined.
The probe commands are used to display all the peripheral devices
connected to the system.
ok> probe-ide : It displays all the disks & CD-ROMS attached to the
on-board IDE Controller.
ok> probe-scsi : It displays all peripheral devices connected to
the primary on-board SCSI controller.
ok> probe-scsi-all : It displays all peripheral devices connected
to the primary on-board SCSI controller & additional SBUS or PCI
SCSI controllers.
ok>sifting <OpenBoot PROM command>: Shifting command with an
OpenBoot PROM command as an parameter displays the the syntax of
OpenBoot PROM command.
ok>.registers: It displays the content of the OBP registers.
To ensure the system is not hung when probe command is used :
1. set the parameter auto-boot? to false.
ok> setenv auto-boot? false
2.Use reset-all command to clear all the buffers & registers.
3. Confirm all the values of OBP registers are set to zero using
.registers command.
Now we are ready to use any probe command without any problem.
ok>.speed: It displays the speed of the processor.
ok>.enet-addr: It displays the MAC address of the NIC
ok>.version: It displays the release and version information of
PROM chip.
6
ok> show-disks: It displays all the connected disks/CD-ROM
ok> page : To clear the screen
ok> watch-net: It displays the NIC status.ok> test-all : It is
nothing but performing POST i.e. self testing all the connected
devices.
ok>sync: It manually attempts to flush memory and synchronize the
file system.
ok>test: It is used to perform self test on the device specified.
Device Tree:
It is used to organize the devices attached to the system.
It is built by the OpenBoot Firmware by using the information
collected at the POST.
Node of the device tree:
1. The top most node of the device tree is the root device node.
2. Bus nexus node follows the root device node.
3. A leaf node(acts as a controller for the an attached device) is
connected to the bus nexus node.
Examples:
1. The disk device path of an Ultra workstation with a PCI IDE Bus:
/pci@1f,0/pci@,1/ide@3/dad@0,0
/ -> Root device
pci@1f,0/pci@,1/ide@3 -> Bus devices & controllers
dad@ -> Device type(IDE disk)
0 -> IDE Target address
0 -> Disk number (LUN logical Unit Number)
2. The disk device path of an Ultra workstation with a PCI SCSI
Bus:
/pci@1f,0/pci@,1/SUNW,isptwo@4/sd@3,0
/ -> Root device
pci@1f,0/pci@,1/SUNW,isptwo@4 -> Bus devices & controllers
sd -> Device type(SCSI Device)
3 -> SCSI Target address
0 -> Disk number (LUN logical Unit Number)
ok> show-devs: Displays the list of all the devices in the OpenBoot
device tree.
ok>devalias: It is used to display the list of defined device
aliases on a system.
Device aliases provides shot names for longer physical device
paths. The alias names are stored under NVRAMRC(contains registes
to store the parameters). It is part of NVRAM.
Creating an alias name for device in Solaris
1. Use the show-disks command to list all the disks connected.
Select and copy the location of the disk for which the alias need
to be created. The partial path provided in show-disks command is
7
completed by entering right targer & disk values.
2. Use the following command to create the alias :
nvalias <alias name> <physical path>
The physical path is the location copied in step 1. The alias name
can be anything of user choice.
ok> devalias boot-device : It displays current boot devices alias
for the system.
ok> nvunalias <alias name>: It removes device alias name.
The /usr/sbin/eeprom command:
It is used to display & change the NVRAM parameters while Solaris
OS is running.
Note: It can be only used by root user.
e.g. #eeprom -> list all the NVRAM parameters.
e.g. #eeprom boot-device -> It lists the value of parameter boot-
device
e.g. #eeprom boot-device=disk2 -> Changes the boot-device parameter
e.g. #eeprom auto-boot?=true -> Sets the parameter auto-boot?
parameter to true
e.g. #eeprom auto-boot? -> It lists the value of auto-boot?
parameter
Interrupting an Unresponsive System:
1. Kill the unresponsive process & then try to reboot unresponsive
system gracefully.
2. If the above step fails, press STOP+A.
3. use sync command at Open Boot prompt. This command creates panic
situation in the system & synchronizes the file systems.
Additionally, it creates a crash dump of memory and reboots system.
GRUB (Grand Unified Loader for x86 systems only):
1. It loads the boot archive(contains kernel modules
& configuration files) into the system's memory.
2. It has been implemented on x86 systems that are running the
Solaris OS.
Some Important Terms:
1. Boot Archive: Collection of important system file required to
boot the Solaris OS. The system maintains two boot archive:
2. Primary boot archive: It is used to boot Solaris OS on a system.
3. Secondary boot archive: Failsafe Archive is used for system
recovery in case of failure of primary boot archive. It is referred
as Solaris failsafe in the GRUB menu.
4. Boot loader: First software program executed after the system is
powered on.
5. GRUB edit Menu: Submenu of the GRUB menu.
Additional GRUB Terms:
1. GRUB main menu: It lists the OS installed on a system.
menu.lst file: It contains the OS installed on the system. The OS
8
displayed on the GRUB main menu is determined by menu.lst file.
2. Miniroot: It is a minimal bootable root(/) file system that is
present on the Solaris installation media. It is also used as
failsafe boot archive.
GRUB-Based Booting:
1. Power on system.
2. The BIOS intializes the CPU, the memory & the platform hardware.
3. BIOS loads the boot loader from the configured boot device. The
BIOS then gives the control of system to the boot loader.
The GRUB implementation on x86 systems in the Solaris OS is
compliant with the multiboot specification. This enables to :
1. Boot x86 systems with GRUB.
2. individually boot different OS from GRUB.
Installing OS instances:
1. The GRUB main menu is based on a configuration file.
2. The GRUB menu is automatically updated if you install or upgrade
the Solaris OS.
3. If another OS is installed, the /boot/grub/menu.lst need to be
modified.
GRUB Main Menu:
It can be used to :
1. Select a boot entry.
2. modify a boot entry.
3. load an OS kernel from the command line.
Editing the GRUB Main menu:
1. Highlight a boot entry in GRUB Main menu.
2. Press 'e' to display the GRUB edit menu.
3. Select a boot entry and press 'c'.
Working of GRUB-Based Booting:
1. When a system is booted, GRUB loads the primary boot archive &
multiboot program. The primary boot archive, called
/platform/i86pc/boot_archive, is a RAM image of the file system
that contains the Solaris kernel modules & data.
2. The GRUB transfers the primary boot archive and the multiboot
program to the memory without any interpretations.
3. System Control is transferred to the multiboot program. In this
situation, GRUB is inactive & system memory is restored.
The multiboot program is now responsible for assembling core kernel
modules into memory by reading the boot archive modules and passing
boot-related information to the kernel.
GRUB device naming conventions:
(fd0), (fd1) : First diskete, second diskette
(nd): Network device
(hd0,0),(hd0,1): First & second fdisk partition of the first bios
disk
(hd0,0,a),(hd0,0,b): SOLARIS/BSD slice 0 & 1 (a & b) on the first
fdisk partition on the first bios disk.
9
Functional Component of GRUB:
It has three functional components:
1. stage 1: It is installed on first sector of SOLARIS fdisk
partition
2. stage 2: It is installed in a reserved areal in SOLARIS fdisk
partition. It is the core image of GRUB.
3. menu.lst: It is a file located in /boot/grub directory. It is
read by GRUB stage2 functional component.
The GRUB Menu
1. It contains the list of all OS instances installed on the
system.
2. It contains important boot directives.
3. It requires modification of the active GRUB menu.lst file for
any change in its menu options.
Locating the GRUB Menu:
#bootadm list-menu
The location for the active GRUB menus is : /boot/grub/menu.lst
Edit the menu.lst file to add new OS entries & GRUB console
redirection information.
Edit the menu.lst file to modify system behavior.
GRUB Main Menu Entries:
On installing the Solaris OS, by default two GRUB menu entries are
installed on the system:
1. Solaris OS entry: It is used to boot Solaris OS on a system.
2. miniroot(failsafe) archieve: Failsafe Archive is used for system
recovery in case of failure of primary boot archive. It is referred
as Solaris failsafe in the GRUB menu.
Modifying menu.lst:
When the system boots, the GRUb menu is displayed for a specific
period of time. If the user do not select during this period, the
system boots automatically using the default boot entry.
The timeout value in the menu.lst file:
1. determines if the system will boot automatically
2. prevents the system from booting automatically if the value
specified as -1.
Modifying X86 System Boot Behavior
1. eeprom command: It assigsn a different value to a standard set
of properties. These values are equivalent to the SPARC OpenBoot
PROM NVRAM variables and are saved in /boot/solaris/bootenv.rc
2. kernel command: It is used to modify the boot behavior of a
system.
3. GRUB menu.lst:
Note:
1.The kernel command settings override the changes done by using
the eeprom command. However, these changes are only effective until
you boot the system again.
2. GRUB menu.lst is not preferred option because entries in
10
menu.lst file can be modified during a software upgrade & changes
made are lost.
Verifying the kernel in use:
After specifying the kernel to boot using the eeprom or kernel
commands, verify the kernel in use by following command:
#prtconf -v | grep /platform/i86pc/kernel
GRUB Boot Archives
The GRUB menu in Solaris OS uses two boot archive:
1. Primary boot archive: It shadows a root(/) file system. It
contains all the kernel modules, driver.conf files & some
configuration files. All these configuration files are placed in
/etc directory. Before mounting the root file system the kernel
reads the files from the boot archive. After the root file system
is mounted, the kernel removes the boot archive from the memory.
2. failsafe boot archieve: It is self-sufficient and can boot
without user intervention. It does not require any maintenance. By
default, the failsafe boot archive is created during installation
and stored in /boot/x86.minor-safe.
Default Location of primary boot archive:
/platform/i86pc/boot_archive
Managing the primary boot archive:
The boot archive :
1. needs to be rebuilt, whenever any file in the boot archive is
modified.
2. Should be build on system reboot.
3. Can be built using bootadm command
#bootadm update-archive -f -R /a
Options of the bootadm command:
-f: forces the boot archive to be updated
-R: enables to provide an alternative root where the boot archive
is located.
-n: enables to check the archive content in an update-archive
operation, without updating the content.
The boot archive can be rebuild by booting the system using the
failsafe archive.
Booting a system in GRUB-Based boot environment:
Booting a System to Run Level 3(Multiuser Level):
To boot a system functioning at run level 0 to 3:
1. reboot the system.
2. press the Enter key when the GRUB menu appears.
3. log in as the root & verify that the system is running at run
level 3 using :
#who -r
Booting a system to run level S (Single-User level):
1. reboot the system
2. type e at the GRUB menu prompt.
11
3. from the command list select the "kernel
/platform/i86pc/multiboot" boot entry and type e to edit the entry.
4. add a space and -s option at the end of the "kernel
/platform/i86pc/multiboot -s" to boot at run level S.
5. Press enter to return the control to the GRUB Main Menu.
6. Type b to boot the system to single user level.
7. Verify the system is running at run level S:
#who -r
8. Bring the system back to muliuser state by using the Ctrl+D key
combination.
Booting a system interactively:
1. reboot the system
2. type e at the GRUB menu prompt.
3. from the command list select the "kernel
/platform/i86pc/multiboot" boot entry and type e to edit the entry.
4. add a space and -a option at the end of the "kernel
/platform/i86pc/multiboot -a" .
5. Press enter to return the control to the GRUB Main Menu.
6. Type b to boot the system interactively.
Stopping an X86 system:
1. init 0
2. init 6
3. Use reset button or power button.
Booting the failsafe archive for recovery purpose:
1. reboot the system.
2. Press space bar while while GRUB menu is displayed.
3. Select Solaris failsafe entry and press b.
4. Type y to automatically update an out-of-date boot archive.
5. Select the OS instance on which the read write mount can happen.
6. Type y to mount the selected OS instance on /a.
7. Update the primary archive using following command:
#bootadm update-archive -f -R /a
8. Change directory to root(/): #cd /
9. Reboot the system.
Interrupting an unresponsive system
1. Kill the offending process.
2. Try rebooting system gracefully.
3. Reboot the system by holding down the ctrl+alt+del key sequence
on the keyboard.
4. Press the reset button.
5. Power off the system & then power it back on.
12
NIS (Network Information Systems)
NIS: Centralizing the users, passwords, hosts & networks.
Issue 1: How to update the newly added users (or mapping information)
A: cd var/yp/usr/ccs/bin/make
Issue 2: When NIS user unable to login?
A: simply I check out the user, pwds
Issue 3: disable the NIS services?
A: simply start and stop the services which are related to NIS (or)
Simply update the maps.
NOTE: In my organization LDAP configuration used so very less to get the problems
- NIS information stored in ‘nis maps’
- All maps located in ‘/var/yp/domain name’ file
- Configure the maps on server
#ypint -m
File system checking
#fsck : Due to improper shutdown of the systems some times the file system gets corrupted and to
check the corrupted file system, we can use utility called "fsck" (file system checking).
• It always in raw format (rdsk)
• It is always run on unmounted file system.
• It refers "/etc/vfstab" file to check in what way the file system check has to be done. i.e. either
sequential or parallely.
Options of "fsck":
1. # fsck -m: This is to check the inconsistency of a file system.
2. # fsck -y: This option used to check and repair the inconsistency of file system.
Note: Before running "fsck" ensure that file system is permanent (i.e. in vfstab), the entry should be
in "/etc/vfstab".
File system configuration:
# df -h
# umountall
# df -h
# vi /etc/vfstab
To check the inconsistency of the file system:
# fsck -m /dev/rdsk/c0t0d0s4
// yes, it is good, ok
To corrupt the file system:
# dd if=/dev/zero of=/dev/rdsk/c0t0d0s4 bs=512 count=32
# fsck -m /dev/rdsk/c0t0d0s4
//now its corrupted
13
To repair file system:
# fsck -F ufs -y -o b=32 /dev/rdsk/c0t0d0s4
File checking is done in two way
1. Sequentially
2. Parellely
6 phases:
1. phase 1= check blocks & sizes
2. phase 2=check path names
3. phase 3a=check connectivity
4. phase 3b=verify shadows/ACLs
5. phase 4=check reference counts
6. phase 5=check cylinder groups
http://mysolariss.blogspot.in/
UFS Architecture
UFS (Unix File System) Architecture:
1. Volume Table of Content (VTOC):
• It always resides in the sector '0'.
• Its capacity is 512 bytes
• It contains the information about
i. Disk Label
ii. No. of assigned slices
iii. Amount of space allocated for slice
2. Primary Boot Block (PRB):
This boot block contains the boot strap program which is nothing but a bootable file and It always
resides to a sector 1 to 15.
3. Secondary Boot Blocks (SBB):
As primary boot block contains the important data, so it's backup has to be maintained. Hence
secondary boot block is used, secondary boot block contains the entire information of PBB.
4. INODE:
If you want to create an file we should definitely have an "INODE" number, where INODE block
limit of the type of file, the size of file when it is created, when it was modified and the file
permissions and it resides from sector 32.
14

More Related Content

What's hot

Ict 9 module 4, lesson 1.1 safety precautions
Ict 9 module 4, lesson 1.1 safety precautionsIct 9 module 4, lesson 1.1 safety precautions
Ict 9 module 4, lesson 1.1 safety precautions
Yonel Cadapan
 
BIOS__Power-On-Self-Test.pptx
BIOS__Power-On-Self-Test.pptxBIOS__Power-On-Self-Test.pptx
BIOS__Power-On-Self-Test.pptx
SamiWhoo
 
TYPES OF COMPUTER SYSTEM ERRORS
TYPES OF COMPUTER SYSTEM ERRORSTYPES OF COMPUTER SYSTEM ERRORS
TYPES OF COMPUTER SYSTEM ERRORS
Perla Pelicano Corpez
 
Parts of a computer crossword: Computer Science
Parts of a computer crossword: Computer ScienceParts of a computer crossword: Computer Science
Parts of a computer crossword: Computer Science
nicamos
 
How to format a computer windows 7
How to format a computer windows 7How to format a computer windows 7
How to format a computer windows 7
Md Aftab
 
Sag computer system servicing nc ii
Sag   computer system servicing nc iiSag   computer system servicing nc ii
Sag computer system servicing nc ii
Delfino Santos
 
Ict 9 module 3, lesson 1.5 materials, tools, equipment and testing devices
Ict 9 module 3, lesson 1.5 materials, tools, equipment and testing devicesIct 9 module 3, lesson 1.5 materials, tools, equipment and testing devices
Ict 9 module 3, lesson 1.5 materials, tools, equipment and testing devices
Yonel Cadapan
 
Ict 9 module 3, lesson 2.5 basic computer configuration setup
Ict 9 module 3, lesson 2.5 basic computer configuration setupIct 9 module 3, lesson 2.5 basic computer configuration setup
Ict 9 module 3, lesson 2.5 basic computer configuration setup
Yonel Cadapan
 
2nd-Quarter-Daily-Lesson-Log.docx
2nd-Quarter-Daily-Lesson-Log.docx2nd-Quarter-Daily-Lesson-Log.docx
2nd-Quarter-Daily-Lesson-Log.docx
NoliZamora2
 
Sim grade 10
Sim grade 10Sim grade 10
Sim grade 10
LASNHS-DALAYA ANNEX
 
Ict 9 module 3, lesson 2.4.2 installing operating system (windows 7)
Ict 9 module 3, lesson 2.4.2 installing operating system (windows 7)Ict 9 module 3, lesson 2.4.2 installing operating system (windows 7)
Ict 9 module 3, lesson 2.4.2 installing operating system (windows 7)
Yonel Cadapan
 
Android - ADB
Android - ADBAndroid - ADB
Android - ADB
Yossi Gruner
 
System Booting Process overview
System Booting Process overviewSystem Booting Process overview
System Booting Process overview
RajKumar Rampelli
 
TVL CSS G11-Q1-M18.pdf
TVL CSS G11-Q1-M18.pdfTVL CSS G11-Q1-M18.pdf
TVL CSS G11-Q1-M18.pdf
charmainejornadal
 
CSS L07 - Preparing the Installer
CSS L07 - Preparing the InstallerCSS L07 - Preparing the Installer
CSS L07 - Preparing the Installer
Marvin Bronoso
 
Difference between RAM and ROM
Difference between RAM and ROMDifference between RAM and ROM
Difference between RAM and ROM
Harshit Pachar
 
COMPONENTS OF SYSTEM UNIT
COMPONENTS OF SYSTEM UNITCOMPONENTS OF SYSTEM UNIT
COMPONENTS OF SYSTEM UNIT
arunakshidatta
 
Ict 9 module 4 introduction
Ict 9 module 4 introductionIct 9 module 4 introduction
Ict 9 module 4 introduction
Yonel Cadapan
 
Ict 9 module 4, lesson 1.3 diagnosing computer systems
Ict 9 module 4, lesson 1.3 diagnosing computer systemsIct 9 module 4, lesson 1.3 diagnosing computer systems
Ict 9 module 4, lesson 1.3 diagnosing computer systems
Yonel Cadapan
 
2nd lesson installing operating system
2nd lesson installing operating system2nd lesson installing operating system
2nd lesson installing operating system
Raiza Janelle
 

What's hot (20)

Ict 9 module 4, lesson 1.1 safety precautions
Ict 9 module 4, lesson 1.1 safety precautionsIct 9 module 4, lesson 1.1 safety precautions
Ict 9 module 4, lesson 1.1 safety precautions
 
BIOS__Power-On-Self-Test.pptx
BIOS__Power-On-Self-Test.pptxBIOS__Power-On-Self-Test.pptx
BIOS__Power-On-Self-Test.pptx
 
TYPES OF COMPUTER SYSTEM ERRORS
TYPES OF COMPUTER SYSTEM ERRORSTYPES OF COMPUTER SYSTEM ERRORS
TYPES OF COMPUTER SYSTEM ERRORS
 
Parts of a computer crossword: Computer Science
Parts of a computer crossword: Computer ScienceParts of a computer crossword: Computer Science
Parts of a computer crossword: Computer Science
 
How to format a computer windows 7
How to format a computer windows 7How to format a computer windows 7
How to format a computer windows 7
 
Sag computer system servicing nc ii
Sag   computer system servicing nc iiSag   computer system servicing nc ii
Sag computer system servicing nc ii
 
Ict 9 module 3, lesson 1.5 materials, tools, equipment and testing devices
Ict 9 module 3, lesson 1.5 materials, tools, equipment and testing devicesIct 9 module 3, lesson 1.5 materials, tools, equipment and testing devices
Ict 9 module 3, lesson 1.5 materials, tools, equipment and testing devices
 
Ict 9 module 3, lesson 2.5 basic computer configuration setup
Ict 9 module 3, lesson 2.5 basic computer configuration setupIct 9 module 3, lesson 2.5 basic computer configuration setup
Ict 9 module 3, lesson 2.5 basic computer configuration setup
 
2nd-Quarter-Daily-Lesson-Log.docx
2nd-Quarter-Daily-Lesson-Log.docx2nd-Quarter-Daily-Lesson-Log.docx
2nd-Quarter-Daily-Lesson-Log.docx
 
Sim grade 10
Sim grade 10Sim grade 10
Sim grade 10
 
Ict 9 module 3, lesson 2.4.2 installing operating system (windows 7)
Ict 9 module 3, lesson 2.4.2 installing operating system (windows 7)Ict 9 module 3, lesson 2.4.2 installing operating system (windows 7)
Ict 9 module 3, lesson 2.4.2 installing operating system (windows 7)
 
Android - ADB
Android - ADBAndroid - ADB
Android - ADB
 
System Booting Process overview
System Booting Process overviewSystem Booting Process overview
System Booting Process overview
 
TVL CSS G11-Q1-M18.pdf
TVL CSS G11-Q1-M18.pdfTVL CSS G11-Q1-M18.pdf
TVL CSS G11-Q1-M18.pdf
 
CSS L07 - Preparing the Installer
CSS L07 - Preparing the InstallerCSS L07 - Preparing the Installer
CSS L07 - Preparing the Installer
 
Difference between RAM and ROM
Difference between RAM and ROMDifference between RAM and ROM
Difference between RAM and ROM
 
COMPONENTS OF SYSTEM UNIT
COMPONENTS OF SYSTEM UNITCOMPONENTS OF SYSTEM UNIT
COMPONENTS OF SYSTEM UNIT
 
Ict 9 module 4 introduction
Ict 9 module 4 introductionIct 9 module 4 introduction
Ict 9 module 4 introduction
 
Ict 9 module 4, lesson 1.3 diagnosing computer systems
Ict 9 module 4, lesson 1.3 diagnosing computer systemsIct 9 module 4, lesson 1.3 diagnosing computer systems
Ict 9 module 4, lesson 1.3 diagnosing computer systems
 
2nd lesson installing operating system
2nd lesson installing operating system2nd lesson installing operating system
2nd lesson installing operating system
 

Similar to Boot prom basics

Ch04 system administration
Ch04 system administration Ch04 system administration
Ch04 system administration
Raja Waseem Akhtar
 
Ch04
Ch04Ch04
motherboard.pptx
motherboard.pptxmotherboard.pptx
motherboard.pptx
RaviRaval36
 
101 1.2 boot the system
101 1.2 boot the system101 1.2 boot the system
101 1.2 boot the system
Acácio Oliveira
 
marlenis del carmen duarte gonzalez tegnologioa
marlenis del carmen duarte gonzalez tegnologioamarlenis del carmen duarte gonzalez tegnologioa
marlenis del carmen duarte gonzalez tegnologioa
marlenisdrt
 
1. What is the value of requiring the OS to provide status informati.pdf
1. What is the value of requiring the OS to provide status informati.pdf1. What is the value of requiring the OS to provide status informati.pdf
1. What is the value of requiring the OS to provide status informati.pdf
udit652068
 
Lecture1,2,3 (1).pdf
Lecture1,2,3 (1).pdfLecture1,2,3 (1).pdf
Lecture1,2,3 (1).pdf
Taufeeq8
 
Amr Chap 08 Operating Systems & Utility Programs
Amr Chap 08 Operating Systems & Utility ProgramsAmr Chap 08 Operating Systems & Utility Programs
Amr Chap 08 Operating Systems & Utility Programs
sharing notes123
 
CCNA CheatSheet
CCNA CheatSheetCCNA CheatSheet
CCNA CheatSheet
Eng. Emad Al-Atoum
 
Configuring startup and troubleshooting startup issues
Configuring startup and troubleshooting startup issuesConfiguring startup and troubleshooting startup issues
Configuring startup and troubleshooting startup issues
elboob2025
 
Unit 6
Unit 6Unit 6
Unit 6
pm_ghate
 
Bootloaders (U-Boot)
Bootloaders (U-Boot) Bootloaders (U-Boot)
Bootloaders (U-Boot)
Omkar Rane
 
Linux startup
Linux startupLinux startup
Linux startup
Amin Hashemi
 
Operating systems 2
Operating systems 2Operating systems 2
Operating systems 2
mariacalji
 
Positive Hack Days. Pavlov. Network Infrastructure Security Assessment
Positive Hack Days. Pavlov. Network Infrastructure Security AssessmentPositive Hack Days. Pavlov. Network Infrastructure Security Assessment
Positive Hack Days. Pavlov. Network Infrastructure Security Assessment
Positive Hack Days
 
Code4vn - Linux day - linux boot process
Code4vn - Linux day - linux boot processCode4vn - Linux day - linux boot process
Code4vn - Linux day - linux boot process
Cường Nguyễn
 
HKG18-TR14 - Postmortem Debugging with Coresight
HKG18-TR14 - Postmortem Debugging with CoresightHKG18-TR14 - Postmortem Debugging with Coresight
HKG18-TR14 - Postmortem Debugging with Coresight
Linaro
 
Case study on chrome os in detail.History, architecture,process
Case study on chrome os in detail.History, architecture,processCase study on chrome os in detail.History, architecture,process
Case study on chrome os in detail.History, architecture,process
skb212733
 
Process management in linux
Process management in linuxProcess management in linux
Process management in linux
Mazenetsolution
 
Linux
Linux Linux
Linux
Mindtree
 

Similar to Boot prom basics (20)

Ch04 system administration
Ch04 system administration Ch04 system administration
Ch04 system administration
 
Ch04
Ch04Ch04
Ch04
 
motherboard.pptx
motherboard.pptxmotherboard.pptx
motherboard.pptx
 
101 1.2 boot the system
101 1.2 boot the system101 1.2 boot the system
101 1.2 boot the system
 
marlenis del carmen duarte gonzalez tegnologioa
marlenis del carmen duarte gonzalez tegnologioamarlenis del carmen duarte gonzalez tegnologioa
marlenis del carmen duarte gonzalez tegnologioa
 
1. What is the value of requiring the OS to provide status informati.pdf
1. What is the value of requiring the OS to provide status informati.pdf1. What is the value of requiring the OS to provide status informati.pdf
1. What is the value of requiring the OS to provide status informati.pdf
 
Lecture1,2,3 (1).pdf
Lecture1,2,3 (1).pdfLecture1,2,3 (1).pdf
Lecture1,2,3 (1).pdf
 
Amr Chap 08 Operating Systems & Utility Programs
Amr Chap 08 Operating Systems & Utility ProgramsAmr Chap 08 Operating Systems & Utility Programs
Amr Chap 08 Operating Systems & Utility Programs
 
CCNA CheatSheet
CCNA CheatSheetCCNA CheatSheet
CCNA CheatSheet
 
Configuring startup and troubleshooting startup issues
Configuring startup and troubleshooting startup issuesConfiguring startup and troubleshooting startup issues
Configuring startup and troubleshooting startup issues
 
Unit 6
Unit 6Unit 6
Unit 6
 
Bootloaders (U-Boot)
Bootloaders (U-Boot) Bootloaders (U-Boot)
Bootloaders (U-Boot)
 
Linux startup
Linux startupLinux startup
Linux startup
 
Operating systems 2
Operating systems 2Operating systems 2
Operating systems 2
 
Positive Hack Days. Pavlov. Network Infrastructure Security Assessment
Positive Hack Days. Pavlov. Network Infrastructure Security AssessmentPositive Hack Days. Pavlov. Network Infrastructure Security Assessment
Positive Hack Days. Pavlov. Network Infrastructure Security Assessment
 
Code4vn - Linux day - linux boot process
Code4vn - Linux day - linux boot processCode4vn - Linux day - linux boot process
Code4vn - Linux day - linux boot process
 
HKG18-TR14 - Postmortem Debugging with Coresight
HKG18-TR14 - Postmortem Debugging with CoresightHKG18-TR14 - Postmortem Debugging with Coresight
HKG18-TR14 - Postmortem Debugging with Coresight
 
Case study on chrome os in detail.History, architecture,process
Case study on chrome os in detail.History, architecture,processCase study on chrome os in detail.History, architecture,process
Case study on chrome os in detail.History, architecture,process
 
Process management in linux
Process management in linuxProcess management in linux
Process management in linux
 
Linux
Linux Linux
Linux
 

More from Ganesh Kumar Veerla

Chapter 5 HP OVOw Node management
Chapter 5 HP OVOw Node managementChapter 5 HP OVOw Node management
Chapter 5 HP OVOw Node management
Ganesh Kumar Veerla
 
Chapter 2 hp ovo service driven management
Chapter 2  hp ovo service driven managementChapter 2  hp ovo service driven management
Chapter 2 hp ovo service driven managementGanesh Kumar Veerla
 
Sunadmin
SunadminSunadmin
Hp open view(hp ov)
Hp open view(hp ov)Hp open view(hp ov)
Hp open view(hp ov)
Ganesh Kumar Veerla
 
Windows command line_sheet_v1
Windows command line_sheet_v1Windows command line_sheet_v1
Windows command line_sheet_v1
Ganesh Kumar Veerla
 
imp websites for solaris and linux
imp websites for solaris and linux imp websites for solaris and linux
imp websites for solaris and linux
Ganesh Kumar Veerla
 
Managerof managerarchitecture
Managerof managerarchitectureManagerof managerarchitecture
Managerof managerarchitecture
Ganesh Kumar Veerla
 
Hp open view
Hp open viewHp open view
Hp open view
Ganesh Kumar Veerla
 
Solaris
SolarisSolaris
Nsm overview
Nsm overviewNsm overview
Nsm overview
Ganesh Kumar Veerla
 
Ovo and nnm work flow at ahcc
Ovo and nnm work flow at ahccOvo and nnm work flow at ahcc
Ovo and nnm work flow at ahcc
Ganesh Kumar Veerla
 

More from Ganesh Kumar Veerla (15)

Omw doc
Omw docOmw doc
Omw doc
 
Chapter 12 user roles
Chapter 12 user rolesChapter 12 user roles
Chapter 12 user roles
 
Chapter 6 polices
Chapter 6 policesChapter 6 polices
Chapter 6 polices
 
Chapter 5 HP OVOw Node management
Chapter 5 HP OVOw Node managementChapter 5 HP OVOw Node management
Chapter 5 HP OVOw Node management
 
Chapter 3 HP OVOW architecture
Chapter 3 HP OVOW architectureChapter 3 HP OVOW architecture
Chapter 3 HP OVOW architecture
 
Chapter 2 hp ovo service driven management
Chapter 2  hp ovo service driven managementChapter 2  hp ovo service driven management
Chapter 2 hp ovo service driven management
 
Sunadmin
SunadminSunadmin
Sunadmin
 
Hp open view(hp ov)
Hp open view(hp ov)Hp open view(hp ov)
Hp open view(hp ov)
 
Windows command line_sheet_v1
Windows command line_sheet_v1Windows command line_sheet_v1
Windows command line_sheet_v1
 
imp websites for solaris and linux
imp websites for solaris and linux imp websites for solaris and linux
imp websites for solaris and linux
 
Managerof managerarchitecture
Managerof managerarchitectureManagerof managerarchitecture
Managerof managerarchitecture
 
Hp open view
Hp open viewHp open view
Hp open view
 
Solaris
SolarisSolaris
Solaris
 
Nsm overview
Nsm overviewNsm overview
Nsm overview
 
Ovo and nnm work flow at ahcc
Ovo and nnm work flow at ahccOvo and nnm work flow at ahcc
Ovo and nnm work flow at ahcc
 

Recently uploaded

Video Streaming: Then, Now, and in the Future
Video Streaming: Then, Now, and in the FutureVideo Streaming: Then, Now, and in the Future
Video Streaming: Then, Now, and in the Future
Alpen-Adria-Universität
 
Microsoft - Power Platform_G.Aspiotis.pdf
Microsoft - Power Platform_G.Aspiotis.pdfMicrosoft - Power Platform_G.Aspiotis.pdf
Microsoft - Power Platform_G.Aspiotis.pdf
Uni Systems S.M.S.A.
 
How to use Firebase Data Connect For Flutter
How to use Firebase Data Connect For FlutterHow to use Firebase Data Connect For Flutter
How to use Firebase Data Connect For Flutter
Daiki Mogmet Ito
 
Goodbye Windows 11: Make Way for Nitrux Linux 3.5.0!
Goodbye Windows 11: Make Way for Nitrux Linux 3.5.0!Goodbye Windows 11: Make Way for Nitrux Linux 3.5.0!
Goodbye Windows 11: Make Way for Nitrux Linux 3.5.0!
SOFTTECHHUB
 
Full-RAG: A modern architecture for hyper-personalization
Full-RAG: A modern architecture for hyper-personalizationFull-RAG: A modern architecture for hyper-personalization
Full-RAG: A modern architecture for hyper-personalization
Zilliz
 
GraphSummit Singapore | Enhancing Changi Airport Group's Passenger Experience...
GraphSummit Singapore | Enhancing Changi Airport Group's Passenger Experience...GraphSummit Singapore | Enhancing Changi Airport Group's Passenger Experience...
GraphSummit Singapore | Enhancing Changi Airport Group's Passenger Experience...
Neo4j
 
RESUME BUILDER APPLICATION Project for students
RESUME BUILDER APPLICATION Project for studentsRESUME BUILDER APPLICATION Project for students
RESUME BUILDER APPLICATION Project for students
KAMESHS29
 
Serial Arm Control in Real Time Presentation
Serial Arm Control in Real Time PresentationSerial Arm Control in Real Time Presentation
Serial Arm Control in Real Time Presentation
tolgahangng
 
Essentials of Automations: The Art of Triggers and Actions in FME
Essentials of Automations: The Art of Triggers and Actions in FMEEssentials of Automations: The Art of Triggers and Actions in FME
Essentials of Automations: The Art of Triggers and Actions in FME
Safe Software
 
GraphRAG for Life Science to increase LLM accuracy
GraphRAG for Life Science to increase LLM accuracyGraphRAG for Life Science to increase LLM accuracy
GraphRAG for Life Science to increase LLM accuracy
Tomaz Bratanic
 
HCL Notes and Domino License Cost Reduction in the World of DLAU
HCL Notes and Domino License Cost Reduction in the World of DLAUHCL Notes and Domino License Cost Reduction in the World of DLAU
HCL Notes and Domino License Cost Reduction in the World of DLAU
panagenda
 
Driving Business Innovation: Latest Generative AI Advancements & Success Story
Driving Business Innovation: Latest Generative AI Advancements & Success StoryDriving Business Innovation: Latest Generative AI Advancements & Success Story
Driving Business Innovation: Latest Generative AI Advancements & Success Story
Safe Software
 
UiPath Test Automation using UiPath Test Suite series, part 5
UiPath Test Automation using UiPath Test Suite series, part 5UiPath Test Automation using UiPath Test Suite series, part 5
UiPath Test Automation using UiPath Test Suite series, part 5
DianaGray10
 
Building Production Ready Search Pipelines with Spark and Milvus
Building Production Ready Search Pipelines with Spark and MilvusBuilding Production Ready Search Pipelines with Spark and Milvus
Building Production Ready Search Pipelines with Spark and Milvus
Zilliz
 
GenAI Pilot Implementation in the organizations
GenAI Pilot Implementation in the organizationsGenAI Pilot Implementation in the organizations
GenAI Pilot Implementation in the organizations
kumardaparthi1024
 
GraphSummit Singapore | Neo4j Product Vision & Roadmap - Q2 2024
GraphSummit Singapore | Neo4j Product Vision & Roadmap - Q2 2024GraphSummit Singapore | Neo4j Product Vision & Roadmap - Q2 2024
GraphSummit Singapore | Neo4j Product Vision & Roadmap - Q2 2024
Neo4j
 
みなさんこんにちはこれ何文字まで入るの?40文字以下不可とか本当に意味わからないけどこれ限界文字数書いてないからマジでやばい文字数いけるんじゃないの?えこ...
みなさんこんにちはこれ何文字まで入るの?40文字以下不可とか本当に意味わからないけどこれ限界文字数書いてないからマジでやばい文字数いけるんじゃないの?えこ...みなさんこんにちはこれ何文字まで入るの?40文字以下不可とか本当に意味わからないけどこれ限界文字数書いてないからマジでやばい文字数いけるんじゃないの?えこ...
みなさんこんにちはこれ何文字まで入るの?40文字以下不可とか本当に意味わからないけどこれ限界文字数書いてないからマジでやばい文字数いけるんじゃないの?えこ...
名前 です男
 
Best 20 SEO Techniques To Improve Website Visibility In SERP
Best 20 SEO Techniques To Improve Website Visibility In SERPBest 20 SEO Techniques To Improve Website Visibility In SERP
Best 20 SEO Techniques To Improve Website Visibility In SERP
Pixlogix Infotech
 
Introduction to CHERI technology - Cybersecurity
Introduction to CHERI technology - CybersecurityIntroduction to CHERI technology - Cybersecurity
Introduction to CHERI technology - Cybersecurity
mikeeftimakis1
 
GraphSummit Singapore | The Future of Agility: Supercharging Digital Transfor...
GraphSummit Singapore | The Future of Agility: Supercharging Digital Transfor...GraphSummit Singapore | The Future of Agility: Supercharging Digital Transfor...
GraphSummit Singapore | The Future of Agility: Supercharging Digital Transfor...
Neo4j
 

Recently uploaded (20)

Video Streaming: Then, Now, and in the Future
Video Streaming: Then, Now, and in the FutureVideo Streaming: Then, Now, and in the Future
Video Streaming: Then, Now, and in the Future
 
Microsoft - Power Platform_G.Aspiotis.pdf
Microsoft - Power Platform_G.Aspiotis.pdfMicrosoft - Power Platform_G.Aspiotis.pdf
Microsoft - Power Platform_G.Aspiotis.pdf
 
How to use Firebase Data Connect For Flutter
How to use Firebase Data Connect For FlutterHow to use Firebase Data Connect For Flutter
How to use Firebase Data Connect For Flutter
 
Goodbye Windows 11: Make Way for Nitrux Linux 3.5.0!
Goodbye Windows 11: Make Way for Nitrux Linux 3.5.0!Goodbye Windows 11: Make Way for Nitrux Linux 3.5.0!
Goodbye Windows 11: Make Way for Nitrux Linux 3.5.0!
 
Full-RAG: A modern architecture for hyper-personalization
Full-RAG: A modern architecture for hyper-personalizationFull-RAG: A modern architecture for hyper-personalization
Full-RAG: A modern architecture for hyper-personalization
 
GraphSummit Singapore | Enhancing Changi Airport Group's Passenger Experience...
GraphSummit Singapore | Enhancing Changi Airport Group's Passenger Experience...GraphSummit Singapore | Enhancing Changi Airport Group's Passenger Experience...
GraphSummit Singapore | Enhancing Changi Airport Group's Passenger Experience...
 
RESUME BUILDER APPLICATION Project for students
RESUME BUILDER APPLICATION Project for studentsRESUME BUILDER APPLICATION Project for students
RESUME BUILDER APPLICATION Project for students
 
Serial Arm Control in Real Time Presentation
Serial Arm Control in Real Time PresentationSerial Arm Control in Real Time Presentation
Serial Arm Control in Real Time Presentation
 
Essentials of Automations: The Art of Triggers and Actions in FME
Essentials of Automations: The Art of Triggers and Actions in FMEEssentials of Automations: The Art of Triggers and Actions in FME
Essentials of Automations: The Art of Triggers and Actions in FME
 
GraphRAG for Life Science to increase LLM accuracy
GraphRAG for Life Science to increase LLM accuracyGraphRAG for Life Science to increase LLM accuracy
GraphRAG for Life Science to increase LLM accuracy
 
HCL Notes and Domino License Cost Reduction in the World of DLAU
HCL Notes and Domino License Cost Reduction in the World of DLAUHCL Notes and Domino License Cost Reduction in the World of DLAU
HCL Notes and Domino License Cost Reduction in the World of DLAU
 
Driving Business Innovation: Latest Generative AI Advancements & Success Story
Driving Business Innovation: Latest Generative AI Advancements & Success StoryDriving Business Innovation: Latest Generative AI Advancements & Success Story
Driving Business Innovation: Latest Generative AI Advancements & Success Story
 
UiPath Test Automation using UiPath Test Suite series, part 5
UiPath Test Automation using UiPath Test Suite series, part 5UiPath Test Automation using UiPath Test Suite series, part 5
UiPath Test Automation using UiPath Test Suite series, part 5
 
Building Production Ready Search Pipelines with Spark and Milvus
Building Production Ready Search Pipelines with Spark and MilvusBuilding Production Ready Search Pipelines with Spark and Milvus
Building Production Ready Search Pipelines with Spark and Milvus
 
GenAI Pilot Implementation in the organizations
GenAI Pilot Implementation in the organizationsGenAI Pilot Implementation in the organizations
GenAI Pilot Implementation in the organizations
 
GraphSummit Singapore | Neo4j Product Vision & Roadmap - Q2 2024
GraphSummit Singapore | Neo4j Product Vision & Roadmap - Q2 2024GraphSummit Singapore | Neo4j Product Vision & Roadmap - Q2 2024
GraphSummit Singapore | Neo4j Product Vision & Roadmap - Q2 2024
 
みなさんこんにちはこれ何文字まで入るの?40文字以下不可とか本当に意味わからないけどこれ限界文字数書いてないからマジでやばい文字数いけるんじゃないの?えこ...
みなさんこんにちはこれ何文字まで入るの?40文字以下不可とか本当に意味わからないけどこれ限界文字数書いてないからマジでやばい文字数いけるんじゃないの?えこ...みなさんこんにちはこれ何文字まで入るの?40文字以下不可とか本当に意味わからないけどこれ限界文字数書いてないからマジでやばい文字数いけるんじゃないの?えこ...
みなさんこんにちはこれ何文字まで入るの?40文字以下不可とか本当に意味わからないけどこれ限界文字数書いてないからマジでやばい文字数いけるんじゃないの?えこ...
 
Best 20 SEO Techniques To Improve Website Visibility In SERP
Best 20 SEO Techniques To Improve Website Visibility In SERPBest 20 SEO Techniques To Improve Website Visibility In SERP
Best 20 SEO Techniques To Improve Website Visibility In SERP
 
Introduction to CHERI technology - Cybersecurity
Introduction to CHERI technology - CybersecurityIntroduction to CHERI technology - Cybersecurity
Introduction to CHERI technology - Cybersecurity
 
GraphSummit Singapore | The Future of Agility: Supercharging Digital Transfor...
GraphSummit Singapore | The Future of Agility: Supercharging Digital Transfor...GraphSummit Singapore | The Future of Agility: Supercharging Digital Transfor...
GraphSummit Singapore | The Future of Agility: Supercharging Digital Transfor...
 

Boot prom basics

  • 1. Basic Concepts 1. Machine : A hardware device is called as Machine. 2. Host : If we assign any address to a machine to identify it, is called Host. 3. Client : A Host PC which is not able to do the job and sending the request to some other PC in network to process the job. 4. Server : A PC which is processing the client's request is called "server". 5. Work Station : A Host PC which is able to perform every job by itself. 6. Process : A foreground process which is running on the system is called process. 7. Daemon : It is a background process. 8. Multitasking : Which allow you to perform a multiple task in a single system. 9. Multi User : Multiple users should be able to login to a single system. 10. Distributed system: A group of systems integrated (or interconnected) to perform a job. 11. False Tolerance : A distributed system which, if any one the system is crashed then also if your able to perform the job successfully is called "False Tolerance". 12. Spanning: If your able to write the data in the multiple disk alternately, simultaneously or sequentially is called Spanning. 13. Kernel : Communication between Hardware device & user. Kernel nothing but a basic device driver. 14. Shell : It acts as a interface between the kernel & user. Few important commands 1. # last: It will give all the information regarding booting, when you shutdown, logged in with time. 2. /etc/ntmp: This file contains record of current logged in user 3. /var/adm/wtmp: it contains record of all logins & log outs for each user 4. /var/adm/lastlog: This file contains the list of the last login records for each user. Security Administration Security Administration: 1. /etc/default/passwd 2. /etc/default/login 3. /etc/default/su 4. /etc/nologin 5. /var/adm/loginlog 6. /etc/skel 1
  • 2. To break a password How to break a pass word 1. Insert the Solaris OS CD 2. Ok setenv boot-device cdrom 3. Ok boot cdrom -s // single user (or) maintainance mode 4. # TERM = ansi # export TERM // RAM to kernel # mkdir /tmp/root/abc # mount /dev/dsk/c0t0d0s0 /tmp/root/abc # vi /tmp/root/abc/etc/shadow /root/xxxxxxxxxxxxxx/pwd now remove the 13 encoded characters, save & exit now restart # init 6 # ok setenv boot-device disk # ok boot disk 2
  • 3. Boot PROM Basics Boot PROM (programmable read only memory): It is a firmware (also known as the monitor program) provides: 1. basic hardware testing & initialization before booting. 2. contains a user interface that provide access to many important functions. 3. Enables the system to boot from wide range of devices. It controls the system operation before the kernel becomes available. It provides a user interface and firmware utility commands known as FORTH command set. These commands include the boot commands, the diagnostic commands & the commands for modifying the default configuration. Command to determine the version of the Open Boot PROM on the system:# /usr/platform/'uname -m'/sbin/prtdiag -v (output omitted) System PROM revisions: ---------------------- OBP 4.16.4 2004/12/18 05:21 Sun Blade 1500 (Silver) OBDIAG 4.16.4.2004/12/18 05:21 # prtconf -v OBP 4.16.4 2004/12/18 05:21 Open Boot Architectures Standards: It is based on IEEE standard #1275, according to which the open boot architecture should provide capabilities of several system tasks including: 1. Testing and initializing system hardware 2. Determining the system's hardware configuration 3. Enabling the use of third-party devices booting the OS 4. Providing an interactive interface for configuration, testing and debugging Boot PROM chip: It is available in Sun SPARC system. It is located on the same board as the CPU. FPROM(Flash PROM): It is a re-programmable boot PROM used by Ultra workstations. It enables to load new boot program data into PROM using software. System configuration Information: Each Sun system has another important element known as System Configuration Information. This information includes the Ethernet or MAC address, the system host identification number (ID), and the user configurable parameters. 3
  • 4. The user configurable parameters in System Information is called NVRAM (Non-Volatile Random Access) Variables or EEPROM (Electronically Erasable PROM) parameters. Using these parameters we can Control: 1. POST (Power on self Test) 2. Specify the default boot device 3. Perform other configuration settings Note: Depending on the system these system configuration information is stored in NVRAM chip, a SEEPROM(Serially Electronically Erasable PROM) or a System Configuration Card(SCC). The older systems used NVRAM chip which is located on the main system board and is removable. It contains Lithium Battery to provide the battery backup for configuration information. The battery also provides the system's time of day(TOD) function. New systems uses a non-removable SEEPROM chip to store the system configuration information. The chip is located on the main board and doesn't requires battery. In addition to NVRAM and SEEPROM chip, some systems uses a removable SCC(System Configuration Card) to store system configuration information. An SCC is inserted into the SCC reader. Working of Boot PROM Firmware: The Boot PROM firmware booting proceeds in following stages: 1. When a system is turned on, It initiates low-level POST. The low level post code is stored in system's boot PROM. The POST code tests the most elementary functions of the system. 2. After the low level post completes successfully, the Boot PROM firmware takes control. It probes memory and CPU. 3. Next, Boot PROM probes bus devices and interprets their drivers to build a device tree. 4. After the device tree is built, the boot PROM firmware installs the console. 5. The Boot PROM displays the banner once the system initialization is complete. Note: The system determines how to Boot the the OS by checking the parameter stored in the Boot PROM and NVRAM. Stop key sequences: It can be used to enable various diagnostics mode. The Stop Key sequences affect the OpenBoot PROM and help to define how POST runs when the system is powered on. Using Stop Key Sequences: When the system is powered on use : 1. STOP+D to switch the boot PROM to the diagnostic mode. In this 4
  • 5. mode the variable "diag-switch?" is set true. 2. STOP+N to set NVRAM parameters to the default value. You can release the key when the LED starts flashing on the key board. Abort Sequences: STOP+A puts the system into command entry mode for the Open Boot PROM & interrupts any running program. When the OK prompt is displayed, the system is ready to accept Open Boot PROM commands. Disabling the Abort Sequences: 1. Edit /etc/default/kbd and comment out the statement "KEYBOARD_ABORT=disable". 2. Run the command: #kbd -i once the abort sequence is disabled, it can only be used during the boot process. Commonly used Open Boot Prompt (OBP) commands ok>banner: It displays the system information such as the model name, the boot PROM version, the memory, the Ethernet addresses, and the host identification number (ID). ok>boot: It is used to boot the system It can be used with following options: -s : for single user mode. Here only root user is allowed to log in. cdrom -s : for booting into single user mode using cdrom -a: To boot the system in interactive mode -r: To perform reconfiguration boot. This is used to detect and create entry for a newly attached device. -v: To display the detailed information on the console during the boot process. ok>help: It is used to list the main help categories of Open Boot firmware. the help command can be used with specific keyword to get the corresponding help. For example: ok> help boot ok> help diag ok>printenv: To display the all the NVRAM parameters. This command displays the default and current values of parameter. It can be used with single parameters to display the corresponding value. e.g. printenv auto-boot? : This command displays the value of auto- boot variable. e.g. printenv oem-banner? : This command displays the status of variable oem-banner. e.g. printenv oem-banner : This command displays customized OEM banner information. e.g. printenv oem-logo? : This displays the status of the variable oem-logo. e.g. printenv oem-logo : This displays the oem-logo. e.g. printenv boot-device : It displays the default boot device.setenv : It is use to assign the value to the environment variable. e.g. setenv auto-boot? false : This command sets the value of 5
  • 6. variable auto-boot to false. e.g. setenv oem-banner? true : This command sets the value of variable oem-banner to true. By default its value is false. e.g. setenv oem-banner <customized message> : This command sets the customized message for the OEM banner. e.g. setenv oem-log? true : It sets value of oem-logo? to true/false. e.g. setenv oem-logo <logo name> : It sets customized logo name. e.g. setenv boot-device cdrom/disk/net : It sets the default boot device. Emergency Open ok>setenv: It is used for setting NVRAM parameters. e.g. setenv autoboot? false: This command sets the autoboot? parameter to false. ok>reset-all: It functions similar to power cycle, and rclears all buffers & registers, and execute a powered off/power on command. ok>set-defaults: It is used to reset all parameter values to factory defalut. To restore a particular parameter to its default setting use set-default command followed by parameter name. e.g. set-default auto-boot? Note: The set-default command can only be used with those parameters for which the default value is defined. The probe commands are used to display all the peripheral devices connected to the system. ok> probe-ide : It displays all the disks & CD-ROMS attached to the on-board IDE Controller. ok> probe-scsi : It displays all peripheral devices connected to the primary on-board SCSI controller. ok> probe-scsi-all : It displays all peripheral devices connected to the primary on-board SCSI controller & additional SBUS or PCI SCSI controllers. ok>sifting <OpenBoot PROM command>: Shifting command with an OpenBoot PROM command as an parameter displays the the syntax of OpenBoot PROM command. ok>.registers: It displays the content of the OBP registers. To ensure the system is not hung when probe command is used : 1. set the parameter auto-boot? to false. ok> setenv auto-boot? false 2.Use reset-all command to clear all the buffers & registers. 3. Confirm all the values of OBP registers are set to zero using .registers command. Now we are ready to use any probe command without any problem. ok>.speed: It displays the speed of the processor. ok>.enet-addr: It displays the MAC address of the NIC ok>.version: It displays the release and version information of PROM chip. 6
  • 7. ok> show-disks: It displays all the connected disks/CD-ROM ok> page : To clear the screen ok> watch-net: It displays the NIC status.ok> test-all : It is nothing but performing POST i.e. self testing all the connected devices. ok>sync: It manually attempts to flush memory and synchronize the file system. ok>test: It is used to perform self test on the device specified. Device Tree: It is used to organize the devices attached to the system. It is built by the OpenBoot Firmware by using the information collected at the POST. Node of the device tree: 1. The top most node of the device tree is the root device node. 2. Bus nexus node follows the root device node. 3. A leaf node(acts as a controller for the an attached device) is connected to the bus nexus node. Examples: 1. The disk device path of an Ultra workstation with a PCI IDE Bus: /pci@1f,0/pci@,1/ide@3/dad@0,0 / -> Root device pci@1f,0/pci@,1/ide@3 -> Bus devices & controllers dad@ -> Device type(IDE disk) 0 -> IDE Target address 0 -> Disk number (LUN logical Unit Number) 2. The disk device path of an Ultra workstation with a PCI SCSI Bus: /pci@1f,0/pci@,1/SUNW,isptwo@4/sd@3,0 / -> Root device pci@1f,0/pci@,1/SUNW,isptwo@4 -> Bus devices & controllers sd -> Device type(SCSI Device) 3 -> SCSI Target address 0 -> Disk number (LUN logical Unit Number) ok> show-devs: Displays the list of all the devices in the OpenBoot device tree. ok>devalias: It is used to display the list of defined device aliases on a system. Device aliases provides shot names for longer physical device paths. The alias names are stored under NVRAMRC(contains registes to store the parameters). It is part of NVRAM. Creating an alias name for device in Solaris 1. Use the show-disks command to list all the disks connected. Select and copy the location of the disk for which the alias need to be created. The partial path provided in show-disks command is 7
  • 8. completed by entering right targer & disk values. 2. Use the following command to create the alias : nvalias <alias name> <physical path> The physical path is the location copied in step 1. The alias name can be anything of user choice. ok> devalias boot-device : It displays current boot devices alias for the system. ok> nvunalias <alias name>: It removes device alias name. The /usr/sbin/eeprom command: It is used to display & change the NVRAM parameters while Solaris OS is running. Note: It can be only used by root user. e.g. #eeprom -> list all the NVRAM parameters. e.g. #eeprom boot-device -> It lists the value of parameter boot- device e.g. #eeprom boot-device=disk2 -> Changes the boot-device parameter e.g. #eeprom auto-boot?=true -> Sets the parameter auto-boot? parameter to true e.g. #eeprom auto-boot? -> It lists the value of auto-boot? parameter Interrupting an Unresponsive System: 1. Kill the unresponsive process & then try to reboot unresponsive system gracefully. 2. If the above step fails, press STOP+A. 3. use sync command at Open Boot prompt. This command creates panic situation in the system & synchronizes the file systems. Additionally, it creates a crash dump of memory and reboots system. GRUB (Grand Unified Loader for x86 systems only): 1. It loads the boot archive(contains kernel modules & configuration files) into the system's memory. 2. It has been implemented on x86 systems that are running the Solaris OS. Some Important Terms: 1. Boot Archive: Collection of important system file required to boot the Solaris OS. The system maintains two boot archive: 2. Primary boot archive: It is used to boot Solaris OS on a system. 3. Secondary boot archive: Failsafe Archive is used for system recovery in case of failure of primary boot archive. It is referred as Solaris failsafe in the GRUB menu. 4. Boot loader: First software program executed after the system is powered on. 5. GRUB edit Menu: Submenu of the GRUB menu. Additional GRUB Terms: 1. GRUB main menu: It lists the OS installed on a system. menu.lst file: It contains the OS installed on the system. The OS 8
  • 9. displayed on the GRUB main menu is determined by menu.lst file. 2. Miniroot: It is a minimal bootable root(/) file system that is present on the Solaris installation media. It is also used as failsafe boot archive. GRUB-Based Booting: 1. Power on system. 2. The BIOS intializes the CPU, the memory & the platform hardware. 3. BIOS loads the boot loader from the configured boot device. The BIOS then gives the control of system to the boot loader. The GRUB implementation on x86 systems in the Solaris OS is compliant with the multiboot specification. This enables to : 1. Boot x86 systems with GRUB. 2. individually boot different OS from GRUB. Installing OS instances: 1. The GRUB main menu is based on a configuration file. 2. The GRUB menu is automatically updated if you install or upgrade the Solaris OS. 3. If another OS is installed, the /boot/grub/menu.lst need to be modified. GRUB Main Menu: It can be used to : 1. Select a boot entry. 2. modify a boot entry. 3. load an OS kernel from the command line. Editing the GRUB Main menu: 1. Highlight a boot entry in GRUB Main menu. 2. Press 'e' to display the GRUB edit menu. 3. Select a boot entry and press 'c'. Working of GRUB-Based Booting: 1. When a system is booted, GRUB loads the primary boot archive & multiboot program. The primary boot archive, called /platform/i86pc/boot_archive, is a RAM image of the file system that contains the Solaris kernel modules & data. 2. The GRUB transfers the primary boot archive and the multiboot program to the memory without any interpretations. 3. System Control is transferred to the multiboot program. In this situation, GRUB is inactive & system memory is restored. The multiboot program is now responsible for assembling core kernel modules into memory by reading the boot archive modules and passing boot-related information to the kernel. GRUB device naming conventions: (fd0), (fd1) : First diskete, second diskette (nd): Network device (hd0,0),(hd0,1): First & second fdisk partition of the first bios disk (hd0,0,a),(hd0,0,b): SOLARIS/BSD slice 0 & 1 (a & b) on the first fdisk partition on the first bios disk. 9
  • 10. Functional Component of GRUB: It has three functional components: 1. stage 1: It is installed on first sector of SOLARIS fdisk partition 2. stage 2: It is installed in a reserved areal in SOLARIS fdisk partition. It is the core image of GRUB. 3. menu.lst: It is a file located in /boot/grub directory. It is read by GRUB stage2 functional component. The GRUB Menu 1. It contains the list of all OS instances installed on the system. 2. It contains important boot directives. 3. It requires modification of the active GRUB menu.lst file for any change in its menu options. Locating the GRUB Menu: #bootadm list-menu The location for the active GRUB menus is : /boot/grub/menu.lst Edit the menu.lst file to add new OS entries & GRUB console redirection information. Edit the menu.lst file to modify system behavior. GRUB Main Menu Entries: On installing the Solaris OS, by default two GRUB menu entries are installed on the system: 1. Solaris OS entry: It is used to boot Solaris OS on a system. 2. miniroot(failsafe) archieve: Failsafe Archive is used for system recovery in case of failure of primary boot archive. It is referred as Solaris failsafe in the GRUB menu. Modifying menu.lst: When the system boots, the GRUb menu is displayed for a specific period of time. If the user do not select during this period, the system boots automatically using the default boot entry. The timeout value in the menu.lst file: 1. determines if the system will boot automatically 2. prevents the system from booting automatically if the value specified as -1. Modifying X86 System Boot Behavior 1. eeprom command: It assigsn a different value to a standard set of properties. These values are equivalent to the SPARC OpenBoot PROM NVRAM variables and are saved in /boot/solaris/bootenv.rc 2. kernel command: It is used to modify the boot behavior of a system. 3. GRUB menu.lst: Note: 1.The kernel command settings override the changes done by using the eeprom command. However, these changes are only effective until you boot the system again. 2. GRUB menu.lst is not preferred option because entries in 10
  • 11. menu.lst file can be modified during a software upgrade & changes made are lost. Verifying the kernel in use: After specifying the kernel to boot using the eeprom or kernel commands, verify the kernel in use by following command: #prtconf -v | grep /platform/i86pc/kernel GRUB Boot Archives The GRUB menu in Solaris OS uses two boot archive: 1. Primary boot archive: It shadows a root(/) file system. It contains all the kernel modules, driver.conf files & some configuration files. All these configuration files are placed in /etc directory. Before mounting the root file system the kernel reads the files from the boot archive. After the root file system is mounted, the kernel removes the boot archive from the memory. 2. failsafe boot archieve: It is self-sufficient and can boot without user intervention. It does not require any maintenance. By default, the failsafe boot archive is created during installation and stored in /boot/x86.minor-safe. Default Location of primary boot archive: /platform/i86pc/boot_archive Managing the primary boot archive: The boot archive : 1. needs to be rebuilt, whenever any file in the boot archive is modified. 2. Should be build on system reboot. 3. Can be built using bootadm command #bootadm update-archive -f -R /a Options of the bootadm command: -f: forces the boot archive to be updated -R: enables to provide an alternative root where the boot archive is located. -n: enables to check the archive content in an update-archive operation, without updating the content. The boot archive can be rebuild by booting the system using the failsafe archive. Booting a system in GRUB-Based boot environment: Booting a System to Run Level 3(Multiuser Level): To boot a system functioning at run level 0 to 3: 1. reboot the system. 2. press the Enter key when the GRUB menu appears. 3. log in as the root & verify that the system is running at run level 3 using : #who -r Booting a system to run level S (Single-User level): 1. reboot the system 2. type e at the GRUB menu prompt. 11
  • 12. 3. from the command list select the "kernel /platform/i86pc/multiboot" boot entry and type e to edit the entry. 4. add a space and -s option at the end of the "kernel /platform/i86pc/multiboot -s" to boot at run level S. 5. Press enter to return the control to the GRUB Main Menu. 6. Type b to boot the system to single user level. 7. Verify the system is running at run level S: #who -r 8. Bring the system back to muliuser state by using the Ctrl+D key combination. Booting a system interactively: 1. reboot the system 2. type e at the GRUB menu prompt. 3. from the command list select the "kernel /platform/i86pc/multiboot" boot entry and type e to edit the entry. 4. add a space and -a option at the end of the "kernel /platform/i86pc/multiboot -a" . 5. Press enter to return the control to the GRUB Main Menu. 6. Type b to boot the system interactively. Stopping an X86 system: 1. init 0 2. init 6 3. Use reset button or power button. Booting the failsafe archive for recovery purpose: 1. reboot the system. 2. Press space bar while while GRUB menu is displayed. 3. Select Solaris failsafe entry and press b. 4. Type y to automatically update an out-of-date boot archive. 5. Select the OS instance on which the read write mount can happen. 6. Type y to mount the selected OS instance on /a. 7. Update the primary archive using following command: #bootadm update-archive -f -R /a 8. Change directory to root(/): #cd / 9. Reboot the system. Interrupting an unresponsive system 1. Kill the offending process. 2. Try rebooting system gracefully. 3. Reboot the system by holding down the ctrl+alt+del key sequence on the keyboard. 4. Press the reset button. 5. Power off the system & then power it back on. 12
  • 13. NIS (Network Information Systems) NIS: Centralizing the users, passwords, hosts & networks. Issue 1: How to update the newly added users (or mapping information) A: cd var/yp/usr/ccs/bin/make Issue 2: When NIS user unable to login? A: simply I check out the user, pwds Issue 3: disable the NIS services? A: simply start and stop the services which are related to NIS (or) Simply update the maps. NOTE: In my organization LDAP configuration used so very less to get the problems - NIS information stored in ‘nis maps’ - All maps located in ‘/var/yp/domain name’ file - Configure the maps on server #ypint -m File system checking #fsck : Due to improper shutdown of the systems some times the file system gets corrupted and to check the corrupted file system, we can use utility called "fsck" (file system checking). • It always in raw format (rdsk) • It is always run on unmounted file system. • It refers "/etc/vfstab" file to check in what way the file system check has to be done. i.e. either sequential or parallely. Options of "fsck": 1. # fsck -m: This is to check the inconsistency of a file system. 2. # fsck -y: This option used to check and repair the inconsistency of file system. Note: Before running "fsck" ensure that file system is permanent (i.e. in vfstab), the entry should be in "/etc/vfstab". File system configuration: # df -h # umountall # df -h # vi /etc/vfstab To check the inconsistency of the file system: # fsck -m /dev/rdsk/c0t0d0s4 // yes, it is good, ok To corrupt the file system: # dd if=/dev/zero of=/dev/rdsk/c0t0d0s4 bs=512 count=32 # fsck -m /dev/rdsk/c0t0d0s4 //now its corrupted 13
  • 14. To repair file system: # fsck -F ufs -y -o b=32 /dev/rdsk/c0t0d0s4 File checking is done in two way 1. Sequentially 2. Parellely 6 phases: 1. phase 1= check blocks & sizes 2. phase 2=check path names 3. phase 3a=check connectivity 4. phase 3b=verify shadows/ACLs 5. phase 4=check reference counts 6. phase 5=check cylinder groups http://mysolariss.blogspot.in/ UFS Architecture UFS (Unix File System) Architecture: 1. Volume Table of Content (VTOC): • It always resides in the sector '0'. • Its capacity is 512 bytes • It contains the information about i. Disk Label ii. No. of assigned slices iii. Amount of space allocated for slice 2. Primary Boot Block (PRB): This boot block contains the boot strap program which is nothing but a bootable file and It always resides to a sector 1 to 15. 3. Secondary Boot Blocks (SBB): As primary boot block contains the important data, so it's backup has to be maintained. Hence secondary boot block is used, secondary boot block contains the entire information of PBB. 4. INODE: If you want to create an file we should definitely have an "INODE" number, where INODE block limit of the type of file, the size of file when it is created, when it was modified and the file permissions and it resides from sector 32. 14