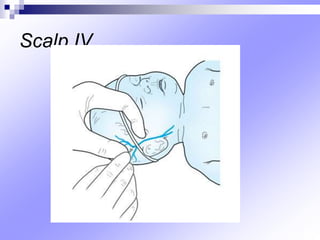
Hold the infant's head still.
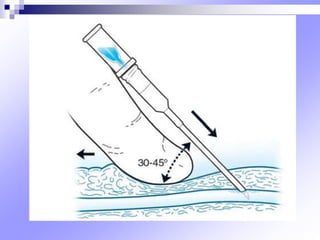
Nurse: Cleanse the scalp area with antiseptic. Stabilize the scalp vein with non-dominant hand. Insert the catheter bevel up at a 30 degree angle. Watch for flashback of blood in the catheter hub. Advance the catheter fully into the vein. Remove the stylet and attach the IV tubing. Secure the site with transparent dressing.


![[CPCR] CARDIOPULMONARY CEREBREAL RESUSCITATION PROCEDURES](https://cdn.slidesharecdn.com/ss_thumbnails/cardiopulmonaryresuscitation-250329164131-a99bc90d-thumbnail.jpg?width=640&height=640&fit=bounds)


