Downloaded 56 times


![45
4. The system will proceed back to the Backup screen.
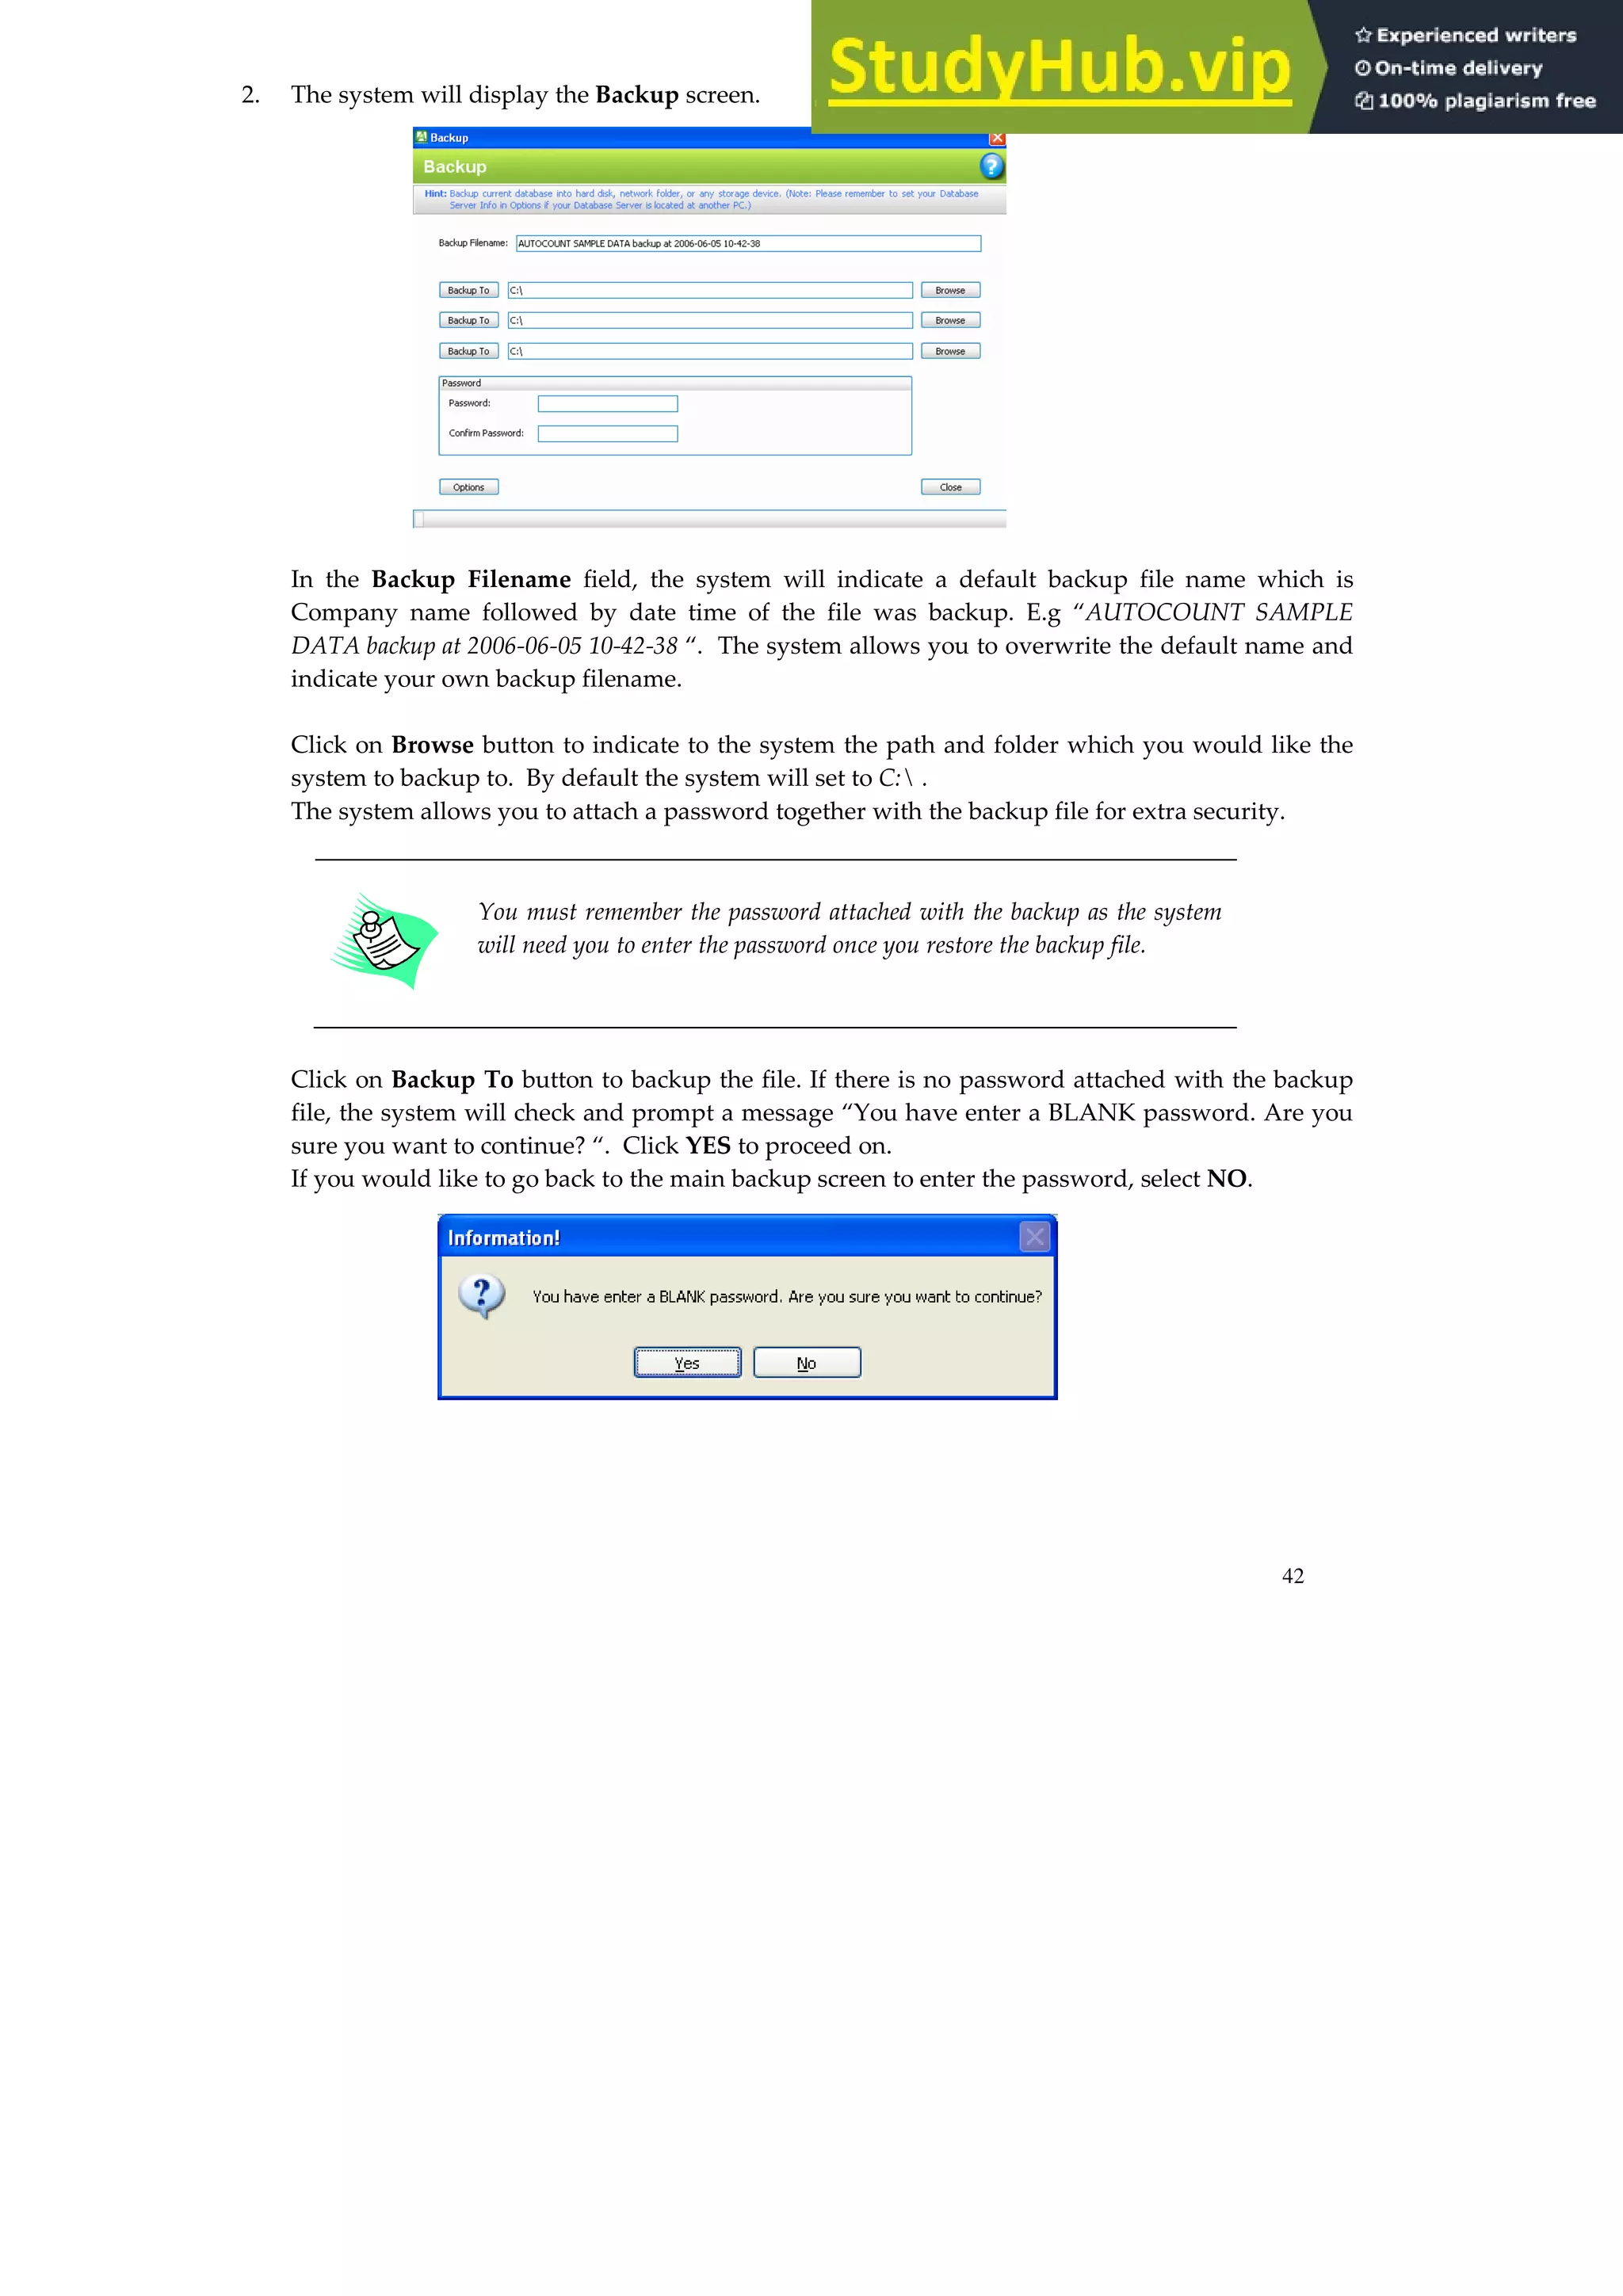
In the Backup Filename field, the system will indicate a default backup file name which is
Company name followed by date time of the file was backup. E.g “AutoCount 2006 Sample [2006]
backup at 2005-10-06 11.30.31“. The system allows you to overwrite the default name and indicate
your own backup filename.
Click on Browse button to indicate to the system the path and folder which you would like the
system to backup to. By default the system will set to C: .
The system allows you to attach a password together with the backup file for extra security.
You MUST remember the password attached with the backup as the system
will need you to enter the password once you restore the backup file. This
applies ONLY if you have attached a password during backup.
Click on Backup To button to backup the file. If there is no password attached with the backup
file, the system will check and prompt a message “You have enter a BLANK password. Are you sure
you want to continue? “Click YES to proceed on.
If you would like to go back to the main backup screen to enter the password, select NO.](https://image.slidesharecdn.com/autocountaccountingusermanual-230806181847-5b382df2/75/AutoCount-Accounting-User-Manual-57-2048.jpg)

![47
HOW TO RESTORE IN AUTOCOUNT Accounting?
1. Select Tools | Restore.
2. The system will display the Restore screen as shown below:-
Click on the Browse button at the Restore from field to indicate the location of the backup file. E.g,
“C:AUTOCOUNT 2006 SAMPLE DATA [2006] backup at 2005-10-06 11-32-31_Zip.A06”](https://image.slidesharecdn.com/autocountaccountingusermanual-230806181847-5b382df2/75/AutoCount-Accounting-User-Manual-59-2048.jpg)


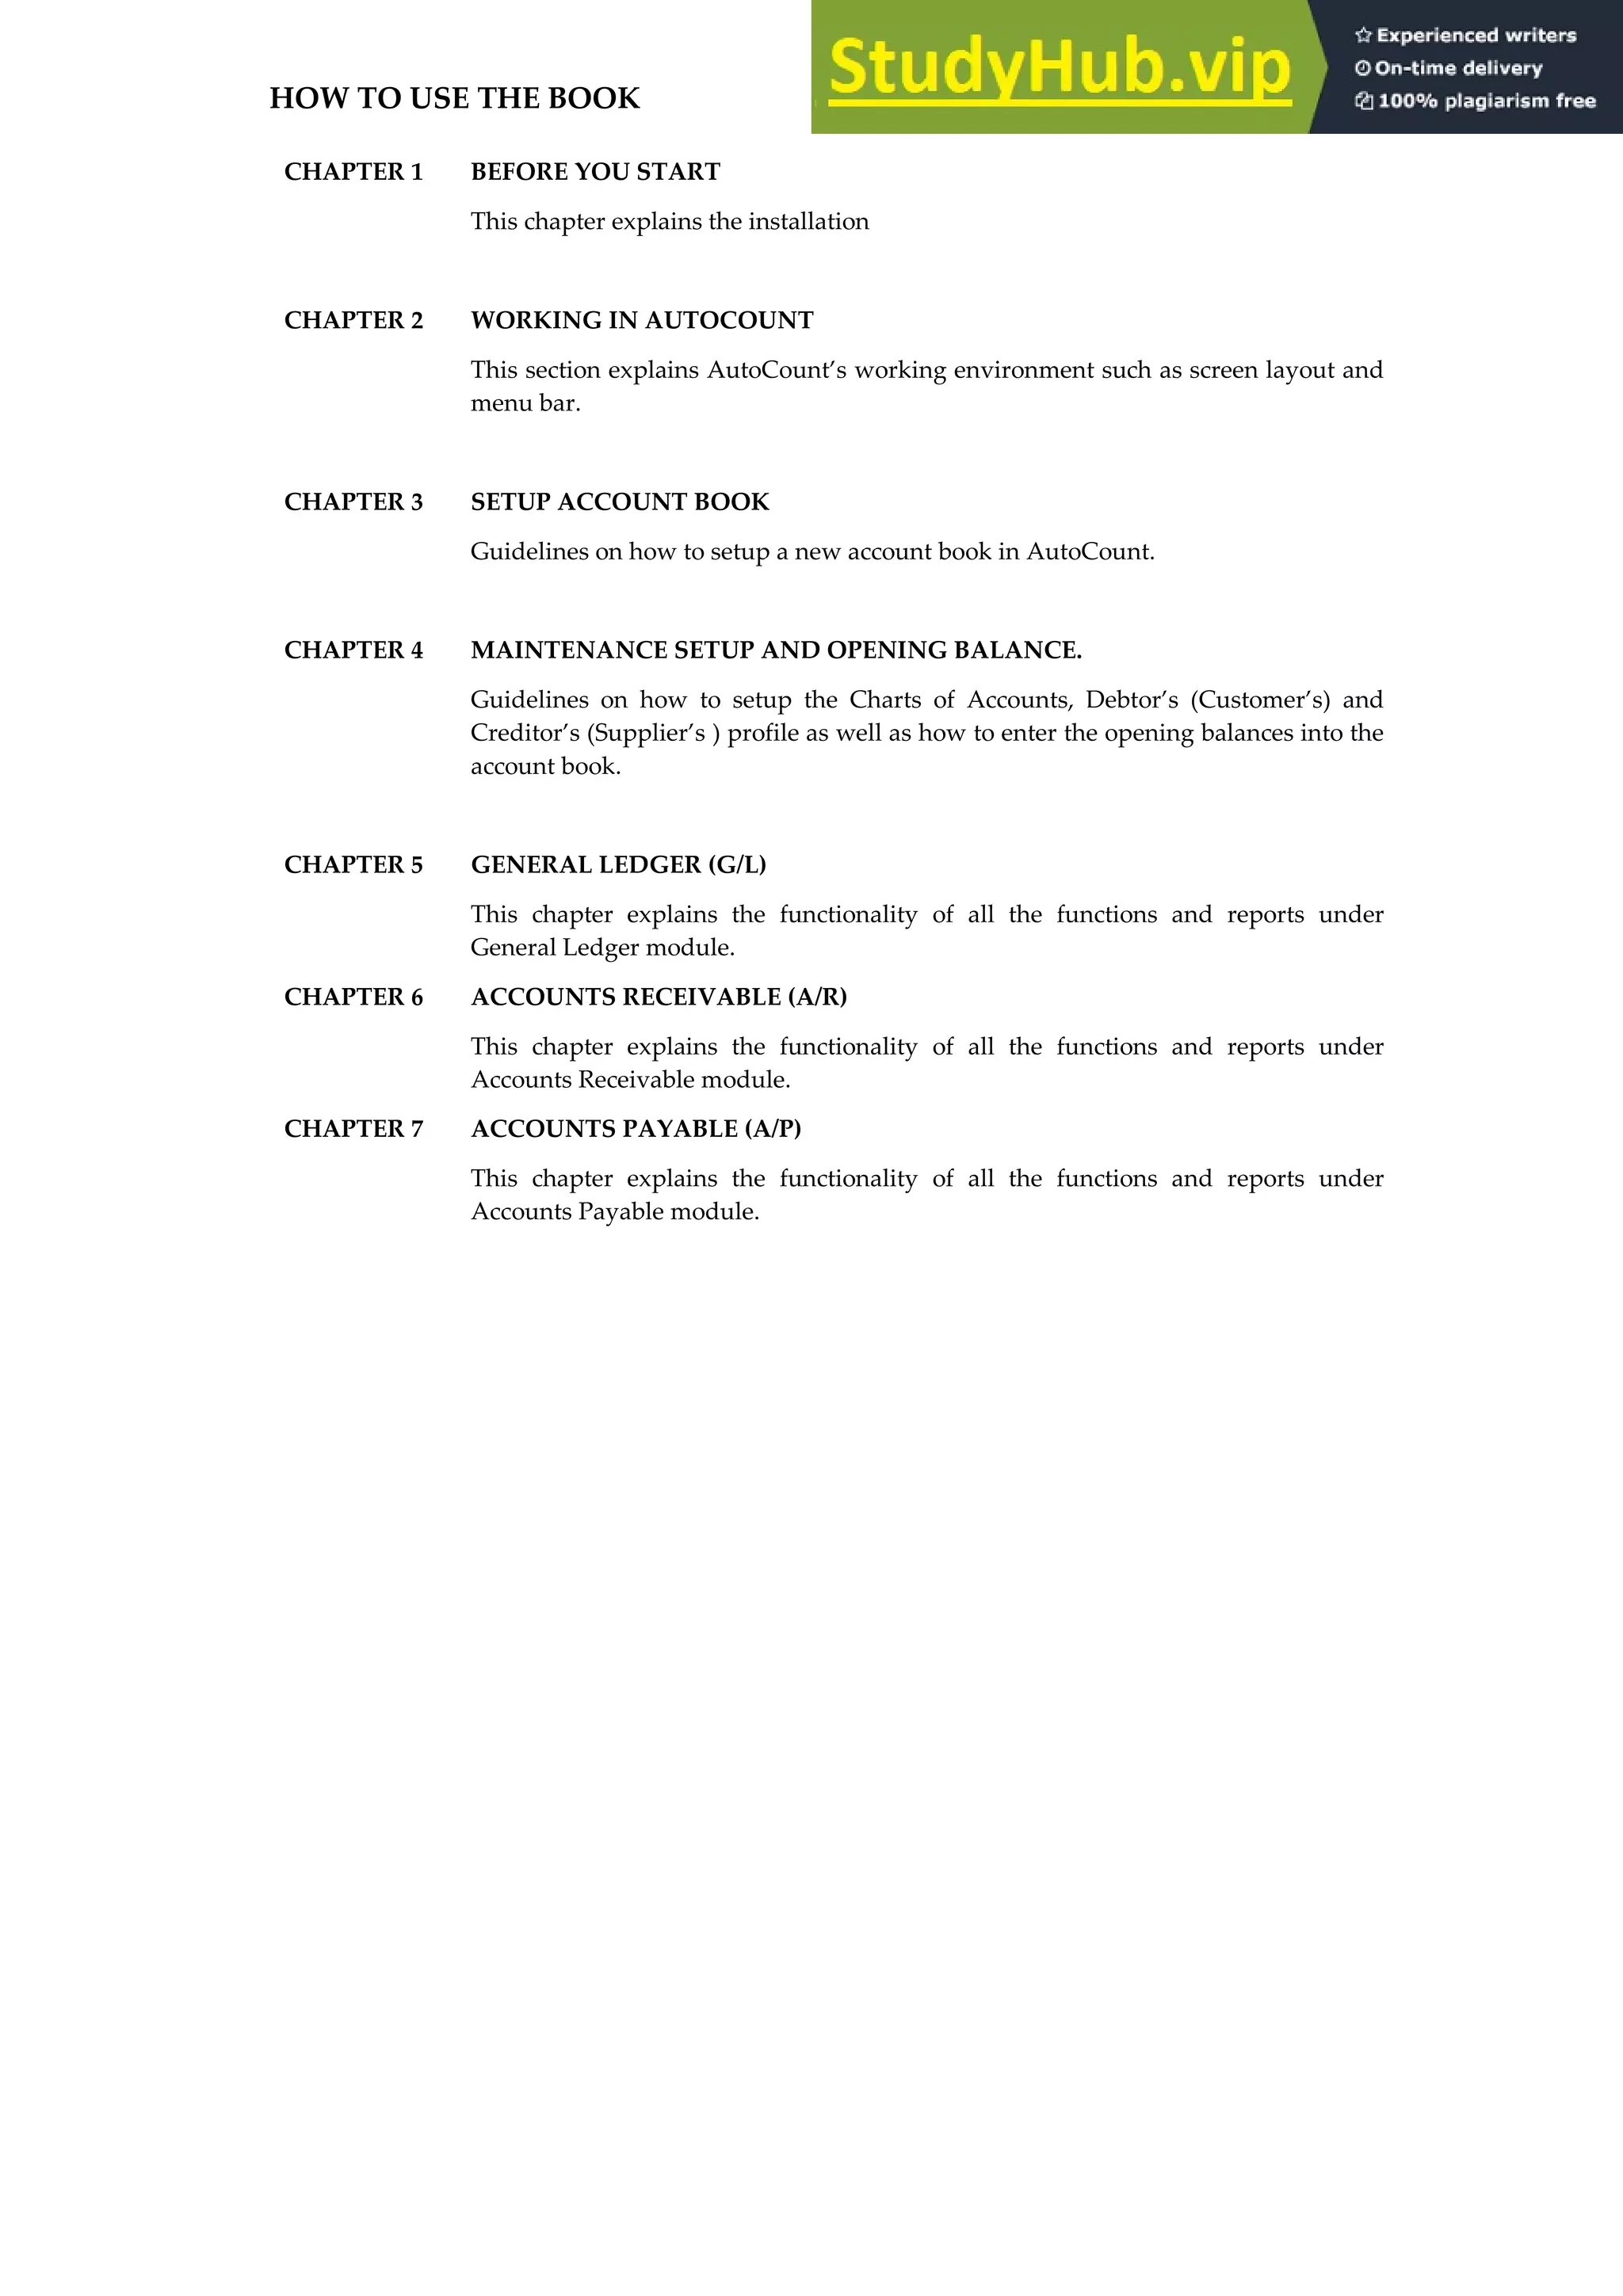
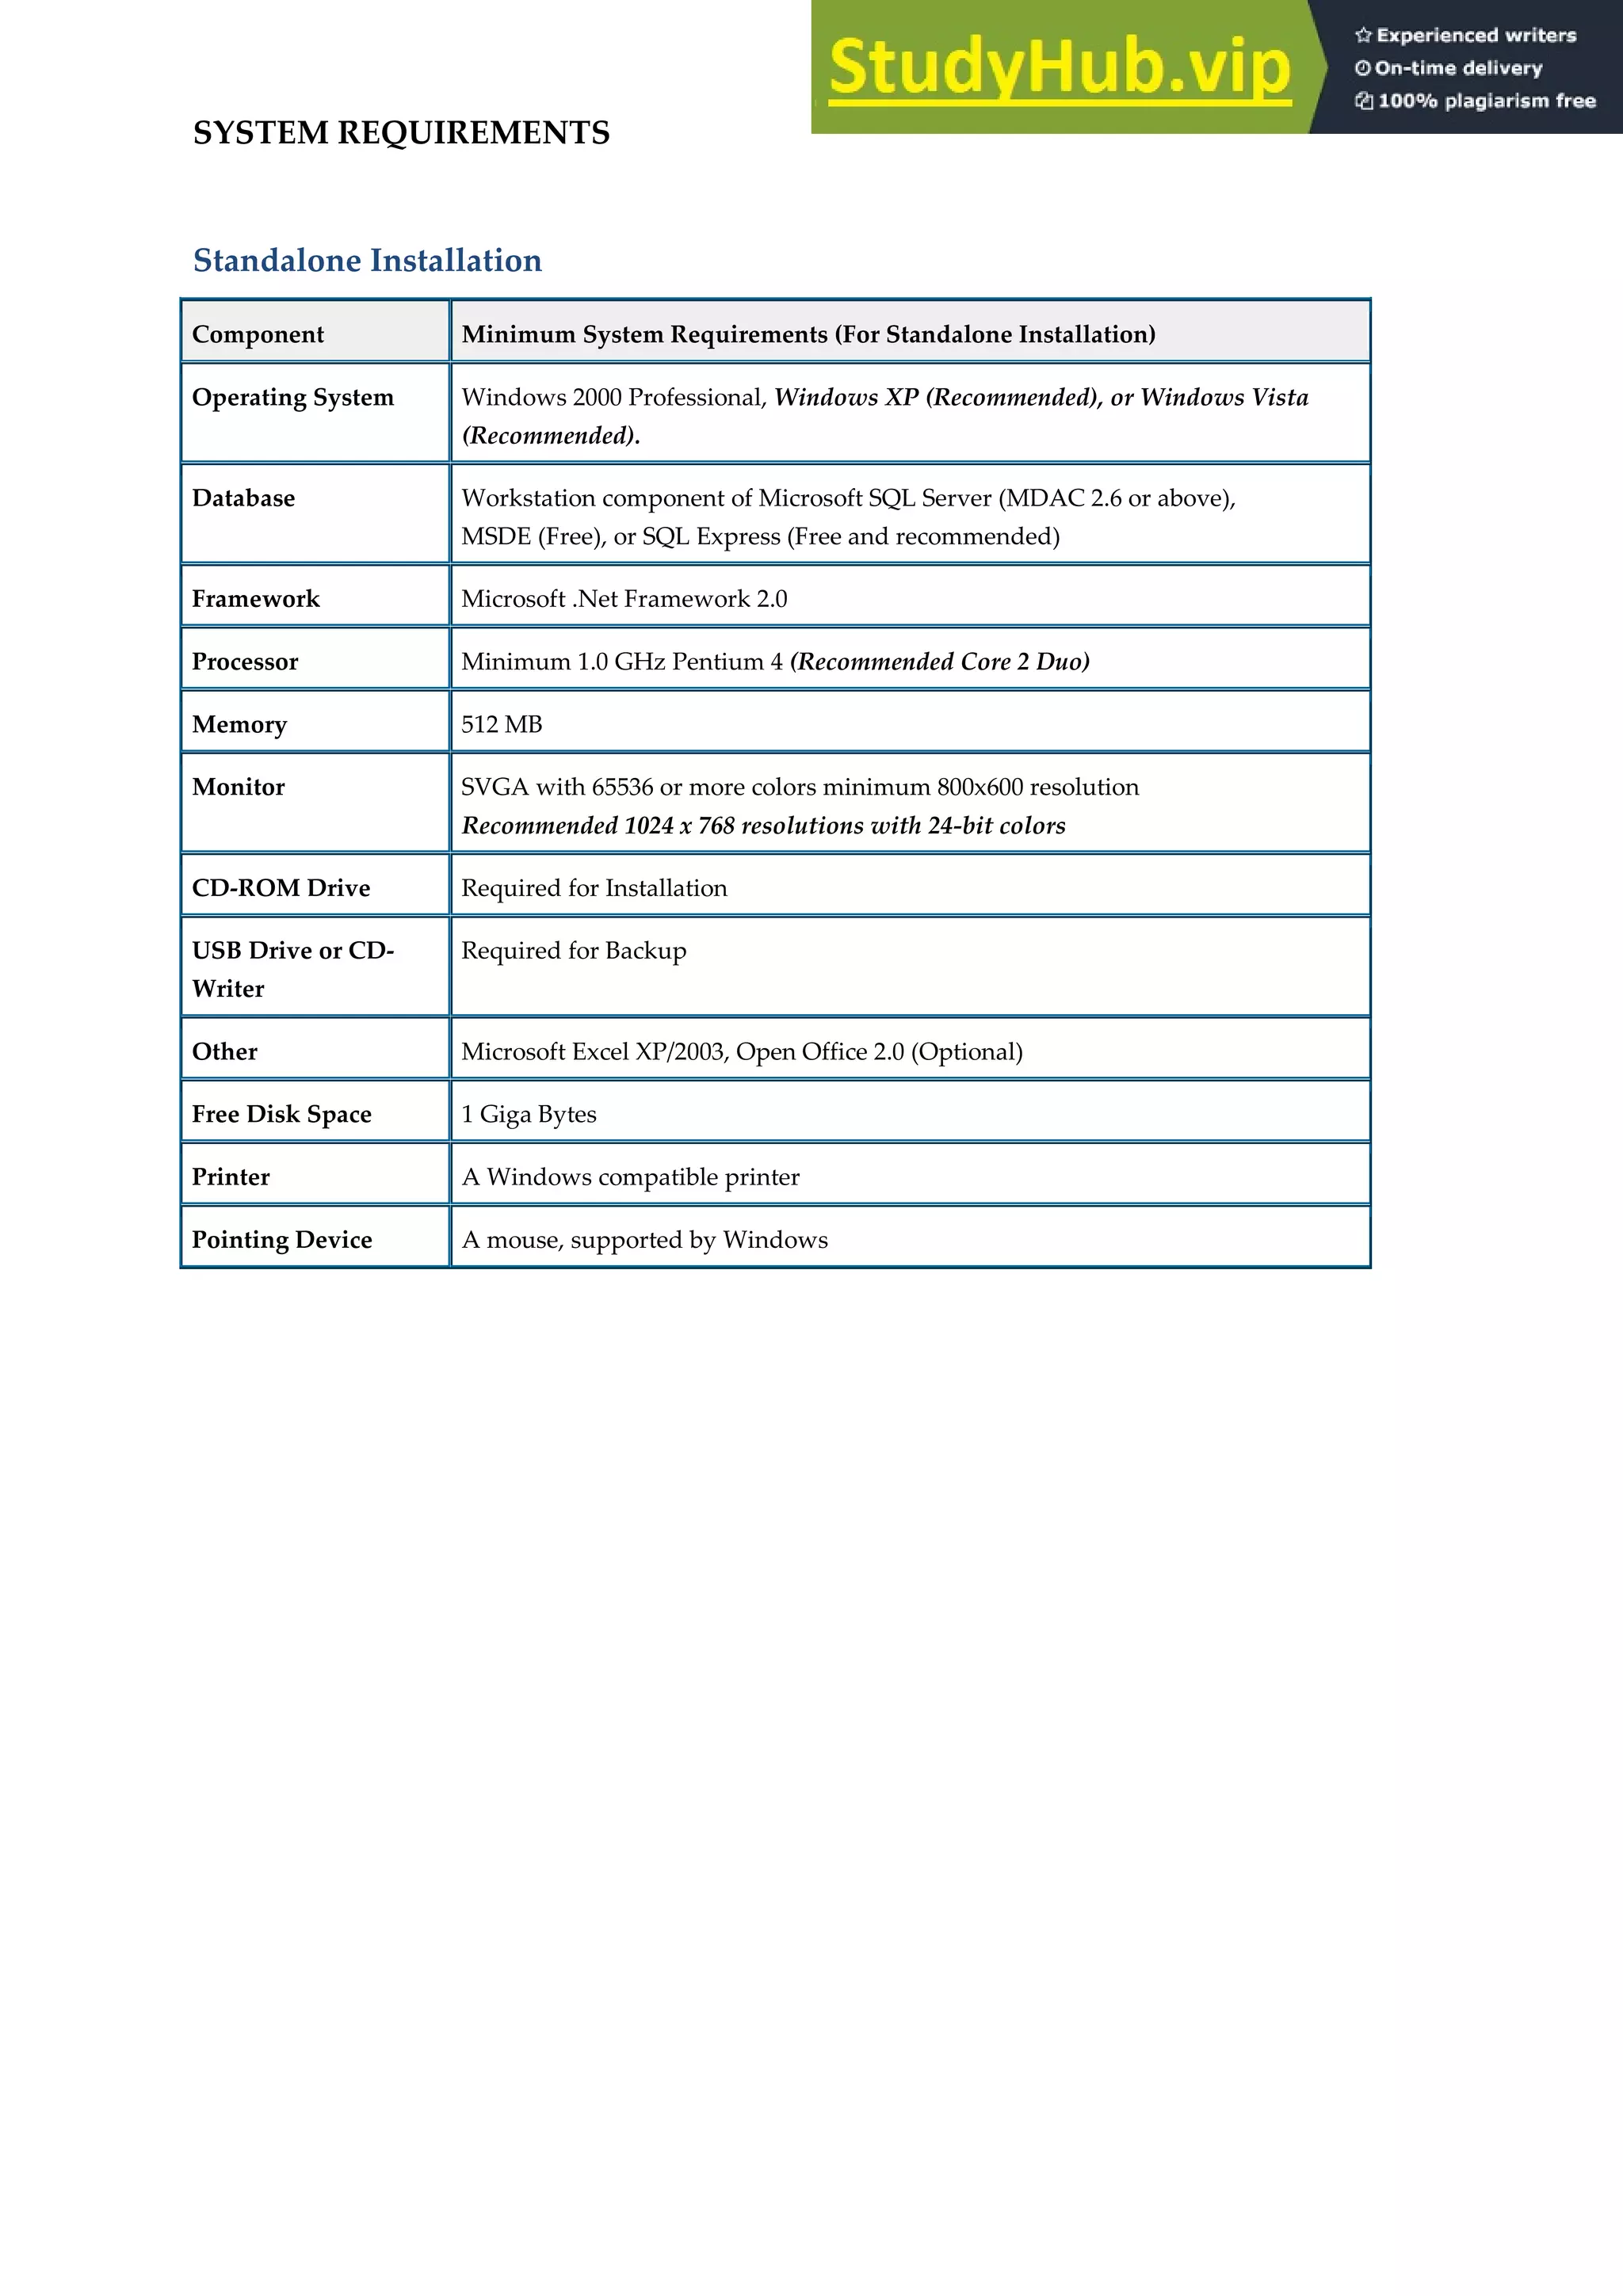
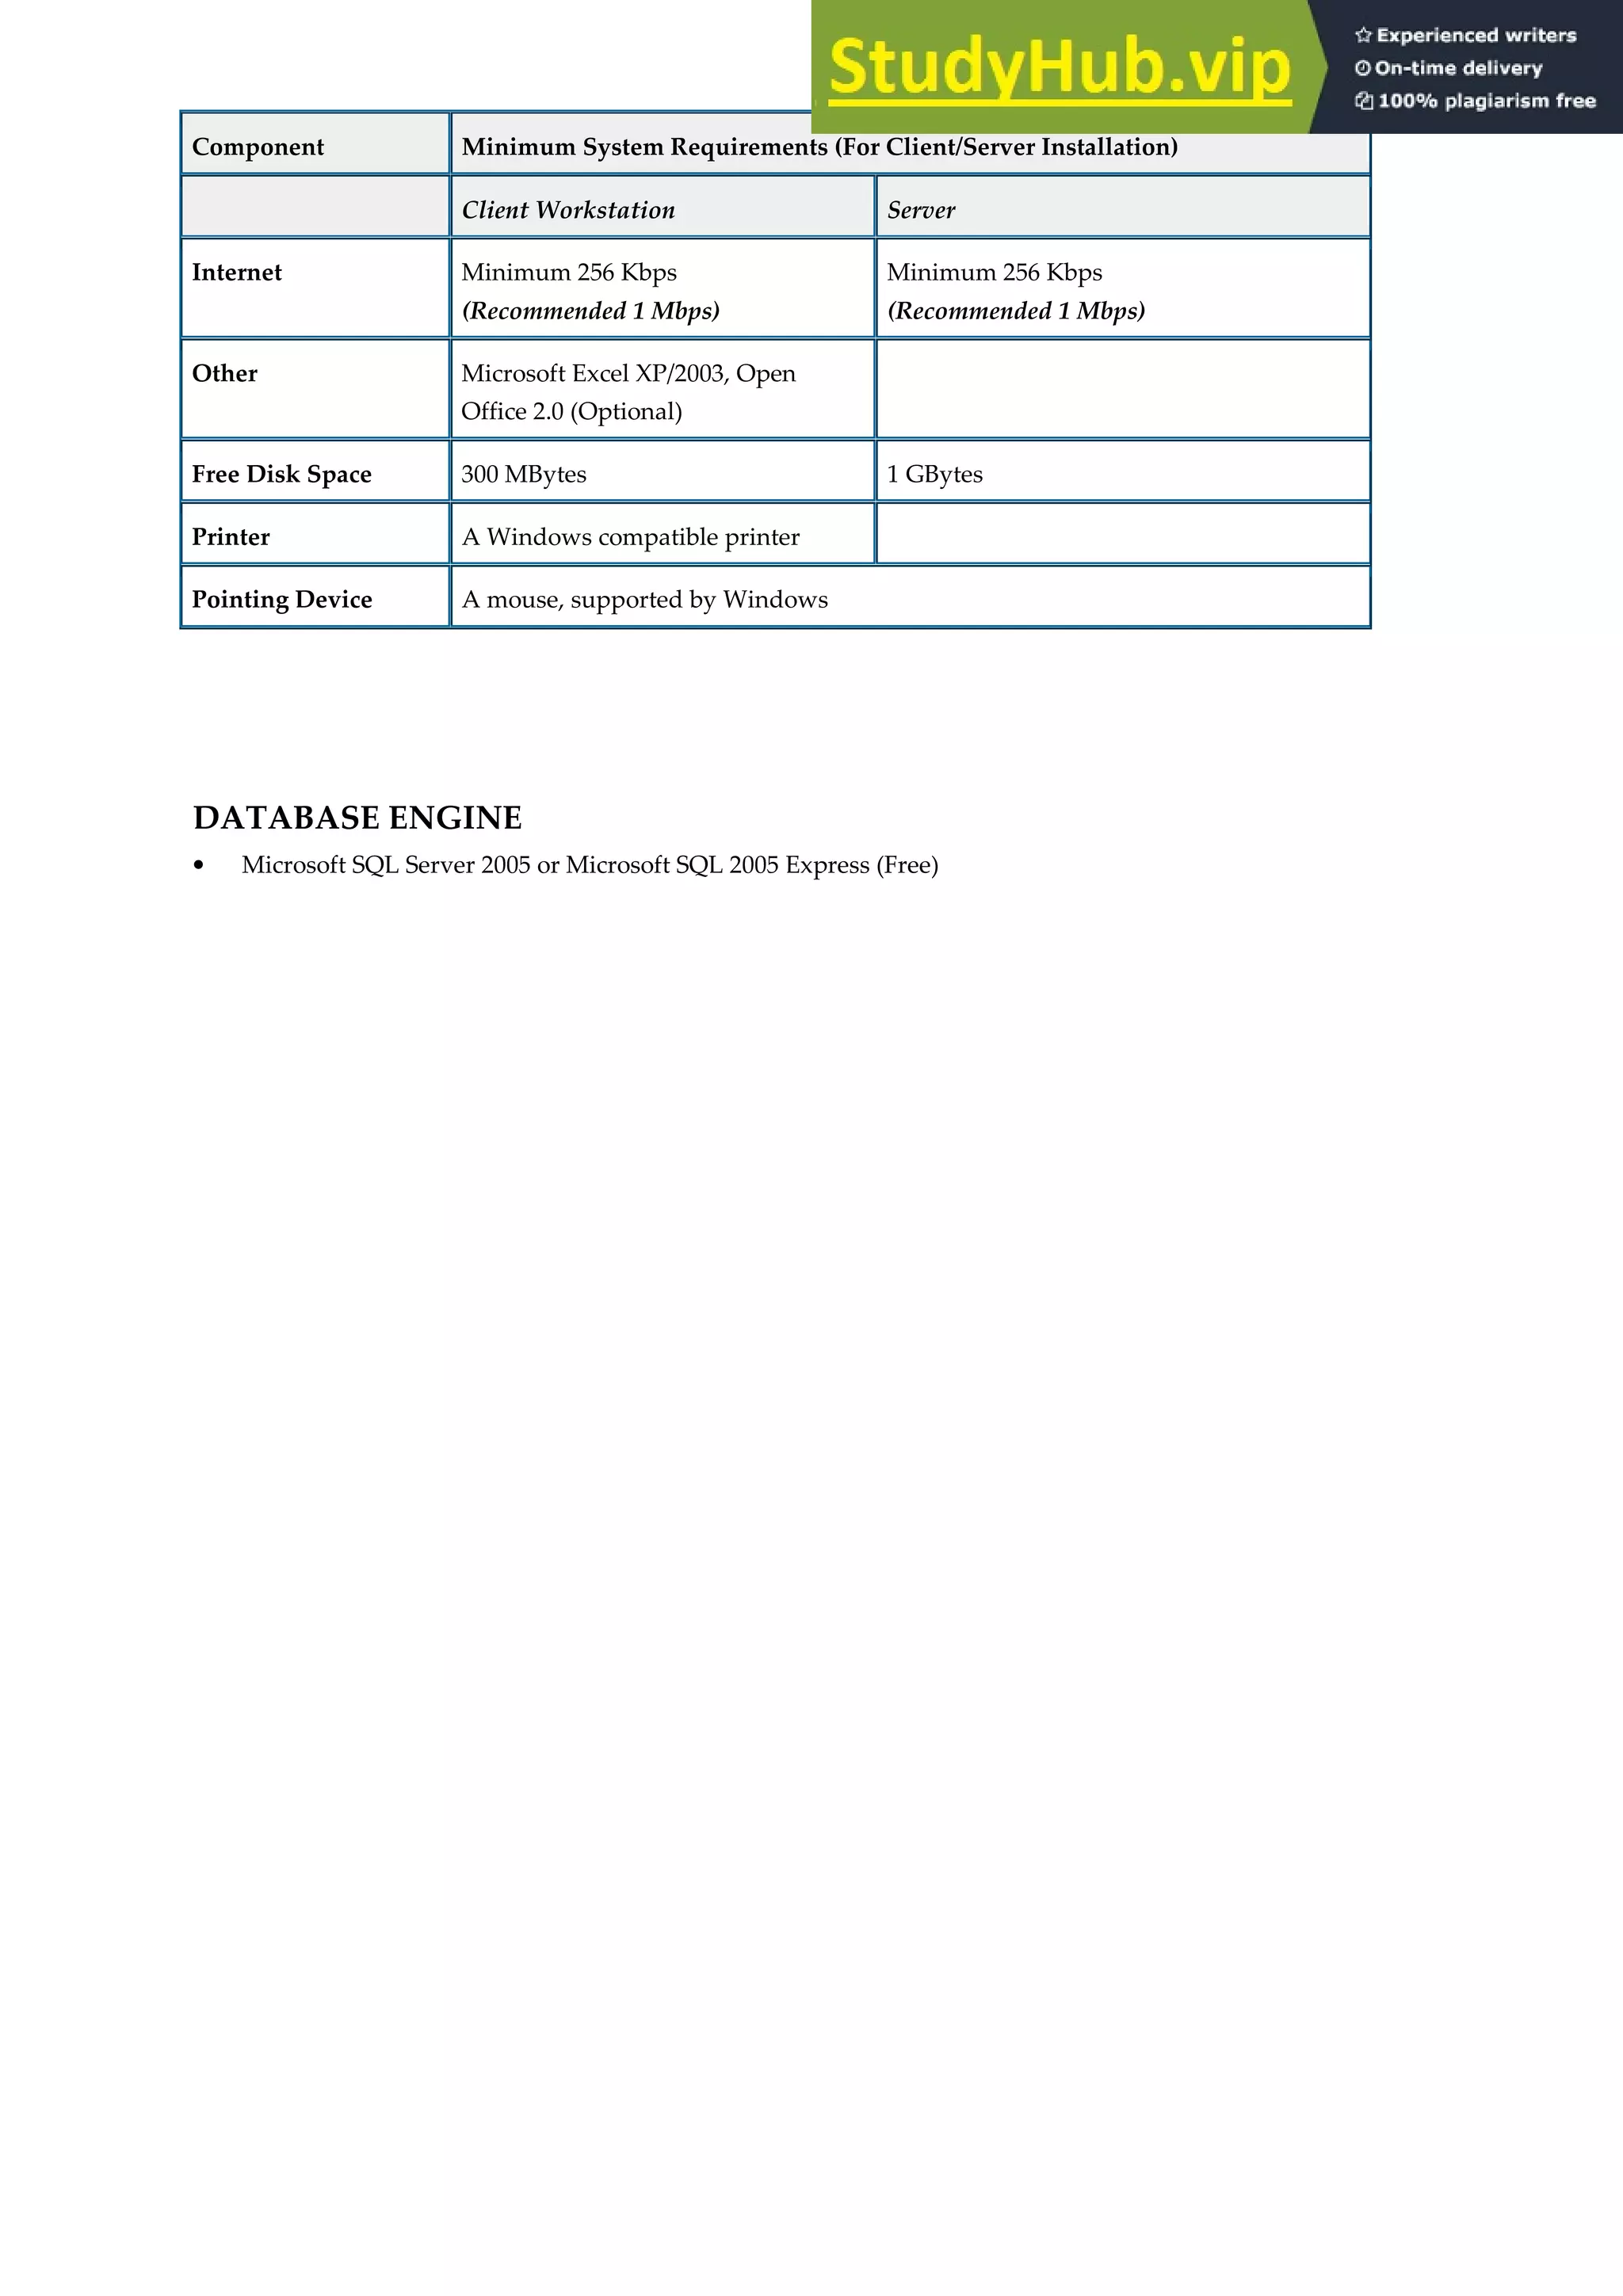
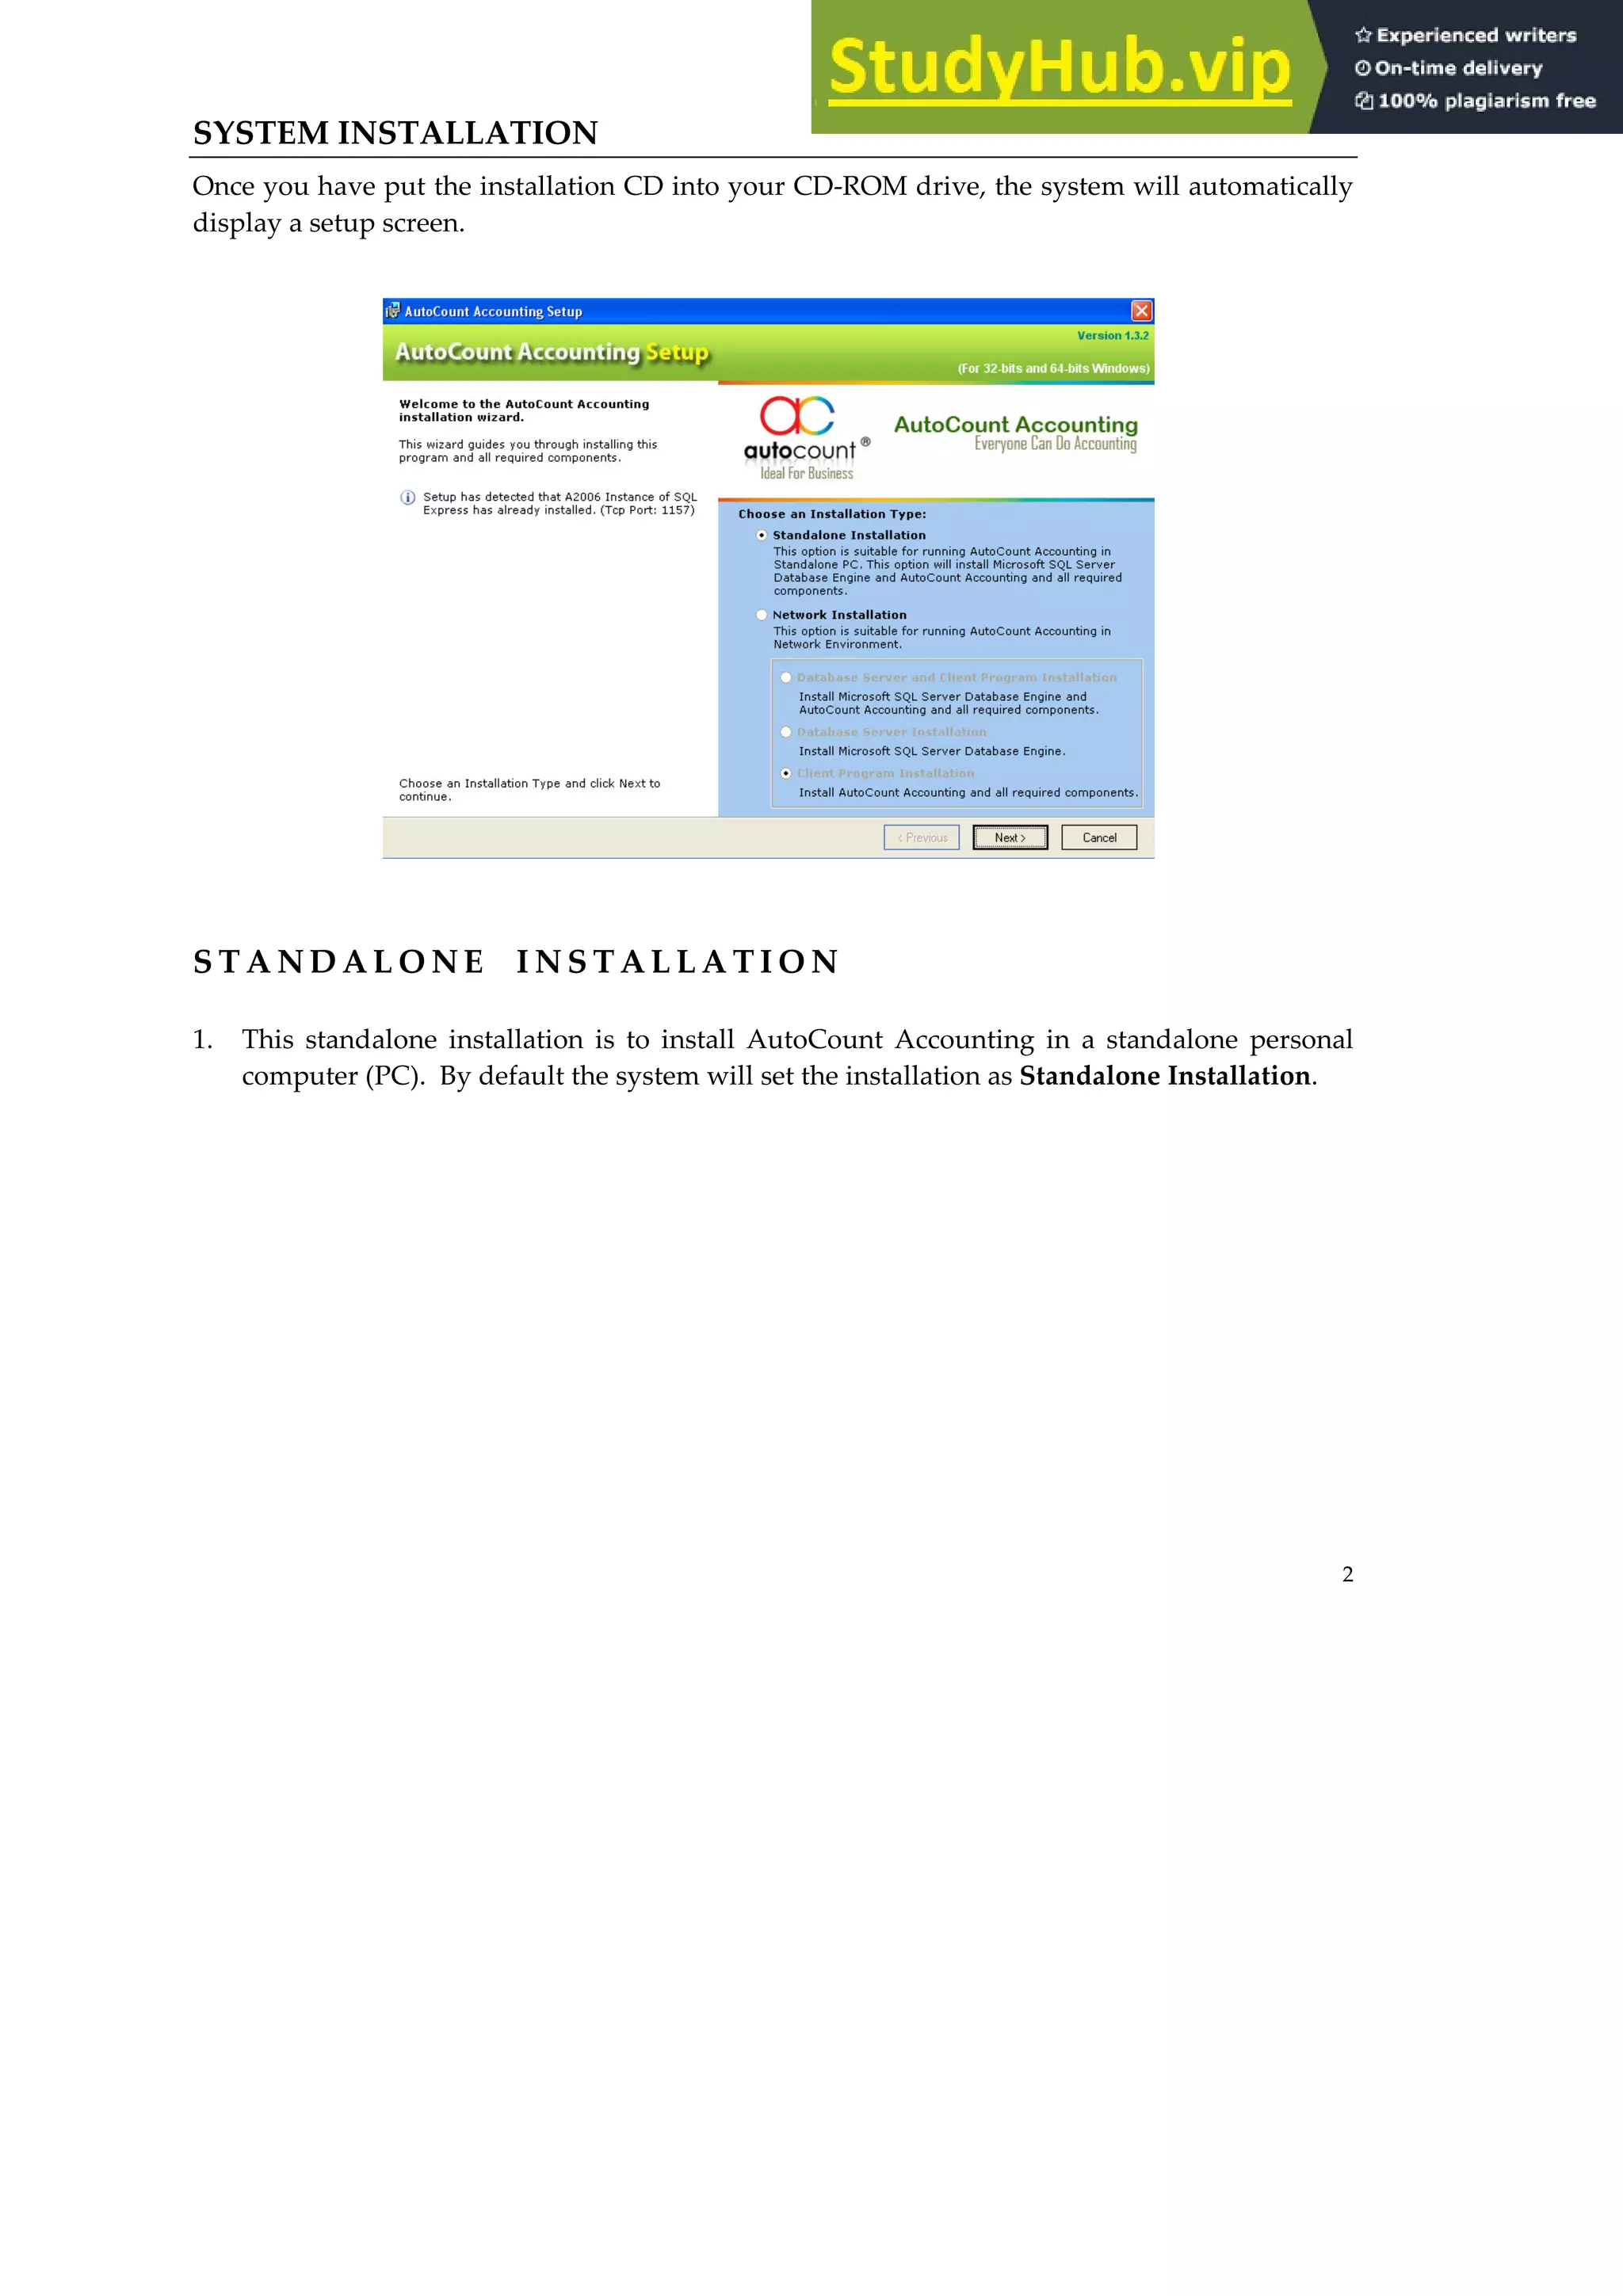
This document provides an overview of how to install AutoCount Accounting software. It outlines the system requirements and covers both standalone and network installations. For standalone installation, it provides step-by-step instructions on running the setup wizard and completing the installation process. For network installation, it describes installing the database server, client programs, and running the client installation. It also provides guidance on starting the application for the first time and managing account books.