Download to read offline


![CS193P Assignment 2B Walkthrough
Winter 2010 Cannistraro/Shaffer
Hints for updating the interface
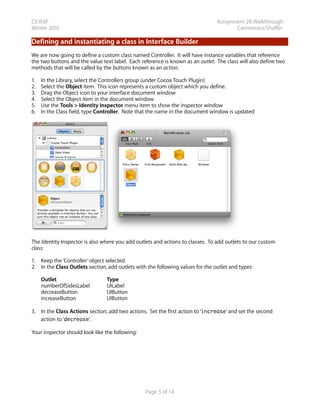
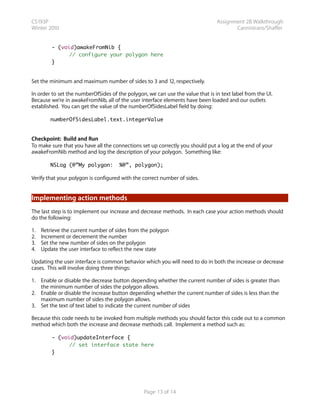
• You can set the enabled property of a UIButton by setting the “enabled” property. For example,
someButton.enabled = NO;
would disable the button.
• You can set the text of a UILabel by setting the “text” property. For example,
someLabel.text = [NSString stringWithFormat:@”%d”, someNumber];
would set the text of the label to a string which displays a number.
• You may want to use the same method for updating the interface when you set up the initial state, for
example from awakeFromNib.
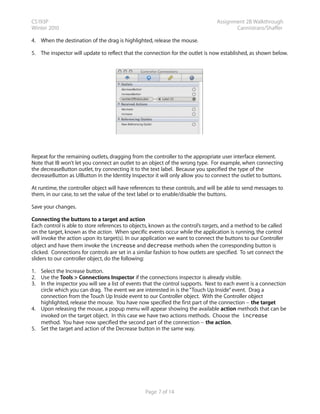
Build and Test
Once you have implemented the increase and decrease methods, build in Xcode, and run the
application. Verify that you can tap the increase and decrease buttons and that the text label updates
correctly. Also verify that you cannot decrease the number of sides below 3 nor above 12.
Building for an iPhone or iPod touch
Now that we have successfully built our application in the iPhone Simulator, we can try building it on a real
iPhone or iPod touch. If you have a device that is set up for development you should be able to simply set
the Active SDK to Device - iPhone OS 2.0 and then build and run. Xcode will build the application for the
device, install it and launch it. If this does not work for you, please let us know and we will help work out any
technical issues.
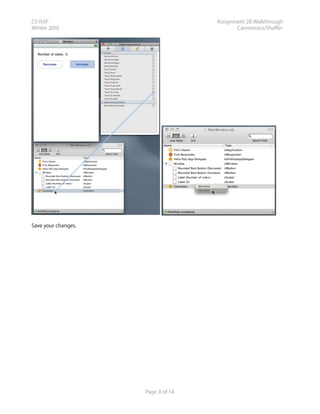
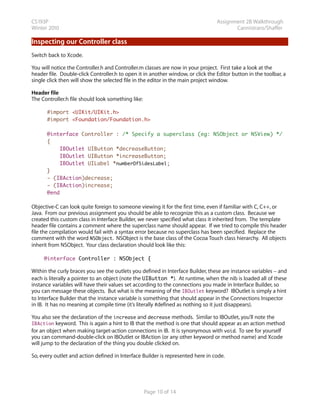
Reviewing Our Design
Congratulations on completing your first “real” iPhone application! Furthermore, you’ve completed a cleanly
designed Model-View-Controller application. To give an overview of the “architecture” of our application and
how the vocabulary we’ve seen so far fits into the picture, we could use a diagram like this:
Page 14 of 14](https://image.slidesharecdn.com/assignment2b-walkthrough-100204180822-phpapp02/85/Assignment2-B-Walkthrough-14-320.jpg)

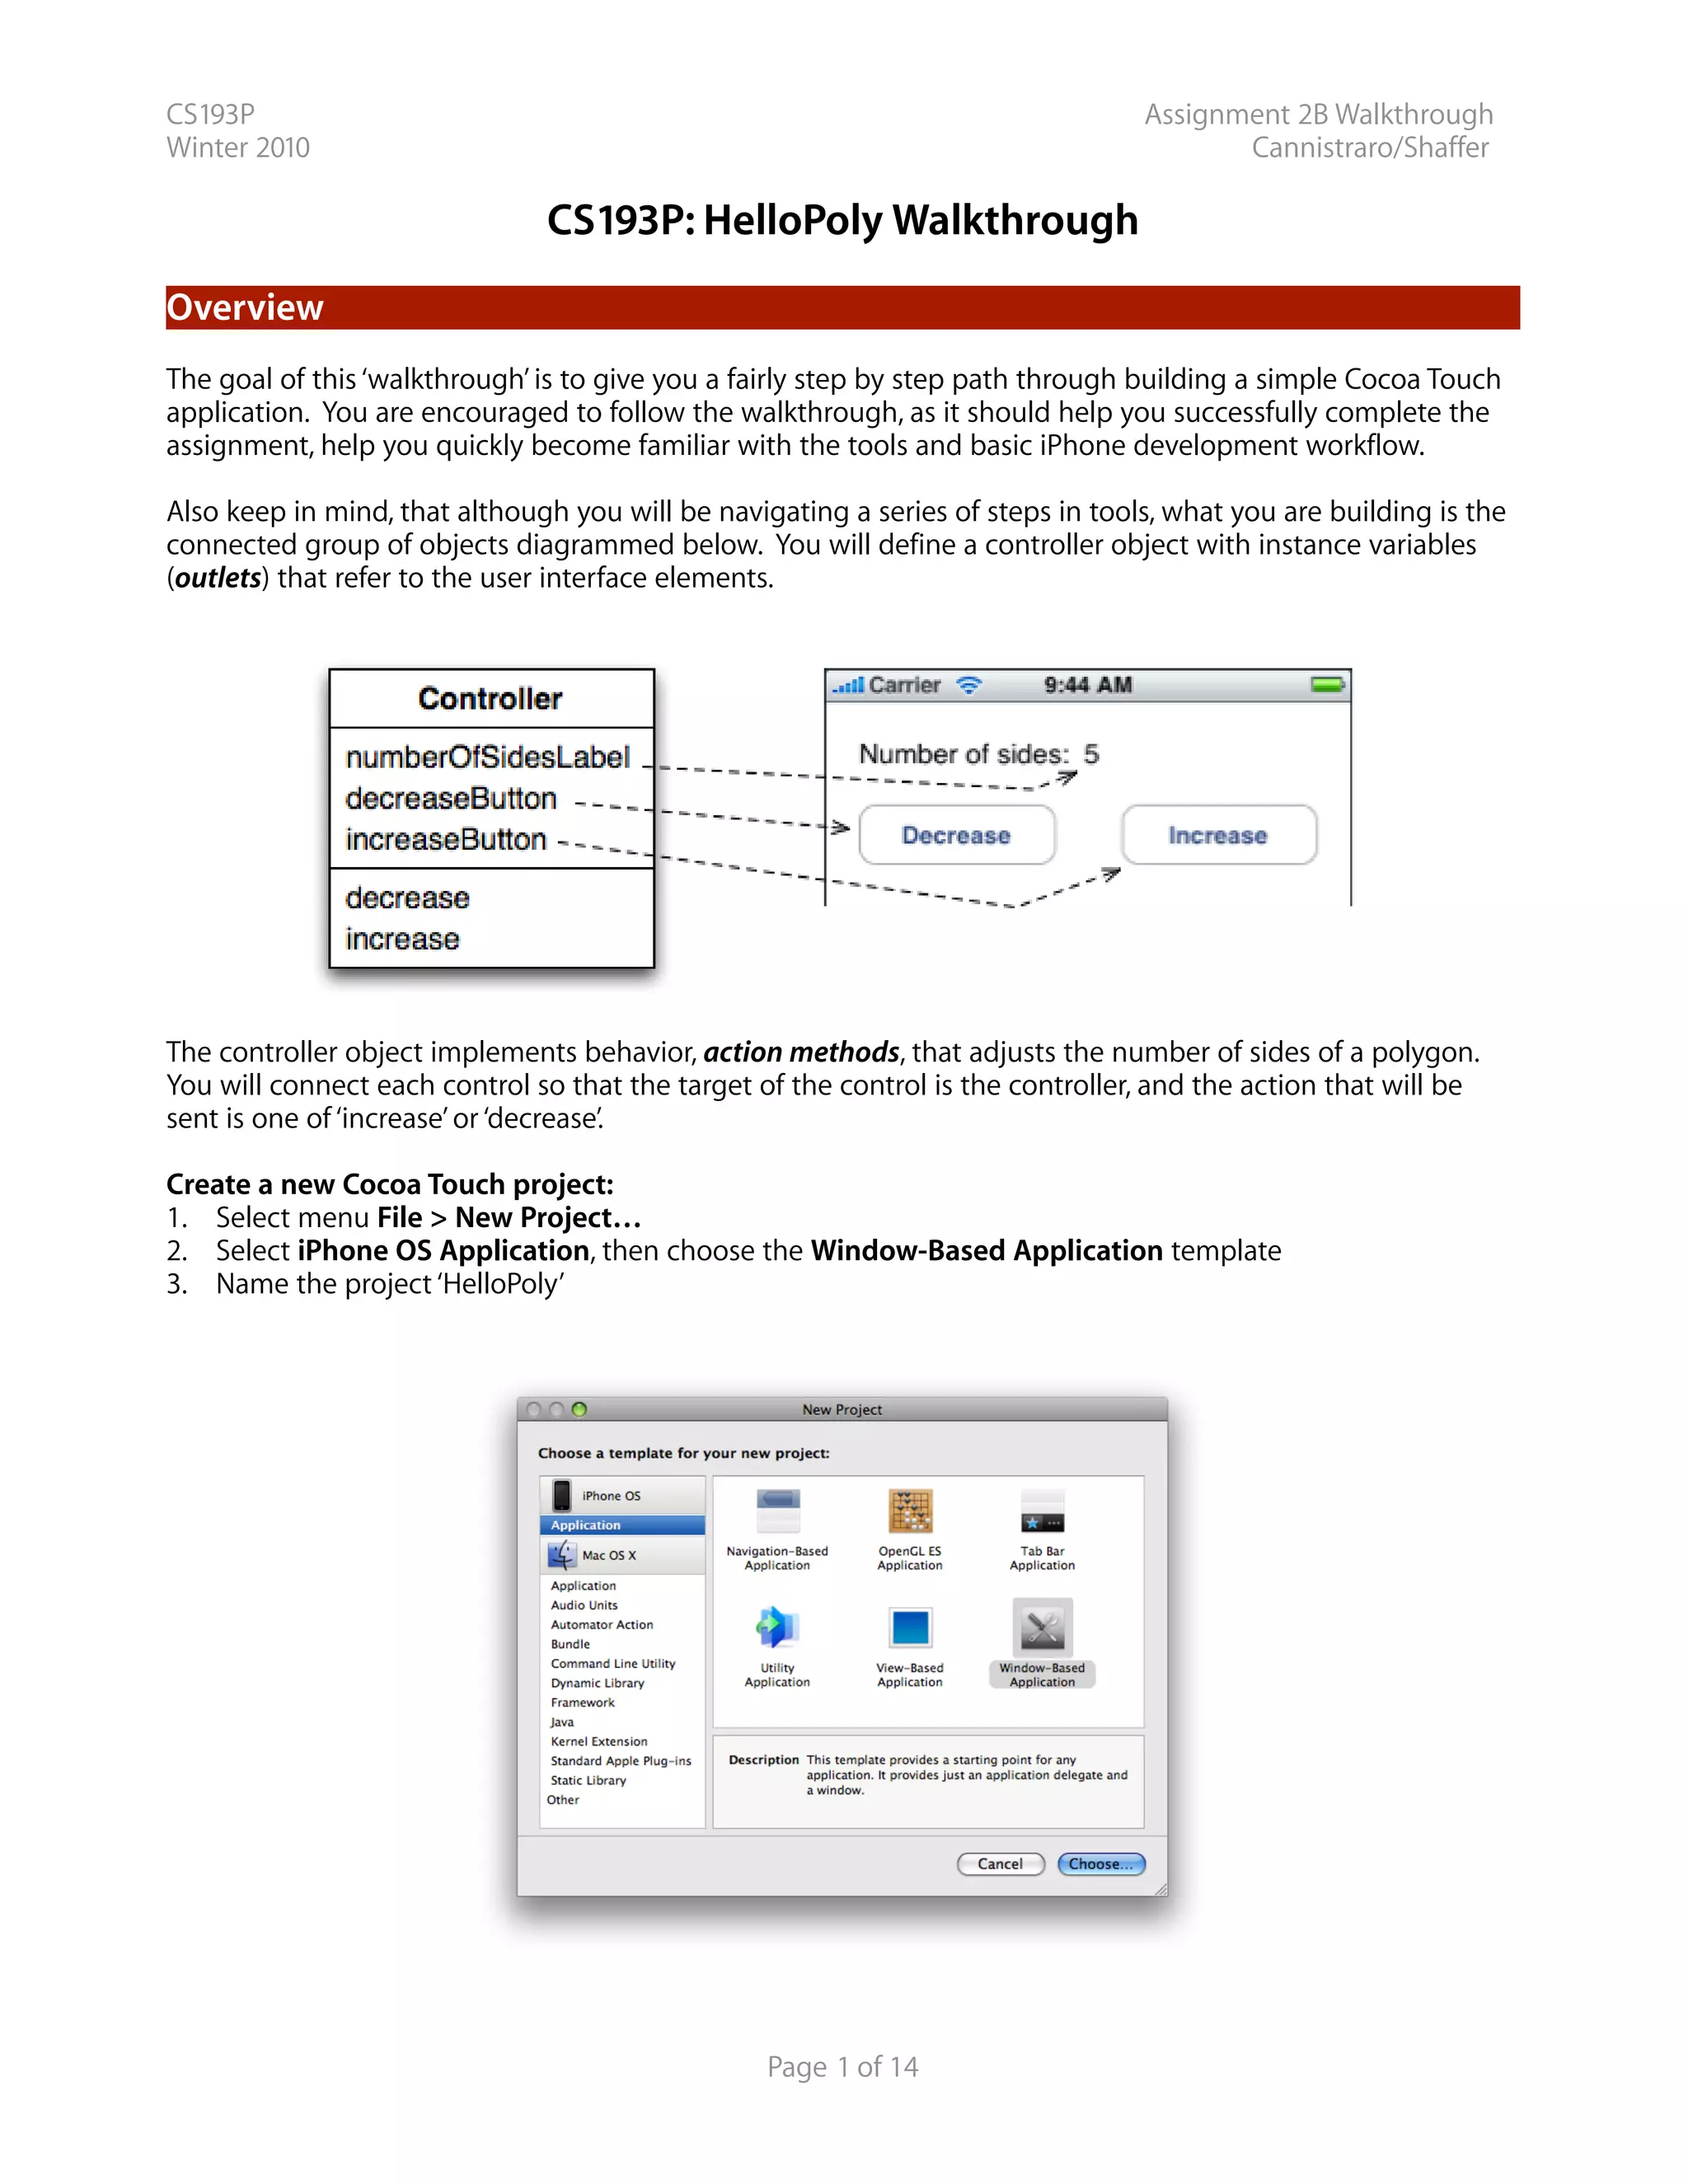
The document provides a step-by-step walkthrough for building a simple iOS application called HelloPoly using Xcode and Interface Builder. It describes laying out the user interface, defining a controller class, connecting the interface to the controller, and generating source files for the controller class. Key steps include adding buttons and labels to the interface, setting up outlets and actions for the controller class, and writing implementation code for the action methods to log messages when the buttons are pressed. The goal is to demonstrate basic iPhone application development workflow and setting up the standard MVC architecture pattern with model, view, and controller classes.


![iPhone Programming in 30 minutes (?) [FTS]](https://cdn.slidesharecdn.com/ss_thumbnails/iphoneprogramming-110802054327-phpapp01-thumbnail.jpg?width=640&height=640&fit=bounds)