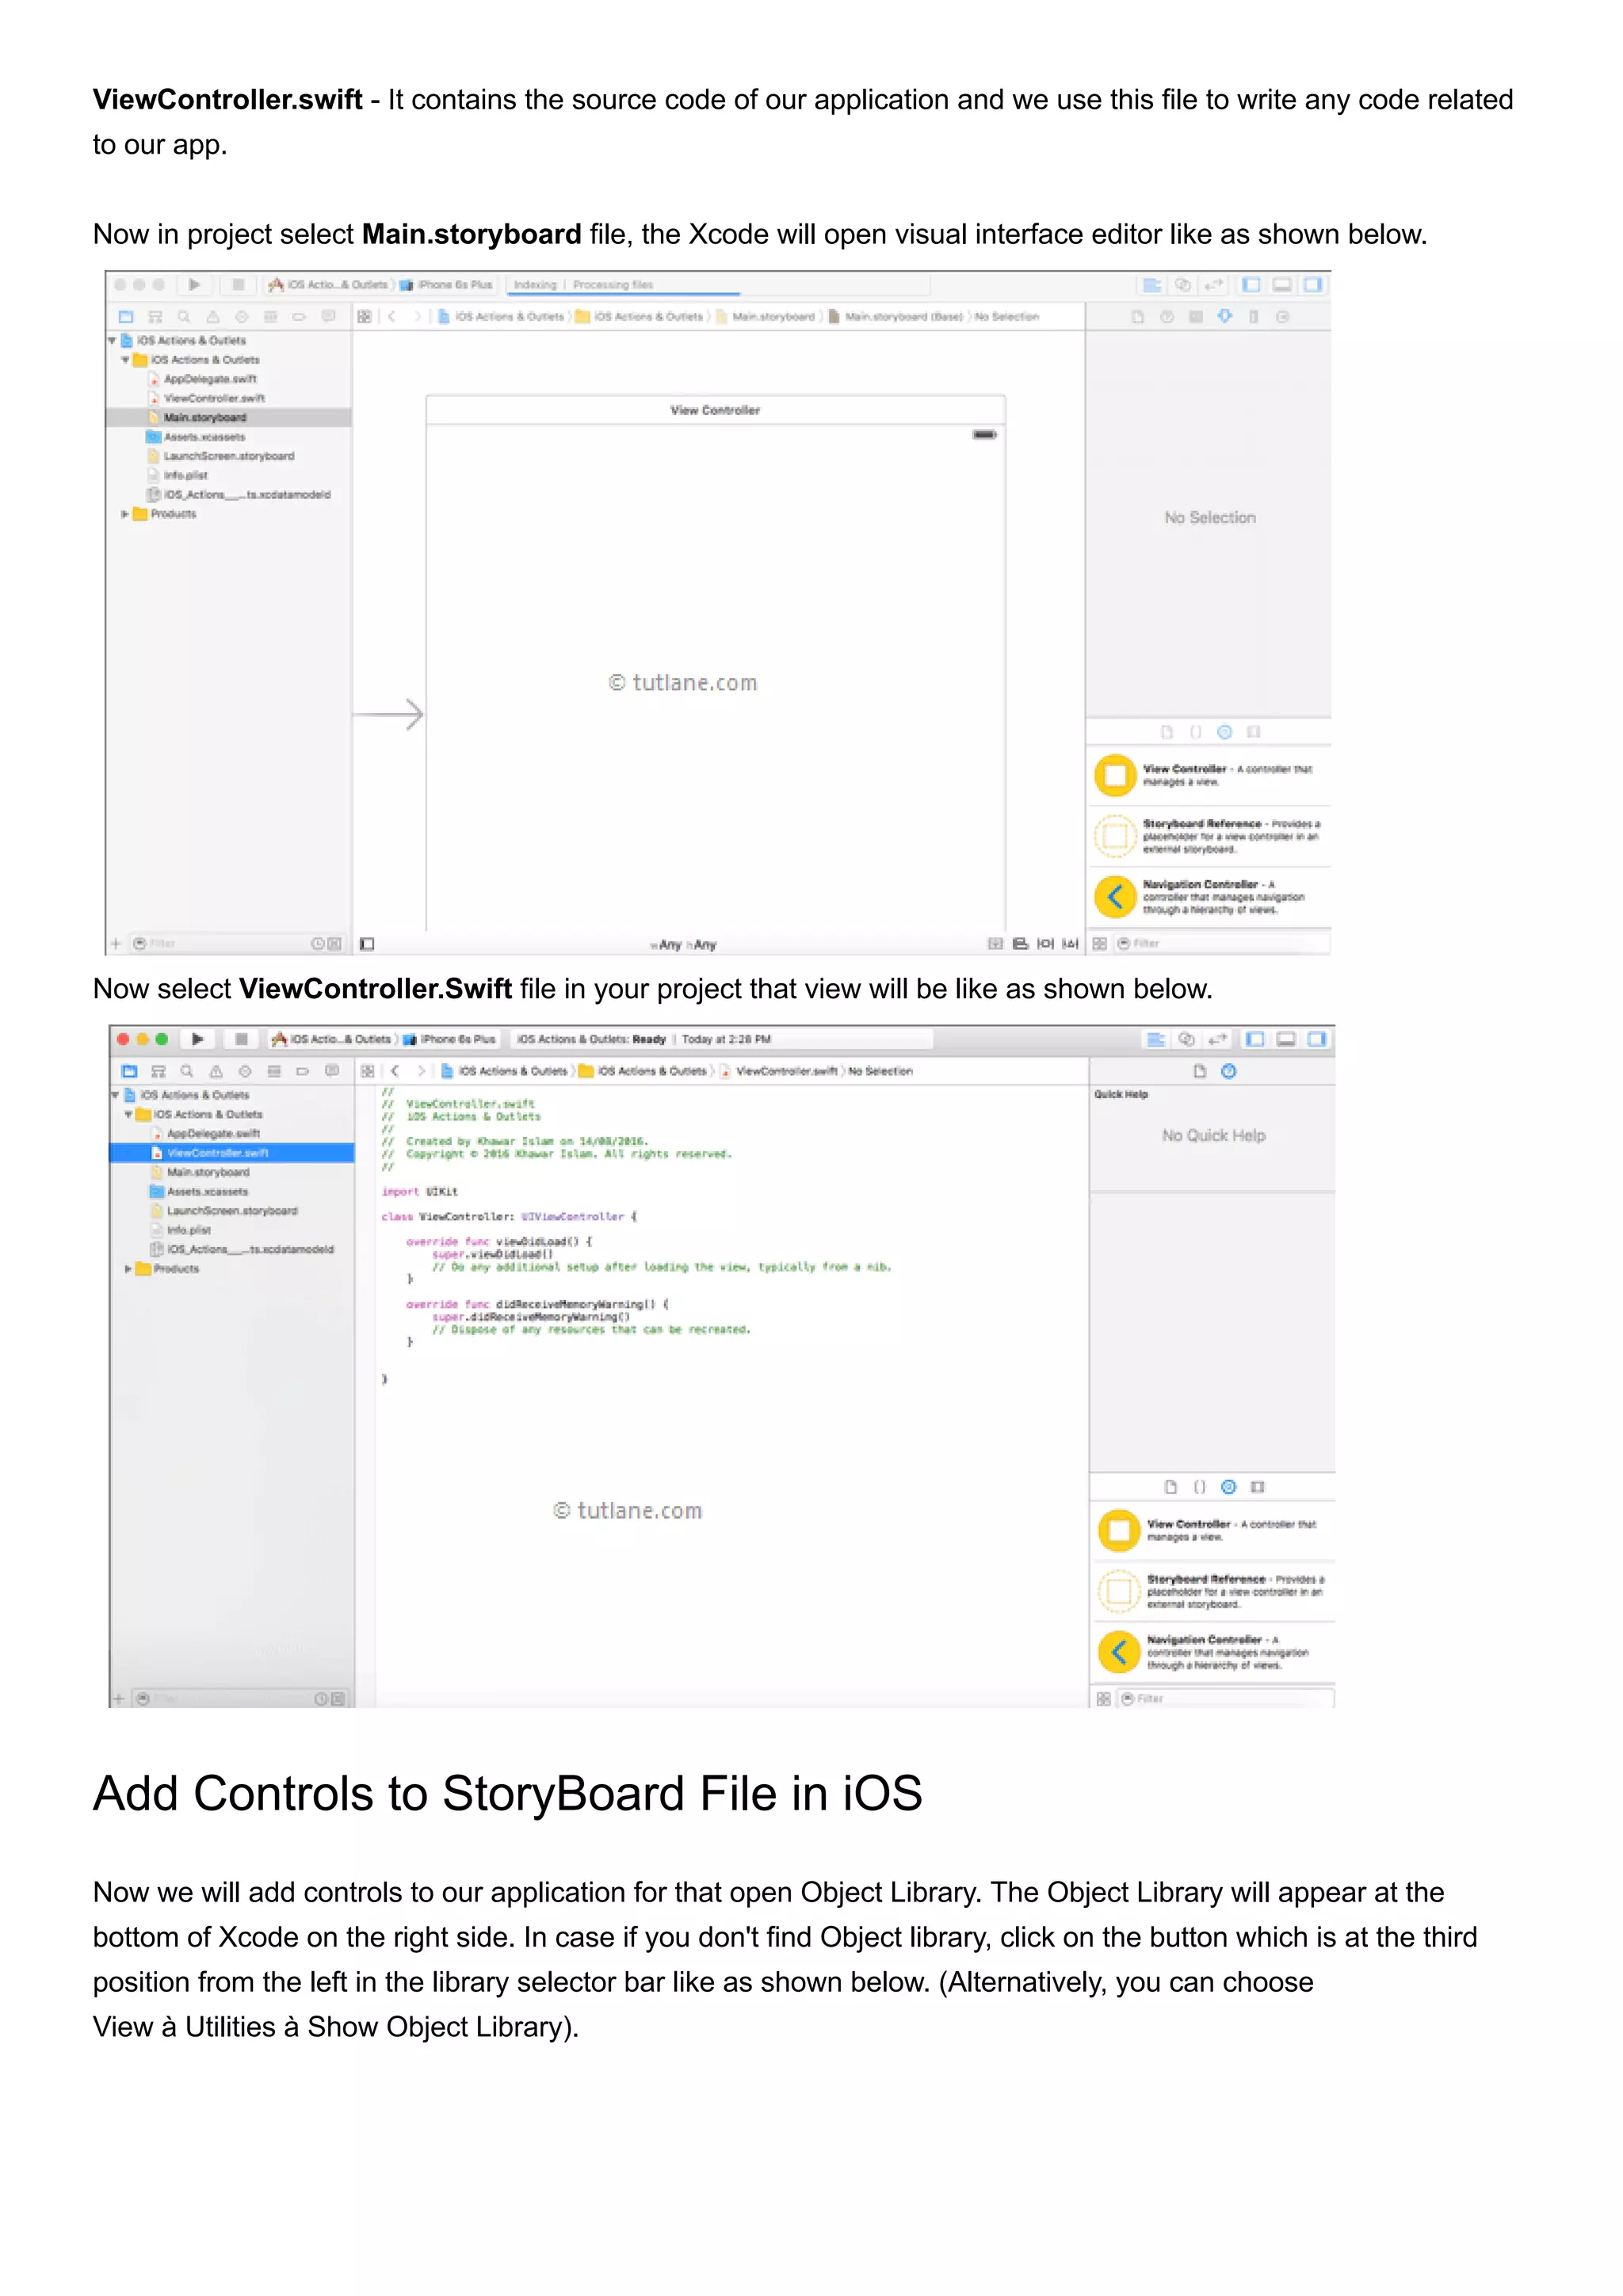
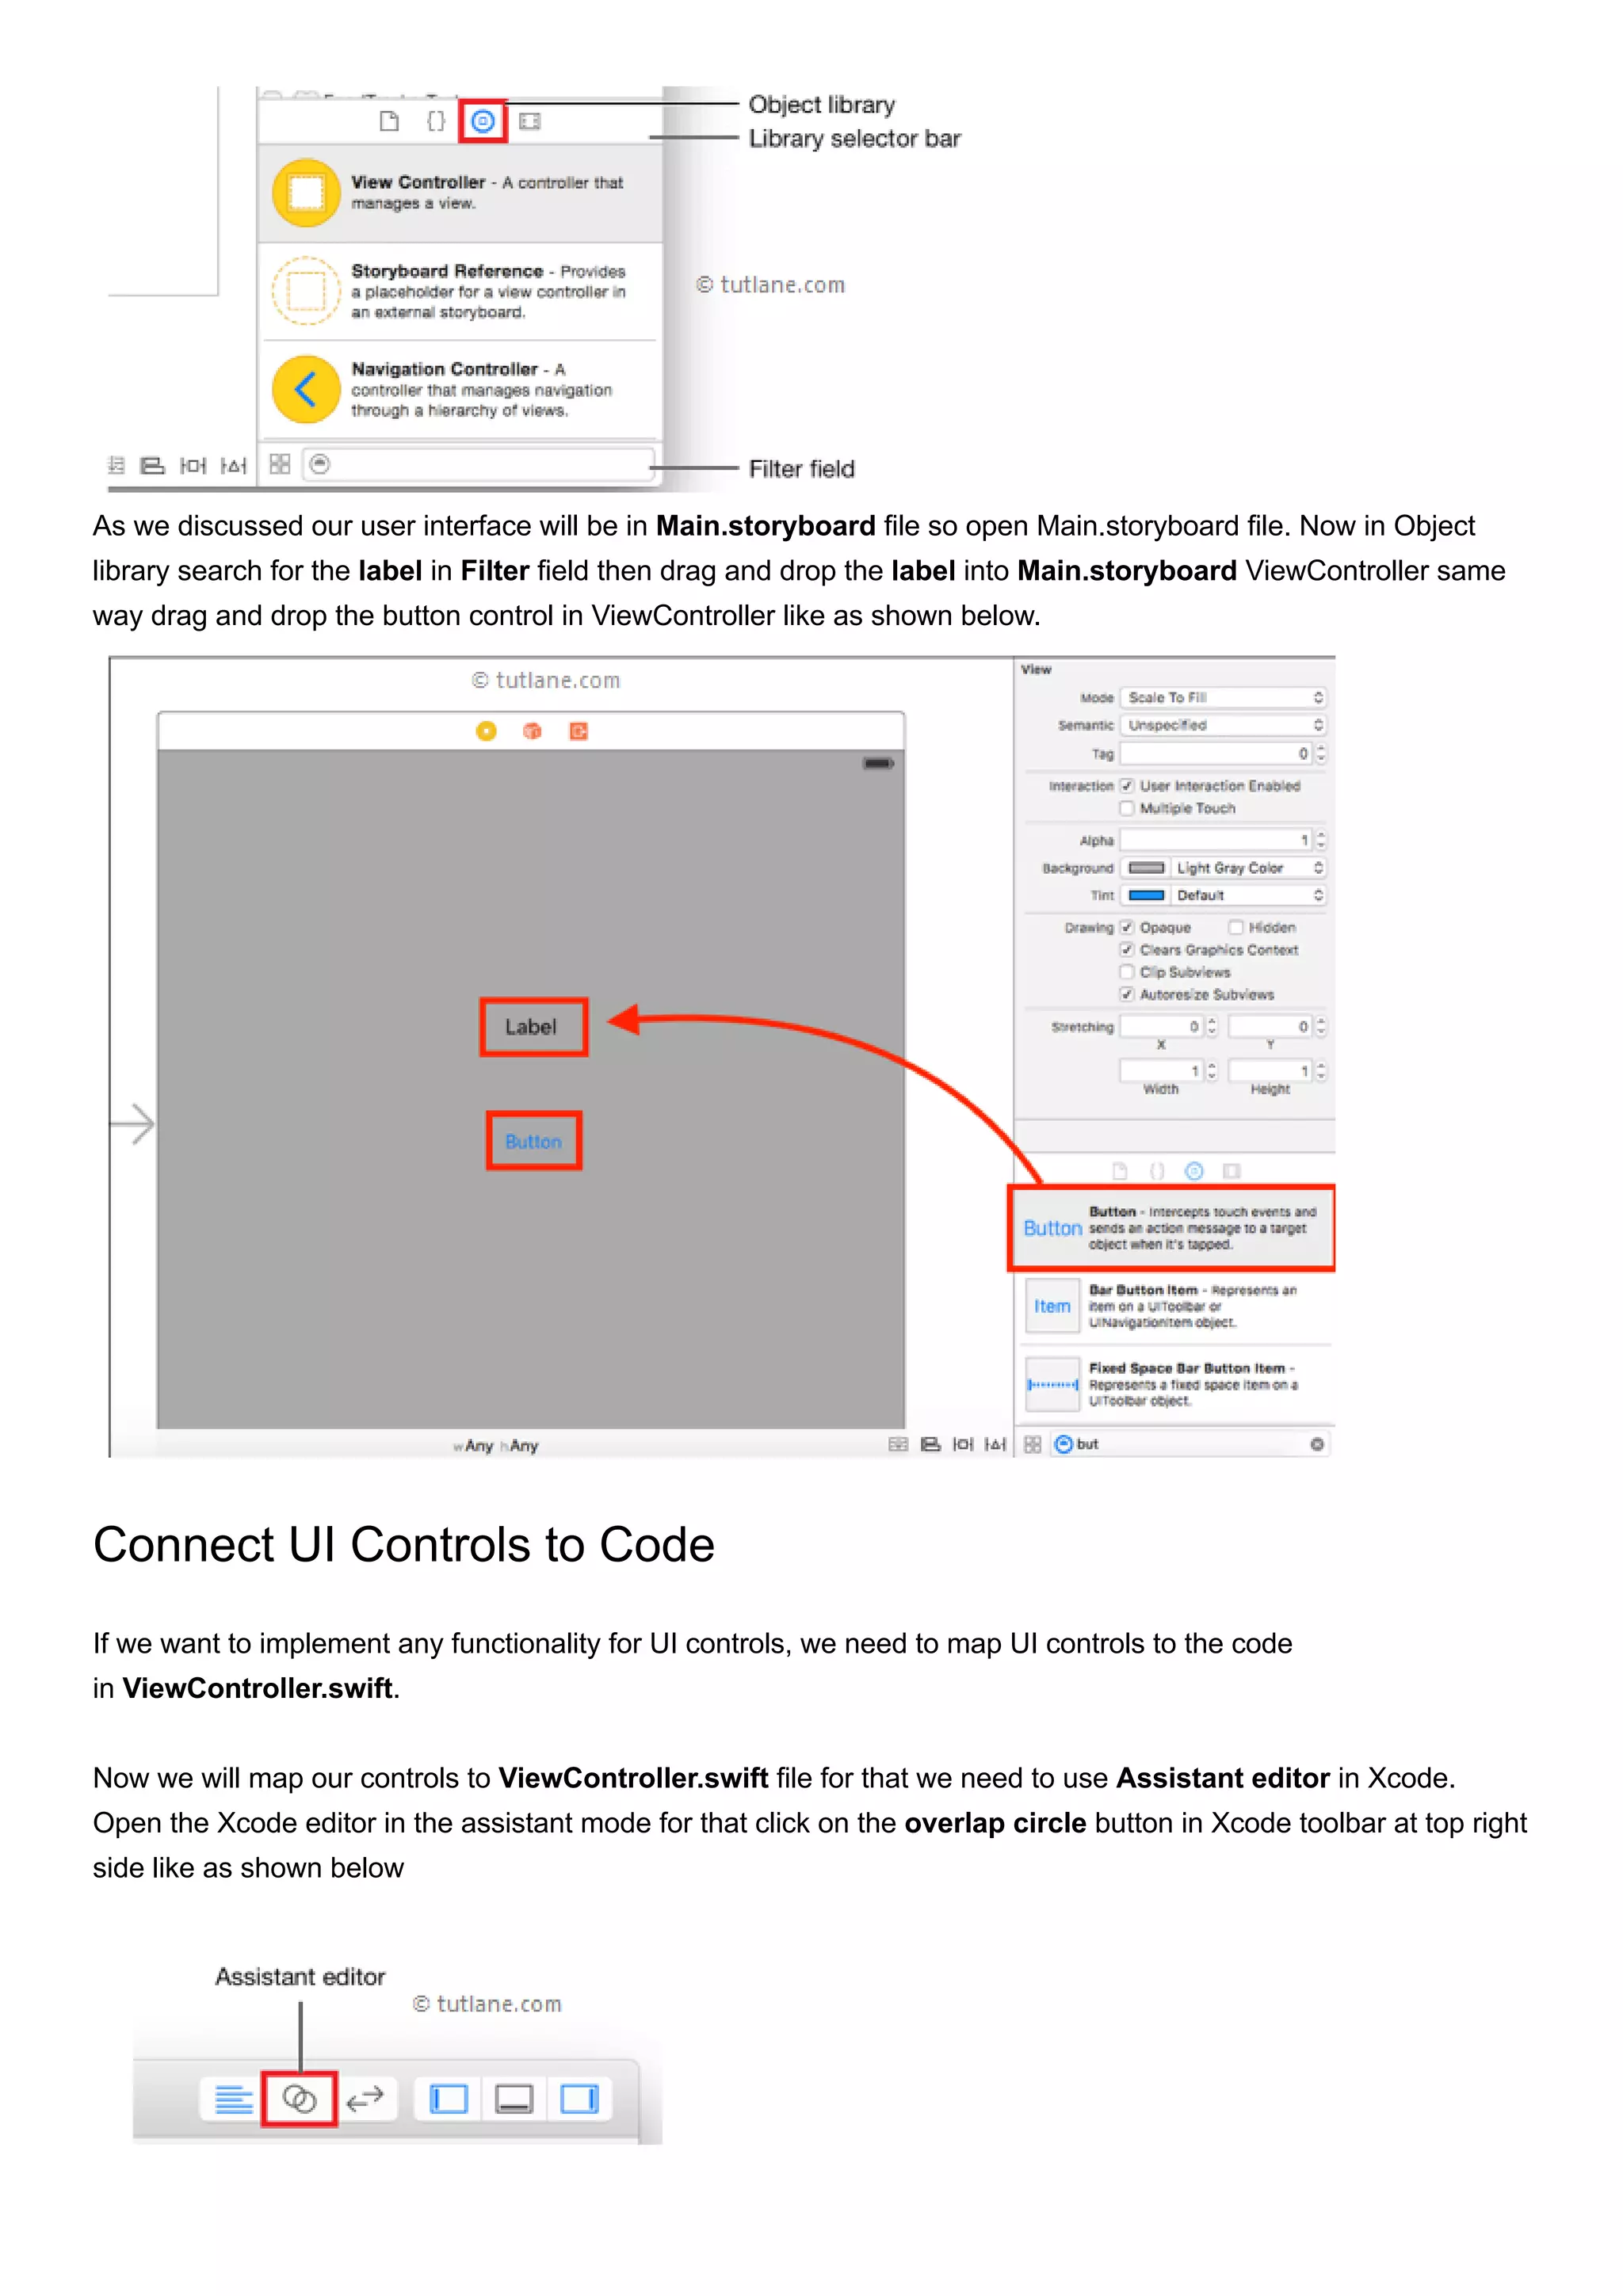
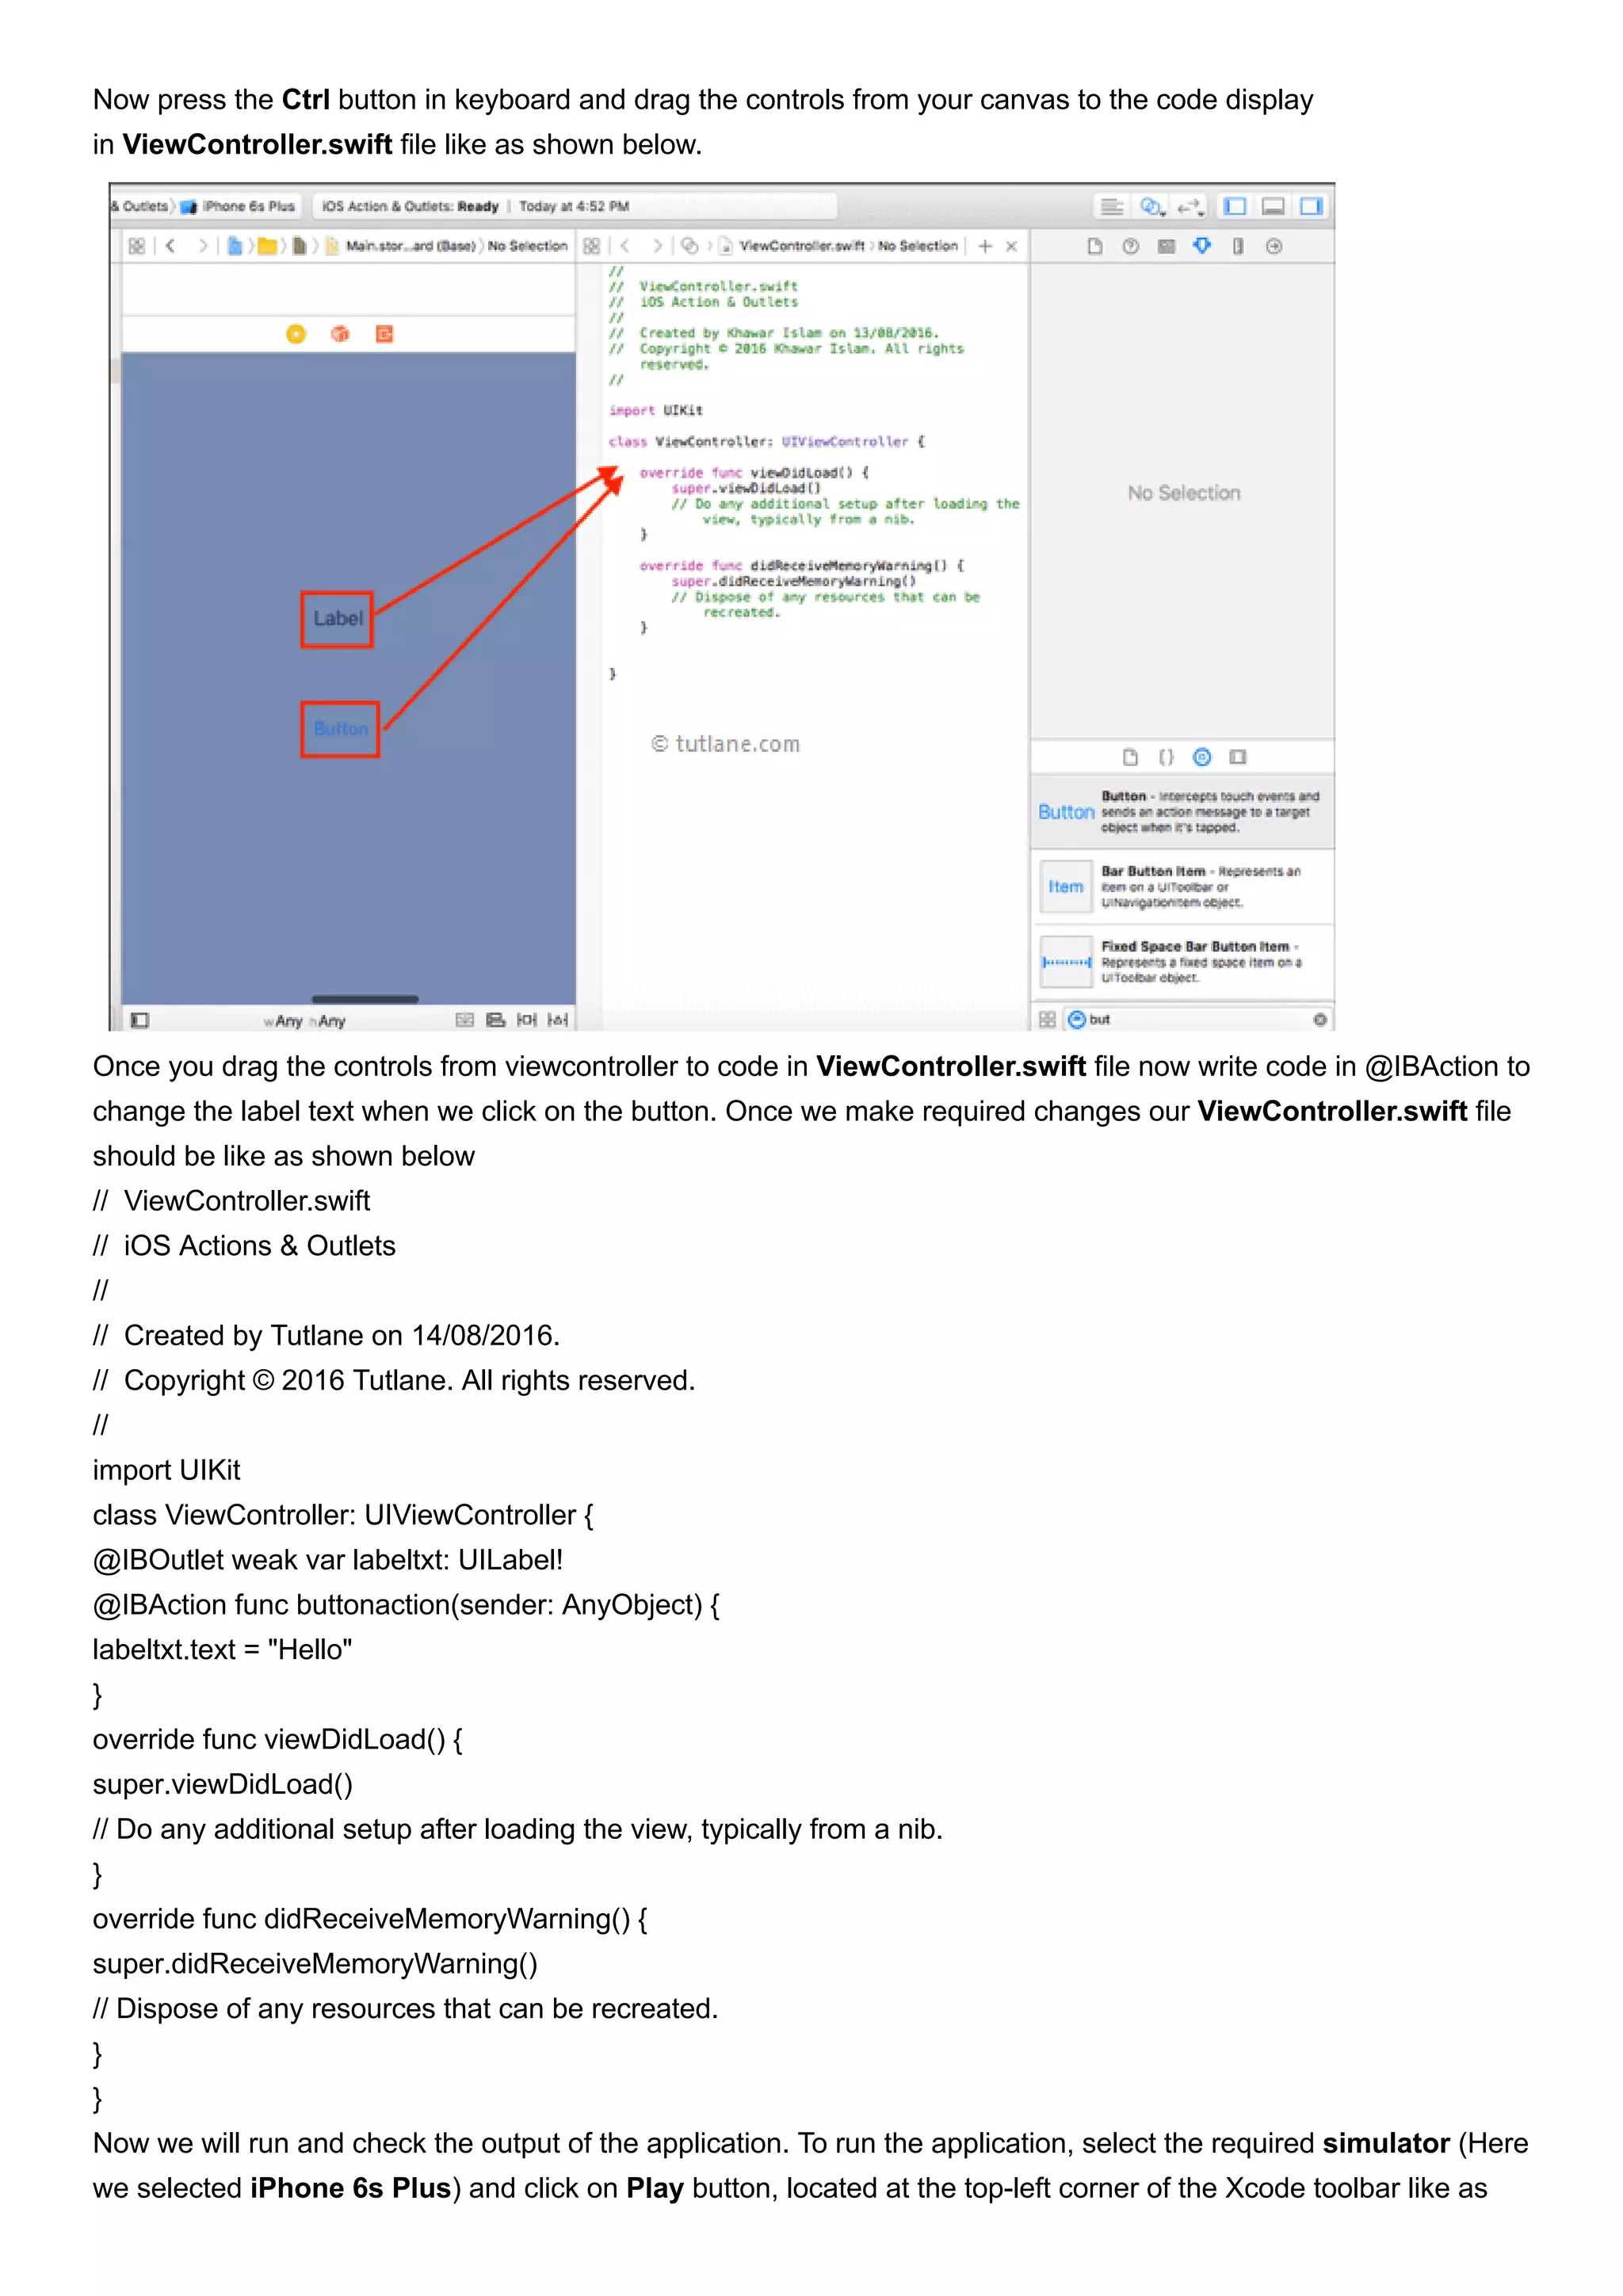
1. Downloaded from: justpaste.it/8q2oq
iOS Actions and Outlets
Here we will learn iOS actions and outlets in swift with examples using Xcode editor and how to use iOS outlets &
actions (IBoutlets and IBActions) in swift with examples.
iOS Actions & Outlets
In iOS Outlets and Actions are basically the property symbol of IBoutlets and IBActions where IB called Interface
Builder and the developer should aware that both IBActions and Outlets are the user interface elements.
If you have some knowledge about object-oriented programming, we can say that the outlet is basically the
reference object and action is the method that is useful to perform some type of actions.
To more information visit:ios app development course.
Syntax of iOS Actions & Outlets
Following is the syntax of using iOS Actions and Outlets in applications.
@IBOutlet weak var labeltxt: UILabel!
@IBAction func buttonaction(sender: AnyObject) {
labeltxt.text = "Hello"
}
If you observe the above syntax we used “@IBOutlet” to add reference of label control and we used “@IBAction” to
add button click action to change label control text.
Now we will see how to use iOS Actions and Outlets features in iOS applications with example.
iOS Actions & Outlets Example
To use iOS Actions and Outlets feature in iOS Applications we will create a simple application for that open the
Xcode Editor from /Applications folder directory. Once we open Xcode the welcome window will open like as
shown below. In the welcome window click on the second option “Create a new Xcode Project” or choose
File à New à Project.
2. After selecting “Create a new Xcode project” a new window will open in that we need to choose a template.
The new Xcode window will contain several built-in app templates to implement the common types of iOS apps like
page-based apps, tab-based apps, games, table-view apps, etc. These templates are having a pre-configured
interface and source code files.
For this iOS Actions and Outlets example, we will use the most basic template “Single View Application”. To
select this one, Go to the iOS section on the left side à select Application à In the main area of dialog select
“Single View Application” and then click on the next button like as shown below.
After click Next we will get a window like as shown below in this, we need to mention project name and other
details for our application.
Product Name: “iOS Actions & Outlets”
The name whatever we enter in the Product Name section will be used for the project and app.
3. Organization Name: “Tutlane”
You can enter the name of your organization or your own name or you can leave it as blank.
Organization Identifier: “com.developersociety”
Enter your organization identifier in case if you don't have any organization identifier enter com.example.
Bundle Identifier: This value will generate automatically based on the values we entered in the Product Name and
Organization Identifier.
Language: “Swift”
Select language type as “Swift” because we are going to develop applications using swift.
Devices: “Universal”
Choose Devices options as Universal it means that one application is for all Apple devices in case if you have any
specific requirement to run an app only for iPad then you can choose the iPad option to make your application
restricted to run only on iPad devices.
Use Core Data: Unselected
This option is used for database operations. In case if you have any database related operations in your
application select this option otherwise unselect the option.
Include Unit Tests: Unselected
In case if you need unit tests for your application then select this option otherwise unselect it.
Include UI Tests: Unselected
In case if you need UI tests for your application then select this option otherwise unselect it.
Once you finished entering all the options then click on Next button like as shown below
4. Once we click on the Next button new dialog will open in that we need to select the location to save our project.
Once you select the location to save project then click on Create button like as shown below
After click on the Create button, the Xcode will create and open a new project. In our
project, Main.storyboard and ViewController.swift are the main files that we used to design the app user
interface and to maintain source code.
Main.storyboard - Its visual interface editor and we will use this file to design our app user interface
5. ViewController.swift - It contains the source code of our application and we use this file to write any code related
to our app.
Now in project select Main.storyboard file, the Xcode will open visual interface editor like as shown below.
Now select ViewController.Swift file in your project that view will be like as shown below.
Add Controls to StoryBoard File in iOS
Now we will add controls to our application for that open Object Library. The Object Library will appear at the
bottom of Xcode on the right side. In case if you don't find Object library, click on the button which is at the third
position from the left in the library selector bar like as shown below. (Alternatively, you can choose
View à Utilities à Show Object Library).
6. As we discussed our user interface will be in Main.storyboard file so open Main.storyboard file. Now in Object
library search for the label in Filter field then drag and drop the label into Main.storyboard ViewController same
way drag and drop the button control in ViewController like as shown below.
Connect UI Controls to Code
If we want to implement any functionality for UI controls, we need to map UI controls to the code
in ViewController.swift.
Now we will map our controls to ViewController.swift file for that we need to use Assistant editor in Xcode.
Open the Xcode editor in the assistant mode for that click on the overlap circle button in Xcode toolbar at top right
side like as shown below
8. shown below.
Output of iOS Actions & Outlets App
Following is the result of the iOS Actions and Outlets app. Once we run the application click on button it will change
the label text. The button performs the action for the label to change its outlet text.
To more information visit:ios online training