The document provides steps for building a personal computer (PC). It includes:
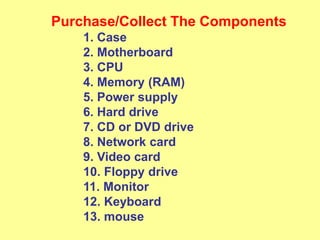
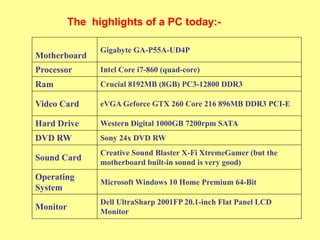
1. Purchasing components like the case, motherboard, CPU, RAM, power supply, hard drive, optical drive, and other parts.
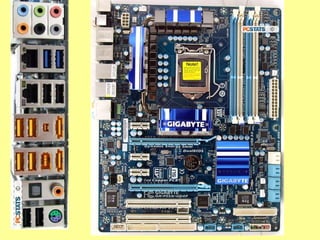
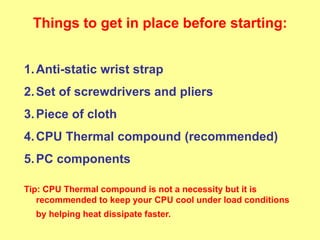
2. Preparing the case and motherboard by cleaning, configuring settings, and installing the motherboard into the case.
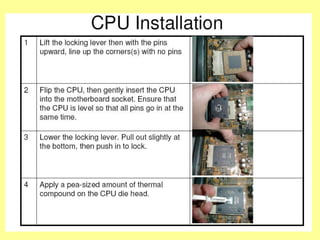
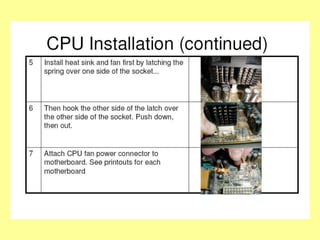
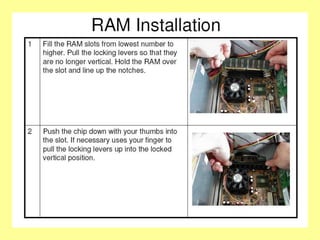
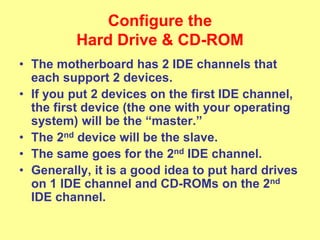
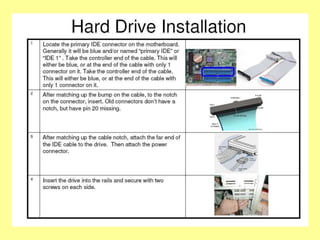
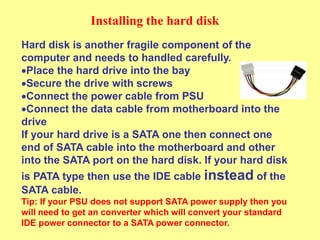
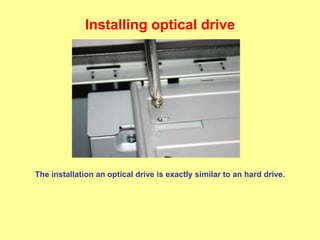
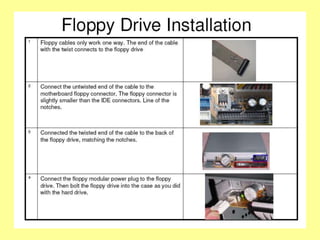
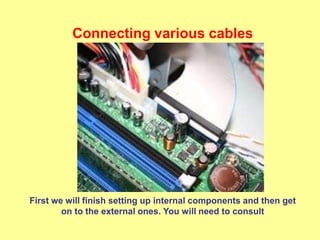
3. Installing the CPU, RAM, hard drive, optical drive and connecting power cables.
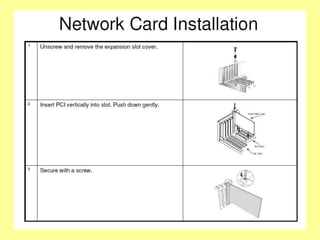
4. Connecting the video card and ensuring proper cooling for components.
Guide to Build A High-Performance Custom Gaming PCMemory4 less
Want to build your own Gaming pc from scratch but don't know how to? This Gaming computer building guide can help you.
You will learn everything from choosing the right computer parts to build a high-performance desktop PC that can run all games, to choosing parts at lowest prices from your desired store.
Save cost on your next Gaming PC build by using techniques mentioned in this Faster Custom Gaming PC Building guide.
This is a summary version of the original post published on this blog: http://blog.memory4less.com/guide-build-custom-gaming-desktop-pc/
To buy parts for building your Custom Gaming Desktop PC visit: www.memory4less.com
Or, choose compatible computer gaming parts for your PC by using our custom PC configurator tool here:
www.memory4less.com/configurator
The main components of a PC and its purpose
Good price ranges for each component
Good options for each component
Cost breakdown for building a
PC Safety for assembly
How to wire a PC
Where each component goes
The main components of a PC and its purpose
Good price ranges for each component
Good options for each component
Cost breakdown for building a
PC Safety for assembly
How to wire a PC
Where each component goes
Building a Raspberry Pi Robot with Dot NET 8, Blazor and SignalR - Slides Onl...Peter Gallagher
In this session delivered at Leeds IoT, I talk about how you can control a 3D printed Robot Arm with a Raspberry Pi, .NET 8, Blazor and SignalR.
I also show how you can use a Unity app on an Meta Quest 3 to control the arm VR too.
You can find the GitHub repo and workshop instructions here;
https://bit.ly/dotnetrobotgithub
Google Calendar is a versatile tool that allows users to manage their schedules and events effectively. With Google Calendar, you can create and organize calendars, set reminders for important events, and share your calendars with others. It also provides features like creating events, inviting attendees, and accessing your calendar from mobile devices. Additionally, Google Calendar allows you to embed calendars in websites or platforms like SlideShare, making it easier for others to view and interact with your schedules.
2. Purchase/Collect The Components
1. Case
2. Motherboard
3. CPU
4. Memory (RAM)
5. Power supply
6. Hard drive
7. CD or DVD drive
8. Network card
9. Video card
10. Floppy drive
11. Monitor
12. Keyboard
13. mouse
3. Steps In Building Your Own PC
1. Purchase/Collect The
Components
2. Case Preparation
3. Configure Your
Motherboard
4. Install the CPU
5. Install Memory
6. Install the Motherboard
7. Configure the Hard
Drive & CD-ROM
8. Mount Hard Drive
9. Install the Floppy &
CD-ROM
10. Connect the Floppy
Drive
11. Connect the Hard
Drive & CD-ROM
12. Install The Video Card
4. The highlights of a PC today:-
Motherboard
Gigabyte GA-P55A-UD4P
Processor Intel Core i7-860 (quad-core)
Ram Crucial 8192MB (8GB) PC3-12800 DDR3
Video Card eVGA Geforce GTX 260 Core 216 896MB DDR3 PCI-E
Hard Drive Western Digital 1000GB 7200rpm SATA
DVD RW Sony 24x DVD RW
Sound Card
Creative Sound Blaster X-Fi XtremeGamer (but the
motherboard built-in sound is very good)
Operating
System
Microsoft Windows 10 Home Premium 64-Bit
Monitor
Dell UltraSharp 2001FP 20.1-inch Flat Panel LCD
Monitor
5.
6. Things to get in place before starting:
1.Anti-static wrist strap
2.Set of screwdrivers and pliers
3.Piece of cloth
4.CPU Thermal compound (recommended)
5.PC components
Tip: CPU Thermal compound is not a necessity but it is
recommended to keep your CPU cool under load conditions
by helping heat dissipate faster.
8. Case Preparation
• Clean Case
• Inspect the Power Supply
• Inspect Power Switch
• Install Feet
• Install Case Fan
• Configure the LED
• Free Up the Drive Bays
10. Installing the motherboard
Make sure you have all the components in place
and a nice, clean and big enough place to work
with.
Put your antic-static wrist strap on to prevent
your components from getting affected. Make
sure your hands are clean before starting. First
we will be installing the motherboard which is a
piece of cake to install.
1. Open the side doors of the cabinet
2. Lay the cabinet on its side
3. Put the motherboard in place
4. Drive in all the required screws
Tip: Most motherboards come with an antistatic bag. It is
advisable to put the motherboard on it for some time and
then remove it from the antistatic bag before placing it in
the cabinet.
11. CPU Installation
CPU is the heart of a computer so make sure you handle it
properly and do not drop it or mishandle it. Also try not to
touch the pins frequently so that they do not get dirty. Get
hold of your motherboard and CPU manual. You need to
place the CPU on the dotted white patch of the
motherboard in a particular fashion for it to fit properly.
There is a golden mark on the CPU to help you assist.
Consult both your motherboard and CPU manual to see
which position it fits exactly or you could also use try all
the 4 positions.
•Lift the CPU lever on the motherboard
•Place the CPU properly on the motherboard
•Pull down the lever to secure the CPU in place
Warning: Do not try to push the CPU into the motherboard!
12.
13.
14.
15.
16. Configure the
Hard Drive & CD-ROM
• The motherboard has 2 IDE channels that
each support 2 devices.
• If you put 2 devices on the first IDE channel,
the first device (the one with your operating
system) will be the “master.”
• The 2nd device will be the slave.
• The same goes for the 2nd IDE channel.
• Generally, it is a good idea to put hard drives
on 1 IDE channel and CD-ROMs on the 2nd
IDE channel.
17. Mount Hard Drive
• A power supply is like a magnet, and
magnets and your data do not go together.
Don't install a hard drive anywhere near the
power supply. Keep your hard drive near the
front of the case.
• Slide the hard drive into an available drive
rail of the case.
• Screw the drive into place.
• Remember, power connectors face the back.
18.
19. Installing the hard disk
Hard disk is another fragile component of the
computer and needs to handled carefully.
Place the hard drive into the bay
Secure the drive with screws
Connect the power cable from PSU
Connect the data cable from motherboard into the
drive
If your hard drive is a SATA one then connect one
end of SATA cable into the motherboard and other
into the SATA port on the hard disk. If your hard disk
is PATA type then use the IDE cable instead of the
SATA cable.
Tip: If your PSU does not support SATA power supply then you
will need to get an converter which will convert your standard
IDE power connector to a SATA power connector.