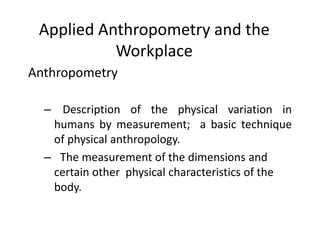
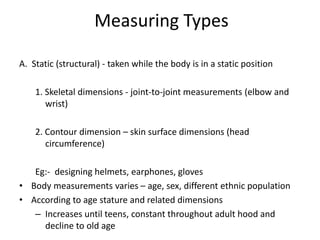
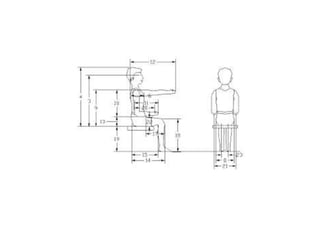
Anthropometry Data | workspace
Design | Ergonomic Chair Design
By: Gaurav Singh Rajput
@gauravkrsrajput
Applied Anthropometry and the
Workplace
Anthropometry
– Description of the physical variation in
humans by measurement; a basic technique
of physical anthropology.
– The measurement of the dimensions and
certain other physical characteristics of the
body.
Measuring Types
A. Static (structural) - taken while the body is in a static position
1. Skeletal dimensions - joint-to-joint measurements (elbow and
wrist)
2. Contour dimension – skin surface dimensions (head
circumference)
Eg:- designing helmets, earphones, gloves
• Body measurements varies – age, sex, different ethnic population
• According to age stature and related dimensions
– Increases until teens, constant throughout adult hood and
decline to old age
Measuring Types
B. Dynamic (functional)
Measurements taken while the body is engaged in
some kind of activity
Eg:- driving a car, assembling a mouse trap, working
on the desk
Factors affect practical limit of arm reach depends on
arm length, shoulder movement, partial trunk
rotation, bending of the back and the function
performed by hand
SOMATOGRAPHY
- a variety of body visualization techniques
3 Principles in the application of
anthropometric data
Work Spaces
• WORK SPACE ENVELOPES:
– It means the 3 dimensional space within which an
individual works. (e.g. the space within which the
hands are used.)
– This topic is related to physical space and
arrangement.
• Related to the concept of work space envelopes:
– Out-of- reach requirements
• The distances required to prevent a person from reaching
something (Usually hazardous) over a barrier.
– Clearance requirements
• The minimum space needed to move through a tight space
or perform work in a confined area.
Work Spaces (Envelopes)
Seated personnel
1. Most important factor in this position is arm reach
a. direction of reach
b. task to be performed (grasp, fingertip operation)
c. type of reaching motion (restricted/unrestricted)
– Design for the minimum (5th percentile) - Makes
it useful for 95% of the population
– Consider apparel worn
• Standing Personnel
Work Spaces (Envelopes)
a. Larger workspace is defined
(due to ability to bend/reach)
b. Workspace is dynamic
(moves as the person moves)
Design of work surfaces
• Work surfaces
– Within the envelope of a workplace, specific design
decisions need to be made about various features of
the workplace, the location and design of work
surfaces
• e.g. surface involved benches, desks, tables, etc.
• Factors to be considered in work surfaces:
– Horizontal work surface area
– Work surface height: seated
– Work surface height: standing
Design: Horizontal work
surfaces
• Horizontal work surface area
– To be used by seated and “sit stand” should provide for
manual activities to be within convenient arm’s reach.
• Work surface area definition and dimensions
– Normal area and maximum area (Barnes, 1963)
• Normal area:
– The area can be conveniently reached with a sweep of the forearm
while the upper arm hangs in a natural position at the side.
• Maximum area:
– The area could be reached by extending the arm from the
shoulder.
– Work surface area with the dynamic interaction of the
movement of the forearm as the elbow is moving
(Squires,1956).
Working Area (NWA or MWA)
• Normal working are (NWA)
– NWA allows hand motion to be made in a
convenient zone with normal energy expenditure.
– Area described by the arms and hands with the
elbows flexed at ~90 degree.
– Typically, the comfortable limit of outward
rotation is about 25 degree.
• Maximum working area(MWA)
– MWA is the intersection of the ZCR with the
horizontal surface such as table or bench
Working Area (NWA or MWA)
Design: Horizontal work surfaces
• Slanted surfaces for visual tasks:
– Eastman and Kamon,(1976).
• They found that subjects using slanted surfaces (12°
and 24°) had better posture
• reported Less trunk movement, less fatigue, and less
discomfort than when using horizontal
– Bridger (1988)
• Slanted surfaces 15 °
• Less bending of the neck, more upright trunk
Design: Horizontal work surfaces
Design: Work surface height
Work surface height: seated
– Work surface height:
• The height of the upper surface of a table, bench, desk, counter,
measured from the floor.
– Working height:
• Depends on what one is working on.
– When wiring on paper: the working height =the work surface height.
– When using a keyboard: above the work surface height
– When washing vegetables in a sink: below the work surface height.
– Seated work-surface height and arm posture
• Reducing work surface heights to permit relaxed postures of the
upper arms with respect to working height.
• The heights of desks have been reduced from about 28.5” in 1970
in Europe but, further reduction of the heights to about 27”.
Seated work surface height and
nature of the task
Design: Work surface height
• Work surface height: seated
– Seated work-surface height and thigh clearance
• Influenced by seat height, the thickness of the work surface, and
the thickness of the thighs.
• The clearance between the seat and the underside of the work
surface should accommodate the thighs of the largest user.
• 26.2” as the minimum height for the underside of a nonadjustable
seated work surface (ANSI, 1988).
– Problems for smaller people (e.g. raising chair, foot rest.)
• A range of height adjustments 20.2”to 26.2” (ANSI,1988).
• General principles for seated work surfaces
– The work-surface height should be adjustable to
fit individual physical dimensions and preferences.
– The work surface should be at a level that places
the working height at elbow height.
– The work surface should provide adequate
clearance for a person’s thighs under the work
surface
• Work surface height: Standing
– The surface height is related to the nature of task.
– Heights for precision work, light work, and heavy
work as related to elbow height (Grandjean, 1988)
• For light and heavy work are below elbow height
• For precision work is slightly above elbow height.
Design: Work surface height
• The surface height is related to the individual preferences
(Word & Kirk, 1970).
Design Ergonomic Chair
• Why an ergonomic chair?
– The average office loses over $7300 per employee per year in
poor productivity and medical and workers’ compensation claims
(the bureau of labor statistics).
– Over 50% are low back injuries. Poor chair design contributes to
poor seated posture which plays a major role in these injuries
(e.g. secretary back syndrome).
– Musculoskeletal discomfort (Ong et al., in work with computers,
330-337,1989)
• Survey of 672 full-time computer users complaints related to poor
ergonomic furniture, including the chair.
– Musculoskeletal discomfort (Ignatius et al., Journal of Human
Ergology, 22, 83-93, 1993)
• Survey of 170 women typists working at computers, Mismatch between
chair height and desk height and poor furniture
Myths of ergonomic seating
• Ergonomic seating always requires a single,
cubist (90 degree upright) postural orientation
that is independent of the user’s task (Dainoff,
1994).
• You can judge how ergonomic a chair is by
briefly sitting in it.
• Users should be able to adjust everything.
• Users don’t need training on how to sit in a chair
(Dainoff, 1994).
• One chair design will provide the best fit for all
users
Principles of ergonomic seat design
• Promote Lumbar Lordosis
• In standing, lodotic inward arch: the lumbar portion of the spine (the small of
the back, just above the buttocks) is naturally curved inward (concave)
• In sitting, Kyphotic ourward bend (convex). Lumbar kyphosis results in
increased pressure on the discs.
– Reclined postures often are preferred (Grandjean, 1988).
– In unsupported sitting or forward leaning the lumbar spine may be in
kyphosis, which is undesirable.
– During supported sitting the lumbar spine should be maintained in
lordosis by an adjustable lumbar support.
• The use of a 2 inch thick lumbar support had a impact on maintaining lumbar
lordosis with a seat backrest angle of 90 degree. When the backrest angle
was reclined to 110 degree, the lumbar spine resembled closely the lumbar
curve of a person standing (Anderson et al. 1979).
– A forward-tilting seat produce a more relaxed posture (Mandal, 1985).
– Lordotic effect of forward-tilting seats was small and depended on other
factors such as seat height and table top slant (Bendix, 1986).
Promote Lumbar Lordosis
Principles of ergonomic seat design
• Minimize disc pressure
– Lumbar disc pressure varies with back posture and the load in
the hands (Nachemson, 1974).
– Unsupported sitting in an upright, erect posture (forced lordosis)
resulted in a 40 % increase in pressure compared to standing
(Nachemson& Elfstrom, 1970).
– Unsupported sitting in a forward slumped posture increased
pressure 90% compared to standing (Nachemson& Elfstrom,
1970).
– Use of a reclined backrest has an effect with reductions in
pressure by reclining backrests from vertical (90°) to 100 to 110 °
. Use of a lumber support reduces disc pressure as does the use
of arm rests. (Anderson, 1987)
• Minimize static loading of the back muscles
– Back muscle pain
– Backrest angle and muscle activity:
– Muscular activity as measured by electromyography
(EMG) is similar when standing or witting. EMG
activity decreases when sitting in a forward slumped
posture, even though maximum pressure on the discs
(Anderson, 1987).
– A reduction in muscular activity in the back when the
backrest was reclines up to 110 degree (Anderson,
1987).
• Adjustment features for an ergonomic chair
–Seat height
– Backrest height
– Ability to turn while seated
– Back tilt adjustment
– Adjustable arms
– Seat tilt adjustment
– Ability to lean back
– Ability to track posture changes
– Carpet casters/ hard floor casters
– Intuitive, easy to use control
• Provide for easy adjustability
– Providing adjustable seats increases productivity (Springer, 1982).
– Reduces complaints of shoulder and back pain (Shute and Starr, 1984).
– People are not aware of the adjustability features and rarely use.
• About 10% adjusted their seats during the day (Kleeman & Prunier,1980).
• Adjustment frequency is higher for older workers than younger people
(Coleman et al., Ergonomics,1998).
– Guidelines for increasing the use (Lueder, 1986):
• Controls can be easily reached and adjusted
• Instructions on the furniture are easy to understand
• Controls are easy to find and interpret
• Tools are not necessary.
• Controls provide immediate feedback
• The direction of operation of controls is logical and consistent
• Few motions are required.
• Adjustments require the use of only one hand.
Ergonomic chair recommendations
• Seat height and slope
– Minimum range of 16 to 20.5 in based on a compressed seat (ANSI)
– 5 to 15 ° forward tilt to 5 ° backward tilt (Lueder,1986)
• Seat depth and width
– Chairs depth Should not exceed 16.8” and the width of the seat surface be not
less than 15.7” (Grandjean et al, 1973).
– Seat depth: 15 to 17 in (ANSI)
– Seat width: 18.2 in (ANSI)
• Contouring and cushioning
– Seat cushion thickness range from 11.5 to 2” (LUeder, 1986).
• Seat back parameters
– Seat back angle: a minimum range of 90° to 105 ° with the seat pan. up to 120°
(ANSI)
– Seat back width: at least 12” in the lumbar region.
– Seat back height: a minimum of 19.5” (Lueder, 1986). As a backrest reclines, the
lumbar support moves upward relative to the lumbar spine (Anderson, 1987).
Ergonomic chair recommendations
Adjusting the
workstation
Step 1 Start with the chair…
What makes an ergonomic chair
• 5 star base of support
• Height adjustable base
• No armrests present
Height of chair
• Chair needs to be at a height so
that your forearms are parallel to
the desk with your shoulders
relaxed and elbows at 90 degrees.
• If your feet can’t reach the floor
comfortably, you require a footrest.
• Backrest at 90o to 100o to the floor.
Step 2 The Visual Display Unit (VDU)
• The VDU should be approximately one arms
length away from the user.
• This is the average focal distance for a person
and reduces the need to slouch forward to
read the screen
• The top of the VDU should be at
eye-level.
• People with bi-focals
may need to have their
VDU lower to avoid
excessive neck extension.
Step 3 The Keyboard
• The keyboard should be positioned
approximately 8cm from the edge of
the desk.
• The keyboard should be located
directly in front of the user.
The keyboard should not be inclined to avoid
excessive and prolonged extension of the
wrist whilst typing.
Step 4 The Mouse
• The mouse should be positioned to allow the elbow by the side of the user’s body
and the wrist remains in a neutral position.
• Positioning the mouse too far backwards and to the right (right hand dominant
people) places the wrist in an unnatural angle which can predispose the user to
carpel tunnel and tennis elbow type symptoms.
The Mouse and Keyboard
• The angle of the elbow should be 90 degree
relative to the upper arms
• Elbow should be close to the side of the body
and the wrist not to the side when typing/
working
Step 5 The zone of frequent use
• Items used repetitively during the
day (for example pens, stapler,
punch or telephone) need to be
close enough so that the user does
not have to stretch for the item.
• This reduces the risk of slouching
once the item has been grasped
Laptops
Always adjust the laptop for the
screen height.
• Preferentially use a laptop stand or
docking station.
• Use an external mouse and
keyboard.

Anthropometry Data | workspace Design | Ergonomic Chair Design | Gaurav Singh Rajput

  • 1.
    Anthropometry Data |workspace Design | Ergonomic Chair Design By: Gaurav Singh Rajput @gauravkrsrajput
  • 3.
    Applied Anthropometry andthe Workplace Anthropometry – Description of the physical variation in humans by measurement; a basic technique of physical anthropology. – The measurement of the dimensions and certain other physical characteristics of the body.
  • 5.
    Measuring Types A. Static(structural) - taken while the body is in a static position 1. Skeletal dimensions - joint-to-joint measurements (elbow and wrist) 2. Contour dimension – skin surface dimensions (head circumference) Eg:- designing helmets, earphones, gloves • Body measurements varies – age, sex, different ethnic population • According to age stature and related dimensions – Increases until teens, constant throughout adult hood and decline to old age
  • 7.
    Measuring Types B. Dynamic(functional) Measurements taken while the body is engaged in some kind of activity Eg:- driving a car, assembling a mouse trap, working on the desk Factors affect practical limit of arm reach depends on arm length, shoulder movement, partial trunk rotation, bending of the back and the function performed by hand
  • 9.
    SOMATOGRAPHY - a varietyof body visualization techniques
  • 10.
    3 Principles inthe application of anthropometric data
  • 12.
    Work Spaces • WORKSPACE ENVELOPES: – It means the 3 dimensional space within which an individual works. (e.g. the space within which the hands are used.) – This topic is related to physical space and arrangement. • Related to the concept of work space envelopes: – Out-of- reach requirements • The distances required to prevent a person from reaching something (Usually hazardous) over a barrier. – Clearance requirements • The minimum space needed to move through a tight space or perform work in a confined area.
  • 13.
    Work Spaces (Envelopes) Seatedpersonnel 1. Most important factor in this position is arm reach a. direction of reach b. task to be performed (grasp, fingertip operation) c. type of reaching motion (restricted/unrestricted)
  • 14.
    – Design forthe minimum (5th percentile) - Makes it useful for 95% of the population – Consider apparel worn • Standing Personnel Work Spaces (Envelopes) a. Larger workspace is defined (due to ability to bend/reach) b. Workspace is dynamic (moves as the person moves)
  • 15.
    Design of worksurfaces • Work surfaces – Within the envelope of a workplace, specific design decisions need to be made about various features of the workplace, the location and design of work surfaces • e.g. surface involved benches, desks, tables, etc. • Factors to be considered in work surfaces: – Horizontal work surface area – Work surface height: seated – Work surface height: standing
  • 16.
    Design: Horizontal work surfaces •Horizontal work surface area – To be used by seated and “sit stand” should provide for manual activities to be within convenient arm’s reach. • Work surface area definition and dimensions – Normal area and maximum area (Barnes, 1963) • Normal area: – The area can be conveniently reached with a sweep of the forearm while the upper arm hangs in a natural position at the side. • Maximum area: – The area could be reached by extending the arm from the shoulder. – Work surface area with the dynamic interaction of the movement of the forearm as the elbow is moving (Squires,1956).
  • 17.
    Working Area (NWAor MWA) • Normal working are (NWA) – NWA allows hand motion to be made in a convenient zone with normal energy expenditure. – Area described by the arms and hands with the elbows flexed at ~90 degree. – Typically, the comfortable limit of outward rotation is about 25 degree. • Maximum working area(MWA) – MWA is the intersection of the ZCR with the horizontal surface such as table or bench
  • 18.
  • 19.
    Design: Horizontal worksurfaces • Slanted surfaces for visual tasks: – Eastman and Kamon,(1976). • They found that subjects using slanted surfaces (12° and 24°) had better posture • reported Less trunk movement, less fatigue, and less discomfort than when using horizontal – Bridger (1988) • Slanted surfaces 15 ° • Less bending of the neck, more upright trunk
  • 20.
  • 21.
    Design: Work surfaceheight Work surface height: seated – Work surface height: • The height of the upper surface of a table, bench, desk, counter, measured from the floor. – Working height: • Depends on what one is working on. – When wiring on paper: the working height =the work surface height. – When using a keyboard: above the work surface height – When washing vegetables in a sink: below the work surface height. – Seated work-surface height and arm posture • Reducing work surface heights to permit relaxed postures of the upper arms with respect to working height. • The heights of desks have been reduced from about 28.5” in 1970 in Europe but, further reduction of the heights to about 27”.
  • 22.
    Seated work surfaceheight and nature of the task
  • 23.
    Design: Work surfaceheight • Work surface height: seated – Seated work-surface height and thigh clearance • Influenced by seat height, the thickness of the work surface, and the thickness of the thighs. • The clearance between the seat and the underside of the work surface should accommodate the thighs of the largest user. • 26.2” as the minimum height for the underside of a nonadjustable seated work surface (ANSI, 1988). – Problems for smaller people (e.g. raising chair, foot rest.) • A range of height adjustments 20.2”to 26.2” (ANSI,1988).
  • 24.
    • General principlesfor seated work surfaces – The work-surface height should be adjustable to fit individual physical dimensions and preferences. – The work surface should be at a level that places the working height at elbow height. – The work surface should provide adequate clearance for a person’s thighs under the work surface
  • 25.
    • Work surfaceheight: Standing – The surface height is related to the nature of task. – Heights for precision work, light work, and heavy work as related to elbow height (Grandjean, 1988) • For light and heavy work are below elbow height • For precision work is slightly above elbow height.
  • 26.
  • 27.
    Design: Work surfaceheight • The surface height is related to the individual preferences (Word & Kirk, 1970).
  • 28.
    Design Ergonomic Chair •Why an ergonomic chair? – The average office loses over $7300 per employee per year in poor productivity and medical and workers’ compensation claims (the bureau of labor statistics). – Over 50% are low back injuries. Poor chair design contributes to poor seated posture which plays a major role in these injuries (e.g. secretary back syndrome). – Musculoskeletal discomfort (Ong et al., in work with computers, 330-337,1989) • Survey of 672 full-time computer users complaints related to poor ergonomic furniture, including the chair. – Musculoskeletal discomfort (Ignatius et al., Journal of Human Ergology, 22, 83-93, 1993) • Survey of 170 women typists working at computers, Mismatch between chair height and desk height and poor furniture
  • 29.
    Myths of ergonomicseating • Ergonomic seating always requires a single, cubist (90 degree upright) postural orientation that is independent of the user’s task (Dainoff, 1994). • You can judge how ergonomic a chair is by briefly sitting in it. • Users should be able to adjust everything. • Users don’t need training on how to sit in a chair (Dainoff, 1994). • One chair design will provide the best fit for all users
  • 30.
    Principles of ergonomicseat design • Promote Lumbar Lordosis • In standing, lodotic inward arch: the lumbar portion of the spine (the small of the back, just above the buttocks) is naturally curved inward (concave) • In sitting, Kyphotic ourward bend (convex). Lumbar kyphosis results in increased pressure on the discs. – Reclined postures often are preferred (Grandjean, 1988). – In unsupported sitting or forward leaning the lumbar spine may be in kyphosis, which is undesirable. – During supported sitting the lumbar spine should be maintained in lordosis by an adjustable lumbar support. • The use of a 2 inch thick lumbar support had a impact on maintaining lumbar lordosis with a seat backrest angle of 90 degree. When the backrest angle was reclined to 110 degree, the lumbar spine resembled closely the lumbar curve of a person standing (Anderson et al. 1979). – A forward-tilting seat produce a more relaxed posture (Mandal, 1985). – Lordotic effect of forward-tilting seats was small and depended on other factors such as seat height and table top slant (Bendix, 1986).
  • 31.
  • 32.
    Principles of ergonomicseat design • Minimize disc pressure – Lumbar disc pressure varies with back posture and the load in the hands (Nachemson, 1974). – Unsupported sitting in an upright, erect posture (forced lordosis) resulted in a 40 % increase in pressure compared to standing (Nachemson& Elfstrom, 1970). – Unsupported sitting in a forward slumped posture increased pressure 90% compared to standing (Nachemson& Elfstrom, 1970). – Use of a reclined backrest has an effect with reductions in pressure by reclining backrests from vertical (90°) to 100 to 110 ° . Use of a lumber support reduces disc pressure as does the use of arm rests. (Anderson, 1987)
  • 33.
    • Minimize staticloading of the back muscles – Back muscle pain – Backrest angle and muscle activity: – Muscular activity as measured by electromyography (EMG) is similar when standing or witting. EMG activity decreases when sitting in a forward slumped posture, even though maximum pressure on the discs (Anderson, 1987). – A reduction in muscular activity in the back when the backrest was reclines up to 110 degree (Anderson, 1987).
  • 34.
    • Adjustment featuresfor an ergonomic chair –Seat height – Backrest height – Ability to turn while seated – Back tilt adjustment – Adjustable arms – Seat tilt adjustment – Ability to lean back – Ability to track posture changes – Carpet casters/ hard floor casters – Intuitive, easy to use control
  • 35.
    • Provide foreasy adjustability – Providing adjustable seats increases productivity (Springer, 1982). – Reduces complaints of shoulder and back pain (Shute and Starr, 1984). – People are not aware of the adjustability features and rarely use. • About 10% adjusted their seats during the day (Kleeman & Prunier,1980). • Adjustment frequency is higher for older workers than younger people (Coleman et al., Ergonomics,1998). – Guidelines for increasing the use (Lueder, 1986): • Controls can be easily reached and adjusted • Instructions on the furniture are easy to understand • Controls are easy to find and interpret • Tools are not necessary. • Controls provide immediate feedback • The direction of operation of controls is logical and consistent • Few motions are required. • Adjustments require the use of only one hand.
  • 36.
    Ergonomic chair recommendations •Seat height and slope – Minimum range of 16 to 20.5 in based on a compressed seat (ANSI) – 5 to 15 ° forward tilt to 5 ° backward tilt (Lueder,1986) • Seat depth and width – Chairs depth Should not exceed 16.8” and the width of the seat surface be not less than 15.7” (Grandjean et al, 1973). – Seat depth: 15 to 17 in (ANSI) – Seat width: 18.2 in (ANSI) • Contouring and cushioning – Seat cushion thickness range from 11.5 to 2” (LUeder, 1986). • Seat back parameters – Seat back angle: a minimum range of 90° to 105 ° with the seat pan. up to 120° (ANSI) – Seat back width: at least 12” in the lumbar region. – Seat back height: a minimum of 19.5” (Lueder, 1986). As a backrest reclines, the lumbar support moves upward relative to the lumbar spine (Anderson, 1987).
  • 37.
  • 38.
  • 39.
    Step 1 Startwith the chair… What makes an ergonomic chair • 5 star base of support • Height adjustable base • No armrests present
  • 40.
    Height of chair •Chair needs to be at a height so that your forearms are parallel to the desk with your shoulders relaxed and elbows at 90 degrees. • If your feet can’t reach the floor comfortably, you require a footrest. • Backrest at 90o to 100o to the floor.
  • 41.
    Step 2 TheVisual Display Unit (VDU) • The VDU should be approximately one arms length away from the user. • This is the average focal distance for a person and reduces the need to slouch forward to read the screen
  • 42.
    • The topof the VDU should be at eye-level. • People with bi-focals may need to have their VDU lower to avoid excessive neck extension.
  • 43.
    Step 3 TheKeyboard • The keyboard should be positioned approximately 8cm from the edge of the desk. • The keyboard should be located directly in front of the user.
  • 44.
    The keyboard shouldnot be inclined to avoid excessive and prolonged extension of the wrist whilst typing.
  • 45.
    Step 4 TheMouse • The mouse should be positioned to allow the elbow by the side of the user’s body and the wrist remains in a neutral position. • Positioning the mouse too far backwards and to the right (right hand dominant people) places the wrist in an unnatural angle which can predispose the user to carpel tunnel and tennis elbow type symptoms.
  • 46.
    The Mouse andKeyboard • The angle of the elbow should be 90 degree relative to the upper arms • Elbow should be close to the side of the body and the wrist not to the side when typing/ working
  • 47.
    Step 5 Thezone of frequent use • Items used repetitively during the day (for example pens, stapler, punch or telephone) need to be close enough so that the user does not have to stretch for the item. • This reduces the risk of slouching once the item has been grasped
  • 49.
    Laptops Always adjust thelaptop for the screen height. • Preferentially use a laptop stand or docking station. • Use an external mouse and keyboard.