This document provides a detailed summary of the Microbiology and Histopathology departments at Premier Diagnostic Center. It describes the various specimen types received in each department, the processing workflows, and techniques used. In Microbiology, specimens like blood, urine, stool and swabs are processed using both manual and automated methods. Culture media, staining techniques and automated equipment for tasks like blood culture testing and antibiotic sensitivity testing are discussed. The Histopathology department's processes for gross examination, sample preparation, staining and generating pathology reports are also outlined. The document concludes with examples of lab reports generated in each department.


![12
LIST OF TABLES
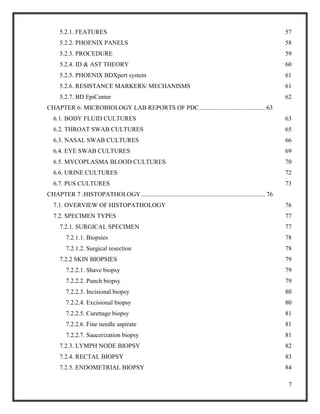
Table 1.1.: Common Specimen Types used in Microbiology Laboratory [6] 14
Table 2.1. : Genital Swab Cultures [16] 23
Table 4.1. A descriptive table of different agar types, its composition and the microorganisms
cultivated 38](https://image.slidesharecdn.com/d82b7d81-8f22-4a04-ac2d-58a6e5bec764-160206110615/85/ALISHA-PS-1-FINAL-REPORT-Copy-12-320.jpg)
![13
CHAPTER 1: OVERVIEW OF THE MICROBIOLOGY DEPARTMENT
The premises of any Diagnostic Center inevitably requires a conventional clinical microbiology
laboratory are they are considered to be the first lines of defense [1] wherein they encompass
recognition, sequestration, categorization and susceptibility testing of disease causing
microorganisms. The clinical appearance of a transmittable disease demonstrates the
communication between the host and infectious microorganism. Diagnosis necessitates an
amalgamation of material, incorporating history, physical inspection, radiographic examination
and laboratory documents [2].The routine functioning of these labs incorporates a variety of
manual techniques which are dependent on the nature of the patient’s sample.
1.1. CLINICAL MICROBIOLOGY
Microbiology (derived from Greek, mīkros – small; bios – life; logia – study) is an investigation
of microscopic organisms (unicellular/multicellular – colonies /acellular) [3]. Microbiology
comprises of several sub-categories inclusive of virology (study of viruses), mycology (study of
fungi), parasitology (study of parasites) and bacteriology (study of bacteria).
A practice of microbiology is medical/clinical microbiology which is frequently presented with
clinical doctrines of immunology as microbiology and immunology. Clinical microbiology is a
precise combination of knowledge, outlook and training designed towards clinical association in
transmittable disease management using core principles of medical microbiology and clinical
medicine [4].
Clinical microbiology deals with the comparison and correlation of microorganisms under normal
and pathological conditions. It analyses the realms of the pathological processes with a description
of treatment till the medical and comprehensive salvage is attained [5].
1.2. THE COMMON SPECIMEN TYPES AND TRANSPORTATION
For accurate diagnosis, further treatment and for the alleviation from the disease; the physician
would require the patient to provide an appropriate sample for testing and analysis. The physician
will determine the type of the sample to be provided based on the symptoms and physical
examination of the patient.](https://image.slidesharecdn.com/d82b7d81-8f22-4a04-ac2d-58a6e5bec764-160206110615/85/ALISHA-PS-1-FINAL-REPORT-Copy-13-320.jpg)
![14
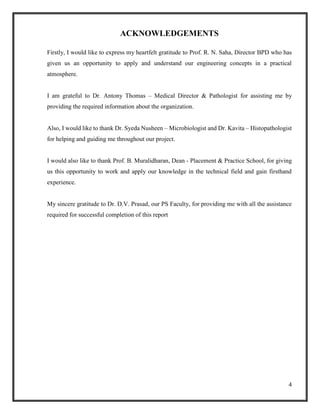
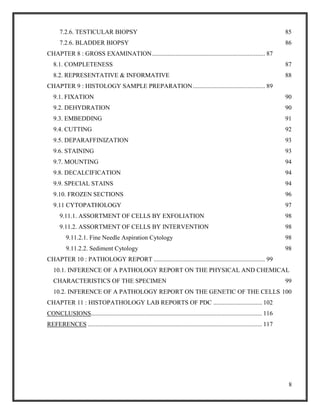
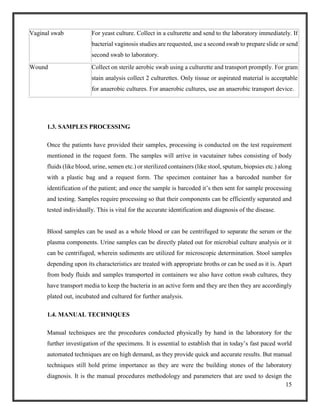
Table 1.1.: Common Specimen Types used in Microbiology Laboratory [6]
Specimen Type Transport Device
Cervix Suitable for GC (Neisseria gonorrhea) culture only. Exudates are expressed and
transported via swab.
Cerebrospinal fluid Collected in special CSF sterile screw capped plastic tube provided in kit.
Drainages Use anaerobic transport tube/ sterile tube /Culturette swab according to the micro-
organisms characteristics.
Exudates Culturette swabs are utilized. For liquid and anaerobes analysis, use anaerobic
transport tube.
Fluids Body /joint fluids are injected in a maximum of 10 mL into an aerobic blood culture
bottle. Transport additional fluid in a sterile tube and in an anaerobic transport tube
if anaerobic culture is requested.
Fungus Aspirate, biopsy, blood, body fluid, bronchoalveolar lavage, hair, nails, sinus, skin,
sputum stool, urine or genital. Tissues are collected in sterile containers; body
fluids and aspirates in blood culture tubes.
Pus For anaerobic cultures, inject aspirated pus into anaerobic transport tube. And
culturette swabs are used for aerobic cultures.
Skin scrapings Place in sterile Petri dish.
Sputum, Routine The specimen is obtained when the cough is productive (early morning). Collect
in a sterile plastic container and refrigerate.
Stool for culture C&S Vial are used to collect the bloody or mucous portions of the stool. Place
sufficient volume into the Cary/Blair transport media to match the fill line.
Urethral swab Culturette charcoal swab is preferred.
Urine Collect as clean catch in a sterile plastic container and aliquot into special
Vacutainer Urine Culture transport tube with growth inhibitor (gray top).
Refrigerate specimen if urine culture transport tube is not used. For urinalysis
aliquot into a yellow top urine preservative transport tube.](https://image.slidesharecdn.com/d82b7d81-8f22-4a04-ac2d-58a6e5bec764-160206110615/85/ALISHA-PS-1-FINAL-REPORT-Copy-14-320.jpg)
![16
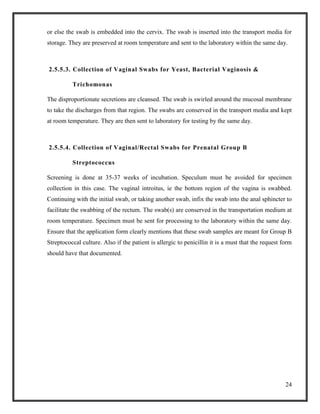
automated techniques. The manual processes are also known to provide us with the standard test
parameters which facilitate comparison with known samples and calibration for the unknown
samples. Through training in these techniques our hands on skills get improved and we also gain
the ability to analyze, in depth the theoretical aspects of microbiology (growth, maintenance,
morphology, resistance, sensitivity etc.). Also these manual techniques are used as an adjunct for
verification of the automated techniques results and are conducted at a lower cost with efficient
results.
Basic laboratory techniques are involved in isolation, cultivation, and cultural characterization of
microorganisms. There are different culture media and lab equipment required for the growth and
maintenance of pure cultures. Microorganisms have to be sub-cultured in sterilized surroundings.
A mixed microbial population can be segregated from the sample by streak plate and spread plate
inoculations techniques [7]. And further in addition to this pure cultures can be isolated and the
infection’s causative organism can be recognized. Microscopic examination of the cultures is also
conducted. An interesting aspect is that these techniques are also used to check for any bacterial
or fungal contamination (due to spillage of body fluids) within the instruments which give us
automated results.
Drawbacks of manual testing would be that they are time consuming and the technicians
performing the procedures have to be proficient in their hand skills, well versed in the protocol,
and should perform the testing in appropriate conditions for accurate results. Any slight deviation
on the protocols would mean a delayed diagnosis which could prove fatal for the patient.](https://image.slidesharecdn.com/d82b7d81-8f22-4a04-ac2d-58a6e5bec764-160206110615/85/ALISHA-PS-1-FINAL-REPORT-Copy-16-320.jpg)
![17
CHAPTER 2: SPECIMENS WORKED ON IN THE MICROBIOLOGY
LABORATORY OF PDC
These specimens have been collected from the patients and transported to the sample collection
area within diagnostic center. These samples are collected in special sterilized containers with
barcodes for the patient’s identification and laboratory record. The samples are processed
according to the tests requested for.
2.1. BLOOD
For collection of blood sample in PDC, an elastic support is circled around the upper arm to inhibit
the flow of blood. The site intended for the needle puncture is sterilized with alcohol to prevent
the blood samples contamination with the skin commensals. Once the vein is identified the needle
is inserted into it – this process is called venipuncture [8]. A tube is fixed onto the needle for the
accumulation of the sample of blood. After 10 ml of blood has been provided by the patient the
elastic support is unwound and the venipuncture site is cleansed with alcohol and a bandage is
applied to the site [9]. Various sets of blood cultures can be called for – this is ideally performed
to ensure that the diagnostic yield of the blood cultures is increased significantly. The patients are
requested to provide samples 30 minutes apart. Samples must be taken from different locations at
different times. Manifold sets of these cultures maximize the probability of sequestering an
infectious organism contaminating the blood [10]. It has also proven to reduce the possibility of a
positive culture which could have occurred due to adulteration of sample by skin commensals [11].
It is recommended that whole blood samples refrigeration at 4°C should follow instantly after
collection – this ensures that its quality is preserved. These samples can be transported in
refrigerated packages at 4°C via ships. This temperature ensures its stability for a week. If sample
investigation is unlikely to happen within a week, then the samples are frozen promptly at 70°C (-
20°C is insufficient).
Blood plasma is the liquid component of the blood providing it fluidity and giving a medium for
the suspension of all the blood cells. The protocol for the blood plasma preparation would comprise](https://image.slidesharecdn.com/d82b7d81-8f22-4a04-ac2d-58a6e5bec764-160206110615/85/ALISHA-PS-1-FINAL-REPORT-Copy-17-320.jpg)
![18
of mixing the blood with anticoagulant. After which the samples are promptly centrifuged and the
supernatant obtained would be the plasma.
Blood plasma deficient in fibrinogen and the other clotting factors is said to be blood serum. The
serum has more clarity in comparison to plasma cause of the decreased quantity of proteins. The
protocol for serum separation from the whole blood would include transferring the blood into a
vacutainer tube without anticoagulant. It’s allowed to rest in the upright position to ensure clotting
of blood after which it’s centrifuged. The supernatant thus obtained is the serum [12].
After all serum/plasma is segregated to appropriate transfer/storage tubes the tubes should be
accurately marked with sticker, marker or other method with an identification code. Blood cultures
or microscopy is employed for sample investigation [13].
[9]
© Copyright the Finnish National Public Health Institute 2002.
Fig.2.1. Blood sample collected in the tube with an identification number attached
2.2. URINE
Urine samples can be collected by different methods and they are accordingly named as random
specimen, first morning specimen, midstream clean catch specimen, timed collection specimen,
catheter collection specimen, suprapubic aspiration specimen and pediatric specimen.](https://image.slidesharecdn.com/d82b7d81-8f22-4a04-ac2d-58a6e5bec764-160206110615/85/ALISHA-PS-1-FINAL-REPORT-Copy-18-320.jpg)
![19
In PDC we usually work with Midstream clean catch specimen. The patients are provided with a
cleansing towelette and a sterile specimen container. Patients are instructed to clean the urethral
site with a towelette (castile soap). The initial portion of the urine flow should be discarded into
the washroom by the patient [14]. These beginning steps are vital as they considerably lessen the
incidences of adulterants to contaminate the urine stream. The urine midstream is the accumulated
in the storage container. Discard the excess urine into the toilet. Utilizing this process, collection
can be done during the day or night according to the patient’s convenience [15]. This is the favored
specimen type as it eases the culturing process and is apt for susceptibility testing due to the
decreased occurrence contamination caused by cells or microorganisms [16]. Urine samples is
cultured else after centrifugation the sediments are microscopically analyzed.
[15]
© Copyright 2014, Saddleback College, Mission Viejo, California
Fig.2.2. Sterile Mid-stream urine collection kit.
[16]
© Copyright 2014,Gilson Inc. Clinical/Forensics
Fig.2.3. Mid-stream catch urine specimen](https://image.slidesharecdn.com/d82b7d81-8f22-4a04-ac2d-58a6e5bec764-160206110615/85/ALISHA-PS-1-FINAL-REPORT-Copy-19-320.jpg)
![20
2.3. STOOL
For stool sample collection, patients are provided with a plastic disposable bowl (composed of
margarine). The stool has to be transferred straight into the clean, dry, wide mouth bowl. Avoid
sample contamination due to urine, toilet water or toilet paper. Areas of the specimen which seem
to have blood, mucous, pus or any watery discharge must be taken in small quantities from the
ends and the middle [17].
Certain collection cups are devoid of the preservative. In such case the tongue depressor is
recommended or an alternative plastic spoon is catered to facilitate the specimen transfer. A walnut
size specimen would suffice for testing. Leakage must be prevented as this may cause sample
rejection. Thus ensure that the lid of the vial is tightened and also refrigerate it to maintain its
quality [18].
In PDC we provide vials with preservative (blue, green, pink, orange). These vials contain an
inbuilt spoon fixed onto the lid, used for sampling. The specimen is sufficiently transferred into
the vial and the additives level is expected to reach the fill line [19]. The formed stool is mashed
against the vials walls with the spoon. Once the lid is tightly affixed, the specimen is shaken until
it is homogenously mixed [20]. Stool samples are inoculated into culture plates for further analysis.
[19]
© 2000-2012 All Rights Reserved, Diagnos-Techs™, Inc.
Fig.2.4. Stool collection procedure](https://image.slidesharecdn.com/d82b7d81-8f22-4a04-ac2d-58a6e5bec764-160206110615/85/ALISHA-PS-1-FINAL-REPORT-Copy-20-320.jpg)
![21
2.4. SPUTUM
For collection of the appropriate sputum sample, the patients are advised to breathe deeply at least
three times and then expel a deep cough [21]. Breathing deeply ensures that the tenacious
secretions are loosened and causes it to accumulate at the rear portion of the throat. When the
sample is collected ensure that the thin mouth secretions – saliva don’t contaminate the sample.
Accentuate the importance of expectorating the viscous lung secretions – the sputum into the
container. In case of emergency always keep a 10% sodium chloride spray or sterilized water by
your side to be rendered to the patient via nebulizer at times of discomfort. This helps in releasing
the thickened secretions. Sputum samples are cultured and colonies can be taken for microscopic
analysis via gram staining or AFB (Acid Fast Bacteria) stain [22].
[21]
© 2011 Copyright, TB Online
Fig.2.5. A sputum sample
2.5. SWAB SAMPLES
In PDC, Becton Dickson swabs are used to take samples from the genital tract, throat, eye, ear,
nose, and superficial wounds (e.g. sores, boils, and rashes). The transport medium generally
provided with these swabs are charcoal or clear gel. The samples must be sent to the laboratory
within 24 hours. These swabs are processed with an expiration date which necessitates the rotation
of stock for quality assurance. Dry swabs sent for culture have to be transported within 1 hour of
collection else they will be rejected and remain unprocessed.](https://image.slidesharecdn.com/d82b7d81-8f22-4a04-ac2d-58a6e5bec764-160206110615/85/ALISHA-PS-1-FINAL-REPORT-Copy-21-320.jpg)
![22
[23]
© Copyright Lifelabs
Fig.2.6. Swabs C & S - Amies Transport Medium Charcoal or Clear gel
2.5.1. WOUND SWAB
The wounded skin (boils, rashes, burns etc.) have to be mildly cleansed prior to sample collection.
The physicians prefer this as it reduces the incidences of contamination due to floral commensals.
The pus discharges are passed onto these swabs, they are then transferred into the medium for
transportation. Maintenance of swabs at room temperature is vital. Submission of the specimens
must be completed within 24 hours of accumulation. Aspirates are considered ideal for the
cavernous wounds as the prognostic assessment of surface swabs is reduced in this case.
2.5.2. EYE SWAB
The purulent expulsion is expressed onto the swabs and is obtained from the upturned lower eyelid.
This collection is done prior to the application of anesthetics. The swabs are placed in the medium
of transport. They need to be maintained at room temperature and submission to the lab has to be
done prior to the completion of 24 hours of sample collection [23]. Else the sample gets rejected
and hence remains unprocessed.
2.5.3. EAR SWAB
For sample collection the exterior ear canal is swabbed. The swab is then transferred into transport
media. These specimens require refrigeration at 2-8 ºC for maintenance. Sample have to be sent to
the laboratory by 24 hours of collection.](https://image.slidesharecdn.com/d82b7d81-8f22-4a04-ac2d-58a6e5bec764-160206110615/85/ALISHA-PS-1-FINAL-REPORT-Copy-22-320.jpg)
![23
2.5.4. THROAT SWAB
The physicians take the sample by swabbing the tonsillar region and/or rear portion of the pharynx.
The swabs are placed into the appropriate medium for transportation and maintained at room
temperature. Submit the specimens by the same day to the lab [24].
2.5.5. GENITAL SWAB CULTURES
Table 2.1. : Genital Swab Cultures [25]
Organism / Syndrome
investigated
Source of specimen Collection
Neisseria gonorrhea Endocervical, Urethral Amies transport Swab
(Charcoal or clear gel)
Yeast, Bacterial vaginosis,
Trichomonas
Post vaginal vault Amies transport Swab
(Charcoal or clear gel)
Prenatal screening for Group
B Streptococcus at 35-37
weeks gestation
Combined Vaginal/Rectal Amies transport Swab
(Charcoal or clear gel)
2.5.5.1. Collection of Urethral Swabs
The purulent discharges are expelled from the urethra onto the swab for sample collection. If
exudates aren’t available, then it’s recommended to introduce the swab in the urethrogenital tract
about 2cm deep into the urethra. The swab is calmly moved in rotatory motion and gently removed.
The swab is shifted into the media for transport and is submitted to the lab on the same day.
2.5.5.2. Collection of Endocervical Swabs
A speculum is utilized for sample collection in this process. It is moistened with warm water. If
the patient is infected by Neisseria gonorrhea, lubricants are avoided as they are toxins to these
microorganisms and the testing will fail in the organism’s apt identification. Emphasis is given to
clear of any mucous or vaginal substance as they can adulterate the sample. Using the speculum’s
blades the walls of the cervix is gently converged. The purulent exudates are passed on the swab](https://image.slidesharecdn.com/d82b7d81-8f22-4a04-ac2d-58a6e5bec764-160206110615/85/ALISHA-PS-1-FINAL-REPORT-Copy-23-320.jpg)
![25
CHAPTER 3: TYPES OF CULTURE MEDIA
To be able to investigate the microorganisms adequately, it is essential to culture them. To
achieve this, it is vital to move the specimens into a habitat replicating the suitable environment
enhancing their development. Nutritional necessities are wide ranging from one species of a
microorganism to another. There are situations where their requirements are blatantly unknown.
Ample research has been conducted with regard to their proliferation conditions required to
cultivate these organisms. In present day and age, most of the microbes are successfully grown
on or in the artificial media. The constituents of the media are prepared keeping in mind the
nutritional and growth conditions of the microbes. The media are made in accordance to
supplement the development of these organisms. Emphasize is made on this aspect as the
cultures now studied will be in correlation to the organisms characteristics which are observable
in the species that occur in nature.
3.1. SEQUESTRATION MEDIA
Media whose function is for the sequestration of bacterial isolates or the inoculum is called
sequestration media. This is generally made in Petridishes to ease the streaking of the organism.
And hence we can attain sequestered colonies of the microbe under study.
3.1.1. Trypticase soy agar (TSA)
Trypticase soy agar is a nutrient media which facilitates primarily in seclusion of microbes. It
allows the development of a variety of bacteria including gram positive and negative bacteria.
[26]
Fig.3.1. Serratia marcescens on Trypticase Soy Agar](https://image.slidesharecdn.com/d82b7d81-8f22-4a04-ac2d-58a6e5bec764-160206110615/85/ALISHA-PS-1-FINAL-REPORT-Copy-25-320.jpg)
![26
3.1.2. Nutrient agar
Nutrient agar is a broad spectrum media which supports the growth of a wide array of non-
fastidious organisms [26].
[26]
© 2011 Copyright, Gilson Inc.
Fig.3.2. Growth of Klebsiella on nutrient agar plate
3.1.3. Caesin Agar
Casein Nutrient agar is a media for growth used to develop isolates of lactic acid bacteria
like Streptococcus thermophilus and Lactobacillus bulgaricus. It’s comprises of the typical
nutrient agar in addition to skim milk powder (the casein ingredient). Casein is precipitated out of
the agar by the lactic acid bacteria by reducing the pH. This results in a cloudy appearance which
surrounds the colonies that perform this activity. This isn’t a selective media as it is considered as
a media for growth of a broad spectrum of organisms [27].
[27]
© 2011 Copyright, Missouri Academic Inc.
Fig.3.3. Casein Hydrolysis by Bacillus subtilis on Skim Milk Agar](https://image.slidesharecdn.com/d82b7d81-8f22-4a04-ac2d-58a6e5bec764-160206110615/85/ALISHA-PS-1-FINAL-REPORT-Copy-26-320.jpg)
![27
3.2. ENRICHMENT MEDIA
Media which is formulated by the increasing the constituents for enrichment and development
of microorganisms with high nutritional demand.
3.2.1. Blood agar
When defibrinated blood (blood without its clotting proteins) is incorporated into agar we get a
blood agar which would enhance the growth of medically vital fastidious bacteria. This media is
opaque and has a prominent bright red color. Such media’s are classified as complex media
(chemical recreation isn’t a possibility) and enhanced (comprising a uniquely rich selection of
nutrients).
Alpha hemolysis: Bacteria cultured on blood agar are segregated based on their interaction with
the red blood cells which are integrated into the medium. Hemolysins (hemo – blood, lysin – to
split), enzymes which degrade the red blood cells by lysing them, are produced by certain
bacteria. Hemolysins disrupt the cells resulting in the release of the internal hemoglobin
molecule into the agar medium. The chemicals in the agar react with the hemoglobin and cause
change in coloration of the media, its typical red color is transformed. This phenomenon is
classified as alpha hemolysis, as the medium beneath the bacterial colonies is prominently
brown – green. Eg: Streptococcus pneumonia
Beta hemolysis: Some strains of bacteria have the capability of consuming the released
hemoglobin molecule simultaneously with degradation of the red blood cells. This results in
complete hemolysis, classified as beta hemolysis. Here clearing of the media beneath the
bacterial colonies is observed. The opaque medium is transformed into a transparent one.
Eg: Streptococcus pyogenes
Gamma hemolysis: Some other bacteria do not react with the red blood cells, significantly
leaving them untouched. The medium shows no discoloration or clearance due to growth.
These bacteria are classified as gamma hemolytic bacteria [28]. Eg: Enterococcus faecalis](https://image.slidesharecdn.com/d82b7d81-8f22-4a04-ac2d-58a6e5bec764-160206110615/85/ALISHA-PS-1-FINAL-REPORT-Copy-27-320.jpg)
![28
[28]
© Copyright Collin Education
Fig.3.4. Three types of Hemolysis seen in Blood agar plates
3.2.2. Chocolate agar
Chocolate agar (CHOC) or chocolate blood agar (CBA) is an enhanced growth medium and is
essentially non selective [29]. It is an alternative of the blood agar petriplate, comprising of lysed
red blood cells. This is achieved by gradually heating the plate to 80 °C. Fastidious respiratory
bacteria like Hemophilus influenzae and Neisseria meningitidis require chocolate agar for their
proper growth. In addition to this certain bacteria, remarkably H. influenzae, require growth factors
like NAD (factor V) and hemin (factor X) which are present within red blood cells. Hence an
essential criterion for such bacterial development is dependent on the lysis of the red blood
corpuscles [29]. Degradation of NAD is prevented by the inactivation of the enzymes due to the
high temperature. The agar medium is named due to its color and comprises of no authentic
chocolate.
[29]
© 2014 Medical Laboratories.
Fig.3.5. Haemophilus influenzae on Chocolate Agar](https://image.slidesharecdn.com/d82b7d81-8f22-4a04-ac2d-58a6e5bec764-160206110615/85/ALISHA-PS-1-FINAL-REPORT-Copy-28-320.jpg)
![29
3.3. SELECTIVE MEDIA
Media utilized to grow one specific bacterial strain from a diverse microbial culture by
constraining the development of the remaining bacteria.
3.3.1. Phenylethyl alcohol (PEA)
PEA is involved in destruction of the lipid structure on the gram negative membrane and hence it
impedes the growth of these organisms [30].
3.3.2. Mannitol salt agar
Mannitol salt agar (MSA) is a frequently used medium required for growth in microbiology. It
supports the growth of specific type of bacteria while constraining the progress of the others. This
medium has a vital role in medical laboratories by differentiating infectious microorganisms in a
limited time frame [31]. MSA is selective for Staphylococci.
[31]
Fig.3.6. Staphylococcus aureus growing on Mannitol salt agar plate
3.3.3. MacConkey agar
MacConkey agar is a growth media structured to culture gram negative bacteria and distinguish
them according to their lactose fermentation potentials [32]. The media consists of lactose,
peptone, bile salts and neutral red dye. The proliferation of the gram positive bacteria is impeded
due to the presence of bile salts and crystal violet in the media. And the neutral red dye functions
in staining the lactose fermenting microorganisms.](https://image.slidesharecdn.com/d82b7d81-8f22-4a04-ac2d-58a6e5bec764-160206110615/85/ALISHA-PS-1-FINAL-REPORT-Copy-29-320.jpg)
![30
[32]
© Copyright, 2014 American Society for Microbiology
Fig.3.7.Escherichia coli isolated from a patient with diarrhea on MacConkey Agar.
3.3.4. Eosin methylene blue agar
Eosin Methylene Blue (EMB / Levine’s formulation) is a stain that is marginally selective
for Gram-negative bacteria. EMB is a combination of two stains, namely eosin and methylene blue
mixed in the ratio of 6:1. This stain is widely used in the constitution of EMB agar which is a
differential medium used in microbiology. This medium is slightly inclined towards the culture of
gram positive bacteria and has a color indicator to differentiate among the microbes that ferment
lactose (eg E.coli) and those that are incapable of doing that phenomenon (eg Salmonella, Shigella)
[33]. The lactose fermenters exhibit colonies with prominent dark nucleated centers.
[33]
© Copyright, 2014 Lacity College Education
Fig.3.8. E. coli showing metallic green sheen on EMB agar plate](https://image.slidesharecdn.com/d82b7d81-8f22-4a04-ac2d-58a6e5bec764-160206110615/85/ALISHA-PS-1-FINAL-REPORT-Copy-30-320.jpg)
![31
3.3.5. XLD agar
Xylose lysine deoxycholate agar (XLD agar) is a growth medium which is selective in nature. It’s
specifically used in the sequestration of Salmonella and Shigella strains obtained from medical
specimens and from food samples. The pH of the agar is maintained approximately a 7.4 due to
which it possesses a bright pink or red coloration as it contains the phenol red indicator. The
evident change of color from yellow to red is observed due to lowering of the pH value due to the
sugar fermentation that occurred [34].
[34]
© Copyright, 2014 Textbook of Bacteriology
Fig.3.9. Salmonella sp. after 24 hours growth on XLD agar.
3.3.6. TSI agar
The Triple Sugar Iron or TSI test is used in microbiological assessments as it is adept in generating
hydrogen sulfide due to the microbe’s capacity of fermenting the sugar present in the medium
[35]. It is commonly used for the selective categorization of the enteric bacteria inclusive of
Salmonella and Shigella but not specifically limited to that alone. This medium is prepared in
slants. The slanted surface of this agar offers a range of areas that are either vulnerable to air
comprising of oxygen in a range of fluctuating degrees (an aerobic atmosphere) or not exposed to
air (an aerobic atmosphere).](https://image.slidesharecdn.com/d82b7d81-8f22-4a04-ac2d-58a6e5bec764-160206110615/85/ALISHA-PS-1-FINAL-REPORT-Copy-31-320.jpg)
![32
[35]
© Copyright, ASM Microbe Library
Fig.3.10. Inoculation of TSI agar slant
3.4. DIFFERENTIAL MEDIA
Media which helps in differentiating among bacterial strains that have likeness in appearance or
appear to have similarity when they are subjected to differential dyes or plated on Tryptic Soy
Agar.
Egs: MacConkey agar – functions as a differentiator amongst the lactose metabolizers and
non-lactose metabolizers.
Mannitol salt agar – segregates amid Staphylococcus aureus and the other
Staphylococcus species.
Eosin methylene blue – separates the E.coli from the other enteric bacilli.
3.5. LIQUID BROTH
Liquid media are transported for use in test tubes, bottles or flasks. Within the liquid medium
the colonies of bacteria develop homogenously thus creating overall turbidity. Liquid media is
preferred when a large bacterial quantities have to be grown. This media is known to sustain a
low inoculum and proliferate the bacteria in adept conditions.
An added on advantage is that the presence of the bacterial inhibitors in the medium will not
dominate as they get diluted out in this medium. This is very reason this is considered as a](https://image.slidesharecdn.com/d82b7d81-8f22-4a04-ac2d-58a6e5bec764-160206110615/85/ALISHA-PS-1-FINAL-REPORT-Copy-32-320.jpg)
![33
reliable media for blood cultures. Also it is noted that viable counts (by dilution methods) can
be inferred from culturing in liquid mediums.
3.5.1. Nutrient Broth
The liquid bacterial growth media comprising of powdered beef extract and small chains of amino
acids liquefied in water is called Nutrient Broth. It is appropriate to use this liquid medium in test
tubes for culture of the bacteria. This helps in providing us information on the oxygen necessities
of bacteria. Aerobic bacteria are see growing at or near to the upper surface of water (higher oxygen
content) whereas on the contrary, Anaerobic bacteria would be seen at the bottom surface of the
tube (minimal or no oxygen content) [36].
3.5.2. Tryptic Soy Broth
Tryptic Soy Broth (Soybean-Casein Digest Medium) is a liquid enhancement medium for overall
use in qualitative processes for the sterility testing and for the augmentation and development of
aerobic microbes that are not disproportionately fastidious. In clinical microbiology, it may be
used for the suspension, enrichment and cultivation of strains isolated on other media.
3.5.3. Brain Heart Infusion Broth
Brain Heart Infusion Broth (BHI) is an enriched non-selective medium intended for the cultivation
of most anaerobic bacteria and other fastidious microorganisms. This medium is used in the
inoculum preparation for antimicrobial susceptibility testing, is especially useful as a base for
blood cultures and is also used in the broth-disc antimicrobial test procedure as described by
Wilkins and Theil. BHI is an enriched non-selective broth medium that is useful in the cultivating
of fastidious and non-fastidious microorganisms.
This medium will also support the growth of aerobic microorganisms from a variety of clinical
and non-clinical specimens. The basal medium is infusion from brains and beef heart
and supplemented with vitamin K1 and hemin as growth factors for most anaerobes. This medium
is prepared, dispensed, stored and packaged under oxygen-free conditions to prevent the formation
of oxidized products prior to use. This medium contains resazurin as a redox indicator which turns
pink upon significant oxygen exposure.](https://image.slidesharecdn.com/d82b7d81-8f22-4a04-ac2d-58a6e5bec764-160206110615/85/ALISHA-PS-1-FINAL-REPORT-Copy-33-320.jpg)
![35
necessary. When we have colonies with slow development, incubators with closed and humidified
containers are preferred as they help to overcome problems with the drying out of the spread plates.
Once the suitable incubation is completed the plates must be crosschecked. If we plate a dilution
series, the development on the plates should depict the expectable decline in CFUs/plate as
demonstrated in this picture of a 10-fold dilution series made from an overnight broth culture
of Escherichia coli. Duplicate or triplicate plates with 30 to 300 CFUs/plate are utilized to
enumerate CFUs/ml. Spread plates with sufficiently sequestered colonies may be examined and
if preferred, these colonies are used to initiate original cultures [37].
[37]
Fig.4.1. Picture of spread plates showing bacterial growth (E.coli, 40 hours, room
temperature) on five plates prepared from a ten-fold dilution series](https://image.slidesharecdn.com/d82b7d81-8f22-4a04-ac2d-58a6e5bec764-160206110615/85/ALISHA-PS-1-FINAL-REPORT-Copy-35-320.jpg)
![36
4.2. STREAK PLATE
The streak plate technique is a prompt qualitative sequestration technique. The methods frequently
used for segregation of distinct colonies primarily required that the amount of microbes in the
inoculums had to be decreased. It is considered to be a dilution procedure that involves distributing
a loop full of inocula covering the area of an agar plate. The outcome of this is the attenuation of
the population size which confirms that after inoculation, the separate cells will be adequately
distanced on the region of the agar medium to facilitate the segregation of the variety of the species
available. There are many measures that can be performed but streaking by quadrant method is the
most frequently conducted.
The human body is a site of proliferation of billions of bacteria which comprise the normal flora
or commensals which are hostile against the infectious pathogens. It’s a cumbersome process to
separate a specific strain of bacteria from a medical specimen. The streak plate procedure is
performed to enable us to culture bacteria on a growth agar medium surface so as to ensure that
distinct bacterial colonies are secluded and tested. The derivatives from an individual precursor
cell imply a clone of cells or secluded colonies.
When the required culture medium is inoculated with the help of an individual sequestered colony,
the final culture that develops would be a derivative of that particular distinct clone. The
contemporary streak plate technique has emerged due to the meticulous hard work of Robert Koch
and other microbiologists. They attained an unadulterated culture of bacteria for the purpose of
investigation.
The dilution or sequestration technique was invented by Loeffler and Gaffky in Koch’s laboratory.
It encompasses diluting the bacteria by methodically streaking the microbes over the agar surface
in a petri dish to acquire secluded colonies which would gradually proliferate into a cluster of cells
or isolates of bacteria. If the progeny of the microbes is genetically identical, the bacterial culture
is defined as a pure culture.
The petri plates of frequent use are of 100mm in diameter. The surface of the agar plate needs to
moisture free and completely dry without any water droplets. The source of inoculums can be
medical sample, ecological swab, sediments of urine, broth or solid culture [38].](https://image.slidesharecdn.com/d82b7d81-8f22-4a04-ac2d-58a6e5bec764-160206110615/85/ALISHA-PS-1-FINAL-REPORT-Copy-36-320.jpg)
![37
The streaking technique is performed using a sterilized inoculation loop or a cotton swab to attain
an unadulterated microbial culture. This procedure is done to pick colonies when it is done from
the surface of the agar with secluded colonies and is relocated to a fresh agar or gelatinous plate
with the help of an inoculation needle or loop. The bacterial suspension is now patterned over the
agar surface.
On the initial region of the streak, many microorganisms are deposited resulting in confluent
growth or the growth of culture over the entire surface of the streaked area. The loop is sterilized
by heating the loop in the blue flame of the Bunsen burner, between streaking different sections,
or zones and thus lesser microorganisms are deposited as the streaking progresses. The streaking
process will dilutes out the sample that was placed in the initial region of the agar surface. There
are two most commonly used streak patterns, a three sector "T streak" and a four quadrant streak
methods.
[38]
Fig.4.2. Quadrant method of streaking plates](https://image.slidesharecdn.com/d82b7d81-8f22-4a04-ac2d-58a6e5bec764-160206110615/85/ALISHA-PS-1-FINAL-REPORT-Copy-37-320.jpg)
![38
Table 4.1. A descriptive table of different agar types, its composition and the
microorganisms cultivated
Agar Medium Organisms isolated by Streaking Contents
TSA Agar Cultivate: Aspergillis niger, Bacillus subtilis,
Candida albicans, Pseudomonas aeruginosa,
Staphylococcus aureus.
Isolate: Aspergillis niger,
Bacillus subtilis, Candida albicans,Pseudomonas
aeruginosa, Staphylococcus aureus
Enzymatic Digest of
Casein,
Enzymatic Digest of
Soybean Meal,
Sodium Chloride,
Agar.
Required pH 7.2 ± 0.3 at
25°C. [39]
Nutrient Agar Cultivate: Bacillus subtilis,
Escherichia coli.
Salmonella typhimurium, Staphylococcus aureus,
Streptococcus pneumoniae , Streptococcus pyogenes
Enzymatic Digest of
Gelatin,
Beef Extract,
Agar,
Required pH: 6.9 ± 0.3 at
25°C
Blood Agar Cultivate: Escherichia coli - Beta hemolysis,
Staphylococcus aureus - Beta hemolysis,
Streptococcus pneumoniae - Alpha hemolysis
Streptococcus pyogenes – Beta hemolysis.
Enzymatic Digest of
Casein,
Enzymatic Digest of
Animal Tissue,
Yeast Extract,
Corn Starch,
Sodium Chloride,
Agar.
Required pH: 7.1 ± 0.3 at
25°C [40]](https://image.slidesharecdn.com/d82b7d81-8f22-4a04-ac2d-58a6e5bec764-160206110615/85/ALISHA-PS-1-FINAL-REPORT-Copy-38-320.jpg)
![39
Chocolate
Agar
Cultivate: Hemophilus influenzae, Neisseria
gonorrhea, Neisseria meningitides, Streptococcus
agalactiae, Streptococcus pneumonia.
Enzymatic Digest of
Casein, Enzymatic Digest
of Animal Tissue,
Corn Starch, Dipotassium
Phosphate,
Monopotassium
Phosphate,
Sodium Chloride,
Agar
Required pH: 7.3 ± 0.3 at
25°C
PEA Agar Culivate: Enterococcus faecalis, Escherichia coli,
Pseudomonas aeruginosa, Staphylococcus aureus.
Beef Extract,
Acid Hydrolysate of
Casein
Starch,
Agar.
Required pH 7.2 ± 0.2 at
25°C
[41]
Mannitol-Salt
Agar
Cultivate: Staphylococcus aureus, Staphylococcus
epidermidis, Escherichia coli
Enzymatic Digest of
Casein, Enzymatic Digest
of Animal Tissue, Beef
Extract, D-Mannitol,
Sodium Chloride, Phenol
Red, Agar .
Required pH: 7.3 ± 0.3 at
25°C
MacConkey’s
Agar
Cultivate: Enterococcus faecalis,
Escherichia coli, Proteus mirabilis, Salmonella
typhimurium, Staphylococcus aureus.
Enzymatic Digest of
Gelatin, Enzymatic Digest
of Casein, Enzymatic
Digest of Animal Tissue,
Lactose, Bile Salts](https://image.slidesharecdn.com/d82b7d81-8f22-4a04-ac2d-58a6e5bec764-160206110615/85/ALISHA-PS-1-FINAL-REPORT-Copy-39-320.jpg)
![40
Mixture, Sodium Chloride
,Neutral Red, Crystal
Violet, Agar.
Required pH: 7.3 ± 0.3at
25°C [42]
EMB Agar Cultivate: Enterococcus faecalis, Escherichia coli,
Pseudomonas aeruginosa
Enzymatic Digest of
Gelatin, Lactose ,
Dipotassium Phosphate,
Eosin Y,
Methylene Blue, Agar.
Required pH: 7.2±0.3 at
25°C
XLD Agar Culivate: Enterococcus faecalis, Escherichia coli,
Salmonella typhimurium, Shigella Flexner
Yeast Extract,
Lactose, Sucrose, Xylose,
L-Lysine, Ferric
Ammonium Citrate,
Phenol Red, Sodium
Chloride, Sodium
Deoxycholate, Sodium
Thiosulfate, Agar.
Required pH: 7.2 ± 0.3 at
25°C [43]
TSI Agar Cultivate: Escherichia coli, Proteus mirabilis,
Pseudomonas aeruginosa, Salmonella typhimurium,
Shigella flexner.
Enzymatic Digest of
Casein,
Enzymatic Digest of
Animal Tissue, Yeast
Enriched Peptone,
Dextrose, Lactose,
Sucrose, Ferric
Ammonium Citrate,
Sodium Chloride, Sodium](https://image.slidesharecdn.com/d82b7d81-8f22-4a04-ac2d-58a6e5bec764-160206110615/85/ALISHA-PS-1-FINAL-REPORT-Copy-40-320.jpg)
![41
Thiosulfate, Phenol Red ,
Agar.
Required pH: 7.2 ± 0.3 at
25°C [44]
4.3. ANTIBIOTIC SENSITIVITY – Kirby Bauer Method
Disk diffusion is one of the oldest approaches to antimicrobial susceptibility testing and remains
one of the most widely used antimicrobial susceptibility testing methods in routine clinical
laboratories. It is suitable for testing the majority of bacterial pathogens, including the more
common fastidious bacteria, is versatile in the range of antimicrobial agents that can be tested
and requires no special equipment.
MH agar is used as the medium, onto which the microbe in question is inoculated and through
spread plate medium the colonies are evenly spread throughout the medium. Apply disks firmly
to the surface of the inoculated and dried agar plate. Disks must not be moved once they have
been applied to plates as diffusion of antimicrobial agents from disks is very rapid. The number
of disks on a plate should be limited to avoid overlapping of zones and interference between
agents. It is important that zone diameters can be reliably measured. The maximum number of
disks depends on the organism and the selection of disks. Normally 6 and 12 disks are the
maximum possible number on a 90 and 150 mm circular plate, respectively. Plates are incubated
for 24 hours. Measure the diameters of zones of inhibition to the nearest mm with a ruler, Caliper
or an automated zone reader. And compare with a standard to interpret results [45].](https://image.slidesharecdn.com/d82b7d81-8f22-4a04-ac2d-58a6e5bec764-160206110615/85/ALISHA-PS-1-FINAL-REPORT-Copy-41-320.jpg)
![42
[45]
© 2000 - 2014. 5m Publishing, Benchmark House, 8 Smithy Wood Drive, Sheffield, S35 1QN, England.
Fig.4.3. Antibiotic Disk Diffusion Method
4.4. BLOOD CULTURES
A blood culture is a test to find an infection in the blood. The blood does not normally have any
bacteria or fungi in it. A blood culture can show what bacteria or fungi are in the blood.
A bacterial infection in the blood, called bacteremia, can be serious because the blood can spread
the bacteria to any part of the body. A blood infection most often occurs with other serious
infections, such as those affecting the lungs, kidneys, bowel, gallbladder, or heart valves. A
blood infection may also develop when the immune system is weak. This can occur in infants
and older adults, and from disease (such as cancer or AIDS) or from medicines (such
as corticosteroids or chemotherapy) that change how well your body can fight infections
(immunity).
Manual blood culture systems that used basal culture media, and except for incubation time [46],
they have not been studied for recently developed automated blood culturing systems that use
specialized media. The organisms are transferred from the culture bottle to the basal medium
(soybean casein digested broth). Blind subculture is done. Changes like turbidity, froth, deposits,
pellicles and hemolysis are observed in the positive culture plates [47].](https://image.slidesharecdn.com/d82b7d81-8f22-4a04-ac2d-58a6e5bec764-160206110615/85/ALISHA-PS-1-FINAL-REPORT-Copy-42-320.jpg)
![44
[48]
© jiandanransefa course
Fig.4.4. Smear preparation and simple staining
4.6. MICROSCOPY
The prepared stained smear is placed side up on the stage of the microscope for observation. First
the slide is positioned on the stage ensuring that stained smear is on top of the opening. Revolve
the lowest objective of power 10X into its place. Primarily the large knob is rotated for coarse
adjustment and this is for the initial adjustment. The smaller knob is altered according for finer
adjustment and the perfect focusing is achieved. The smear is evaluated in the 10X objective. After
this the nosepiece is alternated with the higher objective the dry 40X. A minor relocation is done
with the smaller fine adjustment knob. The amplified size of the bacterial cells and the reduced
amount of cells visible in the microscopic field are recorded. While using the 100X objective, that
is the oil immersion nosepiece for focusing, a droplet of immersion oil has to be placed on the
slide, covering the smear. And the 100X nosepiece is lowered gradually such that it touches the
droplet.](https://image.slidesharecdn.com/d82b7d81-8f22-4a04-ac2d-58a6e5bec764-160206110615/85/ALISHA-PS-1-FINAL-REPORT-Copy-44-320.jpg)

![46
wash bottle is used for rinsing the slide. De-colorization of the smear is conducted by allowing
95% ethanol to flow down over the surface of the slide. The slide is maintained at an angle, held
against light, and this step is performed until the primary stain is no longer seen from the slide.
This procedure requires a few seconds after which the slide is promptly rinsed with water. Now if
we microscopically analyze the slide, the gram positive species will still remain purple whereas
the gram negative species will be colorless. The slide is flooded with the counterstain safranin and
kept for 2 minutes. Now at this point if we investigate the slide microscopically, the gram positive
strain will still remain purple and the gram negative bacteria will show the appearance of the
pinkish red counterstain. Rinsing with water is done and the slide is left to air dry. The slide can
be gently blotted, not rubbed with bibulous sheet. The surface of the slide needs to be free from
moisture before addition of immersion oil for examination under the 100X oil immersion objective
[49].
[48]
© Copyright, Adapted from Jenkins et.al
Fig.4.5. Microscopic observation of Gram negative and positive bacteria
4.6.2. Acid Fast staining (using Ziehl Neelson’s stain)
The Ziehl–Neelsen stain, is a special bacteriological stain used to identify acid-fast organisms,
mainly Mycobacteria [50]. Mycobacterium tuberculosis is the most important of this group
because it is responsible for tuberculosis (TB). Acid fast organisms like Mycobacterium contain
large amounts of lipid substances within their cell walls called mycolic acids. These acids resist
staining by ordinary methods such as a Gram stain. It can also be used to stain a few other bacteria,
such as Nocardia. The reagents used are Ziehl–Neelsen carbol fuchsin, acid alcohol,
and methylene blue. Acid-fast bacilli will be bright red after staining.](https://image.slidesharecdn.com/d82b7d81-8f22-4a04-ac2d-58a6e5bec764-160206110615/85/ALISHA-PS-1-FINAL-REPORT-Copy-46-320.jpg)
![47
A typical AFB stain procedure involves dropping the cells in suspension onto a slide, then air
drying the liquid and heat fixing the cells. The slide is flooded with Carbol Fuchsin, which is then
heated to dry and rinsed off in tap water. The slide is then flooded with a mild solution of
hydrochloric acid in isopropyl alcohol to destain the Carbol Fuchsin, thus removing the stain from
cells that are unprotected by a waxy lipid layer. Thereafter, the cells are stained in methylene blue
and viewed on a microscope under oil immersion.
Initially, Carbol Fuchsin stains every cell. When they are destained with acid-alcohol, only non-
acid-fast bacteria get destained since they don't have a thick, waxy lipid layer like acid-fast bacteria
[51]. When counter stain is applied, non-acid-fast bacteria pick it up and become blue when viewed
under the microscope. Acid-fast bacteria retains Carbol Fuchsin so they appear red.
The stain is the gold standard procedure for diagnosis of tuberculosis and leprosy. Being
unassociated with the human flora (except Mycobacterium smegmatis found in human smegma),
finding of acid-fast bacilli in human specimens such as sputum and nasal scrapings is strongly
indicative of an active infectious process, namely of tuberculosis and leprosy. Acid-fast pathogens
other than mycobacteria include very few genera such as the bacterium Nocardia and the
fungus Cryptosporidium. Ziehl-Neelson stain can also be used for the primary identification of
these other acid-fast pathogens [52].
[50]
© Copyright, Centers for Disease Control and Prevention
Fig.4.6. Microscopic examination of Mycobacterium stained with Ziehl Nielson's stain](https://image.slidesharecdn.com/d82b7d81-8f22-4a04-ac2d-58a6e5bec764-160206110615/85/ALISHA-PS-1-FINAL-REPORT-Copy-47-320.jpg)
![48
4.7. LATEX AGGLUTINATION TEST
The latex agglutination test is a laboratory method to check for certain antibodies or antigens in a
variety of bodily fluids including saliva, urine, cerebrospinal fluid, or blood.
The test depends on what type of sample is needed. For a urine sample, see urine collection - clean
catch or urine collection (infants) [53]. For a blood sample, see venipuncture. For a cerebrospinal
fluid sample, see CSF collection.
The test card will contain circles onto to which one to two drops of latex antiserum is added. A
plastic or wood stirring device is taken and an approximate of 3- colonies of the suspected microbe
is thoroughly blended in the latex antiserum to obtain a uniform and thick suspension. The stick is
disposed of in the sterilizer. The stirring is conducted with this stick for a minimum of 30 seconds
and clumping is checked for. The agglutination process utilizing the latex antiserum is done for
the rapid identification of Staphylococcus aureus / Streptococcus aureus utilizing the detection of
protein A in the cell wall [54].
[52]
CALAS® - Cryptococcal Antigen Latex Agglutination System
Fig.4.7. Cryptococcal Antigen Latex Agglutination System](https://image.slidesharecdn.com/d82b7d81-8f22-4a04-ac2d-58a6e5bec764-160206110615/85/ALISHA-PS-1-FINAL-REPORT-Copy-48-320.jpg)
![49
CHAPTER 5: AUTOMATED TECHNIQUES IN THE MICROBIOLOGY
LABORATORY
The Microbiology laboratory of PDC also comprises of automated techniques which it utilizes
for blood culturing and automated antibiotic sensitivity testing.
5.1. AUTOMATED BLOOD CULTURE TESTING
A doctor orders for a blood culture test to be done when the patient’s symptoms (chills, nausea,
fever, reduced urine, faster breathing and heart rate) depict the possibilities of a systemic disease
or sepsis. The varying outcomes helps in analyzing the different pathogens that could be infecting
the blood like bacteria, fungi etc. these microbes cause the infection by discharging their toxins
into the bloodstream and hence cause devastating effects. This test facilitates in the diagnosis of
pneumonia, neonatal epiglottis, puerperal fever, pelvic inflammations, and fever of unknown
origin or sepsis [55].
5.1.2. METHOD
The collection of blood is done by aseptic procedure of venipuncture. Here the blood is withdrawn
from the veins specifically positioned at the inner side of the elbow or the posterior region of the
hand. Once the vein is selected the site of venipuncture is sterilized with antiseptic or 70%
isopropyl alcohol. And the region of the arm is held taut with an elastic support. As the pressure
is increased the blood is easily collected into the vial fixed to the syringe. The elastic support is
detached and it relieves the pressure after which bandage is put on the area to prevent bleeding
[56]. 10ml of blood is obtained from the venipuncture process and is inserted into the blood culture](https://image.slidesharecdn.com/d82b7d81-8f22-4a04-ac2d-58a6e5bec764-160206110615/85/ALISHA-PS-1-FINAL-REPORT-Copy-49-320.jpg)
![50
bottles containing 30 – 50ml of liquid broth. The commonly used broth for anaerobes would be
thioglycollate, where a more general purpose medium would be brain heart infusion broth.
Multiple sets of blood cultures can be requested for in order to minimize the incidences of
contamination of the culture due to the commensals. Once the blood culture bottles have been
inoculated the bottles are swirled gently to ensure homogeneity and then they are incubated in a
blood culture machine at body temperature. After 5 days of observation the negative cultures are
removed. If a vial is found to be positive, gram stain is performed on the blood sample to identify
the bacteria. The blood can be sub-cultured in order to seclude the infectious microbe for culture
and sensitivity sampling which will reveal the species of the microorganism [57]. Antibiotic
sensitivities are also determined on the sample to inform the physicians on the apt antibiotics to be
prescribed for treatment [58].
5.1.3. BacT/ALERT 3D biomerieux
The BacT/ALERT 3D is a state of art appliance which facilitates in the mechanized microbial
detection system. It is beneficial due to its contemporary design which reduces the space
consumption, a simplified touch screen facility with lithe data administration features ensuring
that any size of a laboratory can accommodate this instrument and perform microbial detection
with ease [59]. This is an automated non-radiometric and non-invasive culture system that
provides unremitted monitoring for the culture of the bacteria (aerobic and anaerobic), fungi and
mycobacteria. The main uses are microbial recognition, sepsis testing, quality control testing,
checking for the presence/absence of microbes, data management/ assimilation and
instrumentation interfacing [60].](https://image.slidesharecdn.com/d82b7d81-8f22-4a04-ac2d-58a6e5bec764-160206110615/85/ALISHA-PS-1-FINAL-REPORT-Copy-50-320.jpg)
![51
[57]
© Copyright, 1996- 2014 bioMerieux SA
Fig.5.1. BacT/ALERT® 3D DUAL-T Microbial Detection System
5.1.3.1. Principle
This closed system functions on the colorimetric principle of carbon dioxide recognition
produced by the microbes. The carbon dioxide is released due to the metabolic activities of the
microbes proliferating in the media, which results in the reduction in pH of the medium. The
decrease in pH causes a color change on the sensor affixed to the carbon dioxide sensitive bases
of the culture bottles. As the level of carbon dioxide becomes higher the sensor in the bottle
changes into a lighter shade. An LED directs light onto the base of the bottle (at the region of the
sensor) and a photodiode placed at right angles to the reflected light to measure the amount of
the reflected light. Thus BacT/ALERT 3D can monitor and detect the color changes in the
sensor. The bottles are continually agitated and are read at 10 minute intervals. The data is sent
to a computer compiler which generates the results. Algorithms examine the readings to establish
positivity in cultures if any, and if so the laboratory is alerted promptly with visual and audible
aids [61].](https://image.slidesharecdn.com/d82b7d81-8f22-4a04-ac2d-58a6e5bec764-160206110615/85/ALISHA-PS-1-FINAL-REPORT-Copy-51-320.jpg)
![52
[60]
© Copyright, bioMerieux Australia Pt. Ltd. 2009
Fig.5.2. Description of the Working Principle of BacT/ALERT 3D
5.1.3.2. Features and Benefits
This instrument has a simplified operation system hence it proves to be a time saver, ensures cross
training and avoids errors. The system offers prompt bottle identification, putting the user in
control of the virtual bottle loading and unloading and hence alleviates the bottle handling errors
during the microbial testing. The appliance also has an automatic, inbuilt quality control along
with a low false positive rate and quick response time ensuring that larger amounts of work is
completed with accuracy in lesser amounts of time. The BacT/ALERT 3D systems provides
advanced, state of the art microbial growth and prompt detection technology of pathogens in blood
samples of patients suffering from septicemia, bacterial endocarditis, enteric fevers and different
pyrexias of other bacterial origin.
More than 89% is reported within a day and a range of 97% would take an approximate of 2 days.
The presence of activated charcoal functions as a neutralizer for the antimicrobials and toxins](https://image.slidesharecdn.com/d82b7d81-8f22-4a04-ac2d-58a6e5bec764-160206110615/85/ALISHA-PS-1-FINAL-REPORT-Copy-52-320.jpg)
![53
which improve the early pathogen recovery process. Even at low concentrations the positives are
rapidly reported in blood and bodily fluids like cerebrospinal fluid, CT guided aspirates etc. This
instrument has the capacity to retrieve more microbes than the resins. Also any transportation delay
will not deteriorate the culture results. The appliance is proficient in supplying a suitable
environment for the salvage of a variety of infectious microorganisms like bacteria, yeasts and
mycobacteria with the usage of patented plastic culture bottles which offers additional user safety.
To meet the needs of your laboratory, the instrument can be configured according to every
laboratory requirements as it has a flexible data management facilities.
[54]
© Copyright, bioMerieux Operate Pt. Ltd. 2009](https://image.slidesharecdn.com/d82b7d81-8f22-4a04-ac2d-58a6e5bec764-160206110615/85/ALISHA-PS-1-FINAL-REPORT-Copy-53-320.jpg)
![54
Fig.5.3. A view cell status screen depicting the automation in the operations
The efficiency of an automated system for microbial testing depend on the safety concerns with
the instrument. The BacT/ALERT 3D bottles are composed of unbreakable plastic to prevent their
damage or breakage. Since they are lightweight the biohazard disposal and shipping costs are
highly reduced.
These light weight bottles can be sent through pneumatic tube systems without any additional
holders. The bottles have an ergonomic design and it helps in lesser space consumption for storage.
It also has a multilayer gas impermeable design which makes the bottles sturdier from within. For
specimen collection a range of safety adapters (bells shaped, luer lock and subculture adapters) are
available with multiple options to fit various protocols [62].
[61]
© Copyright, bioMerieux Operate Pt. Ltd. 2009
Fig.5.4. BacT/ALERT 3D culture media bottles
BacT/ALERT 3D 240: Volume and competence combined [63]
Comprises of 4 incubator drawers with 60 cells per drawer and thus offering a 240 cell
capacity.
A control unit to manage up to 6 incubator modules and thus accommodating up to 1440
cells.
A sophisticated horizontal and vertical modular design to reduce the bodily strain.
Left / right handed sample stacking holders to increase flexibility.](https://image.slidesharecdn.com/d82b7d81-8f22-4a04-ac2d-58a6e5bec764-160206110615/85/ALISHA-PS-1-FINAL-REPORT-Copy-54-320.jpg)
![55
Special compartments configured only for the use of blood / mycobacterium cultures.
[62]
© Copyright, bioMerieux SA
Fig.5.5. BacT/ALERT 3D 240
BacT/ALERT 3D 120 Combo: Compacted and comprehensive
A control and incubator modules is conglomerated into a single appliance
Two compartments with a 120 cell volume
3 incubators modules are attached to the combo instrument
Left / right handed sample stacking holders to increase flexibility.
Special compartments configured only for the use of blood / mycobacterium cultures.](https://image.slidesharecdn.com/d82b7d81-8f22-4a04-ac2d-58a6e5bec764-160206110615/85/ALISHA-PS-1-FINAL-REPORT-Copy-55-320.jpg)
![56
[62]
© Copyright, bioMerieux SA 2014
Fig.5.6. BacT/ALERT 3D 120 Combo
BacT/ALERT 3D 60: Smaller and simplified (used in PDC)
A volume of 60 cells (3600 blood/ body fluids yearly)
Elevated space saving and highly feasible design
Special compartments configured only for the use of blood / mycobacterium cultures.
[62]
© Copyright, bioMerieux
Fig.5.7. BacT/ALERT 3D 60](https://image.slidesharecdn.com/d82b7d81-8f22-4a04-ac2d-58a6e5bec764-160206110615/85/ALISHA-PS-1-FINAL-REPORT-Copy-56-320.jpg)
![57
5.2. AUTOMATED ANTIBIOTIC SENSTIVITY TESTING – BD PHOENIX 100
BD Phoenix 100 is the automated system utilized for recognition and susceptibility testing of
medically pertinent bacteria. It possesses a single panel design and pour and cap process which
ensures that the Phoenix systems preparation for recognition and sensitivity testing is simplified.
The instrument eliminates the requirement of offline tests, handwritten labels or reagent additions
as it has a specifically barcoded and seal panel, which has a compartment for its positioning within
the instrument. This instrument comprises of a state of art instrumentation, a comprehensive and
direct LIS (Laboratory Information Systems) connection and an optional EpiCenter data
management system which ensures that the information can be assimilated via integration with
various BD diagnostic appliances [64].
The Phoenix system allows the user to concurrently perform 1- 100 ID/AST tests. It has features
of an arbitrary entry on request loading, customized antibiotic panels and single/bulk inoculation.
The benefits of using Phoenix is that it give quick results with reduced biohazard waste disposal,
allows for continual observation, and ID / Susceptibility to be conducted individually or in group.
[63]
Becton Dickinson and Company. © 2014 BD
Fig.5.8. BD Phoenix 100
5.2.1. FEATURES
Phoenix has a random panel entry facility with a single rotor as the only locomotory part. It
doesn’t require maintenance, pipetting of liquids, relocation of samples or calibration. This
instrument is capable of conducting its own self check. The softkeys are independent of language
and are easy to handle. The barcode reader provides rapid and streamlined scanning of the](https://image.slidesharecdn.com/d82b7d81-8f22-4a04-ac2d-58a6e5bec764-160206110615/85/ALISHA-PS-1-FINAL-REPORT-Copy-57-320.jpg)
![58
patients ID and ensures reduced transcription faults. The software offers less cumbersome
assimilation of information. With a 100 panel capacity, 200 tests (ID and AST) are conducted
simultaneously. The panels are incubated and read every 20 minutes. Also it has a
comprehensive documentation of database and a BDXpert system. The software uses up to date
standards like DIN 2000, CLSI 2007 (NCCLS) and SFM 2004. The customization of varying
standards allows for the increased range of drug testing. It also has 4 independent readers, 2 UV
lamps (1 as backup), no fluid flow and one rotating movement.
5.2.2. PHOENIX PANELS
Panels are seperately available for identification (ID) and susceptibility testing (AST). In addition
to combined panels for both ID and AST testing to take place simultaneously. This increases
reproducibility, reduces labor and errors. It has a self inoculating leak resistant design for optimum
safety. There are 51 ID wells (45 substrates) and 85 AST wells (doubling dilutions) in the
combined panels. The panels are manufactured with a pre labeled design to allow for barcode
reading and are to be maintained at room temperature.
The panel specificity is based on gram negative (Enterobacteriaceae – non fermenters), gram
positive (Staphylococci / Enterococci) and Streptococci organisms. The only prerequisite being
gram staining. Neither additional testing of oxidase, calatlase or coagulase is required nor are there
any extra reagent costs. These panels offer flexiblity in drug choices due to varying formats XXGN
– gram negative, XXGP – gram positive and 2STREP – Streptococci.
[63]
© Copyright, bioMerieux SA 2014](https://image.slidesharecdn.com/d82b7d81-8f22-4a04-ac2d-58a6e5bec764-160206110615/85/ALISHA-PS-1-FINAL-REPORT-Copy-58-320.jpg)
![59
Fig.5.8. Combined ID and AST panel
5.2.3. PROCEDURE
Once the panel is opened inoculation has to be conducted within 2 hours of opening.
To prepare the ID broth first the organism is inoculated into it and vortexed. After which its density
is checked in the nephelometer to ensure that its lies between 0.50-0.60 McFarland for standard
inoculum / 0.20-0.30 McFarland for low inoculum / 2.00- 2.40 McFarland for yeast inoculum.
Once the appropriate ID broth is made the panel is inoculated within 60 minutes.
To prepare the AST / AST –S broth one free falling drop of the AST/ AST –S indicator is added
into the AST / AST- S broth respectively. This tube can be used within two hours if maintained in
the light else it can be used within 8 hours if maintained in the dark. The tube is vortexed
thoroughly and the solution is mixed. To this tube 25 microliter of the prepared ID broth is added
for standard inoculum or 50 microliter of ID broth is added for low inoculum. The panels are
inoculated with the AST/AST-S broth within 30 minutes of the broths preparation. After panel
inoculation has been conducted, position the closures firmly on the panel for the purpose of sealing.
The panels are loaded into the Phoenix within 30 minutes of its inoculation. Ensure that the panel
sequence number is scanned and the accession number and isolate number is entered before the
panel is placed within the instrument.
To make a purity agar plate, a sterile inoculating loop is used to retrieve a small drop from the
inoculum fluid (before/after panel inoculation). A suitable agar medium plate is then inoculated
with this drop for the purpose of a purity check. These plates are incubated for 18-24 hours or 18-
48 hours (yeast), at 35°C under suitable conditions [65].](https://image.slidesharecdn.com/d82b7d81-8f22-4a04-ac2d-58a6e5bec764-160206110615/85/ALISHA-PS-1-FINAL-REPORT-Copy-59-320.jpg)
![60
[64]
© Copyright, bioMerieux SA 2014
Fig.5.9. BD Phoenix workflow
5.2.4. ID & AST THEORY
The reading of every individual well is taken and calculated every 20 minutes. The ID panel uses
red, green, blue and UV light source whereas the AST measures the turbidity and color change.
The ID (Identification) side contains 45 wells with dried biochemical substrates (fluorogenic,
chromogenic, carbohydrates, carbon sources, esculin or conventional) and 2 fluorescent control
wells. For ID the instrument includes 5 time dependent databases which includes over 300
medically important species (>160 gram negative, >140 gram positive and 30 Strep). On an
average 3 hours would be required to get ID results. Sufficient primary media is supplied and there
is no need of offline testing or a backup system.
The AST (Antimicrobial Susceptibility Testing) side potentially contains up to 84 wells with dried
antimicrobial agents and 1 growth well control. The Phoenix MIC is determined in a manner
similar to conventional testing. Each panel contains multiple wells with varying antibiotics at
doubling concentrations. The amount of growth in in differing wells will determine an MIC. The
Phoenix growth detection includes turbidity (bacterial cell division or increasing cell mass) and
redox reaction (reduction of redox dye) due to bacterial metabolism.](https://image.slidesharecdn.com/d82b7d81-8f22-4a04-ac2d-58a6e5bec764-160206110615/85/ALISHA-PS-1-FINAL-REPORT-Copy-60-320.jpg)
![61
Real MIC determination does a minimum of 3 dilutions per drug allowing for detection of delayed
resistance. It also offers a dual reading technology where a color reaction is evident due to the
redox indicator and the turbidity as a result of growth. Phoenix measures the turbidity and redox
change using 3 light sources (red, green and blue). The raw red, green and blue data is analyzed
through neutral nets. The quantitative turbidity and redox values is determined. And kinetic
measurement is conducted every 20 minutes.
5.2.5. PHOENIX BDXpert system
The selection guidelines for antibiotics is CLSI performance standards for antimicrobial disk
susceptibility. It comprises of 5 groups namely ; Group A (primary testing and reporting), Group
B (Primary testing and reporting selectively), Group C (Supplemental test, reporting selectively
eg – nosocomial infections), Group U (Supplemental test for Urine only) and Group N
(Investigational drug).
The BDXpert system comprises of 2 interrelated systems, the MIC interpretive criteria (S-
susceptible, I- interpretive, R-resistant) and Rules data base ( IF…. THEN rules). Cross validation
reviews all results associated to an actual isolate and looks for inconsistencies like Intrinsic (R/S)
and cross resistance rules. Informational messages are also conveyed in the panel inventory report
on the inferred antibiotic results and the explanation of test implications [66].
5.2.6. RESISTANCE MARKERS/ MECHANISMS
Included in the Phoenix BDXpert system are [67]
ESBL (Extended Spectrum Beta Lactamase): Composed of 5 wells each with different
antibiotics namely; cefpodoxime, ceftazidime, ceftriaxone, cefotaxime and ceftazidime.
Beta lactamase : Staphylococci Penicillinase
MRS : Methicillin (Oxacillin) resistant Staph
VRE : Vancomycin resisitant Enterococci
HLAR : High level Aminoglycoside resistance ( Gentamicin HLR or Streptomycin HLSR)](https://image.slidesharecdn.com/d82b7d81-8f22-4a04-ac2d-58a6e5bec764-160206110615/85/ALISHA-PS-1-FINAL-REPORT-Copy-61-320.jpg)
![62
Macrolide resistance in Streptococci (Efflux/MLSb) and in Staphylococci
(inducible/MLSb)
High level penicillin resistance in S. pneumonia
Low level penicillin resistance in S. pneumonia
High level Mupricon
5.2.7. BD EpiCenter
BD EpiCenter is an optional data management system. This handles and assesses complex data
management generated in the clinical microbiology lab. It simplifies the assimilation of
information, provides an accurate identification and susceptibility results, makes statistics,
controls nosocomial infections and detects emerging resistances.
Enhanced patient care is provided by various features like; extensive patient demographic
capabilities which can be completed with user defined data fields, information completed by
manual test results and technological comments, accurate representation of patient results and
antibiograms, instant access to patient results and alert generated to resistant markers when
detected.
Enhanced control and result validation is ensured due to facilities like automatic notification of
nosocomial infection suspicions, validation rules along with a BDXpert to insure accuracy of the
data being saved, statistics and epidemiology reports based on organism incidence, contamination
rates, phenotype analysis etc. Some predefined filter examples would be patient history report,
organism incidence report and trending graph, isolate with resistance mechanisms, MRSA, percent
susceptibility report, nosocomial infections reports, percent susceptible trending graph, MIC X
and trending, isolate with multiple resistant drugs, organism with the same resistance pattern and
phenotype. EpiCenter V5, Surveillance and epidemiology packages helps control infectious
diseases within the institution, detects potential outbreaks, controls eventual spread of infection,
monitors temporal trends in resistance to antimicrobial agents, generates outputs to share with
local, regional and national surveillance networks and full access in real time to these statistics
also epidemiology and active surveillances from any EpiCenter workstation [68].](https://image.slidesharecdn.com/d82b7d81-8f22-4a04-ac2d-58a6e5bec764-160206110615/85/ALISHA-PS-1-FINAL-REPORT-Copy-62-320.jpg)
![63
[67]
© Copyright, bioMerieux SA 2014
Fig.5.10. BD EpiCentre workflow
CHAPTER 6: MICROBIOLOGY LAB REPORTS OF PDC
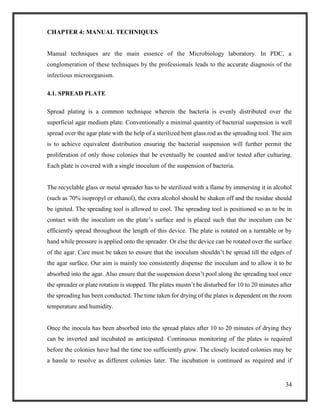
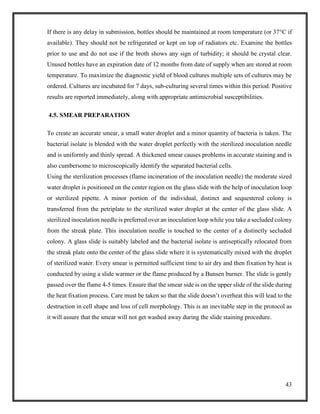
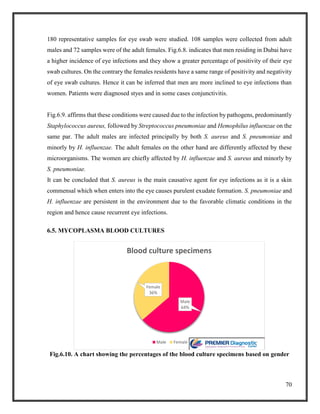
6.1. BODY FLUID CULTURES](https://image.slidesharecdn.com/d82b7d81-8f22-4a04-ac2d-58a6e5bec764-160206110615/85/ALISHA-PS-1-FINAL-REPORT-Copy-63-320.jpg)
![76
CHAPTER 7 :HISTOPATHOLOGY
A diagnostic center requires a diagnostic histopathology department for the examination of tissues
of the human body which may be having abnormalities like tumorous growths, or certain
suspicious rashes, skin lesions which could be the symptoms of an underlying disease. This area
basically aims to detect tumors or cancerous growth, warts or papillary growth, skin allergies and
any cysts or fibroids in the uterus which causes endometrium dysfunctionality.
7.1. OVERVIEW OF HISTOPATHOLOGY
The microscopic anatomy or examination of cells or tissues of plants and/or animals is referred to
as Histology where histos in Greek means tissue and logia implies science. This procedure is
usually conducted by investigation of cells and tissues by sectioning then staining, after which they
are analyzed under a light or electron microscope. Histological evaluations can be performed via
culturing of tissues wherein live cells are secluded and preserved in a suitable environment outside
the human body for a variety of research oriented projects. The capacity to envisage or differentiate
and recognize microscopic structures is commonly improved with the usage of specific
histological stains. The field of histology is an inevitable tool for biology and in medicine.
A substantial constituent of the of the fundamental investigation of a disease and an upcoming
arena in contemporary medical practice and diagnosis is referred to as pathology ( pathos means
suffering and logia implies an account of). Pathology encompasses the analysis of disease in
general, integrating a vast range of bioscience research fields and clinical practices or more
precisely to define work within the modern medical genre of general pathology which comprises
of unique but correlated medical specialties which detect the infection by the examination of tissue
cell and bodily fluid samples. A physician working in the pathology discipline is addressed as a
pathologist. As an arena of overall review and research, pathology covers four mechanisms of a
disease namely etiology (the cause), pathogenesis (mechanisms of proliferation), morphologic
variations (structural amendments of cells) and medical manifestations (consequences of the
fluctuations) [69]. In general medicine, the overall pathology typically centers the investigation of
medical aberrations that are markers or precursors for transmittable and non-transmittable
infections and is performed by professionals in specialties like anatomical and clinical pathology.
Further categories in this forte are based on the specimen types (for eg: cytopathology,
hematopathology and histopathology), organs (like renal pathology) and physiological structures
(like oral pathology) as well as on the grounds of investigation (as in forensic pathology). The](https://image.slidesharecdn.com/d82b7d81-8f22-4a04-ac2d-58a6e5bec764-160206110615/85/ALISHA-PS-1-FINAL-REPORT-Copy-76-320.jpg)
![78
7.2.1.1. Biopsies
A small region of tissue is obtained mainly with the intention of surgical pathology analysis and
with a purpose of offering an assured diagnosis. Here core biopsies are taken with the help of large
bore needles in assistance with techniques like ultrasound, CT scan or magnetic resonance
imaging. These biopsies are known to maintain the structure and architecture of the tissue.
Incisional biopsies are acquired through medical processes that retrieve a portion of any suspicious
lesion on the contrary the excisional biopsy deals with the removal of the entire lesion surface and
resemble the therapeutic surgical resections. Excisional biopsies of skin lesions and GI tract polyps
are usually seen. The interpretation by a specialist, regarding a biopsy is crucial in understanding
the nature of a tumor whether it is benign or malignant. It also facilitates in differentiation between
the various types and degrees of cancer and helps the doctor evaluate the patient’s prognosis.
Biopsies are also beneficial in determining disorders like inflammation, idiopathic diseases of skin/
GI tract etc. Open biopsies are conducted for lymph nodes suspected with tumorous growth.
7.2.1.2. Surgical resection
Surgical resection material is acquired by the therapeutic surgical retrieval of an entire infected
region or organ. These processes are conducted with an intention of certain surgical therapy of a
disease in which the identification is either completed or is affirmably known or suspected. Such
specimens need to be investigated to establish the whether the prior diagnosis conducted was
accurate, evaluating the degree of malignancy, affirming whether the infected region was removed
(by the procedure called determination of surgical margin utilizing frozen section or bread loafing
technique), recognition of the presence of potential concurrent infections, and gaining information
required for postoperative treatment for example adjuvant chemotherapy in the case of cancer.
The diagnostic center obtains sample taken from all chief surgical and clinical fields and overall
practice surgeries. Renal biopsies {need to be processed with an off-site electron microscopy
accommodation), muscle biopsies, paediatric neoplasm specimens are types of surgical specimens.
All specimen types are to be fixed and preserved in a sufficient amount of a10% buffered formalin
solution and transported to the lab. If inadequate volume of formalin solution is used it will result
in the latent damage to the morphology of the cells, which may cause lack of diagnostic
information obtained from the specimen and also create obstacles in conducting distinct staining
procedures that are needed for the investigation of the disease [70].](https://image.slidesharecdn.com/d82b7d81-8f22-4a04-ac2d-58a6e5bec764-160206110615/85/ALISHA-PS-1-FINAL-REPORT-Copy-78-320.jpg)
![79
[69]
Fig.7.1. Surgical Resection of a Colorectal Tumor (Left) with the Resulting Ostomy (Right)
7.2.2 SKIN BIOPSIES
Skin biopsy is a procedure in which a skin lesion is extracted to be sent to pathologist for a
microscopic investigation. It is normally conducted with local anesthetic by a
physcians/dermatologists and the reports arrive within 4 – 10 days. The common types of skin
biopsies are :
7.2.2.1. Shave biopsy
Performed with a scalpel blade or a razor blade (curved). The razor will shave only a minor region
of the tumors proturberance and the surface of the dermis would remain flat after the removal of
the biopsy. The efficieny of the surgeons will ensure that only a negligible blemish remains on the
skin which can be easily cured. Hemostasis (stoppage of bleeding – first step in wound healing
process) is achieved by the utilization of electrocautery, Monsel’solution, astringent (for patients
taking anticoagulants) or aluminium chloride [71]. This technique helps us in determining basal
cell cancer – squamous cell carcinoma and melanoma in-situ but if not performed accurately can
lead to false negative results thus incisional and punch biopsies are preffered over this.
7.2.2.2. Punch biopsy](https://image.slidesharecdn.com/d82b7d81-8f22-4a04-ac2d-58a6e5bec764-160206110615/85/ALISHA-PS-1-FINAL-REPORT-Copy-79-320.jpg)
![80
Punch biopsy is conducted by using a circular blade (1mm-8mm). It is affixed to a handle
(resembling a pencil) and is revolved down the epidermis, then dermis and finally through the
subcutaneous fat layer, generating a core of tissue in the cylindrical shape [72]. Some punches also
produce elliptical core of tissues. The 1mm – 1.5mm punch is done on the cosmetically reveable
areas and these wounds are allowed to self heal as they have very little bleeding. The slightly wider
punches are provided with stitches to increase the recuperation pace (seen in inflammatory skin
issues around 3.5mm-5mm).
7.2.2.3. Incisional biopsy
For an incisional biopsy a slit is made across the entire dermal region till the subcutaneous fat
portion with the help of a scalpel. These encompasses portion of the lesion, or a region of the
infected skin alongwith the normal skin (to compare their interfaces). Used for the detection of
pannicular skin disorders. The long, thin and deep incisional biopsies are best for the posterior
extremities as they permit a huge quantity of tissue to be samples with reduced stress on the wound.
Hence due to effective visualization, the hemostatis is done more quickly.
7.2.2.4. Excisional biopsy
An excisional biopsy differs from incisional as here the entire lesion or tumor region is included
for diagnosis. The small melanomas are identified best through this method and can be submitted
for testing with cosmetic and transportational safety. Here the surgical margin is constricted to
ensure the deepest width of the melanoma is submitted prior to the decision of prognosis. In the
case of melanoma-in-situs physician generally performs many minor punch biopsies before
resorting to an excisional biopsy to ensure that the false positive can be eliminated.](https://image.slidesharecdn.com/d82b7d81-8f22-4a04-ac2d-58a6e5bec764-160206110615/85/ALISHA-PS-1-FINAL-REPORT-Copy-80-320.jpg)
![81
7.2.2.5. Curettage biopsy
The curettage biopsy is conducted on the superficial layer of tumors / epidermal lacerations with
minimal (liquid nitogen / cryotherapy) or no local anesthetic with the help of a round curette blade.
Morphology of the tumor interrupted hence the basal cell cancer is predictable but to an extent.
7.2.2.6. Fine needle aspirate
Needle aspiration biopsy is performed by doing a rapid piercing motion of the hand in which a
needle fixed to a syringe is guided and made to extract the tissue in this process. This technique
helps in detection of tumors present in the lymph nodes beneath the skin. Aspirate will be obtained
and is sent for apt staining and is sent to the lab for diagnosis. For fine needle aspirate (1cc) a
minor bore needle with syringe to create quick fluctuations in the suction force. Helps us to
distinguish between a cystic lesion and a lipoma.
7.2.2.7. Saucerization biopsy
A saucerization biopsy is referred to as scoop or scallop biopsy [73]. Here deep excision is made
into a colored lesion. The advantages would of this procedure would be reduction in time, better
excision yield, saves the recuperation / hemostasis time as well as the suture expense. The
drawback is that this excision doesn’t infiltrate the dermis/ subcutaneous fat sufficiently enough
to incorporate the entire pigmented (melanocytic) lesion causing the regeneration of the
melanocytes in the scar due to the lingering residues. The combined action of scarring, edema and
unusual pigmented lines visible in the recurrent melanocyte, results in a dermatoscopic detection,
hence the physician is bound to insist on re-excision of the scar [74]. It can also lead to outward
herniation of skin, itching sensation, pain or hypertrophic scarring.](https://image.slidesharecdn.com/d82b7d81-8f22-4a04-ac2d-58a6e5bec764-160206110615/85/ALISHA-PS-1-FINAL-REPORT-Copy-81-320.jpg)
![82
[70]
Fig.7.2. Methods of Skin Biopsy
7.2.3. LYMPH NODE BIOPSY
Lymph node (small organs that produce WBCs to combat infections and kill the pathogens) biopsy
involves removal of tissue from the lymph node for microscopic examination generally done to
detect cancers.
Open biopsy is a surgical method to extract a portion of tissue or the entire lymph node. Local or
general anesthetic is administered to the patient and, the site of biopsy is cleansed and a minor cut
is formed to excise sufficient tissue. The area is sutured and bandaged. This procedure takes 30-
45 minutes [75]. Fine needle aspirate biopsy can also be conducted for the lymph node tumors.
Sentinel lymph node biopsy would involve using a radioactive tracer/ blue dye which is injected
into the tumor region and its penetration is traced and the sample is removed from those locations
[76]. It helps in diagnosis of cancer, tuberculosis, sarcoidosis, HIV etc.](https://image.slidesharecdn.com/d82b7d81-8f22-4a04-ac2d-58a6e5bec764-160206110615/85/ALISHA-PS-1-FINAL-REPORT-Copy-82-320.jpg)
![83
[74]
Fig.7.3. Fine needle aspirate of Lymph node biopsy
[75]
Fig.7.4. Sentinel lymph node biopsy
7.2.4. RECTAL BIOPSY
The rectal biopsy is conducted to retrieve a minor portion of rectal tissue for investigation. A visual
examination is done after which an anoscope/ proctoscope (a lubricated instrument) is inserted few
inches within the anus to inspect the anal canal and reports issues like hemorrhoids, anal fissures
(tears in the lining of the anus), and cancer. Proctoscopy is performed with a lubricated proctoscope
and is used to evaluate anal cavity, rectum or sigmoid colon. It diagnoses rectal polyps and
amyloidosis.](https://image.slidesharecdn.com/d82b7d81-8f22-4a04-ac2d-58a6e5bec764-160206110615/85/ALISHA-PS-1-FINAL-REPORT-Copy-83-320.jpg)
![84
Such a biopsy is performed as a part of anoscopy or sigmoidoscopy (where they use a flexible
endoscope to inspect from the anal region upto the sigmoid). Study of such biopsies helps in
detecting conditions like colitis, colorectal polyps, inflammation, abscesses or tumors [77].
[76]
Fig.7.5. Rectal biopsy via a catheter.
7.2.5. ENDOMETRIAL BIOPSY
Endometrial biopsy refers to the excision of a small portion of tissue from the endometrium – the
inner lining of the uterus; for investigation. The pipelle is the instrument utilized in the process,
wherein the speculum is passed through the vagina into the cervix for the evaluation of the cervix,
after which the cervix is held firmly to position the uterus.
The pipelle is a flexible tube made of plastic where the tip has a side opening. The internal piston
from within the pipelle is pulled back to generate a suction. Side by side the pipelle is revolved
and brought outwards to take small portions of the tissue lining the endometrium [78]. The
collected specimen is transported into the lab. The test is conducted to establish the reasons for
irregular menstrual periods, bleeding after menopause or due to hormonal medication, a thickened
uterine wall identified in an ultrasound, uterine fibroids, polyps or cancer [79].](https://image.slidesharecdn.com/d82b7d81-8f22-4a04-ac2d-58a6e5bec764-160206110615/85/ALISHA-PS-1-FINAL-REPORT-Copy-84-320.jpg)
![85
[78]
Fig.7.6. Endometrial biopsy via speculum
7.2.6. TESTICULAR BIOPSY
When surgery is performed to extract a tissue piece from the testicles for microscopic evaluation
it is called a testicular biopsy. Open biopsy is performed wherein the external region of the testicle
is sterilized with an antiseptic, topical anesthetic is administered to numb that region, a surgical
slit is made to open up the skin and the testicular tissue is extracted and the wound is sutured.
Needle biopsy is wherein a needle aspirate of the tissue is collected without cutting through the
skin. The test is performed to analyze semen, establish male infertility causes, cysts, orchitis or
cancer [80].](https://image.slidesharecdn.com/d82b7d81-8f22-4a04-ac2d-58a6e5bec764-160206110615/85/ALISHA-PS-1-FINAL-REPORT-Copy-85-320.jpg)
![86
[79]
Fig.7.7. Open biopsy of Testicle
7.2.6. BLADDER BIOPSY
Bladder biopsy is a process conducted wherein a minor region of the bladder’s tissue is extracted
for microscopic evaluation. Here a lighted instrument called cystoscope is inserted via the urethra
into the bladder. A burning perception is felt when the blood vessels are cauterized to prevent
bleeding. It is conducted to check for bladder/ urethral cancers, cysts or ulcers [81].
[80]
Fig.7.8. Cystoscopy with bladder biopsy](https://image.slidesharecdn.com/d82b7d81-8f22-4a04-ac2d-58a6e5bec764-160206110615/85/ALISHA-PS-1-FINAL-REPORT-Copy-86-320.jpg)
![87
CHAPTER 8 : GROSS EXAMINATION
A biopsy refers to the removal of a tissue edifice from the living body for histological evaluation
and clinical reasons. Gross examination starts with the specimen handling, that is identification
with a specific accession number and then grossing according to triage features like the specimens
category, priority and preservation. Preservation via fixation (preservation in 10% buffered
formalin solution) has a dual function, that is maintaining the morphology and hardening of the
tissue - for immobilization during the sectioning process of grossing. The grossing technique has
few prerequisites ; complete – implying that the specimen should be sent after all techniques of
grossing has been implied , representative – the submitted specimen should have the rightly
sampled regions of the biopsy required for the pathologists examination, informative – the material
must have a blatant and unambiguous processing protocol for the further embedding and
microtomy methods [82].
When the specimen arrives to the diagnostic center, it will be sent in a sterilized container with the
preservative. The patient’s unique accession number is noted done on the pathologist gross
description form. To start with the procedure a sterilized work board, sterilized knifes/ blade and
forceps, fresh 10% buffered formalin solution, filter/tissue paper and fenestrated cassettes are
required. The fenestrated cassette should also have the patient’s unique accession number written
on it for cross examination of sectioned specimen.
8.1. COMPLETENESS
To ensure completeness the specimen is wrapped in appropriate cassette size lens/filter paper after
it has been wetted properly, and then placed in the cassette. This needs to be done with utmost care
as the specimen could be lost if performed incorrectly as the cassettes used are the fenestrated
mesh design which have cause it to float in the preservative and allow for filtration. Artifacts can
generate due to inadequate fixation. The transfer devices used here are forceps. In endometrial,
cervical biopsies or bone marrow aspirates the material is directly filtered from the storage
container onto the cassette to ensure completeness. Also superfluous tissues or floaters produced
due to the grossing technique needs to be eliminated from the specimen before submission for
which accurate cleaning/ moving of the processing board, devices and gloves have to strictly be
employed. This is extremely crucial because grossing is the part of sample processing which can
cause adulteration of sample and create errors in diagnosis.](https://image.slidesharecdn.com/d82b7d81-8f22-4a04-ac2d-58a6e5bec764-160206110615/85/ALISHA-PS-1-FINAL-REPORT-Copy-87-320.jpg)
![88
8.2. REPRESENTATIVE & INFORMATIVE
These techniques go hand in hand. Inking is done to demarcate the margins of the specimen, any
regions of suspicion or to indicate the method of embedding. It’s generally avoided as the ink has
the potential of diffusion from the desired area and thus contaminating the other regions and
causing obstructions in visualizing the specimen for the pathologist. Knifing is employed to cut
sections of the specimen before submission. Uniformity of sections is essential and requires certain
devices. Representative sections is desired for evaluation of any pathological concerns and to avail
the pathologist with the diagnostically apt section. Avoid this technique in cases where the
specimen is less than 0.2cm or the region inevitable for diagnosis is too small, also if the sample
is inadequately fixed (<0.4cm) in the cases of adipose tissue. Informative sectioning is necessary
from the point of view of embedding. The aim is to provide the pathologist with the apt material
for representation and slide processing. The person involved in the embedding procedure can be
rest assured of handling the specimen as this informative section has been prepared in a manner
where it can be molded without loss of important material. Finally the gross examination is crucial
because after sectioning of the sample has been done the gross description of the specimen cannot
be retrieved. Hence before sectioning, the macroscopic results are recorded, the specimen is also
weighed/measured and could be photographed or X-rayed accordingly [83].
[82]
© Copyright, American Association of Pathologists Assistant
Fig.8.1. Gross examination being done by a Pathologists Assistant](https://image.slidesharecdn.com/d82b7d81-8f22-4a04-ac2d-58a6e5bec764-160206110615/85/ALISHA-PS-1-FINAL-REPORT-Copy-88-320.jpg)
![89
CHAPTER 9 : HISTOLOGY SAMPLE PREPARATION
This procedure involves preparing the tissue specimens for microtome sectioning, followed by
staining and diagnosis. The conventional method of paraffinization is employed wherein the tissue
is conditioned via movement thorough sequenced steps so that the soft tissue is hardened in a
medium that permits sectioning. The steps followed are fixing – to preserve tissue morphology
and primary hardening; processing – this dehydrates, clears and causes wax to penetrate into the
tissue cavities; embedding – wherein the specimen is positioned appropriately into a block which
is sent for sectioning and facilitates in simplified storage and maintenance of the specimen;
sectioning- via microtome to generate extremely thin see through slices of specimen that are kept
on slides for staining. Frozen sectioning is a substitute method that will rapidly freeze the specimen
for preservation and offer adequate hardness so that it can be sectioned via cryostat – performed
during surgical interventions wherein the surgeon is in need to position the margin of the tumorous
growth to assure the whole growth is extracted [84].
[83]
© Copyright, American Mastertech Inc.
Fig.9.1. Histology Sample Preparation Workflow](https://image.slidesharecdn.com/d82b7d81-8f22-4a04-ac2d-58a6e5bec764-160206110615/85/ALISHA-PS-1-FINAL-REPORT-Copy-89-320.jpg)
![90
9.1. FIXATION
The specimens wrapped in filter paper, placed in fenestrated cassettes are allowed to be fixed by
immersing them in a container with 10% buffered formalin for few hours to allow the denaturation
of proteins to take place and increase the rigidity of the sample. The cells bolism is detained and
the further deterioration of the specimen is prevented. Certain specimens are fixated overnight,
before the gross examination to facilitate efficient sectioning and ease in specimen handling.
[85]
© Copyright, American Mastertech Inc.
Fig.9.2. Varied types of Tissue fixatives
9.2. DEHYDRATION
The specimens are dehydrated prior to their infiltration with paraffin wax. An automated tissue
processor is utilized in this process. Here the sectioned specimen is immersed in a range of varying
alcohol baths to remove all the water content it possesses. Other efficient dehydrating agents would
be turpentine, but alcohol is frequently used. Then clearing is conducted wherein the alcohol is
replaced by a clearing agent like xylene or toluol. The clearing agent is choosen such that paraffin
is miscible with it. This procedure is done overnight to ensure that the tissue can be embedded
with the wax in the morning.](https://image.slidesharecdn.com/d82b7d81-8f22-4a04-ac2d-58a6e5bec764-160206110615/85/ALISHA-PS-1-FINAL-REPORT-Copy-90-320.jpg)
![91
[86]
© Copyright, Leica Biosystems Ltd.
Fig.9.3. Automated Tissue Processor for Dehydration
9.3. EMBEDDING
The tissue is positioned in molten paraffin wax, for quite some time at 52-56°C. Once the wax
cools the tissue will be embedded into the block and will be adequately rigid for sectioning. The
specimens shape is the deciding factor on the orientation of the tissue in the paraffin block. For
example, any tubular material is placed such that when it is cross- sectioned the region
encompassing the entire lumen is visible.
[87]
© Copyright, Protocols Online
Fig.9.4. Tissue specimen orientation in molten paraffin](https://image.slidesharecdn.com/d82b7d81-8f22-4a04-ac2d-58a6e5bec764-160206110615/85/ALISHA-PS-1-FINAL-REPORT-Copy-91-320.jpg)
![92
[87]
© Copyright, Protocols Online
Fig.9.5. Solidified Tissue paraffin block
9.4. CUTTING
The paraffin block with the embedded tissue are sectioned via microtome in order to generate 5µm
sections. A microtome a proficient instrument, with an inbuilt mechanism to progress the block
across an extremely sharp knife. The sections would be floating on the surface of the waterbath to
eliminate wrinkles and then move them by hand to the glass slides.
[88]
Fig.9.6. Rotatory Microtome Section](https://image.slidesharecdn.com/d82b7d81-8f22-4a04-ac2d-58a6e5bec764-160206110615/85/ALISHA-PS-1-FINAL-REPORT-Copy-92-320.jpg)
![93
[88]
© Copyright, Leica Biosystems Inc.
Fig.9.7. Automated Microtome Sectioning
9.5. DEPARAFFINIZATION
This procedure involves the removal paraffin via xylene or toluol, after which the specimen is
subjected to a range of alcohol washings to rehydrate the specimen. Now the specimen is capable
of being stained with water soluble dyes. This is the main purpose of rehydration.
9.6. STAINING
The slides are appropriately stained to ensure differentiation of the nuclei from the connective
tissue and the remaining region of the tissue. Hematoxylin – phloxine – saffron (HPS) stain is
preffered over the commonly used hematoxylin-eosin (H&E) stain. With the HPS stain the nuclear
material is dyed blue, the cytoplasm, muscle and myelin is stained red and the connective tissue is
colored yellow. Whereas the H&E stain, first hematoxylin is used to stain the nuclei blue after
which eosin is applied to dye the cytoplasm red.](https://image.slidesharecdn.com/d82b7d81-8f22-4a04-ac2d-58a6e5bec764-160206110615/85/ALISHA-PS-1-FINAL-REPORT-Copy-93-320.jpg)
![94
[89]
Fig.9.8. Hematoxylin and eosin staining of Nocardia crassostreae
9.7. MOUNTING
For indefinite preservation of the tissue it is dehydrated yet again with alcohol and toluol. An
automated machine will fix the glass cover slip over the stained specimen. And these prepared
slides are sent for microscopic visualization and diagnosis by the pathologist.
9.8. DECALCIFICATION
In cases where we receive specimens from the bone or bone marrow which possess calcium, a
procedure called decalcification has to be conducted prior to the specimens sectioning. After the
dissection of the specimen (into small portions), it is kept in plastic cassettes and immersed in
RDO for decalcification for an approximate of 4 hours.
9.9. SPECIAL STAINS
There are cases where the pathologist requires the different characteristics of the specimen or the
chemicals present to be distinctly visible and hence they request for special staining of the samples
which will highlight these areas.](https://image.slidesharecdn.com/d82b7d81-8f22-4a04-ac2d-58a6e5bec764-160206110615/85/ALISHA-PS-1-FINAL-REPORT-Copy-94-320.jpg)
![95
For example –
Carbohydrate stains – PAS (Periodic Acid Schiff ) stain
[90]
© Copyright, Path BioResource Inc.
Fig.9.9. PAS staining of Kidney section
Pigment stains – Prussian blue stain for iron
[90]
© Copyright, Suez Canal University
Fig.9.10. Corpus hemorrhagicum, dromedary camel; Prussian blue stain](https://image.slidesharecdn.com/d82b7d81-8f22-4a04-ac2d-58a6e5bec764-160206110615/85/ALISHA-PS-1-FINAL-REPORT-Copy-95-320.jpg)
![96
Microorganism stain – Giemsa stain for Helicobacter pylori bacterium
[90]
Copyright © 2014 BMJ Publishing Group Ltd & Royal College of Paediatrics and Child health
Fig.9.11. Appearance of H. pylori on the gastric mucosal surface with Giemsa stain
Connective tissue stains – Gordon and Sweet stain or reticulum
[90]
Copyright © 2014 BMJ Publishing Group Ltd & Histonet
Fig.9.12. Gordon and Sweet method for reticular fibers
9.10. FROZEN SECTIONS
A frozen section laboratory is often located nearing to the operation theatre, so that the tissue
removed during the surgery is promptly processed without any delay. The specimen is accepted
with a unique accession number for patient’s identification purpose. The gross examination of the
sample is recorded after which a section of the tissue will be sampled. The sampled portion of the
tissue is placed in an isopentane containing histobath, maintained at -50°C for the purpose of
freezing. The frozen specimen is now transferred to a cryostat (a refrigerated instrument) box
having an attached microtome which facilitates in simplified sectioning the tissues into a 5µm](https://image.slidesharecdn.com/d82b7d81-8f22-4a04-ac2d-58a6e5bec764-160206110615/85/ALISHA-PS-1-FINAL-REPORT-Copy-96-320.jpg)
![97
sections. The sections are placed on slides and stained differentially to distinguish the nuclear
region from the remaining tissue. The tissue fixation in acidified alcohol is done, in addition to
staining with hematoxylin and eosin, followed by ethanol dehydration and finally clearing in
toluol. This procedure takes 10 minutes for completion and then the pathologist can conduct a
rapid microscopic examination and report a prompt and accurate diagnosis to the surgeon [91].
[92]
Copyright © 2014 Leica Biosystems Ltd.
Fig.9.13. The Microscopy Core's Leica CM-3050-S cryostat is located in the Histology room
9.11 CYTOPATHOLOGY
Cytopathology is a subdivision of histopathology, wherein it helps in the analysis and medical
diagnosis of diseases at a cellular stage [93]. Pap smear is one of the usual expansions of
cytopathology. This method is useful is the early detection of cervical cancer lesions, thyroid
lesions [94] or the infections within the aseptic body cavities like, peritoneal, cerebrospinal and
pleural regions of the body. This technique primarily functions in the sphere of cancer detection
but also has the capacity to identify other inflammatory body conditions. Its main distinctive
feature would be that it utilizes mobile cells or fragmented tissue sections. The tests conducted in
cytopathology are connoted to as smear tests as the simplest way of microscopic slide
preparation would be to spread or smear the cells over a selected surface of the glass slide to ease
staining, visualization and diagnosis of the specimen.](https://image.slidesharecdn.com/d82b7d81-8f22-4a04-ac2d-58a6e5bec764-160206110615/85/ALISHA-PS-1-FINAL-REPORT-Copy-97-320.jpg)
![98
9.11.1. ASSORTMENT OF CELLS BY EXFOLIATION
In this exfoliation cytology, the cells which are lost extemporaneously by the body are used. If
such samples are unavailable then the cells can be attained by scraping them off the dermal
surface manually with the help of certain brushes. Exfoliation by spontaneity is observed in a
situation where the cells of the body cavities accidentally shed off into their respective body
fluids. Then these pleural or peritoneal fluids (as the case maybe) have to be aseptically collected
via different methods and further examined. Exfoliation by physical procedures would be using a
bronchoscope to obtain scraps from the tracheal site or from the lesion in the bronchial region.
9.11.2. ASSORTMENT OF CELLS BY INTERVENTION
This procedure gets its name as, a pathologist’s interference into the diseased region of the body
is required for specimen collection.
9.11.2.1. Fine Needle Aspiration Cytology
Needle aspirates are obtained by using a syringe affixed with a needle for sample collection. It is
a feasible and non-traumatic procedure for recognition of any infected sites [95]. Whenever a
patient is found to have any anomalous lumps or atypical masses of tissues beneath the dermis
then this procedure is performed [96]. It is generally done in regions of the breast, thyroid, lymph
nodes or armpits. A process called micro-coring is performed, the needle is made to apply a
negative suction force at the region of the abnormality and the sample is collected [97]. Ultra
sound and CAT scanning is additionally employed for deep seated tumors [98].
9.11.2.2. Sediment Cytology
Sediment cytology is another alternative process [99]. For this the cell residues are obtained from
the fixative which was used to preserve the specific autopsy or biopsy specimen [100]. After
subjecting it to micro-centrifugation, the sediments are then used for slide preparation.](https://image.slidesharecdn.com/d82b7d81-8f22-4a04-ac2d-58a6e5bec764-160206110615/85/ALISHA-PS-1-FINAL-REPORT-Copy-98-320.jpg)
![99
CHAPTER 10 : PATHOLOGY REPORT
A pathology report is a documentation, comprising of the diagnosis which has been acquired by
an microscopic investigation of cells and tissues. In certain cases it contains the gross description
of the specimen, which is the macroscopic evaluation of the specimen on the basis of the
specimens size, shape, color and appearance. A pathologist the doctor incharge of conducting the
diagnosis and formulating the pathology report. Such reports are vital in cancer diagnosis and
staging – the description on the degree of cancer, the level of malignancy within the body or if the
tumor is benign also establsihes the treatment which has to be administered to the patient [101].
The pathologist takes an approximate of 10 days to provide a report after the biopsy or surgery is
performed. These documents are written in typical medical terminology and patients are provided
with this report and the doctor gives them an explanation of it.
A pathology report must contain the following:
An accurate demographic details of the patient along with the biopsy date.
It has the gross description of the specimen, that is information on the color, weight, size
and appearance of the tissue as visualised by the naked eye.
A microscopic evaluation of mentioning if any notable differences are seen in these cells
in comparison to the normal cells.
A diagnosis on the kind of cancer and the degree of the spread of the cancer – the level of
abnormality of the cells and the pace at which the tumor is to proliferate and metastasize.
Tumor size given in centimeters
Tumor margins : Positive margins – indicating that cancerous cells were obtained from the
edges of the specimen; negative margins – indicating clear/ free margins with no cancerous
cells seen at specimen margins; close margins – neither negative nor positive
Additonal information on the specimens that have been submitted for different tests or a
second opinion.
Pathologist signature alongwith the name and address of the lab.
10.1. INFERENCE OF A PATHOLOGY REPORT ON THE PHYSICAL AND
CHEMICAL CHARACTERISTICS OF THE SPECIMEN
After confirming the specimen as cancerous, the pathologist would now prefer to conduct extra
tests to attain more information on the tumor that cannot be obtained by mere microscopic
visualization of the tissue with the usual H&E stains. Along with these usual reports the pathology](https://image.slidesharecdn.com/d82b7d81-8f22-4a04-ac2d-58a6e5bec764-160206110615/85/ALISHA-PS-1-FINAL-REPORT-Copy-99-320.jpg)
![100
report will also incorporate the findings of the immunohistochemical stains (IHC) which utilizes
antibodies to detect particular antigens on the superficial layer of cancerous cells. IHC helps in
determing the route of the cancer’s origin, to differentiate among the kinds of cancer like
carcinoma, lymphoma, melanoma etc., in detection and categorization of leukemias and
lymphomas.
A pathology report also integrates the findings of flow cytometry – a technique of measuring the
cell properties of the submitted specimen, that is the number of cells, cells shape and size,
percentage of living cells, existence of tumor markers (specific molecules produced by the tumor
cells or other somatic cells in response to cancer/ certain non cancerous situations) on the cells
surface. Flow cytometry proves beneficial in detection, categorization and supervision of cancers
like acute leukemia, non Hodgkin lymphoma and chronic lympho proliferative disorders.
Finally a pathology report can also have the outcomes of molecular diagnostic and cytogenetic
studies which examine the existence or absence of malignant cells, also their genetic and molecular
anomalies in the samples [102].
10.2. INFERENCE OF A PATHOLOGY REPORT ON THE GENETIC OF THE CELLS
Cytogenetics utilizes specialised techniques along with tissue culturing to attain genetic
information on cells, like genetic abberrations in specific. Genetic modifications are markers
which indicate a particular cancer type [103].
For example : chronic myelogeous leukemia (CML) which is linked to the Philadelphia
chromosome. Any alterations in this can offer valuable prognosis data which helps the doctor
provide recommendations about the treatment to the patient’s.
Some of the additional tests conducted on the tissue specimen are:
Fluorescence in situ hybridization (FISH) - Defines the locations of specific genes. It can
be utilized to classify chromosomal aberrations and to map genes.
Polymerase chain reaction (PCR) - A technique of creating multiple copies of precise DNA
sequences of significance to the diagnosis.
Real-time PCR/ quantitative PCR - A process of assessing the number of copies of a
specific DNA sequences which are existent in the sample.](https://image.slidesharecdn.com/d82b7d81-8f22-4a04-ac2d-58a6e5bec764-160206110615/85/ALISHA-PS-1-FINAL-REPORT-Copy-100-320.jpg)

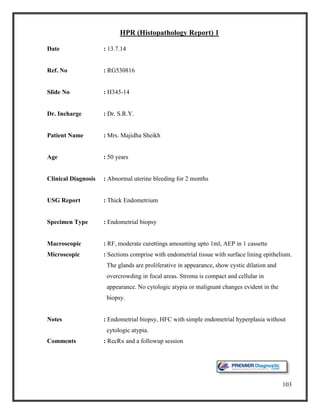
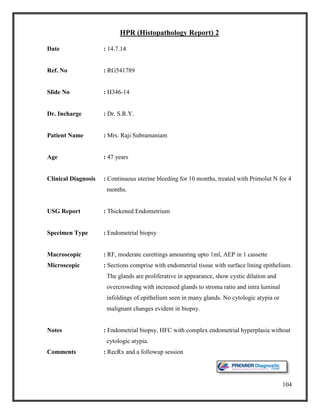
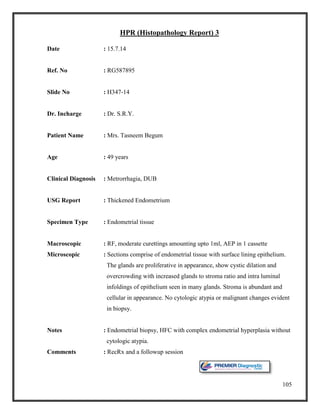
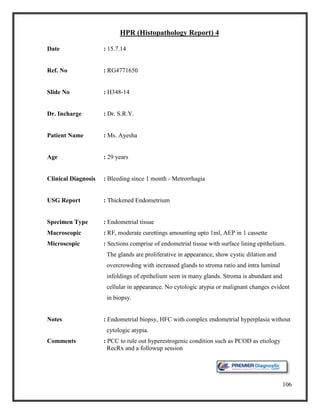


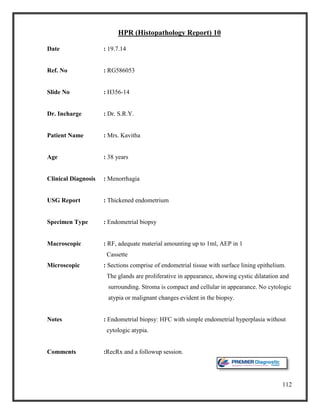

![117
REFERENCES
[1] L. Barth Reller, M. Weinstein, L. Peterson, J. Hamilton, E. Baron, L. Tompkins, J.
Miller, C. Wilfert, F. Tenover and B. Thomson, "Role of Clinical Microbiology
Laboratories in the Management and Control of Infectious Diseases and the Delivery
of Health Care," OXFORD JOURNAL - Clinical Infectious Disease, vol. 32, no. 4, pp.
605-610, 2001.
[2] S. Baron, Medical Microbiology, Galveston, Texas: University of Texas Medical
Branch at Galveston, 1996.
[3] M. Madigan and J. Martinko, Brock Biology of Microorganisms, 13th edition: Pearson
Education, 2006.
[4] S. Bhattacharya, "Clinical microbiology : Should microbiology be a clinical or
laboratory speciality?," Indian Journal of Pathology and Microbiology, vol. 53, no. 2,
pp. 217-222, 2010.
[5] "Clinical MIcrobiology : Open Access," in International Conference on Clinical
Microbiology and Microbial Genomics, Valencia, Spain, 2013.
[6] S. U. M. Center, "Stanford Hospital : Specimen collection - Microbiology," Stanford
Clinical Laboratories, [Online]. Available:
http://www.stanfordlab.com/pages/microbiology.htm#toc1. [Accessed 28 June 2014].
[7] D. Fox, L. Fogel, C. Brassert, W. Earl and D. Novak, Microbiology : A Laboratory
Manual, California: Benjamin/Cummings Science Publishing, 1999.
[8] "Routine venipuncture guidelines," University of Arkansas for medical laboratory, 17
October 2011. [Online]. Available: http://www.uams.edu/clinlab/venipuncture.htm.
[Accessed 12 July 2014].
[9] E. Gregory Thompson and J. O'Donnell, "WebMD Medical Reference," Healthwise, 6
August 2012. [Online]. Available: http://www.webmd.com/a-to-z-guides/blood-
culture?page=3. [Accessed 5 June 2014].
[10] "Procedure for the Collection of Diagnostic Blood Specimens by Venipuncture,"
NCCLS, vol. 27, no. 6, p. 26, 2007.
[11] A. V. Services, "Abbey Clinical Pathology," TQ12 2BG , New Abbot.
[12] "Protocols for the preparation of blood plasma and serum.," Proimmune, March 2009.
[Online]. Available: http://www.proimmune.com/ecommerce/pdf_files/PR31.pdf.
[Accessed 3 June 2014].
[13] K. Melissa, D. Tuck, W. Chan and E. Dean, "Standard Operating Procedures for
Serum and Plasma Collection: Early Detection Research Network Consensus
Statement Standard Operating Procedure Integration Working Group," Journal of
Proteome search, vol. 8, no. 1, pp. 113-117, 2009.
[14] K. Sanford, " Rosen's Emergency Medicine: Concepts and Clinical Practice.," in
MCPherson RA Preanalysis, Philadelphia, Mosby Elsevier, 2011, p. 7 ed. chap 3.
[15] S. Norrby, "Approach to the patient with urinary tract infection.," in Cecil Medicine,
Philadelphia , Saunders Elsevier, 2011, p. 24 ed. chap 292.
[16] C. Skobe, "The basics of specimen collection and handling of urine testing.," BD
Worldwide, vol. 14, no. 2, 2004.](https://image.slidesharecdn.com/d82b7d81-8f22-4a04-ac2d-58a6e5bec764-160206110615/85/ALISHA-PS-1-FINAL-REPORT-Copy-117-320.jpg)
![118
[17] C. Semrad, "Approach to the patient with diarrhea and malabsorption.," in Cecil
Medicine, Philadelphia, Saunders Elsevier, 2011, p. 24 ed. chap 142.
[18] A. Croft and G. Wood, "Specimen collection and handling for diagnosis of infectious
diseases," in Henry's Clinical Diagnosis and Management by Laboratory Methods,
Philadelphia, Saunders Elsevier, 2011, p. 22 ed. chap 63.
[19] W. Bowne, F. Gress, H. Siddiqi and M. Salwen, " Laboratory diagnosis of
gastrointestinal and pancreatic disorders.," in Henry's Clinical Diagnosis and
Management by Laboratory Methods. , Philadelphia, Saunders Elsevier, p. 22 ed..
[20] "Stool Collection," Mc Farl and Clinic, [Online]. Available:
https://www.mcfarlandclinic.com/file.cfm/media/specialtyresources/stool_collection_5
8AA6252A6A20.pdf. [Accessed 7 June 2014].
[21] A. Limper, "Overview of pneumonia.," in Cecil Medicine, Philadelphia, Saunders
Elsevier, 2011, p. 24 ed. chap 97.
[22] C. David Dugdale, D. Hadjiliadis and D. Zieve, "Routine sputum culture : Medline
Plus Encyclopedia," Medline Plus, 11 November 2011. [Online]. Available:
http://www.nlm.nih.gov/medlineplus/ency/article/003723.htm. [Accessed 12 June
2014].
[23] M. Yanoff and D. Cameron, " Diseases of the visual system.," in Cecil Medicine,
Philadelphia, Saunders Elsevier, 2011, p. 24 ed. chap 431.
[24] B. Nussenbaum and C. Bradford, " Pharyngitis in adults.," in Cummings
Otolaryngology: Head & Neck Surgery., Philadelphia, Mosby Elsevier, 2010, p. 5 ed
chap 13.
[25] "Microbiology Specimen Handling and Collection Instructions," Lifelabs, [Online].
Available: http://www.lifelabs.com/files/Ontario_QRA_files/Specimen_Handling-
Collection/06_MICROBIOLOGY_-
_SPECIMEN_HANDLING___COLLECTION_INSTRUCTIONS.pdf. [Accessed 7
June 2014].
[26] Standard Methods for the examination of water and sewage, Association of Official
Agricultural Chemists: American Public Health Association, 1920.
[27] "Biology of Microorganisms Laboratory Manual.," University of Minnesota, Medical
School, Minnesota, 2006.
[28] "Blood Agar," Virtual Unknown Microbiology, [Online]. Available:
http://www.vumicro.com/vumie/help/VUMICRO/Blood_Agar.htm. [Accessed 12 June
2014].
[29] B. ,. A. Gunn, "Chocolate agar, a differential medium for gram-positive cocci.,"
Journal of Clinical Microbiology, vol. 20, no. 4, pp. 822-823, 1984.
[30] W. M. University, Microbiology Lab Procedures.
[31] D. S. Bachoon and W. A. Dustman, "Exercise 8: Selective and Differential Media for
Isolation," in Microbiology Laboratory Manual. , OH: Cengage Learning., 2008.
[32] M. E. Allen, "MacConkey Agar Plates Protocol," ASM MicrobesLibrary, 30
September 2005. [Online]. Available:
http://www.microbelibrary.org/index.php/component/resource/laboratory-test/2855-
macconkey-agar-plates-protocols. [Accessed 14 June 2014].](https://image.slidesharecdn.com/d82b7d81-8f22-4a04-ac2d-58a6e5bec764-160206110615/85/ALISHA-PS-1-FINAL-REPORT-Copy-118-320.jpg)
![119
[33] U. W. Madison, "Differential Media - EMB Agar," Department of Bacteriology - U.W.
Madison, 23 March 2004. [Online]. Available:
http://www.jlindquist.net/generalmicro/dfemb.html. [Accessed 23 June 2014].
[34] Z.-S. J. and G. A. Z., "Xylose lysine deoxycholate agar for the isolation of Salmonella
and Shigella from clinical specimens," Zentralbl Bakteriol , Vols. 2-3, pp. 196 - 200,
1977.
[35] "TSI Reactions," University of Maryland, 17 November 2008. [Online]. Available:
http://www.life.umd.edu/classroom/bsci424/LabMaterialsMethods/TSI.htm. [Accessed
22 June 2014].
[36] "Use of Liquid Nutrient Broth Media for Growing Bacteria," Science Prof Online,
[Online]. Available: http://www.scienceprofonline.com/microbiology/use-of-liquid-
nutrient-broth-media-for-growing-bacteria.html. [Accessed 24 June 2014].
[37] K. Wise, "Spread plate," ASM MicrobeLibrary, 8 October 2008. [Online]. Available:
http://www.microbelibrary.org/component/resource/laboratory-test/3085-preparing-
spread-plates-protocols. [Accessed 23 June 2014].
[38] N. Sherwood, P. Billings and B. Clawson, " Laboratory exercises in bacteriology and
diagnostic methods," KS., The World Co., 1992, p. 7 ed..
[39] "Tryptic Soy Agar," acumedia, 2010 November 2010. [Online]. Available:
http://www.neogen.com/Acumedia/pdf/ProdInfo/7100_PI.pdf. [Accessed 4 June
2014].
[40] "Blood Agar Base," acumedia, 4 April 2009. [Online]. Available:
http://www.neogen.com/Acumedia/pdf/ProdInfo/7268_PI.pdf. [Accessed 25 June
2014].
[41] "Mueller Hinton Agar," acumedia, 3 June 2011. [Online]. Available:
http://www.neogen.com/Acumedia/pdf/ProdInfo/7101_PI.pdf. [Accessed 6 June
2014].
[42] "MacConkey's Agar," acumedia, 5 March 2011. [Online]. Available:
http://www.neogen.com/Acumedia/pdf/ProdInfo/7102_PI.pdf. [Accessed 14 June
2014].
[43] "XLD Agar," acumedia, 5 December 2008. [Online]. Available:
http://www.neogen.com/Acumedia/pdf/ProdInfo/7166_PI.pdf. [Accessed 17 June
2014].
[44] "TSI Agar," acumedia, 2 November 2010. [Online]. Available:
https://www.spectrumchemical.com/OA_HTML/PRODUCTDOCS/7162.pdf.
[Accessed 28 June 2014].
[45] "Antimicrobial susceptibility testing," EUCAST, April 2013. [Online]. Available:
http://www.eucast.org/fileadmin/src/media/PDFs/EUCAST_files/Disk_test_document
s/Manual_v_3.0_EUCAST_Disk_Test.pdf. [Accessed 5 June 2014].
[46] F. Cockerhill, J. Wilson, E. Vetter, K. Goodman, C. Torgerson, W. S. Harmsen, C. D.
Schleck, D. M. Ilstrup, J. A. Washington and W. R. Wilson, "Optimal Testing
Parameters for Blood Cultures," OXFORD JOURNALS : Clincal infectous Disease,
vol. 38, no. 12, pp. 1724-1730, 2004.
[47] "Septicemia and blood culture," slideshare, 16 January 2013. [Online]. Available:
http://www.slideshare.net/MahenKothalawala/septiceamia-and-blood-culture.
[Accessed 25 June 2014].](https://image.slidesharecdn.com/d82b7d81-8f22-4a04-ac2d-58a6e5bec764-160206110615/85/ALISHA-PS-1-FINAL-REPORT-Copy-119-320.jpg)
![120
[48] "Smear preparation and simple staining," [Online]. Available:
http://202.116.160.98:8000/course/weishengwx/huanongen/shiyanjishu/jiandanransefa
(y).asp. [Accessed 3 July 2014].
[49] Z. Monica, "Gram staining," Microbial Life educational sources, 29 May 2012.
[Online]. Available:
http://serc.carleton.edu/microbelife/research_methods/microscopy/gramstain.html.
[Accessed 2014 June 2014].
[50] J. B. W. Truant and W. Thomas, " Fluorescence microscopy of tubercle bacilli stained
with auramine and rhodamine.," Henry Ford Hosp. Med. Bull. , vol. 10, pp. 287-289,
1962.
[51] P. Gerhardt, W. Murray, A. Wood and R. Krieg, Methods for general and molecular
bacteriology., Washington, DC.: ASM Press, 1994.
[52] "Acid Fast (Ziehl Neelson) Stain," ASM Microbelibrary, [Online]. Available:
http://www.microbelibrary.org/library/laboratory%20test/2834-acid-fast-(ziehl-
neelsen)-stain. [Accessed 2 June 2014].
[53] L. Chandler, B. Reisner, G. Woods and K. Jafri, "Comparison of four methods for
identifying Streptococcus pneumoniae.," Microbiol. Infect. Dis, vol. 37, pp. 285-587,
2000.
[54] H. Slotved and M. Kaltoft, "Simple, Rapid Latex Agglutination Test for Serotyping of
Pneumococci (Pneumotest-Latex)," Journal of Clinical Microbiology, vol. 42, no. 6,
pp. 2518-2522, 2004.
[55] B. Kans, "Blood culture : Purpose, Procedures and Risks.," Healthline, July 2012.
[Online]. Available: http://www.healthline.com/health/blood-culture#Overview1.
[Accessed 23 July 2014].
[56] D. Dugale, D. Zieve and B. Black, "Venipuncture : Medline Plus Medical
Encyclopedia," A.D.A.M. , 24 April 2013. [Online]. Available:
http://www.nlm.nih.gov/medlineplus/ency/article/003423.htm. [Accessed 23 June
2014].
[57] A. Croft and G. L. Woods, "Specimen collection and handling for diagnosis of
infectious diseases," in Henry's Clinical Diagnosis and Management by Laboratory
Methods, Philadelphia, Saunders Elsevier, 2006, p. chap 63.
[58] P. Murray and F. Witebsky, "The clinician and the microbiology laboratory," in
Principles and Practices of Infectious Diseases, Philadelphia, Elsevier Churchill
Livingstone, 2006, p. chap17.
[59] "BacT/ALERT 3D : Healthcare," Biomerieux, 2009. [Online]. Available:
http://www.biomerieux-
usa.com/servlet/srt/bio/usa/dynPage?doc=USA_PRD_LST_G_PRD_USA_6.
[Accessed 11 July 2014].
[60] "BacT/ALERT 3D | Microbial detection, identification | biomerieux," Biomerieux,
2009. [Online]. Available: http://www.biomerieux-
usa.com/servlet/srt/bio/usa/dynPage?open=USA_PRD_LST&doc=USA_PRD_LST_G
_PRD_USA_6&pubparams.sform=1&lang=en. [Accessed 12 June 2014].
[61] D. T. V. Rao, "Automation in Microbiology," BacT/ALERT 3D, 28 October 2013.
[Online]. Available:](https://image.slidesharecdn.com/d82b7d81-8f22-4a04-ac2d-58a6e5bec764-160206110615/85/ALISHA-PS-1-FINAL-REPORT-Copy-120-320.jpg)
![121
http://www.slideshare.net/shamsudinGez/automationinmicrobiology-
100416000026phpapp01?related=1. [Accessed 3 July 2014].
[62] "BacT ALERT collection bottles," Biomerieux, [Online]. Available:
http://www.biomerieux-usa.com/upload/BacTALERT-Collection-Bottles-1.pdf.
[Accessed 15 June 2014].
[63] "BacT/ALERT® 3D Microbial Detection Systems," Biomerieux, [Online]. Available:
http://www.biomerieux-diagnostics.com/bact-alert-3d-microbial-detection-systems-
overview. [Accessed 4 June 2014].
[64] "BD Phoenix™ Automated Microbiology System," Becton Dickson, [Online].
Available: http://www.bd.com/ds/productcenter/is-phoenix.asp. [Accessed 12 June
2014].
[65] "BD Phoenix™ ID/AST Manual Panel Inoculation," BD Phoenix, [Online]. Available:
http://www.bd.com/ds/technicalCenter/charts/ch_2_222341.pdf. [Accessed 4 July
2014].
[66] "European Society of Clinical Microbiolgy and Infectious diseases," ESCMID,
[Online]. Available:
http://www.blackwellpublishing.com/eccmid14/abstract.asp?id=15263. [Accessed 12
June 2014].
[67] B. Turning, J. Sinha, M. Deal, J. Pollitt, D. Callihan, B. Brasso, T. Wiles and J.
Reuben, "Detection and Interpretation of Macrolide-Lincosamide-Streptogramin
Resistance among Staphylococcus with Phoenix Automated Microbiology System and
BDXpert™ System," BD Diagnostics, 2005.
[68] "BD EpiCenter™ Microbiology Data Management System," BD EpiCenter, [Online].
Available: http://www.bd.com/ds/learningcenter/labo/nl_labo_222762.pdf. [Accessed
13 June 2014].
[69] R. Stanley, Robins and Cotran pathological basis of disease, Philadelphia: Saunders
Elsevier, 2010.
[70] "Histopathology specimen," Epsom and Saint Helier University Hospitals NHS Trust,
[Online]. Available: http://www.epsom-sthelier.nhs.uk/our-services/a-to-z-of-
services/clinical-services/pathology/histopathology/specimen-information/. [Accessed
5 June 2014].
[71] Marieb, E. Nicpon and K. Hoehn, Human Anatomy & Physiology, San Fransisco:
Benjamin Cummings, 2010.
[72] Zuber and J. Thomas, " Punch biopsy of the skin," American Family Physician , vol.
65, no. 6, pp. 1155-1158, 2002.
[73] J. Ho, R. Brodell and S. Helms, "Saucerization biopsy of pigmented lesions," Clinics
in Dermatology, vol. 6, no. 23, pp. 631-635, 2005.
[74] S. Peter, A. Guiseppe, H. Wellenhof, Rainer and H. Johr, Color Atlas of Melanocytic
Lesions of the Skin, Recurrent Nevus, Berlin: Springer Berlin Heidelberg, 2007.
[75] K. Hunt, M. Green and T. Buchholz, "Diseases of the Breast," in Sabiston Textbook of
Surgery , Philadelphia, Saunders Elsevier, 2012, p. 19 edition chap 36.
[76] K. McMasters and M. Urist, "Melanoma and cutaneous malignancies," in Sabiston
Textbook of Surgery, Philadelphia, Sauners Elsevier, 2012, p. 19 edition chap 32.
[77] A. Robert, Z. David, R. Daid and S. Stephanie, "Rectal biopsy," Medline Plus Medical
Encyclopedia, 12 October 2012. [Online]. Available:](https://image.slidesharecdn.com/d82b7d81-8f22-4a04-ac2d-58a6e5bec764-160206110615/85/ALISHA-PS-1-FINAL-REPORT-Copy-121-320.jpg)
![122
http://www.nlm.nih.gov/medlineplus/ency/article/003891.htm. [Accessed 3 July
2014].
[78] " Endometrial Biopsy, A Review of Sampling Techniques," CooperSurgical, 2012.
[79] A. Choby, "Endometrial biopsy," in Pfenninger's and Fowler's Procedures for
Primary care, Philadelphia, Elsevier Mosby, 2010, p. 3 ed. chap 143.
[80] J. Elder, "Disorders and anomalies of the scrotal contents," in Nelson Textbook of
Pediatrics., Philadelphia, Saunders Elsevier, 2011, p. 19 ed. chap 539.
[81] M. Coburn, "Urologic surgery," in Sabiston Textbook of Surgery., Philadelphia,
Saunders Elsevier, 2012, p. 19 ed. chap 73.
[82] "Annals of Diagnostic Pathology," in Grossing in Dermapathology manual, 2009, pp.
106-113.
[83] B. Izak, "Grossing technology in surgical pathology," Mantra and Wordpress, 2013.
[Online]. Available: http://grossing-technology.com/newsite/home/grossing-
techniques/introduction-in-biopsy-grossing-techniques/. [Accessed 14 June 2014].
[84] "Histology sample preparation," Leica biosystems, 23 October 2012. [Online].
Available: http://www.leicabiosystems.com/pathologyleaders/topics/histology-sample-
preparation/. [Accessed 4 July 2014].
[85] "Bouin's fixative," American MasterTech, [Online]. Available:
http://www.americanmastertech.com/bouins_fluid.htm. [Accessed 3 June 2014].
[86] "Tissue processor for dehydration," Leica BioSystems, [Online]. Available:
http://www.mikrol.ru/products/histology-systems/tissue-
processing/details/product/leica-tp1020/index.php. [Accessed 3 July 2014].
[87] "Histology Supplies: Staining, Specimen Preparation, Staining, Archiving," PODC
Scientific, 20 March 2013. [Online]. Available:
http://www.pocdscientific.com.au/histology.php. [Accessed 7 June 2014].
[88] "Rotatory Microtomes," Leica BioSystems, 10 January 2011. [Online]. Available:
http://www.leicabiosystems.com/specimen-preparation/sectioning/rotary-
microtomes/details/product/leica-rm2125-rts-1/application/. [Accessed 23 July 2014].
[89] "Hematoxylin and eosin staining," IHC World, [Online]. Available:
http://www.ihcworld.com/imagegallery/he-stain.htm. [Accessed 6 June 2014].
[90] "Special Staining," PathologyOutlines, [Online]. Available:
http://www.ihcworld.com/imagegallery/he-stain.htm. [Accessed 2 June 2014].
[91] "Histopathological techniques," Marietta education, [Online]. Available:
http://www.marietta.edu/~spilatrs/biol309/labexercises/Histolgy.pdf. [Accessed 17
July 2014].
[92] "Cryostat," Leica BioSystems, [Online]. Available:
http://www.noble.org/corefacilities/cellular-imaging/. [Accessed 27 July 2014].
[93] Kirkpatrick, The Cassell Concise English Dictionary, London: p.324, 1989.
[94] Mitchell, S. Richard, V. Kumar, K. Abbas and N. Fausto, "Robbins Basic Pathology,"
in Section of squamous cell carcinomas, Philadelphia, Saunders, p. 8 ed. chap 13.
[95] J. Lever, P. Trott and A. Webb, "Fine needle aspiration cytology," Journal of Clinical
Pathology, vol. 38, no. 1, pp. 1-11, 1985.](https://image.slidesharecdn.com/d82b7d81-8f22-4a04-ac2d-58a6e5bec764-160206110615/85/ALISHA-PS-1-FINAL-REPORT-Copy-122-320.jpg)
![123
[96] T. David, "Fine needle aspiration," WebMD, 12 May 2012. [Online]. Available:
http://www.webmd.com/a-to-z-guides/fine-needle-aspiration?page=2. [Accessed 16
June 2014].
[97] "Fine needle aspiration," American Academy of Otolarynglogy - head and neck
surgery, 3 October 2011. [Online]. Available: http://www.entnet.org/content/fine-
needle-aspiration. [Accessed 12 June 2014].
[98] S. Orell, Fine needle aspiration cytology, Philadelphia: Saunders, 2005.
[99] N. Pai, P. Patil and S. Nagalotimath, "Sediment cytology in bone biopsies," PubMed,
vol. 34, no. 3, pp. 409-412, 1990.
[100] S. Shah, K. Rahman, K. Akthar and S. Zaheer, "Bone lesions - role of sediment
cytology," PubMed, vol. 37, no. 6, pp. 397-401, 2009.
[101] M. Morra and E. Potts, Choices, New York: Harper Resource, 2003.
[102] M. Borowitz, W. Westra and L. Cooley, " Pathology and laboratory medicine.," in
Clinical Oncology, London, Churchill Livingstone, 2004, p. 3 ed..
[103] J. Connolly, S. Schnitt and H. Wang, " Principles of cancer pathology.," in Cancer
Medicine, Ontario, BC Decker Inc., 2003, p. 6 ed..](https://image.slidesharecdn.com/d82b7d81-8f22-4a04-ac2d-58a6e5bec764-160206110615/85/ALISHA-PS-1-FINAL-REPORT-Copy-123-320.jpg)


