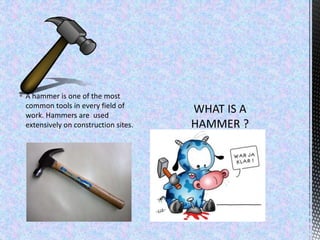
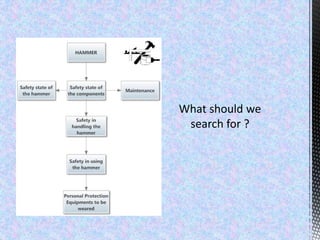
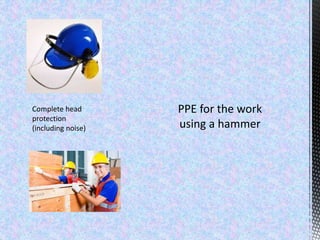
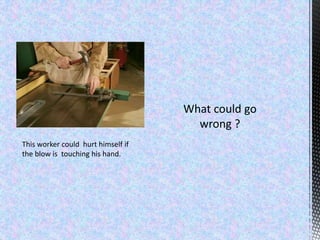
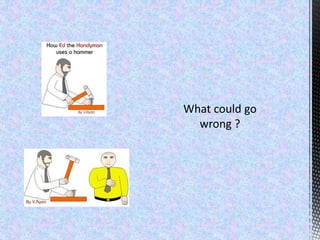
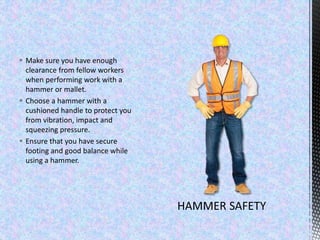
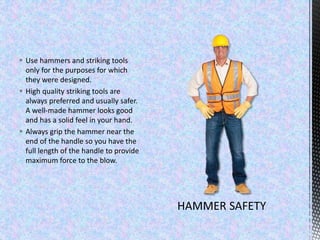
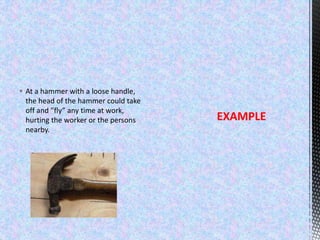
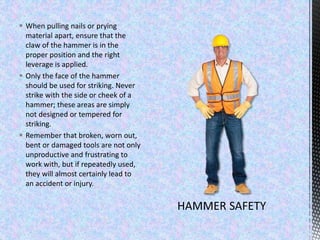
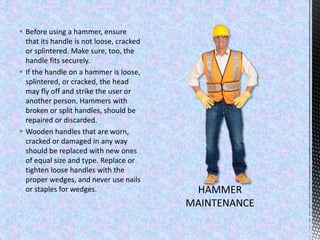
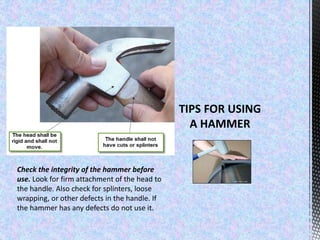
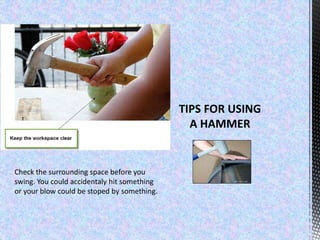
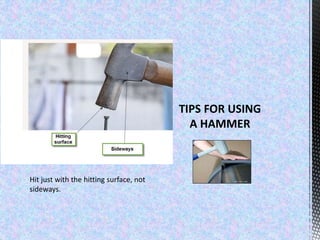
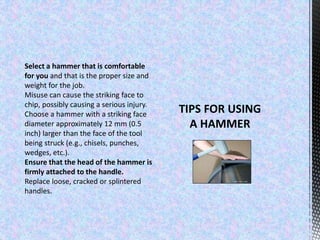
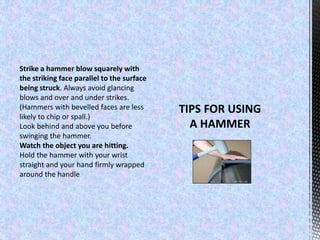
Ph.D:Stefan Kovacs
E-mail: safetyinknowledge@gmail.com
 This presentation shows some
important aspects regarding the
safety and health when working
with hammers. The subject are
manual hammers- not the
mechanical ones. As hammers are
one of the most used tools- we
found that a presentation
regarding hammer safety could be
usefull.
 A hammer is one of the most
common tools in every field of
work. Hammers are used
extensively on construction sites.
 Safety of the components should
include:
 -hammer s head (Face, neck, claw,
cheek) ;
 -hammer s handle and grip;
 -the link between ;
HAMMER
COMPONENT
PARTS
RISKS ? Use of any striking tool involves
potential risks.
 Risks are connected with
manipulating the hammer and the
effective usage of the hammer.
 Every care should be taken to
prevent possible personal injury or
damage to the tool and the
subsequent piece.
 Risks could affect:
 -the assets nearby;
 -the worker;
 -the fellow workers;
Glasses are needed to
protect the eyes from
splinters that could fall
and not just that.
Gloves are an efficient
hand protection
Complete head
protection
(including noise)
This worker could hurt himself if
the blow is touching his hand.
 Make sure you have enough
clearance from fellow workers
when performing work with a
hammer or mallet.
 Choose a hammer with a
cushioned handle to protect you
from vibration, impact and
squeezing pressure.
 Ensure that you have secure
footing and good balance while
using a hammer.
 Without a secure footing your
equilibre would be affected and
you could fall following the
hammer movement...
EXAMPLE
Imagine that you would use the
hammer on a piece of steel in a room full
of people that are not constient that you
are going to start hammering, part of
them doing other things that require
attention and focus. EXAMPLE
 Use hammers and striking tools
only for the purposes for which
they were designed.
 High quality striking tools are
always preferred and usually safer.
A well-made hammer looks good
and has a solid feel in your hand.
 Always grip the hammer near the
end of the handle so you have the
full length of the handle to provide
maximum force to the blow.
 You should never use hammer for
other purposes. EXAMPLE
 Avoid using hammers with sharp
edges as they can cut off
circulation in your finger after long
periods of use.
 A hammer handle should always
be swung so the face contacts the
surface you are hitting squarely.
You should never strike from an
angle.
 When using a hammer to strike
another metal tool, such as a
punch or chisel, aim the blow or
cut away from your body. The tool
being struck must be in perfect
condition. This means a punch
should never have a mushrooming
head, or the handle on a wood
chisel should not be cracked.
 Hammers with sharp edge could
cut other things too. Imagine the
damage that the hammer from the
figure could do accidentally to a
power cable.
EXAMPLE
 Ensure that you have secure
footing and good balance while
using a hammer.
 ALWAYS inspect the hammer
before beginning the task to be
sure it is not damaged and that all
parts are secure. Be certain that
replaceable faces are fitted
securely into the head. On split-
head hammers, be sure that the
face and handle securing screws
are periodically retightened, as
necessary.
 You can use clamps or a vise to
secure the piece you are striking
with a hammer.
 Use only a hammer when driving
nails into an object or material.
Never use a rock, brick or other
tools for this purpose or risk
getting injured.
 NEVER use a hammer with a split
or damaged handle. The practice
of taping a cracked handle is
dangerous and can result in injury
to the user as well as nearby
personnel.
 ALWAYS replace striking faces
before they wear down far enough
to allow the body of the hammer
head to contact the work surface.
 A damaged handle would certainly
break in time. EXAMPLE
 NEVER use a hammer with a loose
handle. Loose handles should be
replaced or fitted with new wedges
of the proper size. Replacement
handles should be of the same
length and quality as the original.
 NEVER use a light weight hammer
on tasks that require heavy blows.
Choose a hammer of sufficient
weight so that only a natural swing
is required. Let the weight of the
hammer do the work.
 At a hammer with a loose handle,
the head of the hammer could take
off and ”fly” any time at work,
hurting the worker or the persons
nearby.
EXAMPLE
 When pulling nails or prying
material apart, ensure that the
claw of the hammer is in the
proper position and the right
leverage is applied.
 Only the face of the hammer
should be used for striking. Never
strike with the side or cheek of a
hammer; these areas are simply
not designed or tempered for
striking.
 Remember that broken, worn out,
bent or damaged tools are not only
unproductive and frustrating to
work with, but if repeatedly used,
they will almost certainly lead to
an accident or injury.
 Before using a hammer, ensure
that its handle is not loose, cracked
or splintered. Make sure, too, the
handle fits securely.
 If the handle on a hammer is loose,
splintered, or cracked, the head
may fly off and strike the user or
another person. Hammers with
broken or split handles, should be
repaired or discarded.
 Wooden handles that are worn,
cracked or damaged in any way
should be replaced with new ones
of equal size and type. Replace or
tighten loose handles with the
proper wedges, and never use nails
or staples for wedges.
Check the integrity of the hammer before
use. Look for firm attachment of the head to
the handle. Also check for splinters, loose
wrapping, or other defects in the handle. If
the hammer has any defects do not use it.
It is more energy efficient to grip the
handle firmly at the end, but hold it a
bit higher up while you are learning if
that feels most comfortable and
secure for you.
If the nail is small, and so difficult to hold
without hitting your fingers with the
hammer, push the nail through a piece of
card (stiff paper, etc) and use that to hold
the nail. In this way your fingers are not
near the hammer.
To avoid marring a surface while
hammering something into place (not a
nail) hold a piece of scrap wood against the
object and pound on that.
Some hammers are ergonomically designed
with rubber grips. If you have problems
gripping a handle properly, try ergonomic
grips
Check the surrounding space before you
swing. You could accidentaly hit something
or your blow could be stoped by something.
Hit just with the hitting surface, not
sideways.
Select a hammer that is comfortable
for you and that is the proper size and
weight for the job.
Misuse can cause the striking face to
chip, possibly causing a serious injury.
Choose a hammer with a striking face
diameter approximately 12 mm (0.5
inch) larger than the face of the tool
being struck (e.g., chisels, punches,
wedges, etc.).
Ensure that the head of the hammer is
firmly attached to the handle.
Replace loose, cracked or splintered
handles.
Strike a hammer blow squarely with
the striking face parallel to the surface
being struck. Always avoid glancing
blows and over and under strikes.
(Hammers with bevelled faces are less
likely to chip or spall.)
Look behind and above you before
swinging the hammer.
Watch the object you are hitting.
Hold the hammer with your wrist
straight and your hand firmly wrapped
around the handle

A tale about safety for hammers

  • 1.
  • 2.
     This presentationshows some important aspects regarding the safety and health when working with hammers. The subject are manual hammers- not the mechanical ones. As hammers are one of the most used tools- we found that a presentation regarding hammer safety could be usefull.
  • 3.
     A hammeris one of the most common tools in every field of work. Hammers are used extensively on construction sites.
  • 5.
     Safety ofthe components should include:  -hammer s head (Face, neck, claw, cheek) ;  -hammer s handle and grip;  -the link between ;
  • 6.
  • 7.
    RISKS ? Useof any striking tool involves potential risks.  Risks are connected with manipulating the hammer and the effective usage of the hammer.  Every care should be taken to prevent possible personal injury or damage to the tool and the subsequent piece.  Risks could affect:  -the assets nearby;  -the worker;  -the fellow workers;
  • 8.
    Glasses are neededto protect the eyes from splinters that could fall and not just that. Gloves are an efficient hand protection
  • 9.
  • 10.
    This worker couldhurt himself if the blow is touching his hand.
  • 12.
     Make sureyou have enough clearance from fellow workers when performing work with a hammer or mallet.  Choose a hammer with a cushioned handle to protect you from vibration, impact and squeezing pressure.  Ensure that you have secure footing and good balance while using a hammer.
  • 13.
     Without asecure footing your equilibre would be affected and you could fall following the hammer movement... EXAMPLE
  • 14.
    Imagine that youwould use the hammer on a piece of steel in a room full of people that are not constient that you are going to start hammering, part of them doing other things that require attention and focus. EXAMPLE
  • 15.
     Use hammersand striking tools only for the purposes for which they were designed.  High quality striking tools are always preferred and usually safer. A well-made hammer looks good and has a solid feel in your hand.  Always grip the hammer near the end of the handle so you have the full length of the handle to provide maximum force to the blow.
  • 16.
     You shouldnever use hammer for other purposes. EXAMPLE
  • 17.
     Avoid usinghammers with sharp edges as they can cut off circulation in your finger after long periods of use.  A hammer handle should always be swung so the face contacts the surface you are hitting squarely. You should never strike from an angle.  When using a hammer to strike another metal tool, such as a punch or chisel, aim the blow or cut away from your body. The tool being struck must be in perfect condition. This means a punch should never have a mushrooming head, or the handle on a wood chisel should not be cracked.
  • 18.
     Hammers withsharp edge could cut other things too. Imagine the damage that the hammer from the figure could do accidentally to a power cable. EXAMPLE
  • 19.
     Ensure thatyou have secure footing and good balance while using a hammer.  ALWAYS inspect the hammer before beginning the task to be sure it is not damaged and that all parts are secure. Be certain that replaceable faces are fitted securely into the head. On split- head hammers, be sure that the face and handle securing screws are periodically retightened, as necessary.  You can use clamps or a vise to secure the piece you are striking with a hammer.
  • 20.
     Use onlya hammer when driving nails into an object or material. Never use a rock, brick or other tools for this purpose or risk getting injured.  NEVER use a hammer with a split or damaged handle. The practice of taping a cracked handle is dangerous and can result in injury to the user as well as nearby personnel.  ALWAYS replace striking faces before they wear down far enough to allow the body of the hammer head to contact the work surface.
  • 21.
     A damagedhandle would certainly break in time. EXAMPLE
  • 22.
     NEVER usea hammer with a loose handle. Loose handles should be replaced or fitted with new wedges of the proper size. Replacement handles should be of the same length and quality as the original.  NEVER use a light weight hammer on tasks that require heavy blows. Choose a hammer of sufficient weight so that only a natural swing is required. Let the weight of the hammer do the work.
  • 23.
     At ahammer with a loose handle, the head of the hammer could take off and ”fly” any time at work, hurting the worker or the persons nearby. EXAMPLE
  • 24.
     When pullingnails or prying material apart, ensure that the claw of the hammer is in the proper position and the right leverage is applied.  Only the face of the hammer should be used for striking. Never strike with the side or cheek of a hammer; these areas are simply not designed or tempered for striking.  Remember that broken, worn out, bent or damaged tools are not only unproductive and frustrating to work with, but if repeatedly used, they will almost certainly lead to an accident or injury.
  • 25.
     Before usinga hammer, ensure that its handle is not loose, cracked or splintered. Make sure, too, the handle fits securely.  If the handle on a hammer is loose, splintered, or cracked, the head may fly off and strike the user or another person. Hammers with broken or split handles, should be repaired or discarded.  Wooden handles that are worn, cracked or damaged in any way should be replaced with new ones of equal size and type. Replace or tighten loose handles with the proper wedges, and never use nails or staples for wedges.
  • 26.
    Check the integrityof the hammer before use. Look for firm attachment of the head to the handle. Also check for splinters, loose wrapping, or other defects in the handle. If the hammer has any defects do not use it.
  • 27.
    It is moreenergy efficient to grip the handle firmly at the end, but hold it a bit higher up while you are learning if that feels most comfortable and secure for you.
  • 28.
    If the nailis small, and so difficult to hold without hitting your fingers with the hammer, push the nail through a piece of card (stiff paper, etc) and use that to hold the nail. In this way your fingers are not near the hammer. To avoid marring a surface while hammering something into place (not a nail) hold a piece of scrap wood against the object and pound on that. Some hammers are ergonomically designed with rubber grips. If you have problems gripping a handle properly, try ergonomic grips
  • 29.
    Check the surroundingspace before you swing. You could accidentaly hit something or your blow could be stoped by something.
  • 30.
    Hit just withthe hitting surface, not sideways.
  • 31.
    Select a hammerthat is comfortable for you and that is the proper size and weight for the job. Misuse can cause the striking face to chip, possibly causing a serious injury. Choose a hammer with a striking face diameter approximately 12 mm (0.5 inch) larger than the face of the tool being struck (e.g., chisels, punches, wedges, etc.). Ensure that the head of the hammer is firmly attached to the handle. Replace loose, cracked or splintered handles.
  • 32.
    Strike a hammerblow squarely with the striking face parallel to the surface being struck. Always avoid glancing blows and over and under strikes. (Hammers with bevelled faces are less likely to chip or spall.) Look behind and above you before swinging the hammer. Watch the object you are hitting. Hold the hammer with your wrist straight and your hand firmly wrapped around the handle