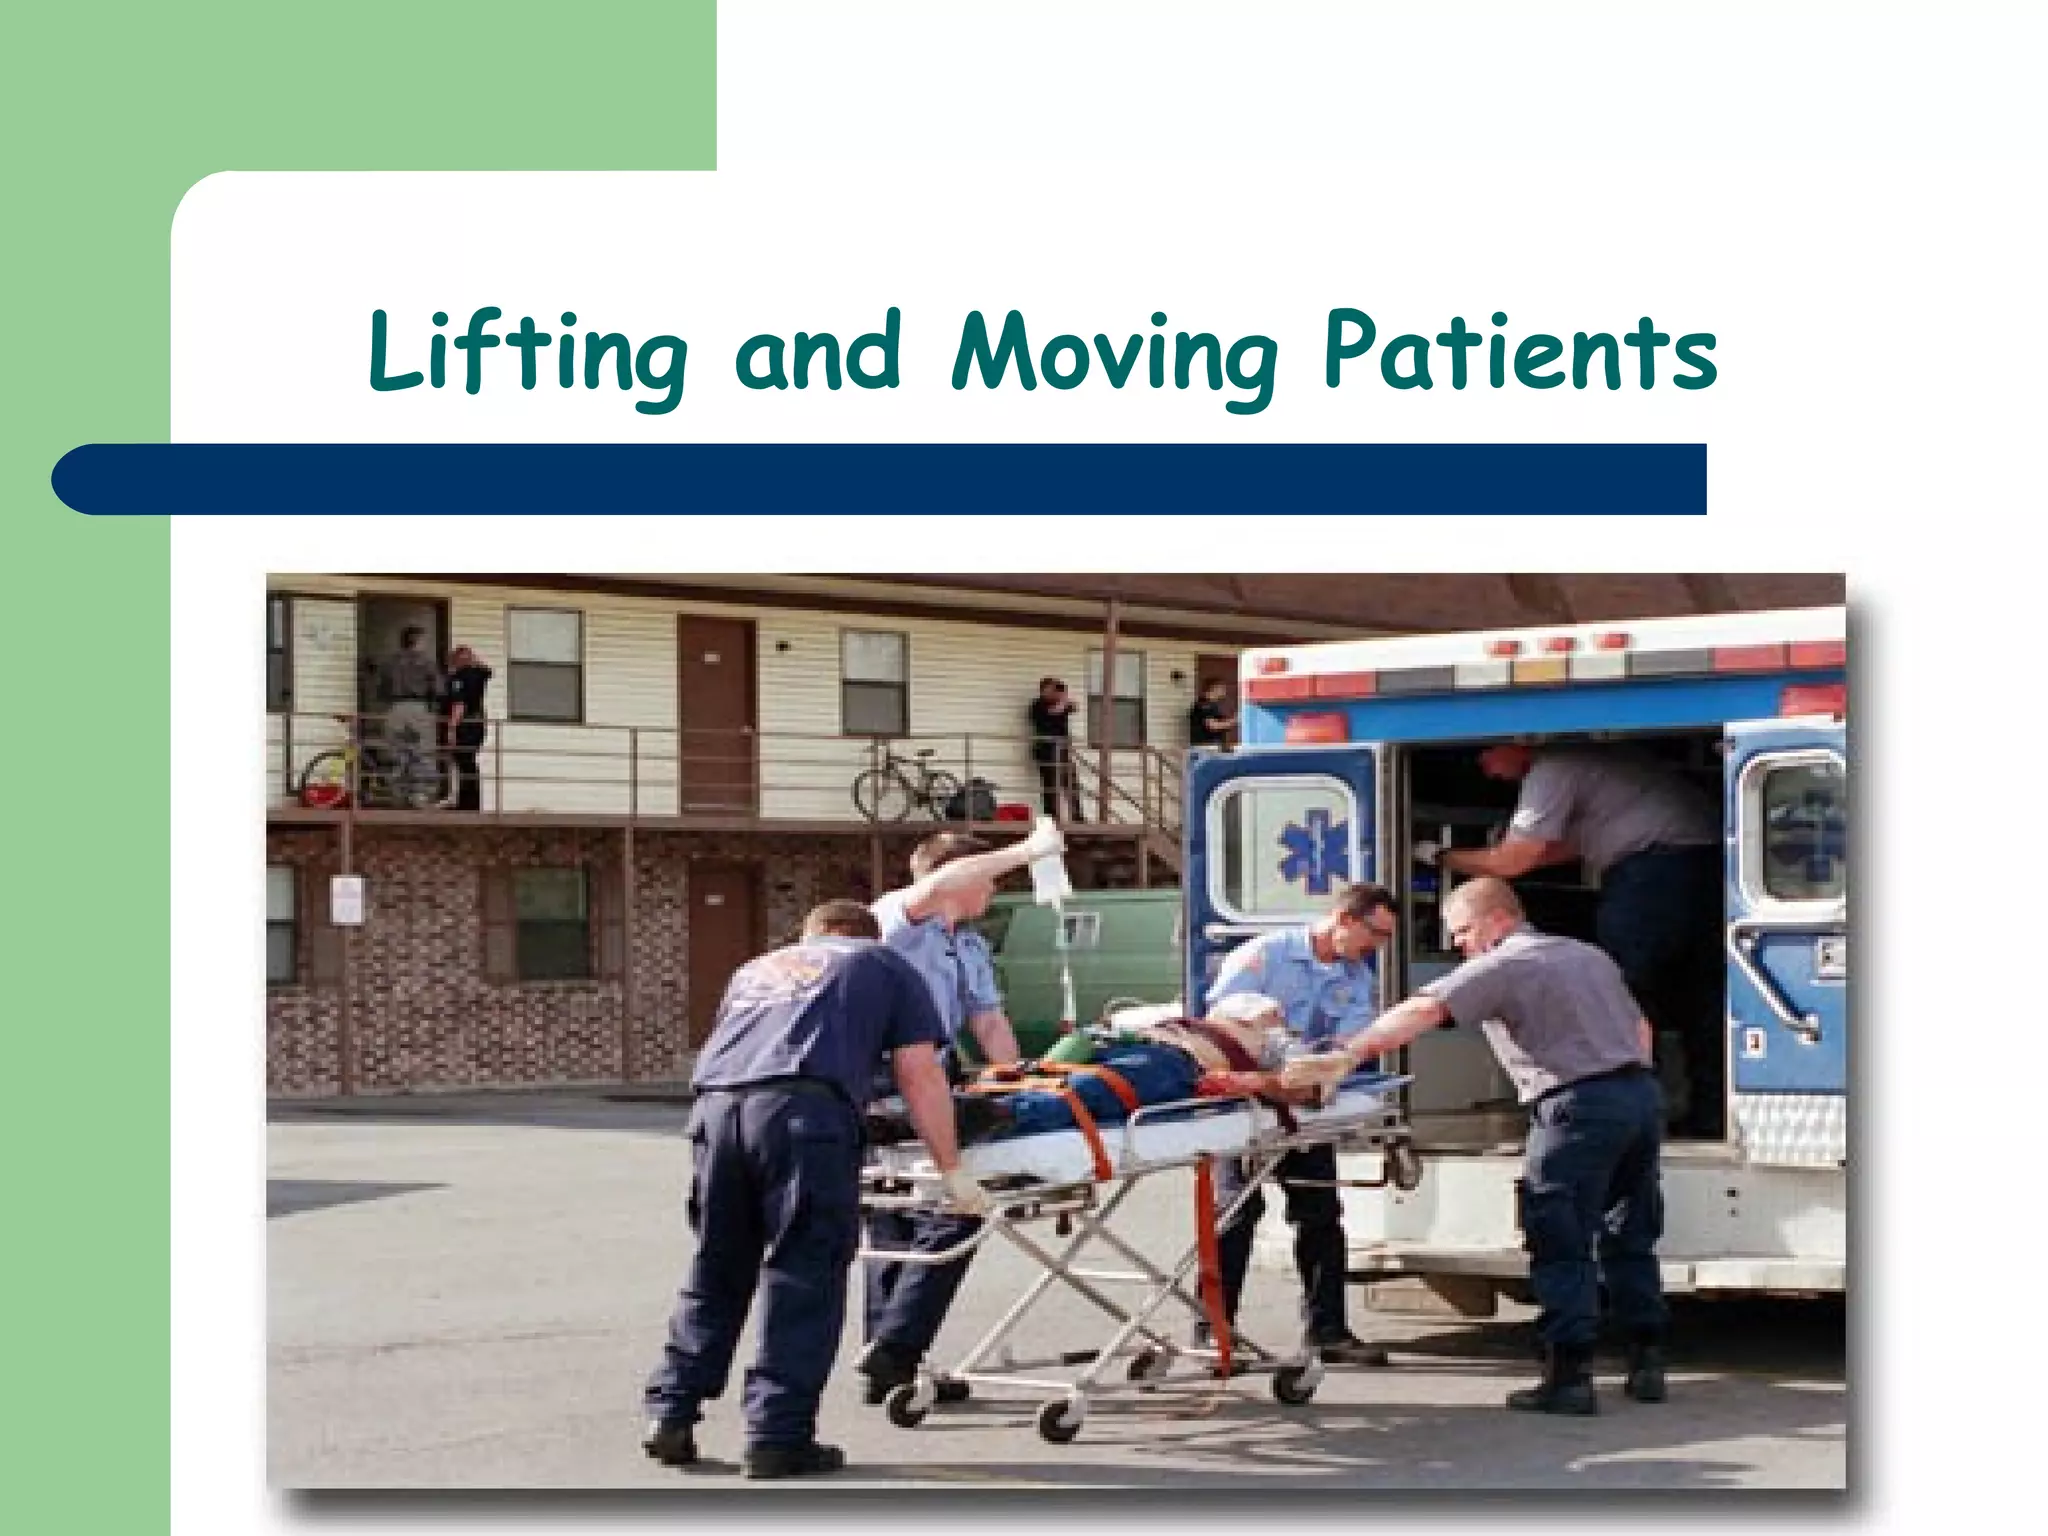
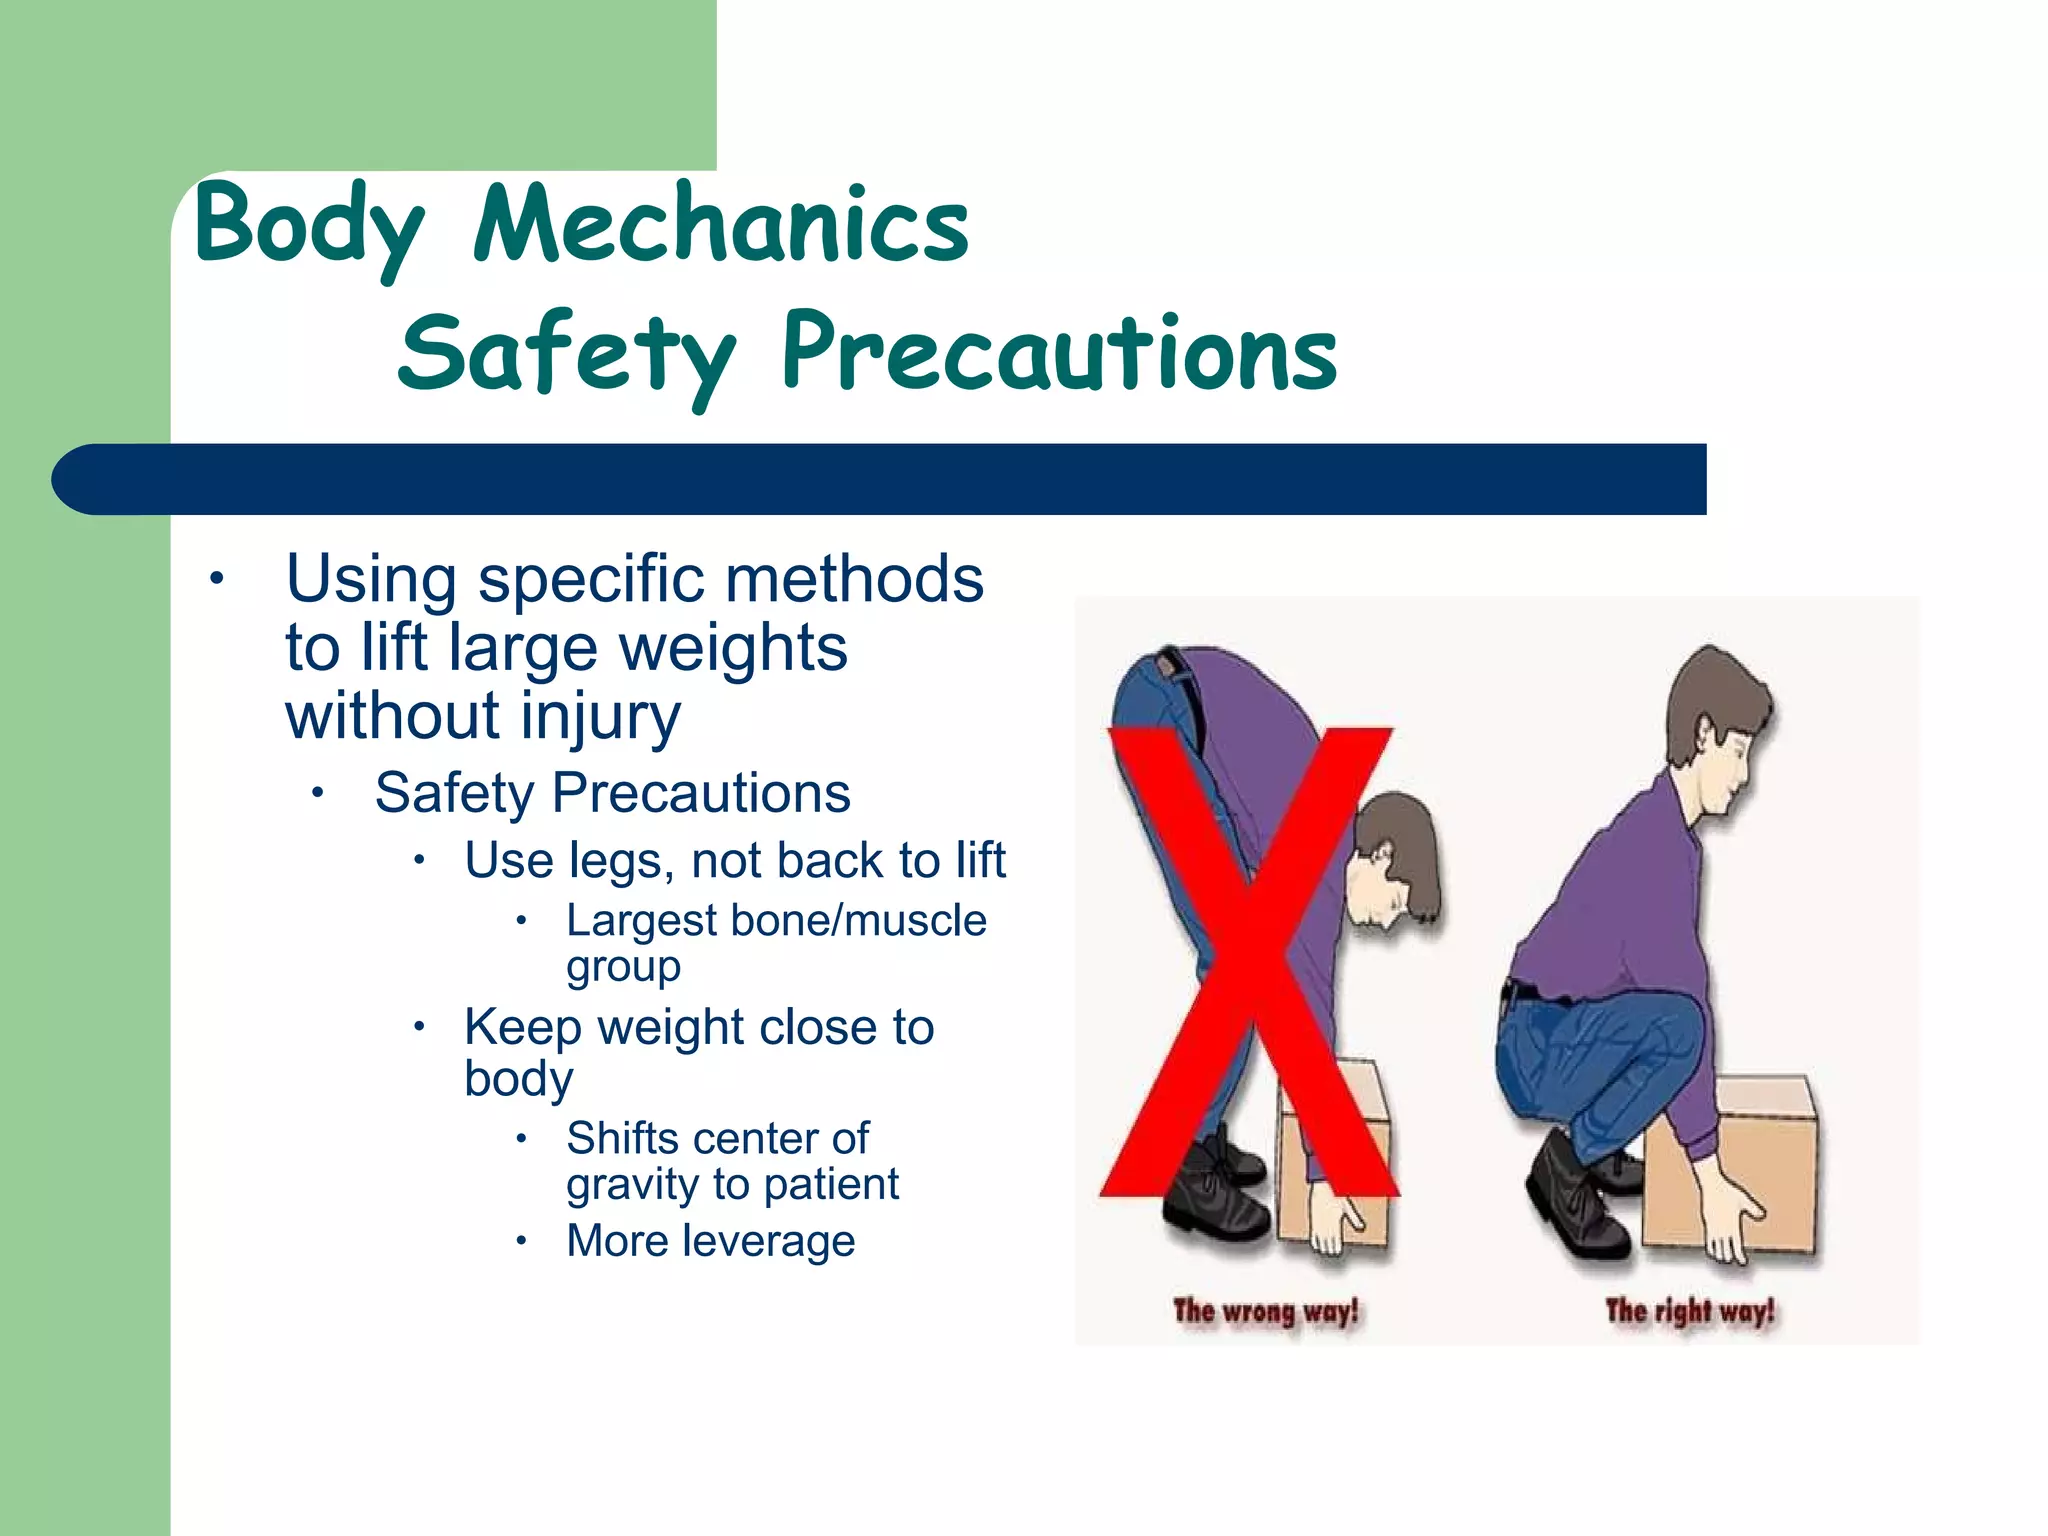
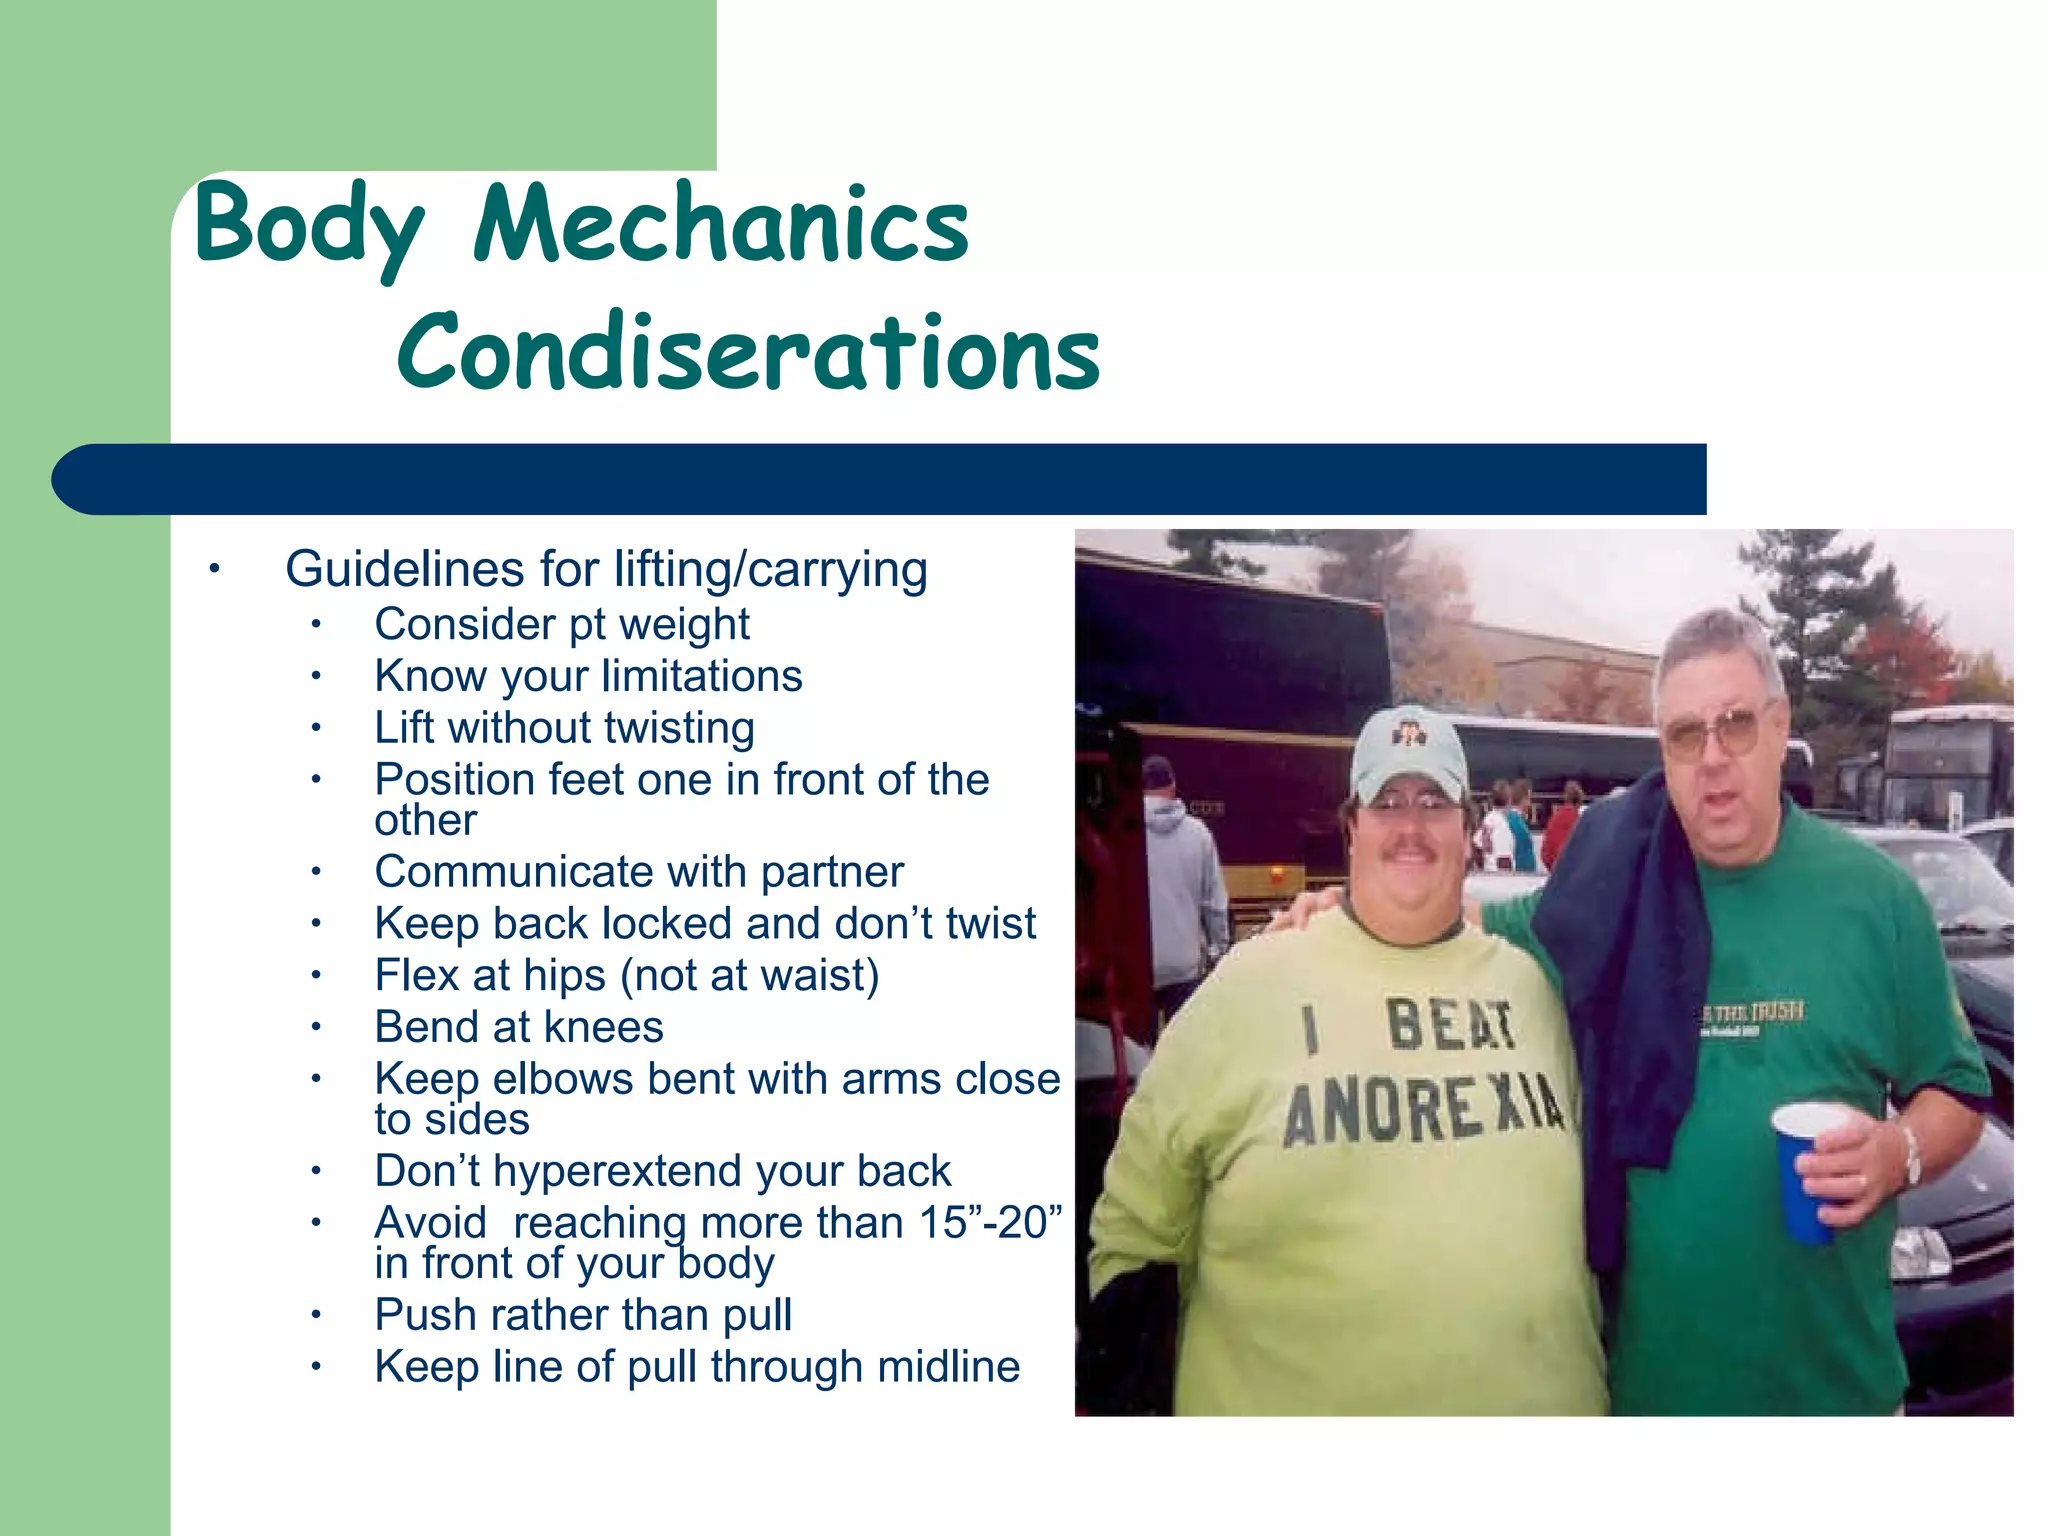
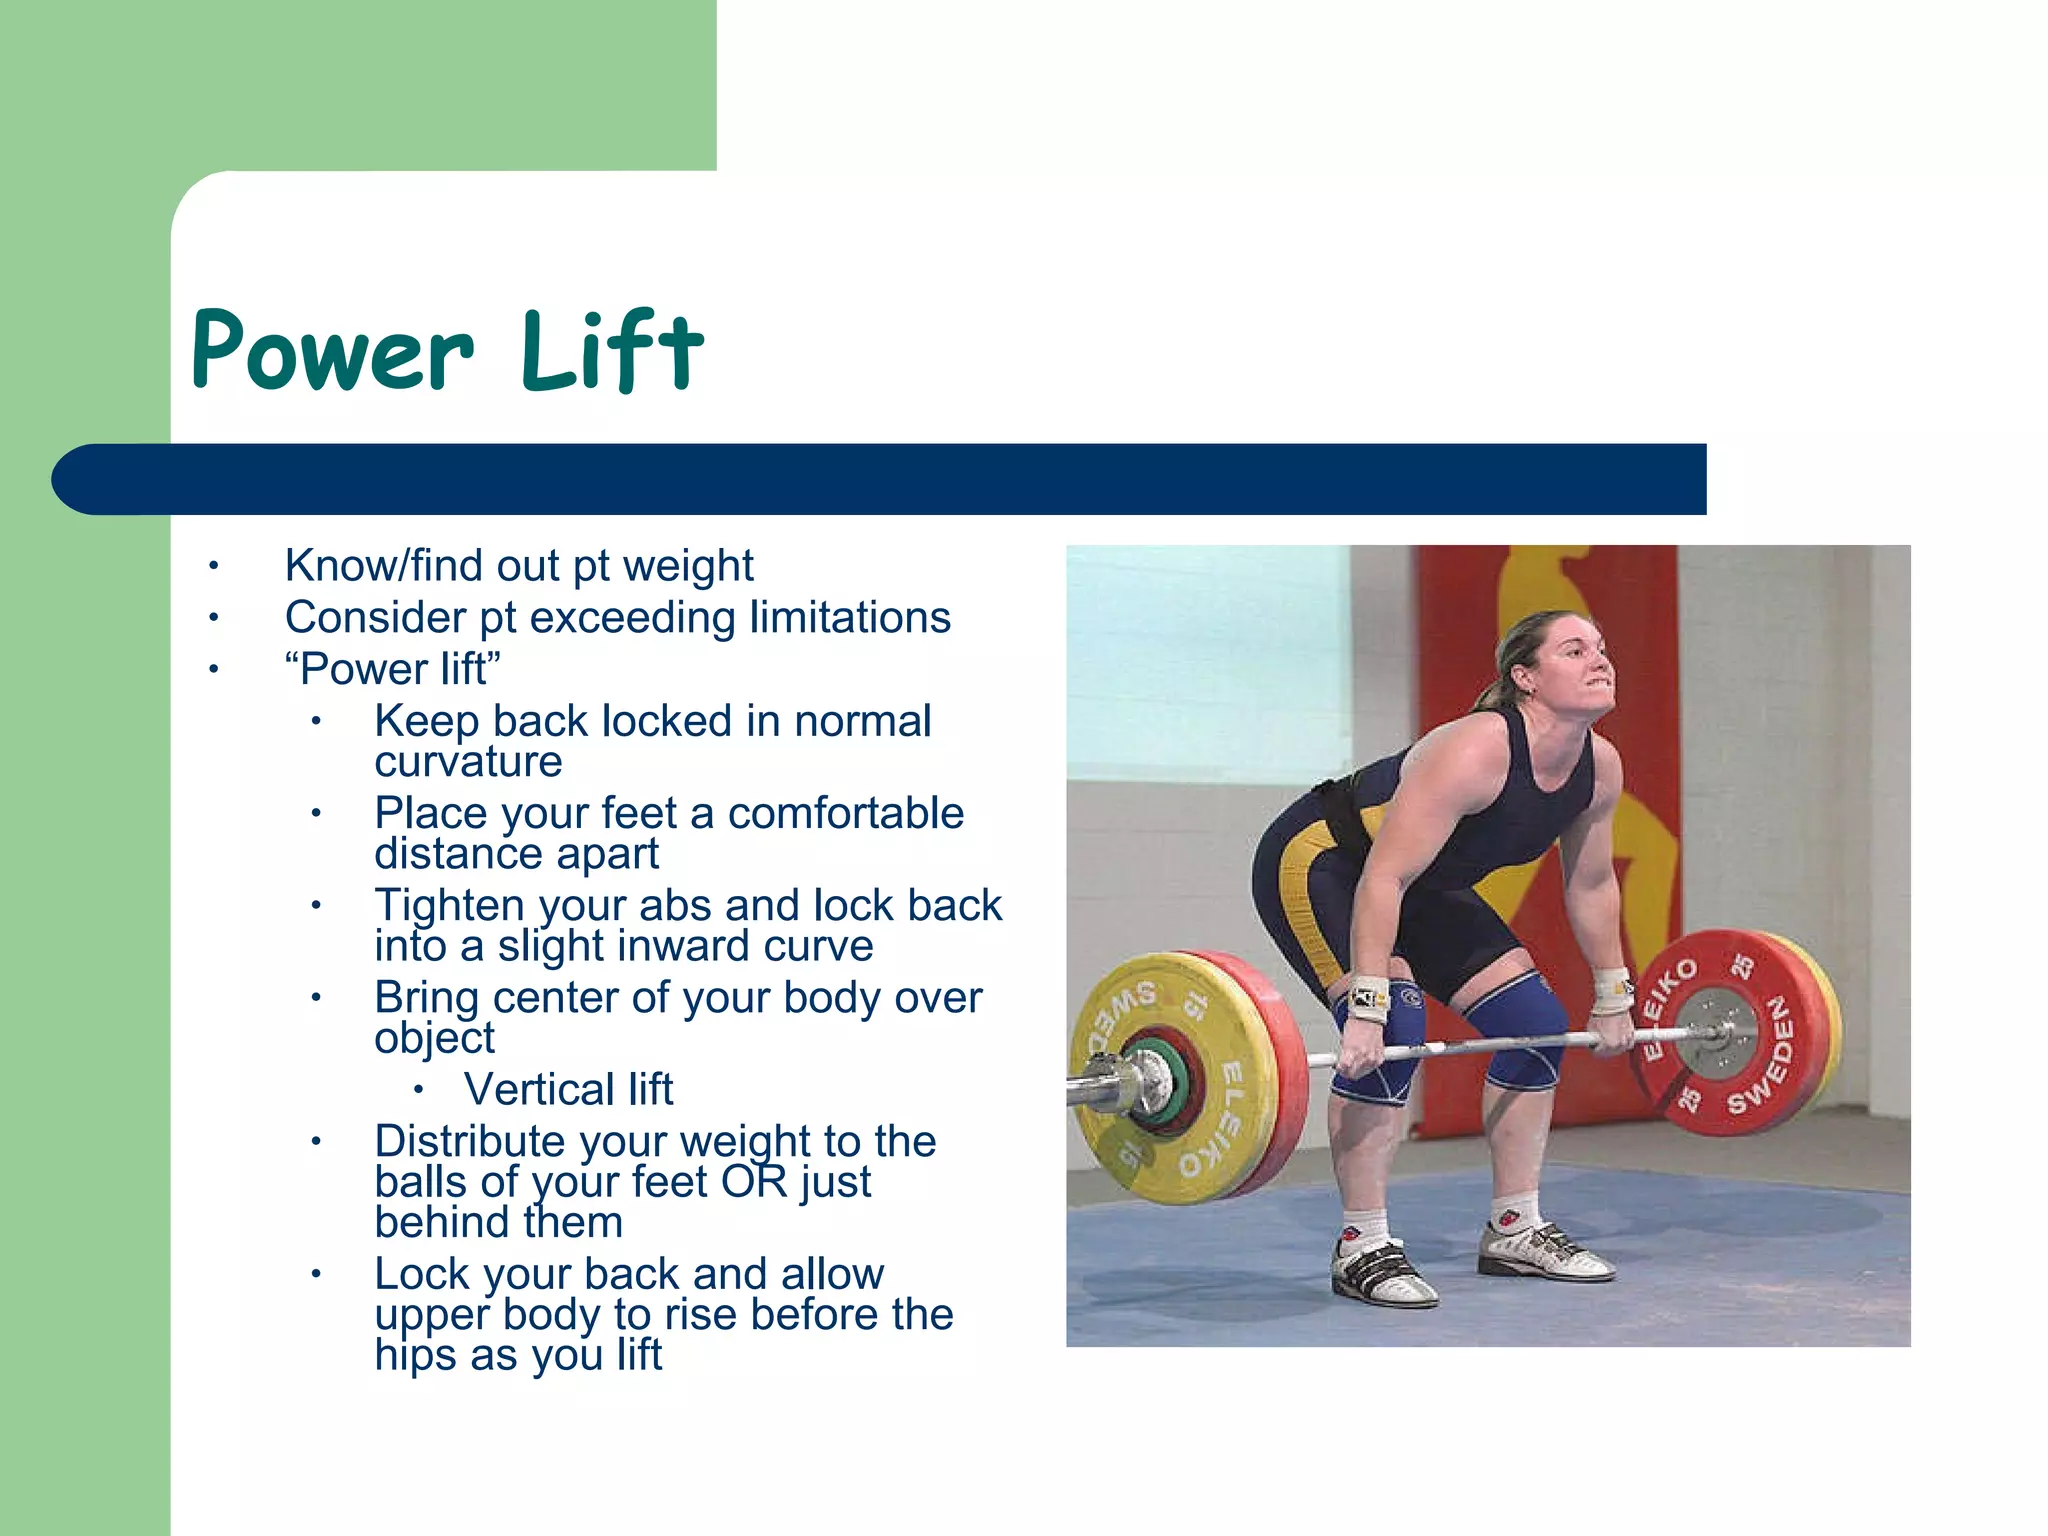
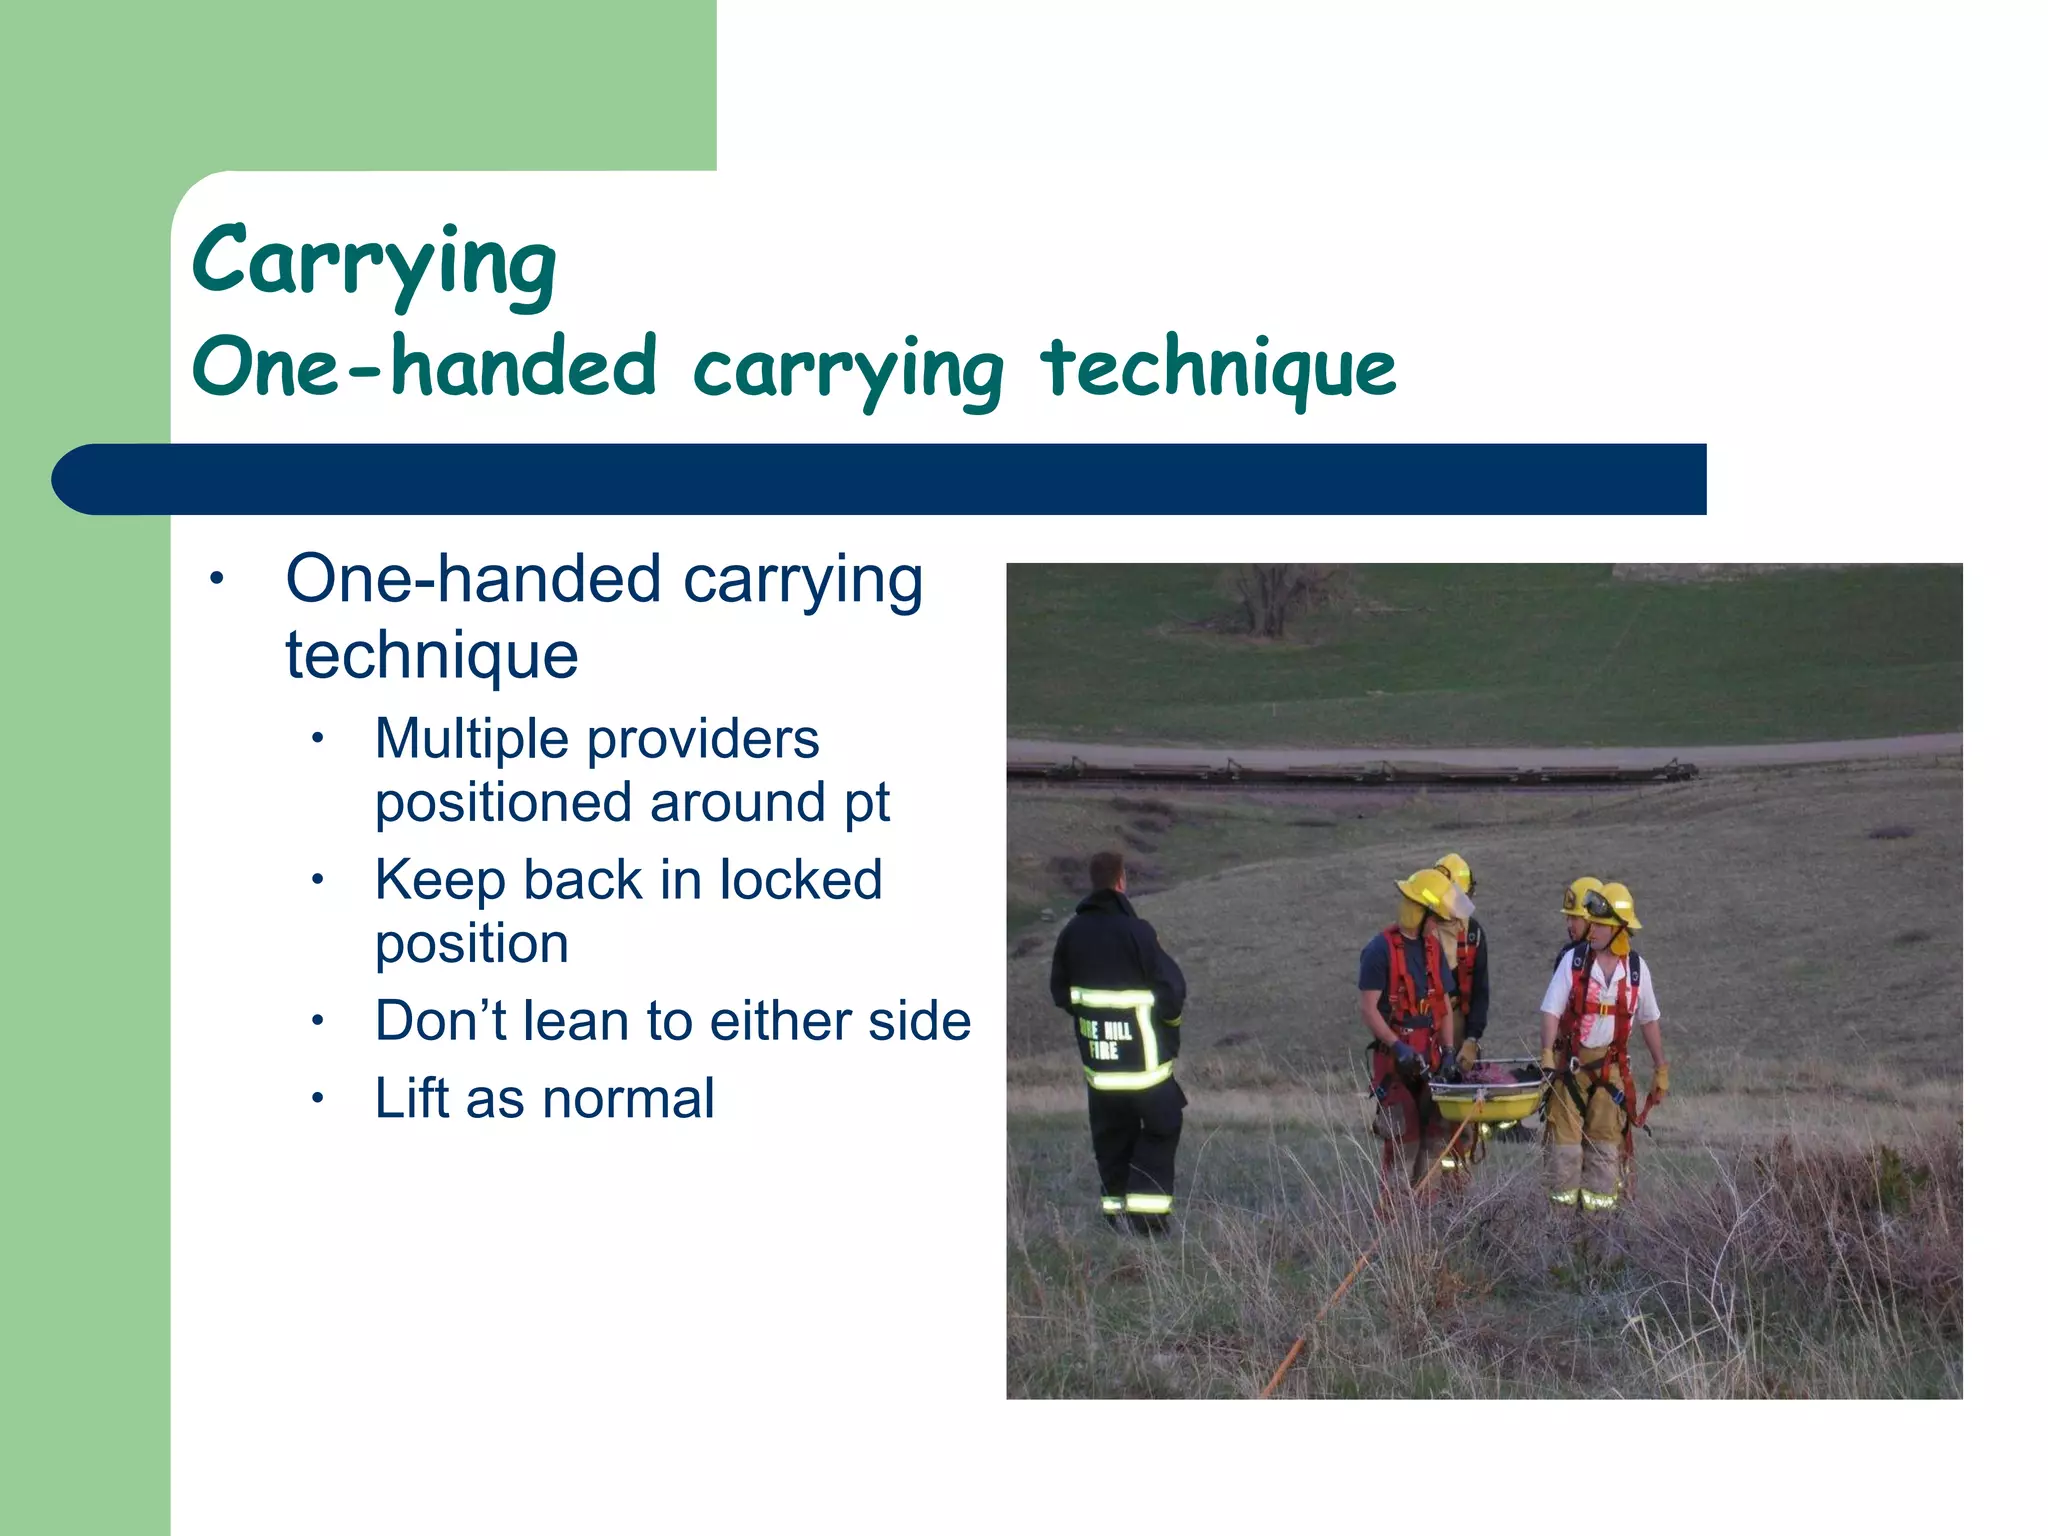
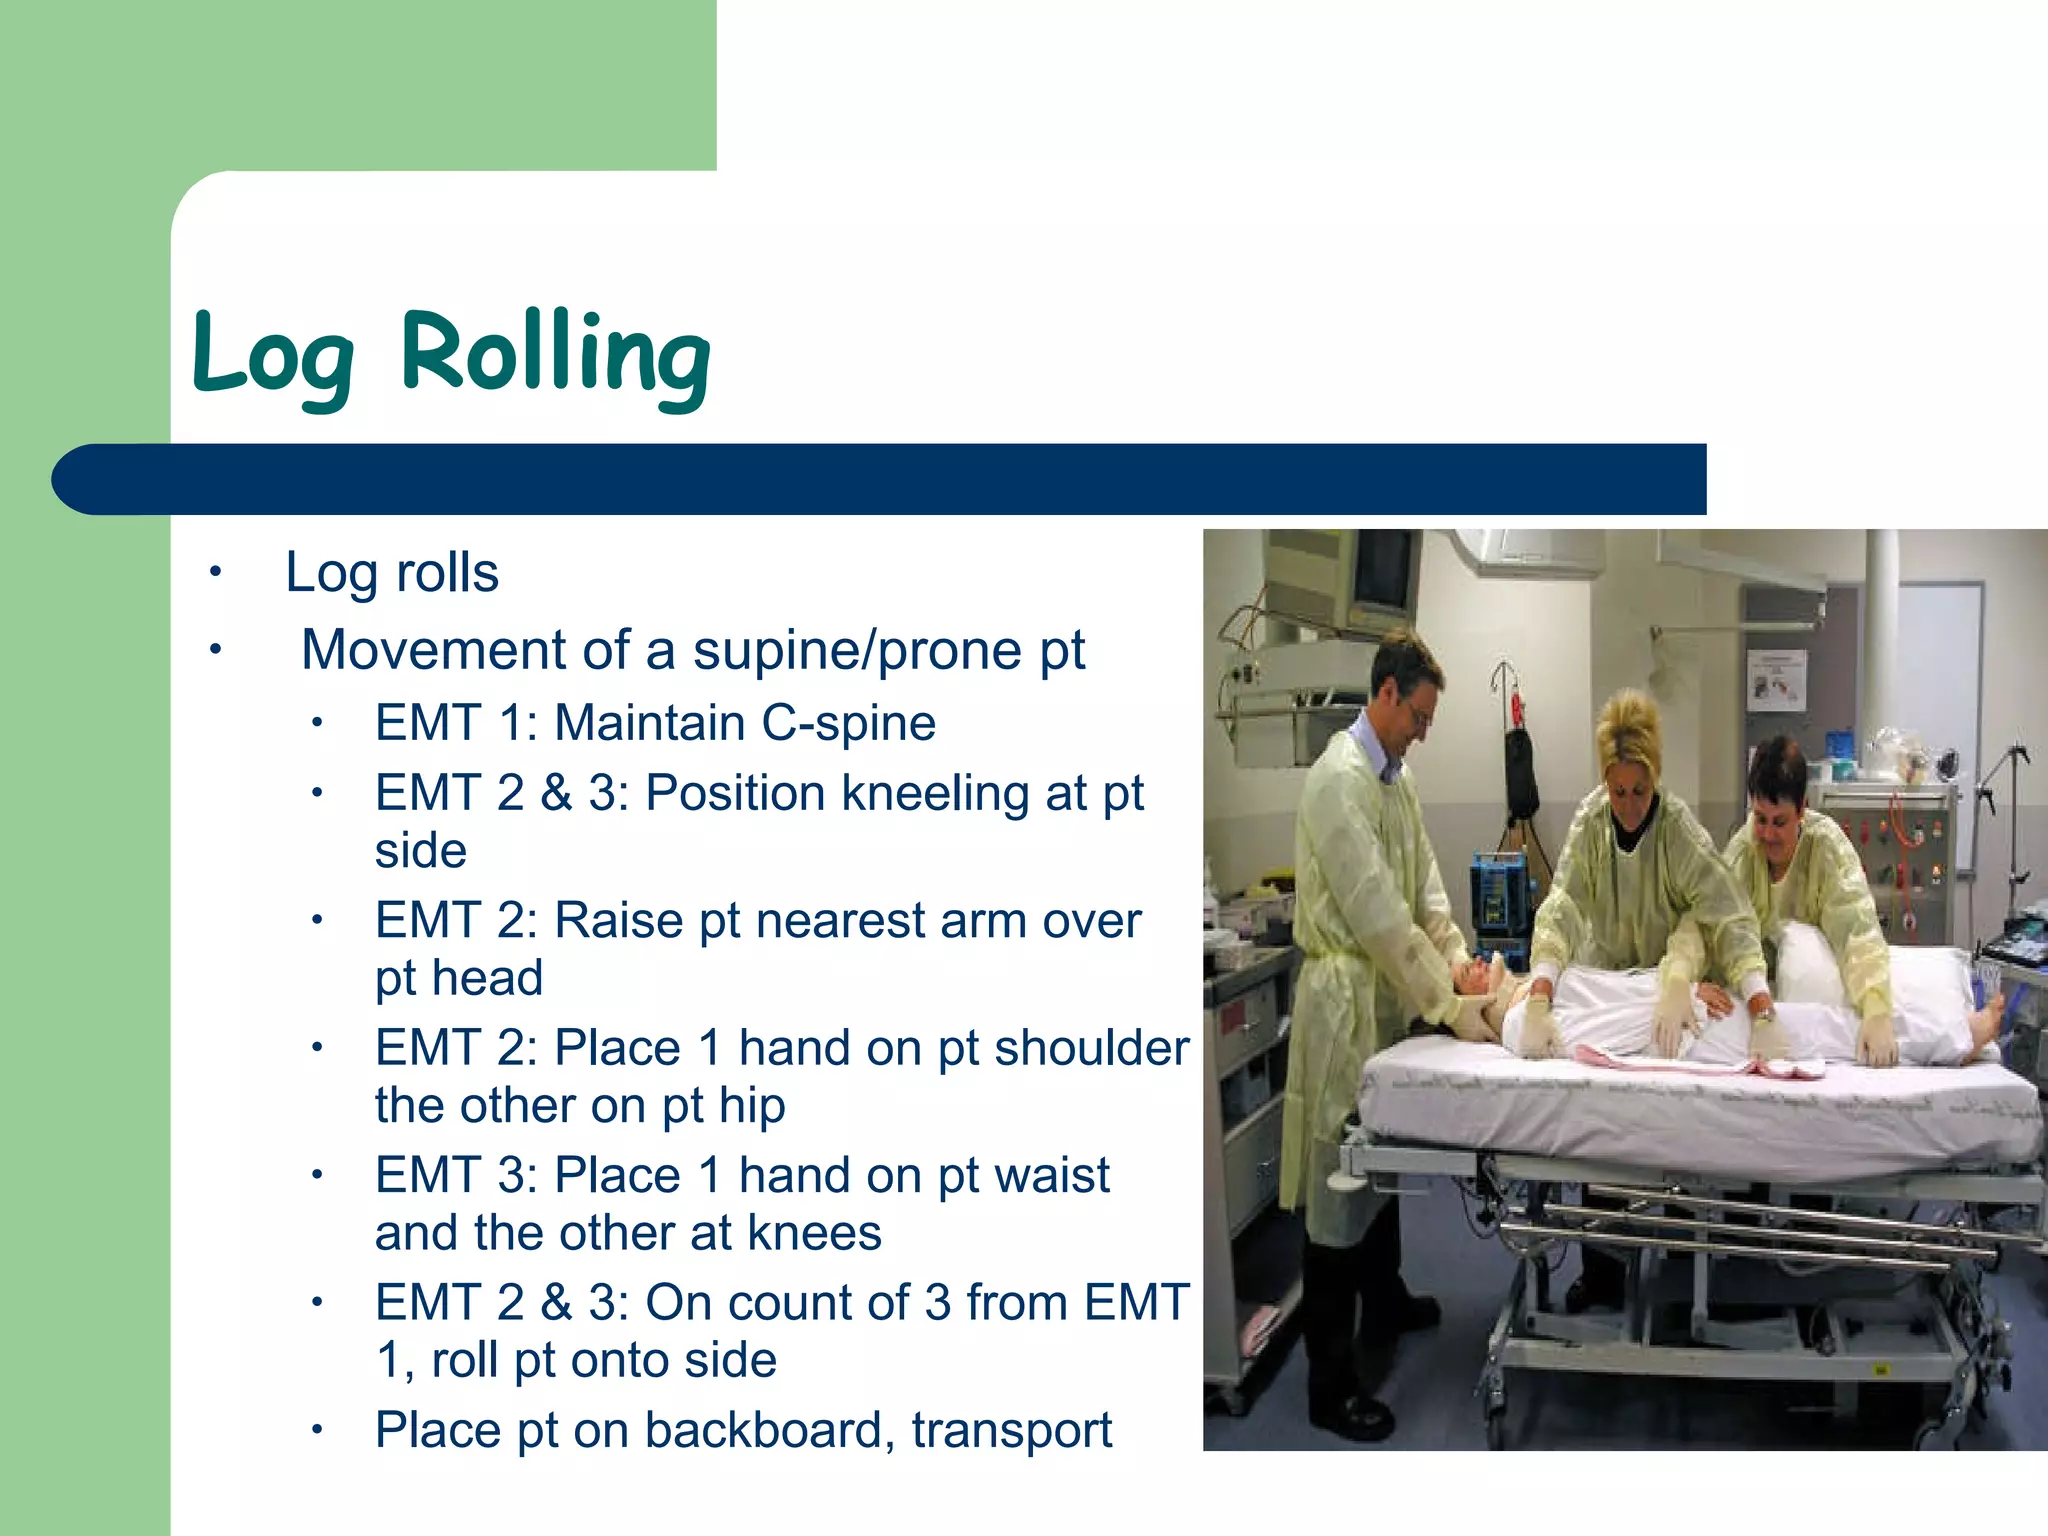
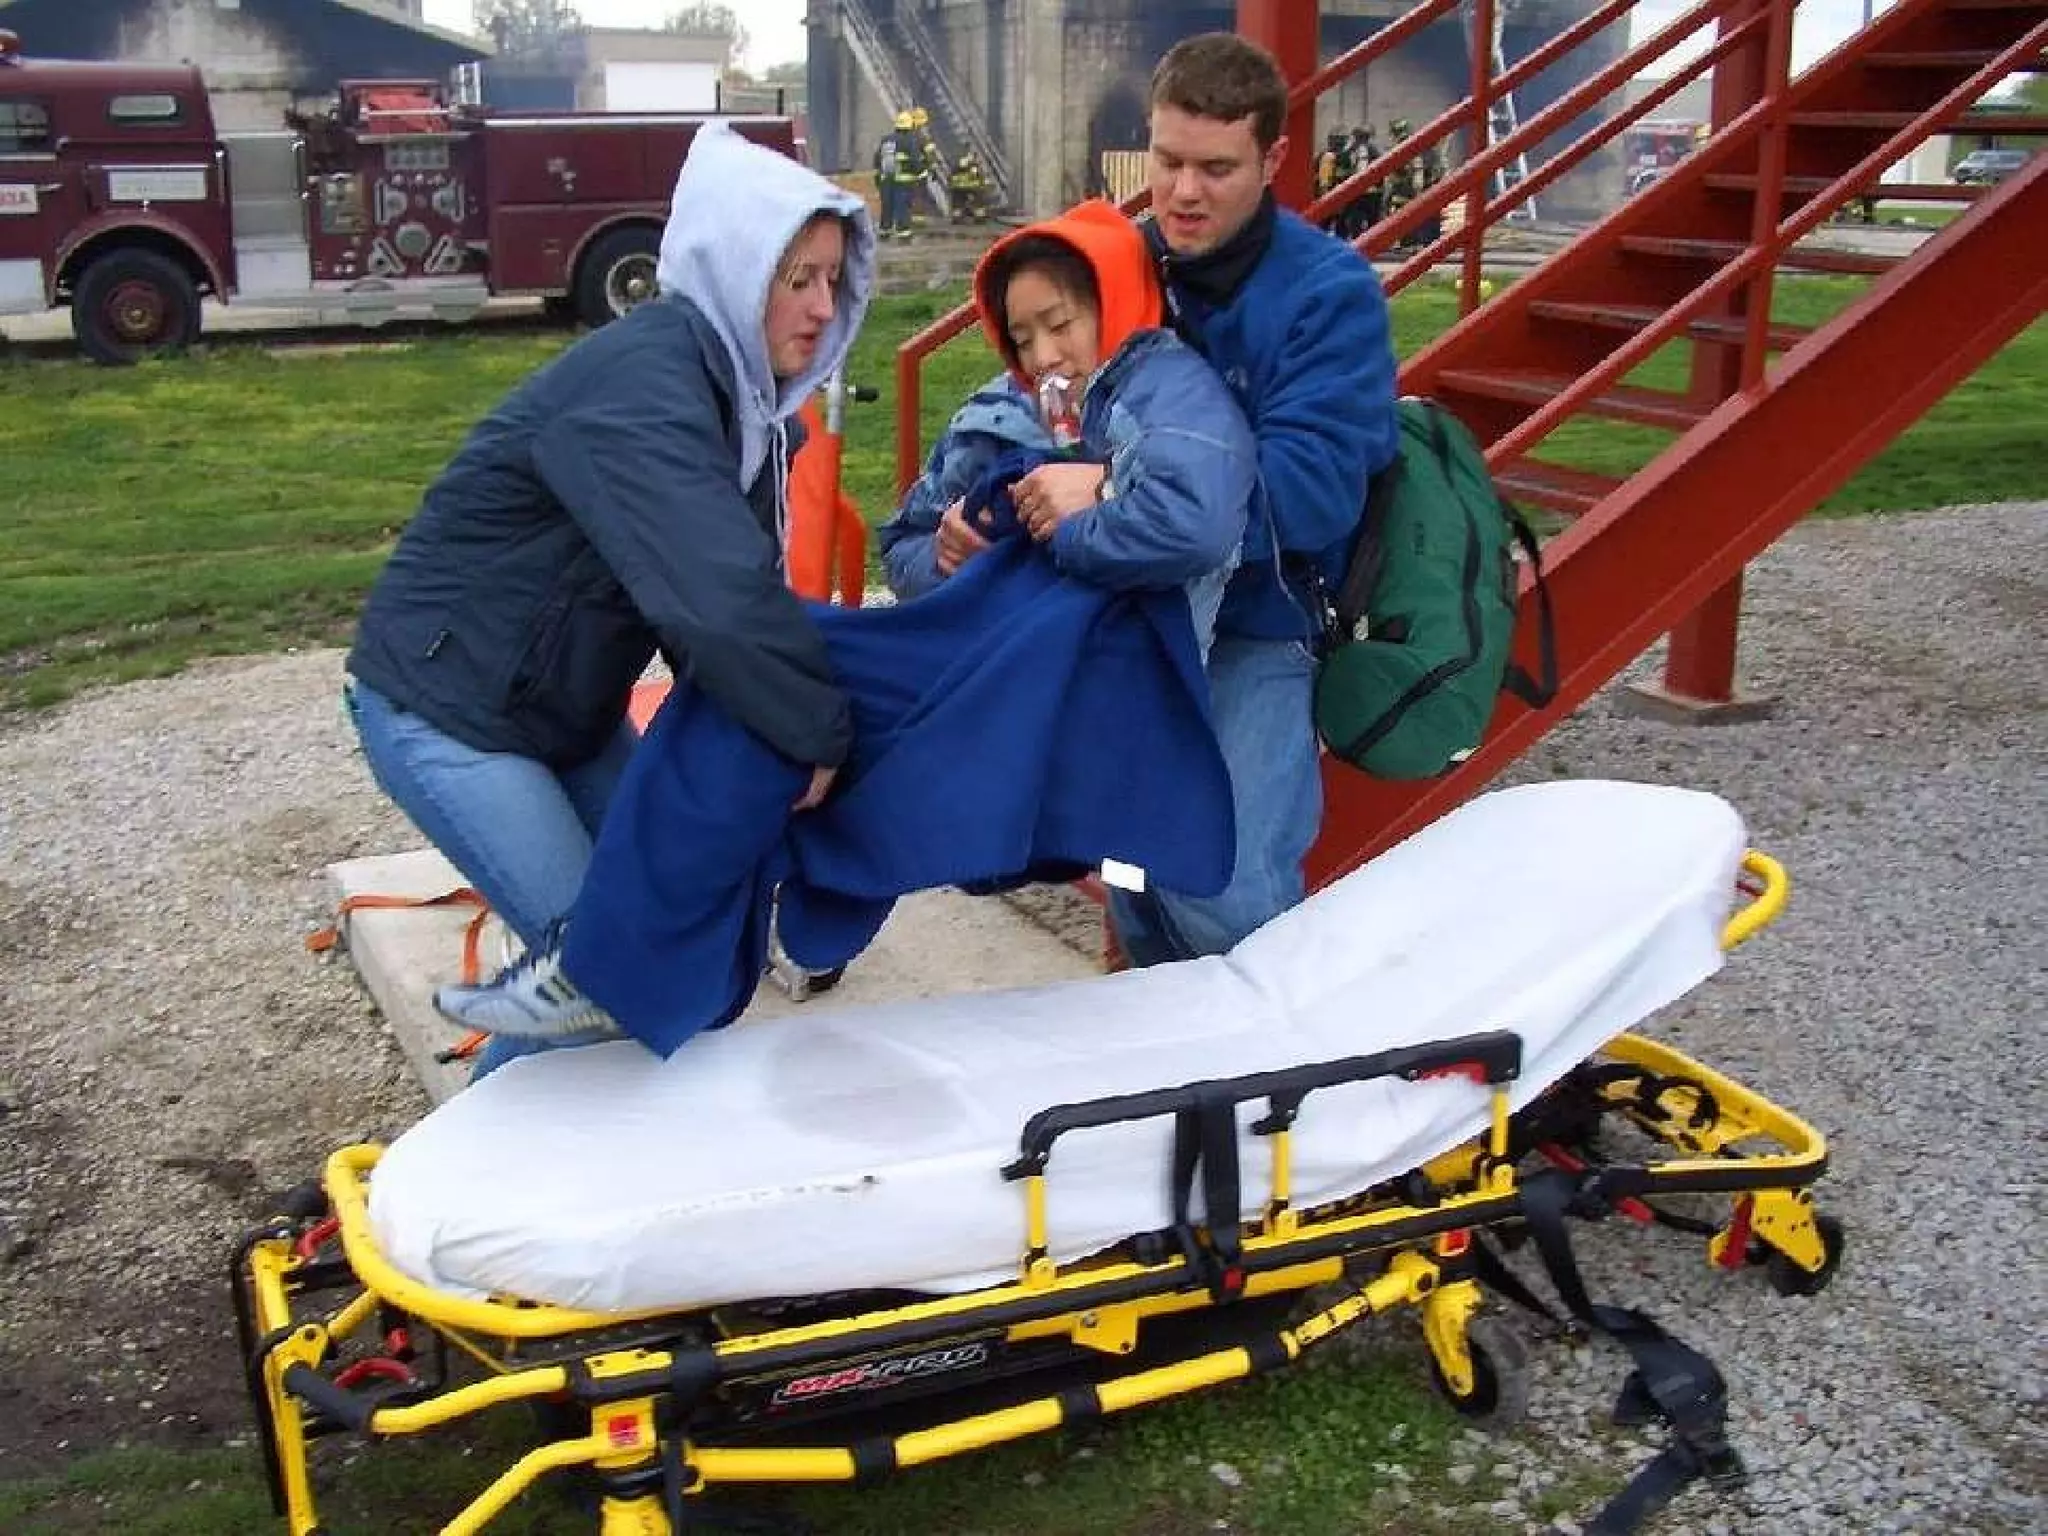
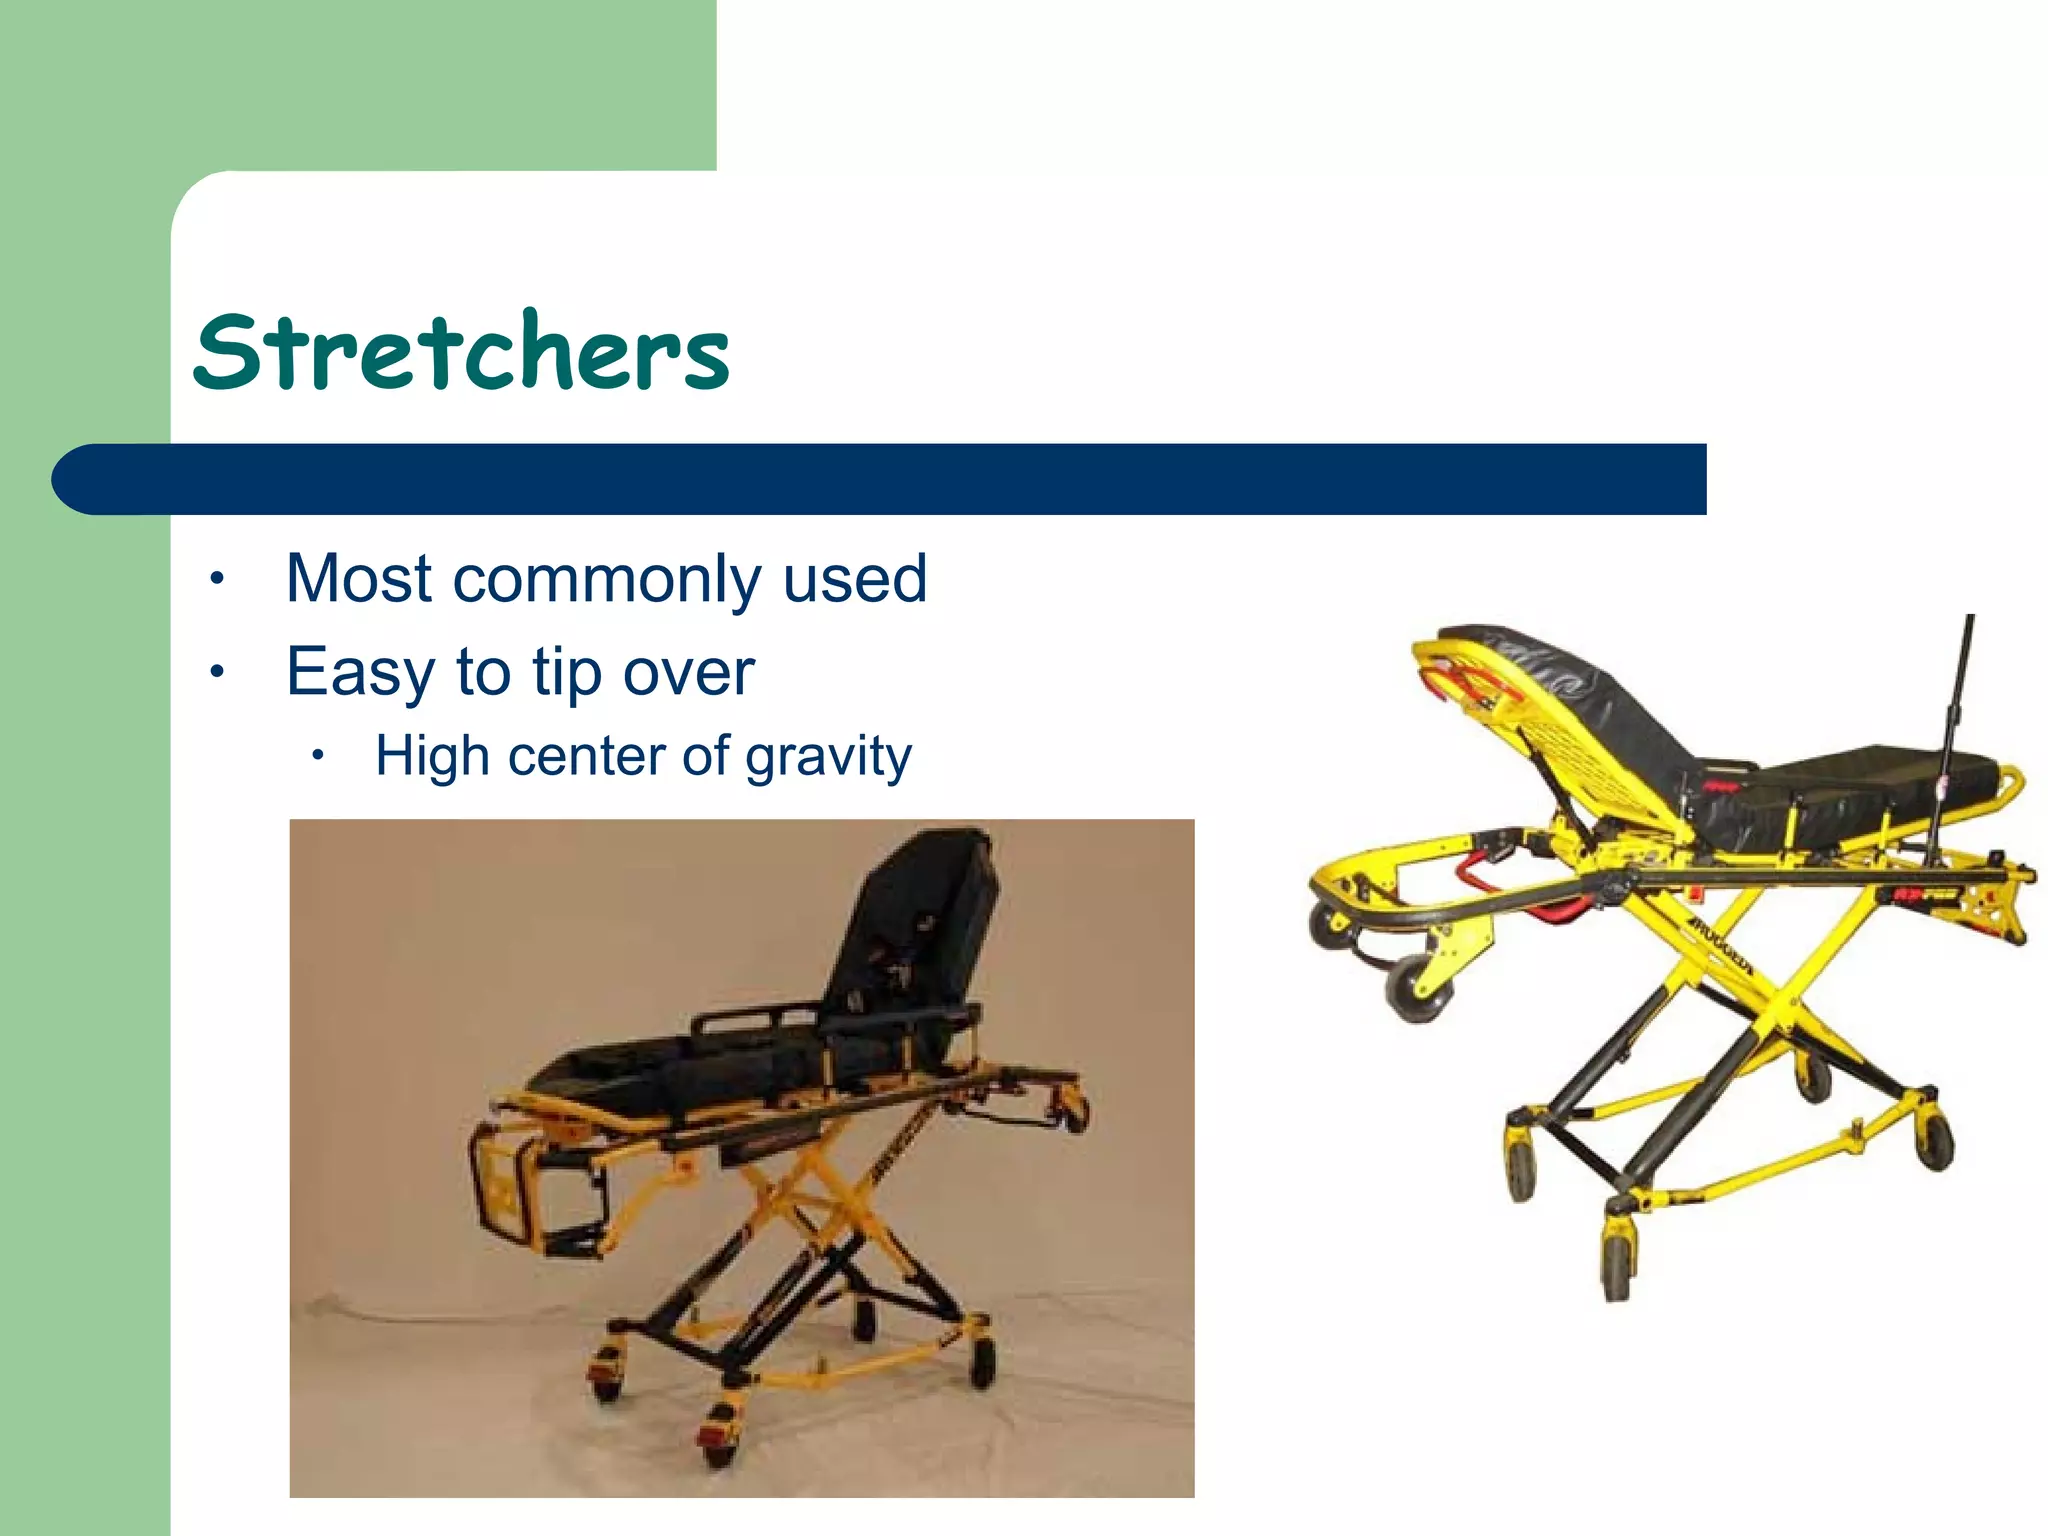
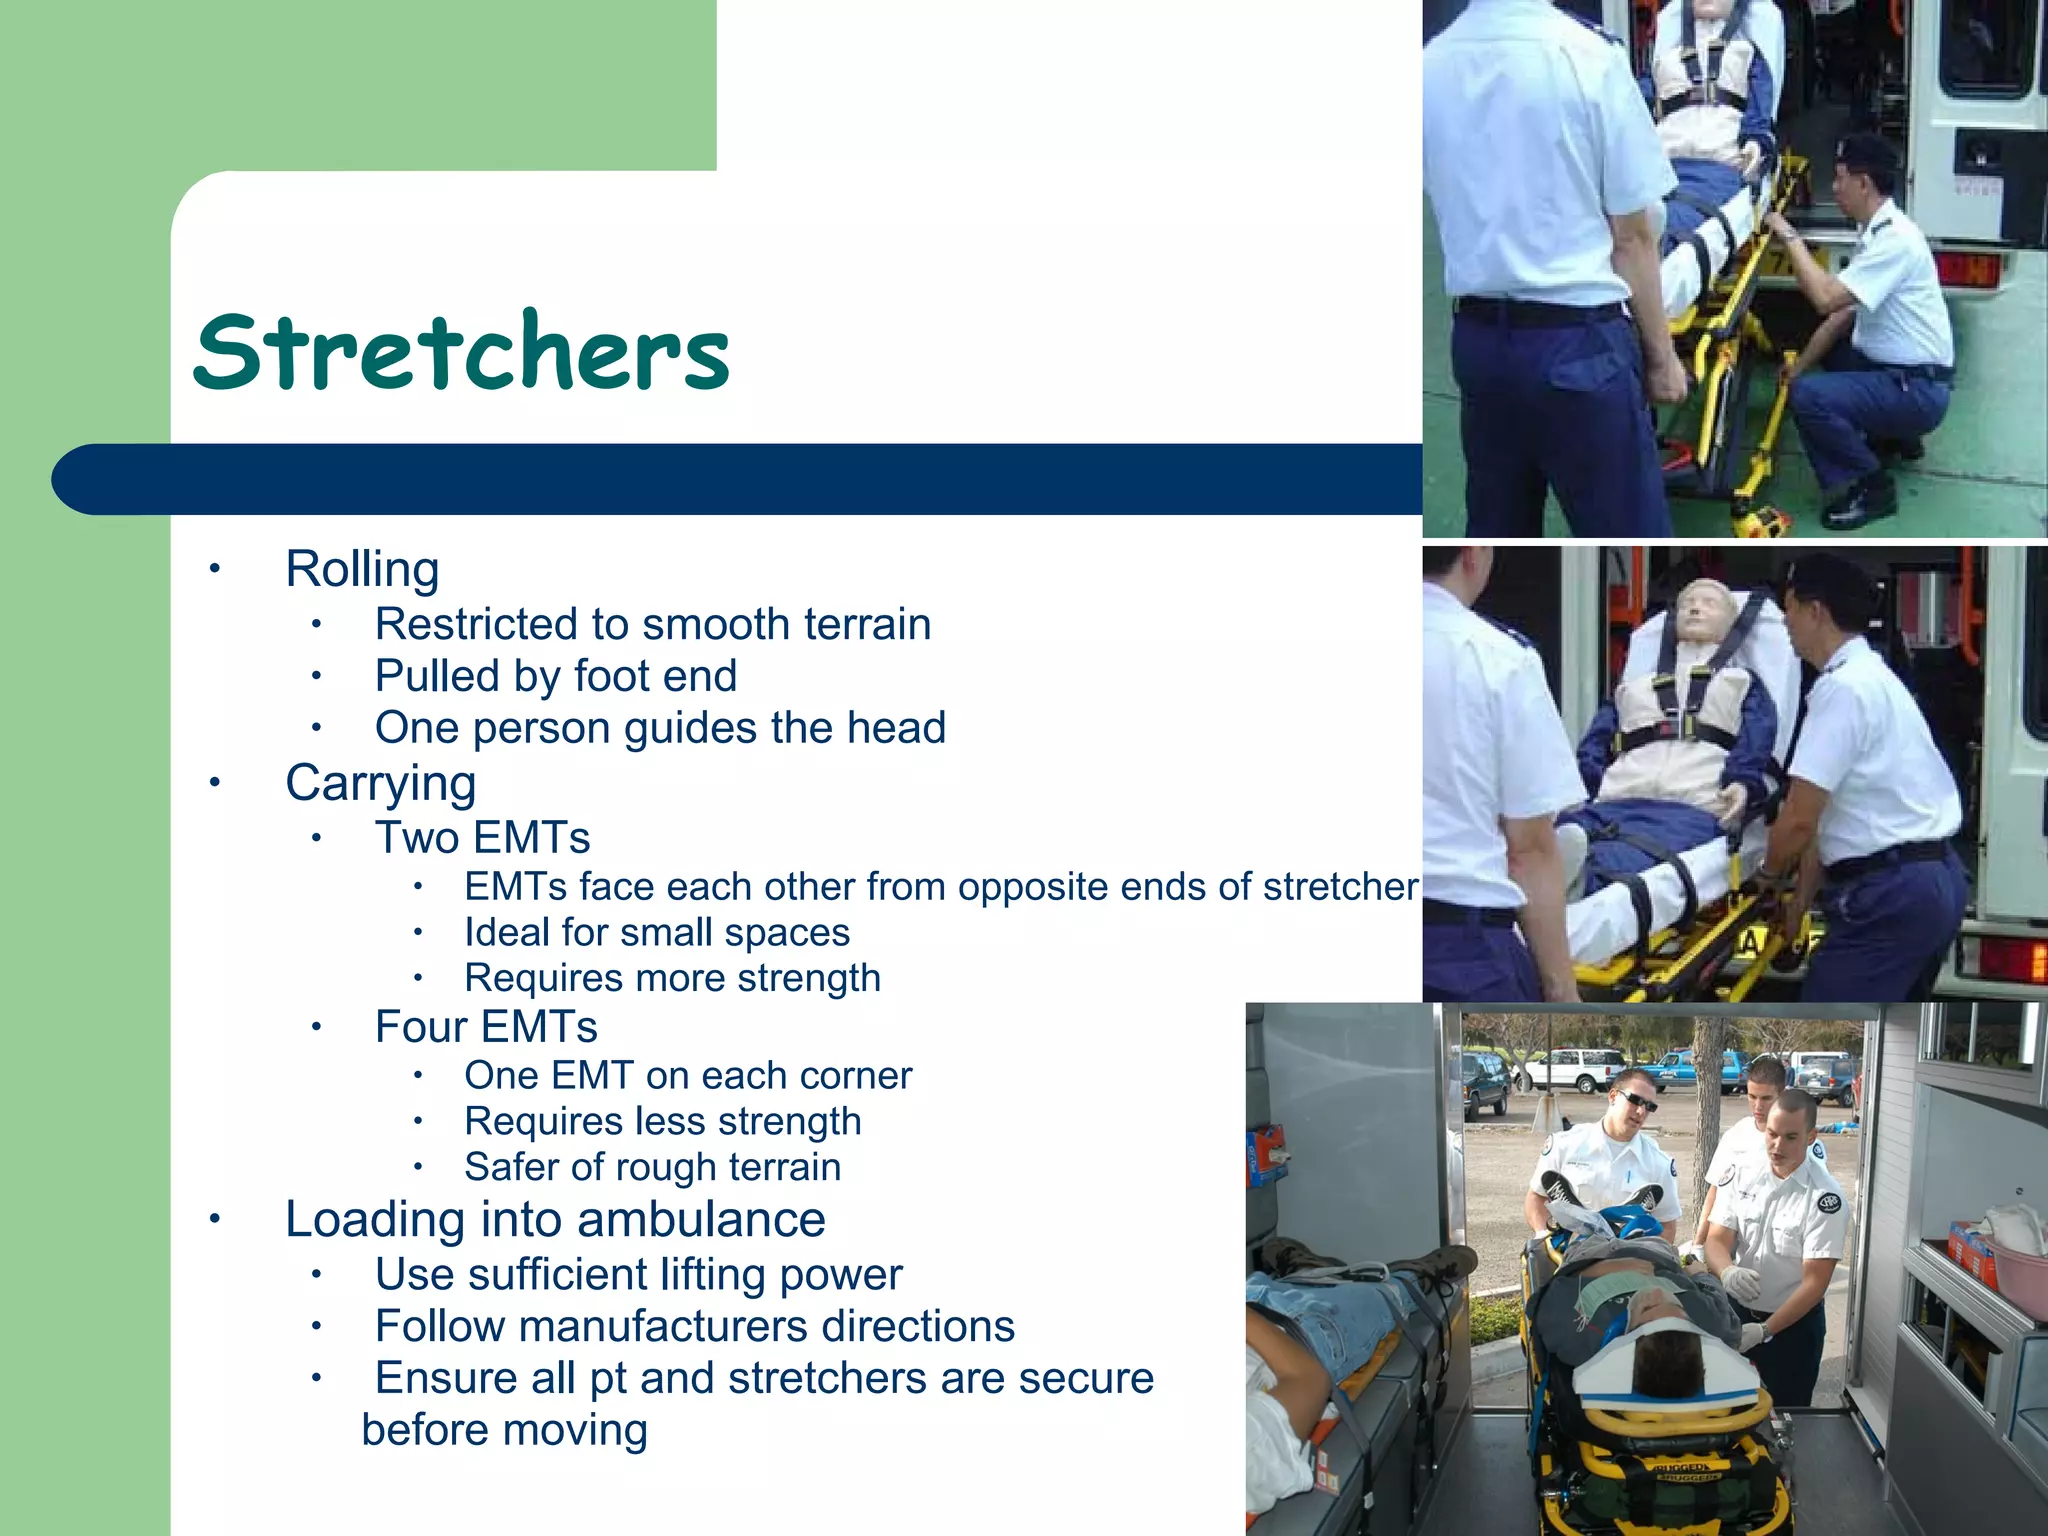
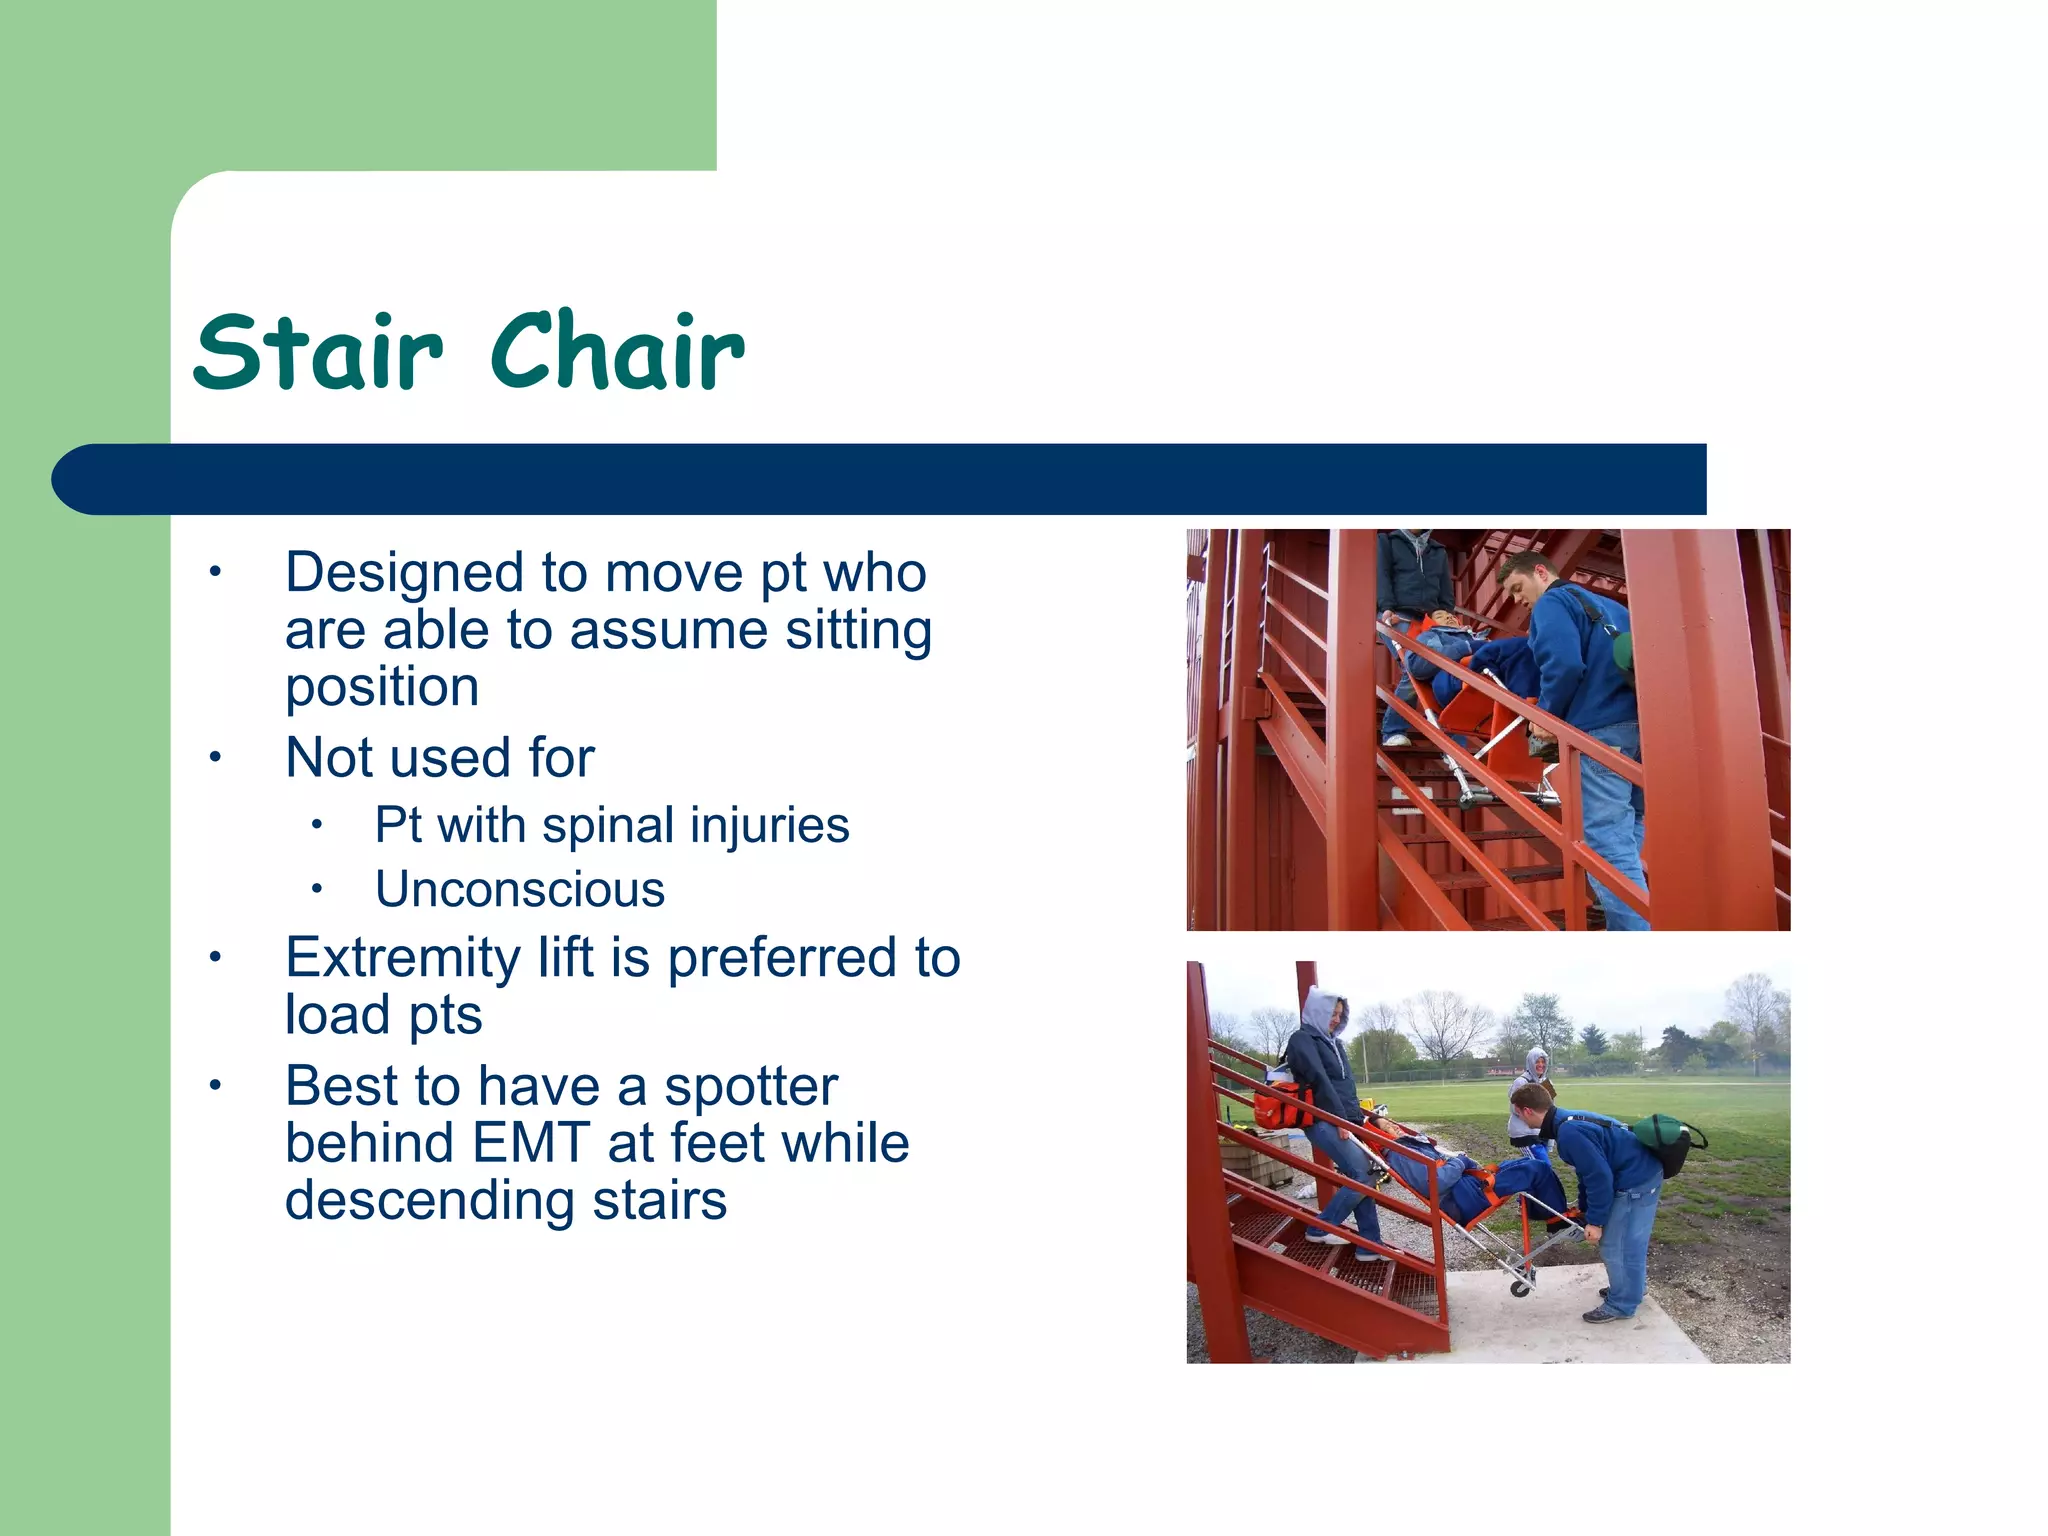
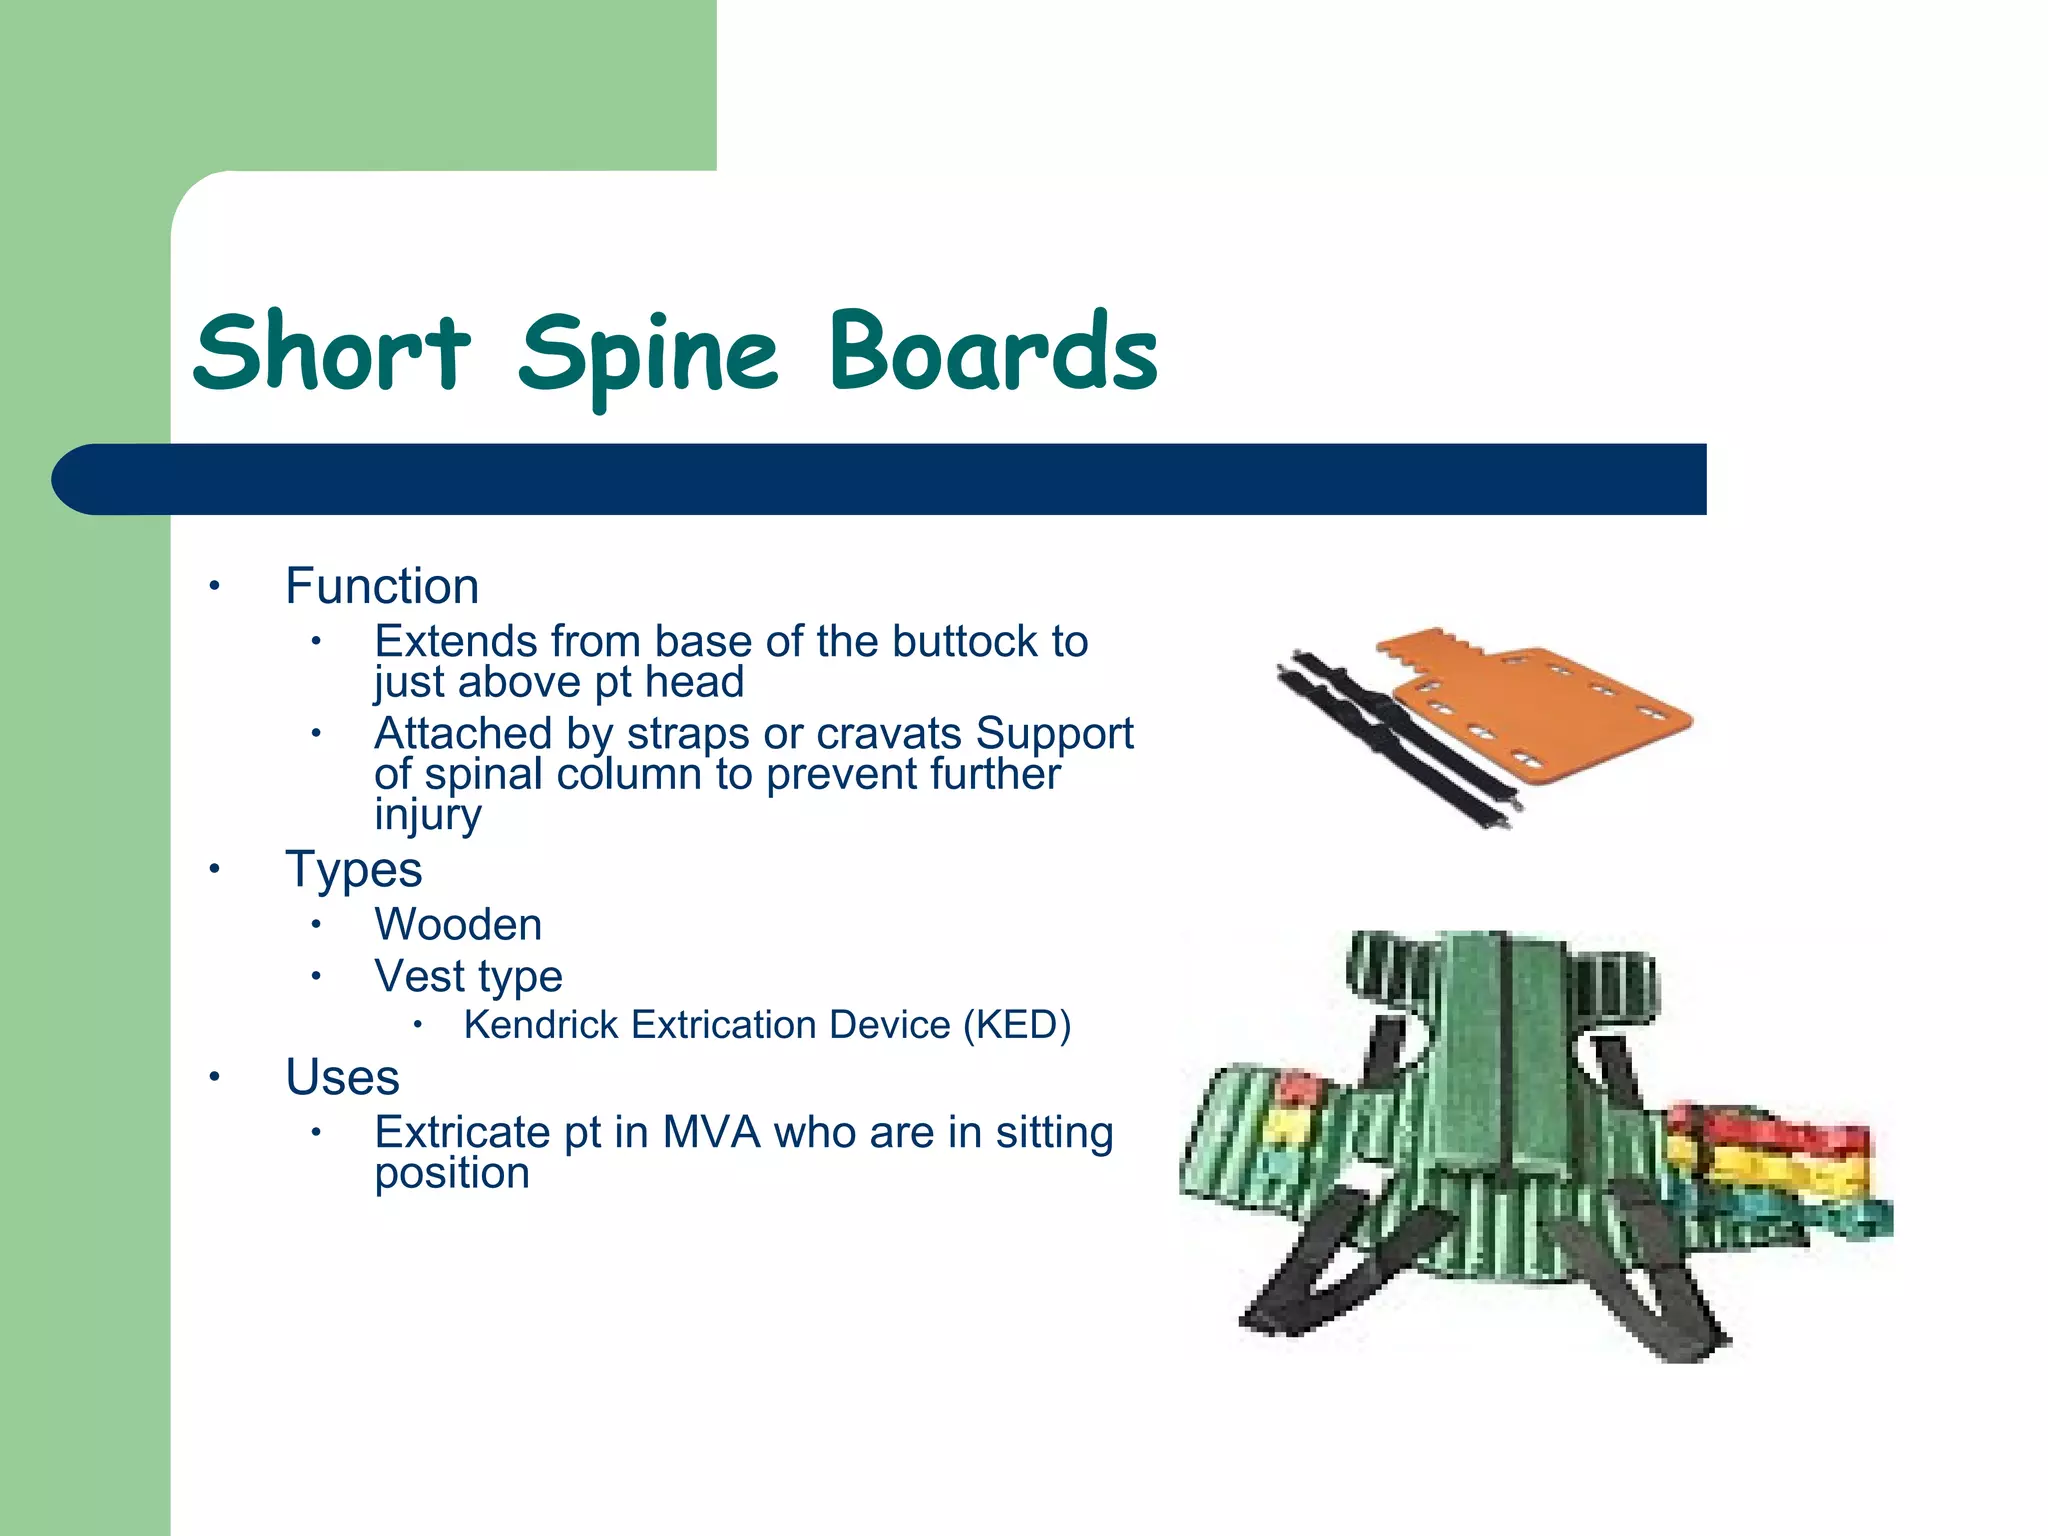
Lifting and Moving Patients
Body Mechanics  Safety Precautions Using specific methods to lift large weights without injury Safety Precautions Use legs, not back to lift Largest bone/muscle group Keep weight close to body Shifts center of gravity to patient More leverage
Body Mechanics Condiserations  Guidelines for lifting/carrying  Consider pt weight Know your limitations Lift without twisting Position feet one in front of the other Communicate with partner Keep back locked and don’t twist Flex at hips (not at waist) Bend at knees Keep elbows bent with arms close to sides Don’t hyperextend your back  Avoid  reaching more than 15”-20” in front of your body Push rather than pull Keep line of pull through midline
Power Lift  Know/find out pt weight Consider pt exceeding limitations “ Power lift” Keep back locked in normal curvature Place your feet a comfortable distance apart Tighten your abs and lock back into a slight inward curve Bring center of your body over object Vertical lift Distribute your weight to the balls of your feet OR just behind them Lock your back and allow upper body to rise before the hips as you lift
Power Grip “ Power Grip” Maximizes force from hands Palm and fingers are in contact with object All fingers are bent at the same angle  Hands at least 10” apart
Carrying One-handed carrying technique One-handed carrying technique Multiple providers positioned around pt Keep back in locked position Don’t lean to either side Lift as normal
Stairs… Whenever possible use stair chair Keep back locked Flex at hips (not waist) Bend at knees (not with back) Keep your weight close to the device Have stronger rescuer at the bottom
Log Rolling  Log rolls Movement of a supine/prone pt EMT 1: Maintain C-spine EMT 2 & 3: Position kneeling at pt side EMT 2: Raise pt nearest arm over pt head EMT 2: Place 1 hand on pt shoulder the other on pt hip EMT 3: Place 1 hand on pt waist and the other at knees EMT 2 & 3: On count of 3 from EMT 1, roll pt onto side Place pt on backboard, transport
Emergency Moves Fastest move No spinal immobilization  Immediate danger to pt if not moved Fire or danger of fire Explosives or other hazardous materials Inability to protect pt from other hazards Inability to access other pts in a vehicle who need life saving care Life saving care cannot be given due to pt position  Examples:  Clothes drag Blanket drag Torso drag
Urgent Moves Fast Spinal immobilization Scene is safe, immediate threat to pt life Altered Mental Status (AMS) Inadequate breathing Shock/Hypoperfusion  Example Rapid extrication Moving pt from MVA with constant spinal immobilization
Rapid Extrication  Rapid extrication from vehicle 1 EMT provides manual C-Spine support 2 nd  EMT applies C-Collar 3 rd  EMT places back board near door and moves to the passengers seat 2 nd  EMT supports thorax as 3 rd  EMT frees pt feet from pedals At direction of 2 nd  EMT he and 3 rd  EMT rotate pt so that pt back is not in doorway Tx C-Spine control 1 st  EMT exits vehicle and supports head from outside Back board is places against pt buttock 1 st  EMT and 2 nd  EMT lower pt to back board 2 nd  and 3 rd  EMT slide the pt onto the board  Rapid Extrication Demo
 
Non-Urgent Moves Scene Safe Stable pt Suspect spinal injury Examples: Direct Ground Lift Extremity Lift Direct Carry Draw Shift
Direct Ground Lift Direct Ground Lift (No spine injury) Two or more rescuers lifting a patient from the side -Cradle 2-3 rescuers line up on one side of pt Rescuers kneel on one knee Pt arms placed on pt chest Rescuer @ head places one arm under pt neck and cradles head. He places other hand under pt lower back Second rescuer places one under the pt knees and the other under the pt buttock On signal the rescuers lift pt to their knees and roll pt towards their chest  On signal the rescuers stand and tx pt to stretcher Steps are reversed to lower pt
Extremity Lift Extremity Lift (No extremity injuries) Two rescuers lifting the patient by the extremities One rescuer in the armpit-forearm drag position and the other holding the patient behind the knees.   1 EMT kneels at the pt head, another kneels at pt side by the knees  EMT at the head places 1 hand under each of the pt shoulders  EMT at the knees grasps the wrists EMT at head slips his hands under the pt arms and grasps pt wrists EMT at feet slips his hands under the pt knees Both EMT’s move to a crouching position EMTs stand simultaneously and move pt to stretcher
 
Direct Carry Similar to direct ground lift except the pt is carried Tx of supine pt from bed to stretcher Place cot perpendicular to bed with head of cot at foot of bed Both EMTs stand between stretcher and bed facing pt 1 st  EMT slips arm under pt neck and cups pt shoulders 2 nd  EMT slips hand under hips and lifts slightly 1 st  EMT slips other arm under pt back 2 nd  EMT places arms  under pt hips/calves EMTS slide pt to edge of bed Pt is lifted/curled towards EMTs chest EMTs rotate and place pt on stretcher
Draw Sheet Loosen sheets from bed Place stretcher next to bed Reach across and firmly grasp sheet Head Chest Hips Knees  Slide pt gently onto stretcher
Stretchers  Most commonly used Easy to tip over High center of gravity
Stretchers Rolling Restricted to smooth terrain  Pulled by foot end One person guides the head  Carrying  Two EMTs EMTs face each other from opposite ends of stretcher Ideal for small spaces  Requires more strength  Four EMTs One EMT on each corner Requires less strength Safer of rough terrain Loading into ambulance Use sufficient lifting power Follow manufacturers directions Ensure all pt and stretchers are secure  before moving
Portable Stretchers Lightweight, foldable Permits tx of pt  Down stairs Over rough terrain Carried end to end
Scoop/Orthopedic Stretcher  Function Splits apart to scoop up the patient on the ground from either side Facilitates easy lifting of supine pt Form Aluminum frame Splits lengthwise in half  Allows pt to be “scooped” off ground For spinal injury pt, Cervical immobilization is maintained
Scoop/Orthopedic Stretcher How to use it… Measure and adjust the length of the device to be just longer than the pt Slide the stretcher under both sides of the pt Lock the head first Lock the feet Strap the pt in place Place pt on a secondary device and secure  Ex. LBB
Stair Chair Designed to move pt who are able to assume sitting position Not used for Pt with spinal injuries Unconscious  Extremity lift is preferred to load pts Best to have a spotter behind EMT at feet while descending stairs
Backboards  Long Spine Boards  Function: Rigid support for spinal column to prevent further injury Types:  Wooden Plastic Uses: Primary device for supine/recumbent pt  Rapid extrications Secondary support in assoc with short spine board
Short Spine Boards Function Extends from base of the buttock to just above pt head Attached by straps or cravats Support of spinal column to prevent further injury Types Wooden Vest type Kendrick Extrication Device (KED) Uses Extricate pt in MVA who are in sitting position
Stokes Basket Function Movement of pt over rough terrain Form Large basket  Flat bottom LBB can fit  Pt can be immobilized as normal
Patient Positioning  Unresponsive pt (non traumatic) Rolled into recovery position (Left side) Pt with dyspnea or chest pain Position of comfort As long as hypotension doesn’t occur Suspected spine injury Immobilized to long backboard Pregnant Pt Left lateral recumbent Supine= Fetus on vena cava Shock Elevated legs 8”-12” Nausea/Vomiting  Position of comfort EMT in position to control airway
 

10)Lifting And Moving Patients

  • 1.
  • 2.
    Body Mechanics Safety Precautions Using specific methods to lift large weights without injury Safety Precautions Use legs, not back to lift Largest bone/muscle group Keep weight close to body Shifts center of gravity to patient More leverage
  • 3.
    Body Mechanics Condiserations Guidelines for lifting/carrying Consider pt weight Know your limitations Lift without twisting Position feet one in front of the other Communicate with partner Keep back locked and don’t twist Flex at hips (not at waist) Bend at knees Keep elbows bent with arms close to sides Don’t hyperextend your back Avoid reaching more than 15”-20” in front of your body Push rather than pull Keep line of pull through midline
  • 4.
    Power Lift Know/find out pt weight Consider pt exceeding limitations “ Power lift” Keep back locked in normal curvature Place your feet a comfortable distance apart Tighten your abs and lock back into a slight inward curve Bring center of your body over object Vertical lift Distribute your weight to the balls of your feet OR just behind them Lock your back and allow upper body to rise before the hips as you lift
  • 5.
    Power Grip “Power Grip” Maximizes force from hands Palm and fingers are in contact with object All fingers are bent at the same angle Hands at least 10” apart
  • 6.
    Carrying One-handed carryingtechnique One-handed carrying technique Multiple providers positioned around pt Keep back in locked position Don’t lean to either side Lift as normal
  • 7.
    Stairs… Whenever possibleuse stair chair Keep back locked Flex at hips (not waist) Bend at knees (not with back) Keep your weight close to the device Have stronger rescuer at the bottom
  • 8.
    Log Rolling Log rolls Movement of a supine/prone pt EMT 1: Maintain C-spine EMT 2 & 3: Position kneeling at pt side EMT 2: Raise pt nearest arm over pt head EMT 2: Place 1 hand on pt shoulder the other on pt hip EMT 3: Place 1 hand on pt waist and the other at knees EMT 2 & 3: On count of 3 from EMT 1, roll pt onto side Place pt on backboard, transport
  • 9.
    Emergency Moves Fastestmove No spinal immobilization Immediate danger to pt if not moved Fire or danger of fire Explosives or other hazardous materials Inability to protect pt from other hazards Inability to access other pts in a vehicle who need life saving care Life saving care cannot be given due to pt position Examples: Clothes drag Blanket drag Torso drag
  • 10.
    Urgent Moves FastSpinal immobilization Scene is safe, immediate threat to pt life Altered Mental Status (AMS) Inadequate breathing Shock/Hypoperfusion Example Rapid extrication Moving pt from MVA with constant spinal immobilization
  • 11.
    Rapid Extrication Rapid extrication from vehicle 1 EMT provides manual C-Spine support 2 nd EMT applies C-Collar 3 rd EMT places back board near door and moves to the passengers seat 2 nd EMT supports thorax as 3 rd EMT frees pt feet from pedals At direction of 2 nd EMT he and 3 rd EMT rotate pt so that pt back is not in doorway Tx C-Spine control 1 st EMT exits vehicle and supports head from outside Back board is places against pt buttock 1 st EMT and 2 nd EMT lower pt to back board 2 nd and 3 rd EMT slide the pt onto the board Rapid Extrication Demo
  • 12.
  • 13.
    Non-Urgent Moves SceneSafe Stable pt Suspect spinal injury Examples: Direct Ground Lift Extremity Lift Direct Carry Draw Shift
  • 14.
    Direct Ground LiftDirect Ground Lift (No spine injury) Two or more rescuers lifting a patient from the side -Cradle 2-3 rescuers line up on one side of pt Rescuers kneel on one knee Pt arms placed on pt chest Rescuer @ head places one arm under pt neck and cradles head. He places other hand under pt lower back Second rescuer places one under the pt knees and the other under the pt buttock On signal the rescuers lift pt to their knees and roll pt towards their chest On signal the rescuers stand and tx pt to stretcher Steps are reversed to lower pt
  • 15.
    Extremity Lift ExtremityLift (No extremity injuries) Two rescuers lifting the patient by the extremities One rescuer in the armpit-forearm drag position and the other holding the patient behind the knees. 1 EMT kneels at the pt head, another kneels at pt side by the knees EMT at the head places 1 hand under each of the pt shoulders EMT at the knees grasps the wrists EMT at head slips his hands under the pt arms and grasps pt wrists EMT at feet slips his hands under the pt knees Both EMT’s move to a crouching position EMTs stand simultaneously and move pt to stretcher
  • 16.
  • 17.
    Direct Carry Similarto direct ground lift except the pt is carried Tx of supine pt from bed to stretcher Place cot perpendicular to bed with head of cot at foot of bed Both EMTs stand between stretcher and bed facing pt 1 st EMT slips arm under pt neck and cups pt shoulders 2 nd EMT slips hand under hips and lifts slightly 1 st EMT slips other arm under pt back 2 nd EMT places arms under pt hips/calves EMTS slide pt to edge of bed Pt is lifted/curled towards EMTs chest EMTs rotate and place pt on stretcher
  • 18.
    Draw Sheet Loosensheets from bed Place stretcher next to bed Reach across and firmly grasp sheet Head Chest Hips Knees Slide pt gently onto stretcher
  • 19.
    Stretchers Mostcommonly used Easy to tip over High center of gravity
  • 20.
    Stretchers Rolling Restrictedto smooth terrain Pulled by foot end One person guides the head Carrying Two EMTs EMTs face each other from opposite ends of stretcher Ideal for small spaces Requires more strength Four EMTs One EMT on each corner Requires less strength Safer of rough terrain Loading into ambulance Use sufficient lifting power Follow manufacturers directions Ensure all pt and stretchers are secure before moving
  • 21.
    Portable Stretchers Lightweight,foldable Permits tx of pt Down stairs Over rough terrain Carried end to end
  • 22.
    Scoop/Orthopedic Stretcher Function Splits apart to scoop up the patient on the ground from either side Facilitates easy lifting of supine pt Form Aluminum frame Splits lengthwise in half Allows pt to be “scooped” off ground For spinal injury pt, Cervical immobilization is maintained
  • 23.
    Scoop/Orthopedic Stretcher Howto use it… Measure and adjust the length of the device to be just longer than the pt Slide the stretcher under both sides of the pt Lock the head first Lock the feet Strap the pt in place Place pt on a secondary device and secure Ex. LBB
  • 24.
    Stair Chair Designedto move pt who are able to assume sitting position Not used for Pt with spinal injuries Unconscious Extremity lift is preferred to load pts Best to have a spotter behind EMT at feet while descending stairs
  • 25.
    Backboards LongSpine Boards Function: Rigid support for spinal column to prevent further injury Types: Wooden Plastic Uses: Primary device for supine/recumbent pt Rapid extrications Secondary support in assoc with short spine board
  • 26.
    Short Spine BoardsFunction Extends from base of the buttock to just above pt head Attached by straps or cravats Support of spinal column to prevent further injury Types Wooden Vest type Kendrick Extrication Device (KED) Uses Extricate pt in MVA who are in sitting position
  • 27.
    Stokes Basket FunctionMovement of pt over rough terrain Form Large basket Flat bottom LBB can fit Pt can be immobilized as normal
  • 28.
    Patient Positioning Unresponsive pt (non traumatic) Rolled into recovery position (Left side) Pt with dyspnea or chest pain Position of comfort As long as hypotension doesn’t occur Suspected spine injury Immobilized to long backboard Pregnant Pt Left lateral recumbent Supine= Fetus on vena cava Shock Elevated legs 8”-12” Nausea/Vomiting Position of comfort EMT in position to control airway
  • 29.