10liftingandmovingpatients 090910172454-phpapp01
•Download as PPT, PDF•
1 like•1,022 views


Recommended
More Related Content
What's hot
What's hot (19)
Viewers also liked
Viewers also liked (20)
Similar to 10liftingandmovingpatients 090910172454-phpapp01
Similar to 10liftingandmovingpatients 090910172454-phpapp01 (20)
Recently uploaded
Recently uploaded (20)
10liftingandmovingpatients 090910172454-phpapp01
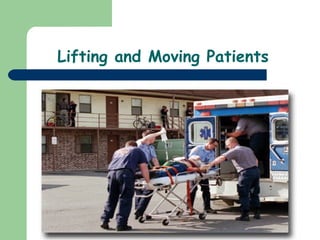
- 1. Lifting and Moving Patients
- 2. Body Mechanics Safety Precautions • Using specific methods to lift large weights without injury • Safety Precautions • Use legs, not back to lift • Largest bone/muscle group • Keep weight close to body • Shifts center of gravity to patient • More leverage
- 3. Body Mechanics Condiserations • Guidelines for lifting/carrying • Consider pt weight • Know your limitations • Lift without twisting • Position feet one in front of the other • Communicate with partner • Keep back locked and don’t twist • Flex at hips (not at waist) • Bend at knees • Keep elbows bent with arms close to sides • Don’t hyperextend your back • Avoid reaching more than 15”-20” in front of your body • Push rather than pull • Keep line of pull through midline
- 4. Power Lift • Know/find out pt weight • Consider pt exceeding limitations • “Power lift” • Keep back locked in normal curvature • Place your feet a comfortable distance apart • Tighten your abs and lock back into a slight inward curve • Bring center of your body over object • Vertical lift • Distribute your weight to the balls of your feet OR just behind them • Lock your back and allow upper body to rise before the hips as you lift
- 5. Power Grip • “Power Grip” • Maximizes force from hands • Palm and fingers are in contact with object • All fingers are bent at the same angle • Hands at least 10” apart
- 6. Carrying One-handed carrying technique • One-handed carrying technique • Multiple providers positioned around pt • Keep back in locked position • Don’t lean to either side • Lift as normal
- 7. Stairs… • Whenever possible use stair chair • Keep back locked • Flex at hips (not waist) • Bend at knees (not with back) • Keep your weight close to the device • Have stronger rescuer at the bottom
- 8. Log Rolling • Log rolls • Movement of a supine/prone pt • EMT 1: Maintain C-spine • EMT 2 & 3: Position kneeling at pt side • EMT 2: Raise pt nearest arm over pt head • EMT 2: Place 1 hand on pt shoulder the other on pt hip • EMT 3: Place 1 hand on pt waist and the other at knees • EMT 2 & 3: On count of 3 from EMT 1, roll pt onto side • Place pt on backboard, transport
- 9. Emergency Moves • Fastest move • No spinal immobilization • Immediate danger to pt if not moved • Fire or danger of fire • Explosives or other hazardous materials • Inability to protect pt from other hazards • Inability to access other pts in a vehicle who need life saving care • Life saving care cannot be given due to pt position • Examples: • Clothes drag • Blanket drag • Torso drag
- 10. Urgent Moves • Fast • Spinal immobilization • Scene is safe, immediate threat to pt life • Altered Mental Status (AMS) • Inadequate breathing • Shock/Hypoperfusion • Example • Rapid extrication • Moving pt from MVA with constant spinal immobilization
- 11. Rapid Extrication • Rapid extrication from vehicle • 1 EMT provides manual C-Spine support • 2nd EMT applies C-Collar • 3rd EMT places back board near door and moves to the passengers seat • 2nd EMT supports thorax as 3rd EMT frees pt feet from pedals • At direction of 2nd EMT he and 3rd EMT rotate pt so that pt back is not in doorway • Tx C-Spine control • 1st EMT exits vehicle and supports head from outside • Back board is places against pt buttock • 1st EMT and 2nd EMT lower pt to back board • 2nd and 3rd EMT slide the pt onto the board • Rapid Extrication Demo
- 13. Non-Urgent Moves Scene Safe Stable pt Suspect spinal injury Examples: – Direct Ground Lift – Extremity Lift – Direct Carry – Draw Shift
- 14. Direct Ground Lift • Direct Ground Lift (No spine injury) • Two or more rescuers lifting a patient from the side -Cradle • 2-3 rescuers line up on one side of pt • Rescuers kneel on one knee • Pt arms placed on pt chest • Rescuer @ head places one arm under pt neck and cradles head. He places other hand under pt lower back • Second rescuer places one under the pt knees and the other under the pt buttock • On signal the rescuers lift pt to their knees and roll pt towards their chest • On signal the rescuers stand and tx pt to stretcher • Steps are reversed to lower pt
- 15. Extremity Lift • Extremity Lift (No extremity injuries) • Two rescuers lifting the patient by the extremities • One rescuer in the armpit-forearm drag position and the other holding the patient behind the knees. • 1 EMT kneels at the pt head, another kneels at pt side by the knees • EMT at the head places 1 hand under each of the pt shoulders • EMT at the knees grasps the wrists • EMT at head slips his hands under the pt arms and grasps pt wrists • EMT at feet slips his hands under the pt knees • Both EMT’s move to a crouching position • EMTs stand simultaneously and move pt to stretcher
- 17. Direct Carry • Similar to direct ground lift except the pt is carried • Tx of supine pt from bed to stretcher • Place cot perpendicular to bed with head of cot at foot of bed • Both EMTs stand between stretcher and bed facing pt • 1st EMT slips arm under pt neck and cups pt shoulders • 2nd EMT slips hand under hips and lifts slightly • 1st EMT slips other arm under pt back • 2nd EMT places arms under pt hips/calves • EMTS slide pt to edge of bed • Pt is lifted/curled towards EMTs chest • EMTs rotate and place pt on stretcher
- 18. Draw Sheet • Loosen sheets from bed • Place stretcher next to bed • Reach across and firmly grasp sheet • Head • Chest • Hips • Knees • Slide pt gently onto stretcher
- 19. Stretchers • Most commonly used • Easy to tip over • High center of gravity
- 20. Stretchers • Rolling • Restricted to smooth terrain • Pulled by foot end • One person guides the head • Carrying • Two EMTs • EMTs face each other from opposite ends of stretcher • Ideal for small spaces • Requires more strength • Four EMTs • One EMT on each corner • Requires less strength • Safer of rough terrain • Loading into ambulance • Use sufficient lifting power • Follow manufacturers directions • Ensure all pt and stretchers are secure before moving
- 21. Portable Stretchers • Lightweight, foldable • Permits tx of pt • Down stairs • Over rough terrain • Carried end to end
- 22. Scoop/Orthopedic Stretcher • Function • Splits apart to scoop up the patient on the ground from either side • Facilitates easy lifting of supine pt • Form • Aluminum frame • Splits lengthwise in half • Allows pt to be “scooped” off ground • For spinal injury pt, • Cervical immobilization is maintained
- 23. Scoop/Orthopedic Stretcher • How to use it… • Measure and adjust the length of the device to be just longer than the pt • Slide the stretcher under both sides of the pt • Lock the head first • Lock the feet • Strap the pt in place • Place pt on a secondary device and secure • Ex. LBB
- 24. Stair Chair • Designed to move pt who are able to assume sitting position • Not used for • Pt with spinal injuries • Unconscious • Extremity lift is preferred to load pts • Best to have a spotter behind EMT at feet while descending stairs
- 25. Backboards • Long Spine Boards • Function: • Rigid support for spinal column to prevent further injury • Types: • Wooden • Plastic • Uses: • Primary device for supine/recumbent pt • Rapid extrications • Secondary support in assoc with short spine board
- 26. Short Spine Boards • Function • Extends from base of the buttock to just above pt head • Attached by straps or cravats Support of spinal column to prevent further injury • Types • Wooden • Vest type • Kendrick Extrication Device (KED) • Uses • Extricate pt in MVA who are in sitting position
- 27. Stokes Basket • Function • Movement of pt over rough terrain • Form • Large basket • Flat bottom • LBB can fit • Pt can be immobilized as normal
- 28. Patient Positioning • Unresponsive pt (non traumatic) • Rolled into recovery position (Left side) • Pt with dyspnea or chest pain • Position of comfort • As long as hypotension doesn’t occur • Suspected spine injury • Immobilized to long backboard • Pregnant Pt • Left lateral recumbent • Supine= Fetus on vena cava • Shock • Elevated legs 8”-12” • Nausea/Vomiting • Position of comfort • EMT in position to control airway