
Principal’s Of Lifting & Moving Patient - Dr Rohit Bhaskar

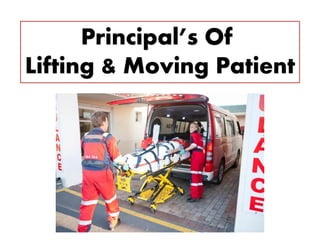
Casualty lifting is the first step of casualty movement, an early aspect of emergency medical care. It is the procedure used to put the casualty (the patient) on a stretcher. Developed emergency services use lifting devices, such as scoop stretchers, that allow secured lifting with minimal personnel. Other methods (explained below) can be used when such devices are not available. Since only stabilised casualties are moved (except in unusual circumstances), the lifting is usually never performed in emergency; emergency movements are sometimes performed to respect the Golden Hour. This depends on the organisation of the medical services and on the specific circumstances. Bhaskar Health News and Medical Education is leading source for trustworthy health, medical, science and technology news and information. Providing world health information Medical Education. Bhaskar Health News and Medical Education is dedicated to medical students, physiotherapists, doctors, nurses, paramedics, physician associates, dentists, pharmacists, midwives and other healthcare professionals. We're committed to being your source for expert health guidance. Bhaskar Health and Medical Education. Source : https://www.bhaskarhealth.com Health Shop: https://www.bhaskarhealth.org @drrohitbhaskar @bhaskarhealth #DrRohitBhaskar #BhaskarHealth #Health #Medical #News #Physiotherapy

Recommended
More Related Content
What's hot
What's hot (20)
Similar to Principal’s Of Lifting & Moving Patient - Dr Rohit Bhaskar
Similar to Principal’s Of Lifting & Moving Patient - Dr Rohit Bhaskar (20)
More from Dr Rohit Bhaskar, Physio
More from Dr Rohit Bhaskar, Physio (20)
Recently uploaded
Recently uploaded (20)
Principal’s Of Lifting & Moving Patient - Dr Rohit Bhaskar
- 1. Principal’s Of Lifting & Moving Patient
- 2. Topics • Principles of Moving Patients • Emergency Moves • Standard Moves • Equipment for Transporting Patients • Patient Positioning • Restraining Patients
- 4. Principles of Moving Patients (continued) • Body Mechanics – Proper and efficient use of your body to facilitate lifting and moving. ▪ Plan what you will do; how you will do it. ▪ Estimate weight. ▪ Consider physical limitations. ▪ Communicate with your partner.
- 5. Principles of Moving Patients (continued) • Body Mechanics – Position your feet properly. – Lift with your legs. – When lifting object with one hand, avoid leaning to either side. – Minimize twisting during lift.
- 6. Principles of Moving Patients • Body Mechanics – Keep weight as close to your body as possible. – When carrying patient on stairways, use chair or commercial stair chair instead of wheeled stretcher whenever possible.
- 7. To begin the power lift, keep your back straight and eyes on your partner.
- 8. Lift with your legs.
- 9. While moving, keep the weight as close to your body as possible.
- 10. When you use a stair chair, have someone spot you as you walk backward down stairs.
- 11. Principles of Moving Patients • When to Move a Patient – Only when absolutely necessary. – Dangerous environment. – Cannot adequately assess airway, breathing, circulation or bleeding. – Unable to gain access to other patients who need lifesaving care.
- 12. EMERGENCY MOVES
- 13. Emergency Moves • Patient and/or rescuers are in immediate danger. • Lifesaving care cannot be given because of patient's location or position. • To gain access to other patients who need lifesaving care. • Rarely provide protection for patient's injuries; may cause patient pain.
- 14. Emergency Moves • Drags – Patients pulled by their clothes, feet, or shoulders or by using a blanket. – Initiated from shoulders by pulling along the long axis of body. – Avoid dragging patient sideways. (continued)
- 15. Emergency Moves • Drags – To move patient down stairs or down incline, grab under shoulders and pull head first as you walk backward.
- 16. Clothing drag, or shirt drag.
- 17. Blanket drag.
- 18. Shoulder drag.
- 20. Strap drag.
- 21. Emergency Moves • Any emergency move must be justified and carried out as quickly as possible.
- 23. Cradle carry.
- 27. STANDARD MOVES
- 28. Standard Moves • Preferred choice when situation is not urgent, patient is stable, have adequate time and personnel for a move. • Standard moves carried out with help of other trained personnel or bystanders.
- 29. Standard Moves • Patient uncomfortable or his position is aggravating the injury. • Emergency care requires moving patient. • Patient insists on being moved.
- 30. Standard Moves • Complete the primary assessment. • Choose the number of rescuers. • Avoid compromising neck/spine injury. • Consider splinting suspected fractures.
- 31. Standard Moves • Direct Ground Lift – Three rescuers move patient from ground to bed or stretcher. – Patient lying face up (supine); arms placed on chest. – Everyone lifts patient up to level of their knees. (continued)
- 32. Position your arms under the patient. Be sure to cradle the head.
- 33. Standard Moves • Direct Ground Lift – Rescuers roll patient toward their chests. – Everyone should stand while holding patient. – Patient moved.
- 34. Lift the patient to your knees and roll toward your chests.
- 35. On signal, move the patient to the carrying device.
- 36. Standard Moves (continued) • Extremity Lift – Two rescuers, one lifting patient's arms and one lifting patient's legs. – Ideal for moving patient from ground to chair or stretcher. – Do not perform if head, neck, spine, shoulder, hip, or knee injury, or suspected fractures to extremities.
- 37. Standard Moves (continued) • Extremity Lift – Patient should be placed face up, with knees flexed. – Kneel at head of patient, placing hands under shoulders. – Have helper stand at patient's feet and grasp his/her wrists.
- 38. To get the patient into a sitting position, one rescuer pushes from behind while the other pulls from the wrists.
- 39. Standard Moves • Extremity Lift – Slip your arms under patient's armpits and grasp wrists. – Pull patient into sitting position. (continued)
- 40. The rescuer at the head places arms under patient's armpits and grasps patient's wrists. While facing the patient, the rescuer at the feet grasps patient's legs behind the knees.
- 41. Standard Moves • Extremity Lift – Both stand at same time. – Move as unit when carrying patient. – Avoid swinging patient.
- 42. You can now carry the patient a short distance or place her on a stretcher or chair.
- 43. Standard Moves • Direct Carry Method – To move patient with no suspected spine injury from bed or from bed-level position to stretcher. – Position stretcher perpendicular to bed, with head end of stretcher at foot of bed. (continued)
- 44. Stretcher is placed at 90-degree angle to bed, depending on room configuration. Prepare stretcher by lowering rails, unbuckling straps, and removing other items. Both Emergency Medical Responders stand between stretcher and bed, facing patient.
- 45. Standard Moves • Direct Carry Method – Position arms under patient; slide patient to edge of bed. (continued)
- 46. Position your arms under the patient and slide the patient to the edge of the bed.
- 47. Standard Moves • Direct Carry Method – Lift patient; curl toward your chests. – Rotate and place patient gently on the carrying device.
- 48. Lift the patient and curl her toward your chests.
- 49. Rotate and place the patient gently on the carrying device.
- 50. Standard Moves • Draw Sheet Method – From side of bed, loosen bottom sheet under patient; position stretcher next to bed. – Adjust height of stretcher to match level of bed, lower rails, unbuckle straps. (continued)
- 51. Standard Moves • Draw Sheet Method – Grasp sheet firmly at patient's head, chest, hips, and knees. – Draw patient onto stretcher, sliding in one smooth motion. – Can also use slider boards and slide bags.
- 52. Draw sheet method of moving a patient from a bed to a stretcher.
- 53. Draw sheet method of moving a patient from a bed to a stretcher.
- 54. Example of a slider board.
- 55. Example of a slide bag.
- 57. Equipment for Transporting Patients • Wheeled stretcher (gurney, cot, pram) – Used to transport patient from scene of emergency to ambulance and from ambulance to hospital bed.
- 58. Equipment for Transporting Patients • Types of Stretchers – Single-operator (continued)
- 61. Equipment for Transporting Patients (continued) • Types of Stretchers – Dual-operator
- 64. Equipment for Transporting Patients • Types of Stretchers – Electric/pneumatic-lift (continued)
- 65. Electric/pneumatic-lift stretcher. These eliminate the need for heavy lifting.
- 66. Equipment for Transporting Patients • Types of Stretchers – Scoop (continued)
- 67. Scoop stretchers. (A) These stretchers are ideal for moving patients in the position they are found.
- 68. Scoop stretchers. (B) Once in place, the patient must be properly secured to the device before moving.
- 69. Equipment for Transporting Patients • Types of Stretchers – Portable – Flexible – Stair (continued)
- 70. Portable stretcher. Beneficial for carrying supine medical patients down stairs.
- 71. Flexible stretcher. Used in restricted areas or narrow hallways.
- 72. Equipment for Transporting Patients • Types of Stretchers – Basket (continued)
- 73. Basket stretcher. Used in rescue situations and to transport over rough terrain.
- 74. Equipment for Transporting Patients • Types of Stretchers – Spine board (continued)
- 75. Long spine board. (A) This backboard is used to immobilize the spine of a supine patient.
- 76. Long spine board. (B) Long spine board with patient properly secured in place.
- 77. Equipment for Transporting Patients • Types of Stretchers – Vest-type extrication device (continued)
- 78. Vest-type extrication device. This device facilitates the extrication of a seated patient, while stabilizing the patient's head, neck, and spine.
- 79. Equipment for Transporting Patients • Types of Stretchers – Full-body immobilization device – Pedi-board (continued)
- 81. Patient Positioning • Recovery Position – Patient with no suspected spine injury placed on side to help maintain open airway (lateral recumbent). (continued)
- 82. Move the closest hand of the patient above his head.
- 83. Patient Positioning • Recovery Position – Move closest hand of patient above head; move far hand across to opposite shoulder, next to patient's cheek. (continued)
- 84. Move the patient's far hand across to the opposite shoulder, next to the patient's cheek.
- 85. Patient Positioning • Recovery Position – Bring patient's far leg to flexed position. (continued)
- 86. Bring the patient's far leg to the flexed position.
- 87. Patient Positioning • Recovery Position – Using knee and shoulder, carefully pull patient onto side. (continued)
- 88. Using the knee and shoulder, carefully pull the patient onto his side.
- 89. Patient Positioning • Recovery Position – Adjust knee and shoulder to stabilize patient; recheck patient's ABCs. (continued)
- 90. Adjust the knee and shoulder to stabilize the patient. Then recheck the patient's ABCs.
- 91. Patient Positioning • Recovery Position – Knee and elbow will support patient. (continued)
- 92. Once properly positioned, the knee and elbow will support the patient.
- 93. Patient Positioning • Fowler's and Semi-Fowler's Positions – Fowler's position: patient is placed fully upright in a seated position, creating a 90- degree angle. – Semi-Fowler's position: semi-seated position; patient reclines at 45-degree angle.
- 94. Patient Positioning • Trendelenburg Position – Patient placed flat on back with legs and feet raised. – May be used in patients with non-traumatic shock. • Shock position used for patients exhibiting signs of shock but have no evidence of trauma or injury.
- 95. Patient Positioning (continued) • Log Roll – Method used to move patient with suspected spine injury from prone position to supine position. – Few as two rescuers; three ideal.
- 96. Patient Positioning (continued) • Log Roll – Manually stabilize patient's head and neck as you place board parallel to patient.
- 97. Manually stabilize the patient's head and neck as you place the board parallel to the patient. Maintain manual stabilization throughout the log roll.
- 98. Patient Positioning • Log Roll – Kneel at patient's side opposite board. – Reach across patient and position your hands. – Inspect patient's back. (continued)
- 99. Kneel at the patient's side opposite the board. Reach across the patient and position your hands. Inspect the patient's back.
- 100. Patient Positioning • Log Roll – As a unit roll patient toward you. – Move spine board into place. – Lower patient onto spine board.
- 101. On command from the rescuer at the head, as a unit roll the patient toward you. Then move the spine board into place.
- 102. Lower the patient onto the spine board at the command of the rescuer at the head. Center the patient on the board.
- 103. RESTRAINING PATIENTS
- 104. Restraining Patients • Process of securing combative patient's body and extremities to prevent injury to himself/herself or others. – Physical restraint: holding patient with your hands or legs so they cannot move. – Mechanical restraint: applying device to patient to restrict movements.
- 105. Restraining Patients • Hard restraints: handcuffs, shackles, plastic zip-ties, belly chains. • Soft restraints: leather or fabric cuffs, cloth straps, rolls of gauze, cravats, sheets, clothing.
- 106. Restraining a patient to a gurney.
- 107. Examples of soft restraints. (A) Restraint of the arm.
- 108. Examples of soft restraints. (B) use of restraints for the legs.
- 109. Restraining Patients • Patient Restraint – Secure limbs with appropriate restraining equipment. – Do NOT secure patient face down. – Consider administering supplemental oxygen. – Check patient's airway, breathing, and circulation. (continued)
- 110. Restraining Patients • Patient Restraint – Clearly document reason for restraining. – Ensure that group uses only force required.
- 111. Restraining Patients • Positional asphyxia – Death resulting from securing a person in the prone position (restraint asphyxia).
- 112. Restraining Patients • Restraint Injuries – Being prepared, communicating, and taking decisive action will help minimize the risk of injury to rescuers and patient. – Be sure to train with the restraint equipment available to you.
- 113. SUMMARY
- 114. Summary • Critical to understand and apply proper body mechanics when lifting either patients or objects. • When lifting, always keep weight as close to body as possible, avoid leaning or twisting, use your leg muscles to lift the weight.
- 115. Summary • When two or more responders are preparing to move a patient, eye contact and effective communication are important. • Sometimes it is necessary for patient to be moved from immediate area for safety or care.
- 116. Summary • Recovery position is effective to care for an unresponsive patient's airway when a spine injury is not suspected. • It is important to only use force necessary to apply proper restraints. • Never restrain patient in prone position.