PATIENT
TRANSFER
PATIENT TRANSFER


A transfer is the safe movement of
the patient from one place to another,
like from bed to wheelchair and by
the used of assistive devices. In
doing so, the nurse must teach
patient and ask for his or her
participation for successful results.
There are many methods of transfer.
The nurse should choose an
appropriate technique for the
patient      by     taking      into
considerations    his      or    her
disabilities and abilities. In most
cases, it is very helpful if the
nurse demonstrates the technique
first before the transfer. During
the transfer, the nurse coaches
and assists the patient.
LEVEL OF TRANSFER

Independent transfers
◦The patient consistently performs all aspects
of the transfer, including setup, in a safe
manner and without assistance.

Assisted transfers
◦The patient actively participates, but also
requires assistance by a clinician(s).

Dependent transfers
◦The patient does not participate actively, or
only very minimally and the clinician(s)
perform all aspects of the transfer
LEVELS OF ASSISTANCE

Stand-by assist (aka supervision)

Close guarding

Contact guarding

Minimal assist

Moderate assist

Maximal assist
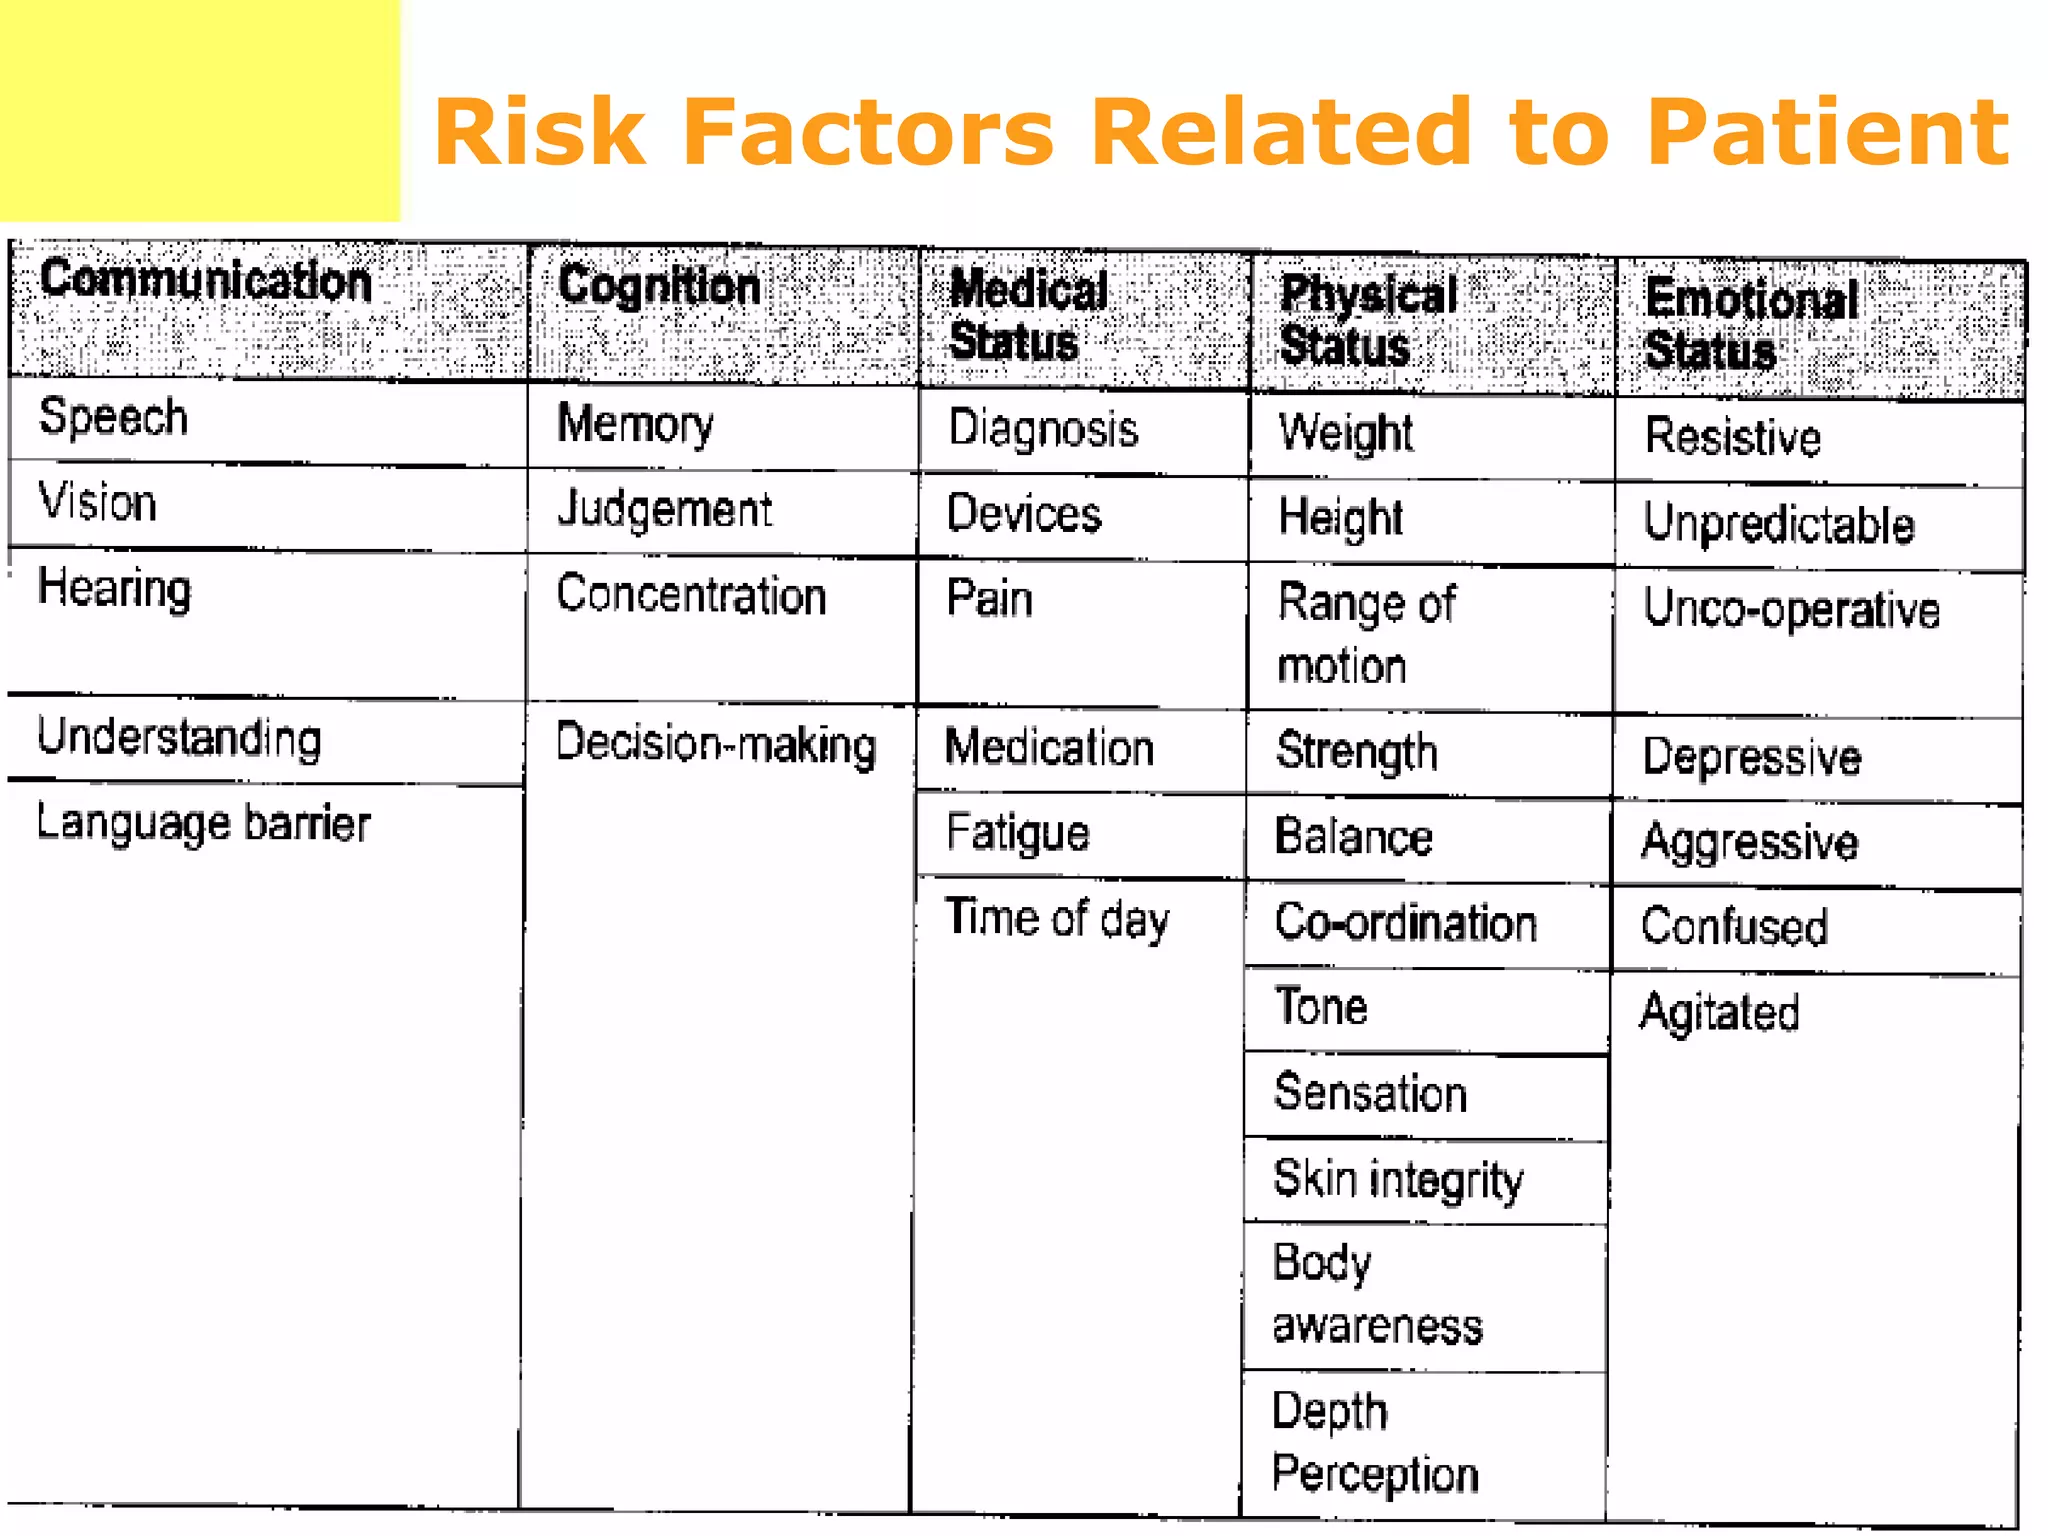
Risk Factors Related to Patient
Communication
The caregiver must assess the patient’s
ability or inability to communicate.
 The risk of injury increases if the
               patient:

• Does not speak/understand the same
language as the
caregiver
• Does not understand speech
• Does not understand non-verbal
communication
• Can not follow simple commands
•Communicates with sign language
or assistive communication devices

• Has a hearing impairment

• Has a speech problem

• Has a low level of consciousness
Cognition

Often hospitalized patients have an
altered level of cognition affecting their
ability to participate in lifts/transfers.

Short term memory loss, poor
judgment,     and     difficulty  making
decisions can all be manifestations of
altered cognition.

Questions testing the short term
memory can often give some indication
of the level of cognition.
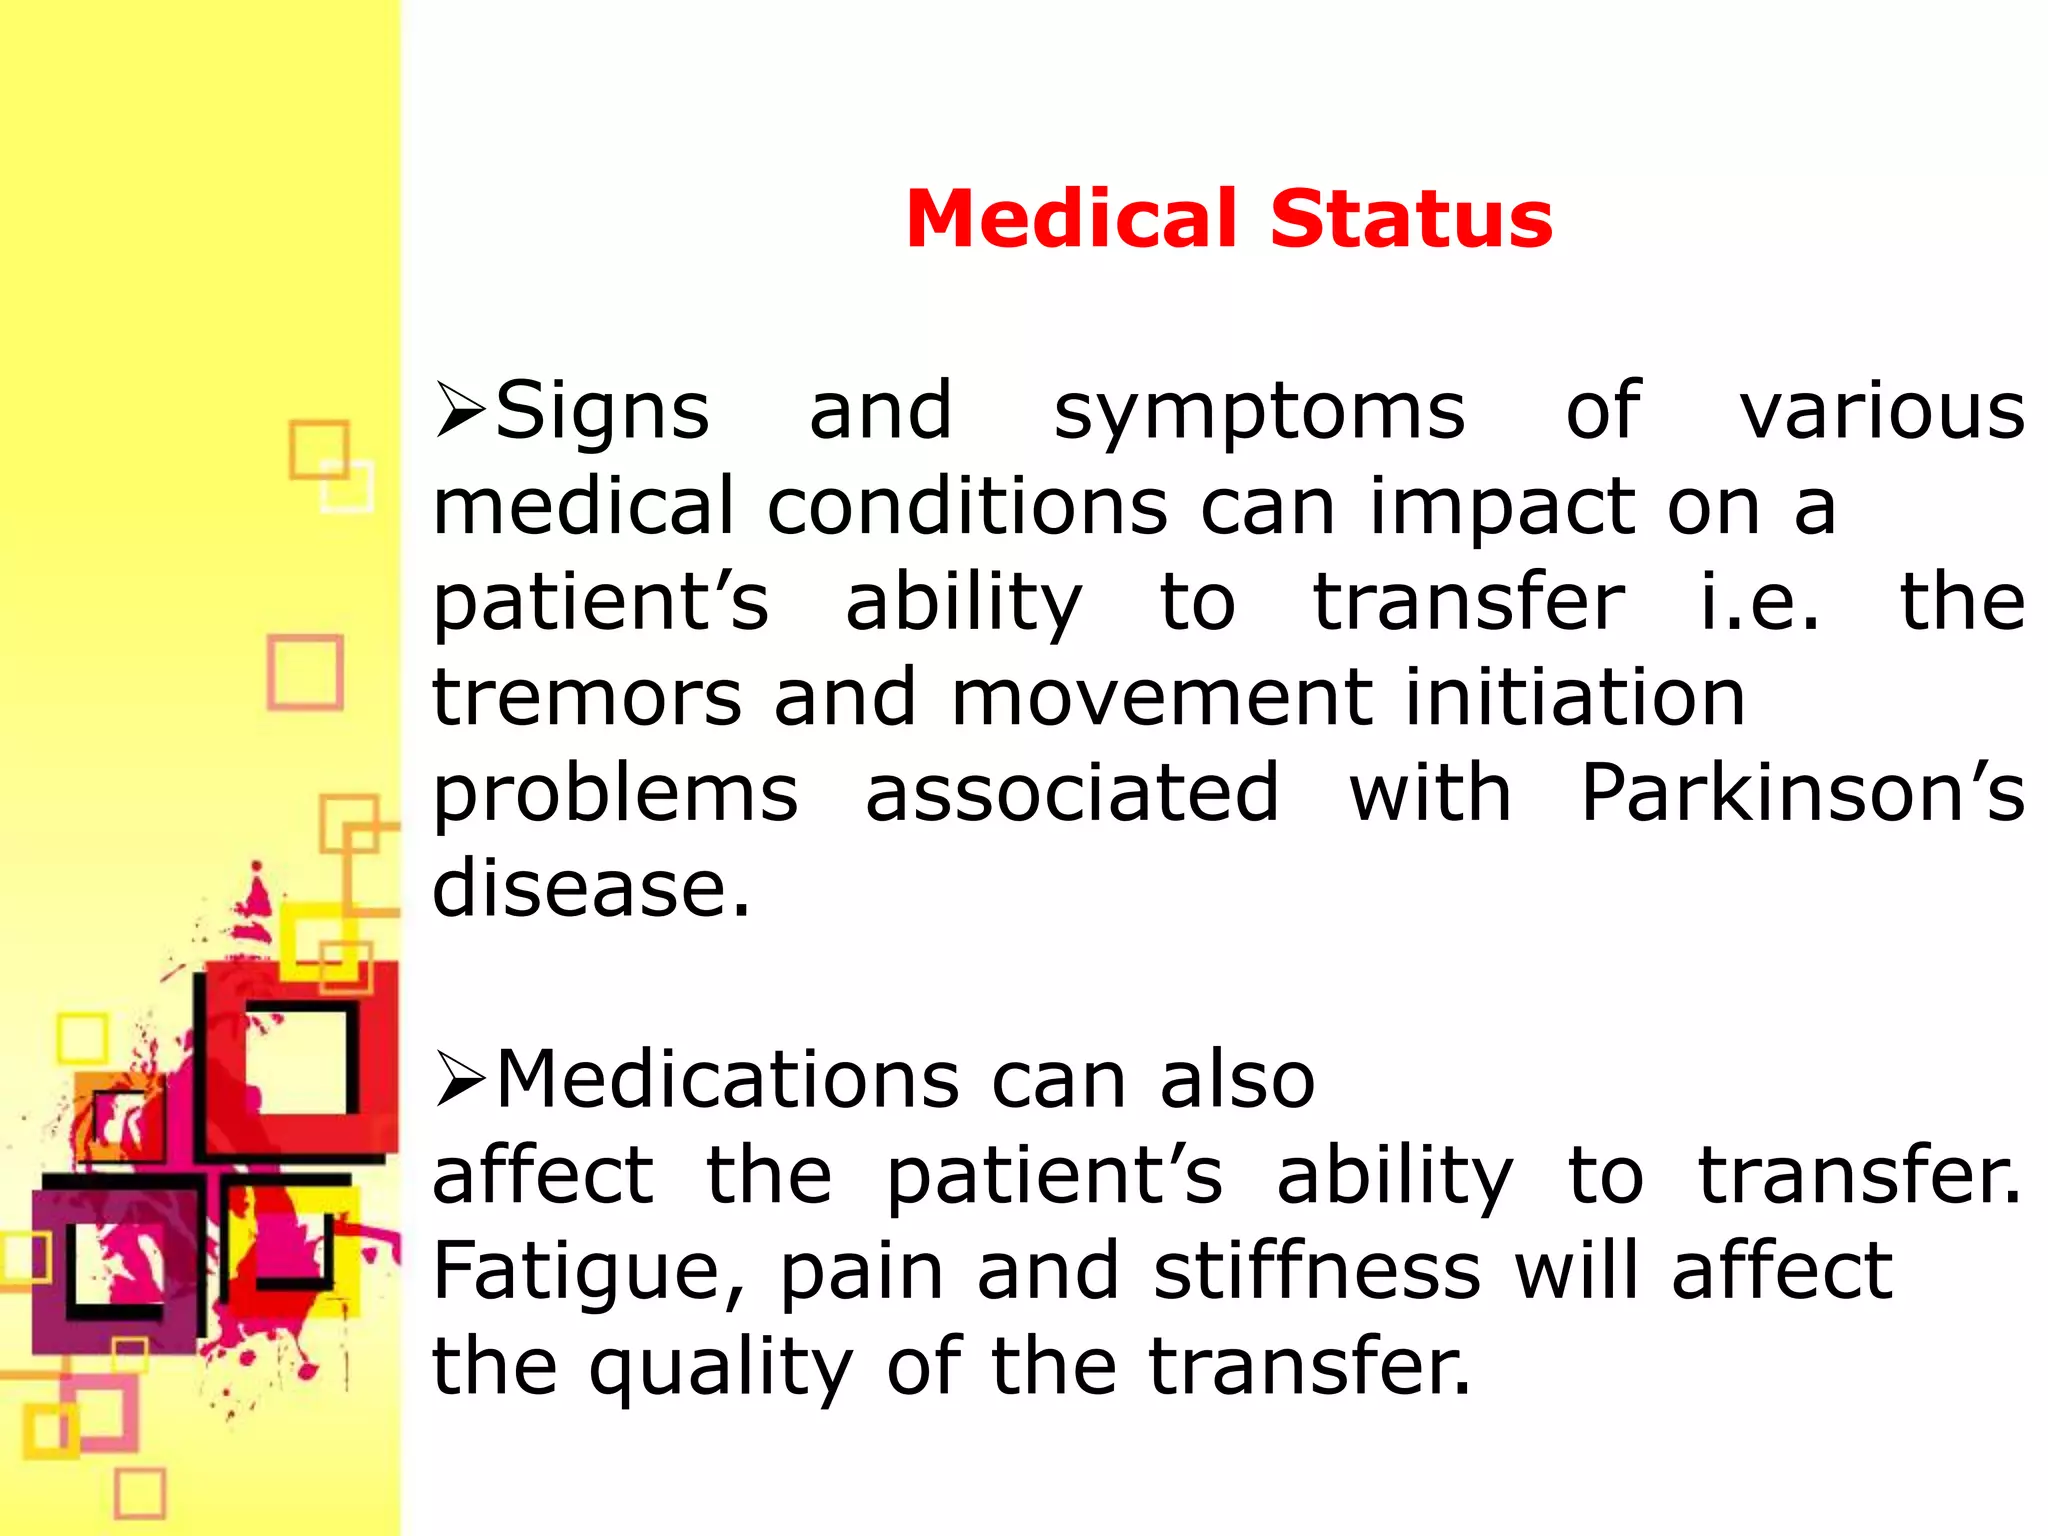
Medical Status

Signs and symptoms of various
medical conditions can impact on a
patient’s ability to transfer i.e. the
tremors and movement initiation
problems associated with Parkinson’s
disease.

Medications can also
affect the patient’s ability to transfer.
Fatigue, pain and stiffness will affect
the quality of the transfer.
The medical status can change
dramatically
during a shift and caregivers need
to observe these changes and
modify
the lift/transfer as necessary.
Physical Status

A physical assessment should include:

• Weight bearing status
• Weight
• Height
• Range of motion (ROM)
• Strength
• Balance
• Coordination
• Sensation
• Clothing
• Footwear
Emotional and Behavioral Status

Patients behavioral and emotional state
may change throughout the day
i.e. Sundowners. The caregiver should
be aware of behavior changes
including:

•   Anxiety
•   Aggression
•   Agitation
•   Combativeness
•   Confusion
•   Depression
•   Hostility
•Impulsiveness
• Low tolerance for change
• Low self esteem (if they think poorly
of their abilities they may not
complete the transfer to the level of
their ability)
• Rejection
• Resistive
• Self Destructive
• Unpredictable
Risk Factors Related to the
Environment

•   Layout
•   Space
•   Lighting
•   Color
•   Temperature
•   Obstacles
•   Floor
Risk Factors related to the
             Equipment

• Medical devices (catheter bags, IV's,
prosthesis)

• Inadequate training in the use of
equipment

• Improper use of equipment or use of
faulty equipment

•Risk increases when
furniture/equipment not adjustable
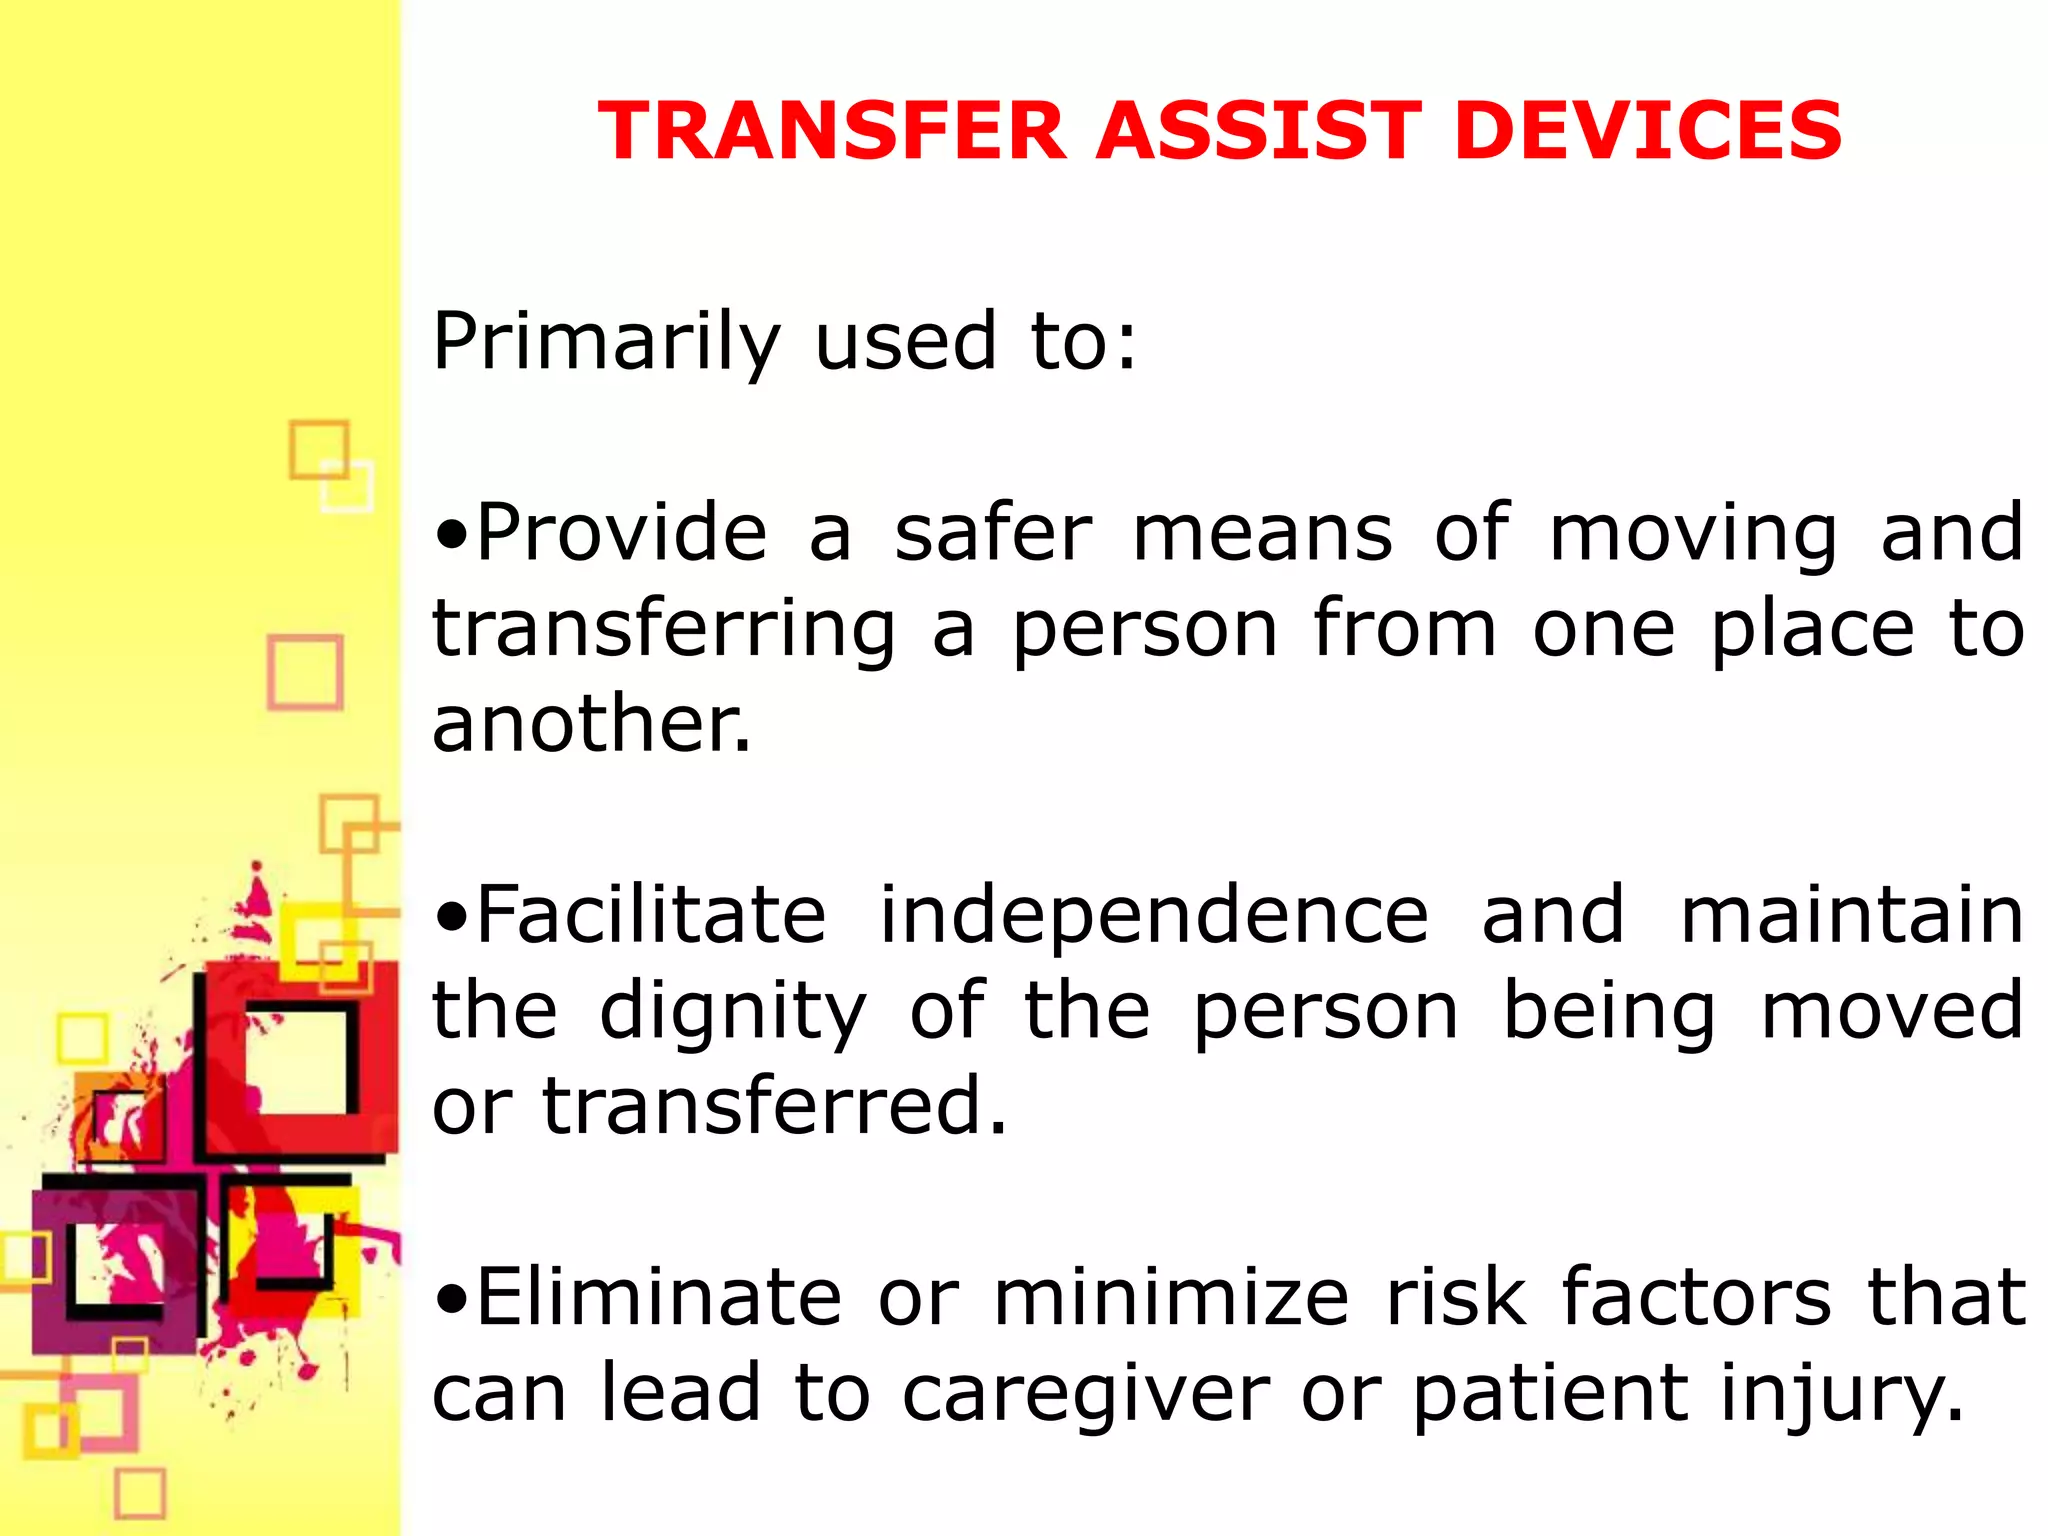
TRANSFER ASSIST DEVICES

Primarily used to:

•Provide a safer means of moving and
transferring a person from one place to
another.

•Facilitate independence and maintain
the dignity of the person being moved
or transferred.

•Eliminate or minimize risk factors that
can lead to caregiver or patient injury.
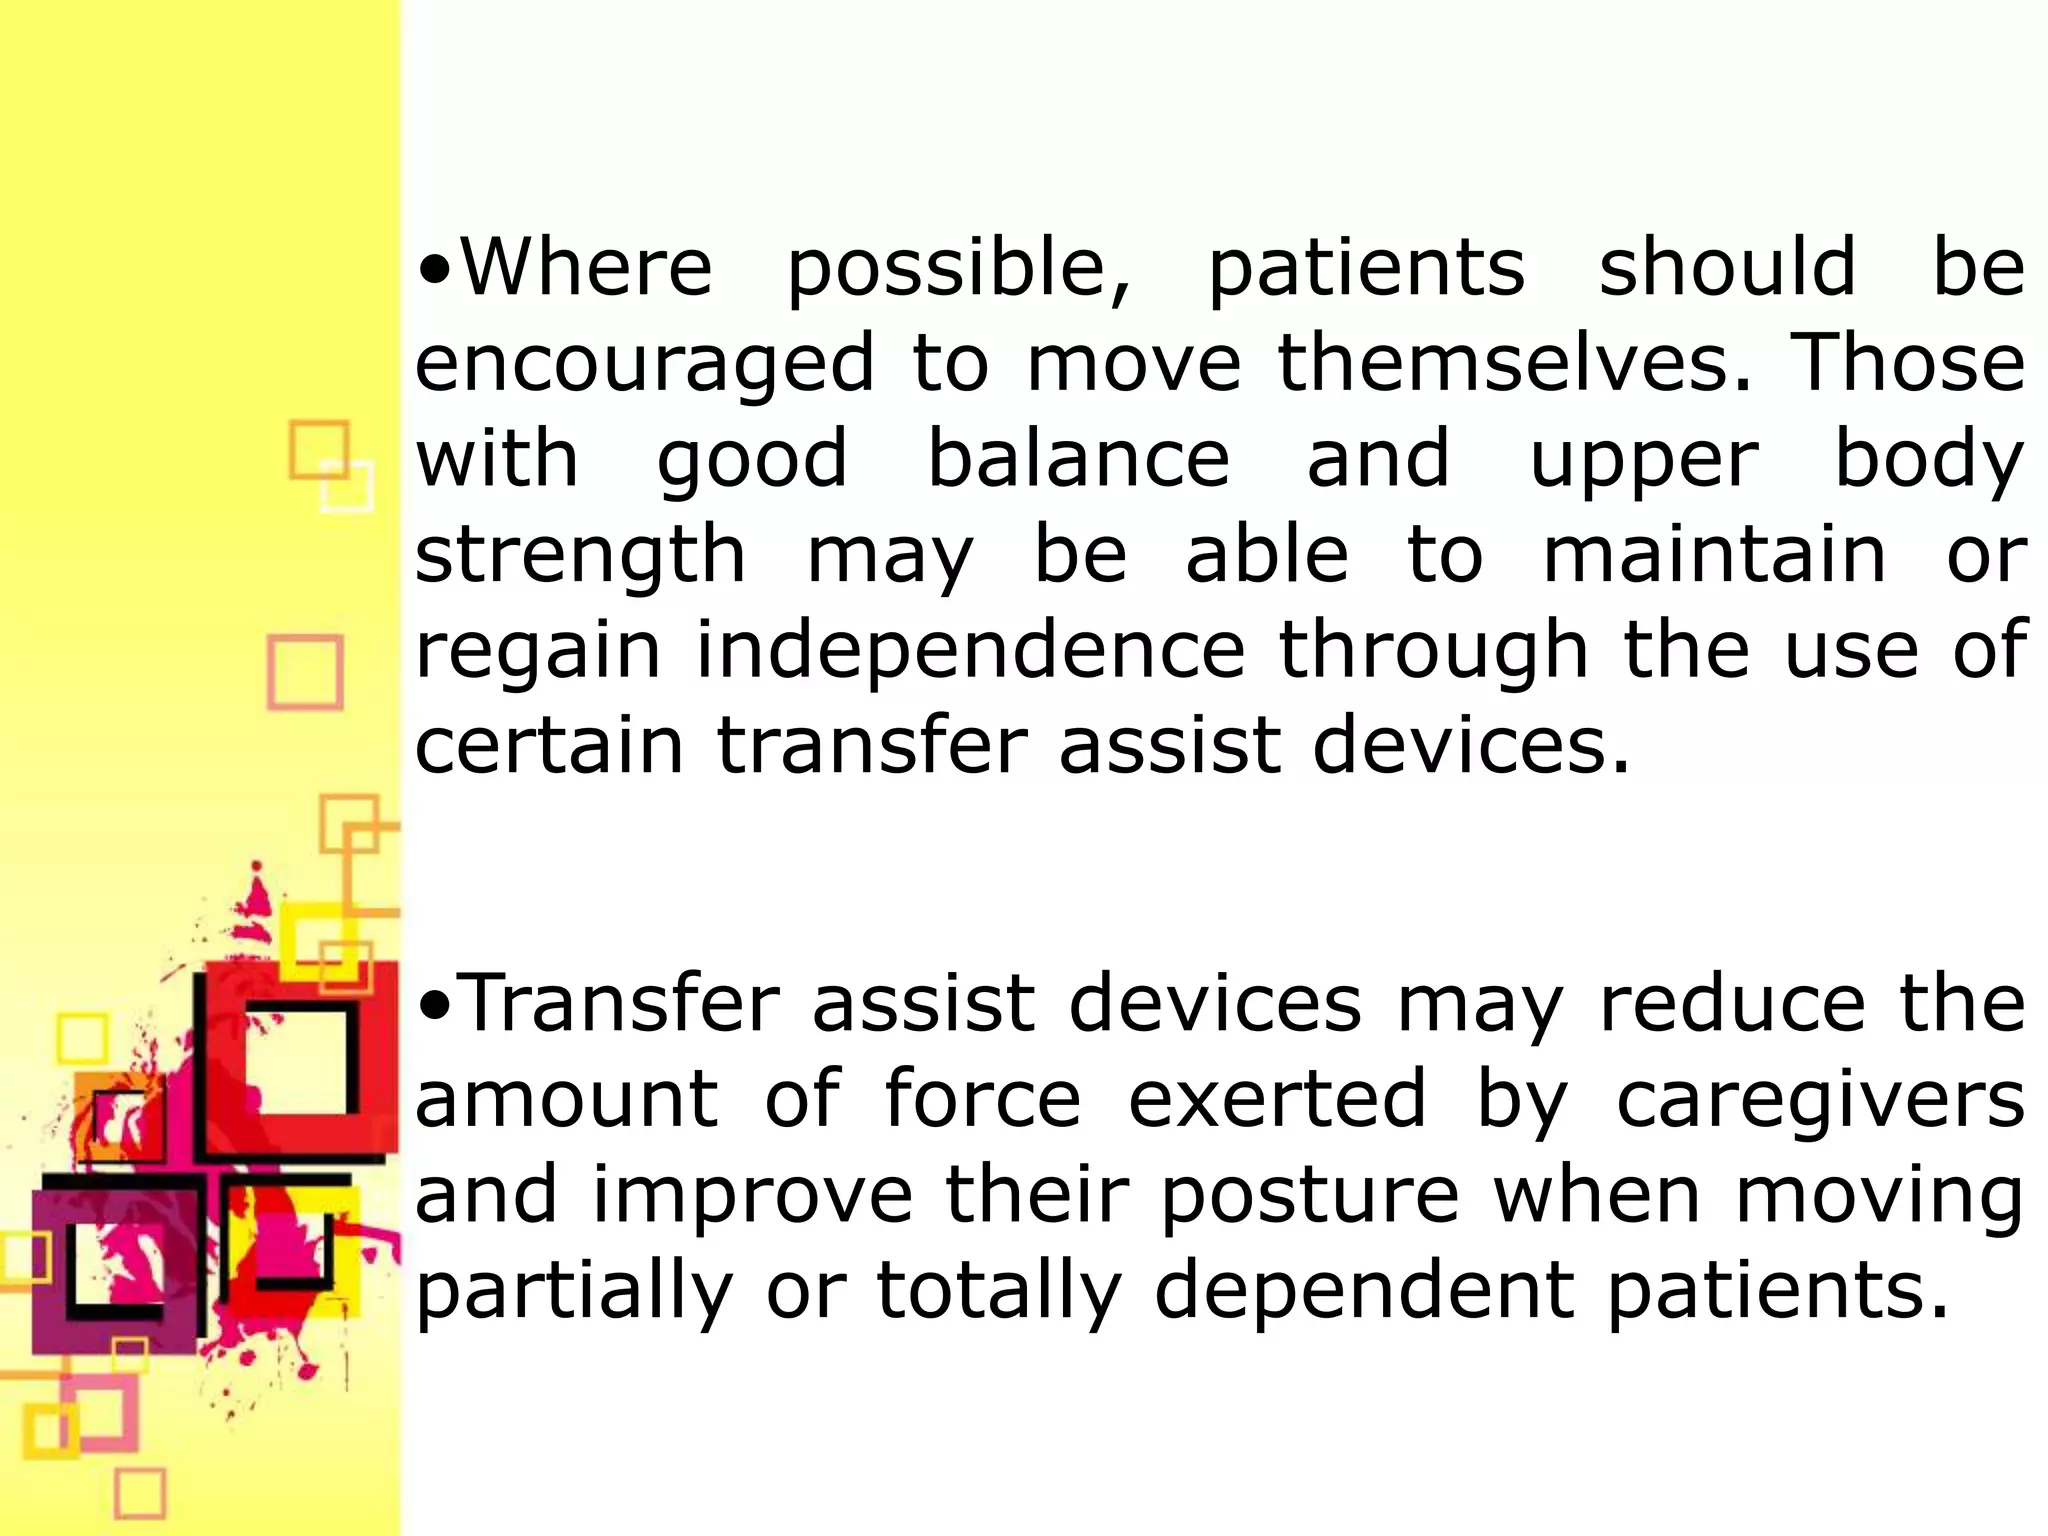
•Where possible, patients should be
encouraged to move themselves. Those
with good balance and upper body
strength may be able to maintain or
regain independence through the use of
certain transfer assist devices.


•Transfer assist devices may reduce the
amount of force exerted by caregivers
and improve their posture when moving
partially or totally dependent patients.
•Transfer assist devices do not reduce
the weight of a patient and should not
be used to lift, carry, or support the
whole or a large part of a patient’s body
weight.


•A safer means of moving the patient,
such as a mechanical lift, may be
required. Safety for both patient and
caregiver must always be considered.
BEST PRACTICES WHEN USING
    TRANSFER ASSIST DEVICES

•Only use transfer assist devices if properly
trained in their safe use. When safe,
encourage patients to move themselves.

•Tell the patient what you intend to do before
you do it. Ensure that the brakes of the bed,
stretcher, or wheelchair are on before
beginning any movement.

•Inspect each device before use. Tag and
remove damaged equipment from service.

•Set the bed at the height of caregivers’ upper
thighs.
•Lower the side rail on the bed to
reduce awkward reaching.

•Minimize gaps and height differences
between surfaces whenperforming a
lateral transfer (for example, from bed
to stretcher), and bridge gaps with
transfer boards, where necessary.

•Avoid differences in height between
two surfaces when performing a
transfer. A gentle decline, however,
may be preferable for some seated or
supine transfers using a transfer board.
•When moving a patient up in bed, tilt
the bed to a “head down” position to
allow   gravity  to  assist,  unless
contraindicated.

•Use moving and handling equipment
in accordance with your organization’s
policies and procedures.

•Ensure friction-reducing devices are
large enough to be placed under the
main points of contact. For supine
patients, this includes the pelvis,
shoulders and, if possible, the feet.
•Do not leave friction-reducing devices
under the patient unless the manufacturer
specifically recommends it. Leaving an
unsecured friction-reducing device under
an unsupervised patient may put the
patient at risk of falling out of bed. as low-
friction draw sheets, are designed to be
left under the patient. These sheets are
secured by tucking the sides of the sheets
under the mattress, so that the sheets
don’t have to be continually placed and
removed

•Have the patient assist as much as
possible during the transfer or reposition.

•Avoid lifting the patient.
Set of two draw sheets
                           Draw and slider sheets

                  Draw sheets

                  •Draw or slide sheets are made of low-
                  frictionfabrics or gel-filled plastics that enable
                  an individual to slide over a surface instead of
                  being dragged or lifted. These sheets come in
                  a variety of widths and lengths and may be
                  used in pairs, singly, or folded.

                  •drawsheet has the slippery surface only on
                  one side and can be kept under the patient.

                  •A slide sheet, on the other hand, is slippery
                  on both sides and should be removed once the
                  patient is repositioned.
Slider sheets

                   •Slider or roller sheets are tubular
                   sliding sheets made of specialized
                   fabrics with low-friction inner surfaces
                   that glide over themselves.

                   •Slider sheets may be flat or padded
                   and can be placed under draw sheets or
                   incontinence pads.

                   •Slider sheets come in several sizes
                   and lengths.

Set of two slider sheets
•Short slider sheets are primarily used
for pivoting and repositioning tasks
such as sitting a patient up on the side
of the bed or repositioning a patient up
in bed.

•Long lateral slider sheets are intended
for transferring supine patients from
one surface to another, such as from
bed to stretcher.
•“ONE-WAY SLIDES,” slide in one
direction only. This facilitates
moving a patient up in bed or back
in a wheelchair, while preventing
the patient from sliding down the
bed or forward in a wheelchair.
One-way slides reduce the need to
manually reposition a patient in a
bed or chair.
•Note:
                       Slider sheets may be used independently
                       or with partial help. When used
                       independently, a patient with good sitting
                       balance and sufficient arm or leg strength
                       may be able to slide from one surface to
                       another or up and down in bed. When
                       providing partial help, it is important to
                       apply forces horizontally only, resulting in a
                       slide, not a lift. The chosen technique
                       should, as much as possible, eliminate the
                       need for the caregiver to twist, reach, or
                       stoop.
Padded one-way slide
Two roller sheets
                                          USES

                    •Facilitate independent bed mobility
                    •Move patients up in bed
                    •Move patients from the side of the bed to the
                    centre or vice versa
                    •Turn patients onto their side in bed
                    •Transfer patients from one surface to another,
                    such as from a bed to a stretcher (when used in
                    conjunction with other devices, such as transfer
                    boards)
                    •Move patients who have fallen into confined or
                    awkward spaces to a place where a mechanical
                    lift can be used
                    •Pivot patients in bed and aid exercise
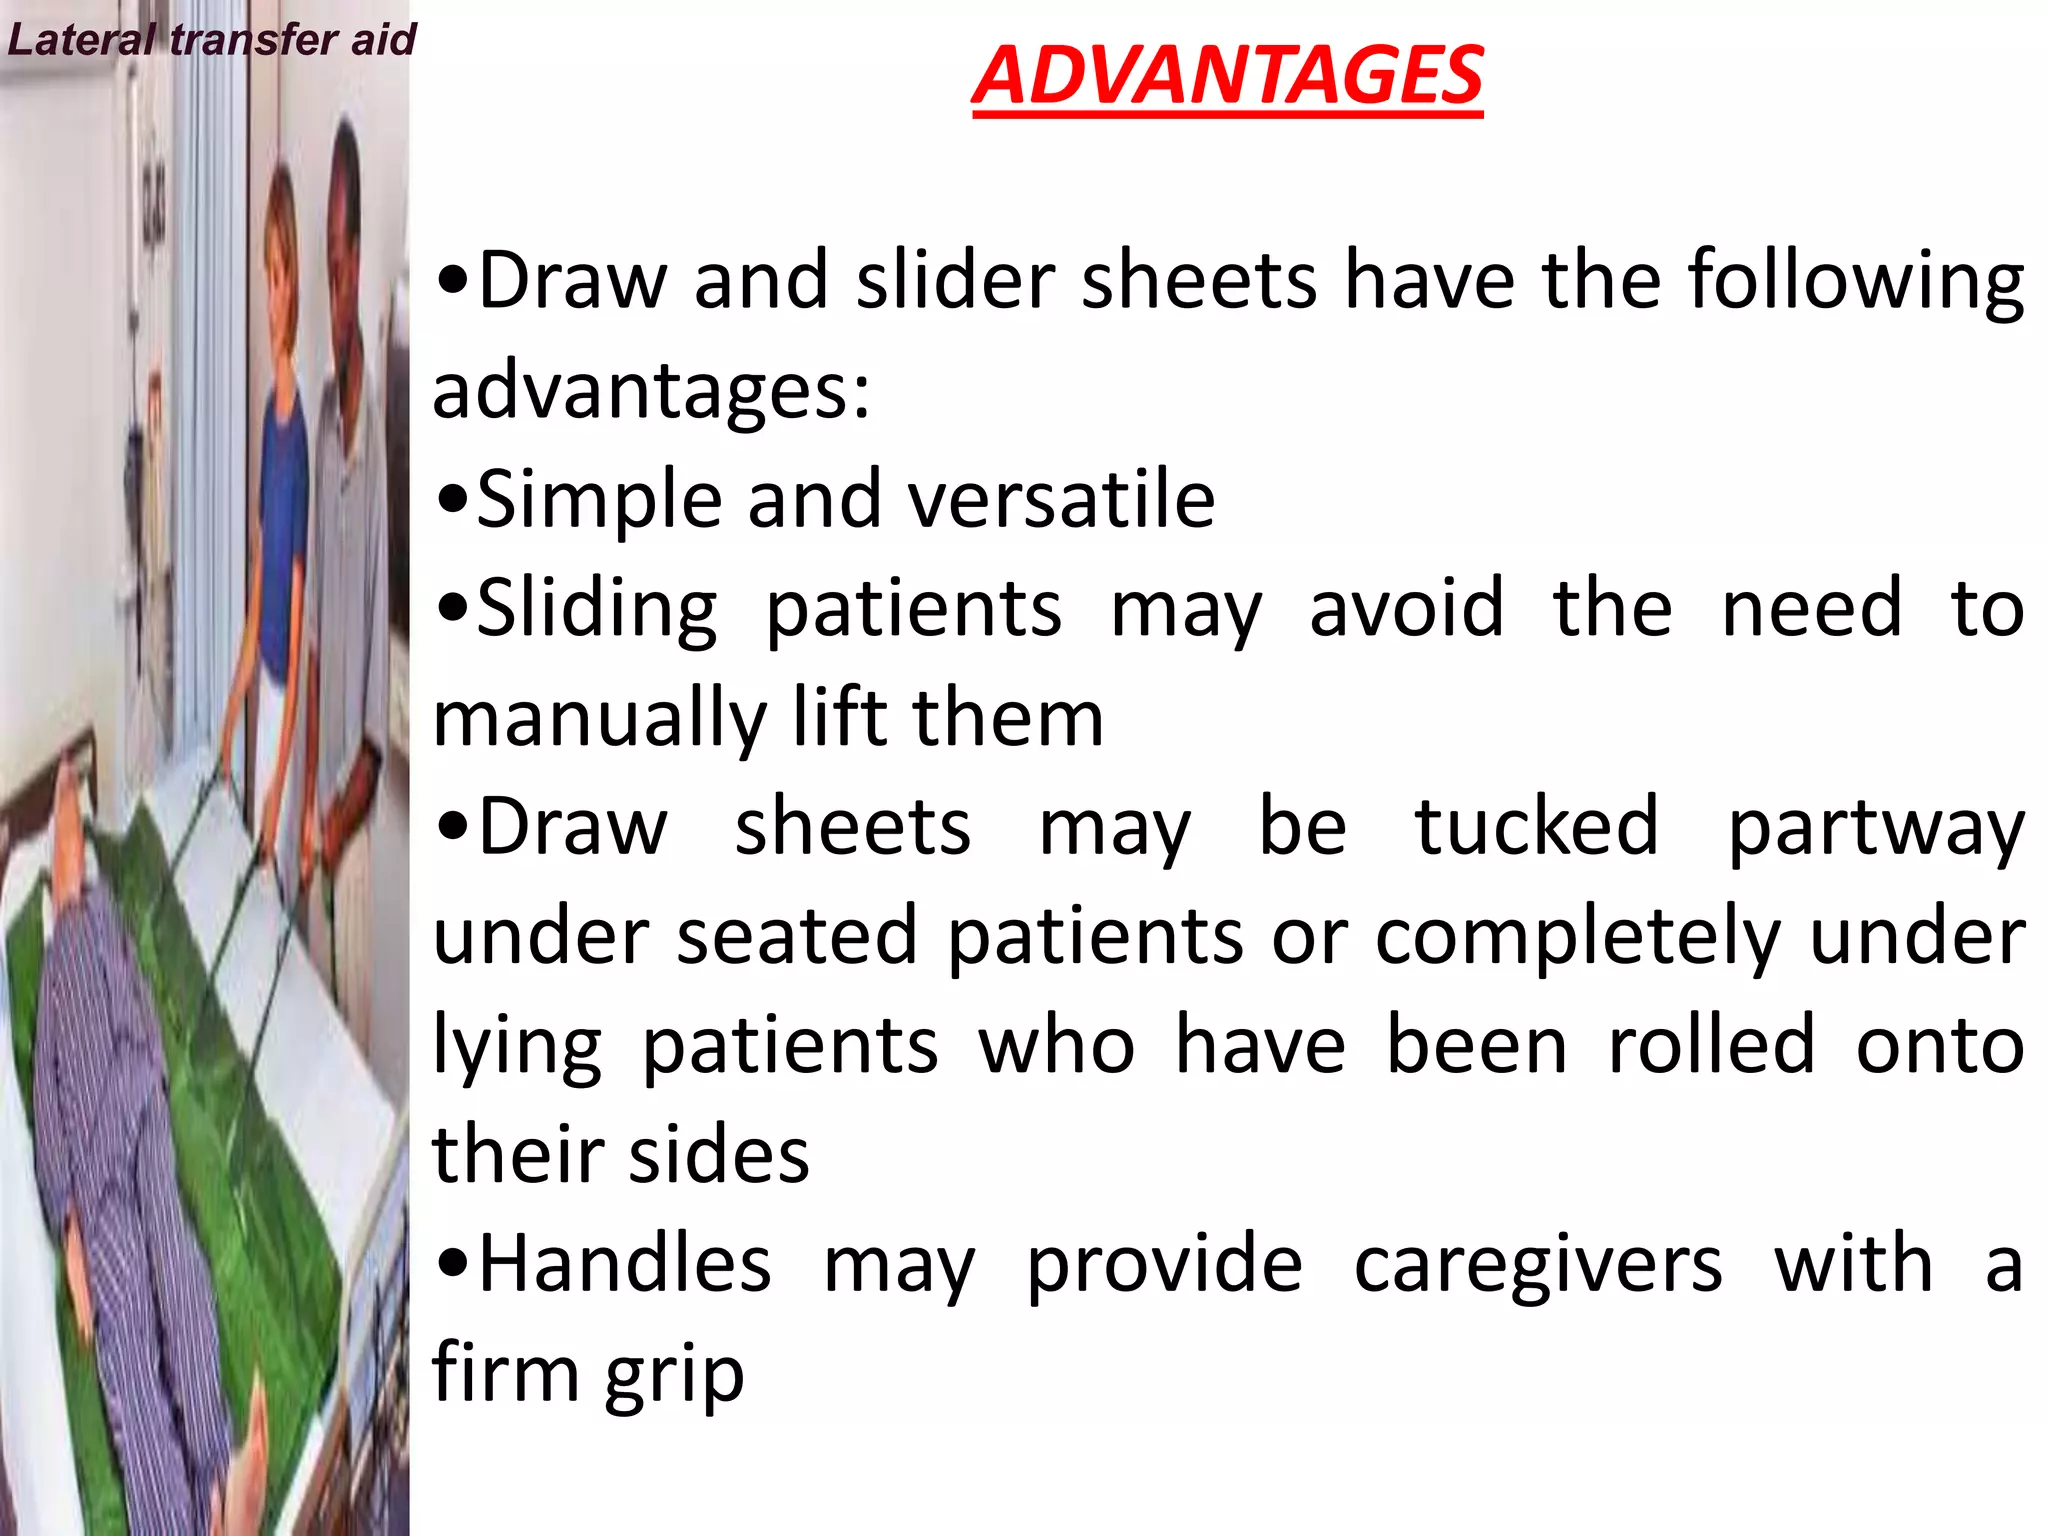
Lateral transfer aid
                                     ADVANTAGES

                       •Draw and slider sheets have the following
                       advantages:
                       •Simple and versatile
                       •Sliding patients may avoid the need to
                       manually lift them
                       •Draw sheets may be tucked partway
                       under seated patients or completely under
                       lying patients who have been rolled onto
                       their sides
                       •Handles may provide caregivers with a
                       firm grip
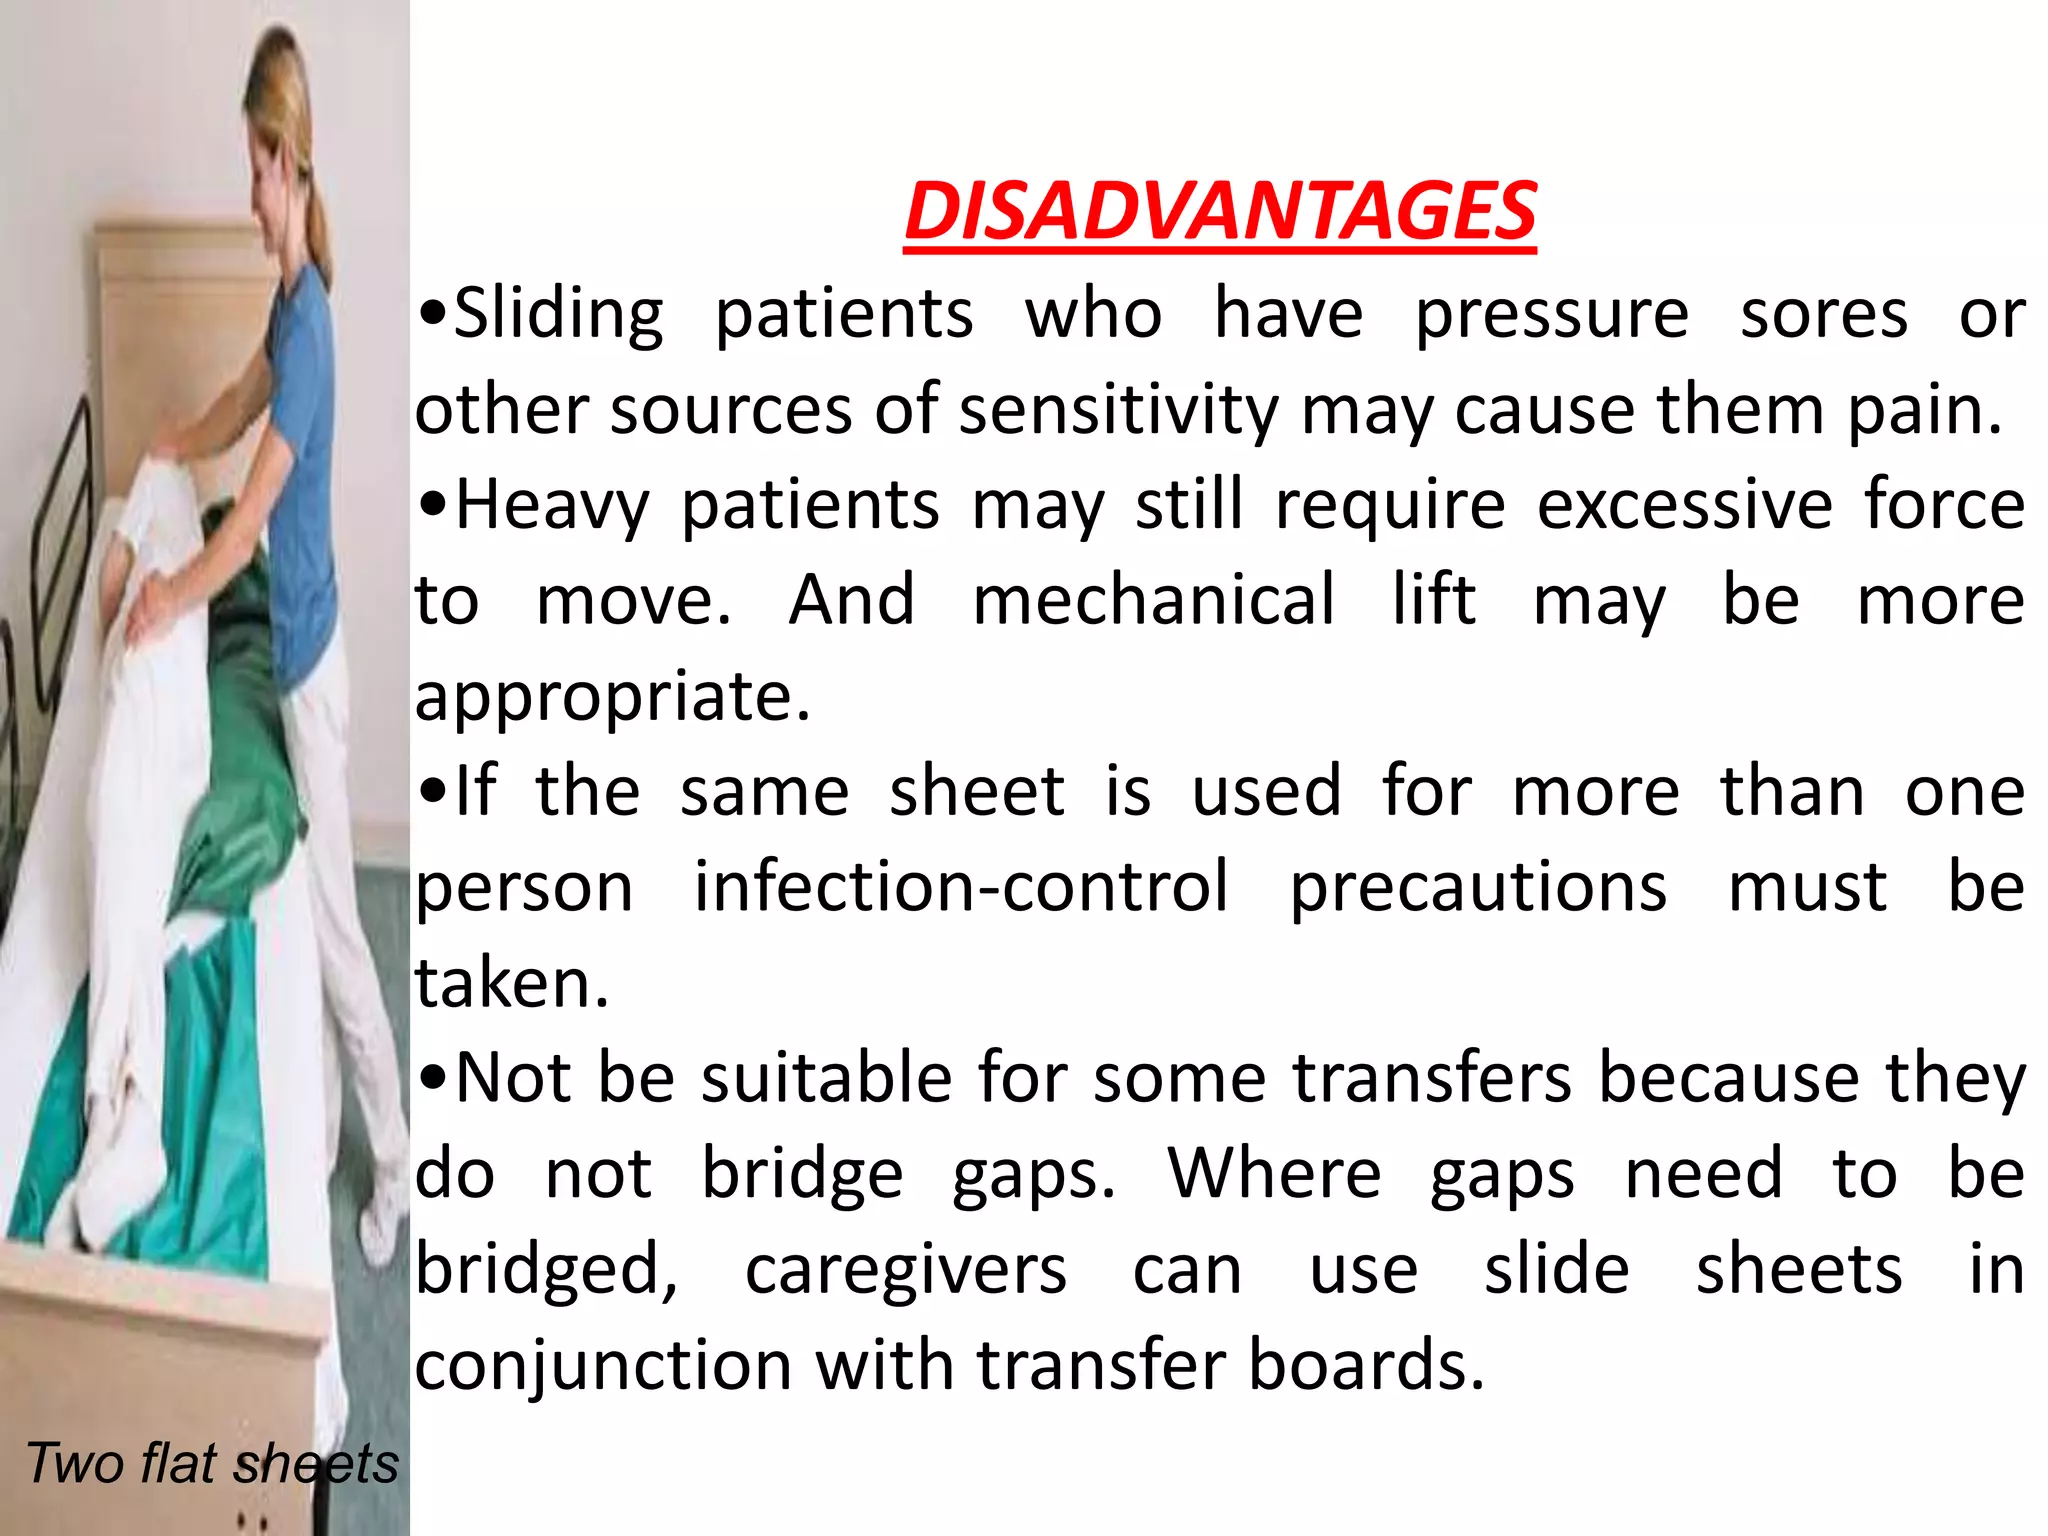
DISADVANTAGES
                  •Sliding patients who have pressure sores or
                  other sources of sensitivity may cause them pain.
                  •Heavy patients may still require excessive force
                  to move. And mechanical lift may be more
                  appropriate.
                  •If the same sheet is used for more than one
                  person infection-control precautions must be
                  taken.
                  •Not be suitable for some transfers because they
                  do not bridge gaps. Where gaps need to be
                  bridged, caregivers can use slide sheets in
                  conjunction with transfer boards.
Two flat sheets
DISADVANTAGES


•A slide may actually turn into a lift if
caregivers do not use proper techniques.

•The move or transfer still requires two
caregivers.

•The use of these sheets may involve
additional effort and handling tasks to
position and remove them.
TIPS
Follow these tips when using draw and
slider sheets:
•Use a “palms up” grip when pulling on
the slide/roller sheet. A “palms up” grip is
a stronger grip than a “palms down” grip.
A “palms up” grip keeps elbows close to
the body and helps to maintain a neutral
shoulder posture.

•Keep knuckles in contact with the
bedsheet to ensure a sliding motion, not a
lifting motion.
•Avoid shrugging the shoulders while
moving the patient, as this indicates a
lifting motion.

•If repositioning the patient up in bed, tilt
the entire bed with the head down, which
allows gravity to assist with the movement.

•Ensure that the sheet is taut before
moving the patient to prevent jerking the
patient.

•Draw sheets can be left under the patient
•Reduces the forces required to move
patients

•Reduces awkward postures if used
correctly

•More comfortable for patients than
transfer boards
Transfer belts
                               TRANSFER BELTS

                 •Transfer belts do not reduce the patient’s
                 weight in any way, and must not be used for
                 lifting patients.

                 •Transfer belts come in a variety of sizes and
                 shapes. They fasten with a buckle, a clasp, or
                 Velcro, and they usually have handles.

                 •Note: Although Velcro fastening is quicker and
                 easier than using buckles or clasps, the hooks
                 may get caught on the patient’s clothing and may
                 deteriorate rapidly if not carefully laundered.
USES
Transfer belts can be used:
•During assisted walking
•To guide patients along transfer boards during
seated transfers

                      ADVANTAGES
Transfer belts have the following advantages:
•They provide a secure grip.
•Caregivers do not need to grip the patient’s clothing
or limbs.
•Caregivers can guide a falling patient to the floor.
•NOTE Do not use transfer belts to catch or support a
falling patient’s weight.
•Caregivers can work in a more upright posture.
DISADVANTAGES

Transfer belts have the following disadvantages:

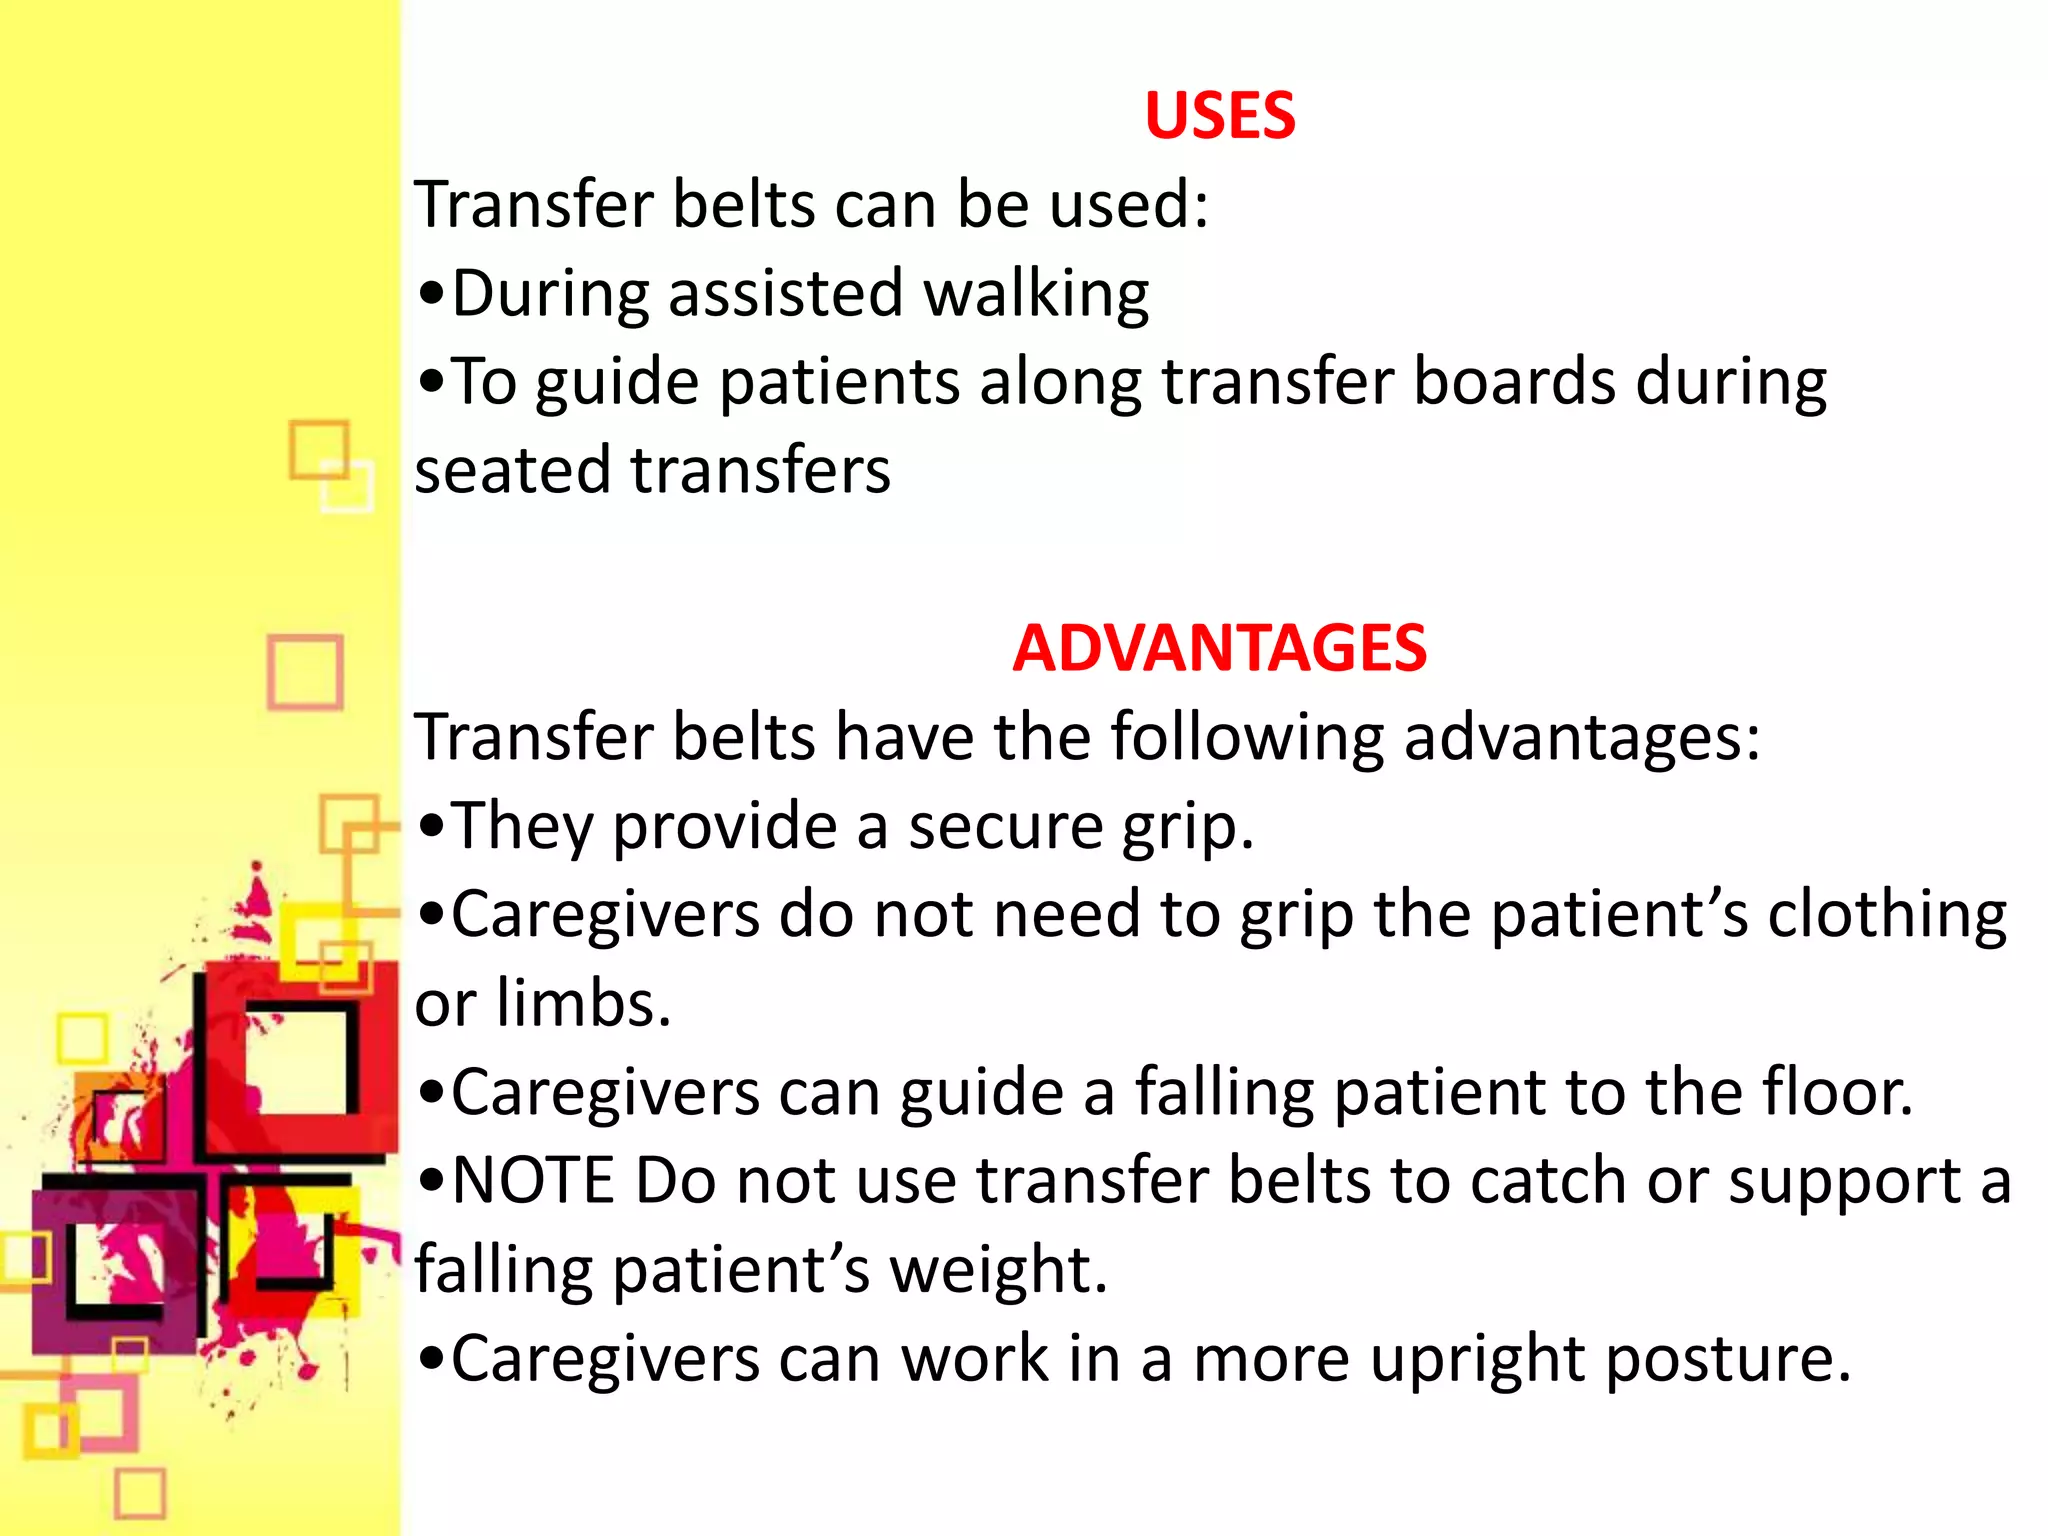
•Belts that are too wide may affect a patient’s
ability to lean forward. Narrow, unpadded belts
may dig into the patient’s waist.

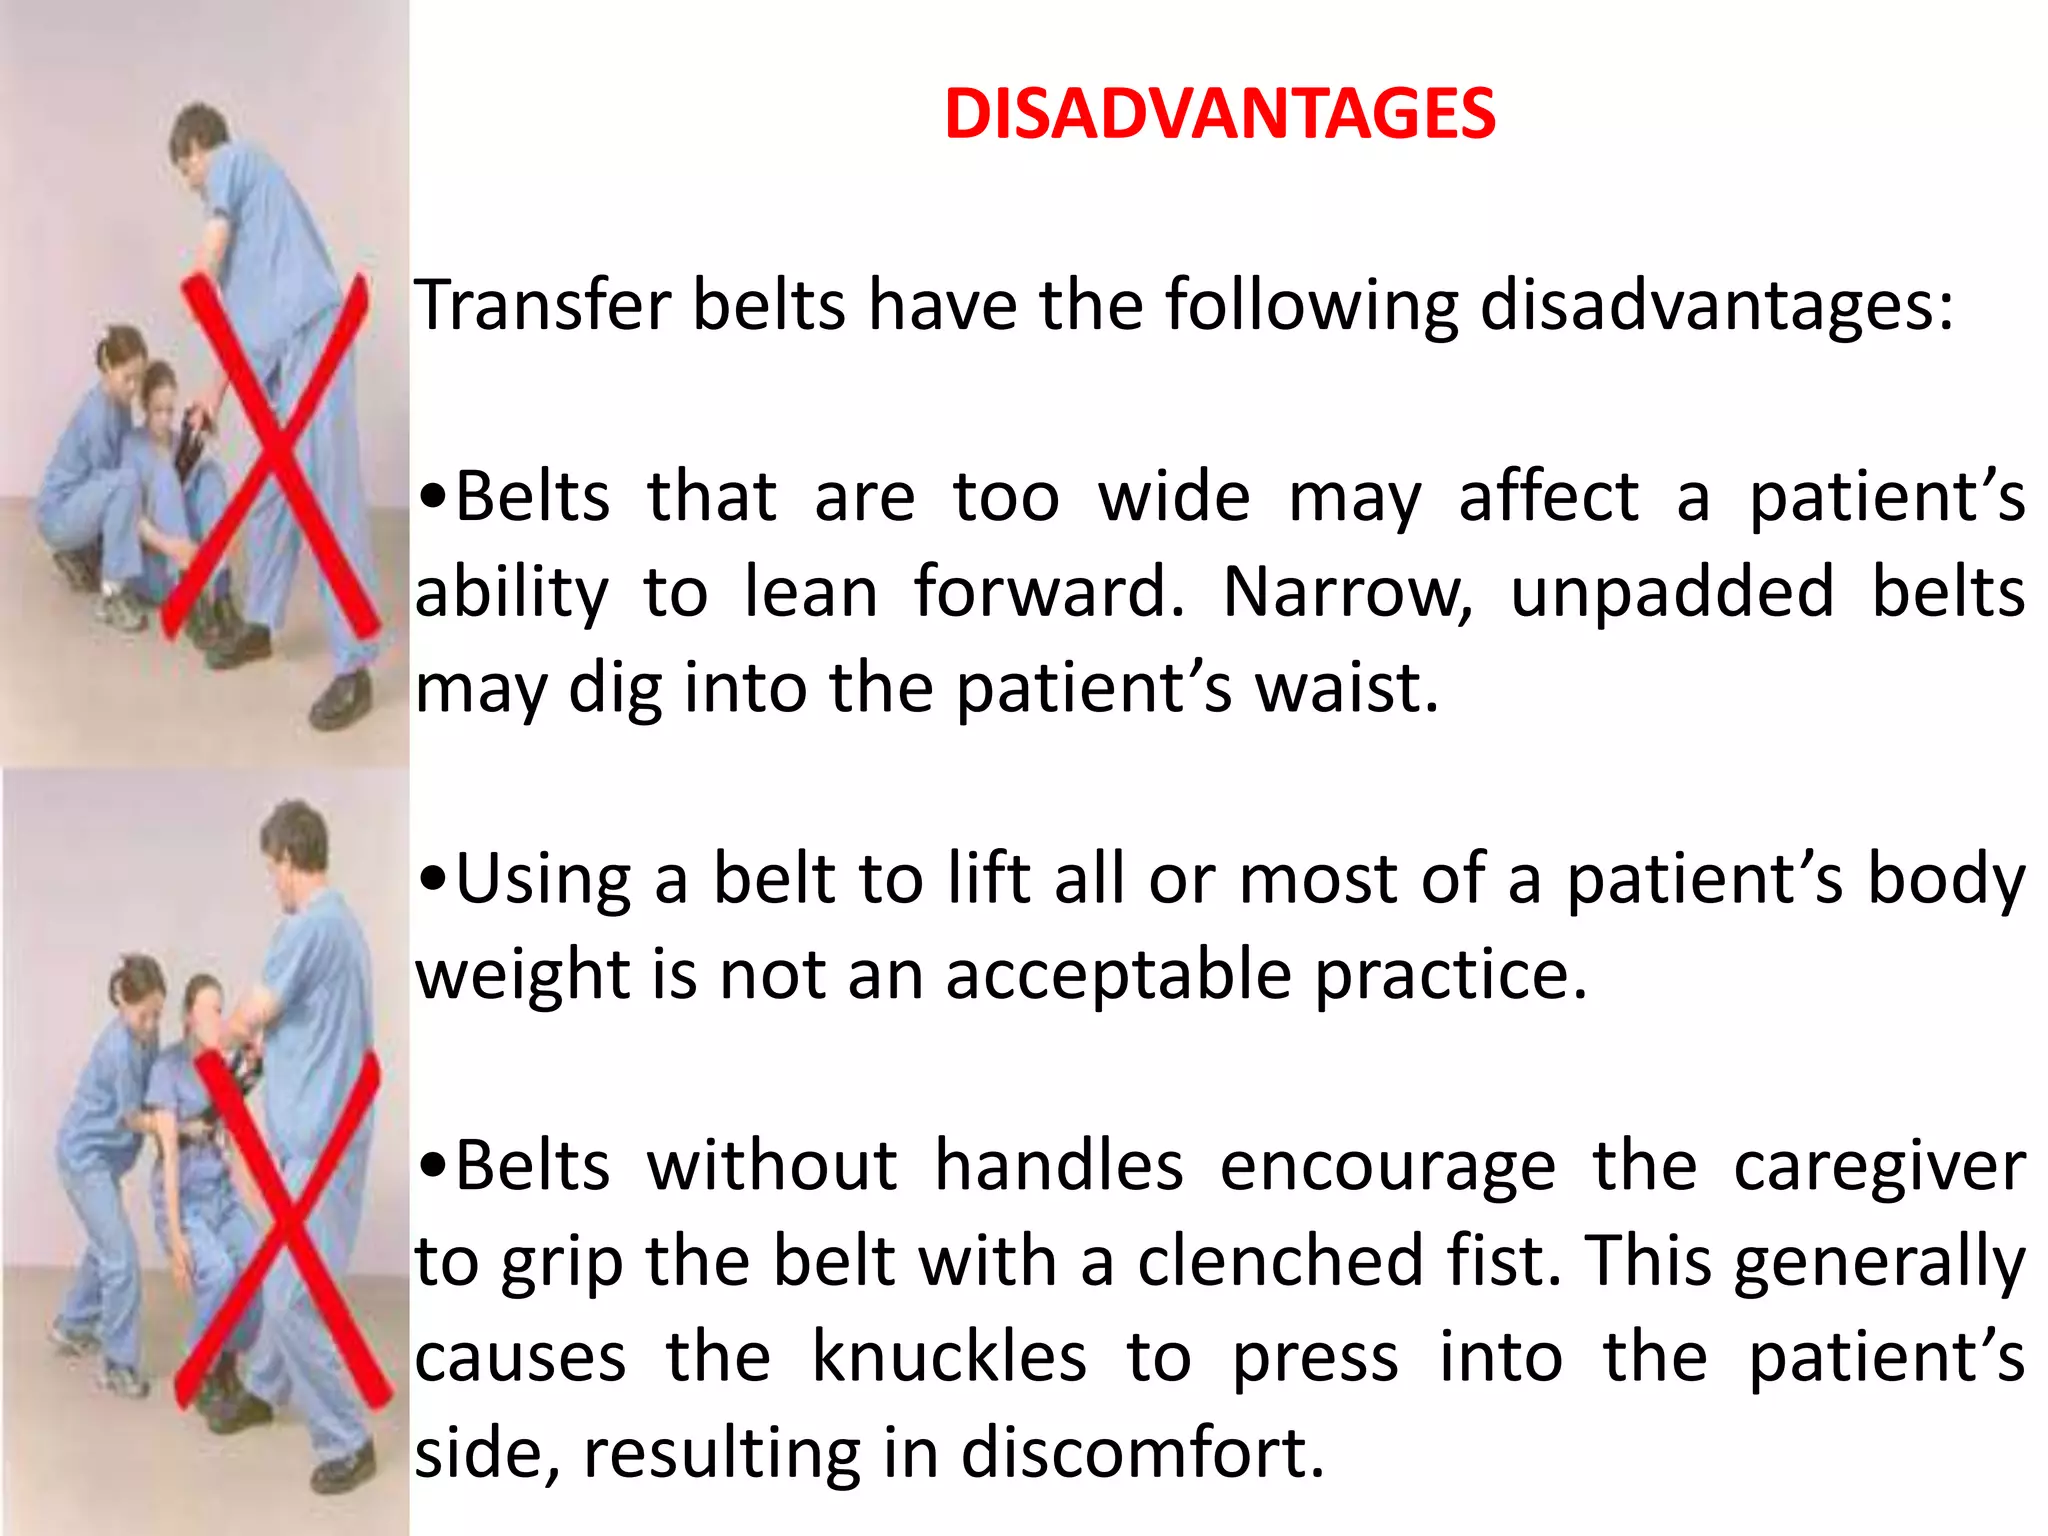
•Using a belt to lift all or most of a patient’s body
weight is not an acceptable practice.

•Belts without handles encourage the caregiver
to grip the belt with a clenched fist. This generally
causes the knuckles to press into the patient’s
side, resulting in discomfort.
•Caregivers should not place their arms
                   through handles, as pictured. Caregivers
                   would rarely have time to free their arms if
                   the patient reacted or fell suddenly.

                   •Caregivers are placed at significant risk
                   when patients are allowed to hold around
                   the caregiver’s neck. Caregivers can avoid
                   this situation by placing their arms outside
Never place your   those of the patient when providing
  arm through
  transfer belt    assistance.
     handles
TIPS
Follow these tips when using transfer belts:

•As long as it is safe to do so, place the
transfer belt on the patientvwith the bed in
a raised position to avoid awkward
bending.

•Ensure that the belt is fairly snug (you
should only be able to place two fingers in
between the belt and the patient) to
reduce the chances of the belt sliding up
the patient during the transfer.
•When performing the transfer, caregivers
should shift their body weight from one leg
to the other and perform a gentle pulling
motion, using the legs to do the work.
Avoid lifting during the transfer movement.


•Get the patient to assist as much as
possible.
SLIDE/TRANSFER BOARDS

                               •Slide/transfer boards or smooth movers are
                               made of wood or plastic and can be used in
                               conjunction with roller sheets or slide sheets.
                               Some boards have rollers, while others have
                               fabric or vinyl coverings designed to further
                               reduce friction.

                               •Slide/transfer boards are used to reduce friction
                               and bridge gaps when sliding patients between
                               two horizontal surfaces such as from a bed to a
                               stretcher.

Rolling slide/transfer board
•These boards are suitable only for those
patients who can power themselves by sliding or
rolling along the board with guidance from a
knowledgeable caregiver. Some procedures
require the caregiver to push or pull the board to
accomplish the transfer.


•Others involve pushing the patient or pulling a
draw sheet across the transfer board. Large
patients and patients with sensitive skin may find
slide/transfer boards uncomfortable. If possible
the use of a mechanical lift is recommended over
a slide/transfer board.
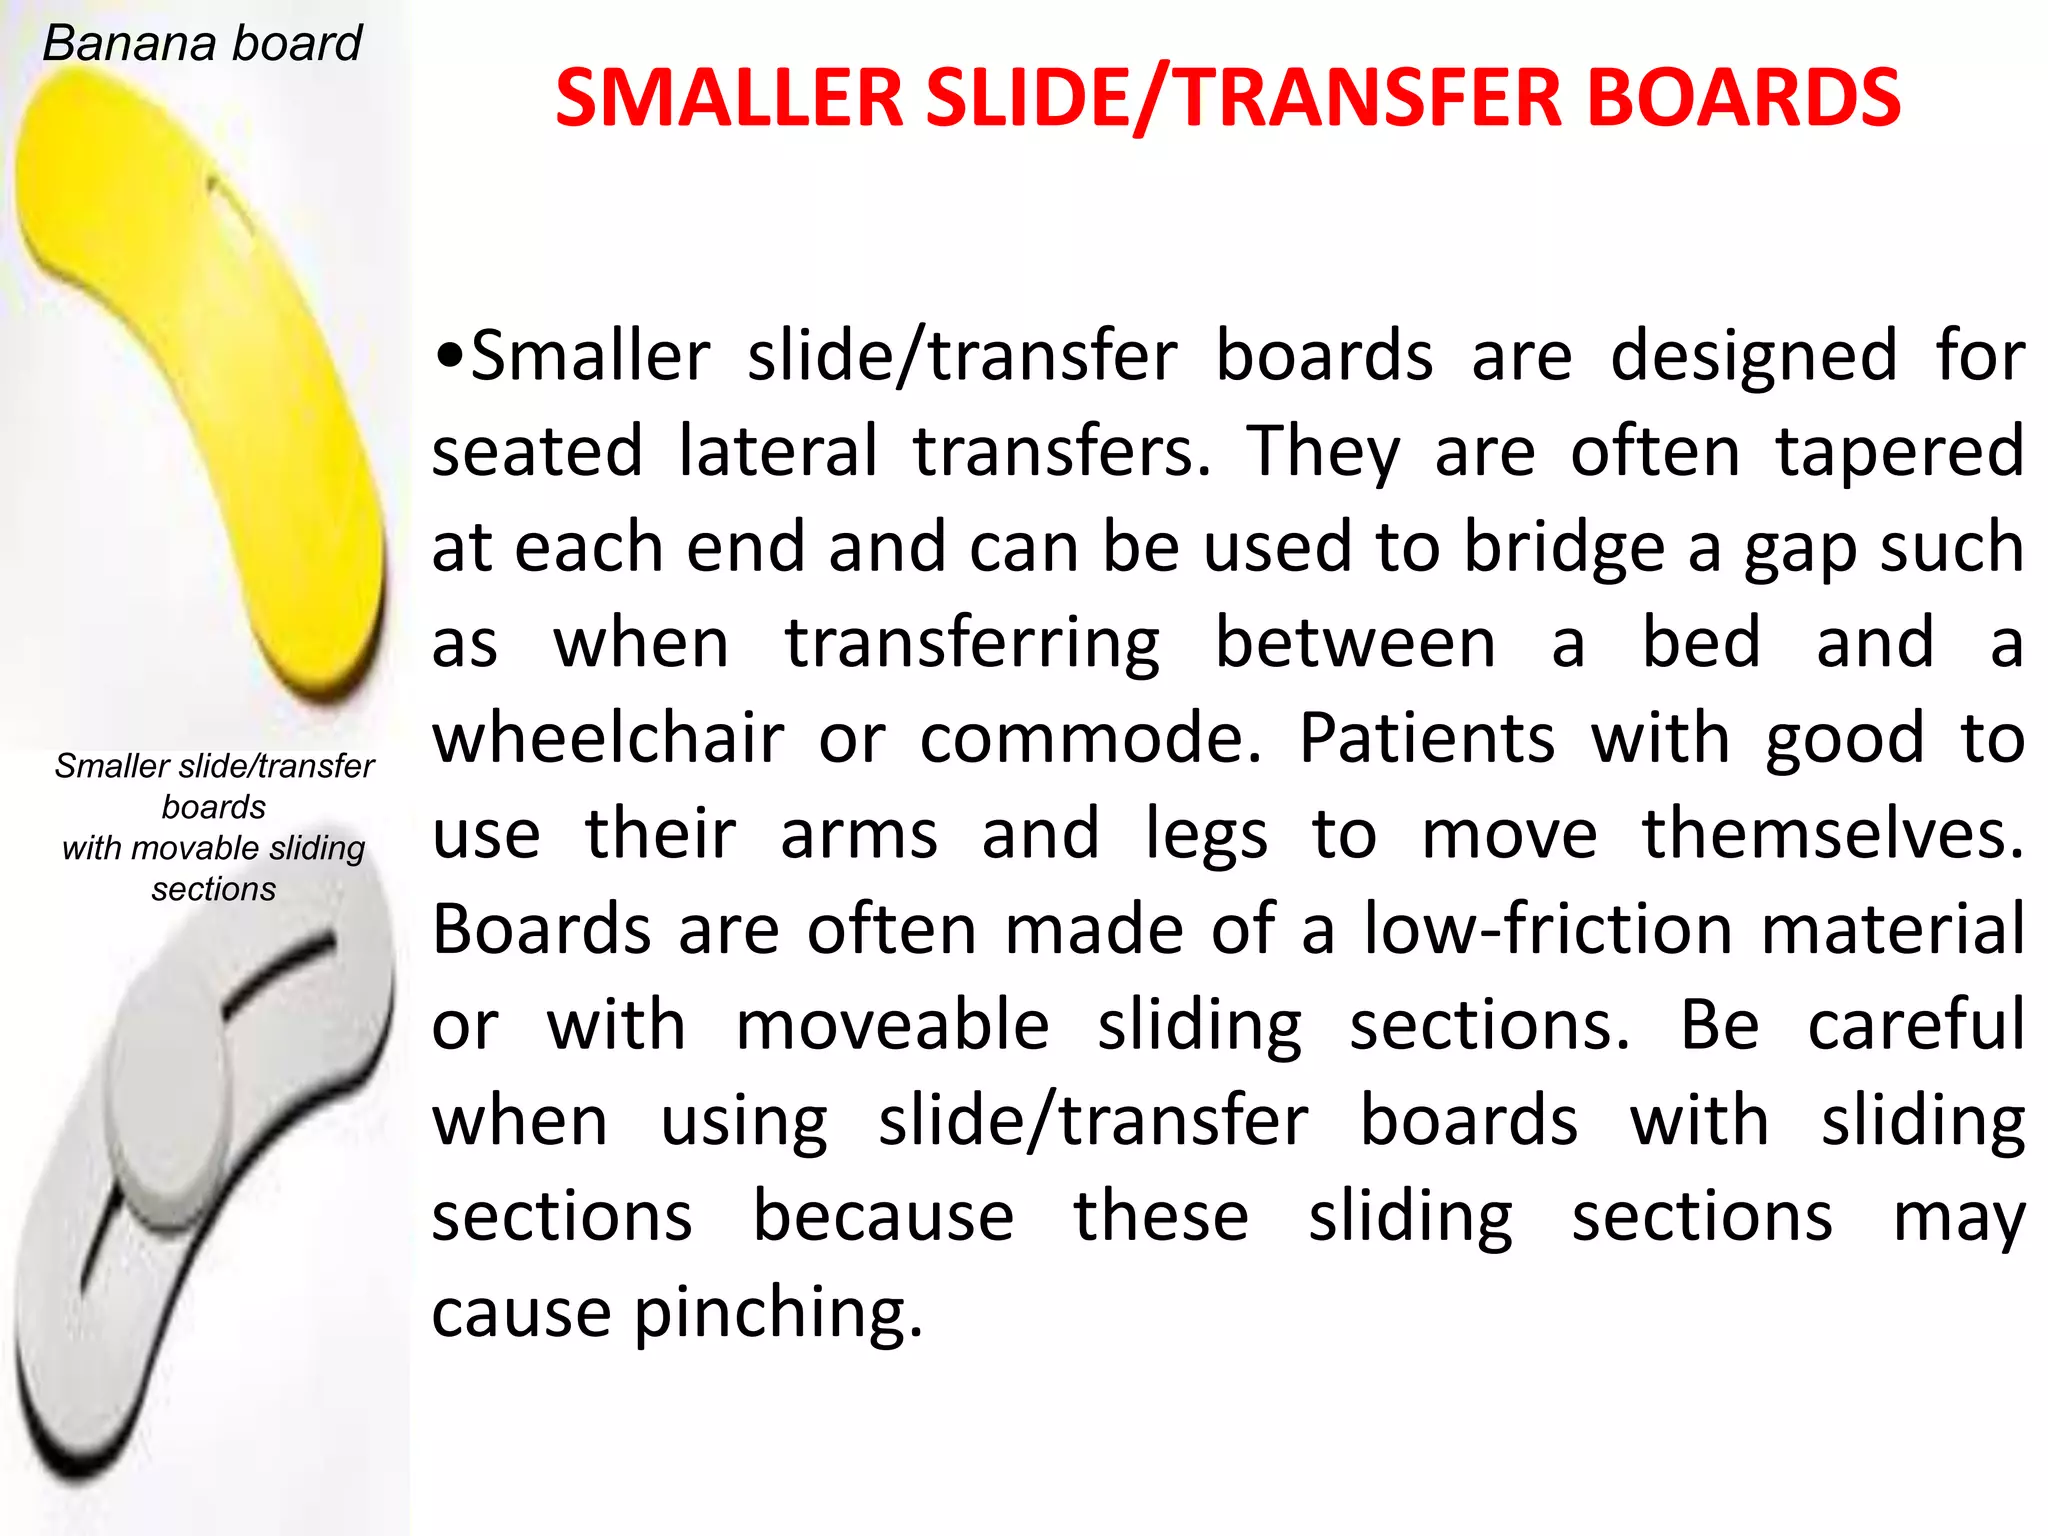
Banana board
                            SMALLER SLIDE/TRANSFER BOARDS

                         •Smaller slide/transfer boards are designed for
                         seated lateral transfers. They are often tapered
                         at each end and can be used to bridge a gap such
                         as when transferring between a bed and a
Smaller slide/transfer   wheelchair or commode. Patients with good to
       boards
with movable sliding     use their arms and legs to move themselves.
      sections
                         Boards are often made of a low-friction material
                         or with moveable sliding sections. Be careful
                         when using slide/transfer boards with sliding
                         sections because these sliding sections may
                         cause pinching.
USES

•Slide/transfer boards can be used to
bridge gaps between two surfaces to
facilitate patient transfer, such as between:
•Bed and wheelchair
•Wheelchair and toilet
•Chair and wheelchair
•Wheelchair and car
•Rolling slide boards can be used when
transferring supine patients between bed
and stretcher.
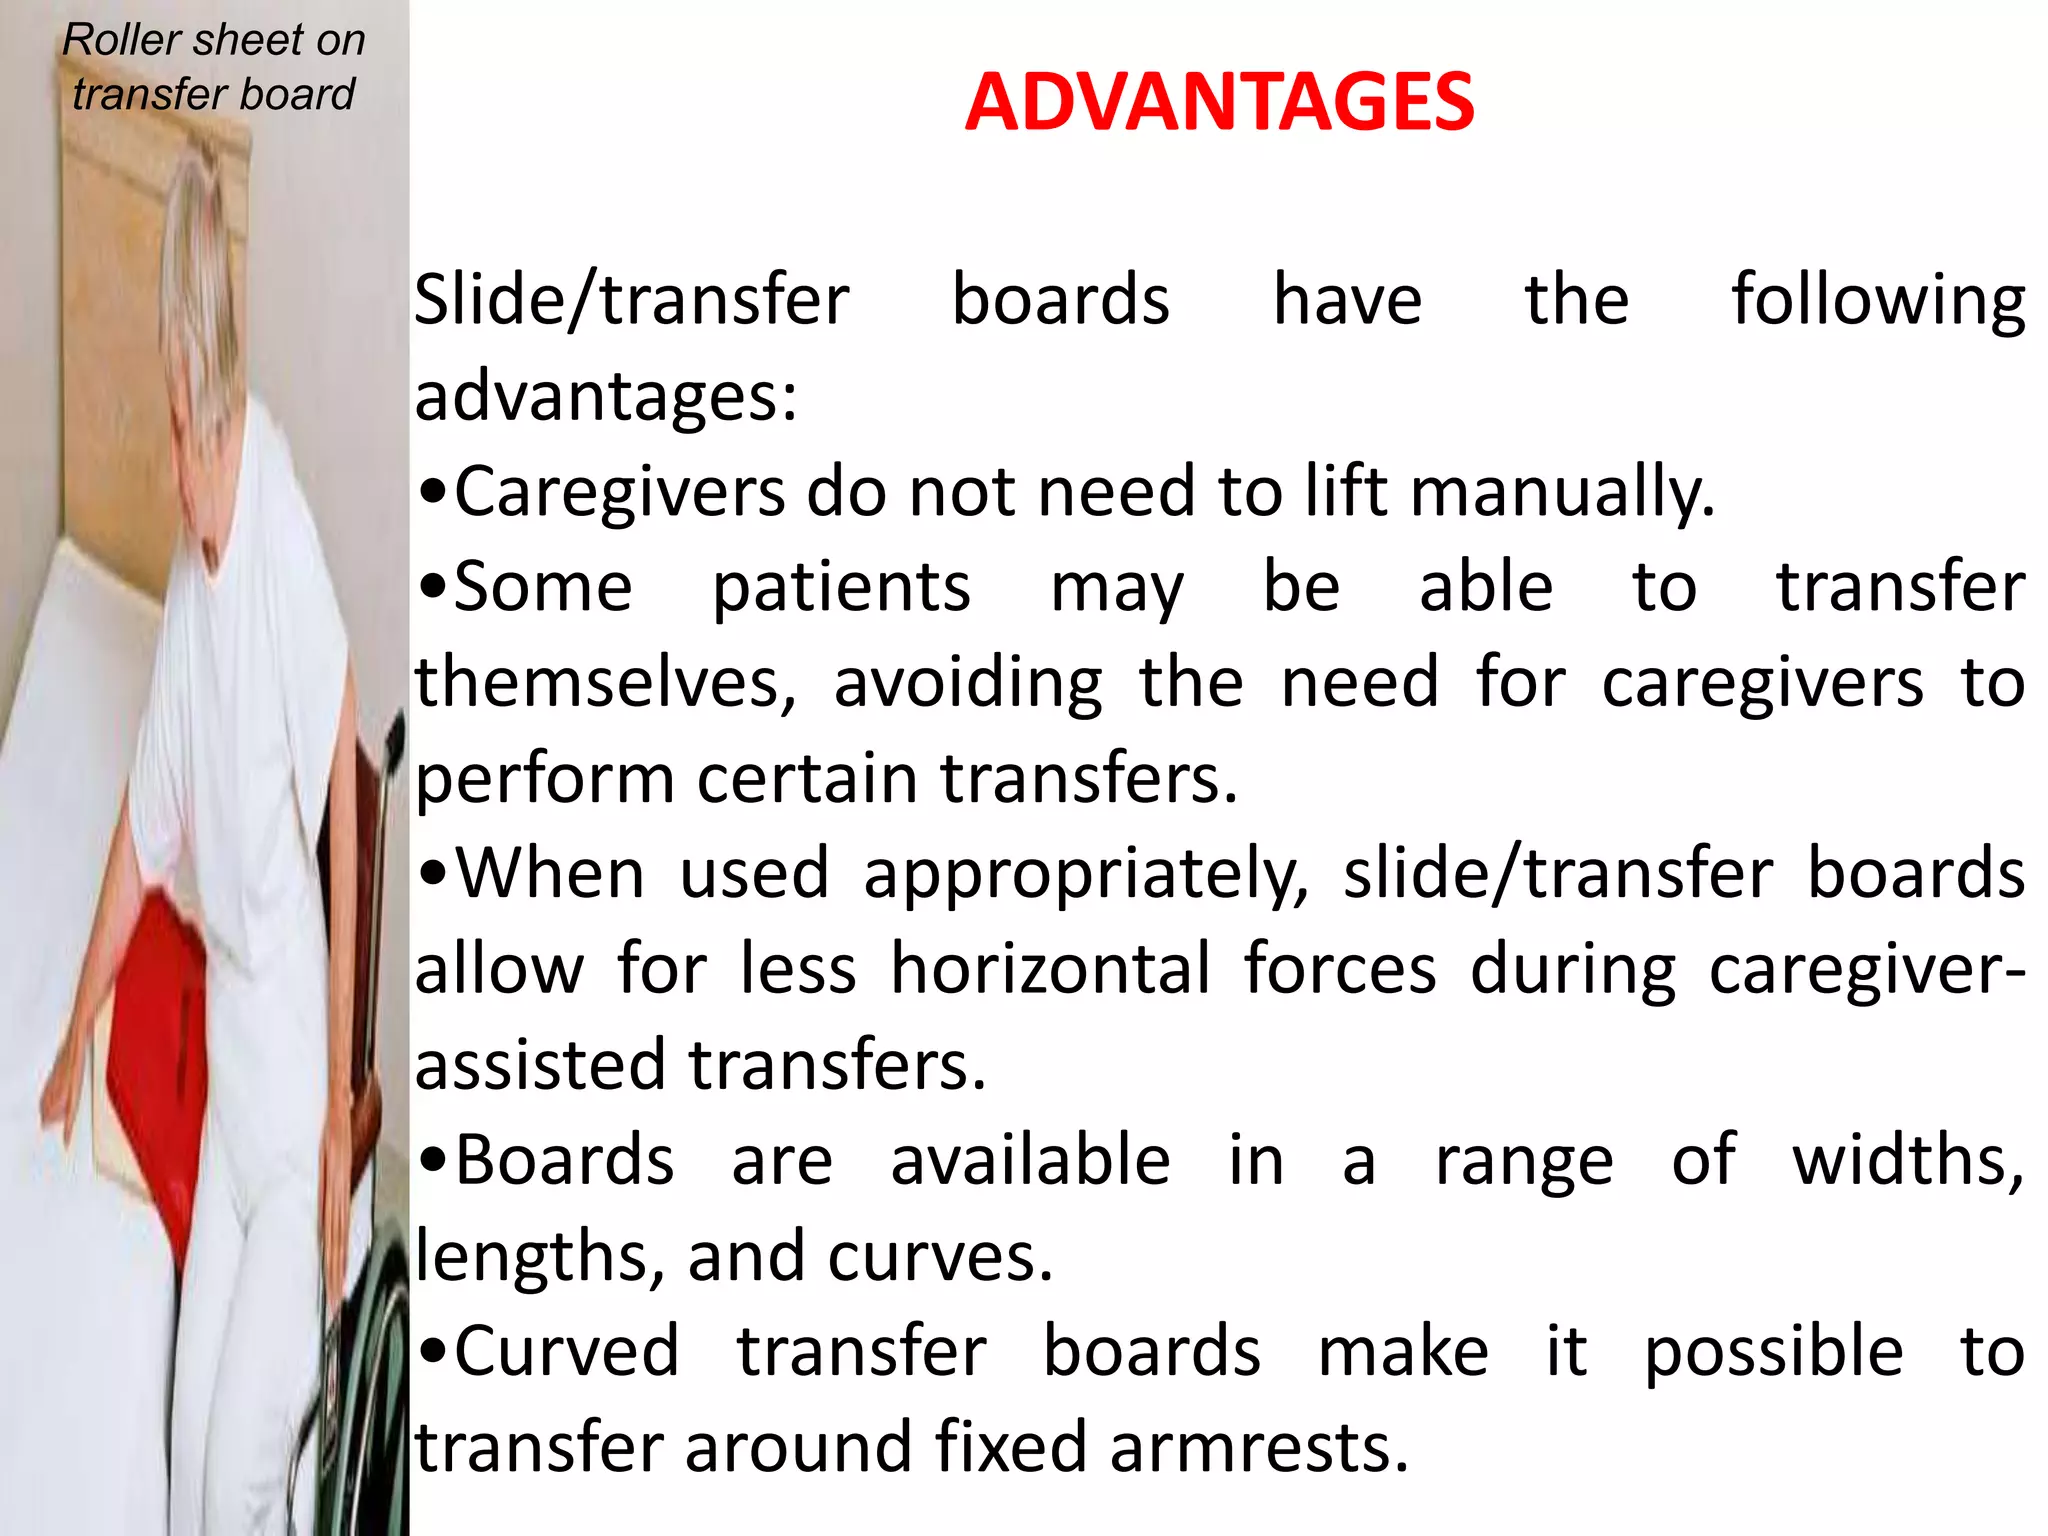
Roller sheet on
transfer board                     ADVANTAGES

                  Slide/transfer boards have the following
                  advantages:
                  •Caregivers do not need to lift manually.
                  •Some patients may be able to transfer
                  themselves, avoiding the need for caregivers to
                  perform certain transfers.
                  •When used appropriately, slide/transfer boards
                  allow for less horizontal forces during caregiver-
                  assisted transfers.
                  •Boards are available in a range of widths,
                  lengths, and curves.
                  •Curved transfer boards make it possible to
                  transfer around fixed armrests.
DISADVANTAGES

Slide/transfer boards have the following
disadvantages:
•Inappropriate use (for example, with
patients who cannot offer sufficient
assistance) may put caregivers at a high risk
of MSI.
•Some slide/transfer boards do not
sufficiently reduce friction.
•Two equal-height surfaces are needed for
easy transfer. For seated transfers, patients
must have some degree of sitting balance.
•Many boards have no handles for
positioning or carrying the board.

•Caregivers must be careful not to twist
during the transfer.

•Caregivers may still apply horizontal forces
in awkward postures.

•Fingers may be trapped under board
edges.
TIPS
Follow these tips when using slide/transfer
boards:

•When transferring a patient between two
surfaces, ensure the receiving surface is a
little bit lower (no more than 2.5 centimetres
or one inch) to allow gravity to assist. Avoid a
difference of more than 2.5 centimetres as
this may be too jarring for the patient.

•Use of a flat sheet directly under the patient
will increase the ease of the transfer because
it will provide the caregivers with something
to grasp onto when pulling the patient onto
the bed/stretcher
•If the patient is lying on a fitted
sheet, do not use the sheet for the
transfer. It’s difficult to keep the sheet
taut during the transfer, and it creates
more friction with the slide/transfer
board, thereby increasing the force
required by the caregiver.

•When applicable, place the receiving
surface to the patient’s stronger side.
TURNING DISCS

                •Turning or pivot discs come in
                various sizes and may be flexible or
                solid. They consist of two circular
                discs that rotate against each other.
                The inner surfaces are made of low-
                friction material, while the outer
                surfaces are typically high-friction
                material. Turning discs are often used
                with transfer boards or transfer belts.
Turning discs
FLEXIBLE TURNING DISCS

•Flexible turning discs conform to the
contours of a surface and are most
useful for pivoting seated patients (for
example, when transferring patients
into vehicles). The inner surfaces are
typically low-friction plastic or other
synthetic material. The top is often
made of quilted or padded fabric for
comfort.
SOLID TURNING DISCS

•Solid turning discs are more durable and
are used for pivoting patients who are
weight bearing and can stand. Solid turning
discs are usually made of wood or moulded
plastic and may contain bearings. Patients
who are weight bearing and can balance
when standing may be guided to a standing
position and swivelled around without
having to adjust their feet.
Patients must have the strength to stand, or
this procedure will require the caregiver to exert
excessive force in an awkward posture. Use
transfer belts with handles to pivot patients
standing on flexible or solid turning discs. Use
turning discs only for patients who can stand up
independently. Patients who are unable to
independently rise to a standing position require
a sit-stand or total body lift.
USES

Turning discs assist with rotation of
patients during a transfer between:

•Wheelchair and bed

•Wheelchair and chair

•Wheelchair and car
ADVANTAGES

Turning discs have the following
advantages:

•The patient’s feet do not need to be
turned or adjusted after the transfer.

•Some discs have a small handle that
makes positioning and storing easier.

•Turning discs reduce the forces required
to rotate or pivot patients.
DISADVANTAGES

Turning discs have the following disadvantages:

•The larger the disc, the greater the risk that the
disc will be in the way of the caregiver’s feet.

•Some solid discs have ball bearings in their
swivel mechanism.

•Choose and use these discs with care. They can
be difficult to control, especially with light
patients.
•Do not use turning discs to transfer unpredictable
patients or dependent, non-weight-bearing
patients.

•The greater the profile (thickness) of a solid disc,
the greater the tripping hazard it presents to the
patient and caregiver.

•A patient’s support base is narrowed while
standing on a turning disc.

•Some patients may become disoriented when
they are turned on the disc.

•Heavy patients may still require excessive force to
move them.
TIPS

Follow these tips when using turning discs:

•For standing pivots, only one of the patient’s feet
should be placed on the solid disc. The patient must
be able to use the other leg to guide the pivot
motion.

•For standing pivots, the patient’s foot should be
placed in the centre of the disc.

•Remove obstacles.

•Place caregivers’ feet shoulder-width apart for a
good base of support.
Assessment
Prior to lifting any object or materials an assessment of
the most appropriate method of lifting should be
completed. Plan the lift in your mind - organize the lift so
that it will be best for you and your co-workers.

• If you are uncertain about your ability to lift an object
safely, get help! Never “go it alone.” Try the heft test. Get
an idea if you can manage the lift.

• Always consider proper positioning of the spine and
upper extremity to prevent injury.

• If you have an idea how the lift or environment could
be improved, talk to your manager. Taking a few seconds
to consciously prepare for the lift may prevent you or a
co-worker from days, months or years of pain.
Assessment before starting a lift or
transfer is essential.

A good assessment
• Ensures that the transfer/lift is
appropriate for the caregiver and
patient
• Aids in preventing back and
shoulder strain/injury to the caregiver
• Reduces the risk to the patient
and/or caregiver
An appropriate transfer/lift

• Is safe for the caregiver and patient

• Enables the patient to be as
independent as possible

• Is comfortable for the patient

• Provides the least wear and tear on
the back and shoulders of the
caregiver
Why is consistency important?
• Unexpected incidences or lack of patient
cooperation are often contributing factors in
injuries to caregivers. When the lifting technique
is consistent the patient is more likely to
cooperate and be less anxious.

Who should do the assessment?
• The nurse is responsible for assessing the
patients transfer/lift needs.

•     Physiotherapists   and/or    Occupational
Therapists are available for consultation
concerning complex cases. A referral may be
required if intervention to improve transfers is
indicated.
When should the initial assessment be done?
• The admitting nurse should do the assessment
of the most appropriate lift/transfer at the time
of admission.
• The accepted lift/transfer should be noted on
the admission history and the Kardex.

What should be included in the initial
assessment?
• Caregiver status
• Assess the patients abilities (strength, ROM,
balance, etc)
• The environment
• Equipment available
When are lifts/transfers reassessed?

• A brief reassessment must be done every
time, before a caregiver intends to
lift/transfer a patient

• Reassessment is important because a
patient’s ability to assist and cooperate
may vary from day to day, or even at
different times during the same day
because of medication, fatigue, stress or
pain
•Reassessment may help to prevent those
unexpected incidents

• More formal reassessments are
necessary when a patient’s condition
improves or deteriorates. This ensure the
procedure listed on the kardex is most
appropriate

• Reassessment also helps to maintain a
high level of awareness
about patient handling
What needs to be reassessed?

• Change in medical status
• Patients ability to communicate
• Level of cognition
• Level of aggression
• Physical Abilities (ROM, strength)
• Environment
• Availability of Equipment
Caregiver Ability
FACTORS TO CONSIDER WHEN ASSESSING PATIENT HANDLING TASKS
PREPARATION

Preparing for the lift/transfer

1. Prepare the equipment
• Adjust position of the equipment (bed,
stretcher, wheelchair, etc)

• Adjustments to the chair include locking
brakes, checking cushion position (if
available), removing arm rests if necessary
for transfer/lift, positioning chair at
appropriate angle.
•Adjustments to the bed include locking
brakes, putting down side rails, adjusting
bed height (hip height if standing, mid
thigh height if knee on bed, level with
chair if using sliding board or hemi
transfer)


• Ensure all devices are in good working
order including belts, lifts,
slings
2. Prepare the patient

• Explain what you are about to do
with the patient

• A well-prepared patient can make
your workload easier!

• Ensure the patient places their
hands on the appropriate place to
assist with the lift i.e. the side rail. DO
NOT ALLOW THE PATIENT
TO     GRAB       AROUND     THE
CAREGIVERS NECK. This could lead
to neck injury or strain.

• Position the IV tubing/poles,
catheter     bags     and   other
appliances so that they do not
interfere with the transfer

• Maintain the patient’s dignity
3. Prepare the Caregiver

• Complete a brief reassessment to ensure appropriate lift
• Position the caregiver so the patient feels safe, the
patient can hear and see the caregiver, and with
appropriate body mechanics (the feet apart and knees
bent slightly)
• Discuss the plan with lifting partners
• Explain the plan to the patient including their role in the
transfer/lift
• Use simple instructions/one step commands
• Tighten abdominal muscles (core) before you lift.
Maintain normal spinal alignment by keeping a slight
inward curve just above the pelvis. Use the powerful leg
muscles to help with the handling
procedure
• Use both hands and hold the patient as close to
your body as possible. Never grasp the patient
under the arms. This can lead to injury or
subluxation
• Count with lifting partners so everyone moves
at same time “1,2,3,lift”
• Be prepared for the unexpected.
• If the load starts to slip or the patient starts to
fall, go with it. Try not to rotate. Protect the
patient’s head
• If the patient falls assess their condition before
returning them to bed
• Postpone the lift/transfer if the patient is
resistive, uncooperative or aggressive (if non
emergent)
4. The Environment

• Clear a working area

• Eliminate any obstacles

• Ensure adequate lighting

• Dry floor

• Minimize distracting noises
THE PRINCIPLES OF SAFER PATIENT HANDLING
Before the task:

• Wear the right clothes: Make sure your clothing
and footwear are appropriate – clothes should
allow free movement and shoes should be non-
slip, supportive and stable

• Never lift: Never plan to lift manually – always
use a hoist to lift a patient

• Know your limits: Know your own capabilities
and don’t exceed them – for
instance, if you need training in the technique to
be used, tell your manager
• Do one thing at a time: Don’t try to do two
things at once – for instance, don’t try to adjust
the patient’s clothing during the transfer

• Prepare for the task: Make sure everything is
ready before you start – for instance, check other
carers are available if needed, equipment is
ready and the handling environment is prepared

• Choose a lead carer: The lead carer checks the
patient profi le and co-ordinates the move. You
should also try to match the height of carers if
possible to avoid awkward postures
Apply safe principles: Always use safe
biomechanical principles – and use rhythm
and timing to aid the task.


caution – High risk. The patient shouldn’t
hold on to you or your clothing, because it
is diffi cult for you to disengage and the
patient could pull you off balance. It is
unsafe for carers and patients.
Safe biomechanical principles

Here’s the safe way to hold your body:
• Stand in a stable position: Your feet should be
shoulder distance apart, with one leg slightly forward
to help you balance – you may need to move your
feet to maintain a stable posture

• Avoid twisting: Make sure your shoulders and
pelvis stay in line with
each other

• Bend your knees: Bend your knees slightly, but
maintain your natural
spinal curve – avoid stooping by bending slightly at
the hips (bottom
out)
• Elbows in: Keep your elbows tucked in
and avoid reaching – the further away from
the body the load is, the greater the
potential for harm

• Tighten abdominal muscles: Tighten your
abdominal muscles to support your spine

• Head up: Keep your head raised, with
your chin tucked in during the movement

• Move smoothly: Move smoothly
throughout the technique and avoid fixed
holds.
Carrying out the task:

• Check patient profi le: Decide if the task is still
necessary and that the handling plan is still
appropriate. Check it still matches the clinical
pathway and physician’s orders

• Seek advice: Talk to your manager or the patient
handling adviser if you need advice on the
techniques and equipment you should be using

• Check equipment: Ensure equipment is available
in good order with all components in place and
ready to use (eg. batteries charged). Always follow
the manufacturer’s instructions
Prepare handling environment: Position furniture
correctly, check route and access ways are clear, and
check the destination is available

• Explain the task: Explain the task to the patient and
other carers who will be helping

• Prepare the patient: Ensure the patient’s clothes and
footwear are appropriate for the task, and they have
any aids they need. Adjust their clothes, aids and
position – for instance, encourage the patient to lean
forward

• Give precise instructions: The lead carer directs the
move and gives clear instructions, eg. “Ready, steady,
stand”. This helps carer/s and patient work together.
After the task:
• Correct your posture: Stand up straight to
correct your spinal alignment. Hold your chest
open, shoulders back and abdominal muscles in
so your lower body aligns properly with your
upper body

• Re-evaluate the task: Could the task have been
done better? How? Mark the patient profile with
your comments

• Report any issues: If you identify issues that
affect patient handling, report them to your
manager and add them to the workplace control
plan for action.
MOVING PATIENTS FROM BED TO
            WHEELCHAIR


Remember: When patients are weak,
brace your knees against theirs to keep
their legs from buckling. Also, transfer
toward patient’s stronger side if possible.
1
    .Sit the Patient Up
    •Position and lock the
    wheelchair close to the bed.
    Remove armrest nearest
    bed and swing away both
    leg rests.

    •Help the patient turn over.

    •Put an arm under        the
    patient’s neck with     your
    hand     supporting      the   •Swing legs over
    shoulder blade; put     your   the edge of the
    other hand under         the   bed, helping the
    knees.                         patient to sit up.
2.Stand the Patient Up
•Have the patient scoot to the edge of the
bed.

•Put your arms around the patient’s chest
and clasp your hands behind his or her
back. Or, you may also use a transfer belt to
provide a firm handhold.
•Supporting the leg farthest from the
wheelchair between your legs, lean back,
shift your weight, and lift.
3. Pivot Toward Chair

•Have the patient
pivot toward the
chair, as you continue
to clasp your hands
around the patient.

•A helper can support
the wheelchair or
patient from behind.
4. Sit the Patient Down

•As the patient bends toward you, bend
your knees and lower the patient into the
back of the wheelchair.


•A helper may position the patient’s
buttocks and support the chair.
PULLING A PATIENT UP IN BED
1. Grasp the Draw-
Sheet
•Put the head of the
bed down and
adjust the top of the
bed to waist- or hip-
level of the shorter
person.

•Grasp the draw-
sheet, pointing one
foot in the direction
you’re moving the
patient.
•Lean in the direction
of the move, using
your legs and body
weight.

•On the count of
three, lift and pull the
patient up. Repeat
this step as many
times as needed to
position the patient.
•Also, patients can bend their knees, push down
with their feet, and pull up with a trapeze (a
device overhead) to help
Remember:
  Putting a pillow under your patients’
  feet helps them push down, making it
  easier for you to pull them up.
  Never clasp the underarm to move the
  patient. This may cause injury to the
  shoulder (i.e., dislocation).
TURNING PATIENTS OVER IN BED


1.Cross Arms
•Put the bed rail and head of the bed down;
adjust the top of the bed to waist- or hip-level.

•Cross the patient’s arms on his or her chest;
bend the leg farther away from you.
2.Turn the Patient

                             •Put one hand behind
                                the patient’s far
                                   shoulder.
                             •Put your other hand
                              behind the patient’s
                                      hip.


•Turn the patient, supporting the patient’s
leg with your knee.
Remember: Putting one knee on the bed gets you closer
to the patient, so you pull more with you
MOVING PATIENTS FROM BED TO
         STRETCHER (GURNEY)

   Remember: If you move patient’s legs
   first, you can decrease the stress on
   your back by as much as a third.

•Patient safety is often the main concern when
moving patients from bed. But remember not to
lift at the expense of your own back. And, never
move a patient by yourself. Two people usually
can do this move safely. The leader, who pulls,
should be the stronger of the two. The helper
holds the draw-sheet, neither pushing nor lifting.
1

    The leader should have one
    foot forward with knees
    bent.

    1.Prepare to Move
    •Put the head of the
    bed down and adjust
    the bed height.
                                 •Move the patient’s
                                 legs closer to the edge
    •Put a garbage bag or
                                 of the bed.
    plastic    slide   board
                                 •Instruct patient to
    between the sheet and
                                 cross arms across chest
    draw-sheet,      beneath
                                 and explain move to
    one edge of the
                                 patient.
    patient’s torso.
2. Pull to Edge of Bed
Grasp the draw-sheet on both sides of the bed.
•On the count of three, lean back and shift your
weight, sliding the patient to the edge of the bed.
The helper holds the sheet, keeping it from
slipping.
3.Position Stretcher
•Have the helper “cradle” the patient in the
draw-sheet while you retrieve a stretcher.
•Adjust the bed to be slightly higher than the
stretcher. Then, position the stretcher, locking it
in place.
•Move the patient’s legs onto the stretcher.
4. Slide onto
Stretcher
•Have the helper
kneel on the bed,
holding on to the
draw-sheet.

•On the count of
three, grasp the
draw-sheet and
slide the patient
onto the stretcher.
You may need to
repeat this step.
TRANSFERRING USING A TRANSFER BOARD

        A caregiver may use a gait belt to
        help you move across the transfer
        board.
                              Using a Transfer Board
                          1. Place the wheelchair
                          as close to the bed as
                          possible, and position it
                          at about a 30-degree
                          angle with the bed.


2. Lock the brakes on the wheelchair, move the
footrests out of the way, and remove the armrest
on the side closest to the patient.
3. Help the patient to sit on the edge of the
bed with his feet flat on the floor.

4. Help the patient to lean over slightly away
from the wheelchair, and carefully slide one
end of the transfer board under the thigh that
is closest to the wheelchair. Point the end of
the board down into the bed as you do this, to
avoid pinching the patient's skin.

5. Place the other end of the transfer board
flat on the seat of the wheelchair with the end
of the board pointed at the back seat corner
farthest from the bed.