

Recommended
More Related Content
What's hot
What's hot (20)
Viewers also liked
Similar to Working with faces
Similar to Working with faces (20)
More from Practiques2
More from Practiques2 (20)
Recently uploaded
Recently uploaded (20)
Working with faces
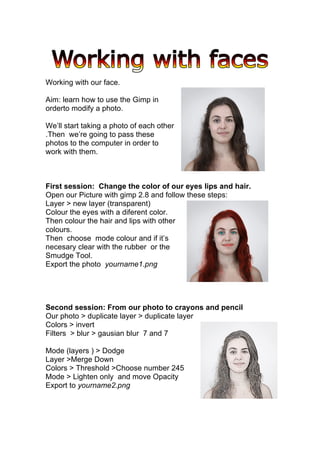
- 1. Working with our face. Aim: learn how to use the Gimp in orderto modify a photo. We’ll start taking a photo of each other .Then we’re going to pass these photos to the computer in order to work with them. First session: Change the color of our eyes lips and hair. Open our Picture with gimp 2.8 and follow these steps: Layer > new layer (transparent) Colour the eyes with a diferent color. Then colour the hair and lips with other colours. Then choose mode colour and if it’s necesary clear with the rubber or the Smudge Tool. Export the photo yourname1.png Second session: From our photo to crayons and pencil Our photo > duplicate layer > duplicate layer Colors > invert Filters > blur > gausian blur 7 and 7 Mode (layers ) > Dodge Layer >Merge Down Colors > Threshold >Choose number 245 Mode > Lighten only and move Opacity Export to yourname2.png
- 2. We can modify with others effects : • Filters> Artistic > cartoon. Export to yourname3.png • Colours > Threshod move the arrow over 200 and the Picture wil be in black and white. Export to yourname 4.png Third session: Draw your face profile With the scissor you click all around the face The selection is closed when you are clicking the last point over the first one. The selection is validate when you click inside. At this point you select a black brush and colour the face. After that Select > Invert and you select all the rest of the Picture. You choose another colour for the brush and you colour the outside of the face. To finish Select > None. Now you can add you name: Folder > create > logo . Export to yourname 5.png You can add efects: Filters > Distorts > Newsprint Export to yourname 6.png