Plaster-of-Paris
and
Plaster Technique
Ashish Tripathi ,Intern,
Dept. of Orthopaedics,
BPKIHS
2.
Contents:
Plaster-of-Paris:
1) Historical Background
2) Uses of POP
3) Types of Plaster Cast
4) Steps in Application of POP Cast
5) Common errors in Application of POP Cast
6) Complications of POP Cast
7) After Care
3.
Orthopaedic Uses ofCast
1) To support fractured bones, controlling
movement of the fragments and resting the
damaged tissues
2) To stabilise and rest joints in ligamentous injury
3) To support and immobilise joints and limbs
post-operatively until healing has occurred
4) To correct a deformity
5) To ensure rest of infected tissues
6) To make a negative mould of a part of body.
4.
Materials available forcasting
Plaster-of-Paris
Plaster-of-Paris with melamine resins
Materials which undergo polymerisation:
a. water activated
b. non-water activated
Low-temperature thermoplastics
5.
PLASTER-OF-PARIS
The name POP is derived from an accident to
a house built on a deposit of Gypsum, near
Paris. The house burnt down. When rain fell
on baked mud of the floors it was noted that
footprints in mud set rock-hard.
Plaster-of-paris bandages were first used by
Matthysen, a Dutch military surgeon in 1952.
6.
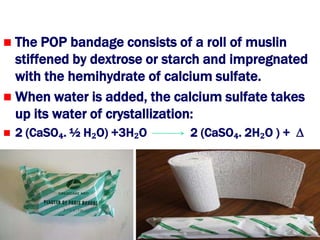
The POPbandage consists of a roll of muslin
stiffened by dextrose or starch and impregnated
with the hemihydrate of calcium sulfate.
When water is added, the calcium sulfate takes
up its water of crystallization:
2 (CaSO₄. ½ H₂O) +3H₂O 2 (CaSO₄. 2H₂O ) + ∆
7.
Setting time:time taken to change from
powder form to crystalline form.
Drying time: time taken to change from
crystalline form to anhydrous form.
Average setting time: 3-9 minutes
Average drying time: 24-72 hours
8.
Factors decreasing setting time:
1) Hot water
2) Salt
3) Borax
4) Resin
Factors increasing setting time:
1)Cold water
2)sugar
9.
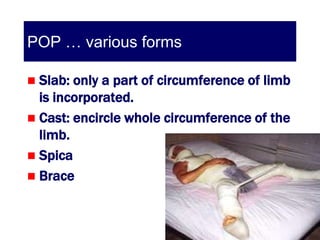
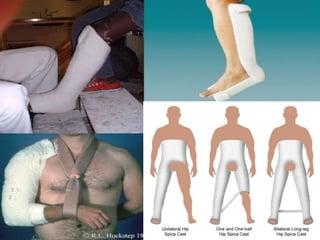
POP … variousforms
Slab: only a part of circumference of limb
is incorporated.
Cast: encircle whole circumference of the
limb.
Spica
Brace
11.
Advantages
Cost-effective
Non-allergic
Easily moulded to different forms
Disadvantages:
1) Radio-opaque so may occlude # lines
2) Heavy
3) Easily breaks when comes in contact with water
12.
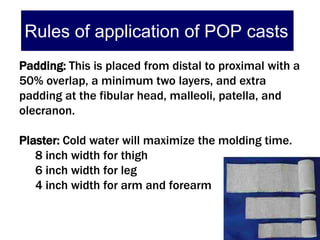
Rules of applicationof POP casts
Padding: This is placed from distal to proximal with a
50% overlap, a minimum two layers, and extra
padding at the fibular head, malleoli, patella, and
olecranon.
Plaster: Cold water will maximize the molding time.
8 inch width for thigh
6 inch width for leg
4 inch width for arm and forearm
13.
Rules of applicationof POP casts
8 inch for thigh,6 inch for leg and 4 inch for forearm.
One joint above and one joint below.
Moulded with palm and not with fingers to avoid
indentation.
Joints should be immobilized in functional position.
Not too tight or too loose i.e. adequate padding
Dip pop vertically in water till air bubble ceases to
come
Uniform thickness of plaster is preferred.
14.
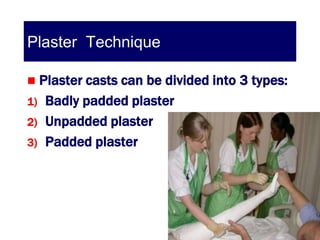
Plaster Technique
Plastercasts can be divided into 3 types:
1) Badly padded plaster
2) Unpadded plaster
3) Padded plaster
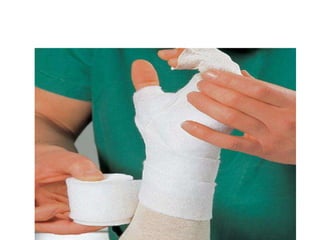
Unpadded Plaster
Made by applying the turns of wet
bandage directly to the skin without
using any textile. (used by Böhler)
For practical purposes, if stockinet is
used the resulting plaster can still be
regarded as an unpadded cast.
17.
Unpadded Plaster
Thecloseness of its application to the
limb and actual adhesion to the skin, is
believed to enhance fixation of a fracture.
Considerably easier to learn than padded
plaster technique.
Bandage should never be pulled tight .
Bandage should be made to roll itself
round the limb.
19.
Unpadded Plaster
Shouldbe applied by laying the wet roll
of plaster on the skin and pushing it
round the curves of limb with flat of
hand.
The roll of plaster should not be lifted off
the limb and pulled.
20.
Unpadded Plaster
Recommonded in 3 condition by sir
Charnley:
1) Colles’ fracture
2) scaphoid fracture
3) Bennett’s fracture
21.
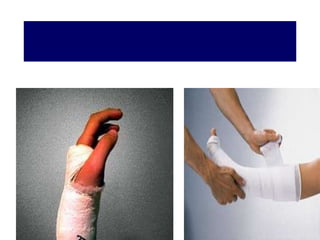
Padded plaster cast
A layer of cotton-wool is interposed
between the skin and plaster, which is
firmly compressed against the limb by
applying wet plaster bandage under
tension.
The elastic pressure of the cotton
enhances the fixation of limb by
compensating for shrinkage in tissues .
22.
Padded plaster cast
When expertly applied, these plasters grip the
limb more firmly and keep this grip for longer
time than unpadded one.
The care with which cotton is applied is
essential for success. It must not obscure the
shape of limb by being put on in careless and
ugly lumps.
The cotton if not rolled already, should be
carefully prepared in rolls before application.
23.
Padded plaster cast
The roll of bandage remains in contact with
surface of limb almost continuously.
Bandage is pressed and pushed round the
limb by the pressure of thenar eminence
under a strong pushing force directed in
length of surgeon’s forearm.
Pressure is applied at the middle of width of
bandage so that no excess of pressure can
fall on either edge .
25.
Padded plaster cast
Each turn is applied slowly and is settled
carefully in position.
At tapering parts of the limb, the turns are
made to lie evenly by small tucks which are
made with quick movement of index finger of
left hand.
The durability of the cast depend on welding
together of individual turns by smoothing
movements of left hand.
Each layer must be applied with equal
deliberation.
26.
Padded plaster cast
The hall-mark of good plaster is that it
should be of even thickness from end to
end.
Never apply two turns in the same place
except at the ends.
Have a progressive ‘backward and forward
rhythm’ from top to bottom.
27.
Triple sequence inPlaster
Application
Phase 1: examination and rehearsal
Phase 2: plastering
Phase 3: reduction and holding
28.
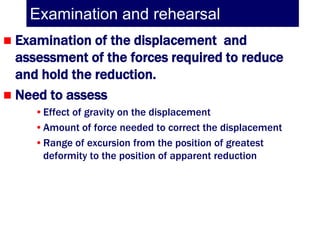
Examination and rehearsal
Examination of the displacement and
assessment of the forces required to reduce
and hold the reduction.
Need to assess
•Effect of gravity on the displacement
•Amount of force needed to correct the displacement
•Range of excursion from the position of greatest
deformity to the position of apparent reduction
29.
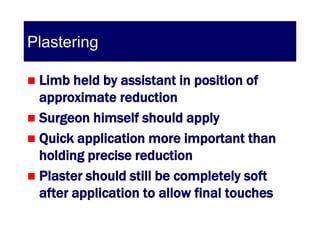
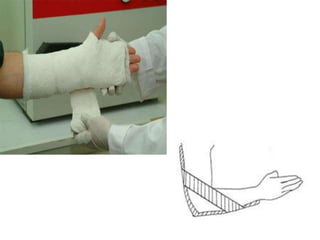
Plastering
Limb heldby assistant in position of
approximate reduction
Surgeon himself should apply
Quick application more important than
holding precise reduction
Plaster should still be completely soft
after application to allow final touches
31.
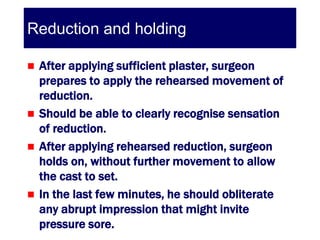
Reduction and holding
After applying sufficient plaster, surgeon
prepares to apply the rehearsed movement of
reduction.
Should be able to clearly recognise sensation
of reduction.
After applying rehearsed reduction, surgeon
holds on, without further movement to allow
the cast to set.
In the last few minutes, he should obliterate
any abrupt impression that might invite
pressure sore.
32.
Not to forget!!!
CheckX Ray should be done after
application of each cast to
confirm the acceptability of
reduction.
33.
Errors in applyingPadded Plasters
1. Attempting to plaster at the same time as
attempting to hold a precise reduction.
2. Applying wool carelessly in shapeless
lumps
3. Loose bandaging
4. Wellington boot effect
5. Failing to recognise sensation of reduction
through the plaster
34.
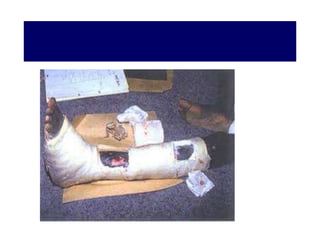
Windowed Plasters
Not usuallyencouraged
Danger of edematous tissue herniating
through the window
Indicated in-
Compound fractures discharging copious
pus
Compound fractures grafted with pinch
graft or Thiersch graft
36.
After care ofPOP
Instructions to be given after applying POP:
1. Come immediately if any of following symptoms
develops:
A) Exessive pain,
B) Exessive swelling,
C) Bluish or white discolouration of fingers or toes
2. Keep the plaster cast dry.
3. Mobilize all the joints which are not incorporated in
the plaster to their full range of motion once
plaster becomes dry.
37.
After care ofPOP
4. Notice any cracks in the plaster.
5. Graduated weight bearing for lower limb
fractures.
6. Physiotherapy of muscles within the plaster
and joints outside the plaster is necessary
to ensure early rehabilitation.
38.
Complications of POP
Due to tight cast
-pain
-pressure sores
-compartment syndromes
-peripheral nerve injuries
c/o unrelenting pain,stretch pain, swelling over
fingers, inability to move fingers, hypoaesthesia
and bluish discolouration of the digits.
39.
Complications of POP
Due to improper applications
-joint stiffness
-plaster blisters and sores
-breakage
Due to plaster allergy
-allergic dermatitis
References
The ClosedTreatment of Common
Fractures by Sir John Charnley.
Chapman’s orthopaedis surgery 3rd
edition.
Rockwood and Green’s Fracture in
adults.
Traction and Orthopaedic Appliances by
Stewart.
Essential orthopaedics by J. Maheshwari.


![Care of bedridden patient [cast]](https://cdn.slidesharecdn.com/ss_thumbnails/careofbedriddenpatientcast-210720163147-thumbnail.jpg?width=640&height=640&fit=bounds)


