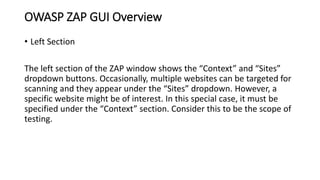
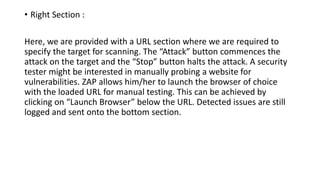
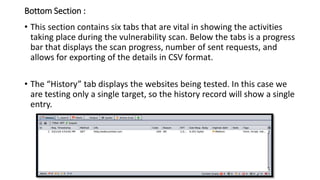
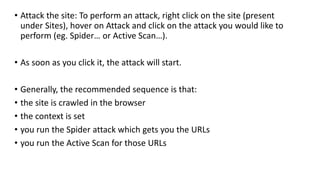
OWASP ZAP
Kalkey.com
What is ZAP
• The OWASP Zed Attack Proxy (ZAP) is one of the world’s most popular
web application security testing tools. It is made available for free as
an open source project, and is contributed to and maintained by
OWASP. The Open Web Application Security Project (OWASP) is a
vendor-neutral, non-profit group of volunteers dedicated to making
web applications more secure. The OWASP ZAP tool can be used
during web application development by web developers or by
experienced security experts during penetration tests to assess web
applications for vulnerabilities.
• The OWASP Zed Attack Proxy is a Java-based tool that comes with an
intuitive graphical interface, allowing web application security testers
to perform fuzzing, scripting, spidering, and proxying in order to
attack web apps. Being a Java tool means that it can be made to run
on most operating systems that support Java.
Why ZAP
• Here are few facts that the ZAP is found to be a good choice for
security testing.
• Free, Open source
• · Involvement actively encouraged
• · Cross platform
• · Easy to use Easy to install
• · Fully documented with comprehensive help pages.
• · Work well with other tools (Jenkins)
• · Under active development
Features of ZAP
• Here are few features of ZAP tool
• Intercepting Proxy
• Active and Passive Scanners
• Traditional and Ajax Spiders
• WebSockets support
• Forced Browsing (using OWASP DirBuster code)
• Fuzzing (using fuzzdb & OWASP JBroFuzz)
• Lets see how to set up OWASP ZAP.
Launching the OWASP Zed Attack Proxy
• OWASP ZAP is found by default within the latest Kali Linux 2.0
Penetration Testing Linux distribution. It can be launched by
navigating to the “Applications” menu and selecting the “Web
Application Assessment” option. A list will appear showing the
different tools used for web app security testing. Here we click on the
OWASP ZAP tool and wait for it to launch. This can be seen below:
• To launch OWASP ZAP via the terminal, simply type in “owasp-zap”.
• Note that, on first launch, a license agreement shows up that we are
required to accept before proceeding. It is important to read this in
order to understand the implications of using the tool in different
jurisdictions.
• The GUI launches and ZAP asks us whether we would like to work
within a persistent session where our results are regularly saved so
that we can resume testing the web application.
OWASP ZAP GUI Overview
• Left Section
The left section of the ZAP window shows the “Context” and “Sites”
dropdown buttons. Occasionally, multiple websites can be targeted for
scanning and they appear under the “Sites” dropdown. However, a
specific website might be of interest. In this special case, it must be
specified under the “Context” section. Consider this to be the scope of
testing.
• Right Section :
Here, we are provided with a URL section where we are required to
specify the target for scanning. The “Attack” button commences the
attack on the target and the “Stop” button halts the attack. A security
tester might be interested in manually probing a website for
vulnerabilities. ZAP allows him/her to launch the browser of choice
with the loaded URL for manual testing. This can be achieved by
clicking on “Launch Browser” below the URL. Detected issues are still
logged and sent onto the bottom section.
Bottom Section :
• This section contains six tabs that are vital in showing the activities
taking place during the vulnerability scan. Below the tabs is a progress
bar that displays the scan progress, number of sent requests, and
allows for exporting of the details in CSV format.
• The “History” tab displays the websites being tested. In this case we
are testing only a single target, so the history record will show a single
entry.
• The “Search” tab allows the tester to make searches that fit any
patterns. For instance, let us query all the GET requests that have
been made and, as shown below, we are presented with information
on all these.
• The “Alerts” tab gives more detail about the issues discovered on the
target being scanned. Issues are ranked by severity, with “Critical”
being considered highest on the risk index and shaded red, “High” of
considerable high risk and shaded orange, “Medium” of slight high
risk and shaded yellow, “Low” of that which could lead to either high
or medium risk, exposure of sensitive information or a compromise of
the target, and shaded blue.
• As can be seen above, seven issues have been discovered. We shall
revisit this as we take a look at how to attack websites.
• The “Spider” tab shows the files crawled (discovered) within the web
application. Spidering can be likened to Fuzzing, where the directories
and files resident on the website are discovered and logged for later
active vulnerability scanning.
• Spidering is important in discovering the entry points into the web
application and what links are beyond the scope of attack. A progress
bar is important in indicating the spidering progress as well.
• The last tab is the “Active Scan.” This is vital in showing the progress
of the ongoing scan in real time, with every processed file being
displayed.
Some Terminologies
• Session: A session simply means whatever you do in your ZAP, i.e. navigating through the
website you want to attack. This is done so as to make ZAP browser understand the
depth in which URLs are to be hit. You can also use any other browser like Firefox, by
changing the proxy settings of that browser.
• You can save your session in ZAP with the extension .session and reuse it.
• Context: A context is the manner of grouping the URLs. When you need to hit the specific
set of URLs with particular user(s), host(s) etc. in your website, a context can be created
in ZAP which will ignore the rest and attack only the ones mentioned. This will help you
avoid the unnecessary heavy data coming your way.
• Attacks in ZAP: The purpose of this tool is to penetrate through the site, attack (hit) its
URLs, scan the URLs hit, and check how prone the site is to the various risks/attacks.
Following are the types of attacks which ZAP provides:
 Quick Attack: This helps you test the application using ZAP in the quickest way possible.
Under the tab Quick Start, put the URL in the URL to attack field and click on the 'Attack'
button.
 ZAP will use its spider to crawl through the application, which will automatically scan all of
the pages discovered. It will then use the active scanner to attack all of the pages. This is a
useful way to perform an initial assessment of an application.
 Spider: It is used to automatically discover new resources/URLs on your website. It visits
those URLs, identifies the hyperlinks and adds them to the list.
 Active Scan: It is used to find the potential vulnerabilities by using the known attacks against
the selected targets. It gets its targets from the spider attack.
 There are more attacks which ZAP provides, other than the ones mentioned above; like AJAX
Spider, Fuzz, Forced Browse Site etc.
 Alerts: Alerts are thrown as results of attacks performed by Spider/Active Scan (or any other
attack). Alerts are the potential vulnerabilities which are flagged as High, Medium, or Low
according to the risk level.
Steps to Run :
• Open / Launch ZAP
• Crawl the Browser: Either you can use ZAP’s browser or any other browser you want to.
• For using any other browser, go to the browser and go to Tools Menu -> Options ->
Advanced tab -> Network -> Settings -> Select Manual Proxy configuration - HTTP Proxy =
127.0.0.1 Port = 8080.
• You just need to open the browser, hit the URL of your website (to be attacked) and crawl
throughout the website. For crawling you can either use a tool or do it manually.
• The more you crawl the website, the more URLs ZAP will be able to find.
• Create a session: It is not mandatory to save a session. But if required, a
session can be saved and used again in future after you are done with
scanning the application. This is done before you start working on ZAP.
As soon as you launch ZAP, it asks you if you want to persist your session
and you can select the option accordingly.
• Create a context: To create a new context right click on the site (to be
attacked) and click on “Include in context”.
• Then click on “New Context” and a modal will open for you. In the
context, you can add specifics like Users, Authentication, Hostname etc.
as per your requirements.
• Attack the site: To perform an attack, right click on the site (present
under Sites), hover on Attack and click on the attack you would like to
perform (eg. Spider… or Active Scan…).
• As soon as you click it, the attack will start.
• Generally, the recommended sequence is that:
• the site is crawled in the browser
• the context is set
• you run the Spider attack which gets you the URLs
• you run the Active Scan for those URLs
Alerts :
• Check the Alerts: Once the attack is completed, you can check the
results in the Alerts tab. The alerts are classified as high, medium or
low.
What Is the Difference Between Active & Passive Scan?
• What is passive scan?
• In terms of penetration test, a passive scan is a harmless test that looks
only for the responses and checks them against known vulnerabilities.
Passive scan doesn’t modify your website data. So it’s really safe for the
websites that we don’t have permission. As you know OWASP number
1 vulnerability in 2018 is still Injection. And be aware that you can not
detect even a SQL Injection with passive scan.
• What is active scan?
• Active scan, attacks the website using known techniques to find
vulnerabilities. Active scan does modify data and can insert malicious
scripts to the website. So when you really test your website against
security issues deploy it to a new environment and run the active scan.
And only run the active scan for the sites you have permission!

Owasp zap

  • 1.
  • 2.
    What is ZAP •The OWASP Zed Attack Proxy (ZAP) is one of the world’s most popular web application security testing tools. It is made available for free as an open source project, and is contributed to and maintained by OWASP. The Open Web Application Security Project (OWASP) is a vendor-neutral, non-profit group of volunteers dedicated to making web applications more secure. The OWASP ZAP tool can be used during web application development by web developers or by experienced security experts during penetration tests to assess web applications for vulnerabilities.
  • 3.
    • The OWASPZed Attack Proxy is a Java-based tool that comes with an intuitive graphical interface, allowing web application security testers to perform fuzzing, scripting, spidering, and proxying in order to attack web apps. Being a Java tool means that it can be made to run on most operating systems that support Java.
  • 4.
    Why ZAP • Hereare few facts that the ZAP is found to be a good choice for security testing. • Free, Open source • · Involvement actively encouraged • · Cross platform • · Easy to use Easy to install • · Fully documented with comprehensive help pages. • · Work well with other tools (Jenkins) • · Under active development
  • 5.
    Features of ZAP •Here are few features of ZAP tool • Intercepting Proxy • Active and Passive Scanners • Traditional and Ajax Spiders • WebSockets support • Forced Browsing (using OWASP DirBuster code) • Fuzzing (using fuzzdb & OWASP JBroFuzz) • Lets see how to set up OWASP ZAP.
  • 6.
    Launching the OWASPZed Attack Proxy • OWASP ZAP is found by default within the latest Kali Linux 2.0 Penetration Testing Linux distribution. It can be launched by navigating to the “Applications” menu and selecting the “Web Application Assessment” option. A list will appear showing the different tools used for web app security testing. Here we click on the OWASP ZAP tool and wait for it to launch. This can be seen below:
  • 7.
    • To launchOWASP ZAP via the terminal, simply type in “owasp-zap”. • Note that, on first launch, a license agreement shows up that we are required to accept before proceeding. It is important to read this in order to understand the implications of using the tool in different jurisdictions. • The GUI launches and ZAP asks us whether we would like to work within a persistent session where our results are regularly saved so that we can resume testing the web application.
  • 8.
    OWASP ZAP GUIOverview • Left Section The left section of the ZAP window shows the “Context” and “Sites” dropdown buttons. Occasionally, multiple websites can be targeted for scanning and they appear under the “Sites” dropdown. However, a specific website might be of interest. In this special case, it must be specified under the “Context” section. Consider this to be the scope of testing.
  • 9.
    • Right Section: Here, we are provided with a URL section where we are required to specify the target for scanning. The “Attack” button commences the attack on the target and the “Stop” button halts the attack. A security tester might be interested in manually probing a website for vulnerabilities. ZAP allows him/her to launch the browser of choice with the loaded URL for manual testing. This can be achieved by clicking on “Launch Browser” below the URL. Detected issues are still logged and sent onto the bottom section.
  • 10.
    Bottom Section : •This section contains six tabs that are vital in showing the activities taking place during the vulnerability scan. Below the tabs is a progress bar that displays the scan progress, number of sent requests, and allows for exporting of the details in CSV format. • The “History” tab displays the websites being tested. In this case we are testing only a single target, so the history record will show a single entry.
  • 11.
    • The “Search”tab allows the tester to make searches that fit any patterns. For instance, let us query all the GET requests that have been made and, as shown below, we are presented with information on all these.
  • 12.
    • The “Alerts”tab gives more detail about the issues discovered on the target being scanned. Issues are ranked by severity, with “Critical” being considered highest on the risk index and shaded red, “High” of considerable high risk and shaded orange, “Medium” of slight high risk and shaded yellow, “Low” of that which could lead to either high or medium risk, exposure of sensitive information or a compromise of the target, and shaded blue.
  • 13.
    • As canbe seen above, seven issues have been discovered. We shall revisit this as we take a look at how to attack websites. • The “Spider” tab shows the files crawled (discovered) within the web application. Spidering can be likened to Fuzzing, where the directories and files resident on the website are discovered and logged for later active vulnerability scanning.
  • 14.
    • Spidering isimportant in discovering the entry points into the web application and what links are beyond the scope of attack. A progress bar is important in indicating the spidering progress as well. • The last tab is the “Active Scan.” This is vital in showing the progress of the ongoing scan in real time, with every processed file being displayed.
  • 15.
    Some Terminologies • Session:A session simply means whatever you do in your ZAP, i.e. navigating through the website you want to attack. This is done so as to make ZAP browser understand the depth in which URLs are to be hit. You can also use any other browser like Firefox, by changing the proxy settings of that browser. • You can save your session in ZAP with the extension .session and reuse it. • Context: A context is the manner of grouping the URLs. When you need to hit the specific set of URLs with particular user(s), host(s) etc. in your website, a context can be created in ZAP which will ignore the rest and attack only the ones mentioned. This will help you avoid the unnecessary heavy data coming your way. • Attacks in ZAP: The purpose of this tool is to penetrate through the site, attack (hit) its URLs, scan the URLs hit, and check how prone the site is to the various risks/attacks.
  • 16.
    Following are thetypes of attacks which ZAP provides:  Quick Attack: This helps you test the application using ZAP in the quickest way possible. Under the tab Quick Start, put the URL in the URL to attack field and click on the 'Attack' button.  ZAP will use its spider to crawl through the application, which will automatically scan all of the pages discovered. It will then use the active scanner to attack all of the pages. This is a useful way to perform an initial assessment of an application.  Spider: It is used to automatically discover new resources/URLs on your website. It visits those URLs, identifies the hyperlinks and adds them to the list.  Active Scan: It is used to find the potential vulnerabilities by using the known attacks against the selected targets. It gets its targets from the spider attack.  There are more attacks which ZAP provides, other than the ones mentioned above; like AJAX Spider, Fuzz, Forced Browse Site etc.  Alerts: Alerts are thrown as results of attacks performed by Spider/Active Scan (or any other attack). Alerts are the potential vulnerabilities which are flagged as High, Medium, or Low according to the risk level.
  • 17.
    Steps to Run: • Open / Launch ZAP • Crawl the Browser: Either you can use ZAP’s browser or any other browser you want to. • For using any other browser, go to the browser and go to Tools Menu -> Options -> Advanced tab -> Network -> Settings -> Select Manual Proxy configuration - HTTP Proxy = 127.0.0.1 Port = 8080. • You just need to open the browser, hit the URL of your website (to be attacked) and crawl throughout the website. For crawling you can either use a tool or do it manually. • The more you crawl the website, the more URLs ZAP will be able to find.
  • 18.
    • Create asession: It is not mandatory to save a session. But if required, a session can be saved and used again in future after you are done with scanning the application. This is done before you start working on ZAP. As soon as you launch ZAP, it asks you if you want to persist your session and you can select the option accordingly. • Create a context: To create a new context right click on the site (to be attacked) and click on “Include in context”. • Then click on “New Context” and a modal will open for you. In the context, you can add specifics like Users, Authentication, Hostname etc. as per your requirements.
  • 19.
    • Attack thesite: To perform an attack, right click on the site (present under Sites), hover on Attack and click on the attack you would like to perform (eg. Spider… or Active Scan…). • As soon as you click it, the attack will start. • Generally, the recommended sequence is that: • the site is crawled in the browser • the context is set • you run the Spider attack which gets you the URLs • you run the Active Scan for those URLs
  • 20.
    Alerts : • Checkthe Alerts: Once the attack is completed, you can check the results in the Alerts tab. The alerts are classified as high, medium or low.
  • 21.
    What Is theDifference Between Active & Passive Scan? • What is passive scan? • In terms of penetration test, a passive scan is a harmless test that looks only for the responses and checks them against known vulnerabilities. Passive scan doesn’t modify your website data. So it’s really safe for the websites that we don’t have permission. As you know OWASP number 1 vulnerability in 2018 is still Injection. And be aware that you can not detect even a SQL Injection with passive scan.
  • 22.
    • What isactive scan? • Active scan, attacks the website using known techniques to find vulnerabilities. Active scan does modify data and can insert malicious scripts to the website. So when you really test your website against security issues deploy it to a new environment and run the active scan. And only run the active scan for the sites you have permission!