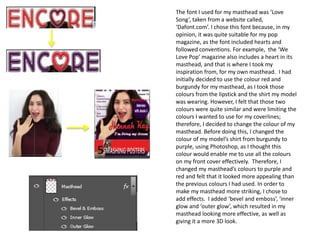
1. The font I used for my masthead was ‘Love
Song’, taken from a website called,
‘Dafont.com’. I chose this font because, in my
opinion, it was quite suitable for my pop
magazine, as the font included hearts and
followed conventions. For example, the ‘We
Love Pop’ magazine also includes a heart in its
masthead, and that is where I took my
inspiration from, for my own masthead. I had
initially decided to use the colour red and
burgundy for my masthead, as I took those
colours from the lipstick and the shirt my model
was wearing. However, I felt that those two
colours were quite similar and were limiting the
colours I wanted to use for my coverlines;
therefore, I decided to change the colour of my
masthead. Before doing this, I changed the
colour of my model’s shirt from burgundy to
purple, using Photoshop, as I thought this
colour would enable me to use all the colours
on my front cover effectively. Therefore, I
changed my masthead’s colours to purple and
red and felt that it looked more appealing than
the previous colours I had used. In order to
make my masthead more striking, I chose to
add effects. I added ‘bevel and emboss’, ‘inner
glow and ‘outer glow’, which resulted in my
masthead looking more effective, as well as
giving it a more 3D look.
2. At the bottom of my front cover, I decided to include a
banner, which would contain 5 images, in order to
follow conventions of real pop magazines. I decided to
fill the box with the colour red, as it is one of my
feature colours, and would help my magazine stand
out and seem bold. To create a 3D look for the box, I
added effects like, ‘Bevel and Emboss’, ‘Inner
Shadow’, ‘Inner Glow’ and ‘Drop Shadow’. This
resulted in the box popping out and enabling it to
look more professional. I also included text just below
the box, as well as a puff. I initially thought of using
the colour white for the number ‘5’, however, when I
applied it, it did not look too appealing and didn’t
stand out as much as I wanted it to. I then played
around with the colours and finally came to the
conclusion of using the colour black. I also added
effects such as ‘Stroke’, ‘Inner Shadow’, ‘Inner Glow’,
‘Outer Glow’ and ‘Drop Shadow’. By including these
effects, the text stood out more. Along with the
number 5, I also included another text; ‘Smashing
Posters’. I did this to follow conventions, as many pop
magazines include it, and it is a way of intriguing the
reader. I chose the font ‘Microsoft YaHei Bold’ for this
text and the colour white, as I knew the colours red,
black and white would look quite attractive, as I had
used these colours before, for my preliminary task
and it appealed to my audience. To make the text
stand out even more, I added effects like ‘Bevel and
Emboss’, ‘Inner Shadow’ and ‘Inner Glow’.
3. The font I used for my artists’ name (Hannah Kay)
was Magneto Bold. The reason I thought that this
font would be suitable for the name was because
it looks similar to a signature. I chose to use the
colour red for this font, as she is the main feature
of the magazine and also because I wanted the
text to stand out the most. To make the text
appear even more noticeable, I added a few
effects such as, ‘Bevel and Emboss’, ‘Inner
Shadow’, Inner Glow’, ‘Gradient Overlay’ and
‘Drop Shadow’. This resulted in the text becoming
much bolder than it was before, and a good way
of intriguing the reader. I also decided to
incorporate a pull quote in my magazine as I
wanted to follow conventions. The font I used for
my pull quote was ‘Forte Regular’. I chose to use
this font because, in my opinion, it looks
handwritten and natural. This would intrigue the
reader as it gives the magazine a more personal
touch. I didn’t add any effects to this text because
they made it look quite dull and not at all eye-
catching. Therefore, I thought it looked much
better without them .
4. I initially decided to use a graphic, which was a gold circle, found from Google Images. I thought that
this would help my magazine stand out, however, when Ms Mottram saw it, she did not find it too
appealing and didn’t think it worked well with the rest of the magazine. I then decided to include a
purple circle on my magazine, to keep the colour scheme going. I also decided to add a text in that
graphic saying, ‘interview with Jessie J’. For this, I used the font ‘Arial Bold’, as I felt that it stood out
the most, compared to the other fonts I tried. I chose the colour white for this and not red, because
it looked quite over the top, and I felt that purple and white look better together. Just above the
graphic, I decided to include the text ‘Exclusive!’ because I wanted the coverline below that to stand
out be noticeable. I chose the font ‘Arial Black’ for this and decided to make it the colour red, as it
resulted in the text becoming more vibrant. Below my masthead, I added a text saying ‘Issue 13’, as I
wanted to make my magazine look realistic as possible, and also to meet conventions. The font I
used for this was ‘Arial Black’ and the colour I chose was black.
5. I decided to include 3 main coverlines on
my poster. I was given the suggestion of
including hearts , from which my coverlines
would come out from , by Ms Mottram. I
took this idea into consideration because
including hearts would mean that I’m
following conventions, as my masthead also
consists of a heart. I copied and pasted the
heart from Google Images, and filled it in, to
be the same shade of red, as the heart of
my masthead. I then included text for each
of the three hearts. The font I used for
these texts were ‘Arial Bold’, as I wanted the
coverlines to be the same font as the
coverline in the graphic, to keep my
magazine consistent. I initially considered to
use the colour black for this font , however,
when I did try this colour, it faded in with
my models hair, and wasn’t quite clear to
read. I then finalised the colour purple for
this text, to keep the colour scheme
consistent. I am also intending to include a
list of celebrity names below these
coverlines, to show the reader what other
artists are featured in the magazine, as well
as a barcode beneath this.