
Recommended
More Related Content
What's hot
What's hot (20)
Viewers also liked
Viewers also liked (15)
Similar to Developing the Front Page of an Indie Music Magazine
Similar to Developing the Front Page of an Indie Music Magazine (20)
Recently uploaded
Recently uploaded (20)
Developing the Front Page of an Indie Music Magazine
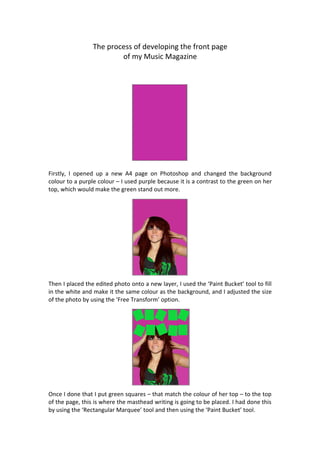
- 1. The process of developing the front page of my Music Magazine Firstly, I opened up a new A4 page on Photoshop and changed the background colour to a purple colour – I used purple because it is a contrast to the green on her top, which would make the green stand out more. Then I placed the edited photo onto a new layer, I used the ‘Paint Bucket’ tool to fill in the white and make it the same colour as the background, and I adjusted the size of the photo by using the ‘Free Transform’ option. Once I done that I put green squares – that match the colour of her top – to the top of the page, this is where the masthead writing is going to be placed. I had done this by using the ‘Rectangular Marquee’ tool and then using the ‘Paint Bucket’ tool.
- 2. Then I placed the letters for the masthead on individually, I got the masthead off ‘Dafont.com’ and found the font I liked by going ‘Fancy > Destroy > Trashco’. I had to use the ‘Triangular Marquee’ tool to copy and paste the letter that I print screened onto Photoshop, and then used the ‘Multiply’ option to take away the white background around the letter – I done this process for all the letters that spelt out ‘INDIE CINDY’. Once I done that I decided to include the coverlines. For the ‘WHATS NEW’ part I used the same font off ‘Dafont.com’ and used the same techniques at the masthead, but for the coverlines I used a font on Photoshop and i changed the effect of it by double clicking the layer and going ‘Effect > Drop shadow’. Then I included the main coverline. I done the same thing as the coverlines – I used the same font off ‘Dafont.com’ and used the same techniques as the masthead and coverlines for the ‘EXCLUSIVE’ part, and a Photoshop font for the rest and i changed the effect of it by double clicking the layer and going ‘Effect > Drop shadow’.
- 3. Also, I included a freebee section. I used a font off Photoshop – and i changed the effect of it by double clicking the layer and going ‘Effect > Stroke’ – but made the opening line ‘Like Minx?’ larger than the rest. And I used a Photoshop brush that was in the shape of a star to make it stand out – u also done it in the same green as the rest of the green. Then I added a skyline (but placed it at the bottom instead) which included other interviews included in the Music Magazine. I used the ‘Rectangular Marquee’ tool and then the ‘Paint Bucket’ tool and change the colour to the green used before. Then I used the font off ‘Dafont.com’ which I have used previously. I made a slight change to the coverlines text, I moved it from the left hand side to the right hand side, I done this because I thought it looked better.
- 4. Then I added a pull quote, which I used a font off Photoshop and changed it to the colour green – to make it stand out – and i changed the effect of it by double clicking the layer and going ‘Effect > Drop shadow’. I also added a dateline. I used a Photoshop font and change the colour to green – and i changed the effect of it by double clicking the layer and going ‘Effect > Stroke’ – and I placed it under the masthead. And finally, I made another change; I changed the pattern behind the main coverline to a different Photoshop brush, I done this because I simply thought it looked better.
- 5. The process of developing the contents page of my Music Magazine Firstly, I opened up a new A4 page on Photoshop and changed the background colour to a green – the same green used on the front cover, I done this because it’s a contrast to the purple on her top making her stand out more, and also because it sticks with the house style. Then I opened a new layer and placed the photo I was planning to use for the contents page, I used the ‘Paint Bucket’ tool to fill in the white and make it the same colour as the background, and I used the ‘Free Transform’ option to adjust the size of the photo. After that, I added purple squares which matched the colour of her top – to show house style, as so on the front page – this is where the masthead writing is going to
- 6. be placed. I had done this by using the ‘Rectangular Marquee’ tool and then using the ‘Paint Bucket’ tool. Once I done that I placed the letters for the masthead on individually – which I got off ‘Dafont.com’, I found the font I liked by going ‘Fancy > Destroy > Trashco’. I used the ‘Triangular Marquee’ tool to copy and paste the letter that I print screened onto Photoshop, and then I had to used the ‘Multiply’ option to take away the white background around the letter – I done this method for all the letters that spelt out ‘INSIDE...’, I chose to say ‘Inside’ rather than ‘Contents’ because I felt it was different and more trendy. Then, I added the content that would be included in the magazine – but, I decided to do something different, instead of adding all the contents I only added the main features because I thought that would capture the target audiences’ attention more. I used the font off ‘Dafont.com’ and done the same method as I did for the masthead lettering. I placed them in order of appearance in the magazine and spaced them out.
- 7. And then I added the page numbers, which I used a font off Photoshop for and made them small and placed them under the titles, I also made them purple – again, sticking with the house style. And finally, I added a piece of text next to the image of the main coverline – using the same font, size and colour as the page numbers – which indicated that this was, in fact, imagery of the main coverline and referred to the page number.
- 8. The process of developing the double page spread of my Music Magazine First, I opened up a new A3 page on Photoshop and changed the background colour to a purple – the same purple used on the front cover, I done this because it sticks to the house style. Then, I placed the imagery on. The three that are insets I left the background white, but the main one I changed the white background to the same as the background – I done this by using the ‘Paint Bucket’ tool and changing the colour to the colour of the background. Once I had done that, I added the masthead which I got from ‘Dafont.com’, and I also added a subheading which I got from the same website. Once I found the fonts I wanted I print screened them, placed them on a new page, used the ‘Rectangular Marquee’ tool to use to cut, copy and paste the text onto a new layer, and then I simply went ‘Effects > Multiply’ and then used the ‘Free Transform’ option.
- 9. After that I added a stand first – which is where you have a small piece about them at the beginning – and with that stand first I used a drop cap – first letter of first word larger than others. I used a font that was on Photoshop. Then I added the interview, I used a font from Photoshop and changed the ‘Interviewers questions’ to a green – I done this for two reasons, one was because it made the questions stand out more, and two was because it was one of the house style colours. Then I added a pull quote, I again used a font from Photoshop and used the ‘Free Transform’ option to tilt it. I included a pull quote because it helps to grab the reader’s attention. I also added page numbers at the bottom of the two pages; I used a font from Photoshop and changed the colour to a green – same as the house style.
- 10. Then, I simple added some green scribbled lines to the corners of the inset imagery’s – to make them more attractive and not to seem just ‘placed there’. Originally, I was going to finish at the last point, but I realised there was a big empty space in the top right-hand corner, so I decided to add something to there. I chose to add three more photos that look like they are layered on top of each other to make it more interesting – I have edited the photos, but since it was a ‘last minute’ decision there is no step-by-step guide to the process of developing them, however the process is pretty much the same as the others.