
Recommended
More Related Content
What's hot
What's hot (19)
Similar to eMedRec overview
Similar to eMedRec overview (20)
More from Laura Holt
Recently uploaded
Recently uploaded (20)
eMedRec overview
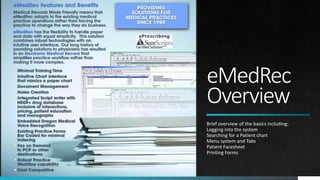
- 1. eMedRec Overview Brief overview of the basics including: Logging into the system Searching for a Patient chart Menu system and Tabs Patient Facesheet Printing Forms
- 2. Outline Lesson 1 – Logging into eMedRec Lesson 2 – Searching for a patient chart Lesson 3 – eMedRec Chart Viewer Lesson 4 – Patient Facesheet Lesson 5 – Printing Forms
- 3. Logging In/Out Login using your user name and password. Note that there are two logins. First you log into your Cloud session. The Cloud session can only be open in one location at a time. After you are in a Cloud session, either on your workstation or at another location, such as an exam room, you then Login to eMedRec under your user name. You can be logged into eMedRec under your user name both at your workstation and in an Exam Room Cloud session at the same time. You can either Close eMedRec, or Logout/Login via the File menu. eMedRec can also be configured to automatically log out users for security purposes.
- 4. Searching for a Patient Chart Name The most common way to search for a patient is by name. You may type the whole last name or just the first few letters. Also you can search with a few letters of the last, comma, and a few of the first name. Or if you only have the first, just a comma then the first name. MRNumber If you have the patient MRNumber the fastest method of bring up the chart is to search on that entire number. DOB or SSN If you have the Date of Birth, or Social Security number available you can also enter that in the search field. Enter birth dates as MM/DD/YYYY If the Search results contain multiple patients then double click on the desired patient name. Clicking on Search with nothing in the search field will display the options.
- 5. The eMedRec Viewer There are 3 sections to the Viewer Menu – Toolbar – Displayed along the top are both the drop down menu items, and icons for frequently used functions. Tabs – Displayed along the left side of the viewer. Click on the Tab to see the contents. List of documents – Displayed under the Toolbar the contents of the individual Tab are listed by reverse Date of Service by default.
- 6. Viewer controls – Menu Bar File: New – Logout – Print – Fax – Exit Edit: Not used. Edit functionality is accessed through the Edit Icon View: Aesthetic preferences and the link to the Face Sheet Document: Deleting, editing indexes, viewing history, or re-routing of documents Page: Forward and Backward movement through chart. Page deleting, Reorder pages, and saving changes to the page. Tools: Database configurations, List maintenance functions, and workflow queue delegation. Annotations: To add explanatory notes or comments and facilitate Workflow. Appearance properties of the annotations. ActiveInk: In Development. This menu area will be used for electronic forms including Active Ink forms Forms: Design, Print, and configure packages of forms Notes: Define and create visit notes Health Maintenance: Rules and protocols as established by the practice Dragon NatSpeak: Creation and maintenance of Voice Recognition users Help: Product Help and Version information and link to Knowledge Base
- 7. Viewer controls - Icons Back and Next icons navigate through the pages of the documents in the chart tabs. Clear closed the patient chart. Edit is used to update Lists and compose Notes. Print will print either to printers, pdf, or print to fax. View List toggles between showing the list of documents or hiding that detail. eScripts – ePrescribing. Mail – not used by most practices. Forms – Printing Forms. Notes – Creating Patient Visit Notes. Fax – Direct fax to Patient’s referring physicians. Face – Patient Face sheet showing an overview of patient lists. Rotate – Rotate image in viewer – it may also be saved in the rotated view by clicking Page – Modify Image. Zoom In/Out – Fit Height/Width – Change size of image. Sign Off – Used to quickly Sign off and file documents in workflow that don’t need further annotation.
- 8. The Facesheet The Facesheet shows an overview of Patient List Data 1. Problem List 2. Medication List 3. Patient Photo 4. Allergies 5. Procedures 6. Vitals 7. Health Summary 8. Health Maintenance 9. Data from Labs 10. Advanced Directives 11. Immunizations
- 9. Printing Forms Forms for the patient visit can be printed in configured packages or individually. Click on the Forms icon. Enter a DOS, or pick appointment date. The Forms button toggles between packages and individual forms. Unlimted numbers of forms can be designed. Unlimited numbers of packages can be put together. Common packages are ‘New Patient’ or ‘Medicare Wellness Visit’.
- 10. Overview Conclusion We have briefly covered the following items: Logging in and out of eMedRec Searching for the Patient Chart The eMedRec Viewer and menu system The Facesheet Printing Forms More in-depth training slide shows on many other features and functions are also available. These can be found in the Knowledge Base. A link is found in the Help menu item.