Create wireless ad hoc internet connection on windows 10
•Download as DOCX, PDF•
0 likes•66 views

Wireless ad hoc internet connection on windows 10

Recommended
Recommended
More Related Content
What's hot
Similar to Create wireless ad hoc internet connection on windows 10
Similar to Create wireless ad hoc internet connection on windows 10 (20)
More from Sattar kayani
More from Sattar kayani (17)
Recently uploaded
Recently uploaded (20)
Create wireless ad hoc internet connection on windows 10
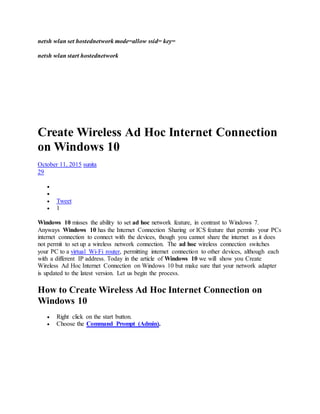
- 1. netsh wlan set hostednetwork mode=allow ssid= key= netsh wlan start hostednetwork Create Wireless Ad Hoc Internet Connection on Windows 10 October 11, 2015 sunita 29 Tweet 1 Windows 10 misses the ability to set ad hoc network feature, in contrast to Windows 7. Anyways Windows 10 has the Internet Connection Sharing or ICS feature that permits your PCs internet connection to connect with the devices, though you cannot share the internet as it does not permit to set up a wireless network connection. The ad hoc wireless connection switches your PC to a virtual Wi-Fi router, permitting internet connection to other devices, although each with a different IP address. Today in the article of Windows 10 we will show you Create Wireless Ad Hoc Internet Connection on Windows 10 but make sure that your network adapter is updated to the latest version. Let us begin the process. How to Create Wireless Ad Hoc Internet Connection on Windows 10 Right click on the start button. Choose the Command Prompt (Admin).
- 2. If prompted by User Account Control, click An elevated Command Prompt window appears on your screen. Type the following command which will scan the virtualization support of your network interface. netsh wlan show drivers Now, here, if you get a No message then you have to update your network adapter. And if the Hosted Network gives you a Yes message then it means that you can go ahead as the network interface assisted virtualization.
- 3. Type the below-mentioned command to set up an ad hoc wireless internet connection. netsh wlan set hostednetwork mode=allow ssid= key= Now substitute the markup tags with your desired entries. In the place of “network name” provide your desired network name and instead of “pass key” provide your key which should not be less than 8 characters.
- 4. After setting up the hosted network, you need to start it. And to do so, type the following command. netsh wlan start hostednetwork Now open open Windows 10 Control Panel. Choose Network and Sharing Center.
- 5. On the left pane of Network and Sharing Center window, click the link Change Adapter Settings. This will open up Network Connections. Here, for the recently created Wi-Fi connection you need to turn on the Internet Connection Sharing. And to do so right click on the internet connection device which is currently connected to the internet.
- 6. Navigate to the Sharing Select the checkbox which asks you to Allow other network users to connect through this computer’s Internet connection.
- 7. And then use the drop down menu and select the recently created ad hoc You can get the IP address of the recently created ad hoc connection by double clicking the TCP/IPv4 Properties under the Networking Tab.
- 8. Now you can connect any of your Wi-Fi able devices with your Windows 10 Fix: The Hosted Network Couldn’t Be Started while setting up Windows as HotSpot RECOMMENDED: Clickhere to fixWindowserrors and optimize systemperformance We all know that Windows 7 added the Wireless Hosted Network feature for the first time to the Windows OS, so that you can turn your Windows system into a hotspot for sharing data connection to various devices. We’ve already posted about how to set up Windows as hotspot manually. Today, we came around an issue due to which we were unable to host the hotspot from a Windows 8 system.
- 9. The Hosted Network Couldn’t Be Started Whenever we tried to start the hosted network, Windows ended itself with this error: The hosted network couldn’t be started. The group or resource is not in the correct state to perform the requested operation. Well, this issue can be due to misconfiguration in network adapter settings. We already tried to update even reinstalling the wireless driver, but no luck. Following fixes you can try to solve it: FIX 1 1. Press Windows Key + R, type ncpa.cpl in the Run dialog box and hit Enter, this should open Network Connections.
- 10. 2. In the Network Connections window, select the network you’re going to share. Right click on it and select Properties. 3. In the network connection Properties window, switch to Sharing tab. Now enable first two options there as indicated in the screenshot below.
- 11. Click OK, close the Network Connections window and reboot. Your problem should be fixed by now and if it doesn’t, try the second fix mentioned below. FIX 2 1. Press Windows Key + R, type devmgmt.msc in the Run dialog box and hit Enter, this should open Device Manager.
- 12. 2. In the Device Manager window, expand Network adapters, from the list pick the wireless adapter and do a right click on it and select Properties or simply double click on it. 3. In the Properties window, switch to Power Management tab, here make sure that option Allow the computer to turn off this device to save power is checked/enabled.
- 13. Click OK, close Device Manager and reboot the system, issue should be fixed significantly. Hope this helps you resolve The Hosted Network Couldn’t Be Startederror while setting up Windows as a HotSpot.