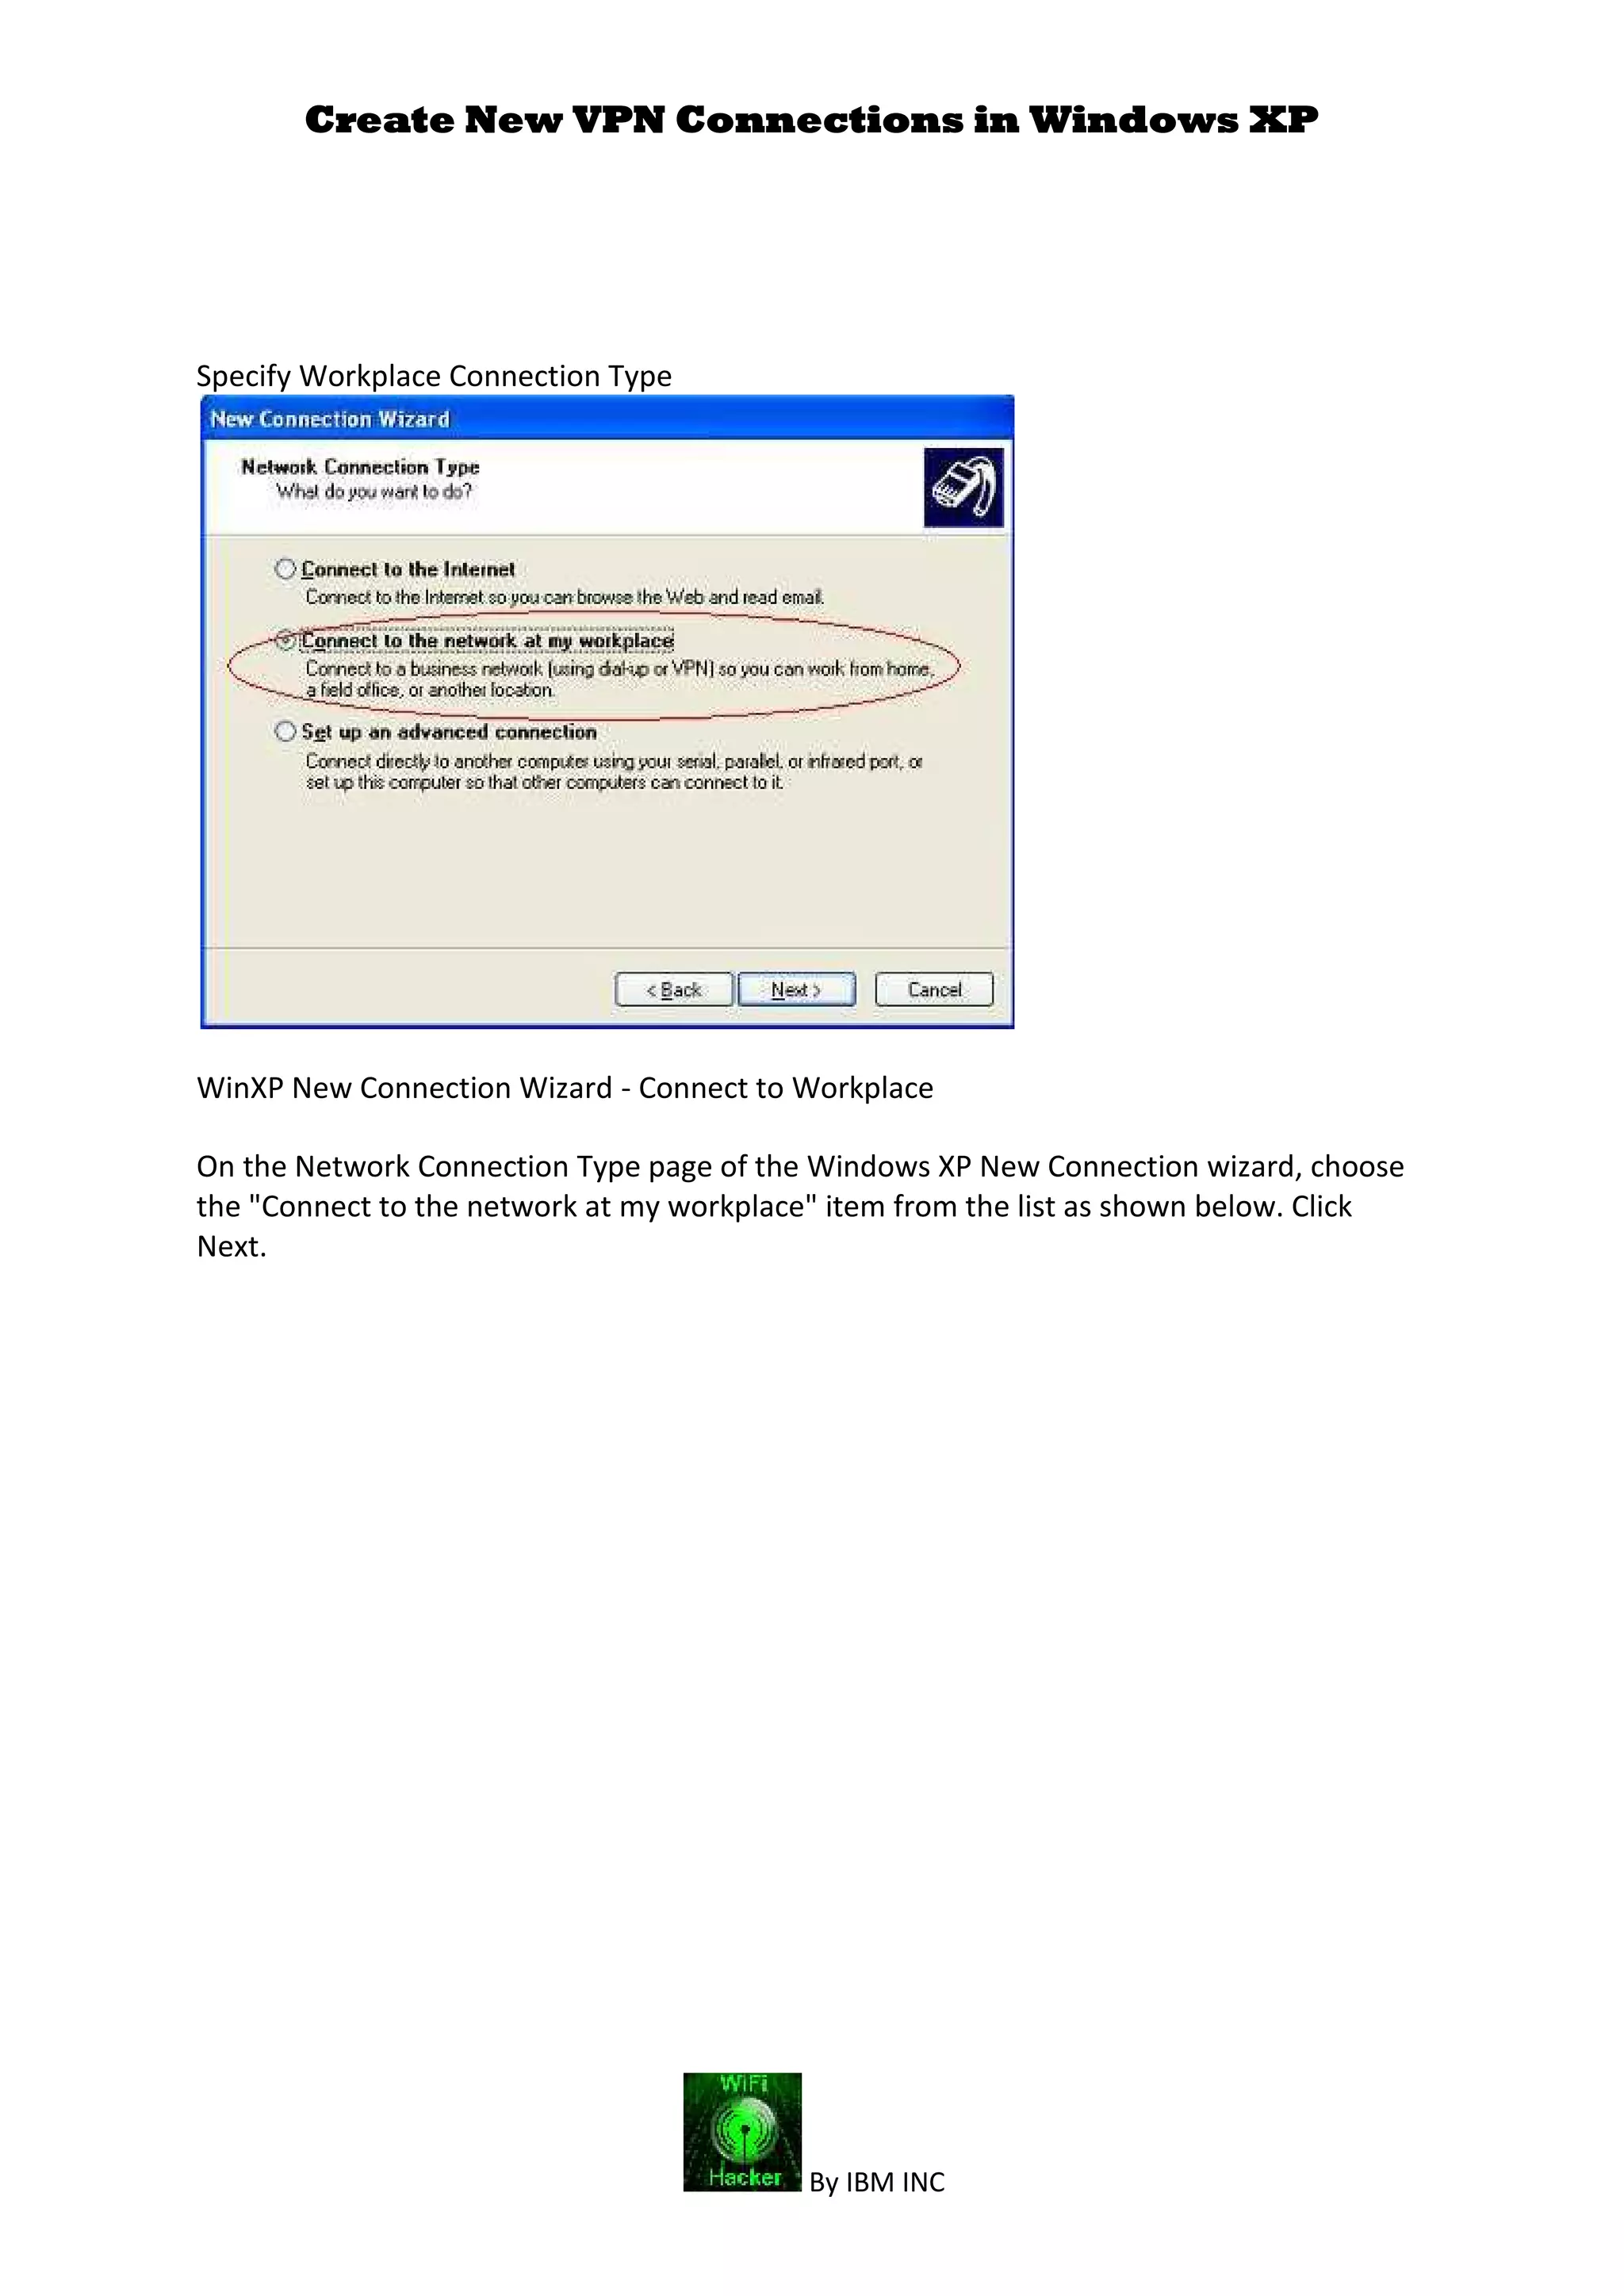
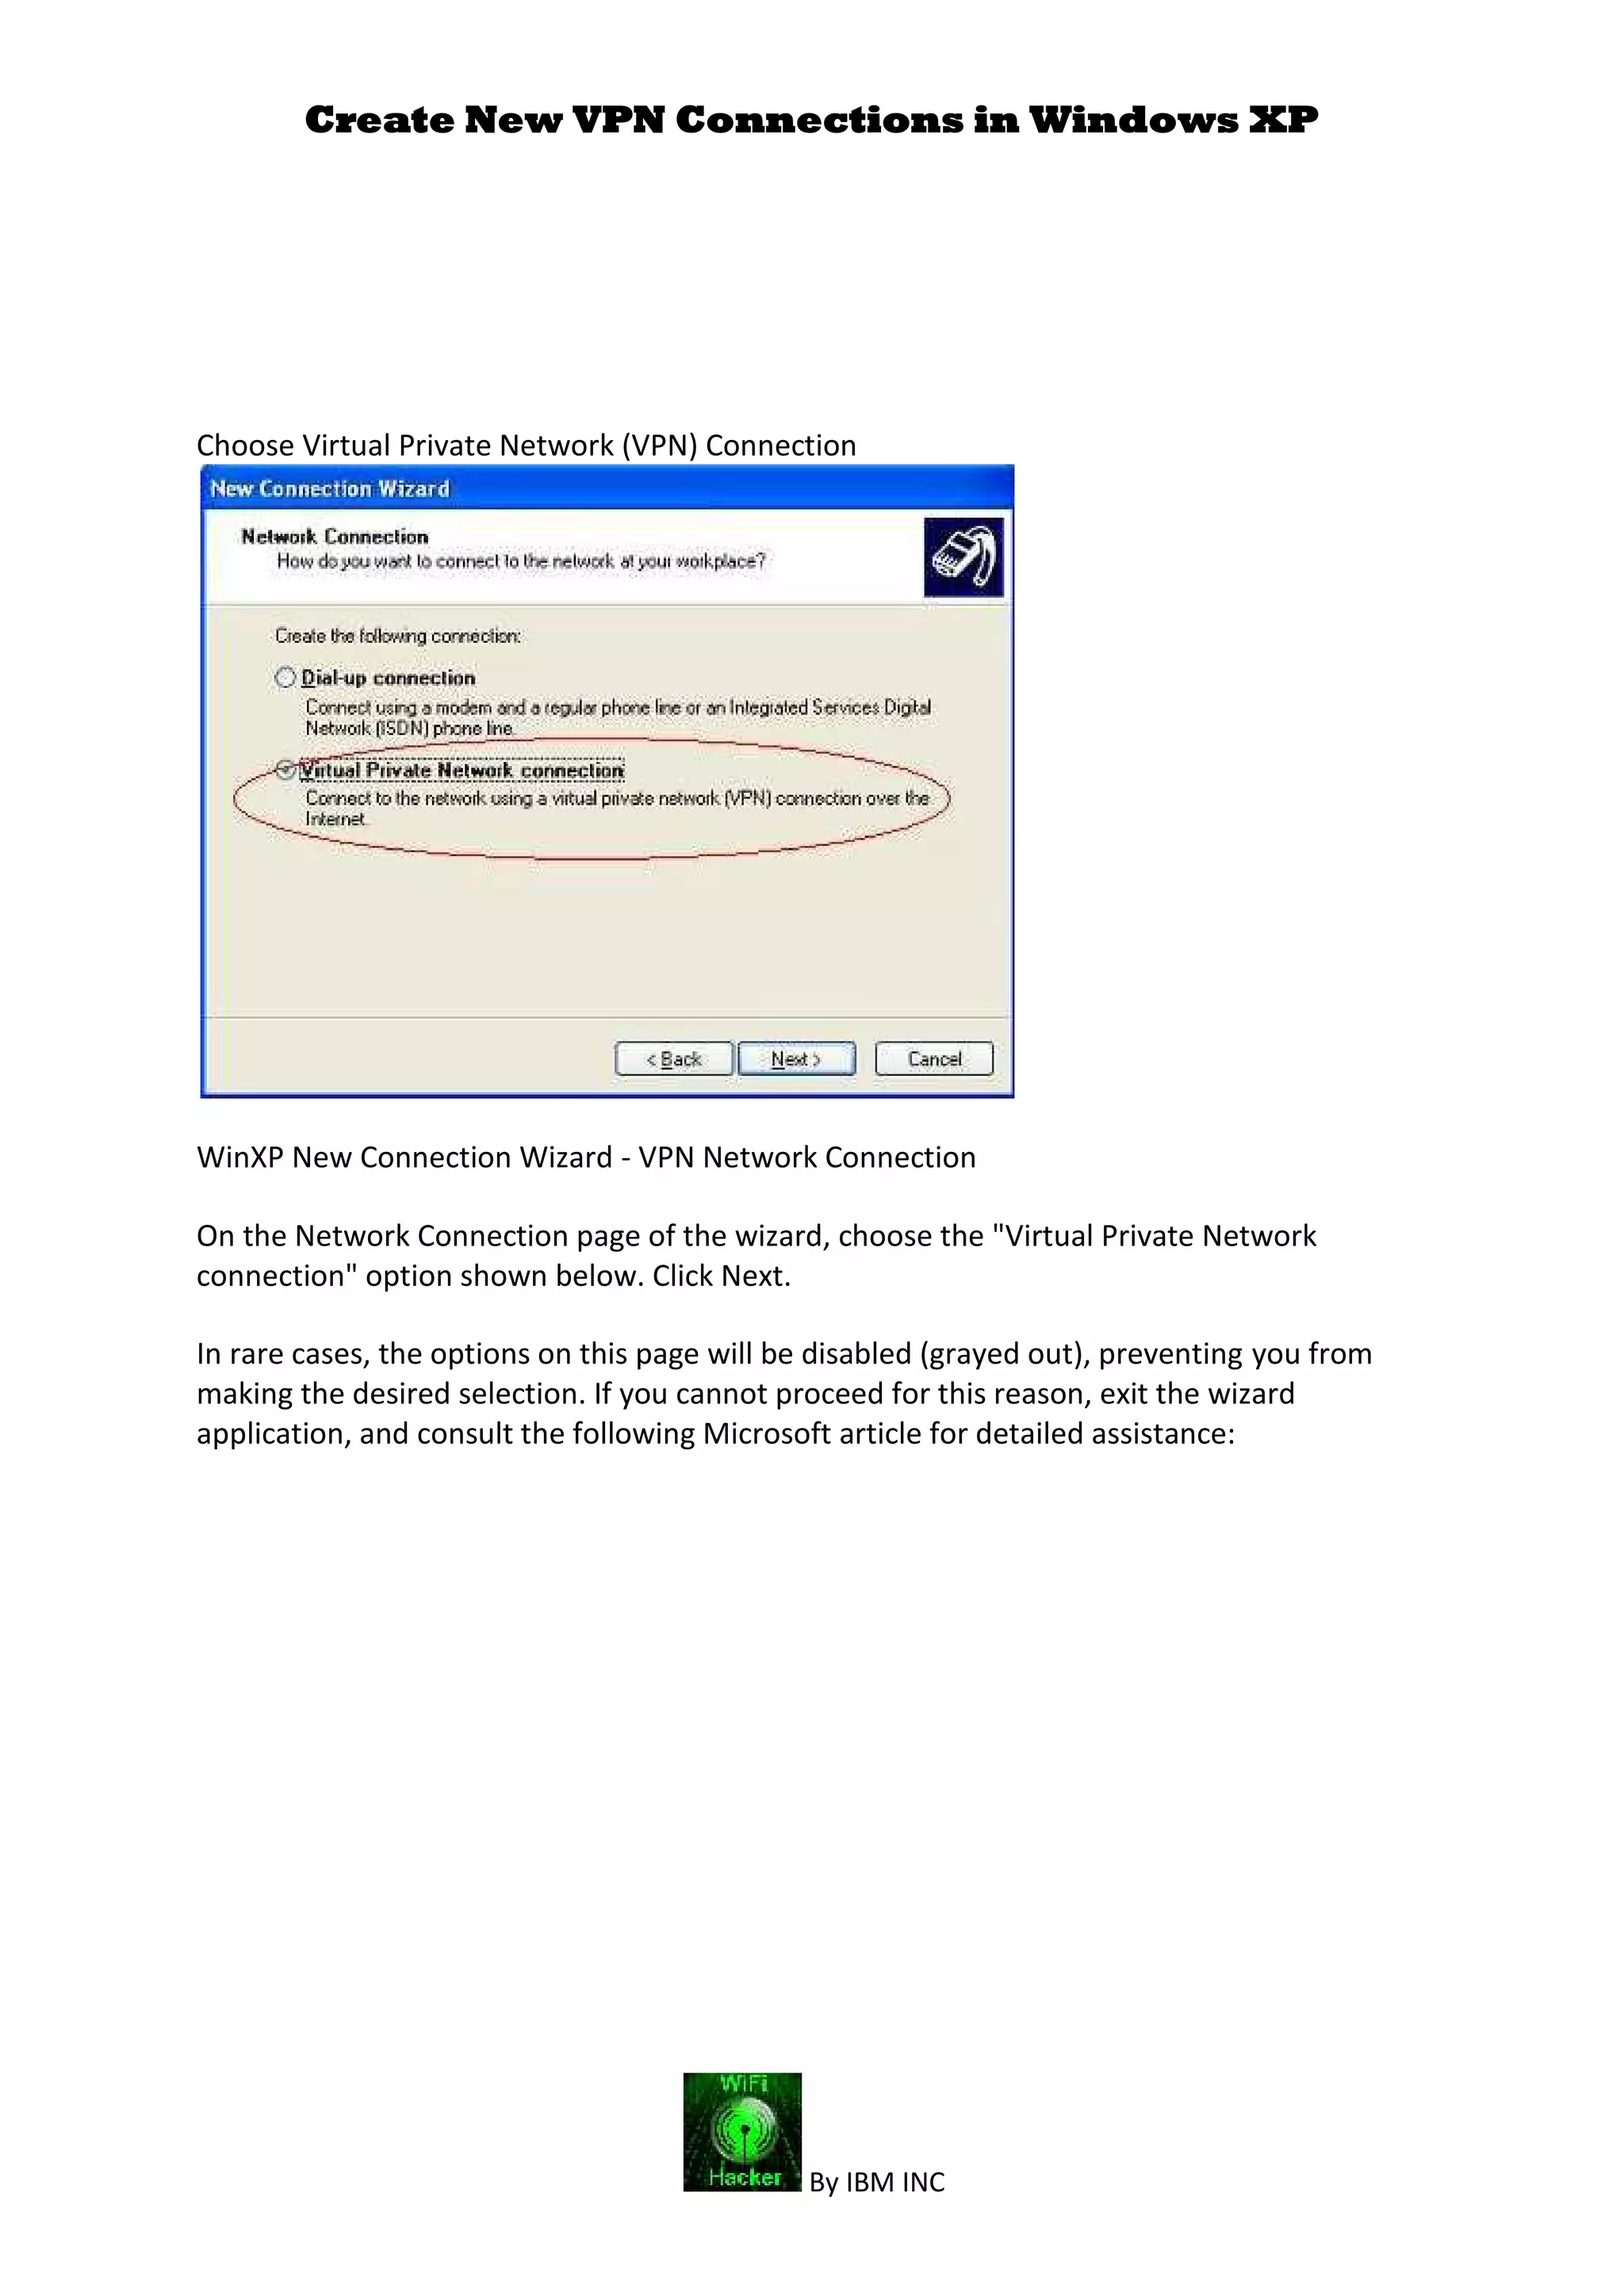
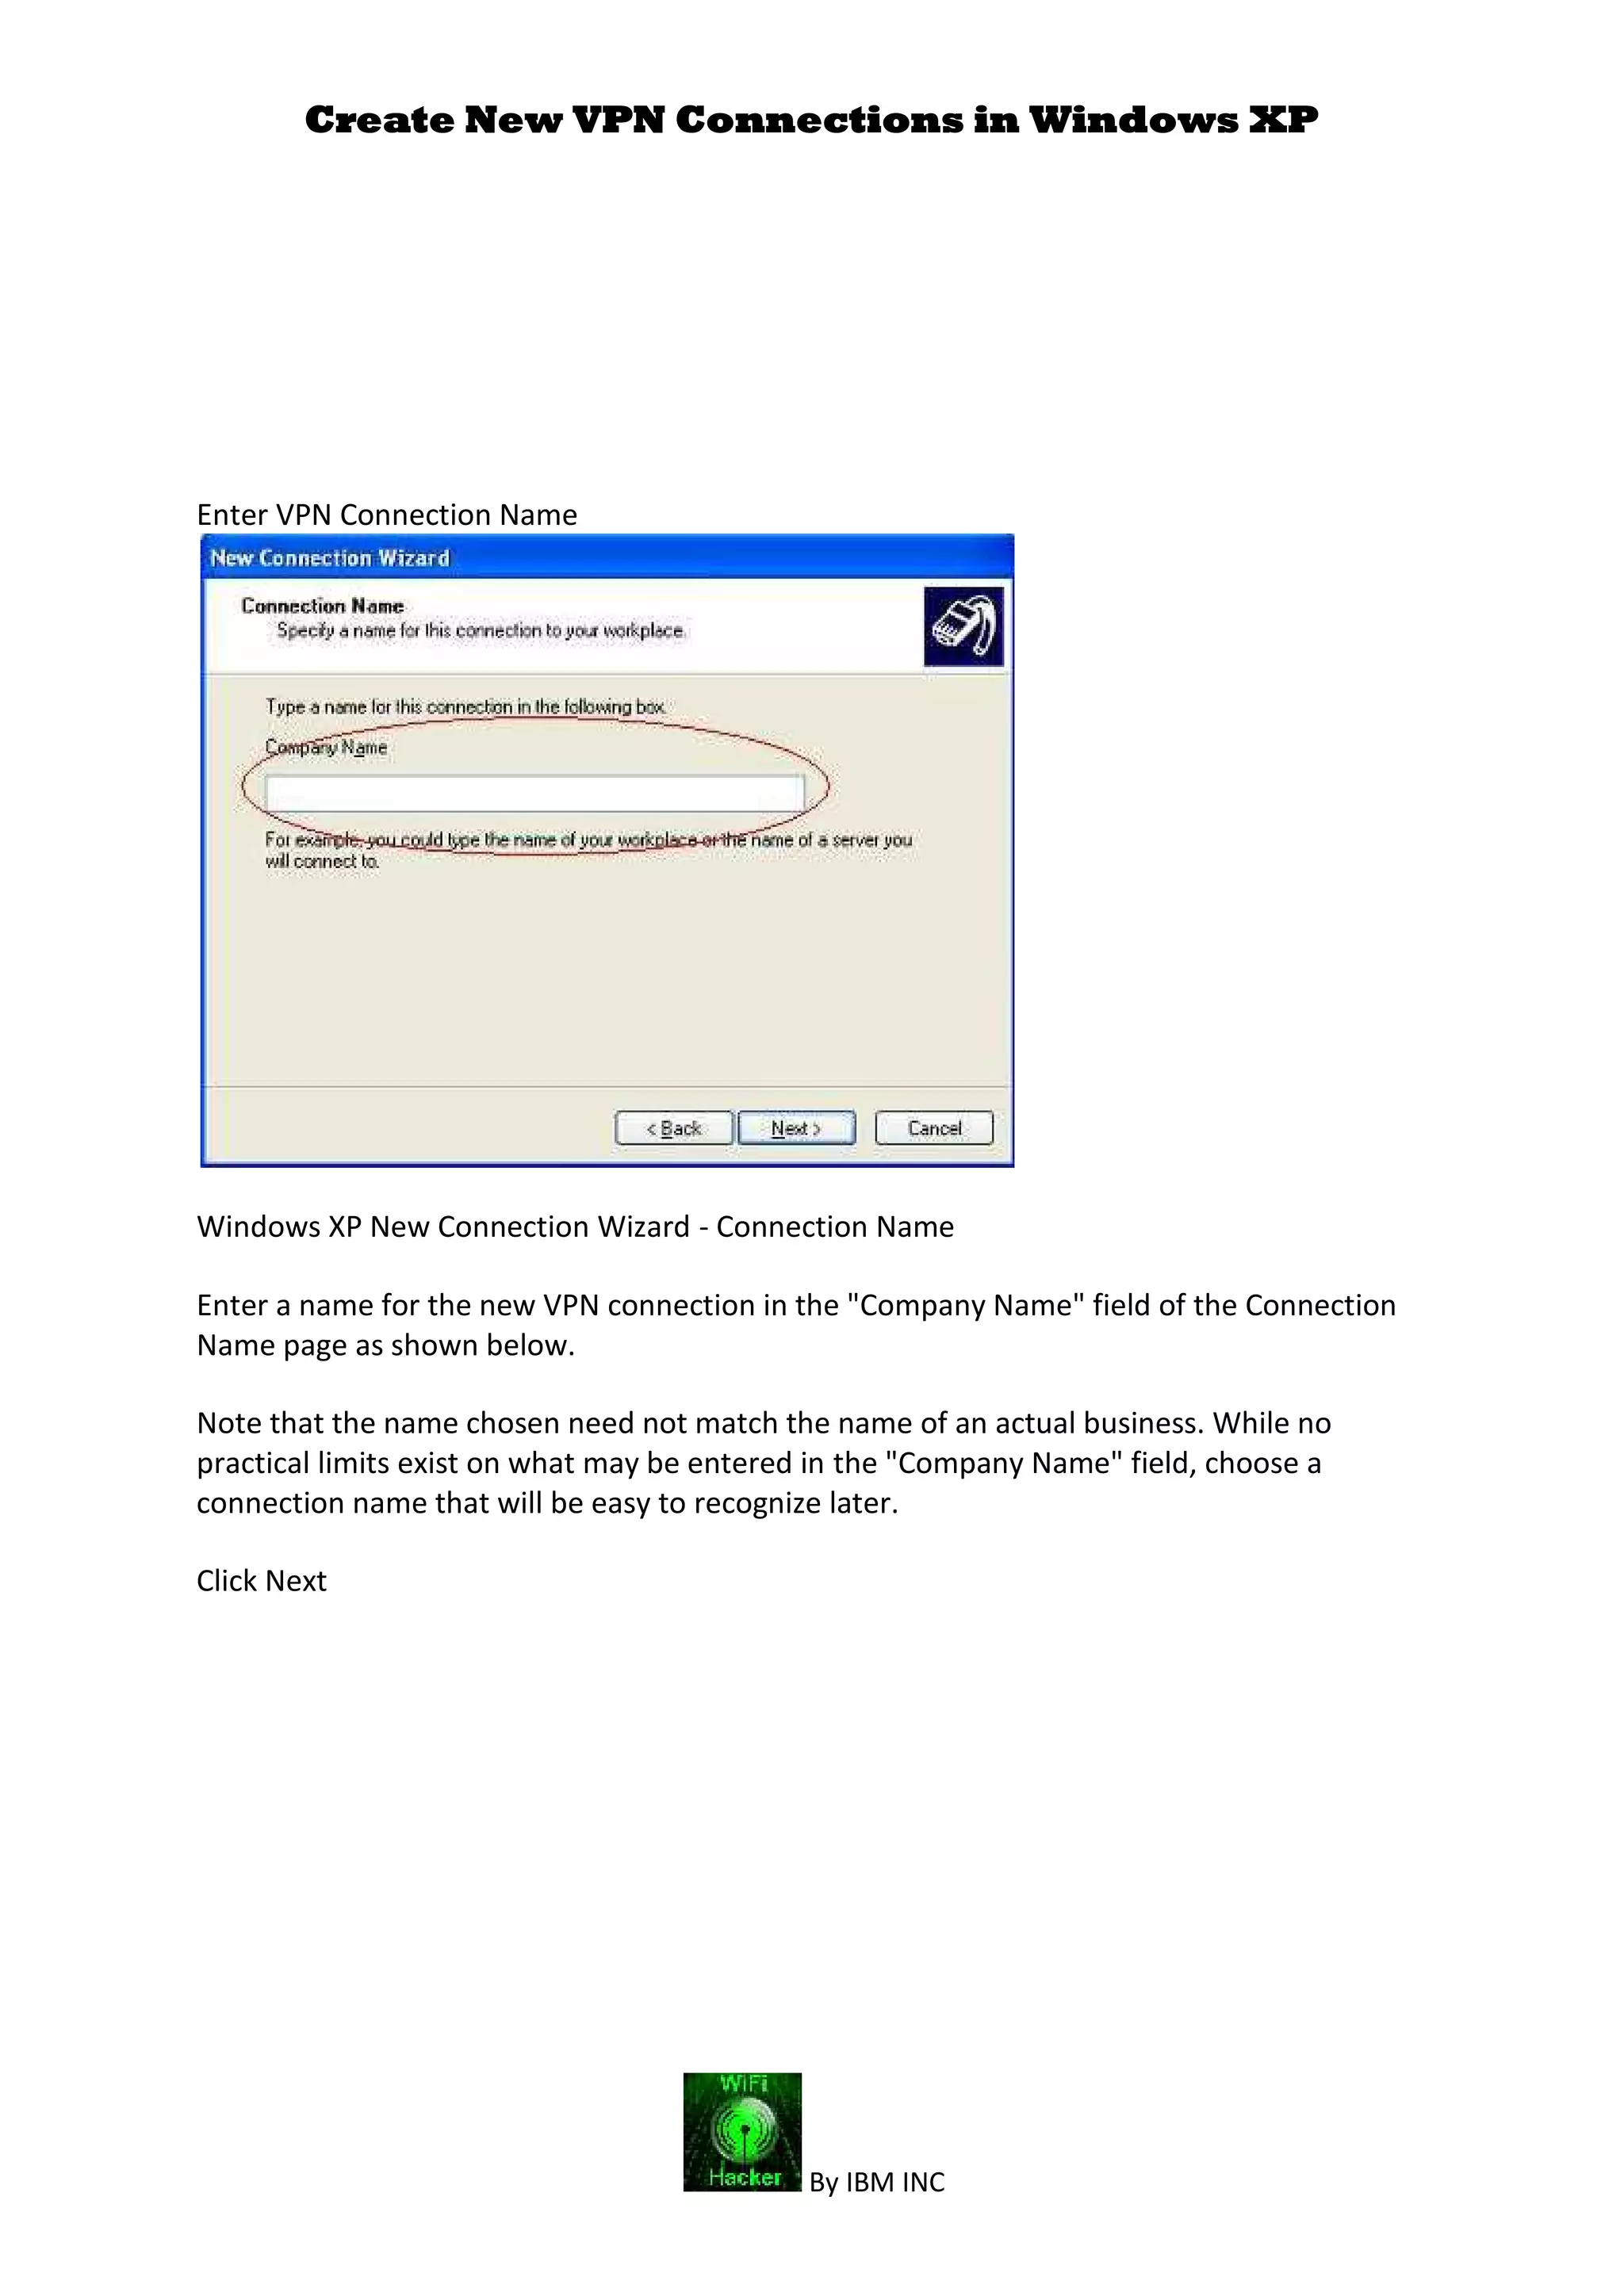
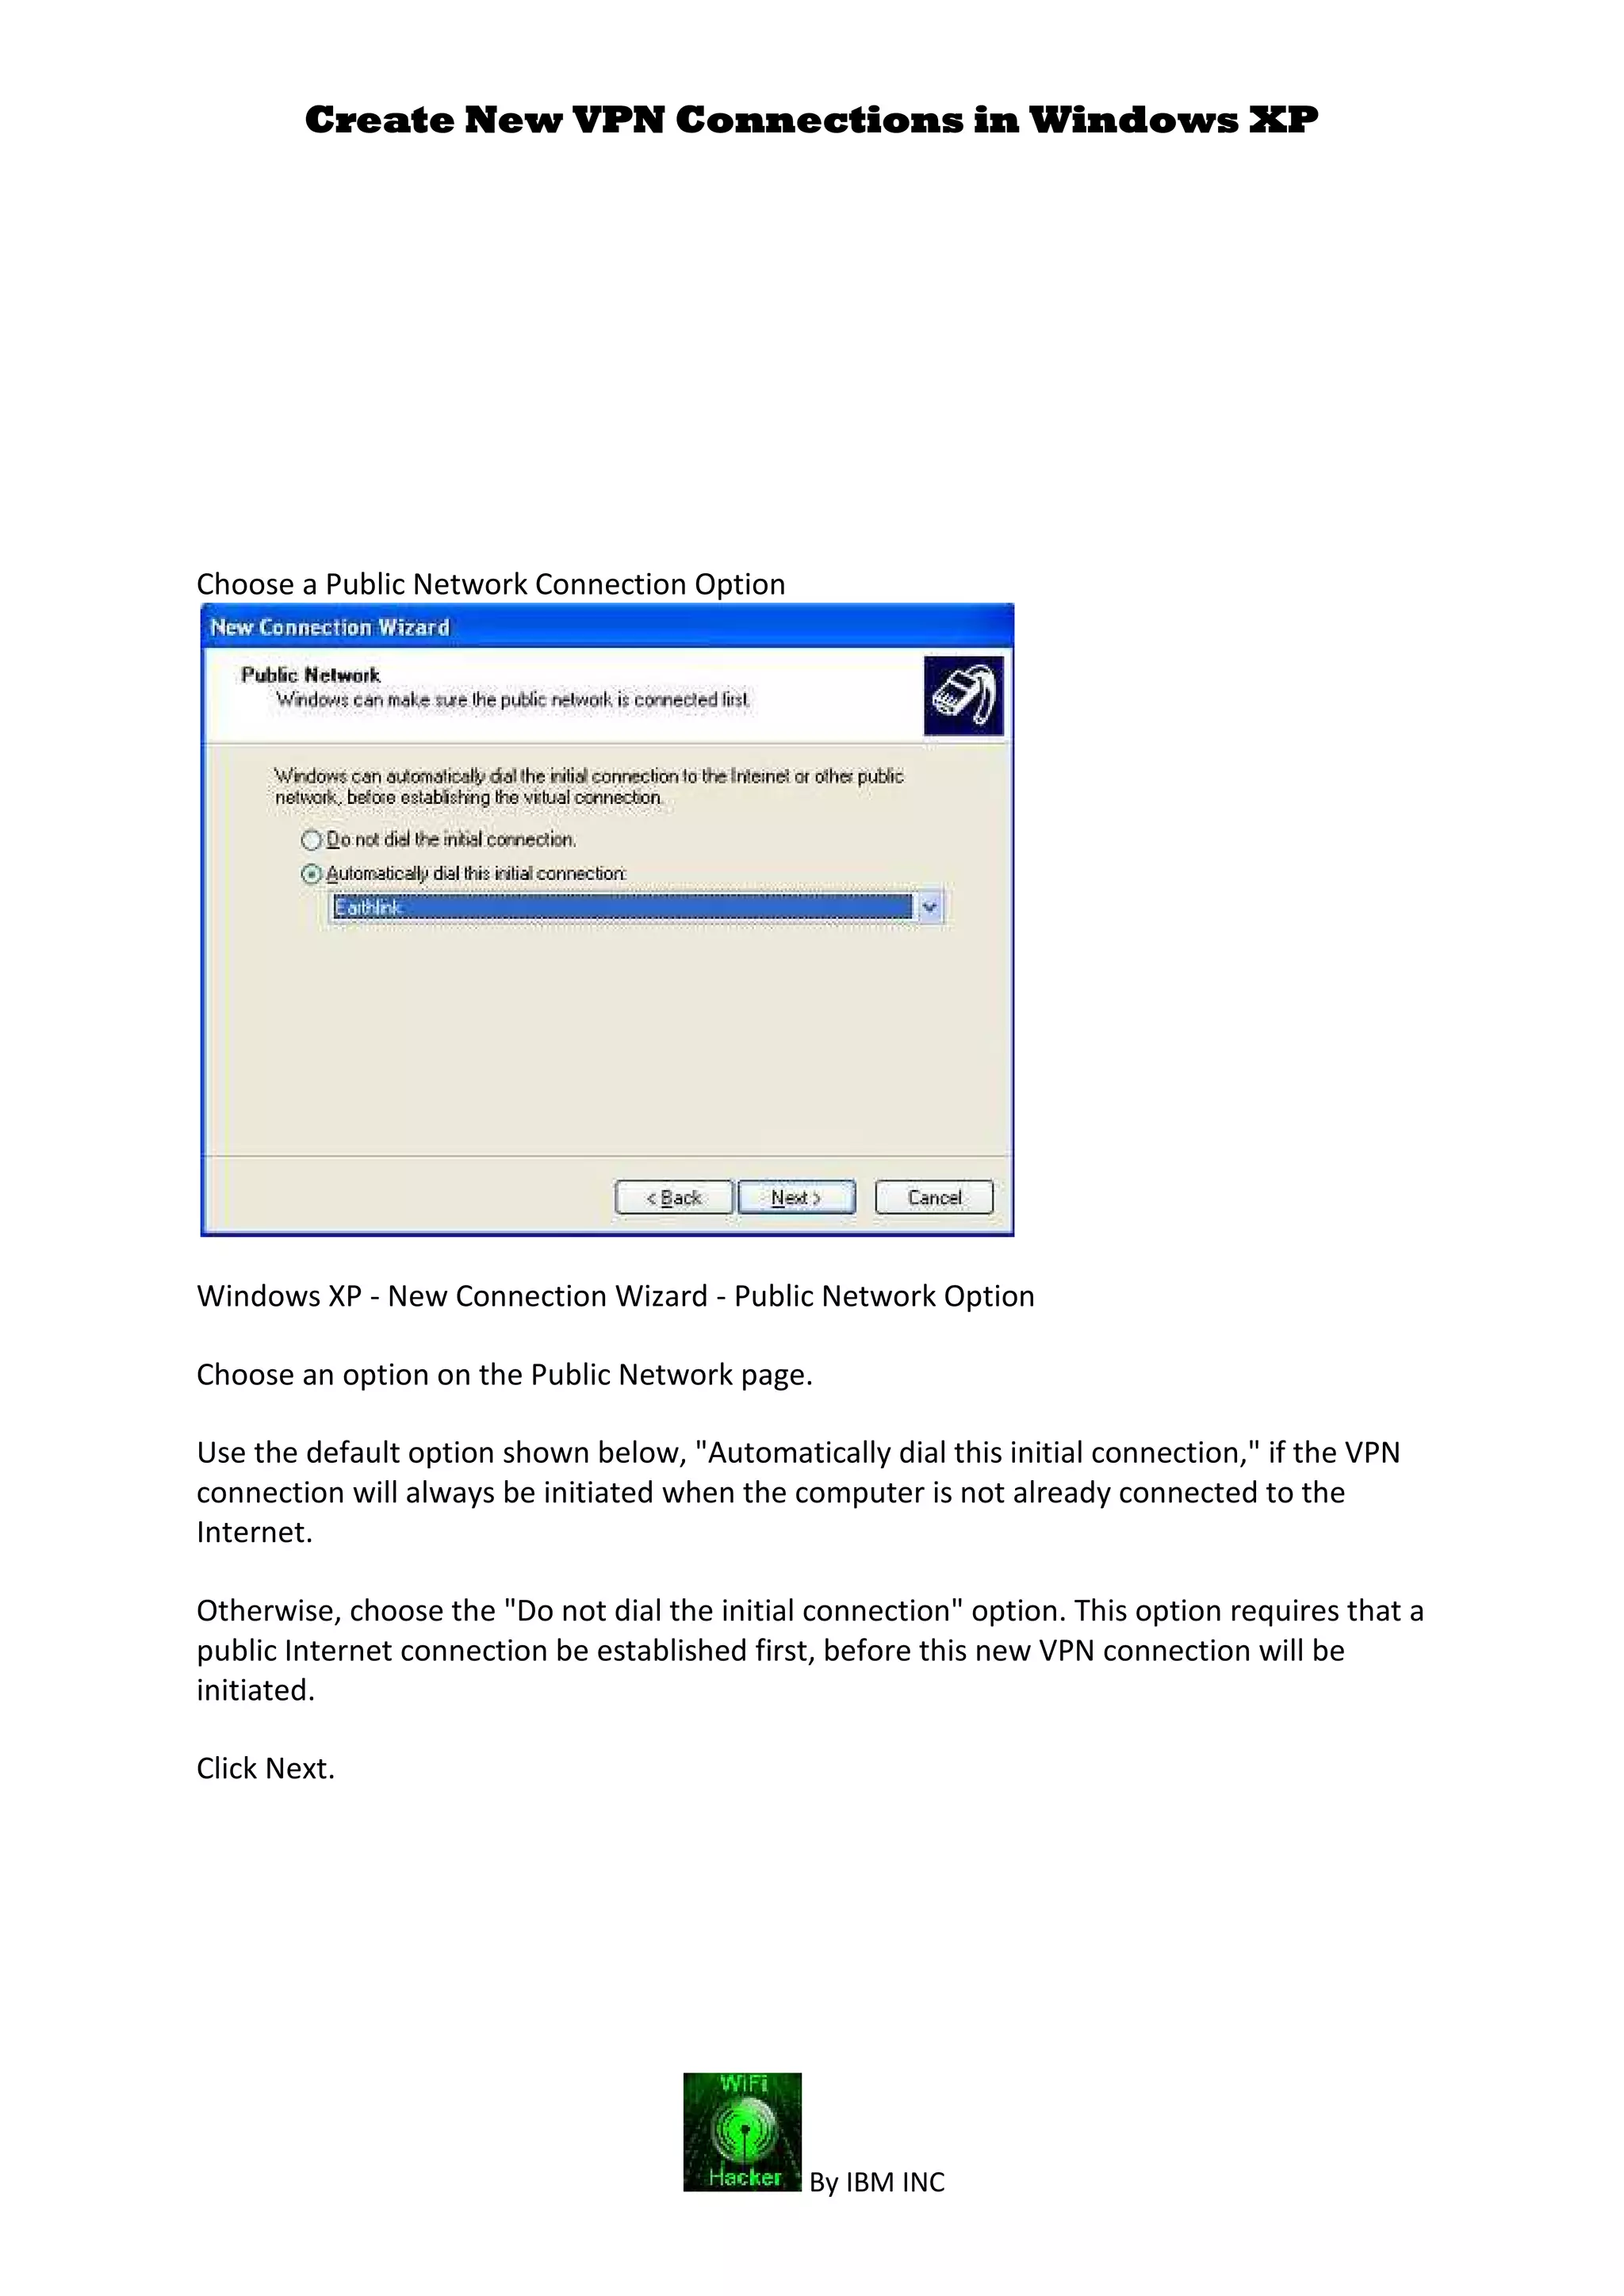
1. Create New VPN Connections in Windows XP
By IBM INC
Connections "Create a New Connection"
WinXP - Network Connections - Create a New Connection
Open the Windows Control Panel, then select the Network Connections item in Control
Panel. A list of existing dial-up and LAN connections will appear.
Choose the "Create a new connection" item from the left-hand side of the window as shown
below.
2. Create New VPN Connections in Windows XP
By IBM INC
Start the Windows XP New Connection Wizard
WinXP New Connection Wizard - Start
A new window now appears on the screen titled "New Connection Wizard" as shown below.
Windows XP will now ask you a series of questions to configure the new VPN connection.
Click Next to begin the procedure.
3. Create New VPN Connections in Windows XP
By IBM INC
Specify Workplace Connection Type
WinXP New Connection Wizard - Connect to Workplace
On the Network Connection Type page of the Windows XP New Connection wizard, choose
the "Connect to the network at my workplace" item from the list as shown below. Click
Next.
4. Create New VPN Connections in Windows XP
By IBM INC
Choose Virtual Private Network (VPN) Connection
WinXP New Connection Wizard - VPN Network Connection
On the Network Connection page of the wizard, choose the "Virtual Private Network
connection" option shown below. Click Next.
In rare cases, the options on this page will be disabled (grayed out), preventing you from
making the desired selection. If you cannot proceed for this reason, exit the wizard
application, and consult the following Microsoft article for detailed assistance:
5. Create New VPN Connections in Windows XP
By IBM INC
Enter VPN Connection Name
Windows XP New Connection Wizard - Connection Name
Enter a name for the new VPN connection in the "Company Name" field of the Connection
Name page as shown below.
Note that the name chosen need not match the name of an actual business. While no
practical limits exist on what may be entered in the "Company Name" field, choose a
connection name that will be easy to recognize later.
Click Next
6. Create New VPN Connections in Windows XP
By IBM INC
Choose a Public Network Connection Option
Windows XP - New Connection Wizard - Public Network Option
Choose an option on the Public Network page.
Use the default option shown below, "Automatically dial this initial connection," if the VPN
connection will always be initiated when the computer is not already connected to the
Internet.
Otherwise, choose the "Do not dial the initial connection" option. This option requires that a
public Internet connection be established first, before this new VPN connection will be
initiated.
Click Next.
7. Create New VPN Connections in Windows XP
By IBM INC
Identify the VPN Server by Name or IP Address
Windows XP - New Connection Wizard - VPN Server Selection
On the VPN Server Selection page shown below, enter the name or IP address of the VPN
remote access server to connect to. VPN network administrators will provide you this
information.
Take special care to key the VPN server name/IP address data correctly. The Windows XP
wizard does not automatically validate this server information.
Click Next.
8. Create New VPN Connections in Windows XP
By IBM INC
Select Availability of the New Connection
Windows XP - New Connection Wizard - Connection Availability
Choose an option on the Connection Availability page.
The default option shown below, "My Use Only," ensures that Windows will make this new
connection available only to the currently logged on user.
Otherwise, choose the "Anyone's use" option. This option allows any user of the computer
access to this connection.
Click Next.
9. Create New VPN Connections in Windows XP
By IBM INC
Completing the New VPN Connection Wizard
Windows XP - New Connection Wizard - Completion
Click Finish to complete the wizard as shown below. If necessary, first click Back to review
and change any settings made previously. When Finish is clicked, all settings associated with
the VPN connection will be saved.
If desired, click Cancel to abort the VPN connection setup. When Cancel is chosen, no VPN
connection information or settings will be saved.