1) The document describes how to create green glow and lightning effects in Adobe After Effects.
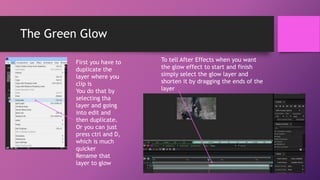
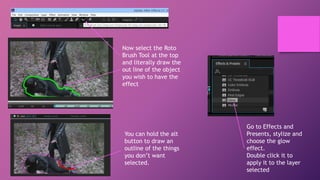
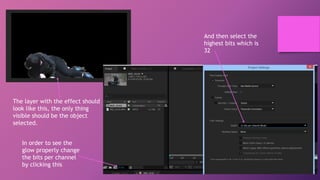
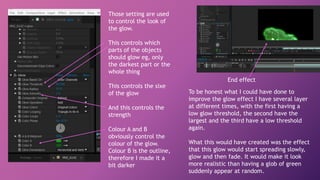
2) For the green glow effect, it instructs to duplicate the layer, use the Roto Brush tool to select the object, apply the Glow effect, and adjust settings like threshold, size, and color.
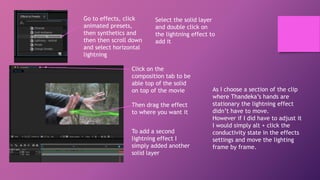
3) For the lightning effect, it says to add a solid layer, apply the Lightning effect from the effects panel, and position the layer over the video clip. Additional lightnings can be added by duplicating the solid layer.


![[Pro forma] - production log](https://cdn.slidesharecdn.com/ss_thumbnails/pro-forma-productionlog-171123132521-thumbnail.jpg?width=640&height=640&fit=bounds)


