
Recommended
More Related Content
What's hot
What's hot (20)
Viewers also liked
Viewers also liked (17)
Similar to Evaluation - Question 6
Similar to Evaluation - Question 6 (20)
More from 08tparnell
More from 08tparnell (20)
Recently uploaded
Recently uploaded (20)
Evaluation - Question 6
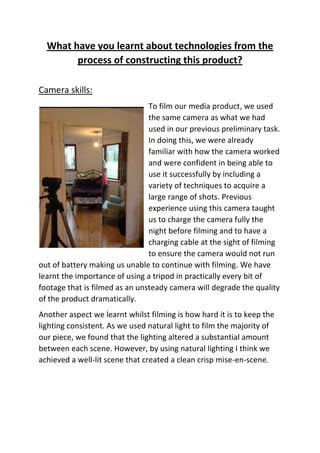
- 1. What have you learnt about technologies from the process of constructing this product? Camera skills: To film our media product, we used the same camera as what we had used in our previous preliminary task. In doing this, we were already familiar with how the camera worked and were confident in being able to use it successfully by including a variety of techniques to acquire a large range of shots. Previous experience using this camera taught us to charge the camera fully the night before filming and to have a charging cable at the sight of filming to ensure the camera would not run out of battery making us unable to continue with filming. We have learnt the importance of using a tripod in practically every bit of footage that is filmed as an unsteady camera will degrade the quality of the product dramatically. Another aspect we learnt whilst filming is how hard it is to keep the lighting consistent. As we used natural light to film the majority of our piece, we found that the lighting altered a substantial amount between each scene. However, by using natural lighting I think we achieved a well-lit scene that created a clean crisp mise-en-scene.
- 2. Sound kit: Similarly to the camera, we also used the same sound kit as what was used in our preliminary task. This was: Microphone with an auxiliary lead that plugged into the camera Dead cat Boom Pole We used the sound kit successfully in our preliminary task so we already had good understanding of using this piece of kit for our main task. One major area we learnt and improved upon from our preliminary task and carried through to our main task was ensuring the camera kit (the boom pole in particular) did not fall into shot. In the preliminary task this was extremely noticeable and ruined the quality of our piece. We did not make this error in our main task. We also used a dead cat to ensure any unwanted sounds that may have been picked up by the microphone from the background. This meant that only the sounds and dialogue we wanted and had planned to include were picked up. We also used a dead cat whilst recording the sound of the alarm ringing. We did this to ensure the sound wasn’t too loud and distorted.
- 3. Adobe Premier Pro: To edit the footage and combine all the shots together we used the programme Adobe Premier Pro. To me this was the most difficult and challenging task of creating our media product yet one of the more successful areas. In this process we have learnt and performed the following: Transferring the footage from the camera to the computer and then importing the useful footage we were going to use into Premier Pro. Cropping and stitching together each piece of footage and combining them to create a sequence to perform the skills required such as match on action. Adding transitions between each scene such as fade to black and additive dissolves. Adding text that fits into and matches the colour of objects in the scene and then animating it. Adding blank title screens at the beginning and end of the sequence. Altering the volume level to the sounds. Inserting a soundtrack that continued throughout the duration of our piece that faded in and out accordingly to what was happening in the sequence. The importance of adding several layers of video and audio tracks.
- 4. These screen shots were took during the editing process in which we were animating the text. In these two particular scenes we wanted the text to fall from the top of the scene to the bottom one by one. To do this we had to create a title per letter and use video effects to animate each letter. This involved inserting key frames when we wanted the title to appear and when and then inserting a following key frame that determined where the title would end up on screen once it’s finished moving and when. The top two screen shots show us matching the timing of the title falling with the stomping of the foot so as the foot hit the floor so did each letter. I am really pleased with how this task was performed and think it added a unique and professional element to our media as a pose to just having still titles appear on screen. Similarly below, this screen shot shows the same technique being used of the text falling down, just a little faster and in a less regimented way. Both screen shots show us layering each title up on different video tracks. This allowed coherent flowand didn’t made sure material wasn’t cropped.
- 5. This screen shot shows us once again using key frames to animate our text however this time we are moving our text across screen horizontally rather that vertically. We did this because we wanted to give the illusion to the audience that the text was being blown across screen whilst the character was drying her hair with the hair dryer. I think we have been incredibly creative learning and performing inserting key frames to animate our titles to do specific things so they fit in with the mise-en-scene. The screen shot above shows us inserting key frames to animate the text in order for it to sit on the curtains whilst the camera pans from the bed to the curtains and back. In this particular scene we used just one title with all the text on because we wanted the text to move together and not each letter individually.
- 6. Youtube: The final task in producing our media product was exporting it and uploading the content to the schools media account on youtube. We did this by selecting: File - export - media Tumblr: Throughout the course we have constantly been uploading work that
- 7. was being done in order to produce our media product on the blogging site, ‘Tumblr’. These things were mainly planning and research which included a variety of digital technology. This required getting to know how to use Tumblr in order for us to be able to upload our work which came in the format of pictures, videos, word documents, PowerPoint documents and Prezi links. We have also customised our own blogs by creating and selecting different themes to make them personal to us.