SlideShare a Scribd company logo
1 of 10
Download to read offline
Teak wood Floors
Timber floors are divided into two types.
• Suspended floor : Consist of timber joist on which floor boards are supported.
• Solid floors : Consist of either wood board of blocks fixed on concrete
foundation.
Suspended floors : Suspended floors can also be classified into three types
depending on Sets of joists used to support floor boards.
• Single floors : This type consist of one set of joist known as bridging or
common joist.
• Double floors : This type consist of one additional and large joist
known as binder, which supports the bridging joist.
• Triple floors : In this type three sets of joists are used i.e. bridging
joist supported by binders, which are in turn framed
into and supported at Intervals by larger joist called
Girders.
Double and triple floors are used to cover large area in a building. The binders and girders
are in wood. This material is now rarely being used. They are increasingly being replaced by steel
beams.
Single floors The floor of domestic building with residential use load and
generally for ground and an upper floor of the building.
• Floor Insulation: Use of wooden floor for ground floor requires floor to be insulated
for passage of air, by providing ventilation by air bricks to prevent disease such as dry rot.
Since the floor boards are not considered to be completely air resistance, a 12.5 mm thick
expanded polystyrene slab is laid on top of the joist before boarding is fixed.
Ground floor
Sizes of joists are depended upon i) span, ii) distance between each joists, iii) load on the
floor and iv) the timber used.
• Intermediate supports to ground floors are provide by constructing a 115mm thick
sleeper walls at maximum distance of 1800mm c/c, as a result small joists are required
to support the floor boards. As the upper floor has no provision of such intermediate
walls, the joists span from wall to wall.
• Spacing of joists varies between 300 to 400mm c/c, if 25mm thick floor boards are used,
the distance is generally 400mm.
• The minimum safe superimposed load (live load) varies with the type of building. It is
about 200kg/sq.m. for the residential building.
• Suitable timber for floor is red wood in softwood type and teak wood in hardwood
variety.
Wall plates
They run along the full length of wall having 100 X 75mm (or 115 X 75) size. They are useful
as
They serve as suitable bearing of 100mm (115mm) size of joist.
Uniformly distribute load of joist over the entire length of wall.
Provides suitable edge to bring upper end of all joists to one level to receive floor boards.
Allows fixing of joist.
Wall plates are solidly bedded in cement/ lime mortar by a brick layer for the entire width of
the floor. Joints in long length are provided with simple lap joint (see fig). Ground floor wall plates
are normally placed immediately over damp proof course.
Joists are placed on wall plates and nails are driven through for fixing. If the size of joist vary
than they are levelled by removing a portion of wall plate and housed jointed into it. Other type of
joints being used is either single notching, double notching or cogged joint (see fig M,N,O,P).
For ground floor suspended flooring, it is necessary to prevent virulent diseaseof timber
known as dry rot. It is necessary to safe guard against disease by providing well seasoned timber and
to provide adequate ventilation. For free circulation of air between various ground floor timbers, it is
essential to provide Sleeper wall 50mm away from main wall to support wall plate.
Upon offsets of corbels (see fig). If for economical purpose the wall plates are to be support
on main wall it is necessary to form air space round the sides and top of joist (see fig U) and apply
a coat of black Japan to ends of wall plates and joists. In addition to this perforated bricks are
provided near joist level at @900c/c. The sleeper wall is honey combed (with voids) in them for free
circulation of air through it.
Sometimes offsets (for ground floor) or corbel (for upper floors) to support wall plates are
used.Alternatively corbel brackets of mild steel or wrought iron is used to support the wall plate (see
fig). They are 75 to 100mm wide and 10mm thick and about 430mm long with ends turned 50mm in
opposite direction. If used they should be oil painted and placed at 750mm to 900mm apart.
Joists
Joists can be placed in any direction but usually placed across the short span of room for
reduce span and timber saving. A space of 50mm should be left between wall and first joist running
parallel to it. Joist of adjutants room if running in the same direction, the overlapping ends on
division walls are nailed to each other and to wall plates (see fig).
Floor boards
Red wood is generally preferred for the floor boards. White wood such as pine and spruce is
used for cheaper work. Hardwood like teakwood and saal are used for first class floors.
The size of floor boards is generally 100mm to 25mm wide; they are 25 to 38mm thick. The
narrower the boards the better, since the shrinkage will be minimum and joint will be open and
there will not tend to cup (see fig). Hence 100mm wide boards are used for first class work, 115mm
wide for normal work and 175mm wide for common work. The thickness of 25mm is preferred with
400 c/c spacing of joist. The boards are about 7m long are available. (The actual size of boards shall
vary in above case by 5mm in both directions due to planning and finishing of boards.
Joints
Various joints in floor boards are shown in the figure. They are described below.
• Square or plain joint
The edges of boards are cut planed at right angle to the face or sides. They are never
used in good works unless the boards are to be covered.
• Rebated joint
A 10mm wide tongue and up to 1/3rd
of the thickness of the board is formed along lower
edge to fit into a slightly wide rebate formed on the adjutants’ board.
• Tongue and groove joint
A narrow projecting tongue is formed just slightly smaller than the groove(10mm wide
tongue and 12mm wide groove) to enable the boards to fit snugly in to one another.
Nailing of boards can be done secretly in this case as shown in the figure.
• Rebated tongue and groove joint
An expensive joint adopted for hardwood floor boards where nailing are required to be
concealed.
• Splayed rebated tongue and groove joint
This joint gives thicker tongue due to ‘v’ formed and can be secretly nailed.
• Ploughed and tongue joint
Grooves formed or ploughed in both floor boards and a hard wood tongue is in to them.
A rarely used joint as separate timber is required to form tongue.
• Heading or end joints
Normally floor boards are selected such that they cover the entire length of the room
from one wall to other wall. If there is any joint required than the boards are cut straight
as to cover the half of the width of the joist. The heading joint can be splayed as shown
in figure or sometime rebated in good works.
Cramping and Nailing boards
The joints must be as close as possible before they are nailed. The best means of affecting
this is to employ a cramping tool. This is first fixed to joist by a clamp. A rough strip of wood is placed
between floor boards and clamp arm. Rotating the arm, the clamp can be pressed towards floor
boards, which are than nailed. This process of cramping done after placing 4 to 5 boards together. As
the work proceeds towards the outer wall, the last few length of boards cannot be cramped owing
to lack of space. These boards are than brought tight by using a piece of boards and by a few smart
strokes with hammer on the upper end of board will close joints.
Double boarded floors
Double flooring is sometimes required in building of the factory type and other domestic
buildings, which require good clean floor. The first covering of boards is 20mm thick roughly sawn
square edged boards lay diagonally across the joist to avoid their joist coinciding with those of the
boards above. The upper boards may be 20 to 25mm hardwood which is fixed at right angle to joist.
Cleaning off and protecting floors
On completion wood floor must be flogged. This consists of planning the boards to a smooth
level and smooth surface either by a hand or machine. Hardwood floor are rubbed smooth with sand
paper and finally oiled or polished. Floor should be protected by liberally spreading saw dust on
them; this prevents plaster, paint or dust from soiling and scratching the boards.
Upper floor
The bridging joists are placed across the shortest span, and as there is no intermediate
support, the clear span is from wall to wall. In accordance the size of joist required is 175mm X
50mm.
Trimming
Where fire places and openings for the staircases occur, the bridging joist cannot be
supported at both ends by the walls. An additional timber member needs to be introduced to
receive the ends of joist, which have to be cut. This operation is known as trimming. The trimmed
opening at the staircase opening has two thick joists, on both its sides known as trimming joist. They
run for the full length of wall. The additional timber member span between these two trimming
joists and joined by a special joint known as tusk tenon joint, which is known as trimmer joist. The
trimmer joist supports the trimmed bridging joist, known as trimmed joist.
Trimming and trimmer joists should be thicker than the bridging joists on account of greater
weight which they have to support. The usual practice is to make trimming and trimmer joist 25mm
thicker than bridging joist. The trimmer joist supports not more than six trimmed joist. As the
bridging joists are 50mm thick, the trimming and trimmer joists are 75mm thick.
Joints
The following joints used at trimmed openings
• Tusk and tenon joint
This is the strongest form of joint in floor construction and for this reason it is used to
join trimming and trimmer joists. The tenon is cut at the end of trimmer and passes
through the trimming joist by about 100 to 125mm, is cut in the center. The projecting
piece below the tenon known as tusk transmits most of the load of trimmer to trimming
joist which enters from 1/8 to 1/4 into the trimming joist. The beveled portion above
tenon known as horn or haunch strengthens the tenon. The trimmer joist is brought
tight with trimming joist by driving a wood wedge into the hole provided in tenon. The
side of the hole must be long enough to allow the trimmer to be forced into the
direction of trimming joist until the joint is tight.
• Dove tailed housed or notched joint
This joint is used to house trimmed joist into the trimmer joist. The end of trimmed joist
is formed to correspond to the housing made into the trimmer to receive it and is
dropped into the housing. Long nails are than driven inclined from outer edge of
trimmer joist. (see fig)
• Bevelled housed joint
It is also known as half depth joint as the depth of housing is equal to the half the depth
of joist. The joist must be nailed securely. Note that the amount of timber removed from
the trimmer varies from nil at top fiber, where maximum compressive stress exists, to a
maximum at the neutral axis.
• Square housed joint
Another half depth joint adopted for smaller trimmed joist.
Strutting
Floor needs to be rigid as the vibrations and undue stress may be transmitted to the
supporting walls and ceiling, which might make them defective. The deep bracing joist have
tendency to twist and tilt sideways. It is therefore necessary to stiffen the floor by providing cross
bracing or strutting in a continuous row at least at 1.8m c/c distance. There are two types of
strutting as given below
• Herring bone strutting
This is the best form and comprised of a pair of inclined timber which are tightly fitted between two
joists and are nailed. The size of timber vary from 50mm X 32mm to 50mm X 50mm. Provided the
walls are sufficiently strong, folding wedges are driven between wall and adjutants joist and in line
with strutting to increase the efficiency of the strutting. This form of strutting is effective even when
the joist shrink along its depth or thickness, for the depth shrinkage especially tends to reduce the
inclination of the struts, resulting into increase in compression.
• Solid strutting
The simplest form of strutting adopted only in cheap work. This consists of merely
nailing short length of floor board into continuous row between joists. They are
ineffective and waste of material, as the joist shrink along its thickness, they become
loose and comes out.
The only way to make them effective is to fix a long circular steel or wrought iron rod (13
to 25mm in diameter) through the whole of joists and near the strutting as shown in
figure. This form of strutting is rarely adopted.
Double floors
The single floors are restricted to 5.0m clear span. When the width of the room
increases, one or more relatively large members are required to be introduced to act as
intermediate support for bridging joist. They are known as binders or beams. This result in saving of
timber in limiting size of bridging joist. The binders are spaced at 1.8 to 3.0m c/c nad spanned across
shorter side of room to keep their dimension to minimum.
•
Plan, elevation and details of double floors are shown at A,B,C,D,E,F,G and H.The plan shows
use of two binders thus dividing the room in three bays. The bridging joist can be cogged into beams
to reduce overall depth of floor and saving on brickwork. The cogging can be limited upto 2/3rd
depth of bridging joist. Providing the joints to be tight fit and also avoiding unnecessary cutting and
notching of binders. Necessary circulation of airspace is affected around binders resting on stone
pad as shown at F and H.
Solid strutting of bridging joist is sometimes resorted to as shown in A and H, but this can be
avoided by cogging of joist into the binders.
If the ceiling of room is required to be flushed with the soffit of the binders than a small fillet
of 50mm X 25mm is nailed to the side of binders and plugged to the walls (as shown). The ends of
100mmx50mm ceiling joist are notched to these fillets and nailed. Several alternative details
showing the ceiling attached to the bridging joist are shown in fig. 8.
Mild steel and reinforced concrete beams have replaced the timber binders as they have very
high strength, both in compression as well as tensile stress, as compared to timber. Hence a lot of
saving can be affected by using them instead of timber binders as dead weight and brickwork saving.
A detail incorporating a rolled mild steel beam is shown with ceiling joists.
Framed or Triple floors
As the name suggest the floor consist of three sets of joists i.e. bridging joist, binders and
girders. In addition t solid timber girders they can also be made of glued laminated timber or box
plywood construction (shown in fig.) when the load is not excessive. While steel or reinforced
concrete girders are usually used in framing large floors with heavy loading. The framed floor is
adopted when the narrowest span of the room is more than 7.0m and superimposed load is heavy.
The figure showing plan, section and details of room with 7.62 m wide width. Steel girders
span the room at 3.0m centers. They support the two wood binders at one third the point (2.54m
centers) and the later carries the bridging and ceiling joists. The details P and Q show binders
notched over top flange of girder, supported on 90mmx65mmx10mm m.s. angle, secured to web by
either 20mm dia. Rivets at 380mm c/c or welded to it. These angles support 75mm x 50mm bearer
to which cradaling is nailed. Attached brick piers are formed to give adequate support to girders
resting on stone pads. This construction and the steelwork are more clearly shown in the sketch at R.
The sketch at S shows the cradling and other details, the former consist of 50mm x 32mm firring at
400mm centers for fixing plasterboards.
The other details of bridging joists and ceiling joists are similar to double floors. The binders
of 300mm x 150mm may consist of two 300mm x 75mm joists bolted together as shown at B. The
use of such stock sizes may be preferred if larger single member is not available. If desired the binder
can be lowered in to steel girder and supported over wood bearers bolted to steel girder. The detail
at Q would than resemble than at M or F.
Laminated beams
Solid timber sections bigger than 300mm x 300mm is difficult to obtain, but it is possible to
built up a section by gluing 25mm thick laminae to each other and form a section of required size.
Alternatively the laminae can be placed vertically for beams upto 30mm deep, in which case the
permissible bending stress may be upto 25 percent greater than if the beam were of solid timber.
Plywood box beams
These beams are made for large spans, they incorporate top and bottom solid timber chords
to which plywood webs are glued and nailed down to either side. (see fig.)
The beam shown has 125mm X 75mm top and bottom chords with 18mm plywood webs
glued and pinned to them. Vertical braces of the same section as the chords are placed within the
web at 600mm intervals (see fig.). The fastening is made by making the plywood webs project so
that they lap the sides of the column where they are nailed. The ends of the beams are strengthened
by cranked metal plates made from 75mm X 10mm steel which pass down the brace and are
cranked over for a distance of 100mm.

More Related Content

What's hot (20)

FALSE CEILING
FALSE CEILINGFALSE CEILING
FALSE CEILING
 
STAIRS 1
 STAIRS 1 STAIRS 1
STAIRS 1
 
Roofs
RoofsRoofs
Roofs
 
Roof covering
Roof coveringRoof covering
Roof covering
 
Cornices
CornicesCornices
Cornices
 
types of Flooring in construction
types of Flooring in constructiontypes of Flooring in construction
types of Flooring in construction
 
Partition & suspended ceiling
Partition & suspended ceilingPartition & suspended ceiling
Partition & suspended ceiling
 
stone cladding
  stone cladding  stone cladding
stone cladding
 
Wall finishes
Wall finishesWall finishes
Wall finishes
 
Softscape And Hardscape
Softscape And HardscapeSoftscape And Hardscape
Softscape And Hardscape
 
Cladding
CladdingCladding
Cladding
 
Floor finishes - flooring and finish types
Floor finishes - flooring and finish typesFloor finishes - flooring and finish types
Floor finishes - flooring and finish types
 
7 Types of Cladding
7 Types of Cladding7 Types of Cladding
7 Types of Cladding
 
Global style- Interior Design
Global style- Interior DesignGlobal style- Interior Design
Global style- Interior Design
 
External finishes
External finishesExternal finishes
External finishes
 
False ceiling
False ceilingFalse ceiling
False ceiling
 
Deterioration in building
Deterioration in buildingDeterioration in building
Deterioration in building
 
Different types of insulation materials
Different types of insulation materialsDifferent types of insulation materials
Different types of insulation materials
 
Sound insulation
Sound insulation Sound insulation
Sound insulation
 
Wall finishes
Wall finishesWall finishes
Wall finishes
 

Similar to Teak Wood Floors Guide

Wooden flooring and repair
Wooden flooring and repairWooden flooring and repair
Wooden flooring and repairanishanaidu13
 
Industrial Timber.pptx
Industrial Timber.pptxIndustrial Timber.pptx
Industrial Timber.pptxVIVA35
 
1.3_Basic Engineering_Day 5.pptx
1.3_Basic Engineering_Day 5.pptx1.3_Basic Engineering_Day 5.pptx
1.3_Basic Engineering_Day 5.pptxJanak82
 
Lesson 3 Floor screeds _suspended floors.pptx
Lesson 3 Floor screeds _suspended floors.pptxLesson 3 Floor screeds _suspended floors.pptx
Lesson 3 Floor screeds _suspended floors.pptxsydneyaugust1
 
Type iv building construction
Type iv building constructionType iv building construction
Type iv building constructionBrianna Mason
 
Chapter threesjjsjsjsjsjsjsjsjsjjsjsjssj
Chapter  threesjjsjsjsjsjsjsjsjsjjsjsjssjChapter  threesjjsjsjsjsjsjsjsjsjjsjsjssj
Chapter threesjjsjsjsjsjsjsjsjsjjsjsjssjzekimamaru
 
Type iv building construction FINAL
Type iv building construction FINALType iv building construction FINAL
Type iv building construction FINALBrianna Mason
 
Types of Roofing and Roofing Materials
Types of Roofing and Roofing MaterialsTypes of Roofing and Roofing Materials
Types of Roofing and Roofing MaterialsShayne Galo
 
Install lining, panelling and moulding - Linings presentation
Install lining, panelling and moulding - Linings presentationInstall lining, panelling and moulding - Linings presentation
Install lining, panelling and moulding - Linings presentationCanberra Institute of technology
 
Timber flooring
Timber flooringTimber flooring
Timber flooringkaiwan1996
 
Visual Dictionary- Cement1
Visual Dictionary- Cement1Visual Dictionary- Cement1
Visual Dictionary- Cement1cement1
 
Partition System in building construction
Partition System in building constructionPartition System in building construction
Partition System in building constructionSanaFarooqui19
 
Bmc timber flooring
Bmc timber flooringBmc timber flooring
Bmc timber flooringBinaf AG
 

Similar to Teak Wood Floors Guide (20)

Wooden flooring and repair
Wooden flooring and repairWooden flooring and repair
Wooden flooring and repair
 
Industrial Timber.pptx
Industrial Timber.pptxIndustrial Timber.pptx
Industrial Timber.pptx
 
ROOFS.ppt
ROOFS.pptROOFS.ppt
ROOFS.ppt
 
1.3_Basic Engineering_Day 5.pptx
1.3_Basic Engineering_Day 5.pptx1.3_Basic Engineering_Day 5.pptx
1.3_Basic Engineering_Day 5.pptx
 
Lesson 3 Floor screeds _suspended floors.pptx
Lesson 3 Floor screeds _suspended floors.pptxLesson 3 Floor screeds _suspended floors.pptx
Lesson 3 Floor screeds _suspended floors.pptx
 
All about decking
All about deckingAll about decking
All about decking
 
Type iv building construction
Type iv building constructionType iv building construction
Type iv building construction
 
Chapter threesjjsjsjsjsjsjsjsjsjjsjsjssj
Chapter  threesjjsjsjsjsjsjsjsjsjjsjsjssjChapter  threesjjsjsjsjsjsjsjsjsjjsjsjssj
Chapter threesjjsjsjsjsjsjsjsjsjjsjsjssj
 
Type iv building construction FINAL
Type iv building construction FINALType iv building construction FINAL
Type iv building construction FINAL
 
Types of Roofing and Roofing Materials
Types of Roofing and Roofing MaterialsTypes of Roofing and Roofing Materials
Types of Roofing and Roofing Materials
 
Floor
FloorFloor
Floor
 
Install lining, panelling and moulding - Linings presentation
Install lining, panelling and moulding - Linings presentationInstall lining, panelling and moulding - Linings presentation
Install lining, panelling and moulding - Linings presentation
 
All about decking
All about deckingAll about decking
All about decking
 
Timber flooring
Timber flooringTimber flooring
Timber flooring
 
Timber roofs
Timber roofsTimber roofs
Timber roofs
 
Visual Dictionary- Cement1
Visual Dictionary- Cement1Visual Dictionary- Cement1
Visual Dictionary- Cement1
 
Partition System in building construction
Partition System in building constructionPartition System in building construction
Partition System in building construction
 
Lay a laminate floor
Lay a laminate floorLay a laminate floor
Lay a laminate floor
 
Bmc timber flooring
Bmc timber flooringBmc timber flooring
Bmc timber flooring
 
Partition wall
Partition wallPartition wall
Partition wall
 

Recently uploaded

Crayon Activity Handout For the Crayon A
Crayon Activity Handout For the Crayon ACrayon Activity Handout For the Crayon A
Crayon Activity Handout For the Crayon AUnboundStockton
 
Class 11 Legal Studies Ch-1 Concept of State .pdf
Class 11 Legal Studies Ch-1 Concept of State .pdfClass 11 Legal Studies Ch-1 Concept of State .pdf
Class 11 Legal Studies Ch-1 Concept of State .pdfakmcokerachita
 
call girls in Kamla Market (DELHI) 🔝 >༒9953330565🔝 genuine Escort Service 🔝✔️✔️
call girls in Kamla Market (DELHI) 🔝 >༒9953330565🔝 genuine Escort Service 🔝✔️✔️call girls in Kamla Market (DELHI) 🔝 >༒9953330565🔝 genuine Escort Service 🔝✔️✔️
call girls in Kamla Market (DELHI) 🔝 >༒9953330565🔝 genuine Escort Service 🔝✔️✔️9953056974 Low Rate Call Girls In Saket, Delhi NCR
 
_Math 4-Q4 Week 5.pptx Steps in Collecting Data
_Math 4-Q4 Week 5.pptx Steps in Collecting Data_Math 4-Q4 Week 5.pptx Steps in Collecting Data
_Math 4-Q4 Week 5.pptx Steps in Collecting DataJhengPantaleon
 
Introduction to AI in Higher Education_draft.pptx
Introduction to AI in Higher Education_draft.pptxIntroduction to AI in Higher Education_draft.pptx
Introduction to AI in Higher Education_draft.pptxpboyjonauth
 
SOCIAL AND HISTORICAL CONTEXT - LFTVD.pptx
SOCIAL AND HISTORICAL CONTEXT - LFTVD.pptxSOCIAL AND HISTORICAL CONTEXT - LFTVD.pptx
SOCIAL AND HISTORICAL CONTEXT - LFTVD.pptxiammrhaywood
 
Enzyme, Pharmaceutical Aids, Miscellaneous Last Part of Chapter no 5th.pdf
Enzyme, Pharmaceutical Aids, Miscellaneous Last Part of Chapter no 5th.pdfEnzyme, Pharmaceutical Aids, Miscellaneous Last Part of Chapter no 5th.pdf
Enzyme, Pharmaceutical Aids, Miscellaneous Last Part of Chapter no 5th.pdfSumit Tiwari
 
CARE OF CHILD IN INCUBATOR..........pptx
CARE OF CHILD IN INCUBATOR..........pptxCARE OF CHILD IN INCUBATOR..........pptx
CARE OF CHILD IN INCUBATOR..........pptxGaneshChakor2
 
Biting mechanism of poisonous snakes.pdf
Biting mechanism of poisonous snakes.pdfBiting mechanism of poisonous snakes.pdf
Biting mechanism of poisonous snakes.pdfadityarao40181
 
Proudly South Africa powerpoint Thorisha.pptx
Proudly South Africa powerpoint Thorisha.pptxProudly South Africa powerpoint Thorisha.pptx
Proudly South Africa powerpoint Thorisha.pptxthorishapillay1
 
Alper Gobel In Media Res Media Component
Alper Gobel In Media Res Media ComponentAlper Gobel In Media Res Media Component
Alper Gobel In Media Res Media ComponentInMediaRes1
 
Organic Name Reactions for the students and aspirants of Chemistry12th.pptx
Organic Name Reactions  for the students and aspirants of Chemistry12th.pptxOrganic Name Reactions  for the students and aspirants of Chemistry12th.pptx
Organic Name Reactions for the students and aspirants of Chemistry12th.pptxVS Mahajan Coaching Centre
 
ENGLISH5 QUARTER4 MODULE1 WEEK1-3 How Visual and Multimedia Elements.pptx
ENGLISH5 QUARTER4 MODULE1 WEEK1-3 How Visual and Multimedia Elements.pptxENGLISH5 QUARTER4 MODULE1 WEEK1-3 How Visual and Multimedia Elements.pptx
ENGLISH5 QUARTER4 MODULE1 WEEK1-3 How Visual and Multimedia Elements.pptxAnaBeatriceAblay2
 
Kisan Call Centre - To harness potential of ICT in Agriculture by answer farm...
Kisan Call Centre - To harness potential of ICT in Agriculture by answer farm...Kisan Call Centre - To harness potential of ICT in Agriculture by answer farm...
Kisan Call Centre - To harness potential of ICT in Agriculture by answer farm...Krashi Coaching
 
internship ppt on smartinternz platform as salesforce developer
internship ppt on smartinternz platform as salesforce developerinternship ppt on smartinternz platform as salesforce developer
internship ppt on smartinternz platform as salesforce developerunnathinaik
 
Science 7 - LAND and SEA BREEZE and its Characteristics
Science 7 - LAND and SEA BREEZE and its CharacteristicsScience 7 - LAND and SEA BREEZE and its Characteristics
Science 7 - LAND and SEA BREEZE and its CharacteristicsKarinaGenton
 
Pharmacognosy Flower 3. Compositae 2023.pdf
Pharmacognosy Flower 3. Compositae 2023.pdfPharmacognosy Flower 3. Compositae 2023.pdf
Pharmacognosy Flower 3. Compositae 2023.pdfMahmoud M. Sallam
 

Recently uploaded (20)

Model Call Girl in Bikash Puri Delhi reach out to us at 🔝9953056974🔝
Model Call Girl in Bikash Puri  Delhi reach out to us at 🔝9953056974🔝Model Call Girl in Bikash Puri  Delhi reach out to us at 🔝9953056974🔝
Model Call Girl in Bikash Puri Delhi reach out to us at 🔝9953056974🔝
 
Crayon Activity Handout For the Crayon A
Crayon Activity Handout For the Crayon ACrayon Activity Handout For the Crayon A
Crayon Activity Handout For the Crayon A
 
Class 11 Legal Studies Ch-1 Concept of State .pdf
Class 11 Legal Studies Ch-1 Concept of State .pdfClass 11 Legal Studies Ch-1 Concept of State .pdf
Class 11 Legal Studies Ch-1 Concept of State .pdf
 
call girls in Kamla Market (DELHI) 🔝 >༒9953330565🔝 genuine Escort Service 🔝✔️✔️
call girls in Kamla Market (DELHI) 🔝 >༒9953330565🔝 genuine Escort Service 🔝✔️✔️call girls in Kamla Market (DELHI) 🔝 >༒9953330565🔝 genuine Escort Service 🔝✔️✔️
call girls in Kamla Market (DELHI) 🔝 >༒9953330565🔝 genuine Escort Service 🔝✔️✔️
 
Model Call Girl in Tilak Nagar Delhi reach out to us at 🔝9953056974🔝
Model Call Girl in Tilak Nagar Delhi reach out to us at 🔝9953056974🔝Model Call Girl in Tilak Nagar Delhi reach out to us at 🔝9953056974🔝
Model Call Girl in Tilak Nagar Delhi reach out to us at 🔝9953056974🔝
 
_Math 4-Q4 Week 5.pptx Steps in Collecting Data
_Math 4-Q4 Week 5.pptx Steps in Collecting Data_Math 4-Q4 Week 5.pptx Steps in Collecting Data
_Math 4-Q4 Week 5.pptx Steps in Collecting Data
 
Introduction to AI in Higher Education_draft.pptx
Introduction to AI in Higher Education_draft.pptxIntroduction to AI in Higher Education_draft.pptx
Introduction to AI in Higher Education_draft.pptx
 
TataKelola dan KamSiber Kecerdasan Buatan v022.pdf
TataKelola dan KamSiber Kecerdasan Buatan v022.pdfTataKelola dan KamSiber Kecerdasan Buatan v022.pdf
TataKelola dan KamSiber Kecerdasan Buatan v022.pdf
 
SOCIAL AND HISTORICAL CONTEXT - LFTVD.pptx
SOCIAL AND HISTORICAL CONTEXT - LFTVD.pptxSOCIAL AND HISTORICAL CONTEXT - LFTVD.pptx
SOCIAL AND HISTORICAL CONTEXT - LFTVD.pptx
 
Enzyme, Pharmaceutical Aids, Miscellaneous Last Part of Chapter no 5th.pdf
Enzyme, Pharmaceutical Aids, Miscellaneous Last Part of Chapter no 5th.pdfEnzyme, Pharmaceutical Aids, Miscellaneous Last Part of Chapter no 5th.pdf
Enzyme, Pharmaceutical Aids, Miscellaneous Last Part of Chapter no 5th.pdf
 
CARE OF CHILD IN INCUBATOR..........pptx
CARE OF CHILD IN INCUBATOR..........pptxCARE OF CHILD IN INCUBATOR..........pptx
CARE OF CHILD IN INCUBATOR..........pptx
 
Biting mechanism of poisonous snakes.pdf
Biting mechanism of poisonous snakes.pdfBiting mechanism of poisonous snakes.pdf
Biting mechanism of poisonous snakes.pdf
 
Proudly South Africa powerpoint Thorisha.pptx
Proudly South Africa powerpoint Thorisha.pptxProudly South Africa powerpoint Thorisha.pptx
Proudly South Africa powerpoint Thorisha.pptx
 
Alper Gobel In Media Res Media Component
Alper Gobel In Media Res Media ComponentAlper Gobel In Media Res Media Component
Alper Gobel In Media Res Media Component
 
Organic Name Reactions for the students and aspirants of Chemistry12th.pptx
Organic Name Reactions  for the students and aspirants of Chemistry12th.pptxOrganic Name Reactions  for the students and aspirants of Chemistry12th.pptx
Organic Name Reactions for the students and aspirants of Chemistry12th.pptx
 
ENGLISH5 QUARTER4 MODULE1 WEEK1-3 How Visual and Multimedia Elements.pptx
ENGLISH5 QUARTER4 MODULE1 WEEK1-3 How Visual and Multimedia Elements.pptxENGLISH5 QUARTER4 MODULE1 WEEK1-3 How Visual and Multimedia Elements.pptx
ENGLISH5 QUARTER4 MODULE1 WEEK1-3 How Visual and Multimedia Elements.pptx
 
Kisan Call Centre - To harness potential of ICT in Agriculture by answer farm...
Kisan Call Centre - To harness potential of ICT in Agriculture by answer farm...Kisan Call Centre - To harness potential of ICT in Agriculture by answer farm...
Kisan Call Centre - To harness potential of ICT in Agriculture by answer farm...
 
internship ppt on smartinternz platform as salesforce developer
internship ppt on smartinternz platform as salesforce developerinternship ppt on smartinternz platform as salesforce developer
internship ppt on smartinternz platform as salesforce developer
 
Science 7 - LAND and SEA BREEZE and its Characteristics
Science 7 - LAND and SEA BREEZE and its CharacteristicsScience 7 - LAND and SEA BREEZE and its Characteristics
Science 7 - LAND and SEA BREEZE and its Characteristics
 
Pharmacognosy Flower 3. Compositae 2023.pdf
Pharmacognosy Flower 3. Compositae 2023.pdfPharmacognosy Flower 3. Compositae 2023.pdf
Pharmacognosy Flower 3. Compositae 2023.pdf
 

Teak Wood Floors Guide

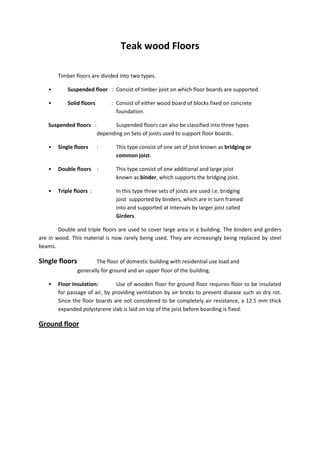
  • 1. Teak wood Floors Timber floors are divided into two types. • Suspended floor : Consist of timber joist on which floor boards are supported. • Solid floors : Consist of either wood board of blocks fixed on concrete foundation. Suspended floors : Suspended floors can also be classified into three types depending on Sets of joists used to support floor boards. • Single floors : This type consist of one set of joist known as bridging or common joist. • Double floors : This type consist of one additional and large joist known as binder, which supports the bridging joist. • Triple floors : In this type three sets of joists are used i.e. bridging joist supported by binders, which are in turn framed into and supported at Intervals by larger joist called Girders. Double and triple floors are used to cover large area in a building. The binders and girders are in wood. This material is now rarely being used. They are increasingly being replaced by steel beams. Single floors The floor of domestic building with residential use load and generally for ground and an upper floor of the building. • Floor Insulation: Use of wooden floor for ground floor requires floor to be insulated for passage of air, by providing ventilation by air bricks to prevent disease such as dry rot. Since the floor boards are not considered to be completely air resistance, a 12.5 mm thick expanded polystyrene slab is laid on top of the joist before boarding is fixed. Ground floor
  • 2. Sizes of joists are depended upon i) span, ii) distance between each joists, iii) load on the floor and iv) the timber used. • Intermediate supports to ground floors are provide by constructing a 115mm thick sleeper walls at maximum distance of 1800mm c/c, as a result small joists are required to support the floor boards. As the upper floor has no provision of such intermediate walls, the joists span from wall to wall. • Spacing of joists varies between 300 to 400mm c/c, if 25mm thick floor boards are used, the distance is generally 400mm. • The minimum safe superimposed load (live load) varies with the type of building. It is about 200kg/sq.m. for the residential building. • Suitable timber for floor is red wood in softwood type and teak wood in hardwood variety. Wall plates
  • 3. They run along the full length of wall having 100 X 75mm (or 115 X 75) size. They are useful as They serve as suitable bearing of 100mm (115mm) size of joist. Uniformly distribute load of joist over the entire length of wall. Provides suitable edge to bring upper end of all joists to one level to receive floor boards. Allows fixing of joist. Wall plates are solidly bedded in cement/ lime mortar by a brick layer for the entire width of the floor. Joints in long length are provided with simple lap joint (see fig). Ground floor wall plates are normally placed immediately over damp proof course. Joists are placed on wall plates and nails are driven through for fixing. If the size of joist vary than they are levelled by removing a portion of wall plate and housed jointed into it. Other type of joints being used is either single notching, double notching or cogged joint (see fig M,N,O,P). For ground floor suspended flooring, it is necessary to prevent virulent diseaseof timber known as dry rot. It is necessary to safe guard against disease by providing well seasoned timber and to provide adequate ventilation. For free circulation of air between various ground floor timbers, it is essential to provide Sleeper wall 50mm away from main wall to support wall plate. Upon offsets of corbels (see fig). If for economical purpose the wall plates are to be support on main wall it is necessary to form air space round the sides and top of joist (see fig U) and apply a coat of black Japan to ends of wall plates and joists. In addition to this perforated bricks are provided near joist level at @900c/c. The sleeper wall is honey combed (with voids) in them for free circulation of air through it. Sometimes offsets (for ground floor) or corbel (for upper floors) to support wall plates are used.Alternatively corbel brackets of mild steel or wrought iron is used to support the wall plate (see fig). They are 75 to 100mm wide and 10mm thick and about 430mm long with ends turned 50mm in opposite direction. If used they should be oil painted and placed at 750mm to 900mm apart. Joists Joists can be placed in any direction but usually placed across the short span of room for reduce span and timber saving. A space of 50mm should be left between wall and first joist running parallel to it. Joist of adjutants room if running in the same direction, the overlapping ends on division walls are nailed to each other and to wall plates (see fig). Floor boards Red wood is generally preferred for the floor boards. White wood such as pine and spruce is used for cheaper work. Hardwood like teakwood and saal are used for first class floors. The size of floor boards is generally 100mm to 25mm wide; they are 25 to 38mm thick. The narrower the boards the better, since the shrinkage will be minimum and joint will be open and there will not tend to cup (see fig). Hence 100mm wide boards are used for first class work, 115mm
  • 4. wide for normal work and 175mm wide for common work. The thickness of 25mm is preferred with 400 c/c spacing of joist. The boards are about 7m long are available. (The actual size of boards shall vary in above case by 5mm in both directions due to planning and finishing of boards. Joints Various joints in floor boards are shown in the figure. They are described below. • Square or plain joint The edges of boards are cut planed at right angle to the face or sides. They are never used in good works unless the boards are to be covered. • Rebated joint A 10mm wide tongue and up to 1/3rd of the thickness of the board is formed along lower edge to fit into a slightly wide rebate formed on the adjutants’ board. • Tongue and groove joint A narrow projecting tongue is formed just slightly smaller than the groove(10mm wide tongue and 12mm wide groove) to enable the boards to fit snugly in to one another. Nailing of boards can be done secretly in this case as shown in the figure. • Rebated tongue and groove joint An expensive joint adopted for hardwood floor boards where nailing are required to be concealed. • Splayed rebated tongue and groove joint This joint gives thicker tongue due to ‘v’ formed and can be secretly nailed. • Ploughed and tongue joint Grooves formed or ploughed in both floor boards and a hard wood tongue is in to them. A rarely used joint as separate timber is required to form tongue. • Heading or end joints Normally floor boards are selected such that they cover the entire length of the room from one wall to other wall. If there is any joint required than the boards are cut straight as to cover the half of the width of the joist. The heading joint can be splayed as shown in figure or sometime rebated in good works. Cramping and Nailing boards The joints must be as close as possible before they are nailed. The best means of affecting this is to employ a cramping tool. This is first fixed to joist by a clamp. A rough strip of wood is placed between floor boards and clamp arm. Rotating the arm, the clamp can be pressed towards floor boards, which are than nailed. This process of cramping done after placing 4 to 5 boards together. As
  • 5. the work proceeds towards the outer wall, the last few length of boards cannot be cramped owing to lack of space. These boards are than brought tight by using a piece of boards and by a few smart strokes with hammer on the upper end of board will close joints. Double boarded floors Double flooring is sometimes required in building of the factory type and other domestic buildings, which require good clean floor. The first covering of boards is 20mm thick roughly sawn square edged boards lay diagonally across the joist to avoid their joist coinciding with those of the boards above. The upper boards may be 20 to 25mm hardwood which is fixed at right angle to joist. Cleaning off and protecting floors On completion wood floor must be flogged. This consists of planning the boards to a smooth level and smooth surface either by a hand or machine. Hardwood floor are rubbed smooth with sand paper and finally oiled or polished. Floor should be protected by liberally spreading saw dust on them; this prevents plaster, paint or dust from soiling and scratching the boards. Upper floor The bridging joists are placed across the shortest span, and as there is no intermediate support, the clear span is from wall to wall. In accordance the size of joist required is 175mm X 50mm.
  • 6. Trimming Where fire places and openings for the staircases occur, the bridging joist cannot be supported at both ends by the walls. An additional timber member needs to be introduced to receive the ends of joist, which have to be cut. This operation is known as trimming. The trimmed opening at the staircase opening has two thick joists, on both its sides known as trimming joist. They run for the full length of wall. The additional timber member span between these two trimming joists and joined by a special joint known as tusk tenon joint, which is known as trimmer joist. The trimmer joist supports the trimmed bridging joist, known as trimmed joist. Trimming and trimmer joists should be thicker than the bridging joists on account of greater weight which they have to support. The usual practice is to make trimming and trimmer joist 25mm thicker than bridging joist. The trimmer joist supports not more than six trimmed joist. As the bridging joists are 50mm thick, the trimming and trimmer joists are 75mm thick. Joints The following joints used at trimmed openings • Tusk and tenon joint This is the strongest form of joint in floor construction and for this reason it is used to join trimming and trimmer joists. The tenon is cut at the end of trimmer and passes through the trimming joist by about 100 to 125mm, is cut in the center. The projecting piece below the tenon known as tusk transmits most of the load of trimmer to trimming joist which enters from 1/8 to 1/4 into the trimming joist. The beveled portion above tenon known as horn or haunch strengthens the tenon. The trimmer joist is brought tight with trimming joist by driving a wood wedge into the hole provided in tenon. The side of the hole must be long enough to allow the trimmer to be forced into the direction of trimming joist until the joint is tight. • Dove tailed housed or notched joint This joint is used to house trimmed joist into the trimmer joist. The end of trimmed joist is formed to correspond to the housing made into the trimmer to receive it and is dropped into the housing. Long nails are than driven inclined from outer edge of trimmer joist. (see fig) • Bevelled housed joint It is also known as half depth joint as the depth of housing is equal to the half the depth of joist. The joist must be nailed securely. Note that the amount of timber removed from the trimmer varies from nil at top fiber, where maximum compressive stress exists, to a maximum at the neutral axis. • Square housed joint
  • 7. Another half depth joint adopted for smaller trimmed joist. Strutting Floor needs to be rigid as the vibrations and undue stress may be transmitted to the supporting walls and ceiling, which might make them defective. The deep bracing joist have tendency to twist and tilt sideways. It is therefore necessary to stiffen the floor by providing cross bracing or strutting in a continuous row at least at 1.8m c/c distance. There are two types of strutting as given below • Herring bone strutting This is the best form and comprised of a pair of inclined timber which are tightly fitted between two joists and are nailed. The size of timber vary from 50mm X 32mm to 50mm X 50mm. Provided the walls are sufficiently strong, folding wedges are driven between wall and adjutants joist and in line with strutting to increase the efficiency of the strutting. This form of strutting is effective even when the joist shrink along its depth or thickness, for the depth shrinkage especially tends to reduce the inclination of the struts, resulting into increase in compression.
  • 8. • Solid strutting The simplest form of strutting adopted only in cheap work. This consists of merely nailing short length of floor board into continuous row between joists. They are ineffective and waste of material, as the joist shrink along its thickness, they become loose and comes out. The only way to make them effective is to fix a long circular steel or wrought iron rod (13 to 25mm in diameter) through the whole of joists and near the strutting as shown in figure. This form of strutting is rarely adopted. Double floors The single floors are restricted to 5.0m clear span. When the width of the room increases, one or more relatively large members are required to be introduced to act as intermediate support for bridging joist. They are known as binders or beams. This result in saving of timber in limiting size of bridging joist. The binders are spaced at 1.8 to 3.0m c/c nad spanned across shorter side of room to keep their dimension to minimum. • Plan, elevation and details of double floors are shown at A,B,C,D,E,F,G and H.The plan shows use of two binders thus dividing the room in three bays. The bridging joist can be cogged into beams to reduce overall depth of floor and saving on brickwork. The cogging can be limited upto 2/3rd depth of bridging joist. Providing the joints to be tight fit and also avoiding unnecessary cutting and
  • 9. notching of binders. Necessary circulation of airspace is affected around binders resting on stone pad as shown at F and H. Solid strutting of bridging joist is sometimes resorted to as shown in A and H, but this can be avoided by cogging of joist into the binders. If the ceiling of room is required to be flushed with the soffit of the binders than a small fillet of 50mm X 25mm is nailed to the side of binders and plugged to the walls (as shown). The ends of 100mmx50mm ceiling joist are notched to these fillets and nailed. Several alternative details showing the ceiling attached to the bridging joist are shown in fig. 8. Mild steel and reinforced concrete beams have replaced the timber binders as they have very high strength, both in compression as well as tensile stress, as compared to timber. Hence a lot of saving can be affected by using them instead of timber binders as dead weight and brickwork saving. A detail incorporating a rolled mild steel beam is shown with ceiling joists. Framed or Triple floors As the name suggest the floor consist of three sets of joists i.e. bridging joist, binders and girders. In addition t solid timber girders they can also be made of glued laminated timber or box plywood construction (shown in fig.) when the load is not excessive. While steel or reinforced concrete girders are usually used in framing large floors with heavy loading. The framed floor is adopted when the narrowest span of the room is more than 7.0m and superimposed load is heavy. The figure showing plan, section and details of room with 7.62 m wide width. Steel girders span the room at 3.0m centers. They support the two wood binders at one third the point (2.54m centers) and the later carries the bridging and ceiling joists. The details P and Q show binders notched over top flange of girder, supported on 90mmx65mmx10mm m.s. angle, secured to web by either 20mm dia. Rivets at 380mm c/c or welded to it. These angles support 75mm x 50mm bearer to which cradaling is nailed. Attached brick piers are formed to give adequate support to girders resting on stone pads. This construction and the steelwork are more clearly shown in the sketch at R. The sketch at S shows the cradling and other details, the former consist of 50mm x 32mm firring at 400mm centers for fixing plasterboards. The other details of bridging joists and ceiling joists are similar to double floors. The binders of 300mm x 150mm may consist of two 300mm x 75mm joists bolted together as shown at B. The use of such stock sizes may be preferred if larger single member is not available. If desired the binder can be lowered in to steel girder and supported over wood bearers bolted to steel girder. The detail at Q would than resemble than at M or F. Laminated beams Solid timber sections bigger than 300mm x 300mm is difficult to obtain, but it is possible to built up a section by gluing 25mm thick laminae to each other and form a section of required size. Alternatively the laminae can be placed vertically for beams upto 30mm deep, in which case the permissible bending stress may be upto 25 percent greater than if the beam were of solid timber.
  • 10. Plywood box beams These beams are made for large spans, they incorporate top and bottom solid timber chords to which plywood webs are glued and nailed down to either side. (see fig.) The beam shown has 125mm X 75mm top and bottom chords with 18mm plywood webs glued and pinned to them. Vertical braces of the same section as the chords are placed within the web at 600mm intervals (see fig.). The fastening is made by making the plywood webs project so that they lap the sides of the column where they are nailed. The ends of the beams are strengthened by cranked metal plates made from 75mm X 10mm steel which pass down the brace and are cranked over for a distance of 100mm.