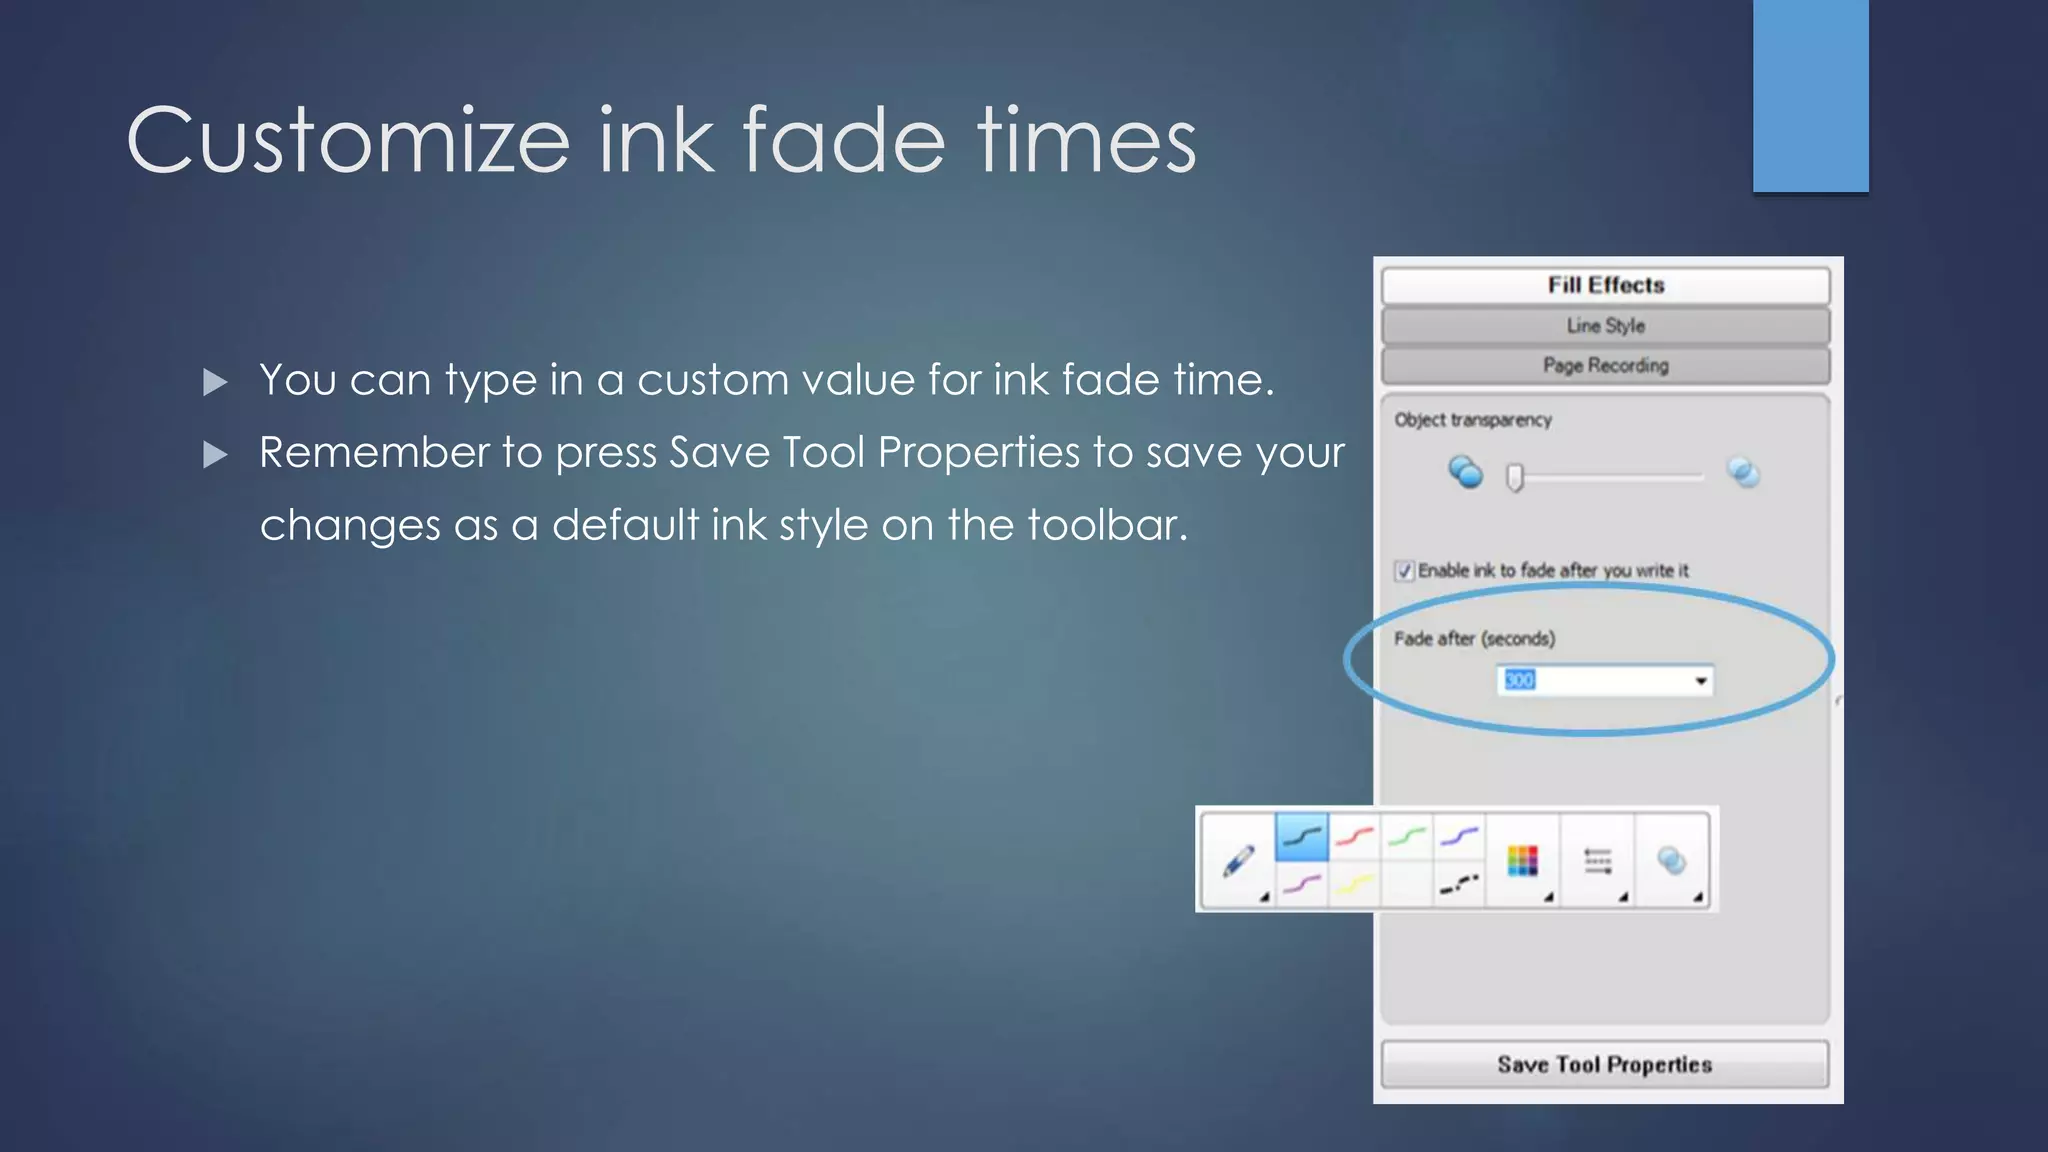
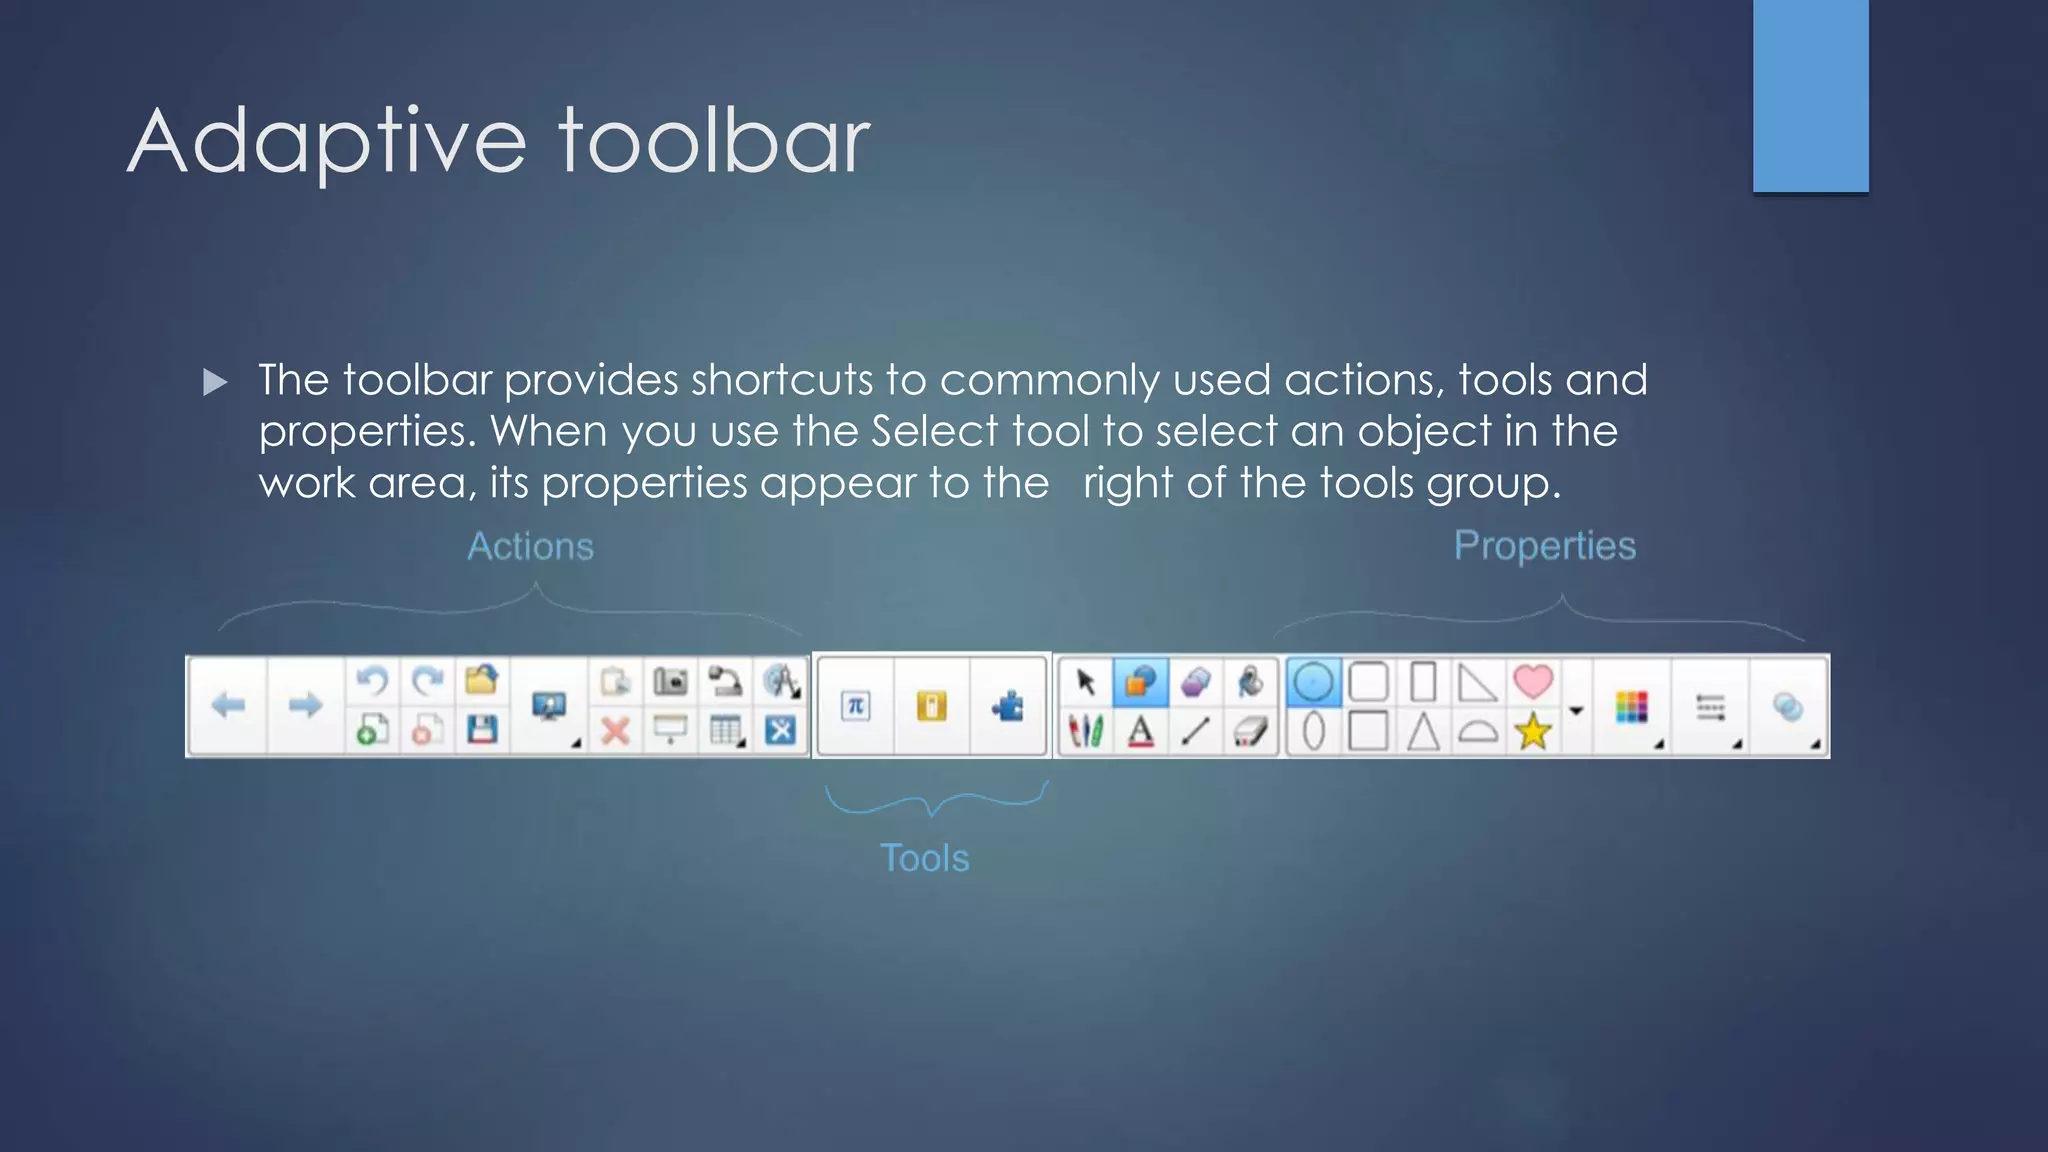
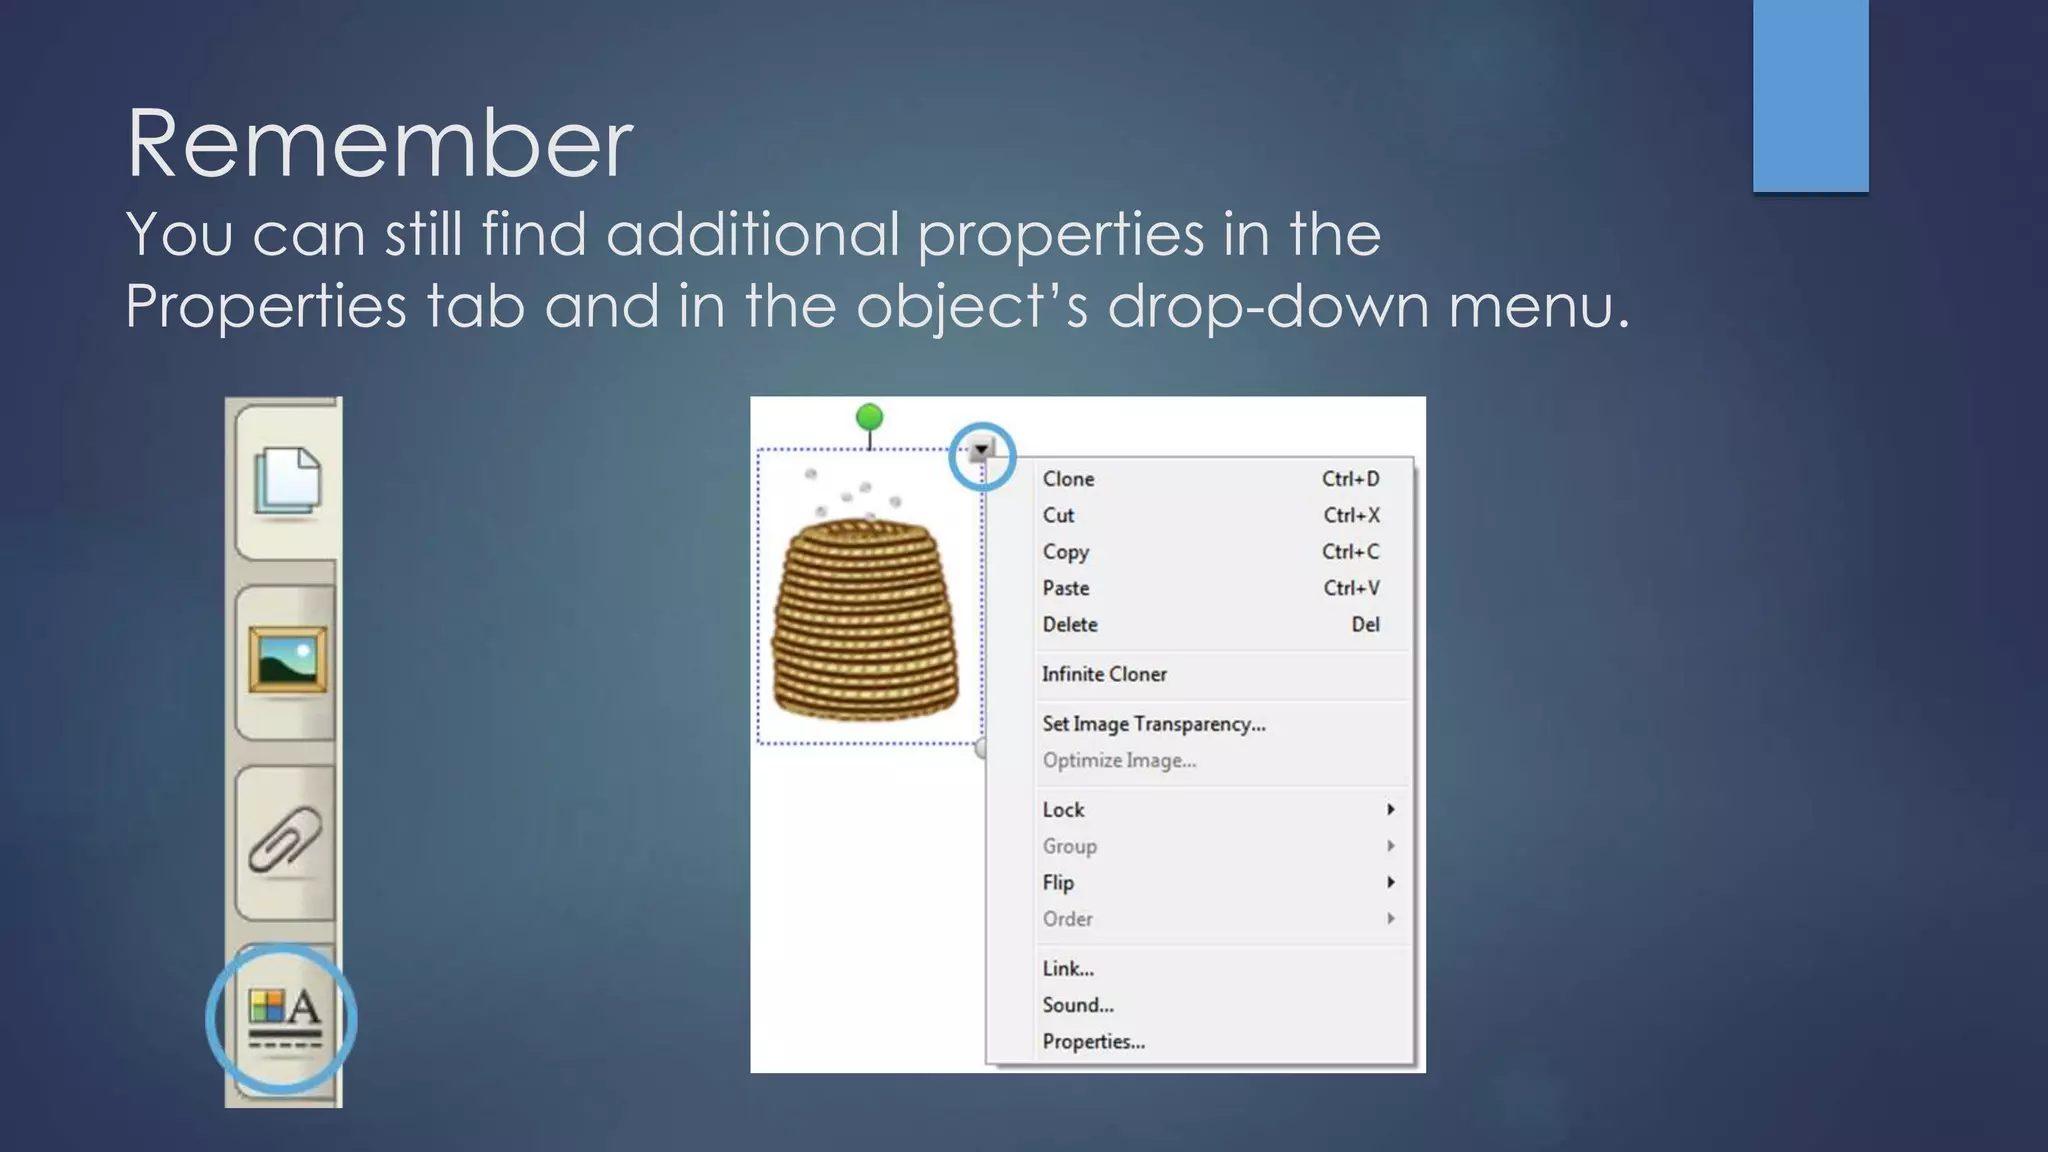
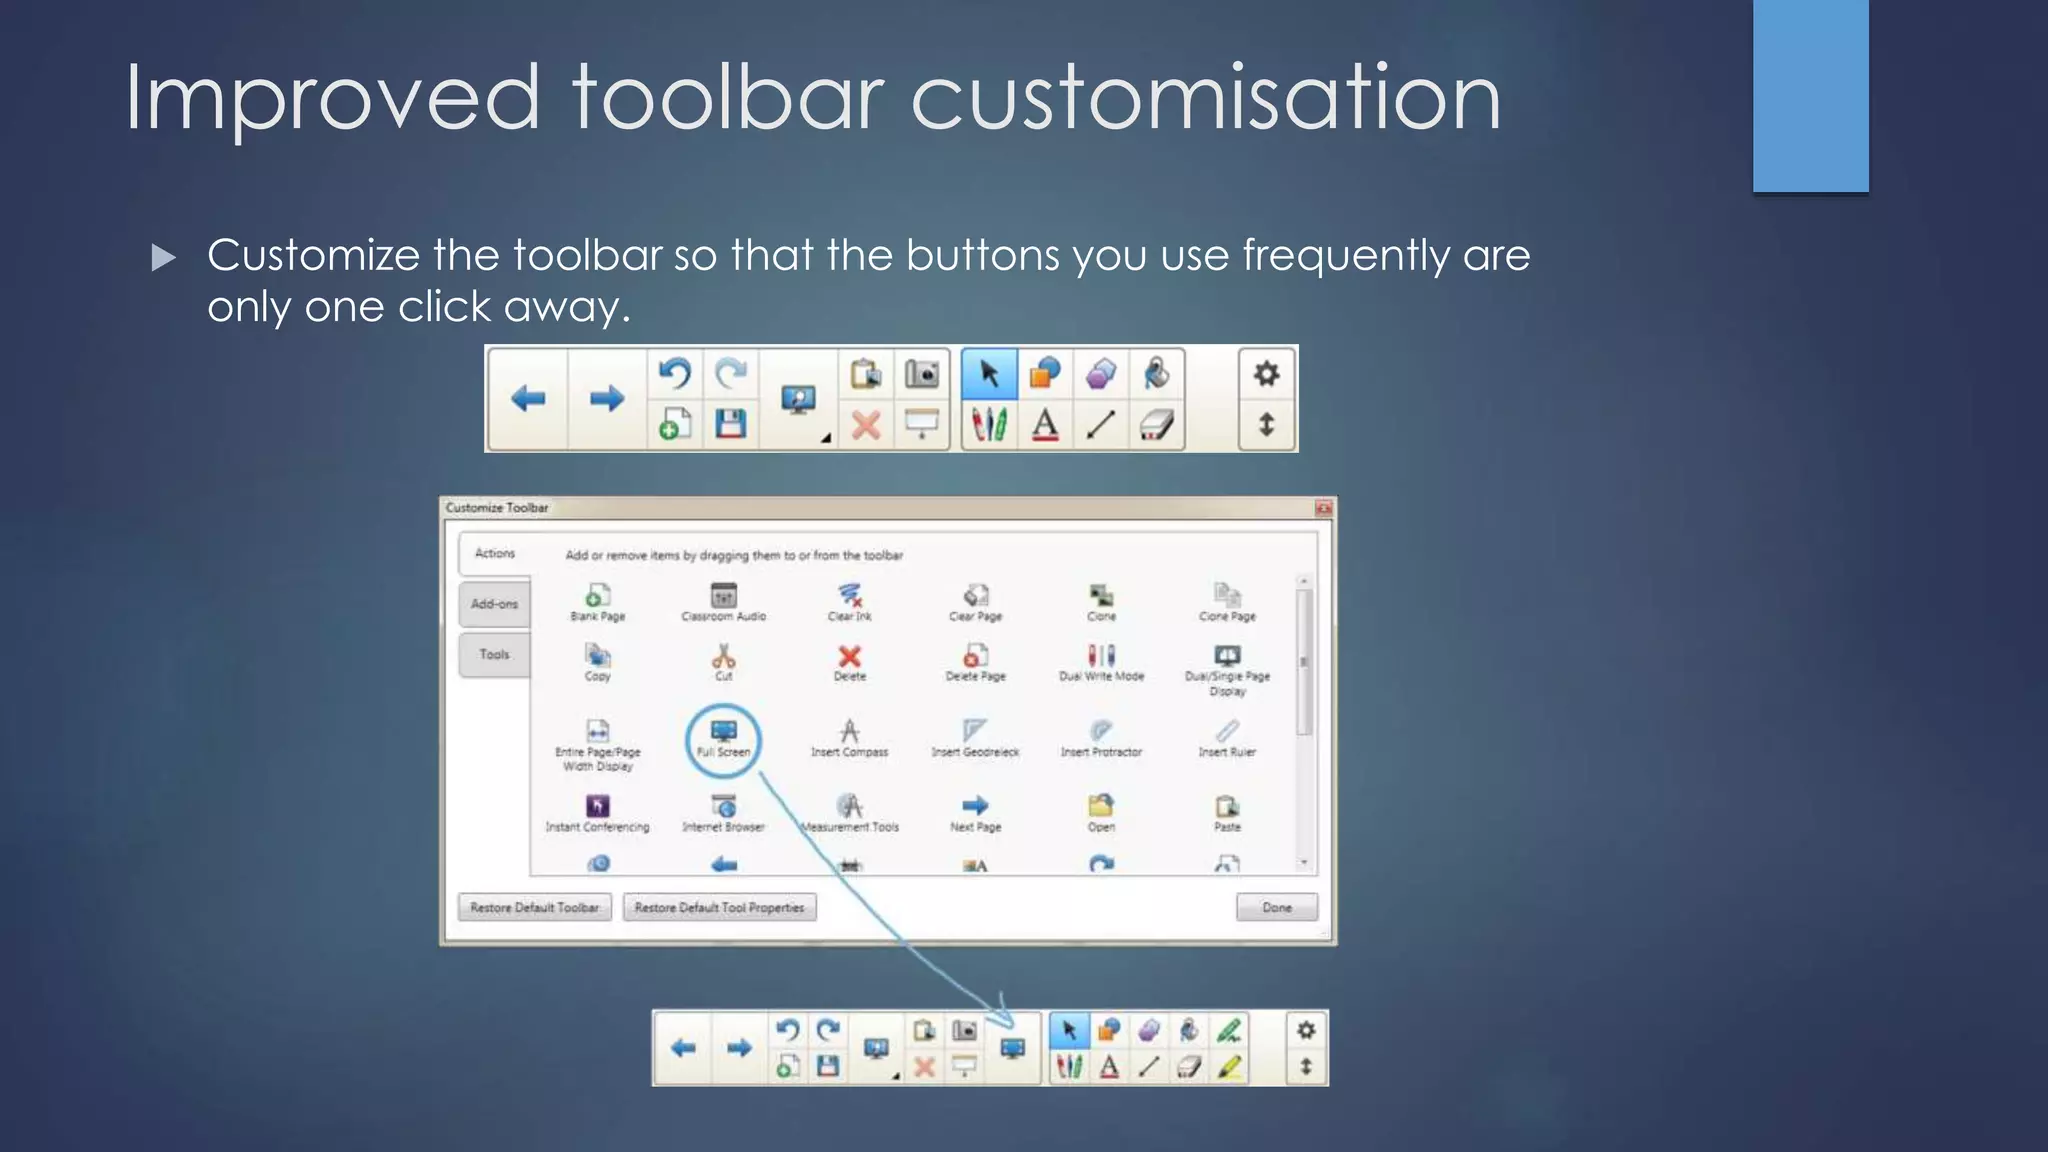
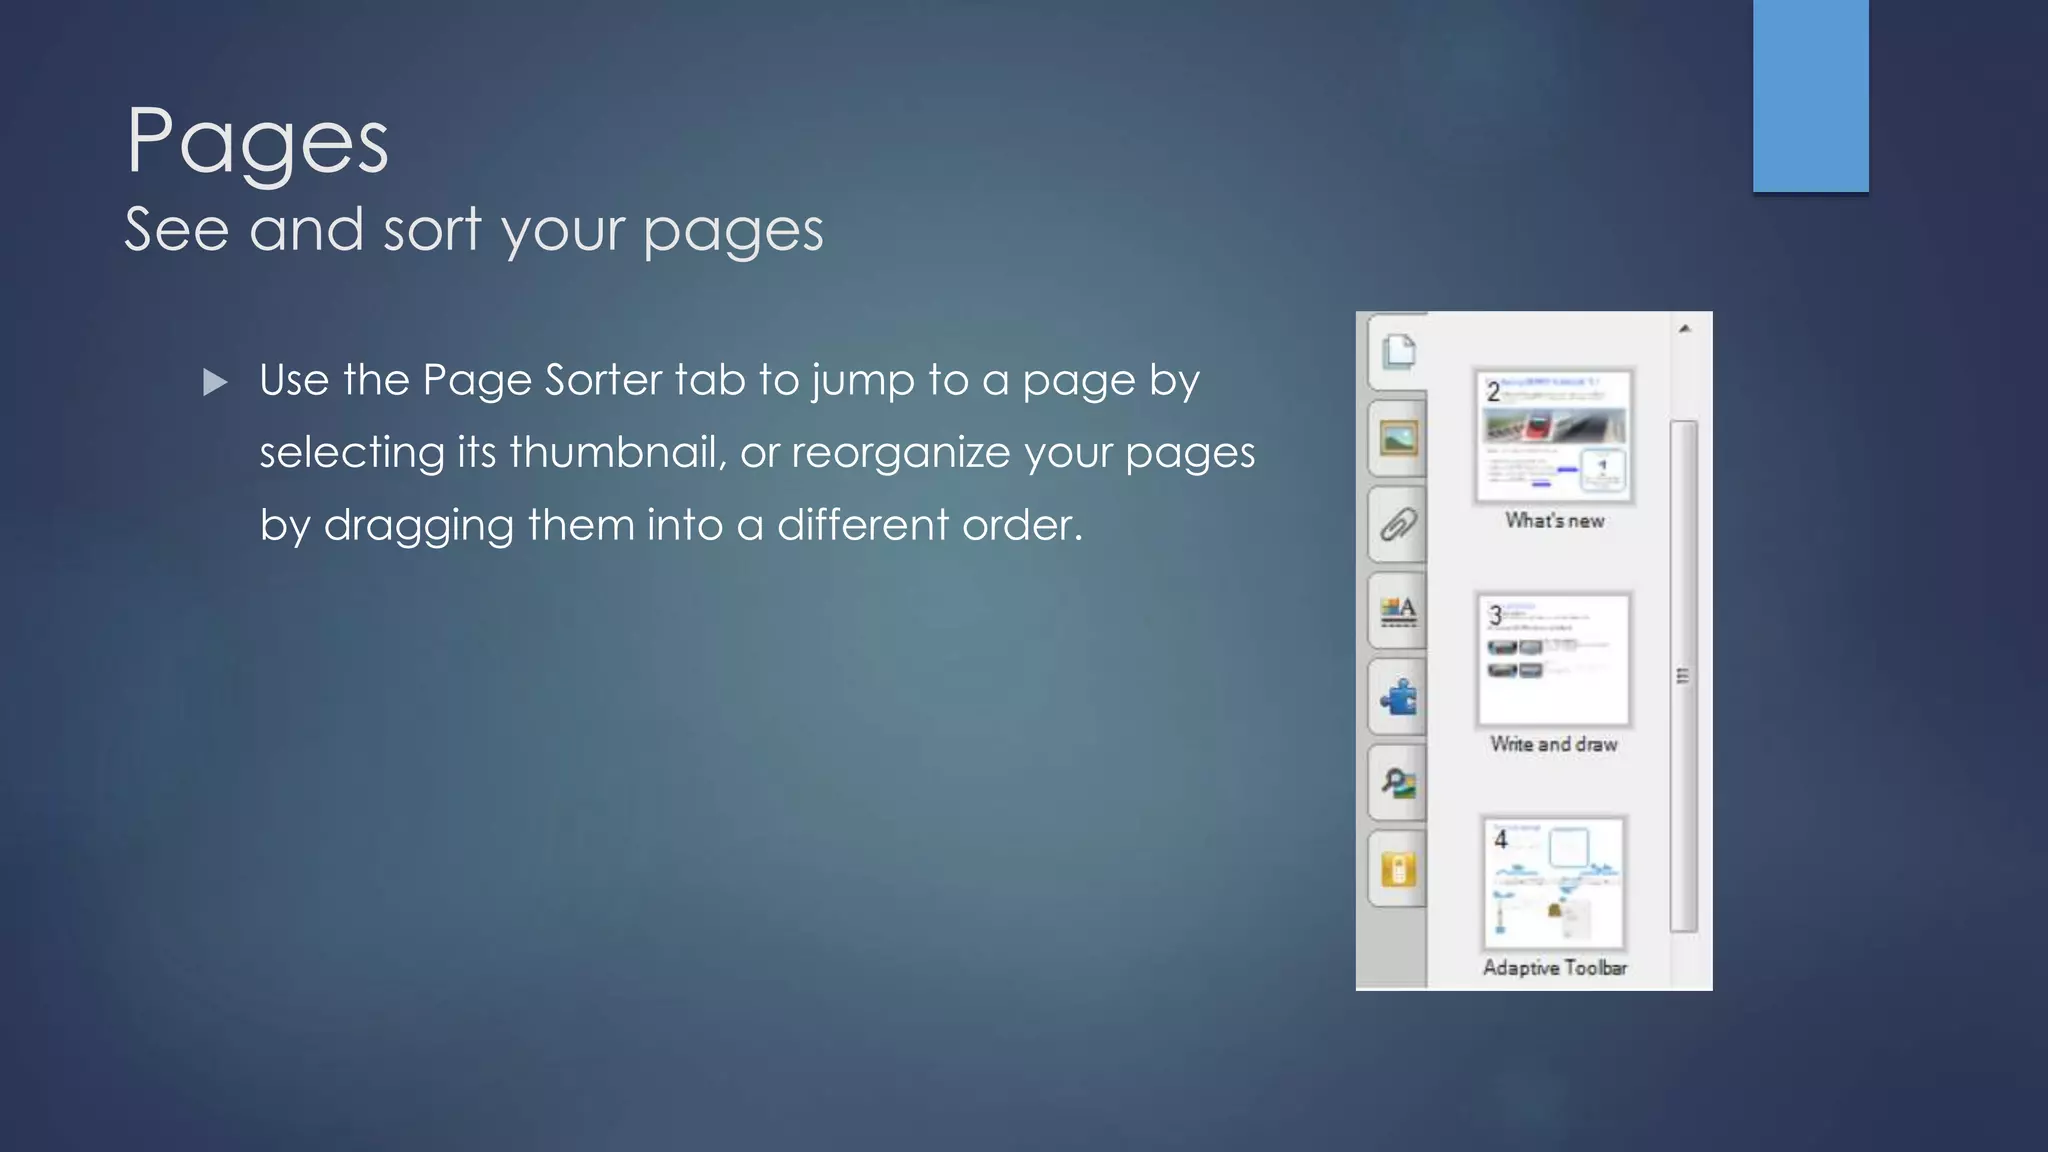
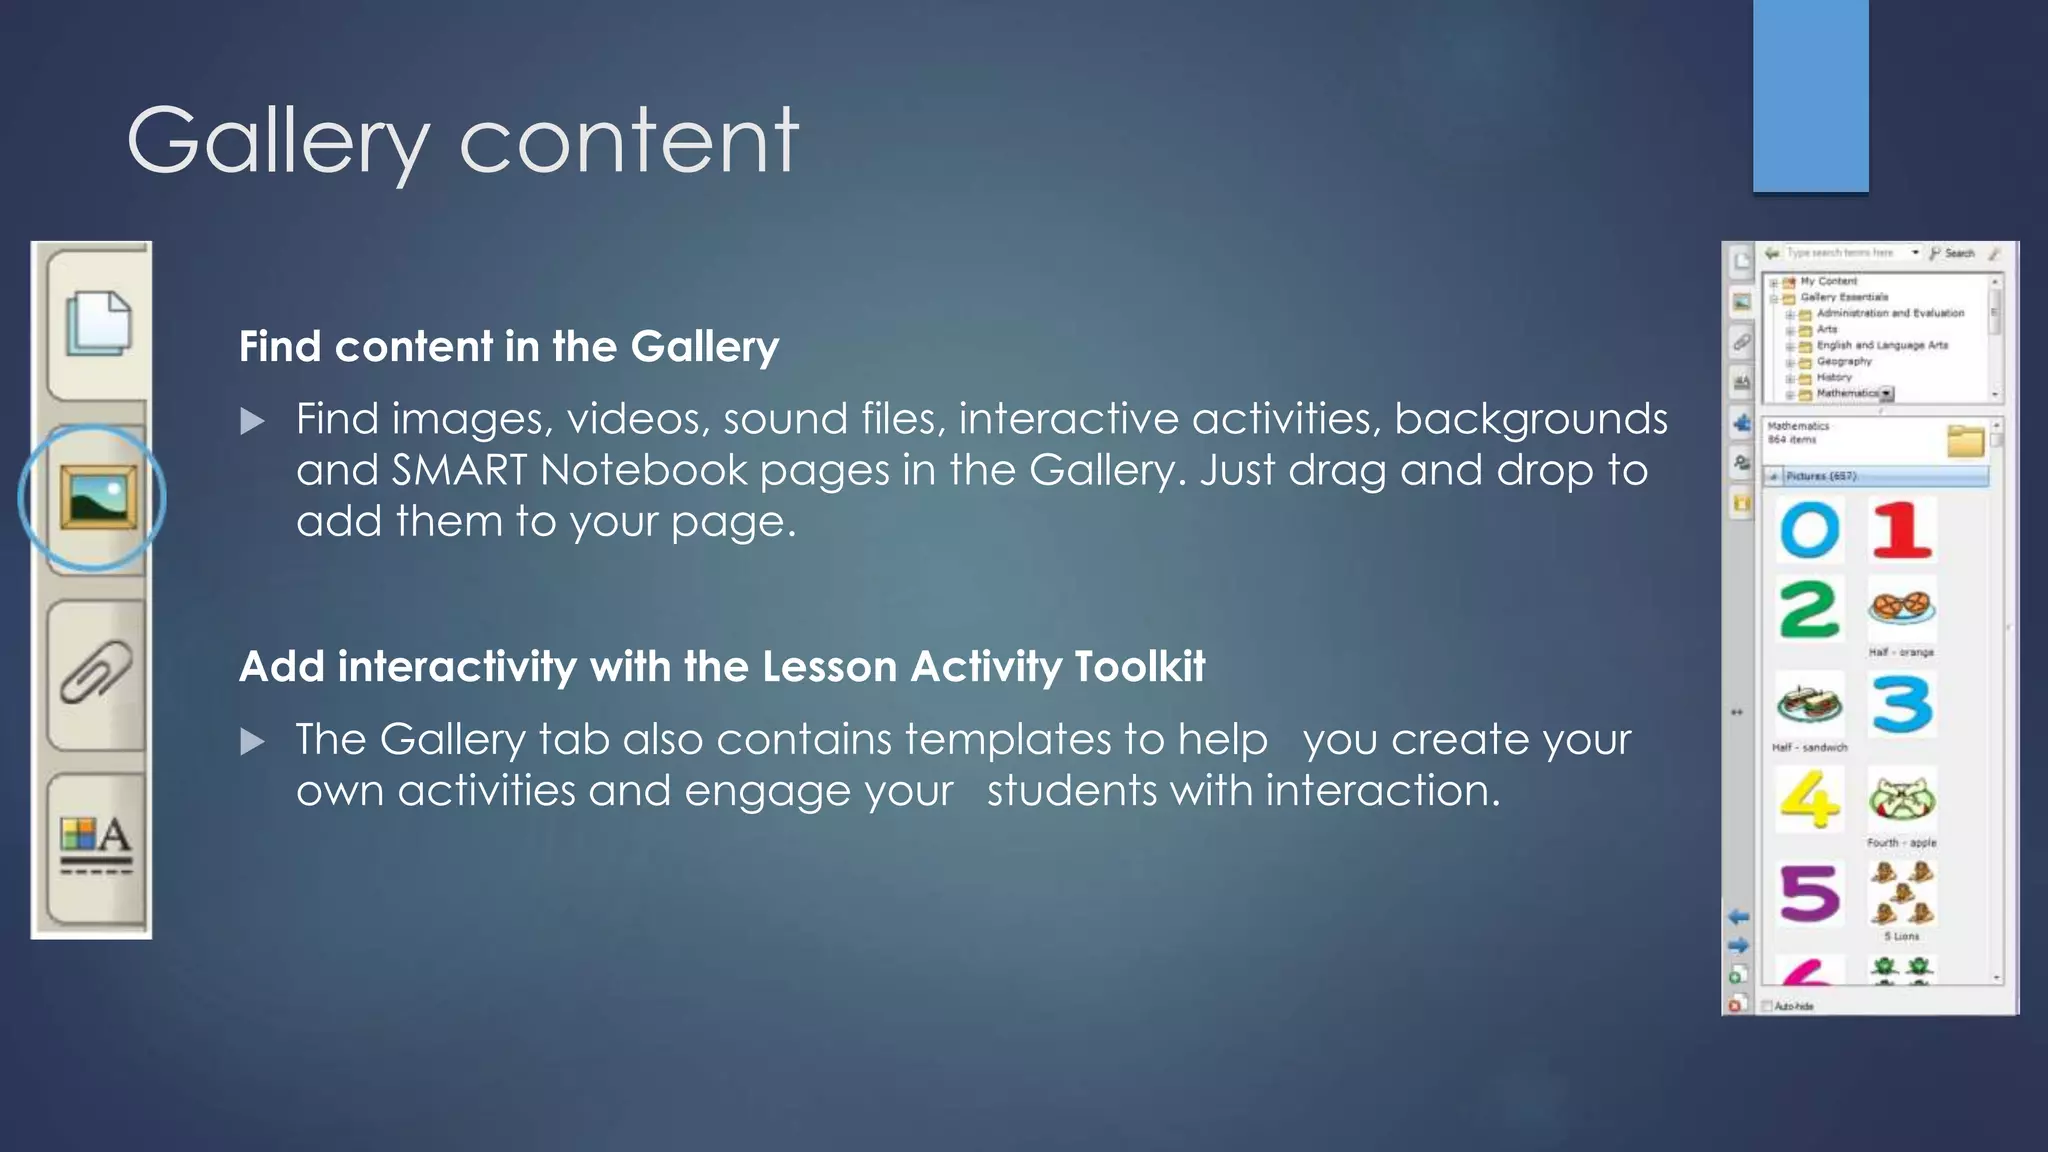
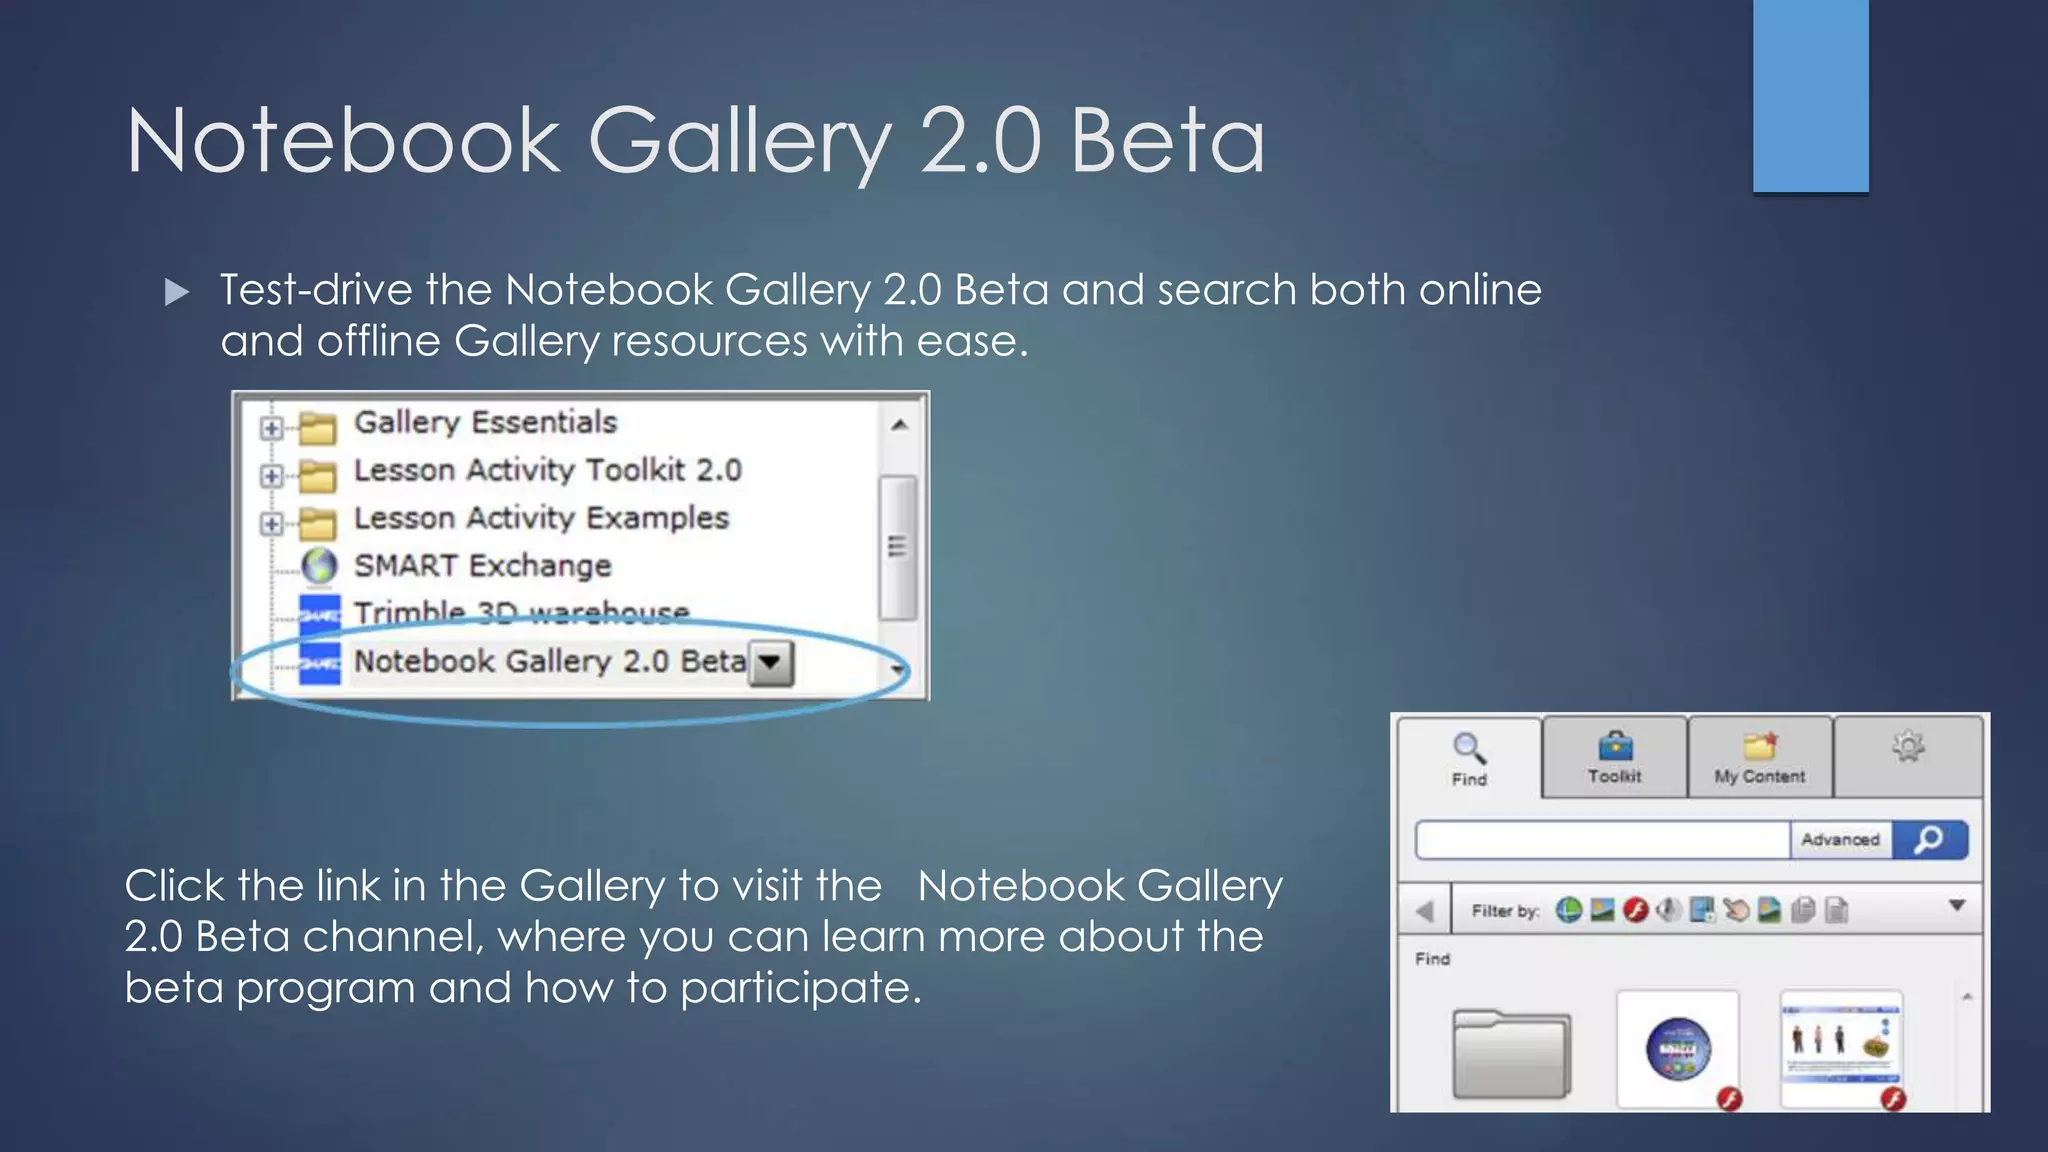
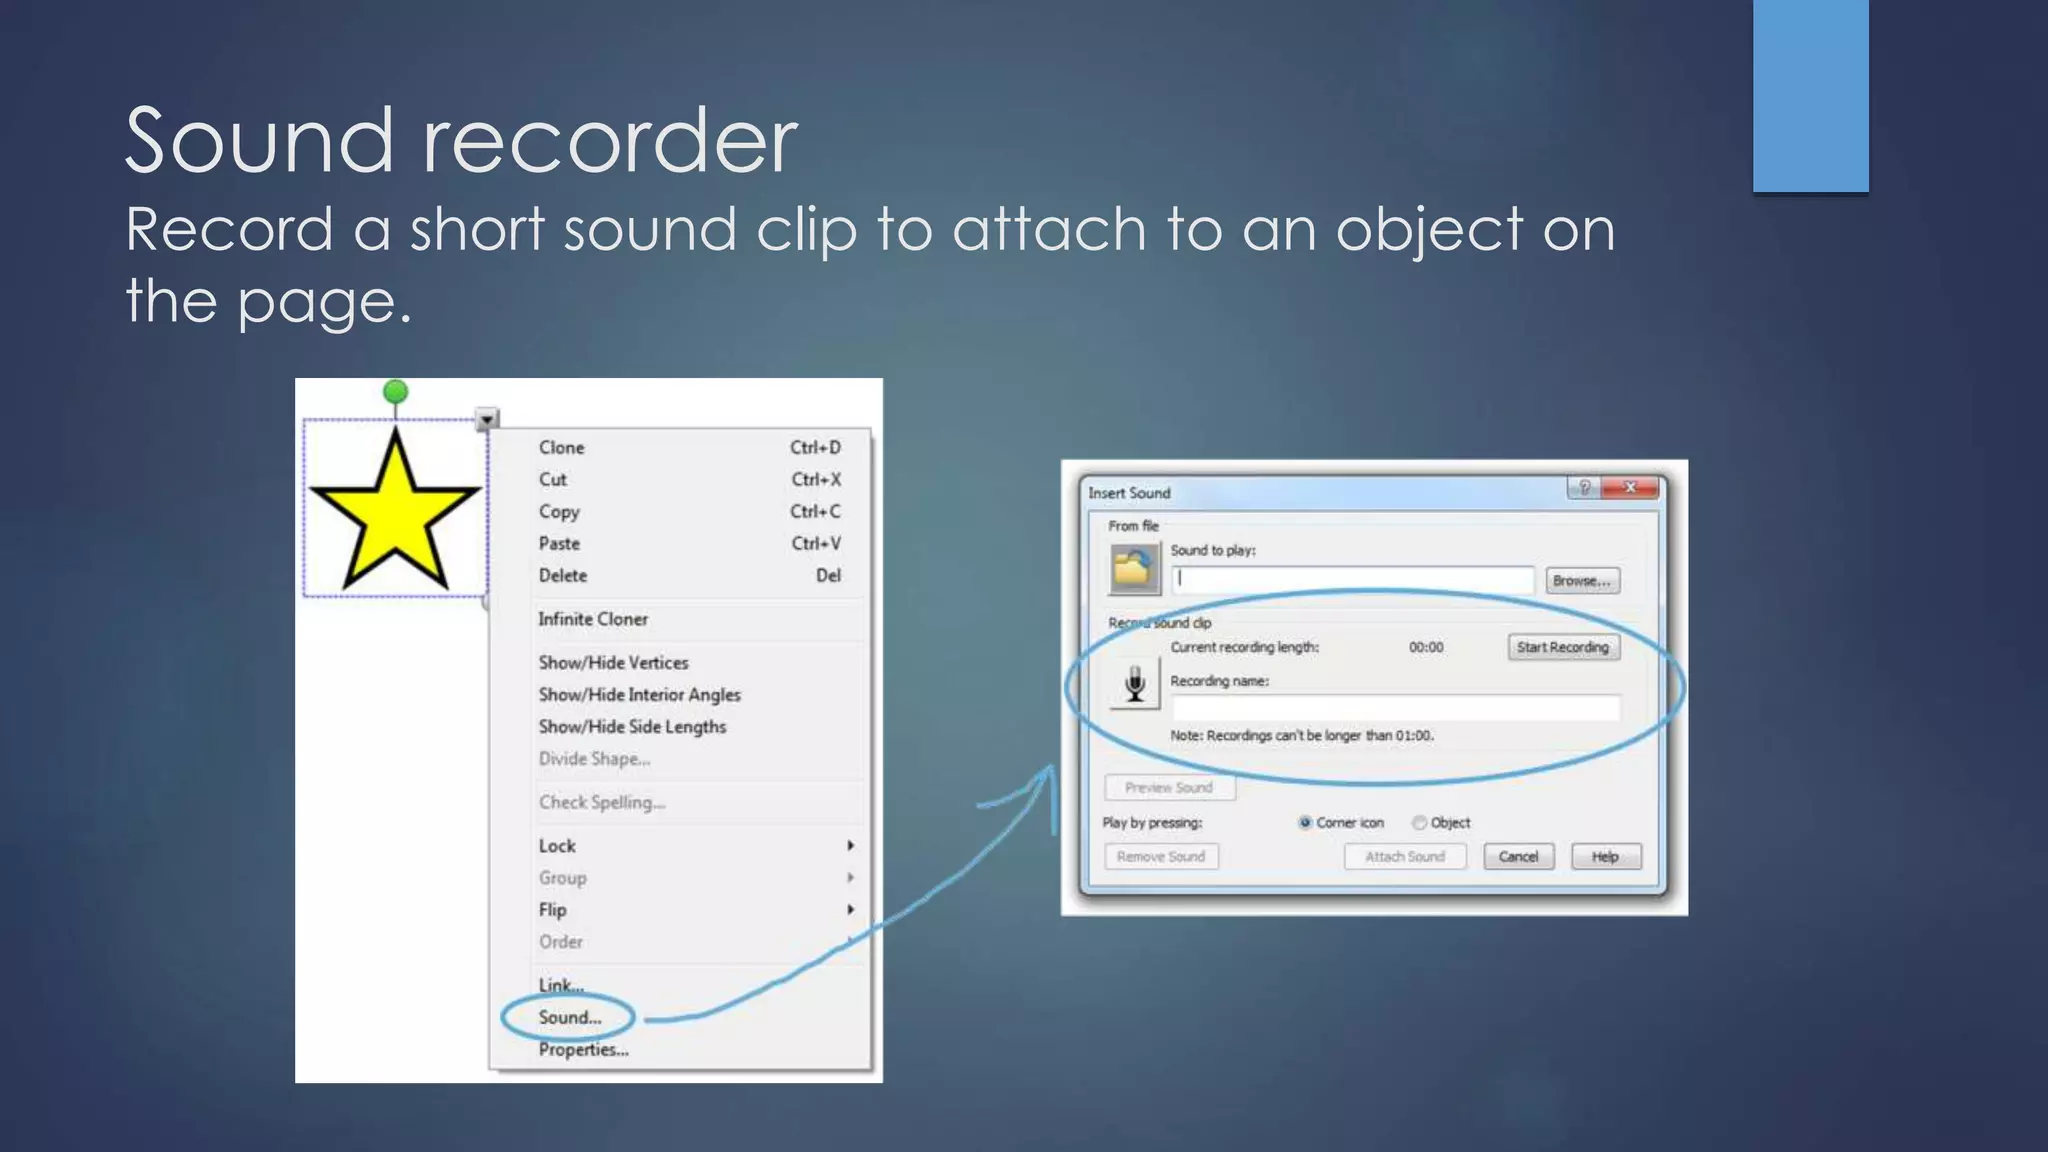
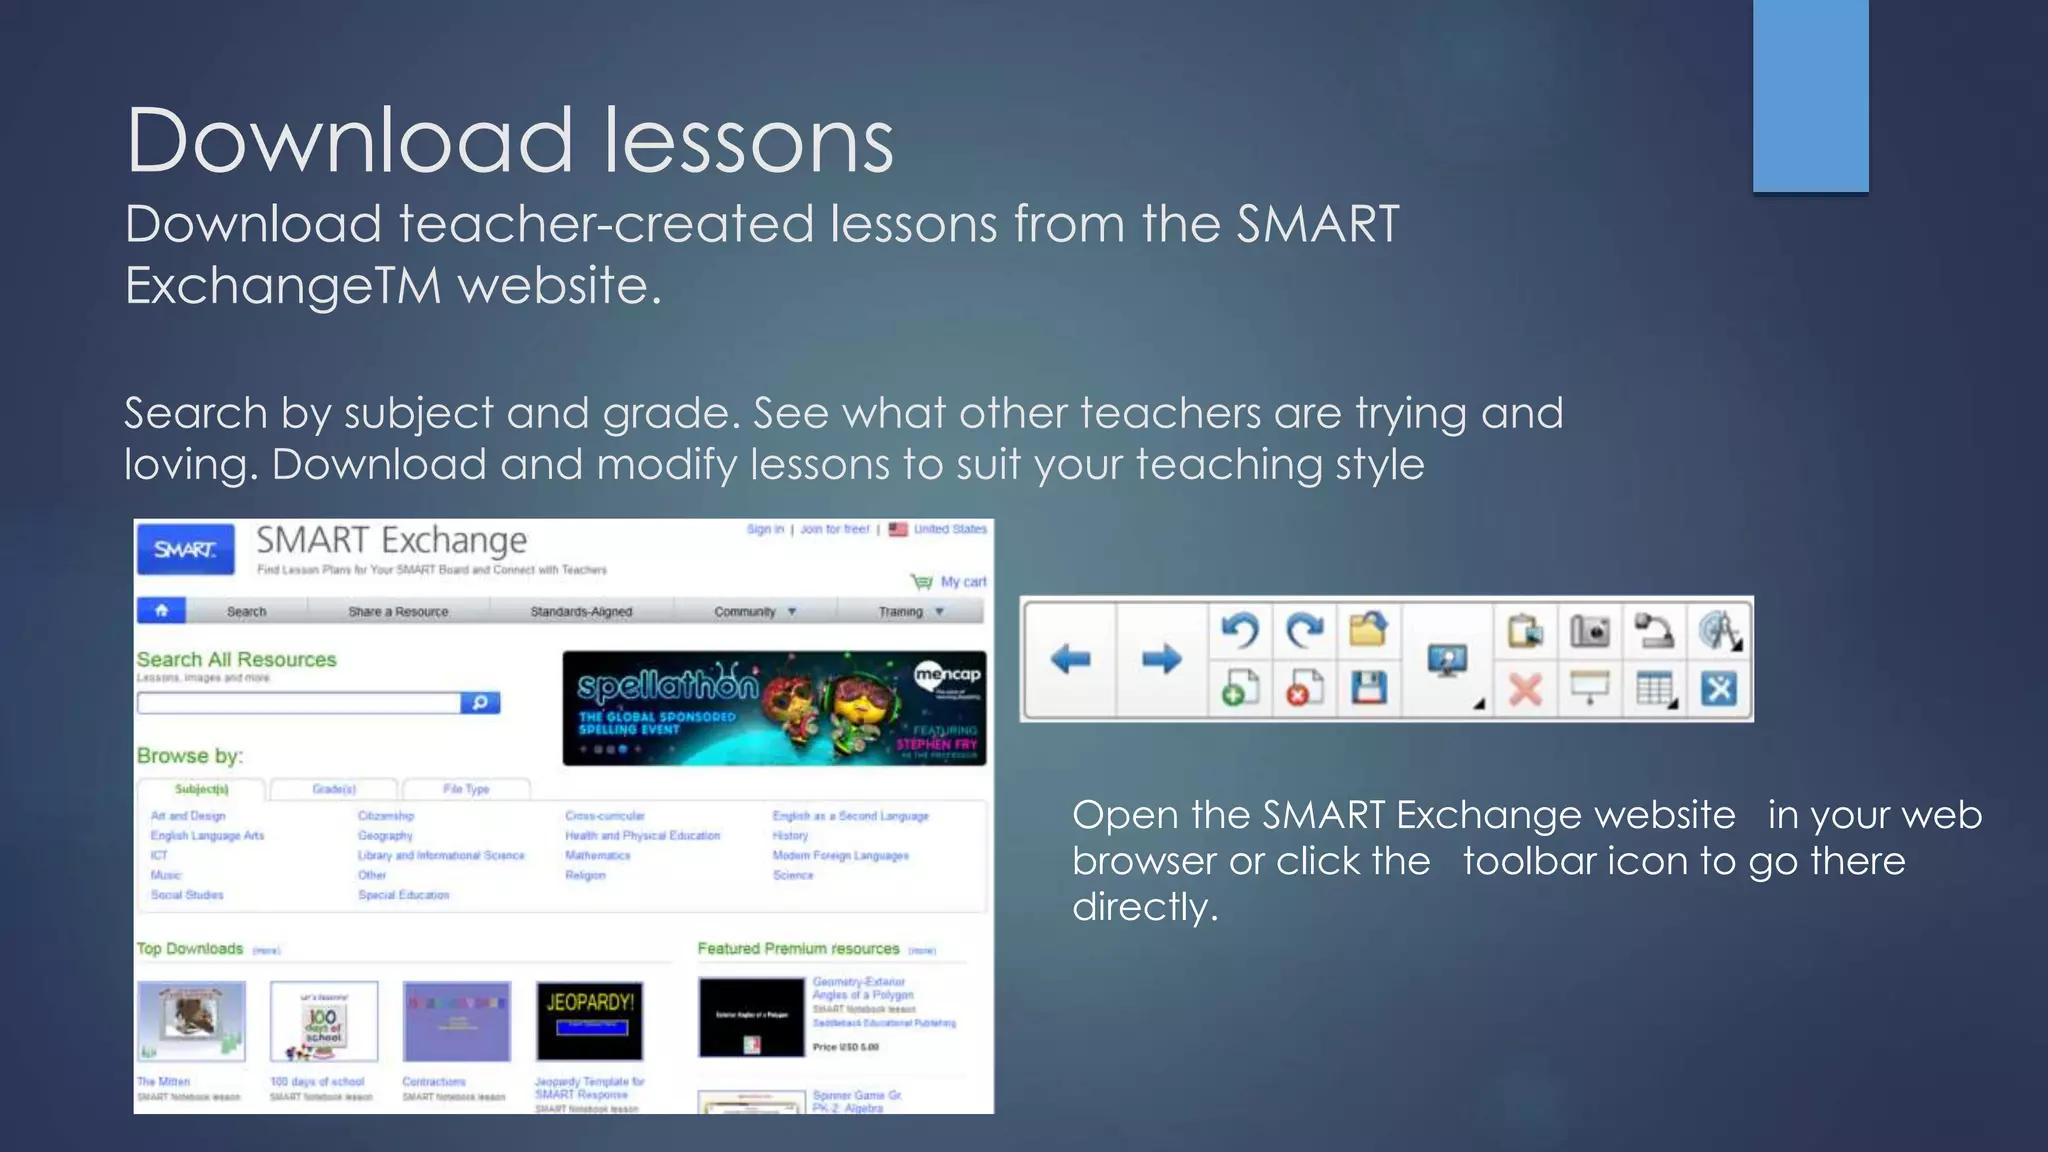
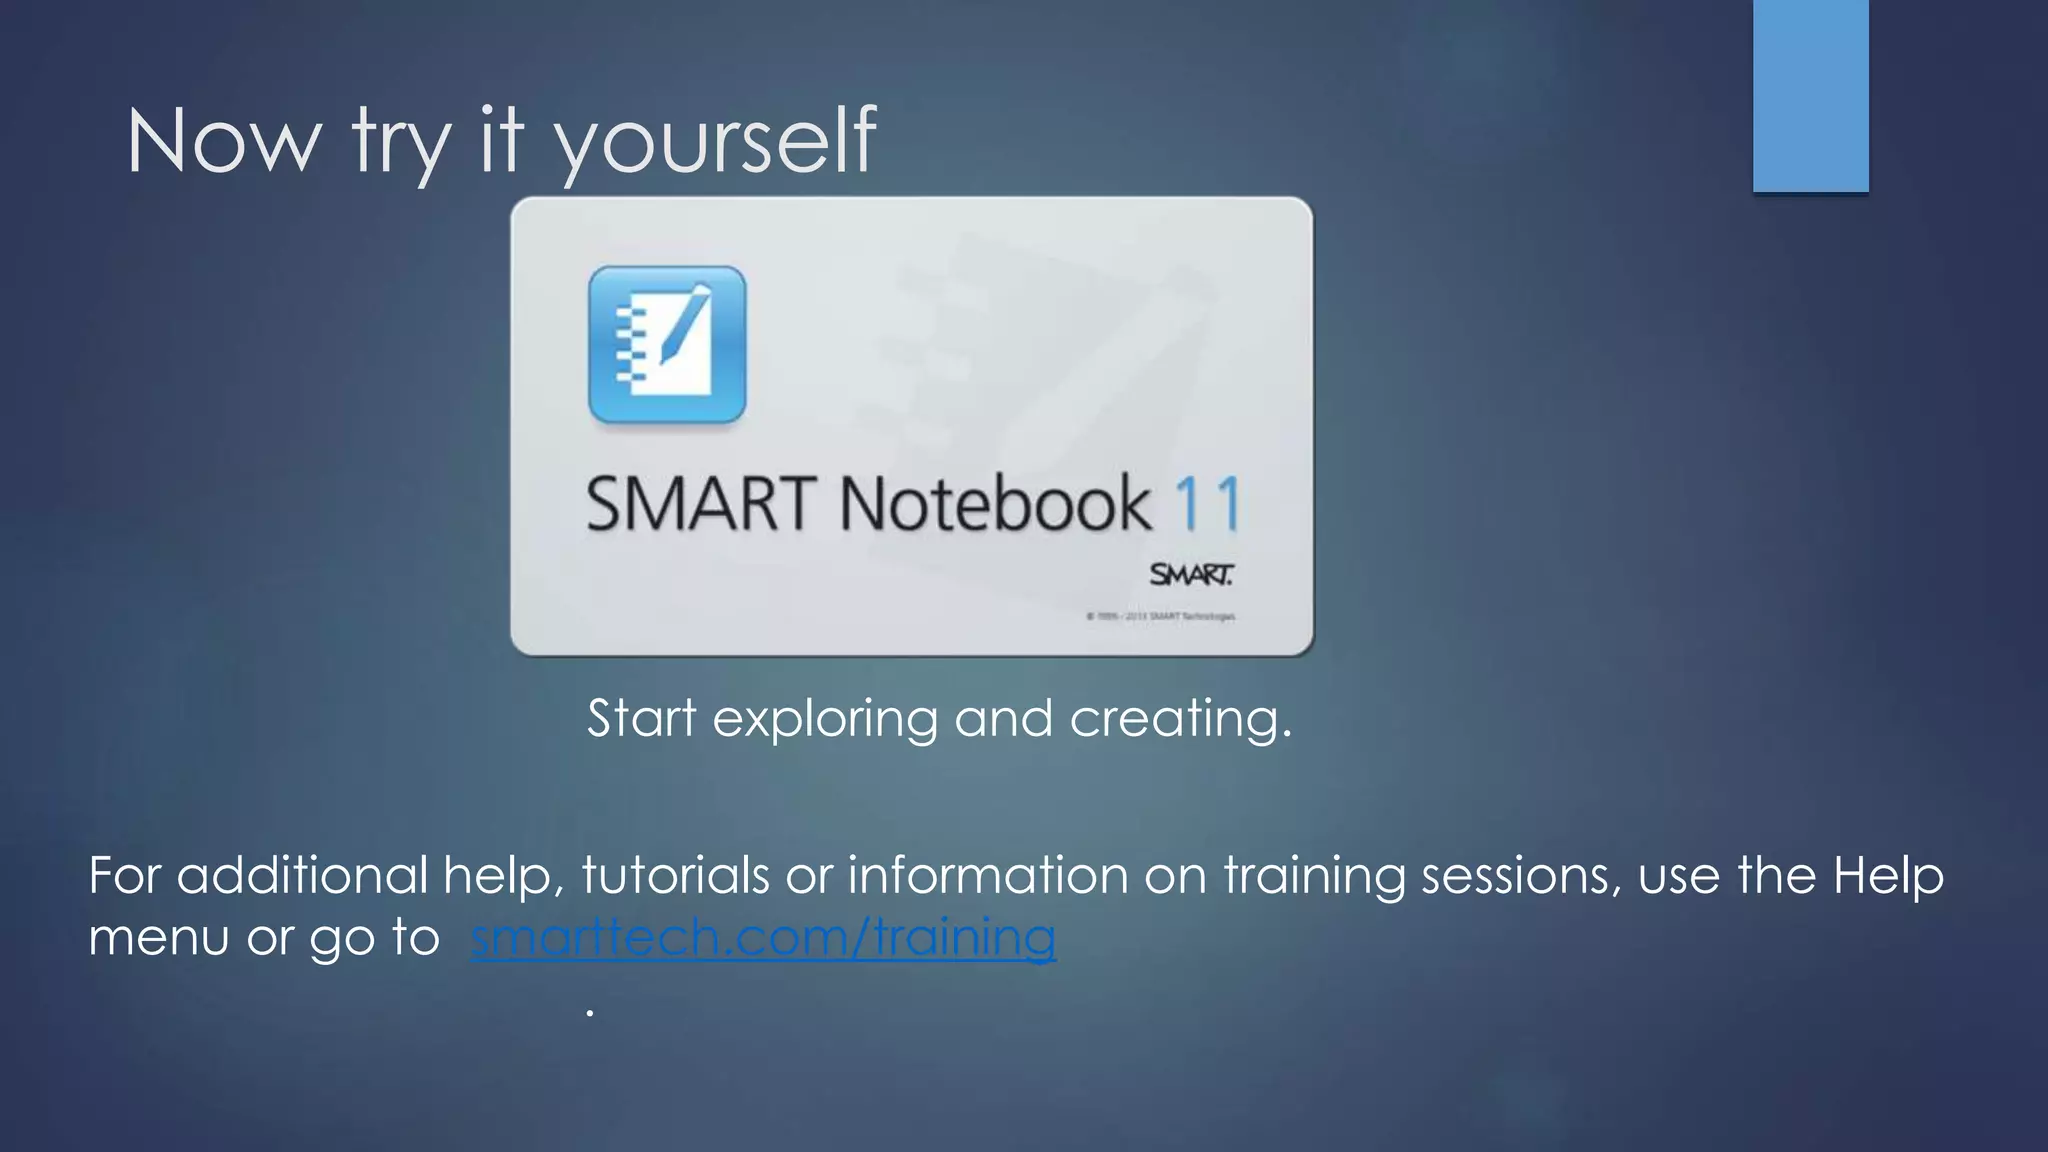
Welcome to the SMART Notebook 11.4
collaborative learning software tutorial
Review features and get started
quickly.
To access this tutorial later, go to
Help and then SMART Notebook
tutorial
Alignment Tools add-on
 Use the new Alignment Tools add-on to align and distribute objects
on the SMART Notebook page. You can align objects on the
bottom, left, right or top, as well as vertically or horizontally. You can
also align stacked objects vertically or horizontally.
 To start, select multiple objects on the page, press the Add-ons
button in the toolbar and then press an alignment option.
 Alignment options available on your toolbar can be customized.
Drop Cap support
 Add decorative initials to the beginning of any paragraph.
 This button is available in the Properties tab, under Text Style.
Once upon a time there was a dear little girl who was loved by everyone who looked at her, but most of all by her
grandmother, and there was nothing that she would not have given to the child. Once she gave her a little cap of red
velvet, which suited her so well that she would never wear anything else; so she was always called 'Little Red-Cap.'
- introduction to "Little Red Cap" by The Brothers Grimm
Toggle the zoom level
 Switch quickly between the two most common zoom levels, Entire
Page and Page Width, by adding this button to your toolbar.
 This button is also available on the Full Screen toolbar.
Change the default page
background color
 You can change the default page background color in SMART
Notebook Preferences.
Turn off Extend Page
 Prevent your pages from becoming longer by turning off Extend
Page.
 Access this option from View > Extend Page.
Customize ink fade times
 You can type in a custom value for ink fade time.
 Remember to press Save Tool Properties to save your
changes as a default ink style on the toolbar.
Adaptive toolbar
 The toolbar provides shortcuts to commonly used actions, tools and
properties. When you use the Select tool to select an object in the
work area, its properties appear to the right of the tools group.
Remember
You can still find additional properties in the
Properties tab and in the object’s drop-down menu.
Improved toolbar customisation
 Customize the toolbar so that the buttons you use frequently are
only one click away.
Pages
See and sort your pages
 Use the Page Sorter tab to jump to a page by
selecting its thumbnail, or reorganize your pages
by dragging them into a different order.
Reset Page
Easily reset your page to its last saved state, without
reopening your lesson file.
Text objects
 Add text
 Click the Text button on the toolbar, and then click the work area
to create a text box. Start typing.
 You can format text using the buttons in the toolbar or the options
in the Properties tab or the Format menu.
 Edit text
 Double-click the text box to edit text.
 Resizing the text box
 Drag the white handle to adjust the length of the text box and
reflow the text inside.
Gallery content
Find content in the Gallery
 Find images, videos, sound files, interactive activities, backgrounds
and SMART Notebook pages in the Gallery. Just drag and drop to
add them to your page.
Add interactivity with the Lesson Activity Toolkit
 The Gallery tab also contains templates to help you create your
own activities and engage your students with interaction.
Notebook Gallery 2.0 Beta
 Test-drive the Notebook Gallery 2.0 Beta and search both online
and offline Gallery resources with ease.
Click the link in the Gallery to visit the Notebook Gallery
2.0 Beta channel, where you can learn more about the
beta program and how to participate.
Sound recorder
Record a short sound clip to attach to an object on
the page.
Download lessons
Download teacher-created lessons from the SMART
ExchangeTM website.
Search by subject and grade. See what other teachers are trying and
loving. Download and modify lessons to suit your teaching style
Open the SMART Exchange website in your web
browser or click the toolbar icon to go there
directly.
Now try it yourself
Start exploring and creating.
For additional help, tutorials or information on training sessions, use the Help
menu or go to smarttech.com/training
.

Welcome to the smart notebook 11

  • 1.
    Welcome to theSMART Notebook 11.4 collaborative learning software tutorial
  • 2.
    Review features andget started quickly. To access this tutorial later, go to Help and then SMART Notebook tutorial
  • 3.
    Alignment Tools add-on Use the new Alignment Tools add-on to align and distribute objects on the SMART Notebook page. You can align objects on the bottom, left, right or top, as well as vertically or horizontally. You can also align stacked objects vertically or horizontally.  To start, select multiple objects on the page, press the Add-ons button in the toolbar and then press an alignment option.  Alignment options available on your toolbar can be customized.
  • 4.
    Drop Cap support Add decorative initials to the beginning of any paragraph.  This button is available in the Properties tab, under Text Style. Once upon a time there was a dear little girl who was loved by everyone who looked at her, but most of all by her grandmother, and there was nothing that she would not have given to the child. Once she gave her a little cap of red velvet, which suited her so well that she would never wear anything else; so she was always called 'Little Red-Cap.' - introduction to "Little Red Cap" by The Brothers Grimm
  • 5.
    Toggle the zoomlevel  Switch quickly between the two most common zoom levels, Entire Page and Page Width, by adding this button to your toolbar.  This button is also available on the Full Screen toolbar.
  • 6.
    Change the defaultpage background color  You can change the default page background color in SMART Notebook Preferences.
  • 7.
    Turn off ExtendPage  Prevent your pages from becoming longer by turning off Extend Page.  Access this option from View > Extend Page.
  • 8.
    Customize ink fadetimes  You can type in a custom value for ink fade time.  Remember to press Save Tool Properties to save your changes as a default ink style on the toolbar.
  • 9.
    Adaptive toolbar  Thetoolbar provides shortcuts to commonly used actions, tools and properties. When you use the Select tool to select an object in the work area, its properties appear to the right of the tools group.
  • 10.
    Remember You can stillfind additional properties in the Properties tab and in the object’s drop-down menu.
  • 11.
    Improved toolbar customisation Customize the toolbar so that the buttons you use frequently are only one click away.
  • 12.
    Pages See and sortyour pages  Use the Page Sorter tab to jump to a page by selecting its thumbnail, or reorganize your pages by dragging them into a different order.
  • 13.
    Reset Page Easily resetyour page to its last saved state, without reopening your lesson file.
  • 14.
    Text objects  Addtext  Click the Text button on the toolbar, and then click the work area to create a text box. Start typing.  You can format text using the buttons in the toolbar or the options in the Properties tab or the Format menu.  Edit text  Double-click the text box to edit text.  Resizing the text box  Drag the white handle to adjust the length of the text box and reflow the text inside.
  • 15.
    Gallery content Find contentin the Gallery  Find images, videos, sound files, interactive activities, backgrounds and SMART Notebook pages in the Gallery. Just drag and drop to add them to your page. Add interactivity with the Lesson Activity Toolkit  The Gallery tab also contains templates to help you create your own activities and engage your students with interaction.
  • 16.
    Notebook Gallery 2.0Beta  Test-drive the Notebook Gallery 2.0 Beta and search both online and offline Gallery resources with ease. Click the link in the Gallery to visit the Notebook Gallery 2.0 Beta channel, where you can learn more about the beta program and how to participate.
  • 17.
    Sound recorder Record ashort sound clip to attach to an object on the page.
  • 18.
    Download lessons Download teacher-createdlessons from the SMART ExchangeTM website. Search by subject and grade. See what other teachers are trying and loving. Download and modify lessons to suit your teaching style Open the SMART Exchange website in your web browser or click the toolbar icon to go there directly.
  • 19.
    Now try ityourself Start exploring and creating. For additional help, tutorials or information on training sessions, use the Help menu or go to smarttech.com/training .