Download to read offline

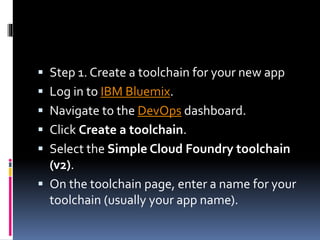


The document provides a 5-step plan to deploy a simple "Hello World" website to Bluemix: 1. Create a toolchain in Bluemix for the new app project. 2. Use the Web IDE to code a simple index.html page that displays "Hello, BluemixWorld!". 3. Create a manifest.yml file to define how to deploy the app. 4. Deploy the app which will open the running website in a new browser window. 5. Commit the code changes to the Git repository to track the project.