Downloaded 120 times


![6/10
4.3. Click the “Weather Company Data for IBM Bluemix” tile, then CREATE. Once the new service is
created, the application needs to be restaged (so click RESTAGE when asked). When staging
completes, the “Weather Company Data for IBM Bluemix” service is added to the application.
You are now ready to use the Weather APIs in your application. Yes, it is that simple!
5. CALL THE WEATHER API FROM YOUR APPLICATION
In this section, you modify the source code to add Weather API calls and get access to weather forecasts. The
information is then used to suggest some activities depending on the upcoming weather conditions.
5.1. Go back to the development environment to modify a bit more the code of your application.
5.2. Open the index.js file under the Route folder. Add the following code after line 14.
(if the Copy&Paste alters the indentation, you may want to use a tool such as http://jsbeautifier.org/)
// Weather data
var request = require('request');
var services = JSON.parse(process.env.VCAP_SERVICES);
var weather_service = services["weatherinsights"][0].credentials.url;
function weatherdataAPI(path, qs, done) {
var url = weather_service + path;
console.log(url, qs);
request({
url: url,
method: "GET",
headers: {
"Content-Type": "application/json;charset=utf-8",
"Accept": "application/json"
},
qs: qs
}, function(err, req, data) {
if (err) {
done(err);
} else {
if (req.statusCode >= 200 && req.statusCode < 400) {
try {
done(null, JSON.parse(data));
} catch(e) {
console.log(e);
done(e);
}
} else {
console.log(err);
done({ message: req.statusCode, data: data });
}
}
});
}
// End of Weather data](https://image.slidesharecdn.com/homesteadweatherworkshop-160523203305/75/Homestead-Weather-workshop-6-2048.jpg)
![7/10
This simple function uses the “Weather Company Data” service that is bound to your Bluemix
application. It first gets the credentials for the service (stored in VCAP_SERVICES), before sending a
GET http request (REST API).
5.3. In the same file, modify the exports.activities section to include a call to the weatherAPI
function as shown below.
(if the Copy&Paste alters the indentation, you may want to use a tool such as http://jsbeautifier.org/)
exports.activities = function(req, res) {
var geoloc="45.50,-73.56"; // Montreal, Canada
// Hanaoi, Vietnam // var geoloc="21.03,105.83";
// Sao Paulo, Brasil // var geoloc= "-23.55,-46.63";
var geocode = geoloc.split(",");
weatherdataAPI("/api/weather/v1/geocode/" + geocode[0] + "/" + geocode[1] +
"/forecast/daily/10day.json", {
units: req.query.units || "m",
language: req.query.language || "en"
}, function(err, result) {
if (err) {
res.send(err).status(400);
} else {
res.render('activities',{weather: result });
//res.json(result); //for debug
}
});
};
In this code, the weatherdataAPI function is called to obtain a forecast for the next 10 days. To
simplify the workshop, the location (geoloc) is set to Montreal, Canada. But it can be changed in the
code by any other location around the world (latitude, longitude).
5.4. Open the sol-activities.ejs file under the views>sol folder. To help you in this task, the final
code to use it available and you just have to copy it.
5.5. Copy the code between <BODY> …</BODY> section (line 21 to 70)
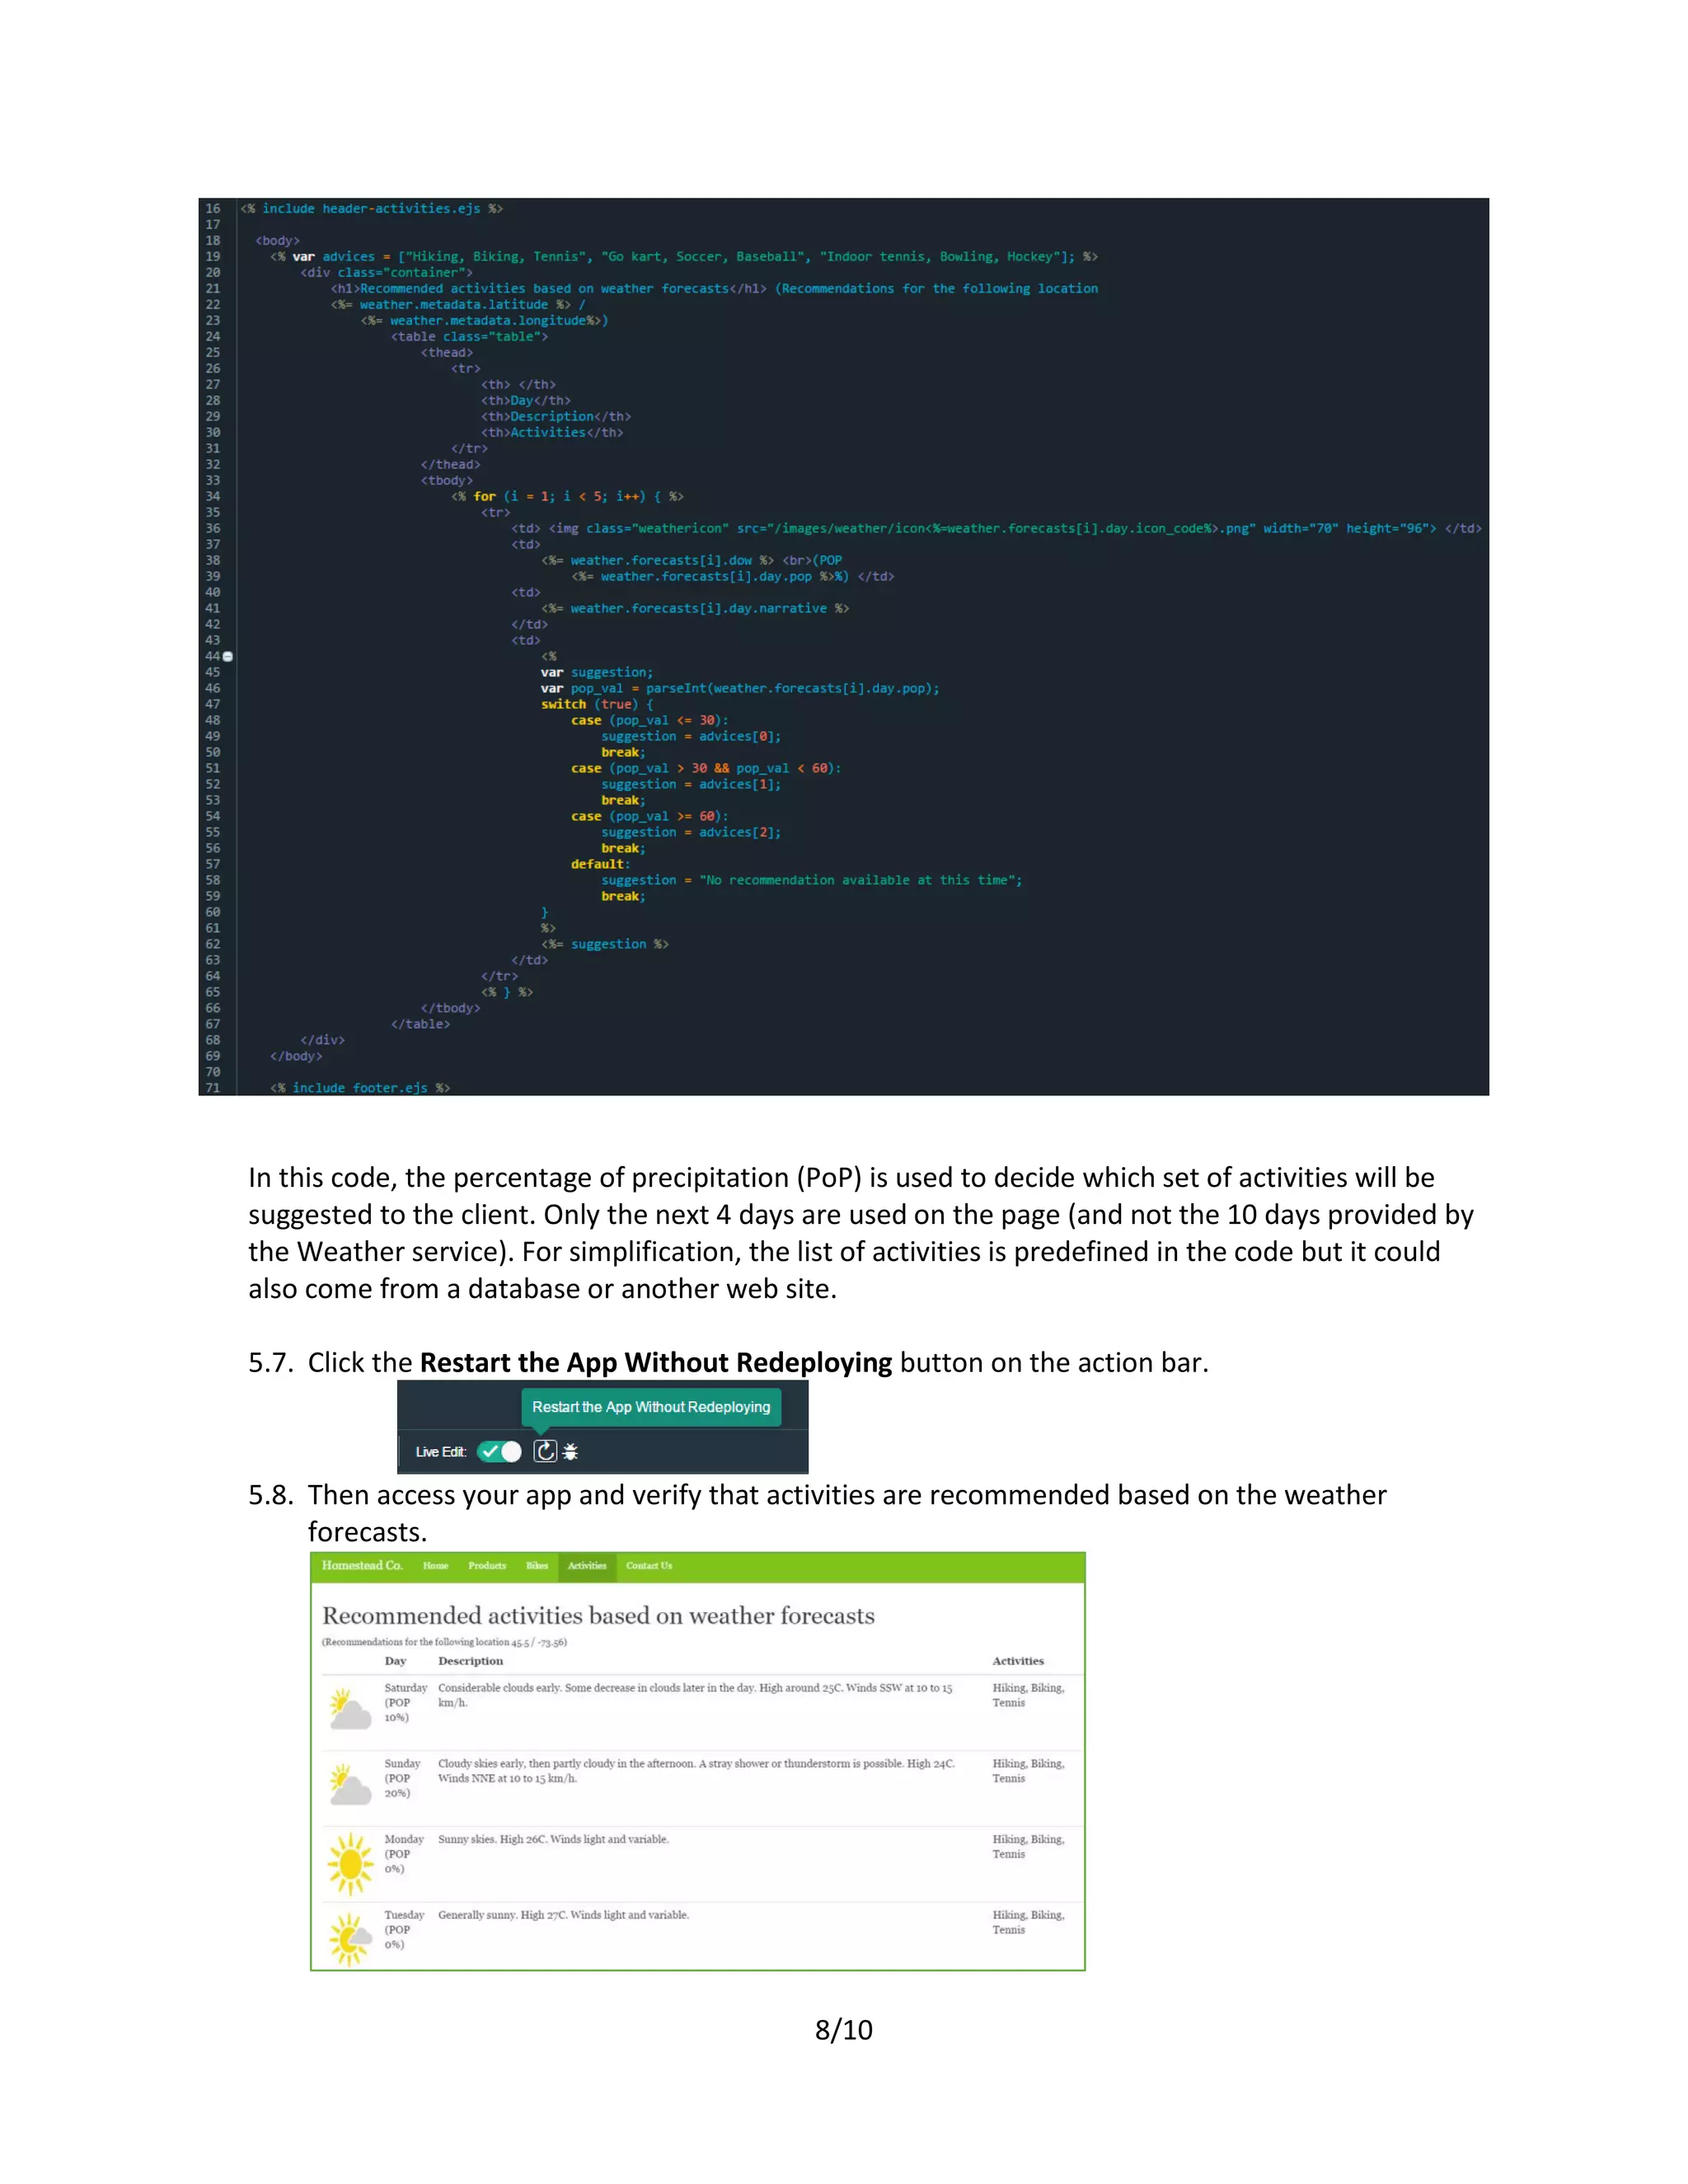
5.6. Now under the views folder, open the activities.ejs file. Modify the code of the <BODY>
…</BODY> section with the one copied form the sol-activities.ejs file. Your code should now be
similar to the one below:](https://image.slidesharecdn.com/homesteadweatherworkshop-160523203305/75/Homestead-Weather-workshop-7-2048.jpg)


This document outlines a lab exercise for building a cloud application using IBM Bluemix and the Weather Company Data service. Participants will follow a DevOps lifecycle to modify an existing web application, incorporating weather forecasts to suggest activities based on the weather. The lab covers application cloning, adding features, utilizing API calls, and deploying changes within the Bluemix environment.


![Vibe Coding vs. Spec-Driven Development [Free Meetup]](https://cdn.slidesharecdn.com/ss_thumbnails/vibecodingvsspecdrivendevelopment-251209105622-43f455e7-thumbnail.jpg?width=640&height=640&fit=bounds)


