Downloaded 455 times
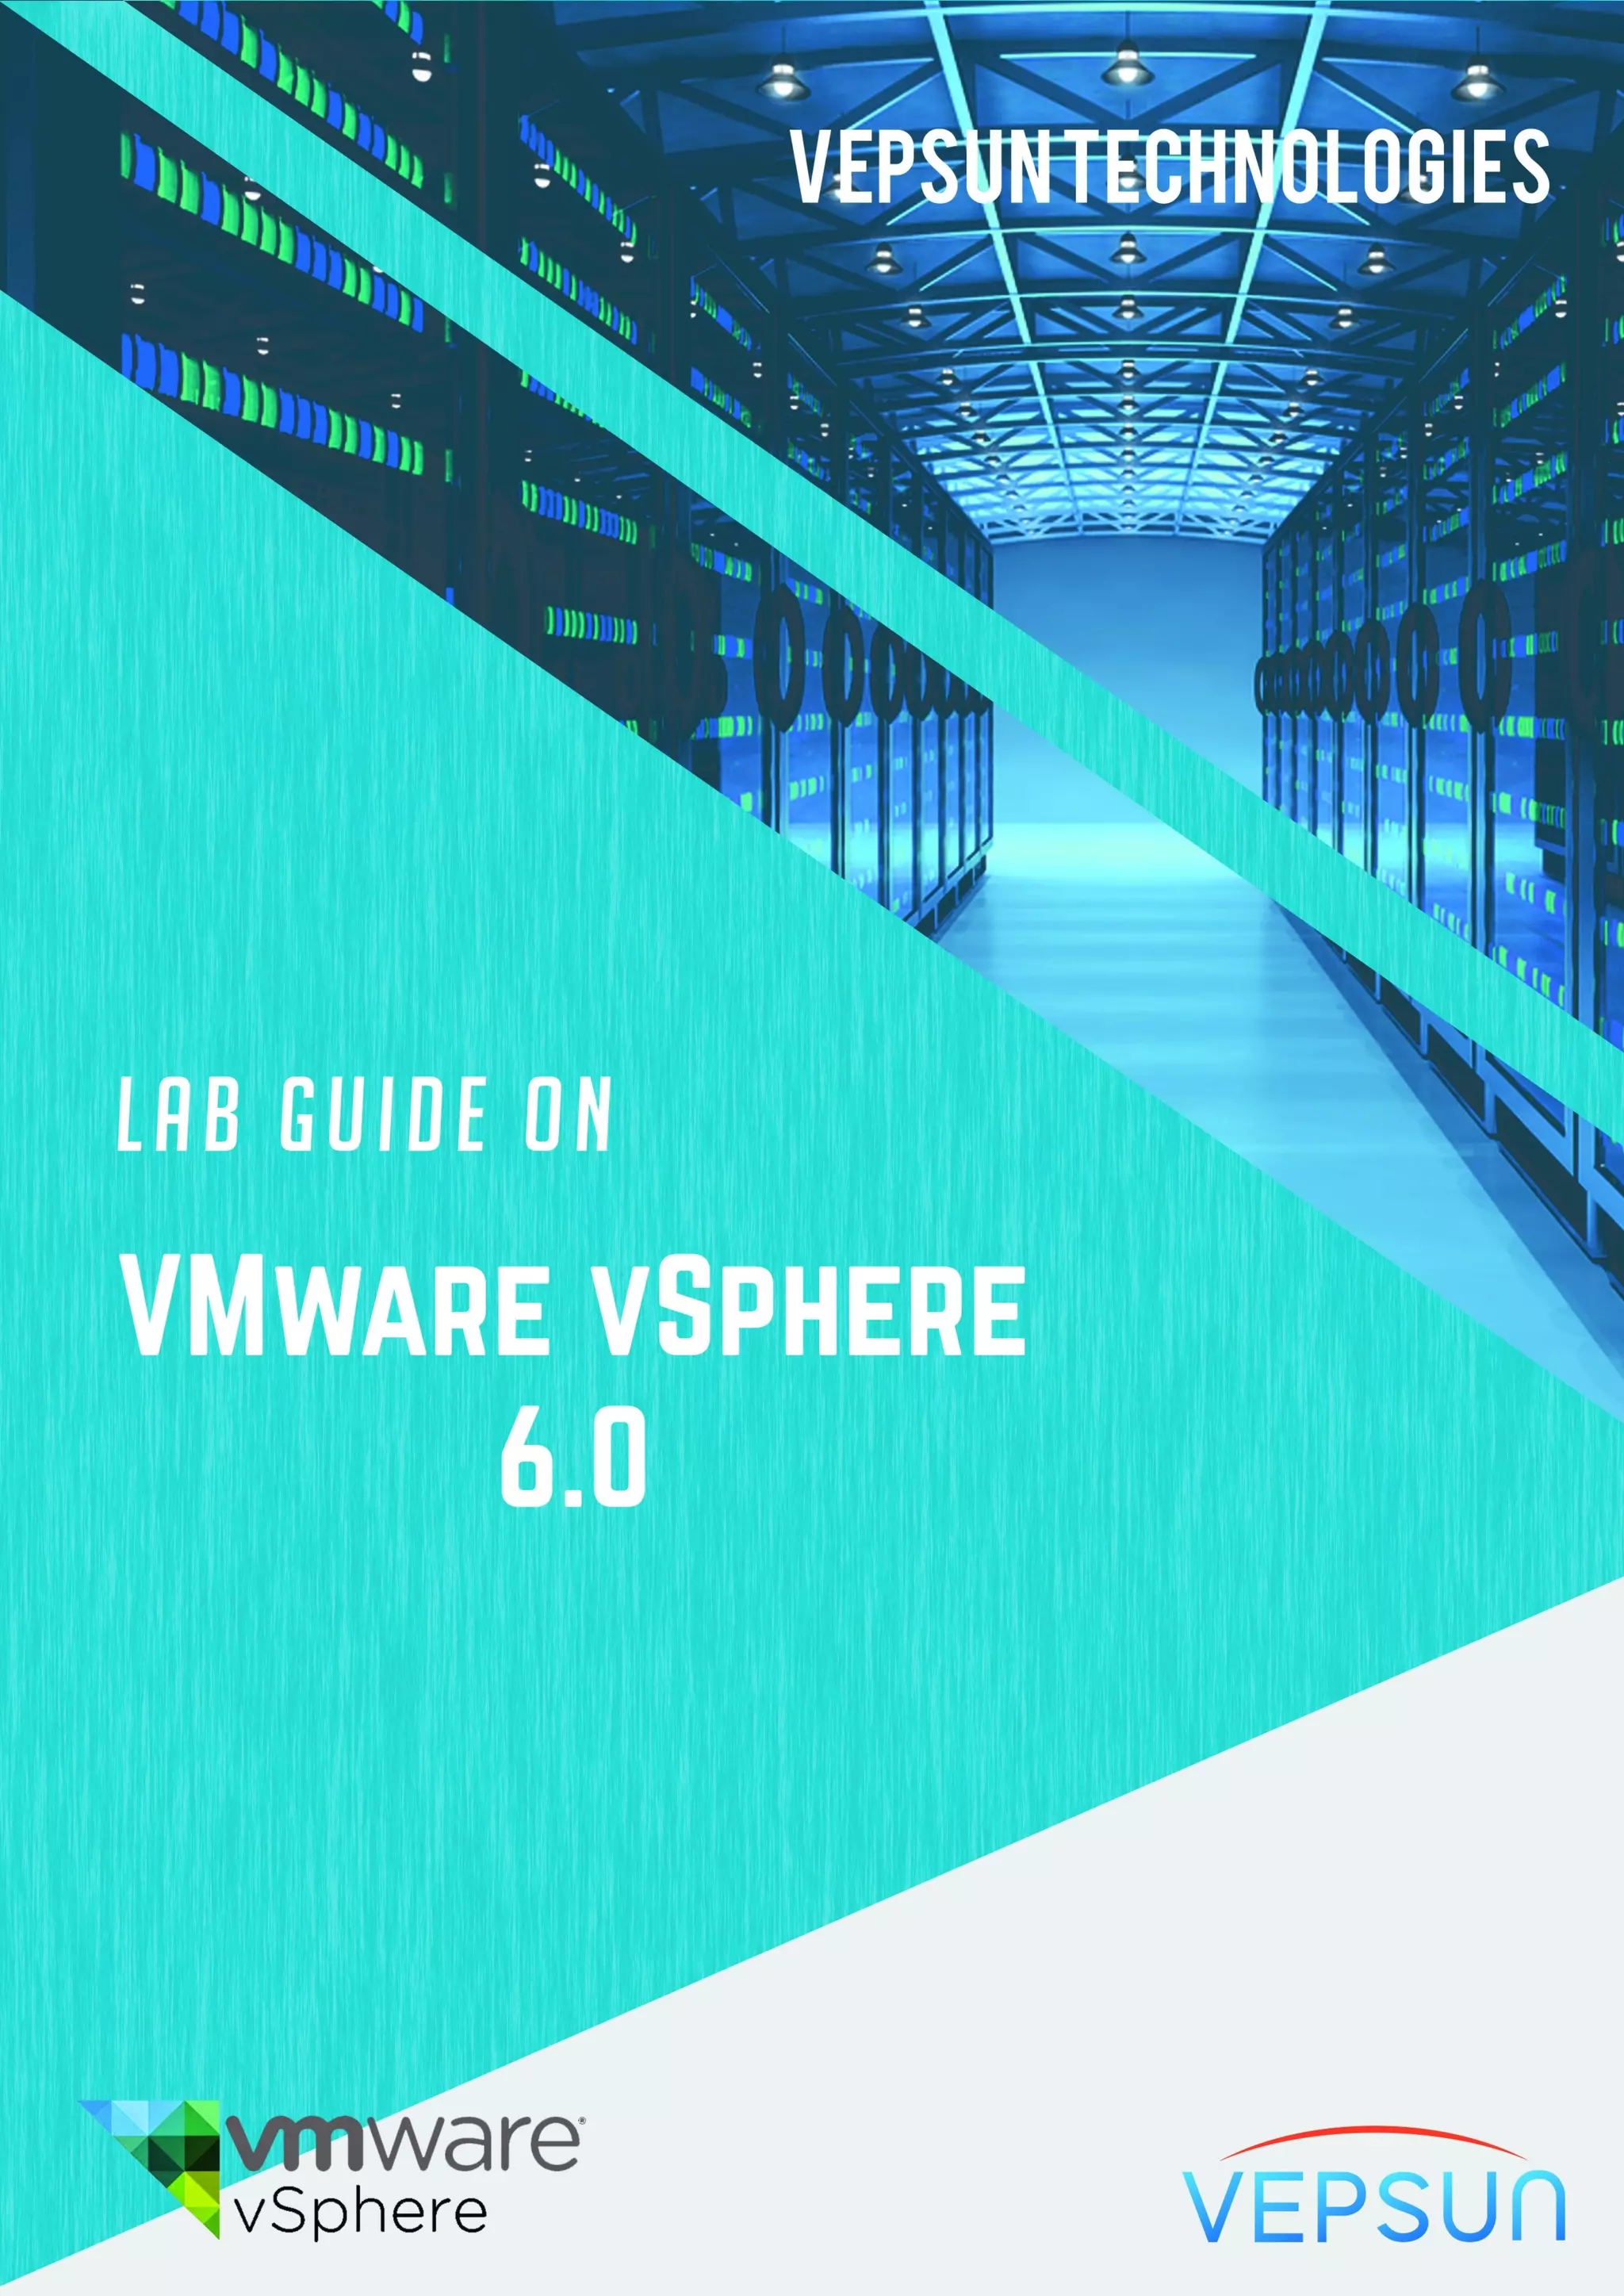


Vepsun Technologies is an IT training company that has grown to become the largest independent training provider since 2010. It offers advanced technology courses delivered by experts to businesses and individuals. The company aims to form long-term relationships with clients by understanding their goals and putting efforts to refine and achieve those goals with experience. The document contains a lab guide for VMware vSphere 6.0 that includes instructions on installing an Active Directory server, ESXi server, and vCenter server.
Introduction of Vepsun Technologies as a leading IT training institute since 2010, offering advanced courses.
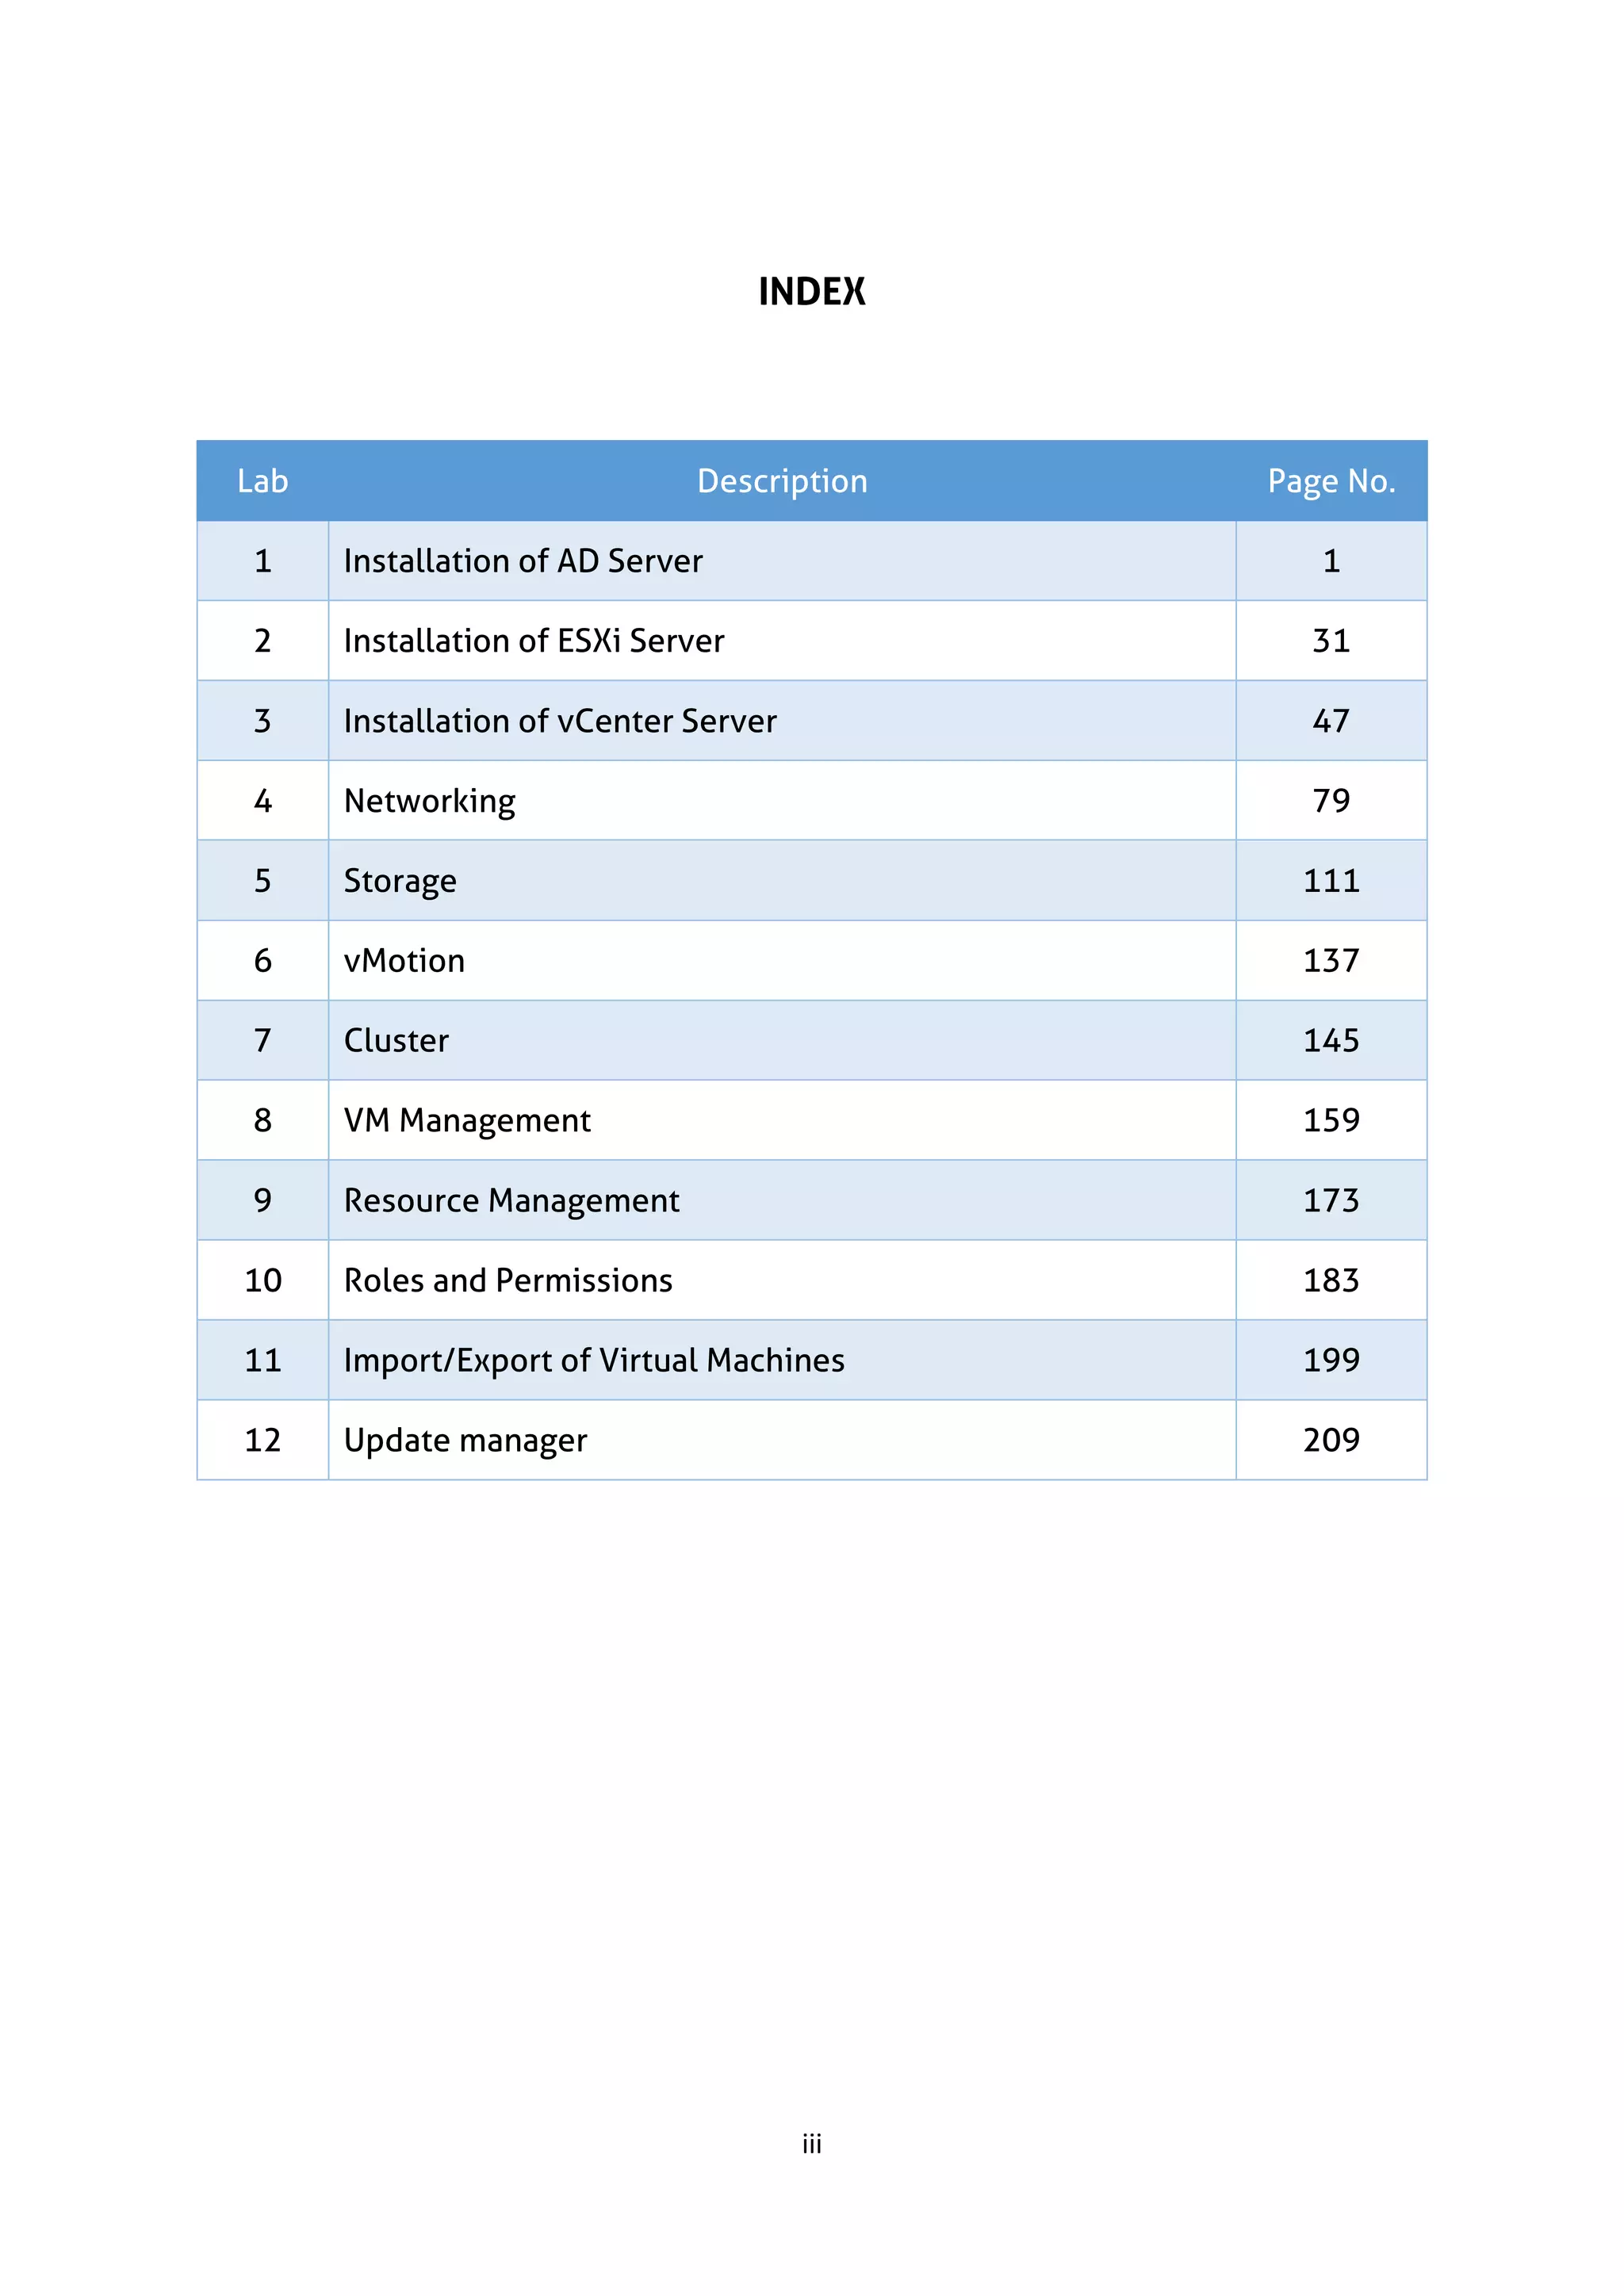
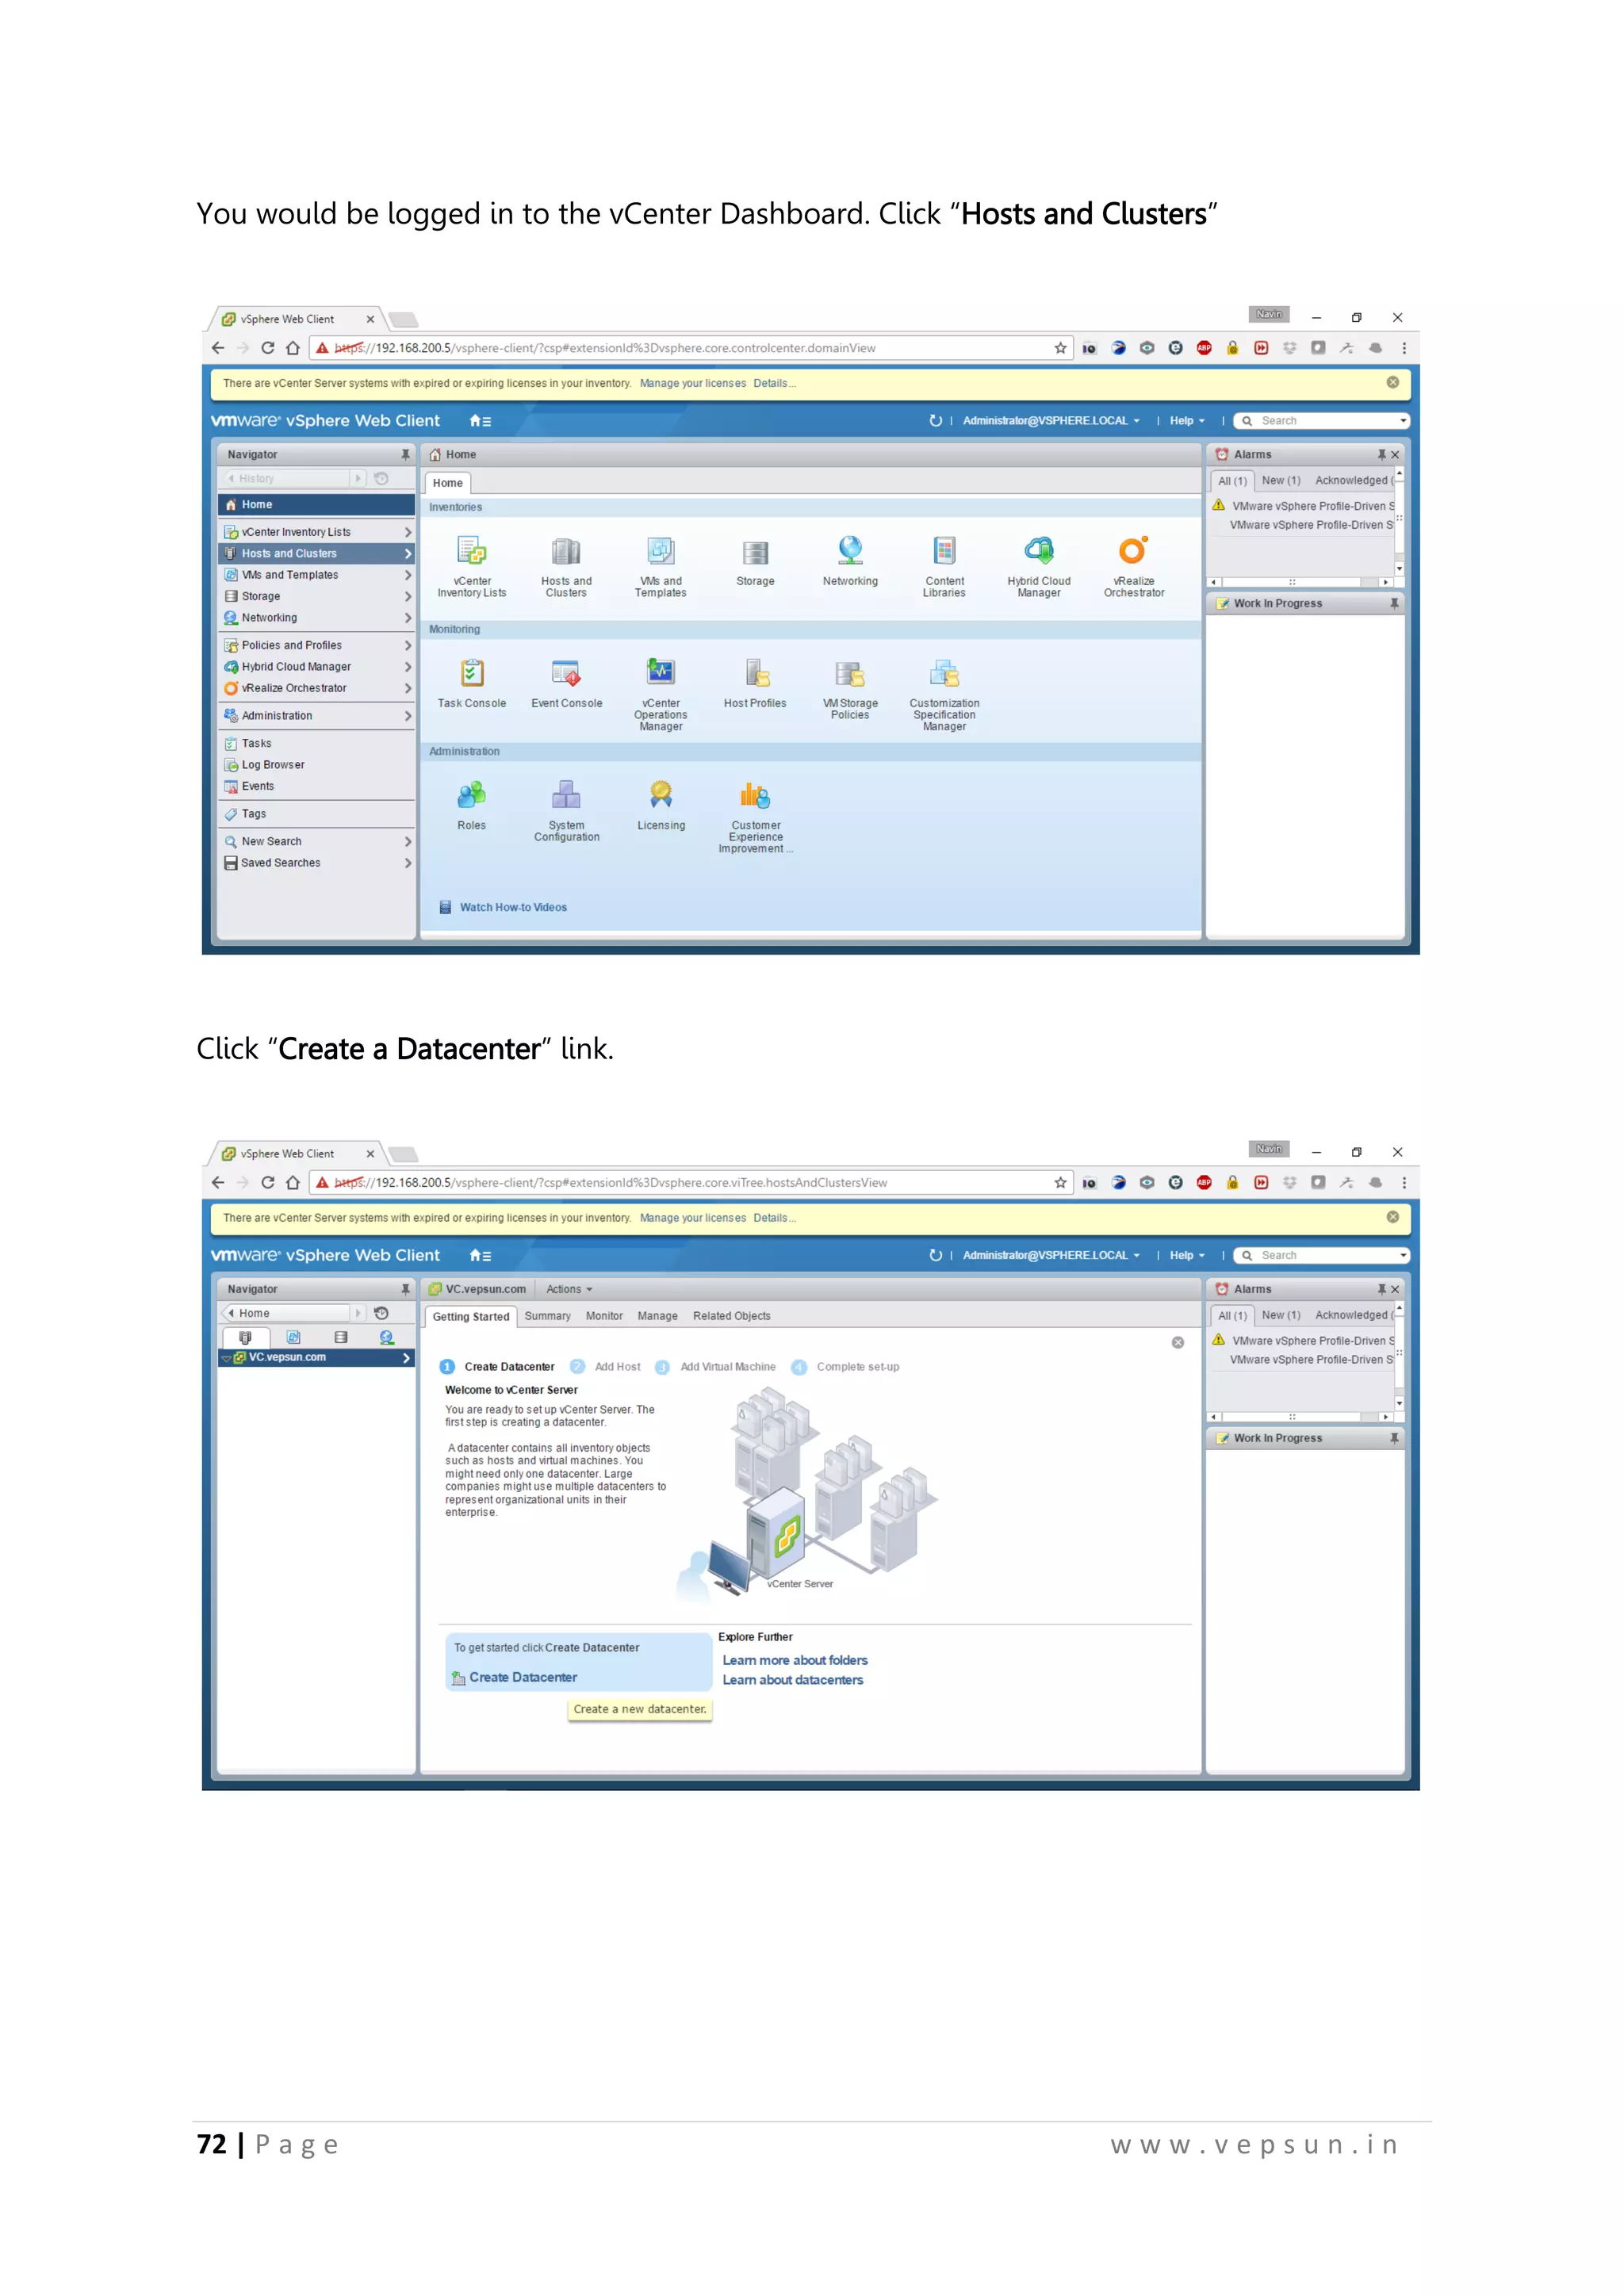
Overview of the lab guide contents including installation and management of VMware vSphere 6.0 components.
Overview of the lab guide contents including installation and management of VMware vSphere 6.0 components.
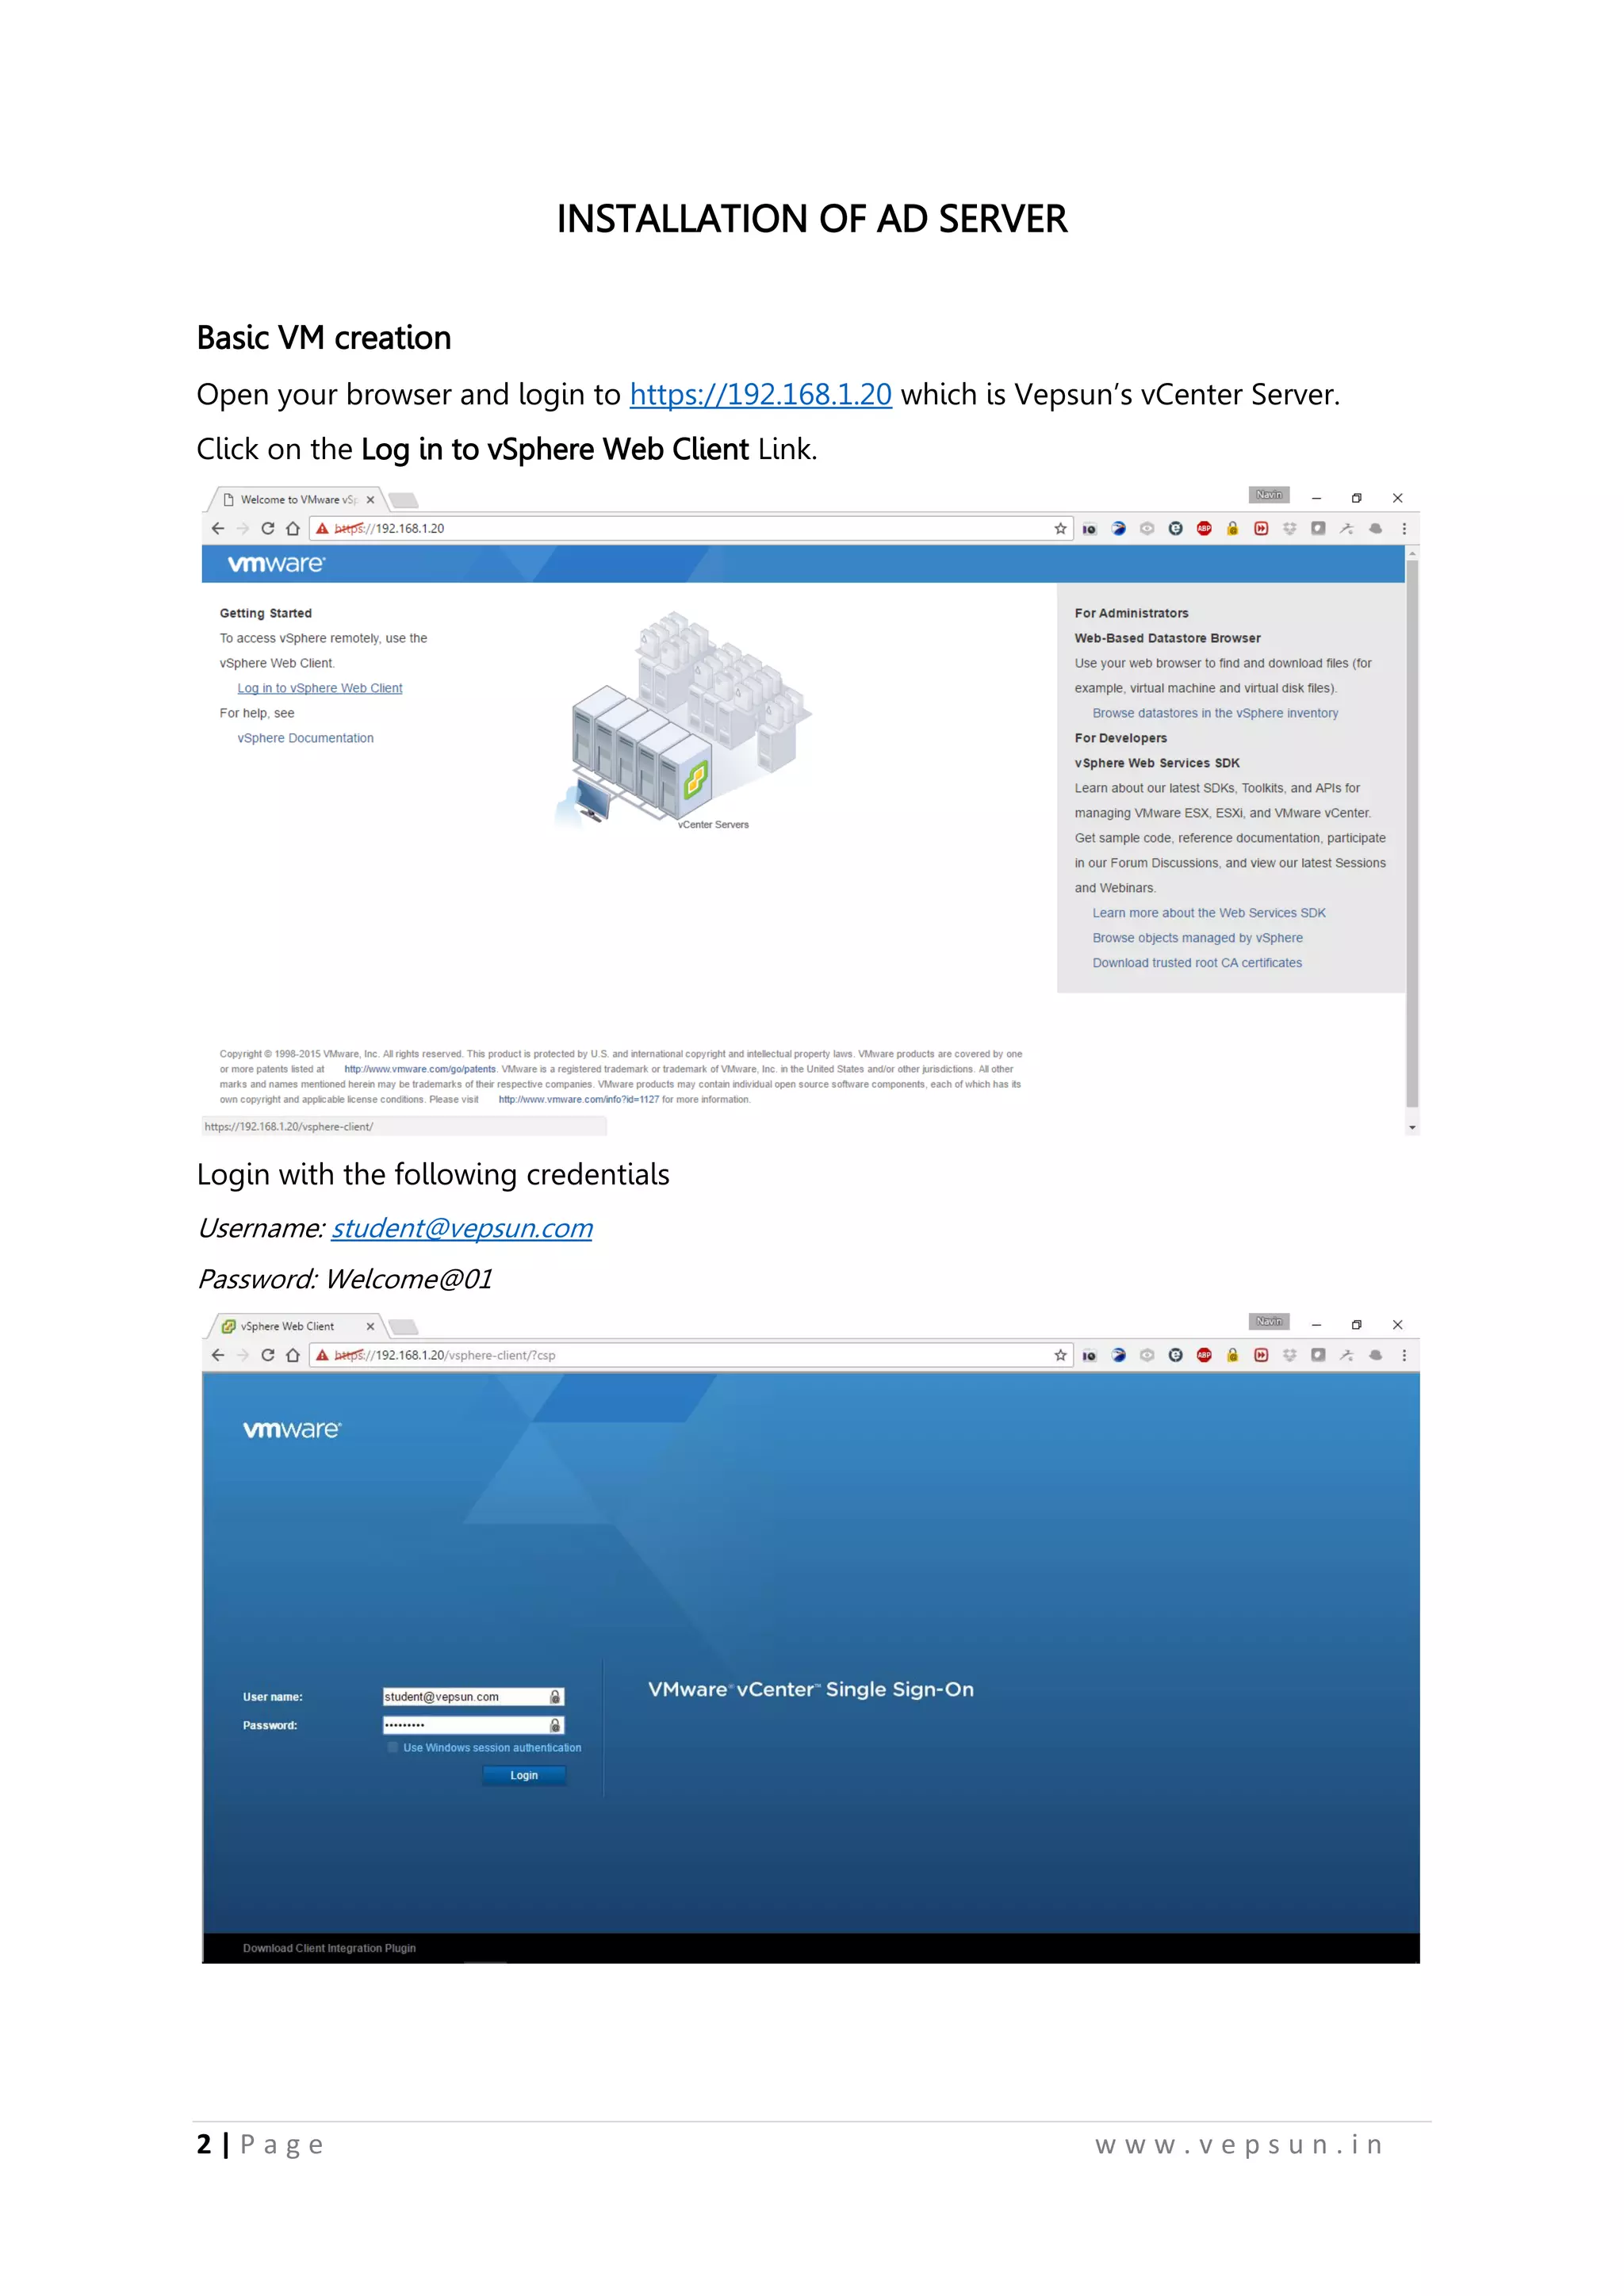
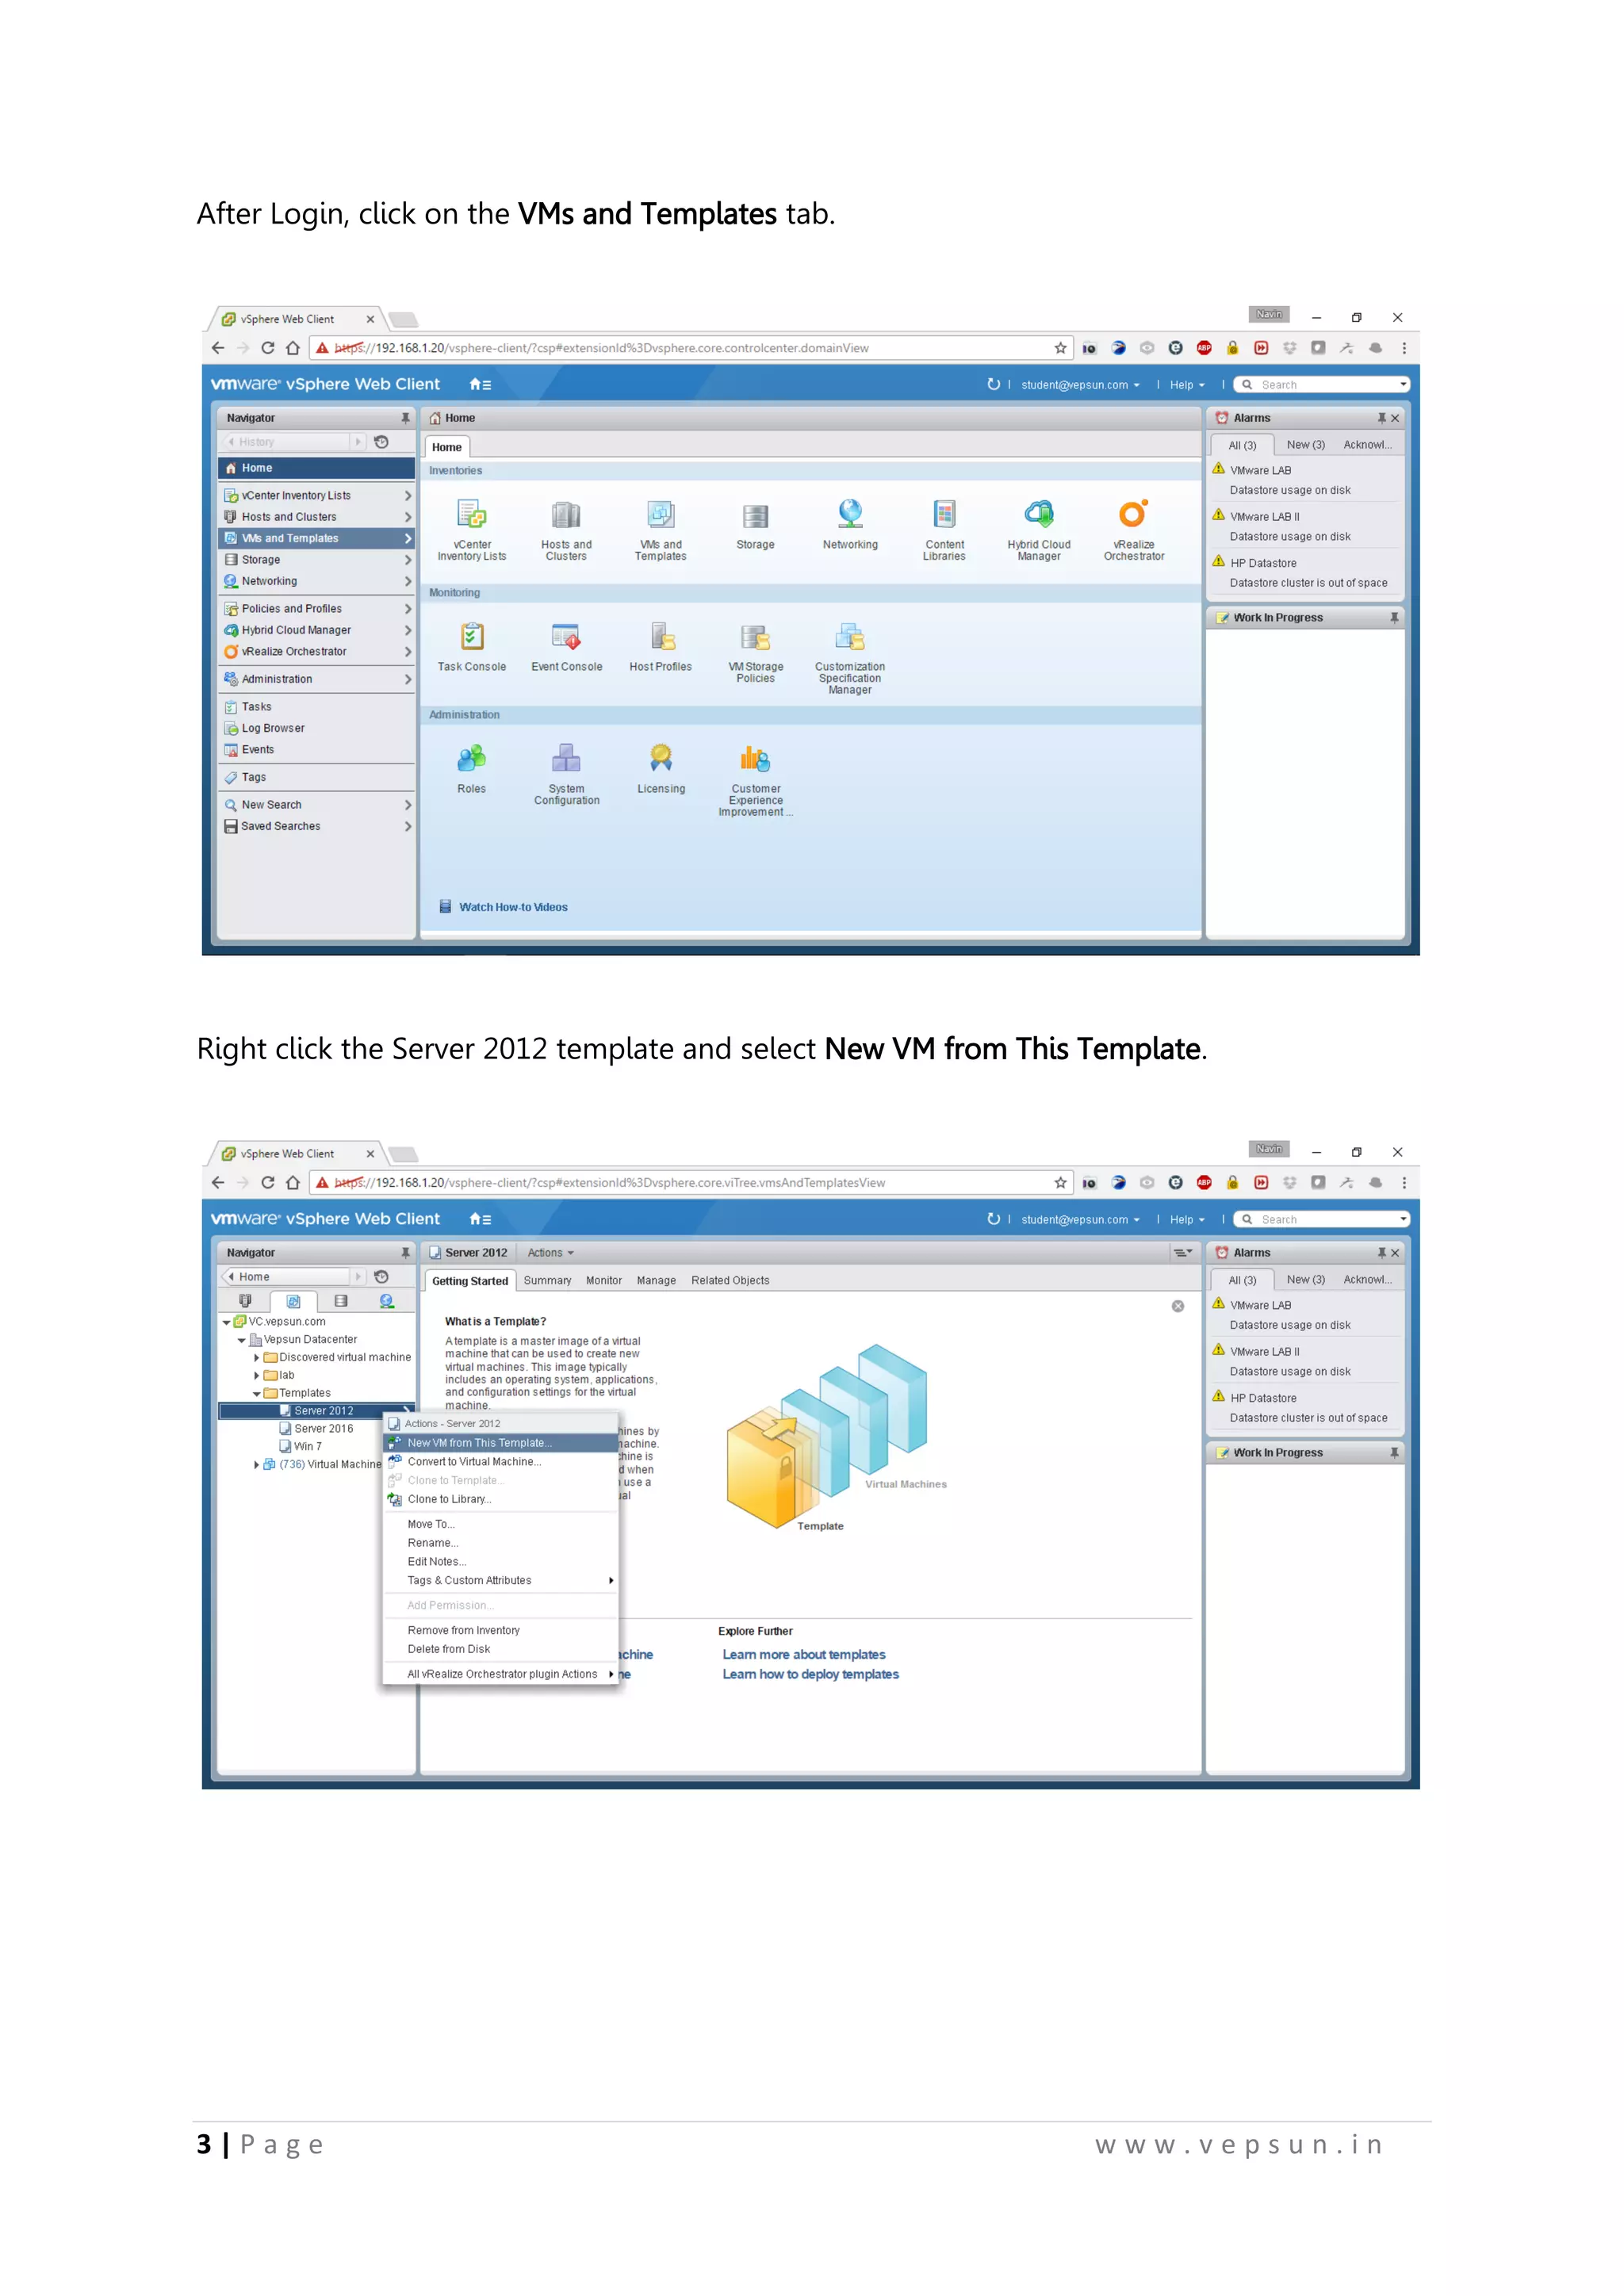
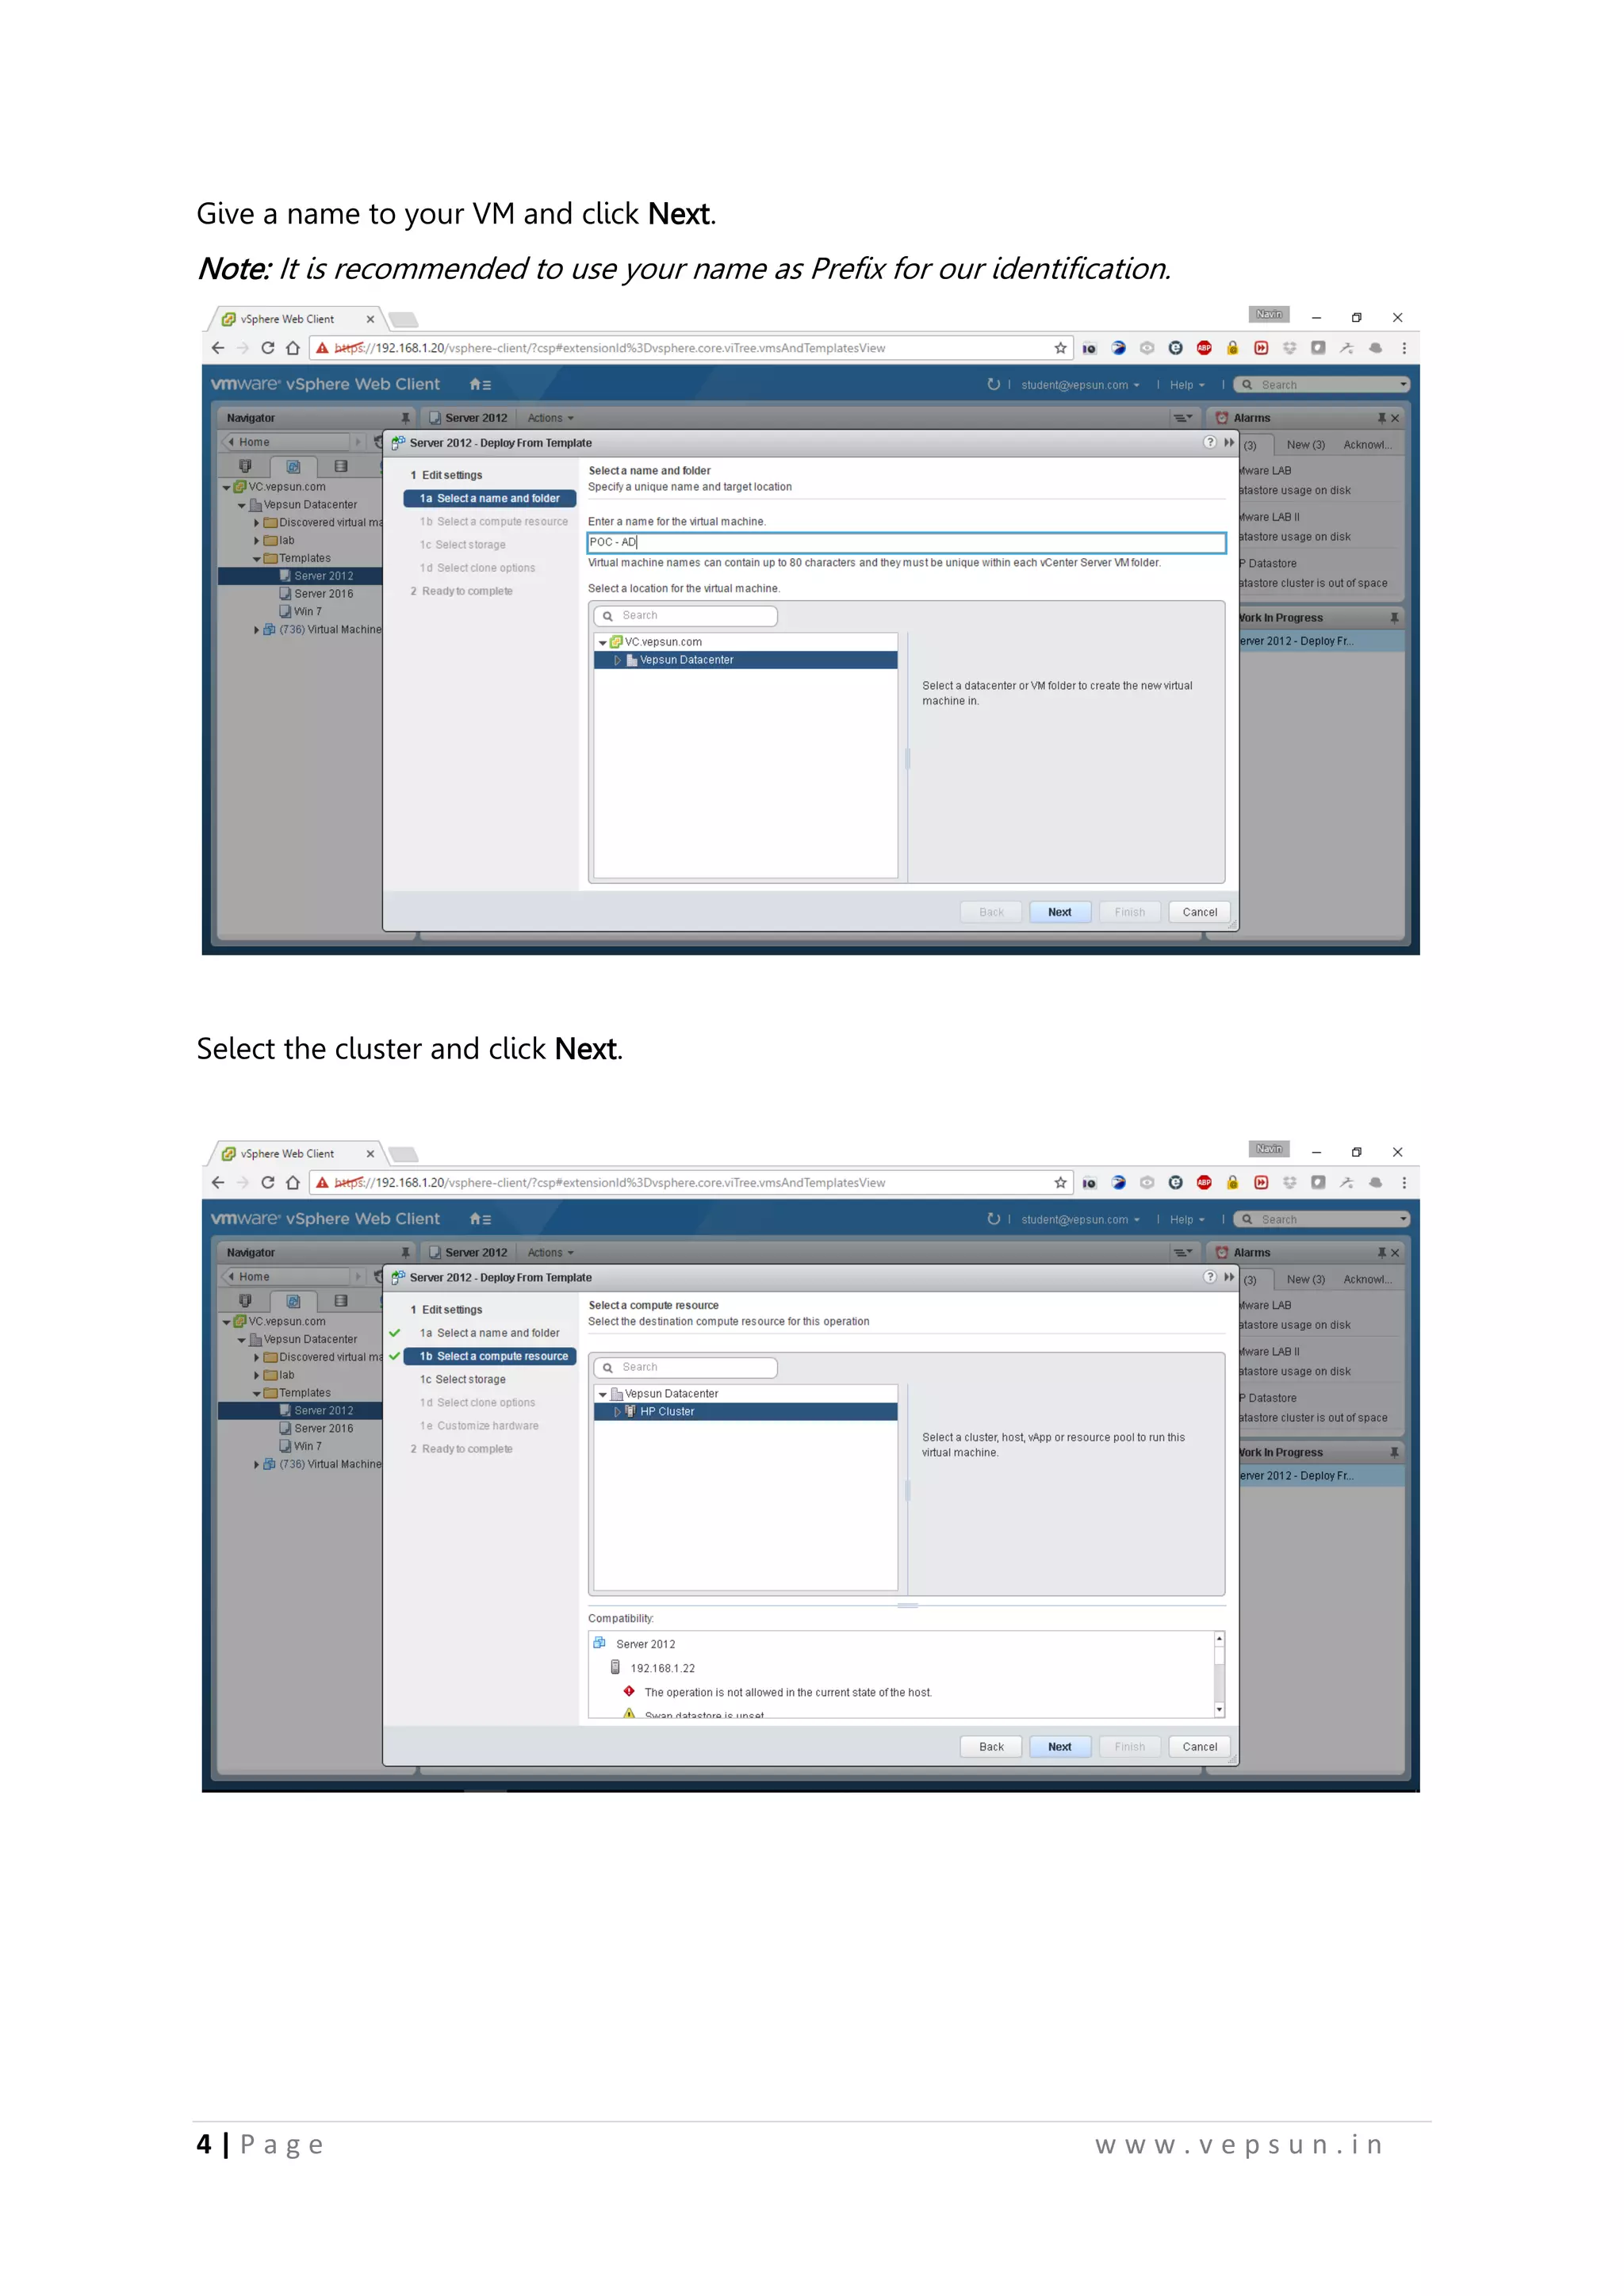
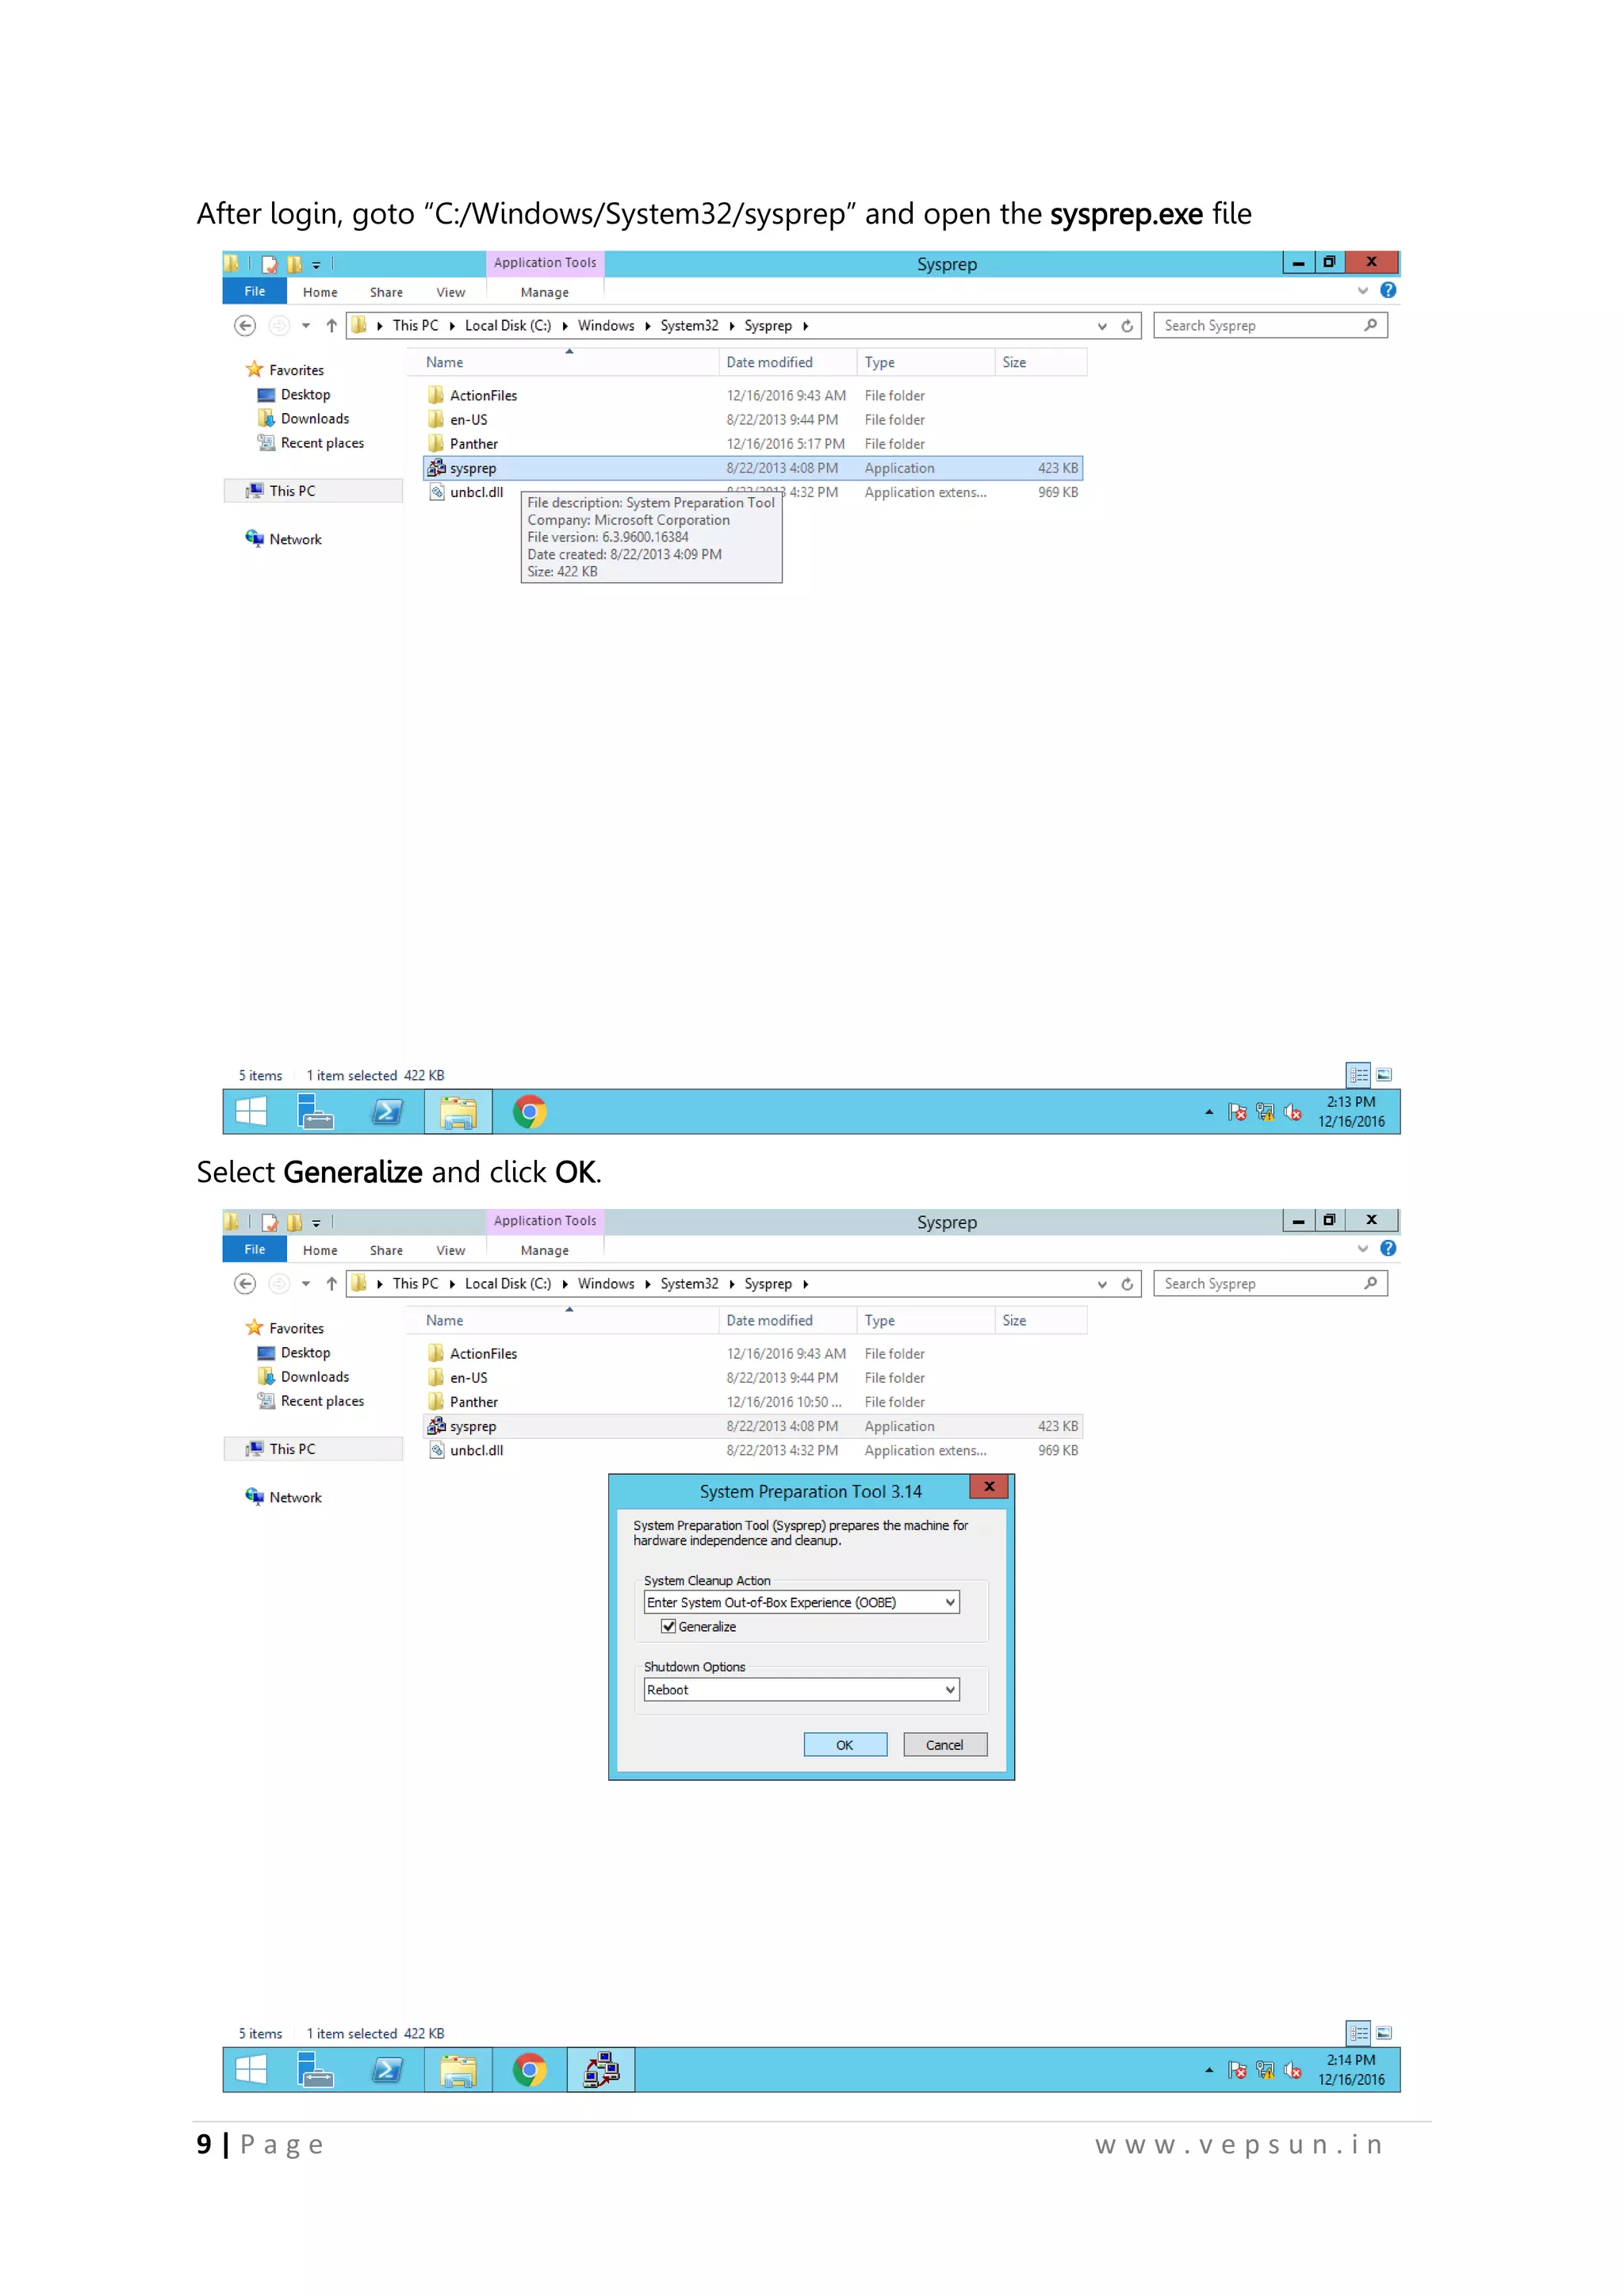
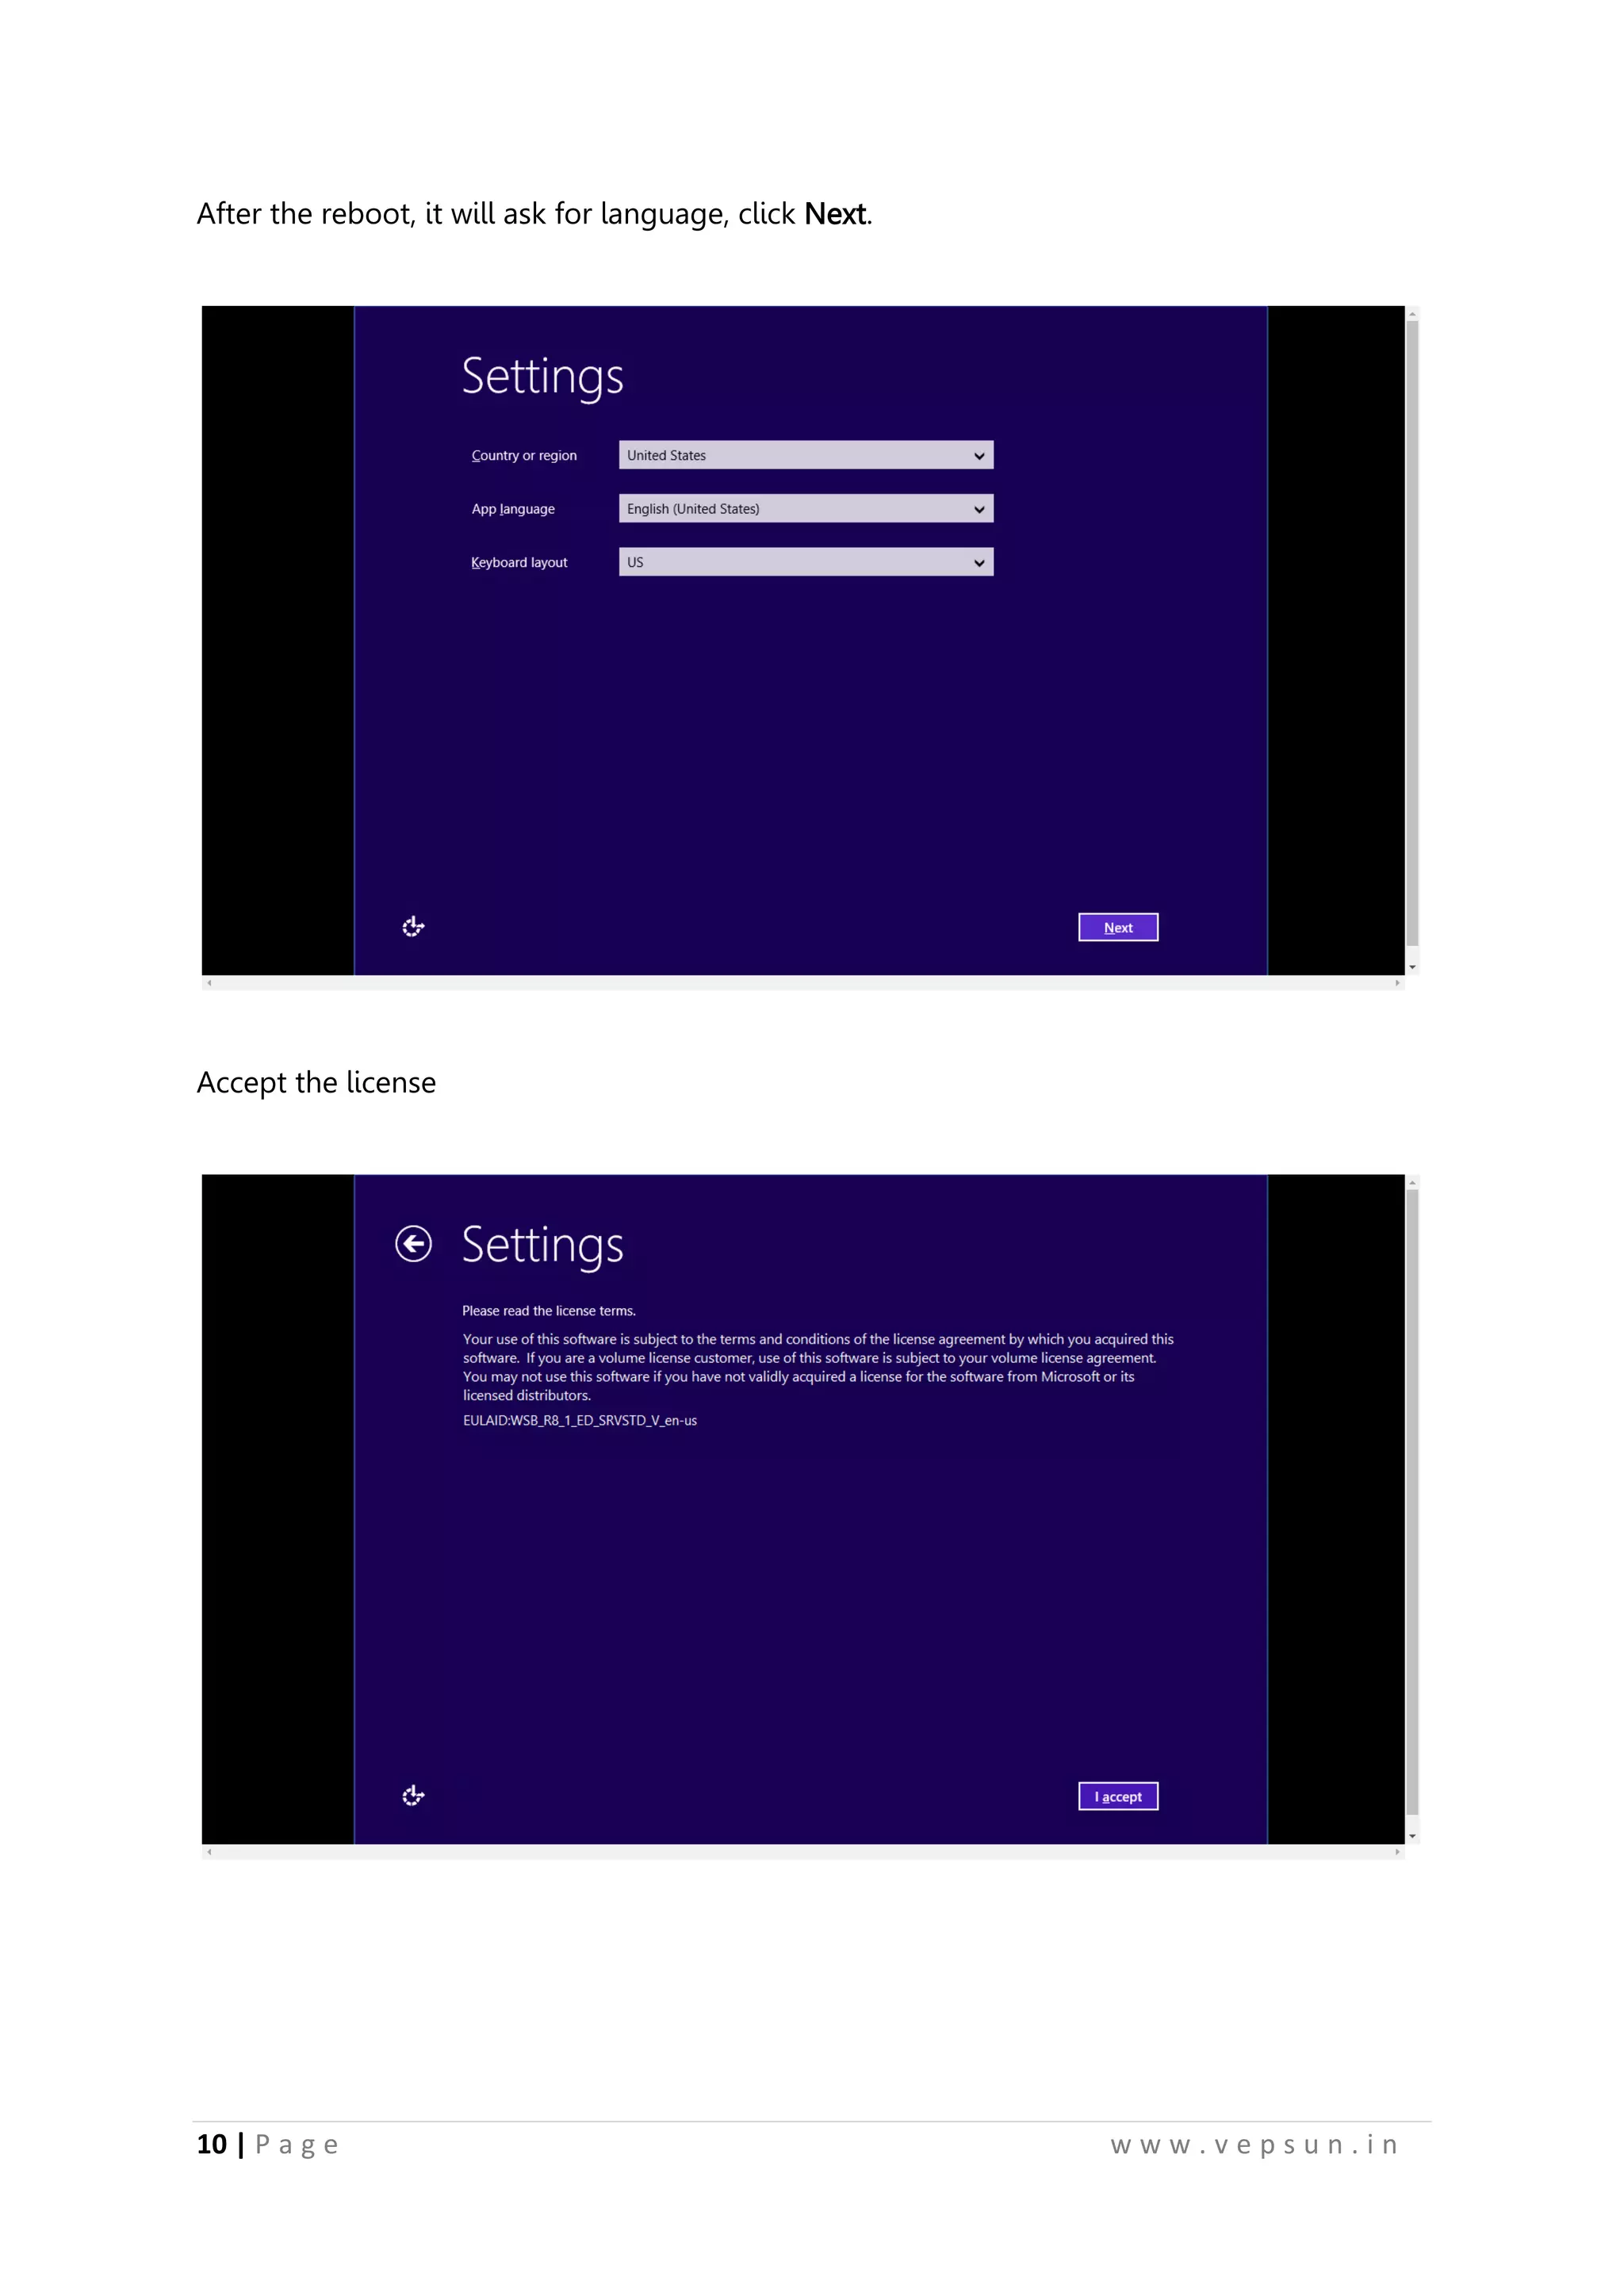
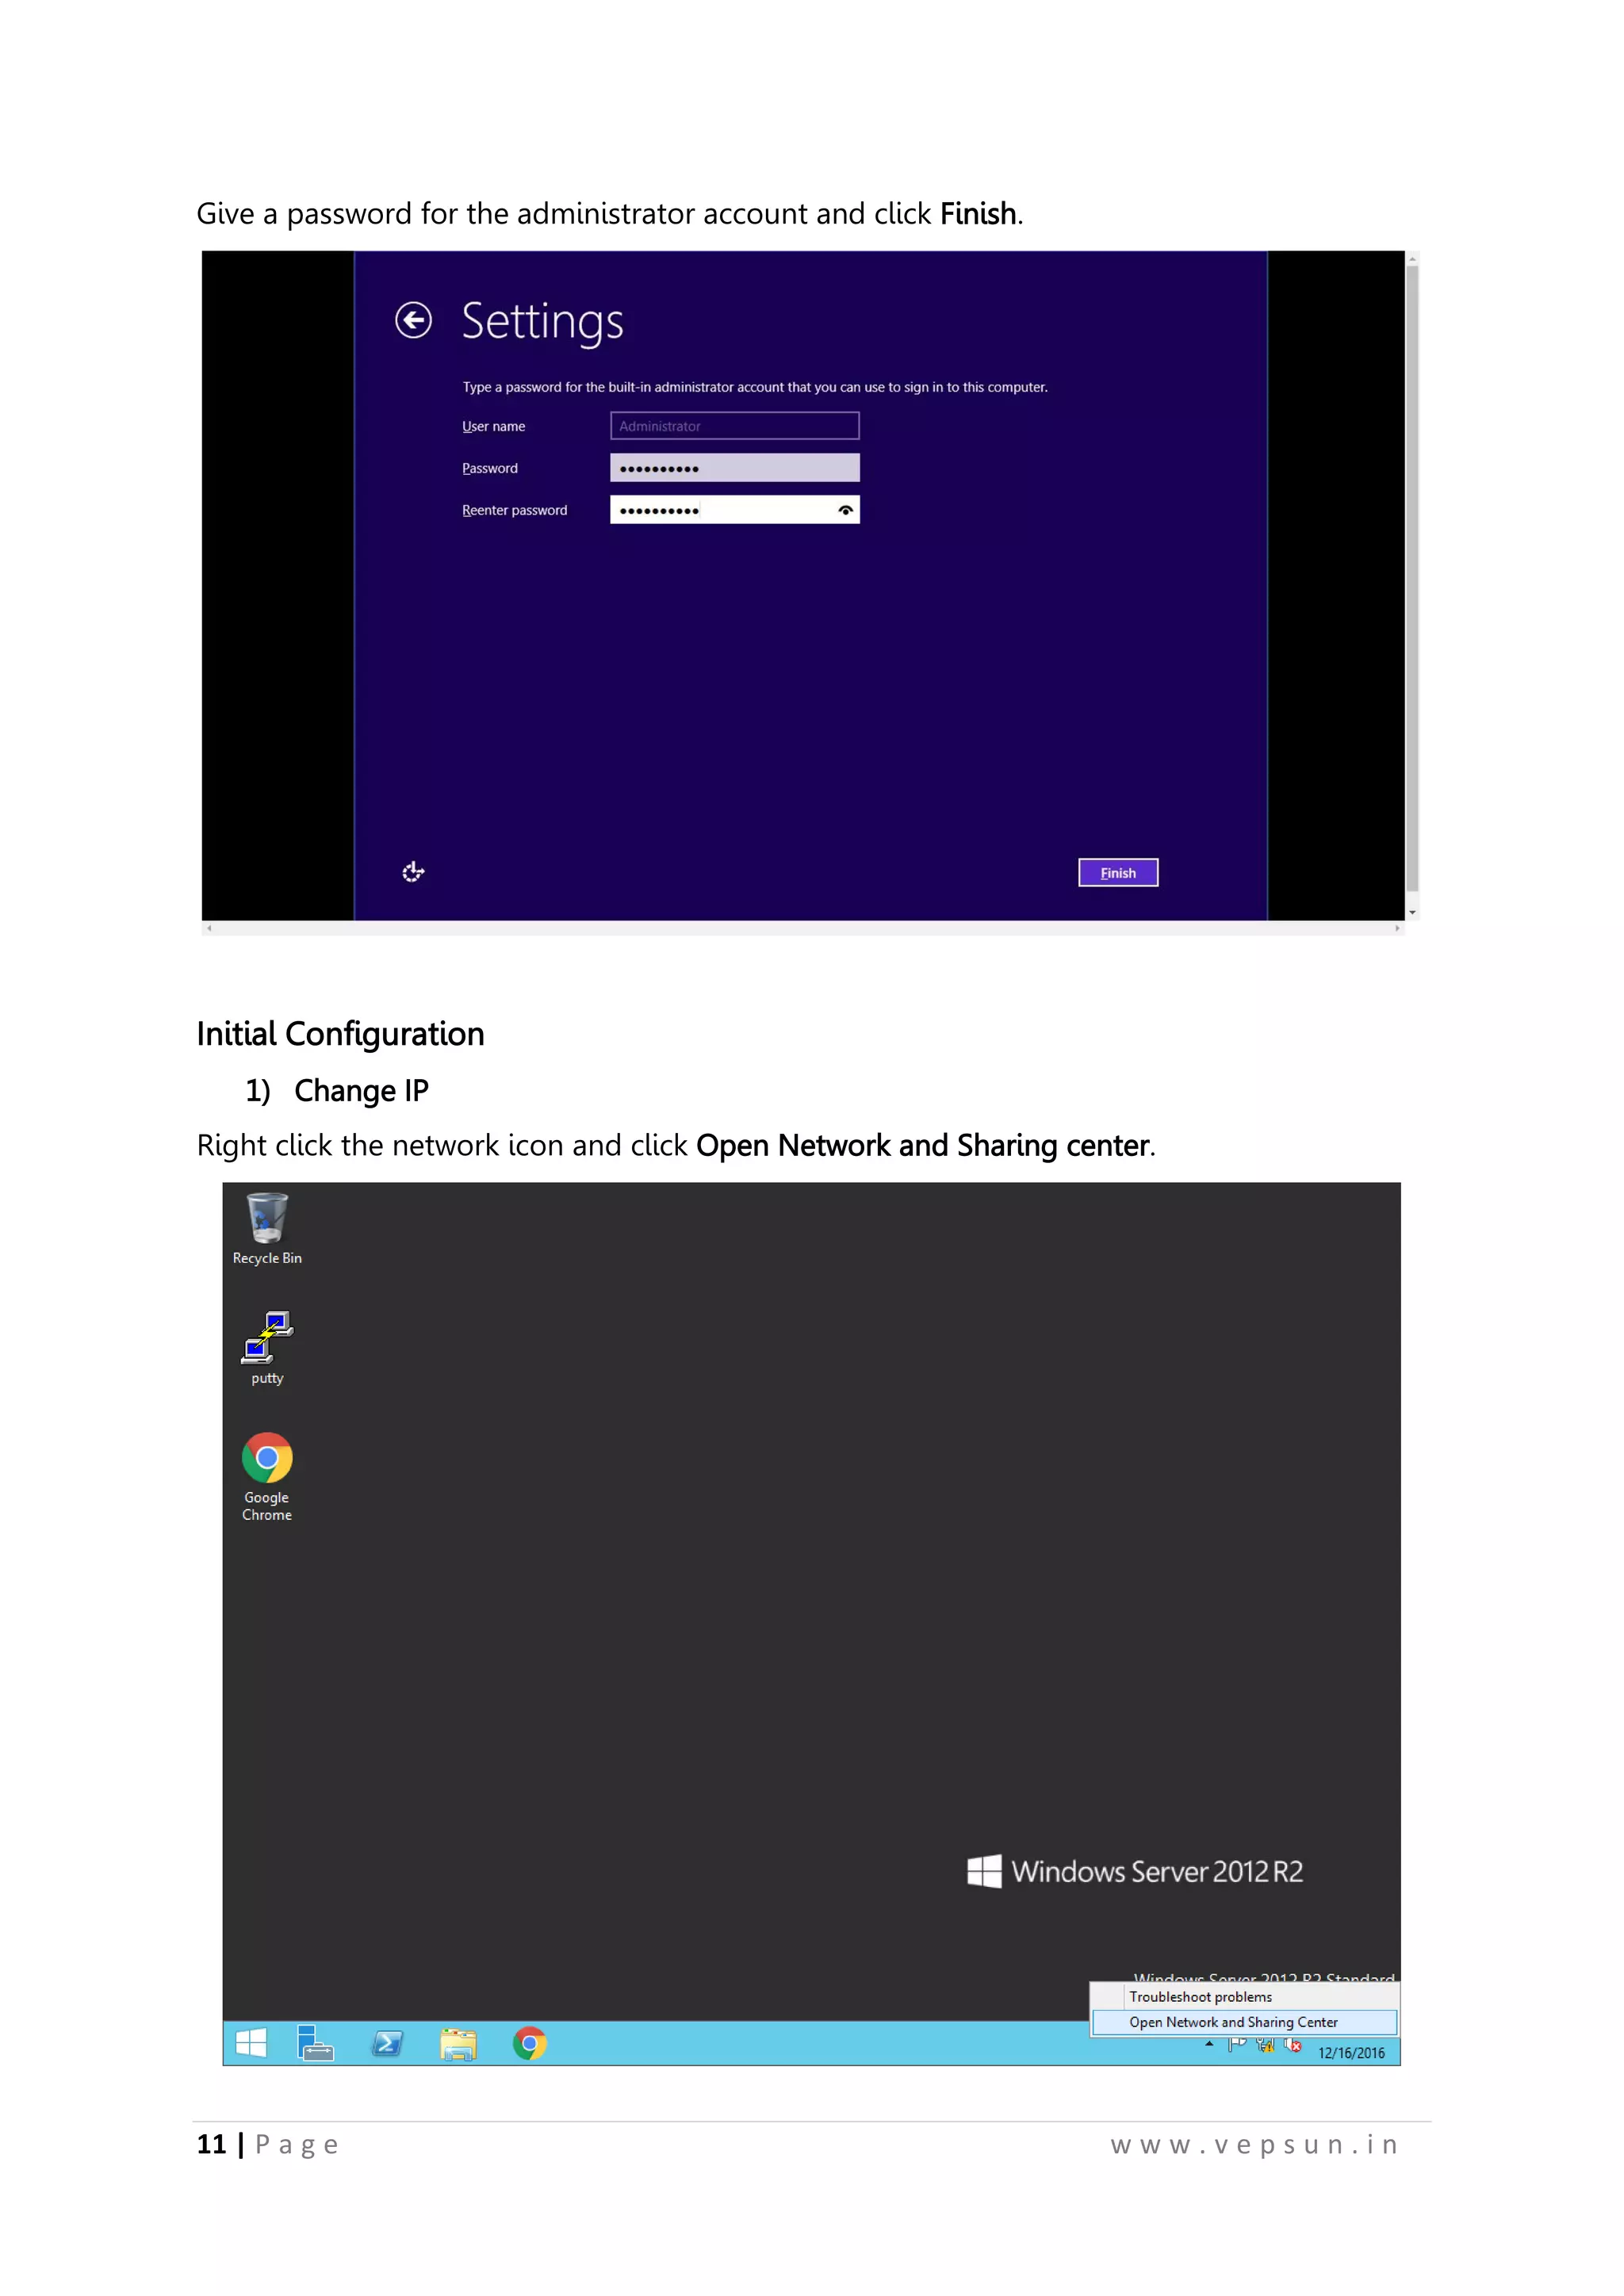
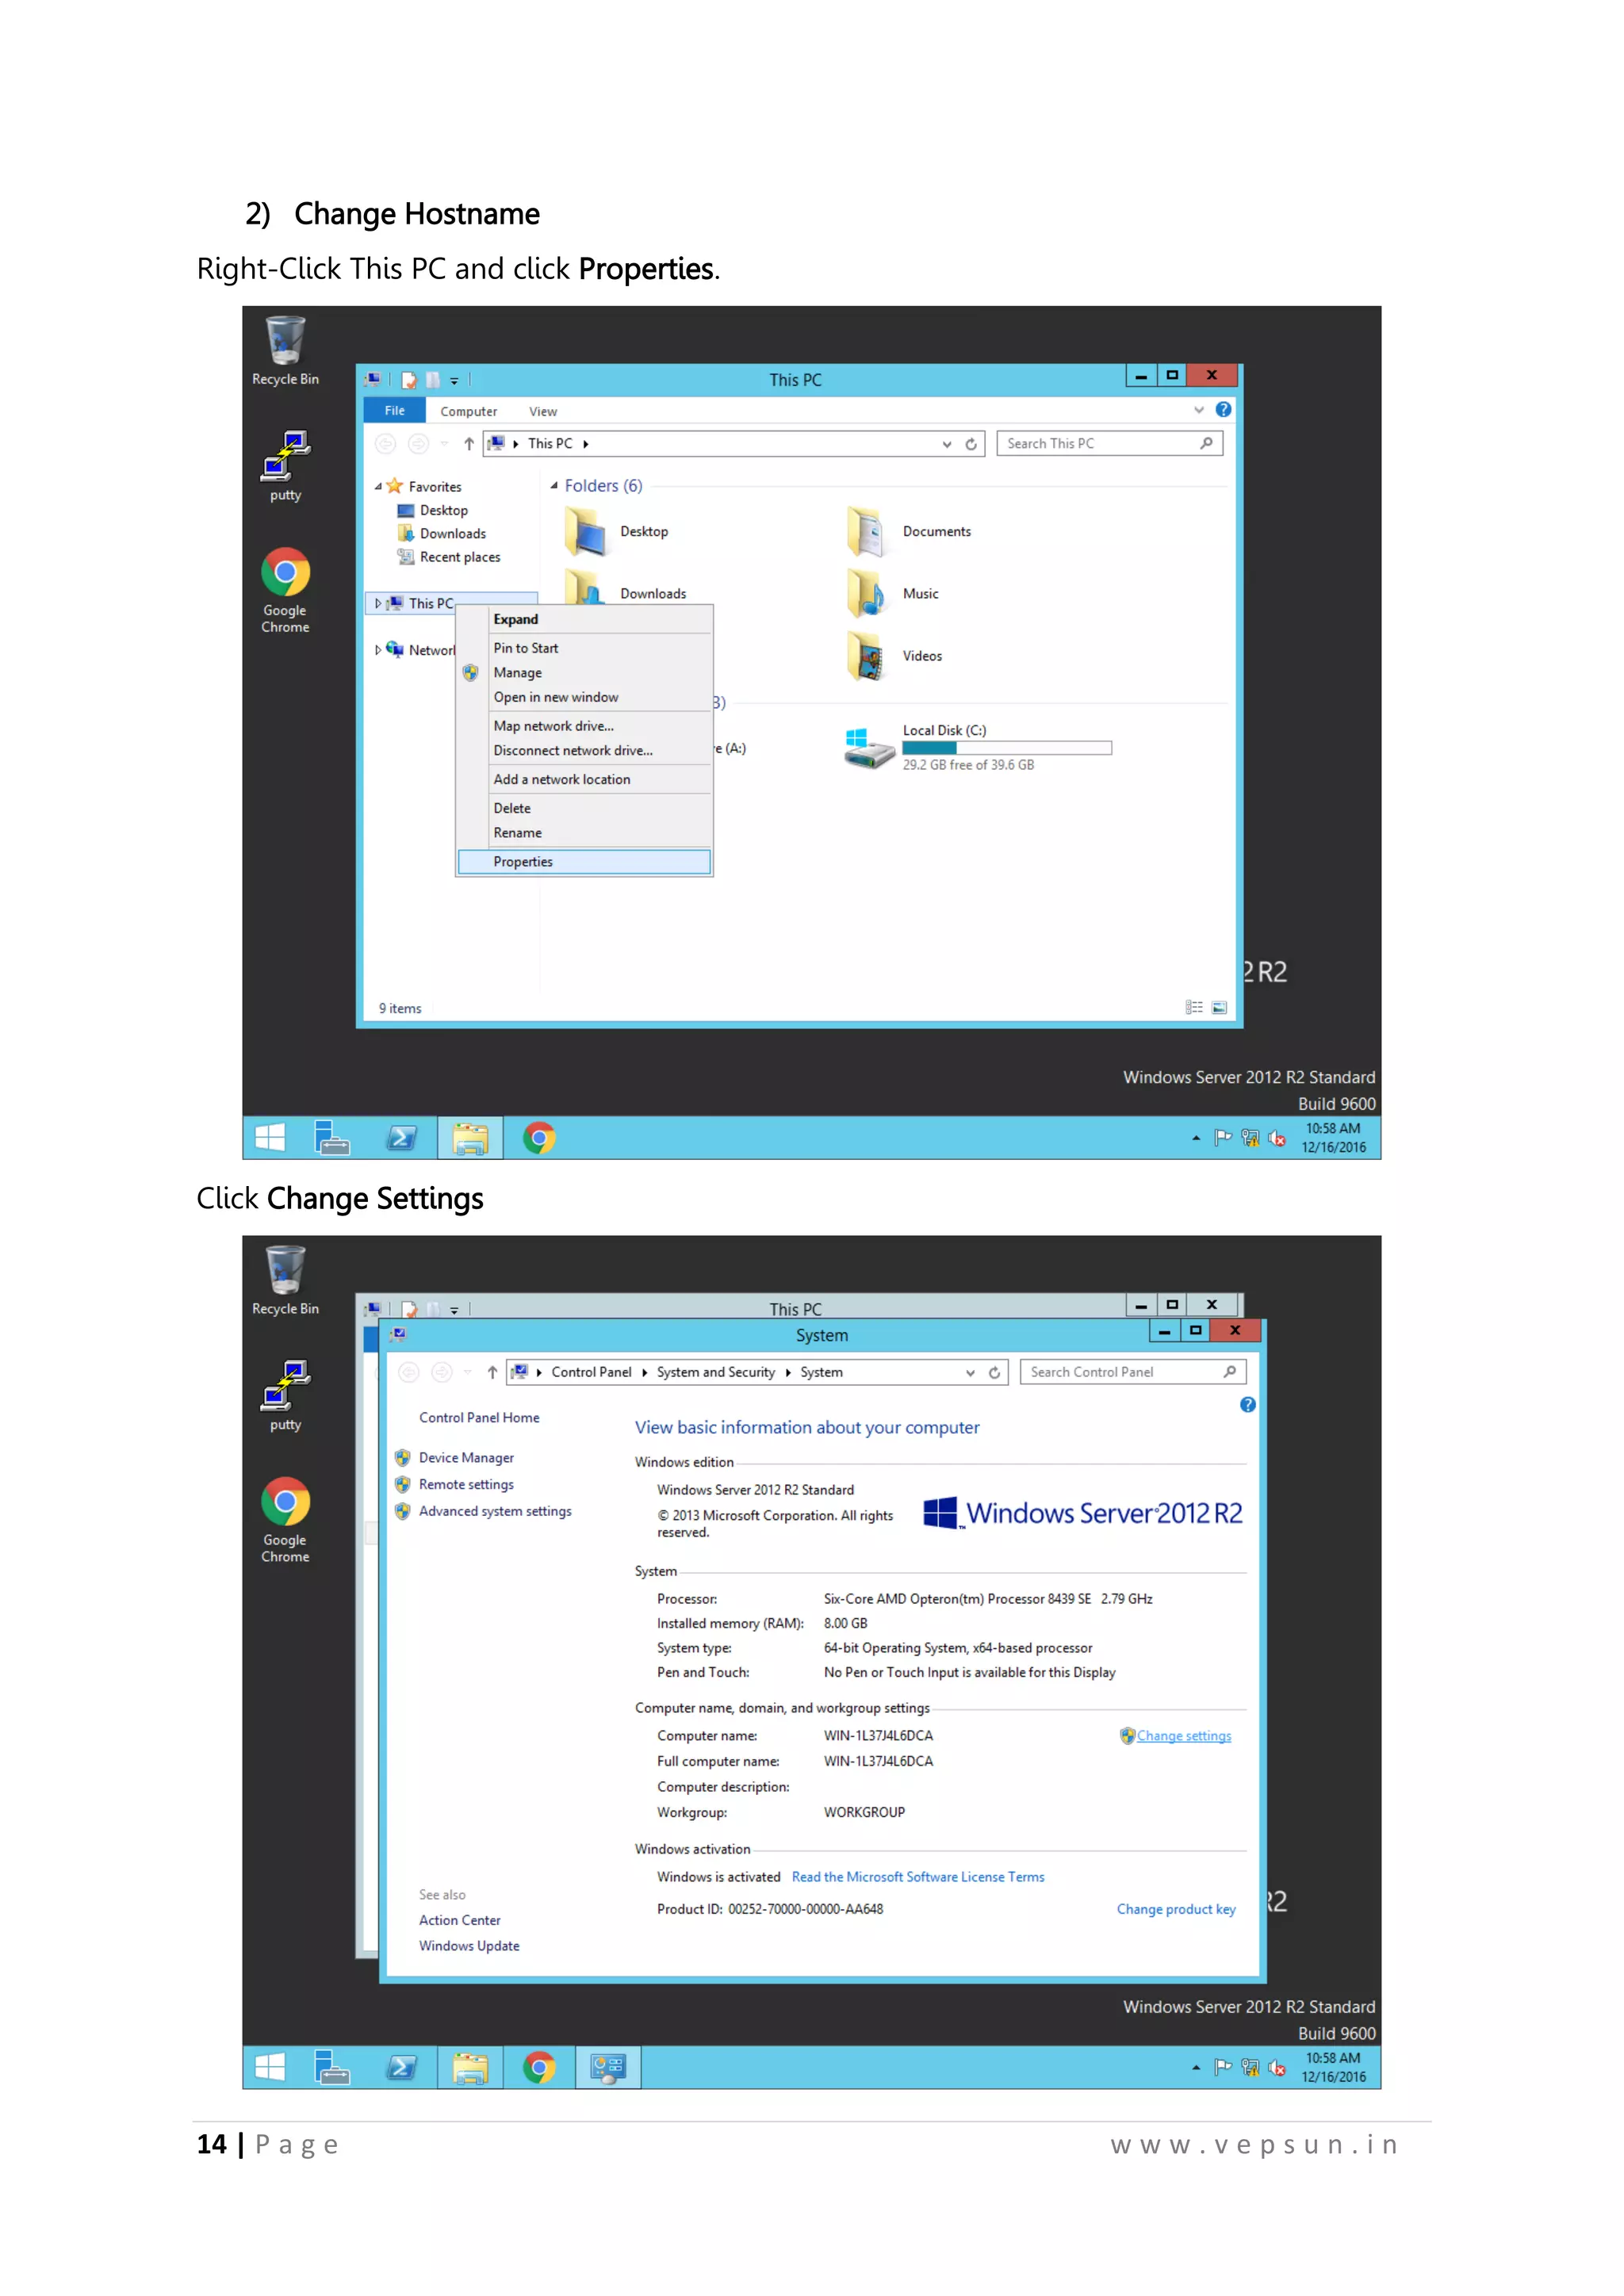
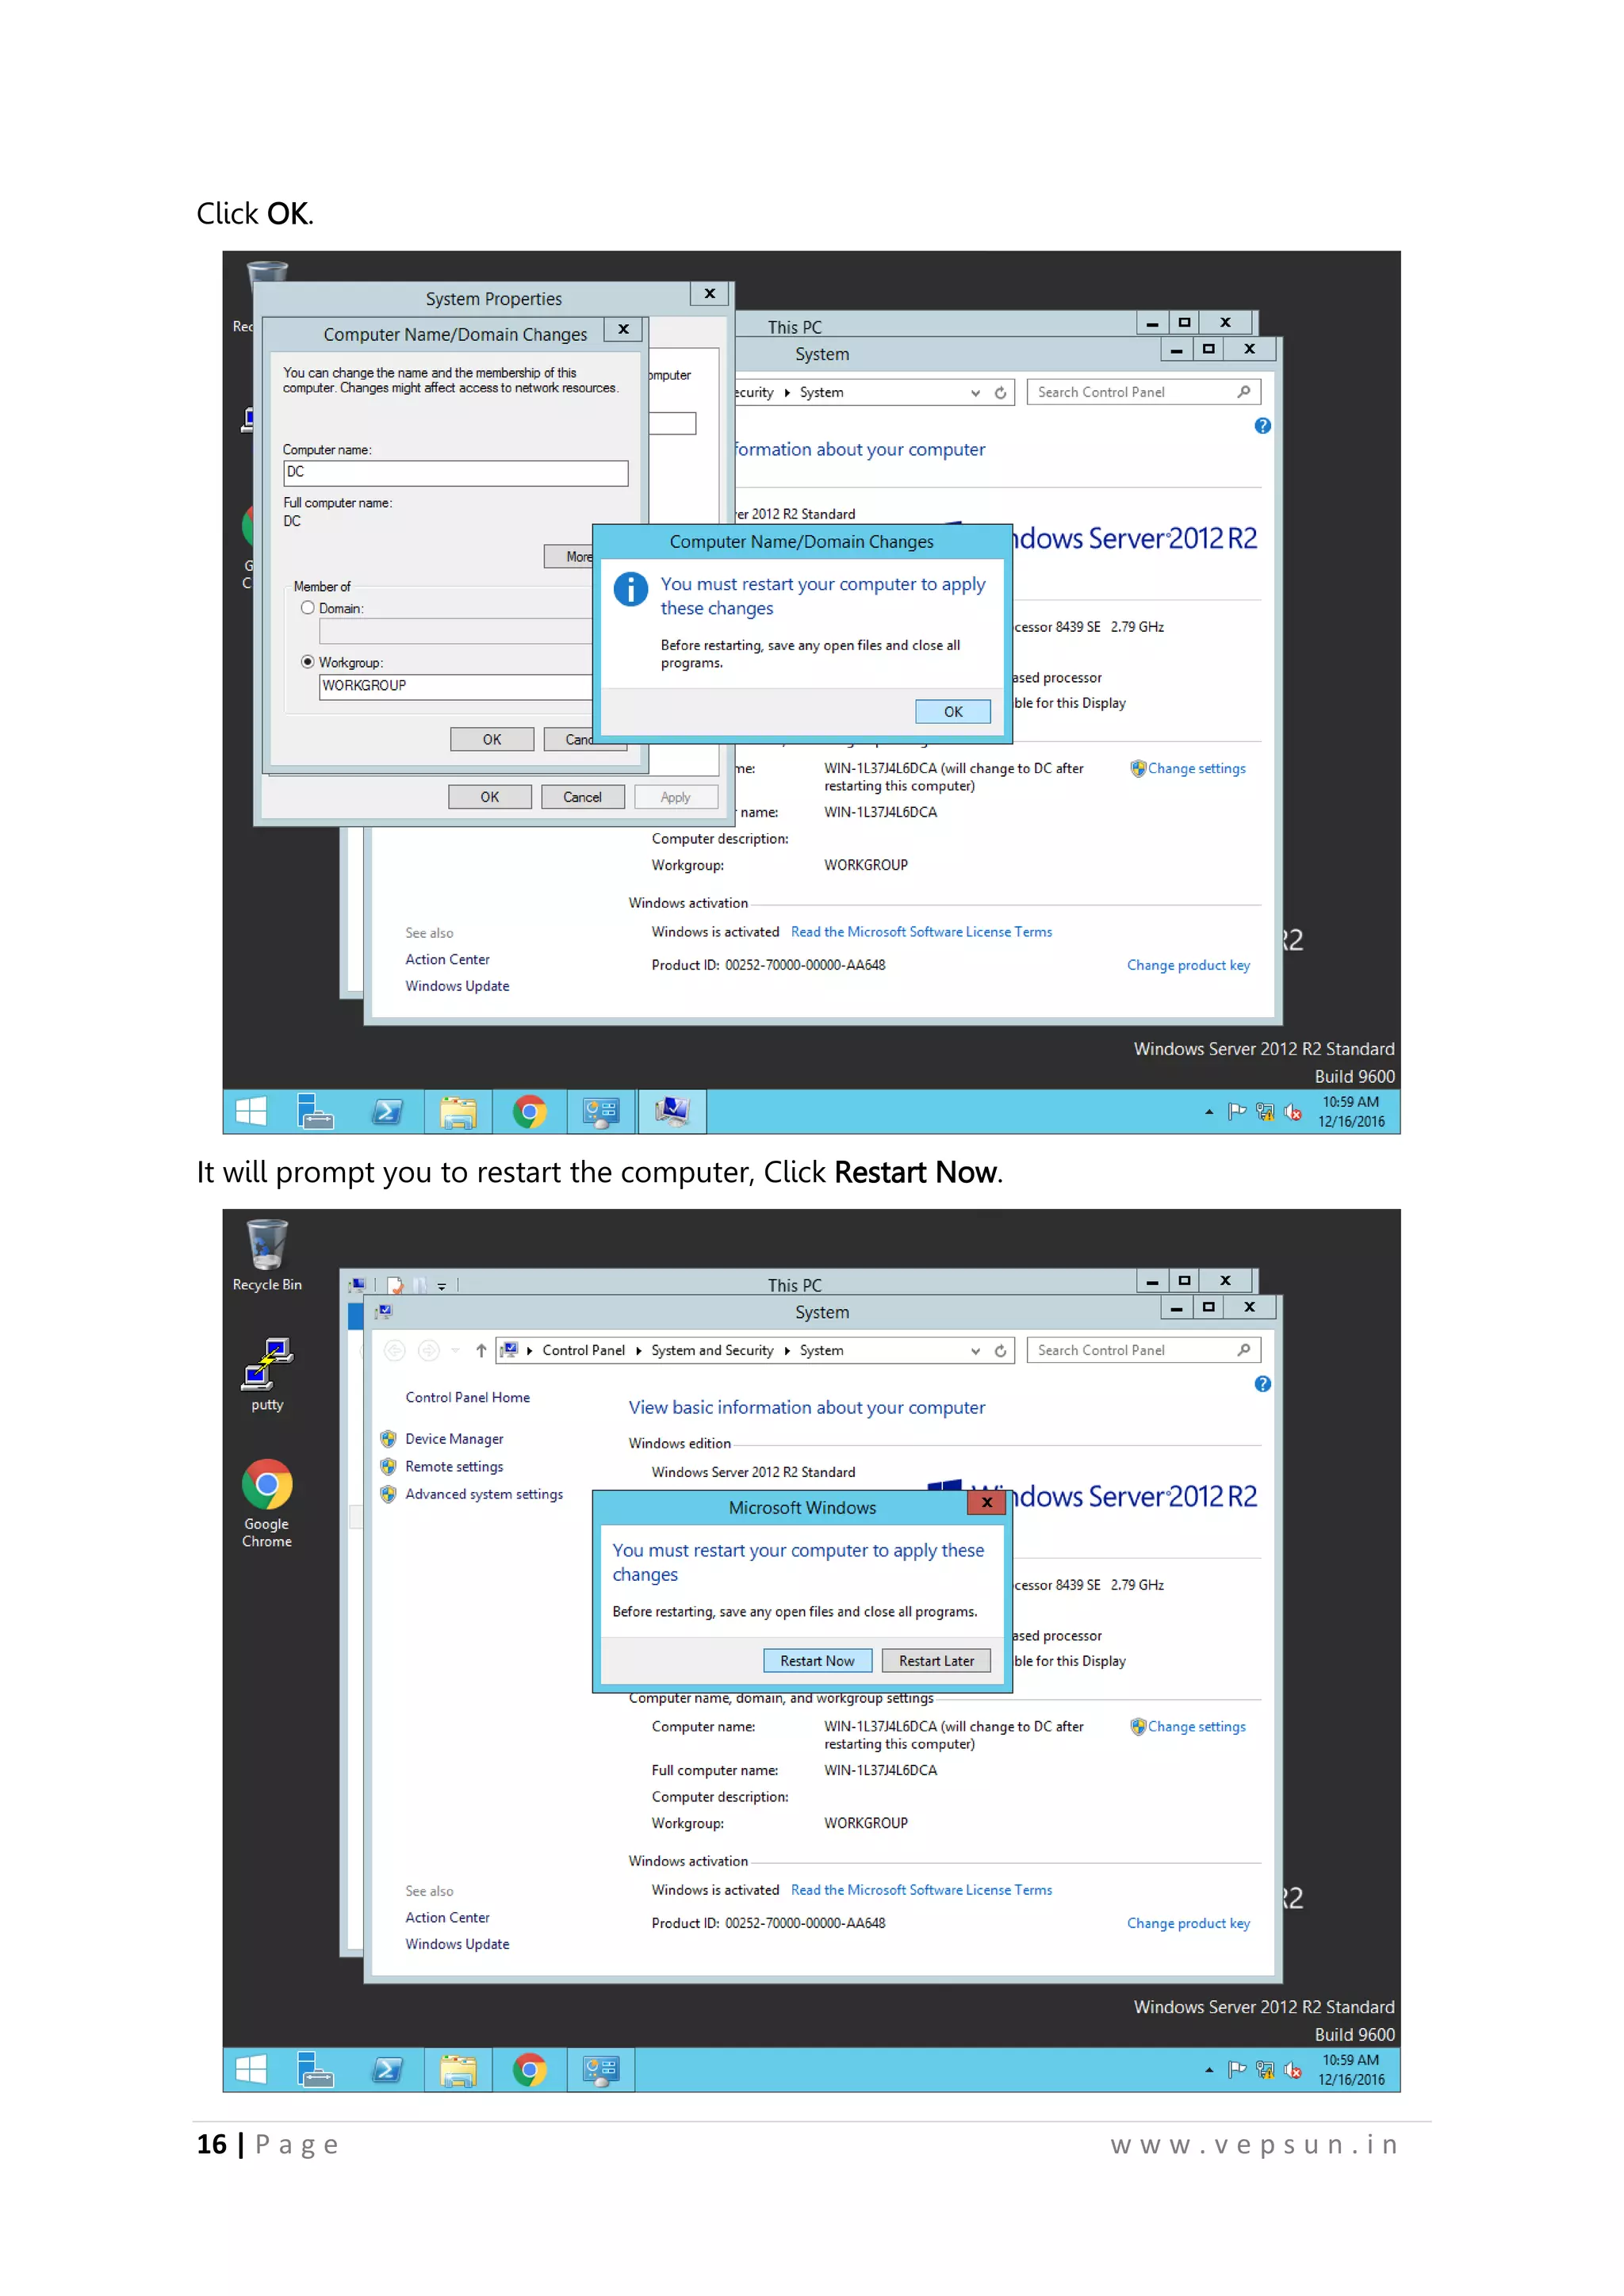
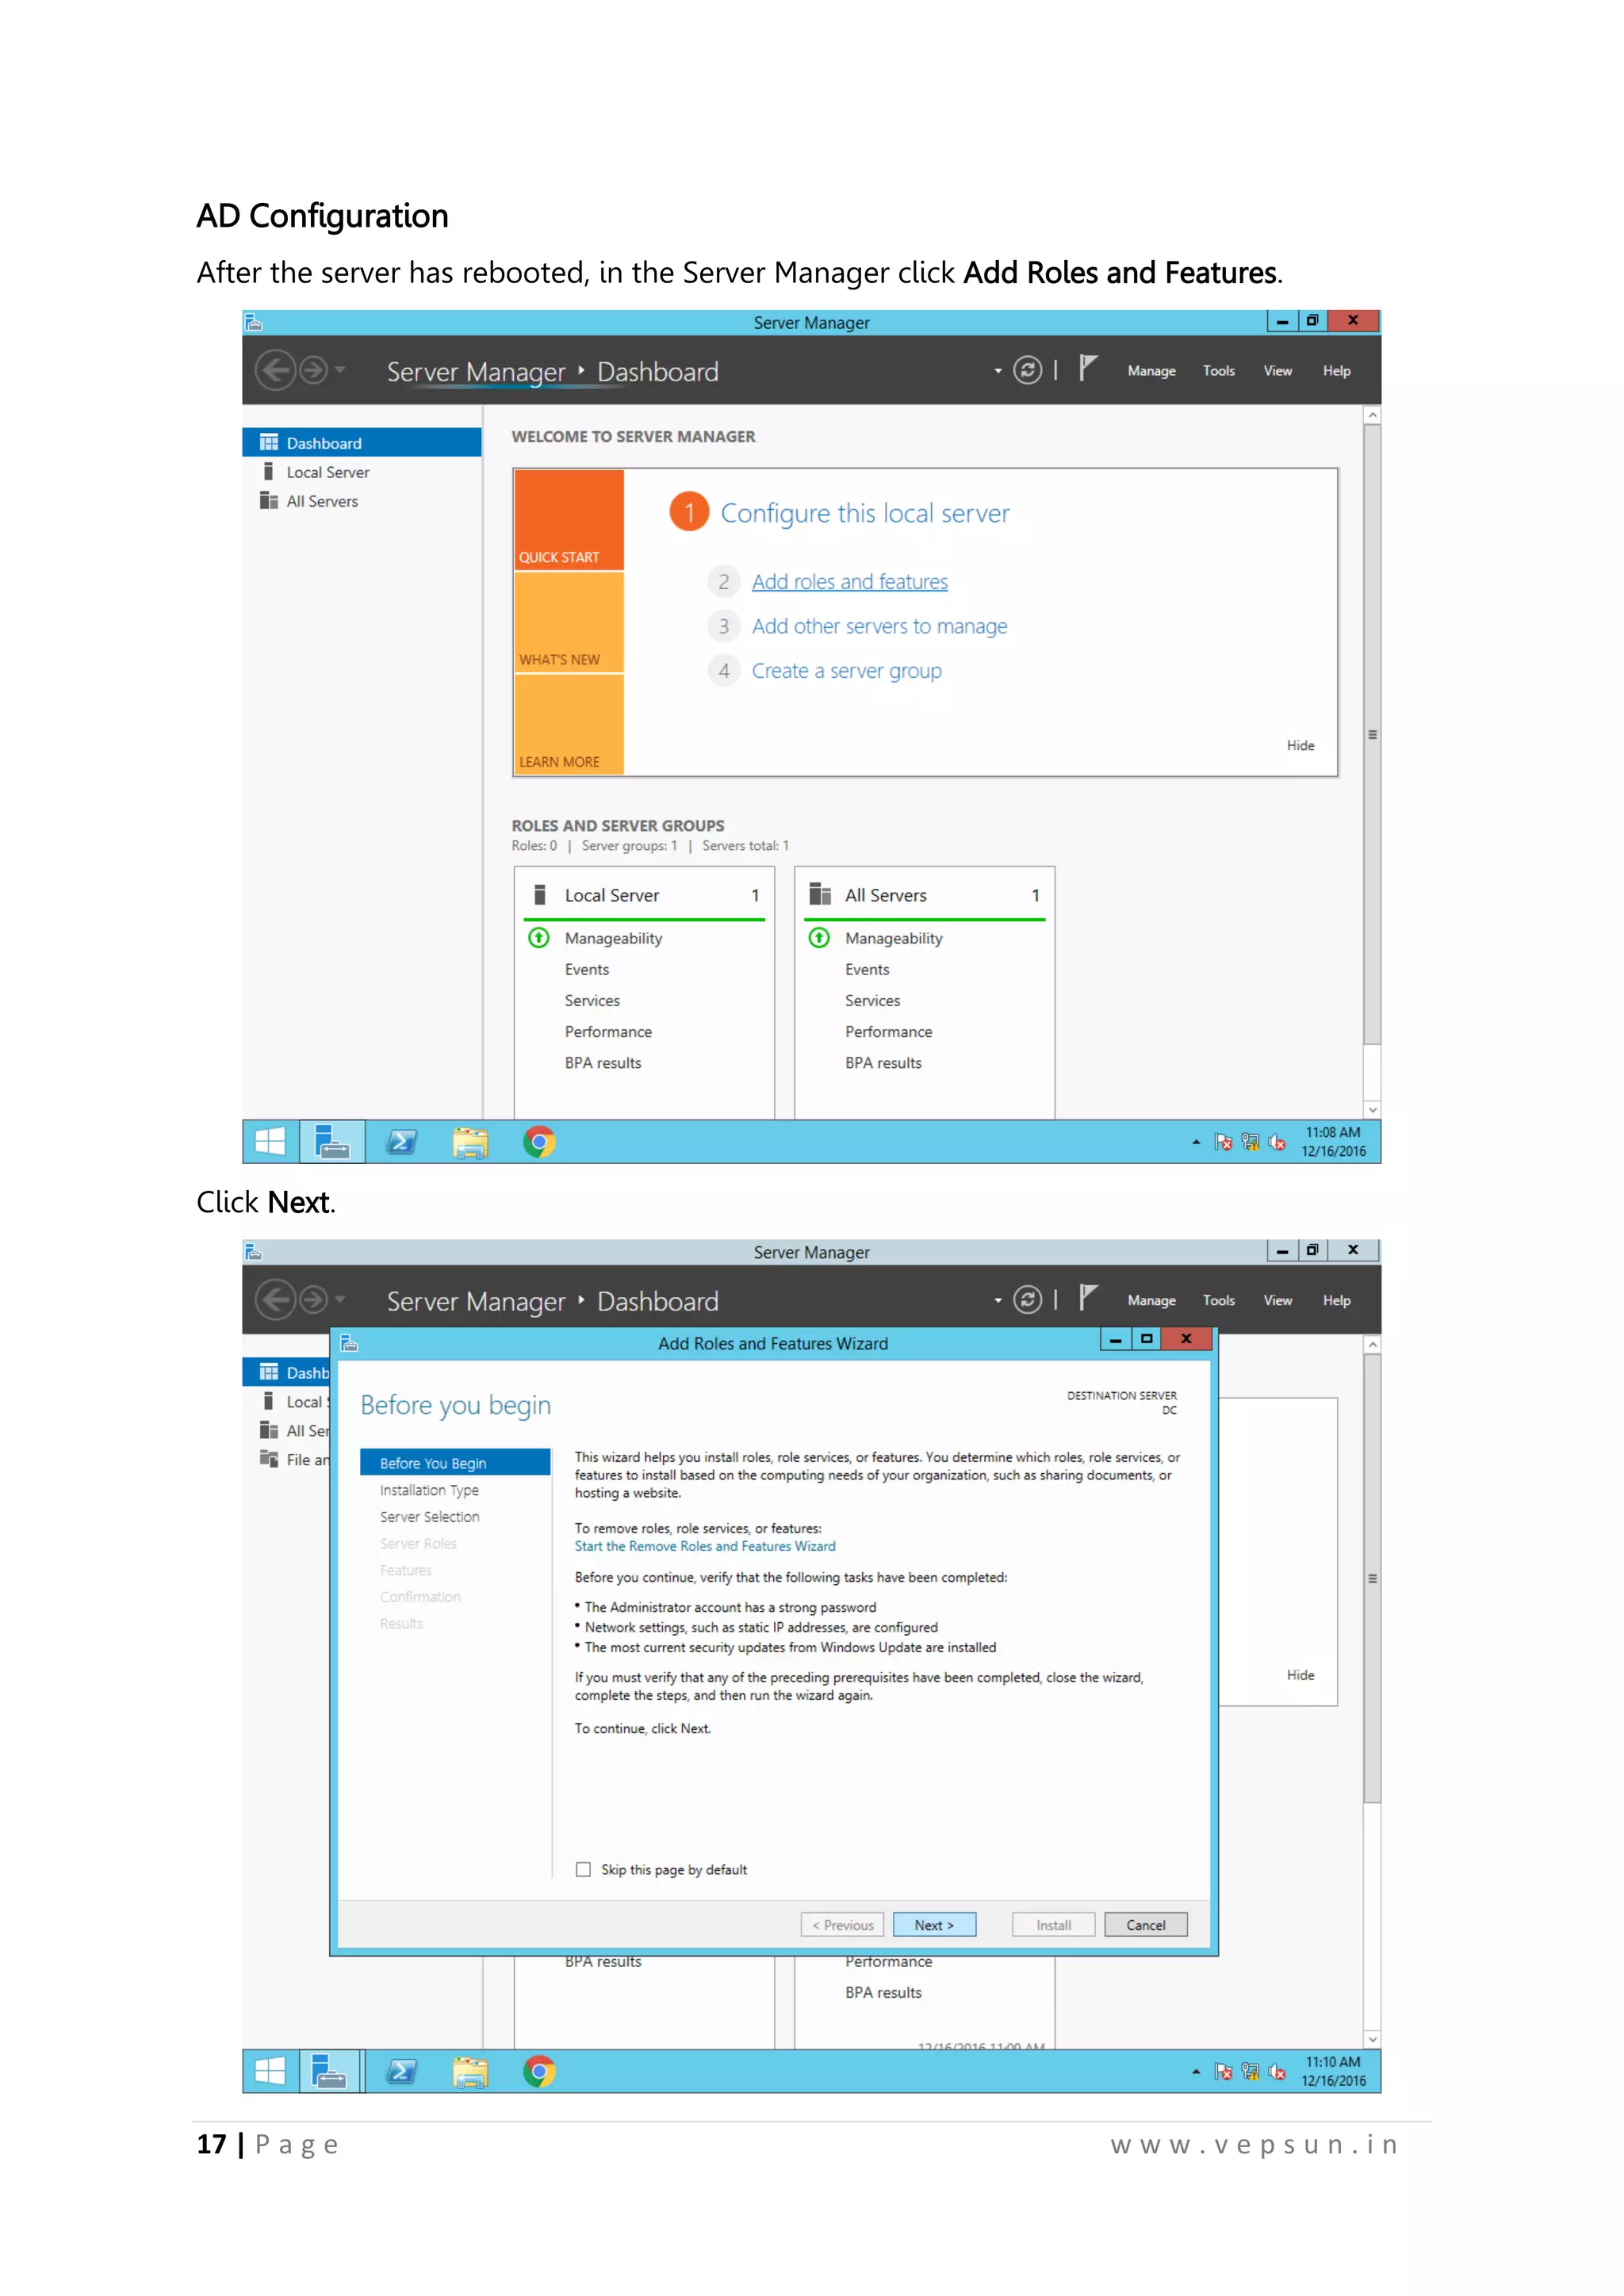
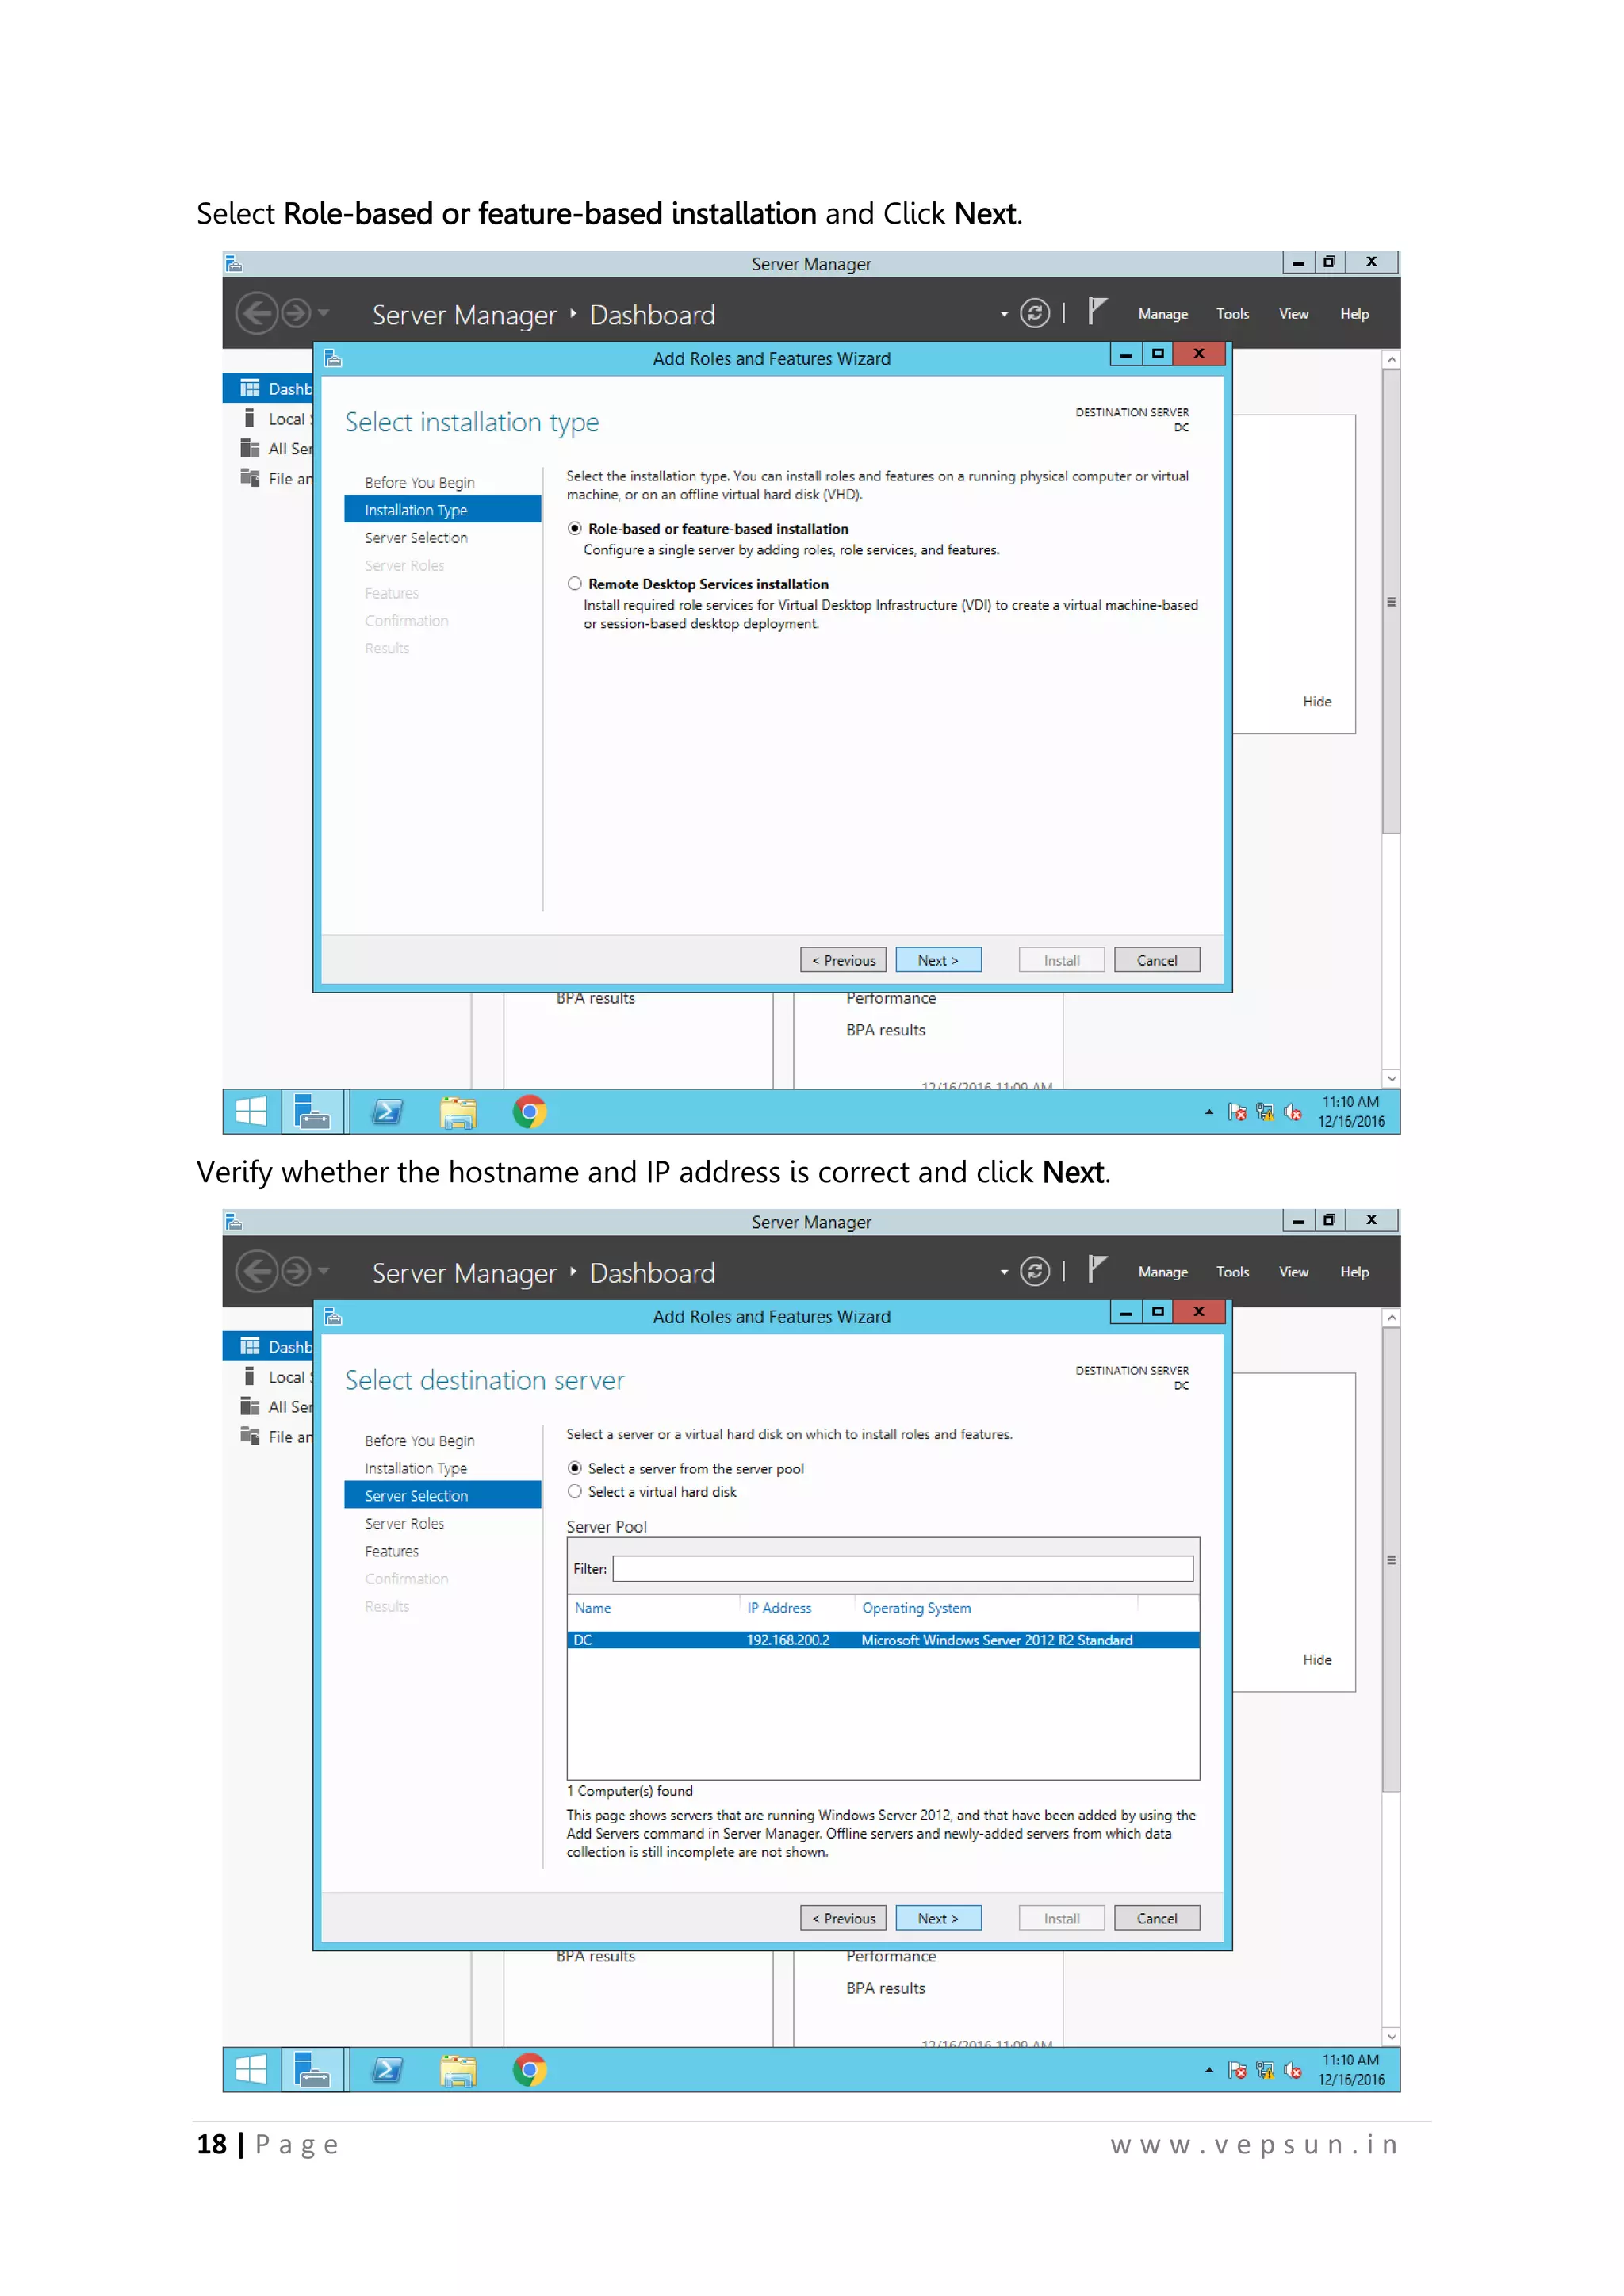
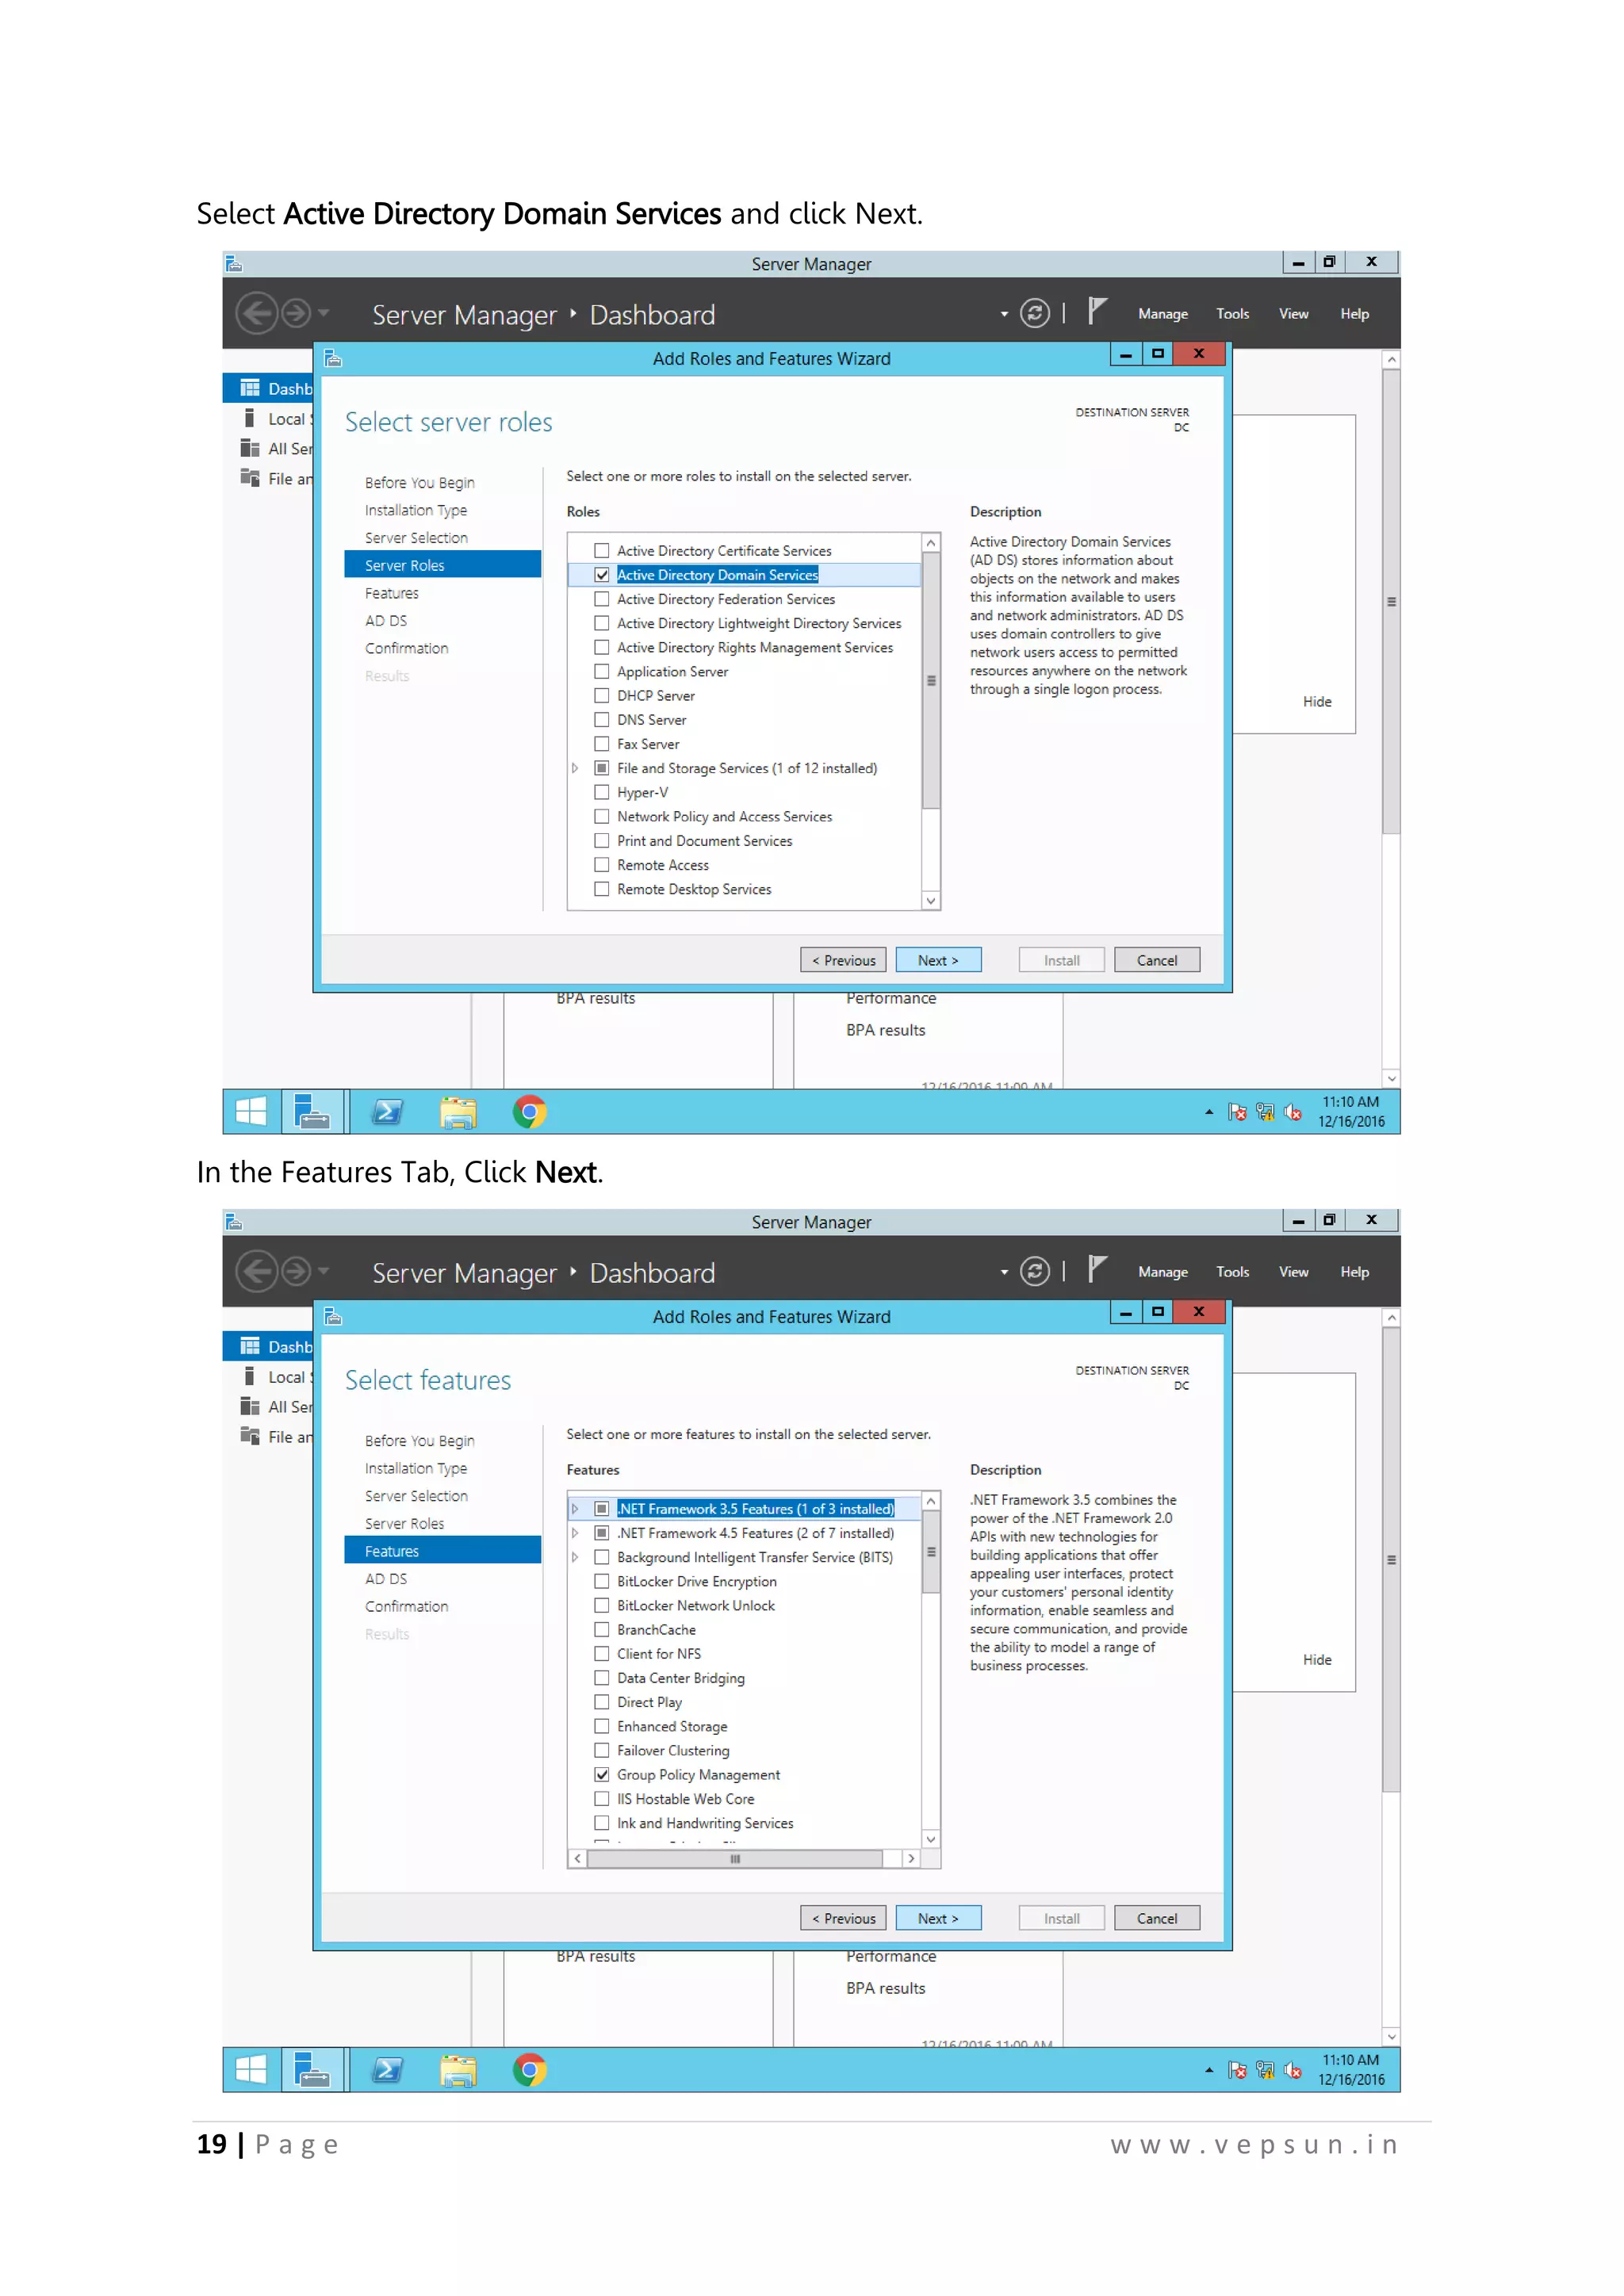
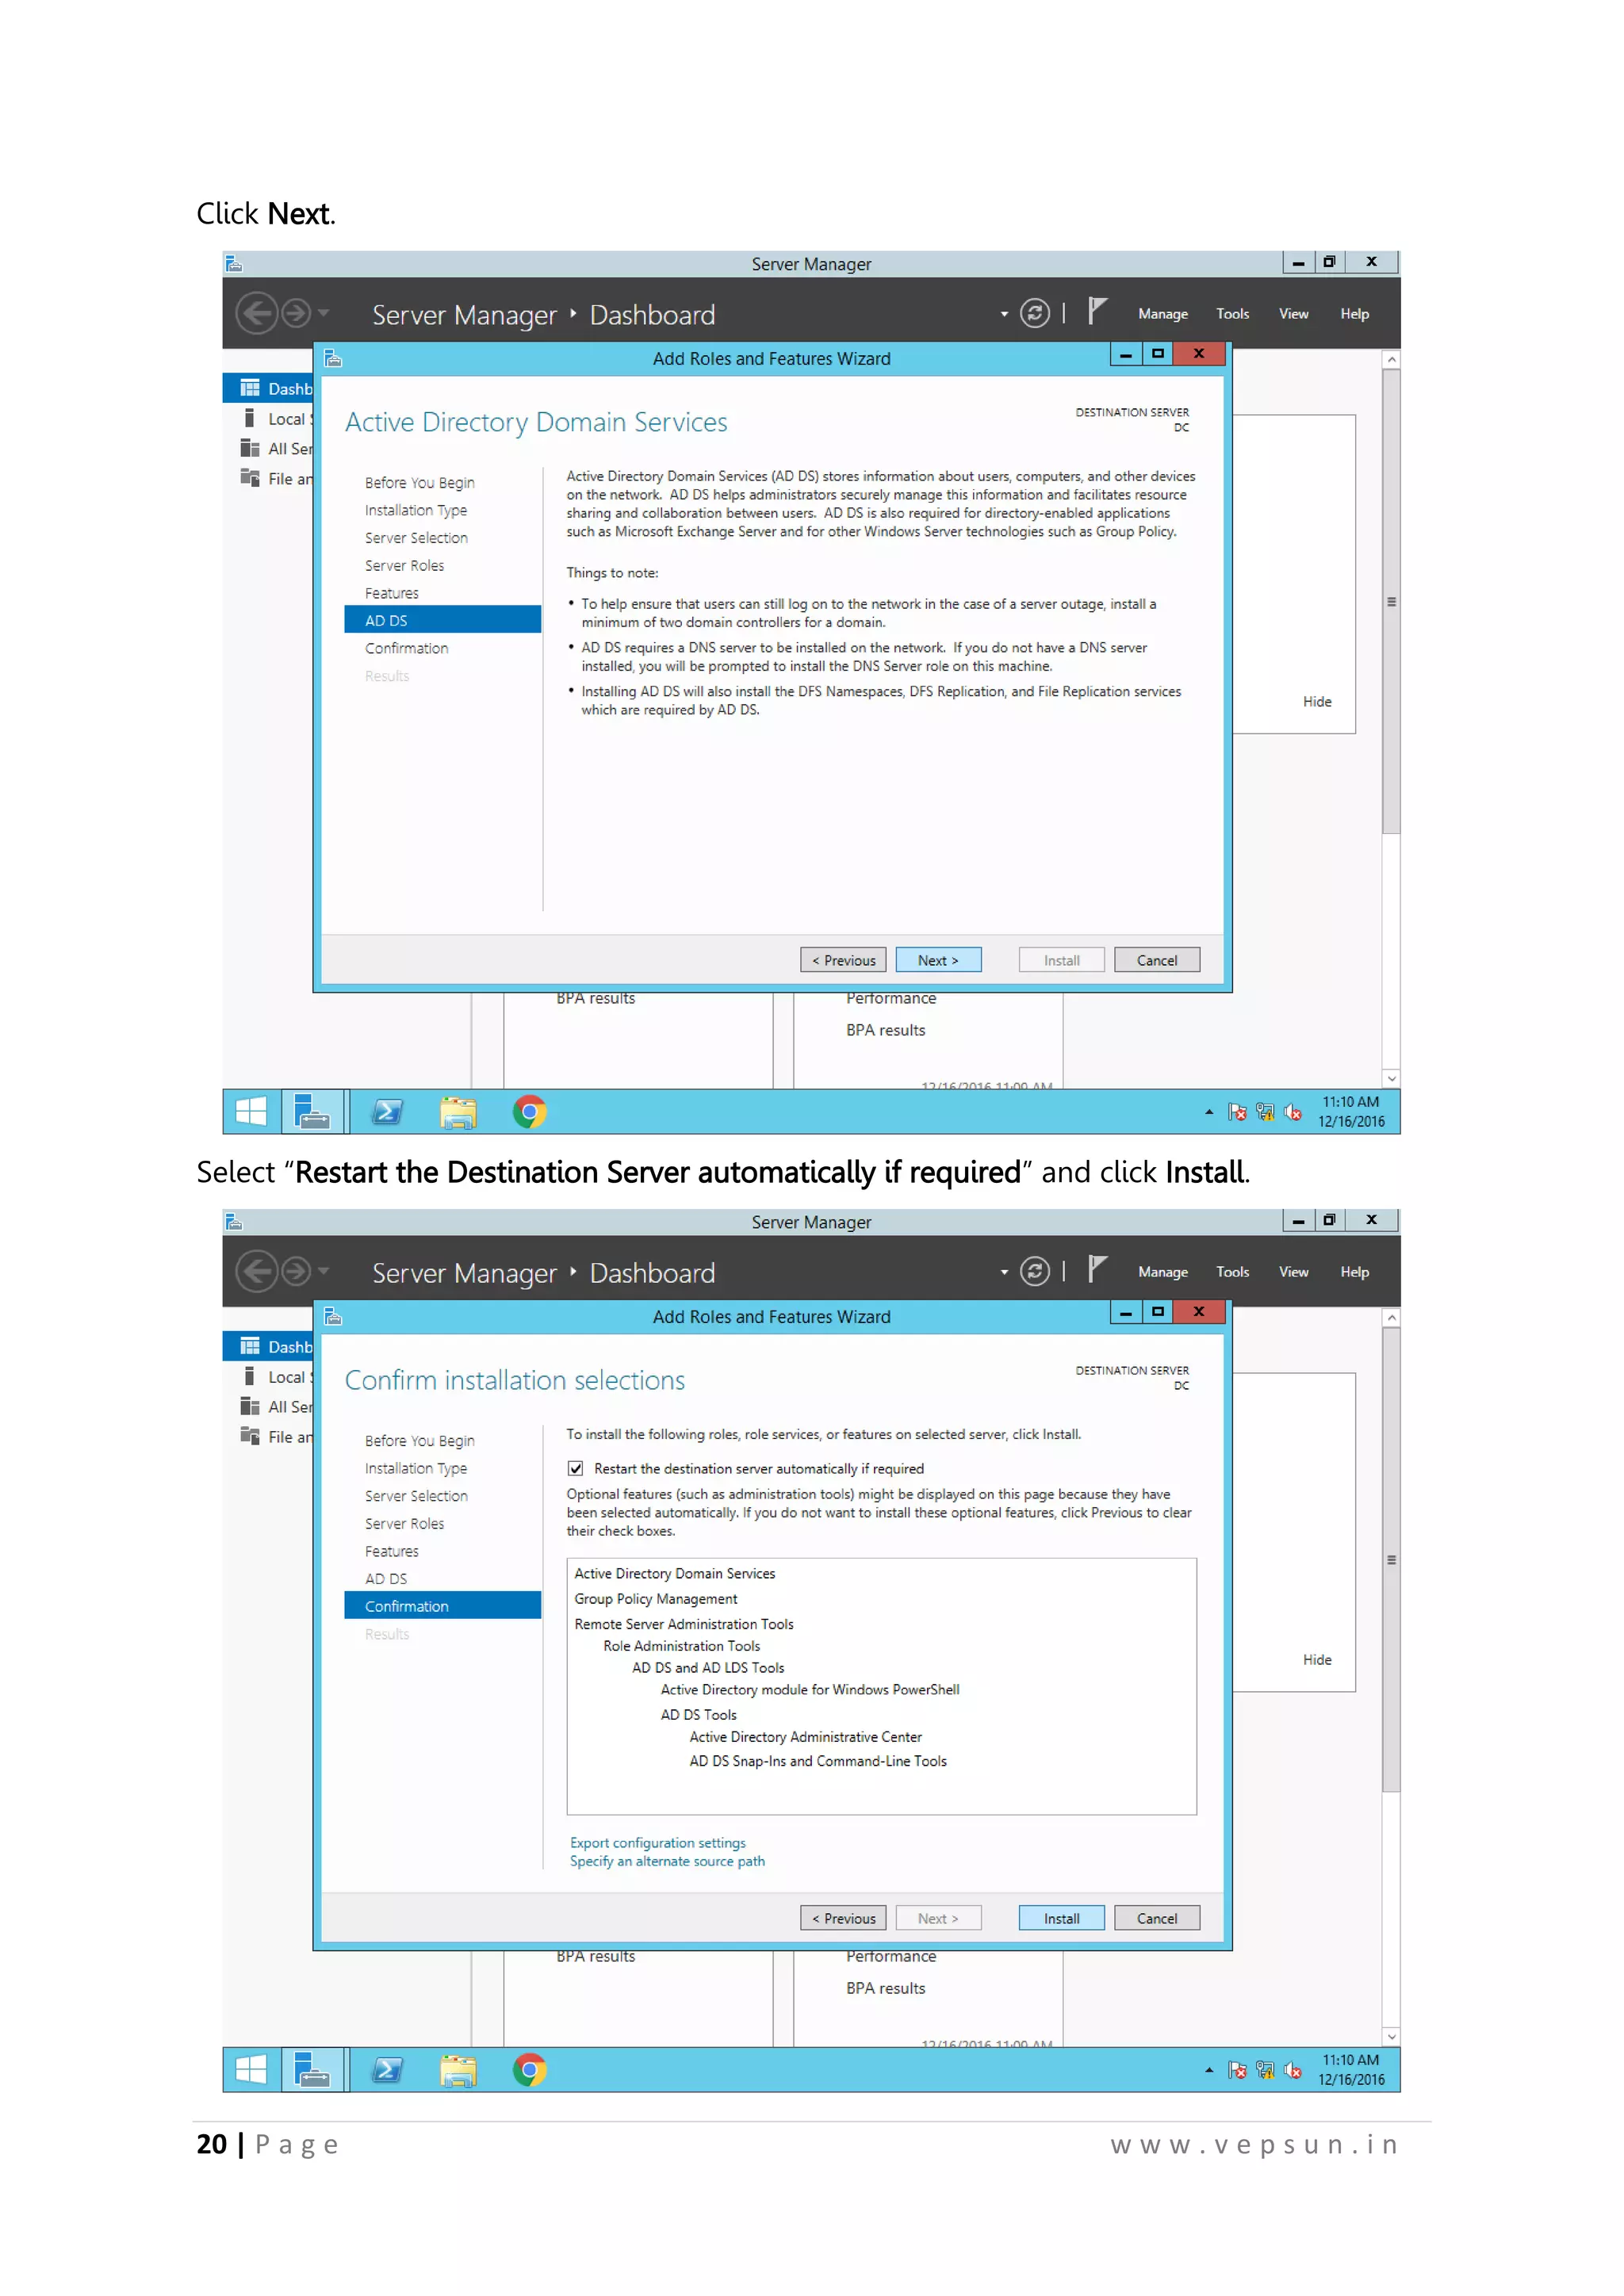
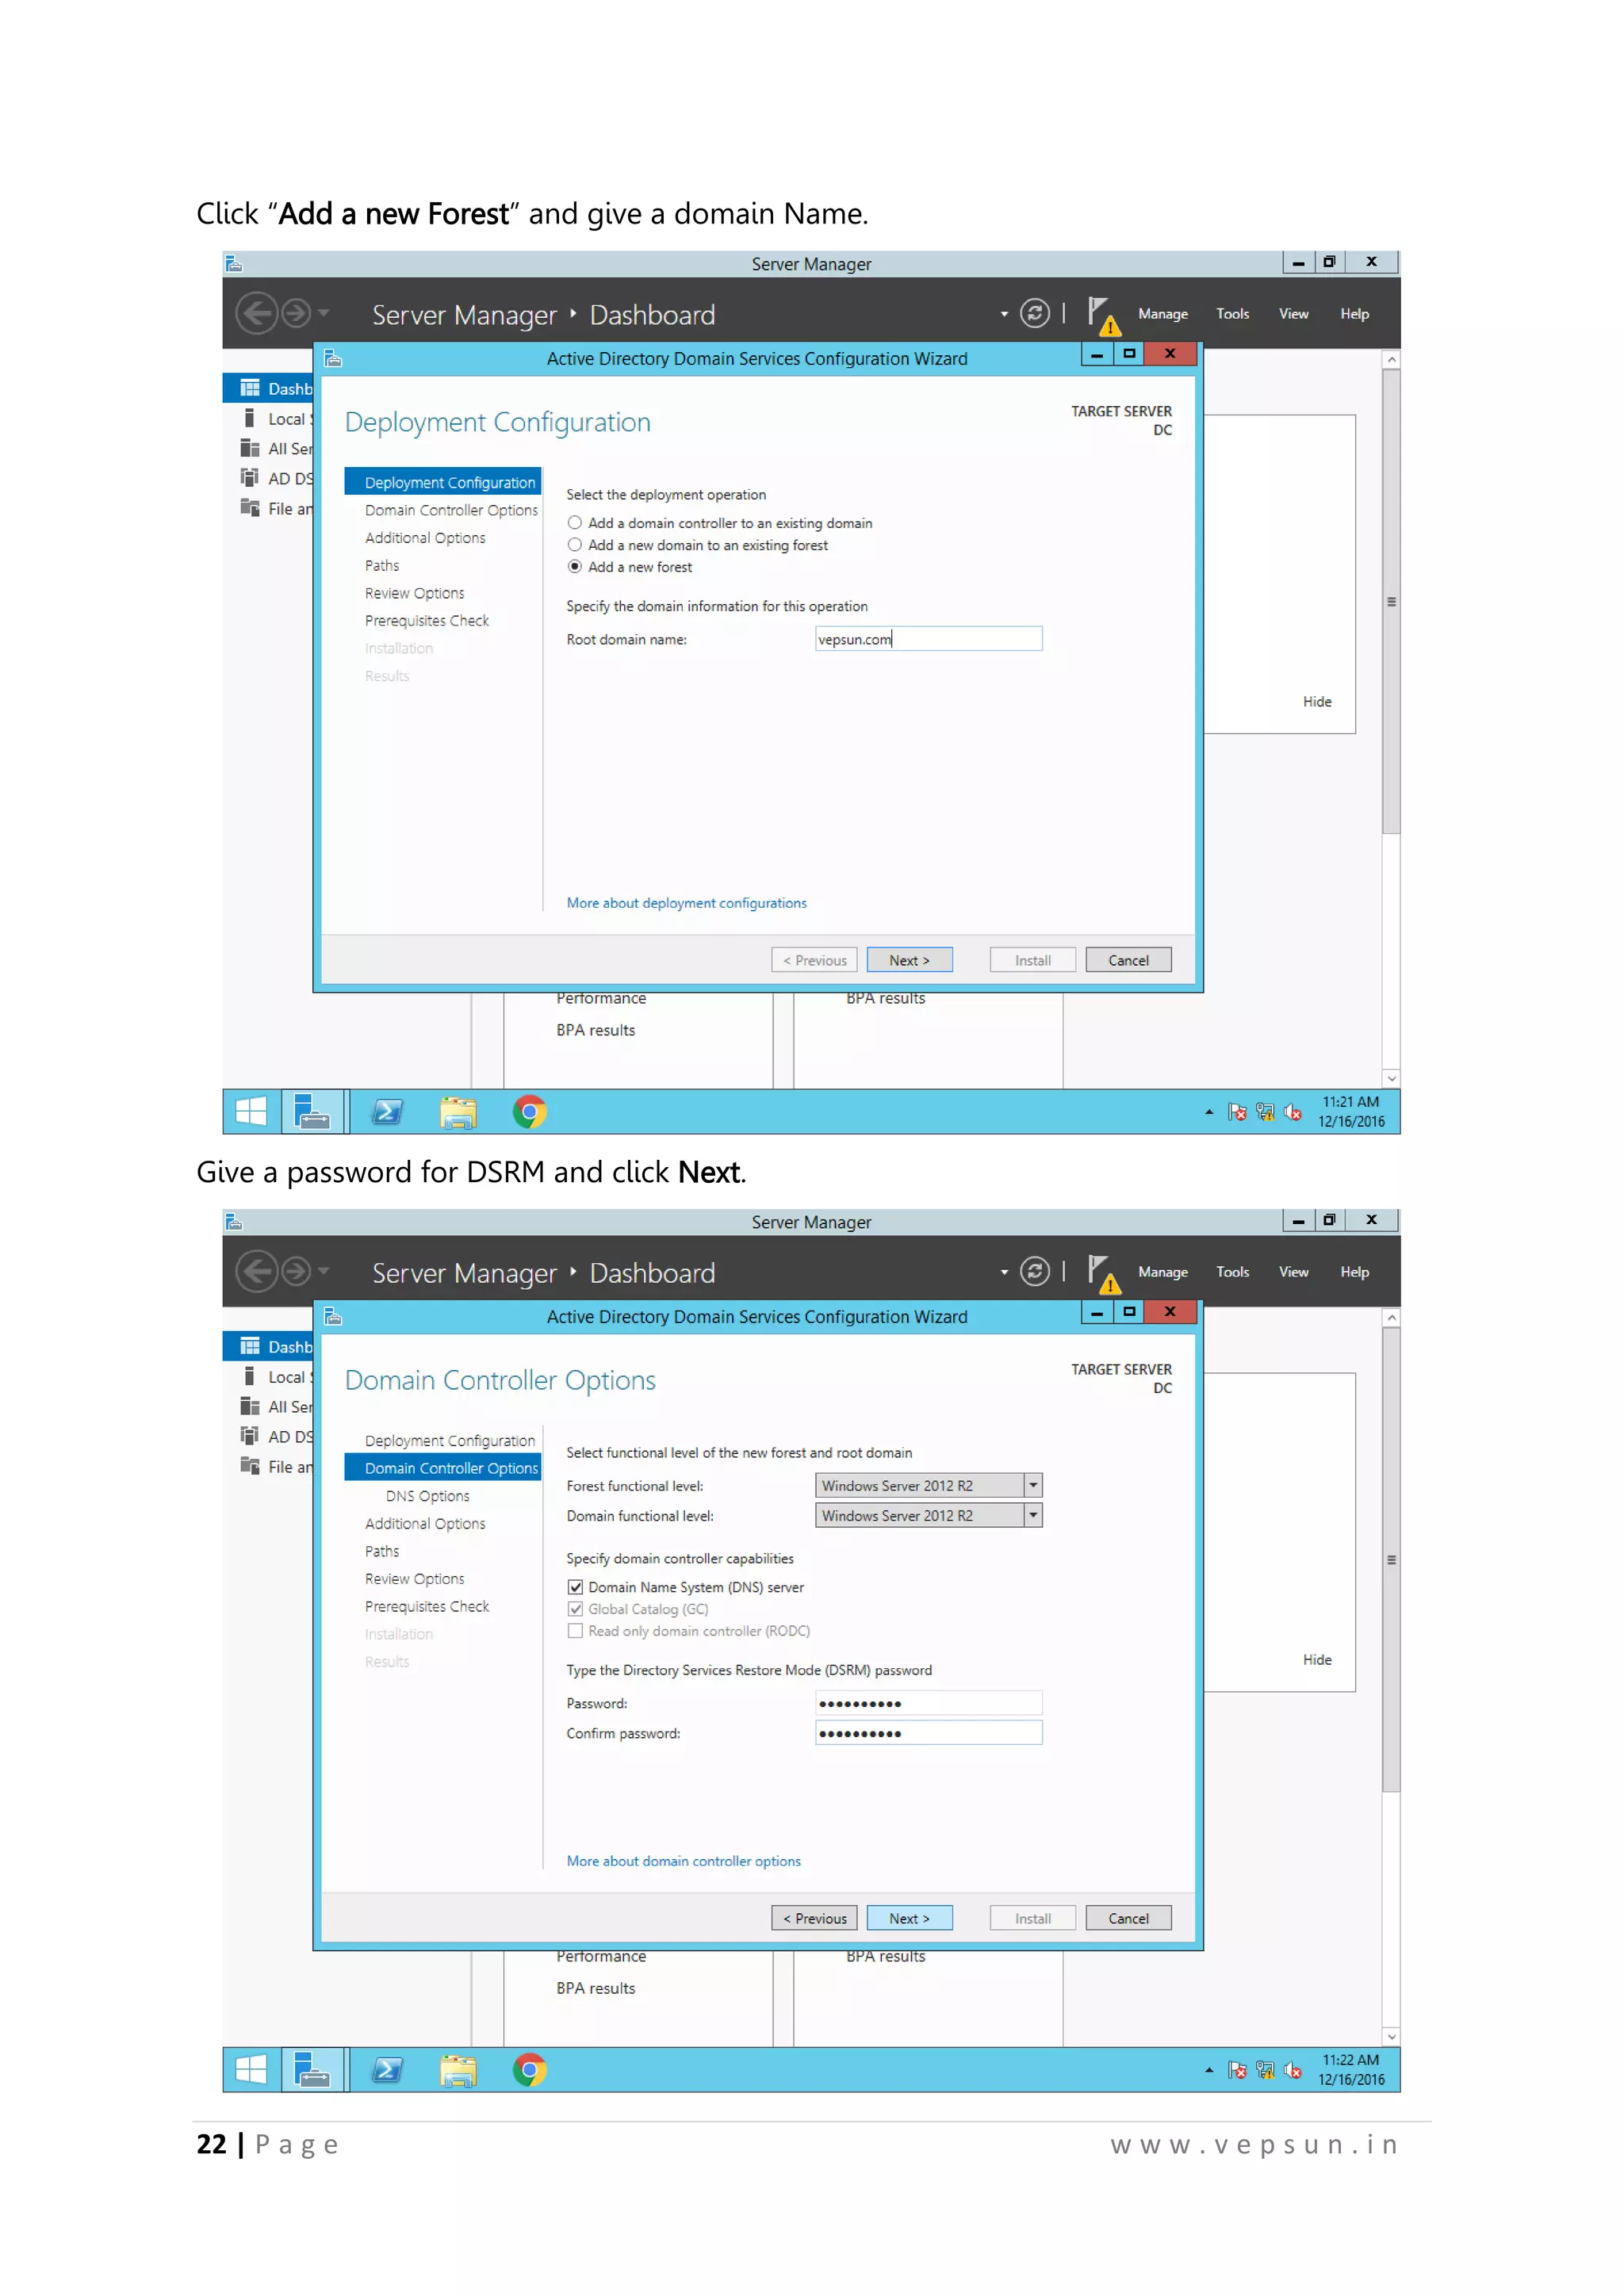
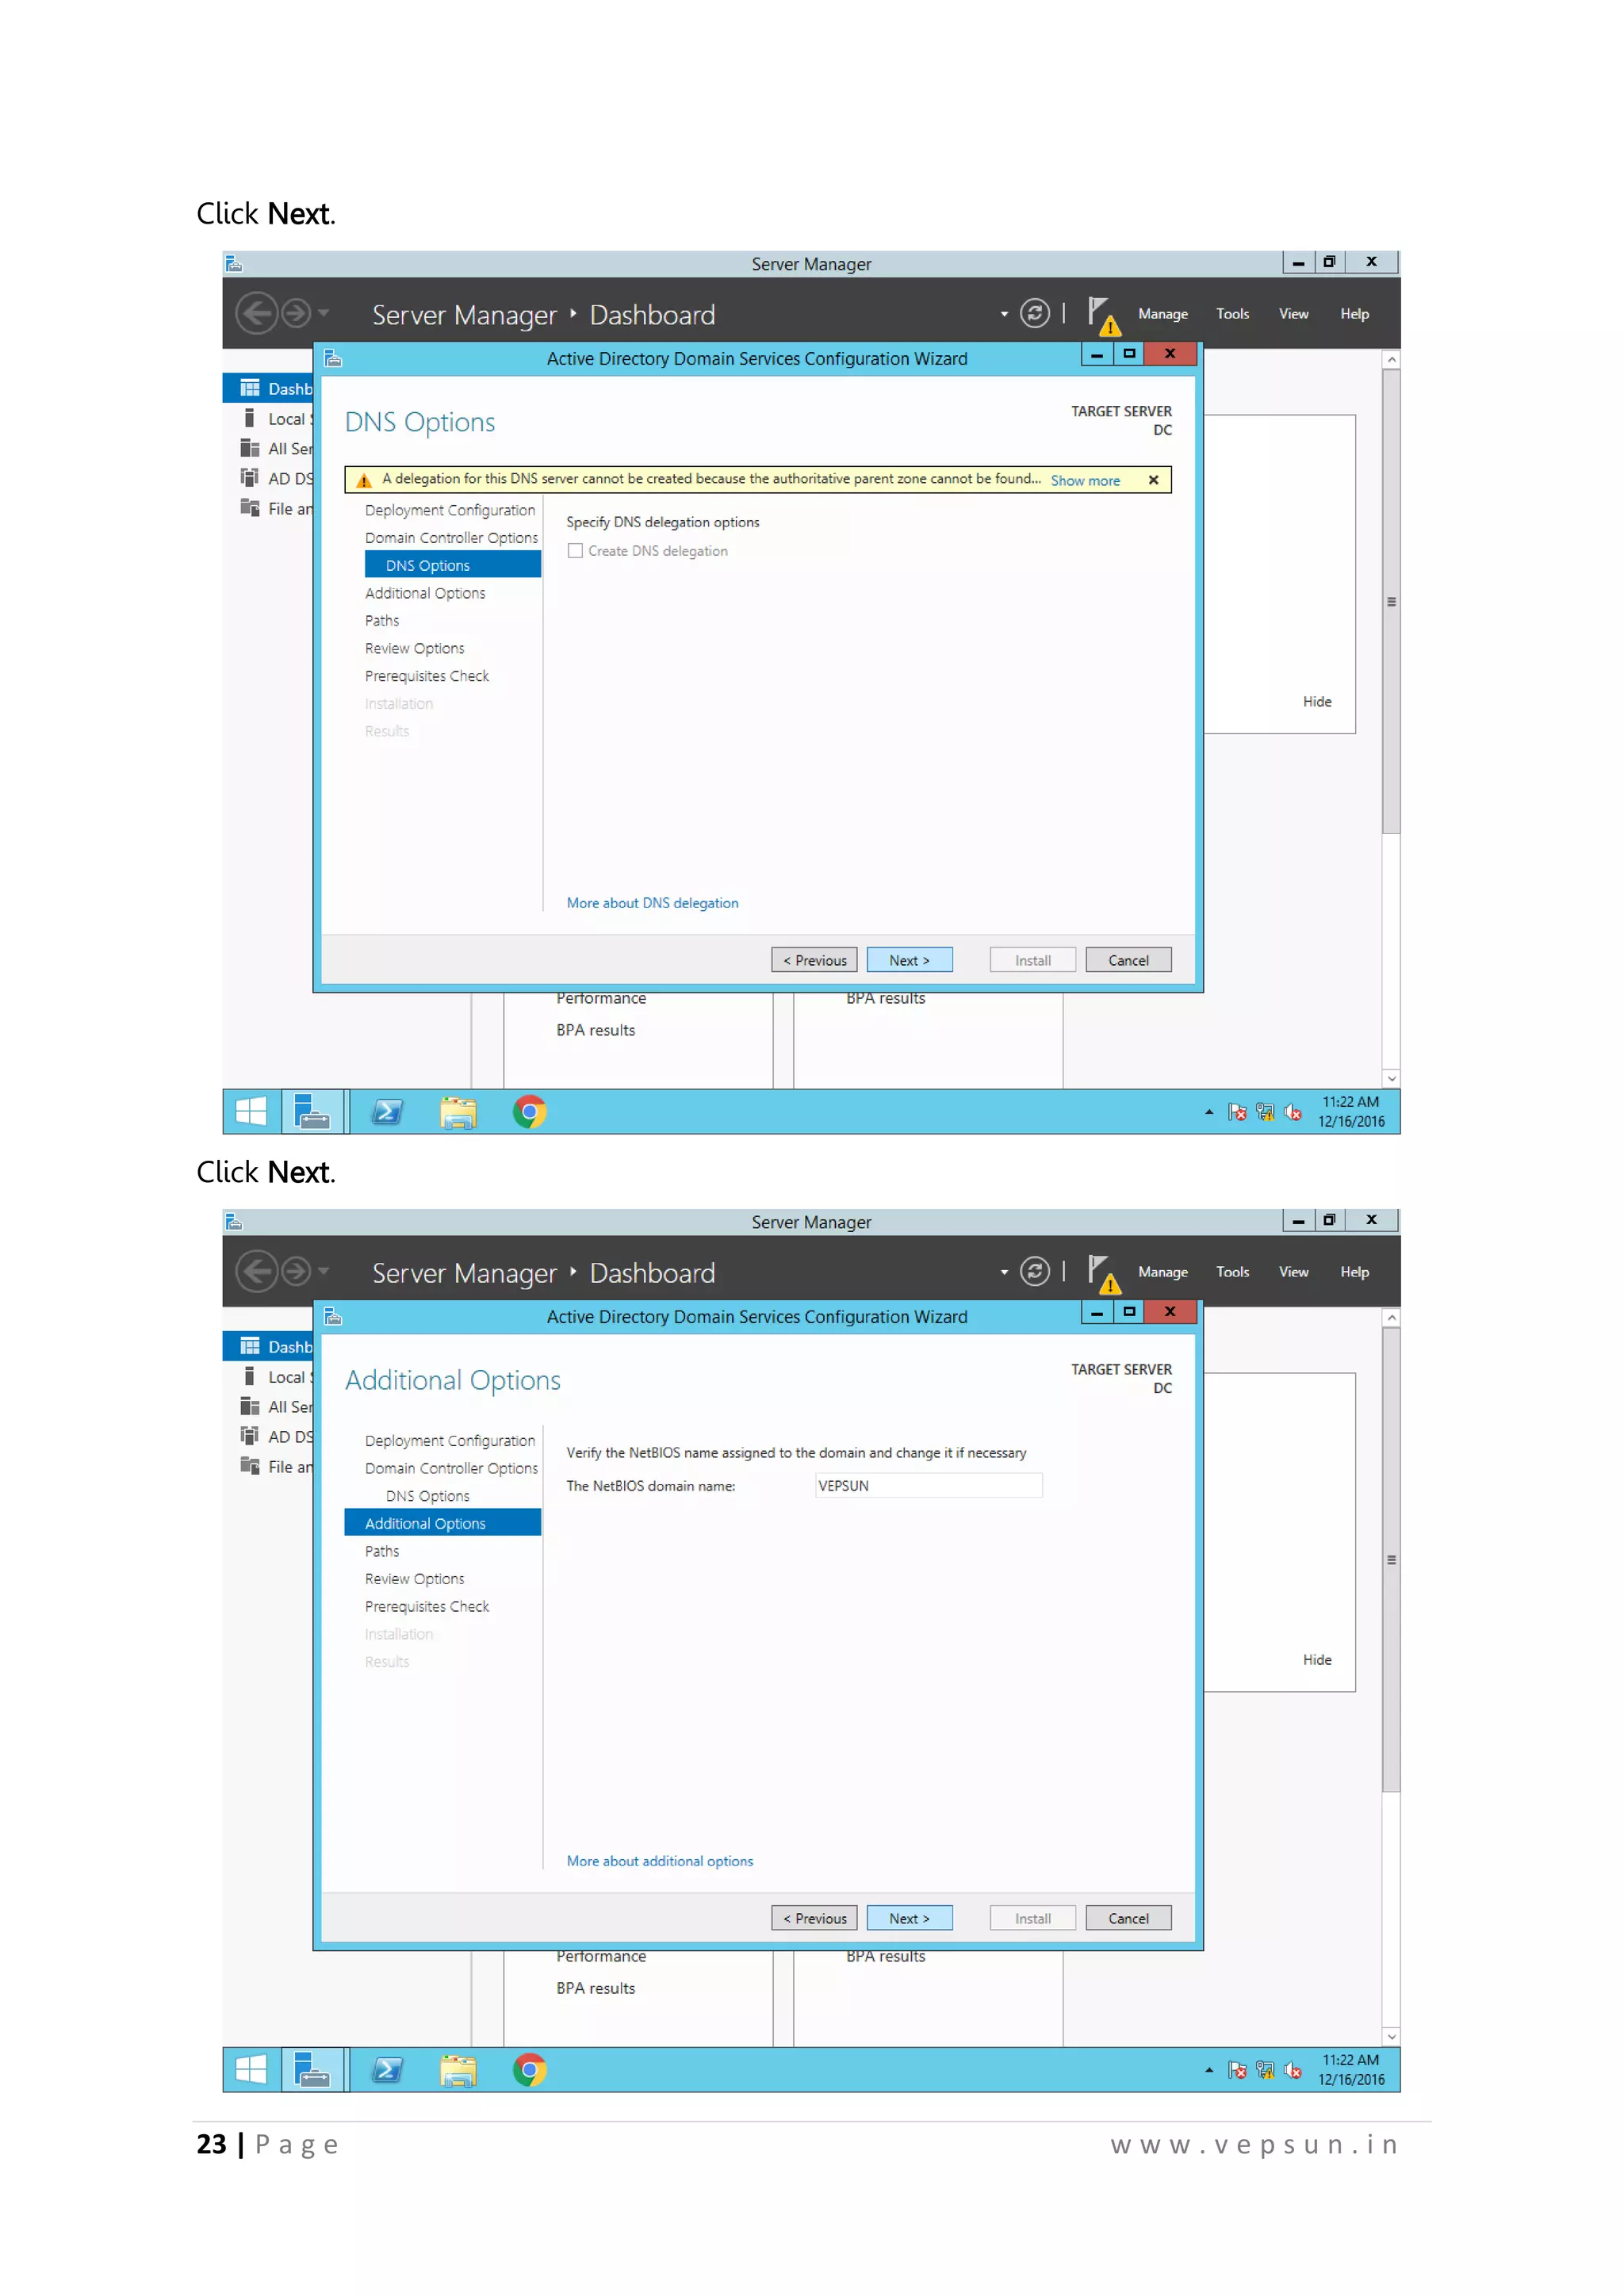
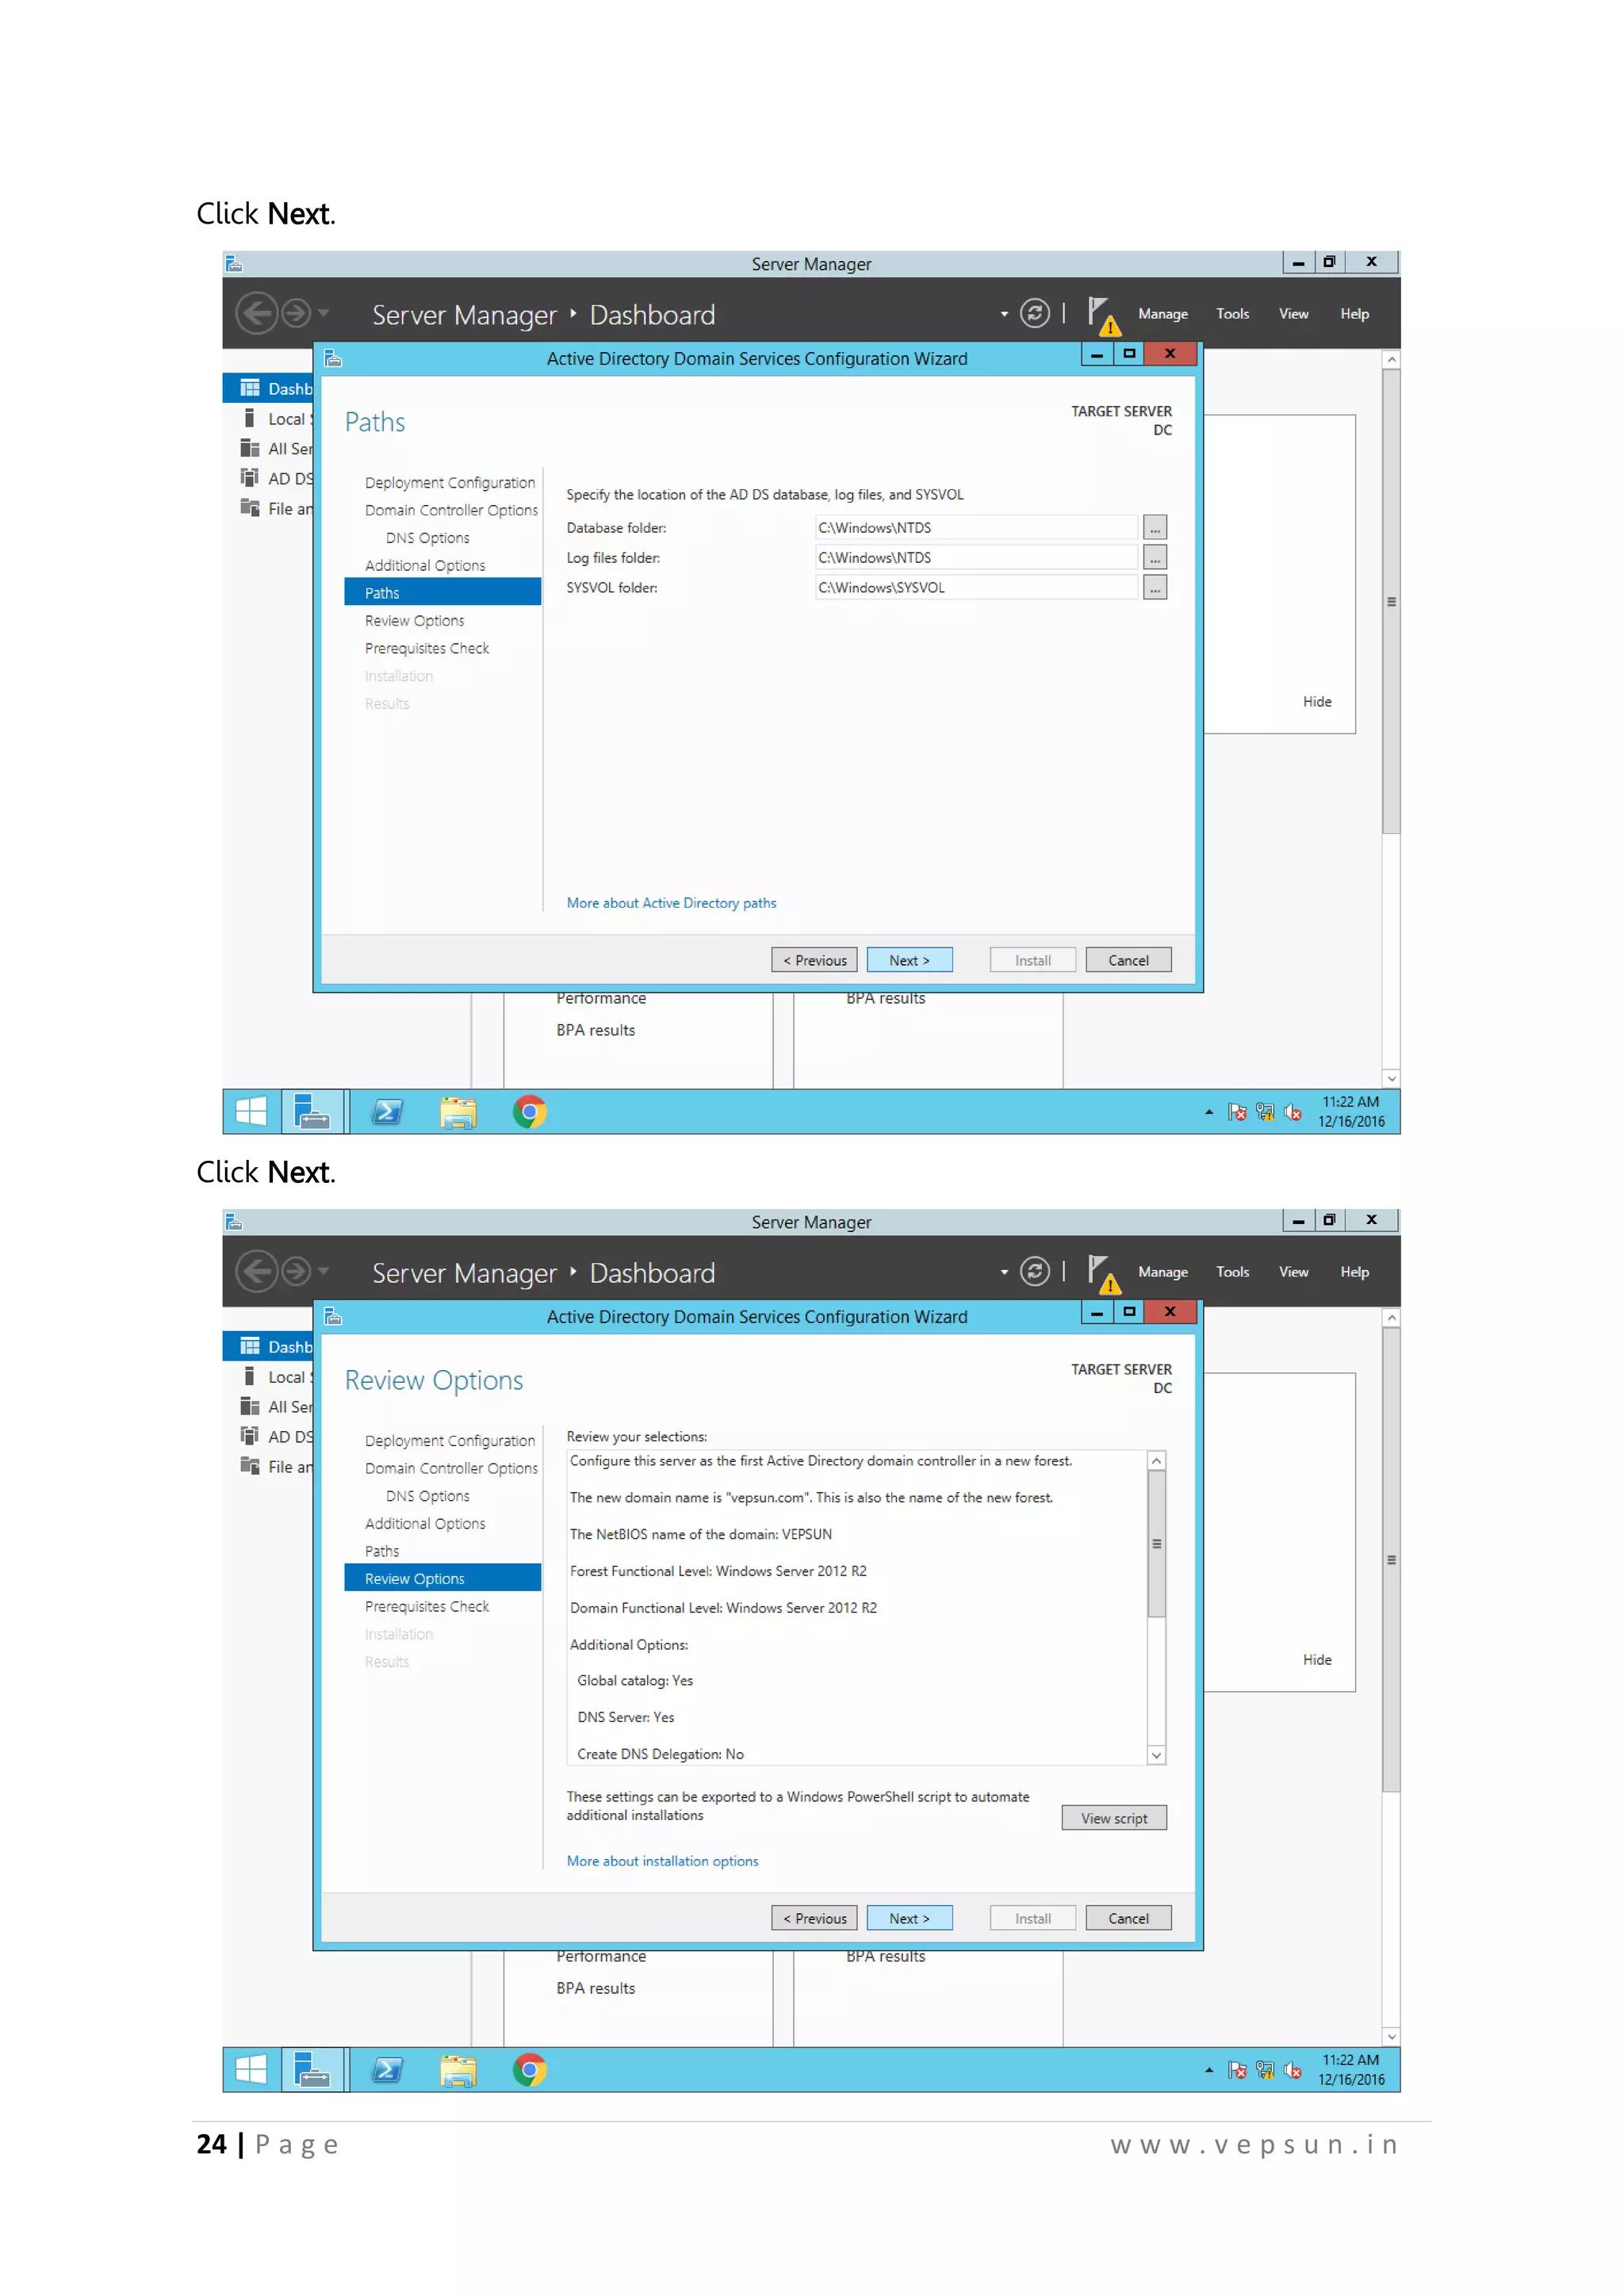
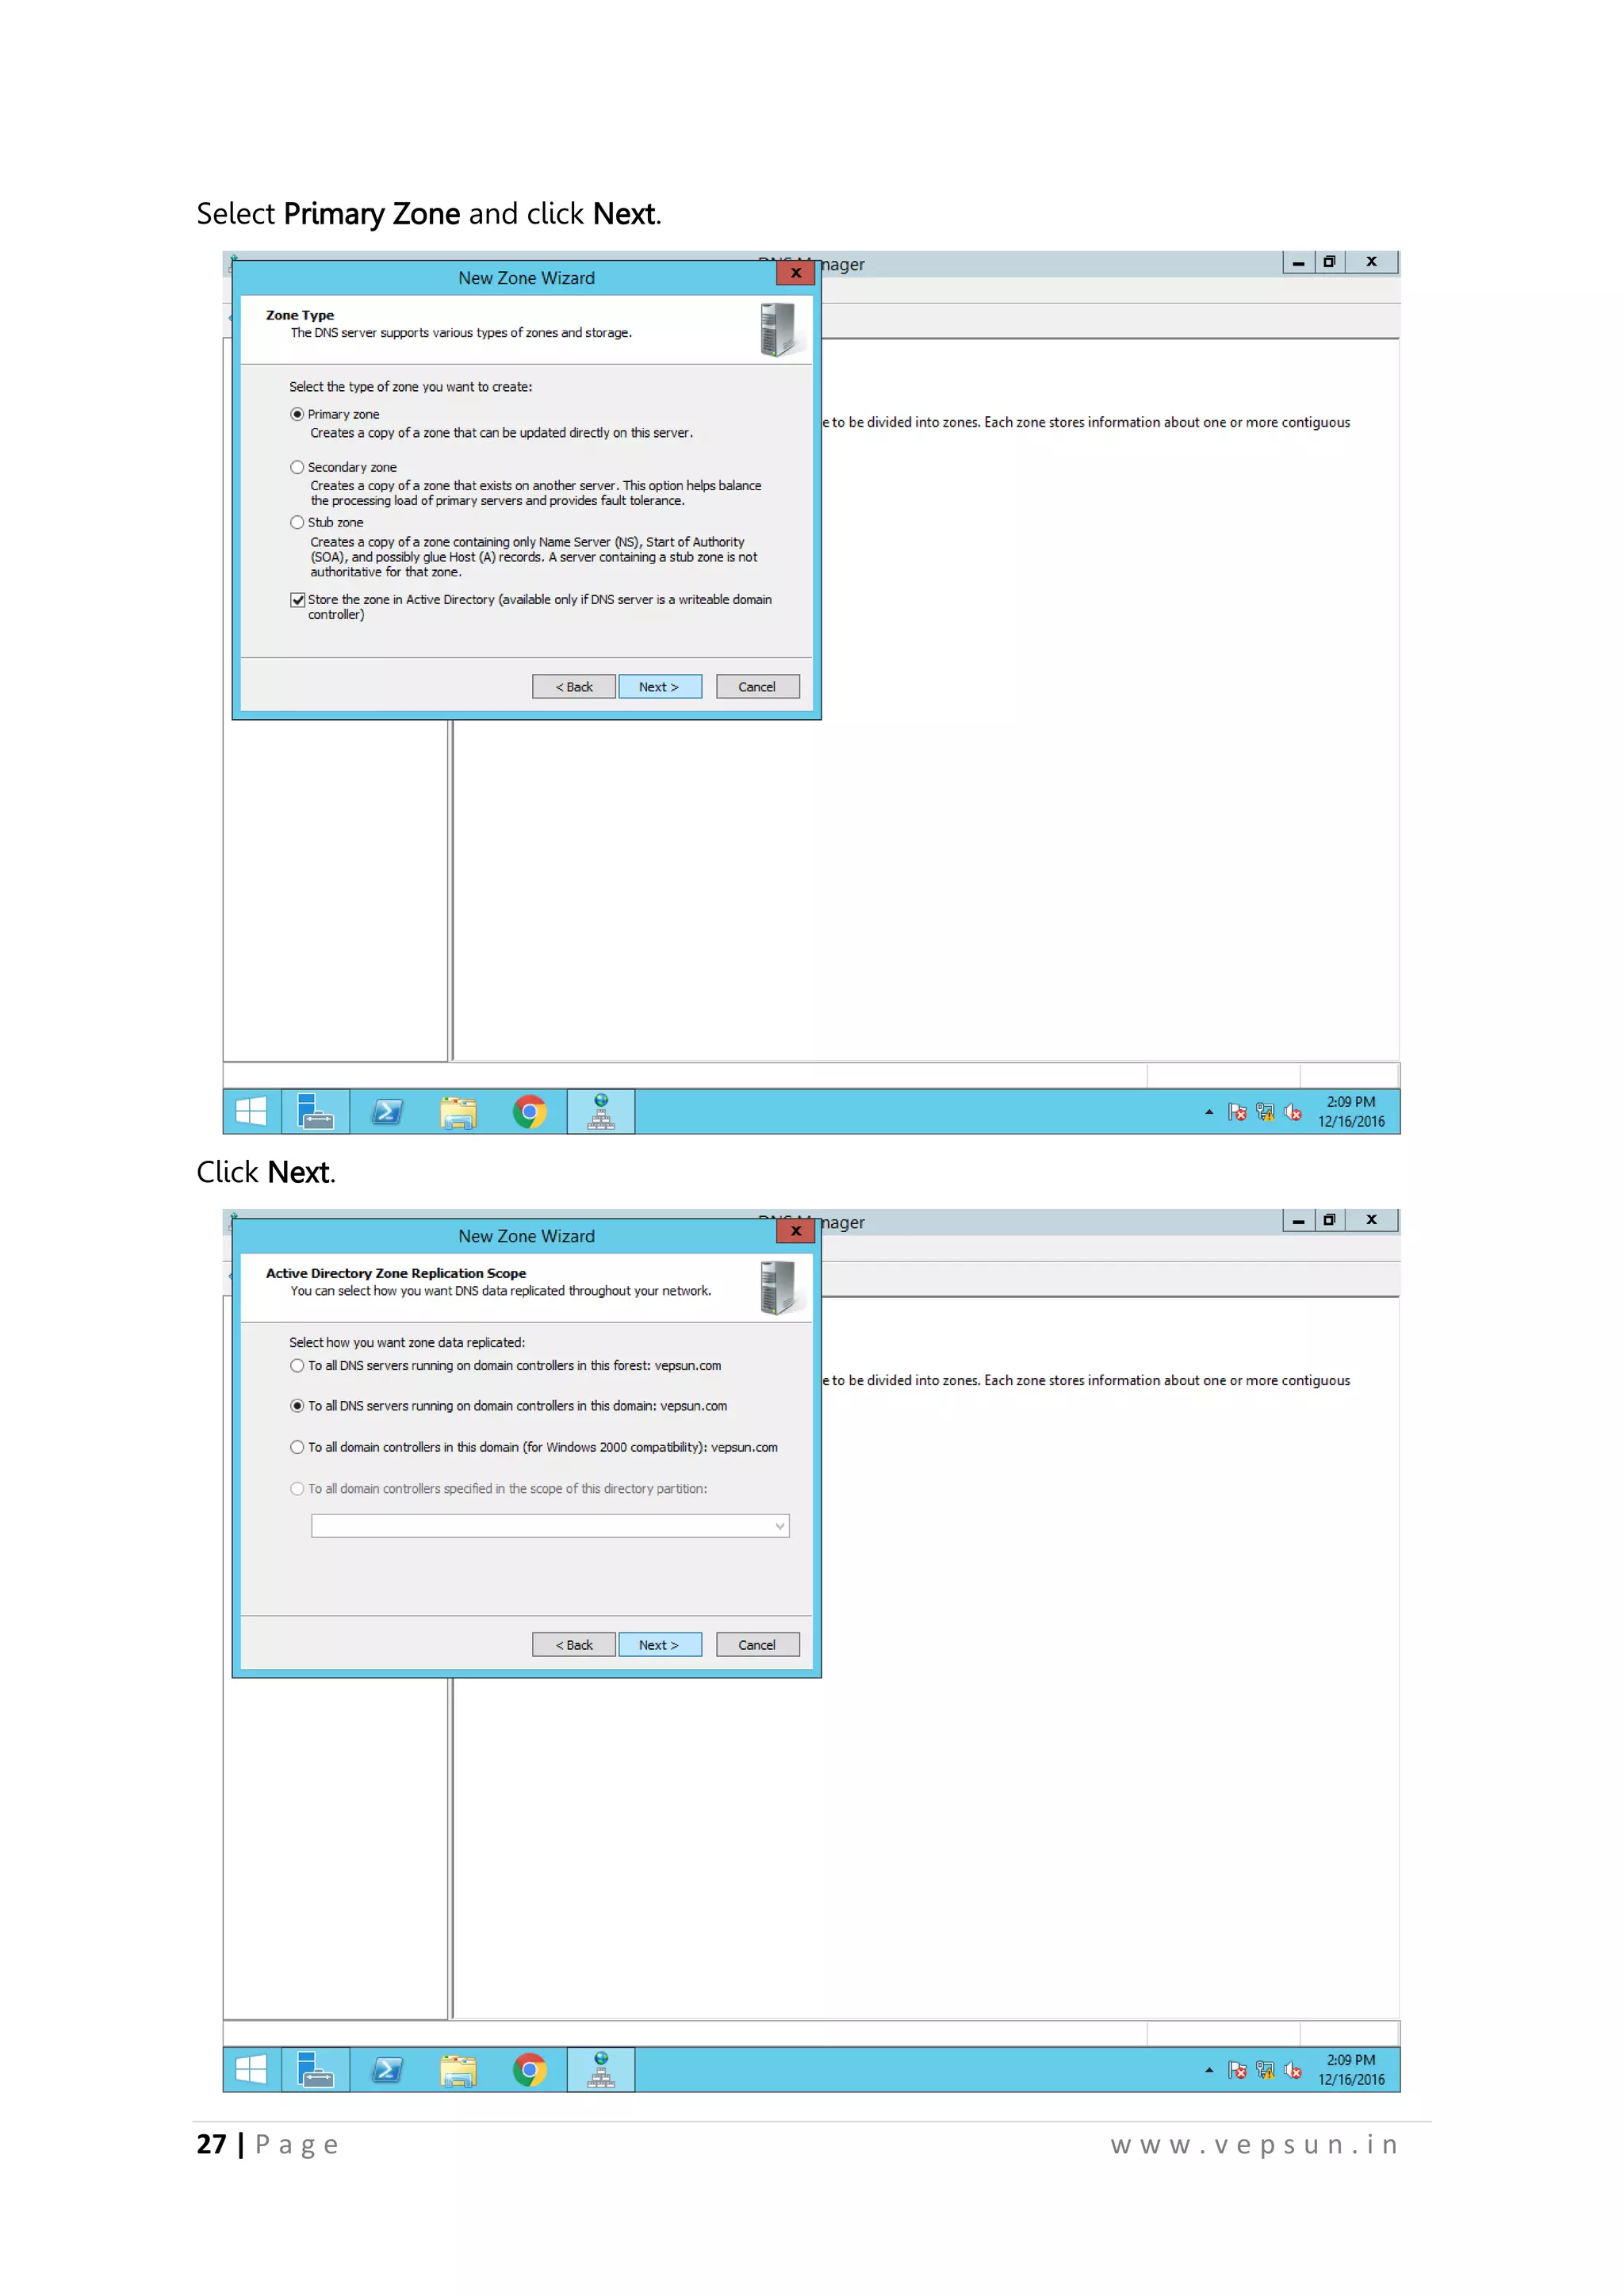
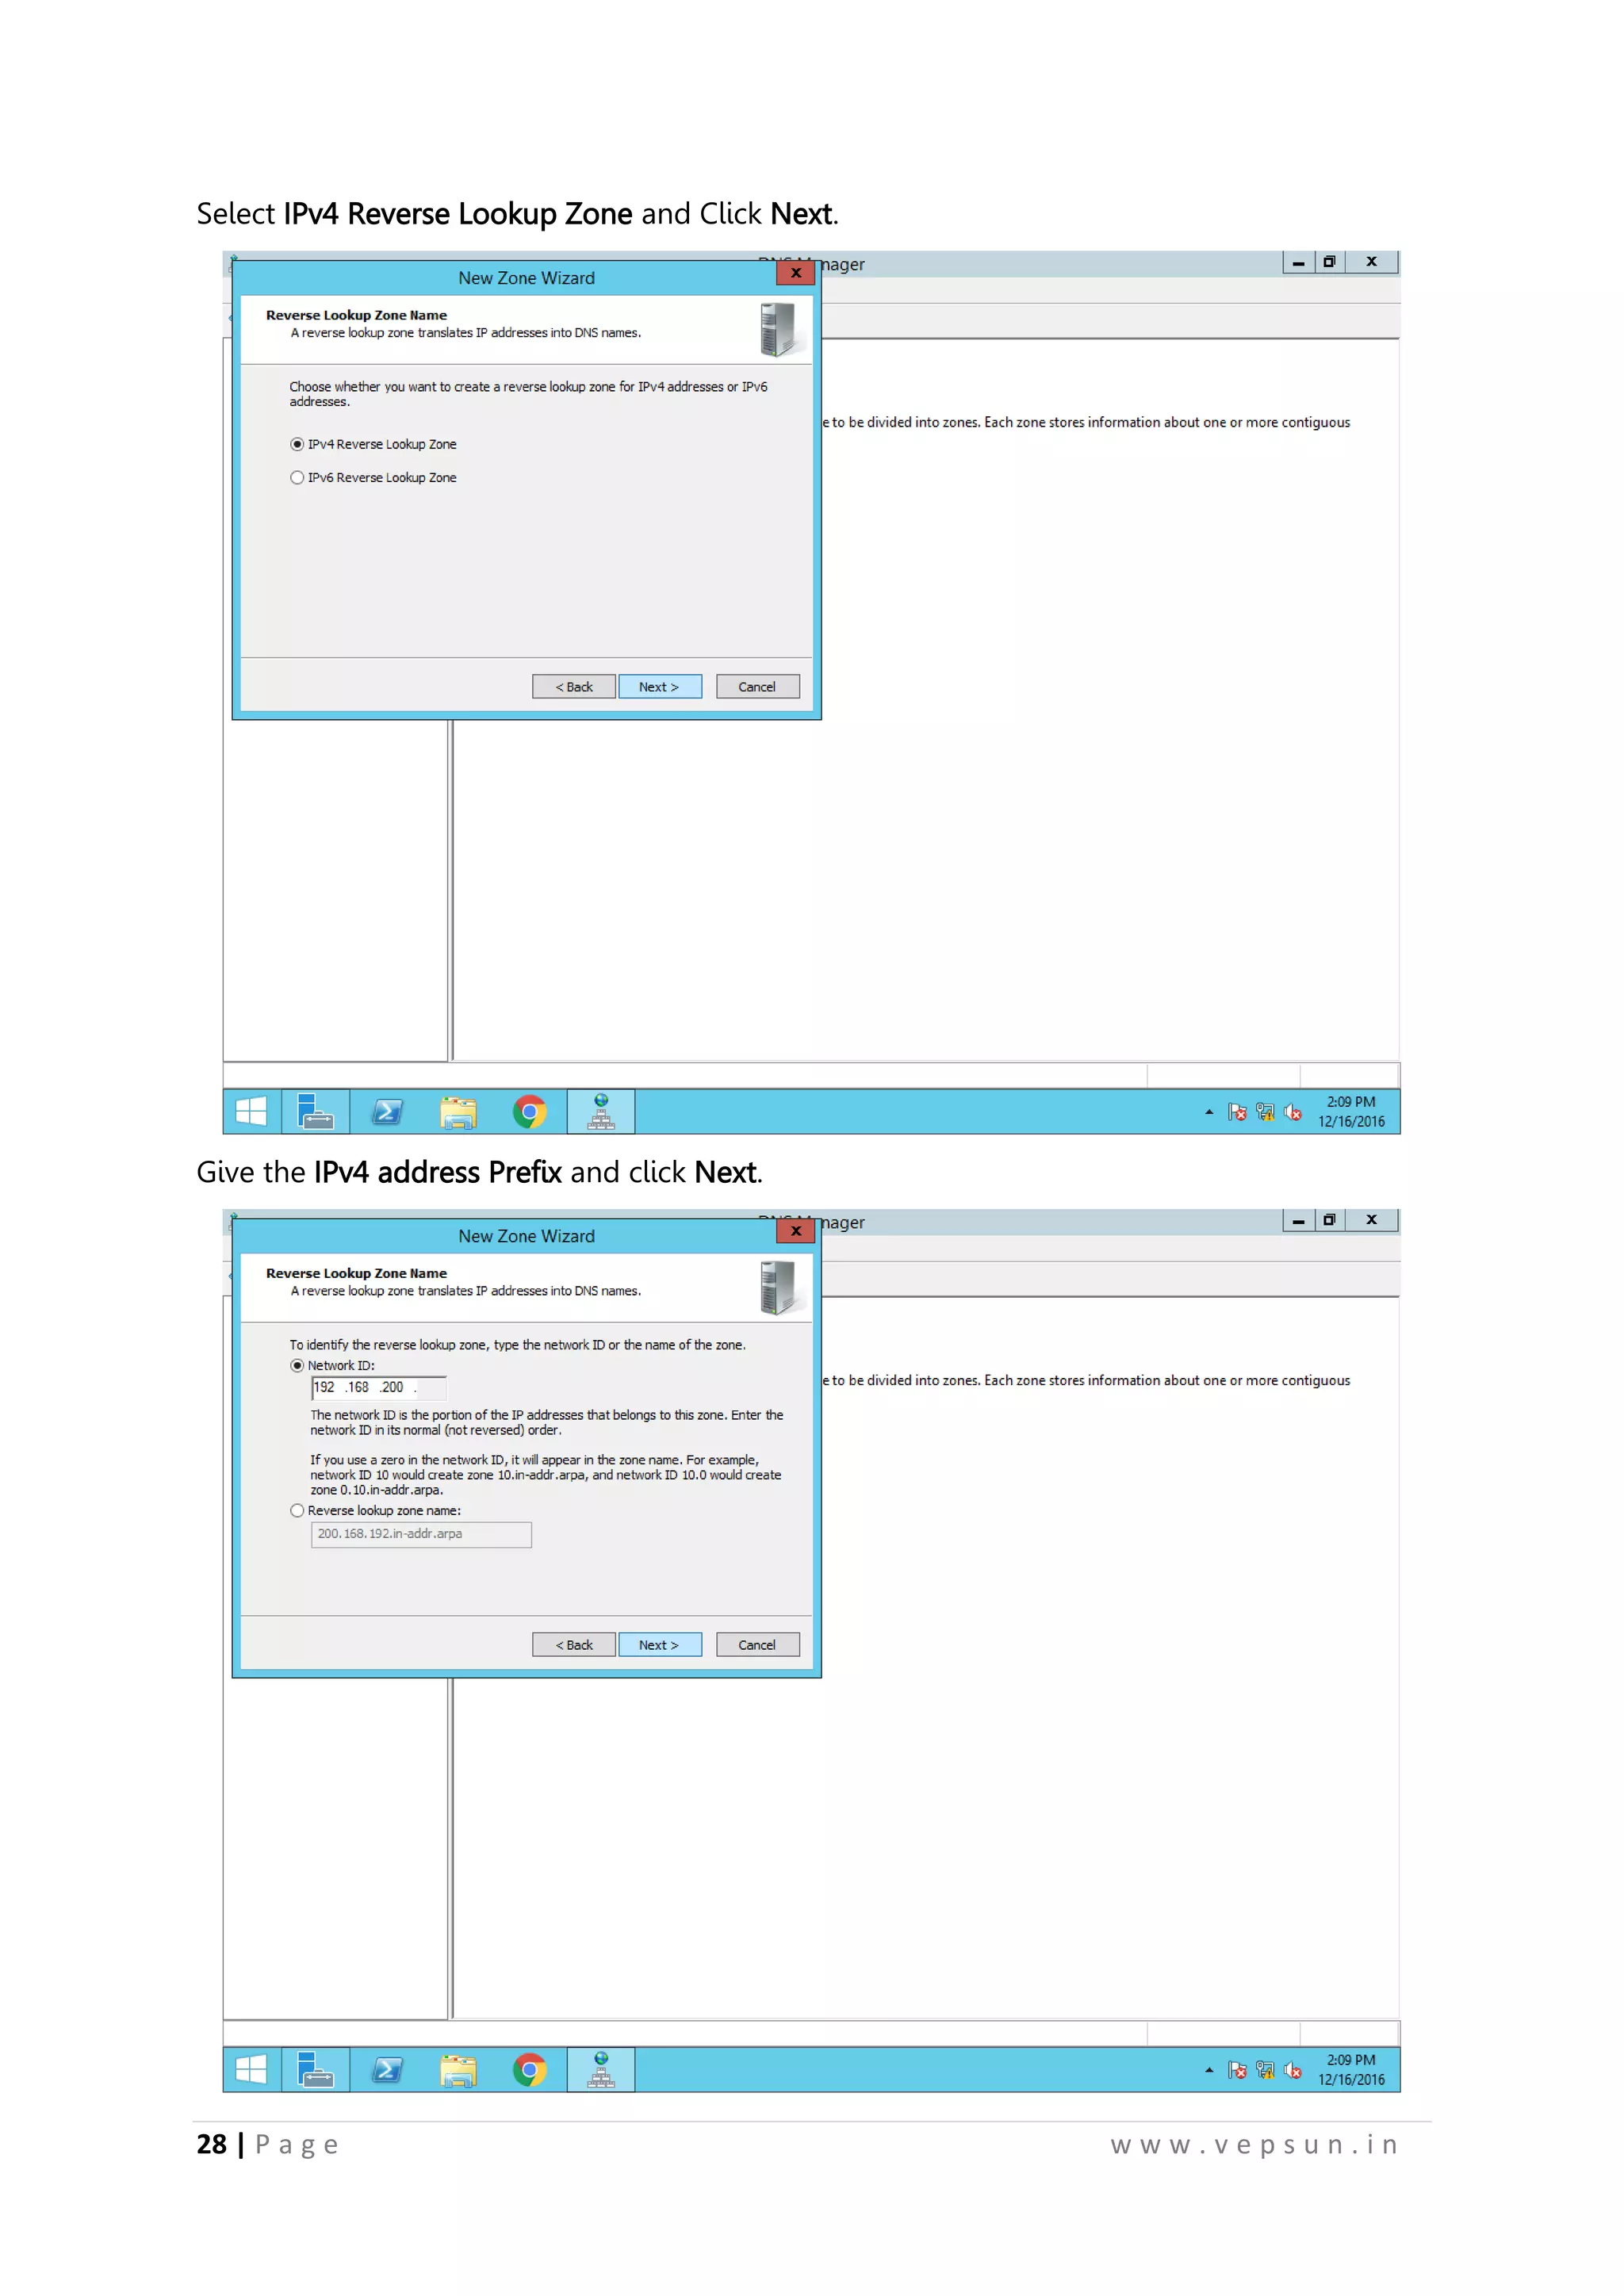
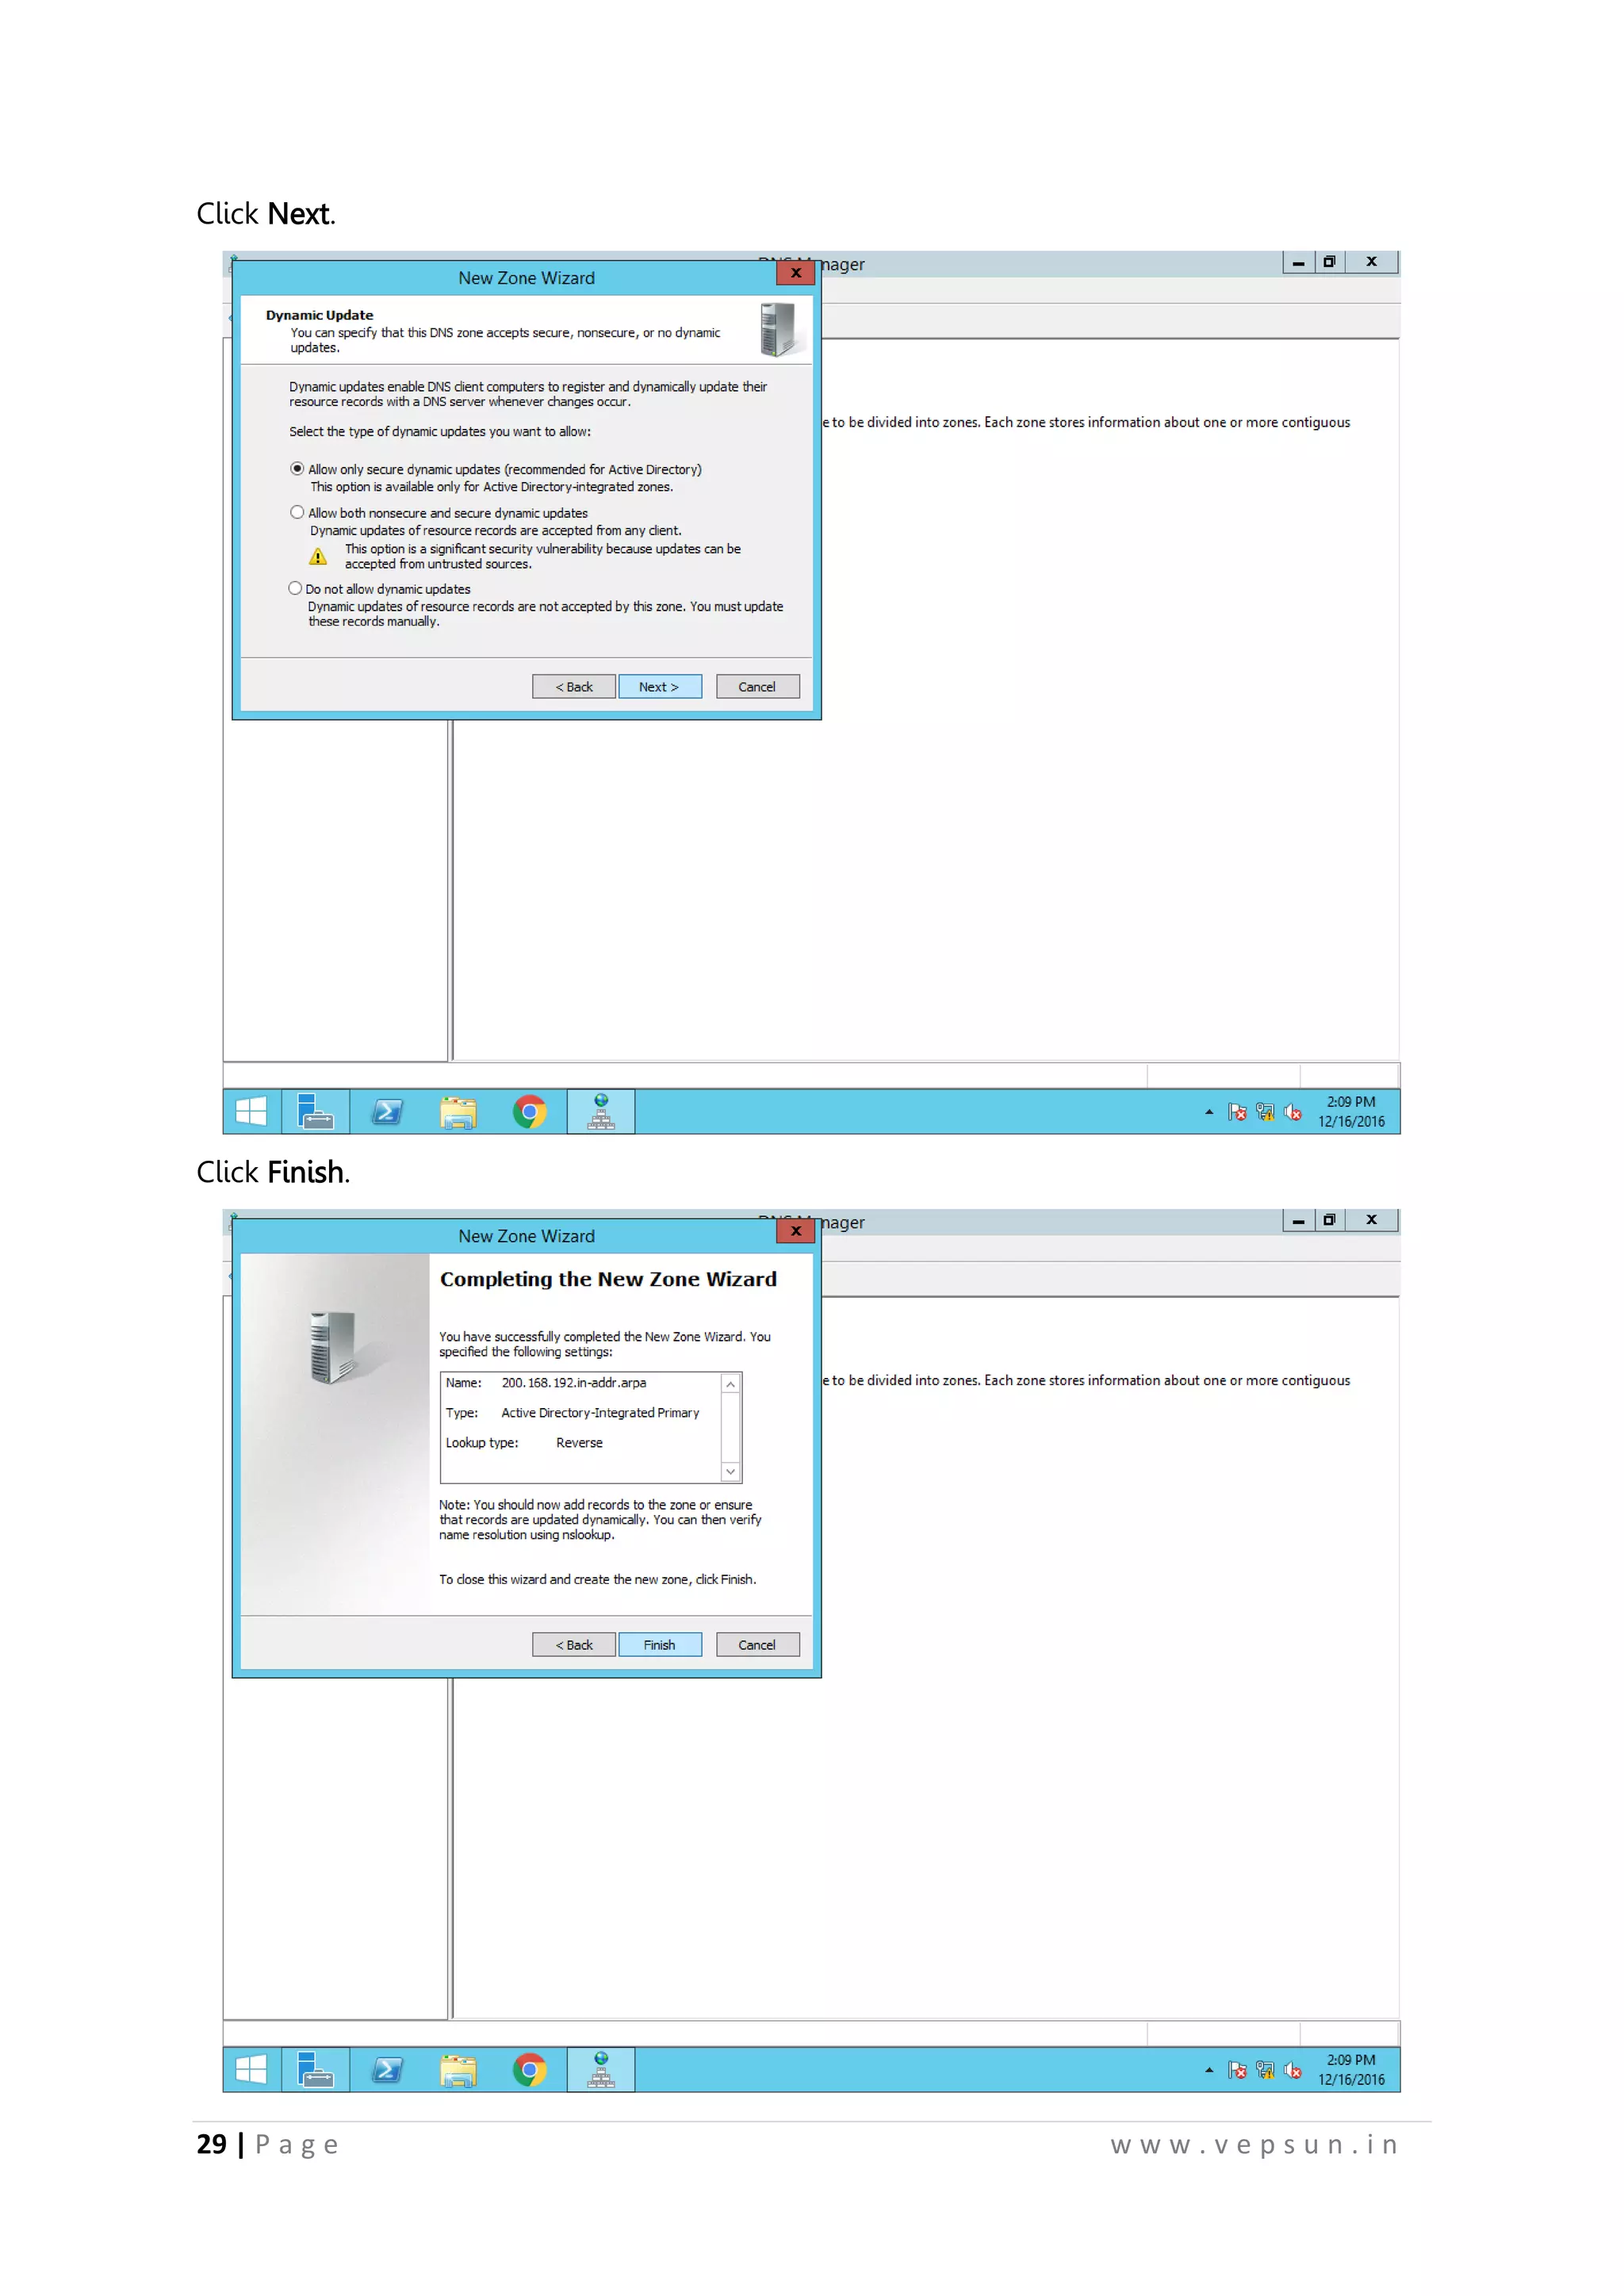
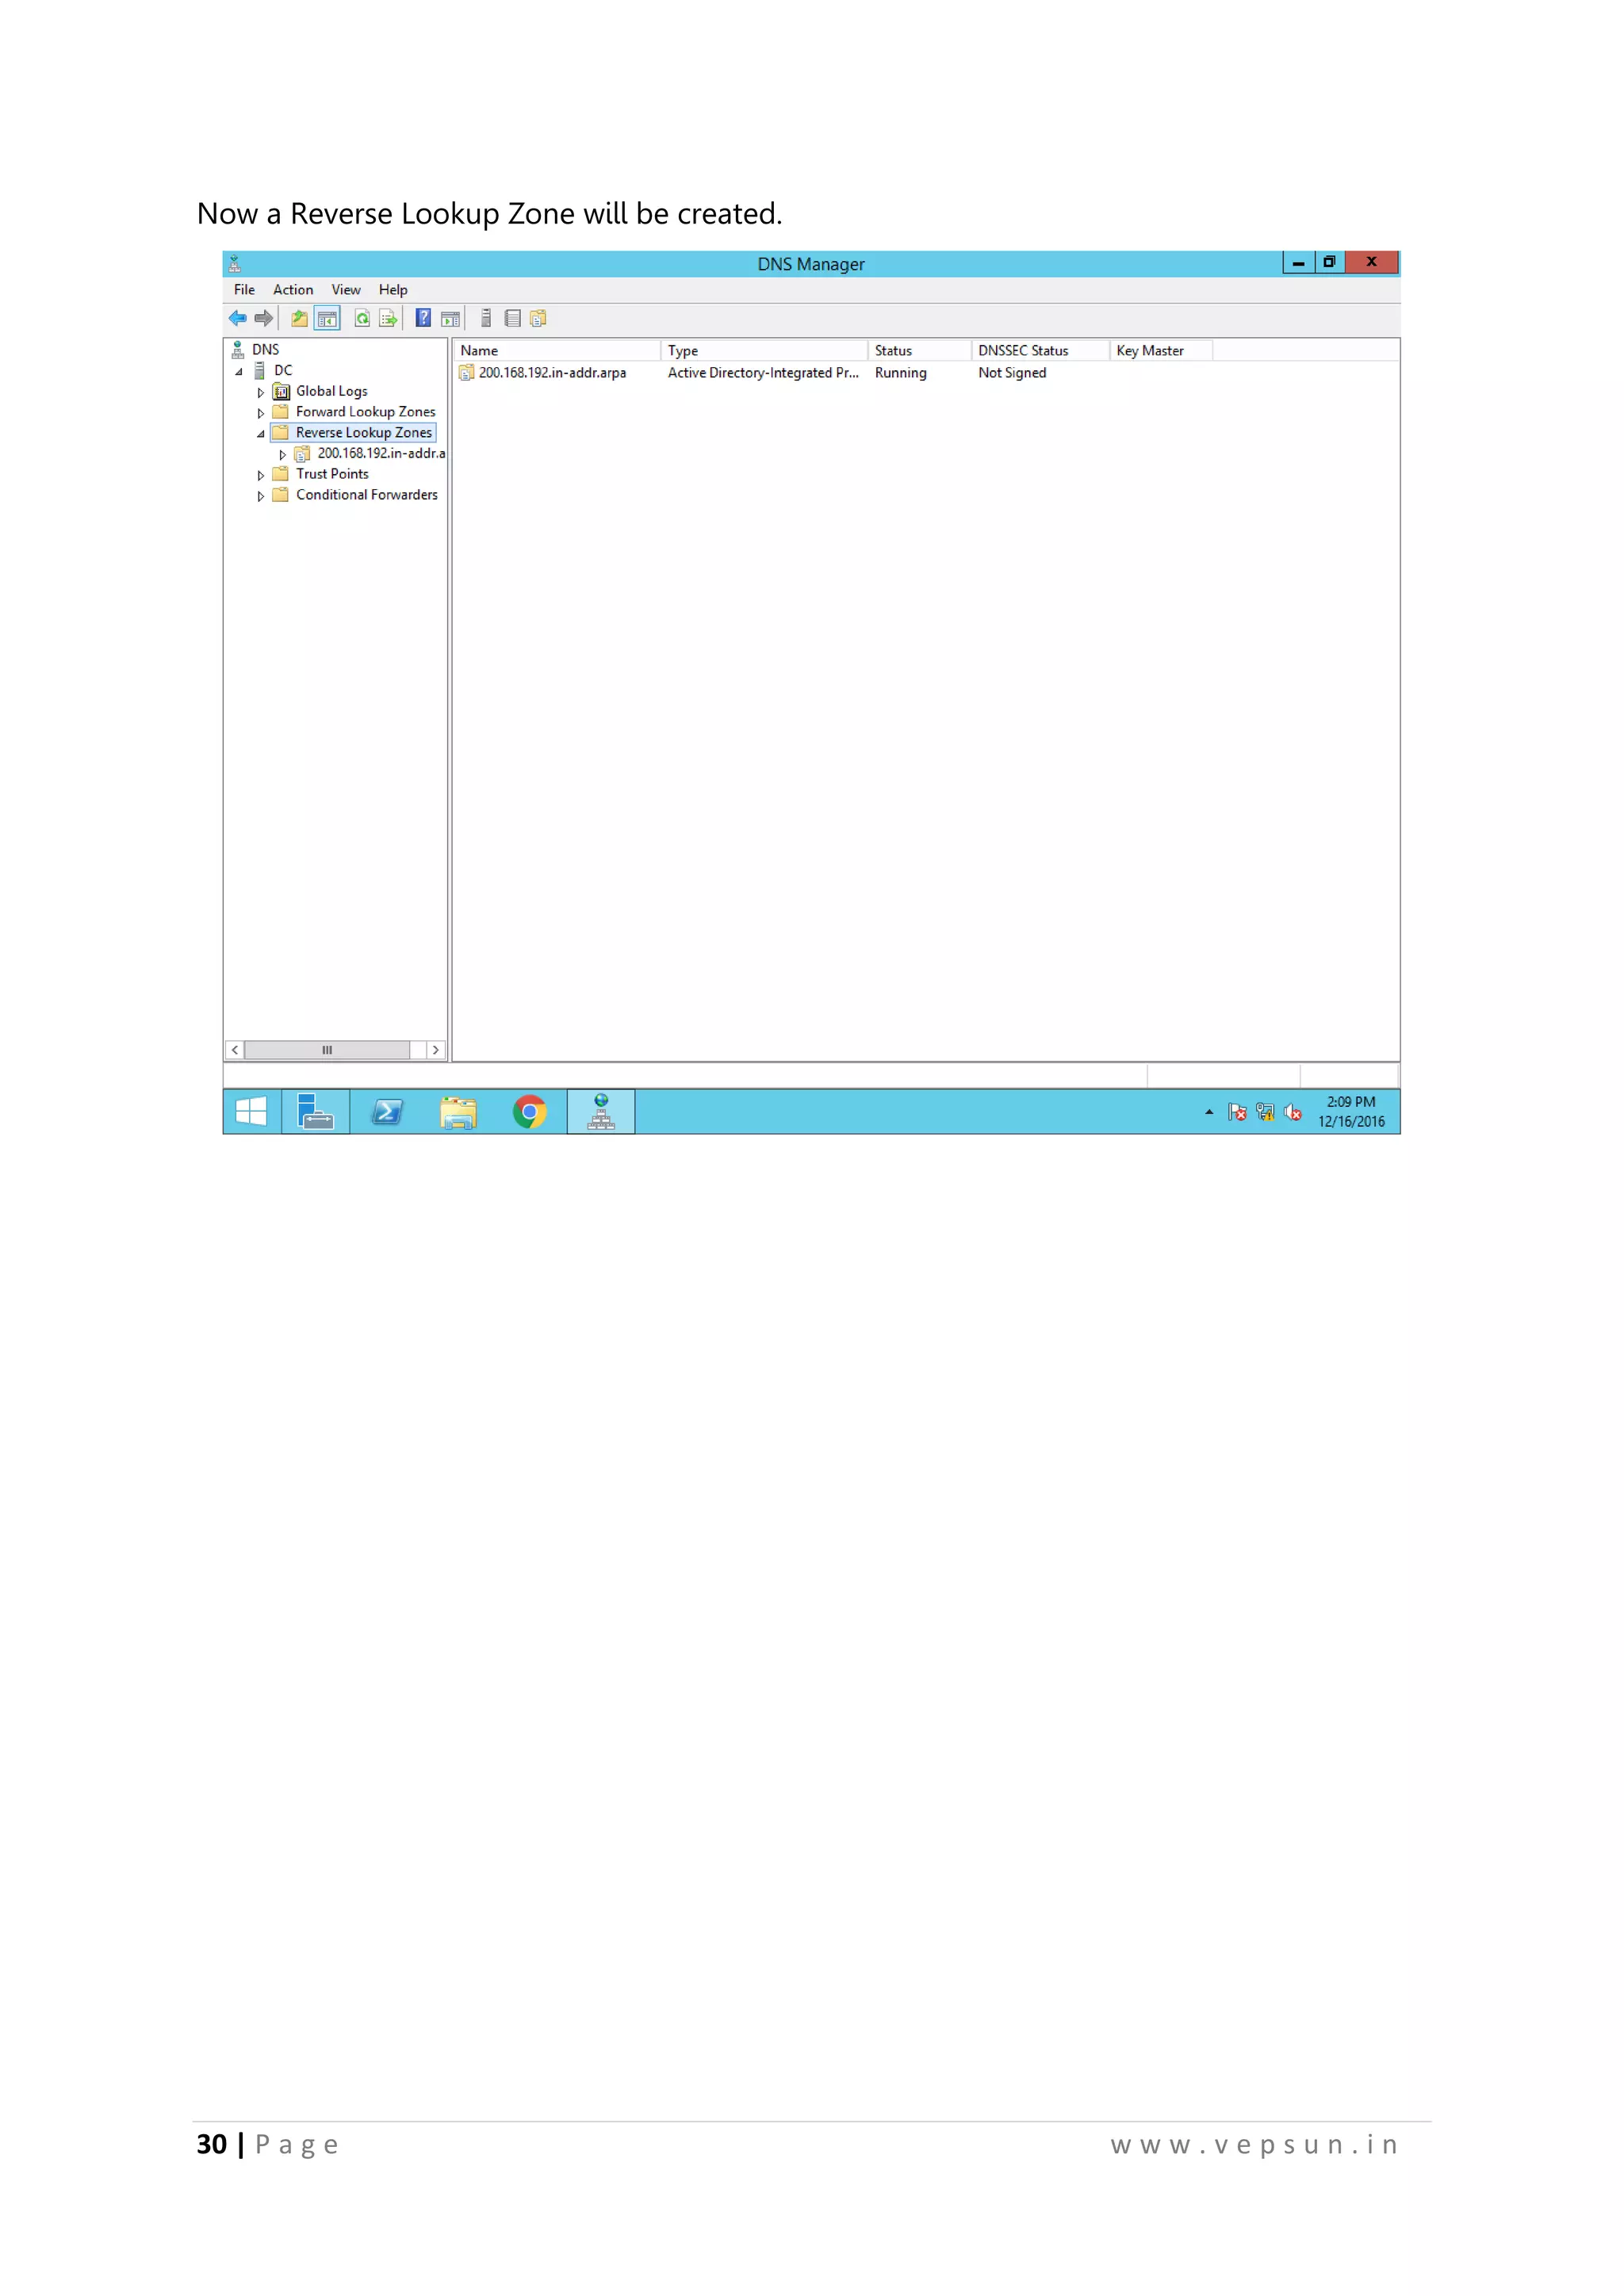
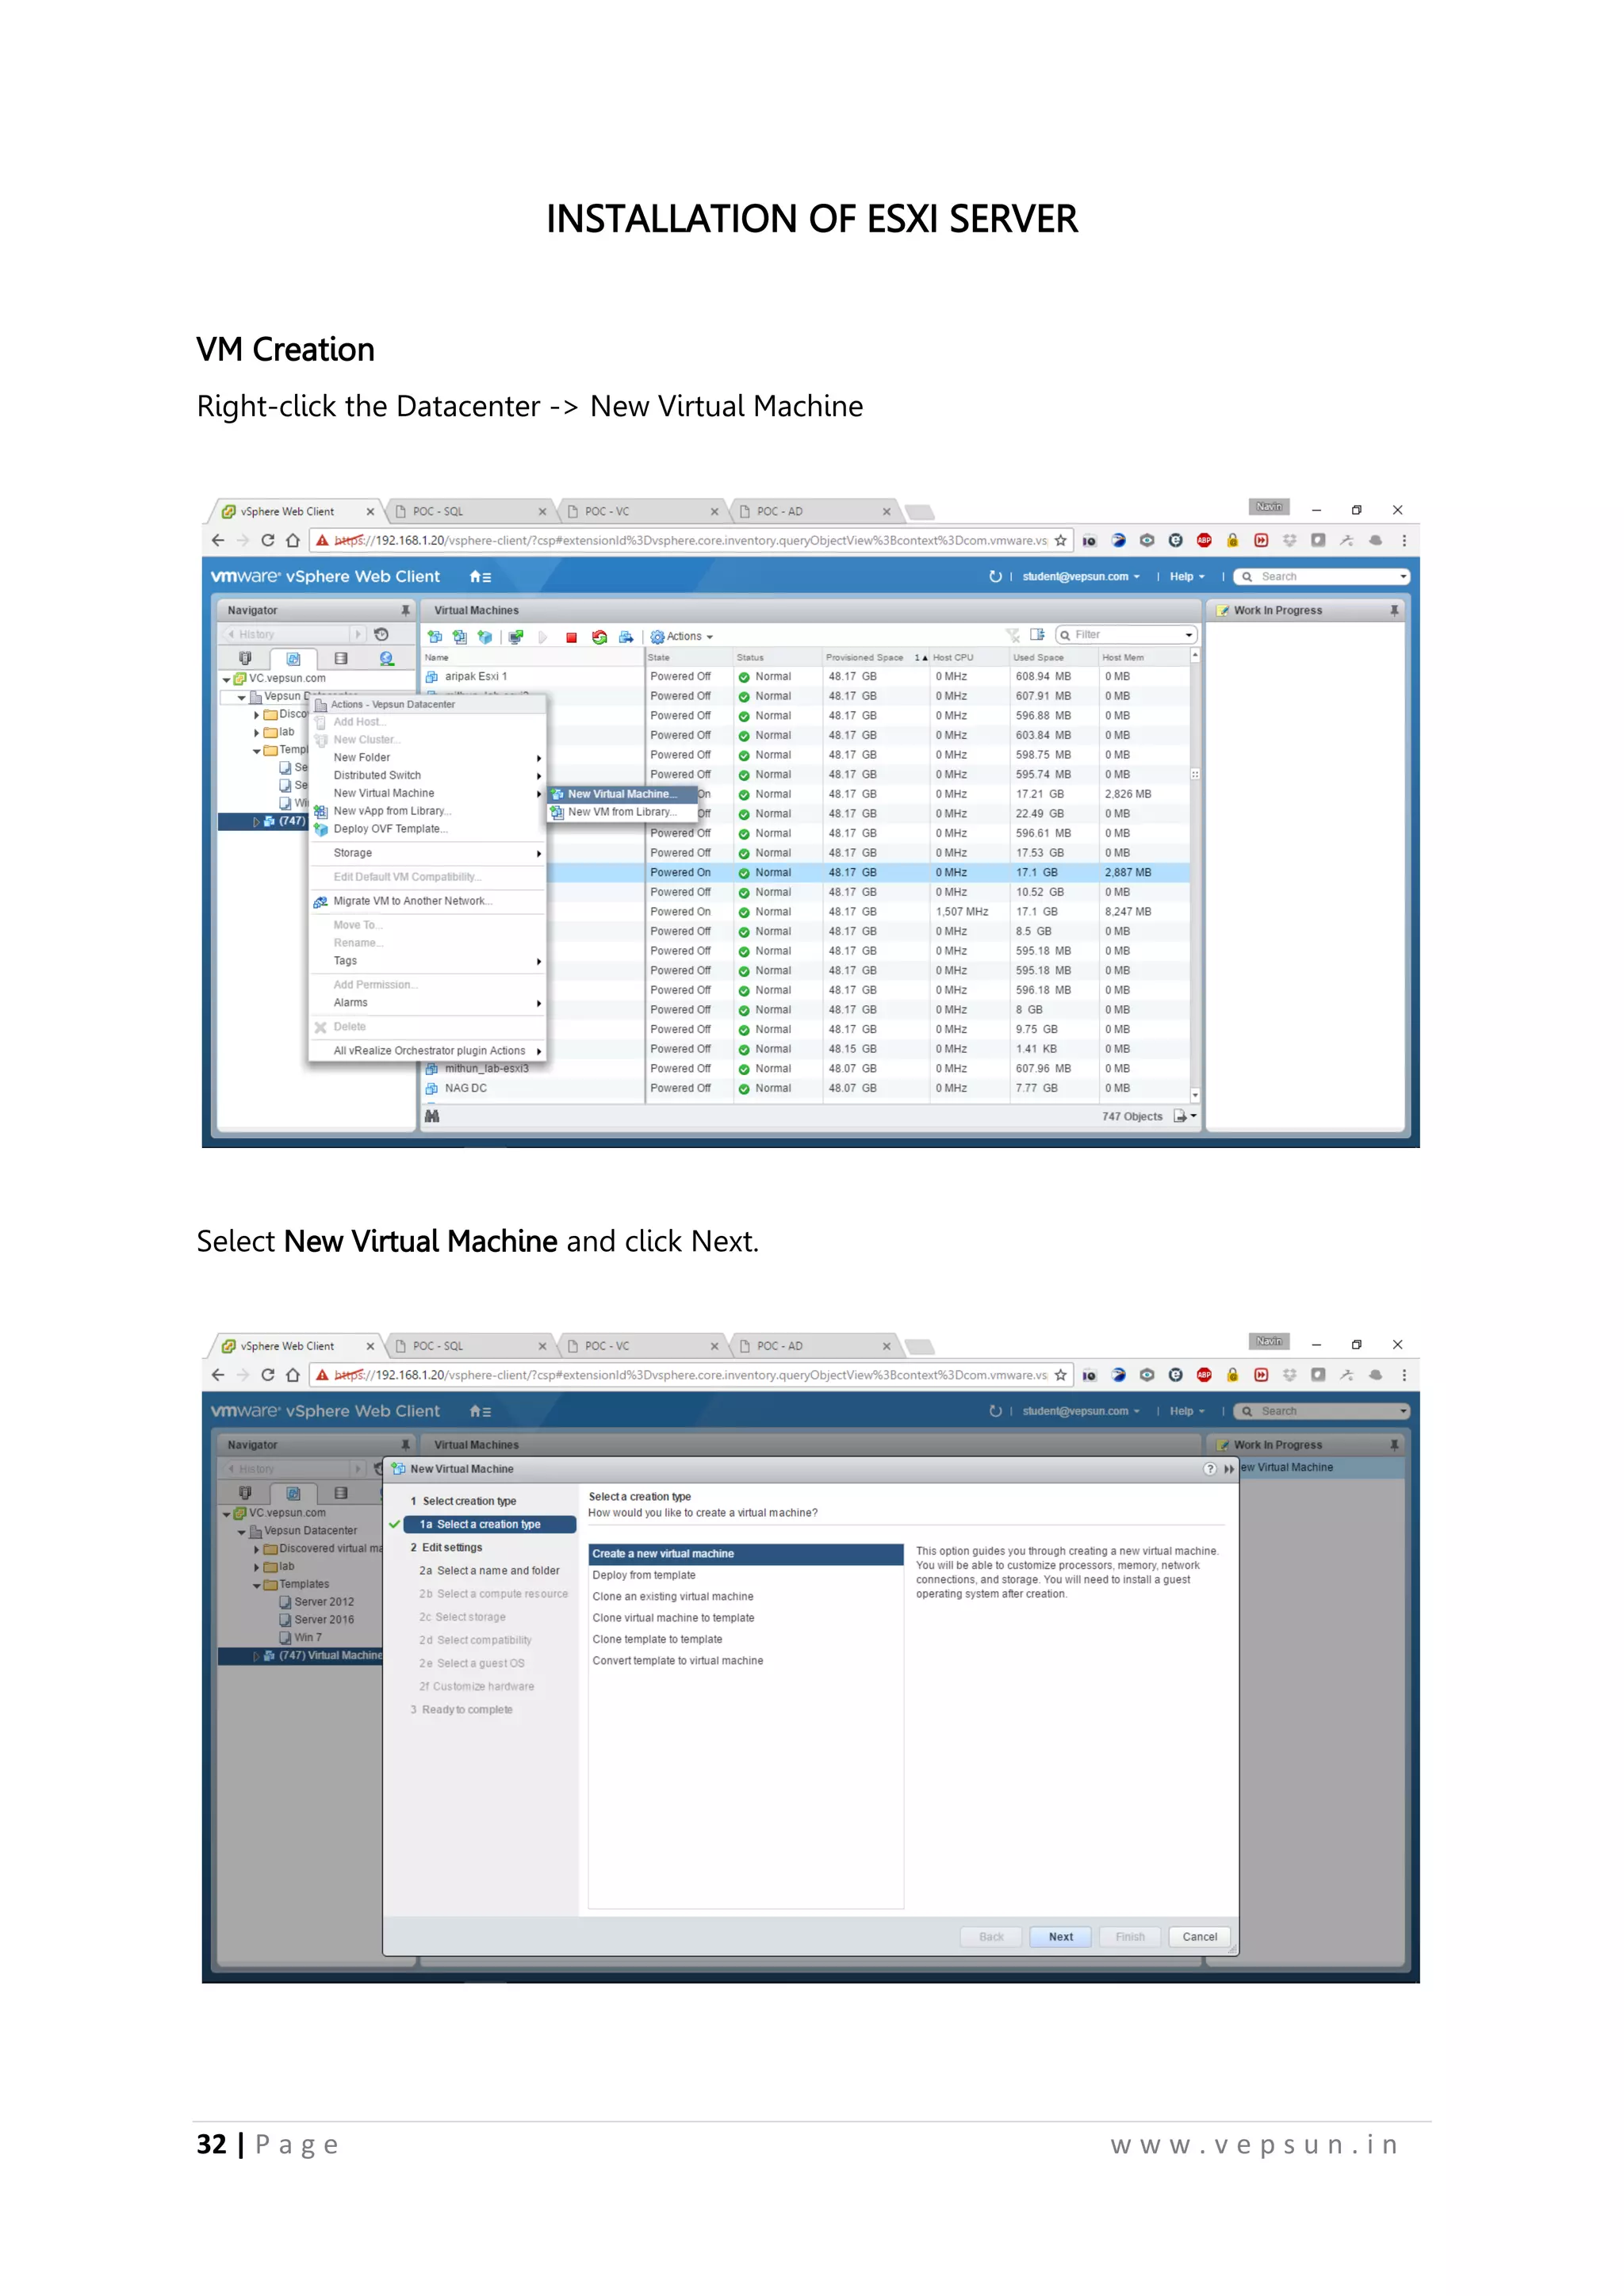
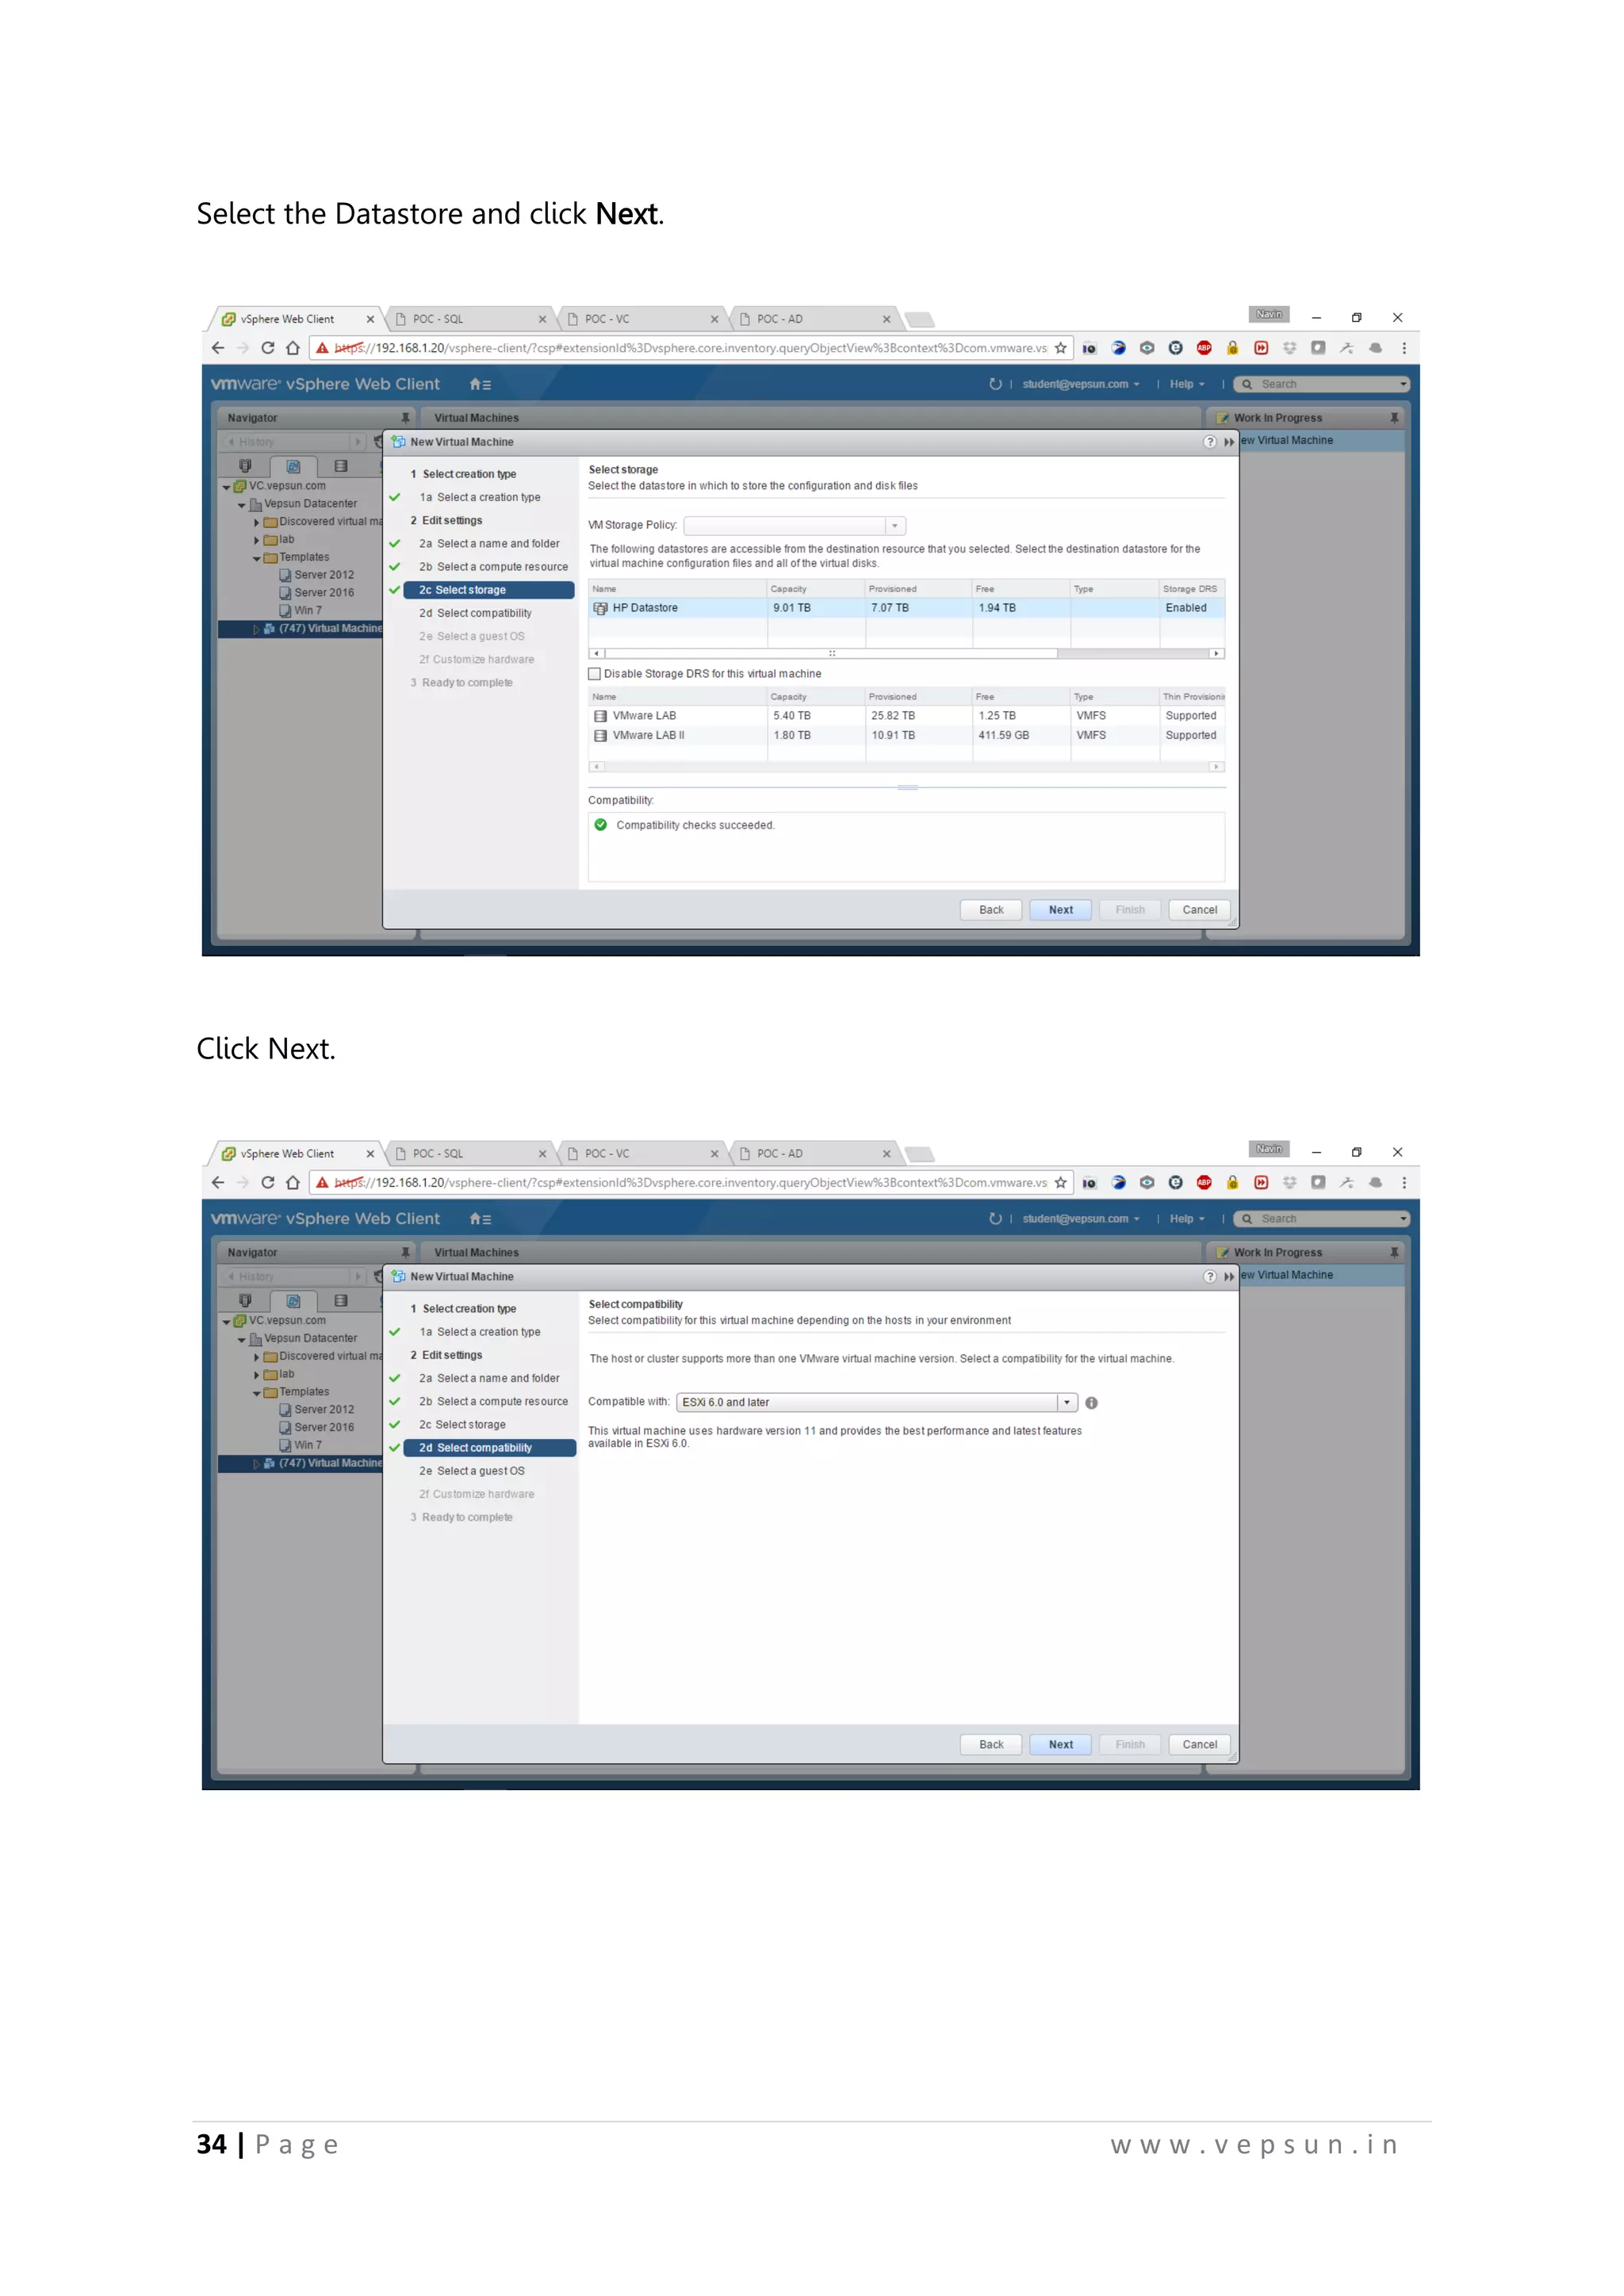
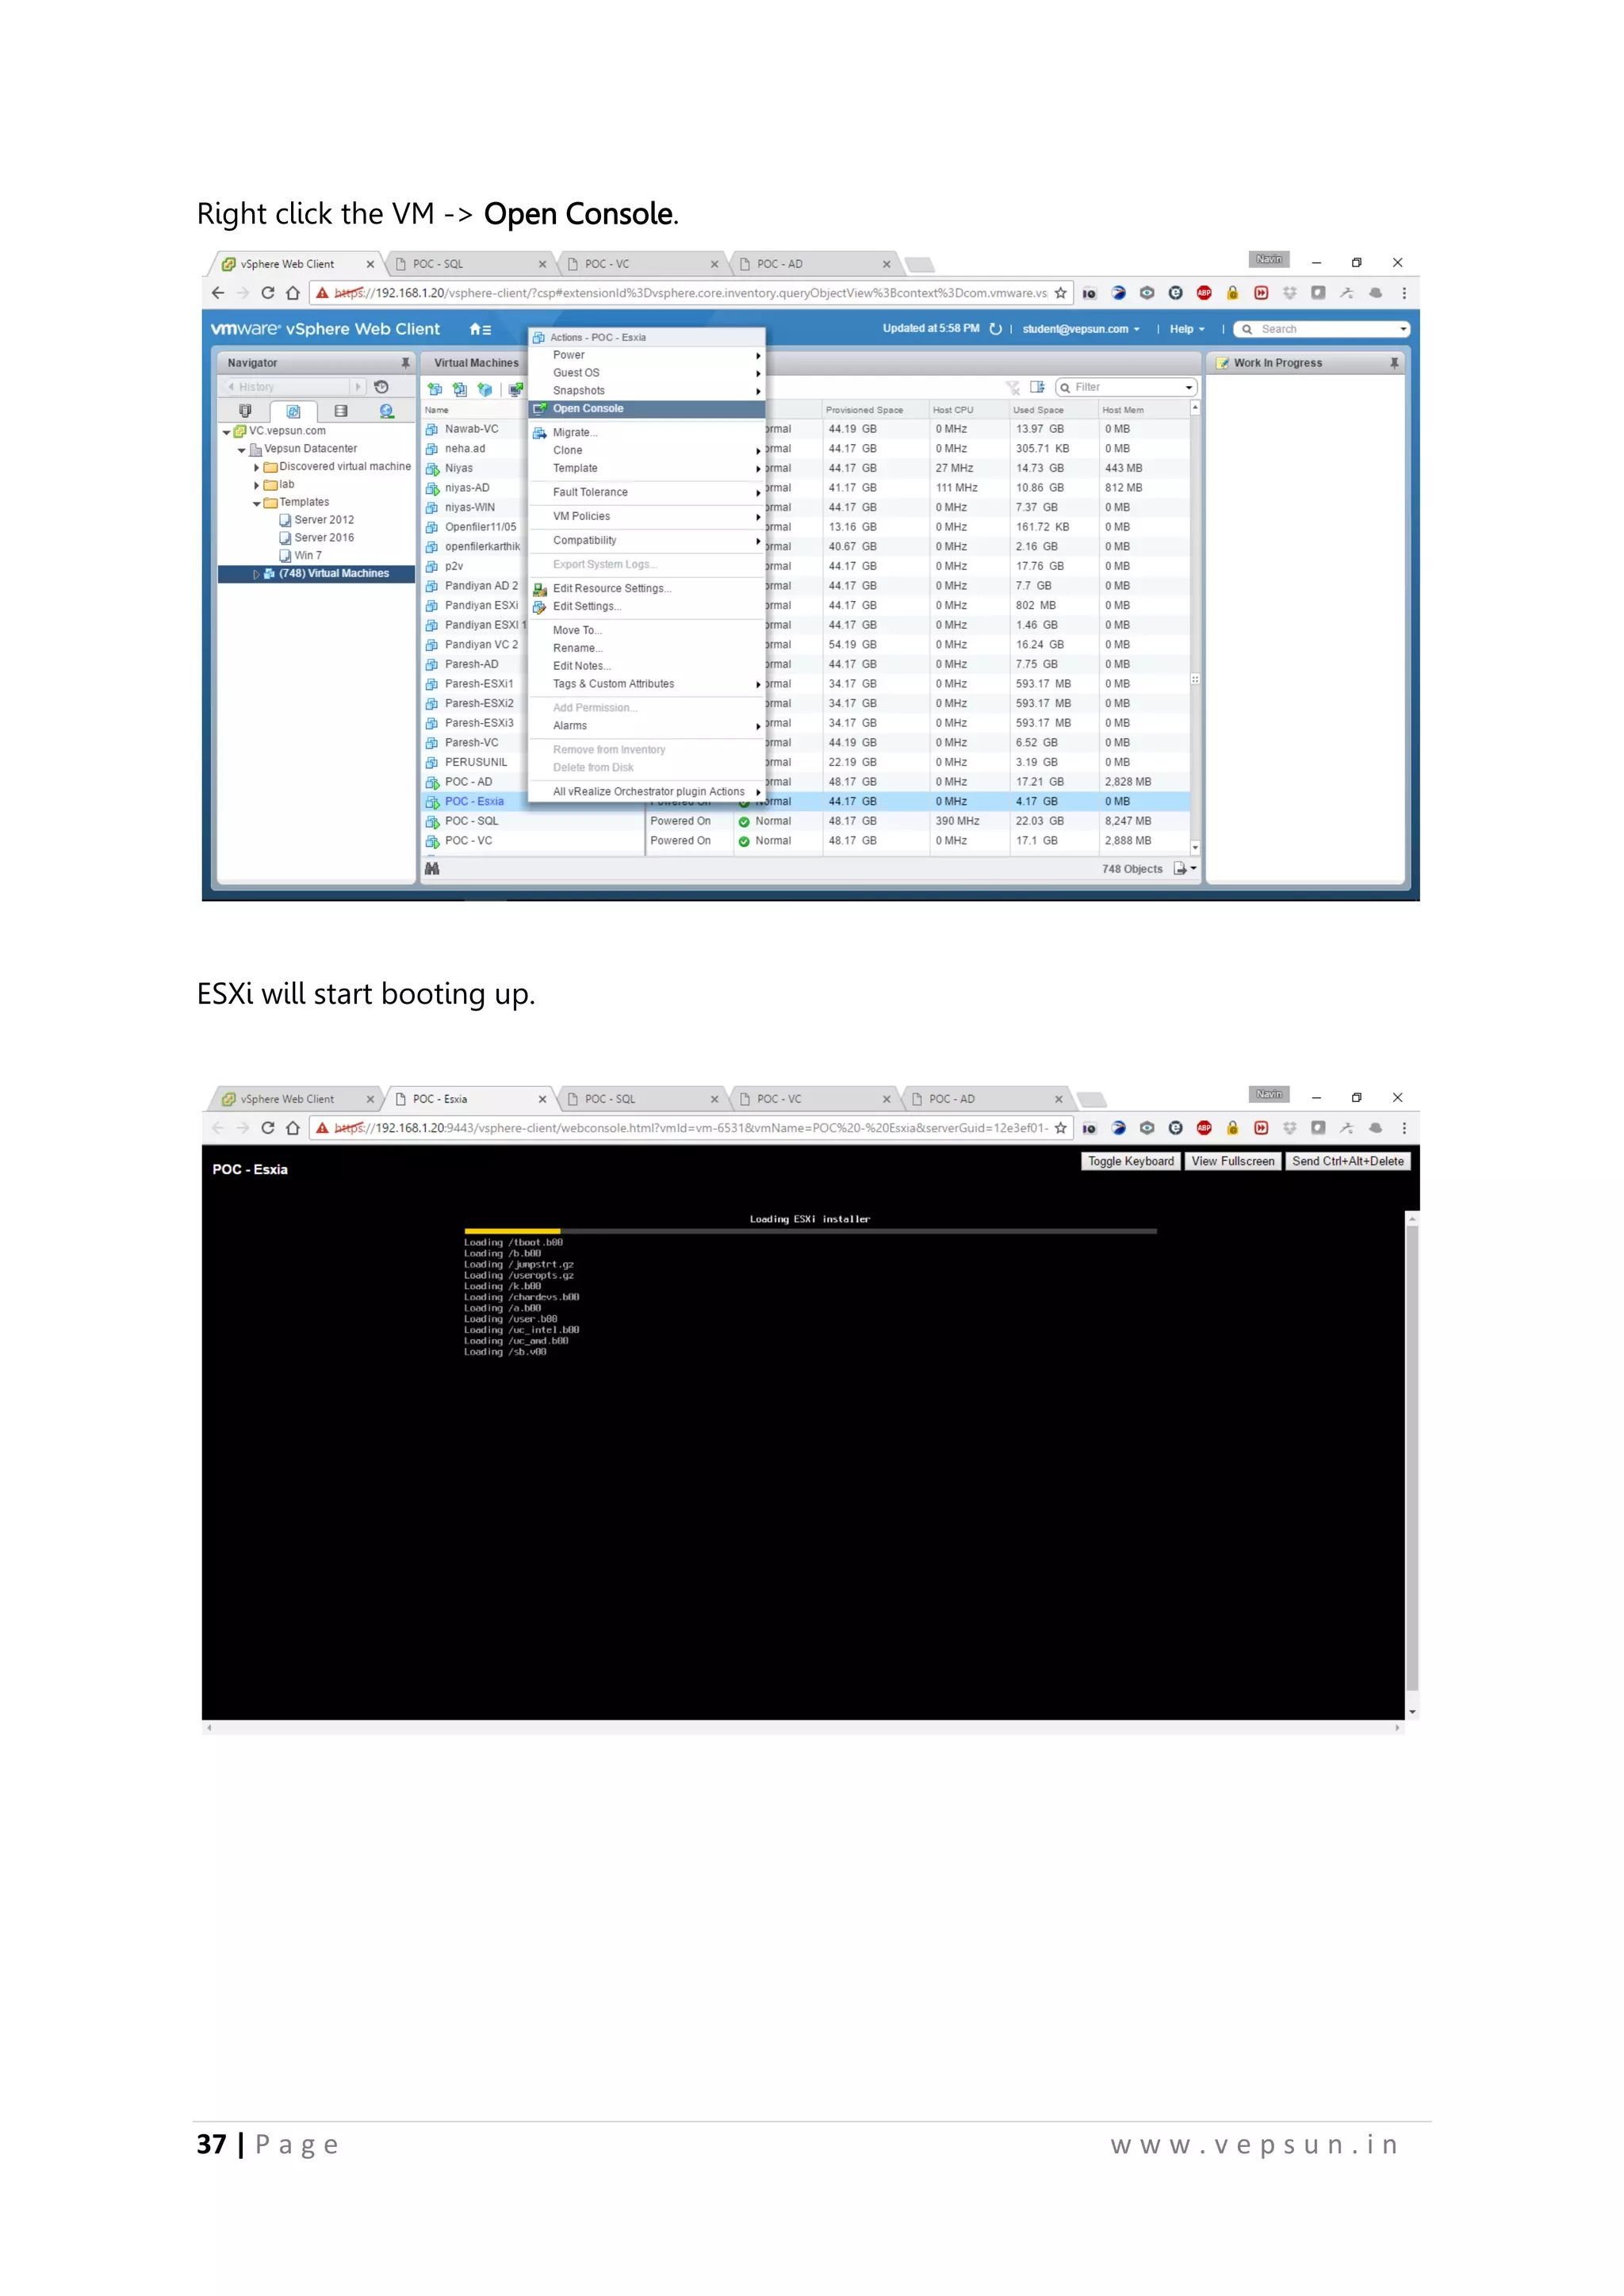
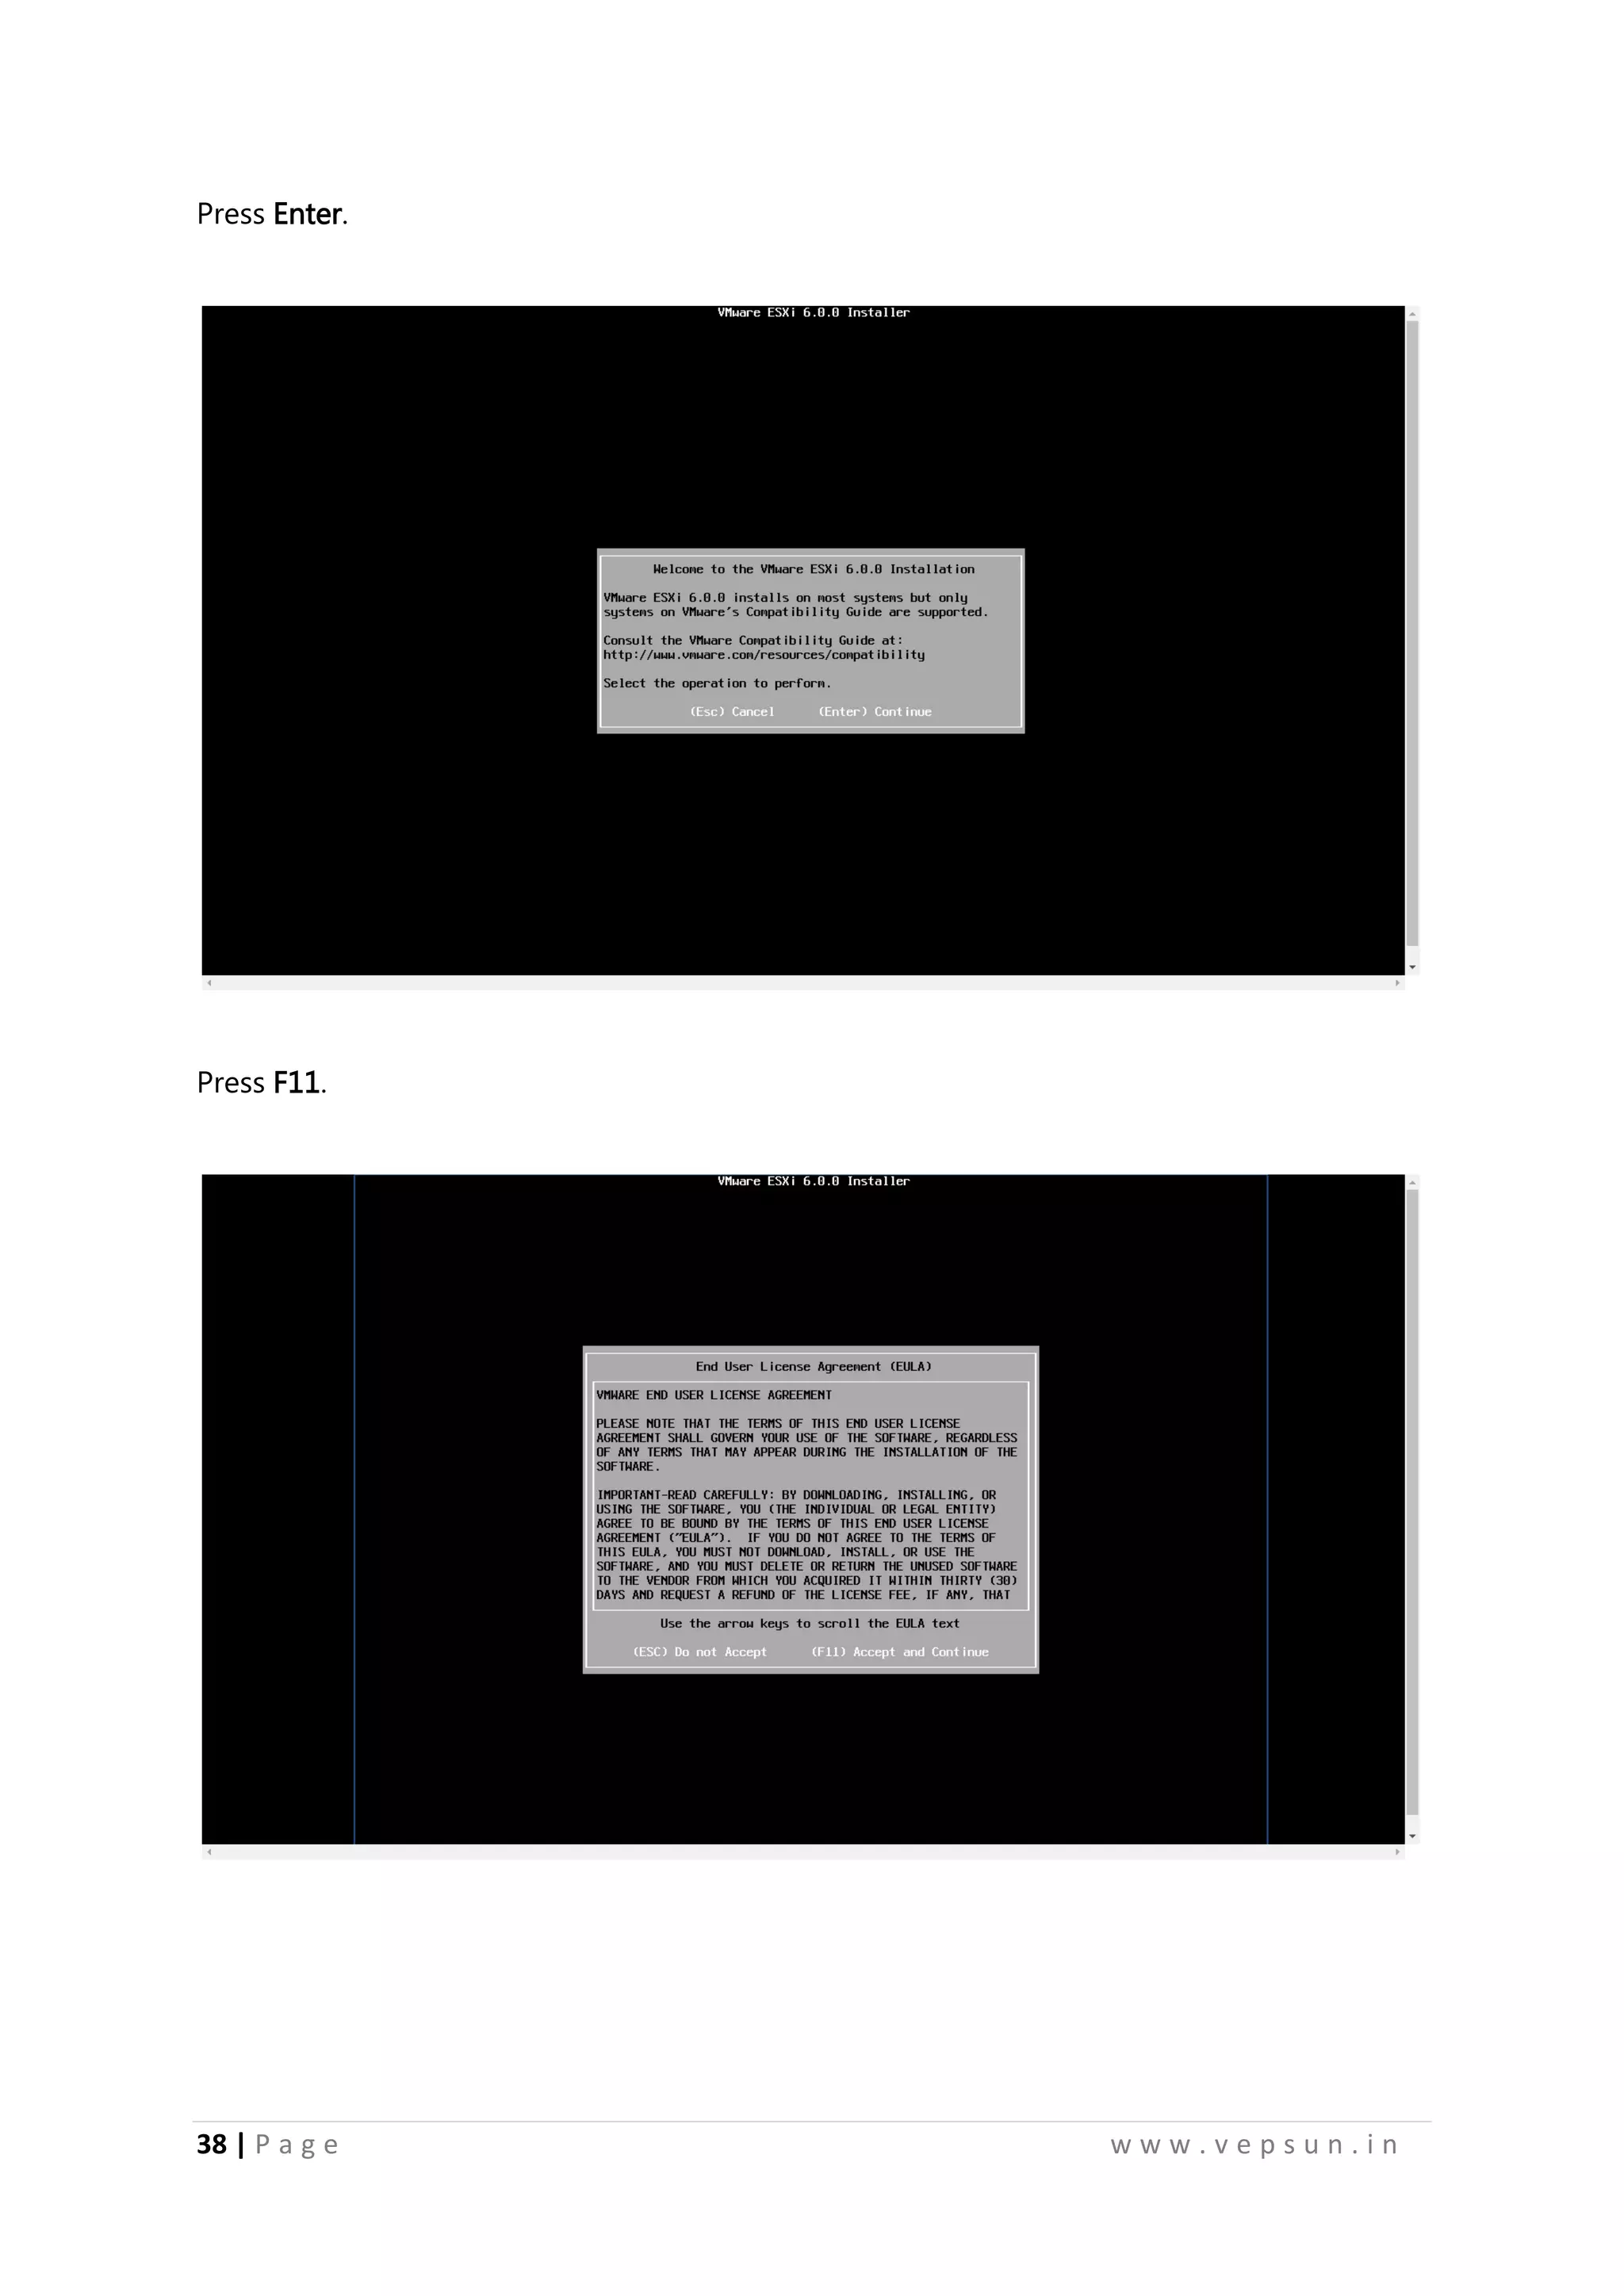
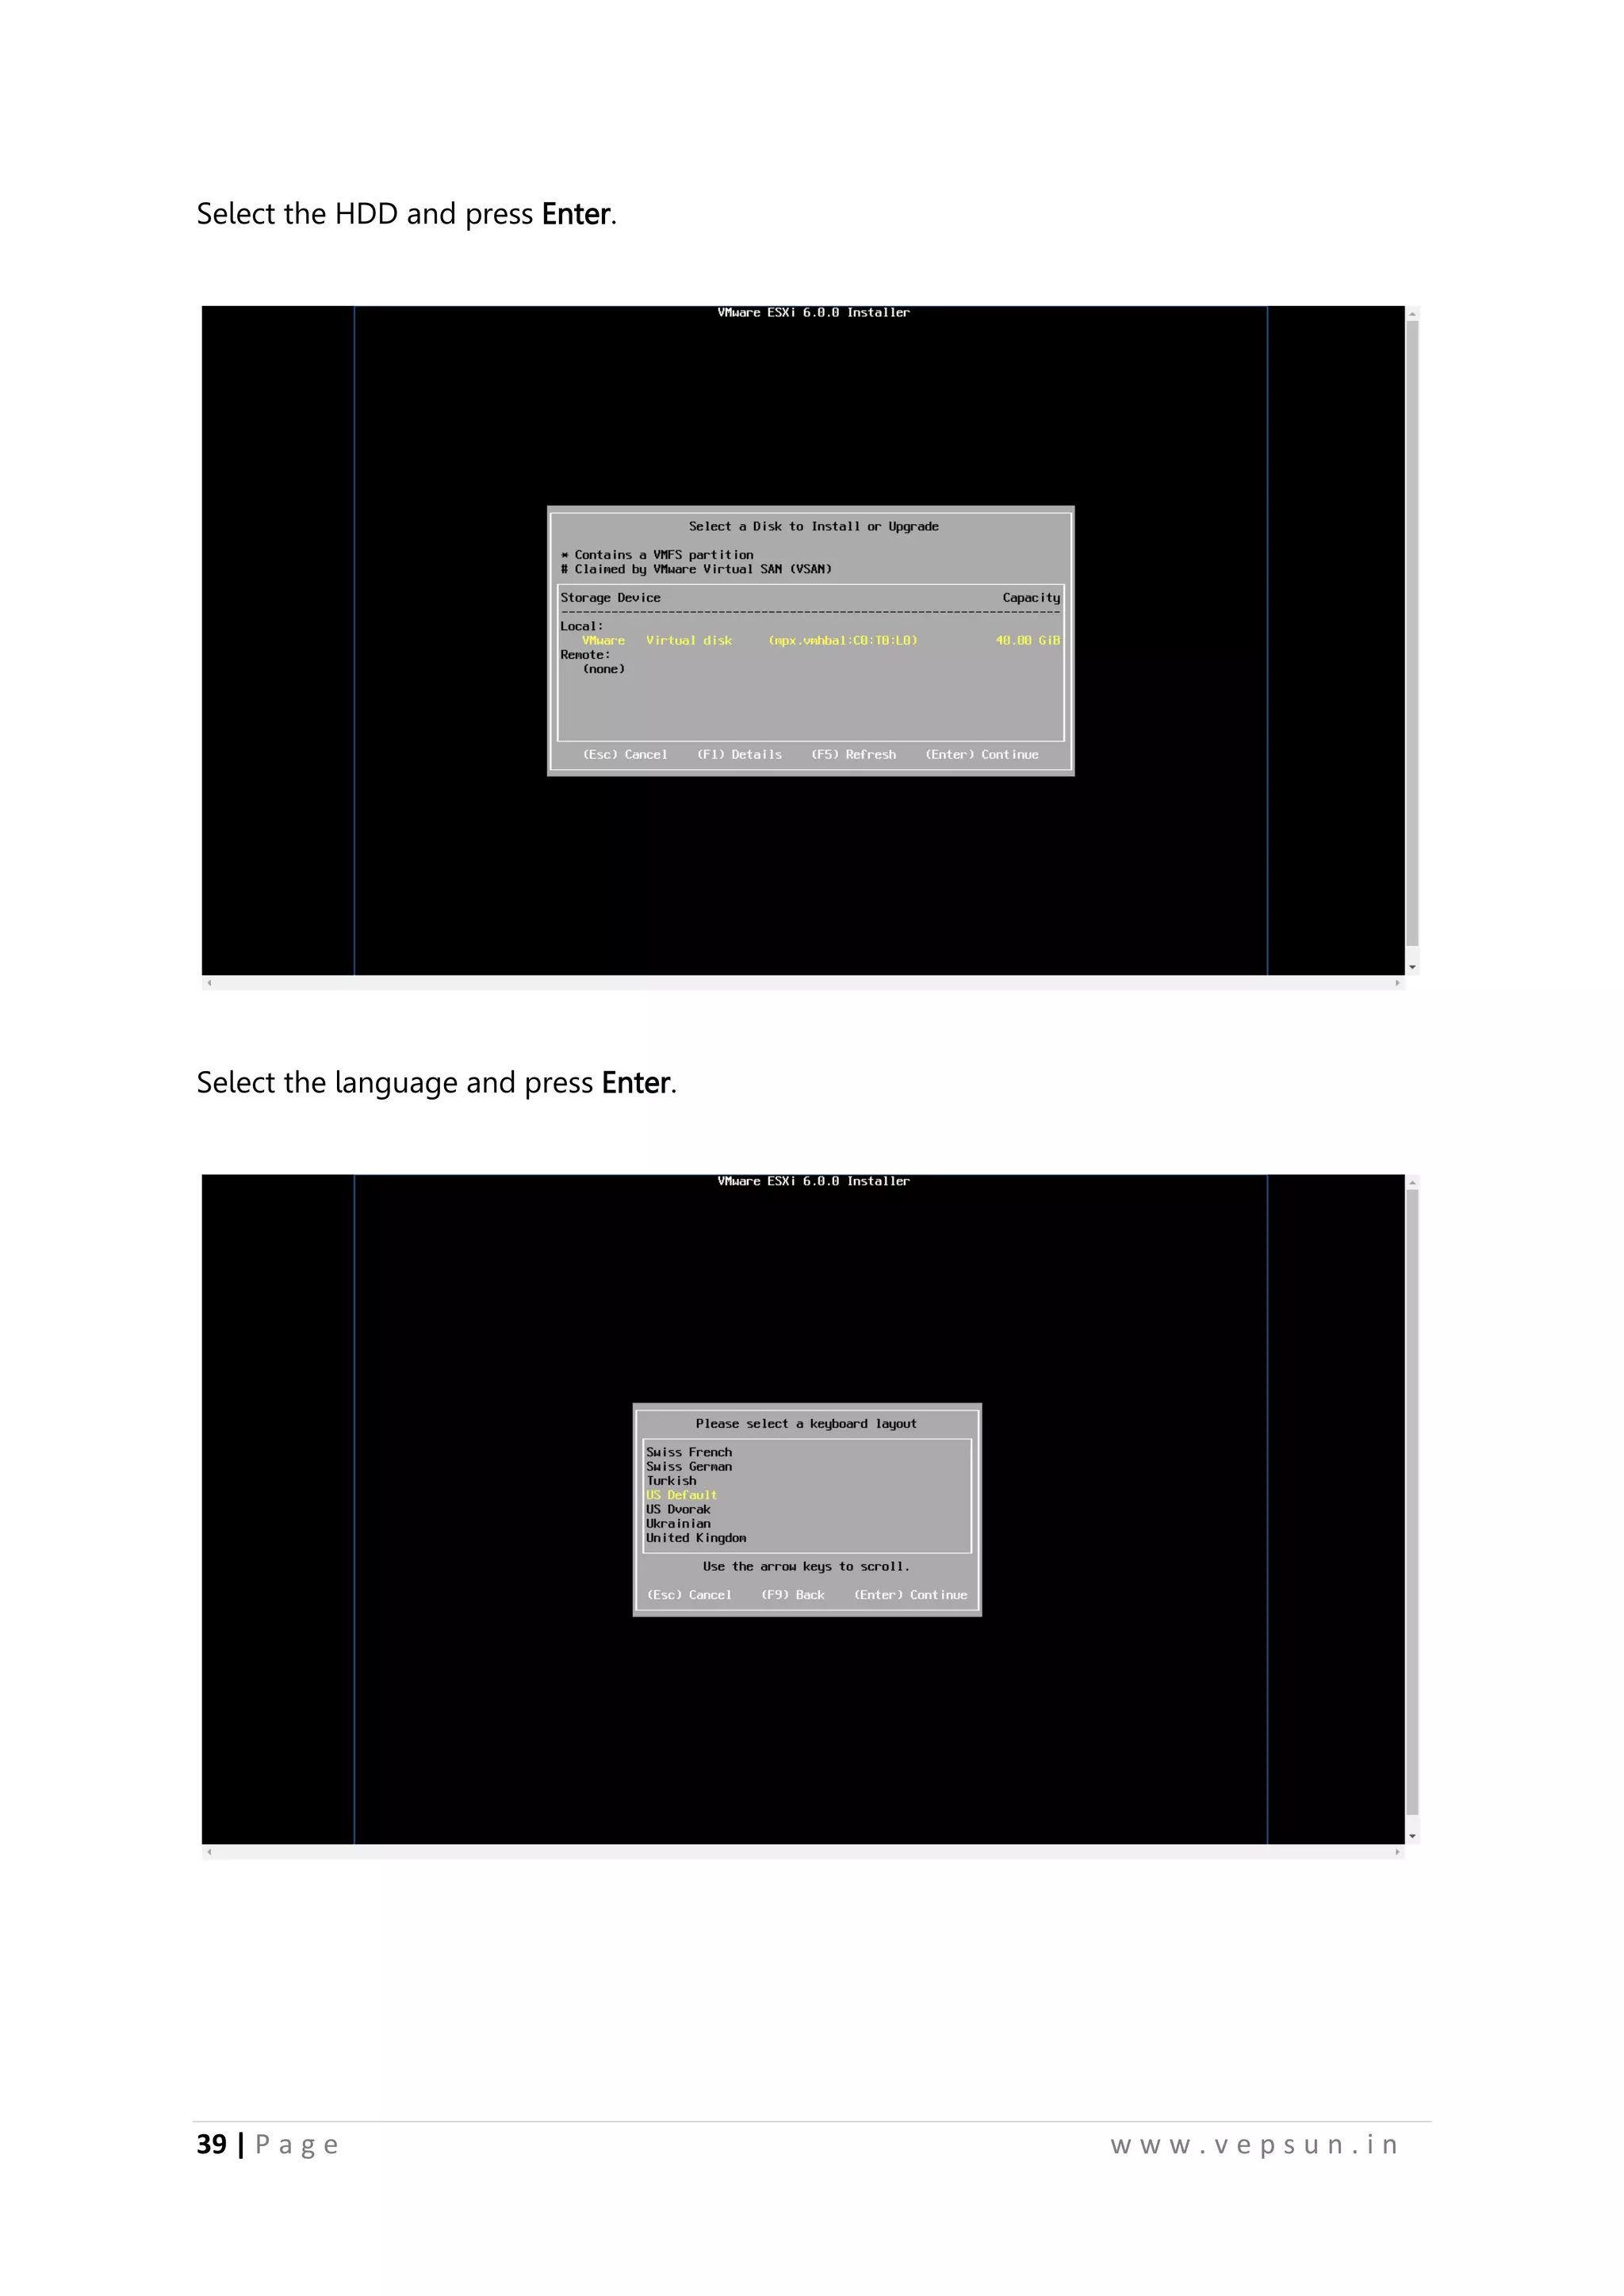
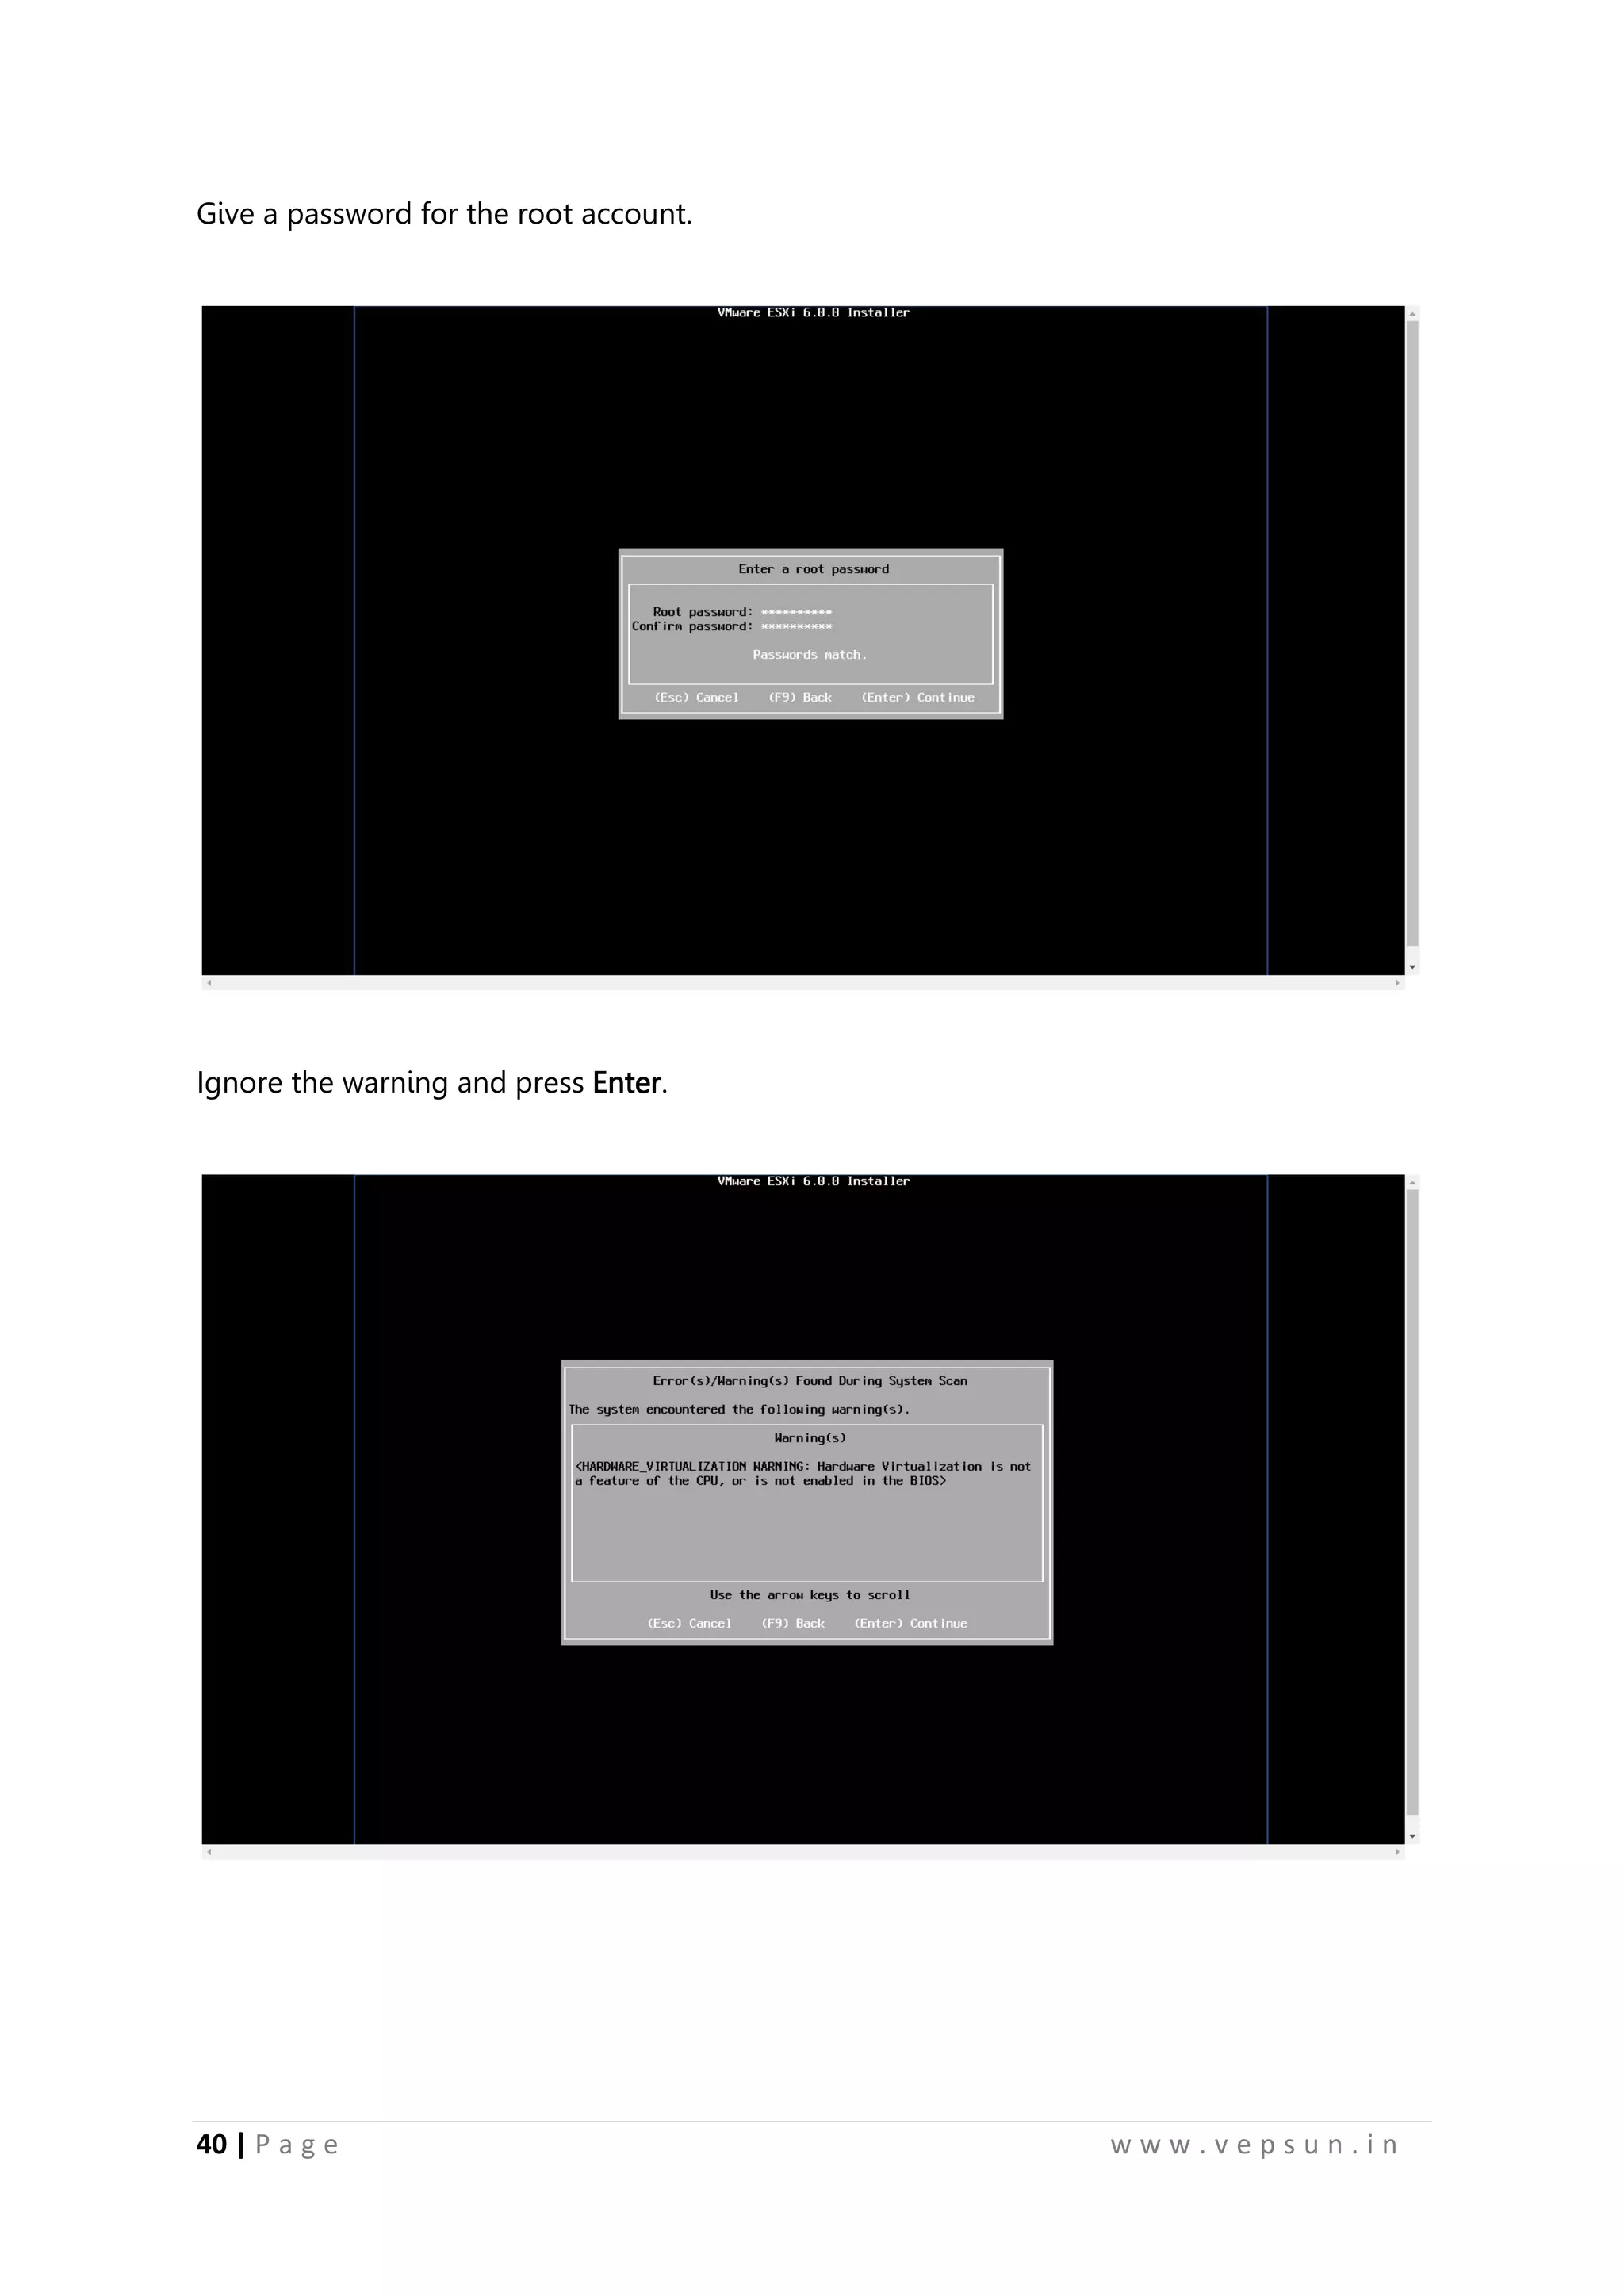
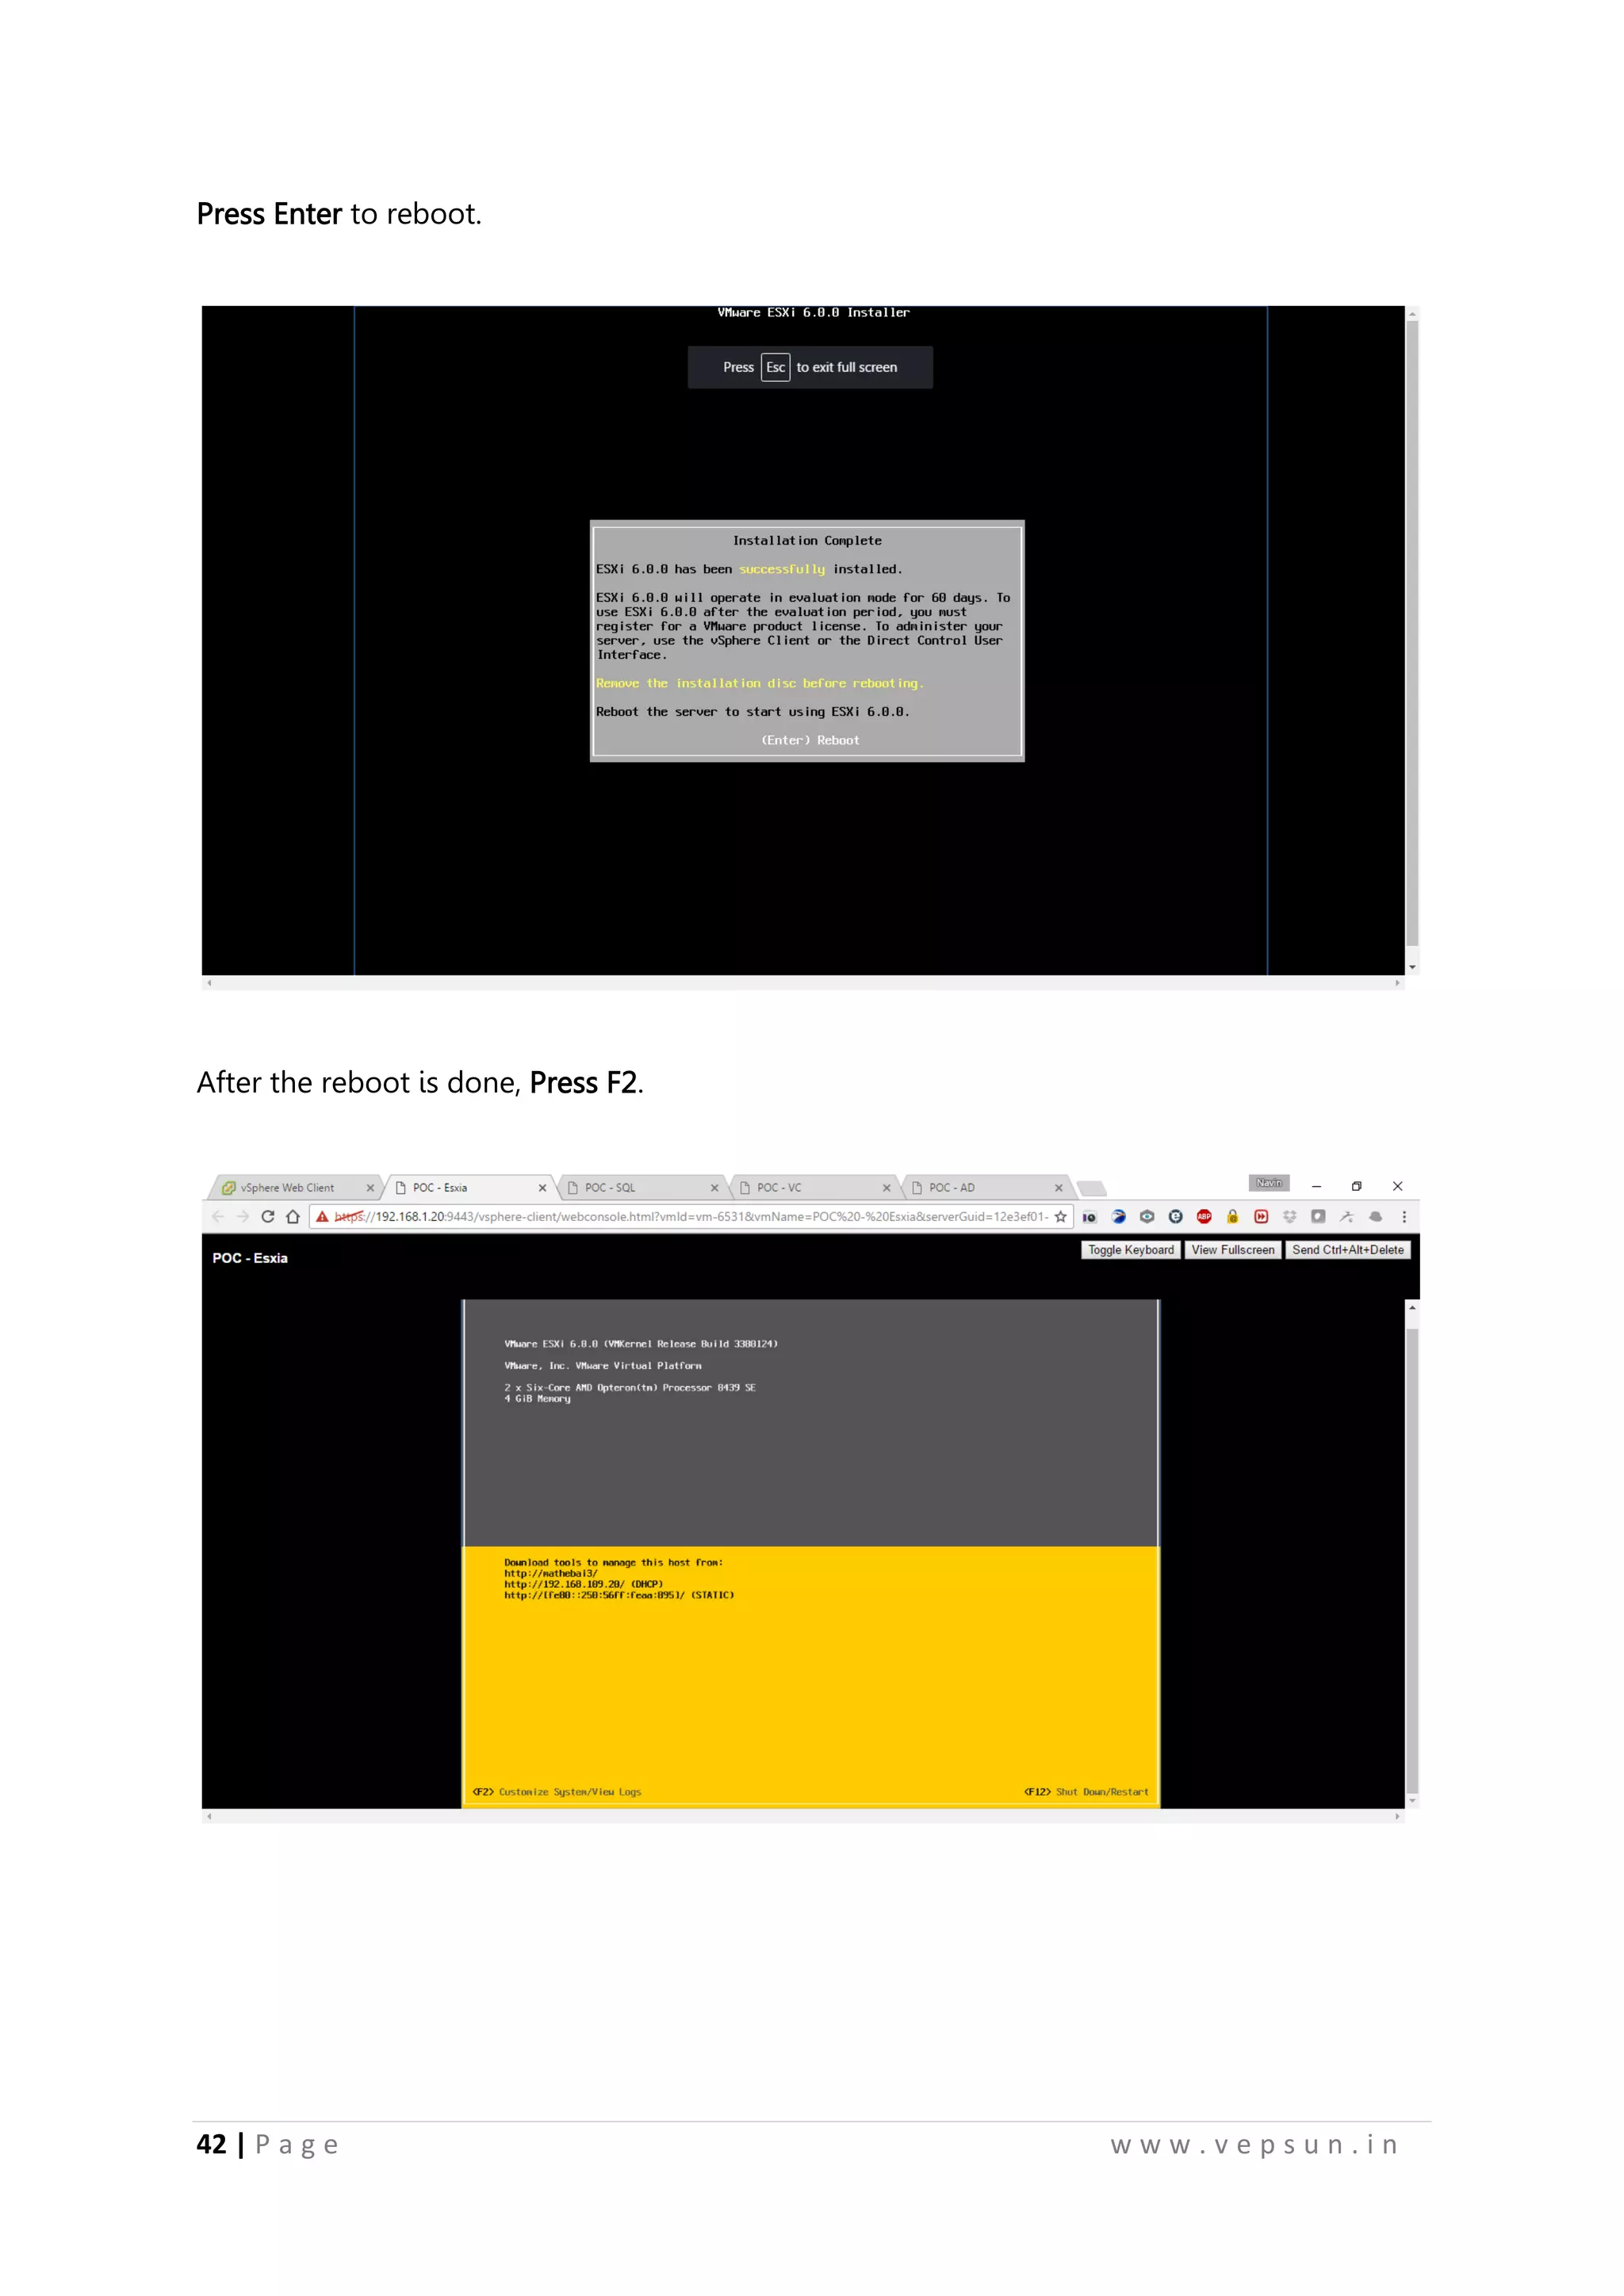
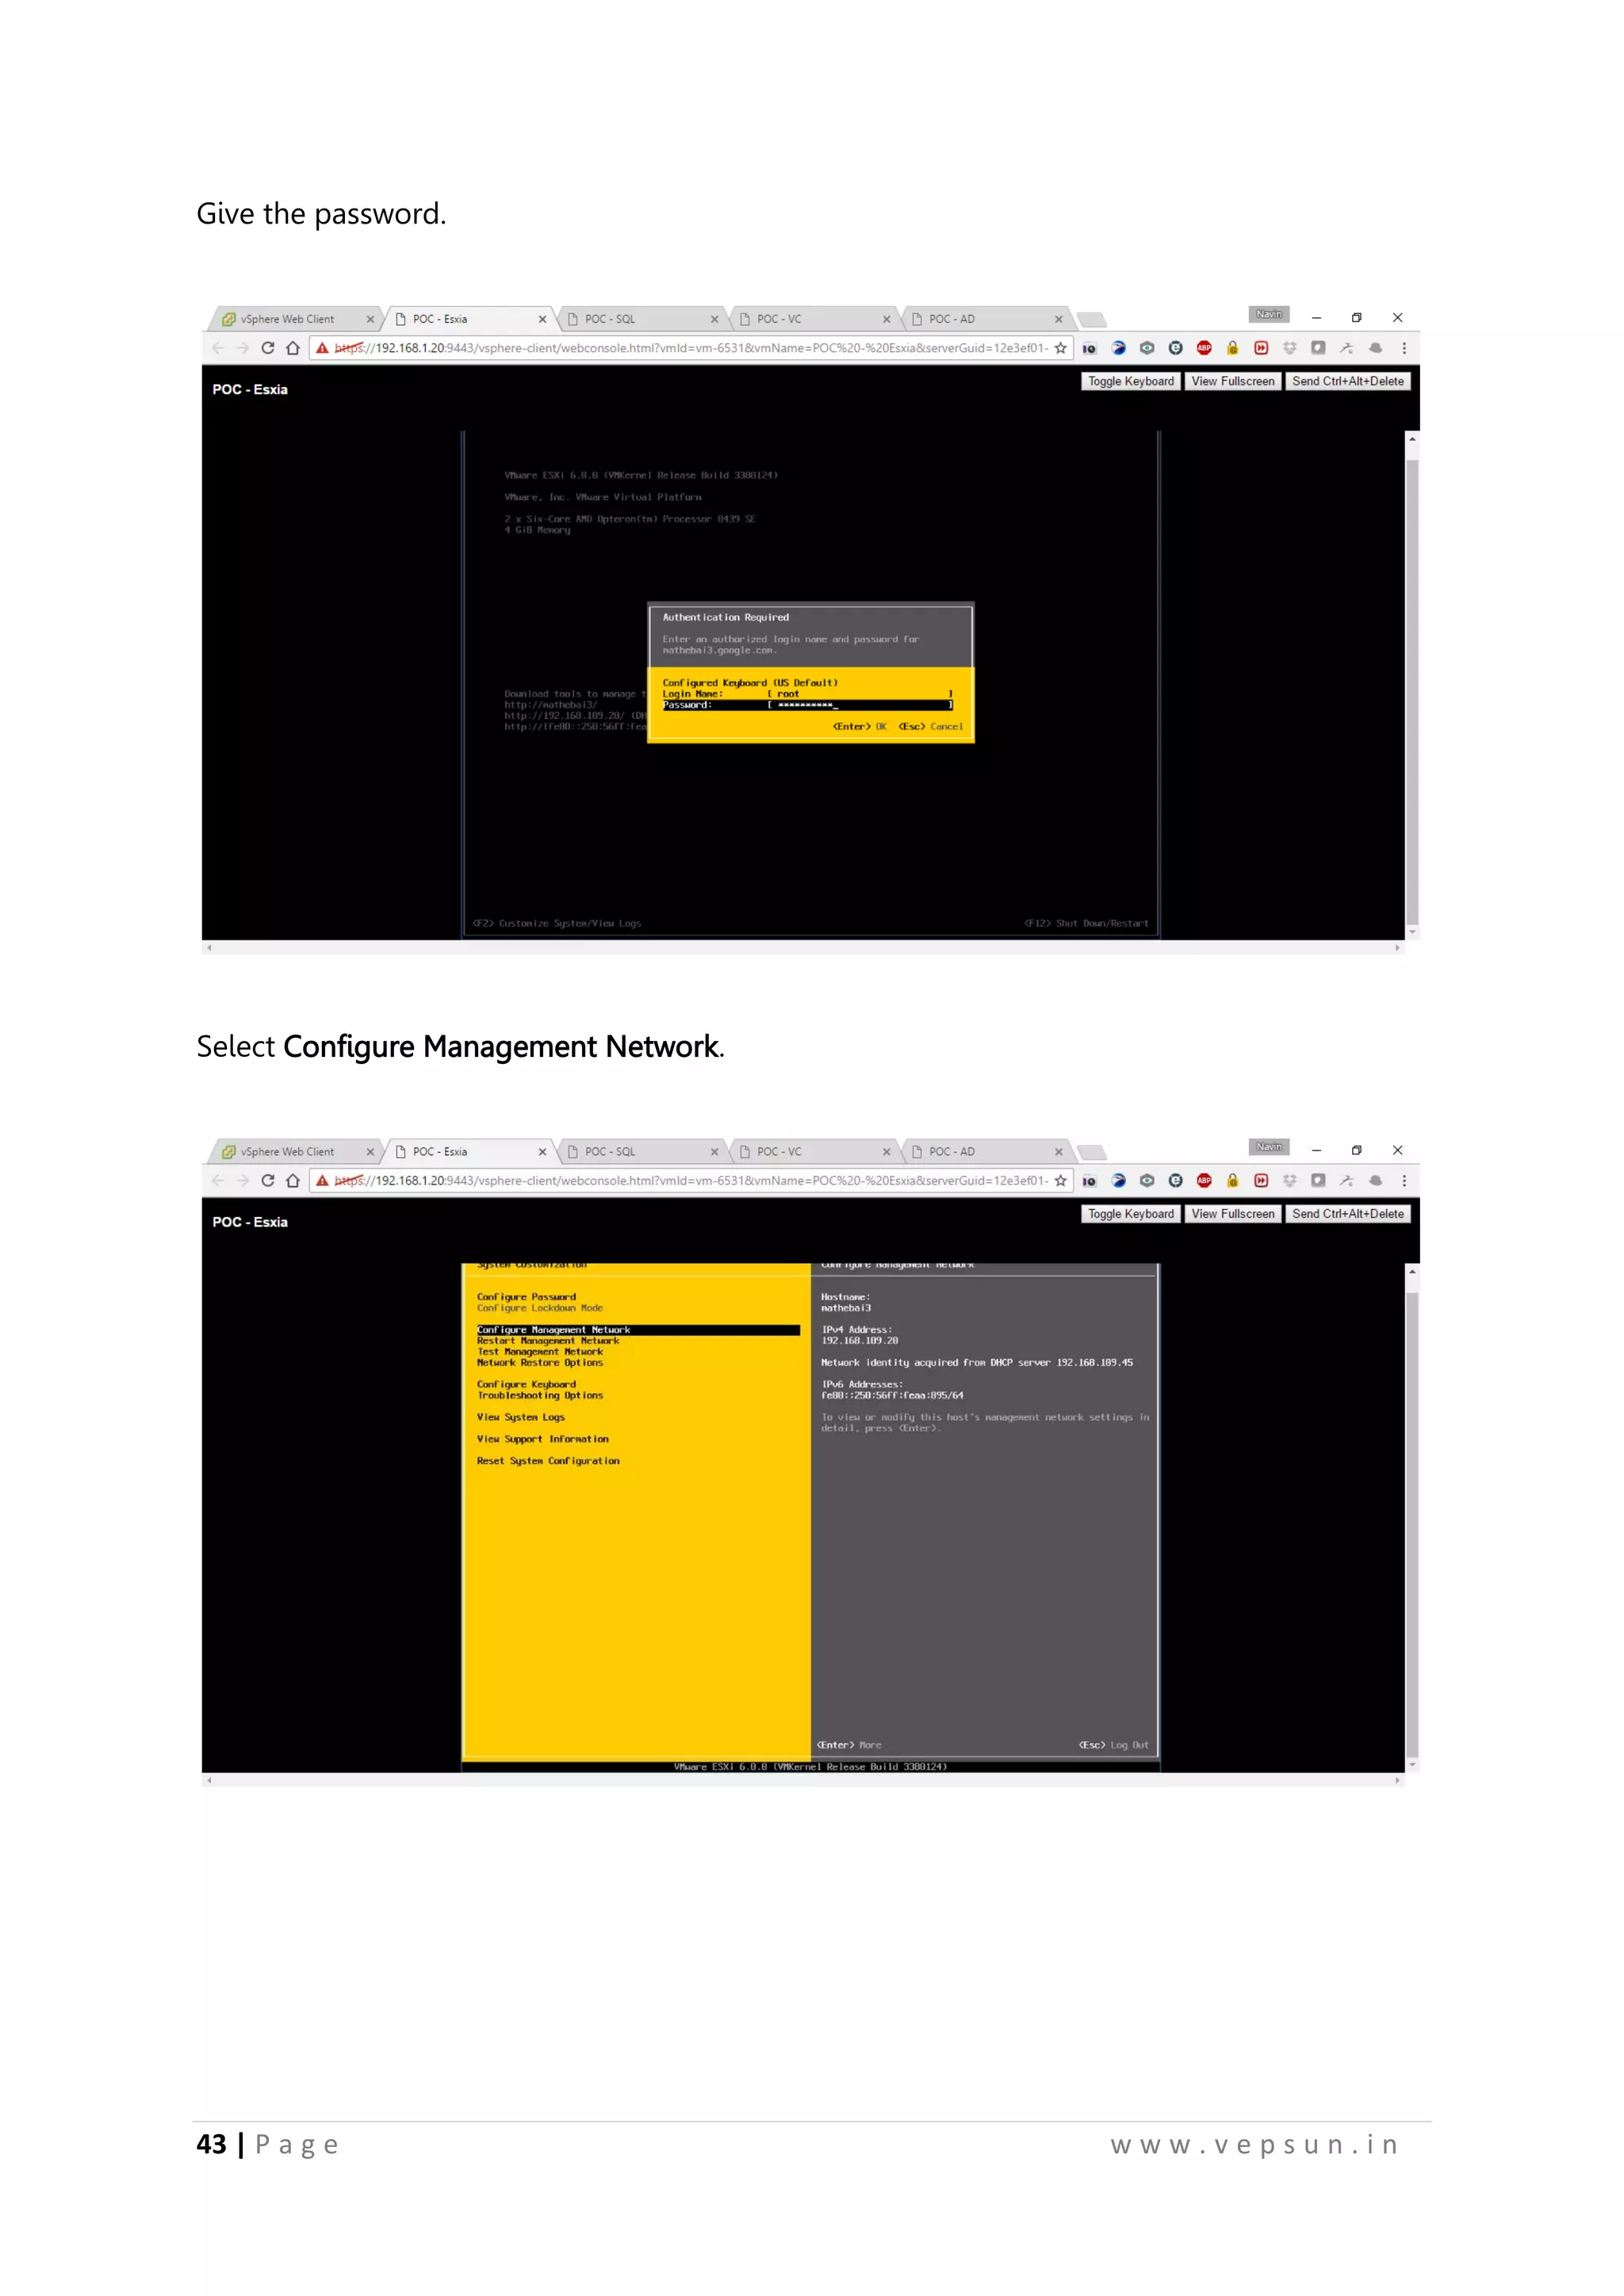
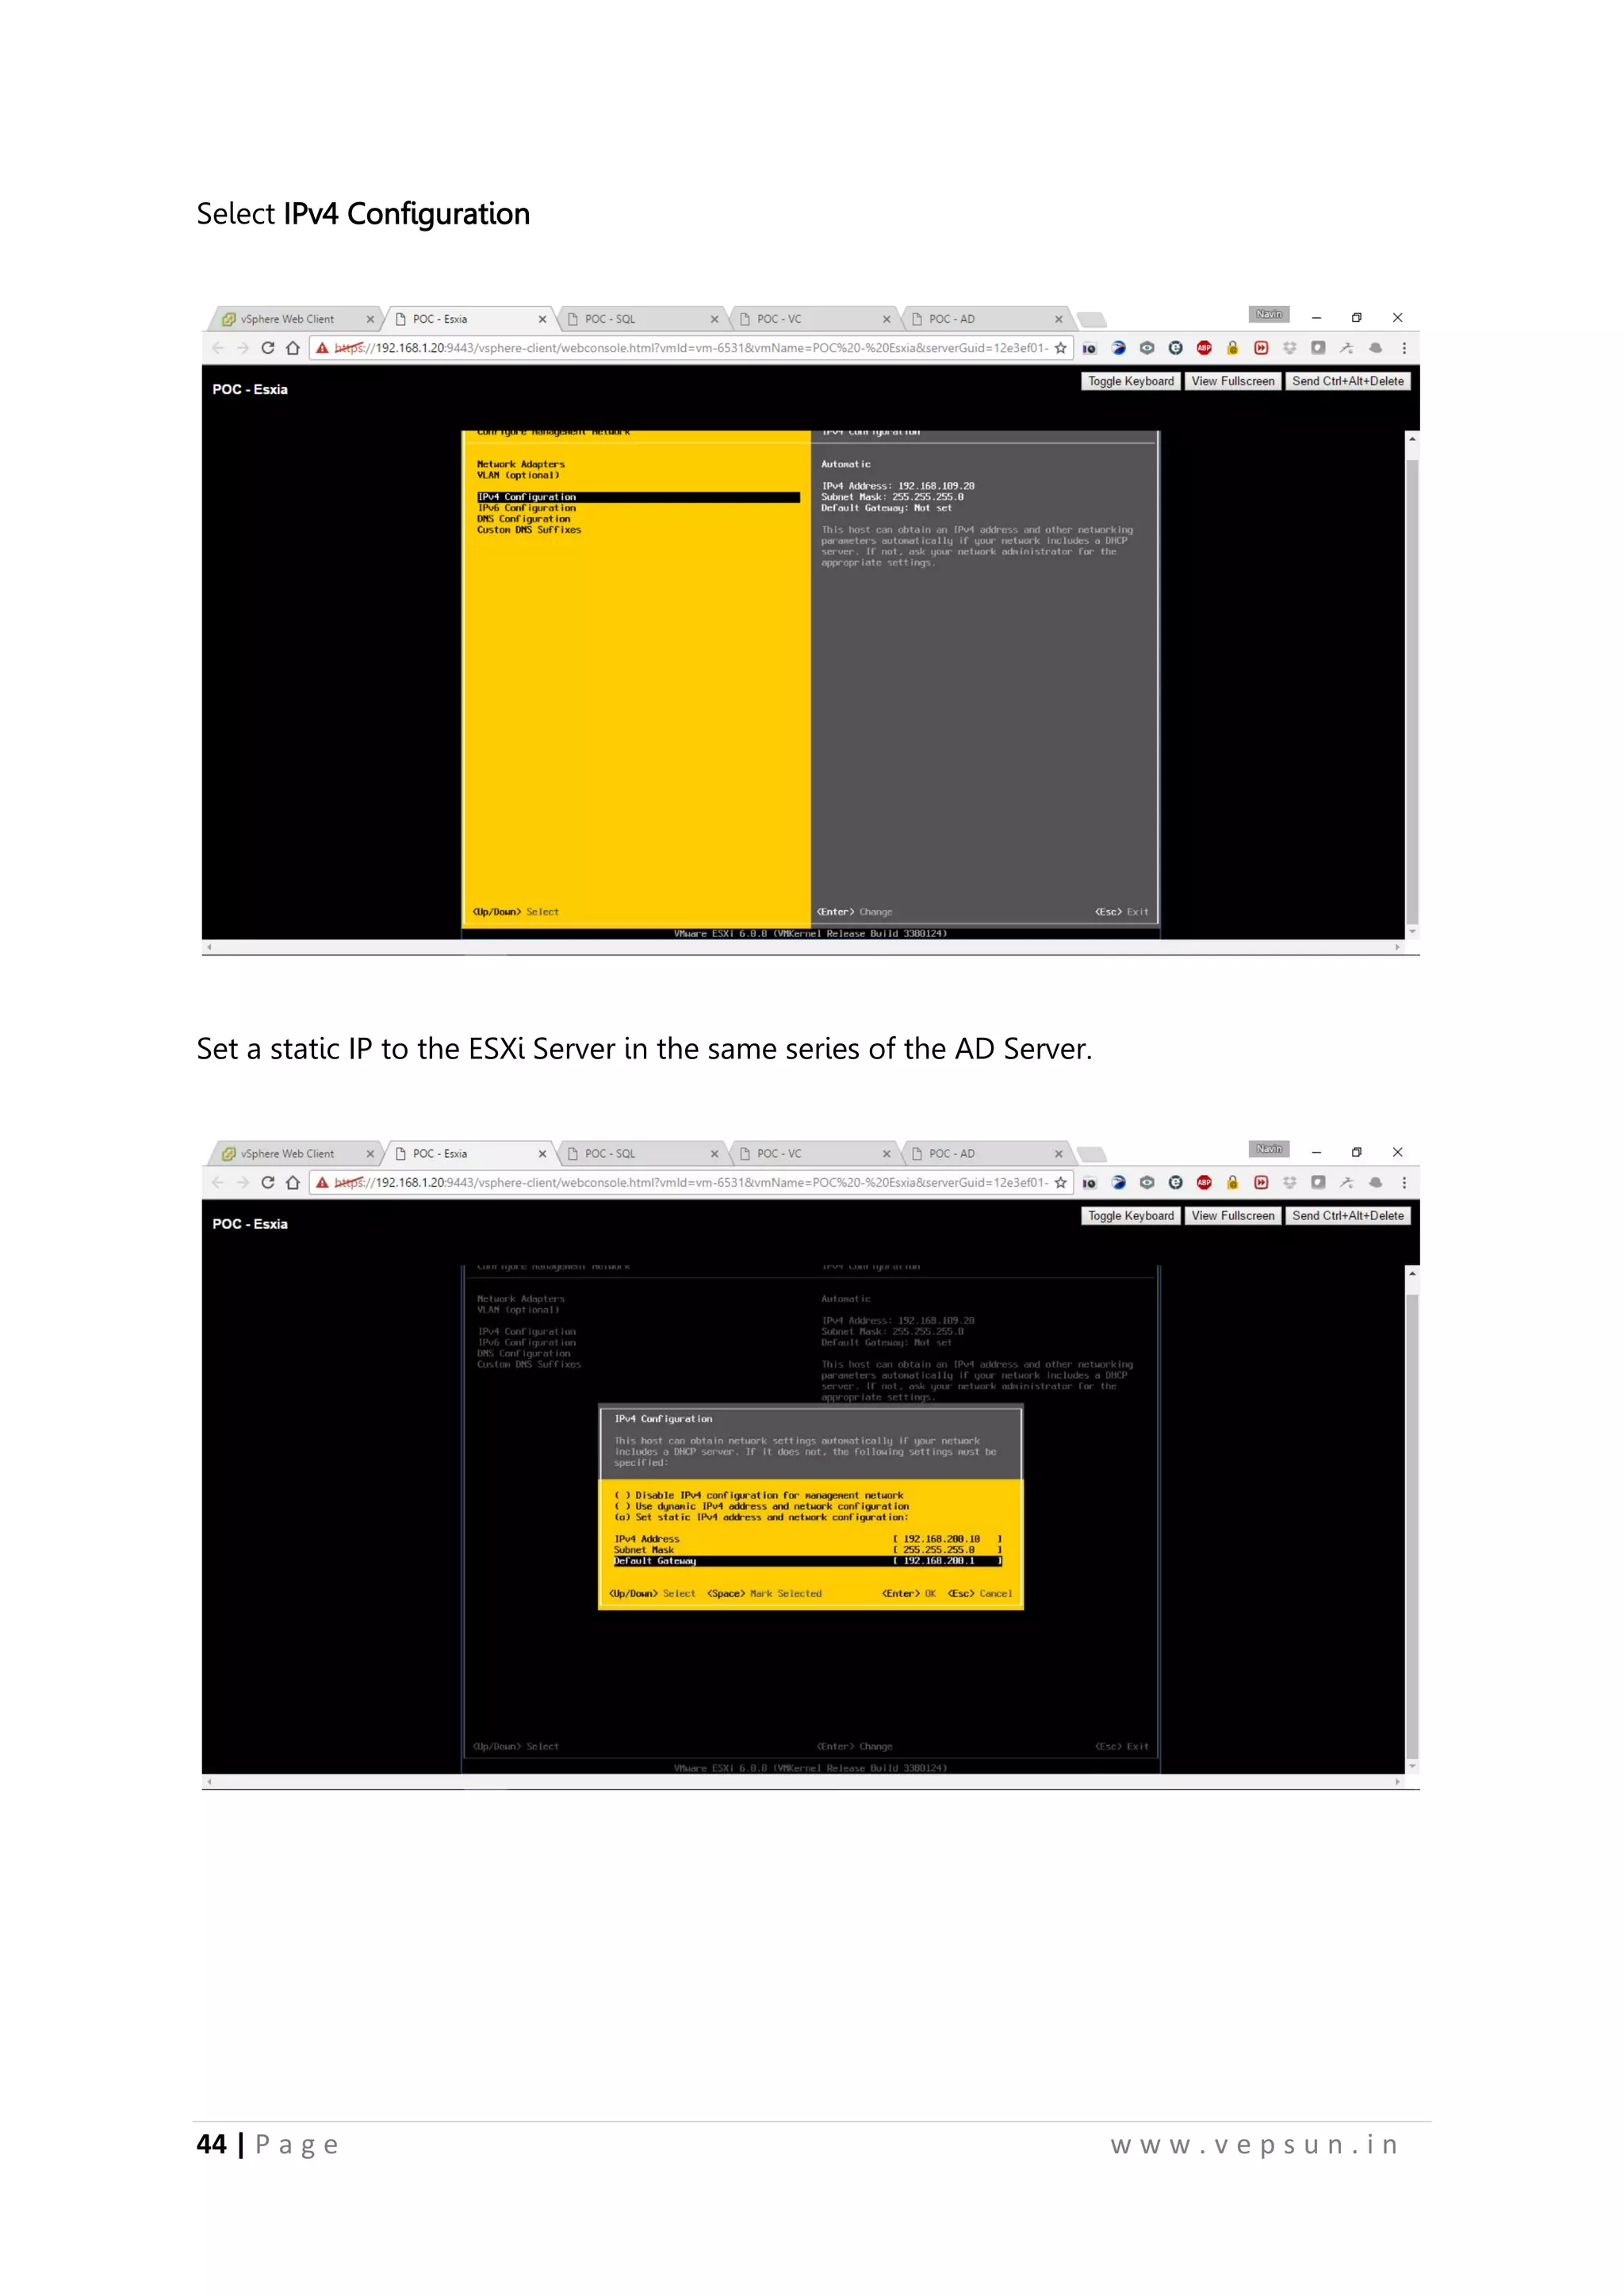
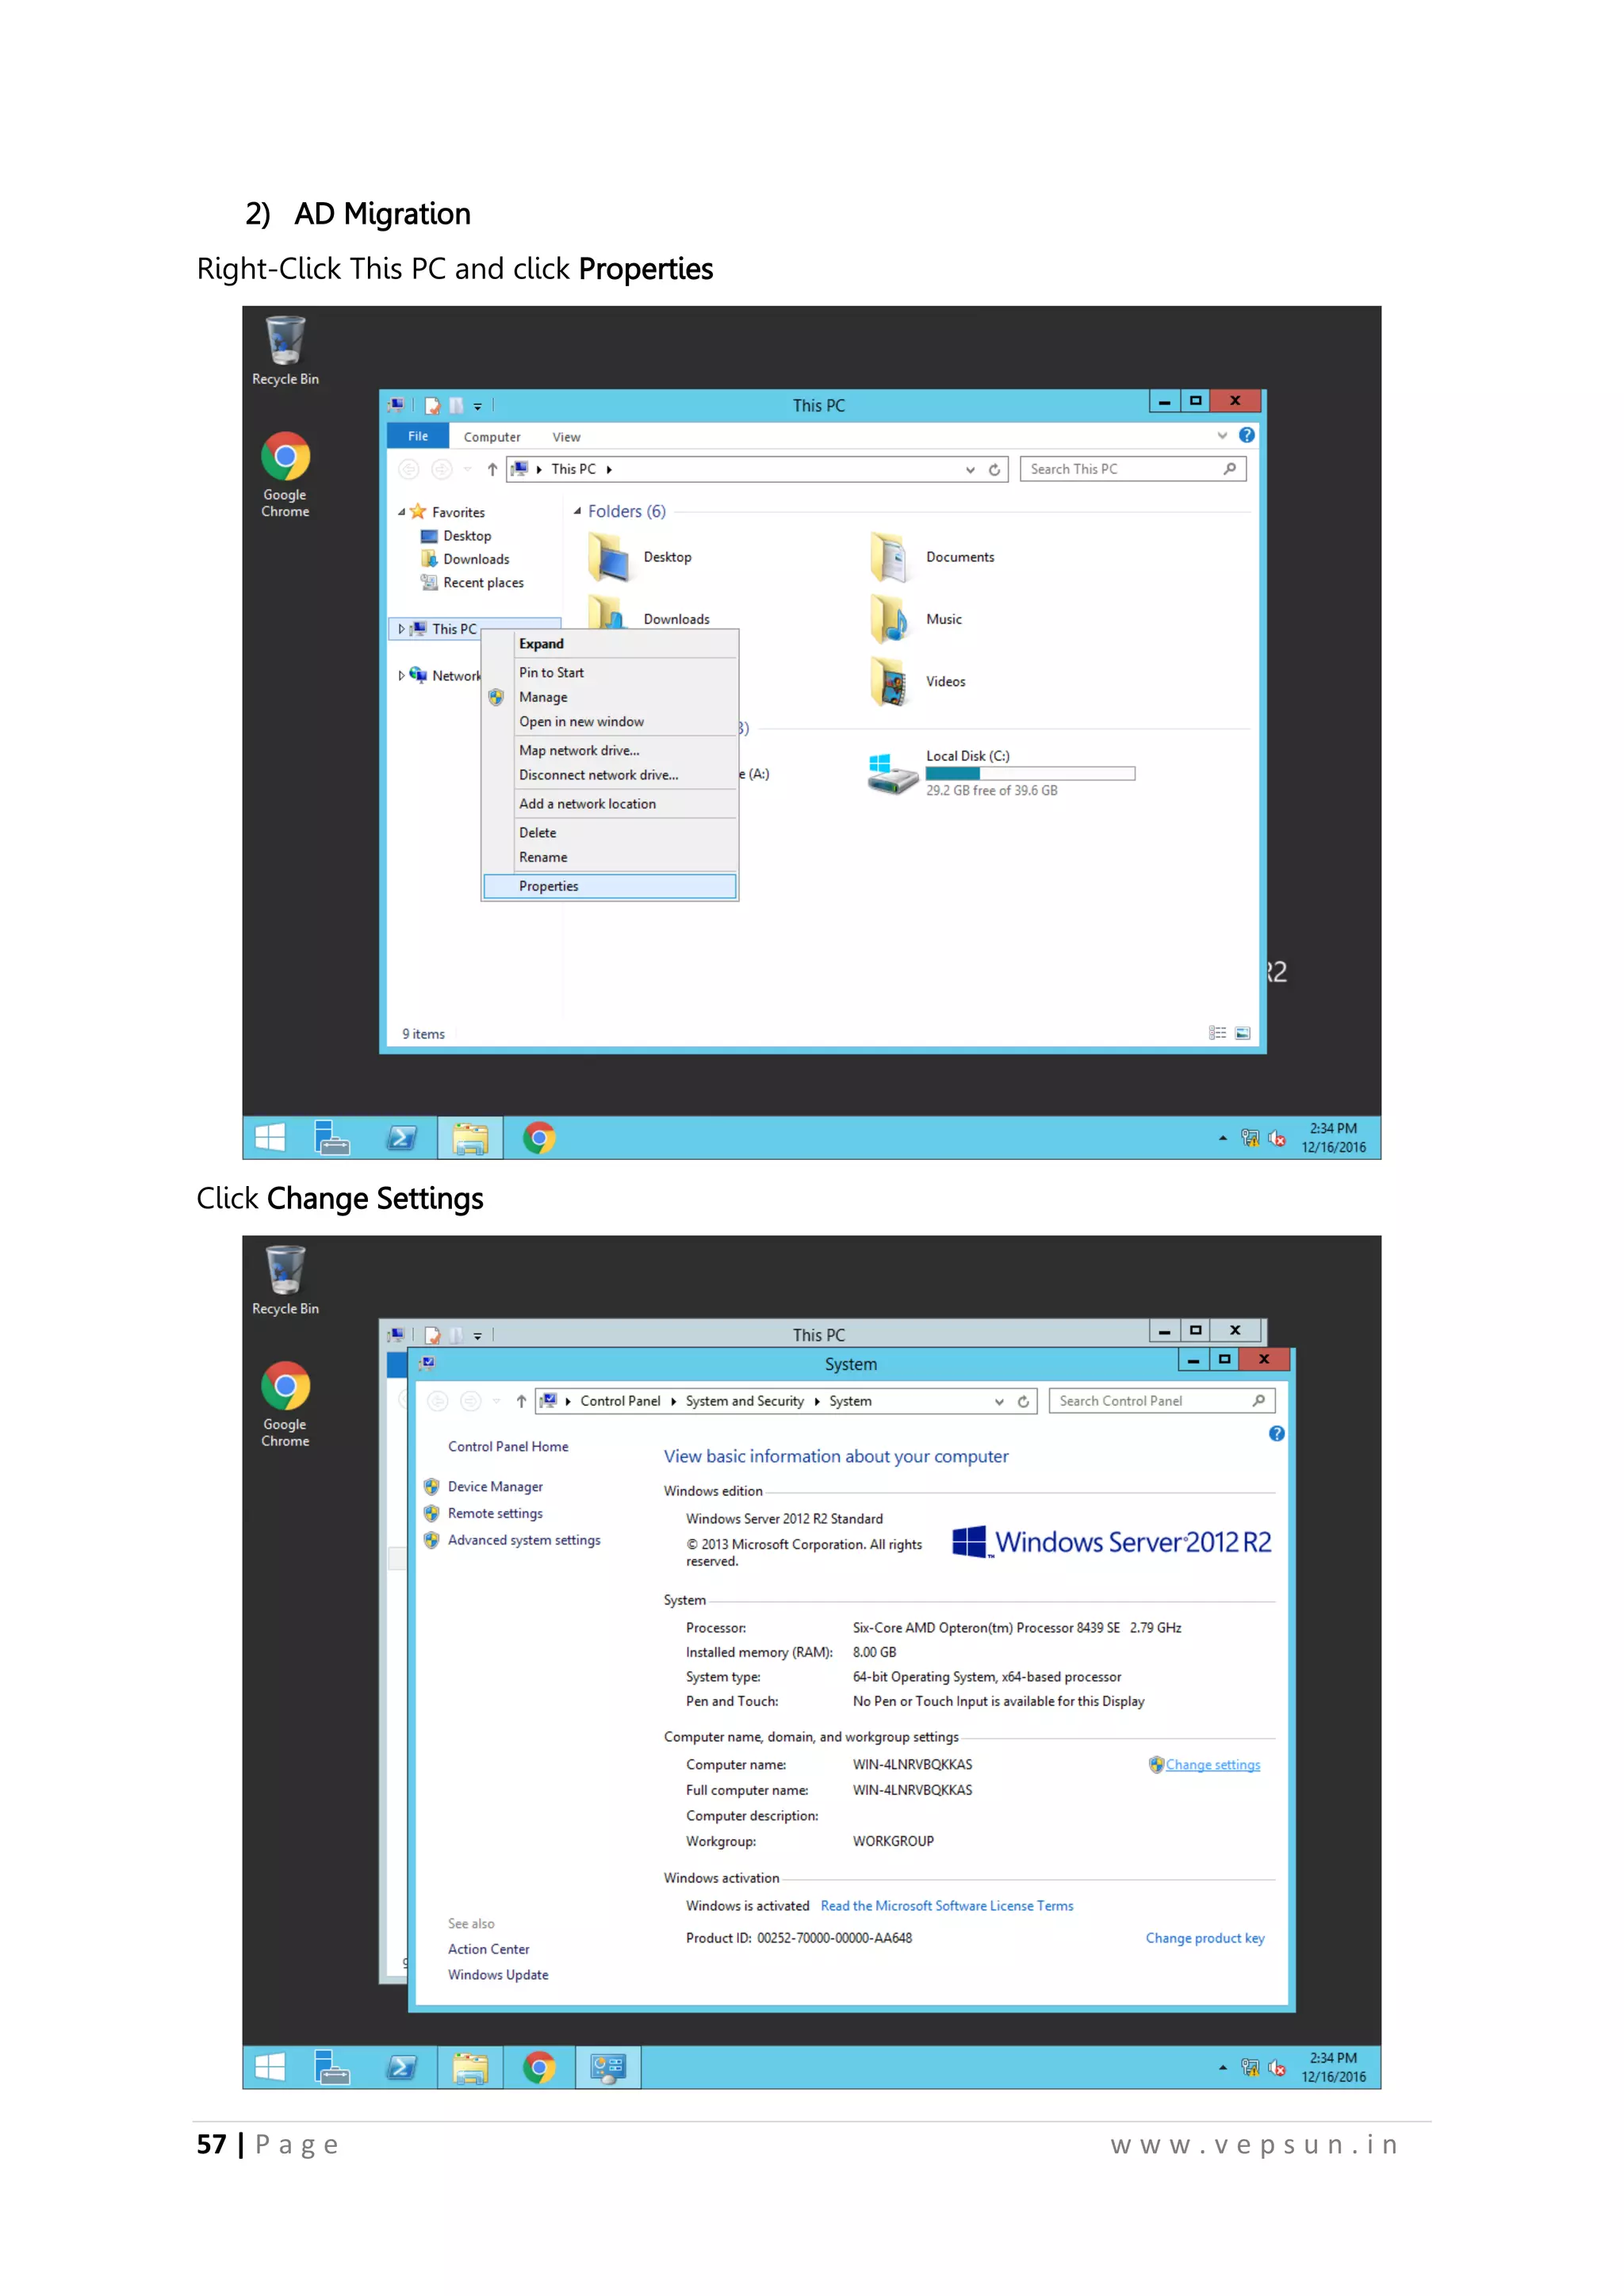
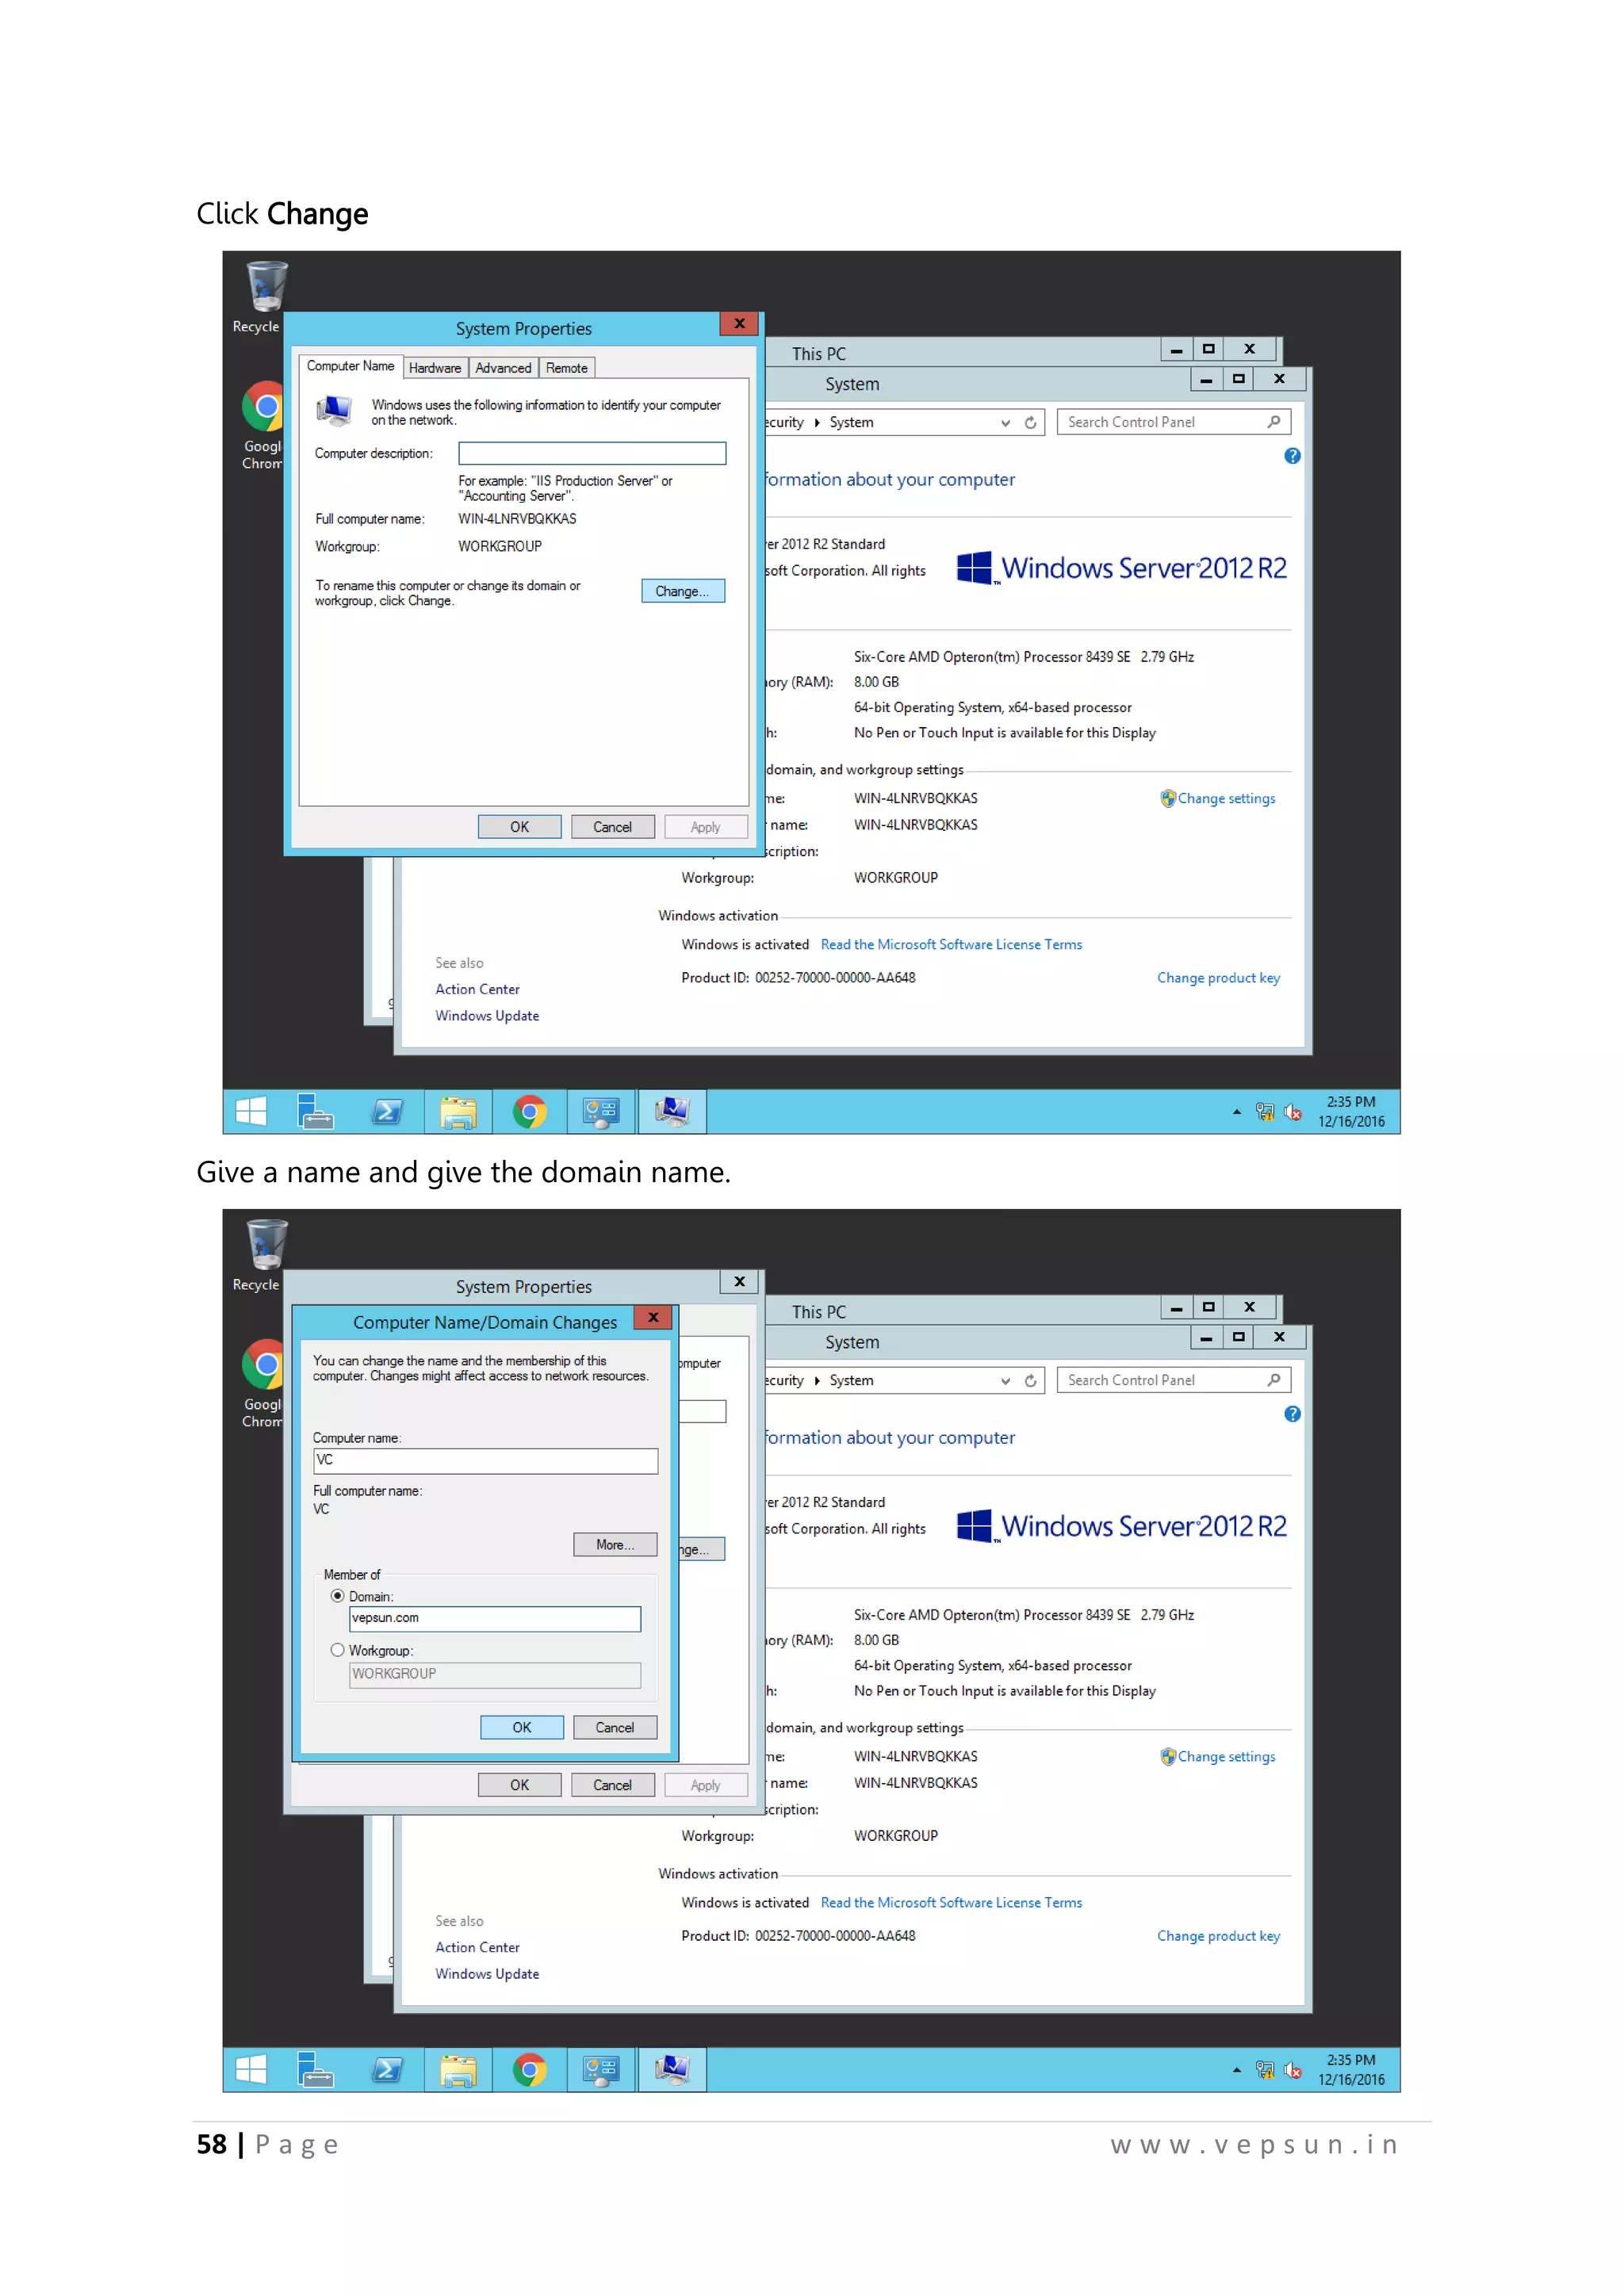
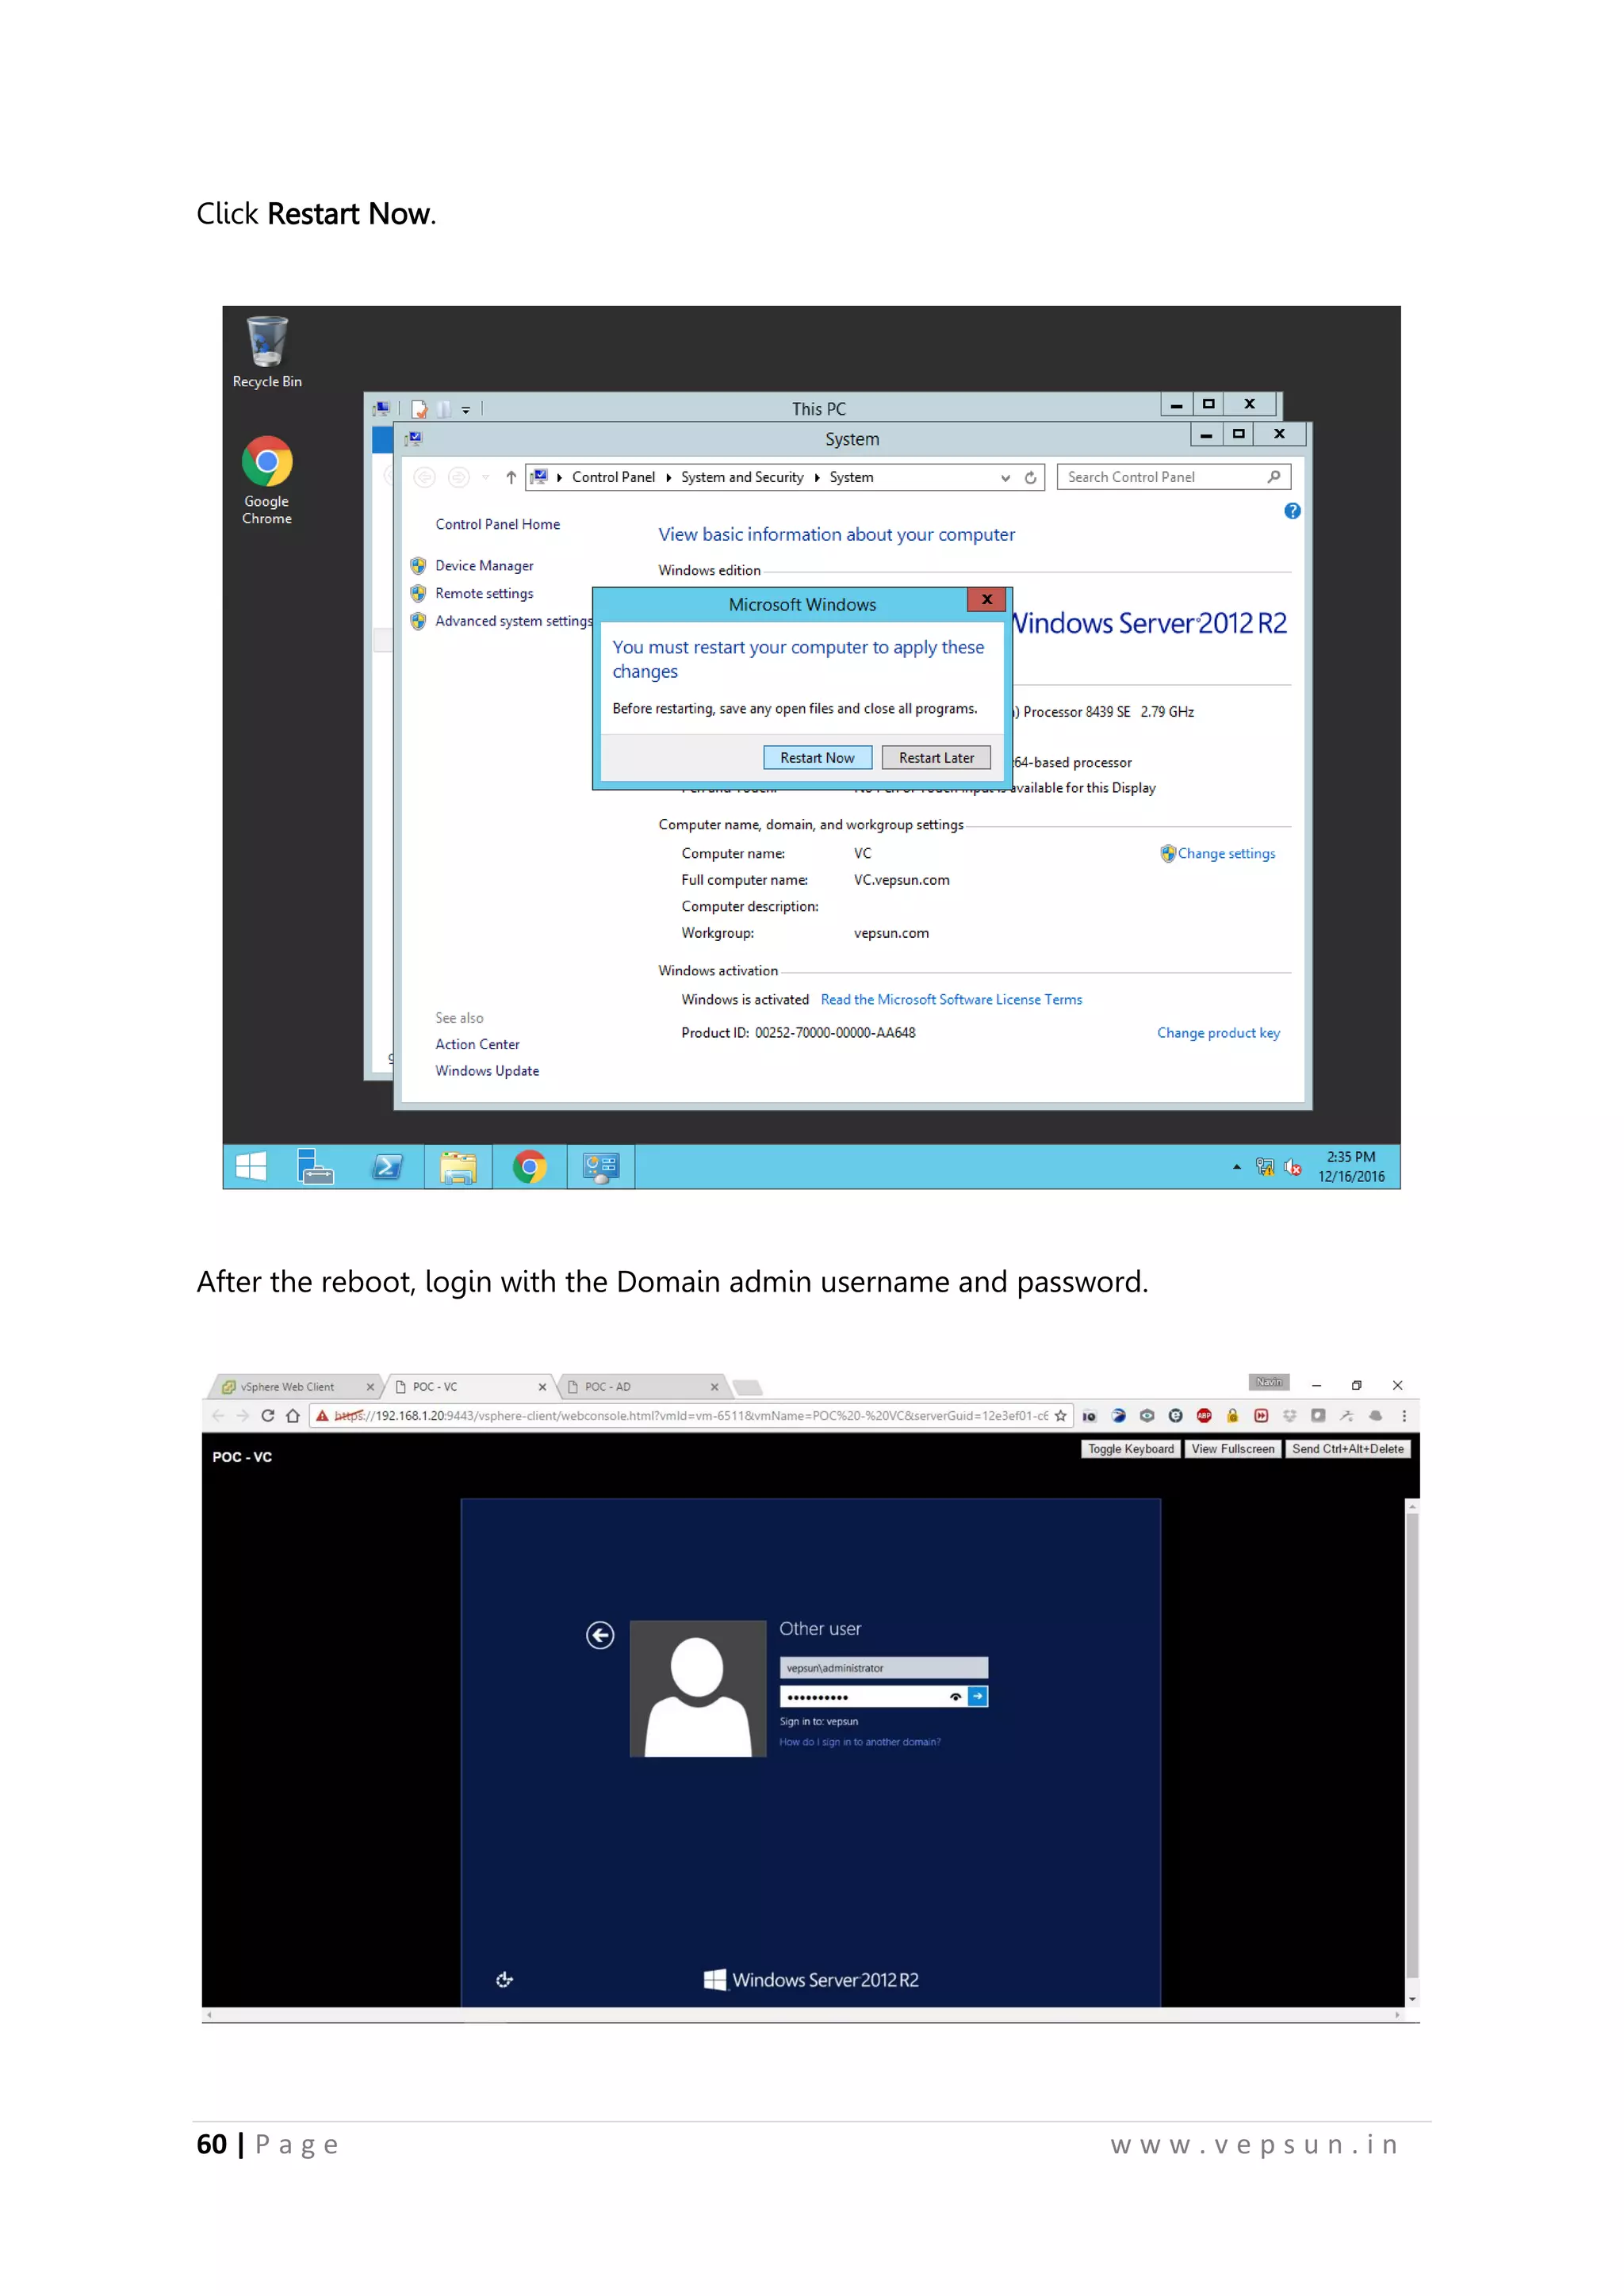
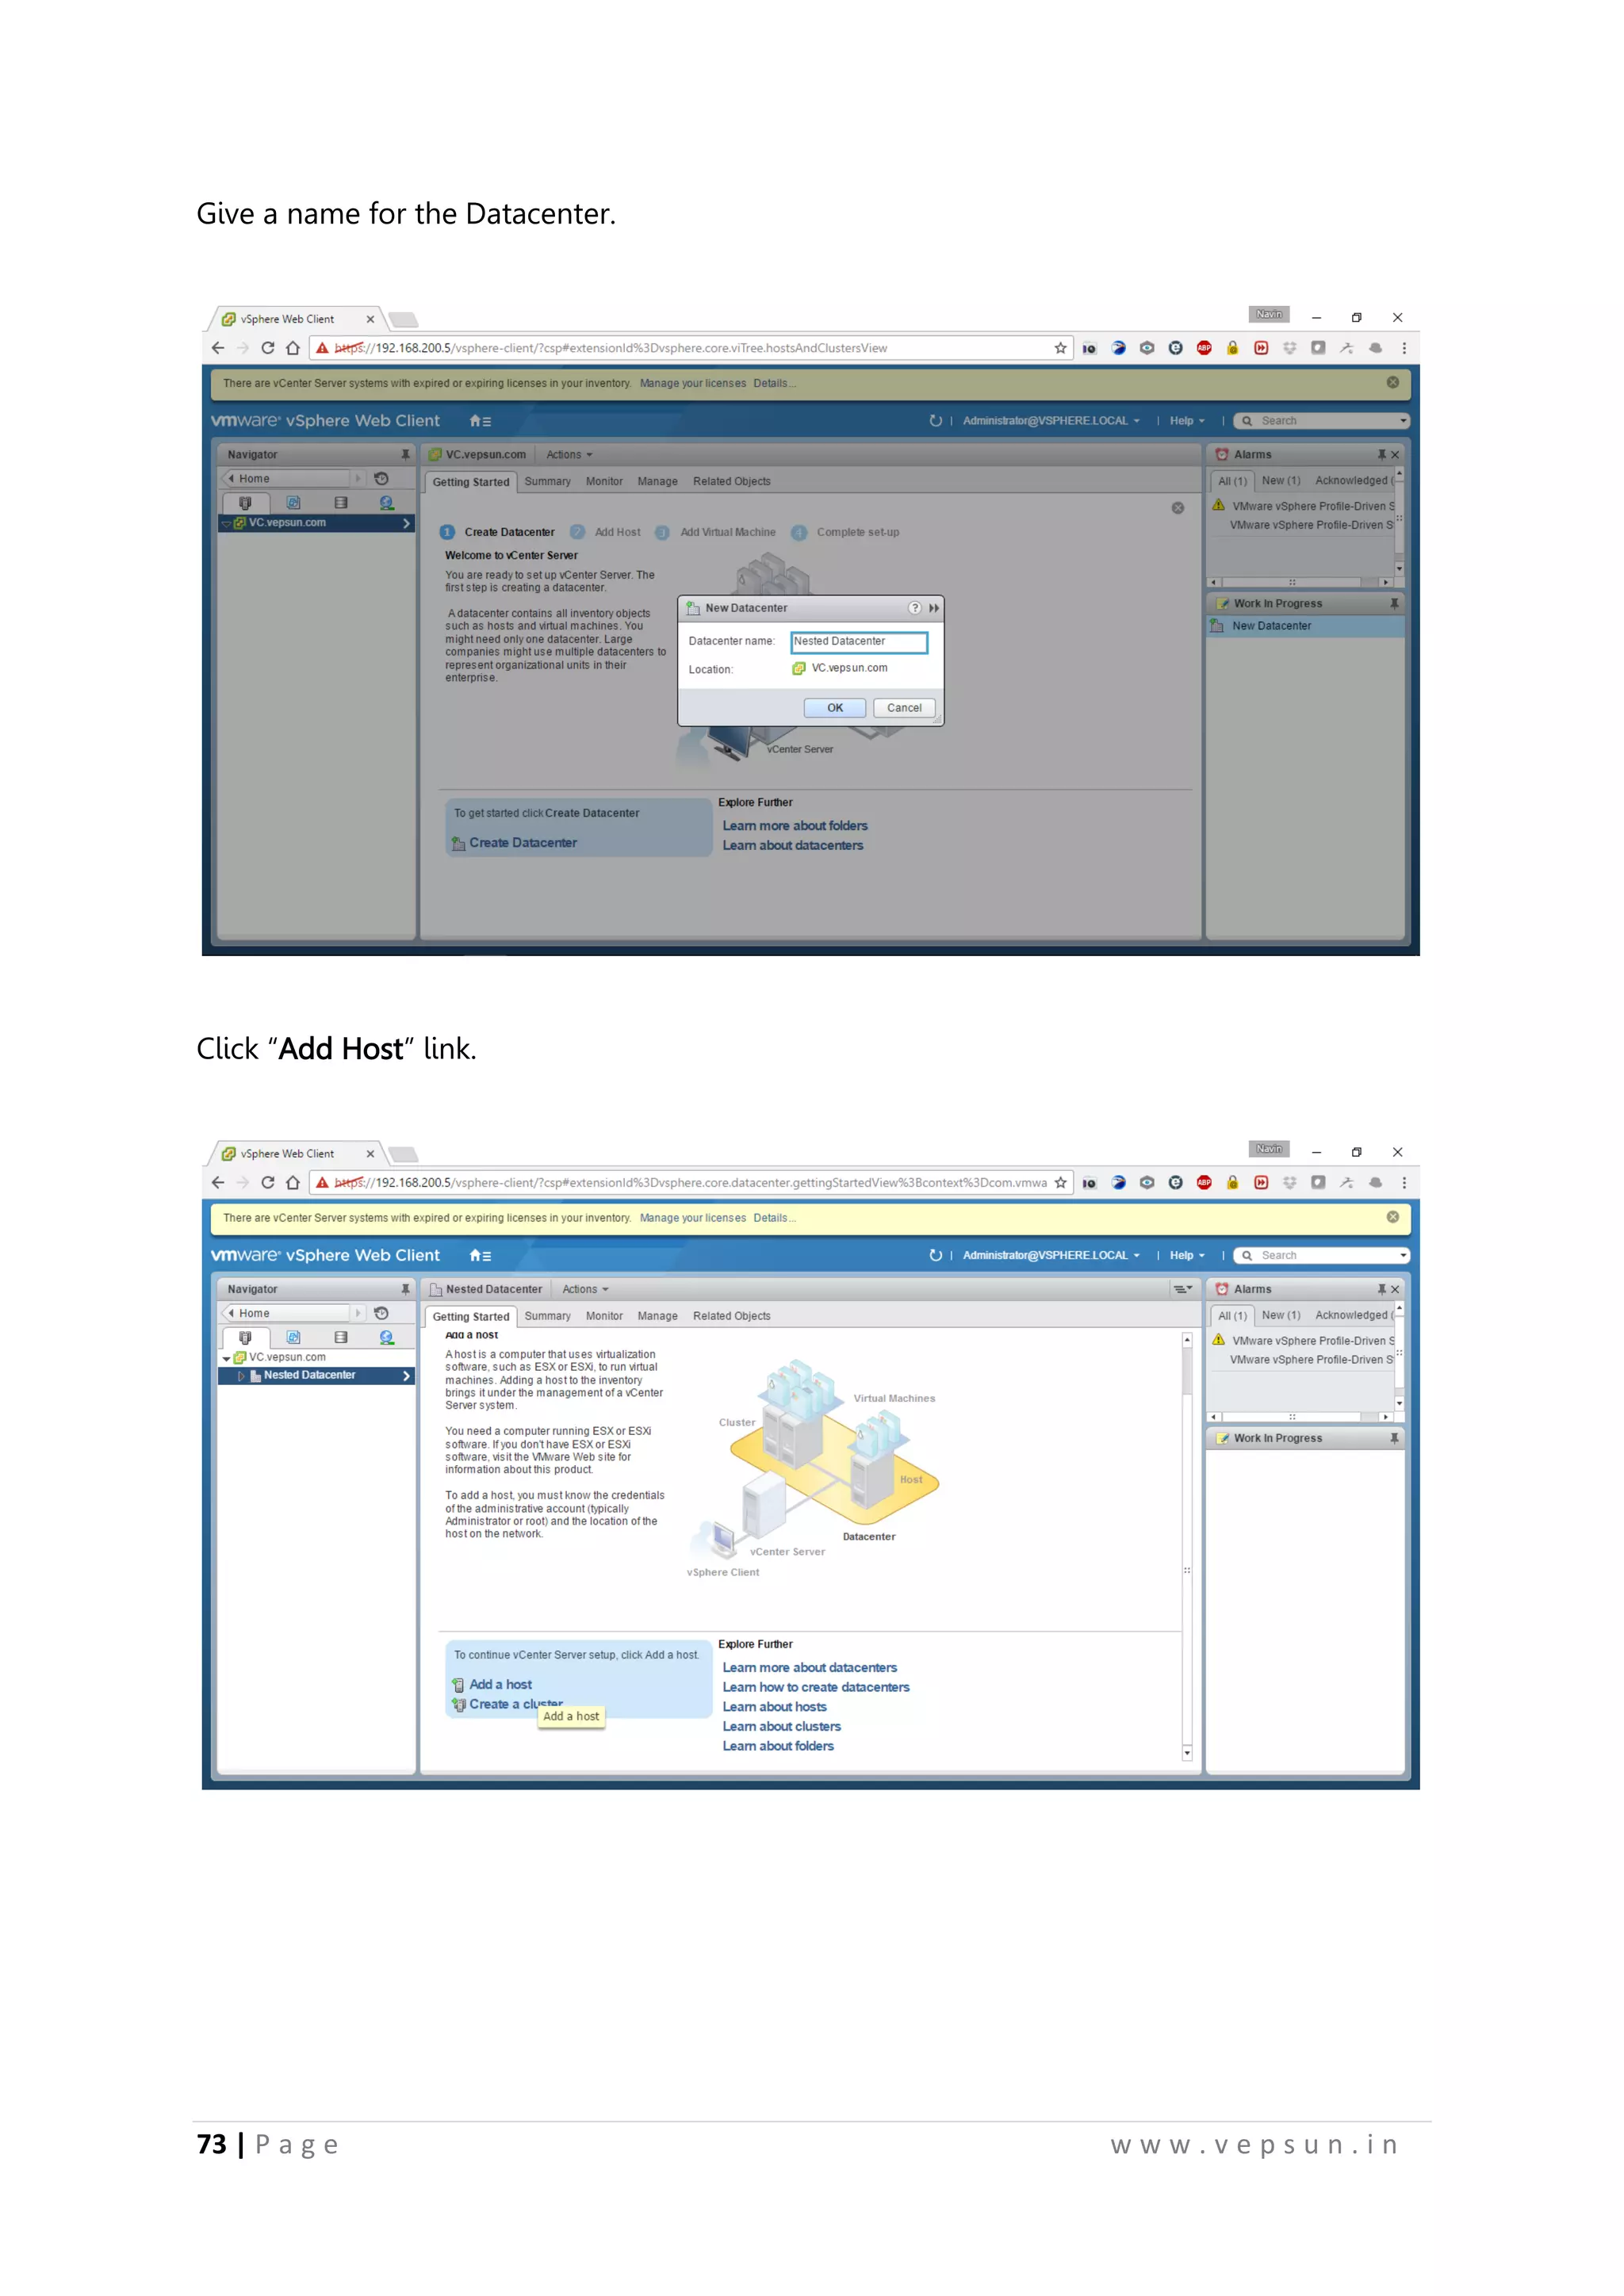
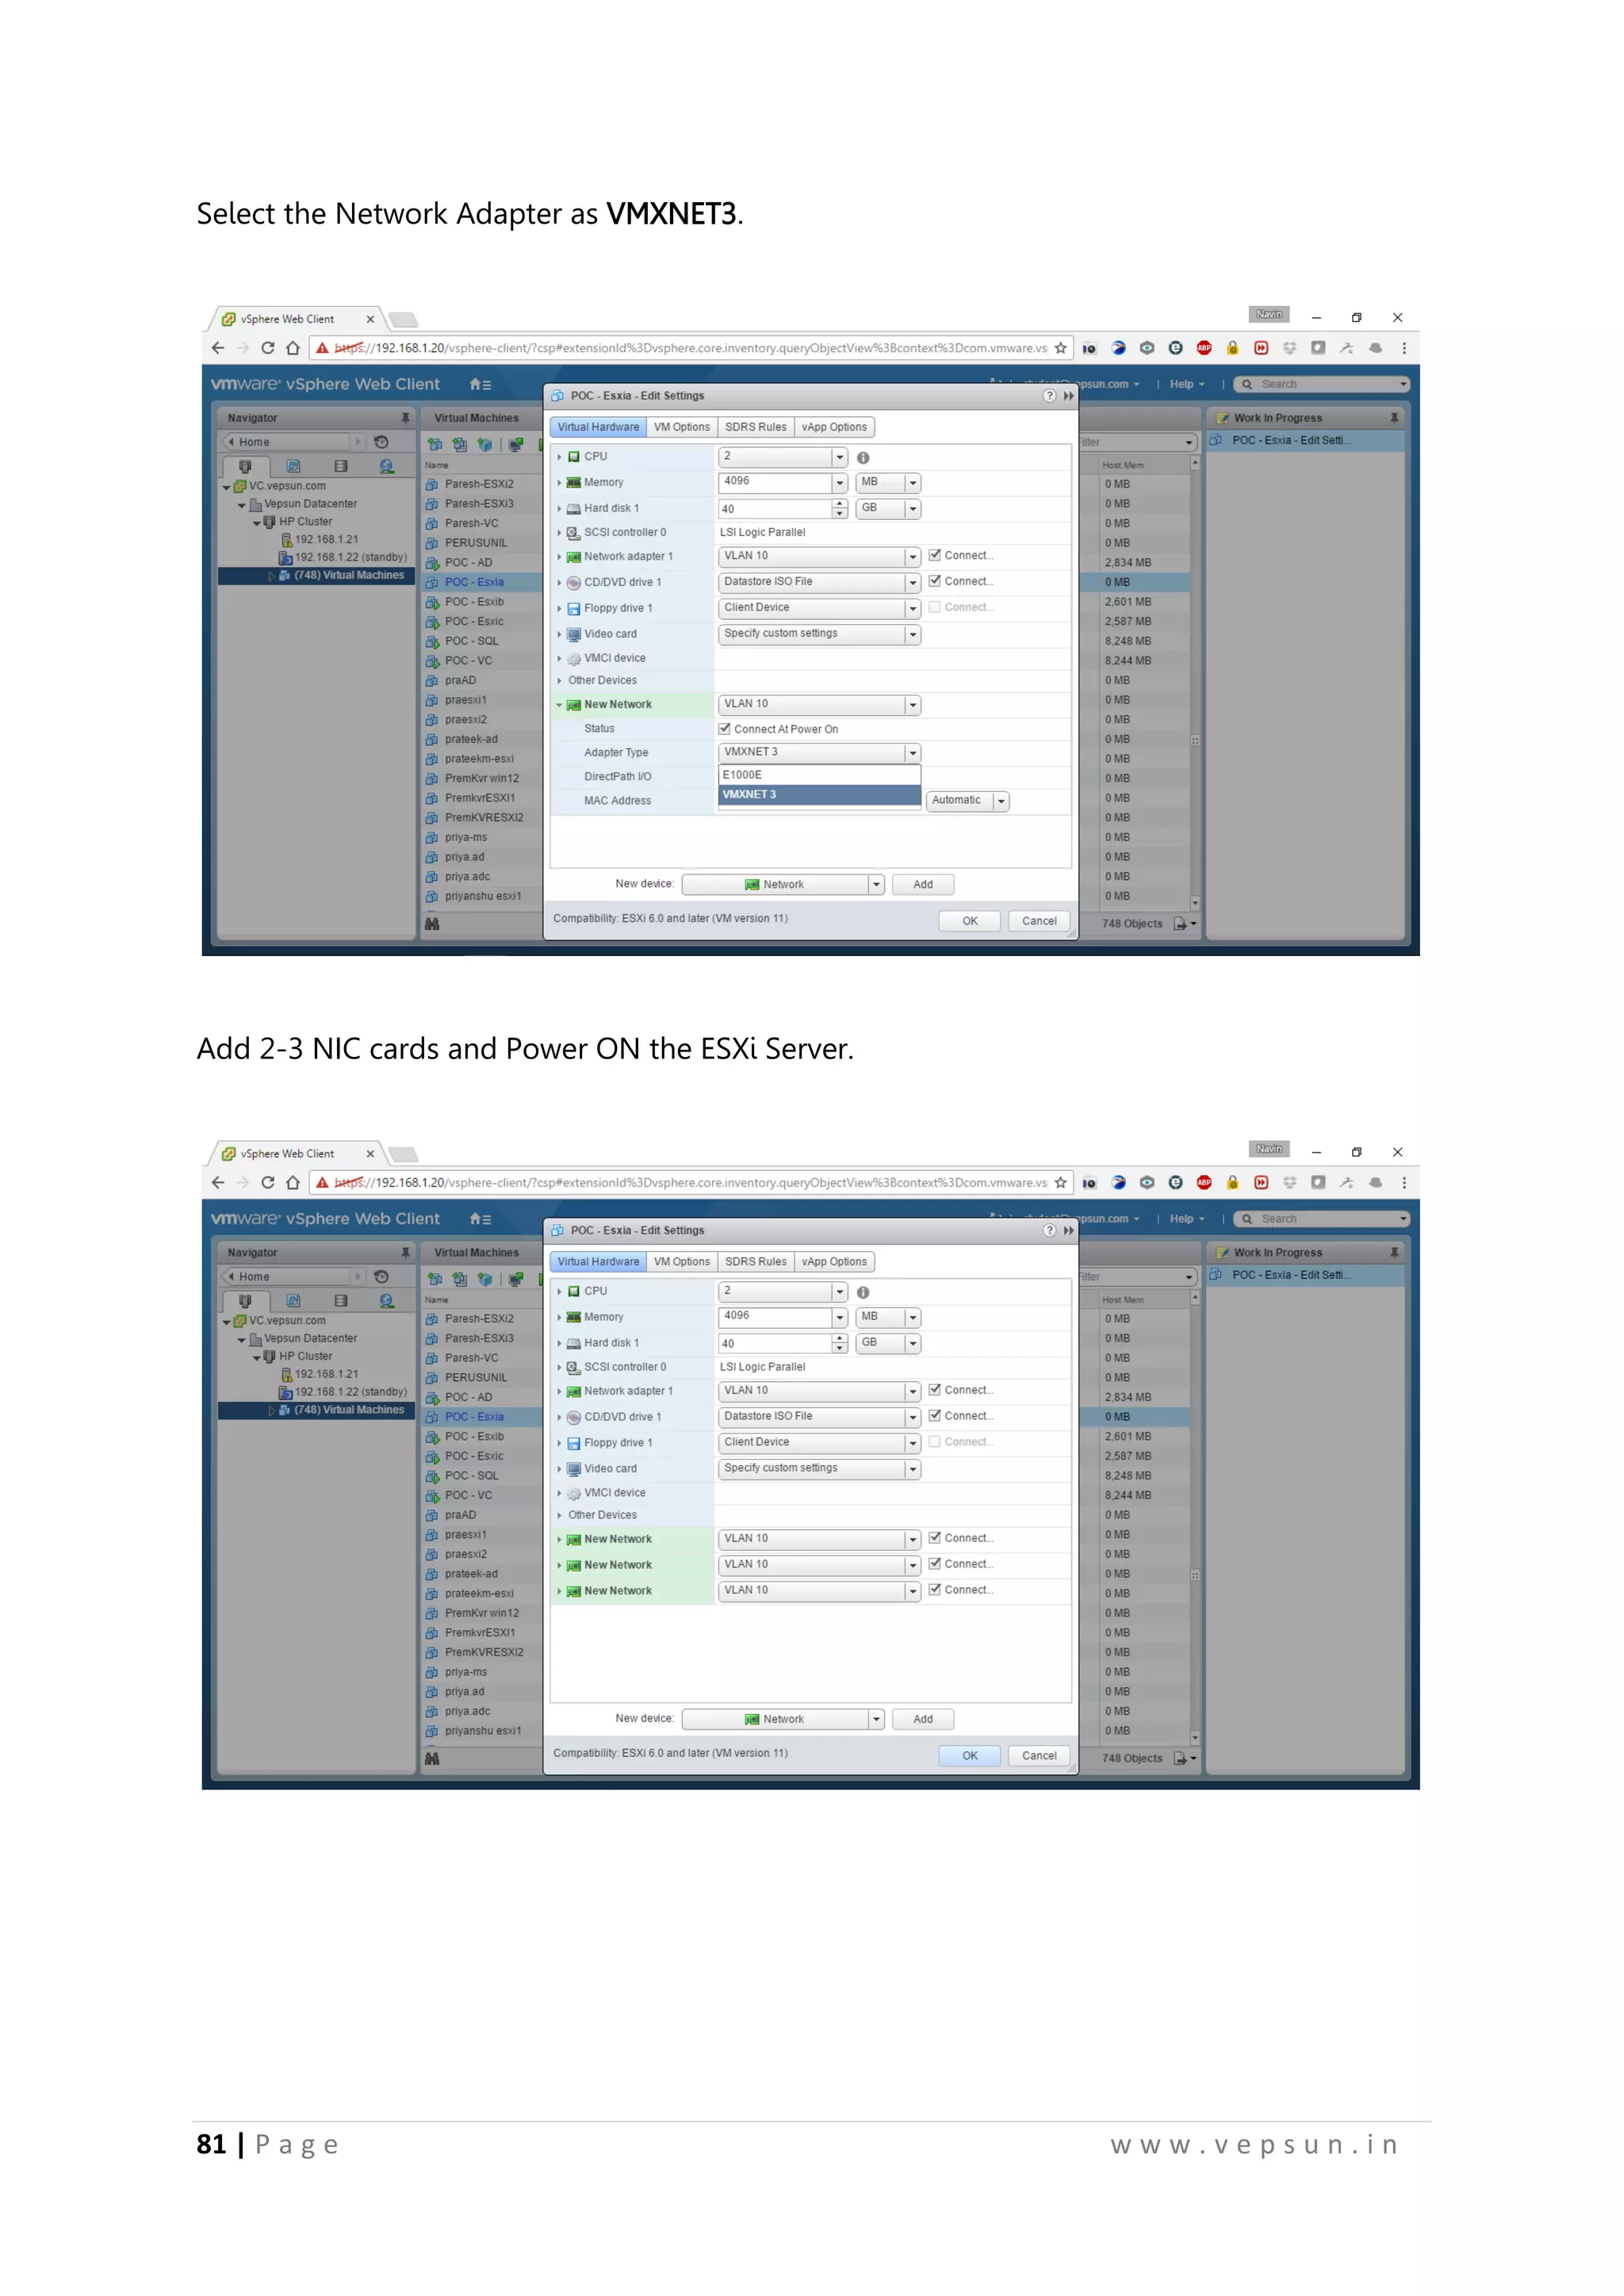
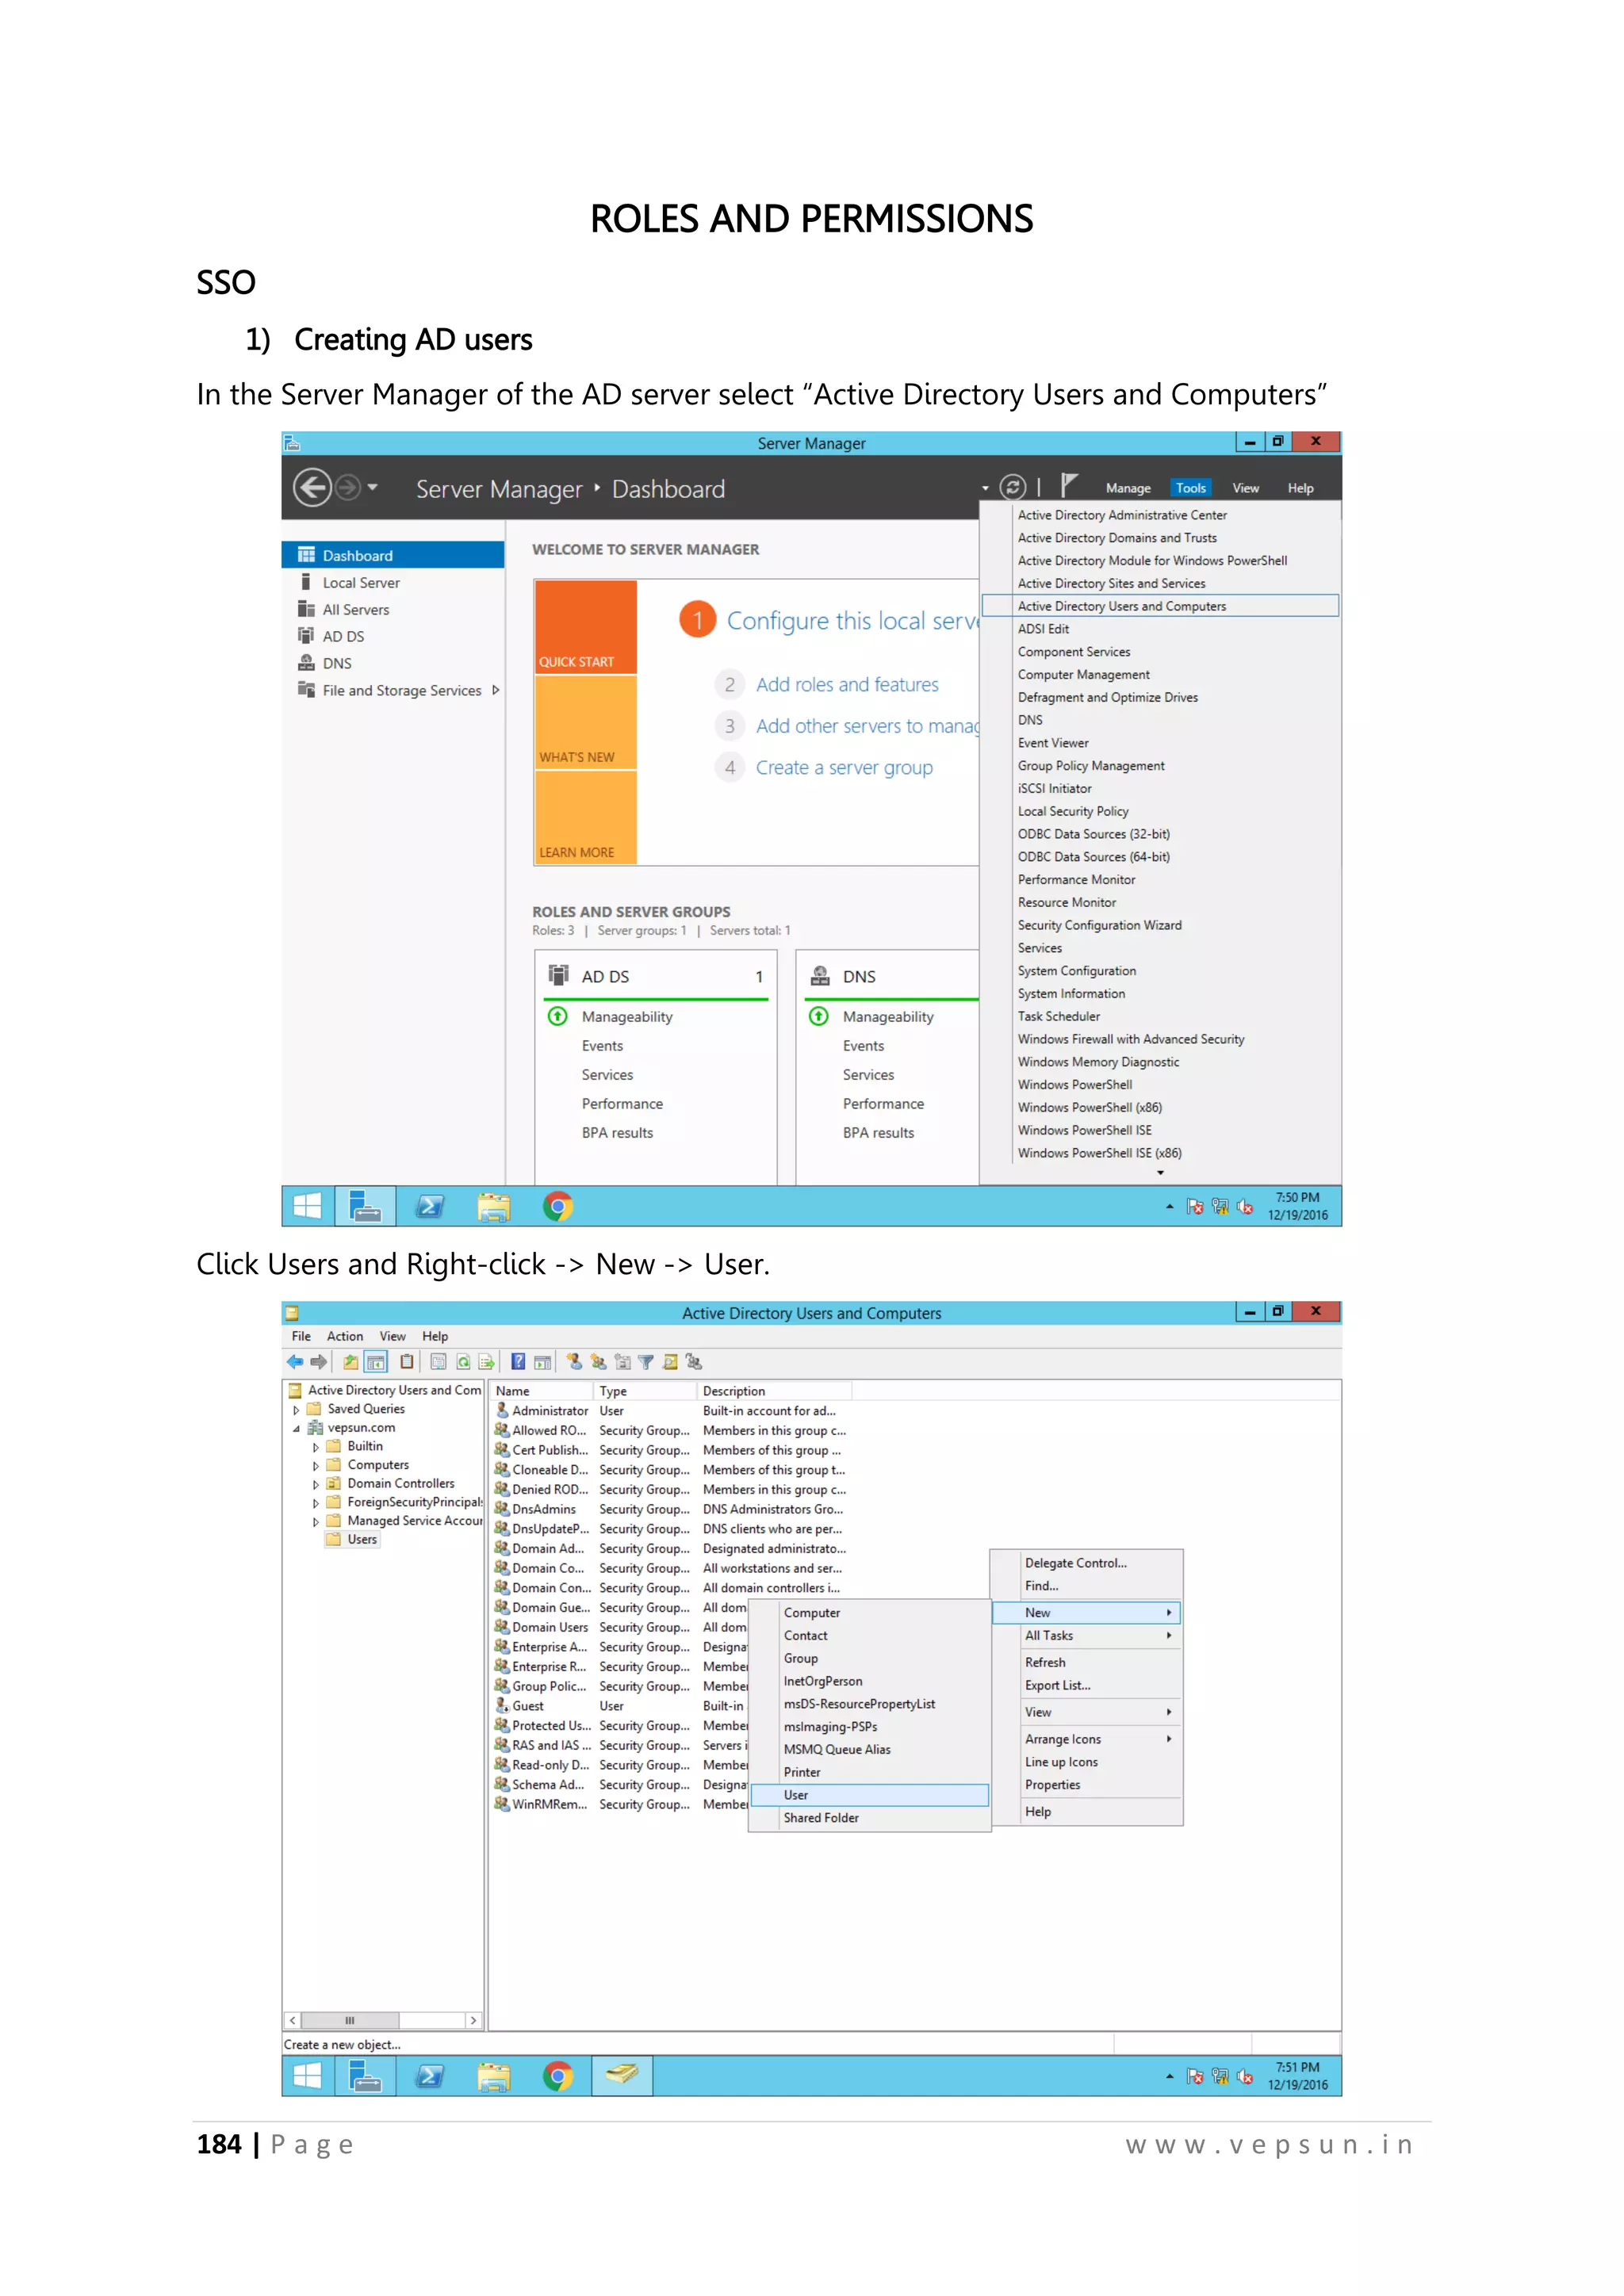
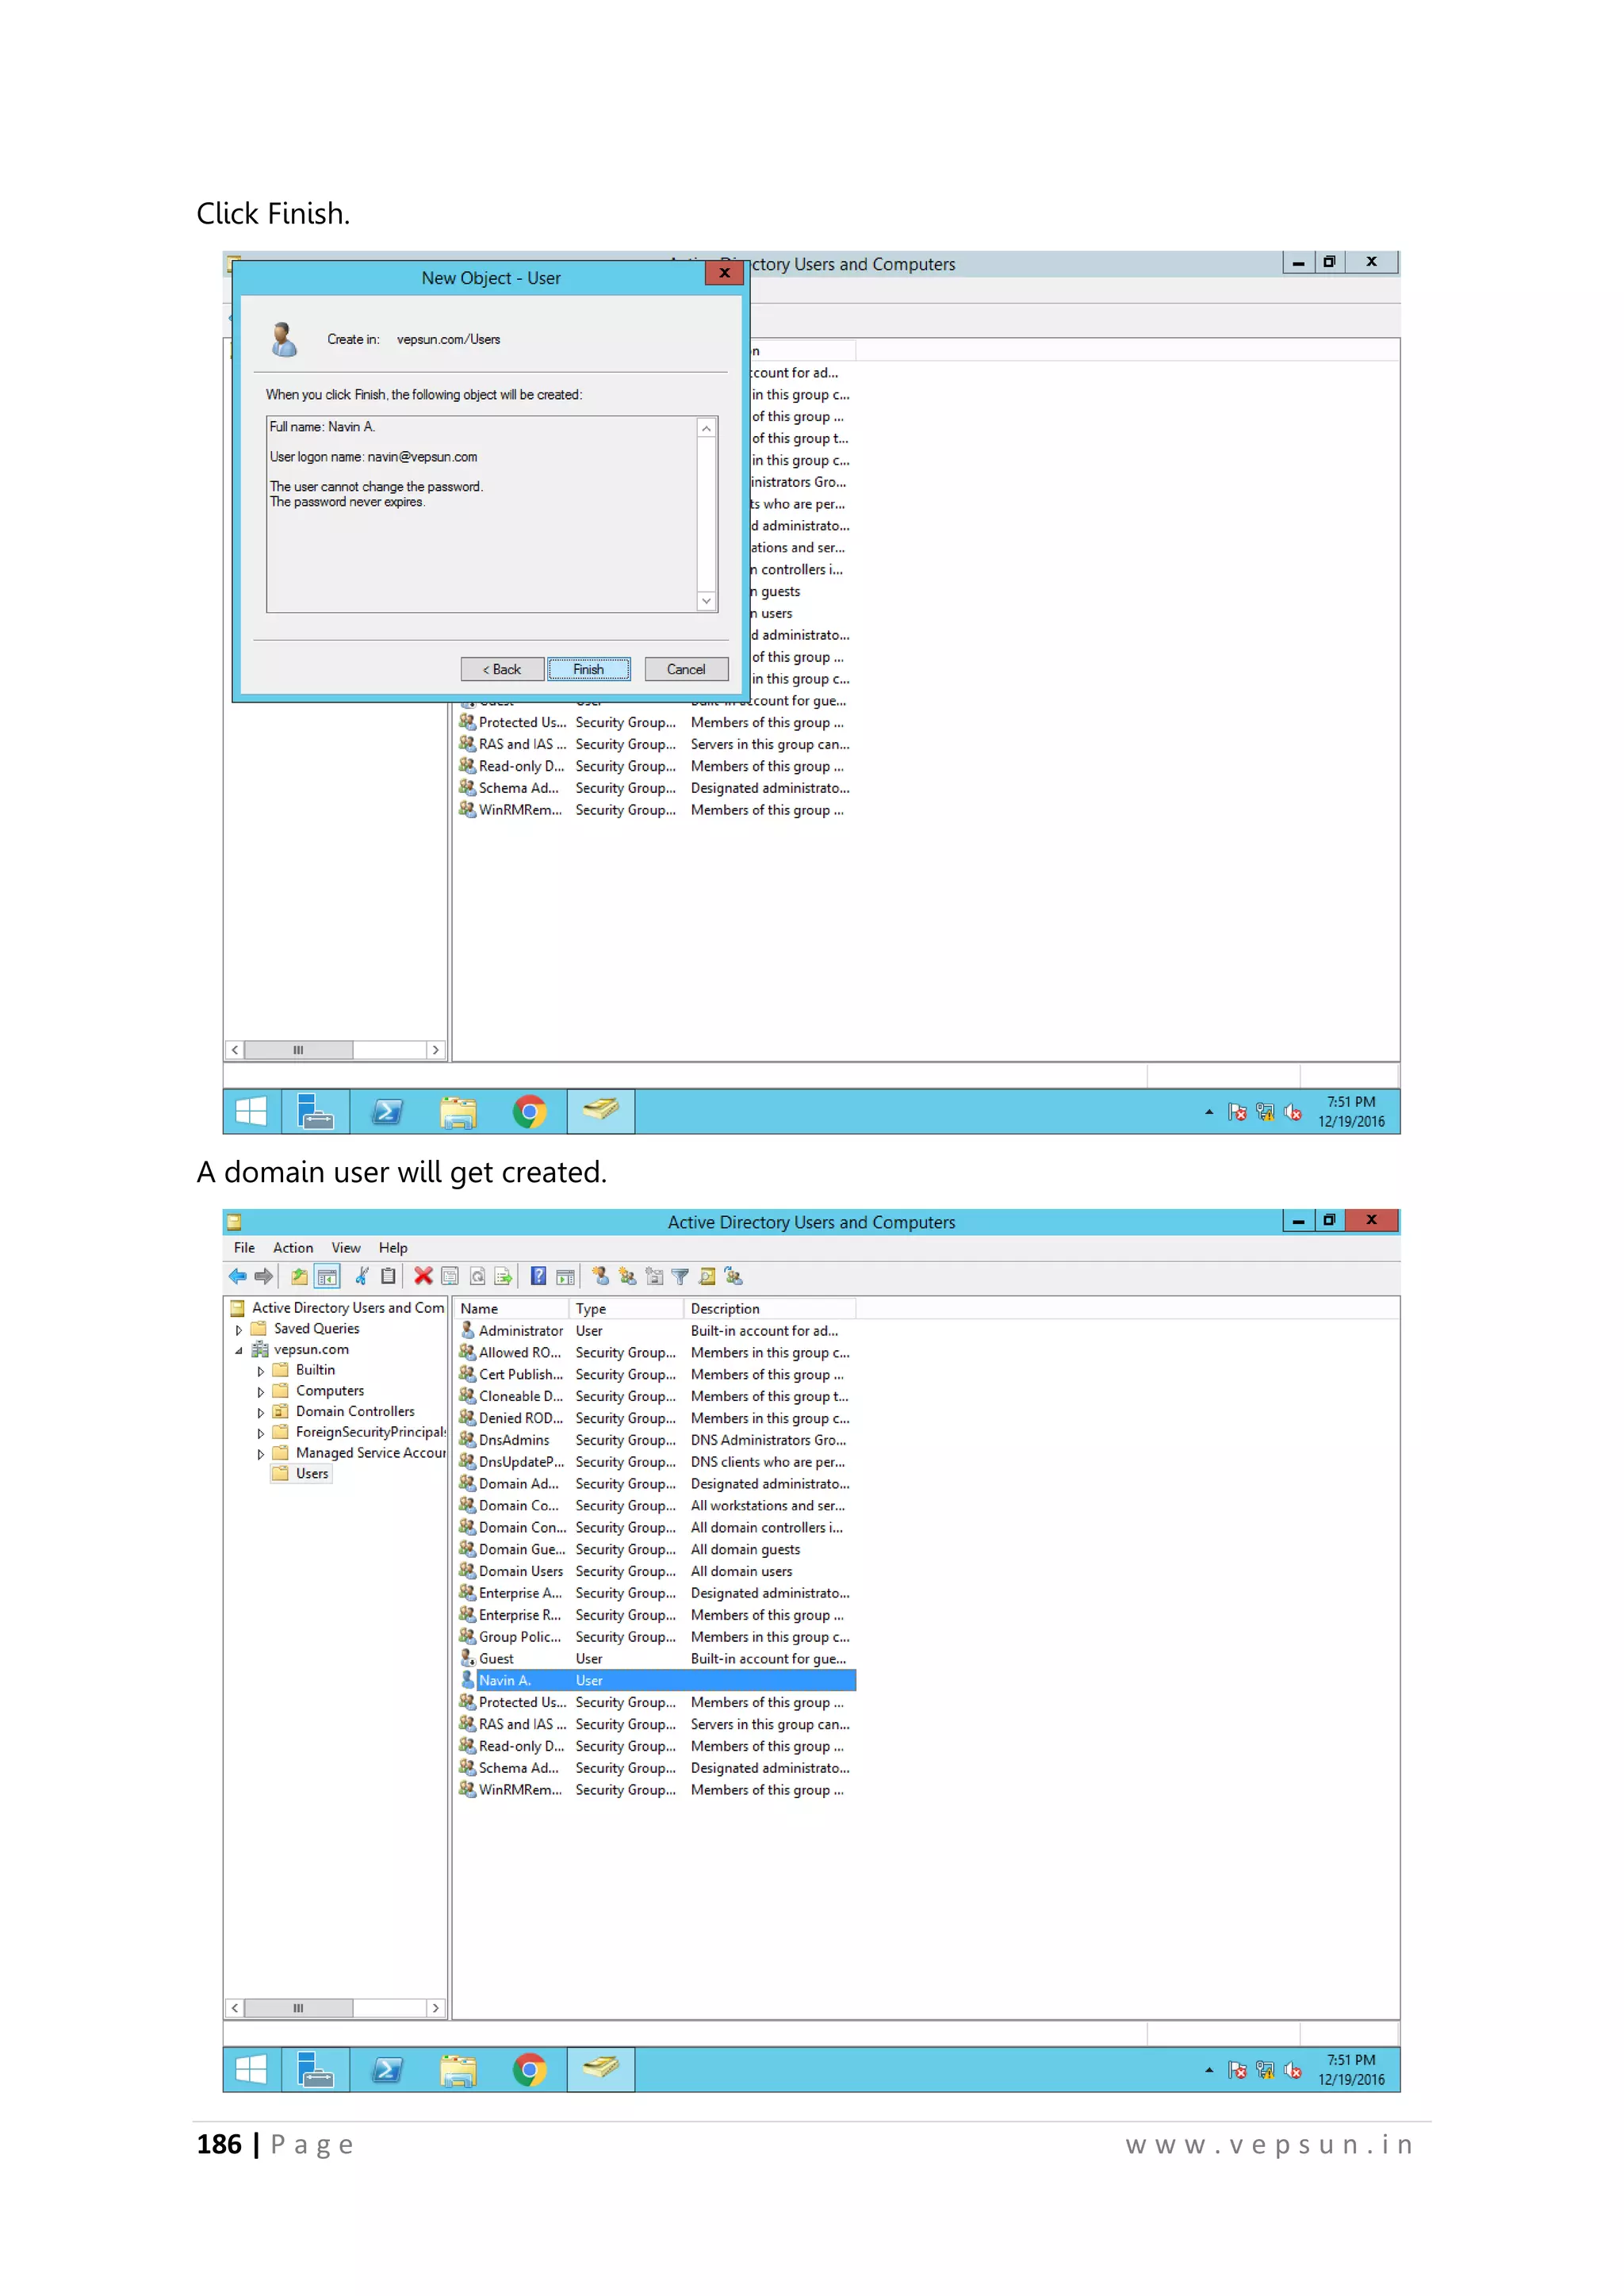
Overview of the lab guide contents including installation and management of VMware vSphere 6.0 components.Steps to install AD Server including basic VM creation, configuration of AD roles, installing ESXi server.
Overview of the lab guide contents including installation and management of VMware vSphere 6.0 components.Steps to install AD Server including basic VM creation, configuration of AD roles, installing ESXi server.
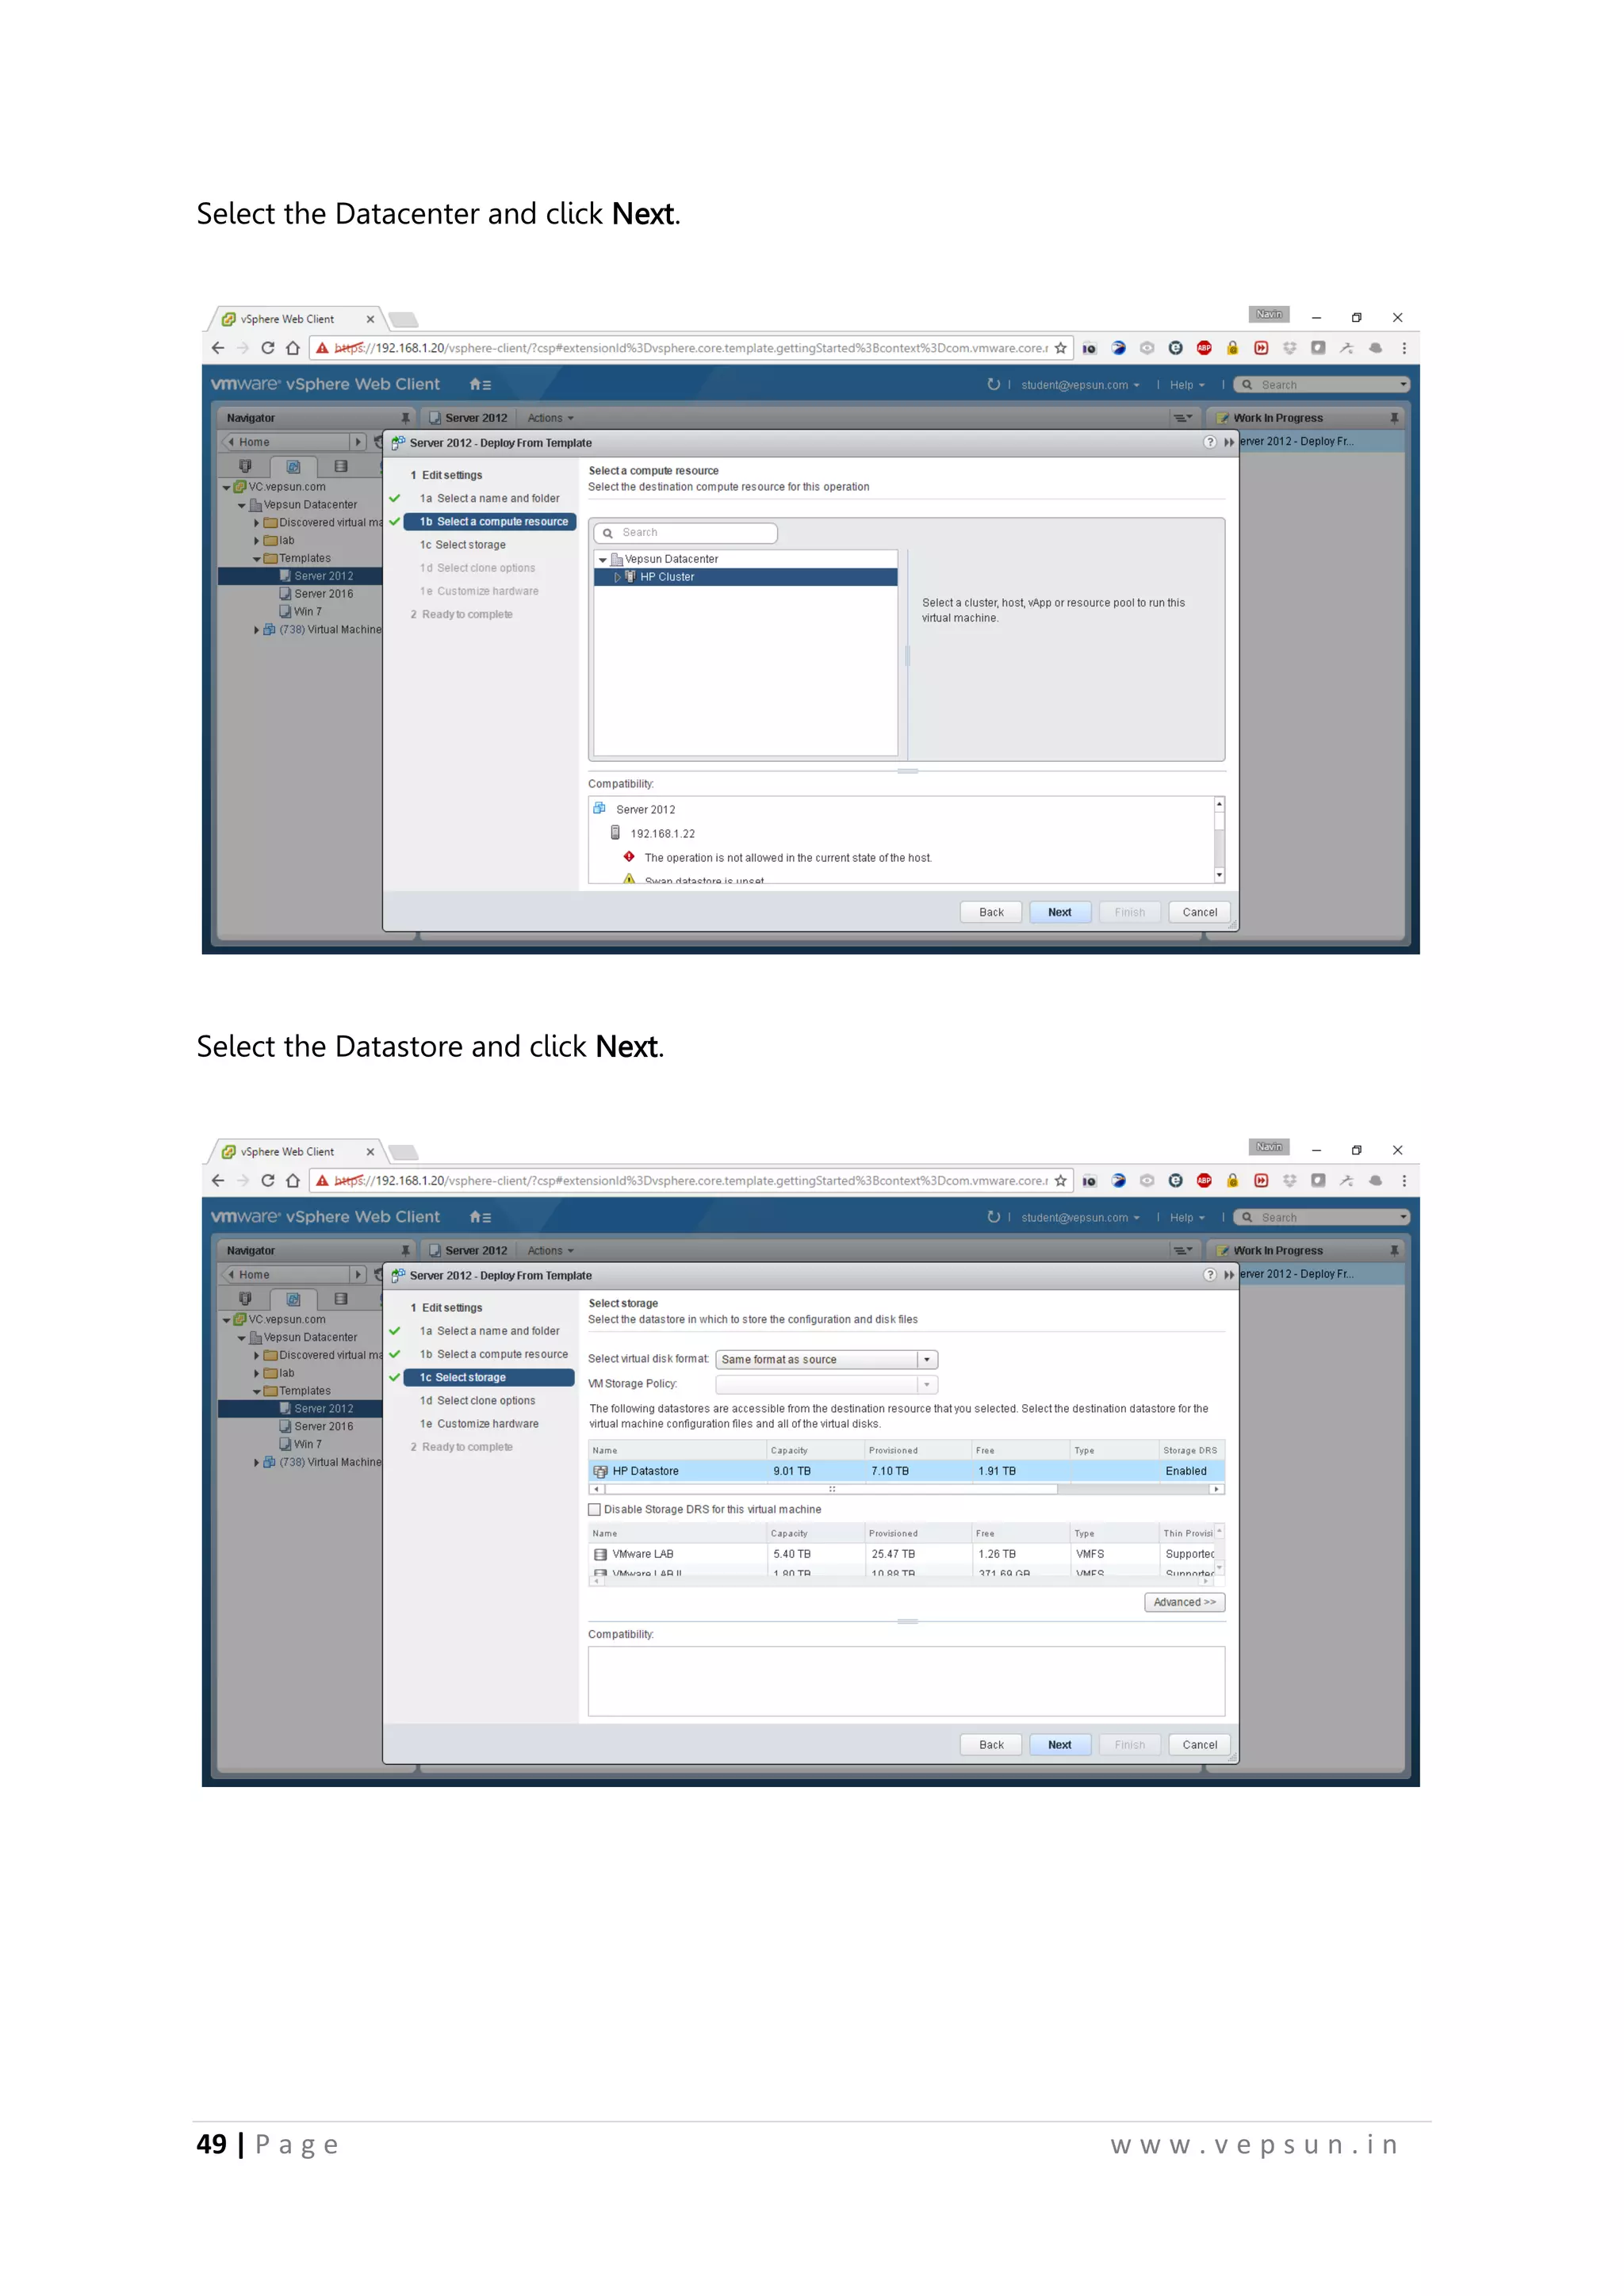
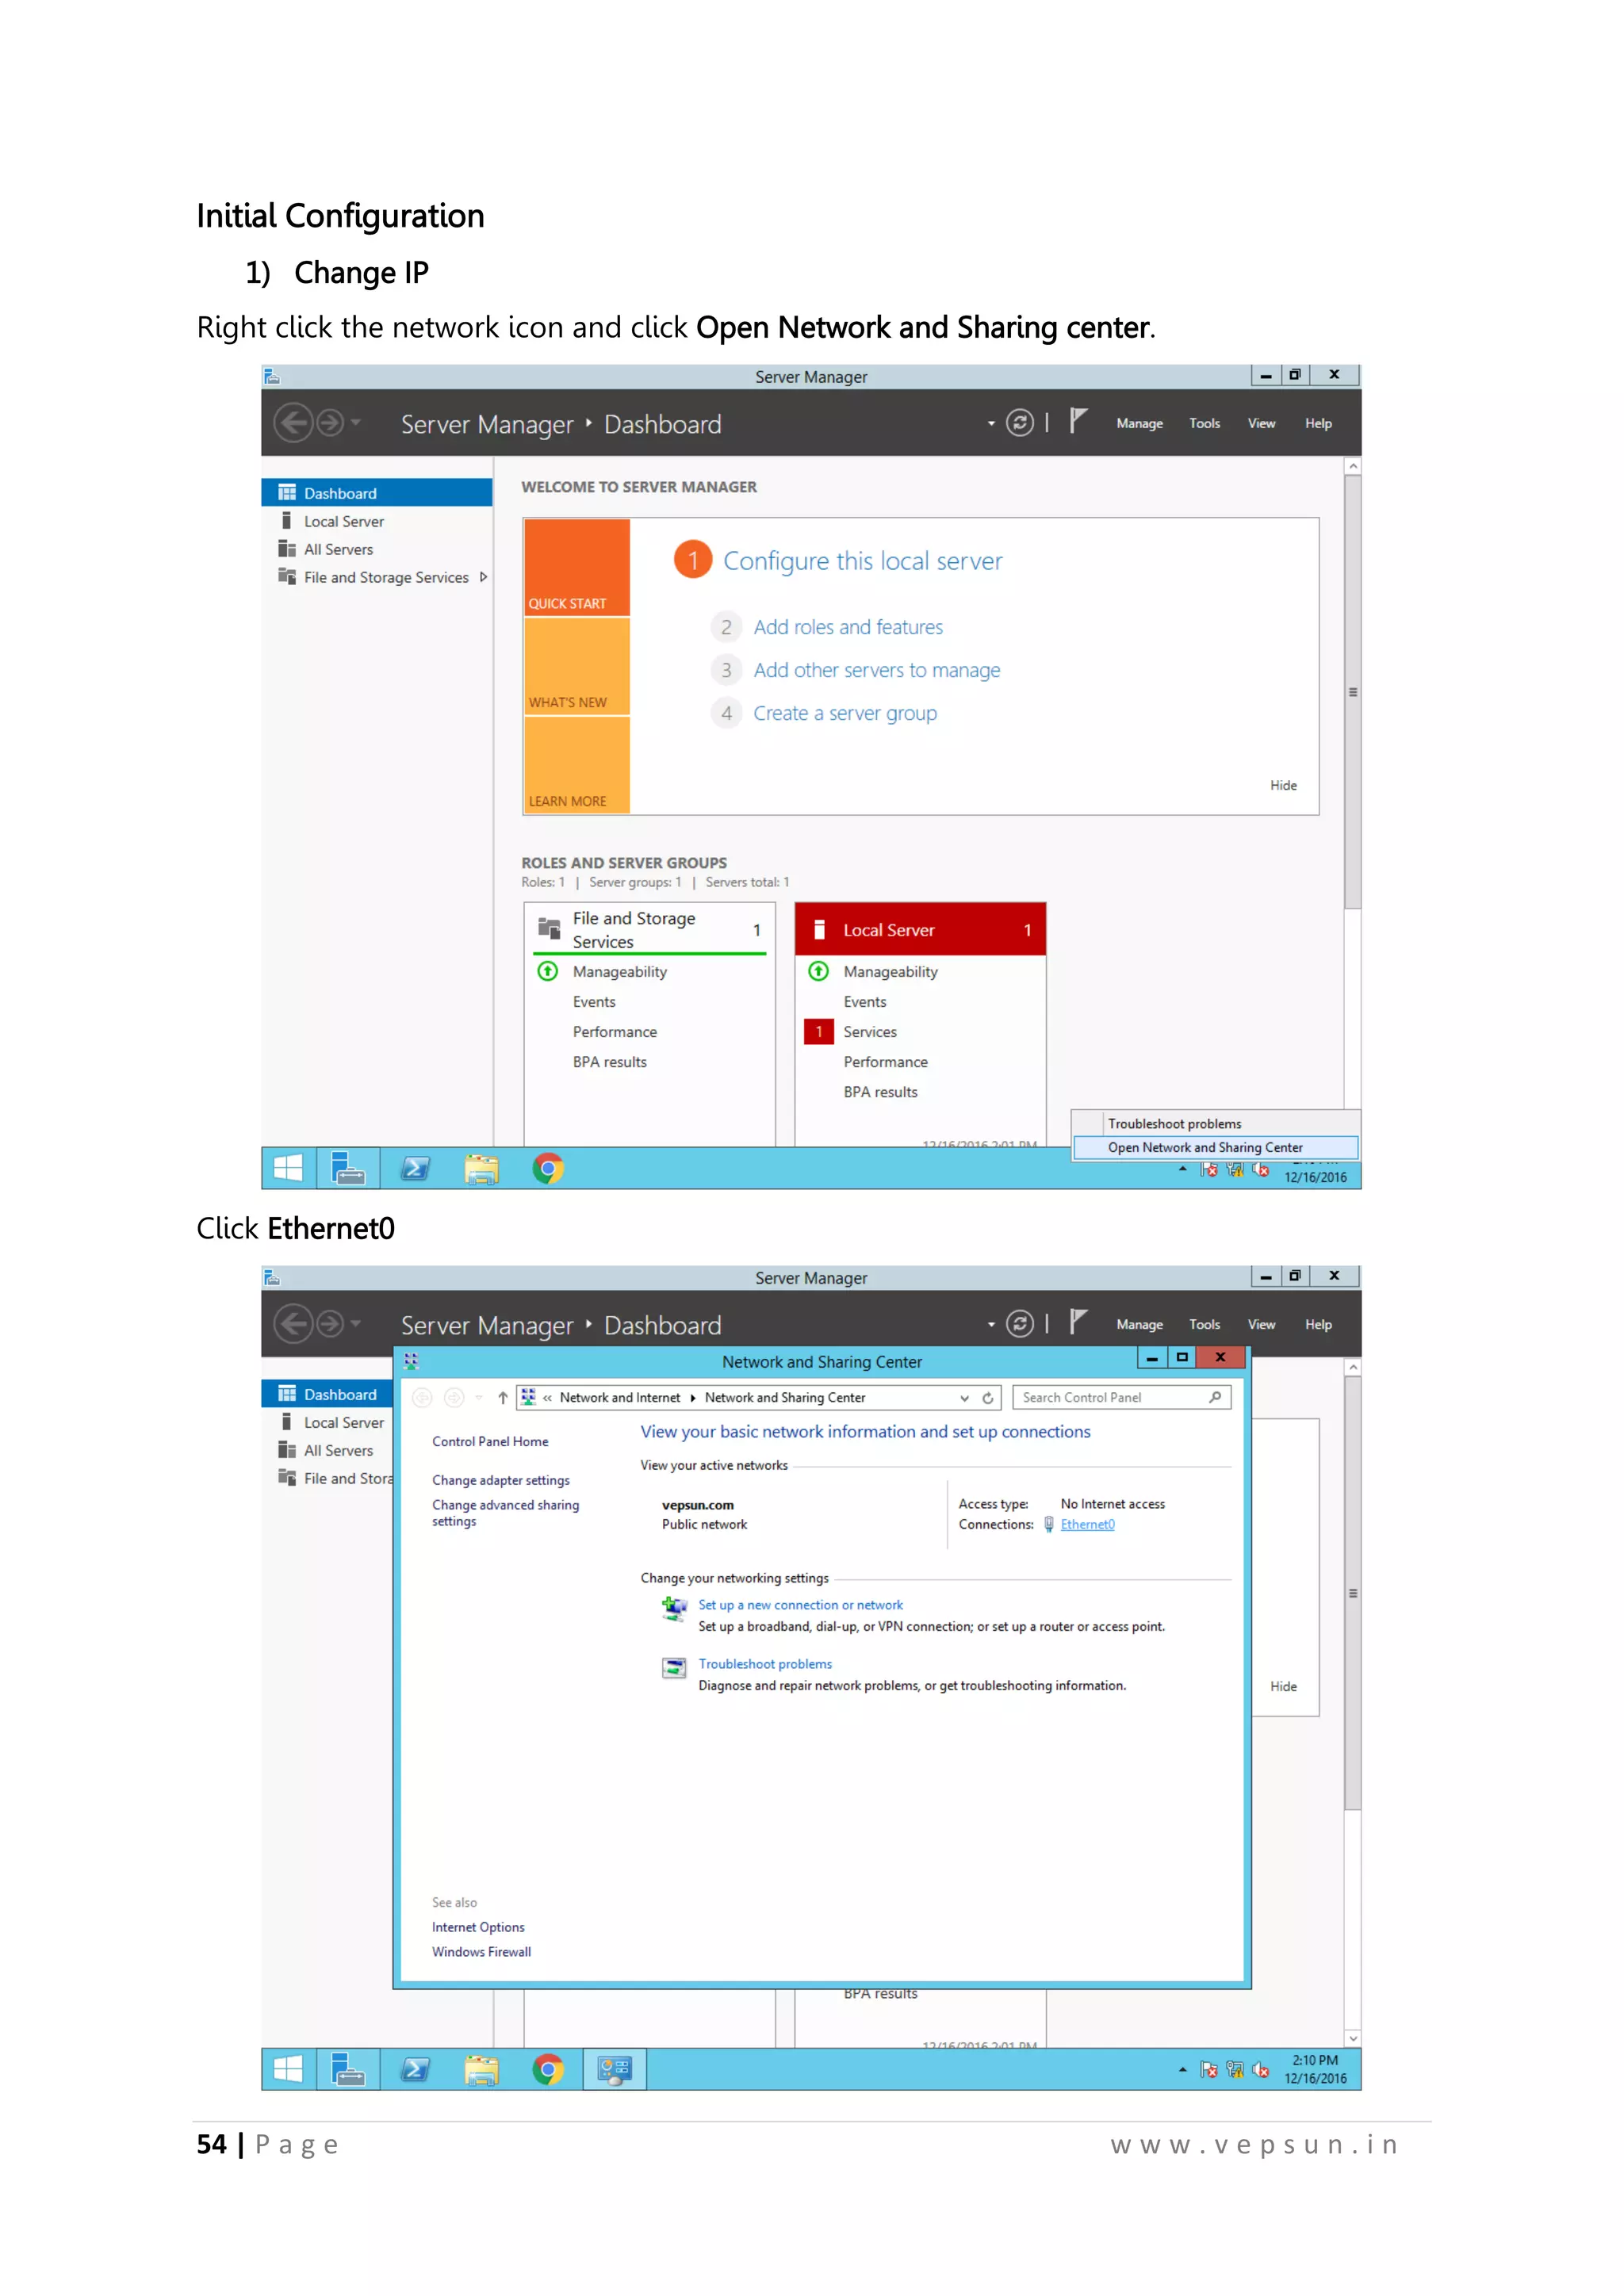
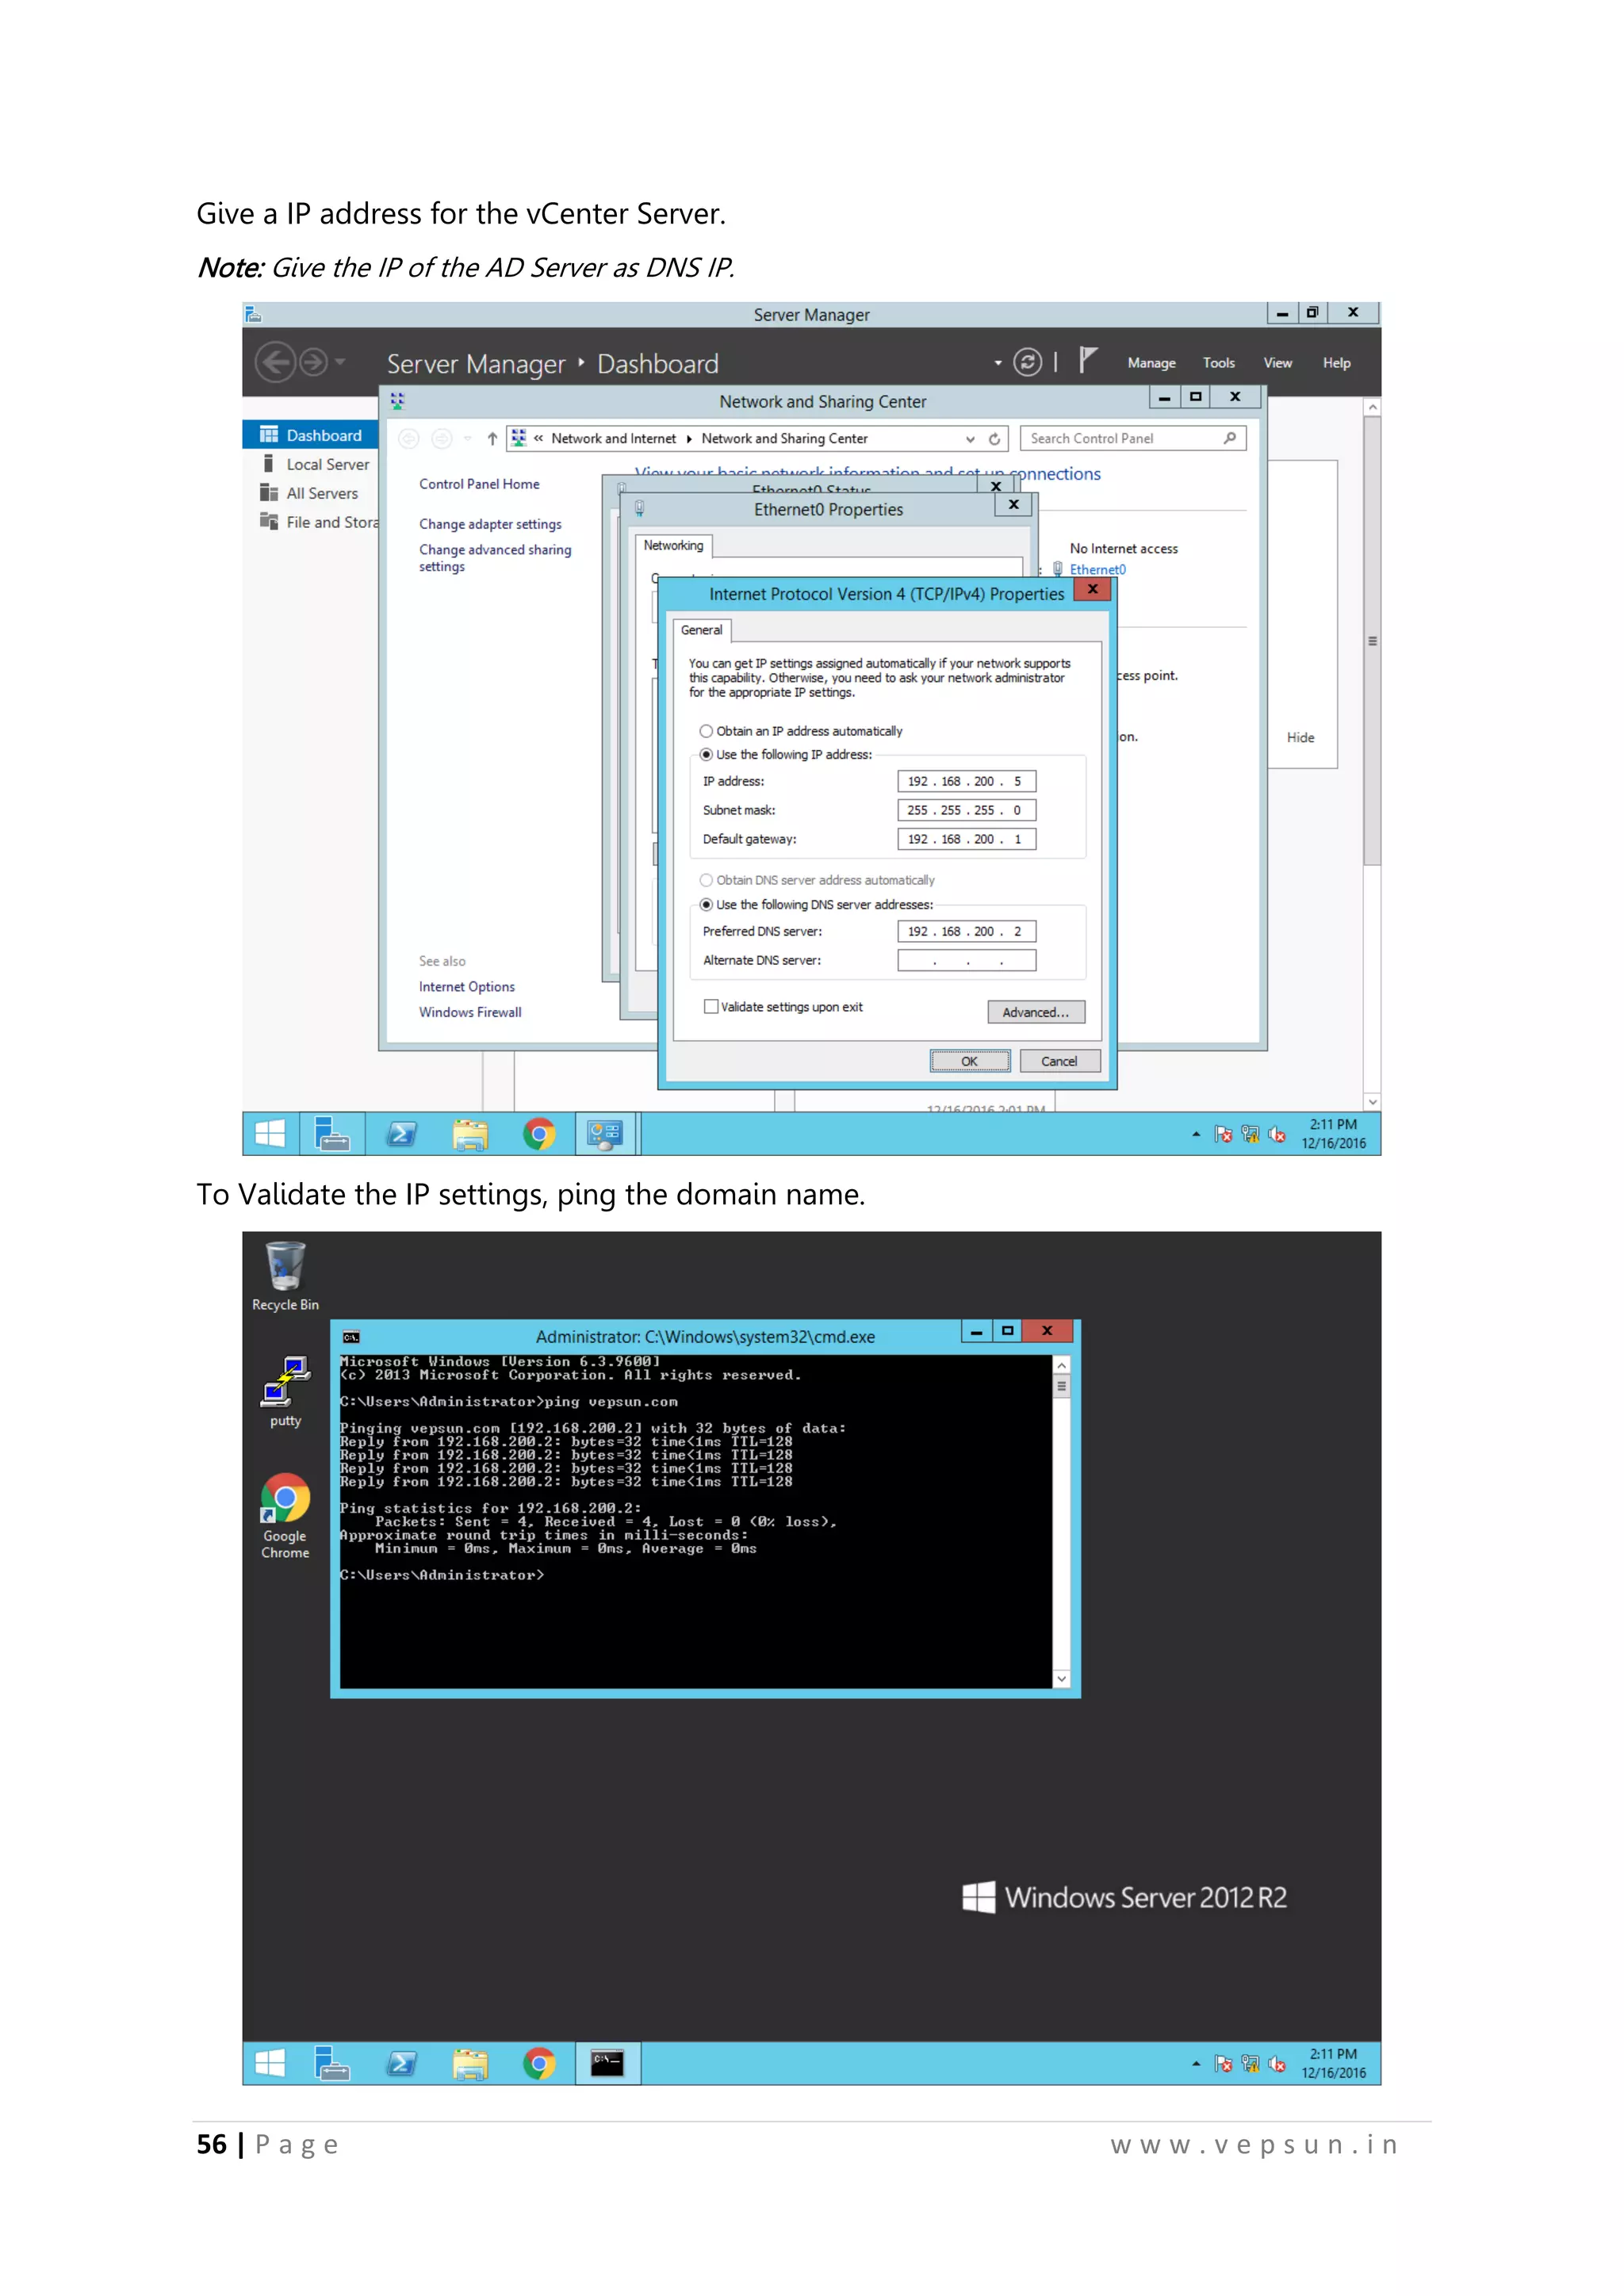
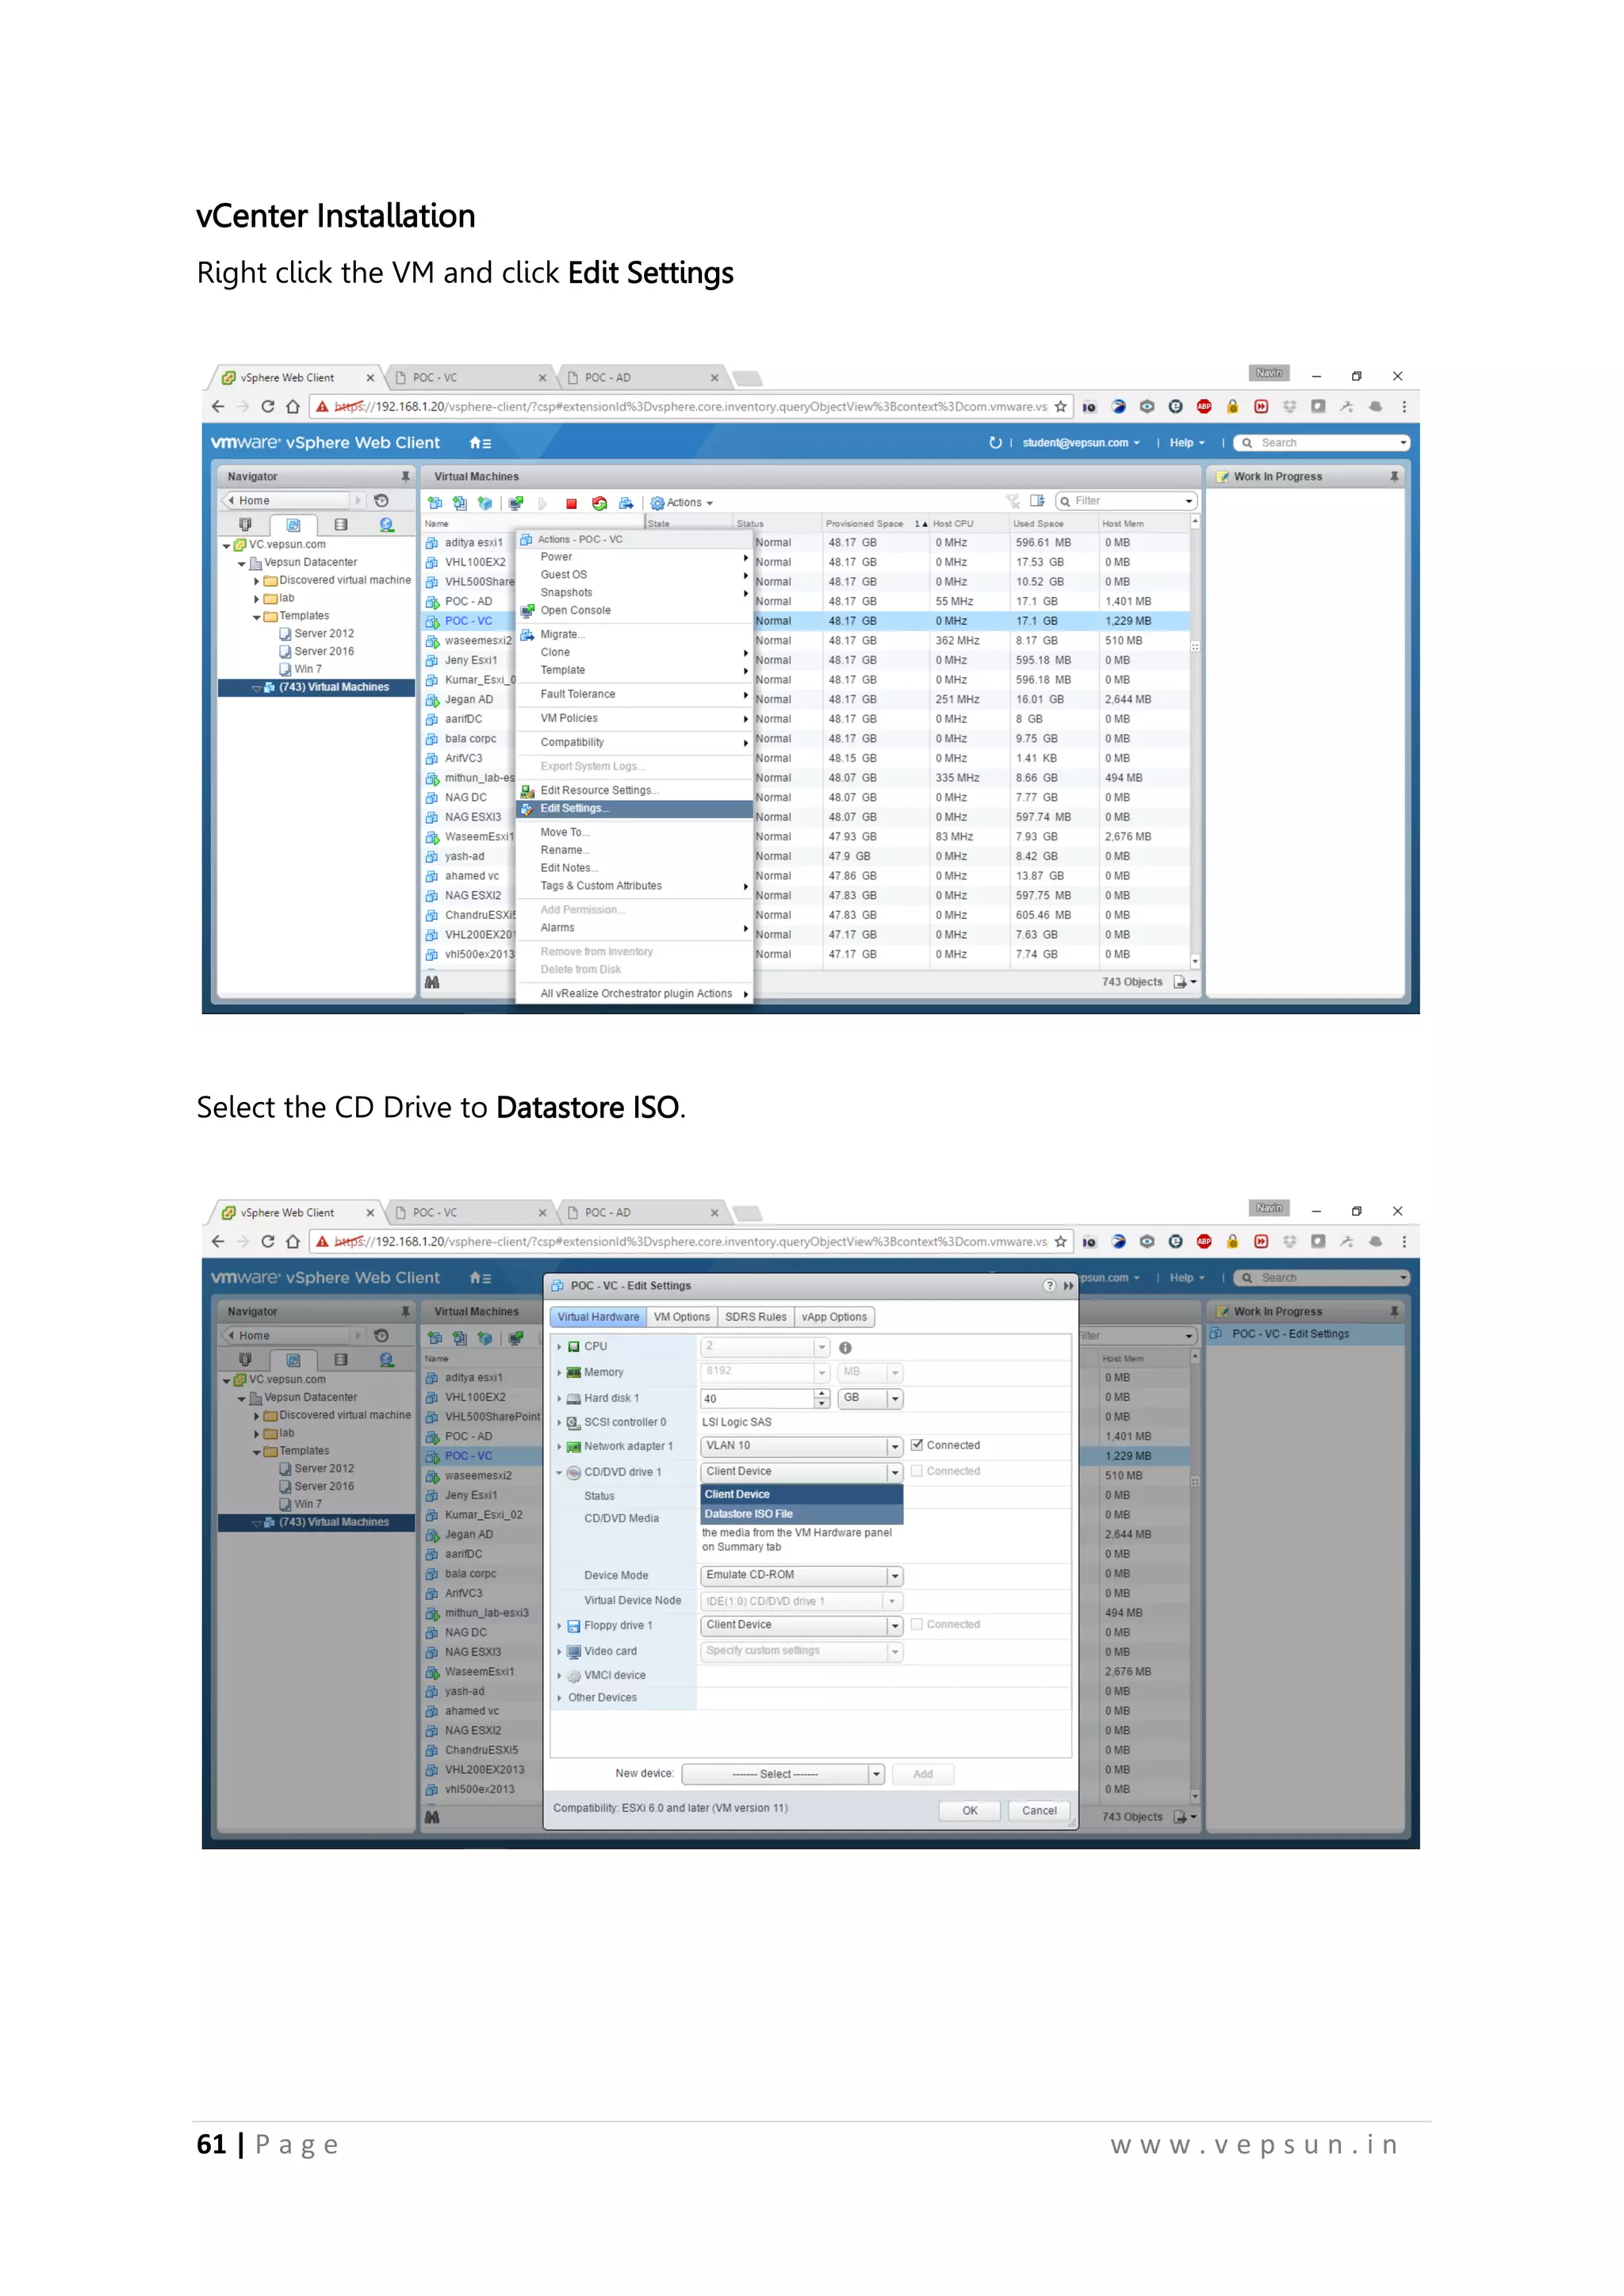
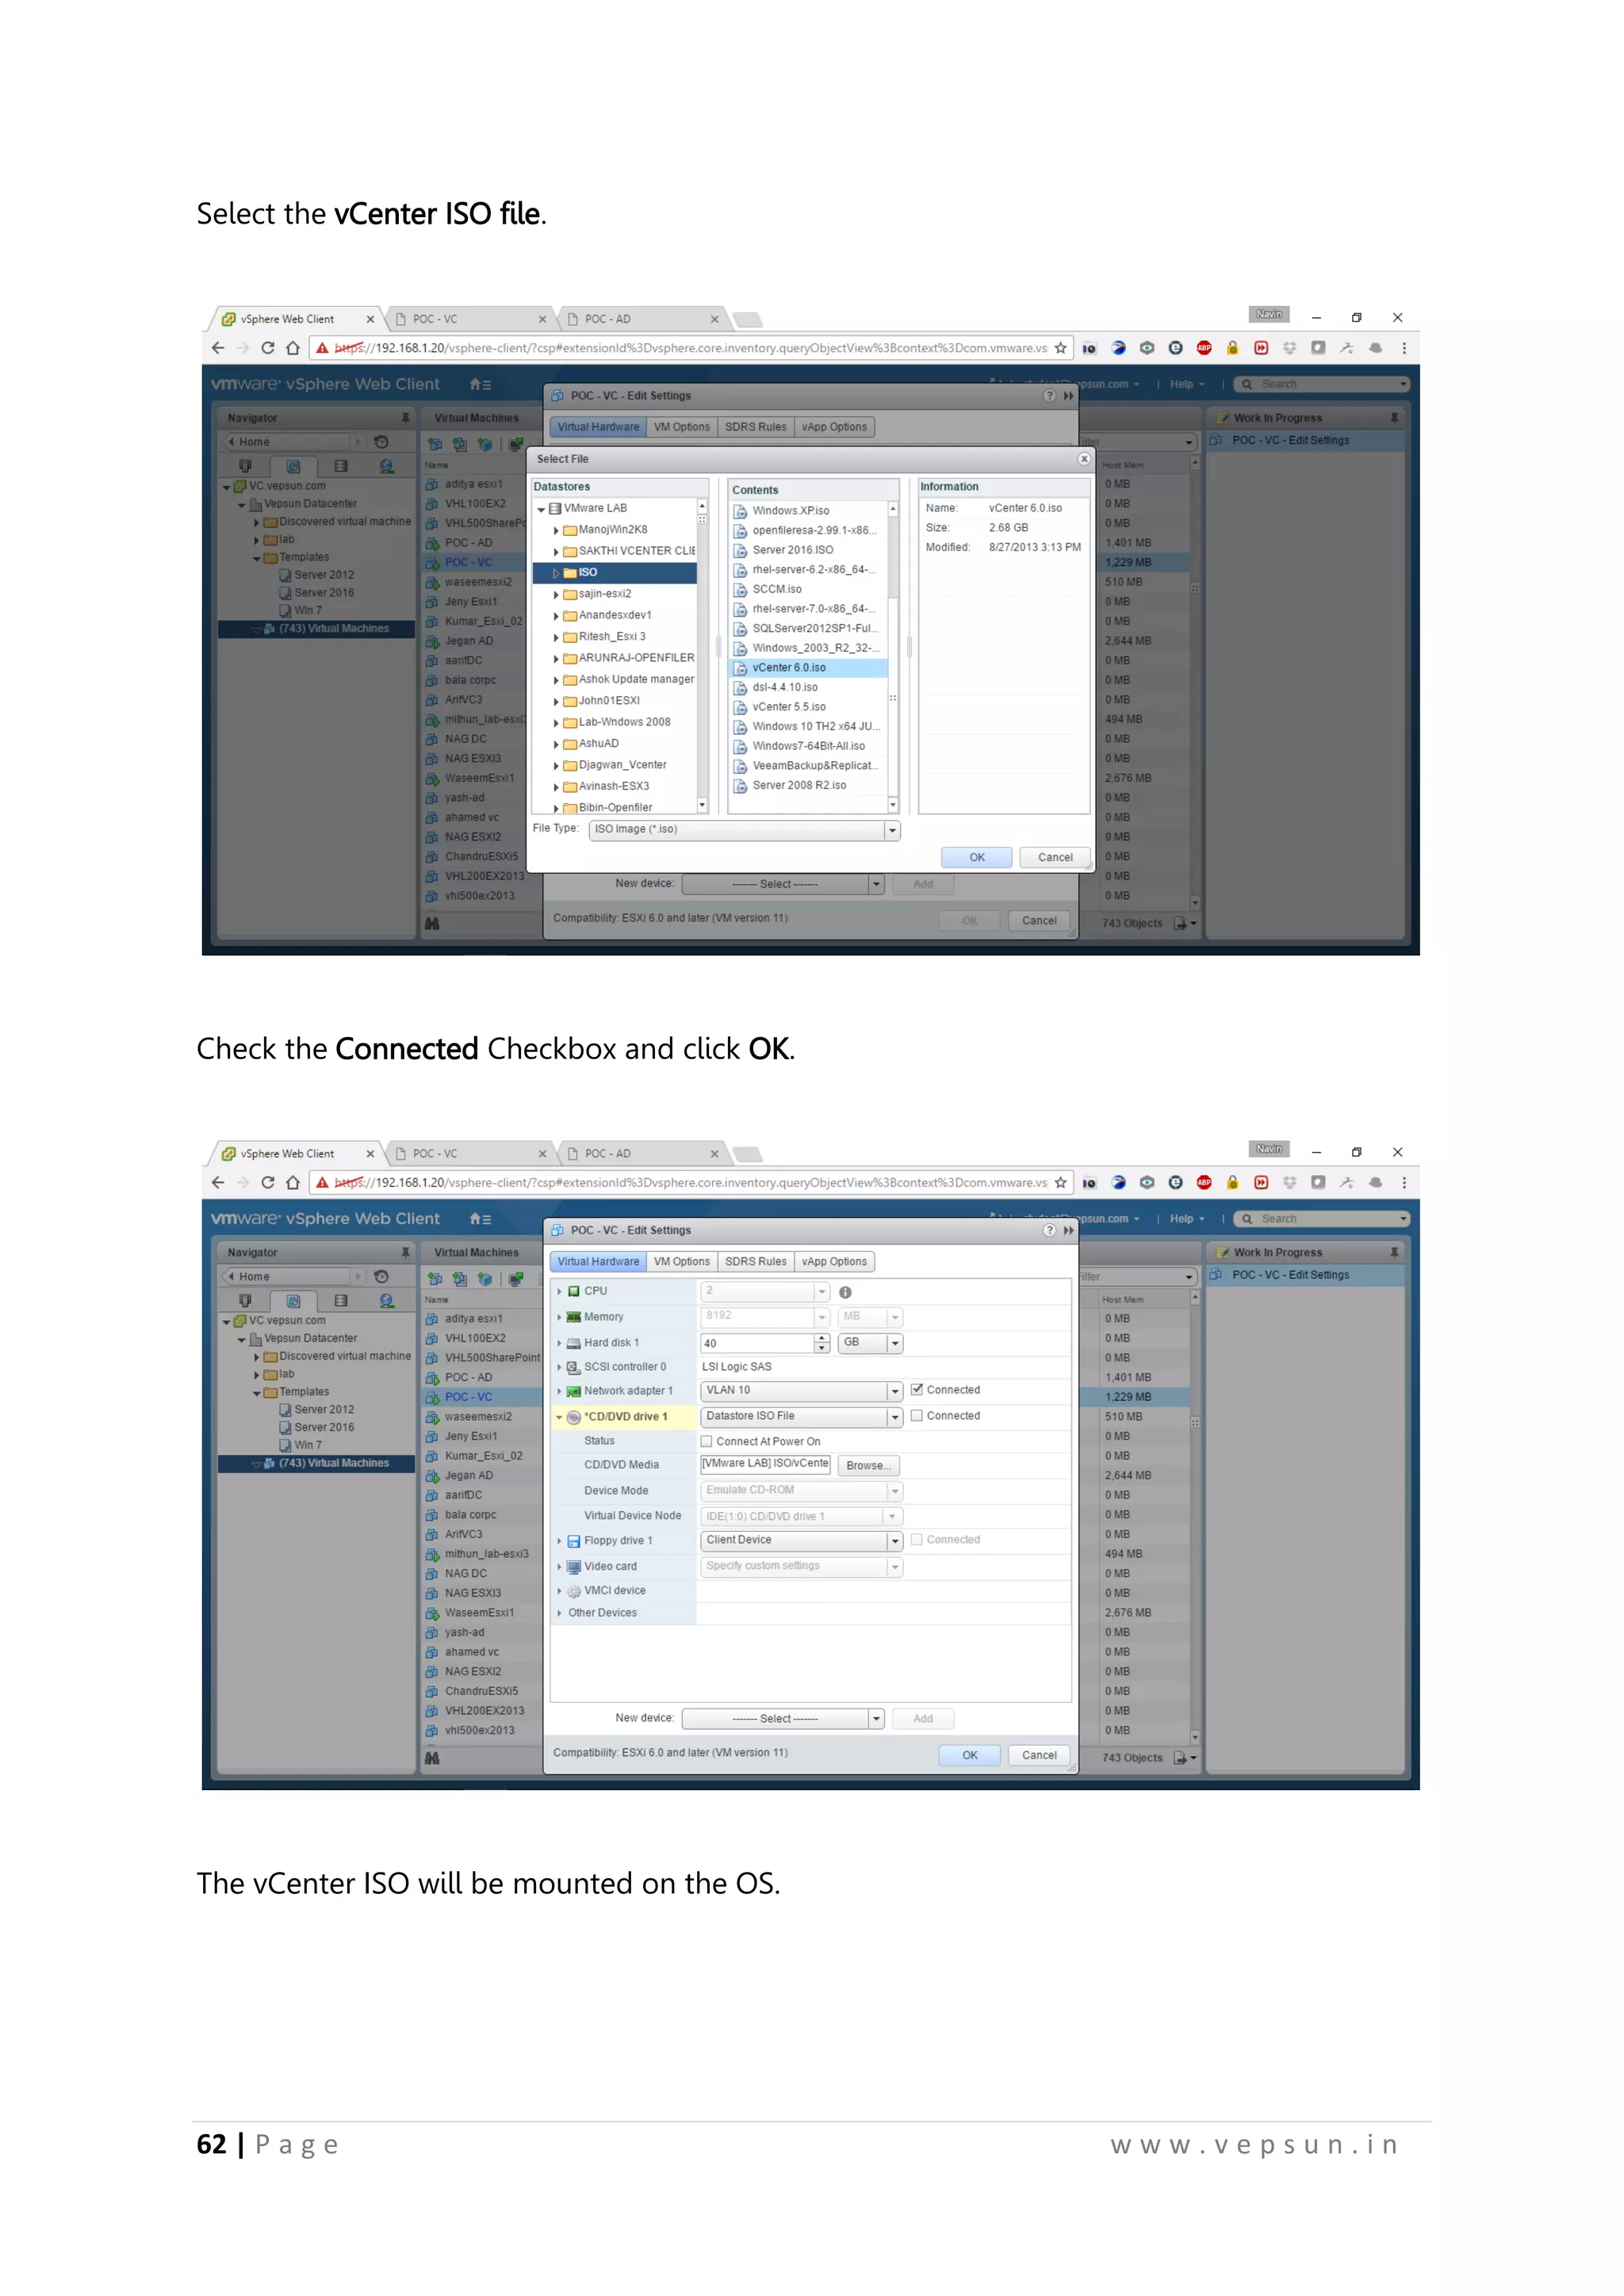
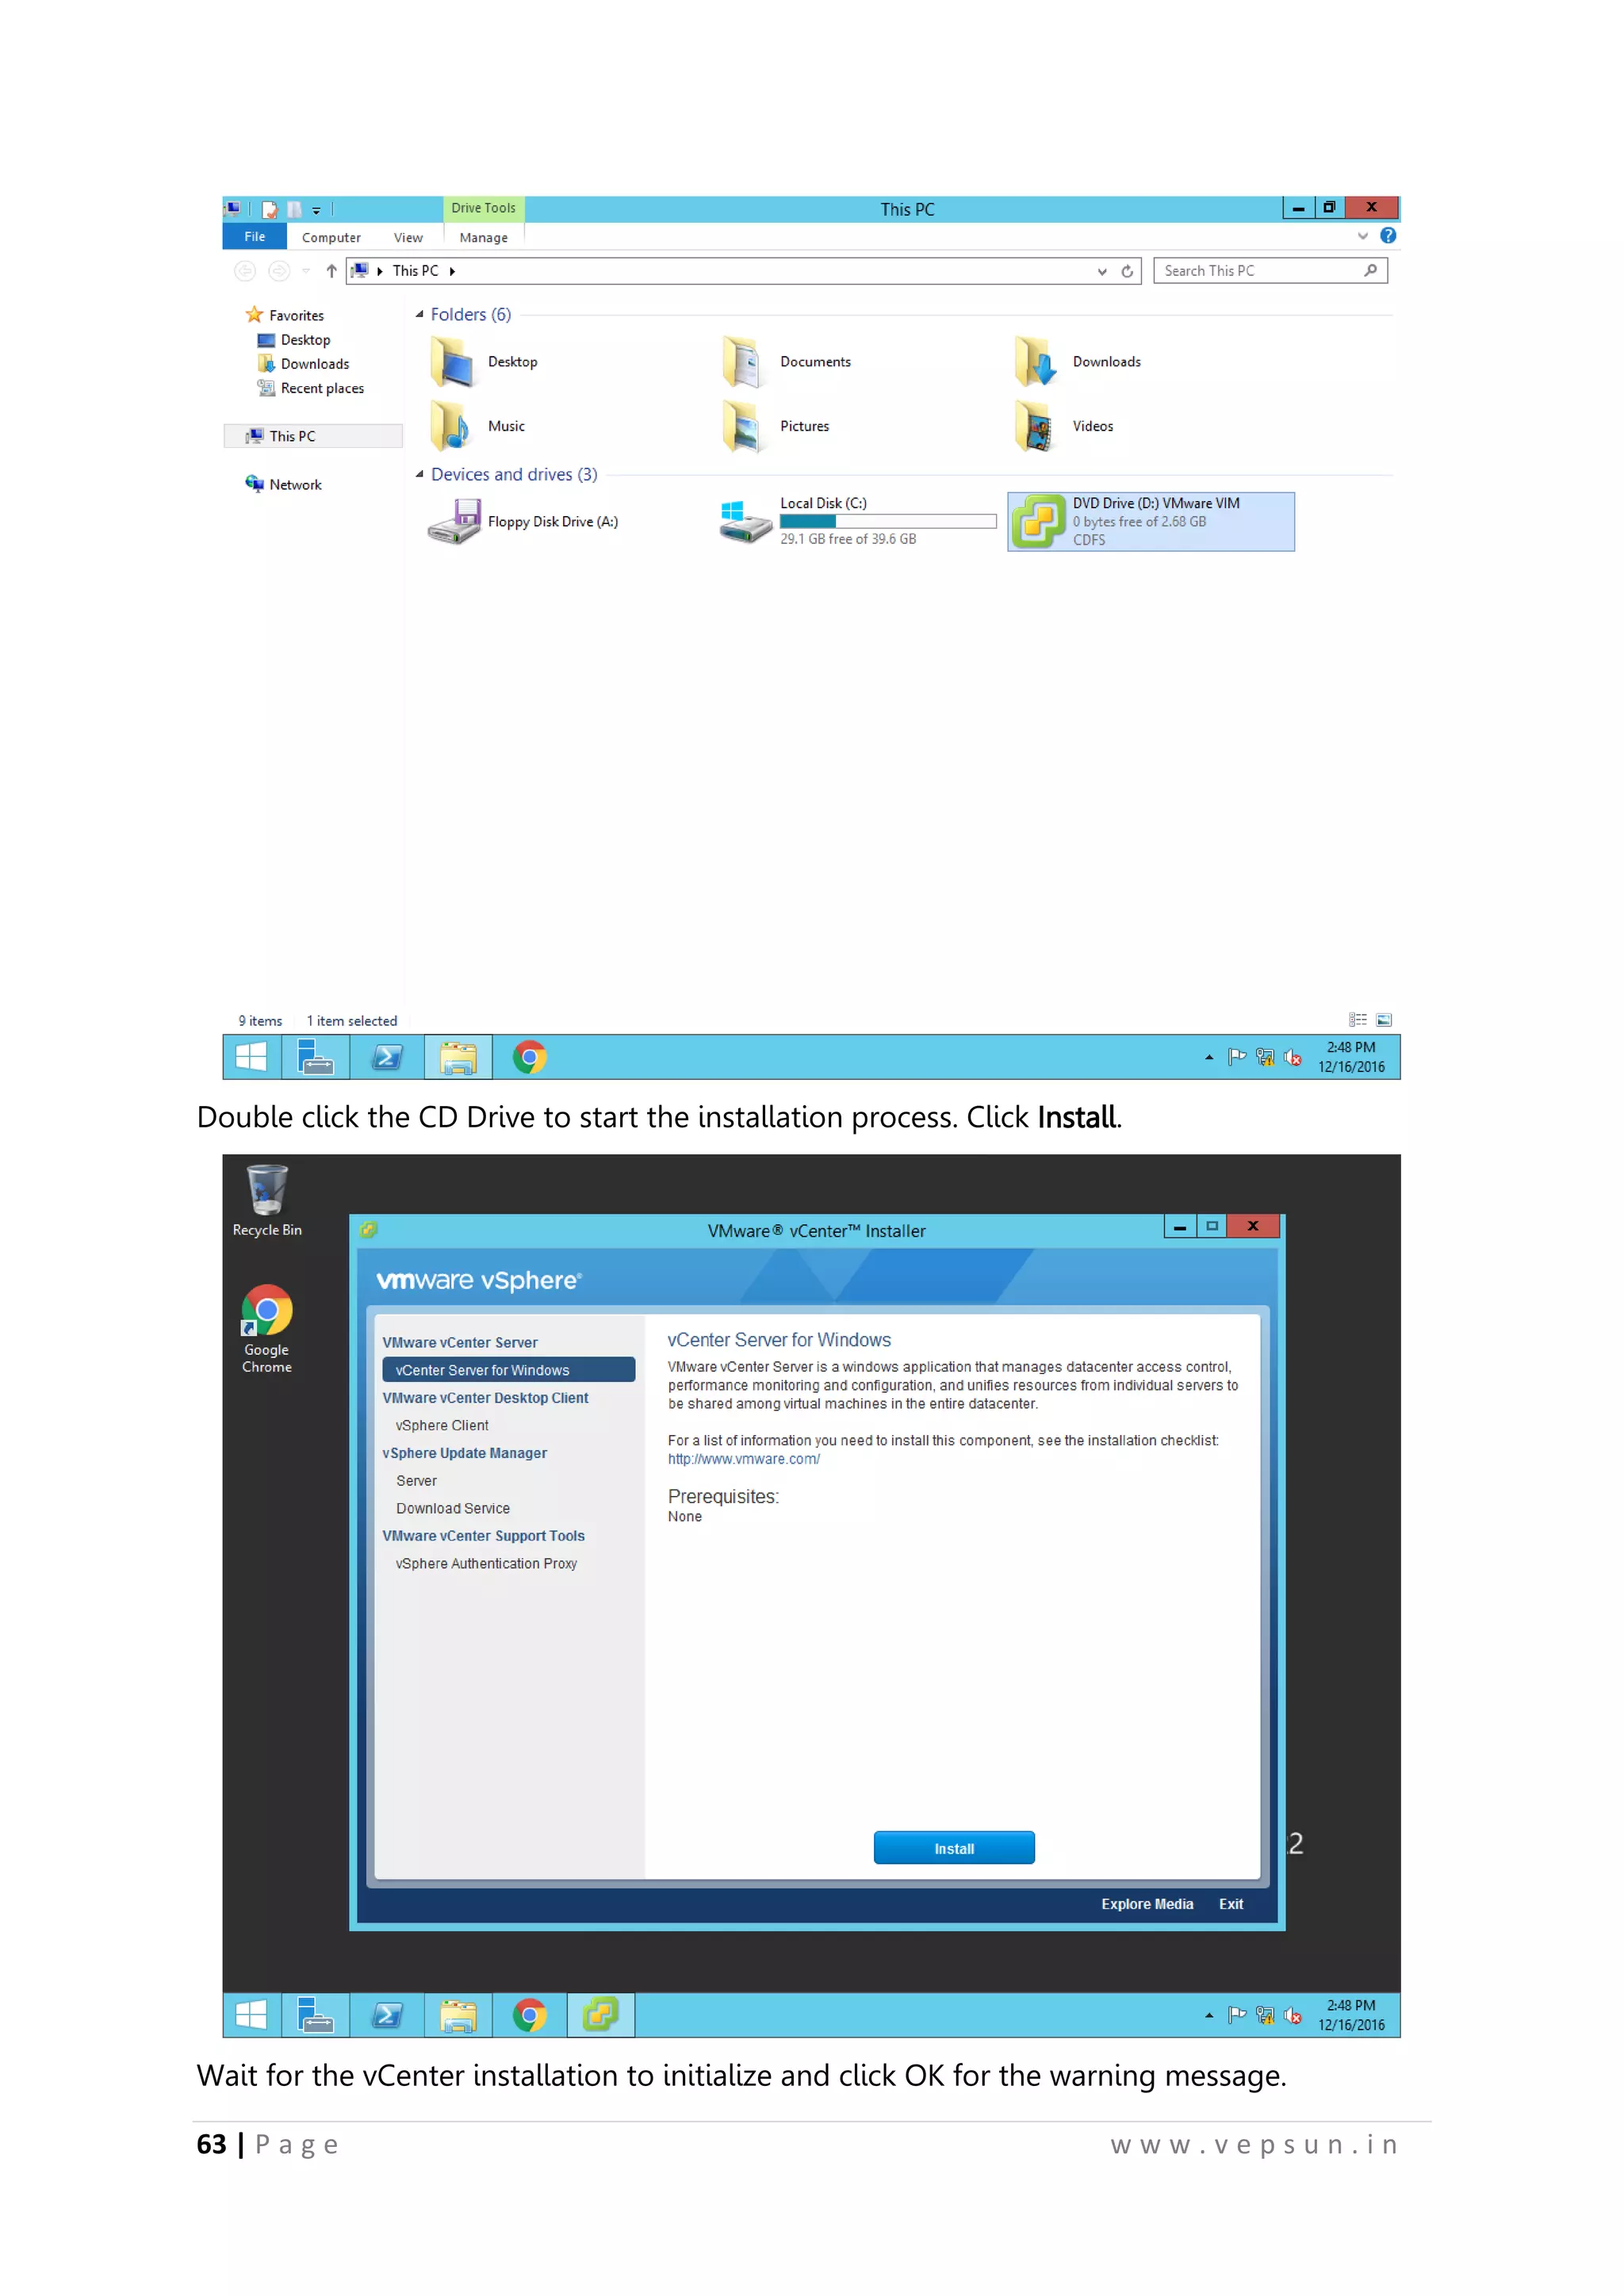
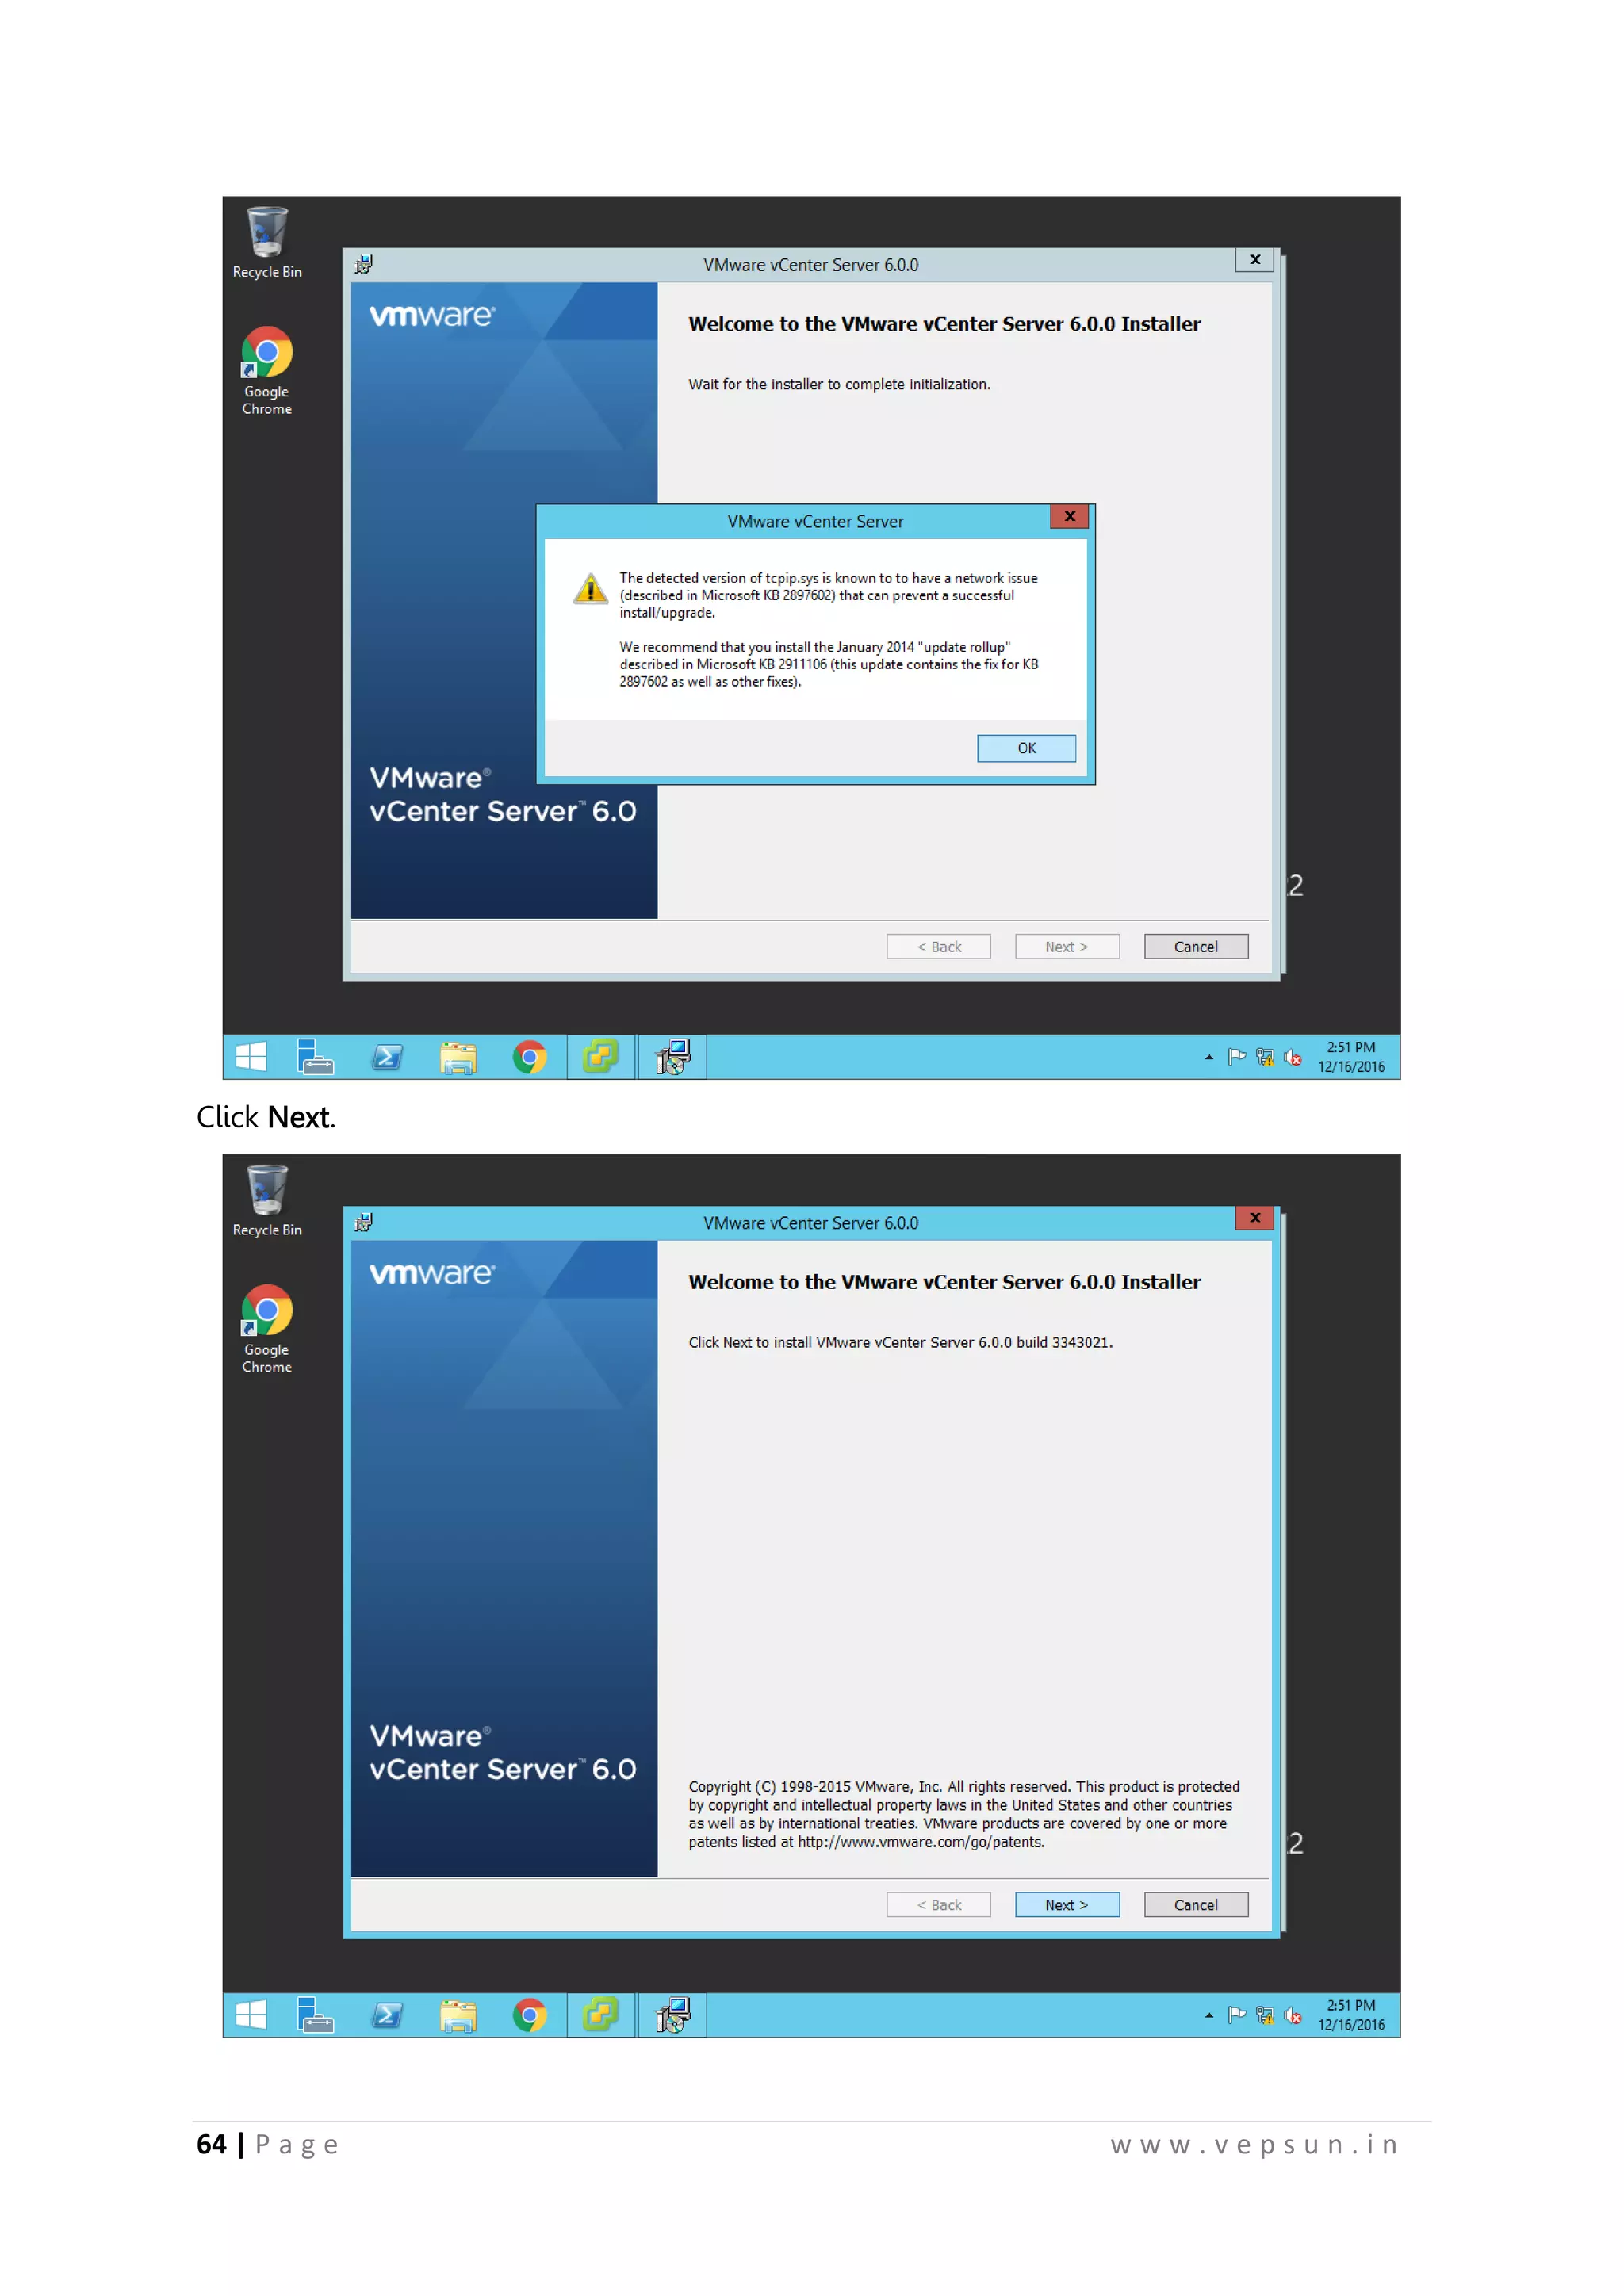
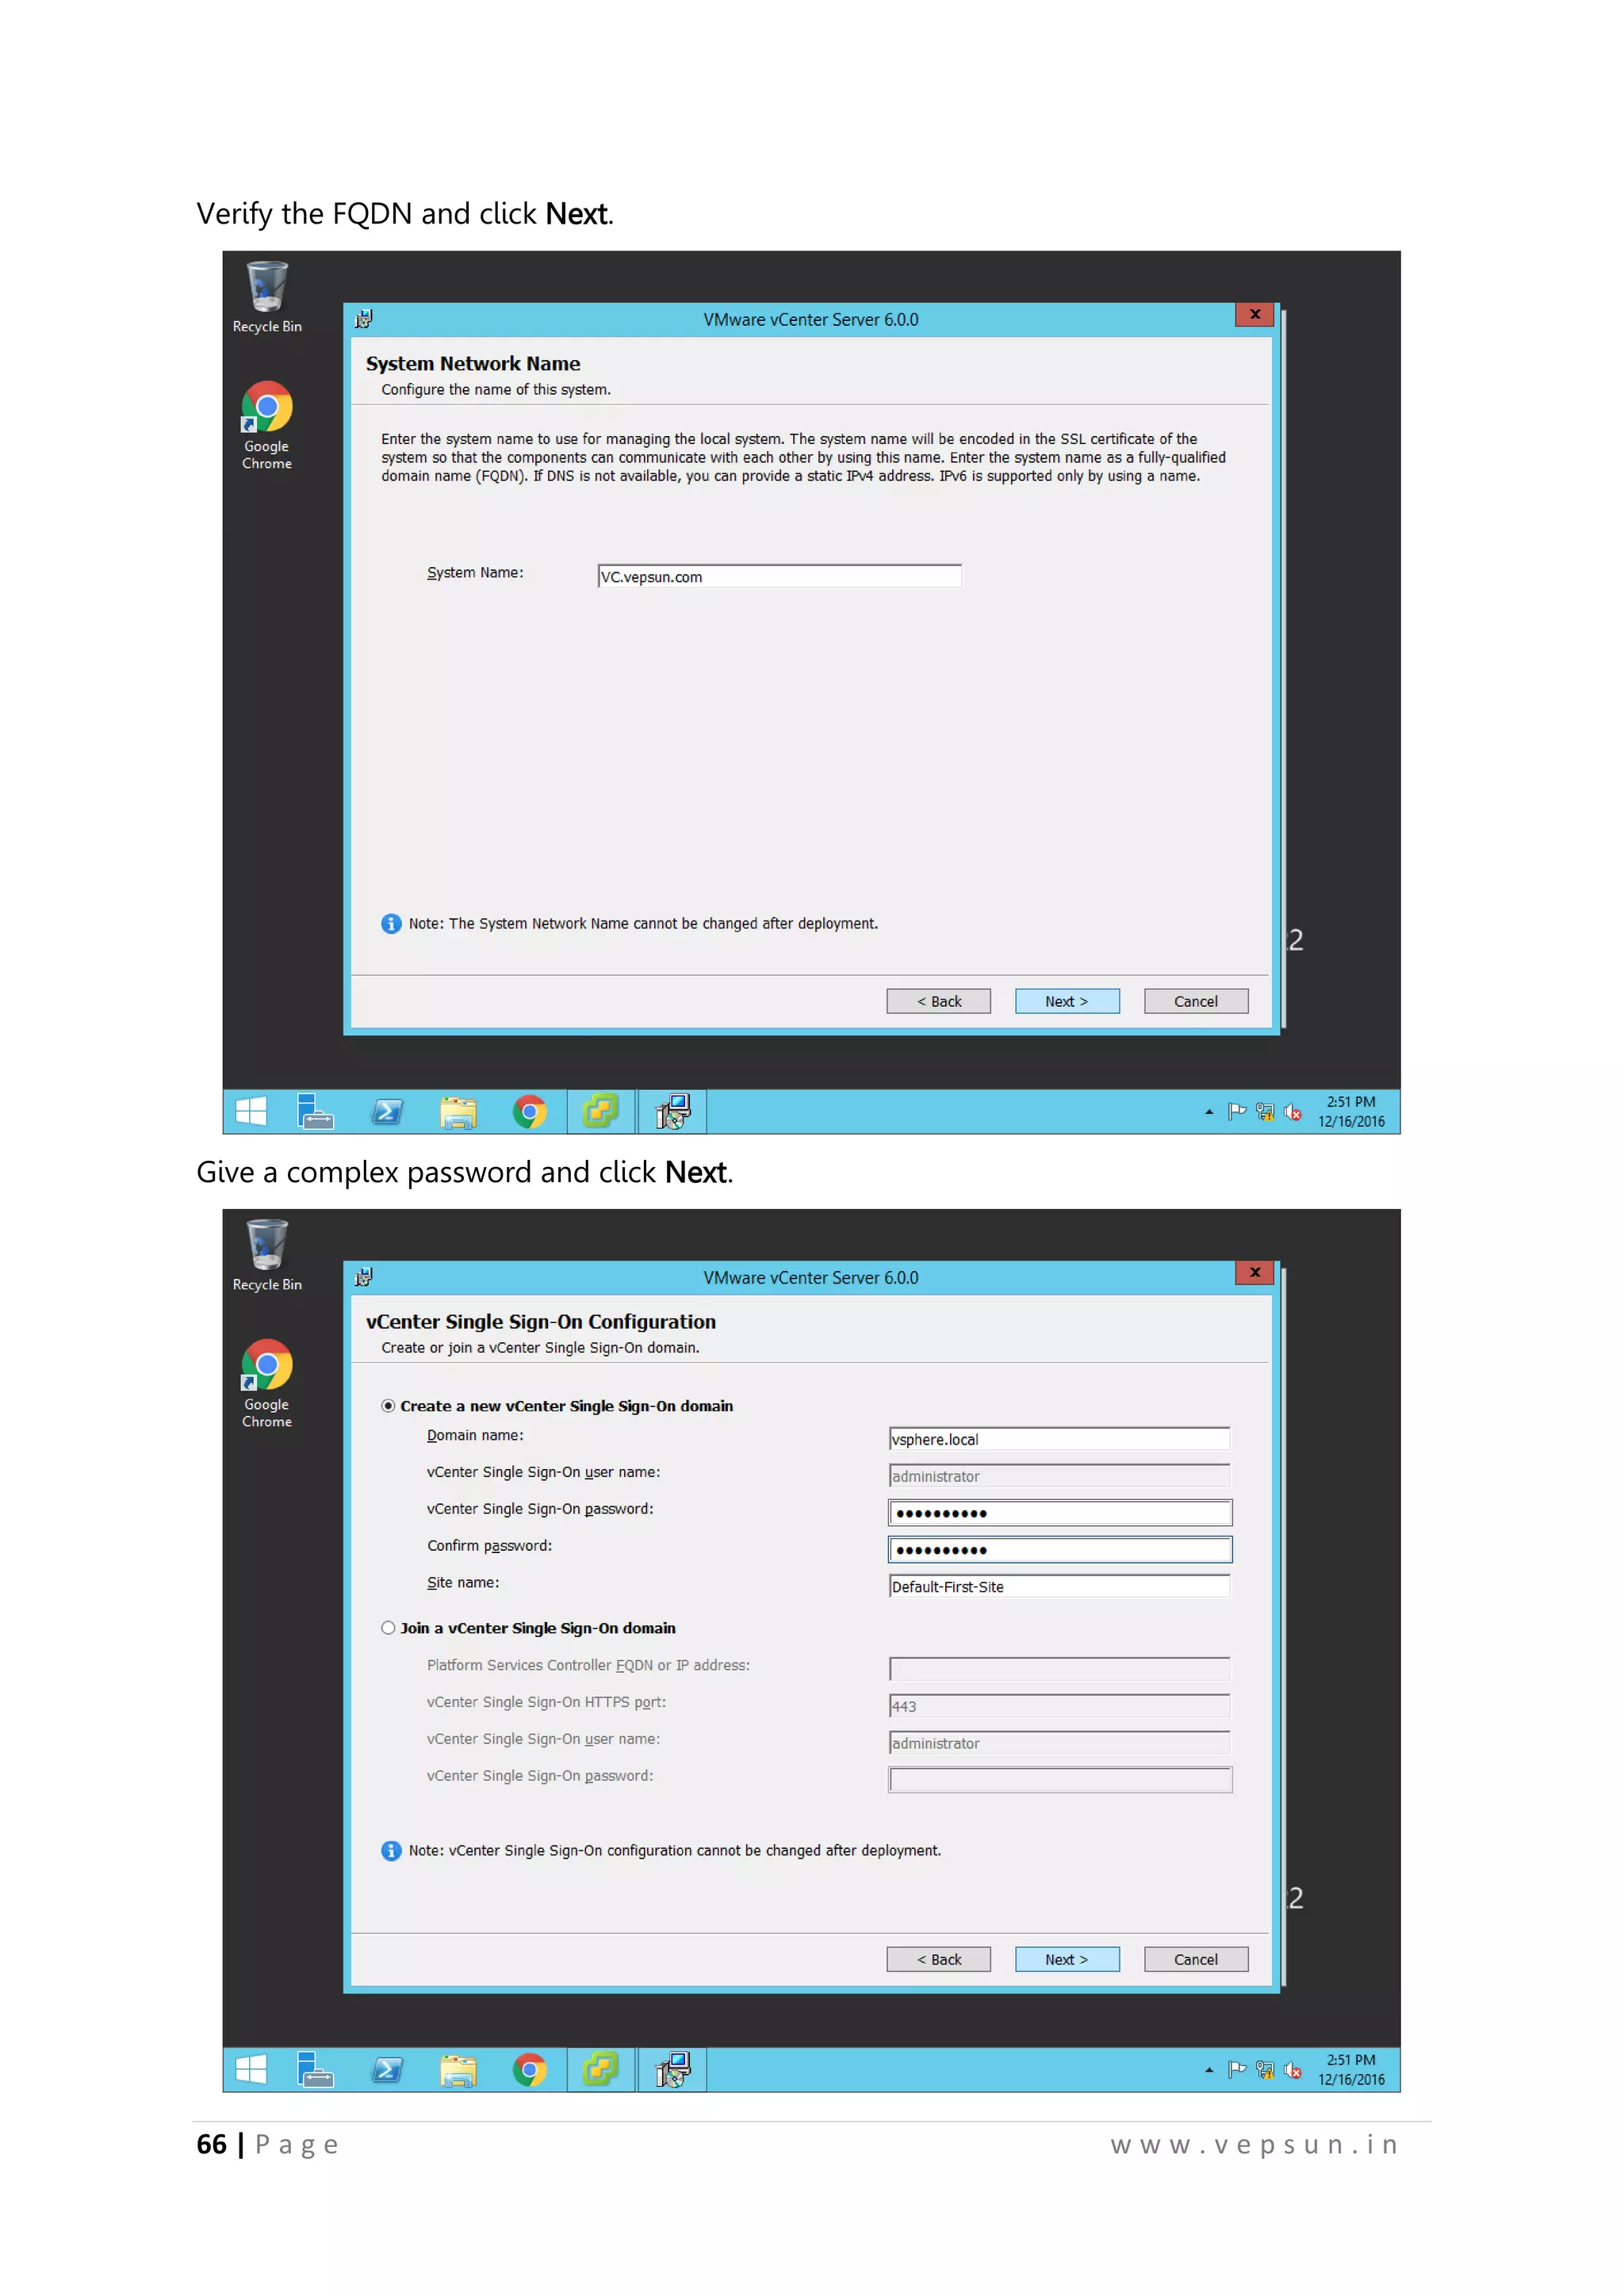
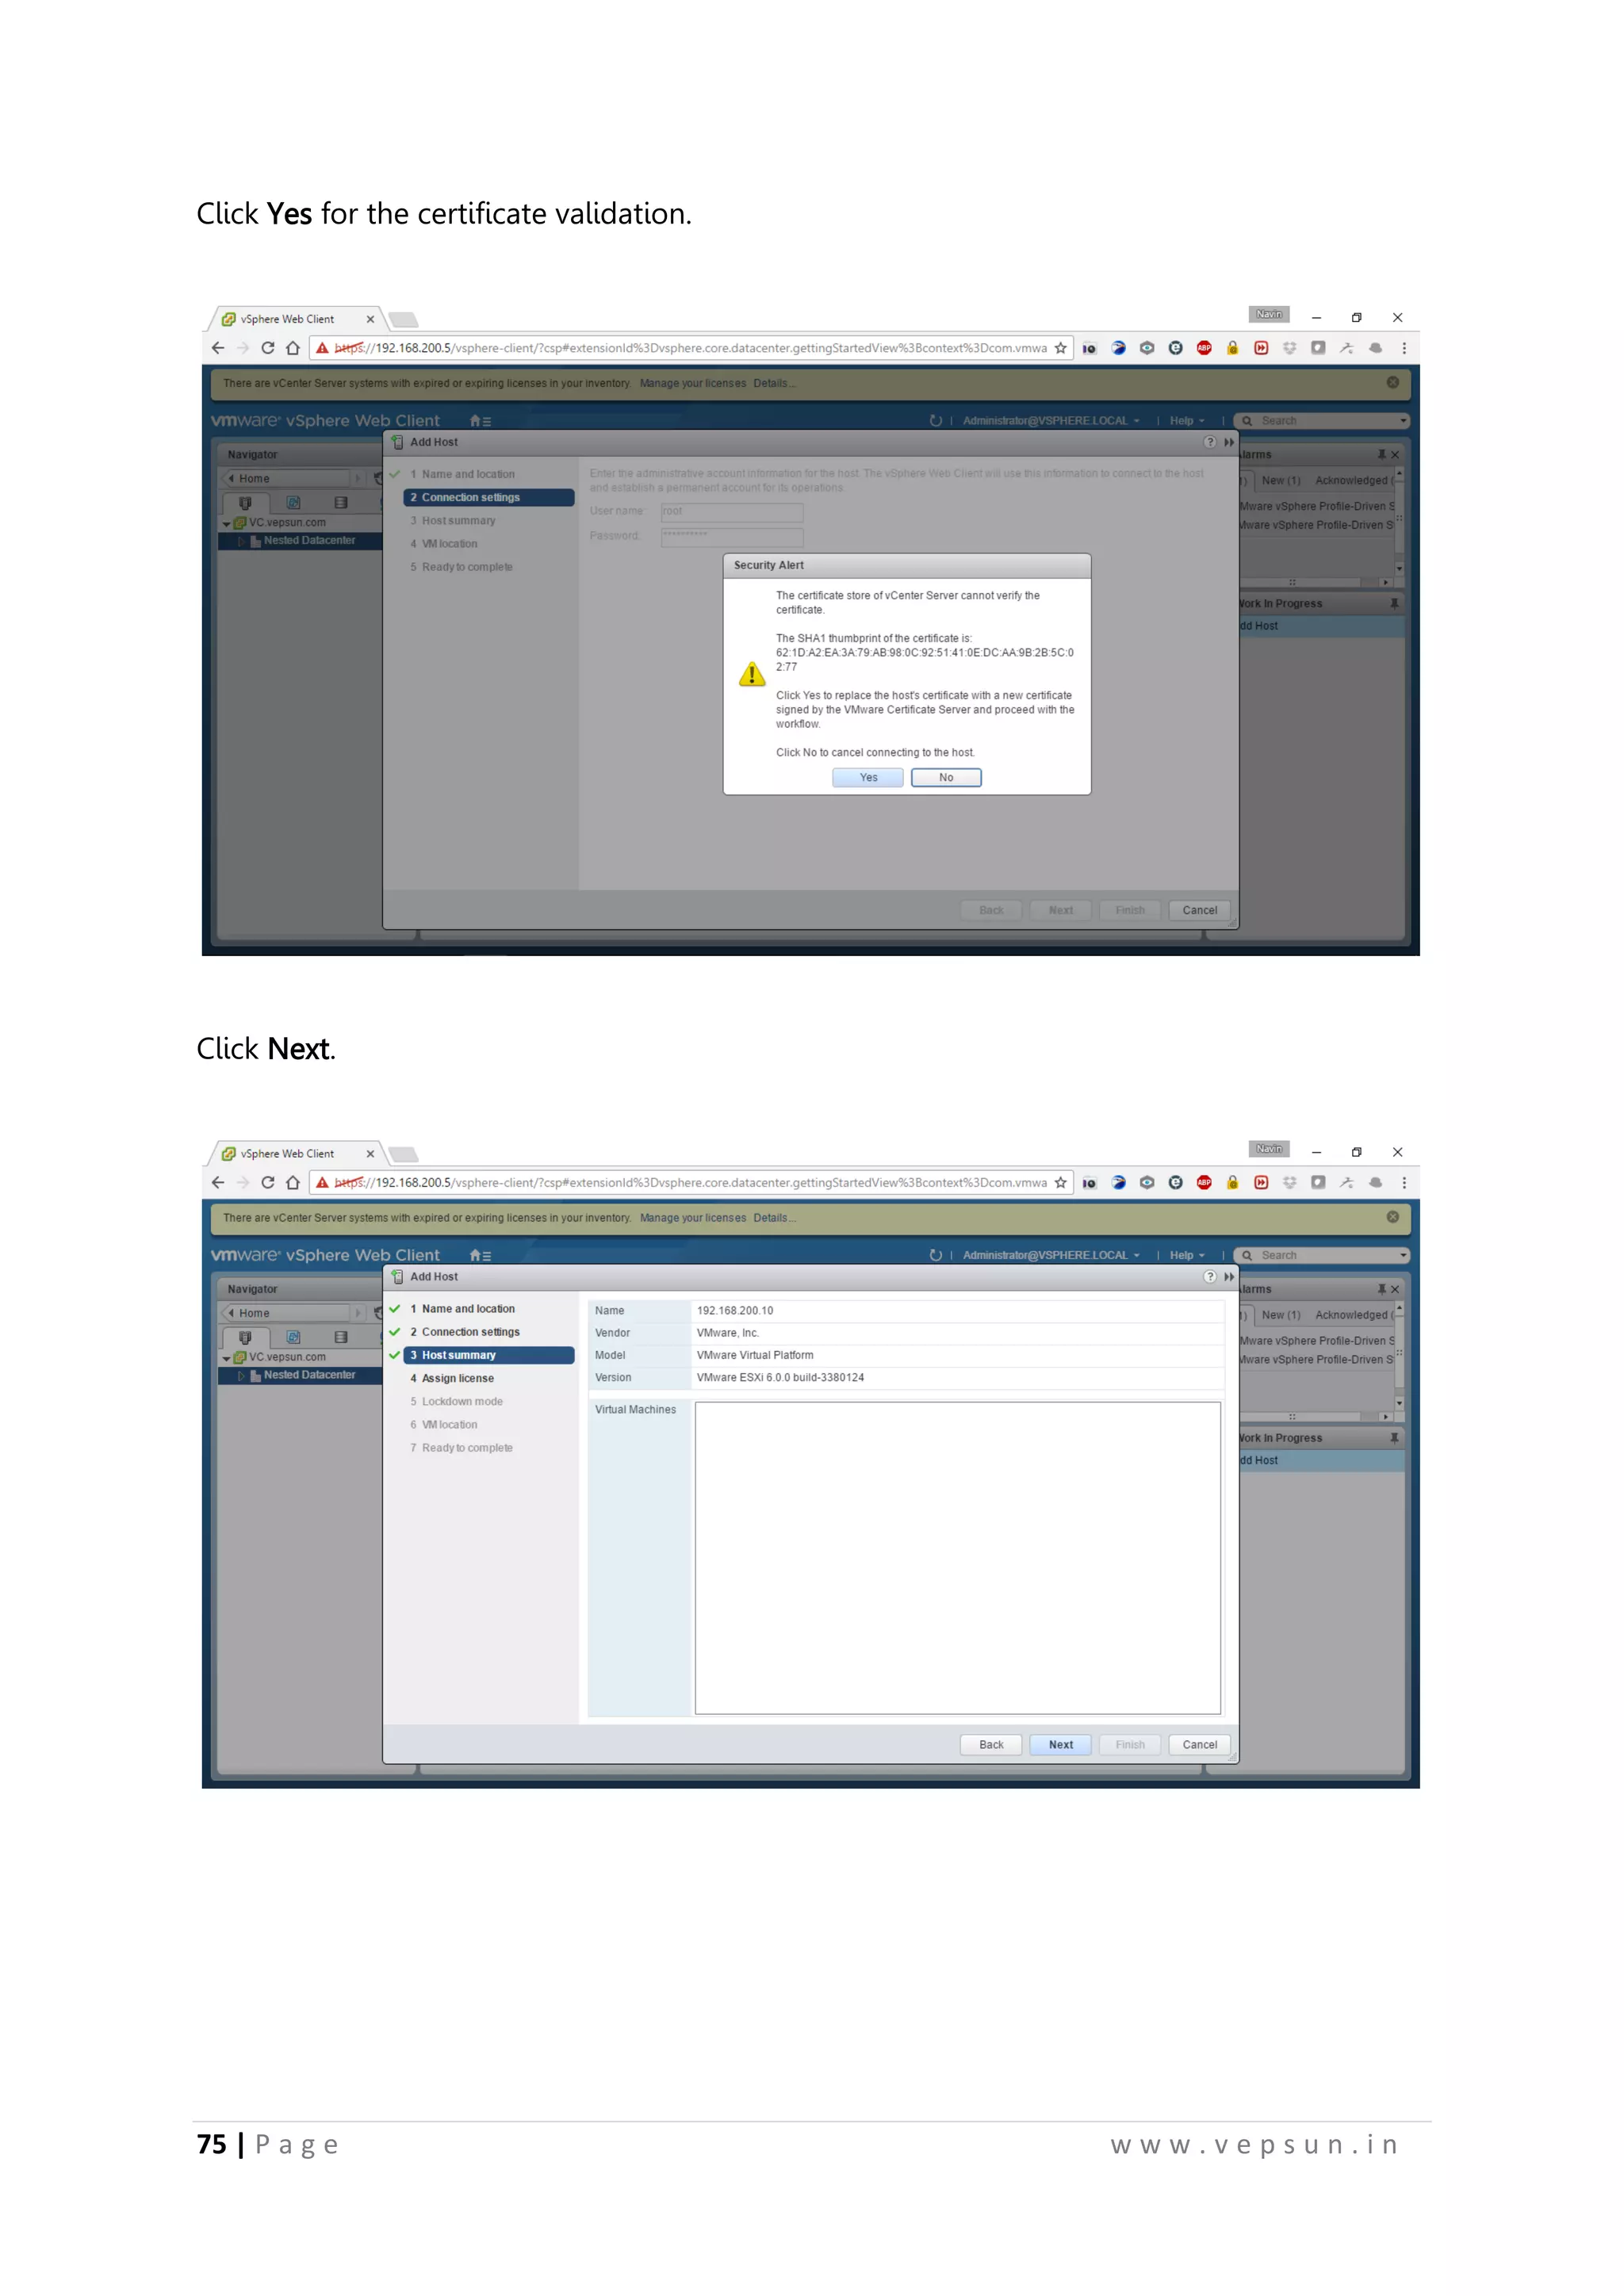
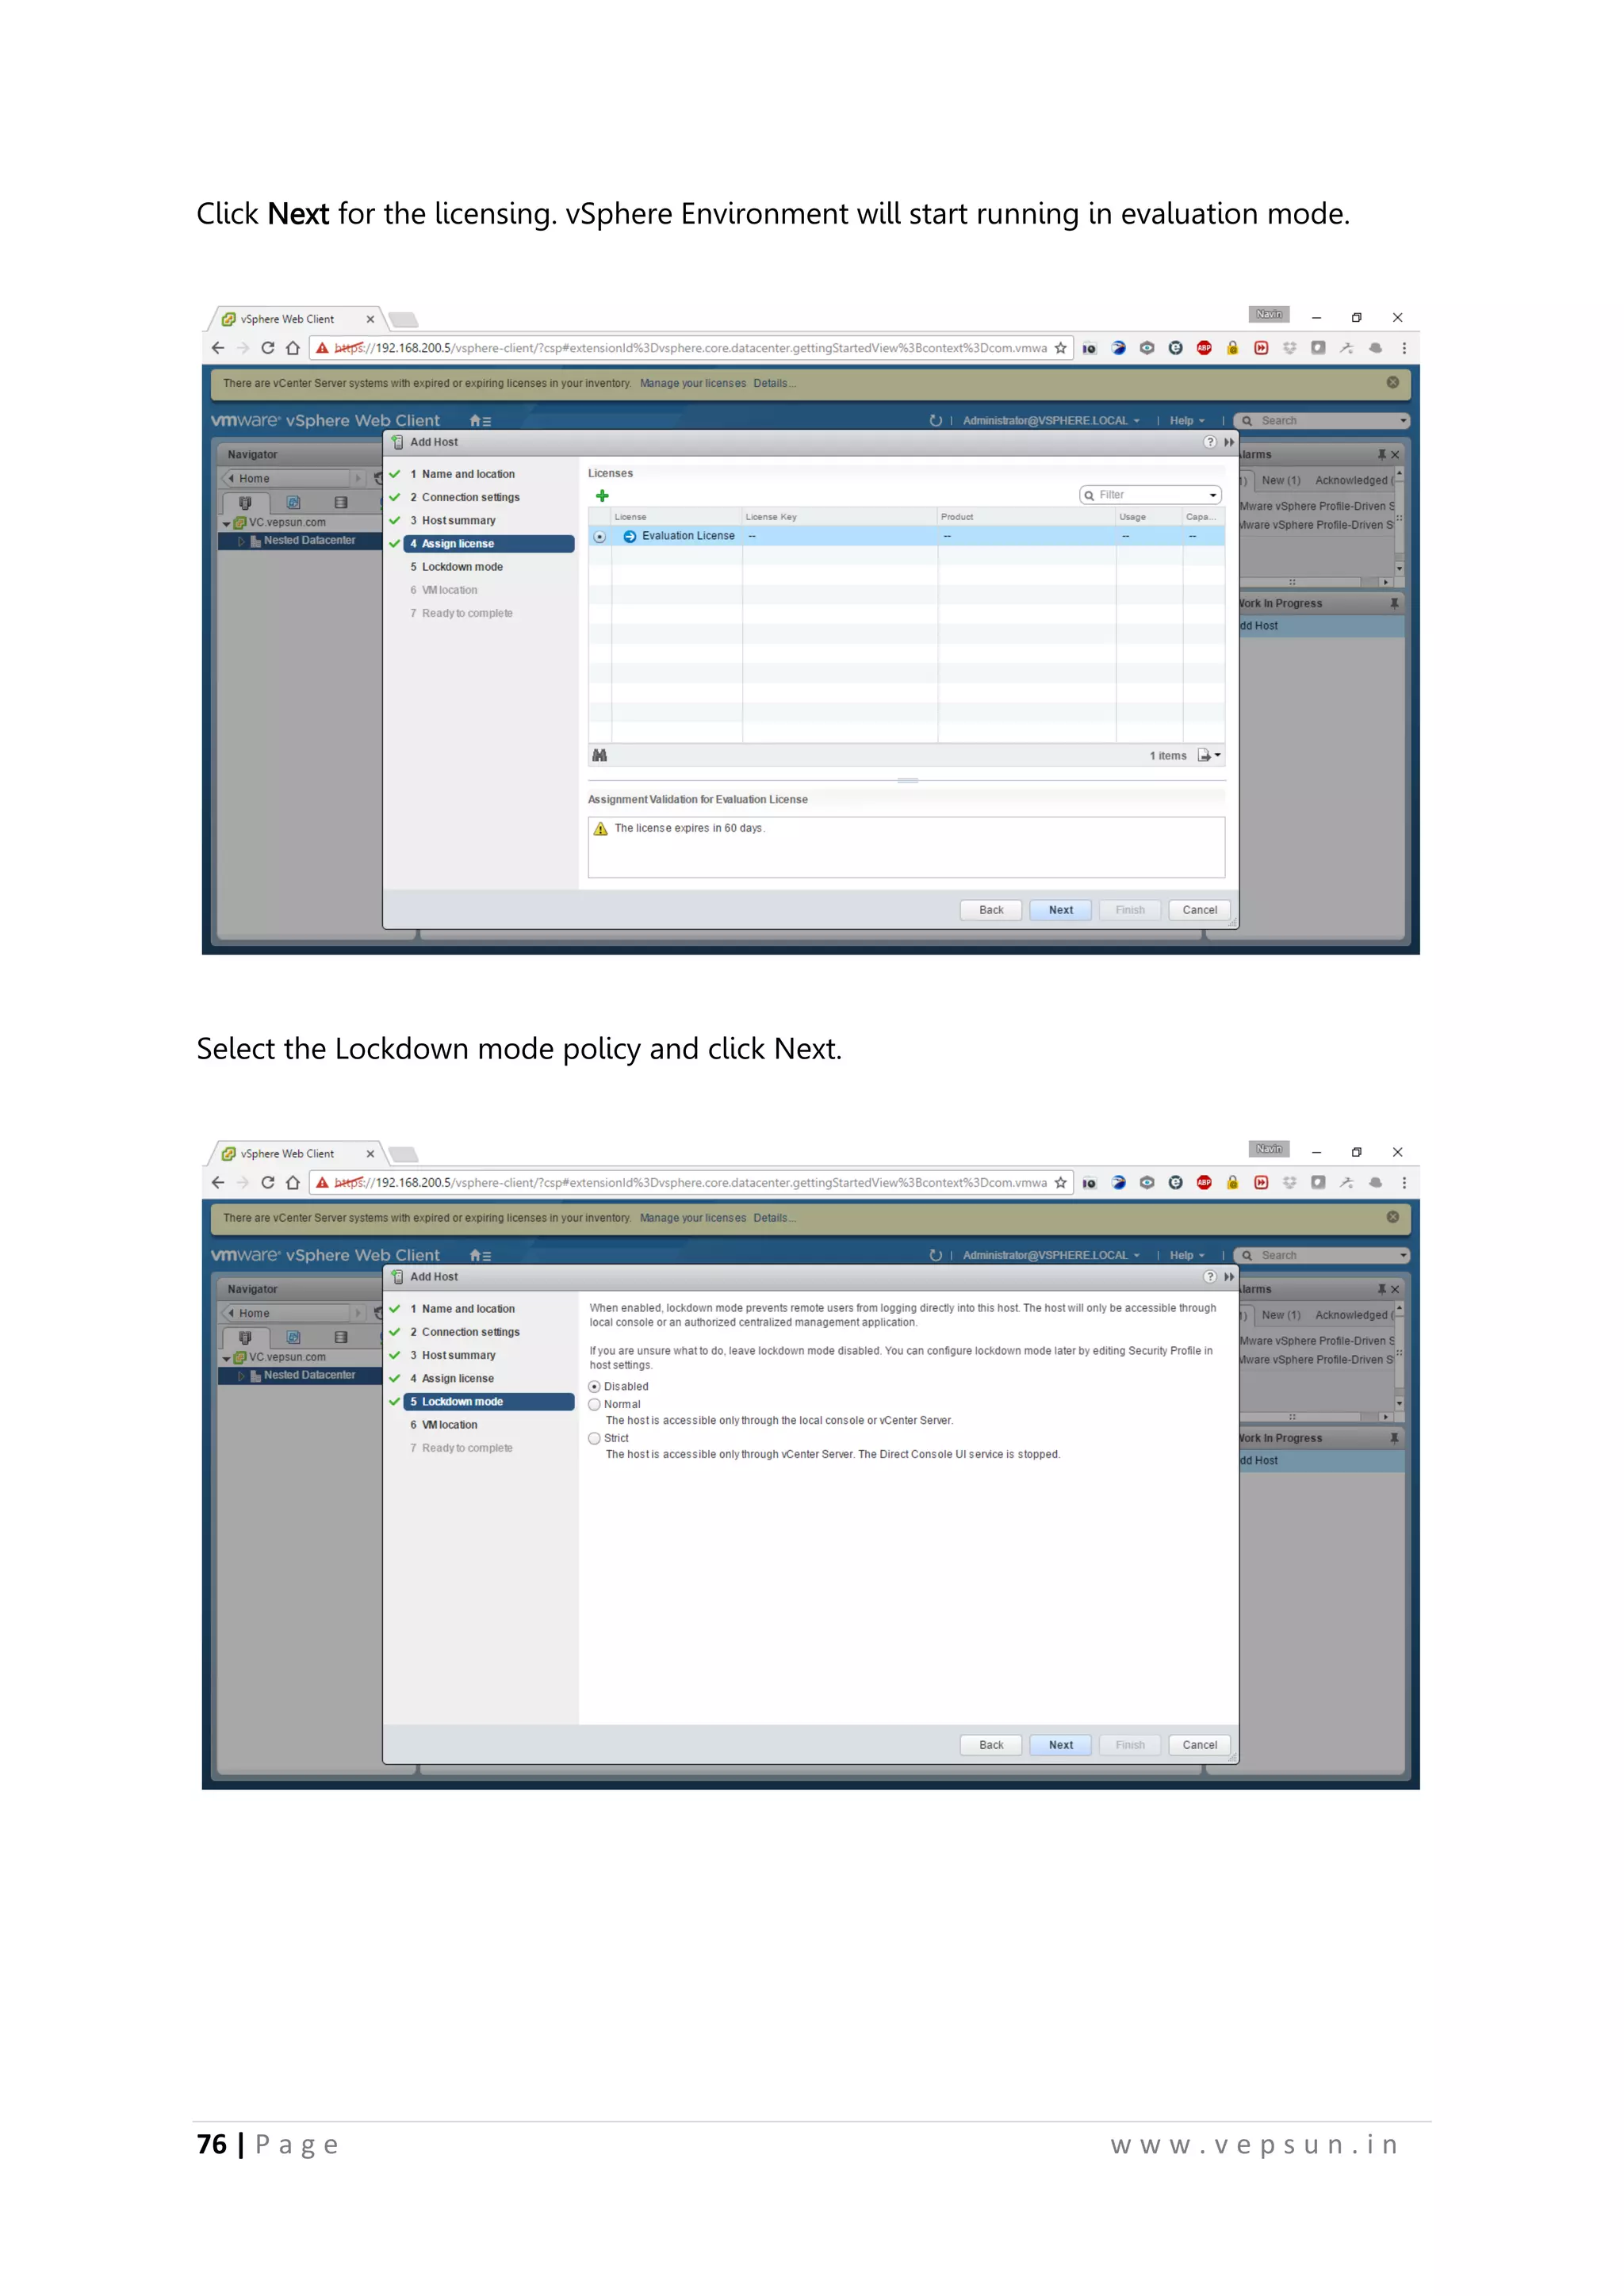
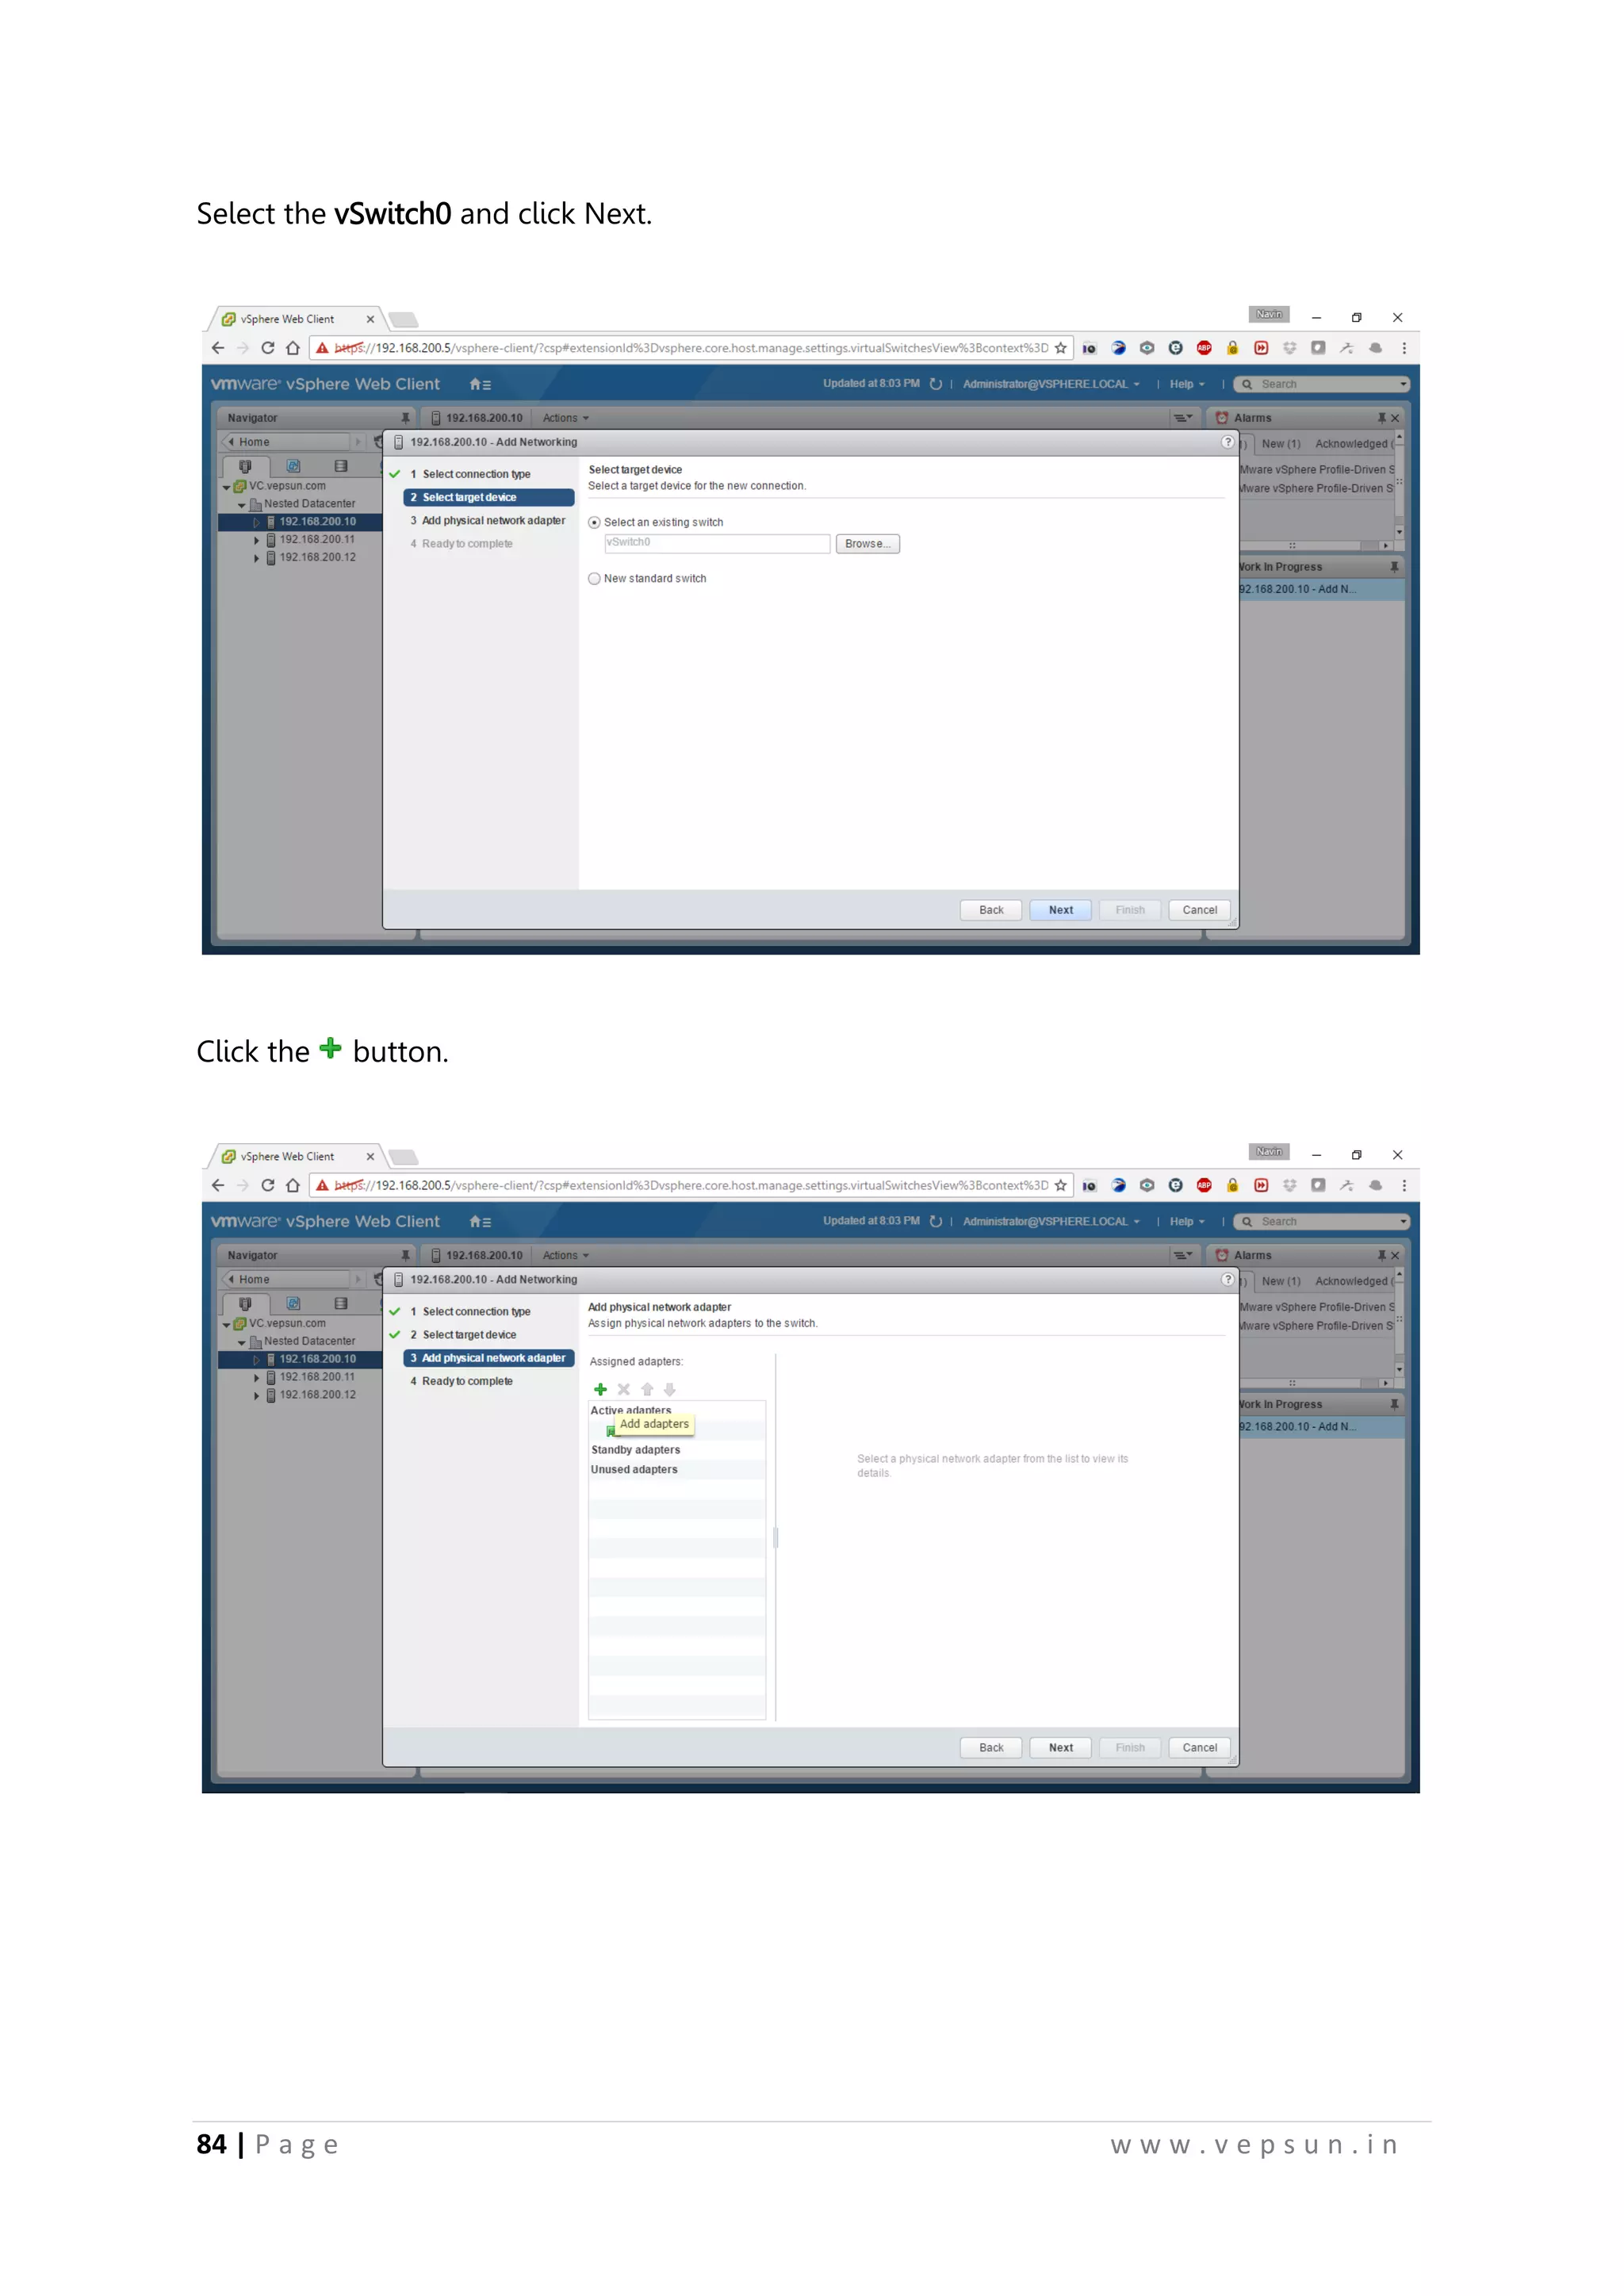
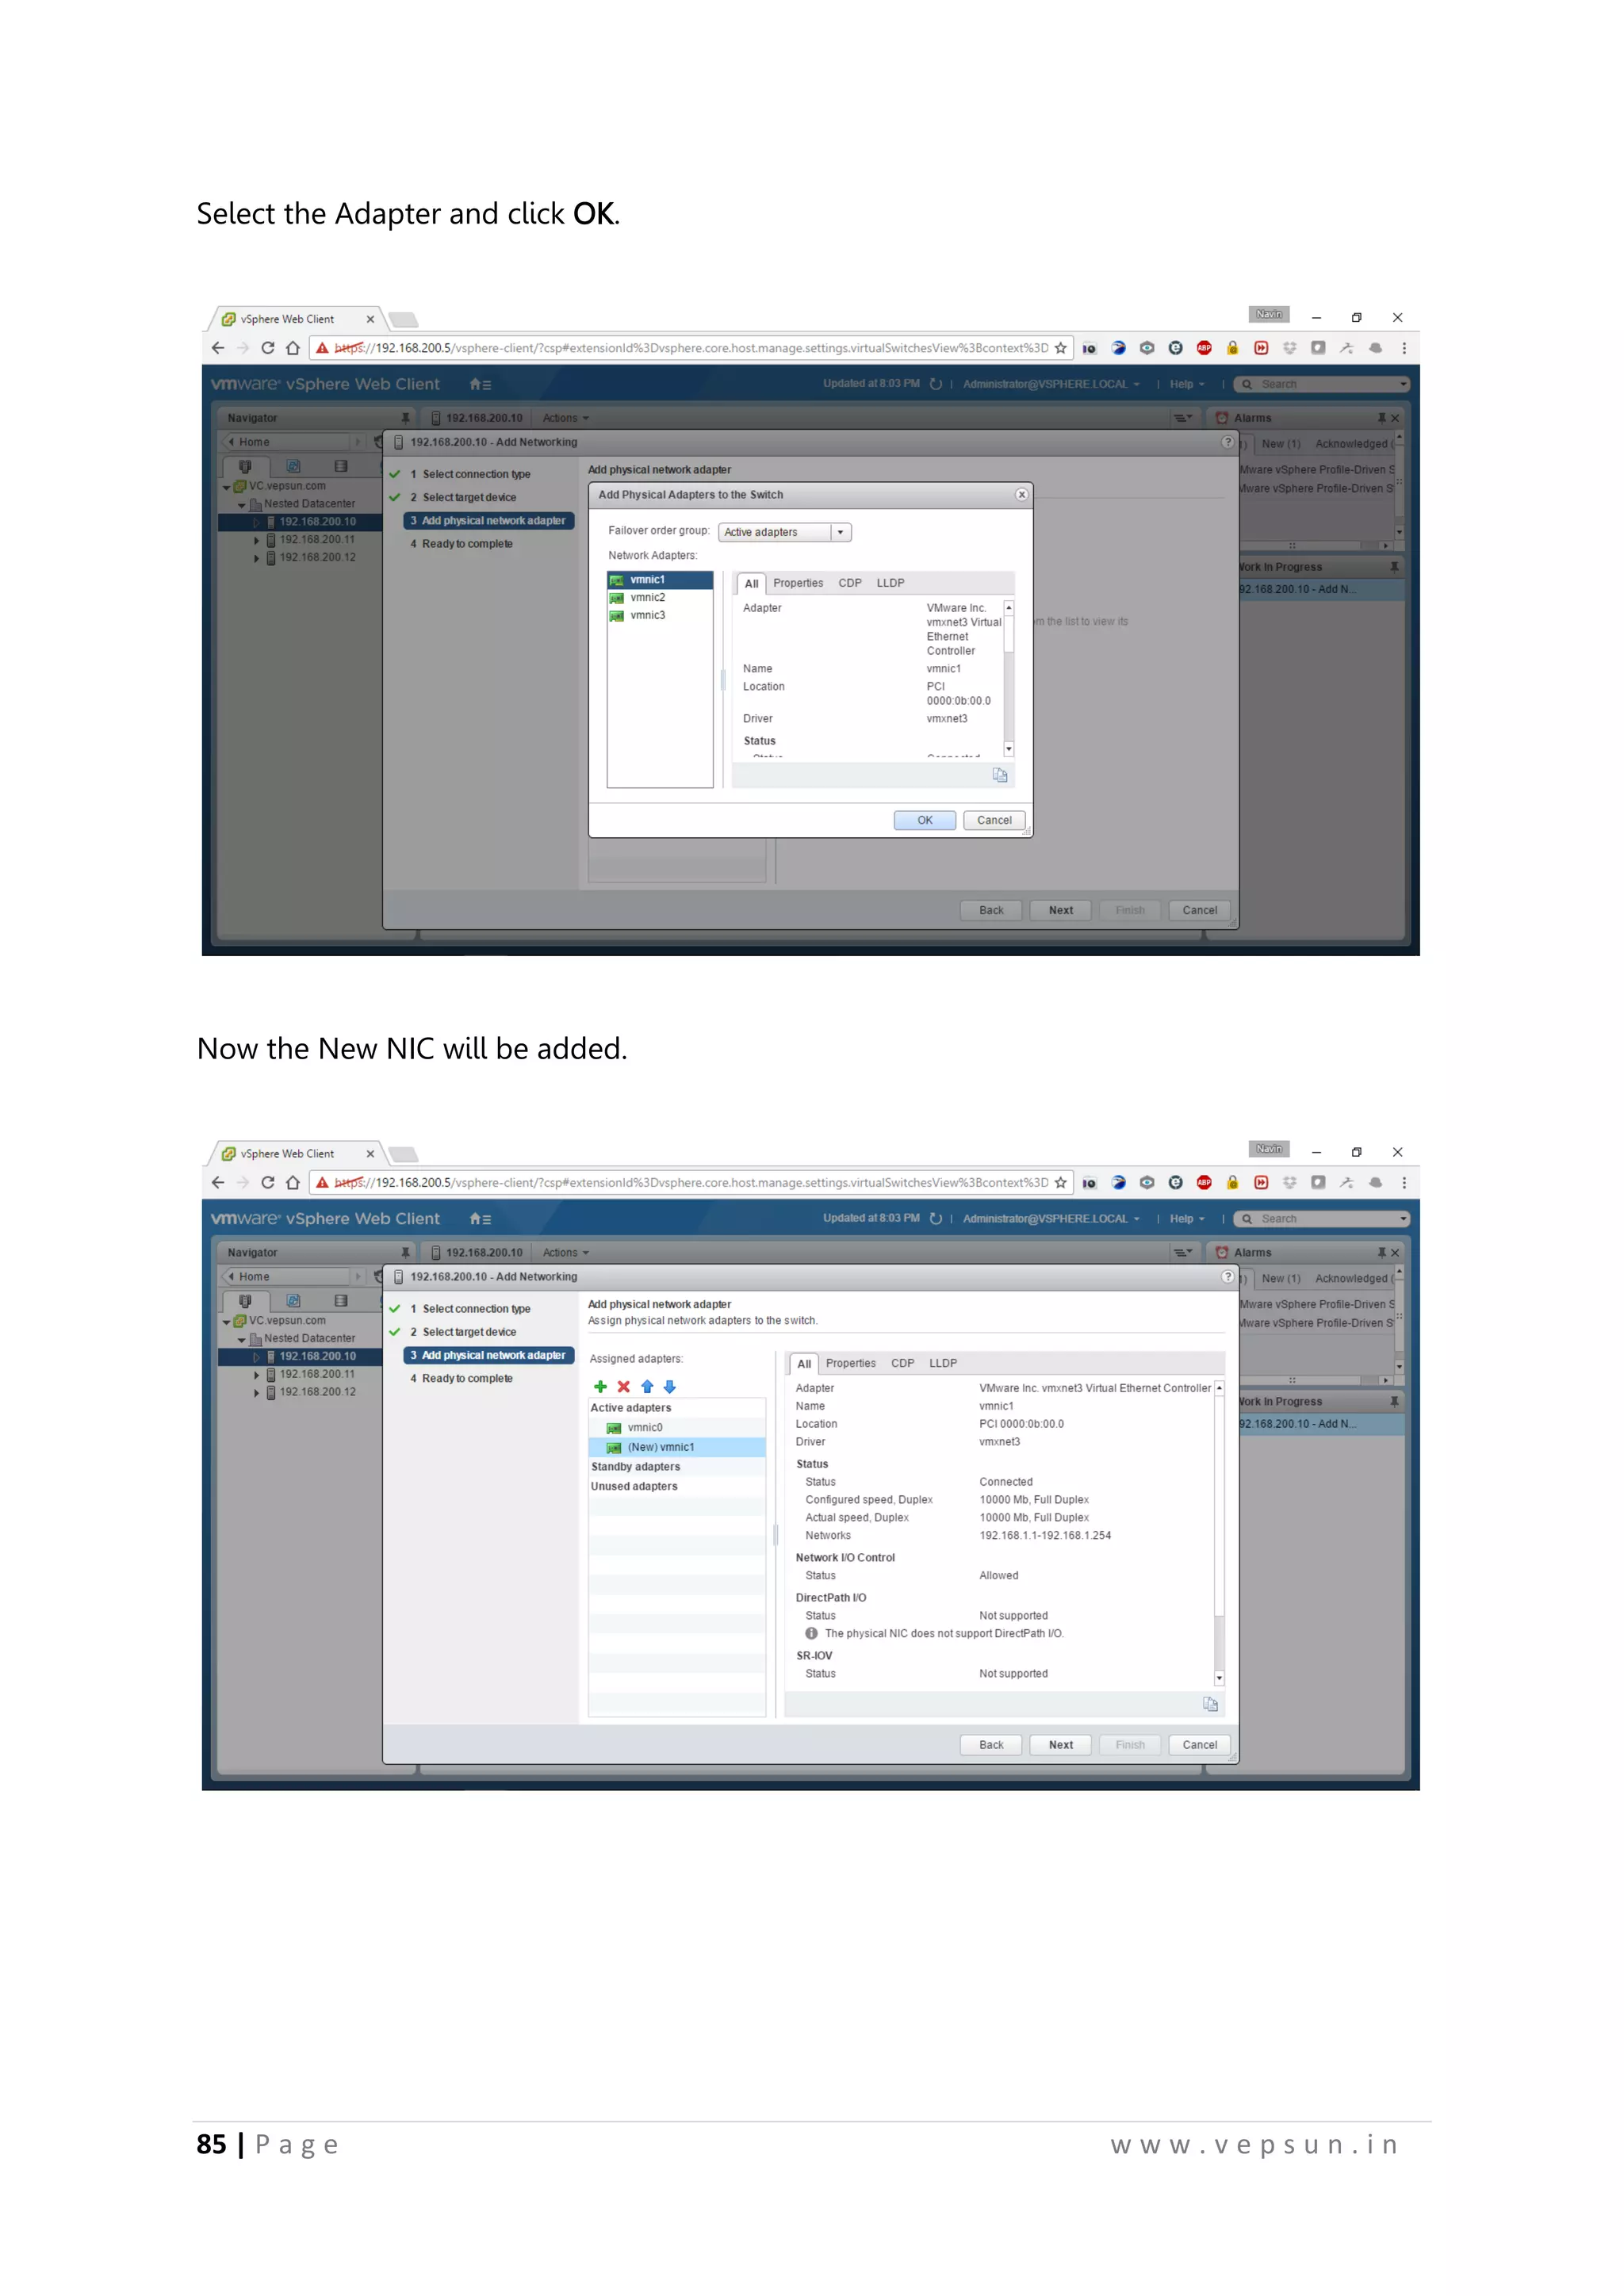
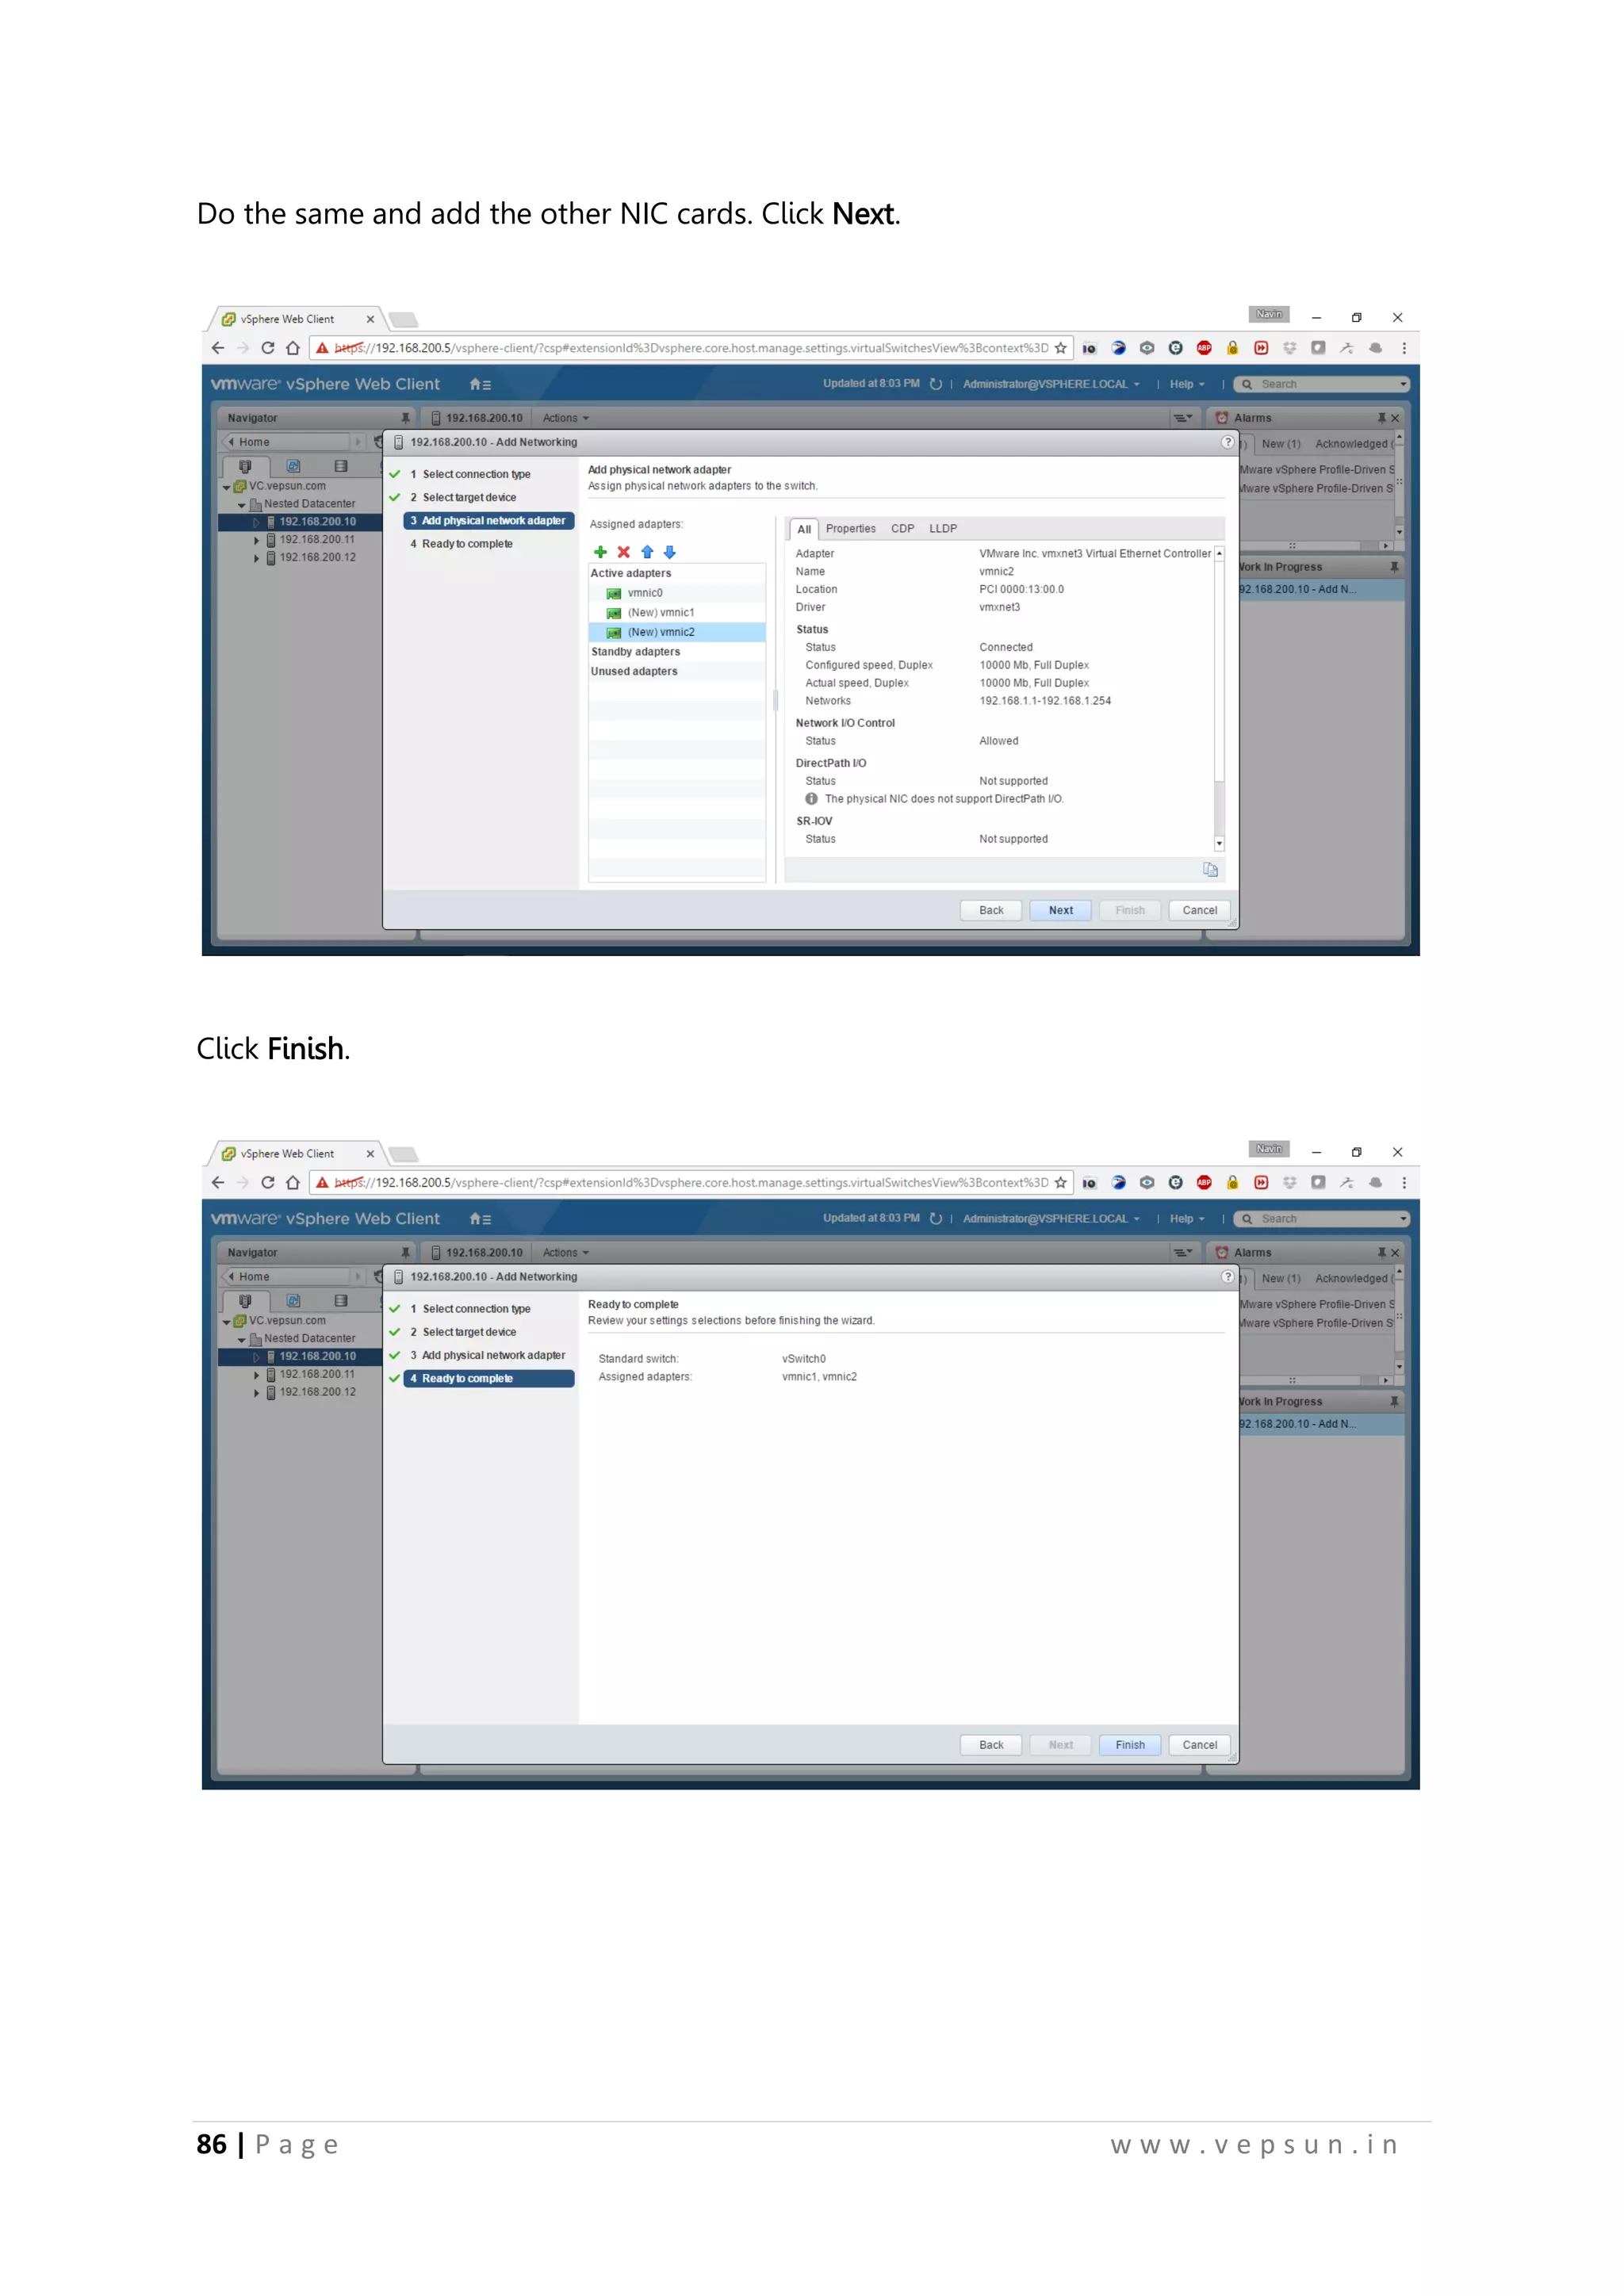
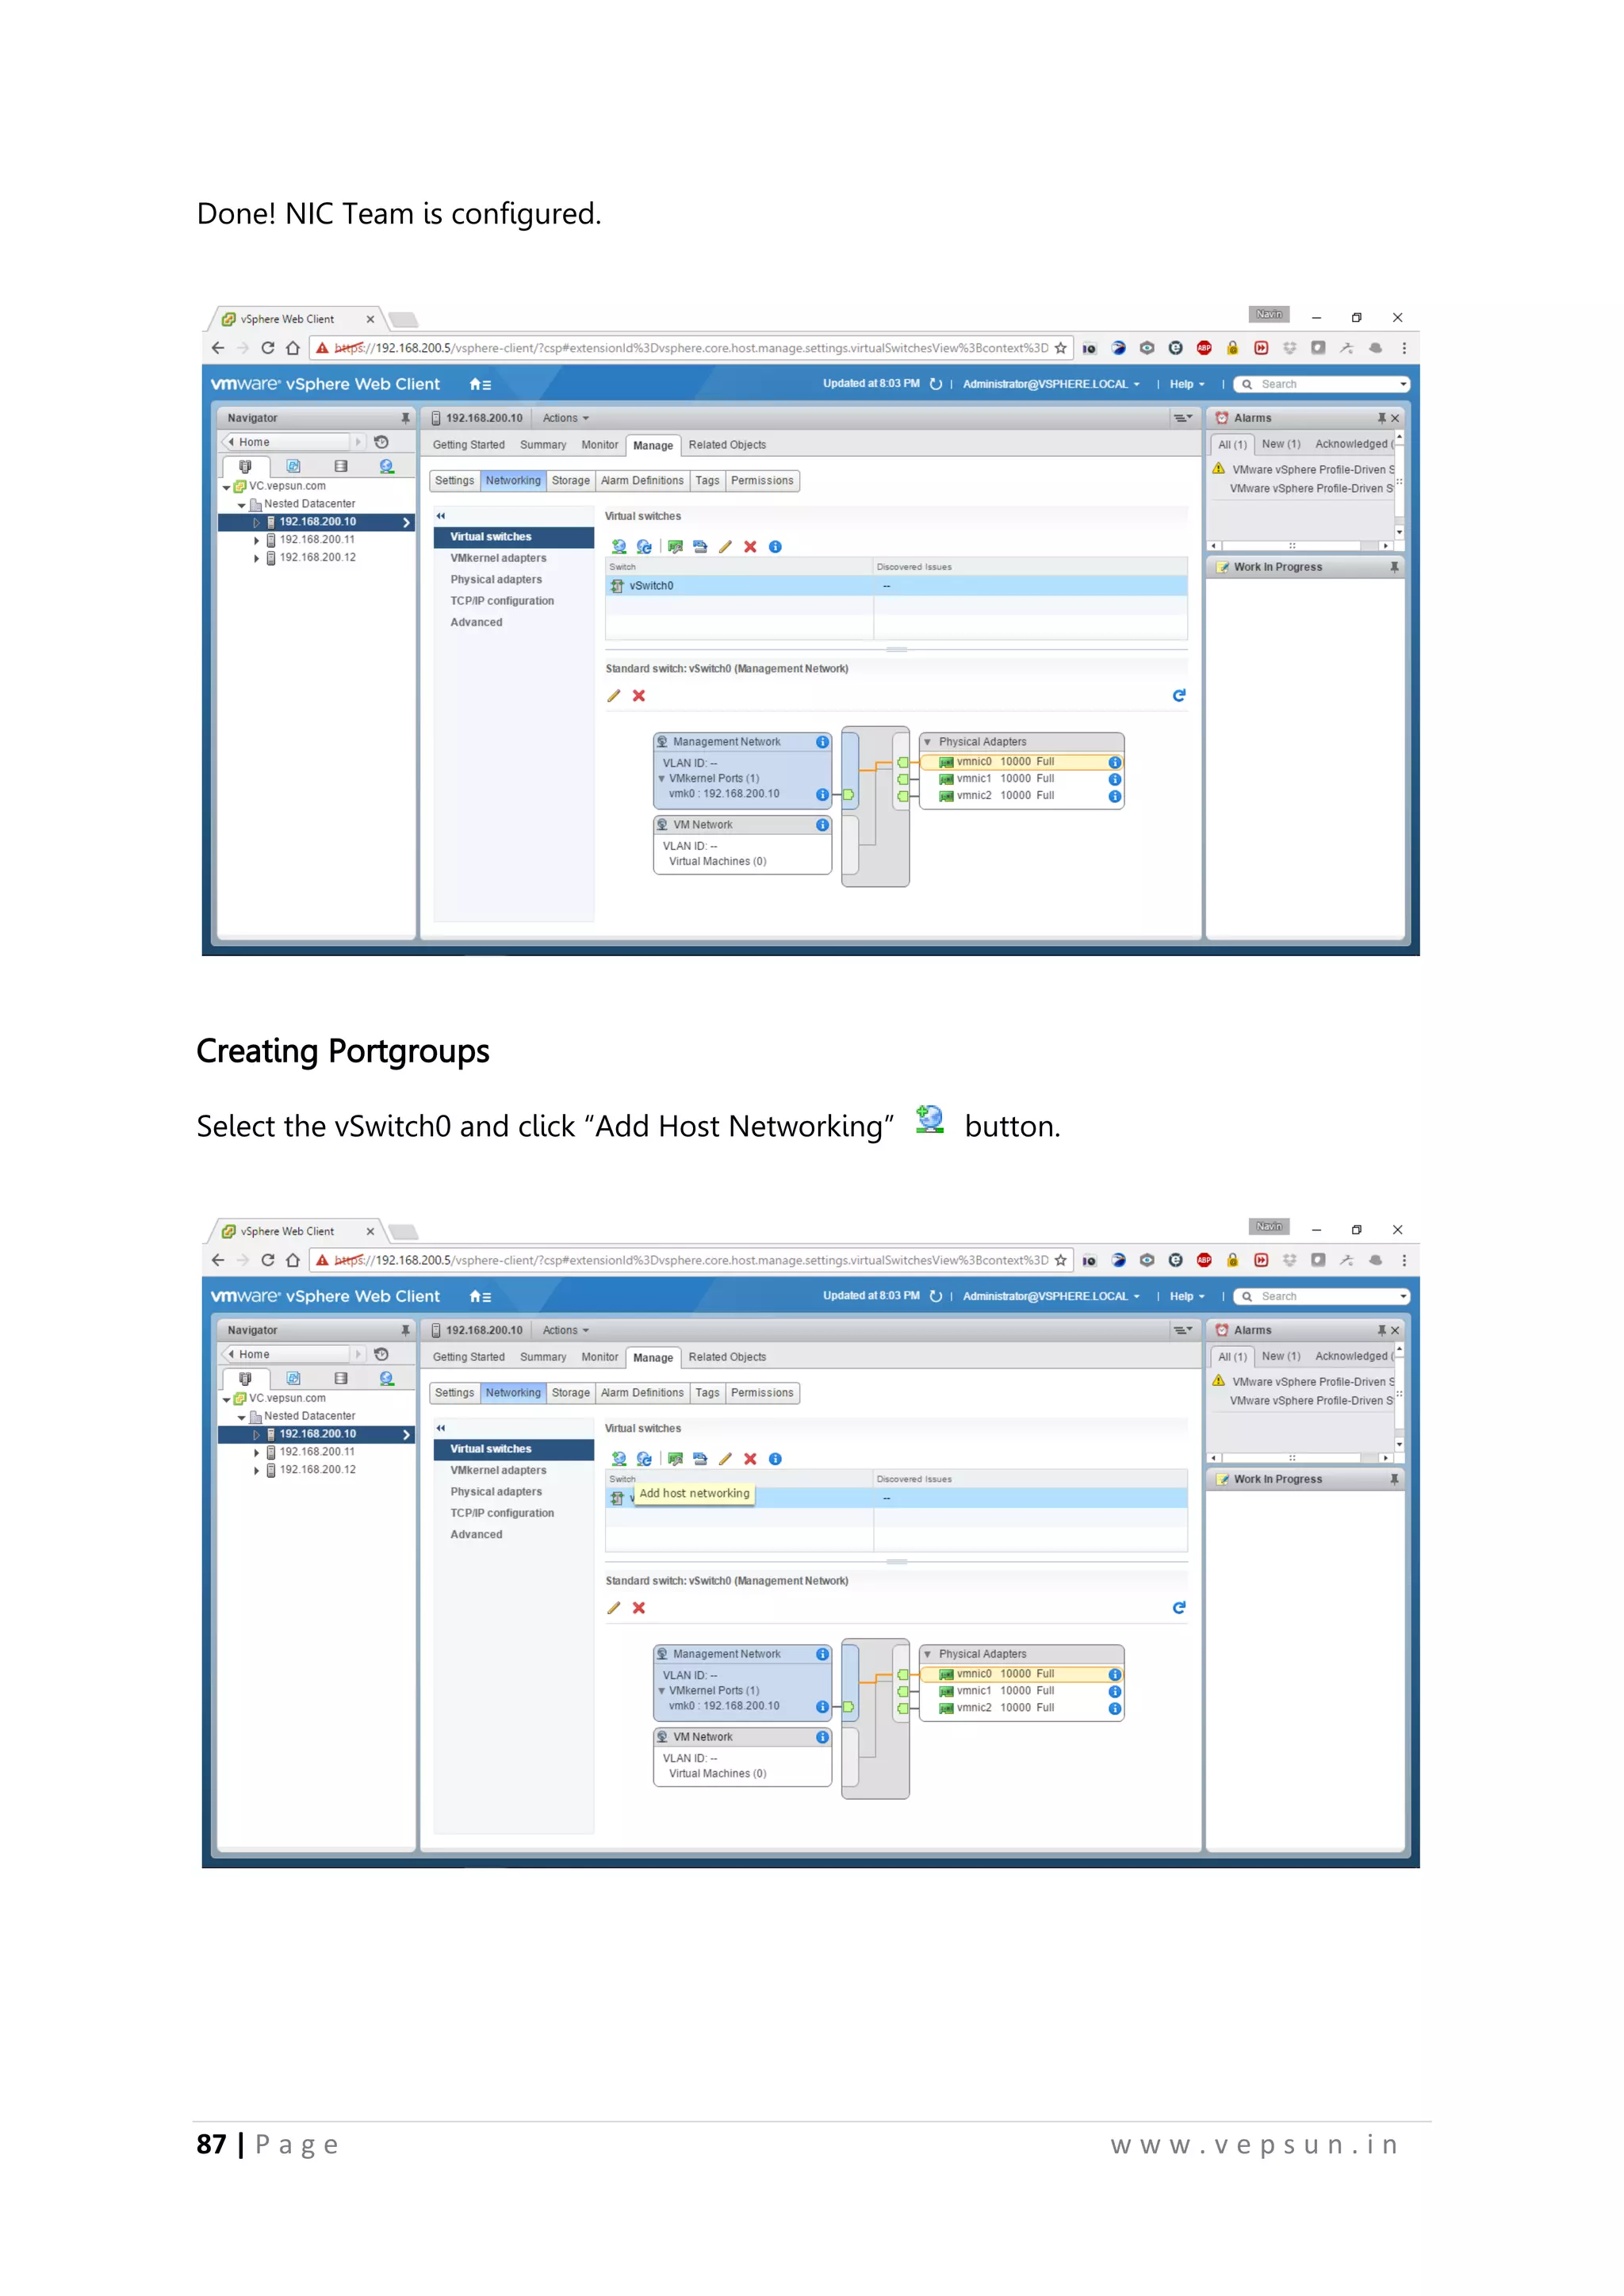
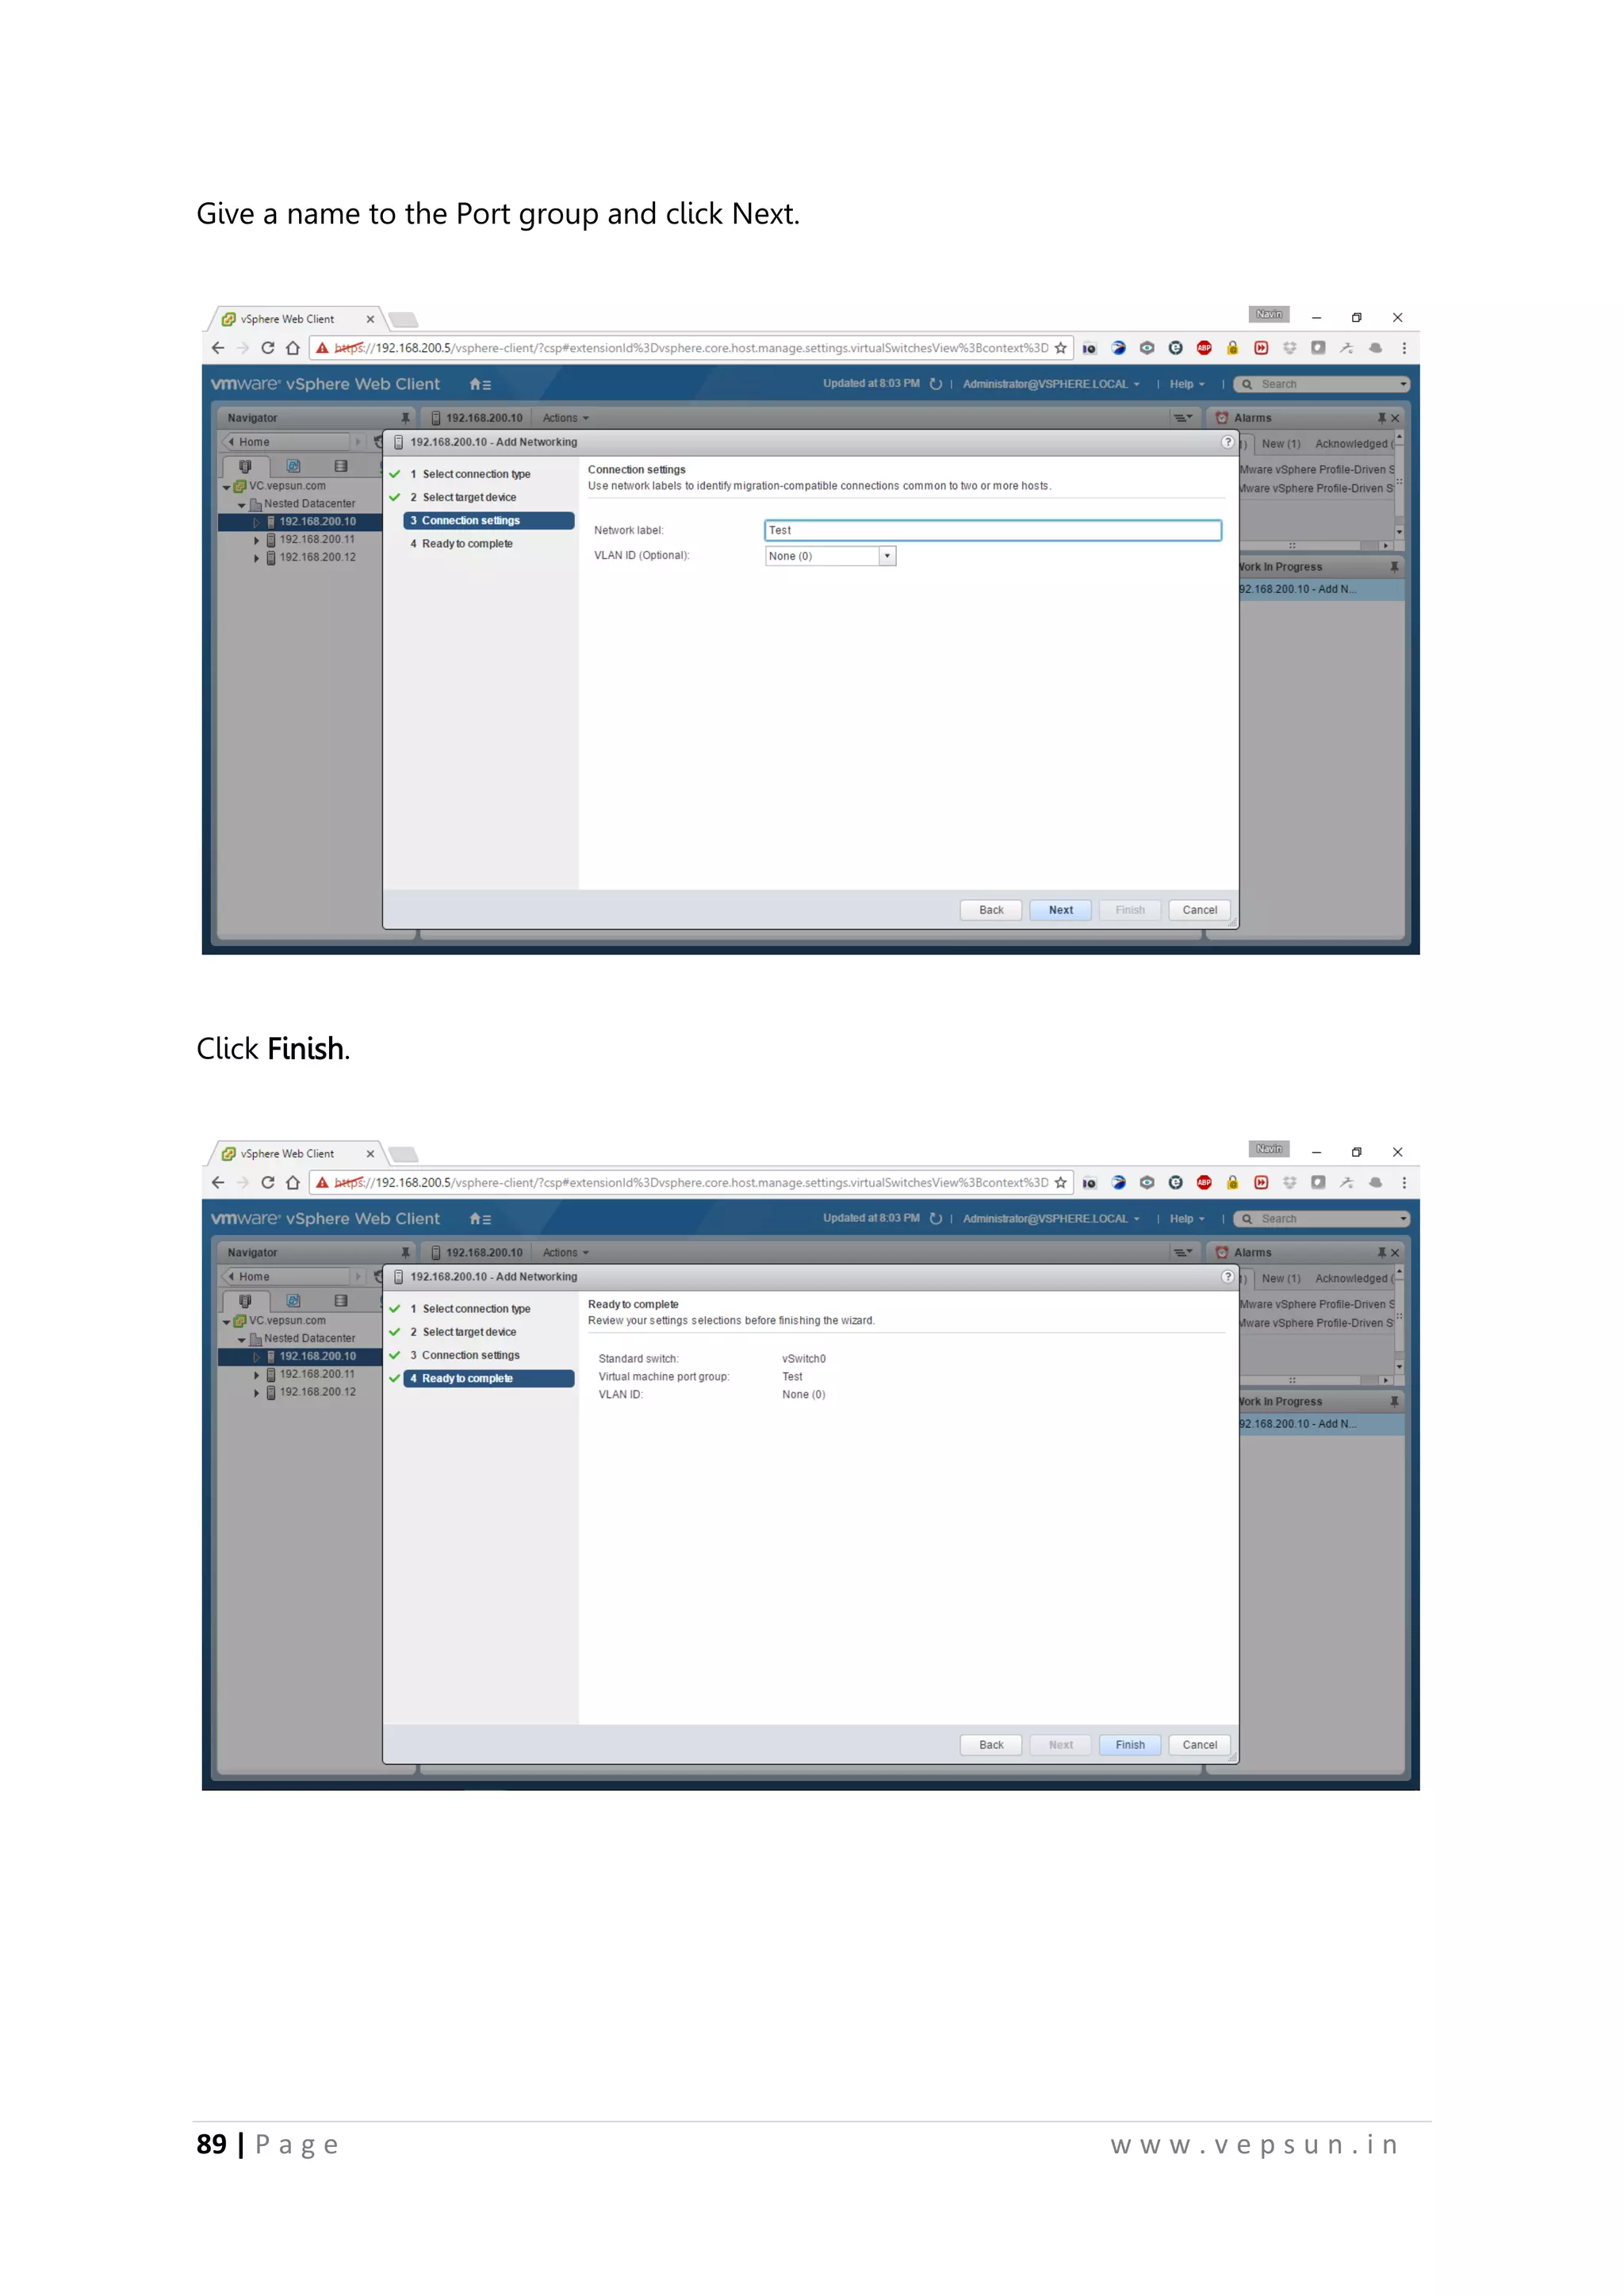
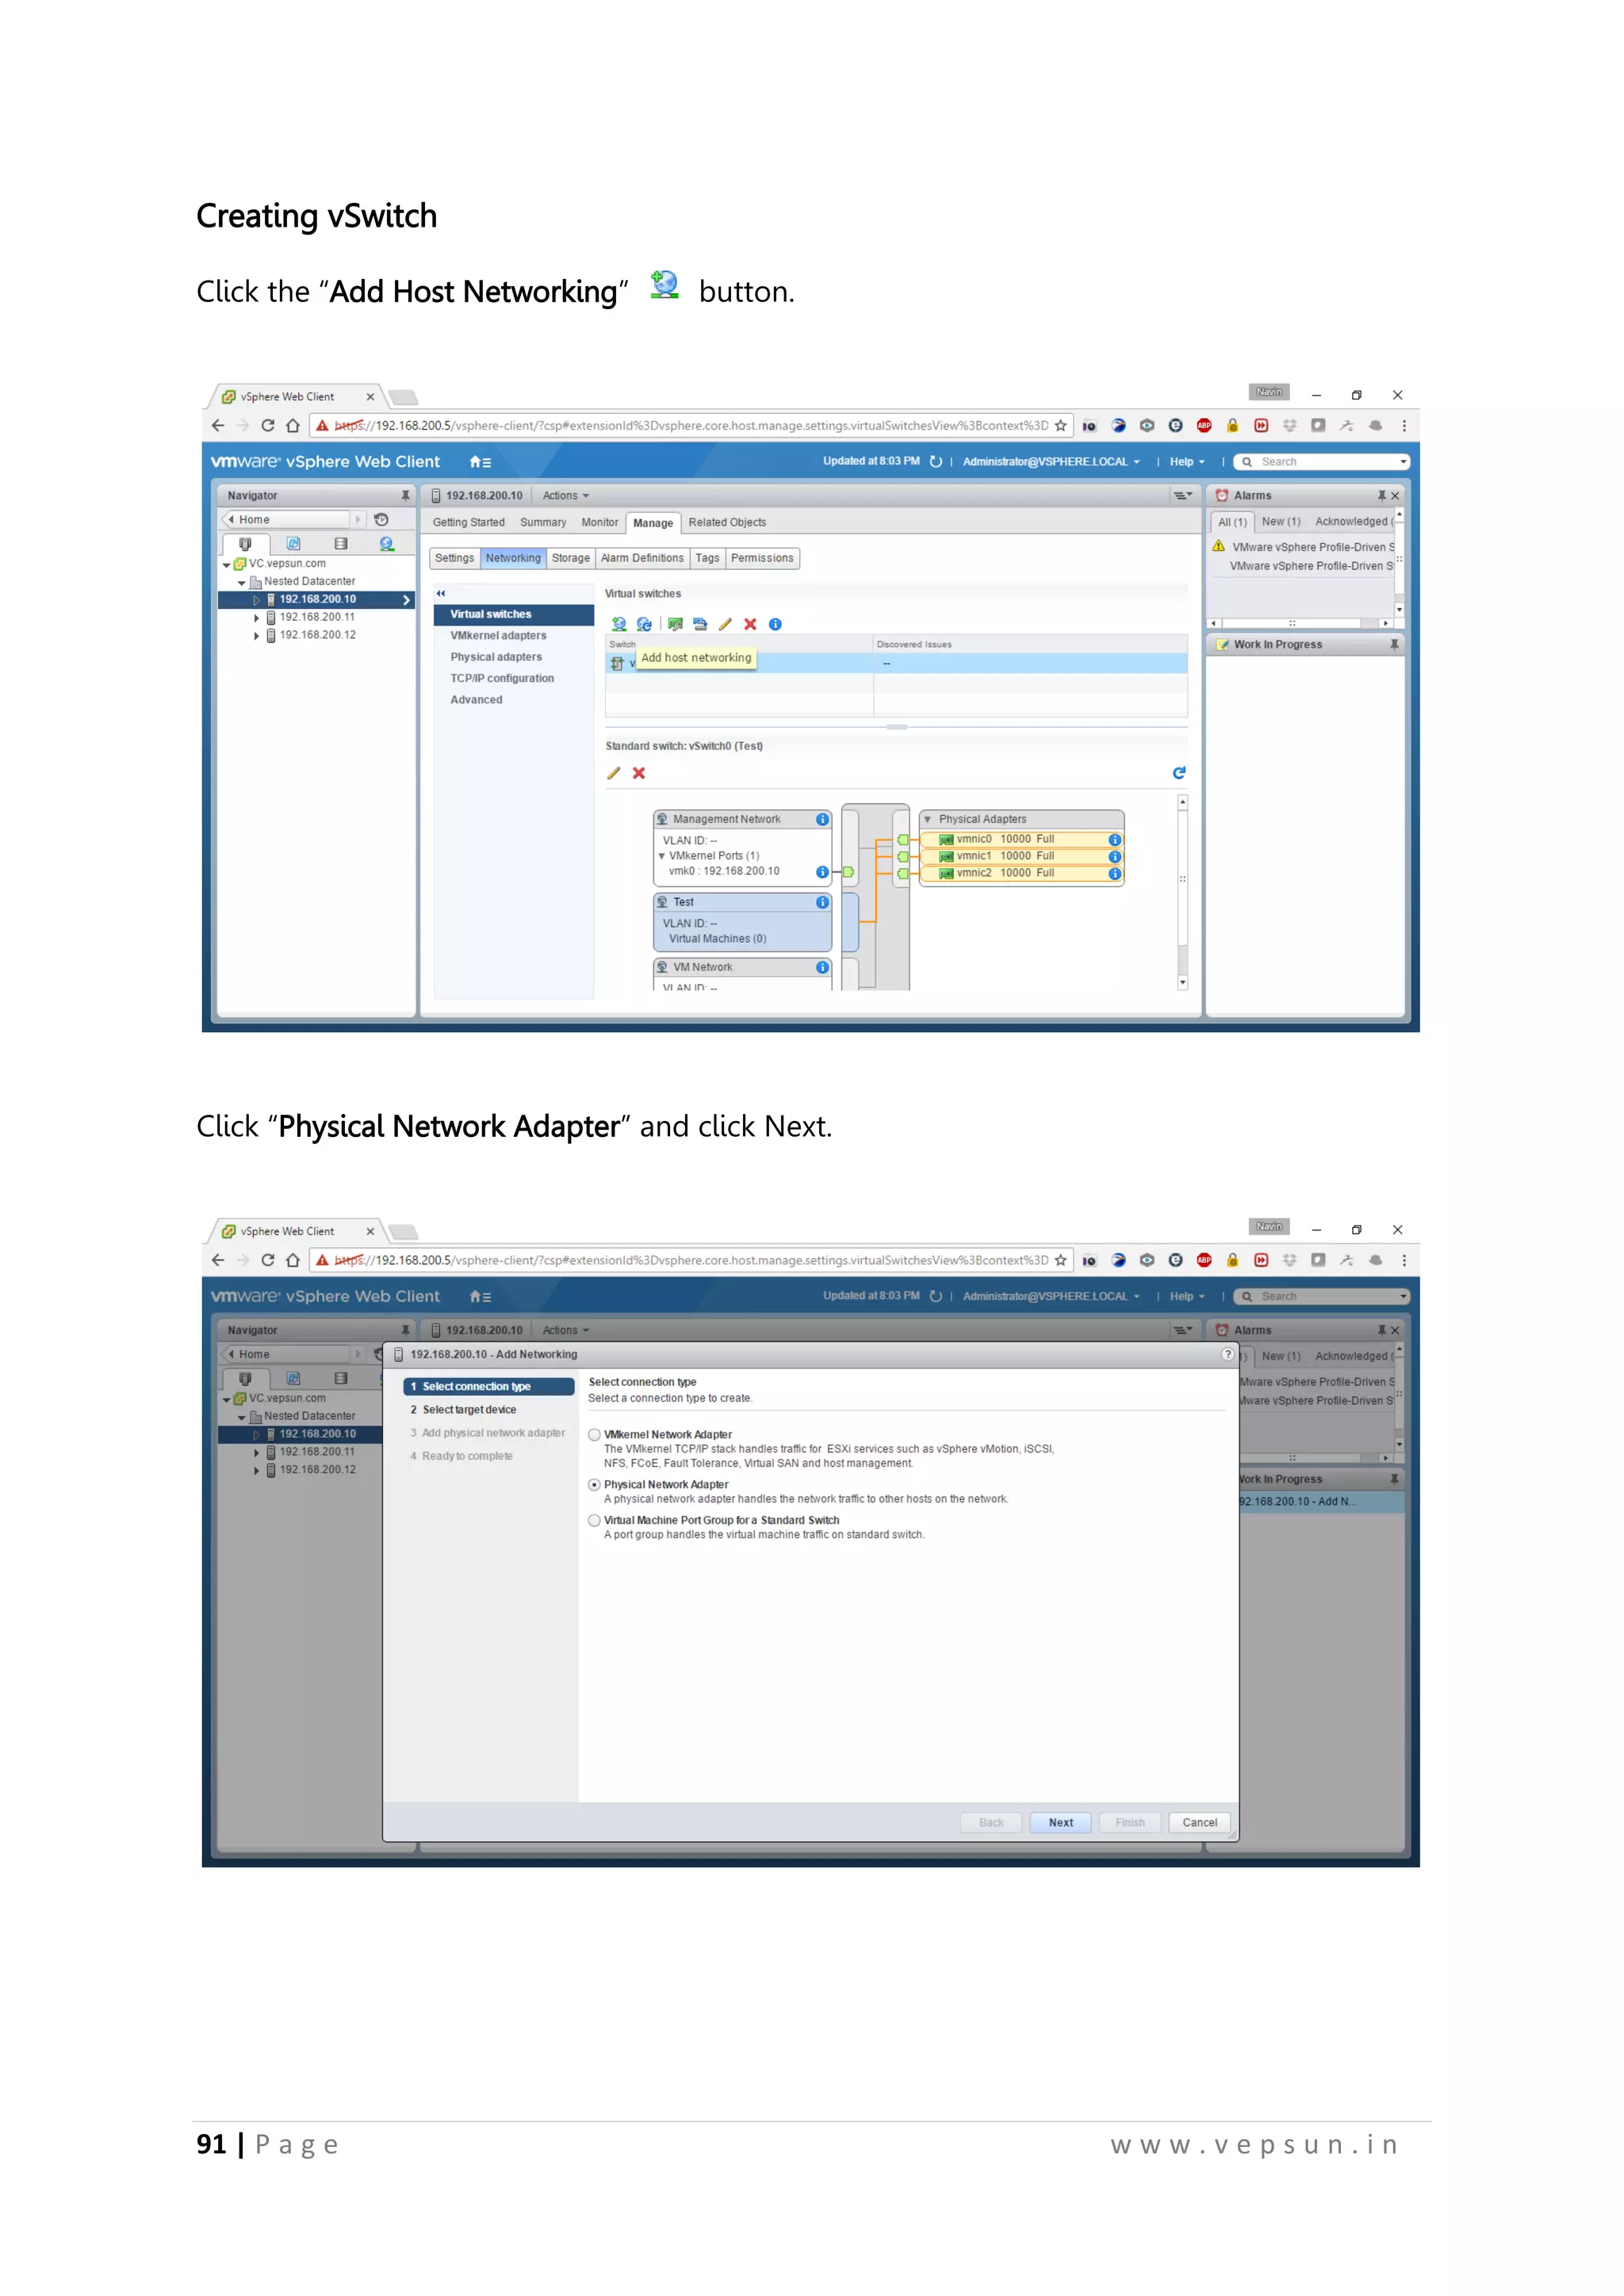
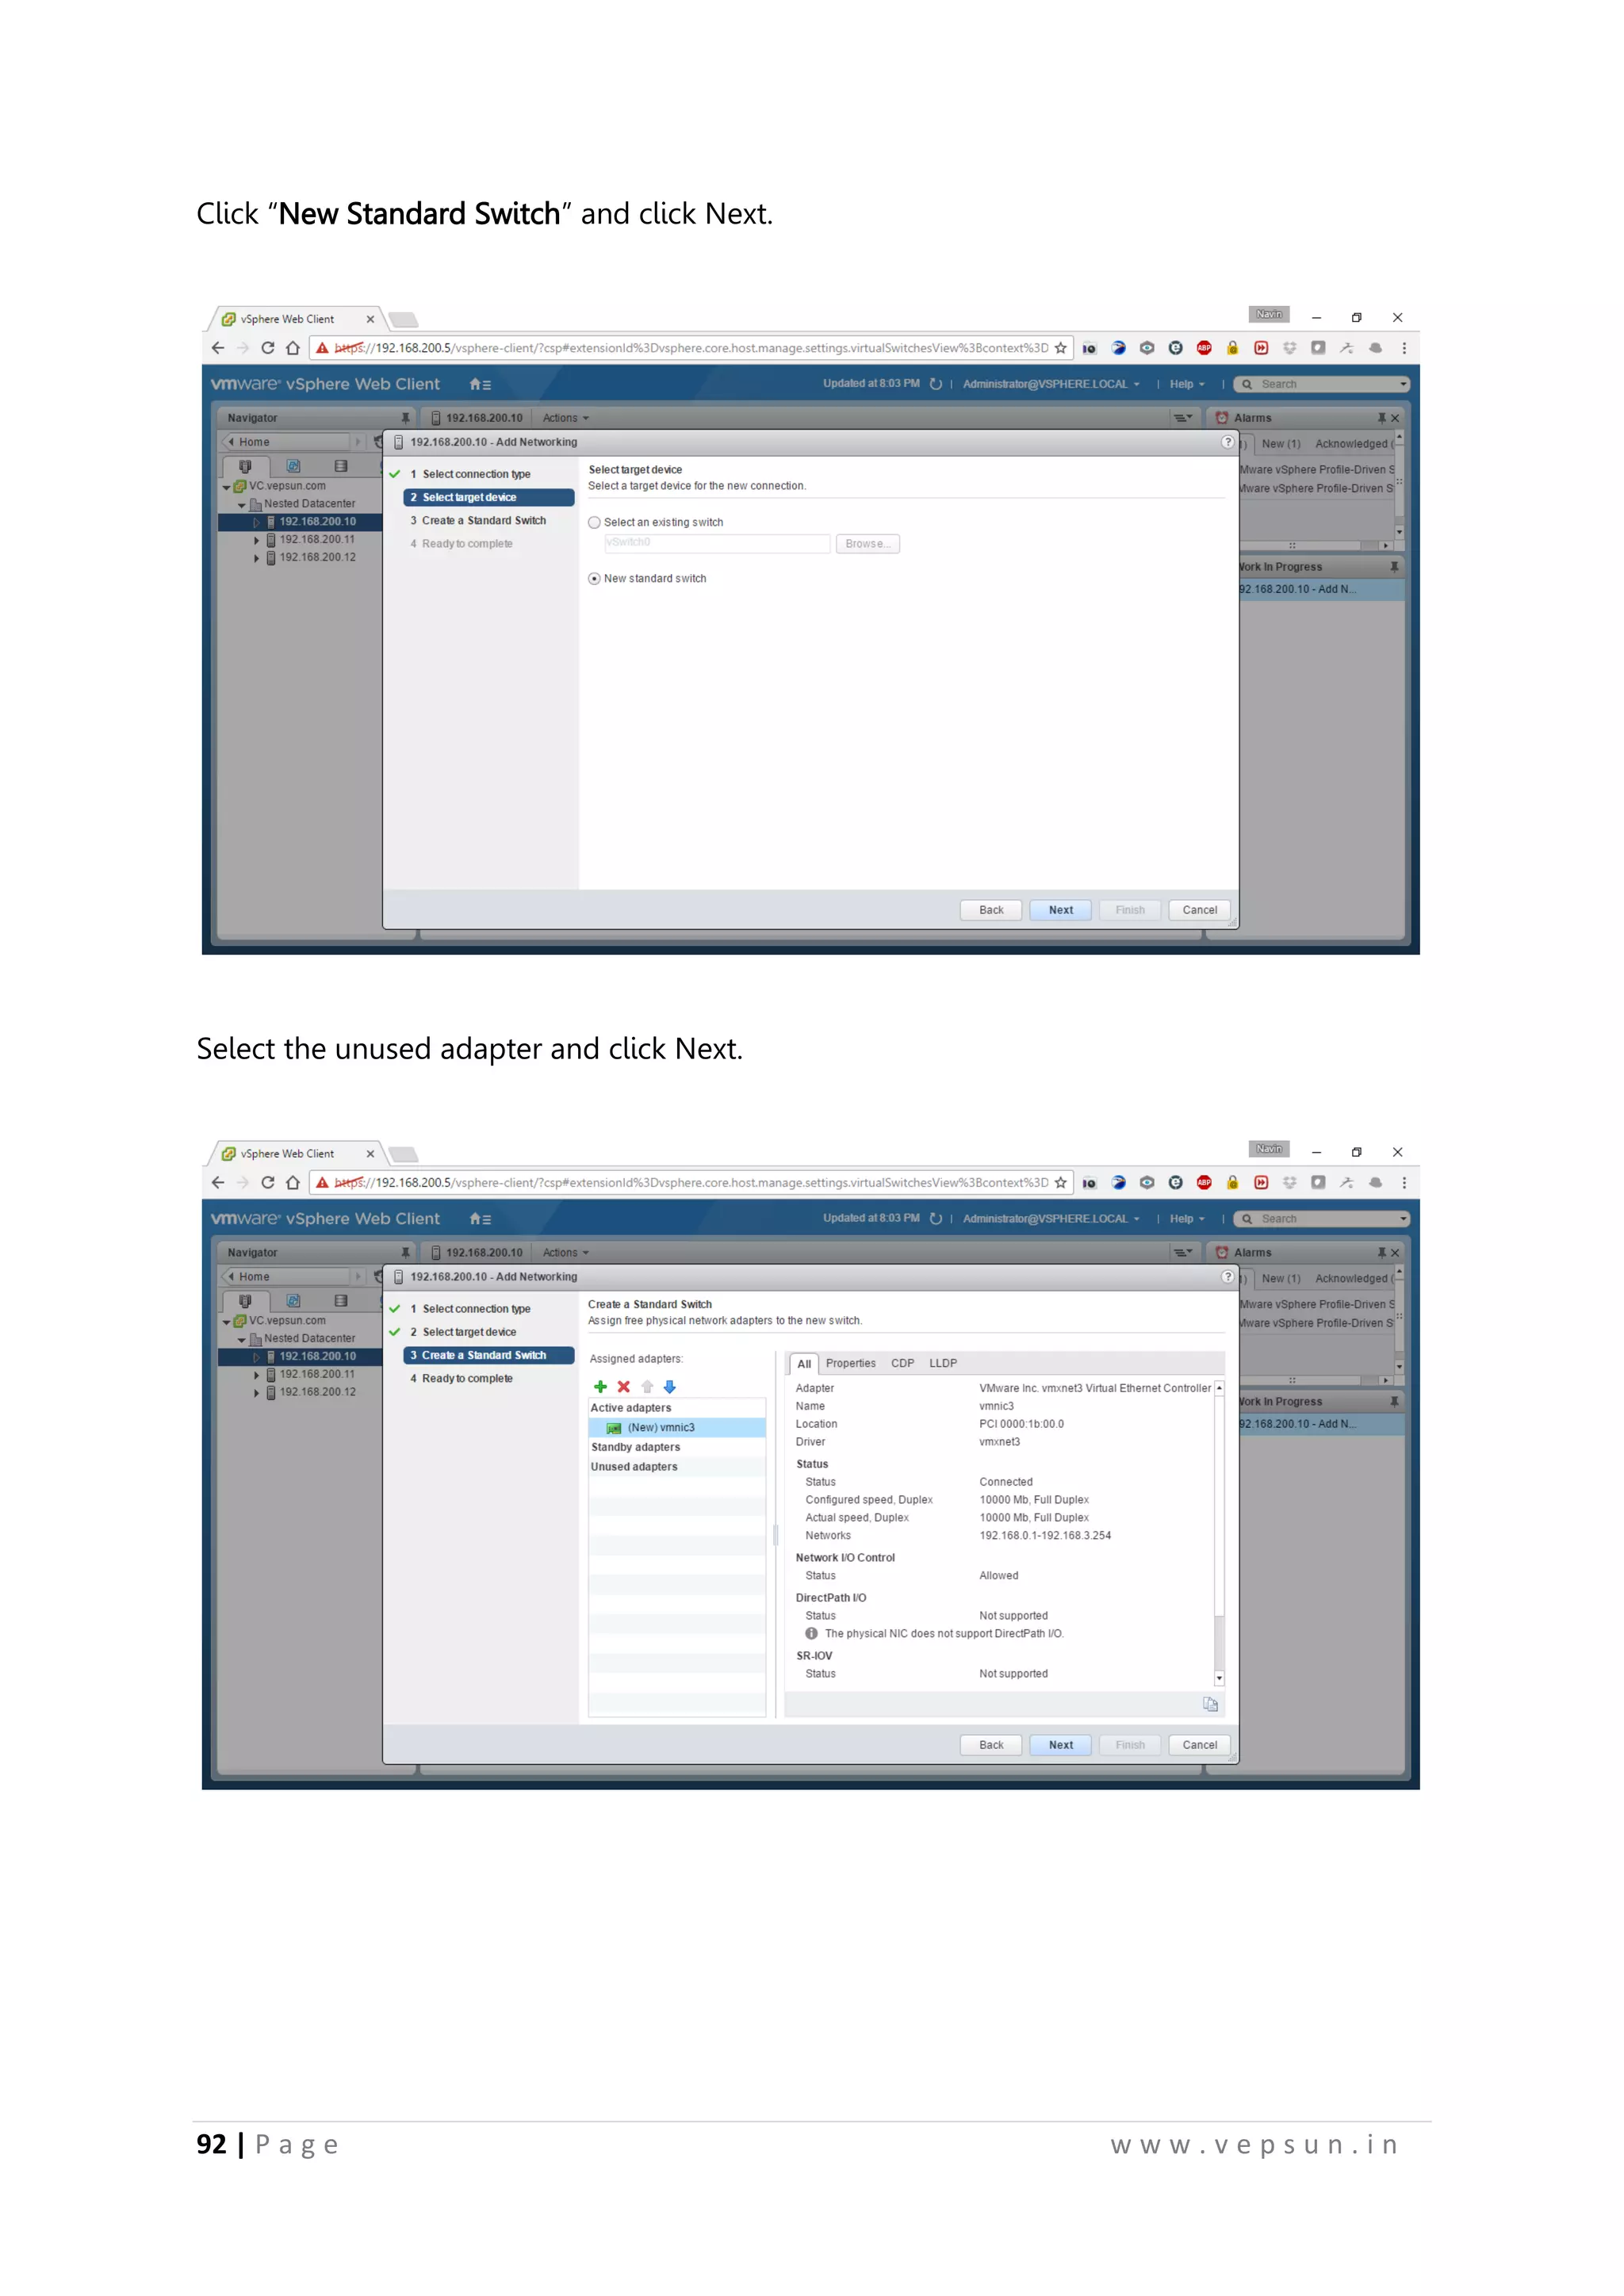
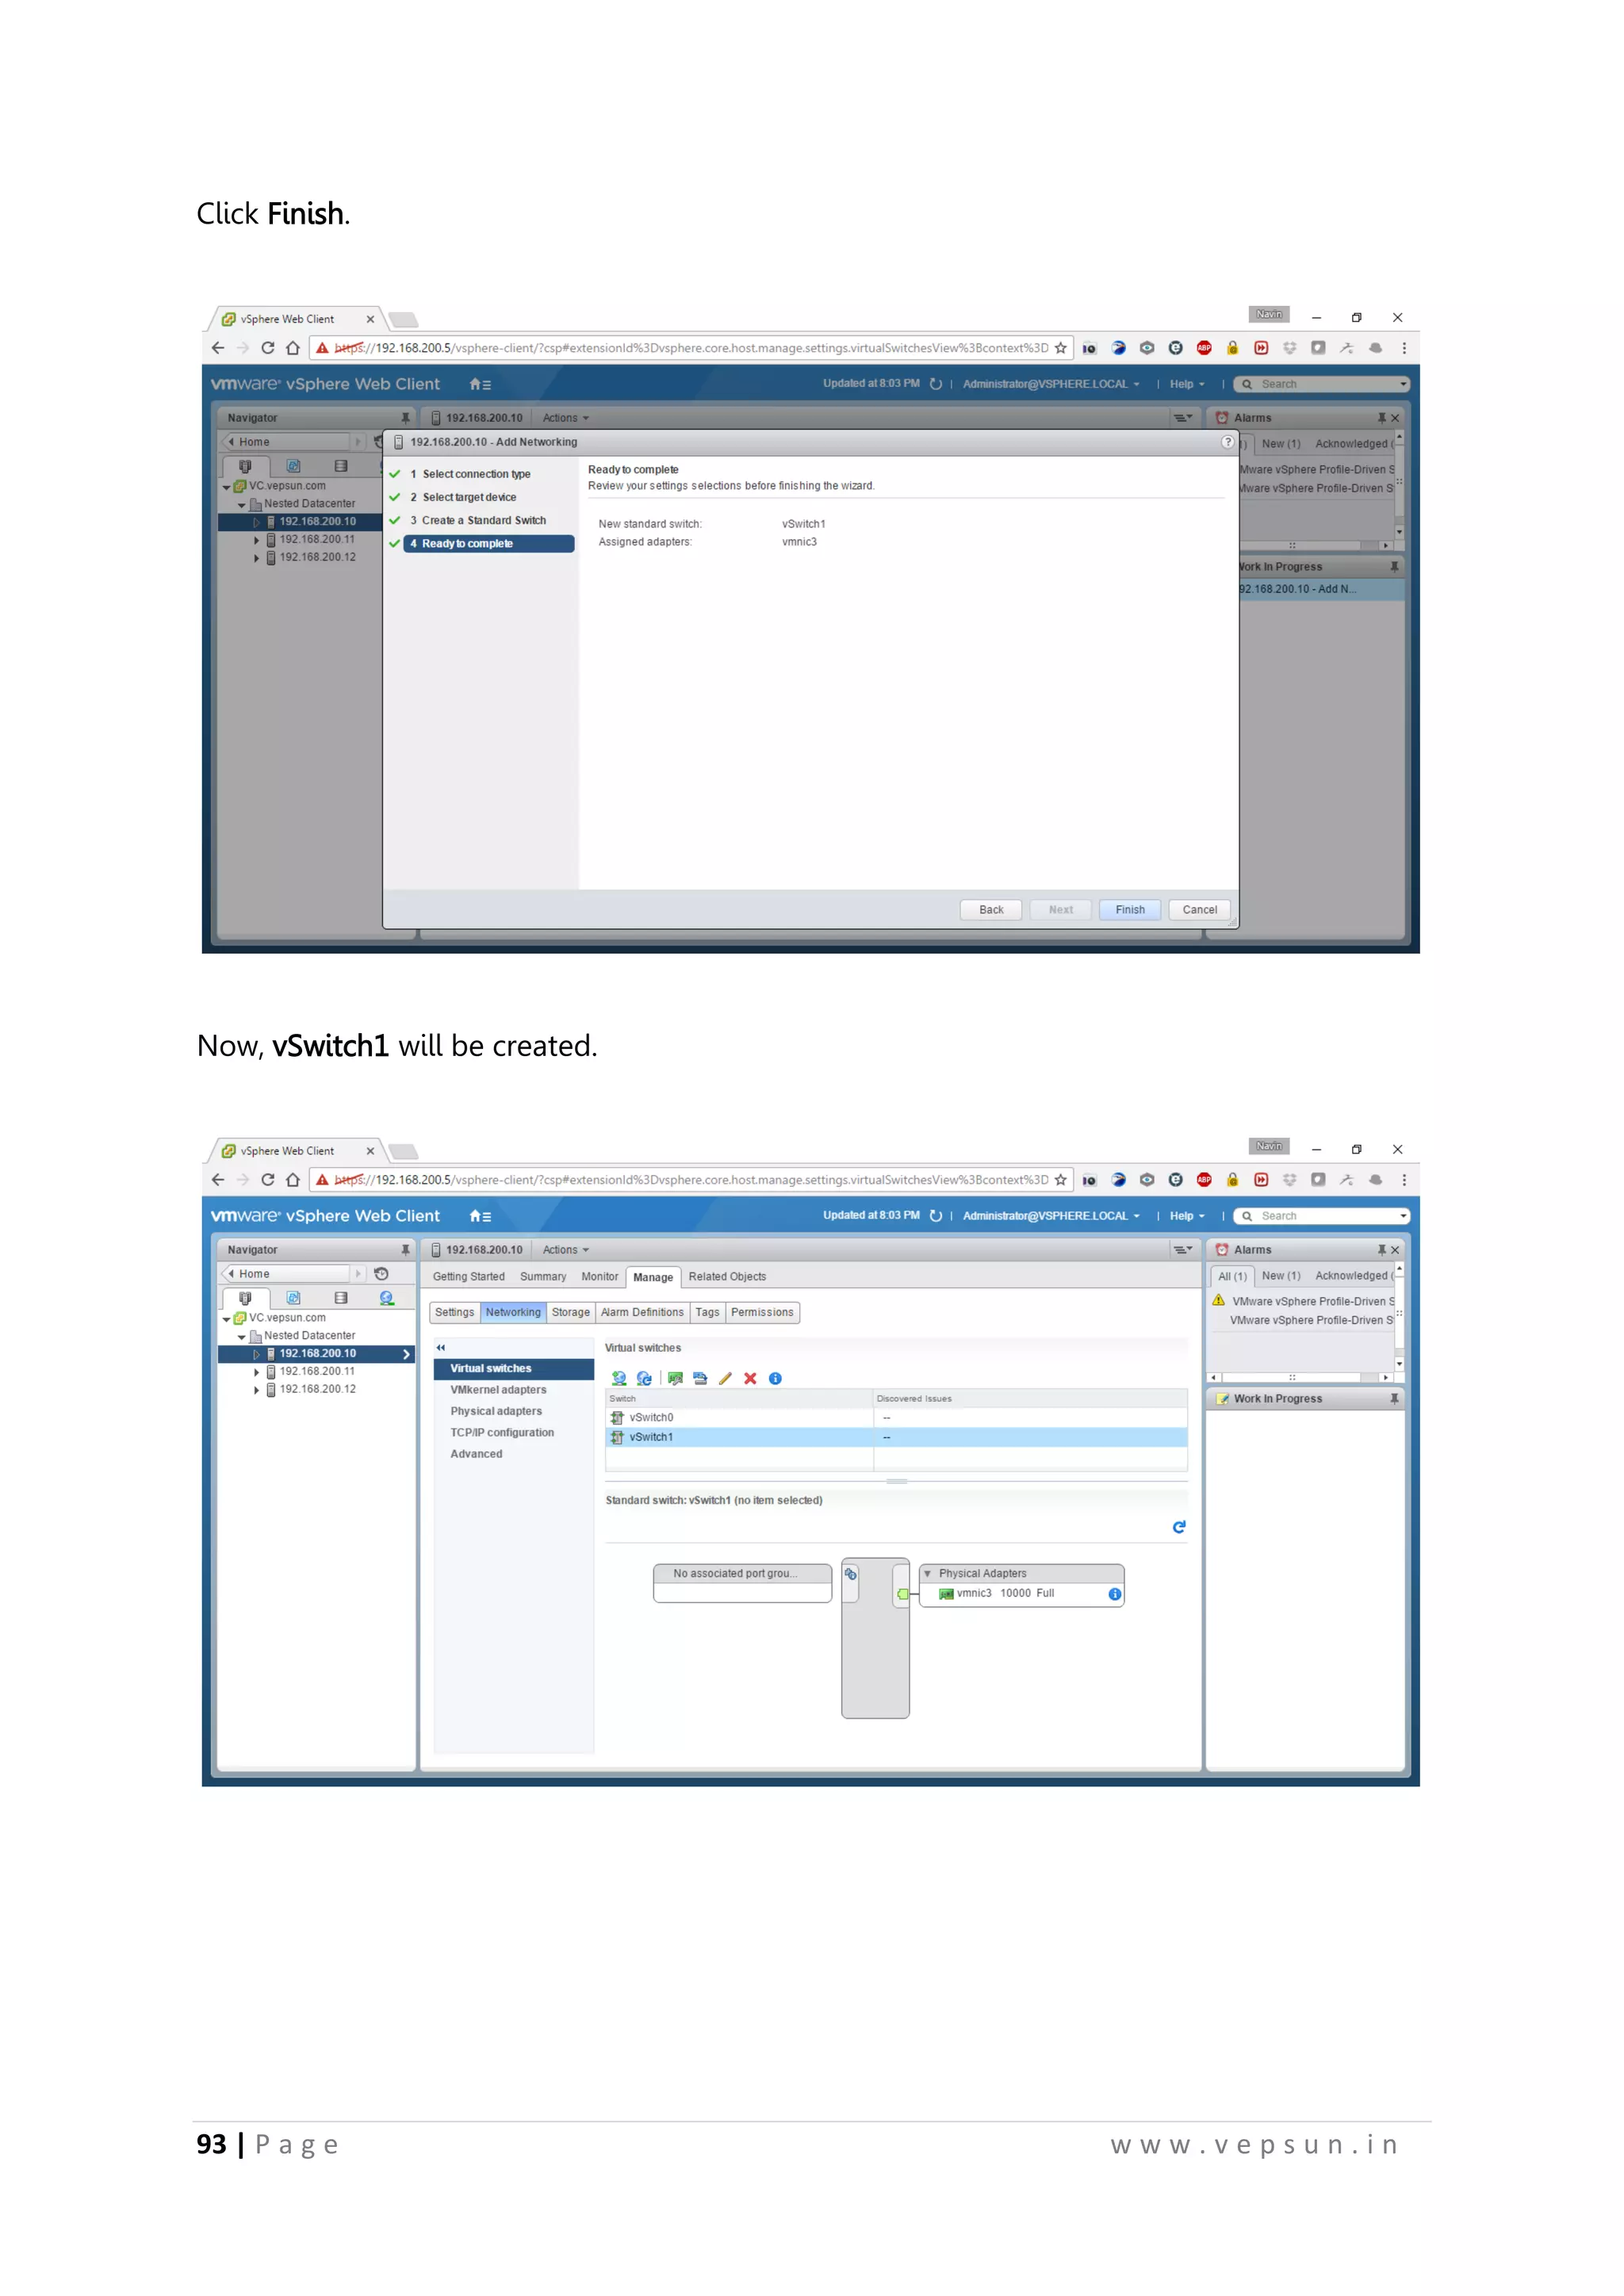
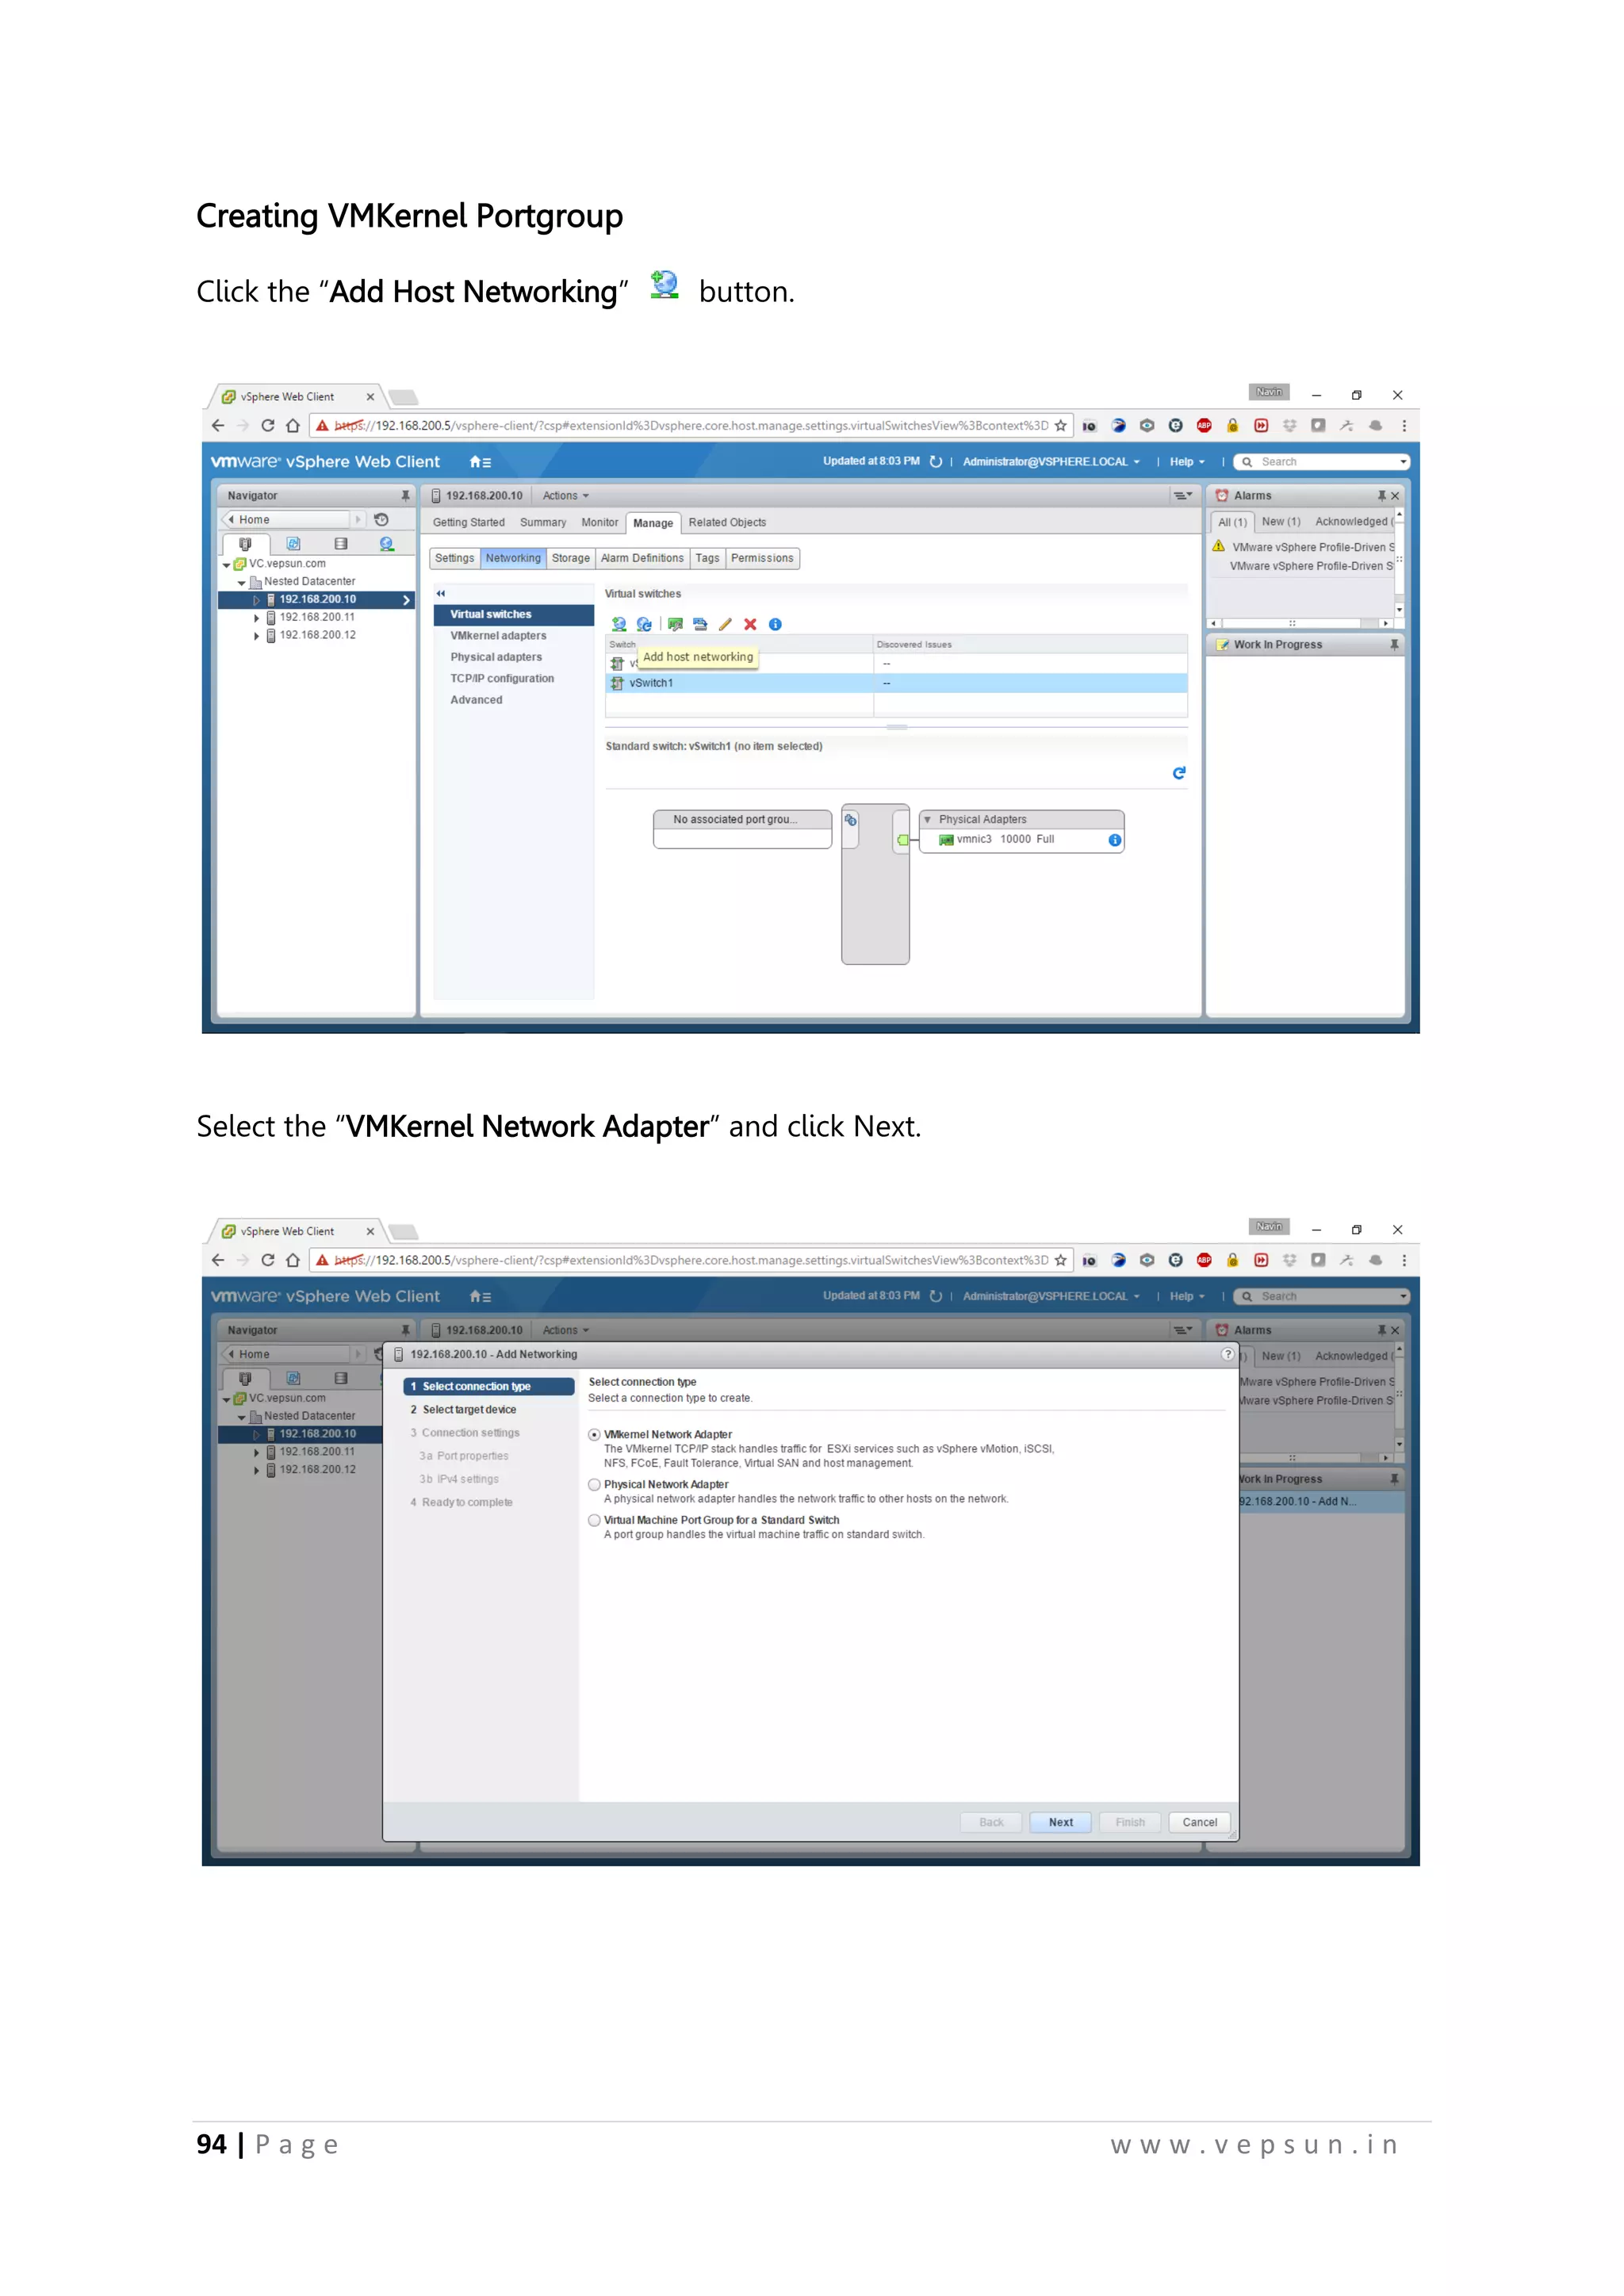
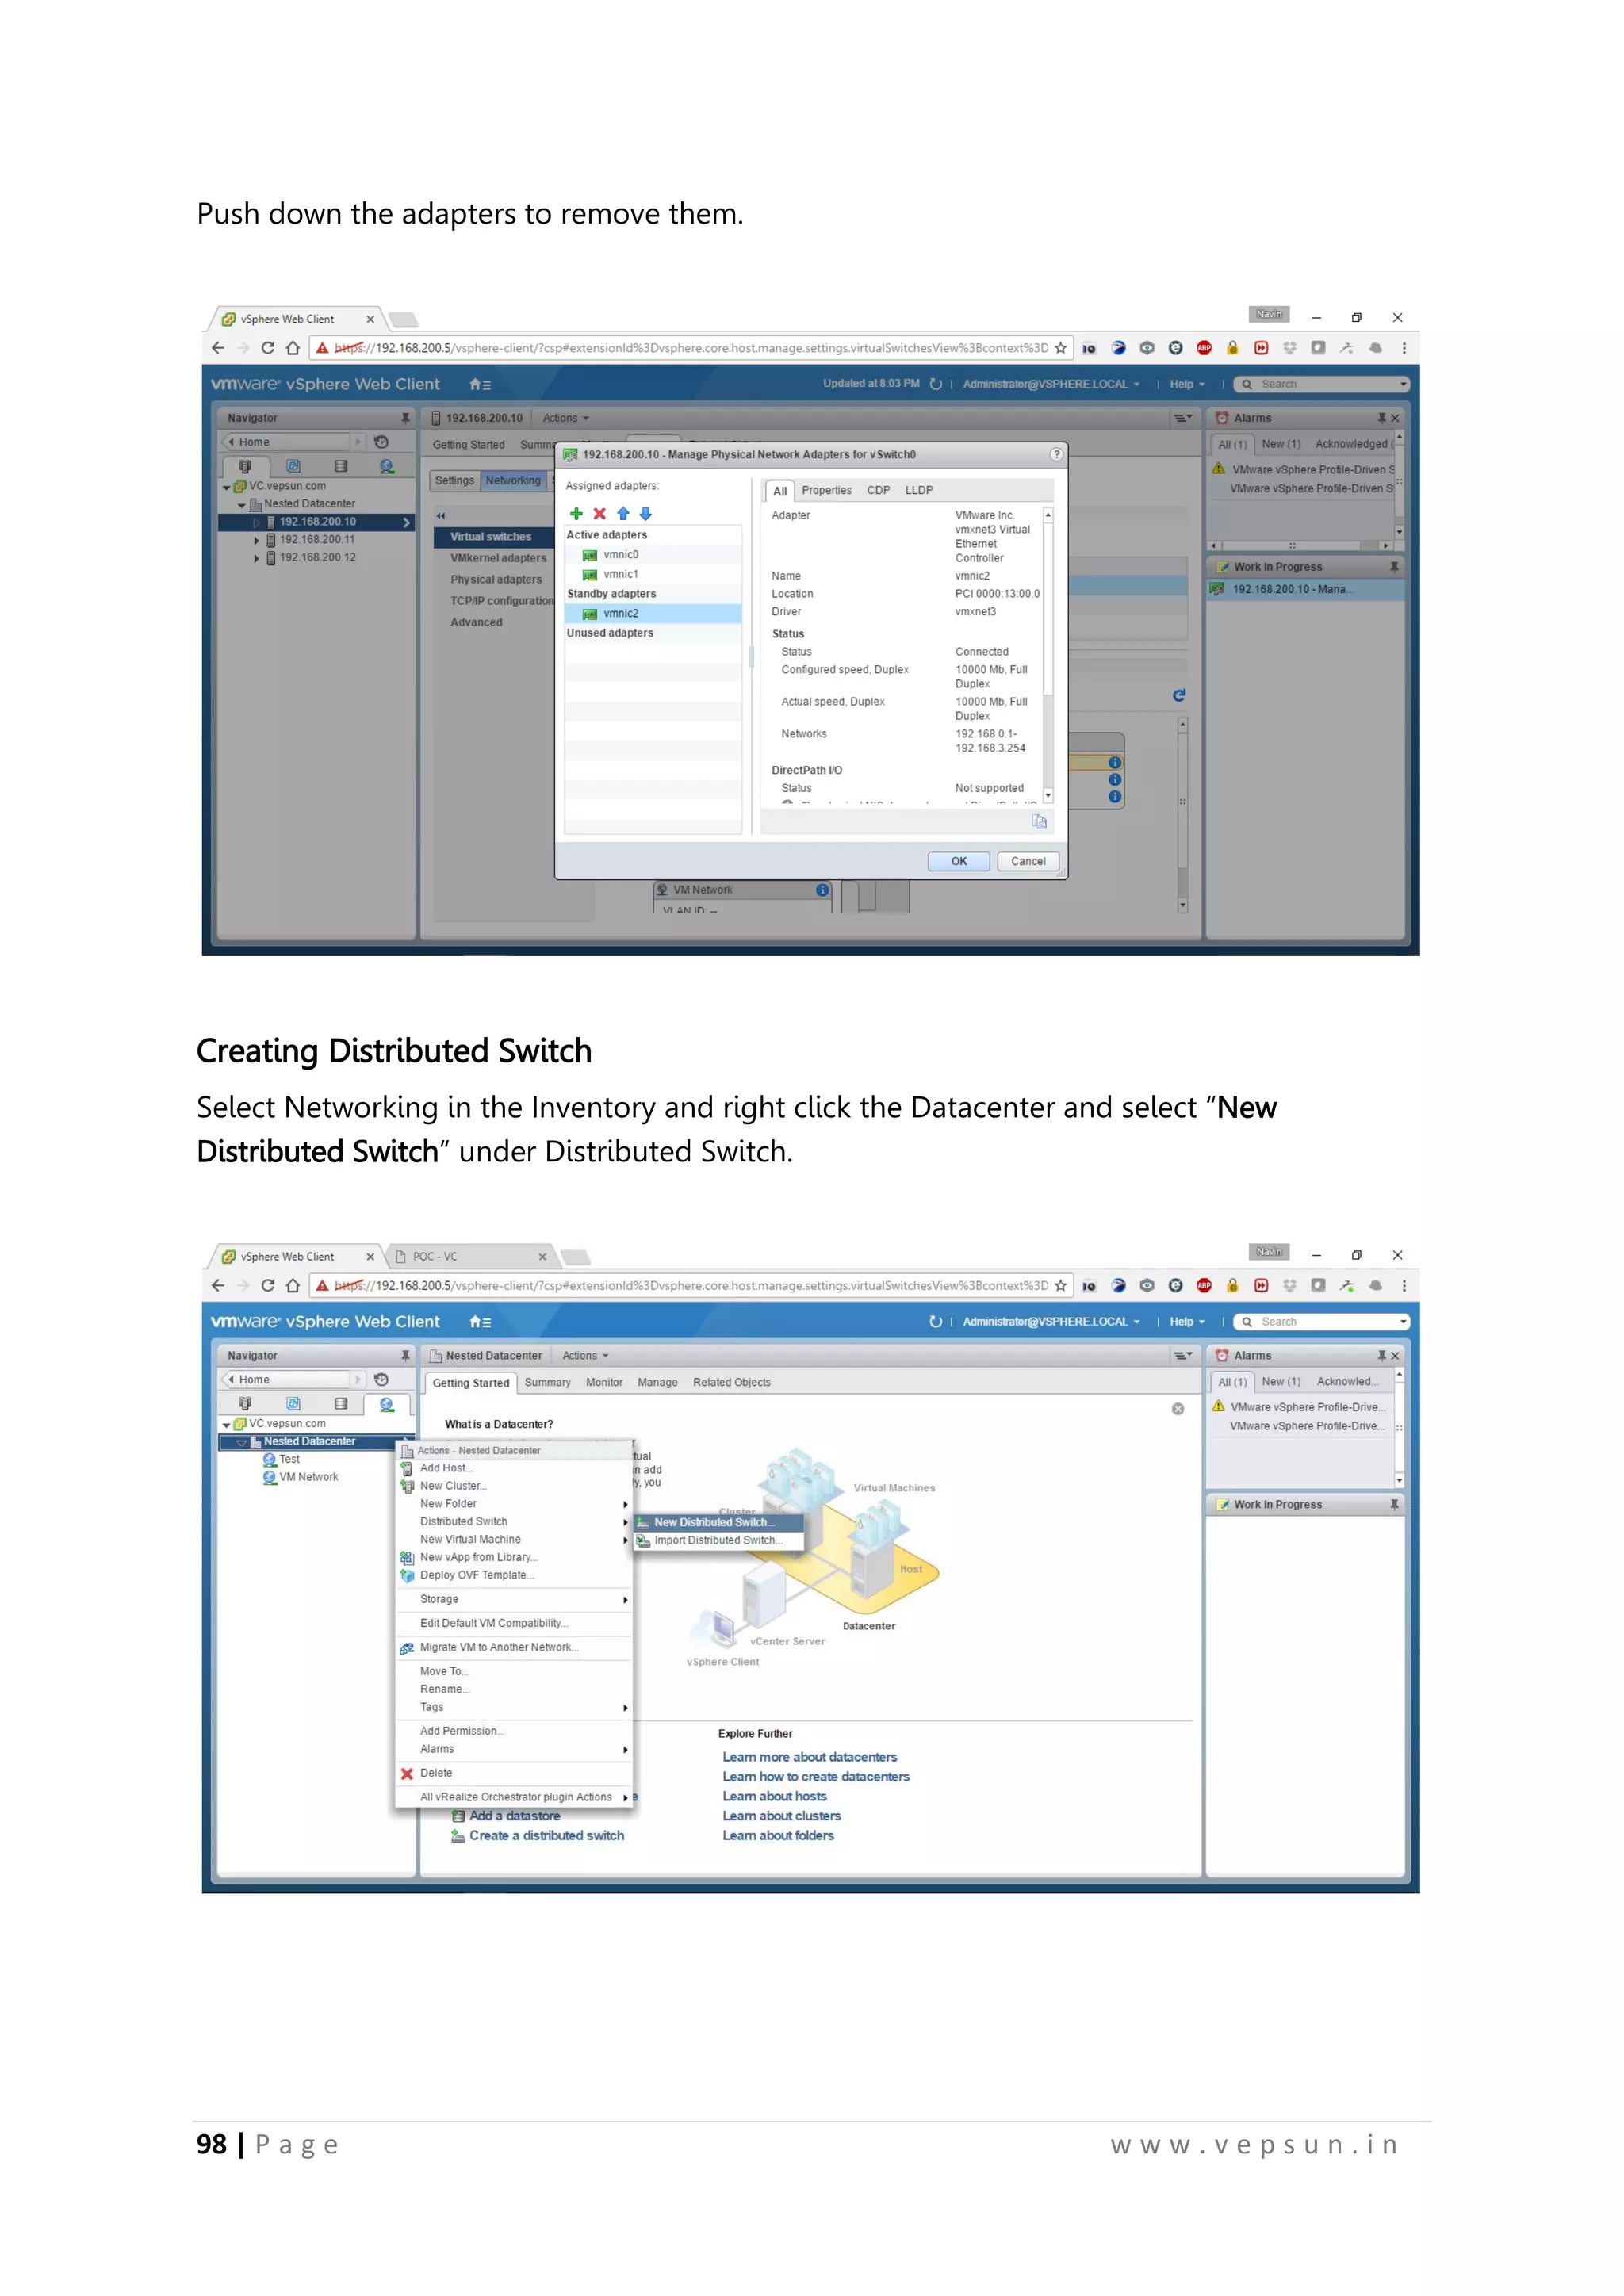
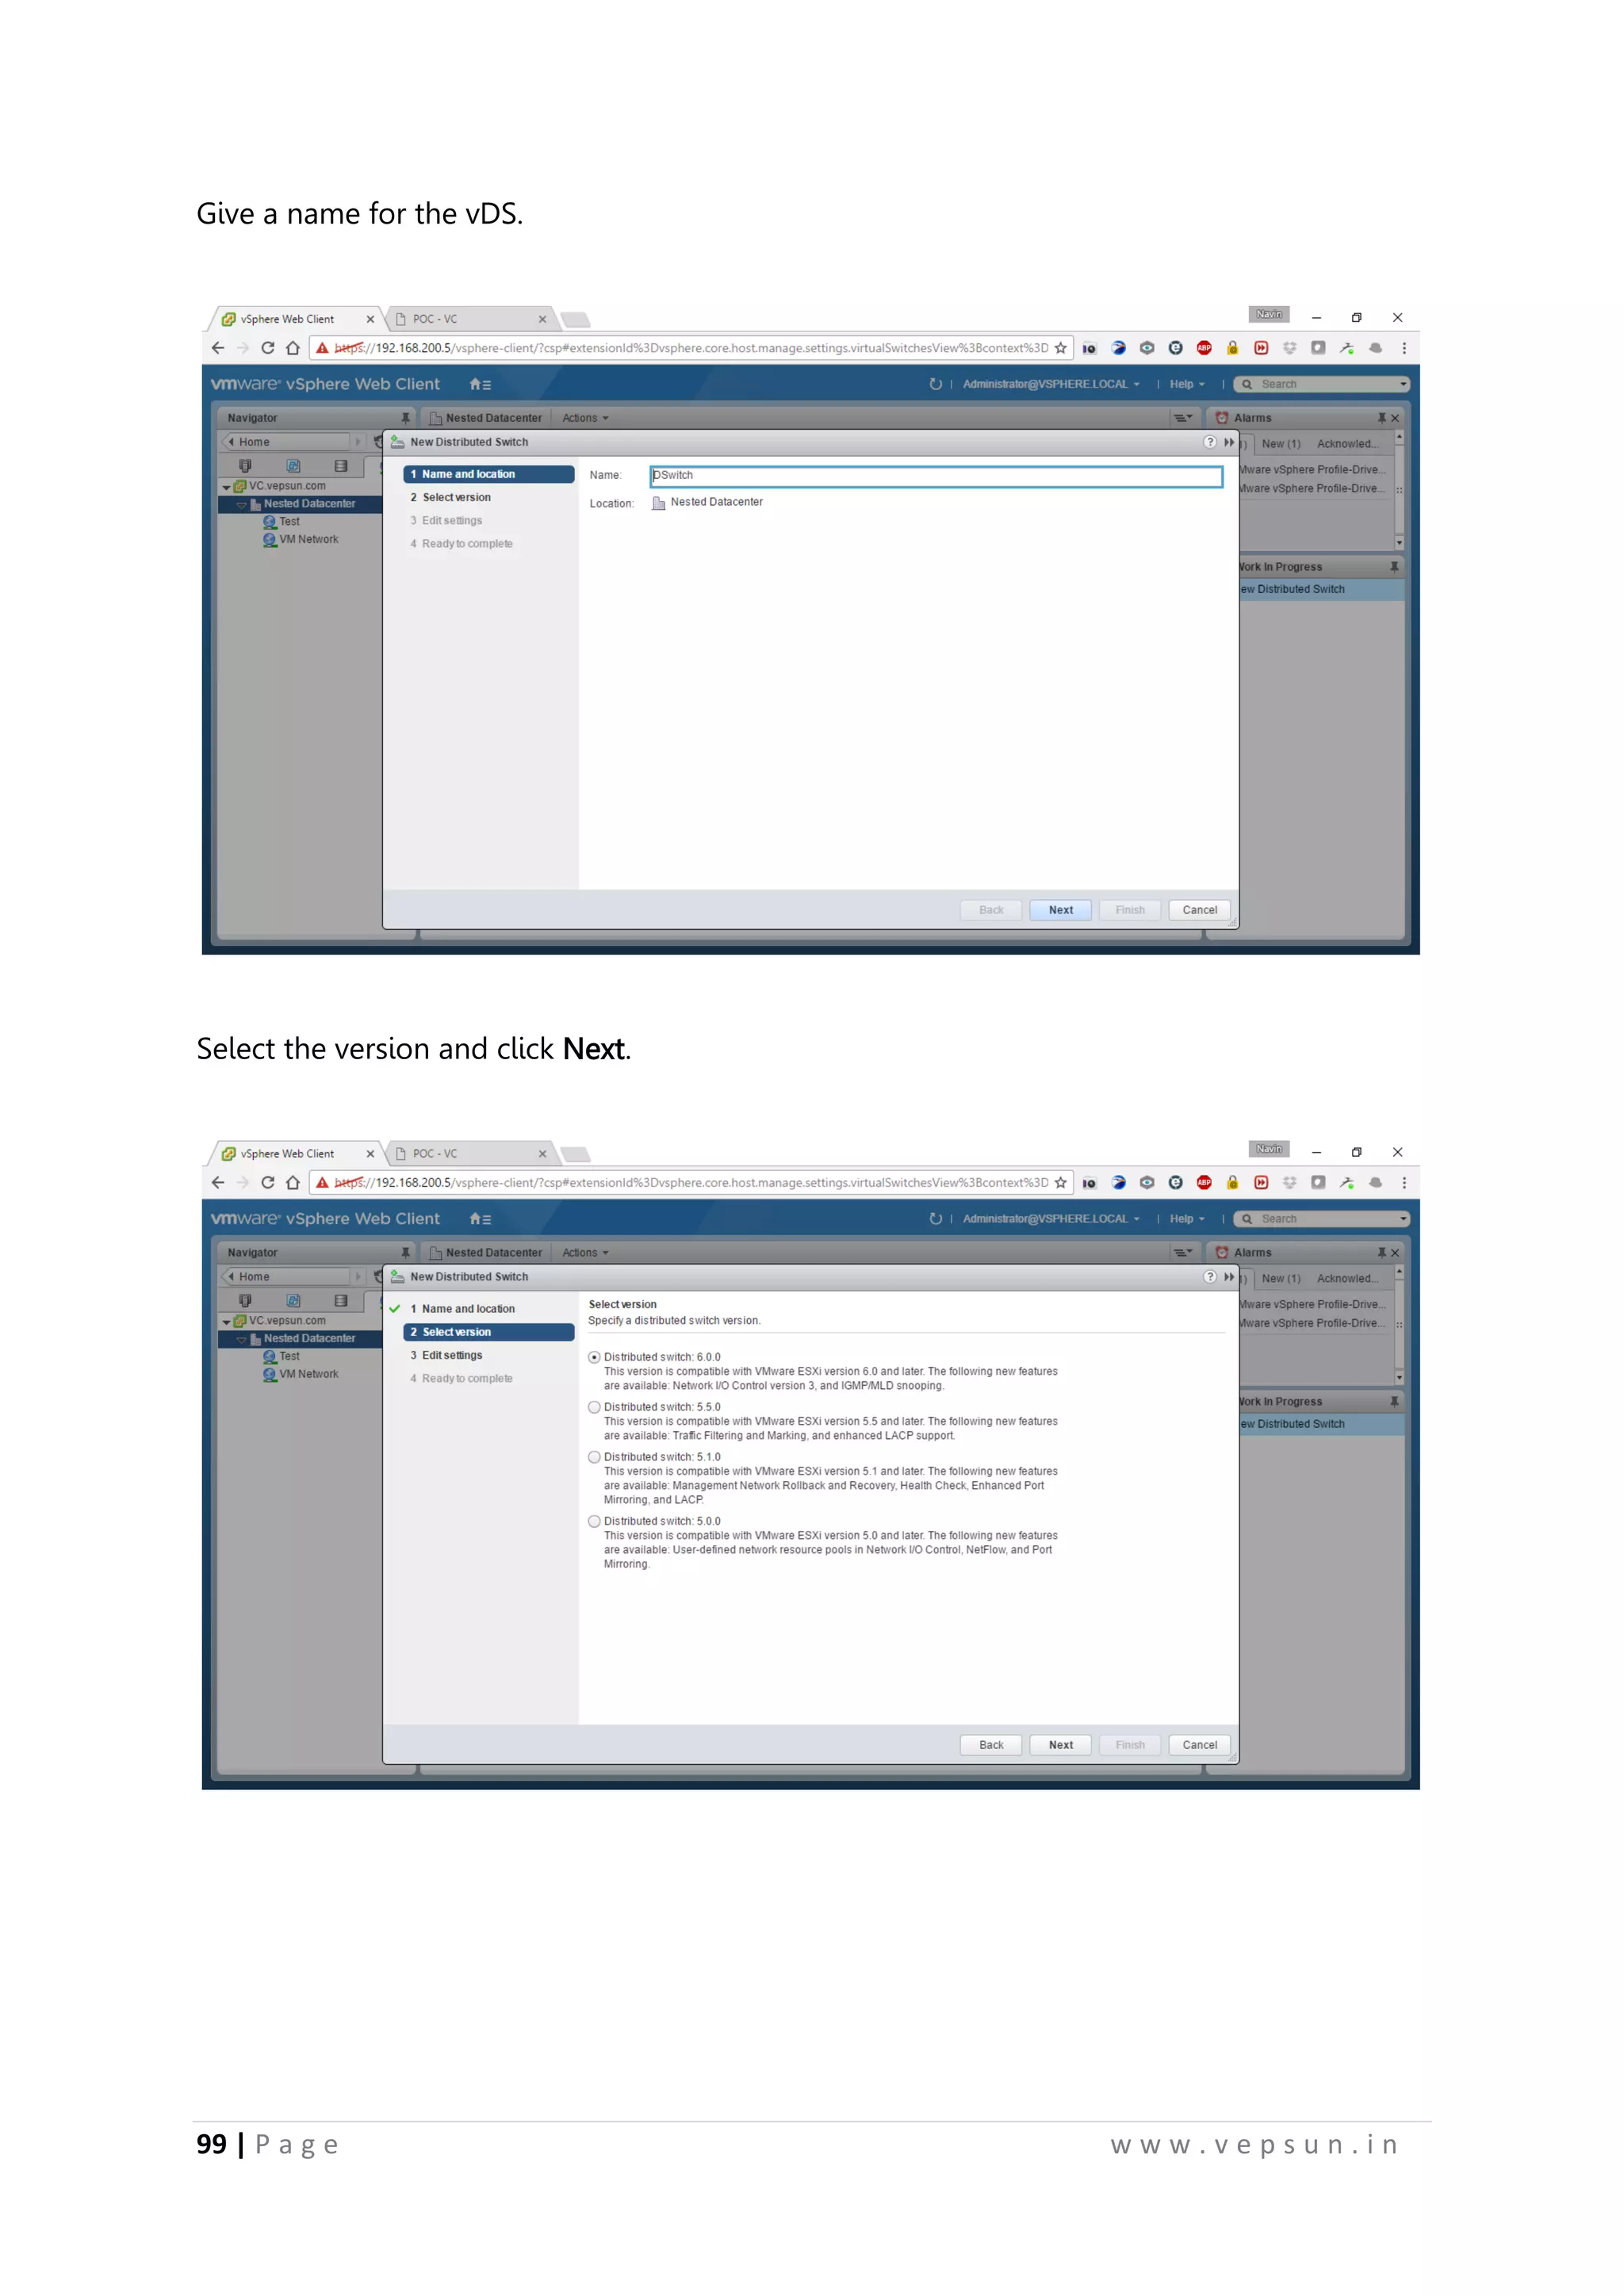
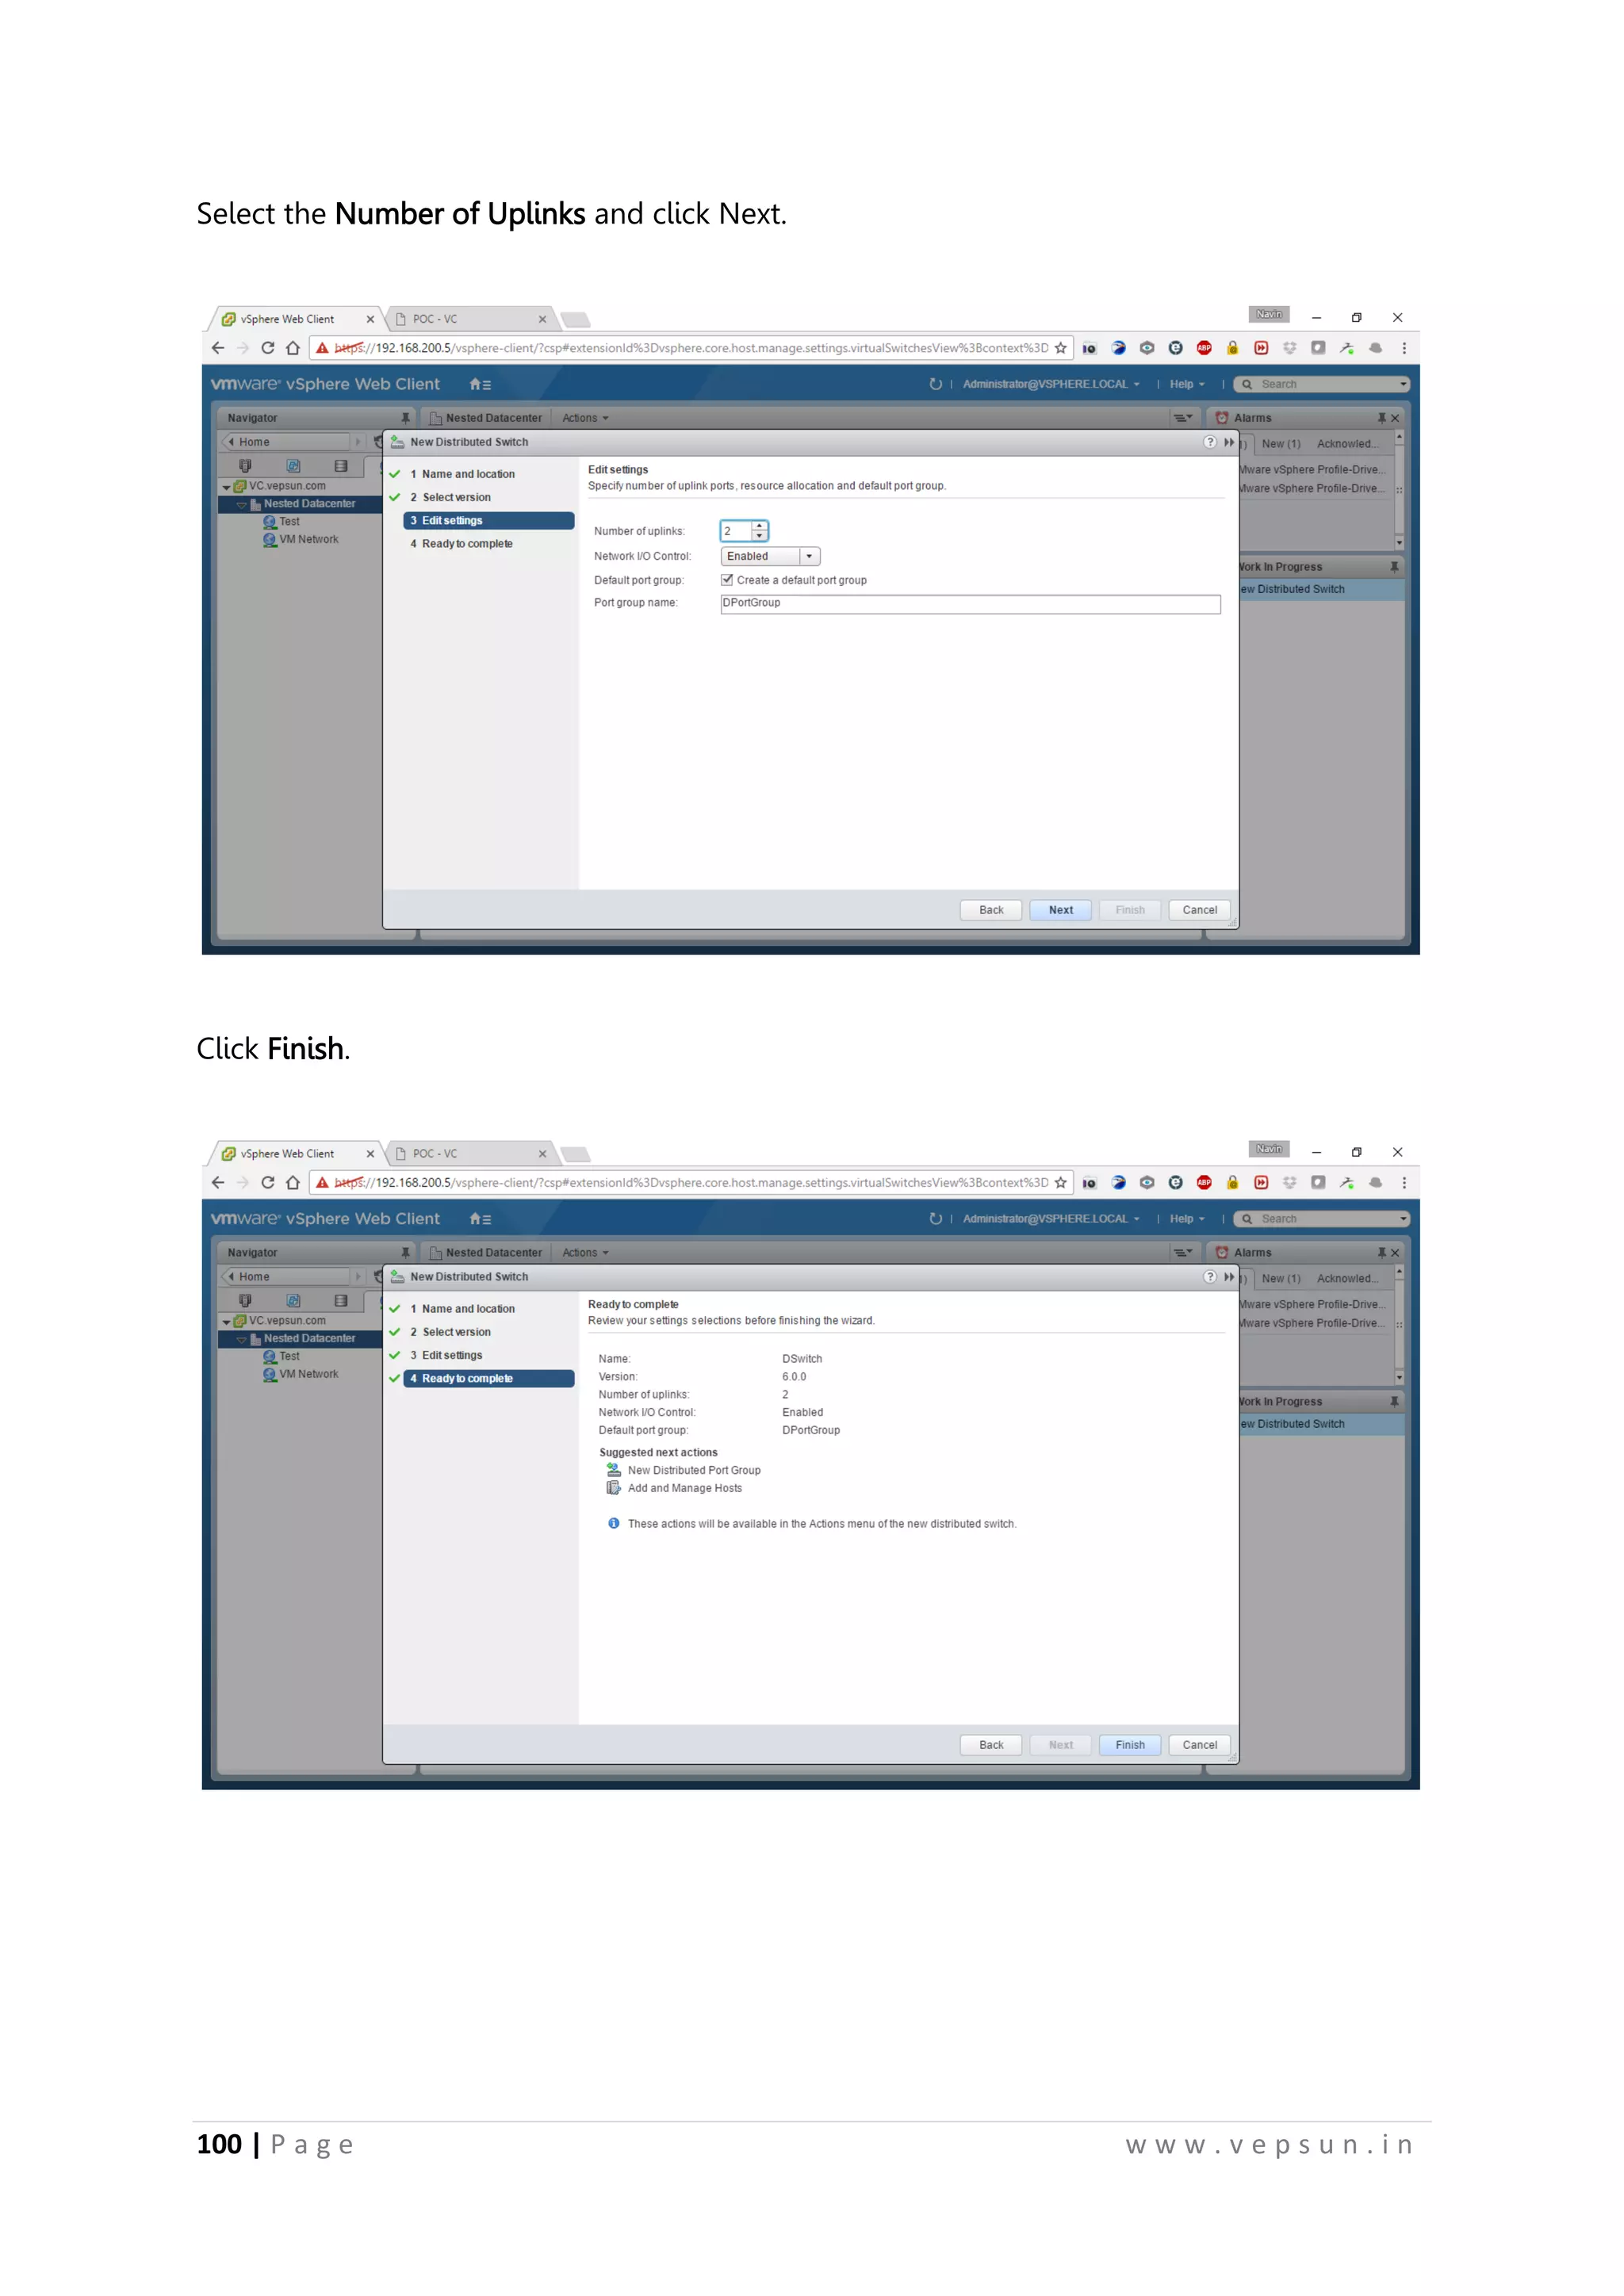
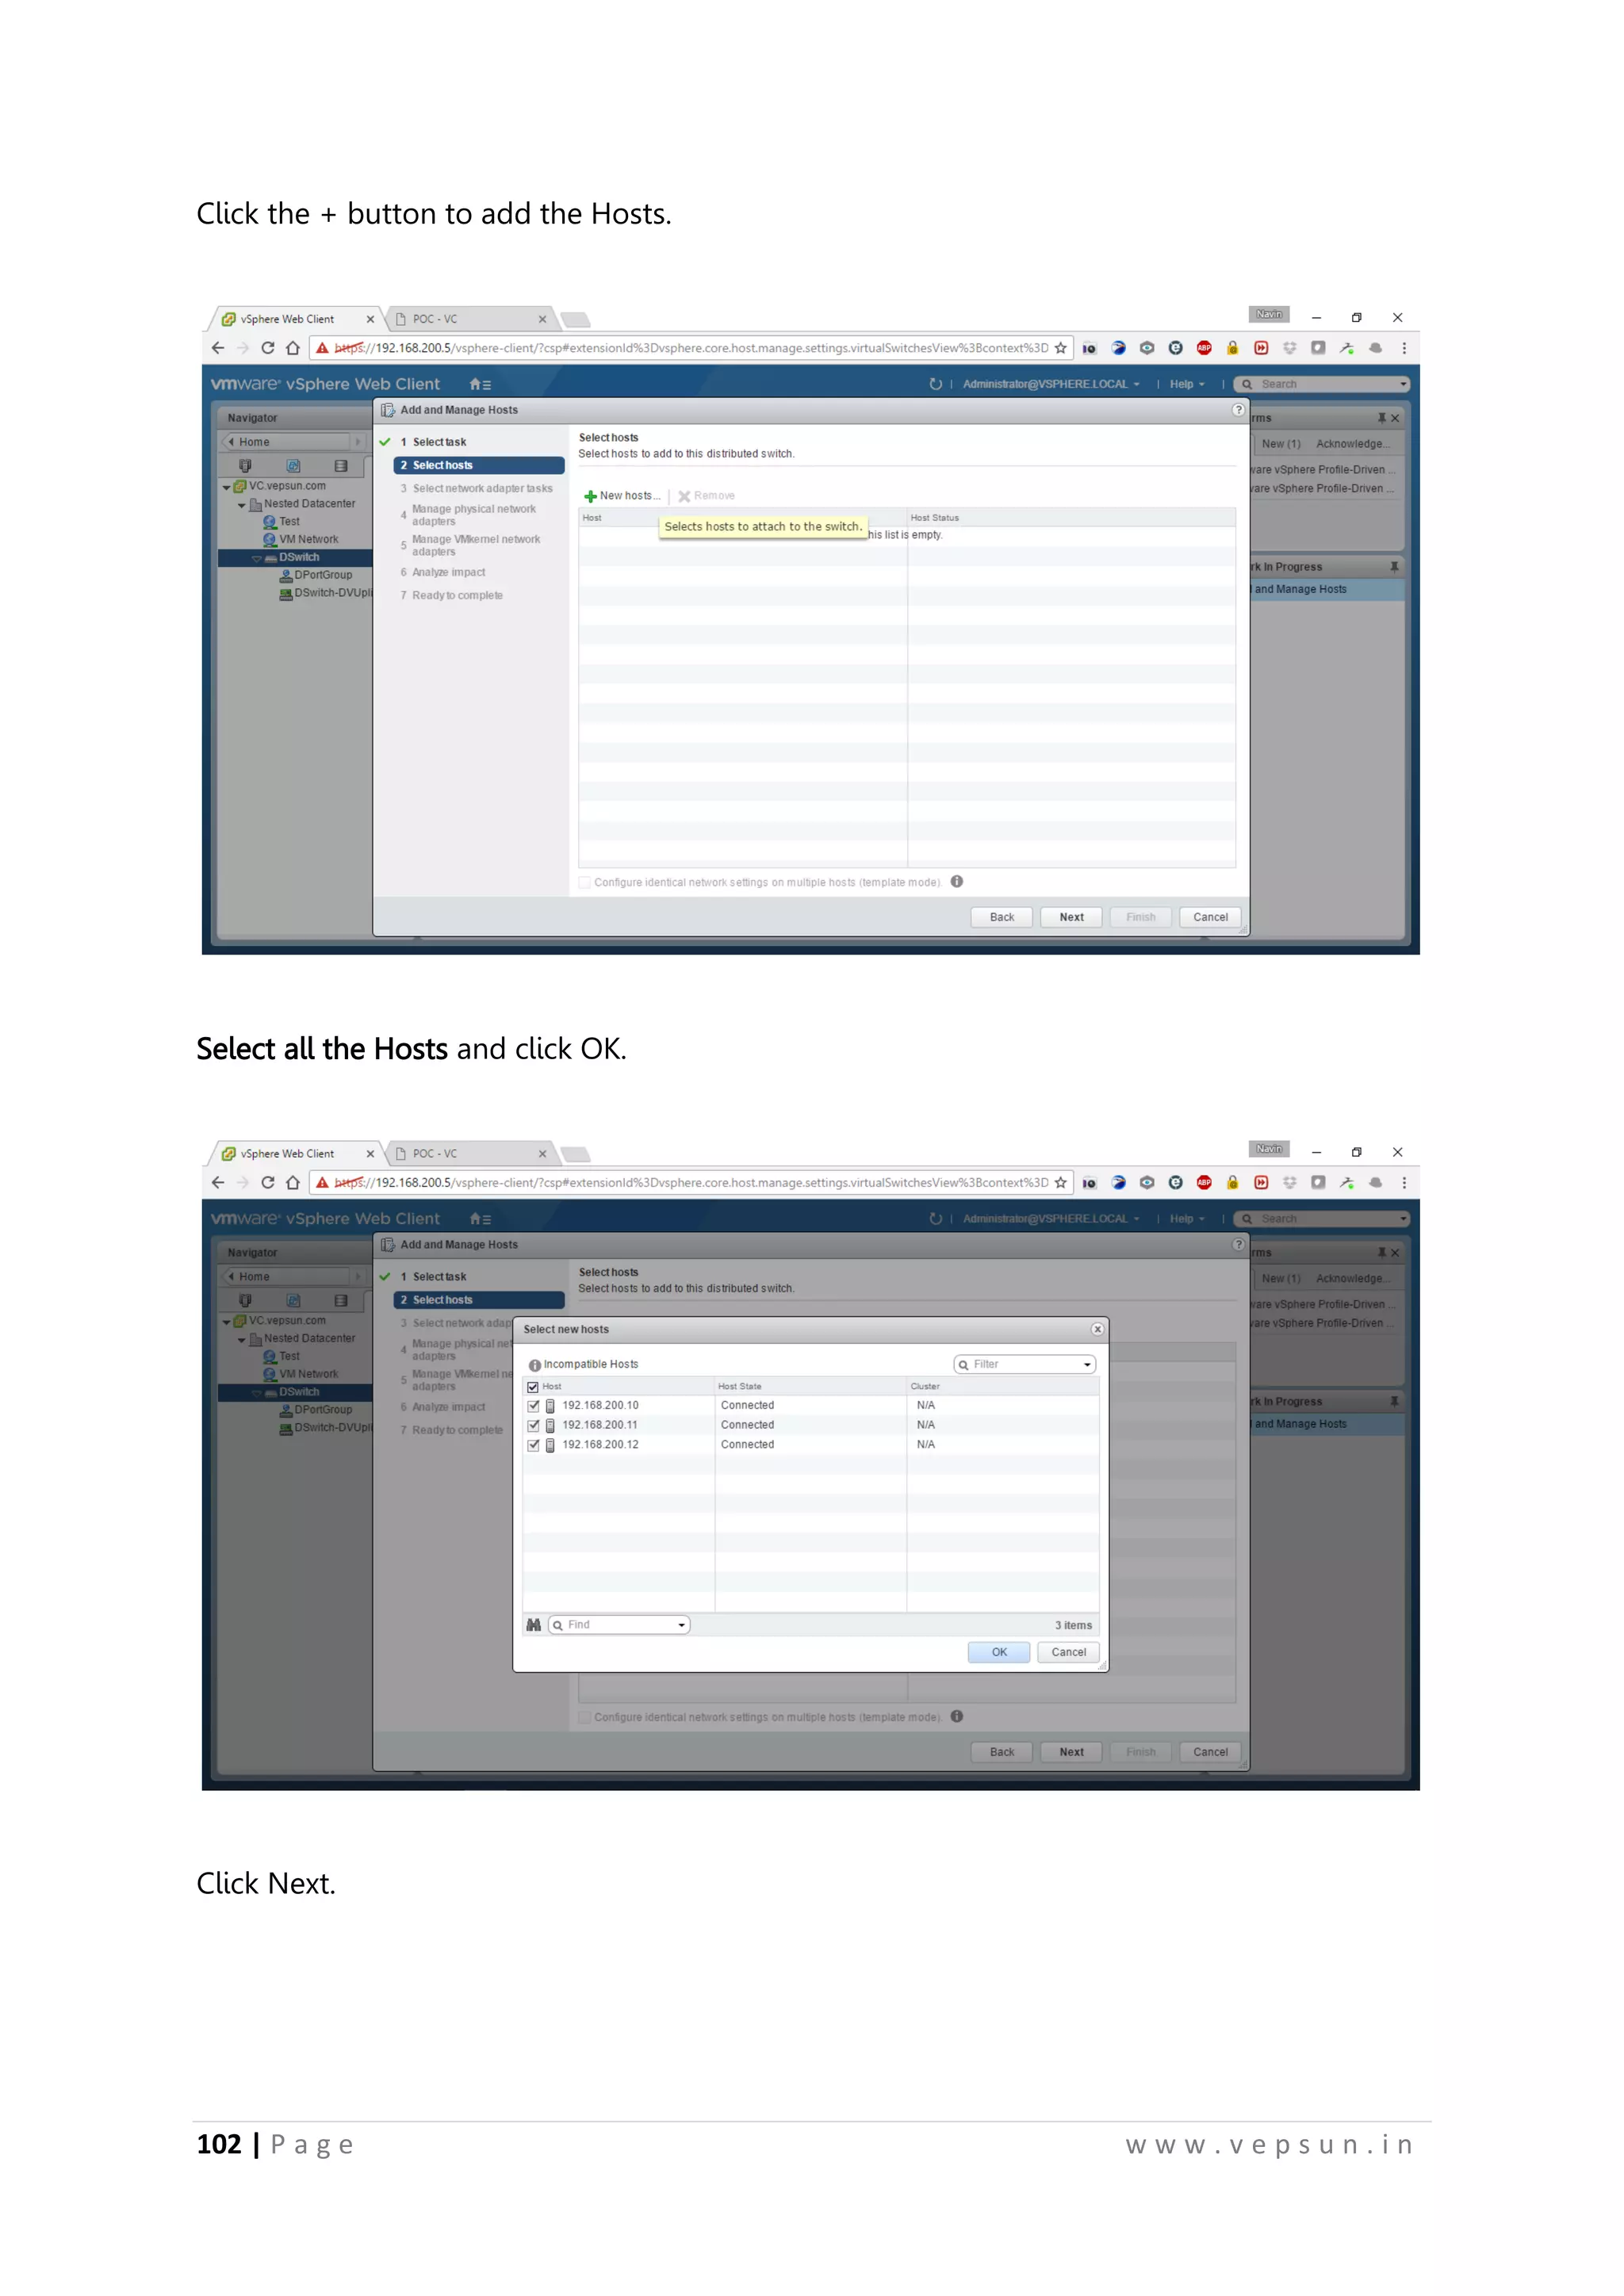
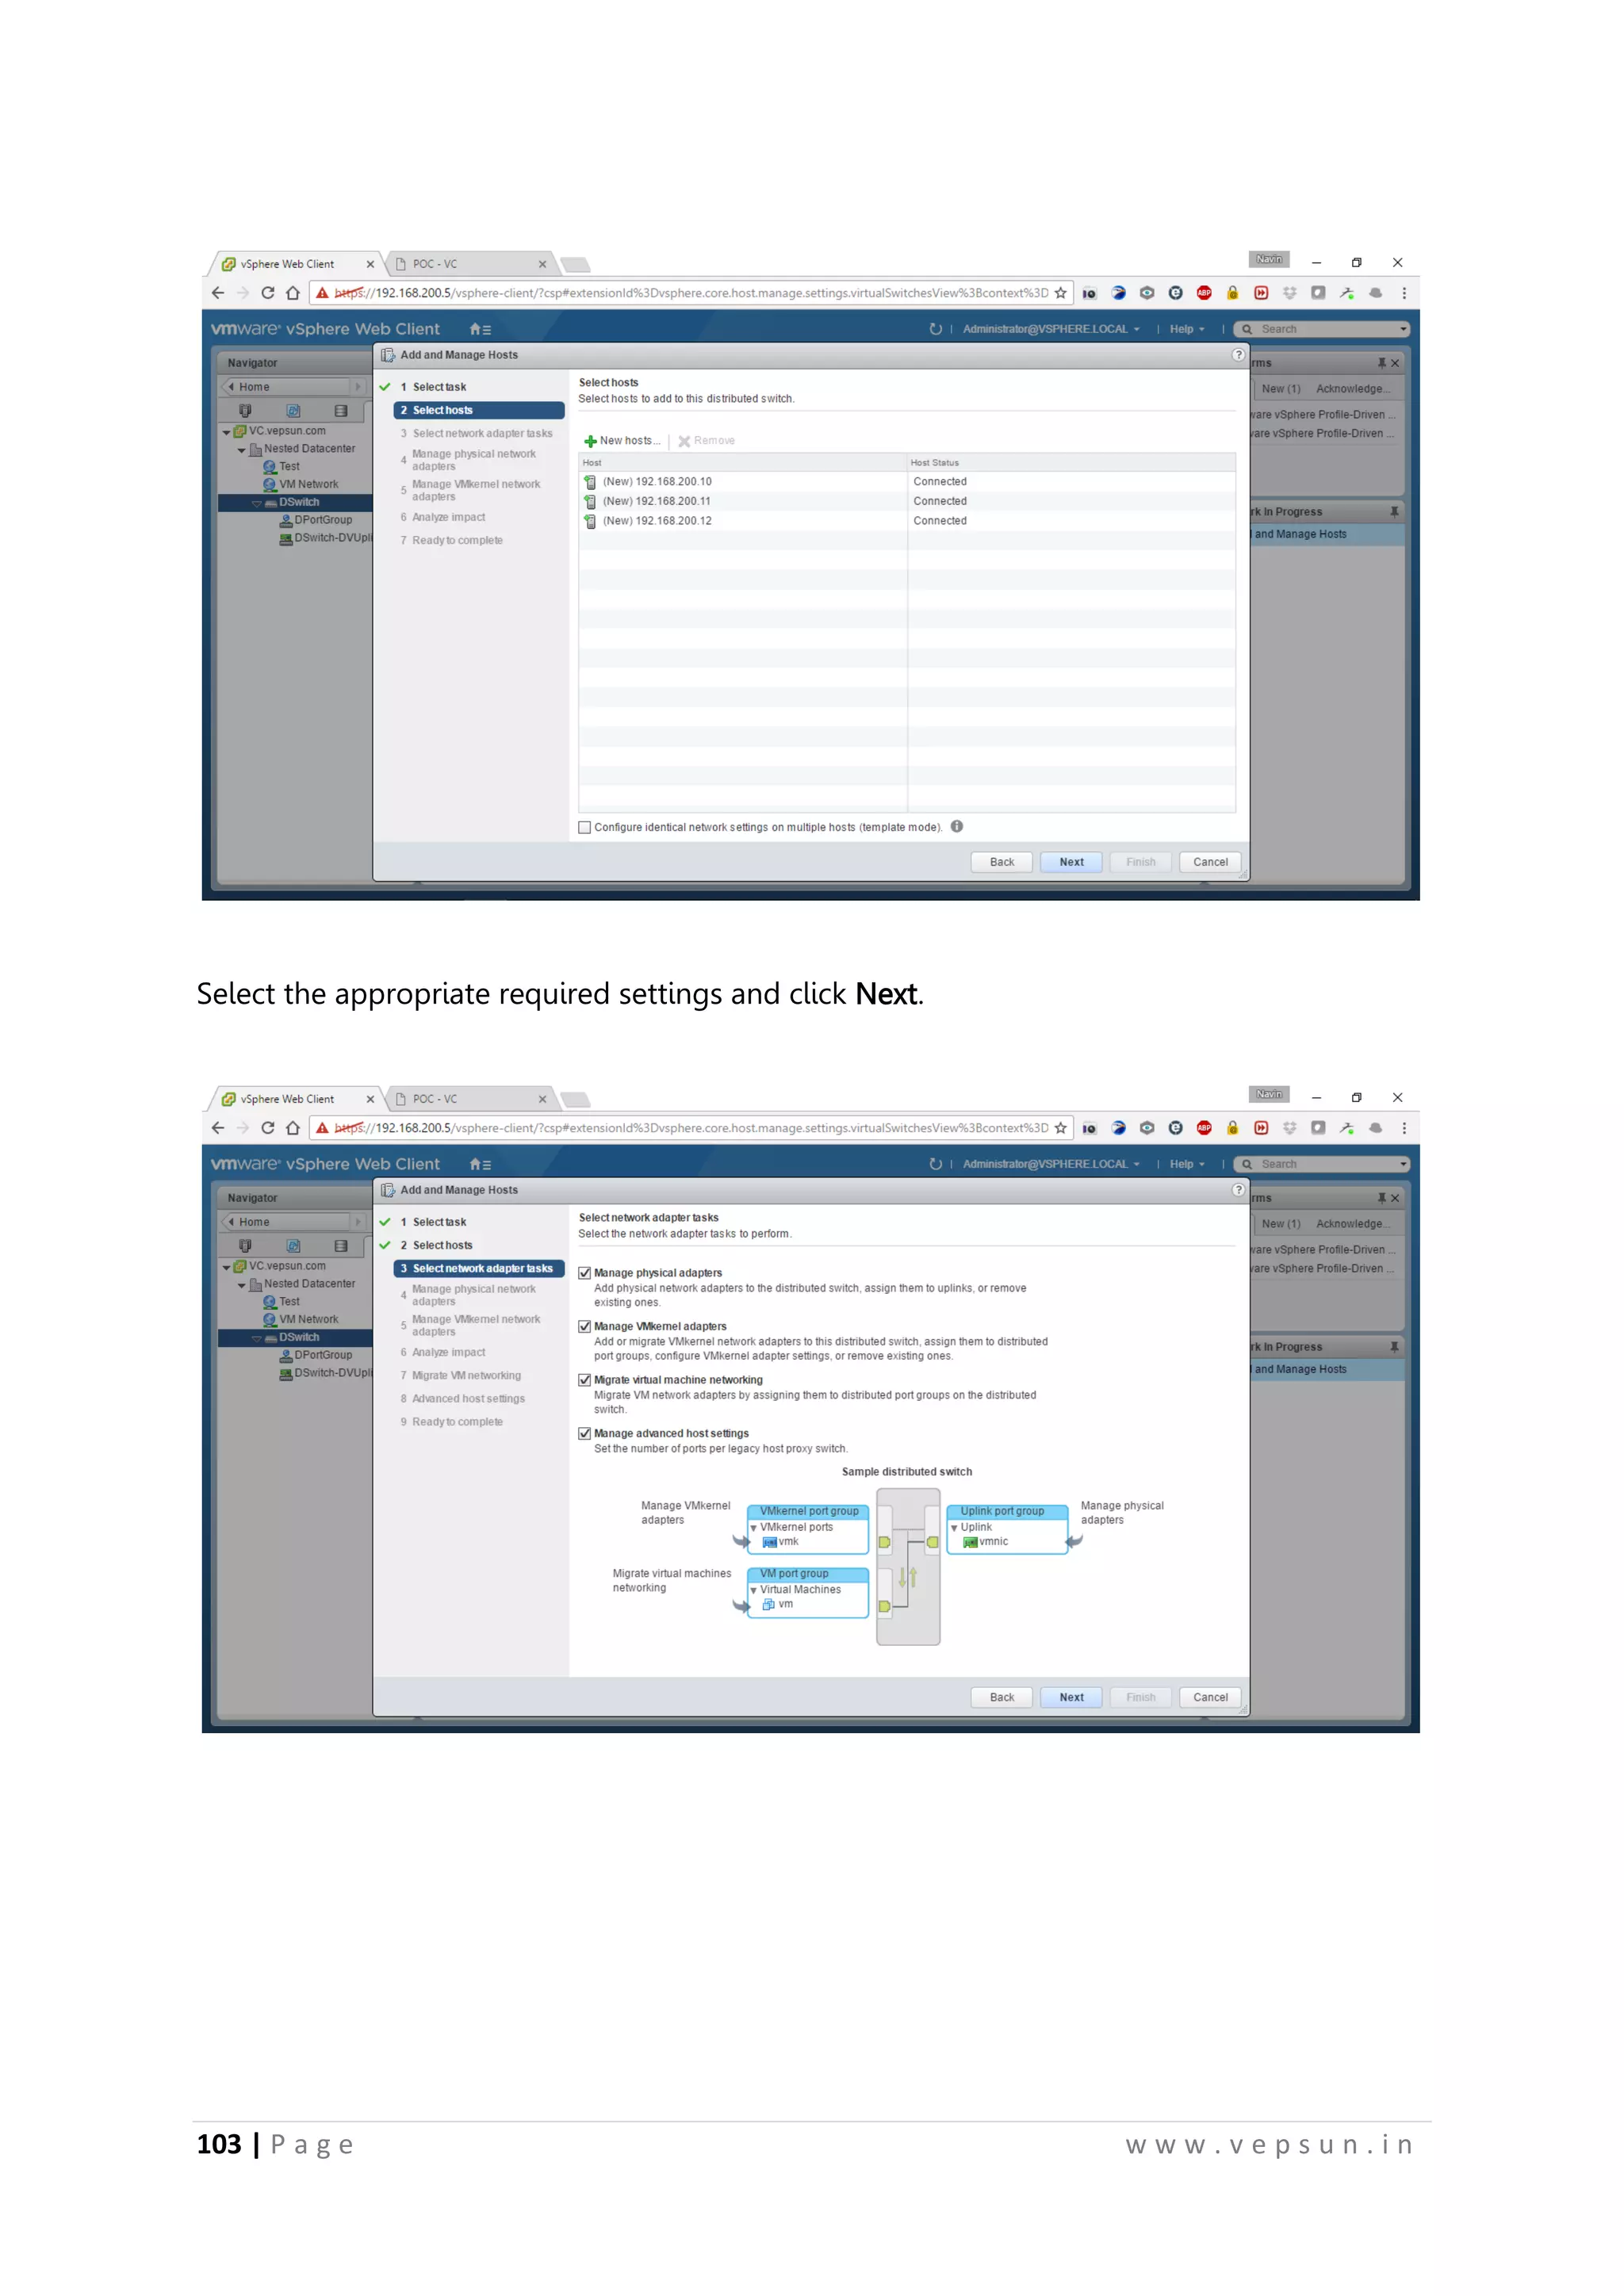
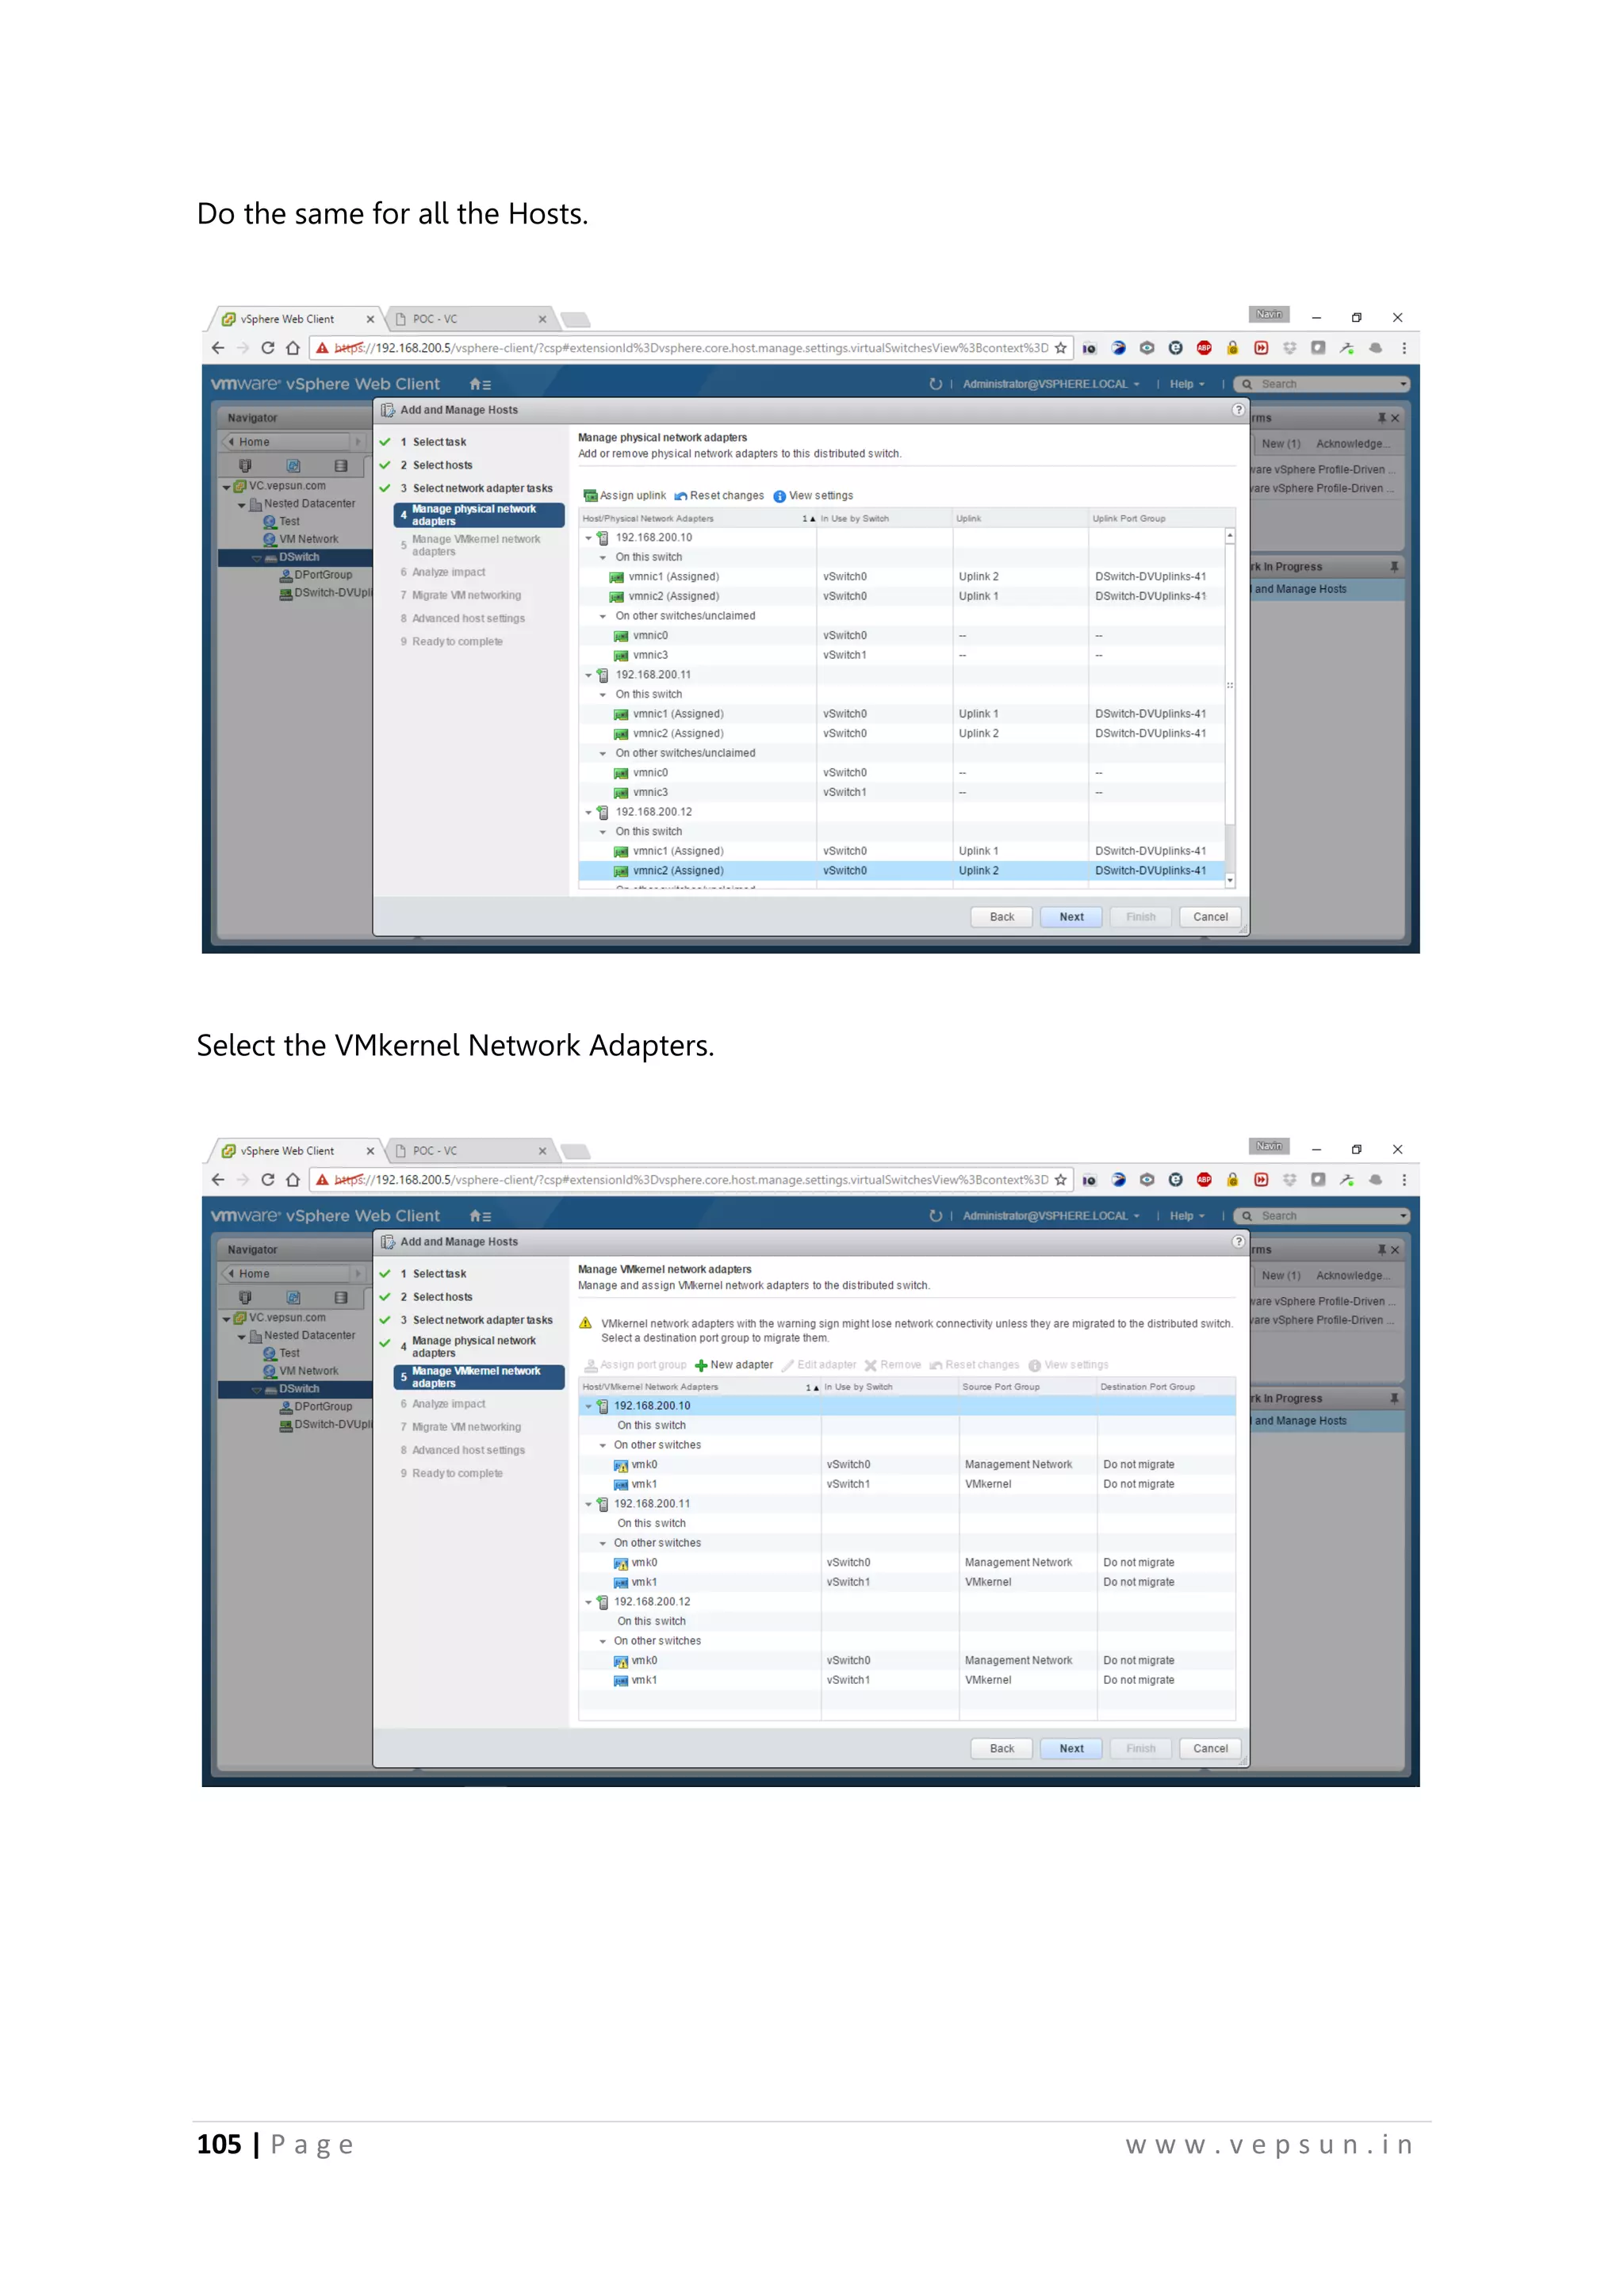
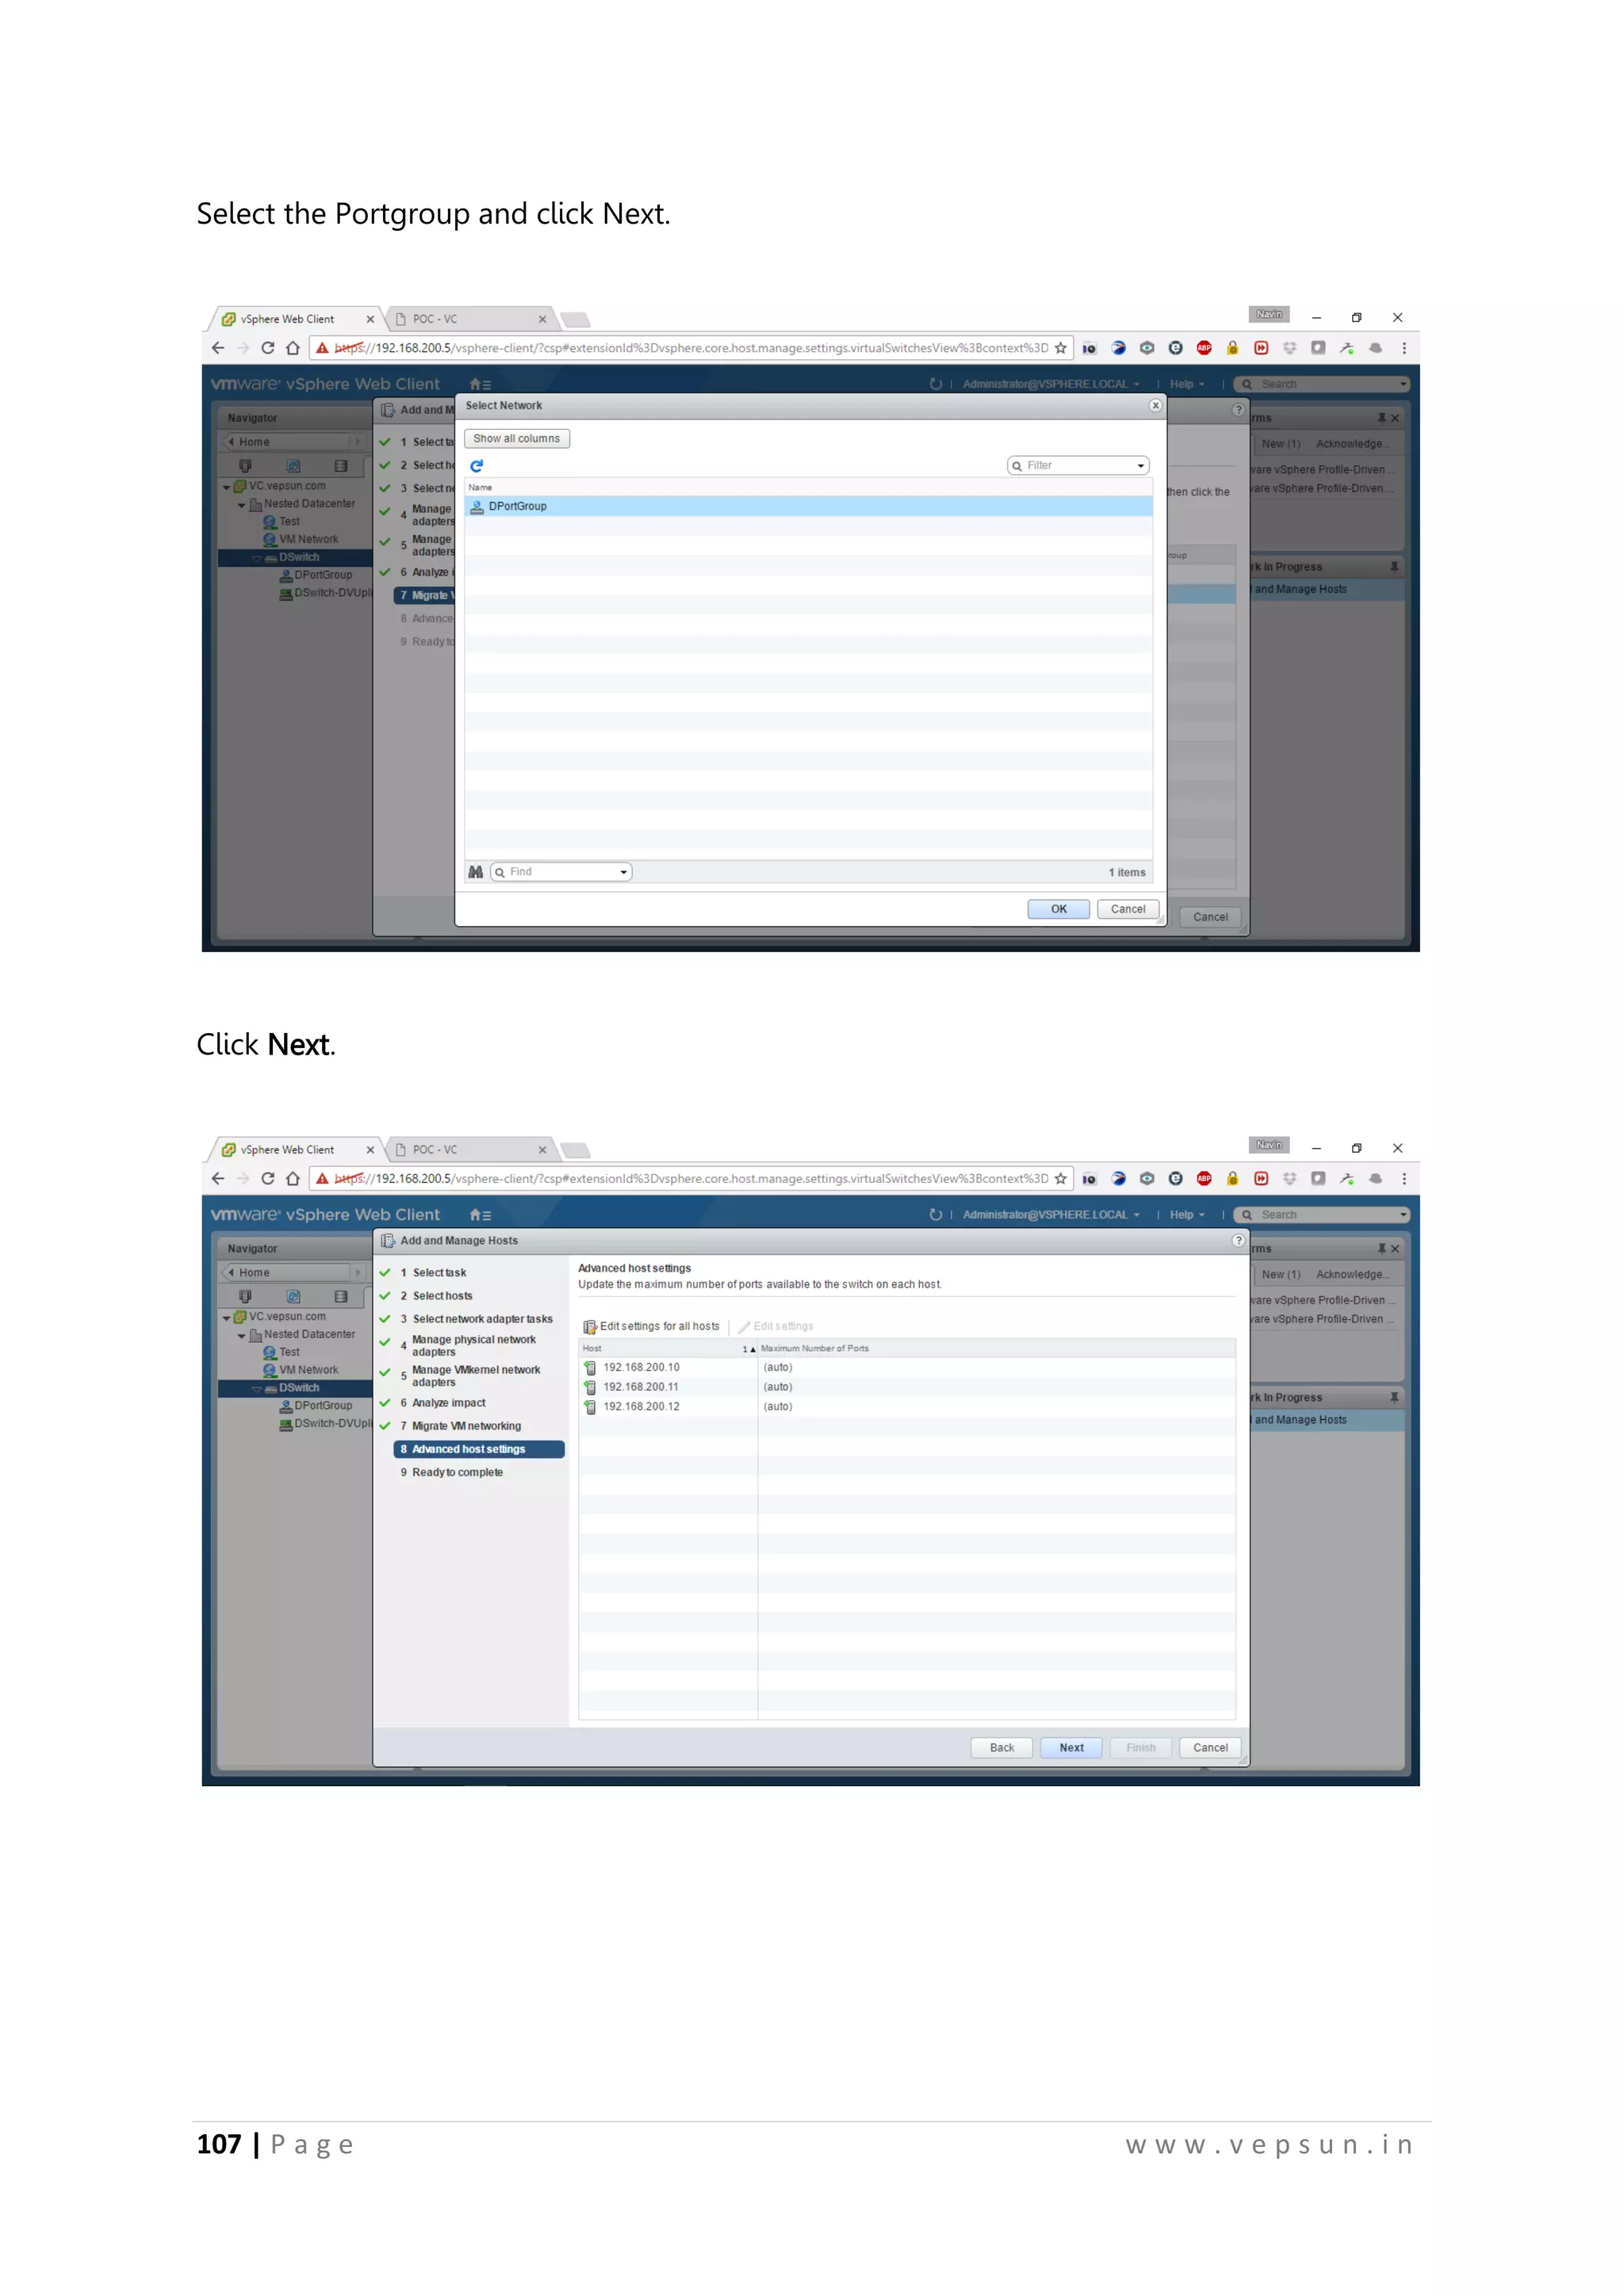
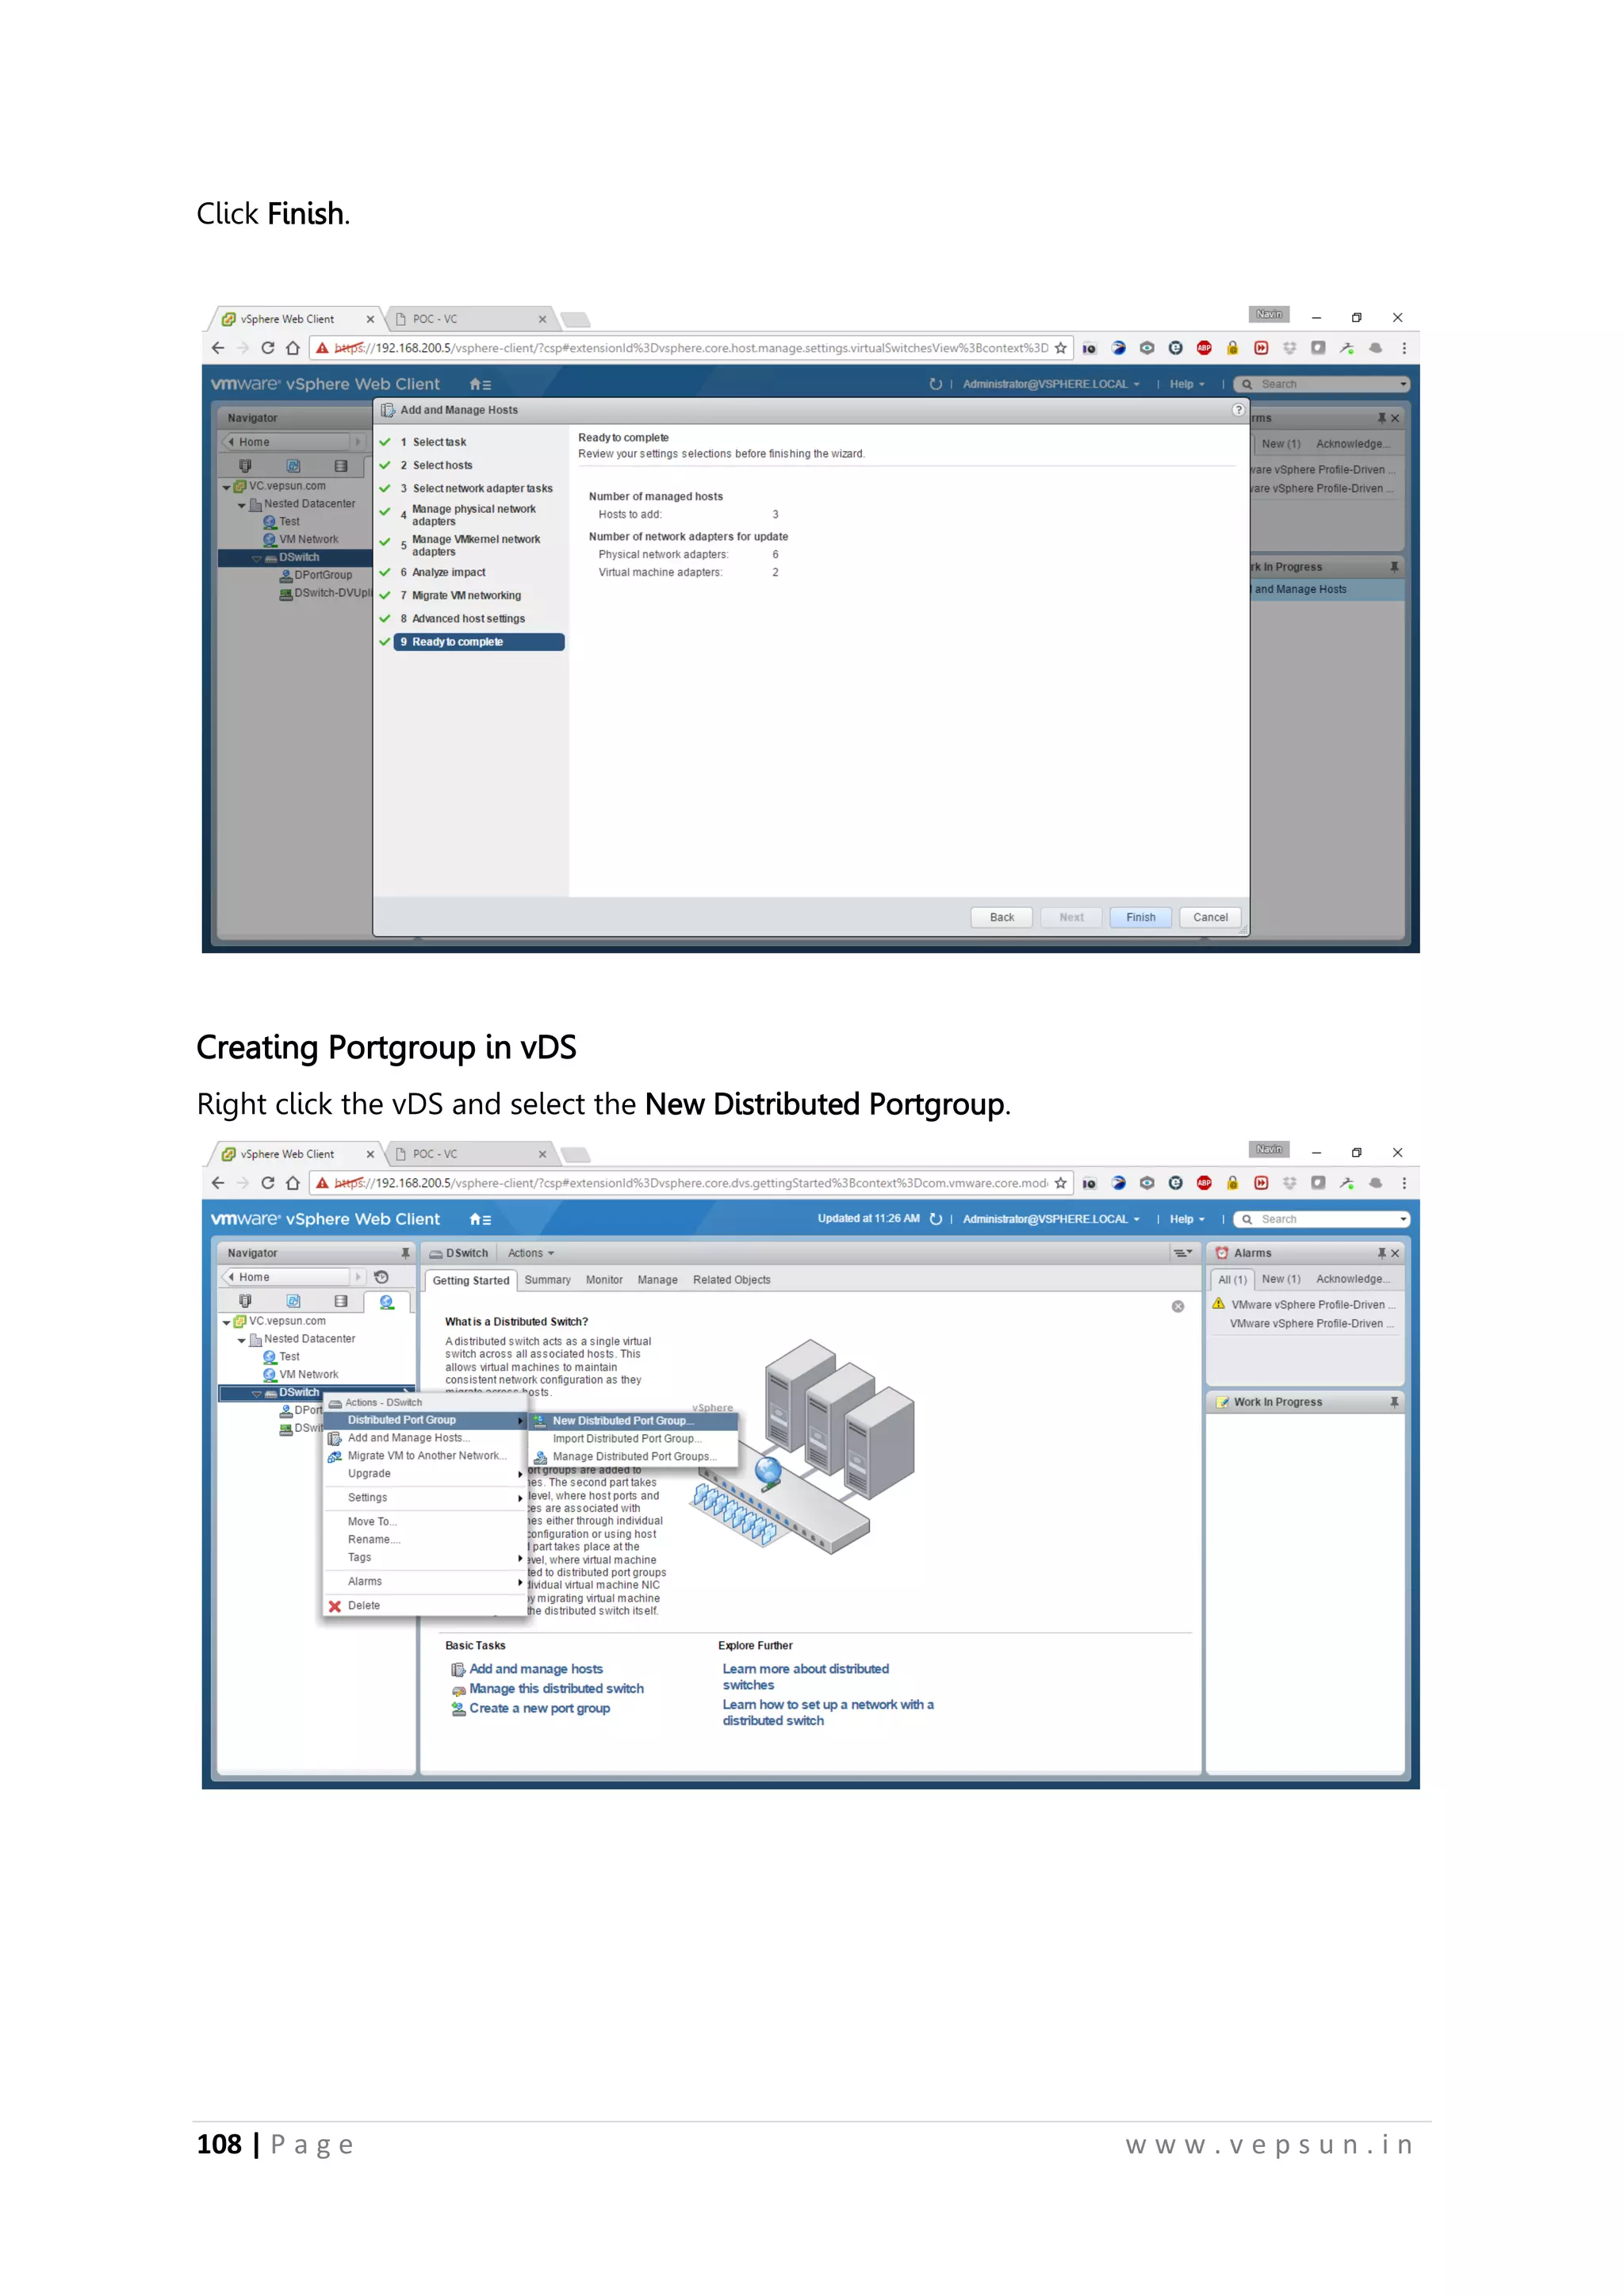
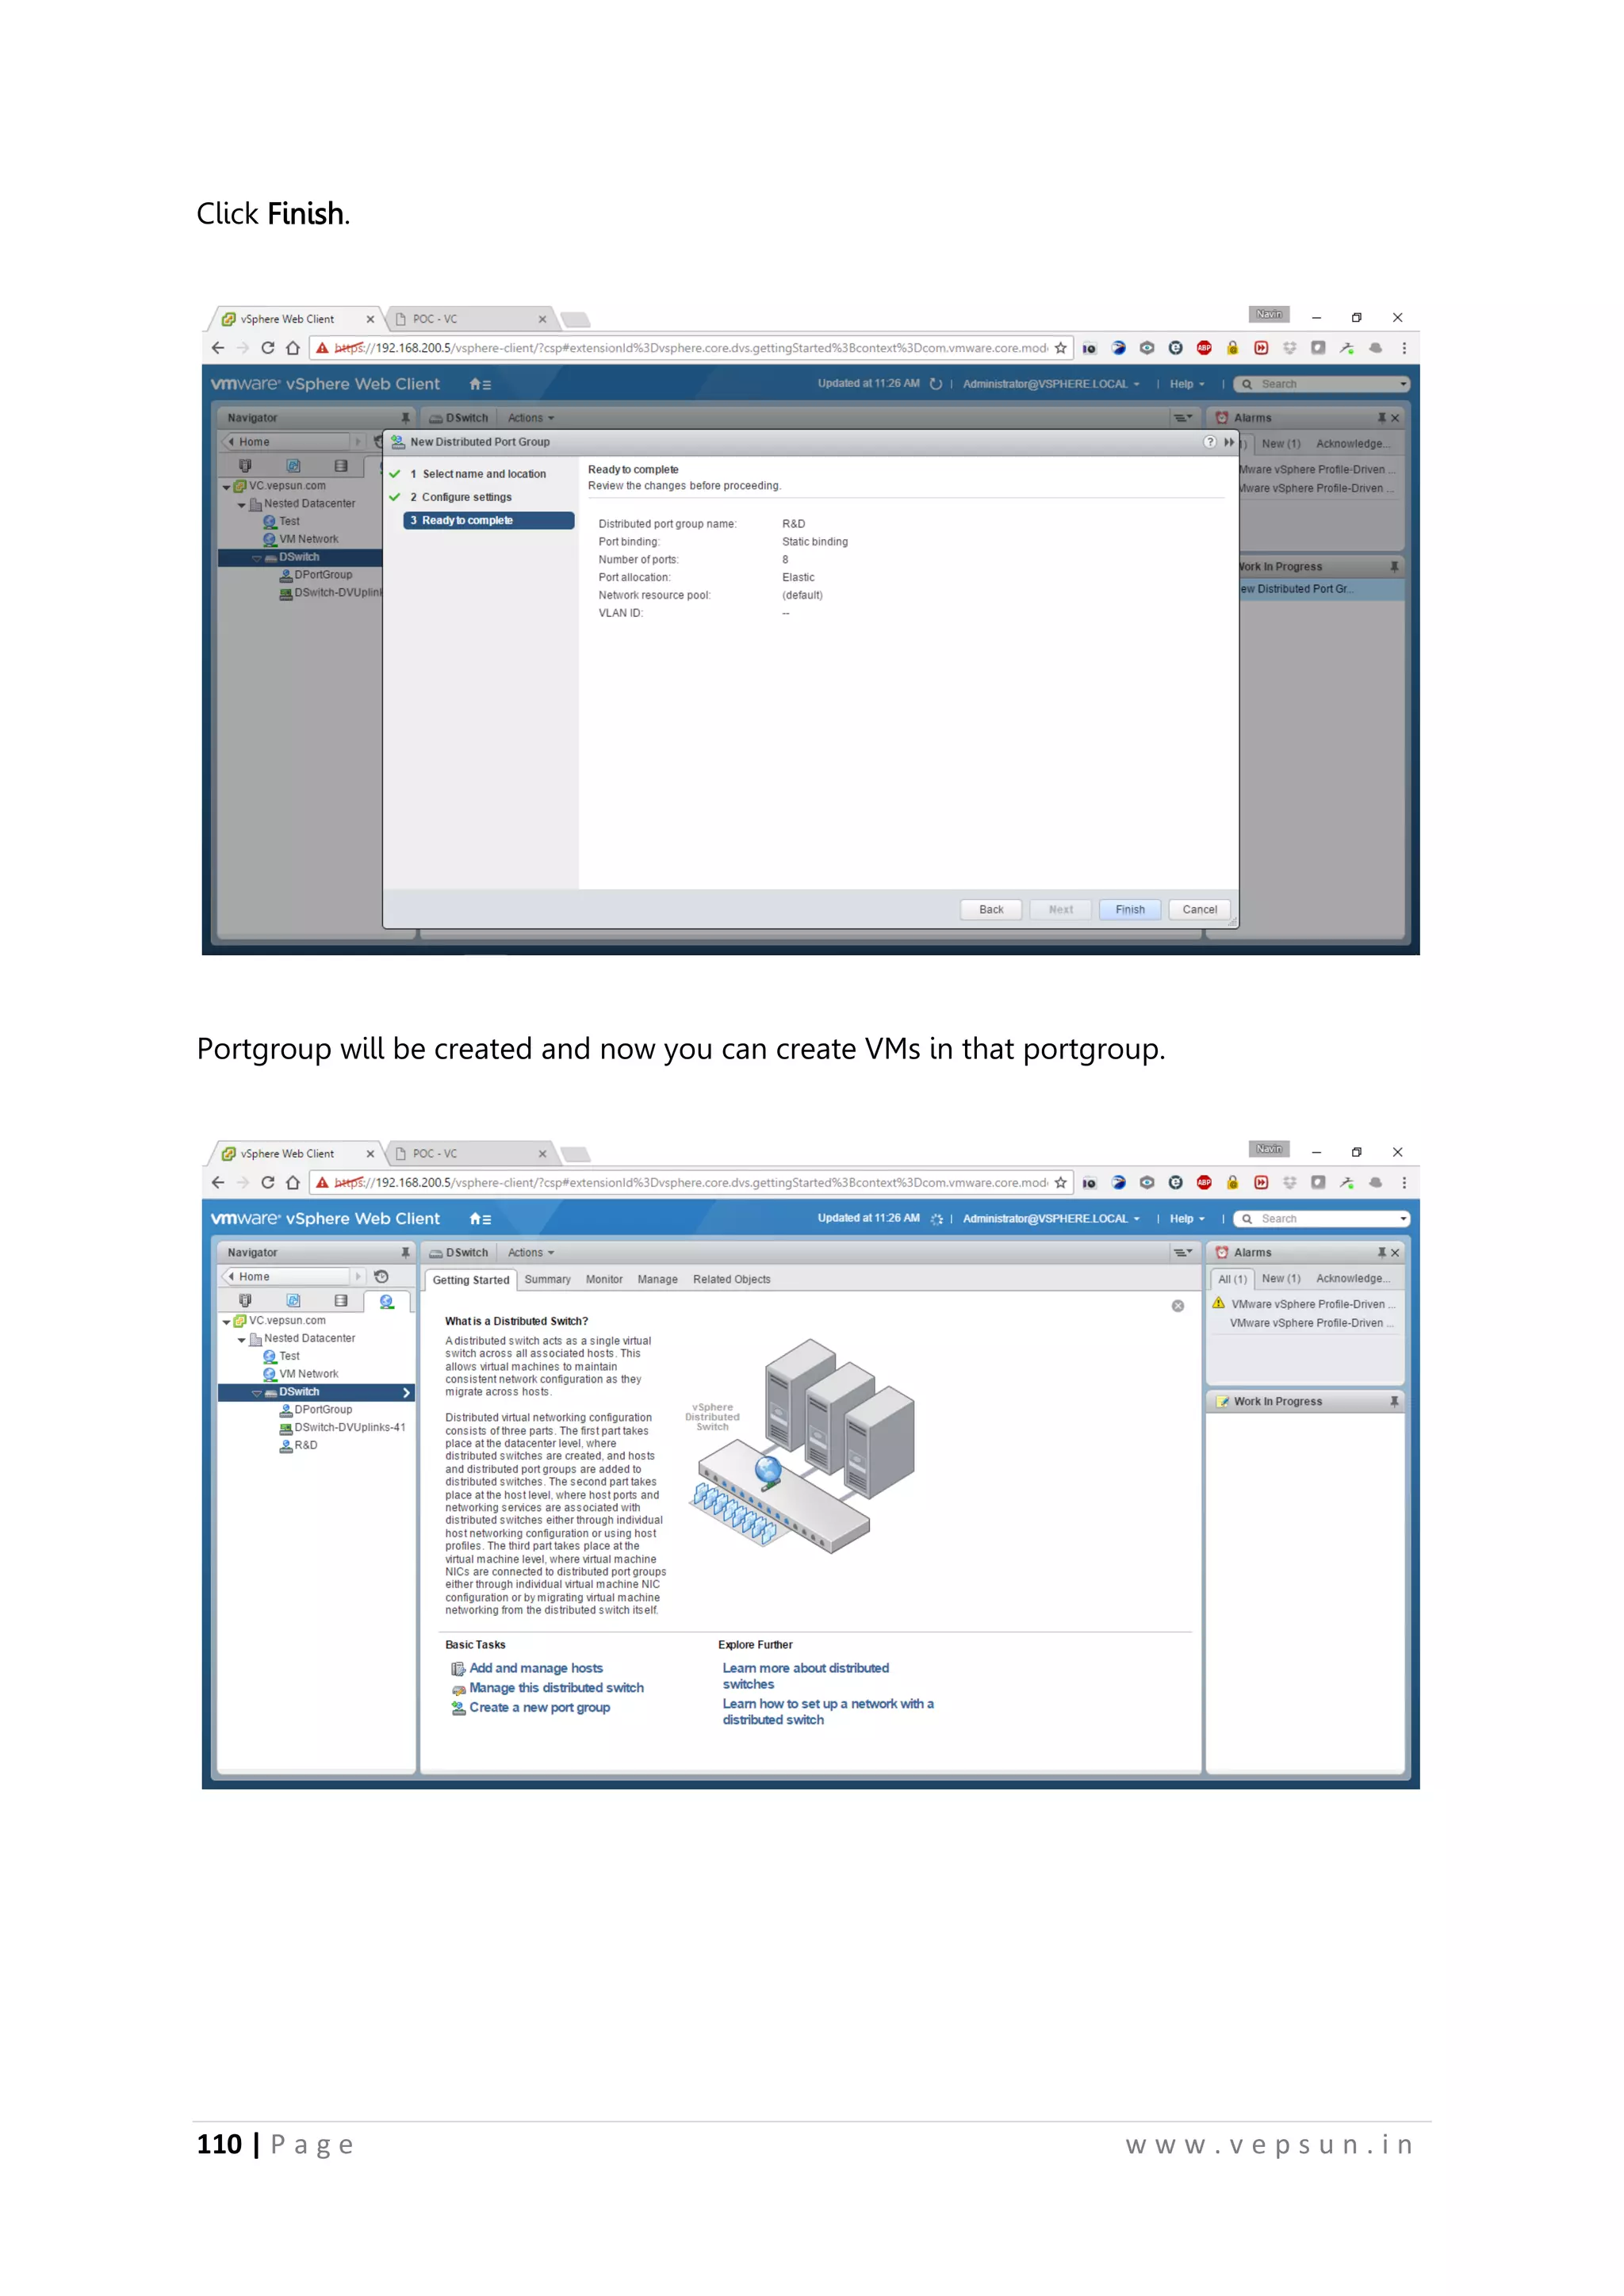
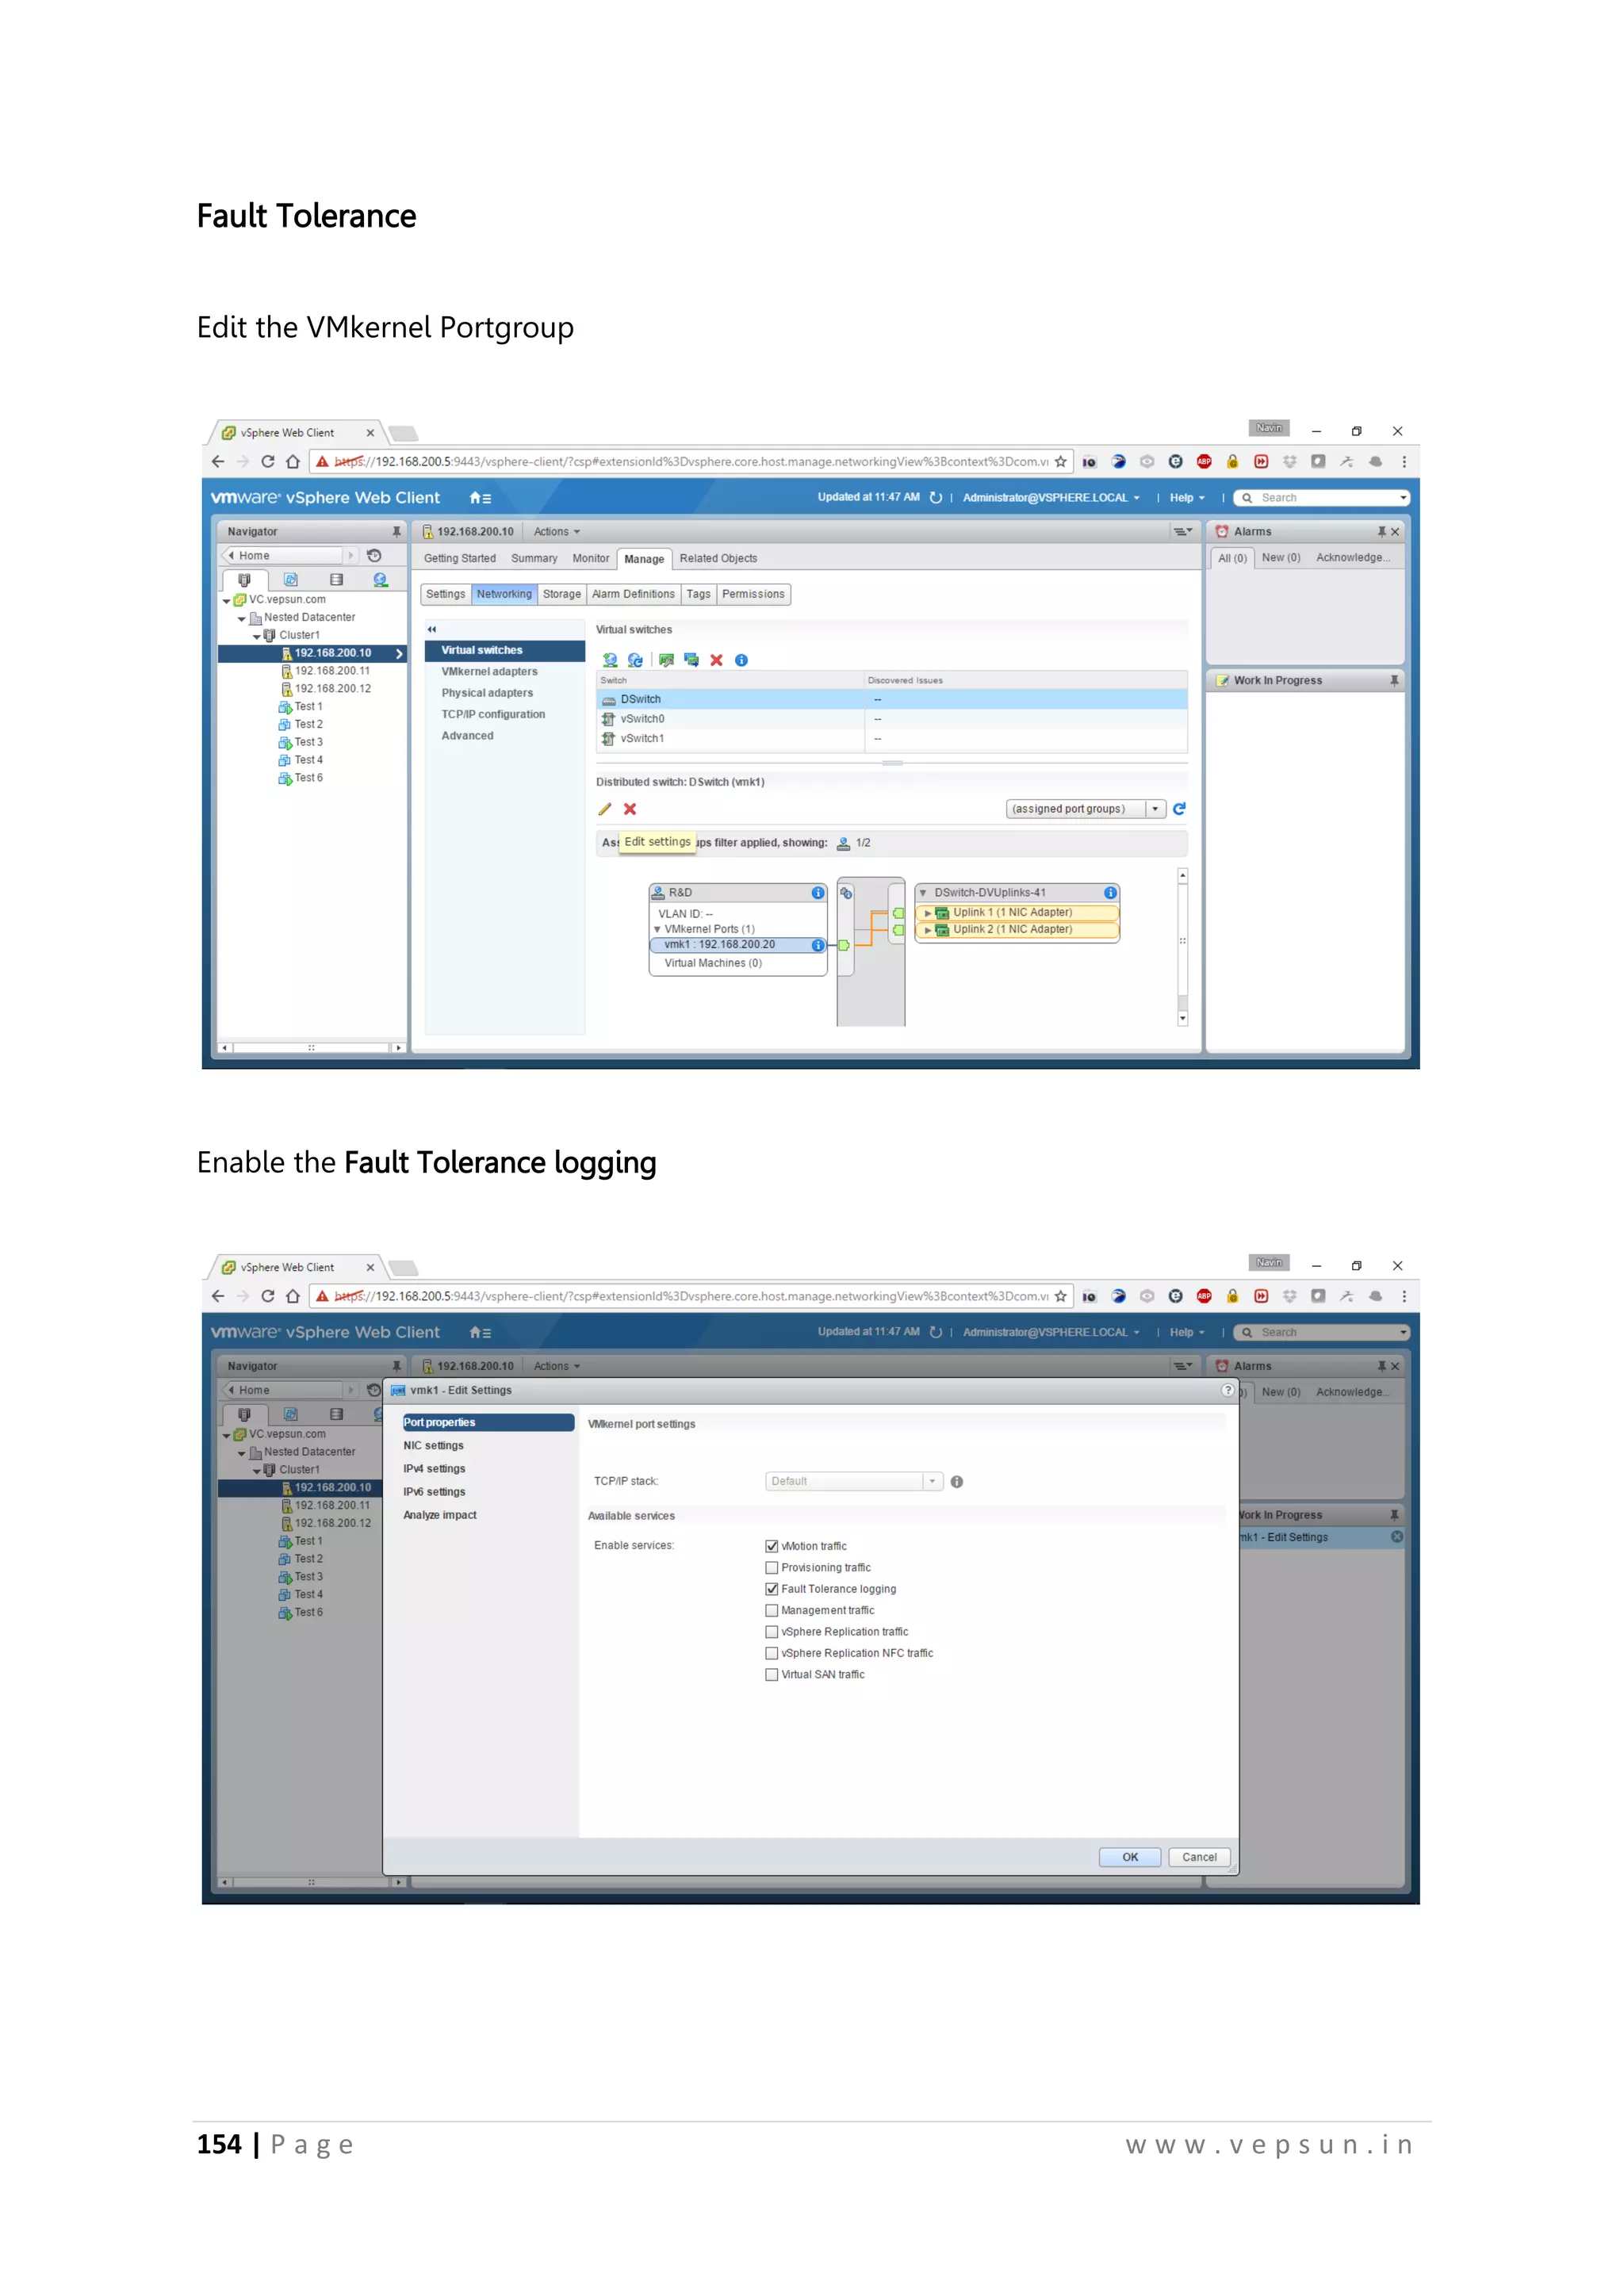
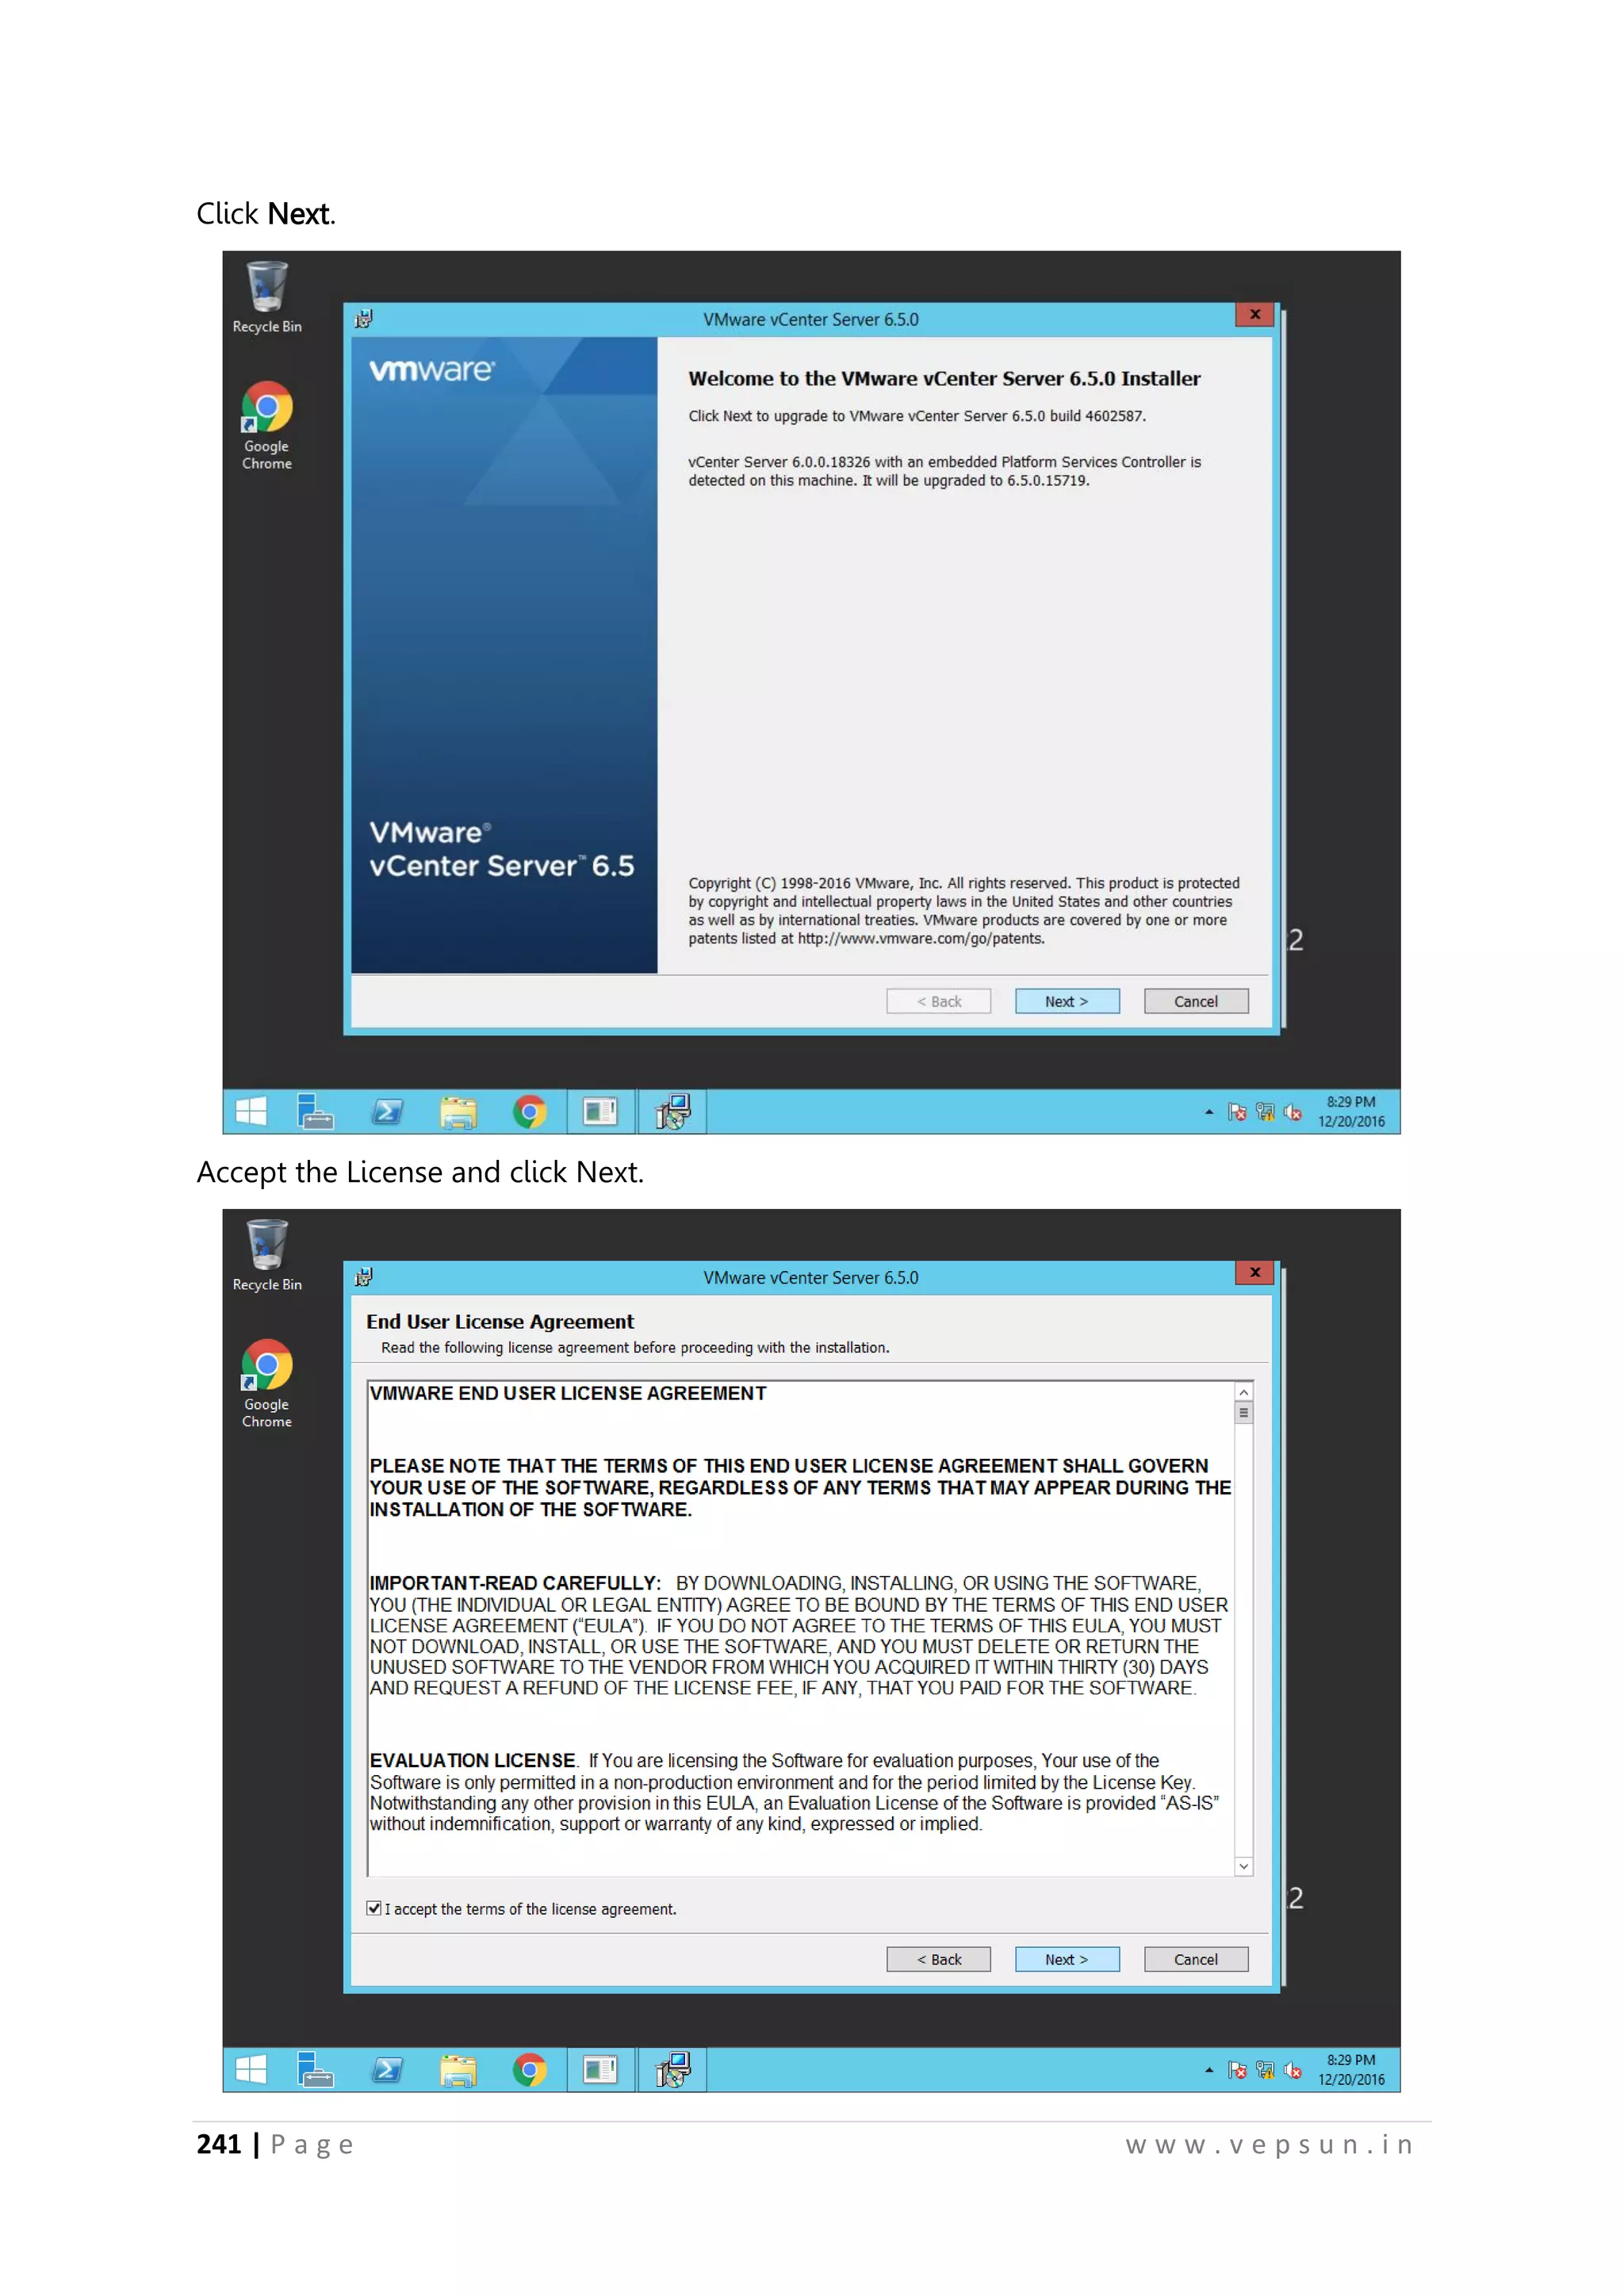
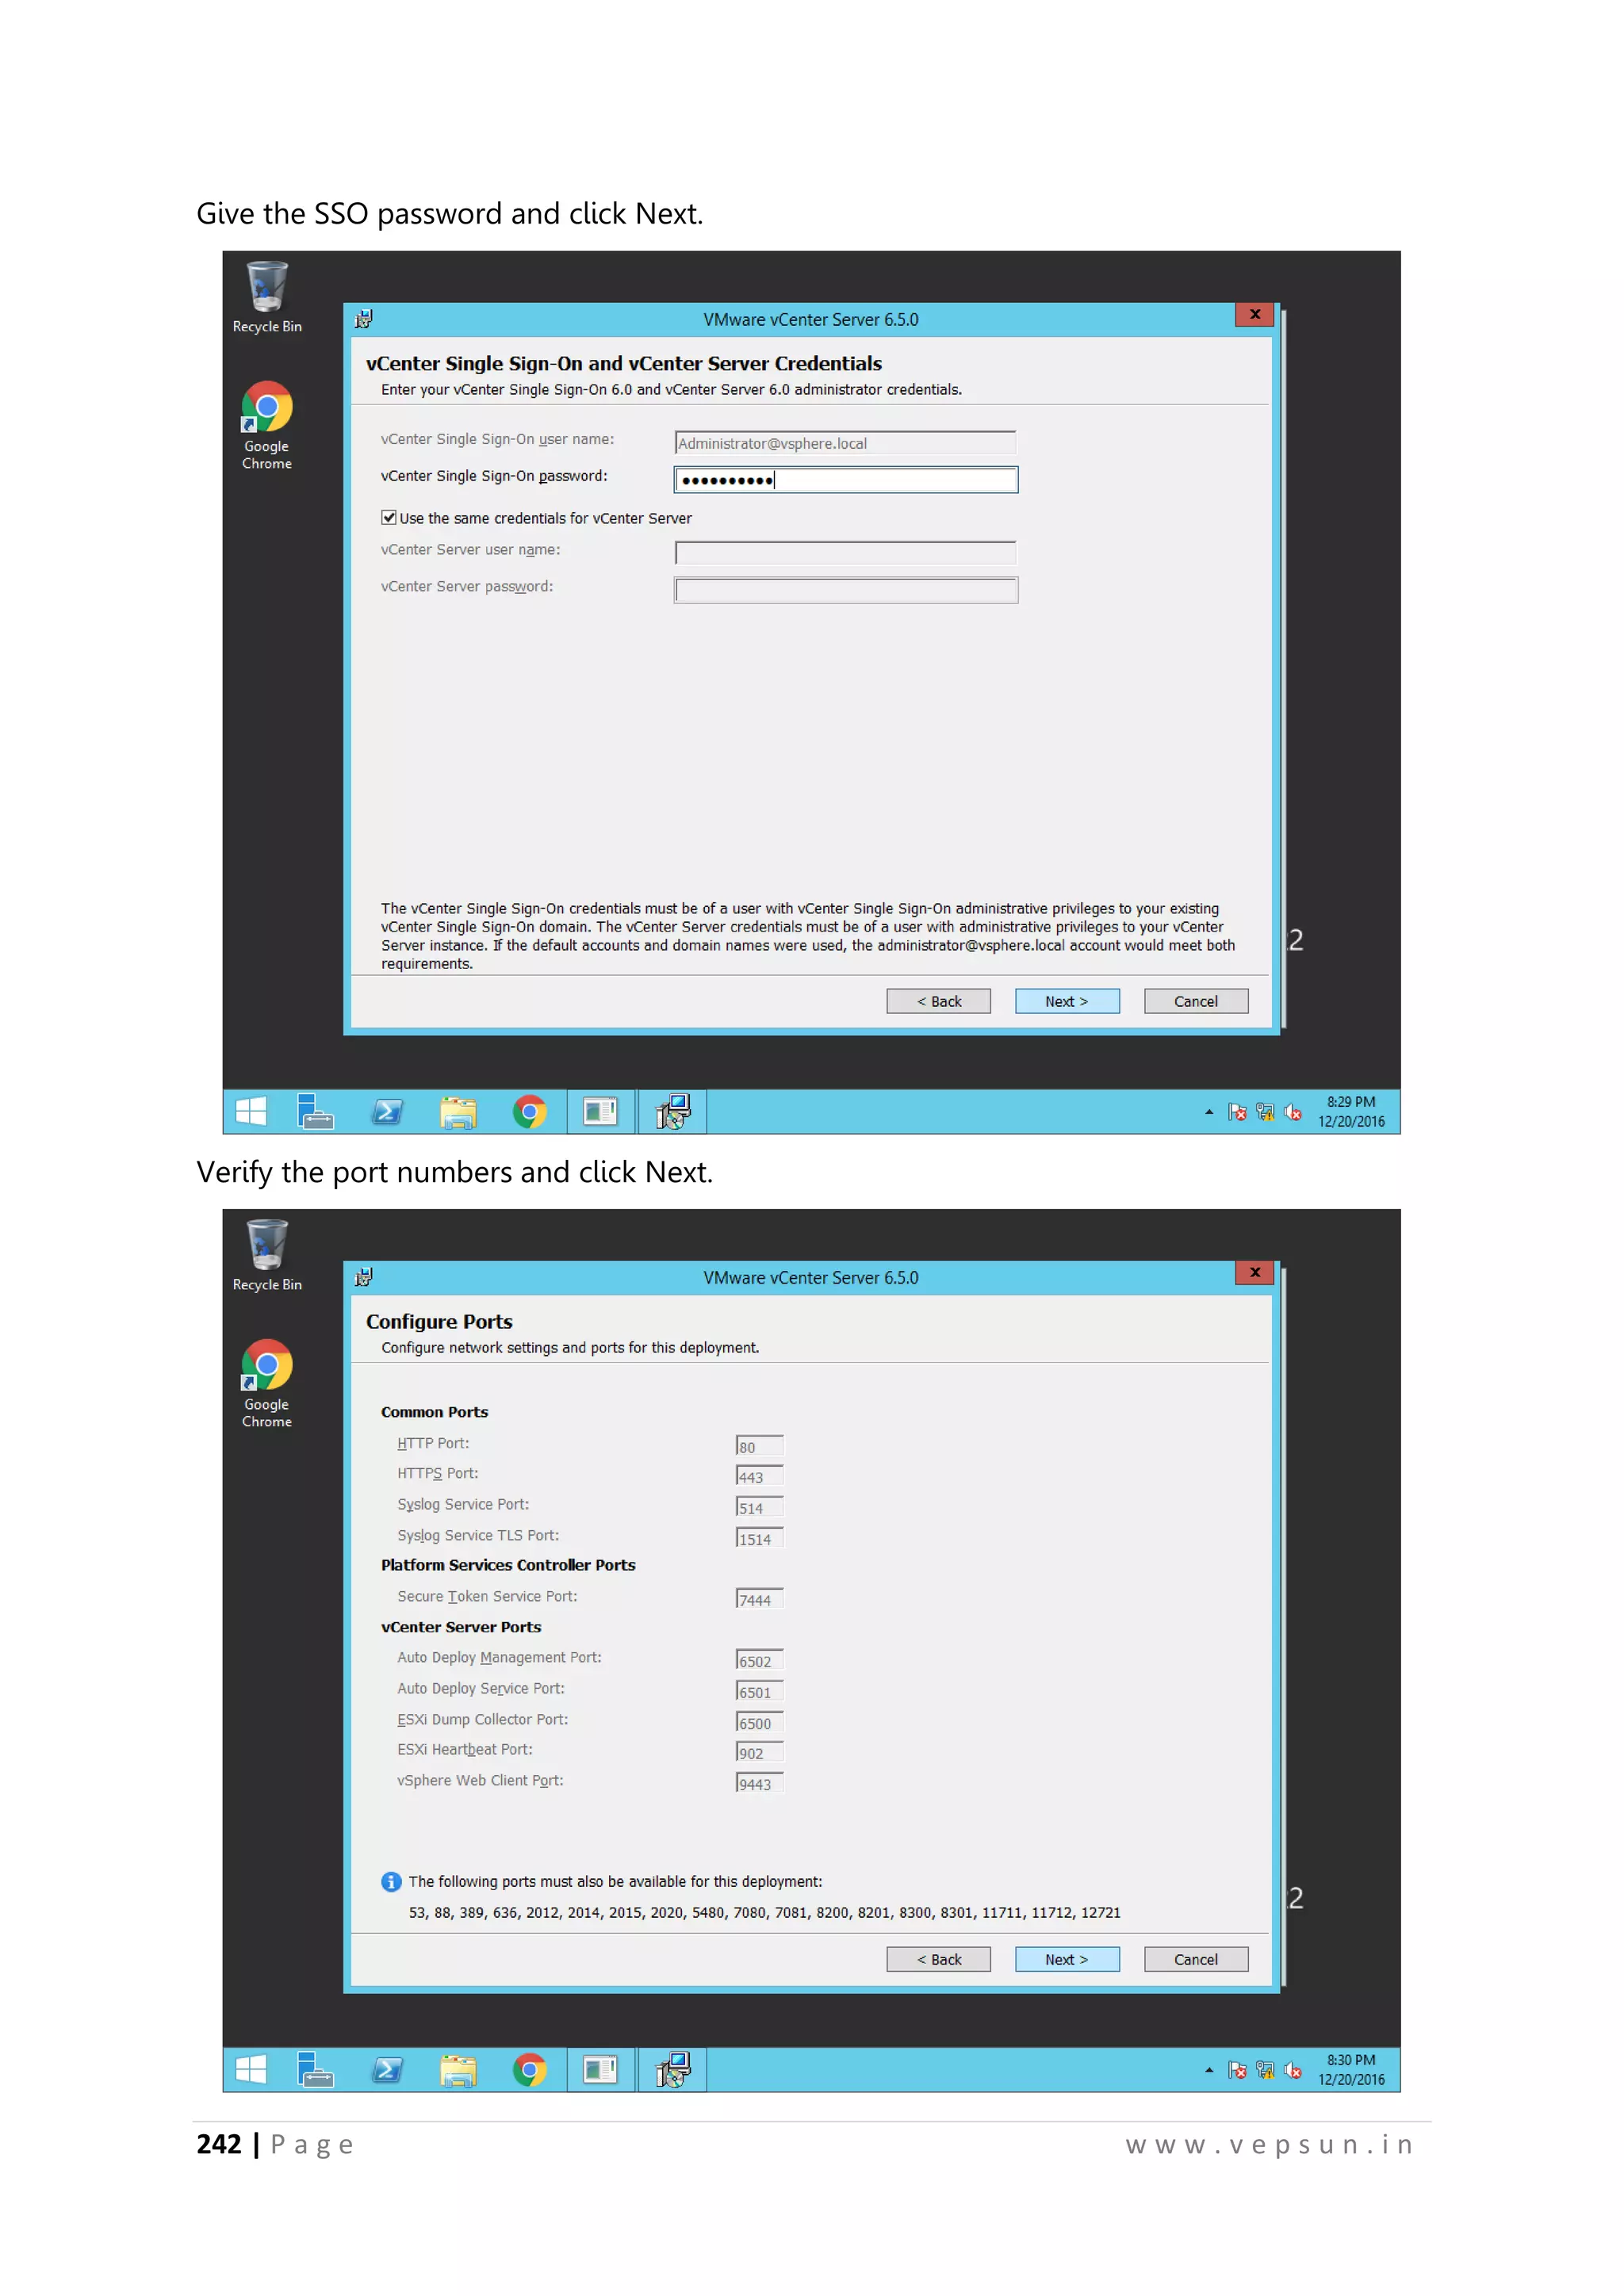
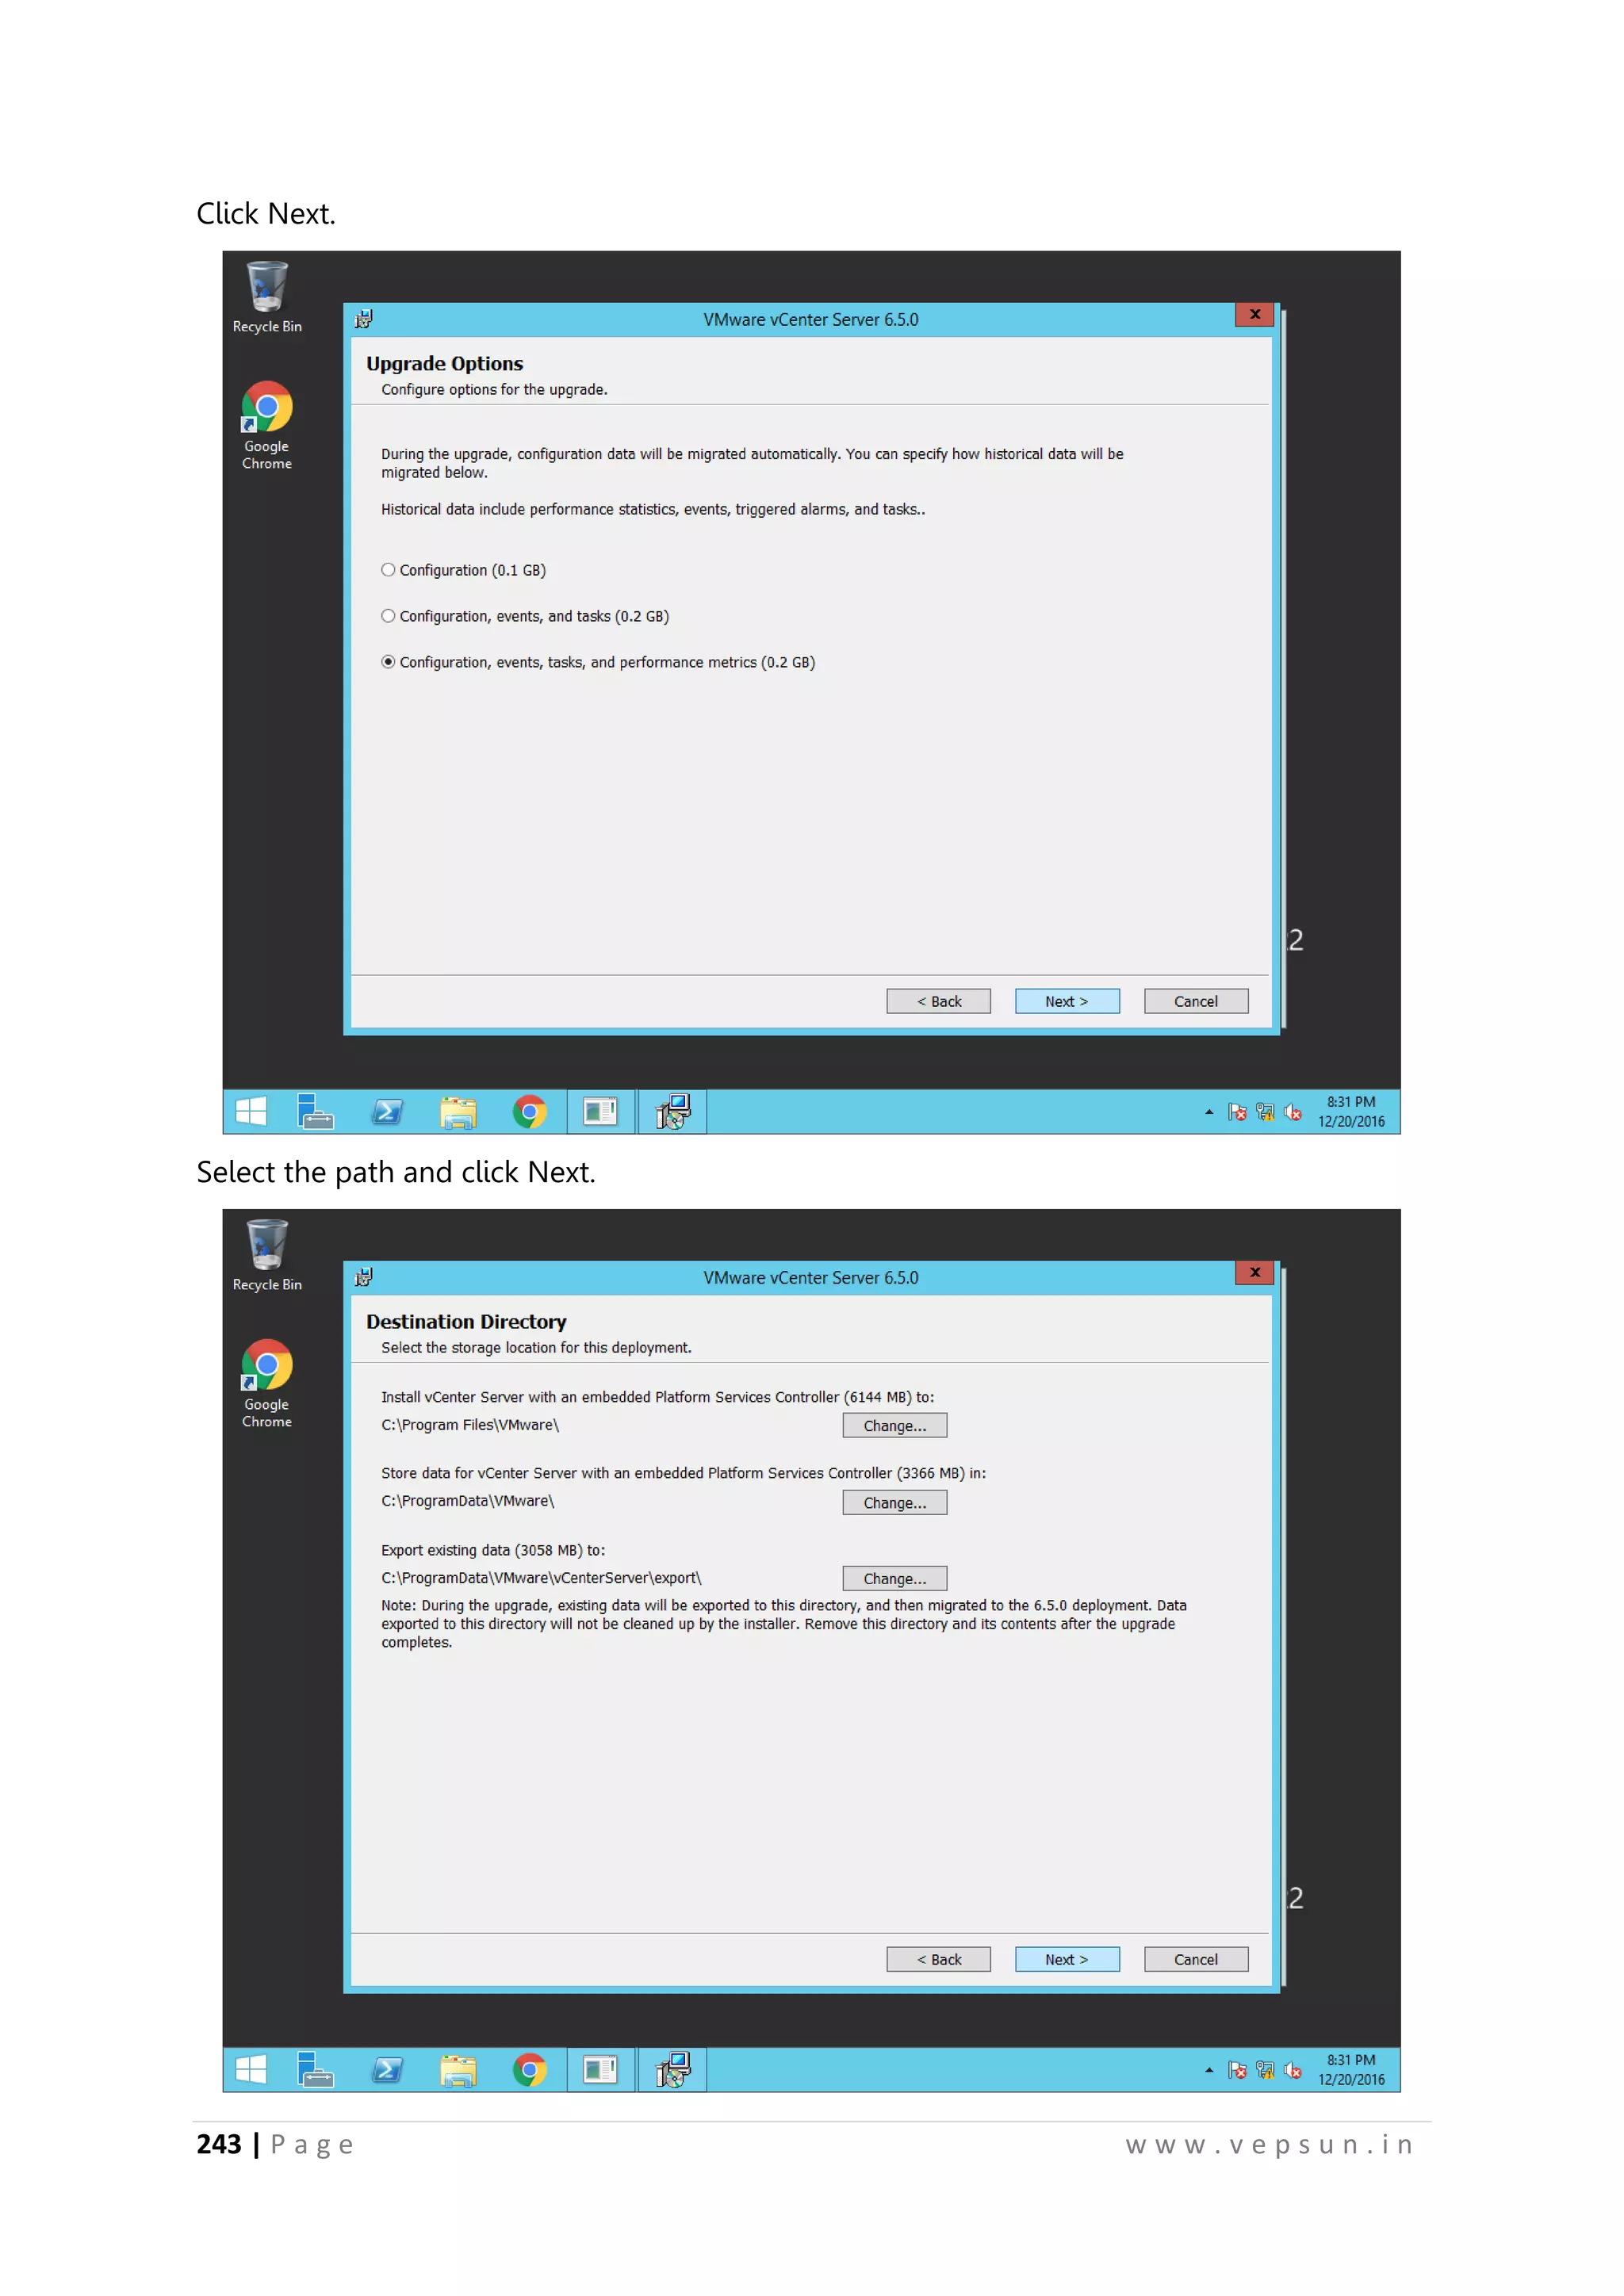
Procedure to install vCenter Server, including initial configurations and setting IP and DNS settings. Configuring NIC Teaming, creating Portgroups, and setting up virtual switches in the vSphere environment.
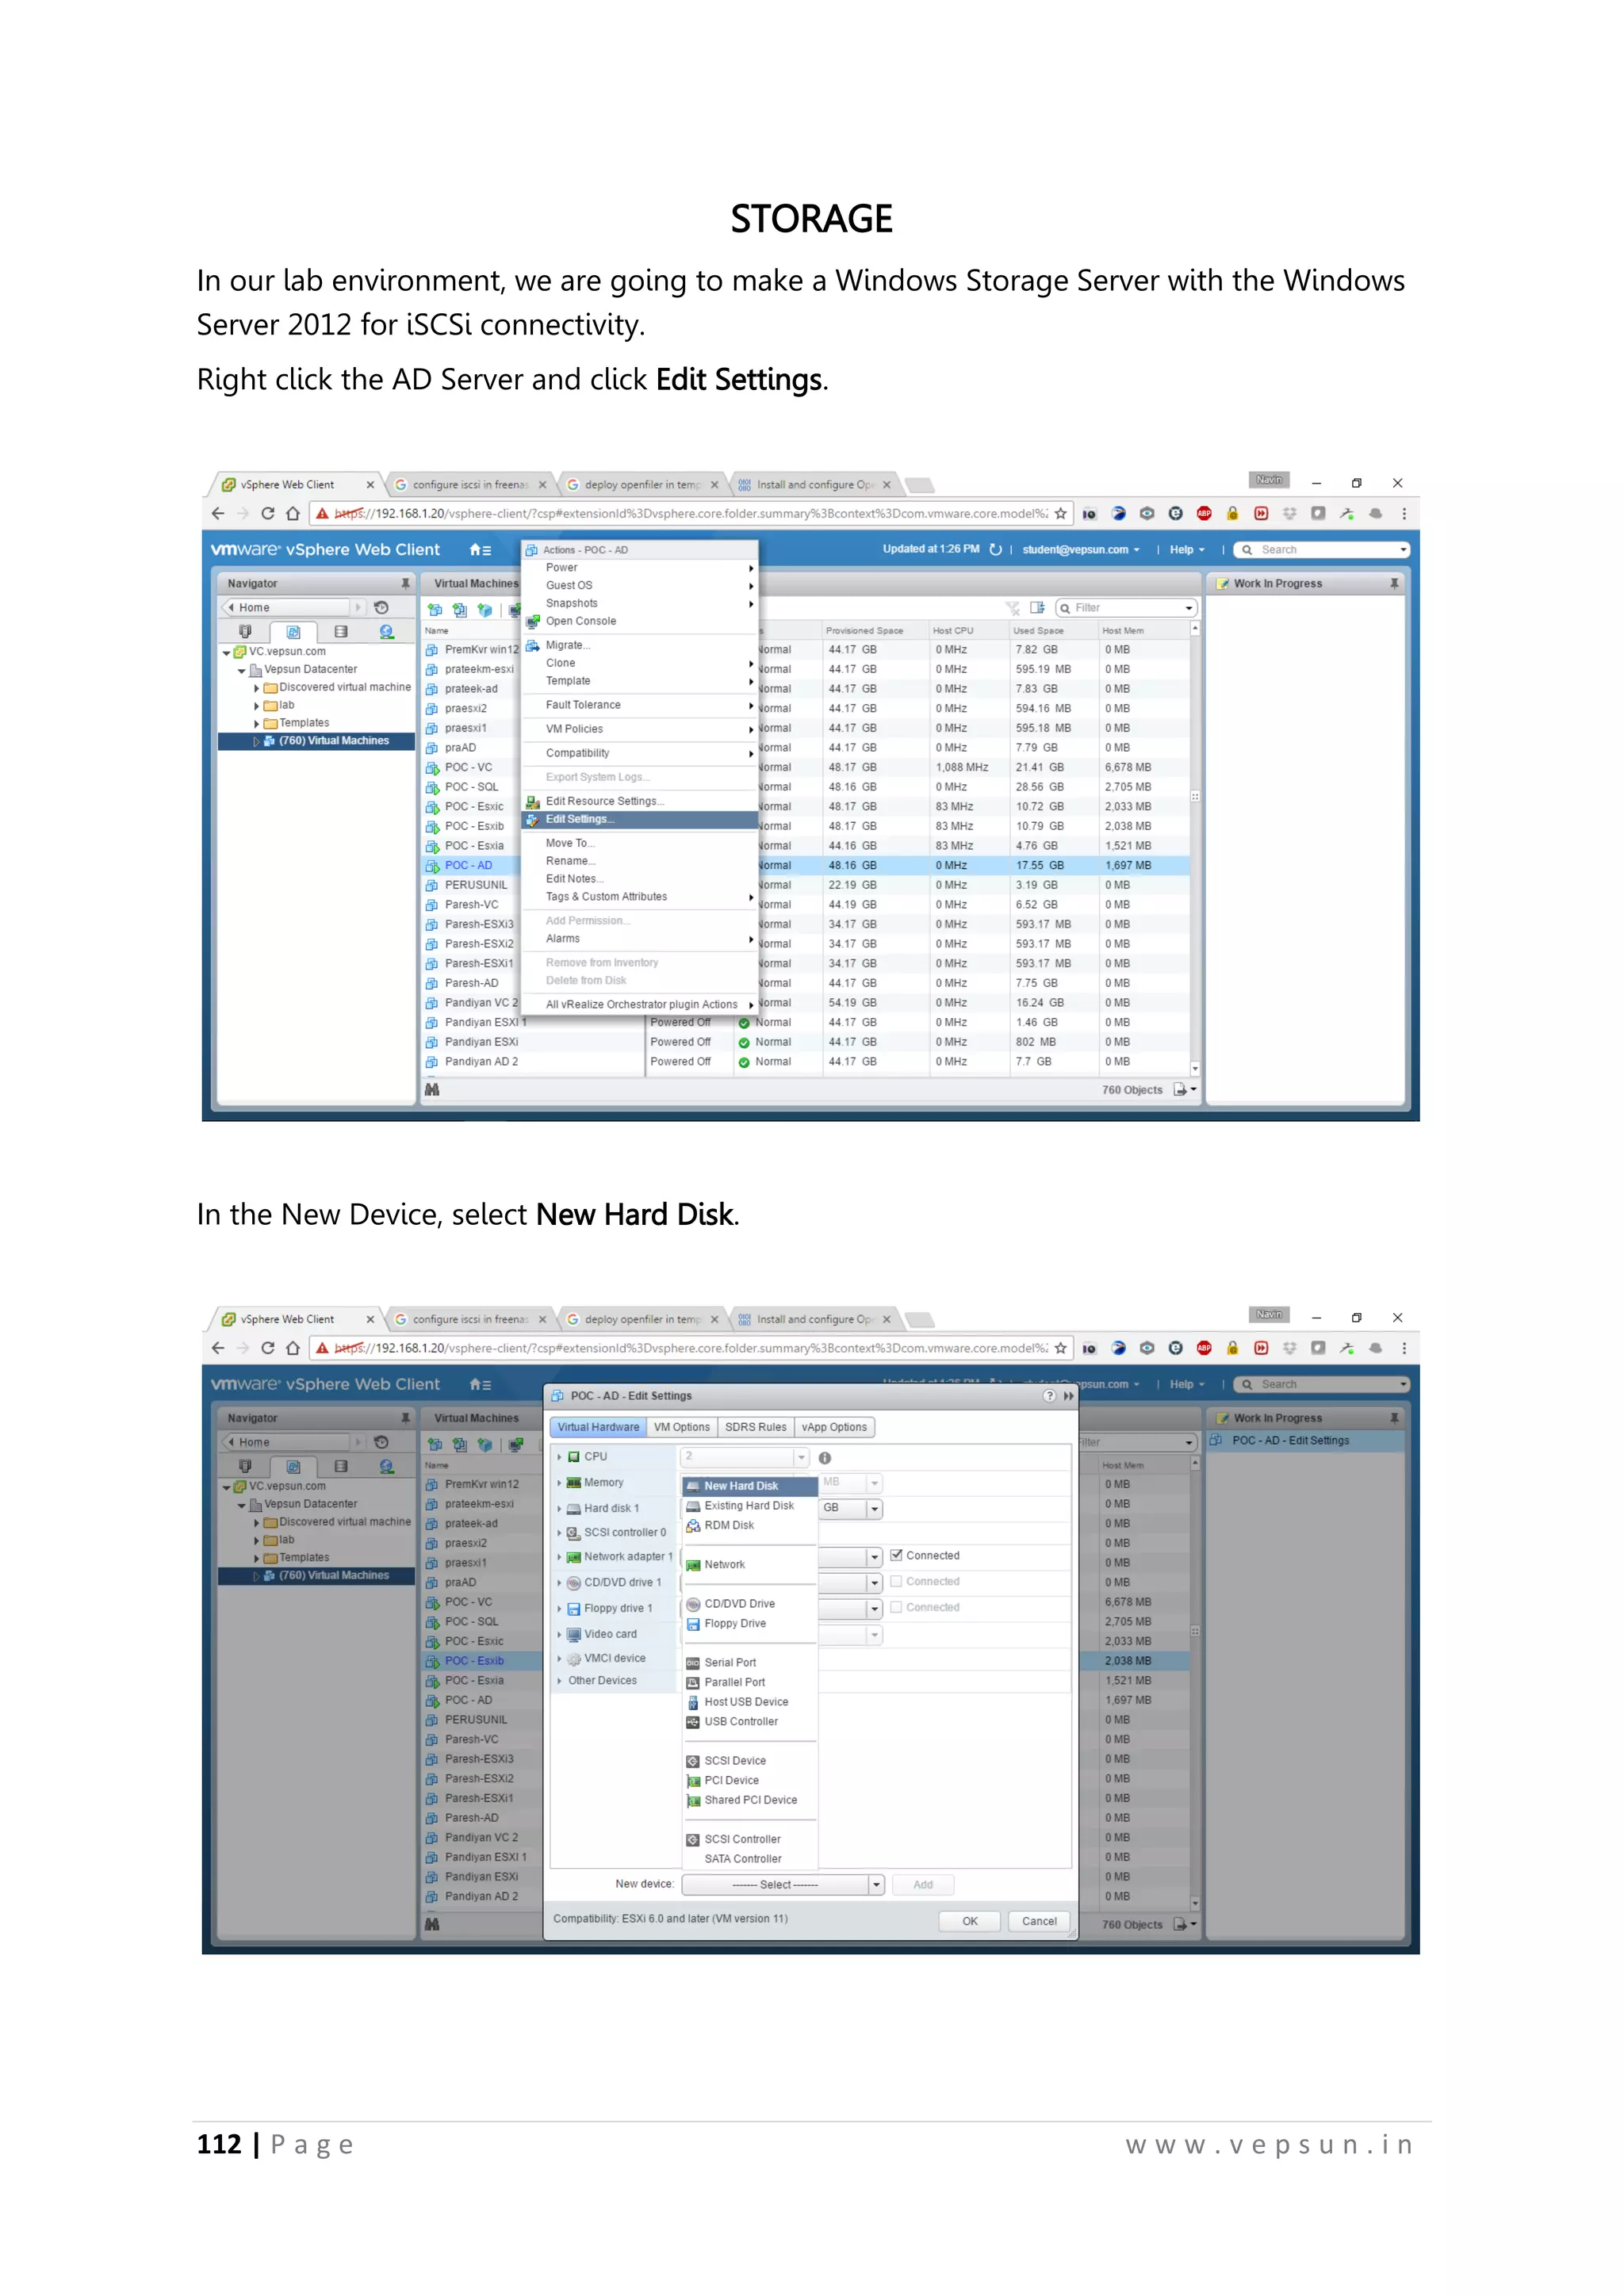
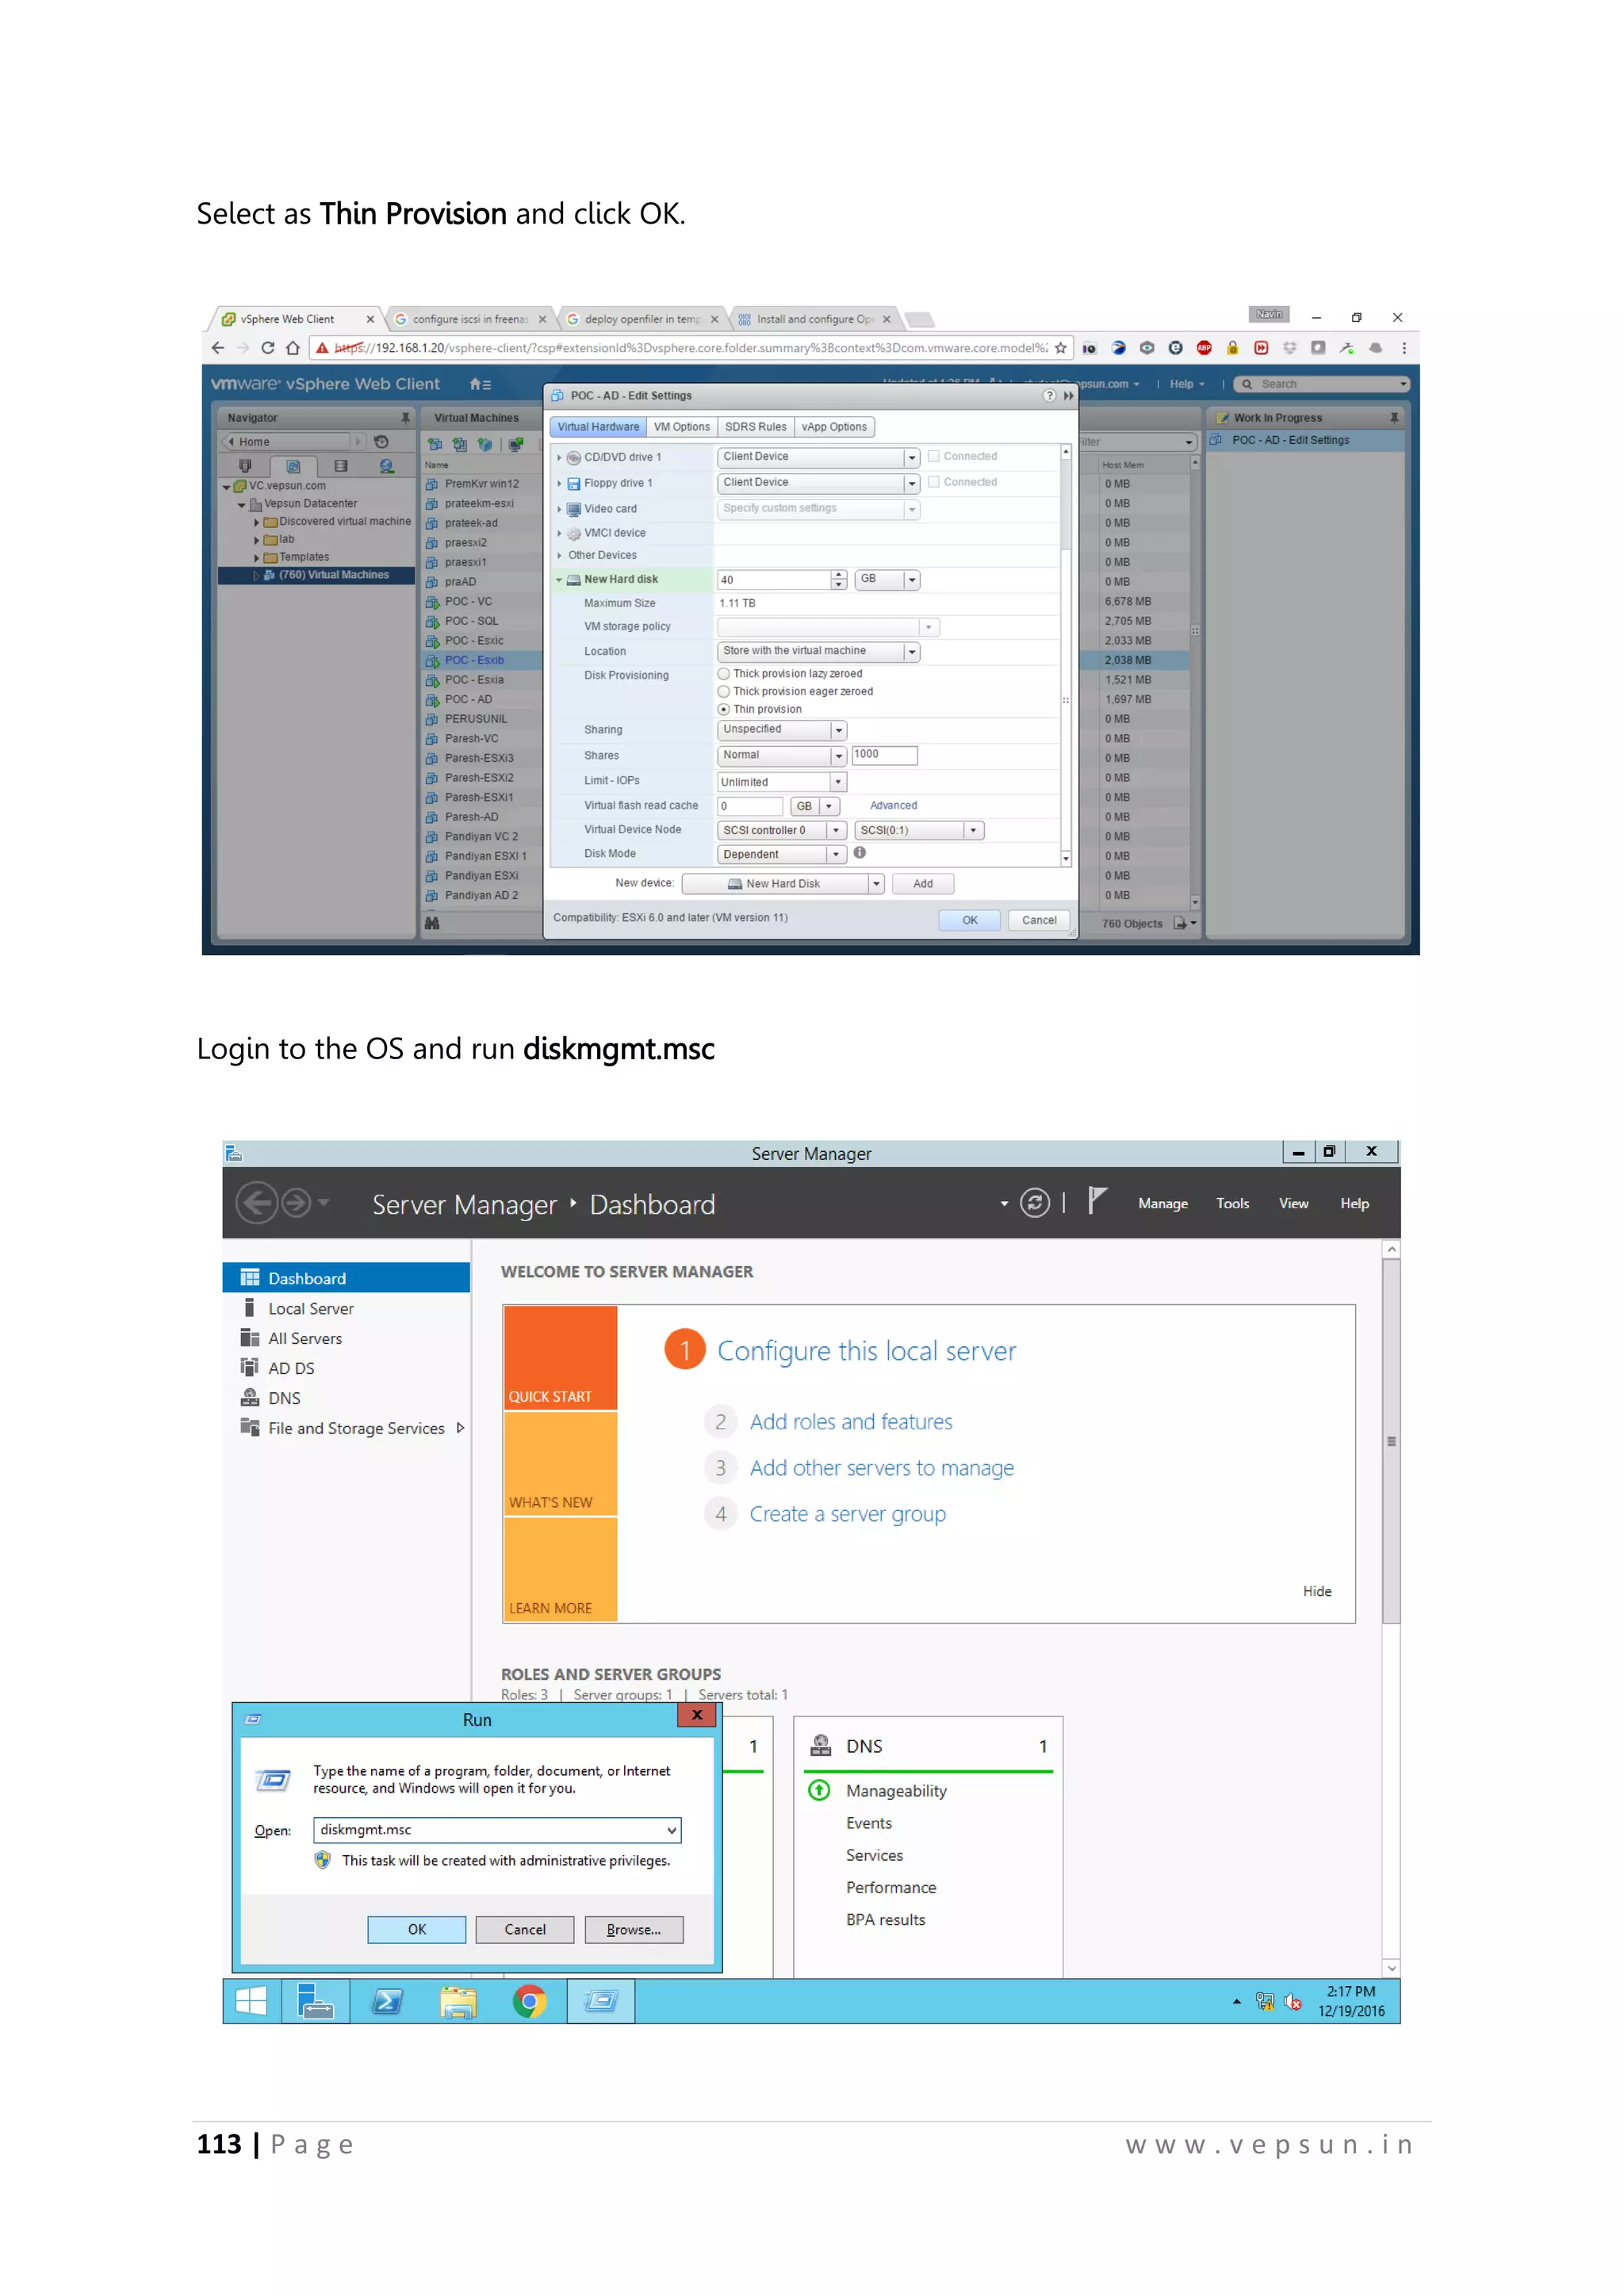
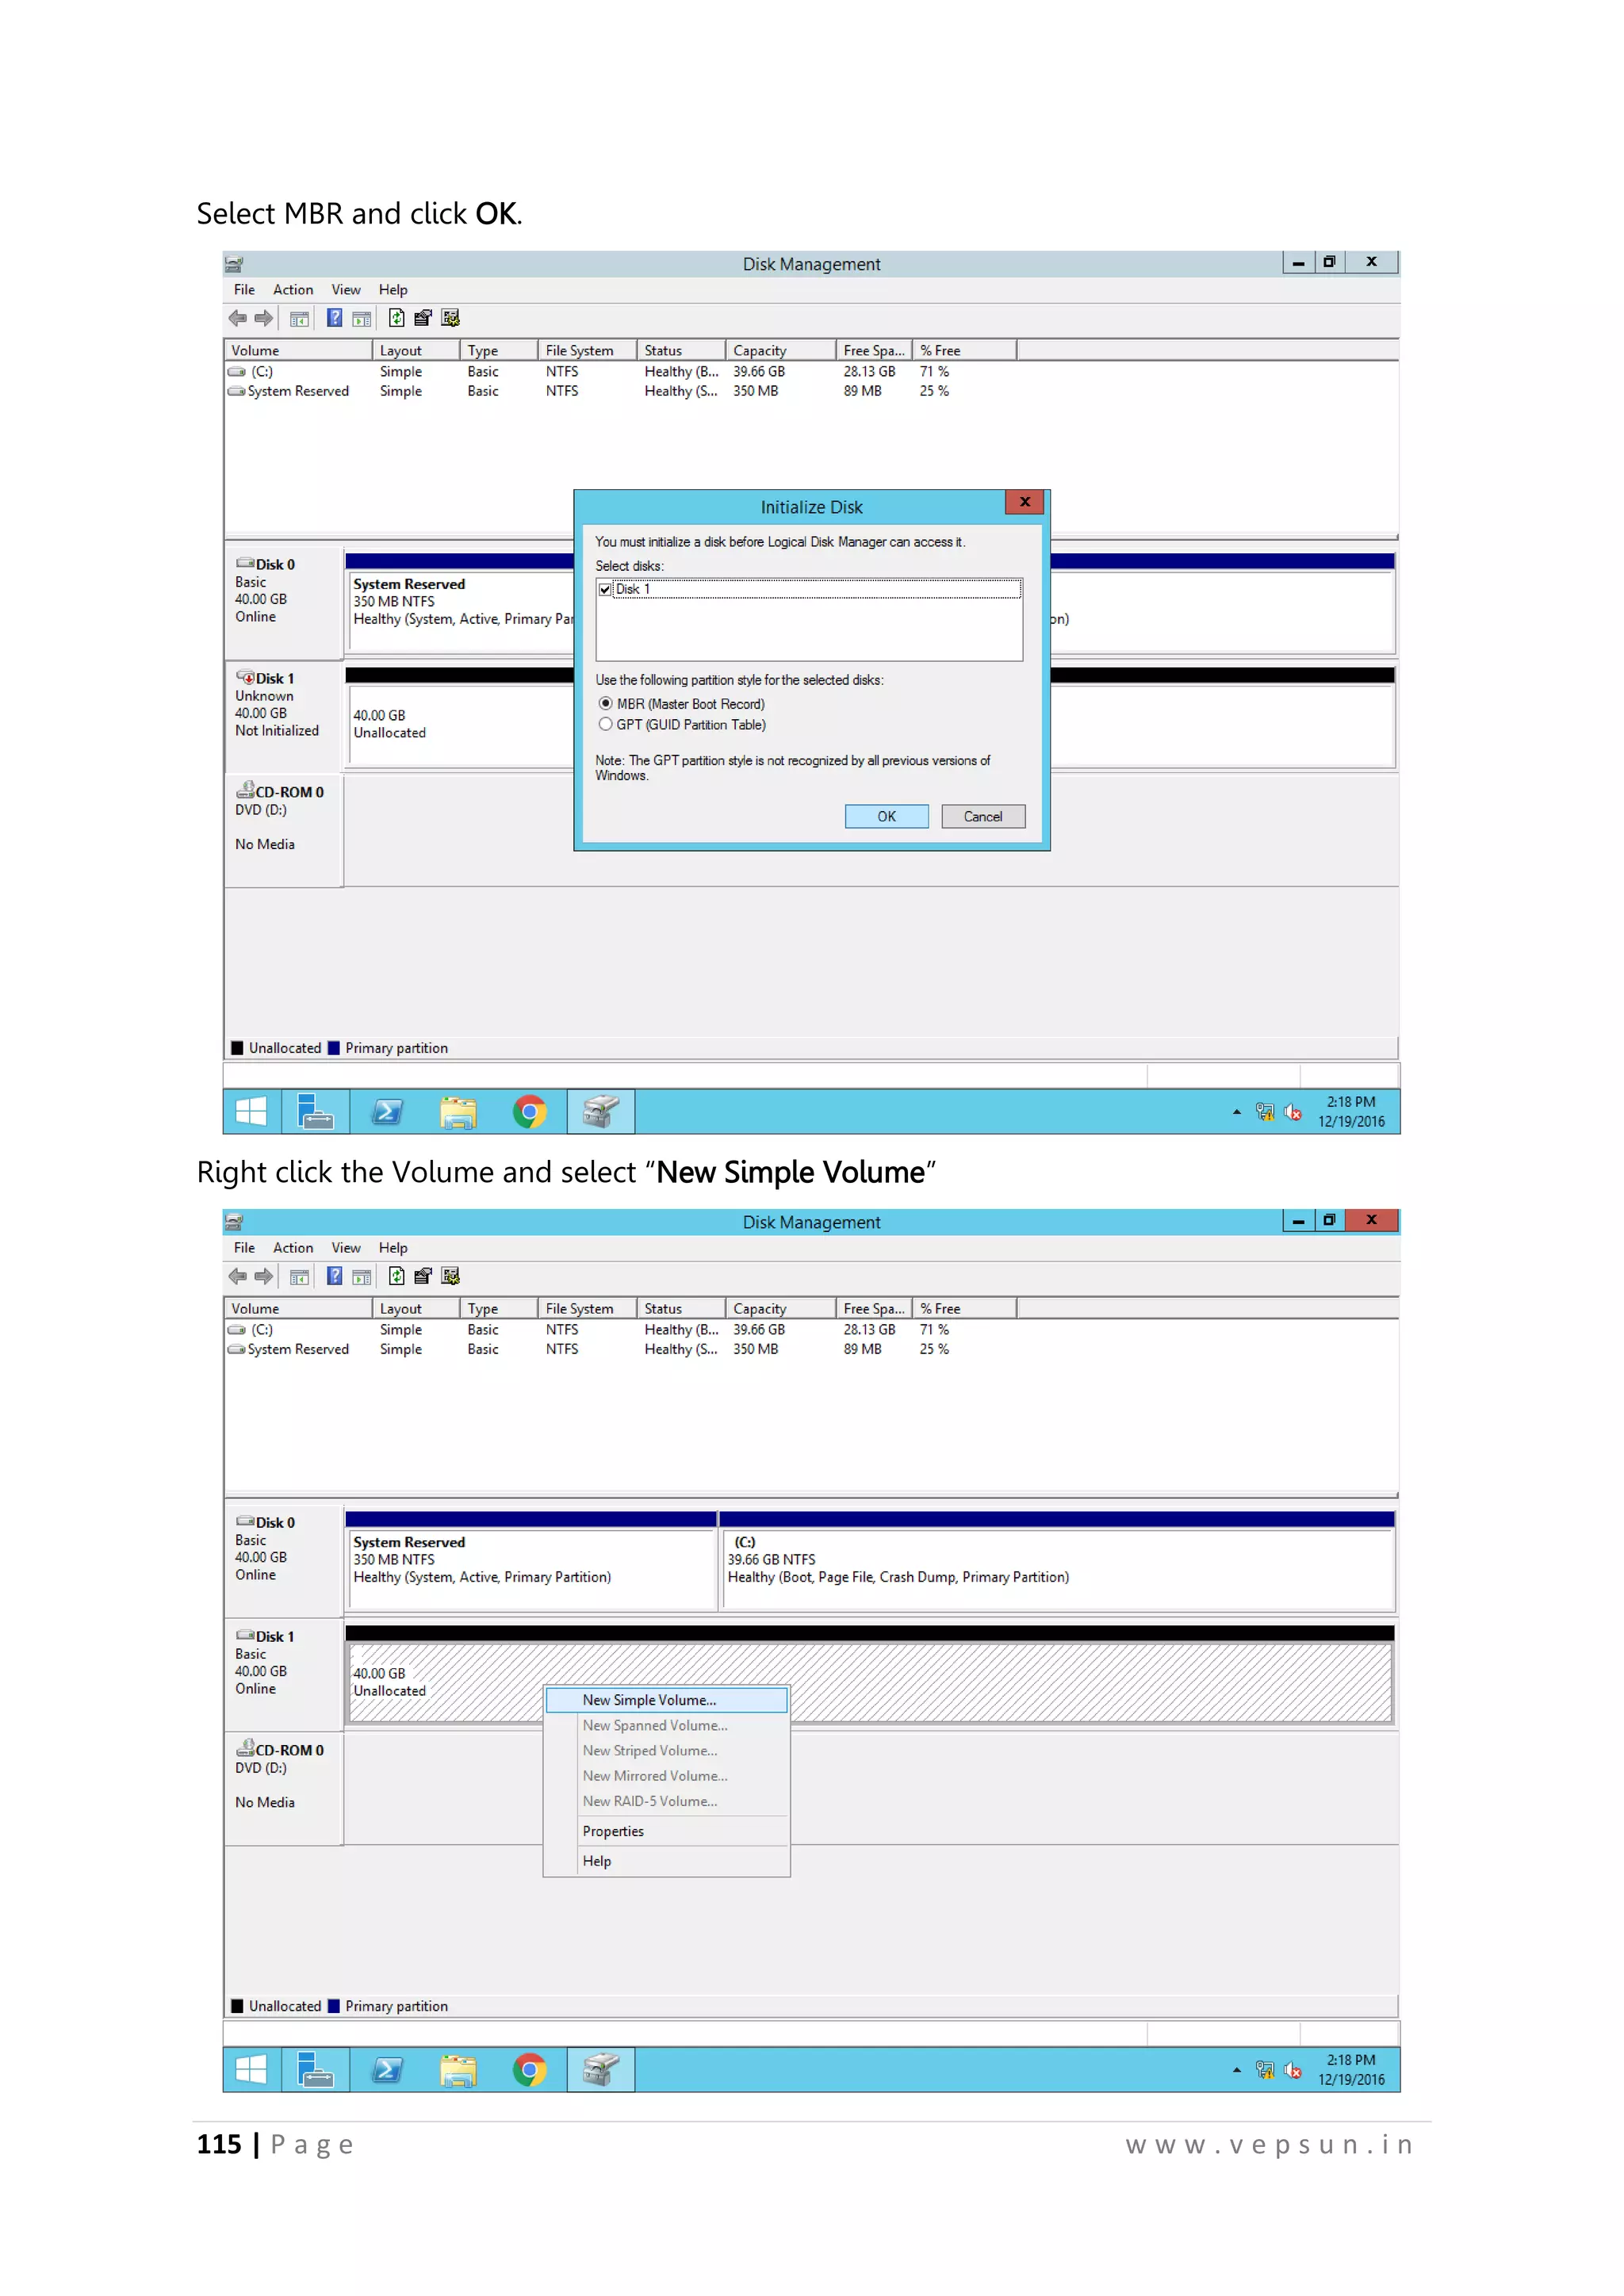
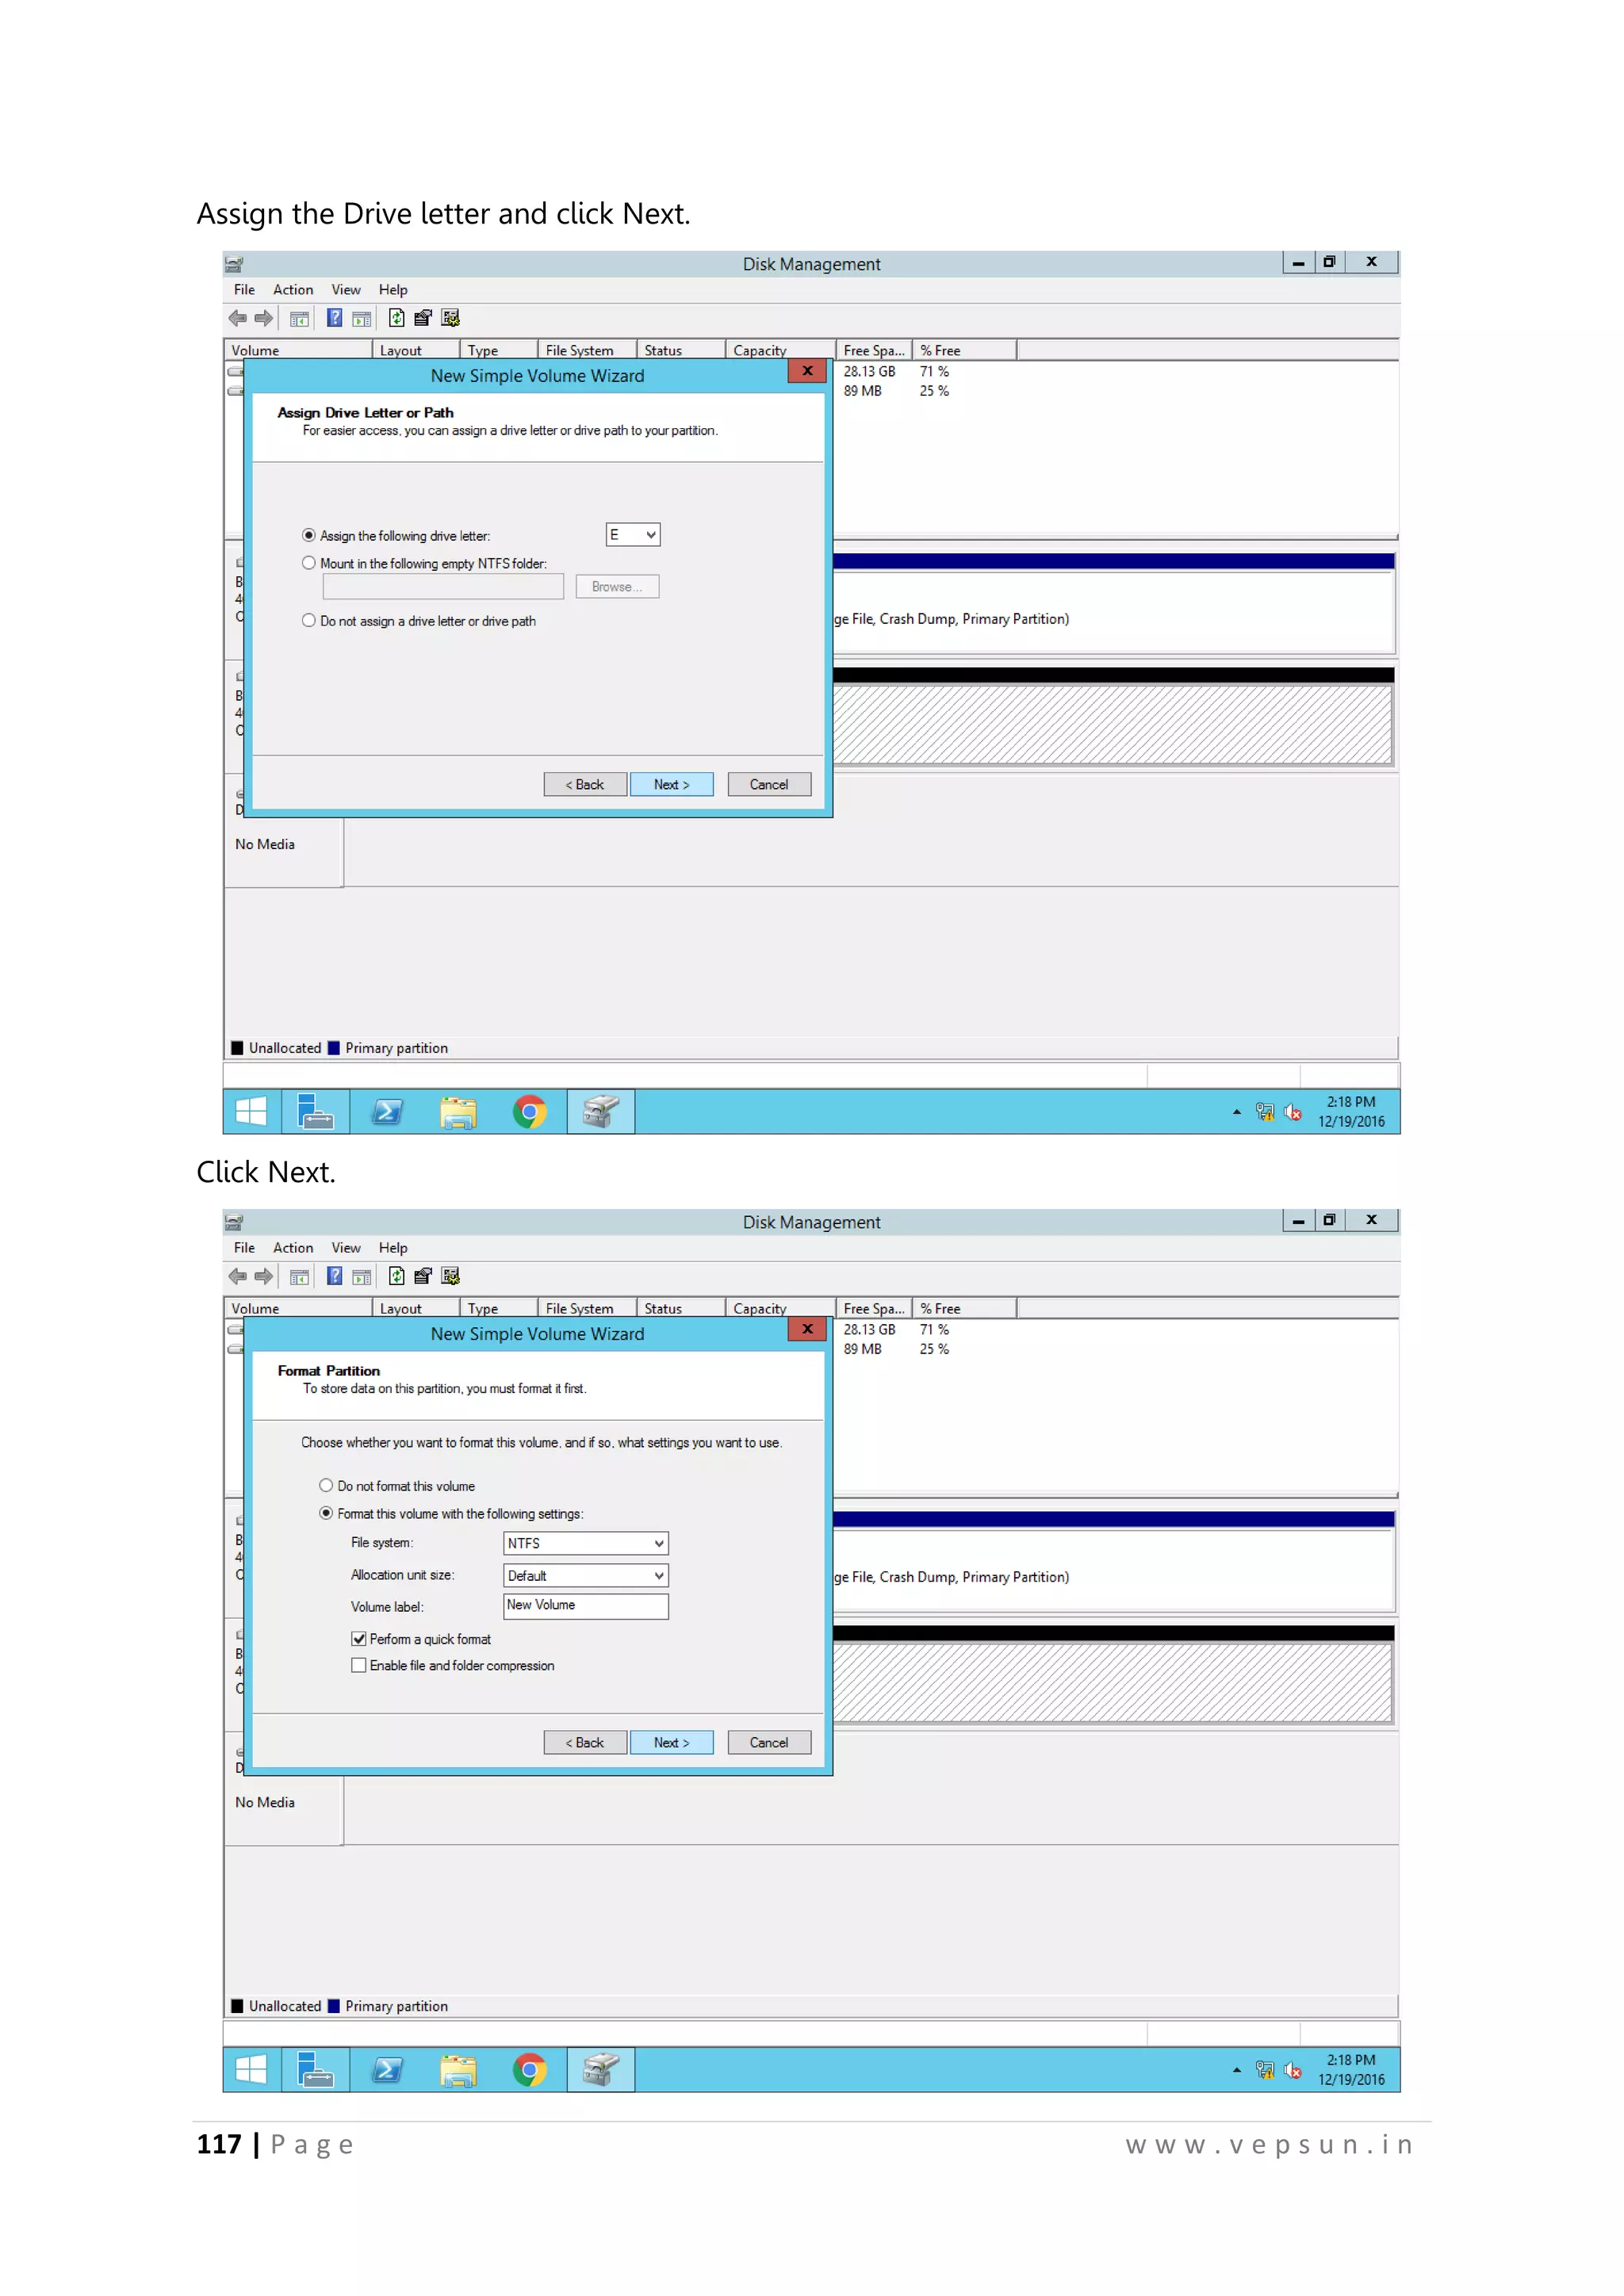
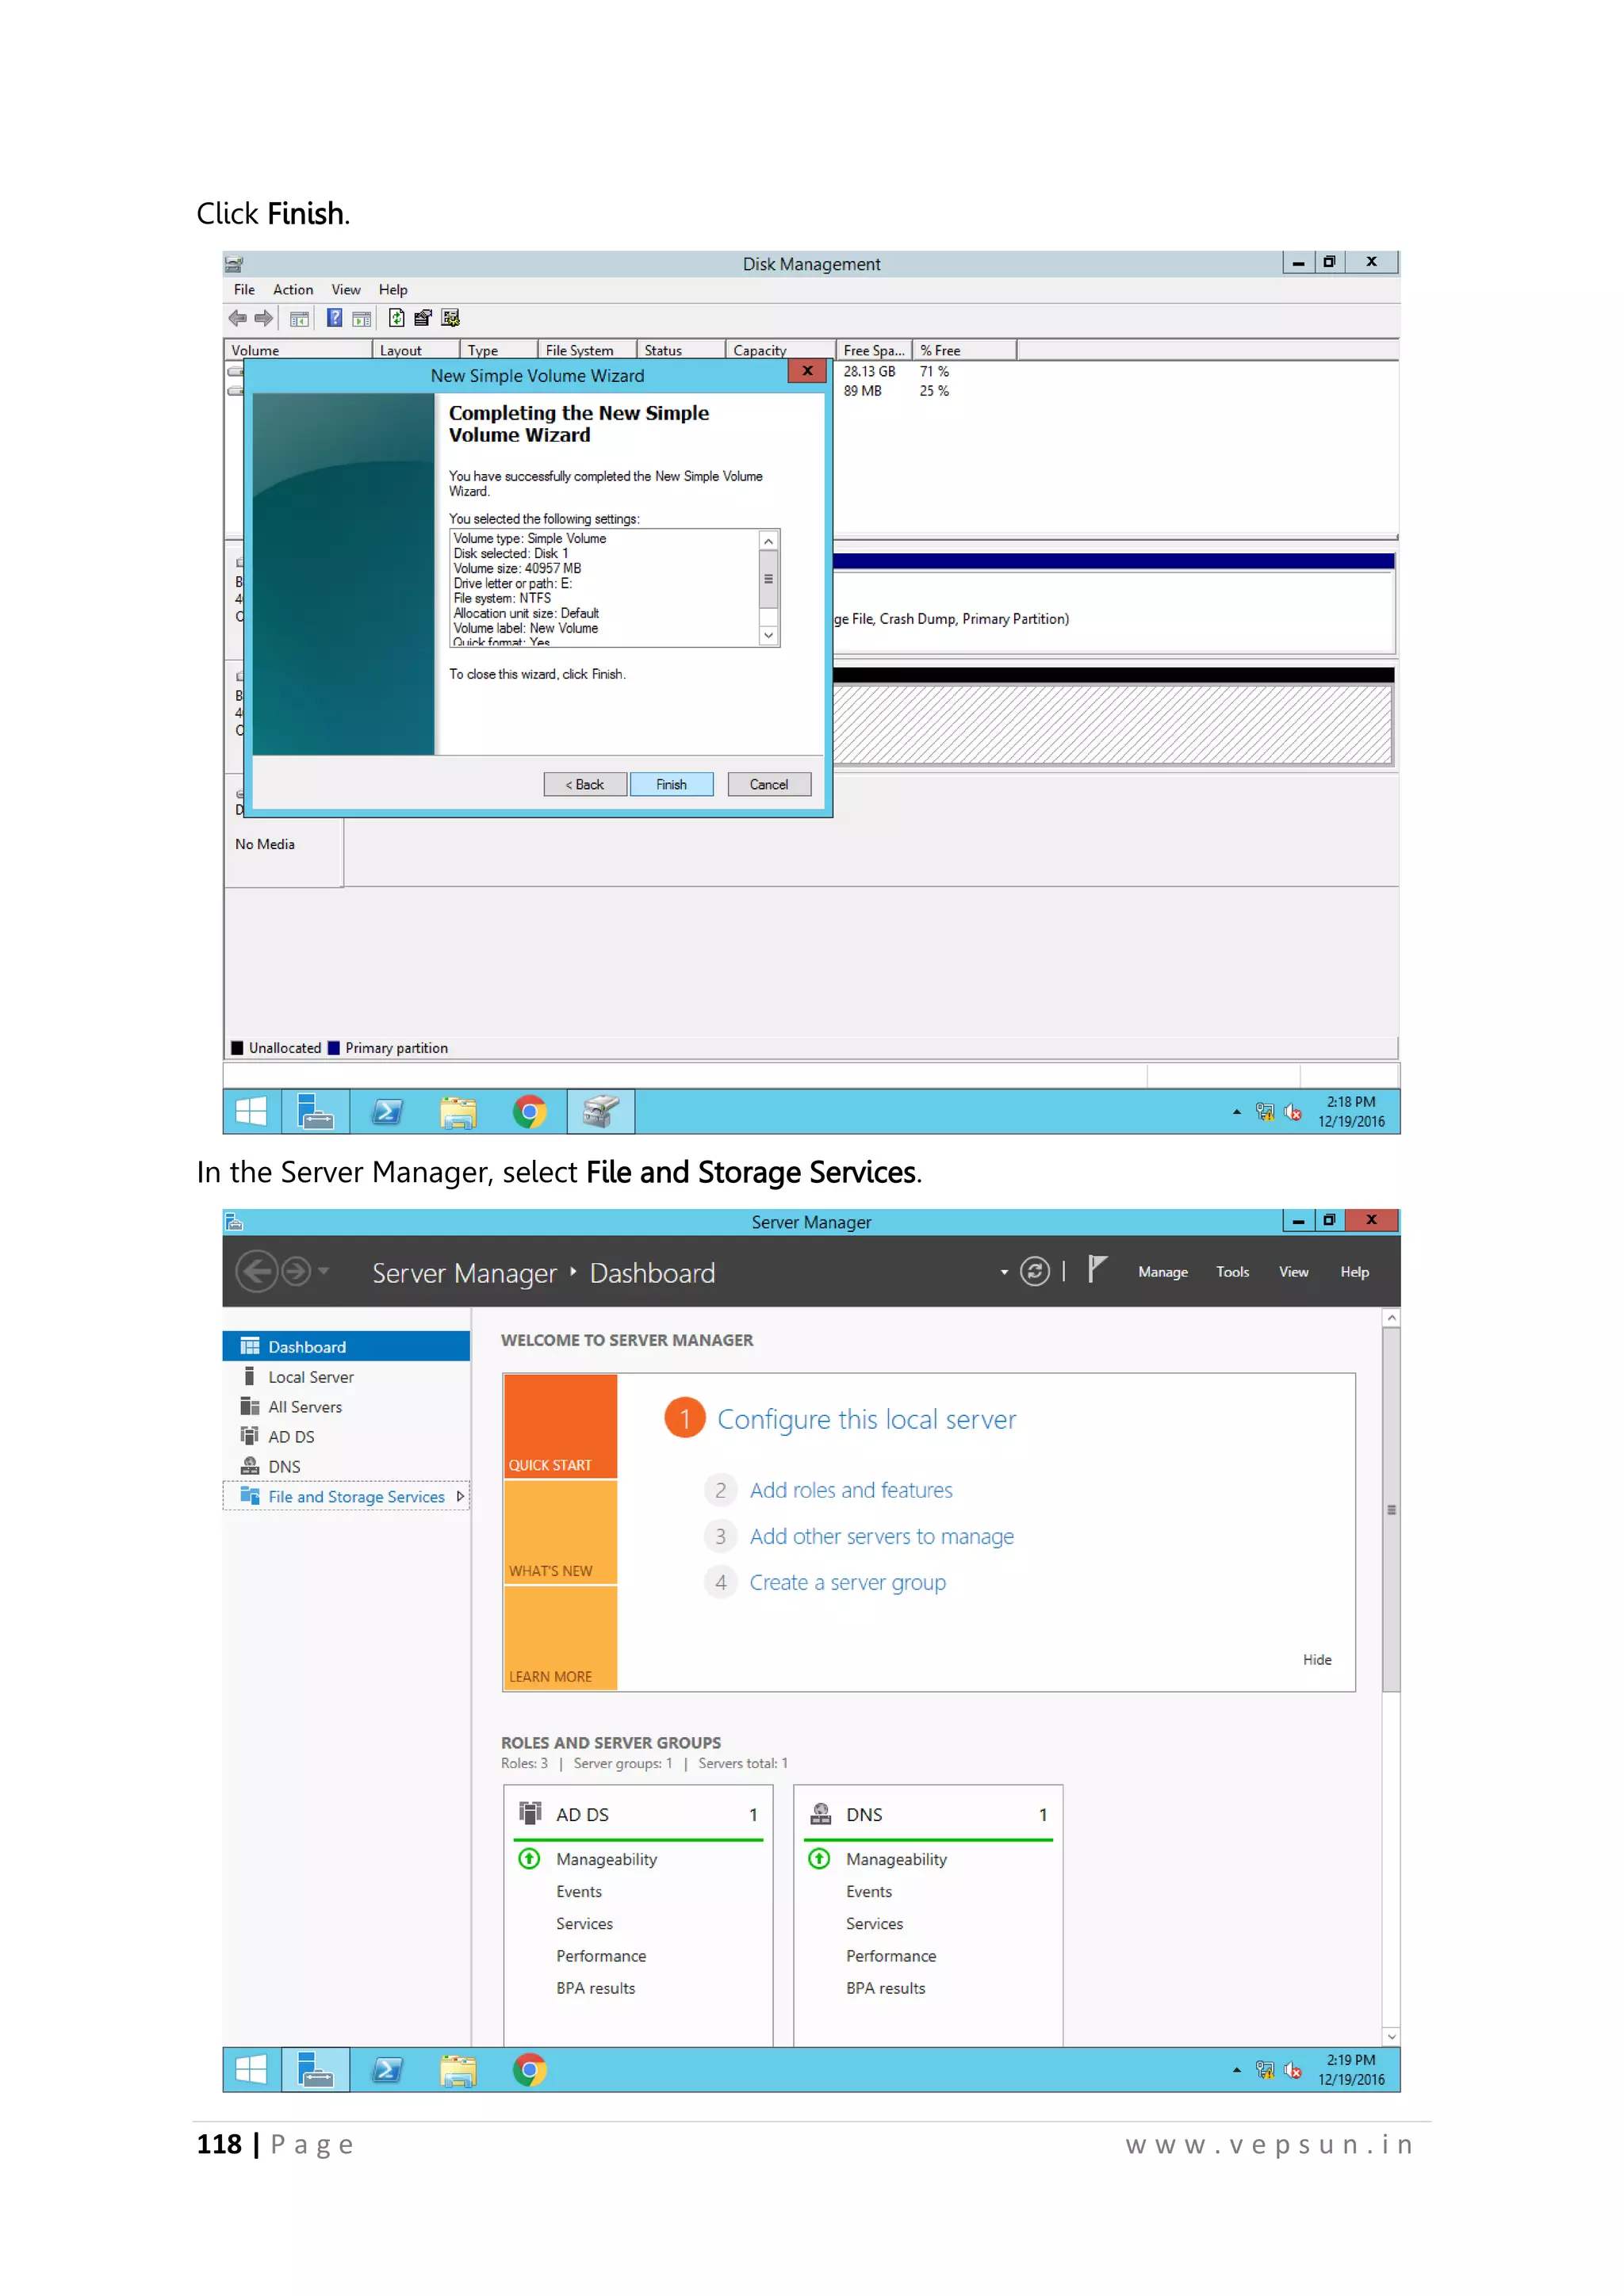
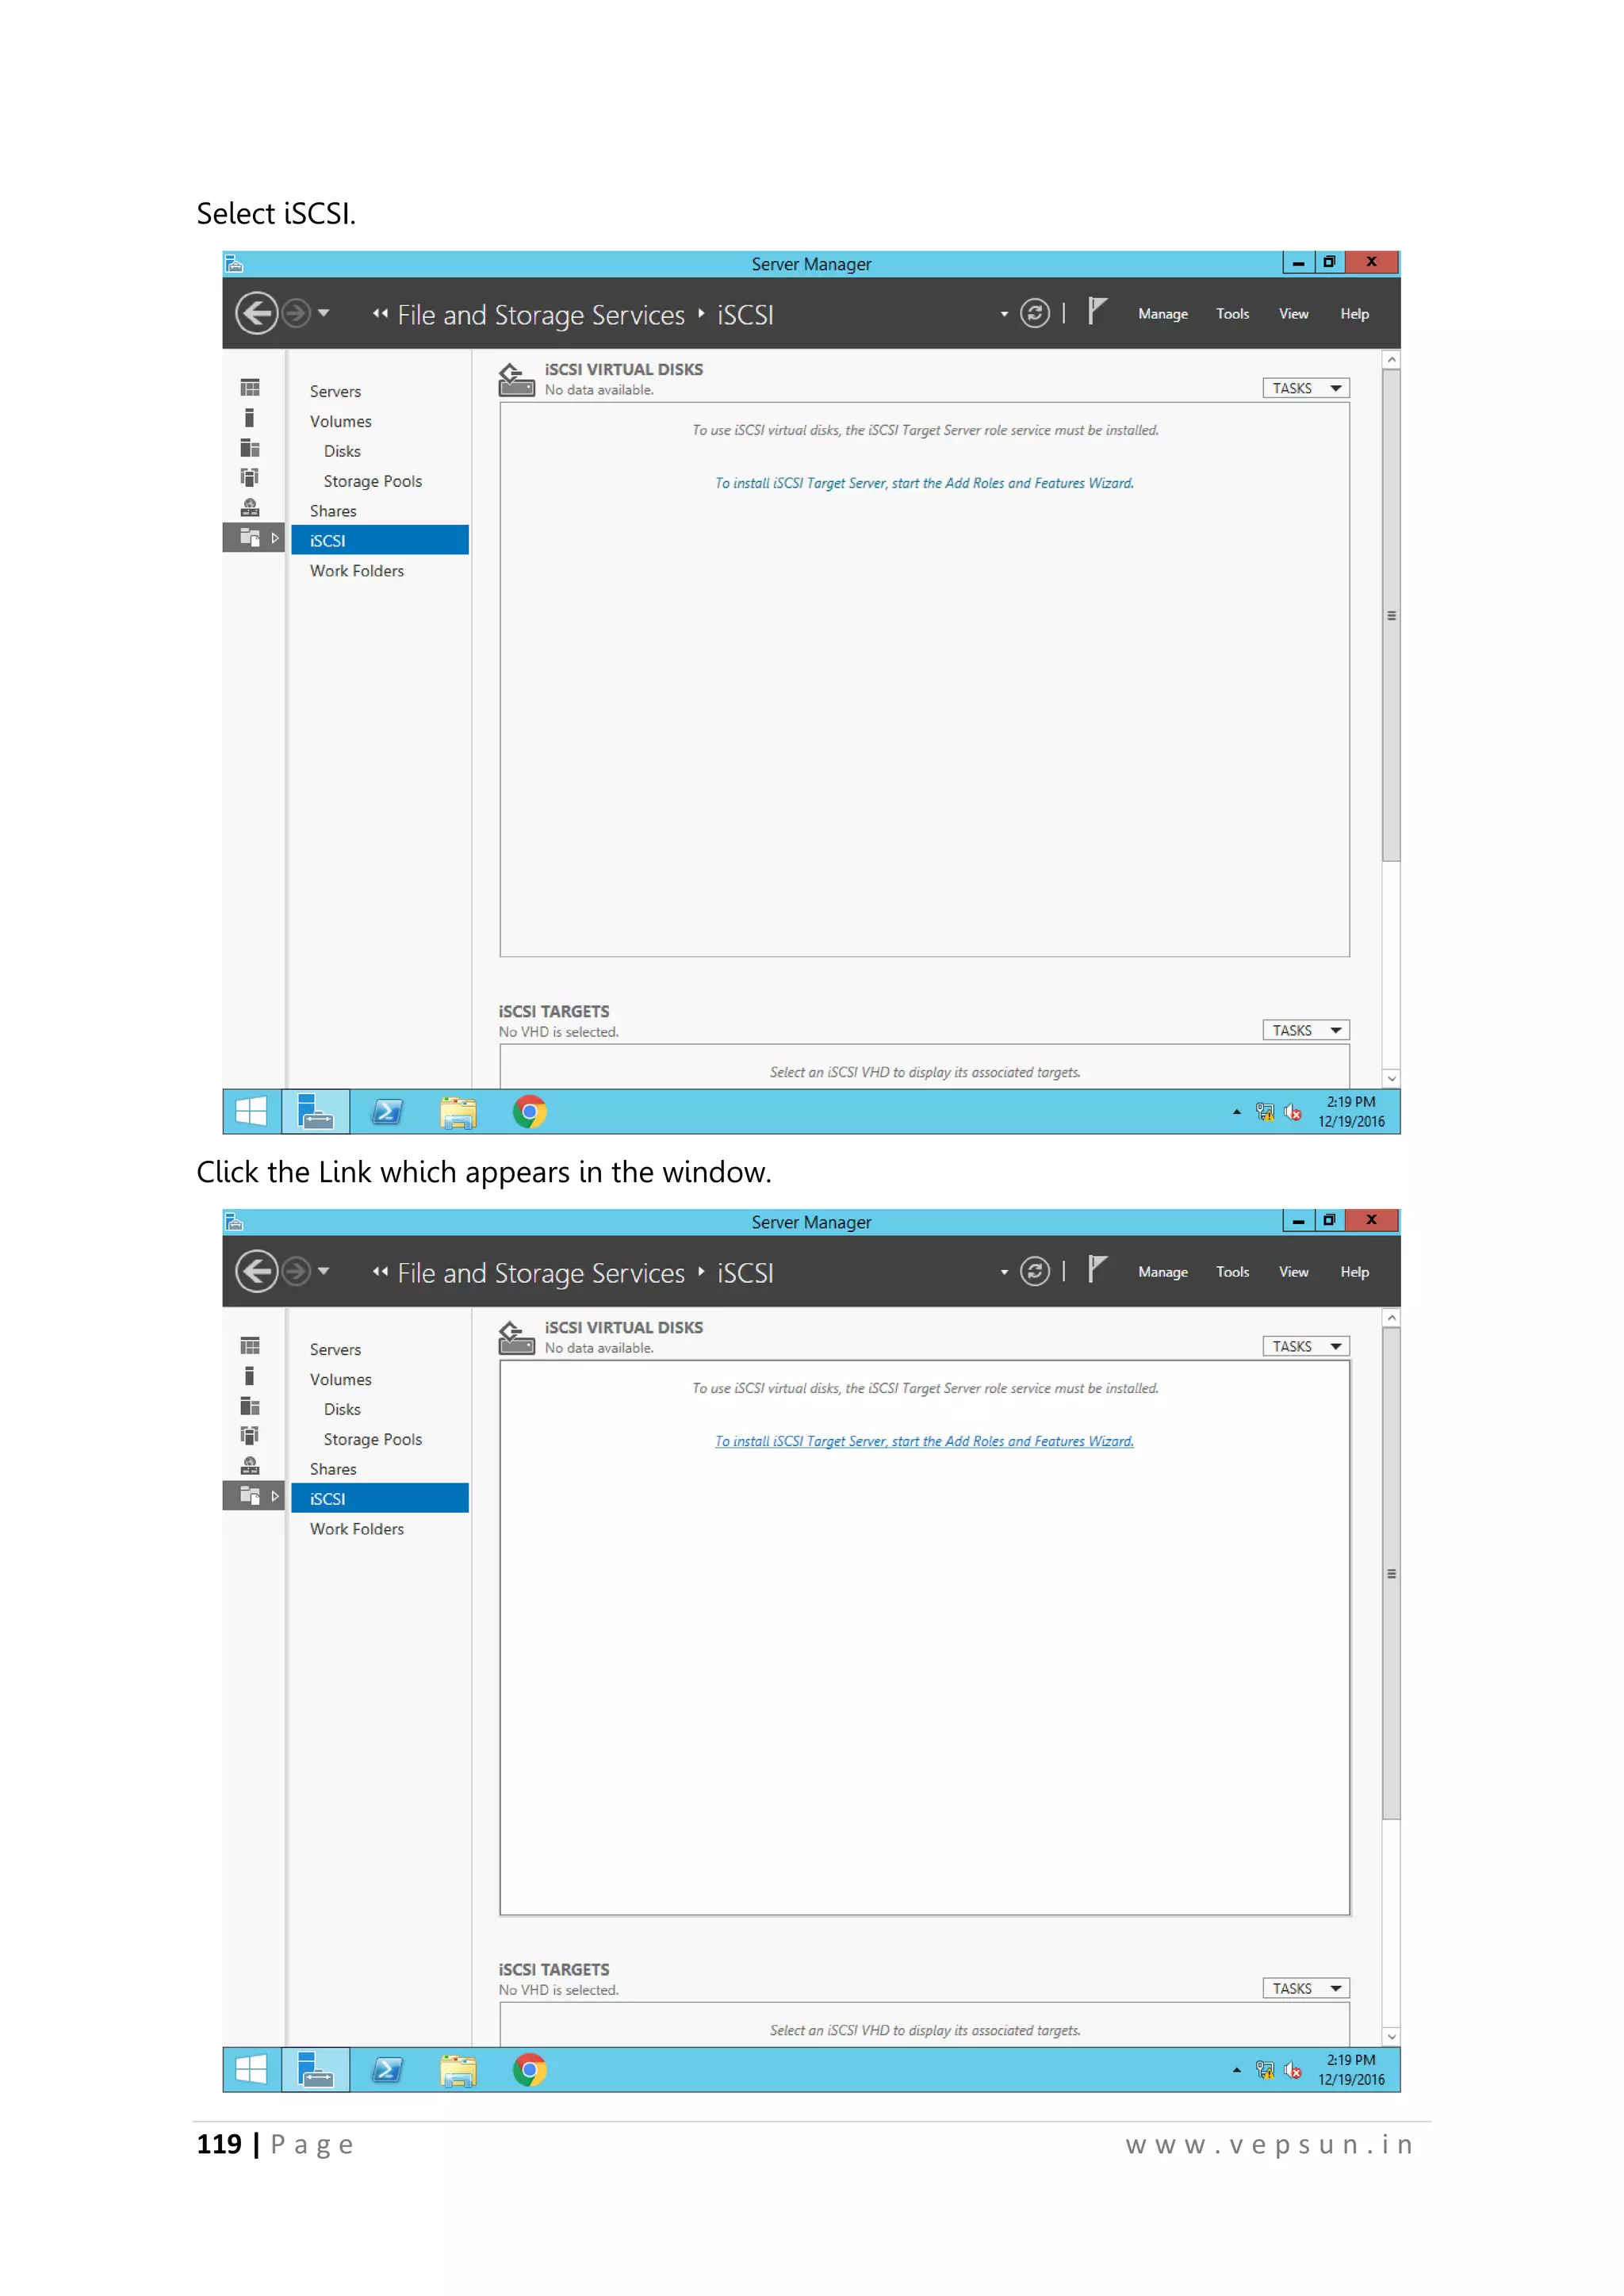
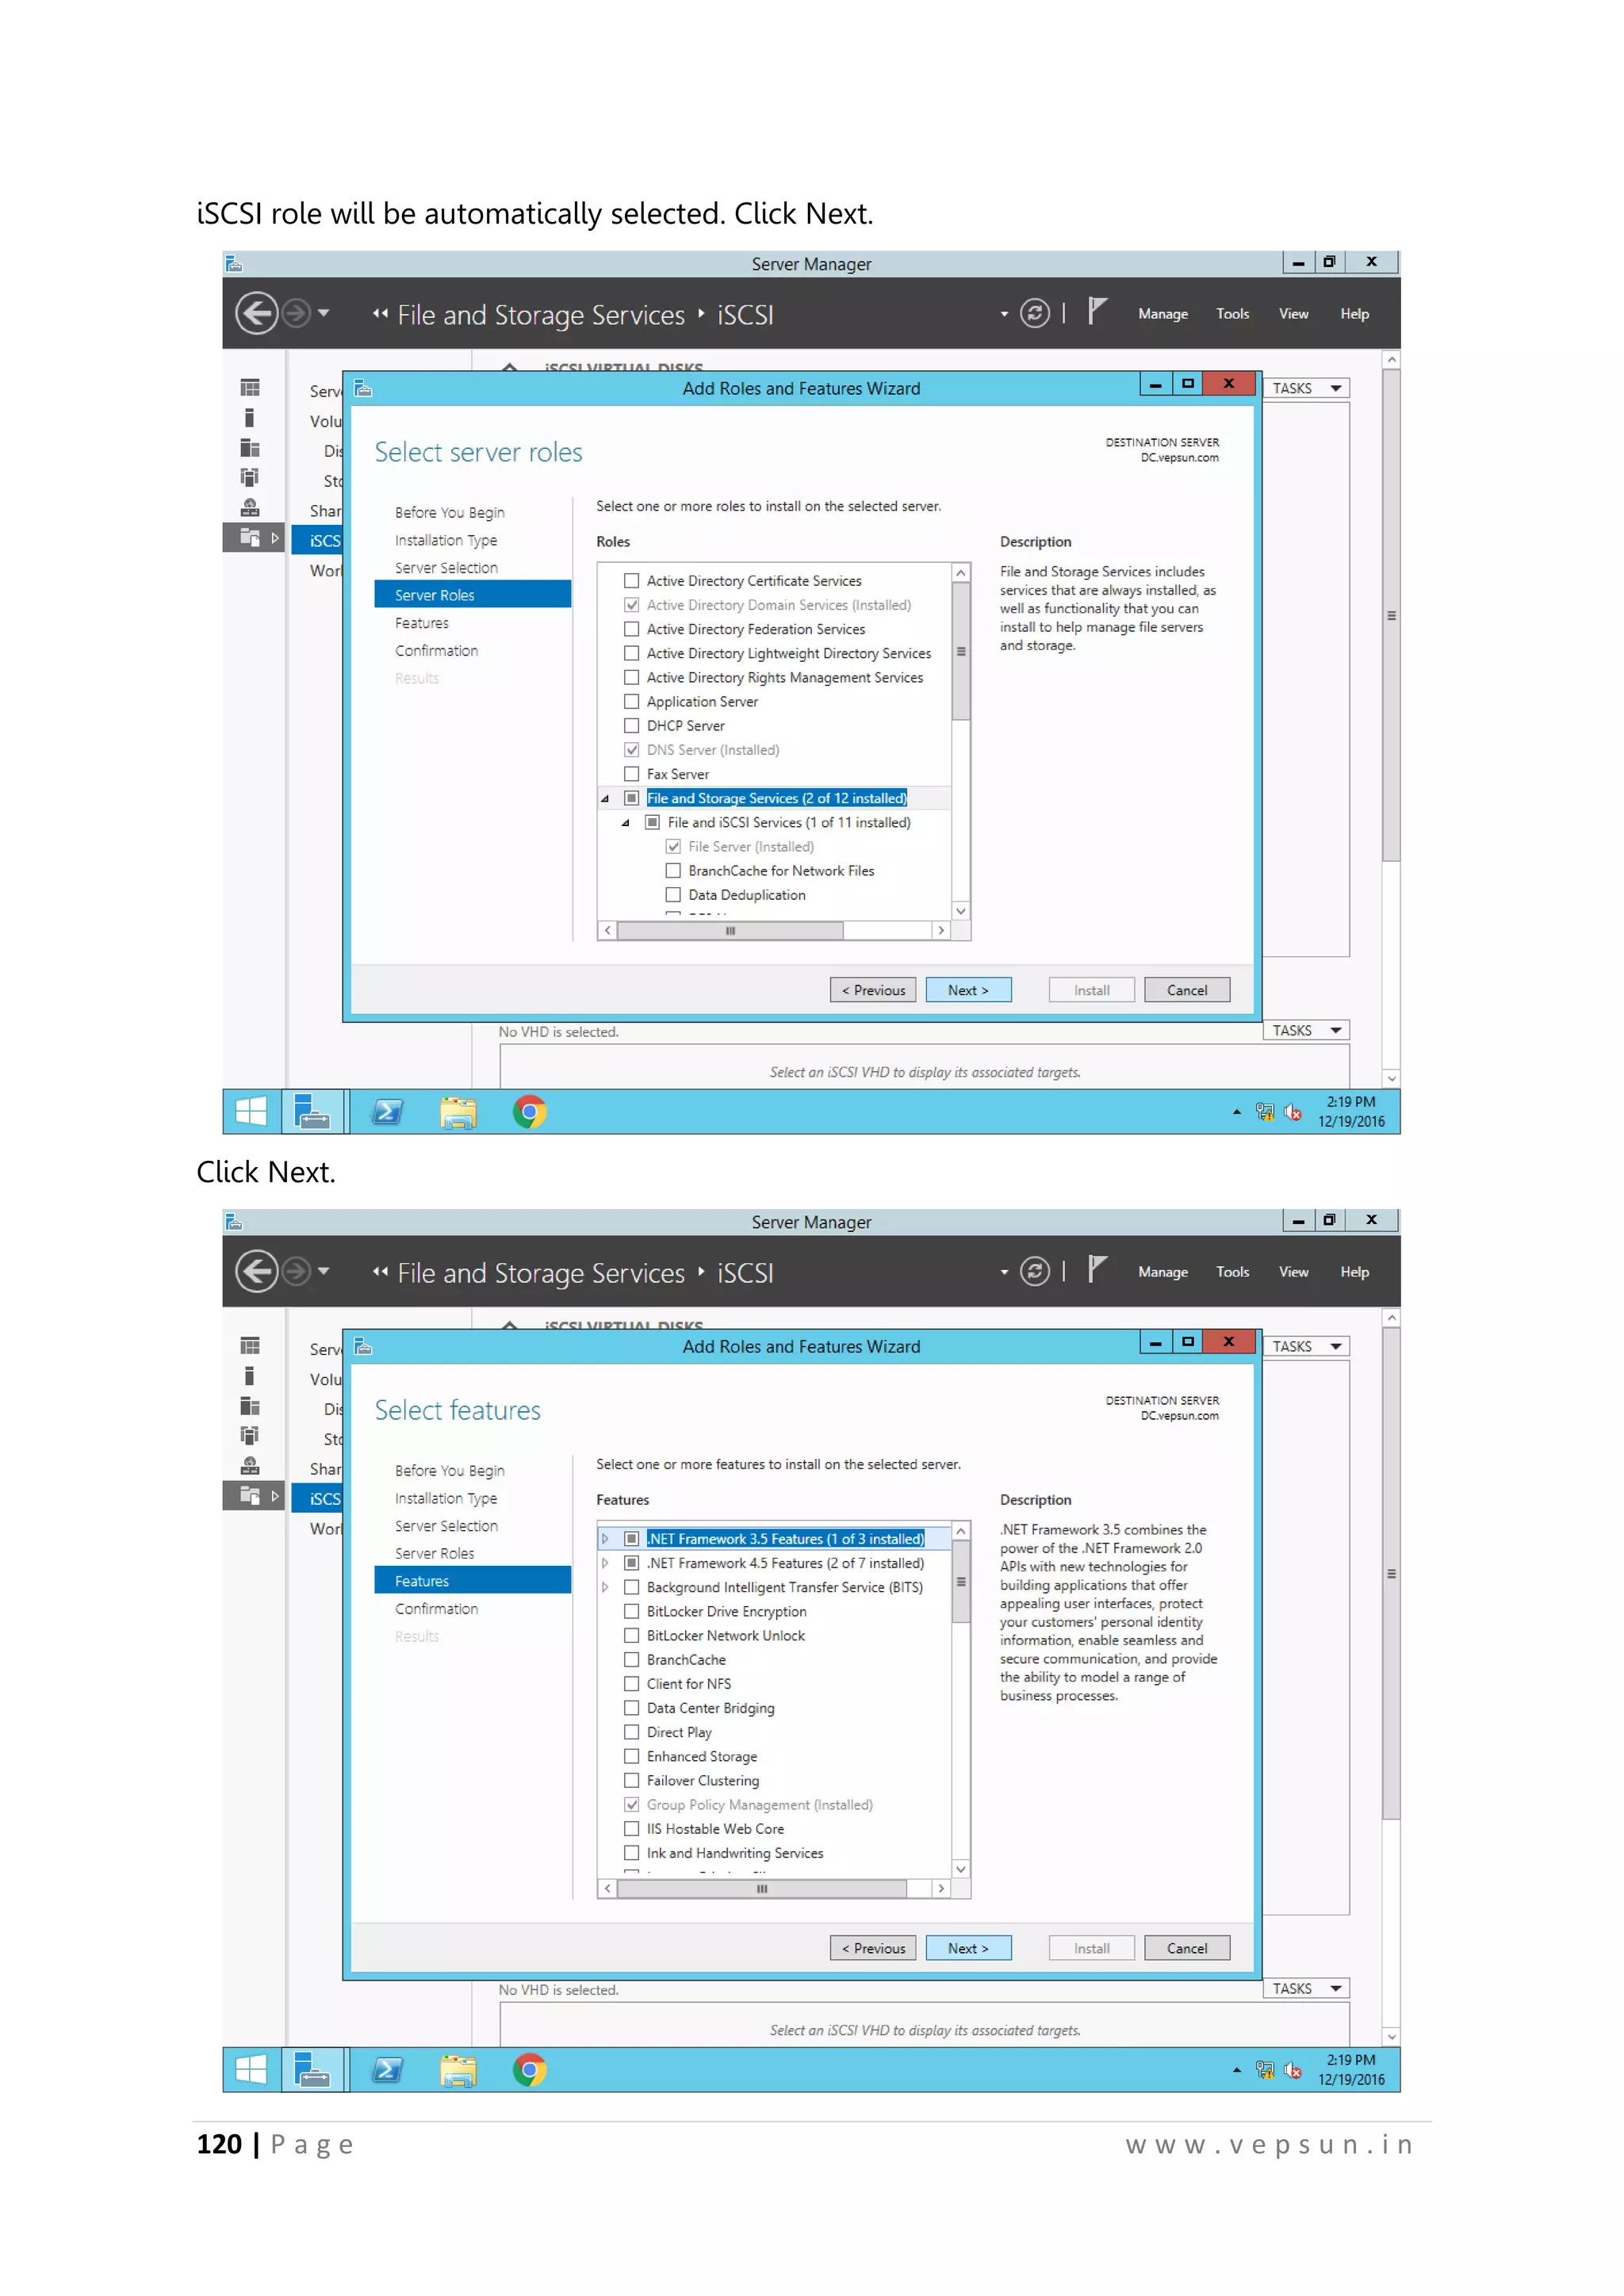
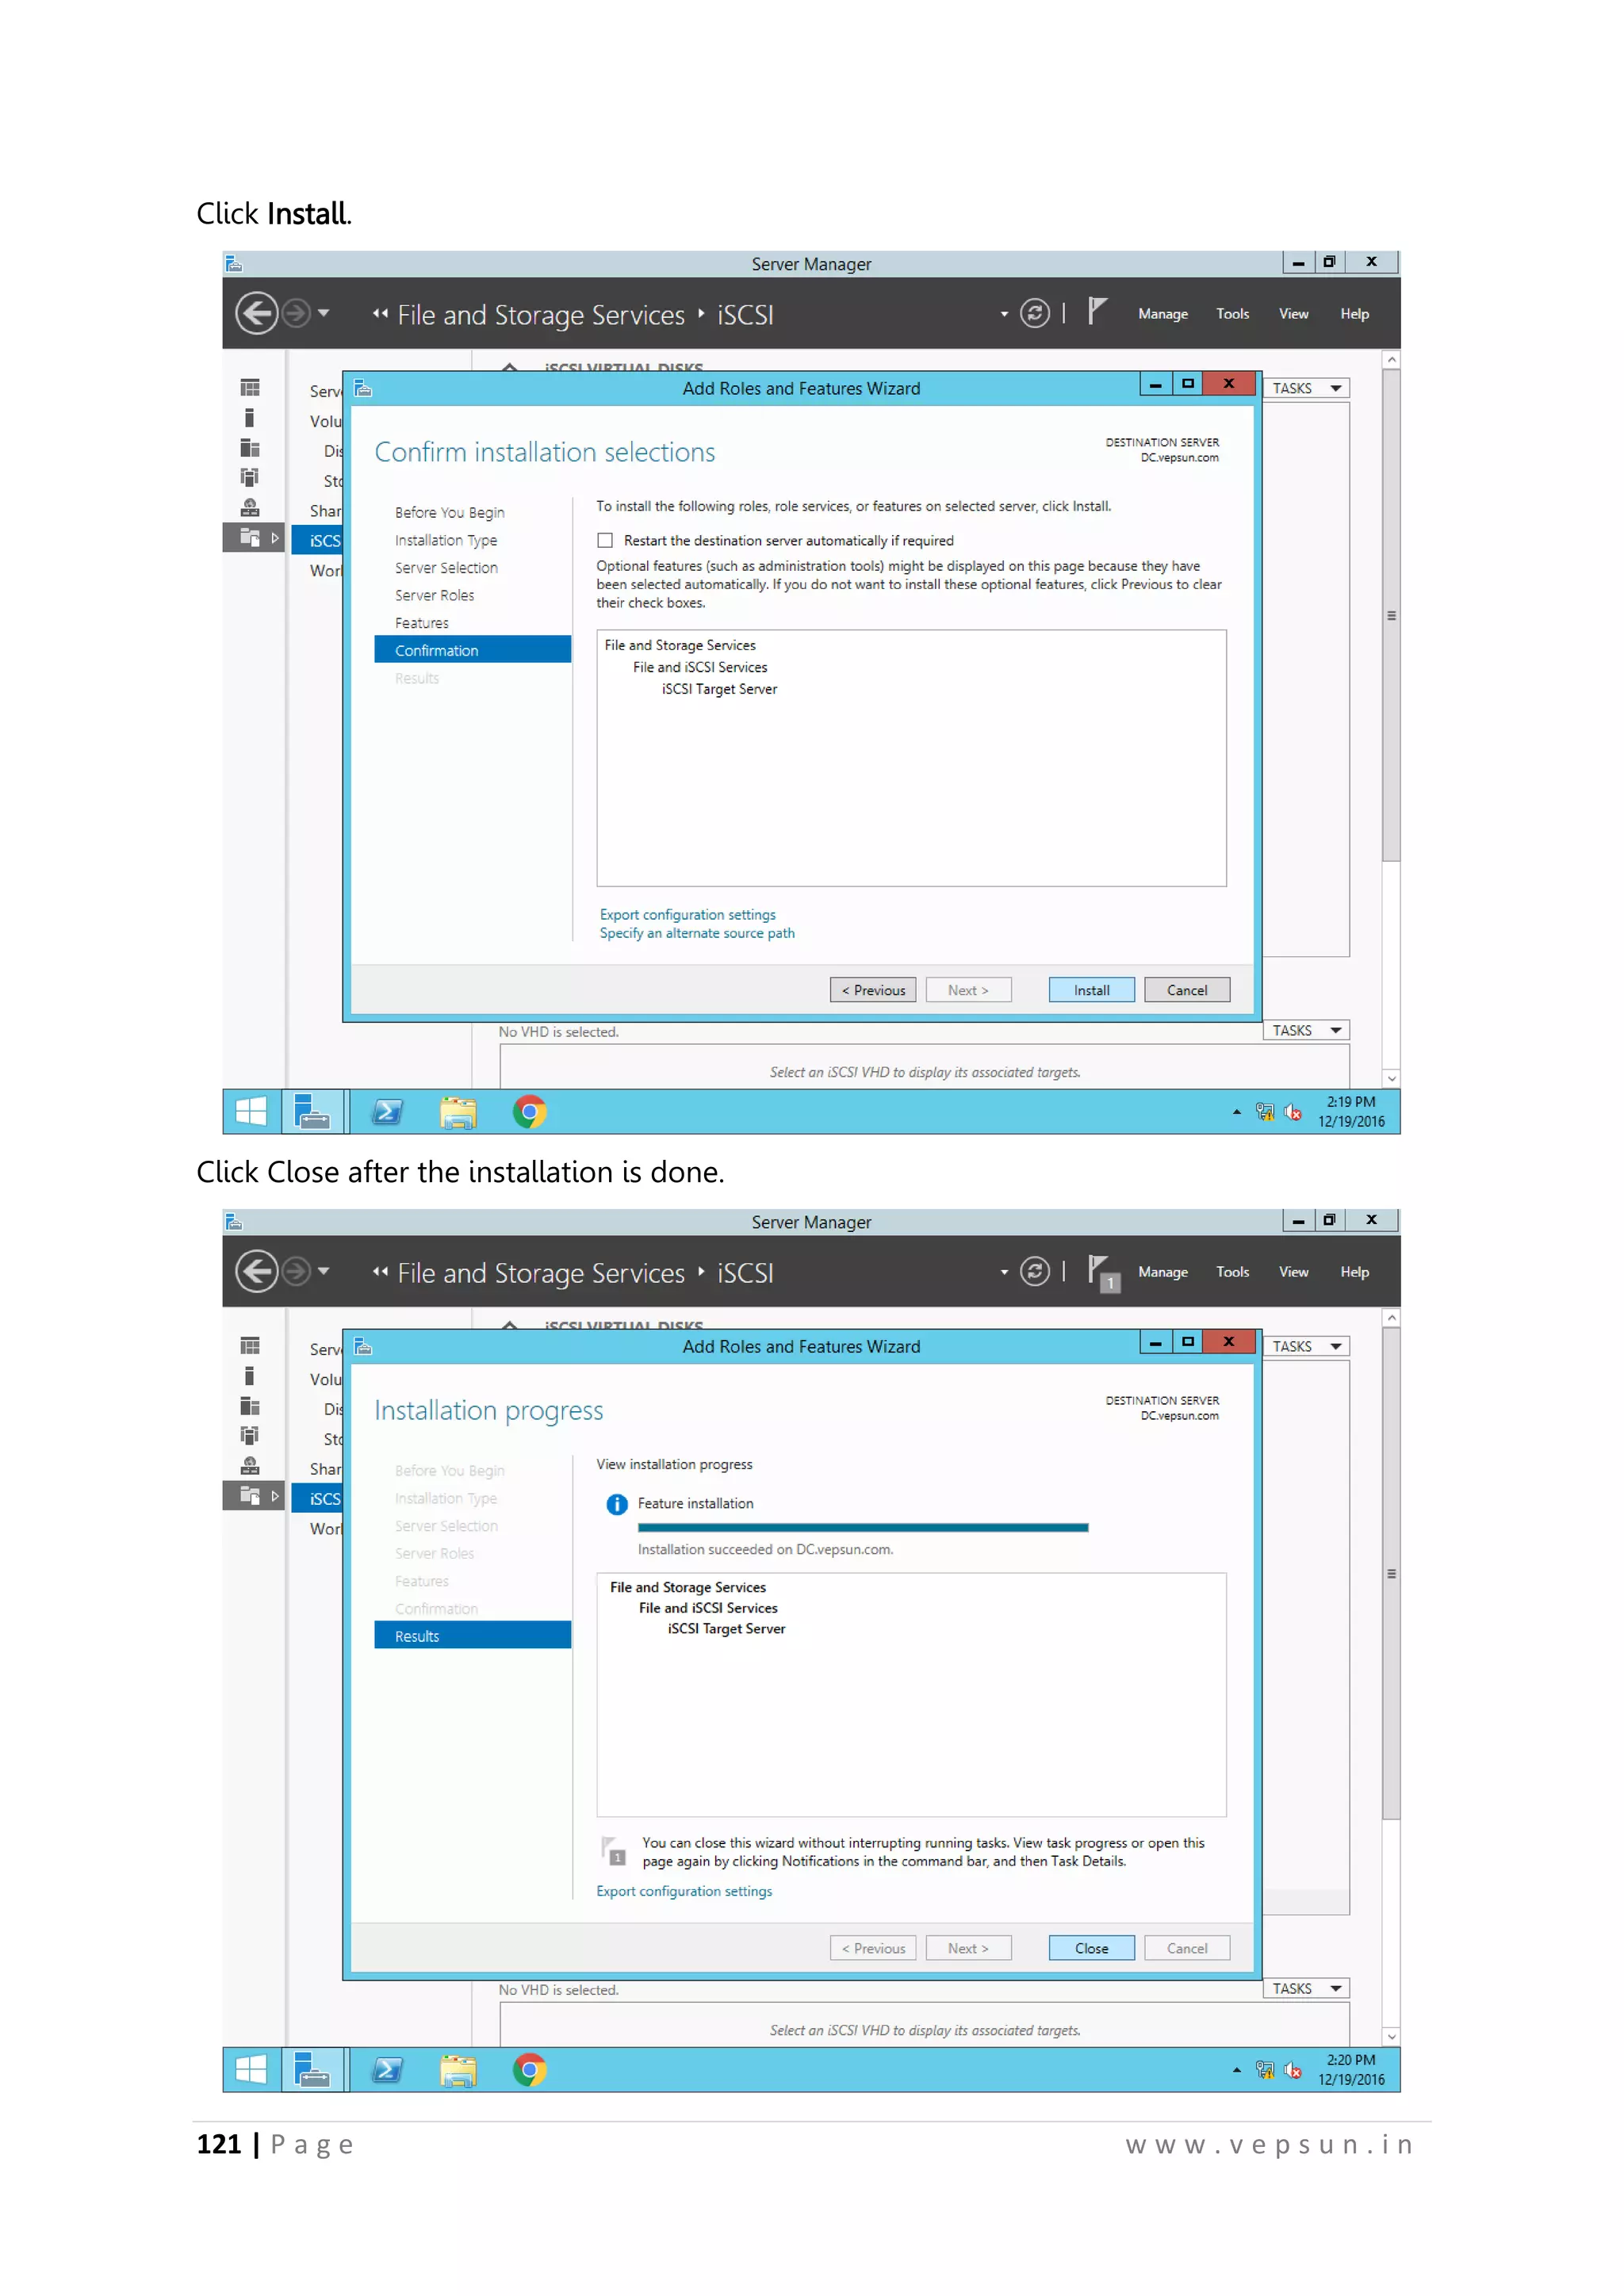
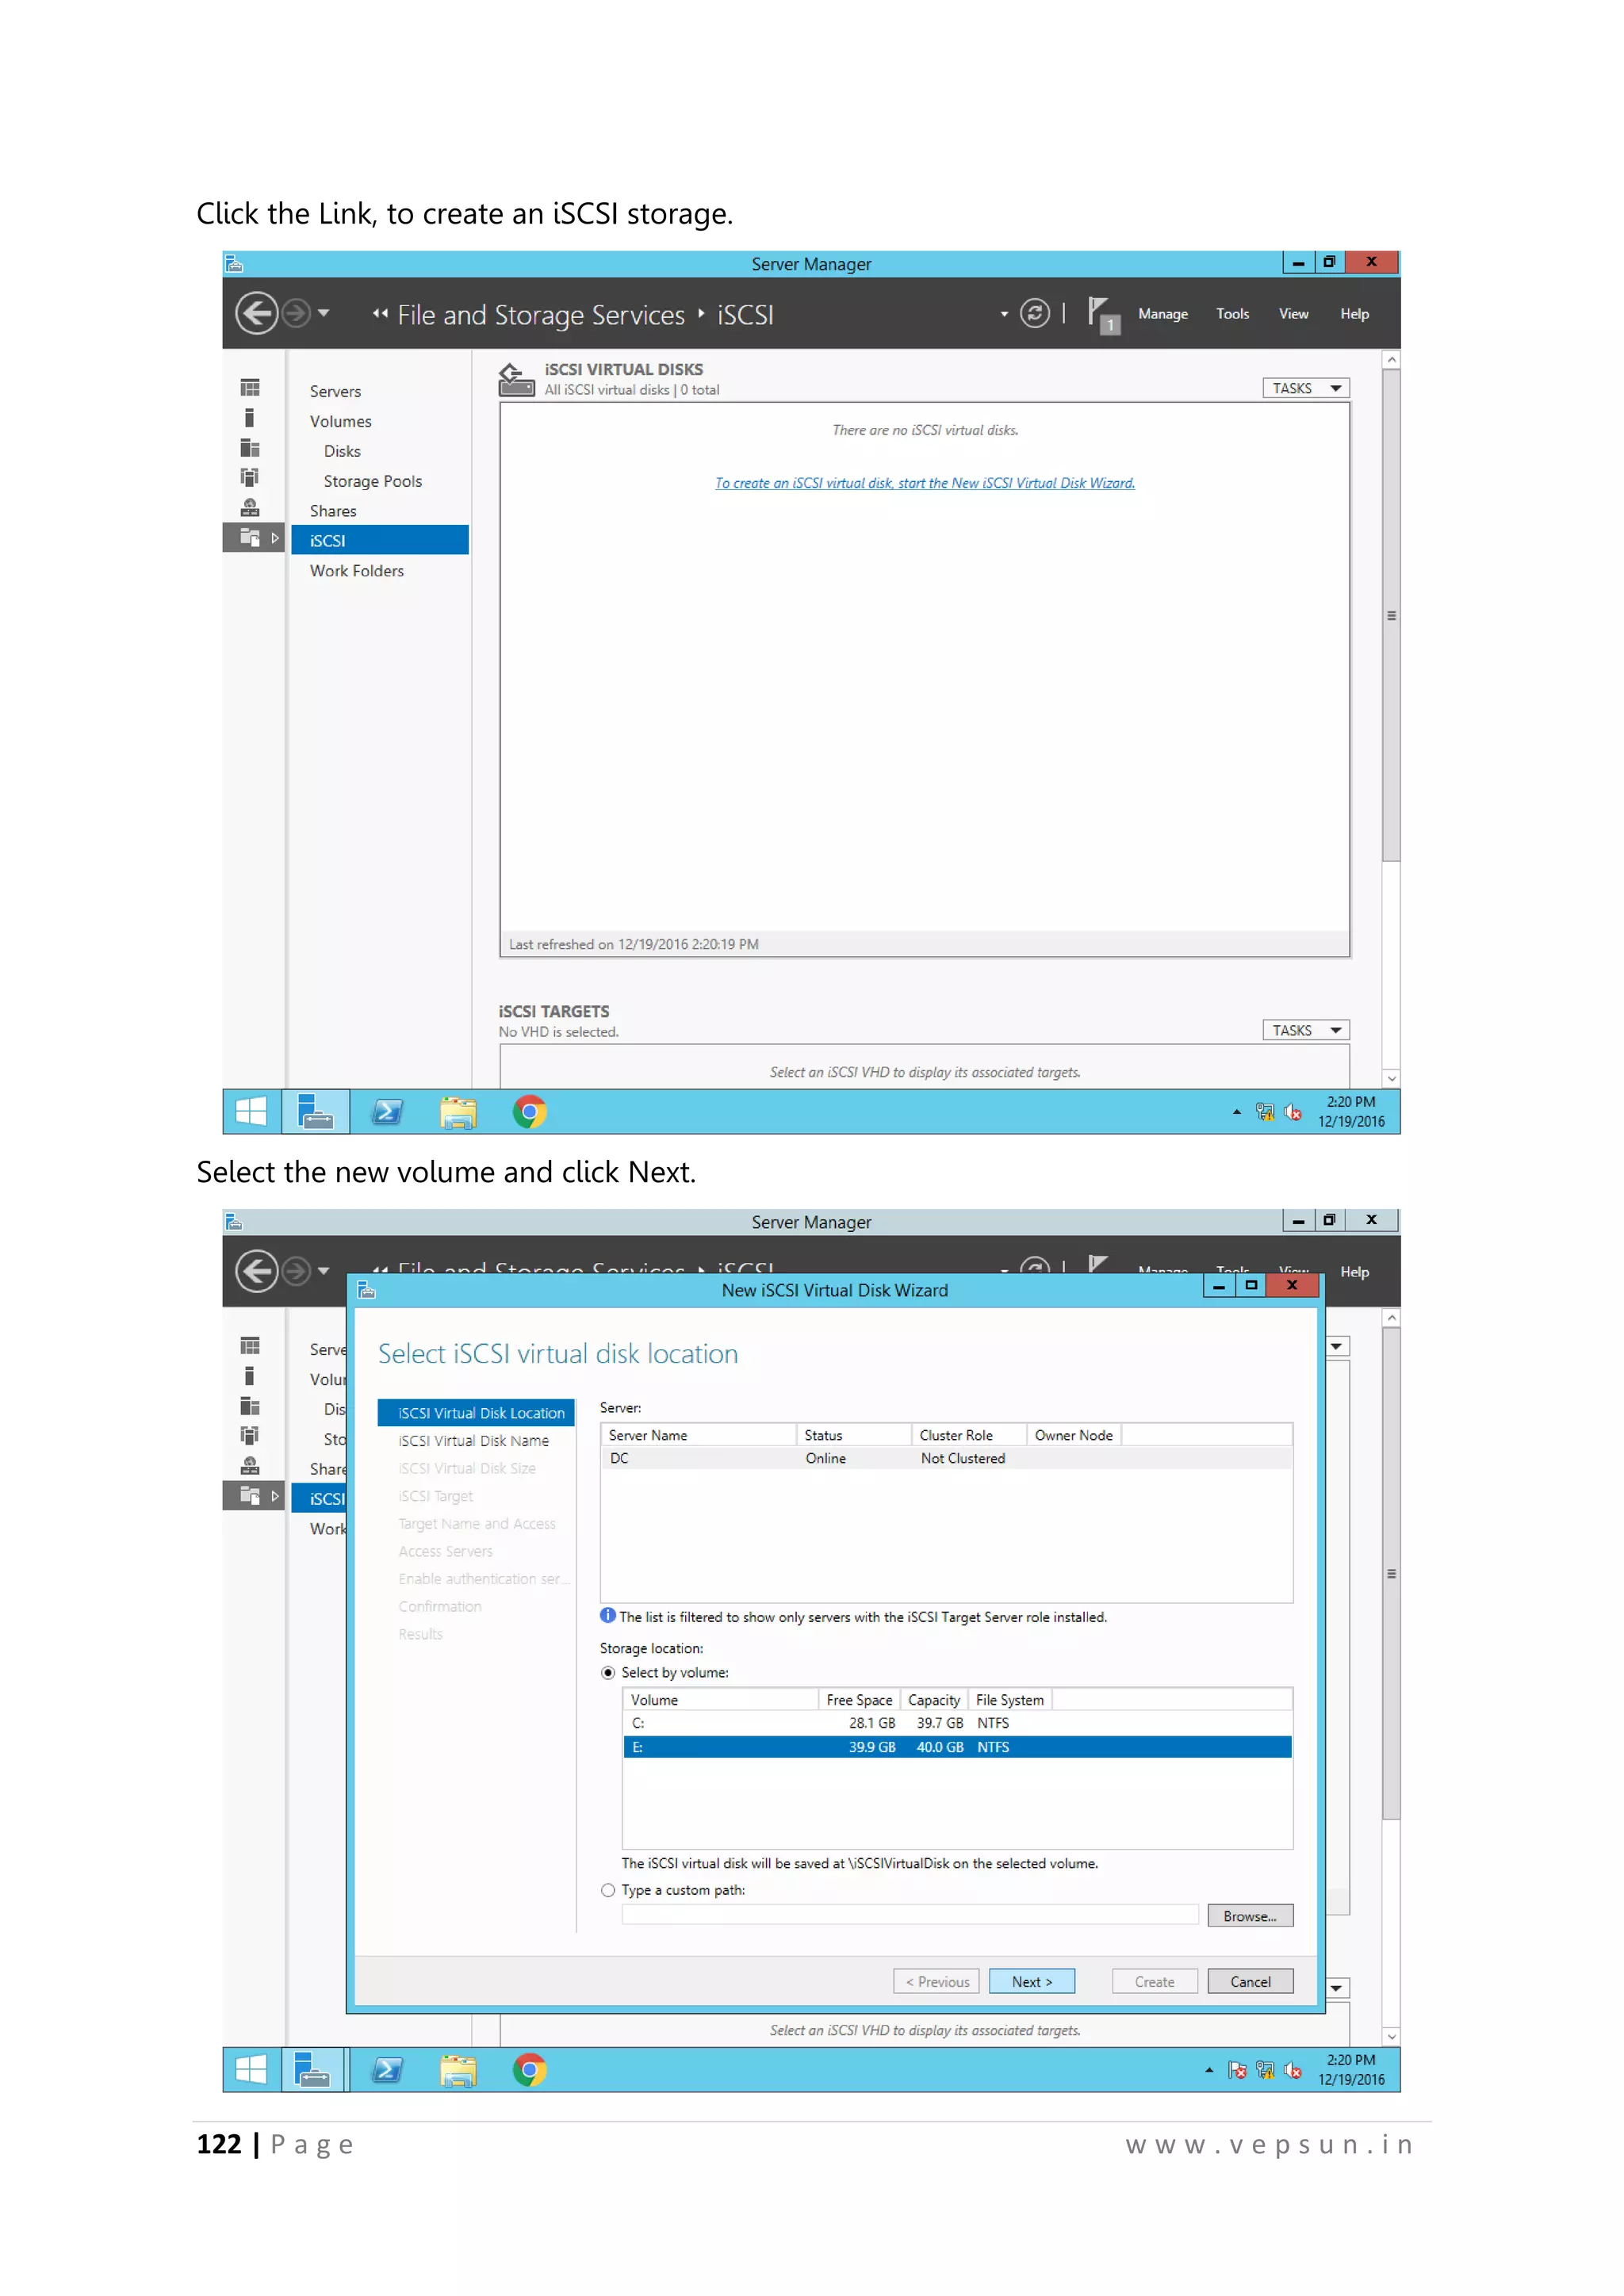
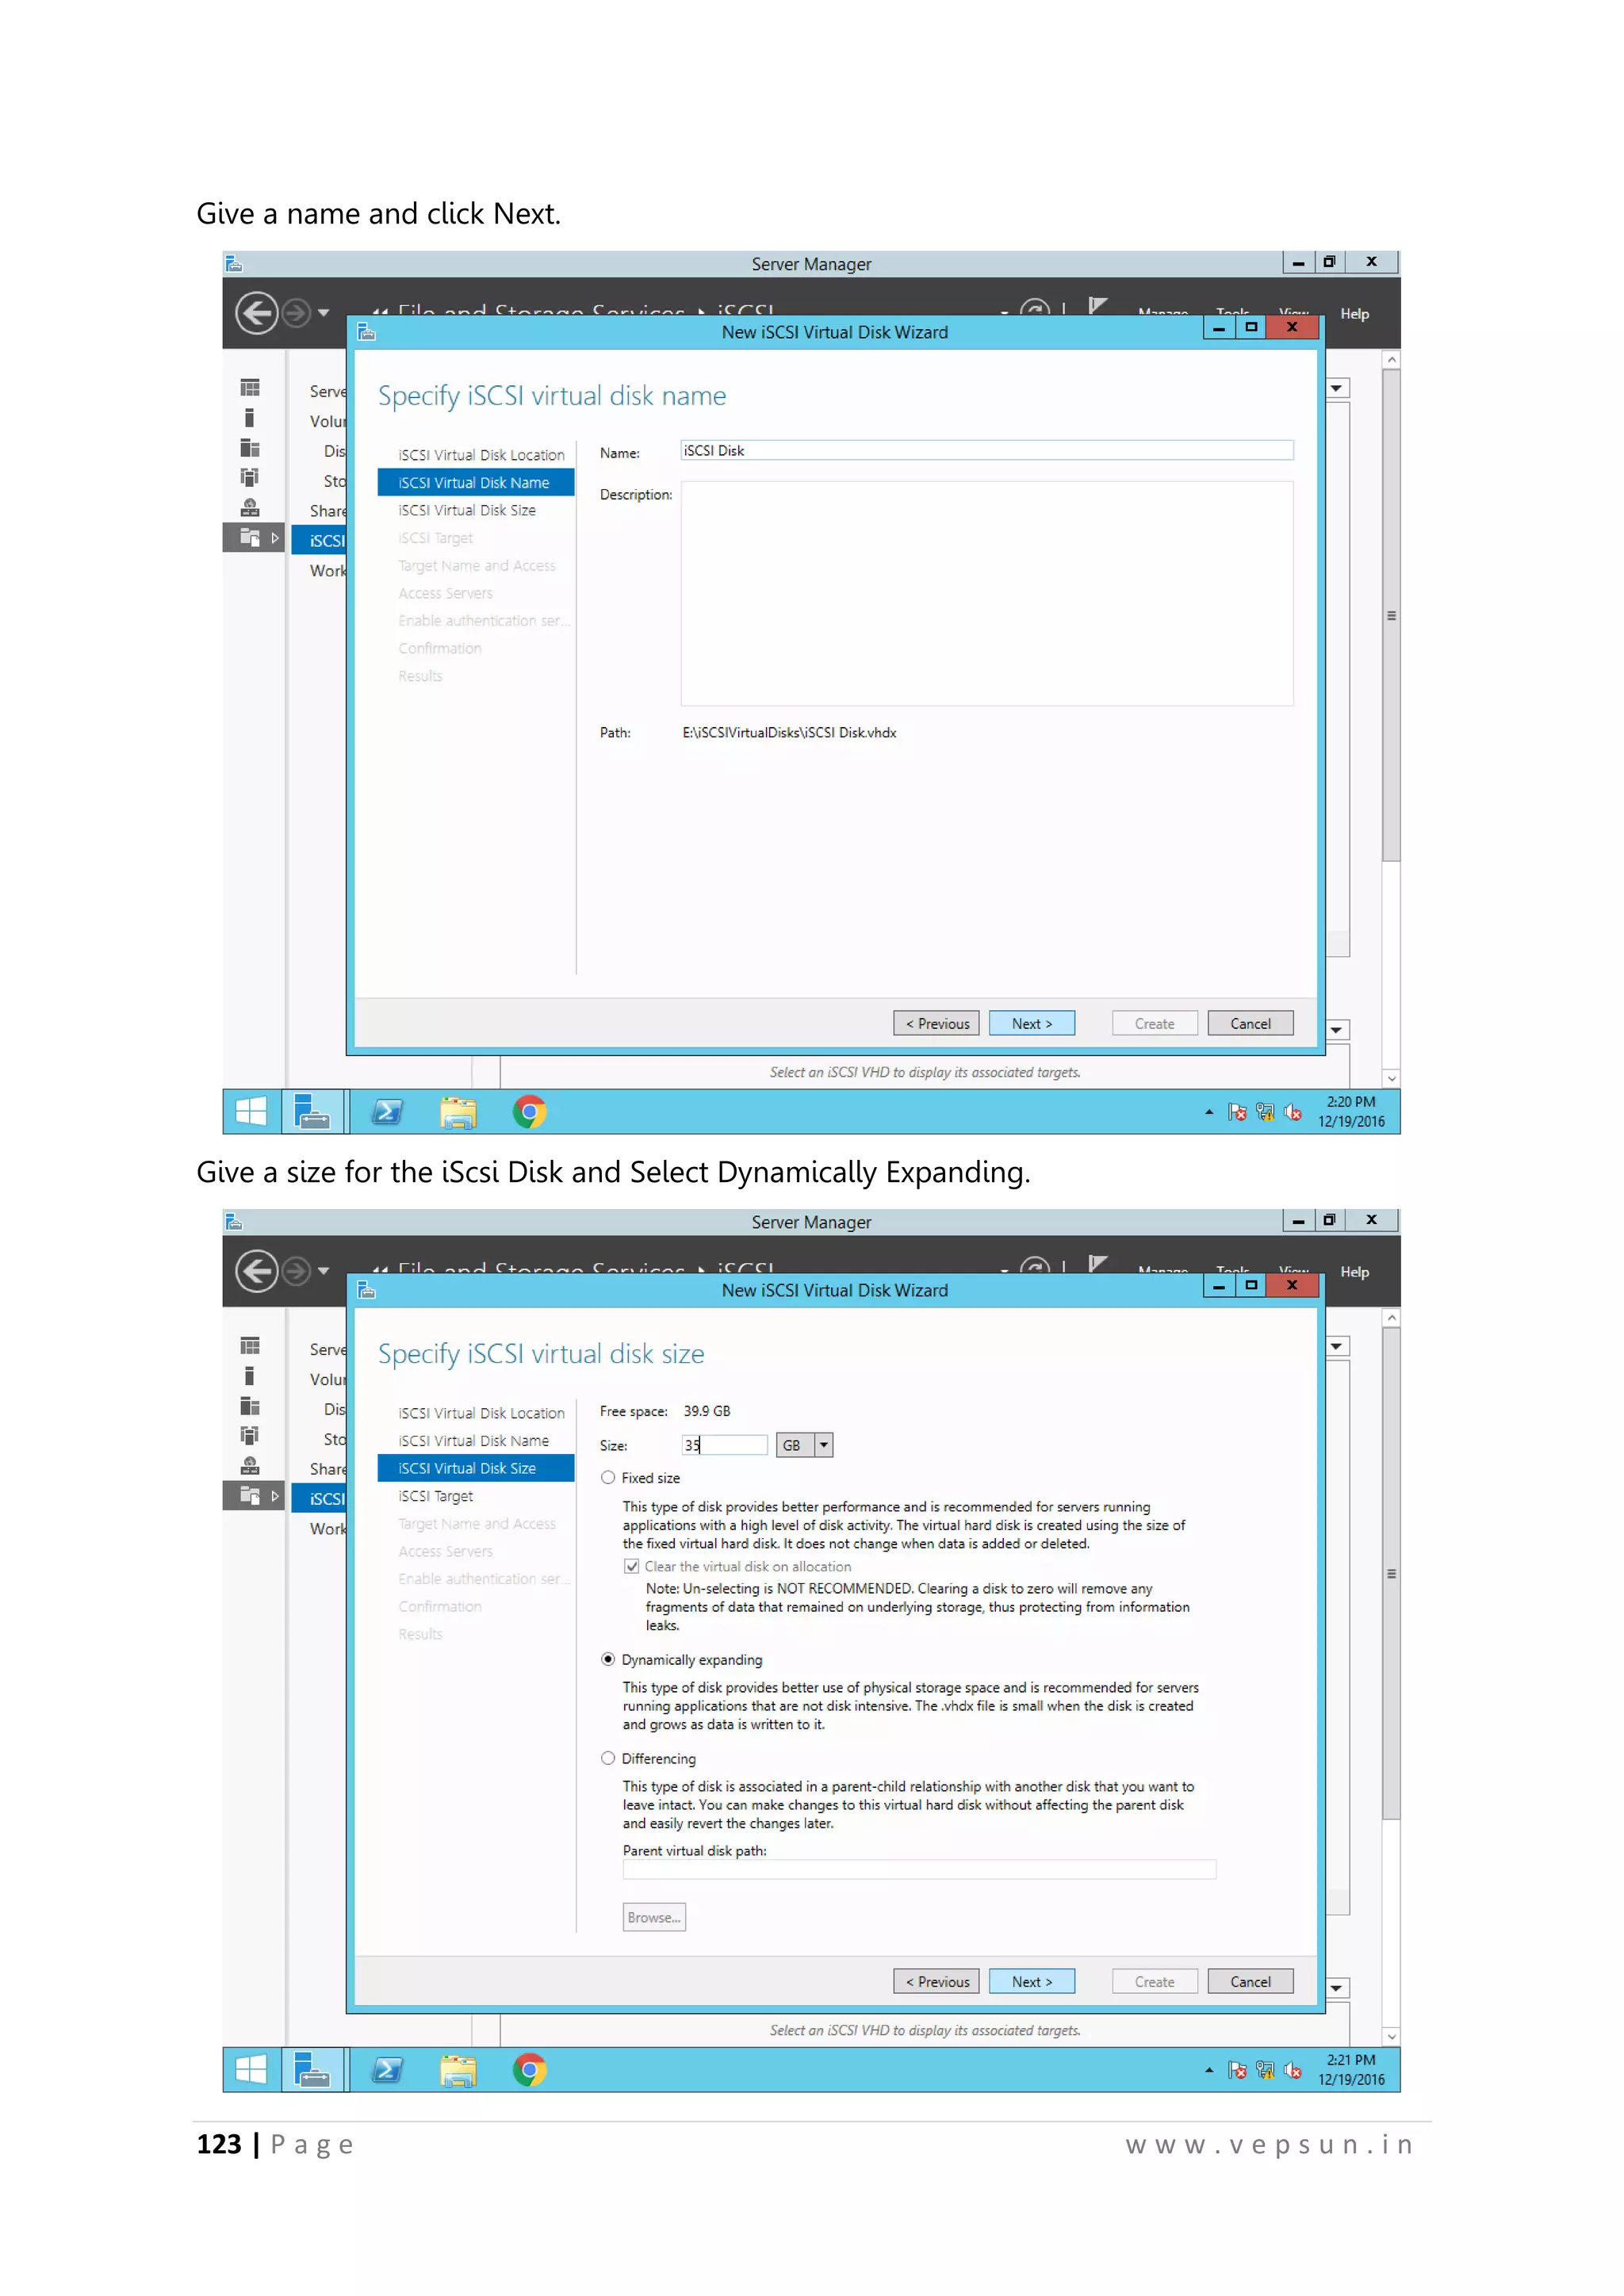
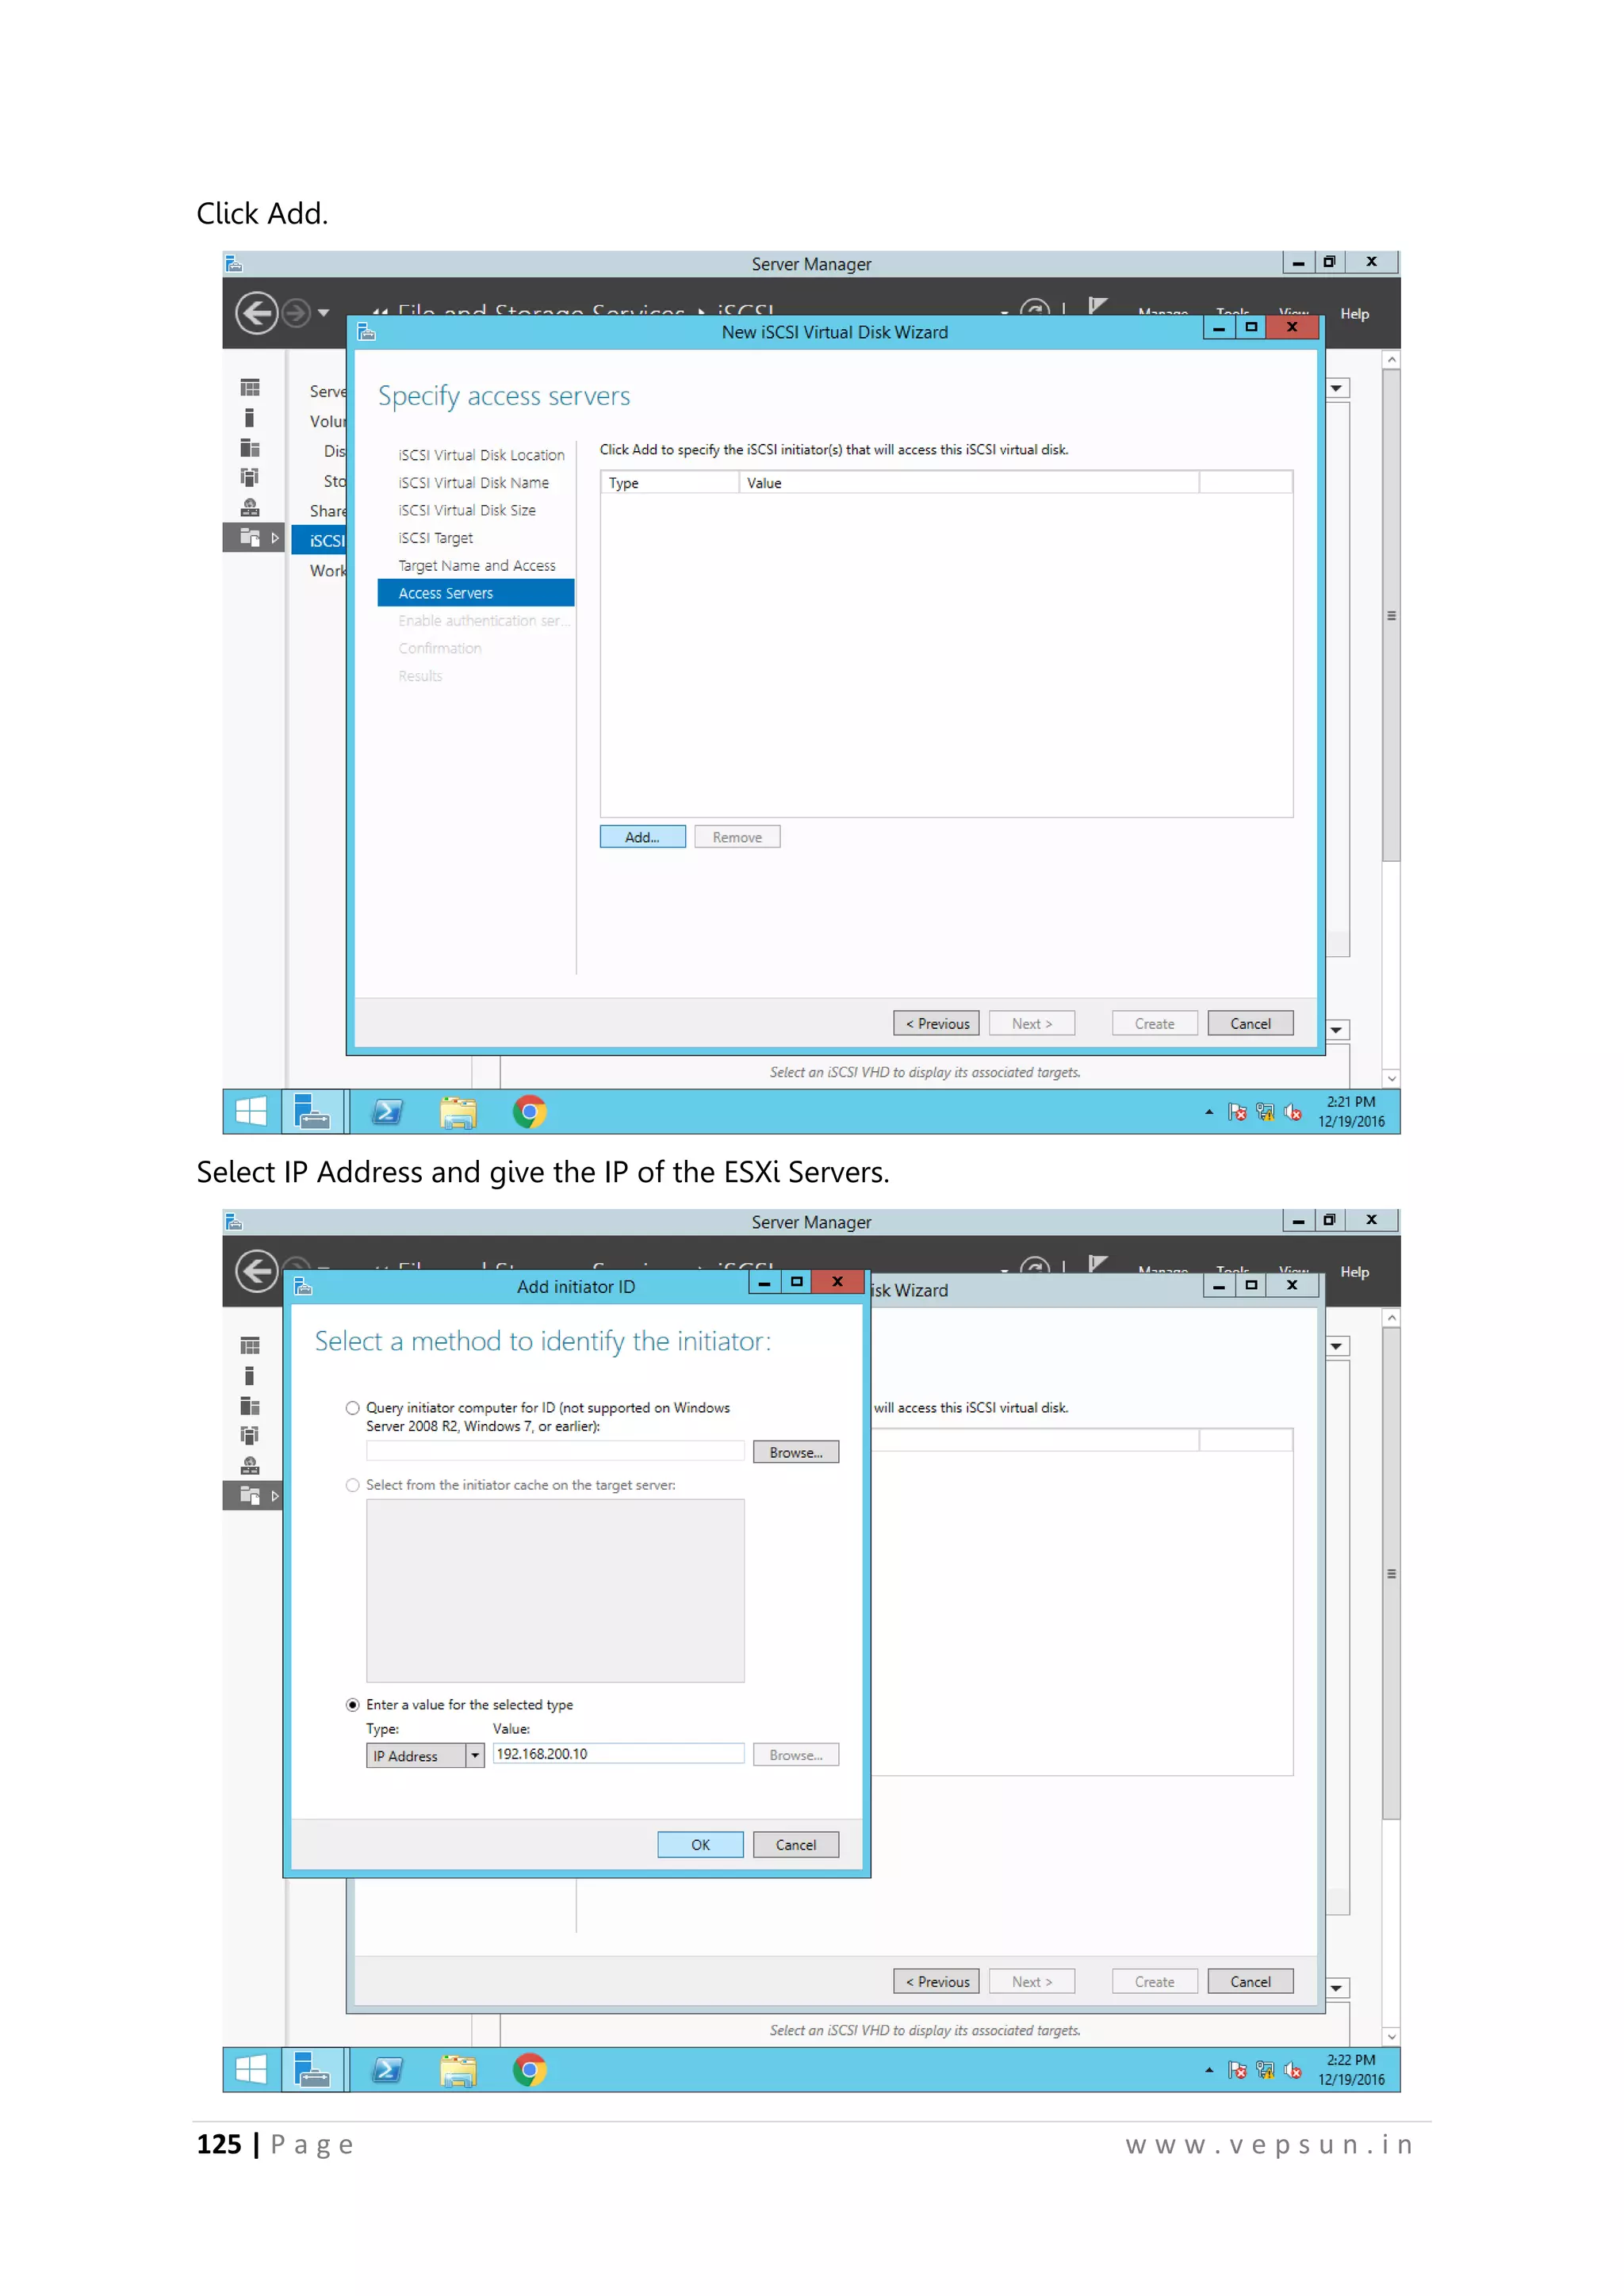
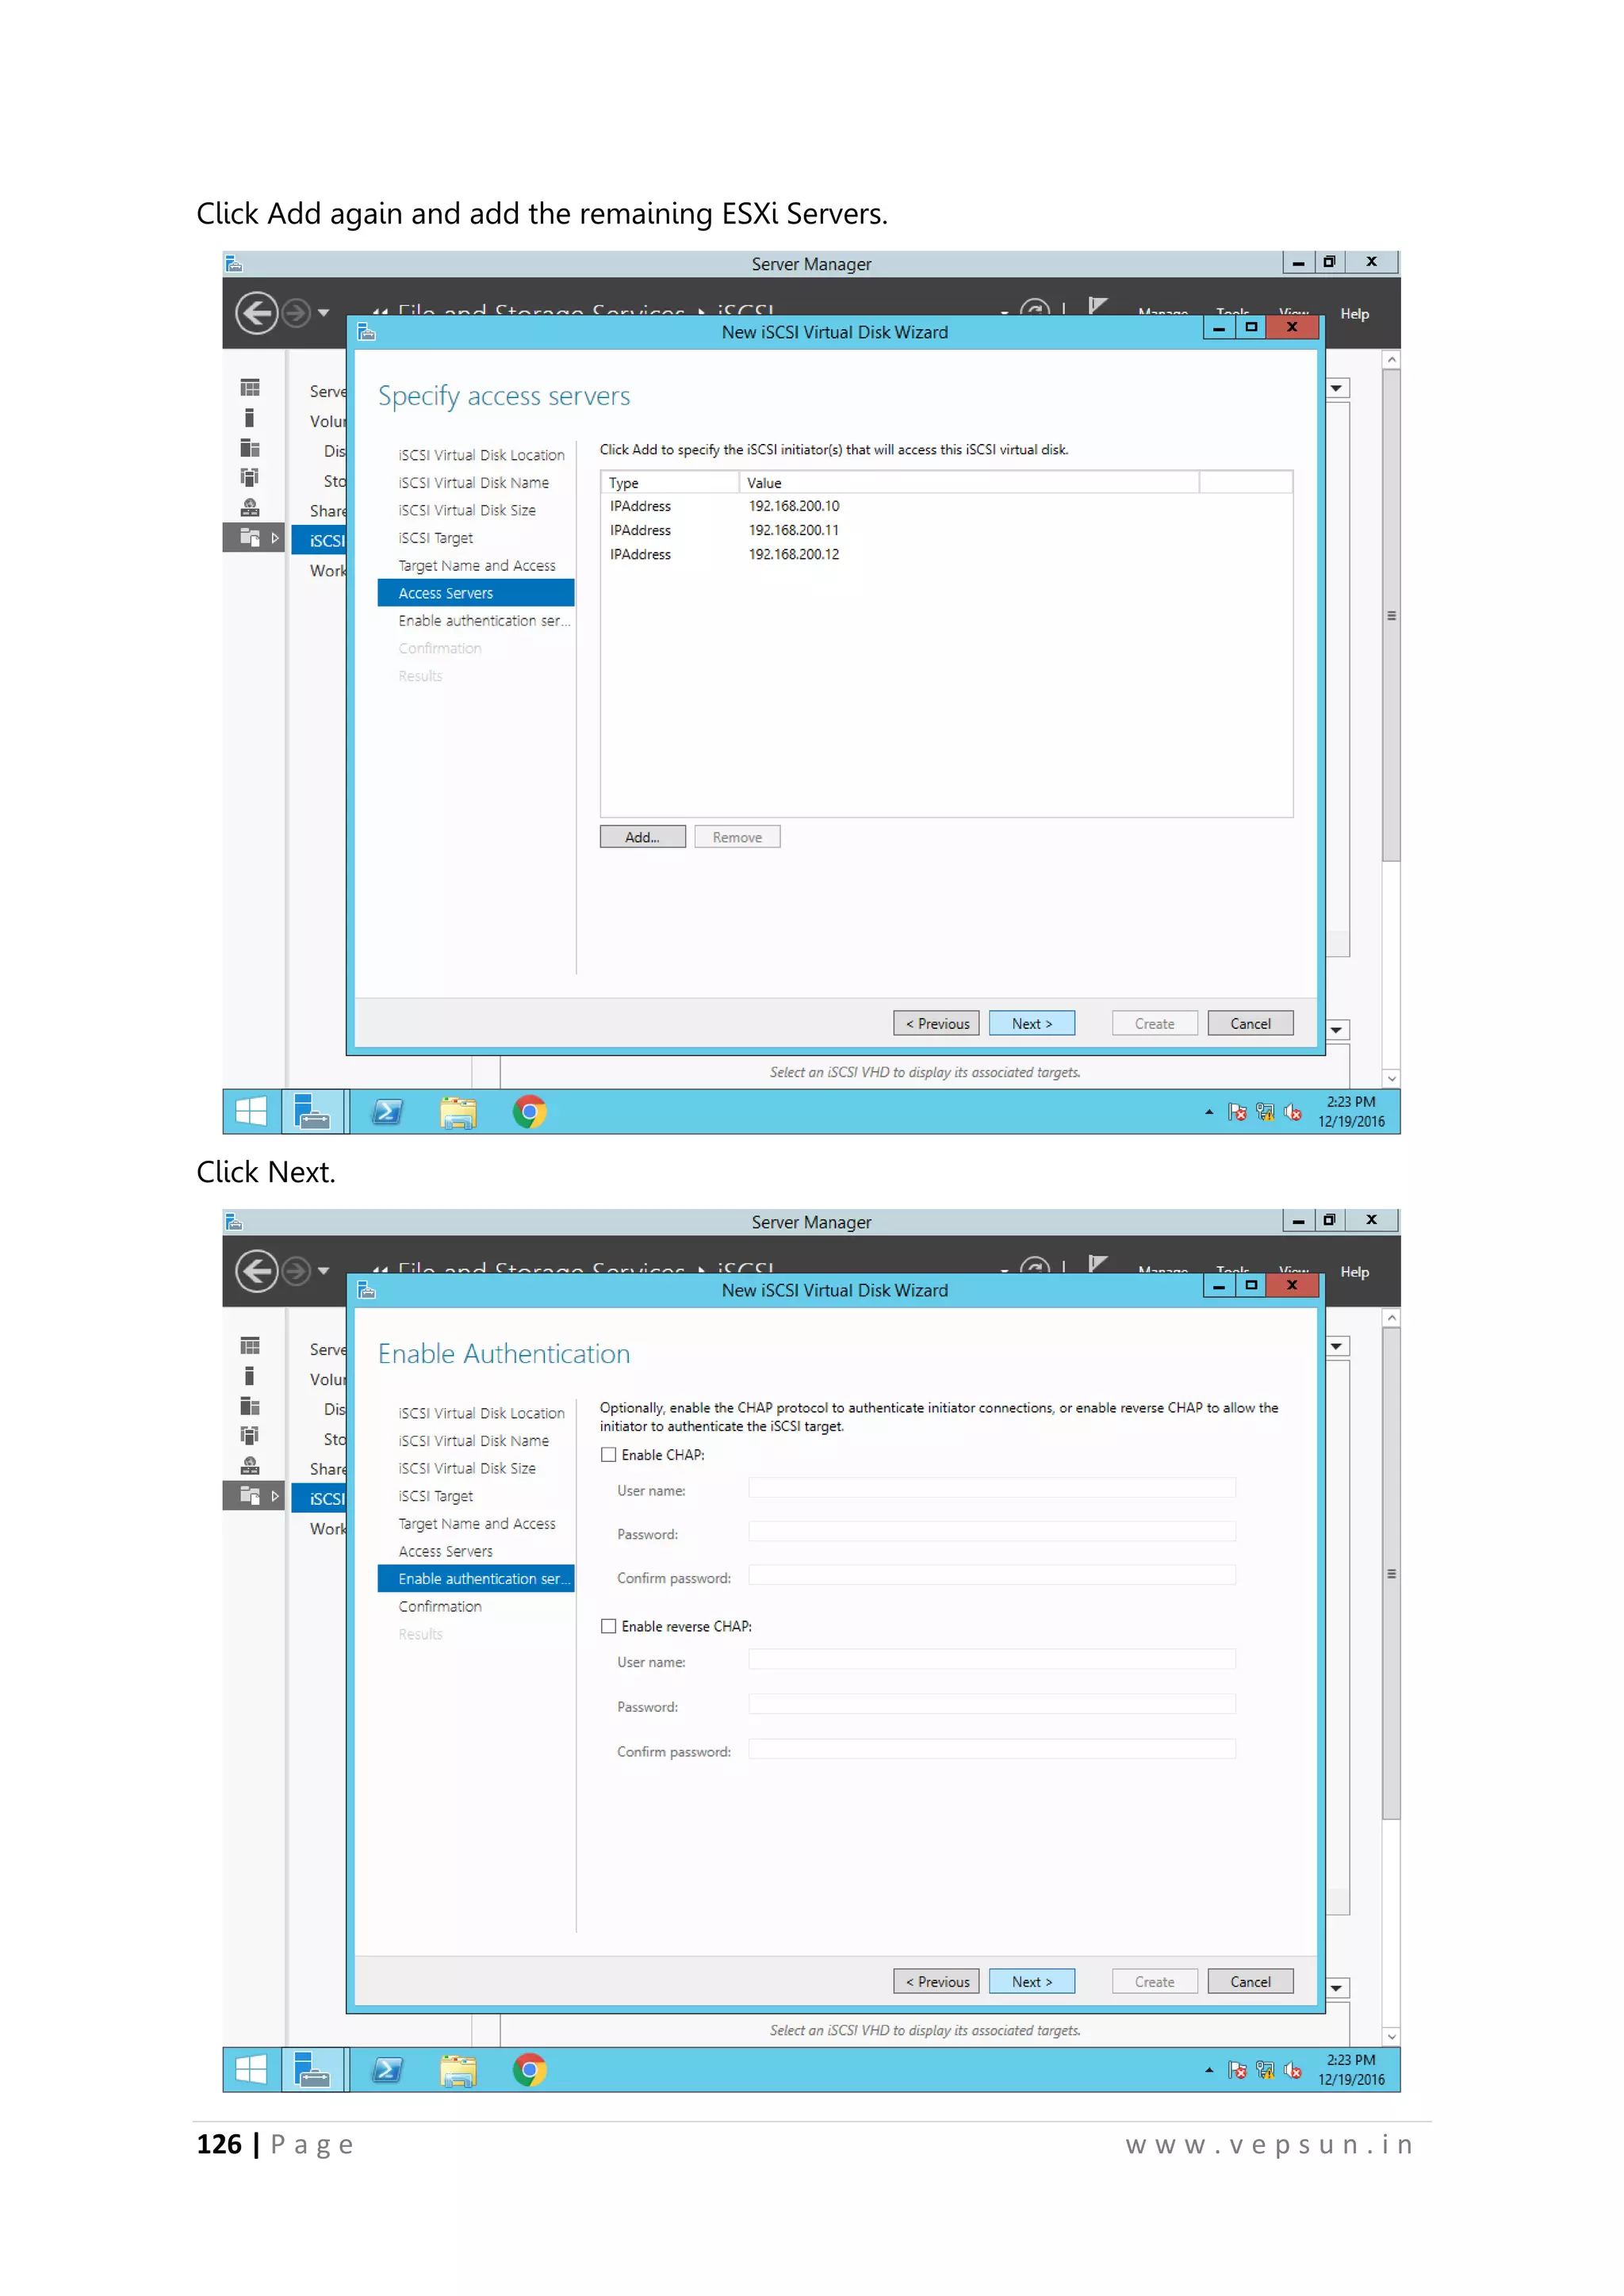
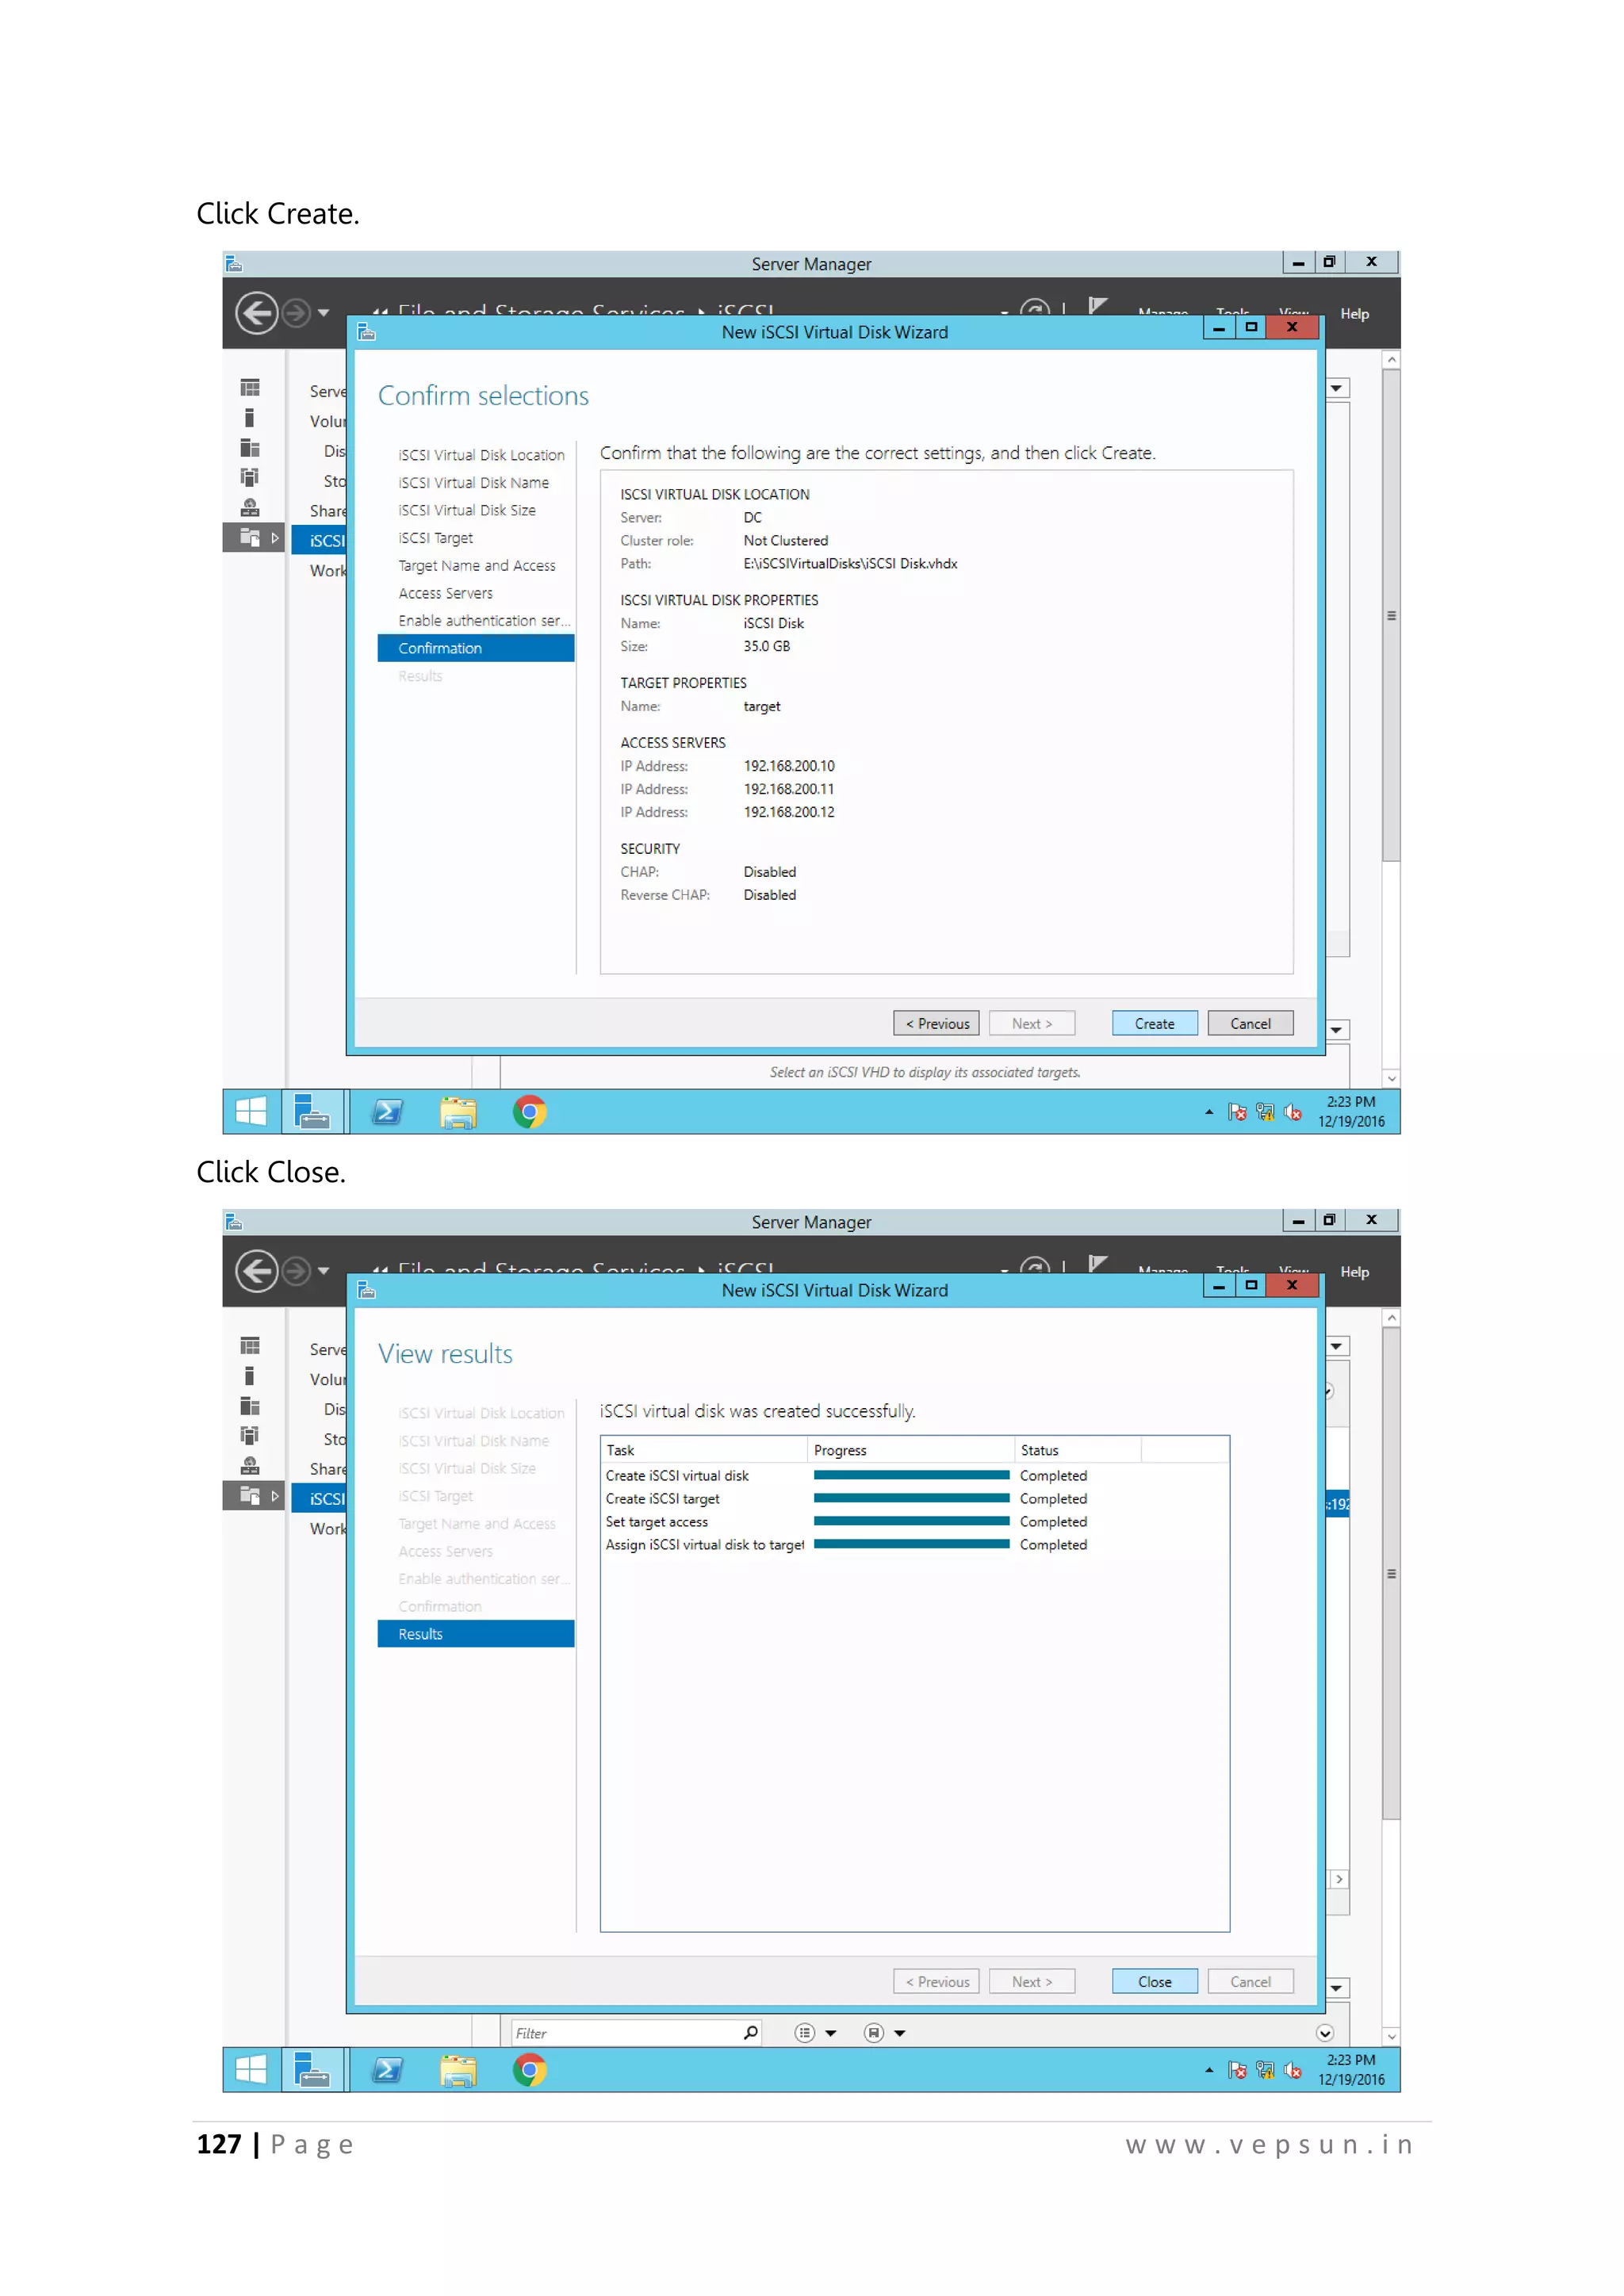
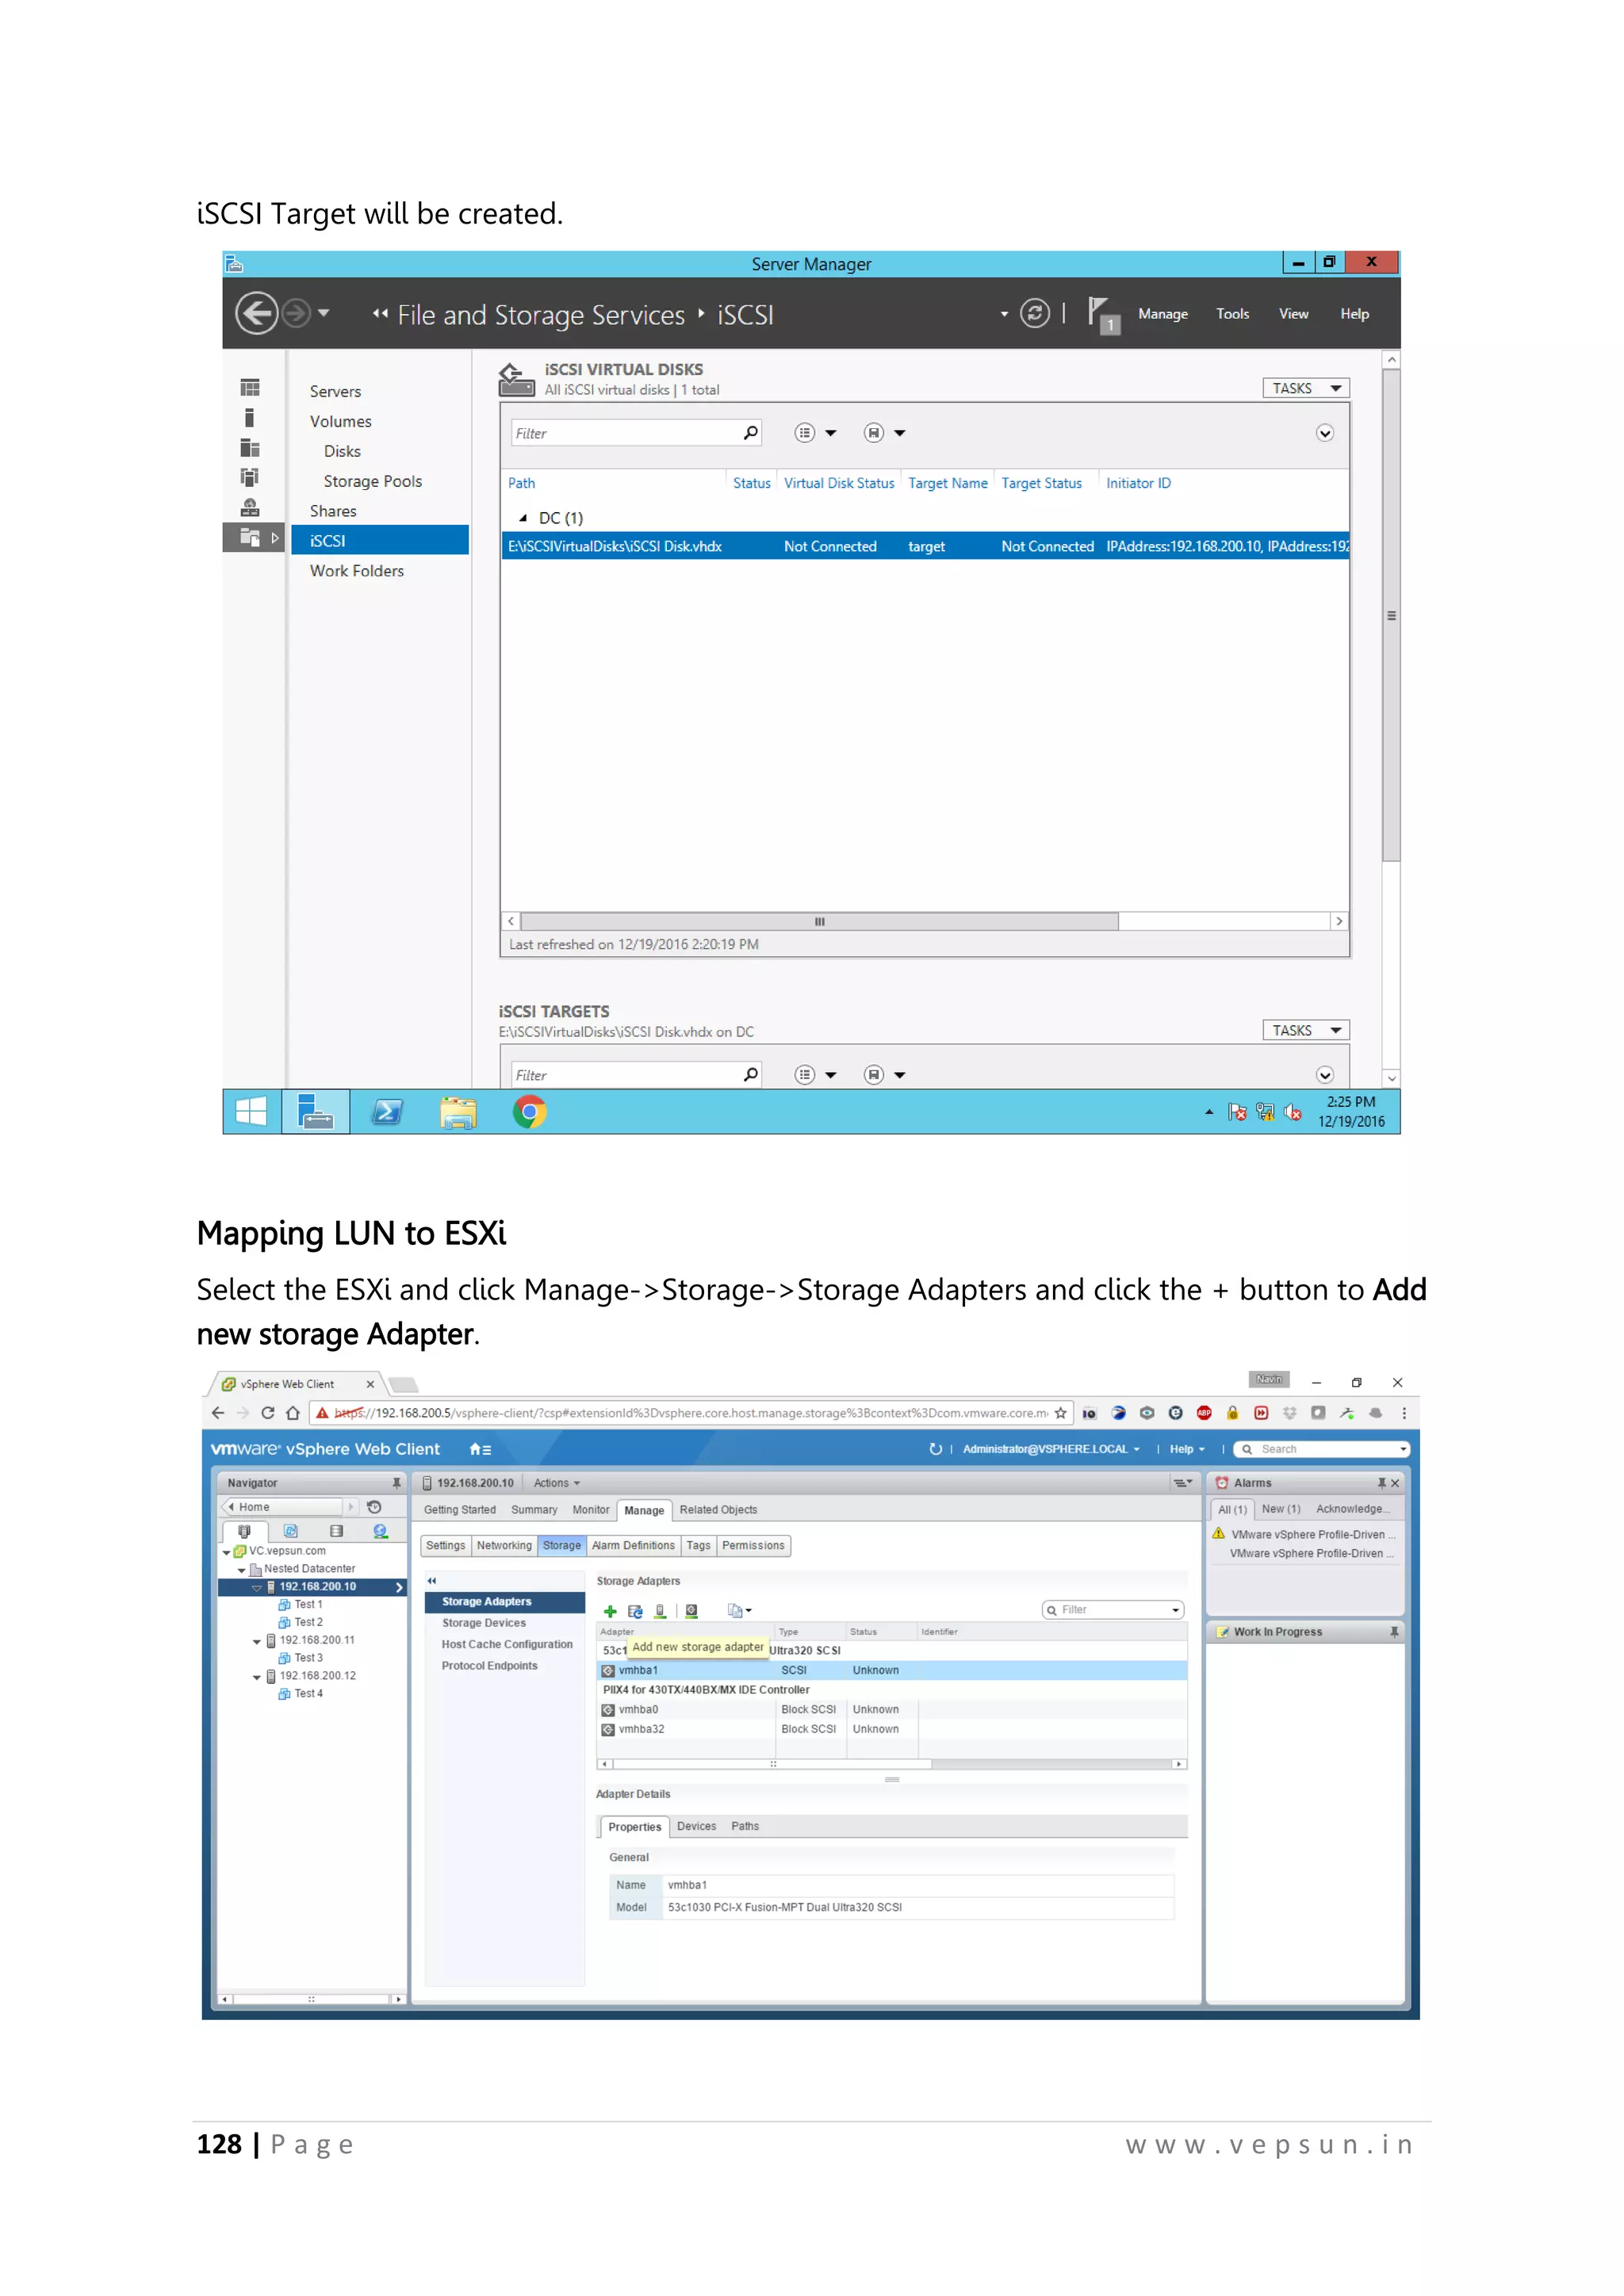
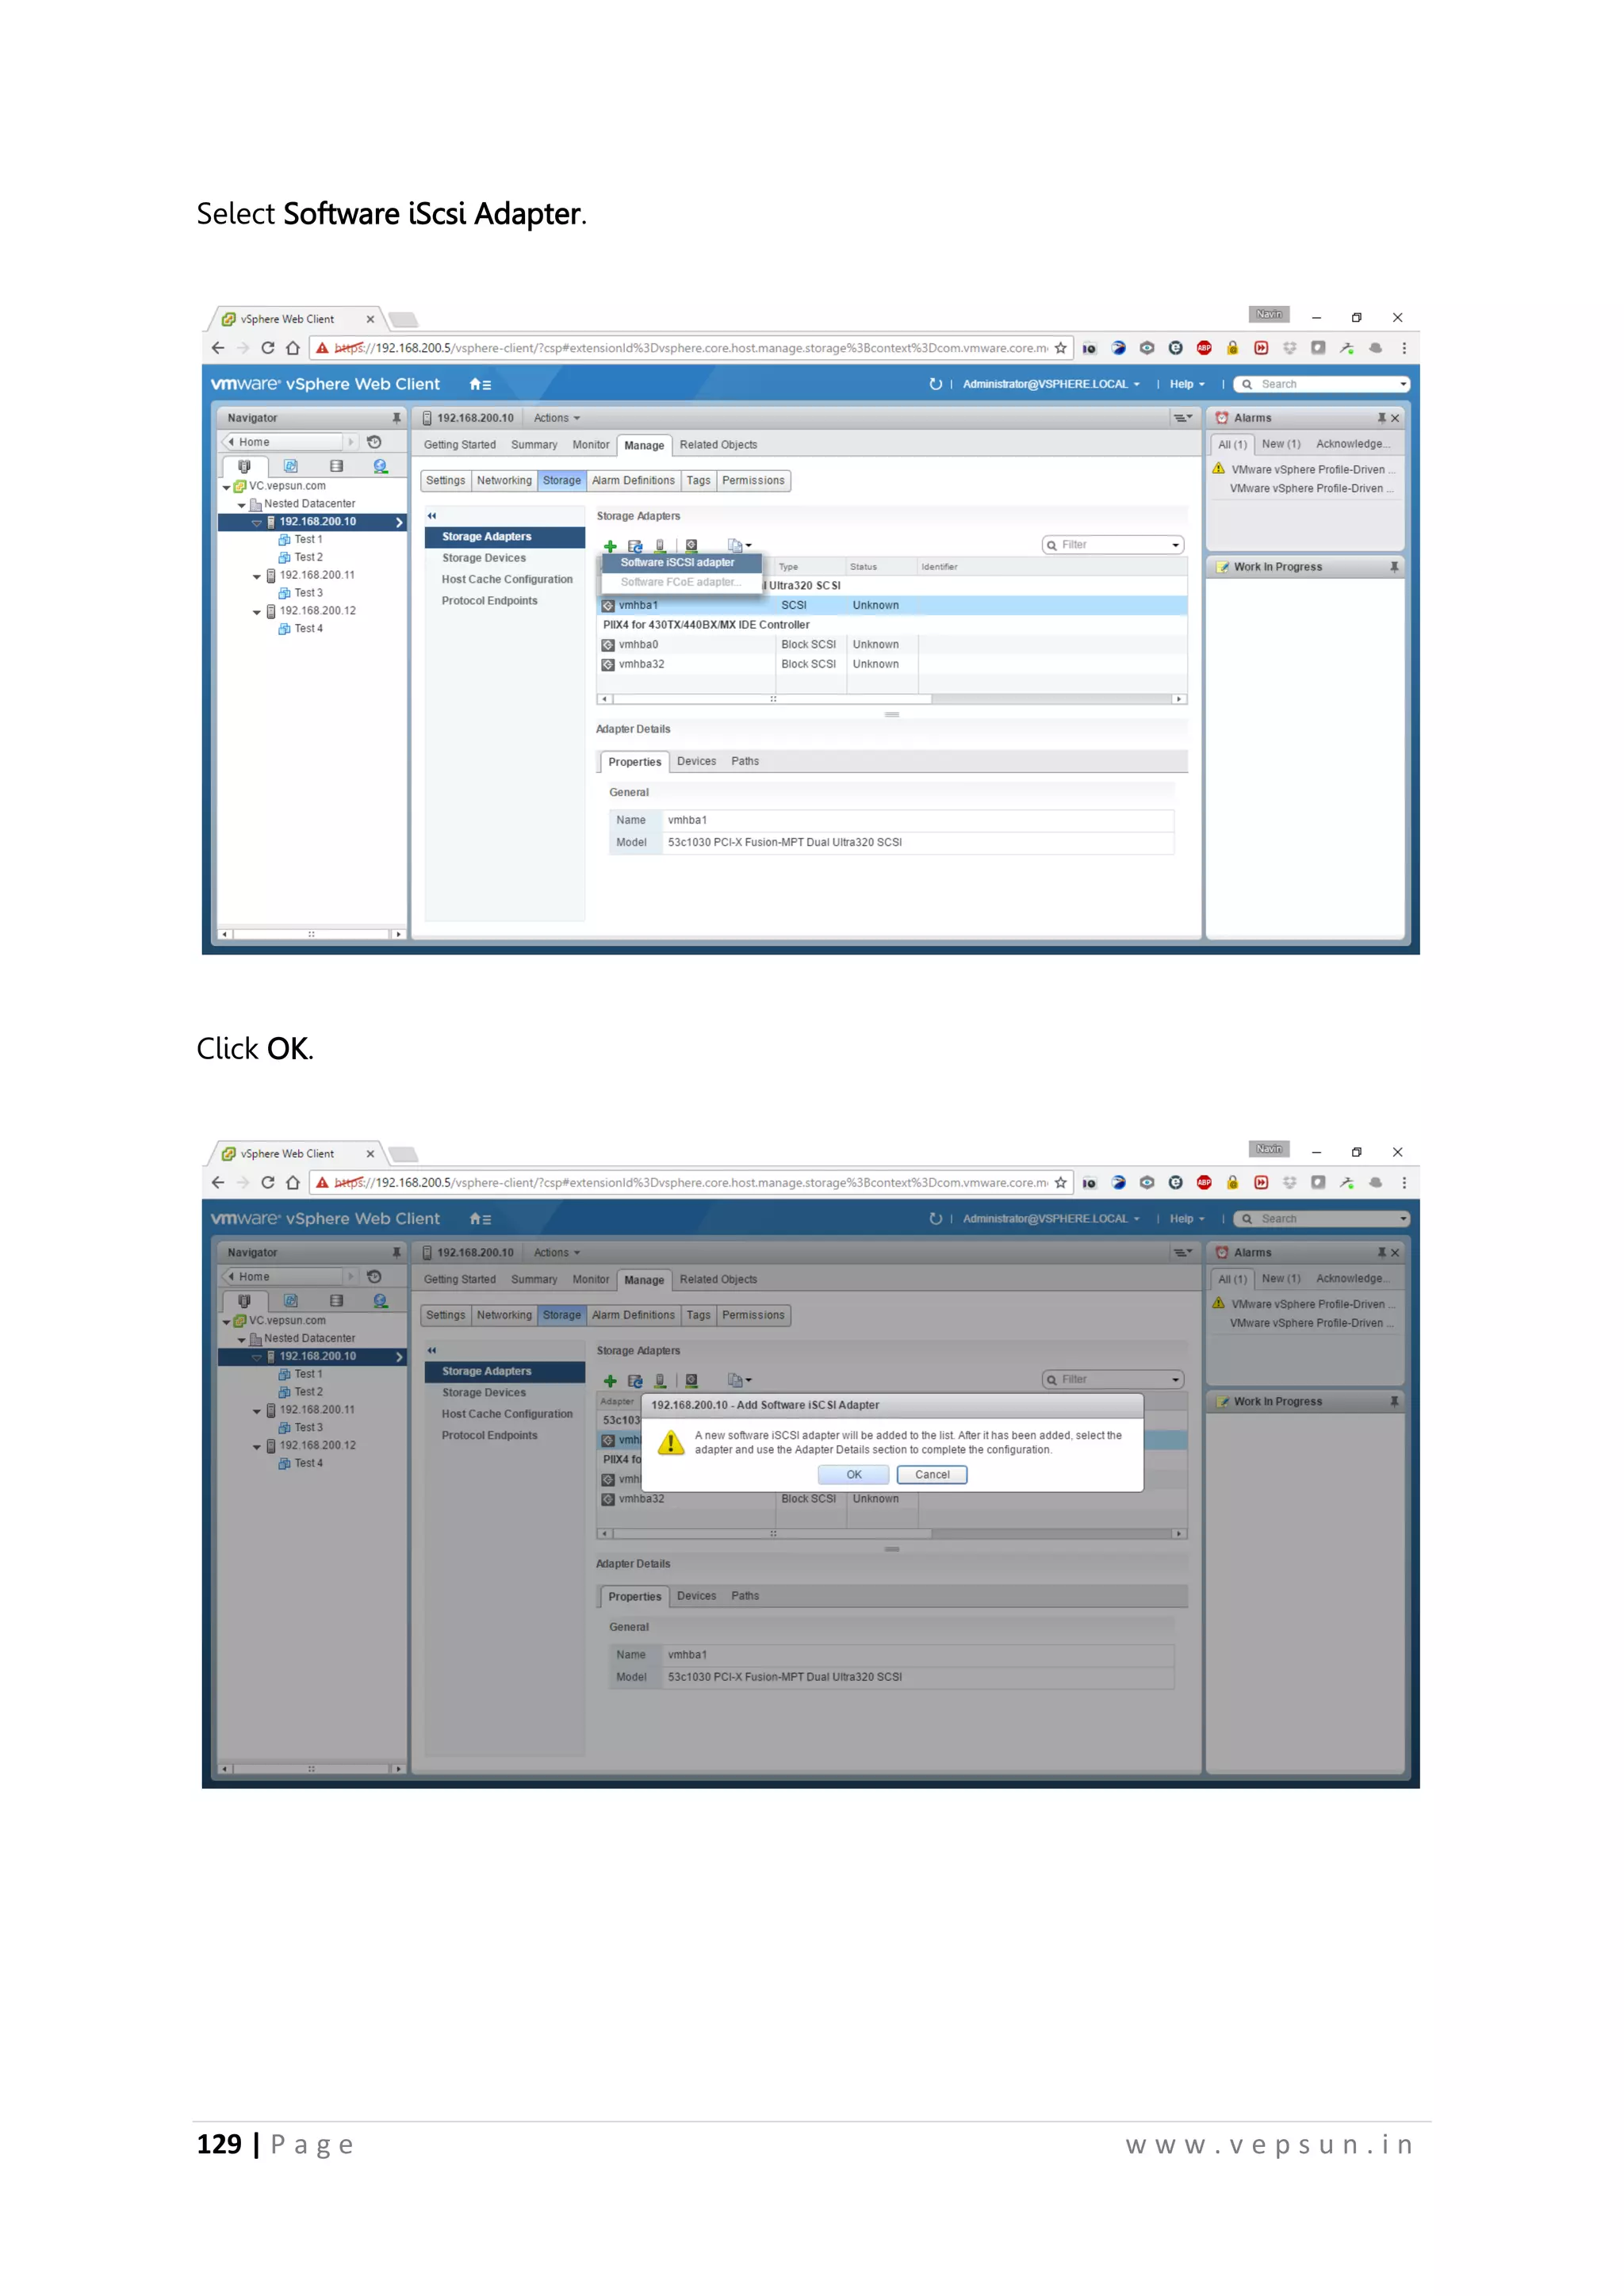
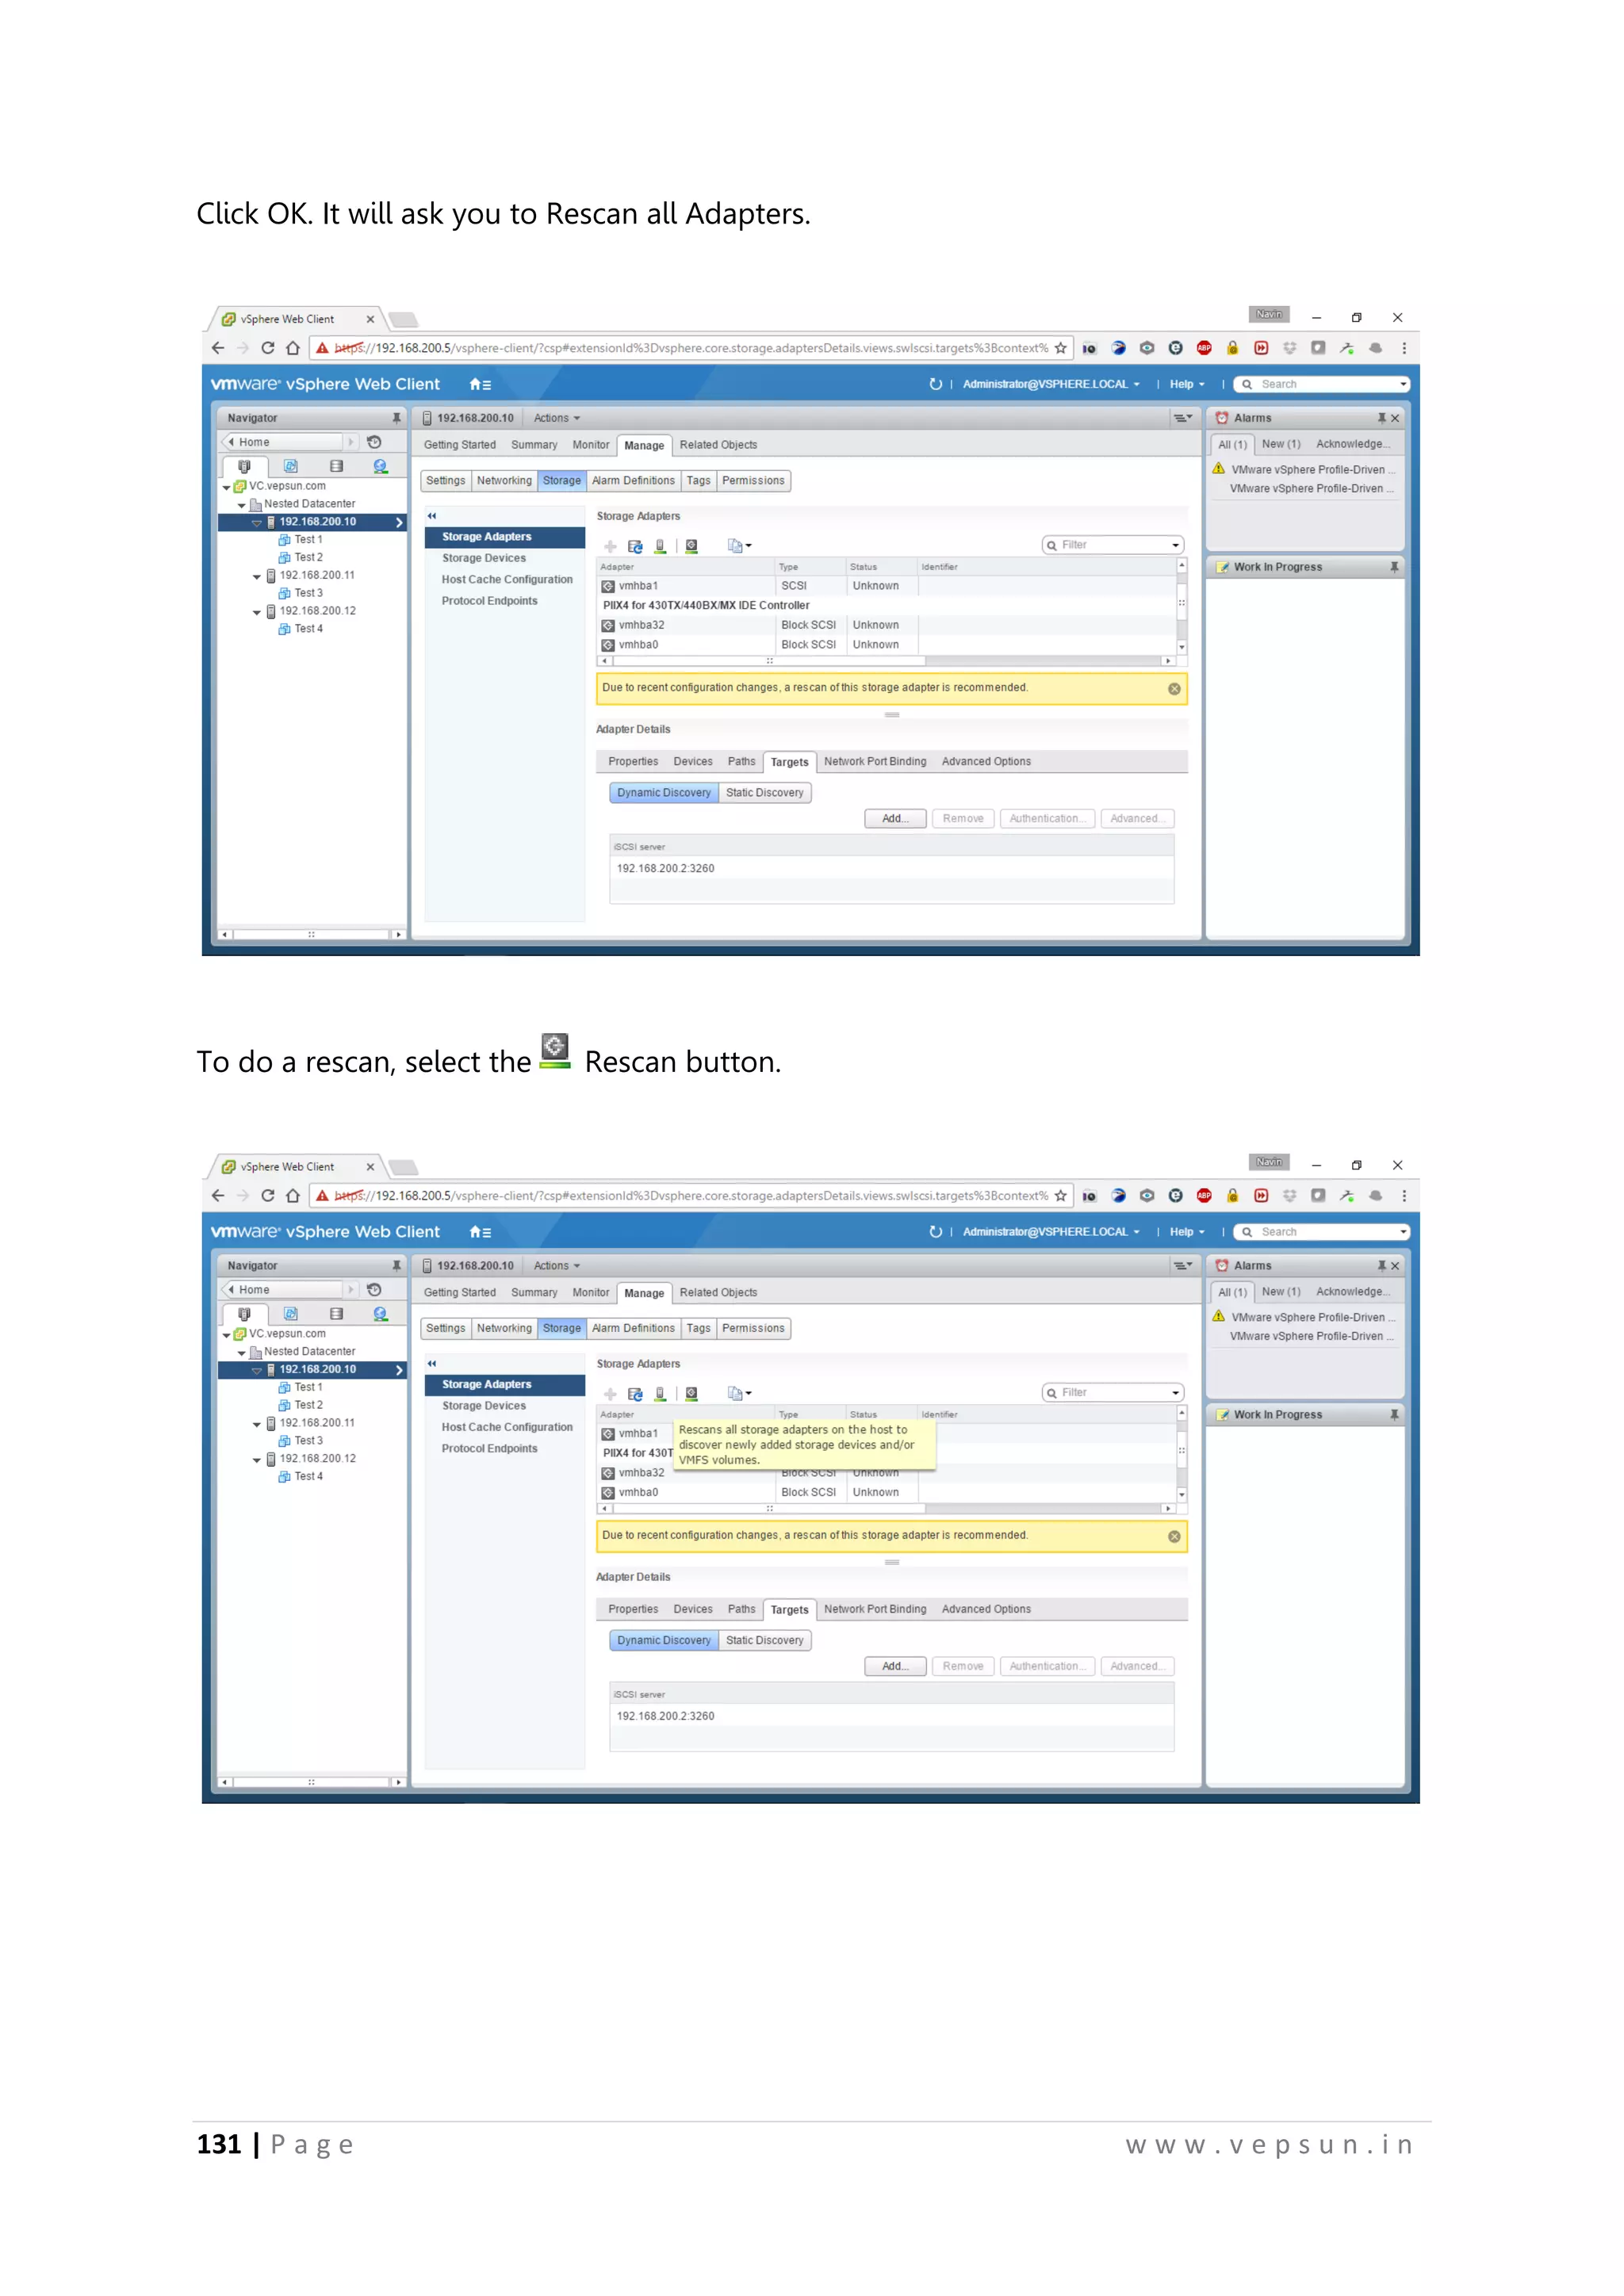
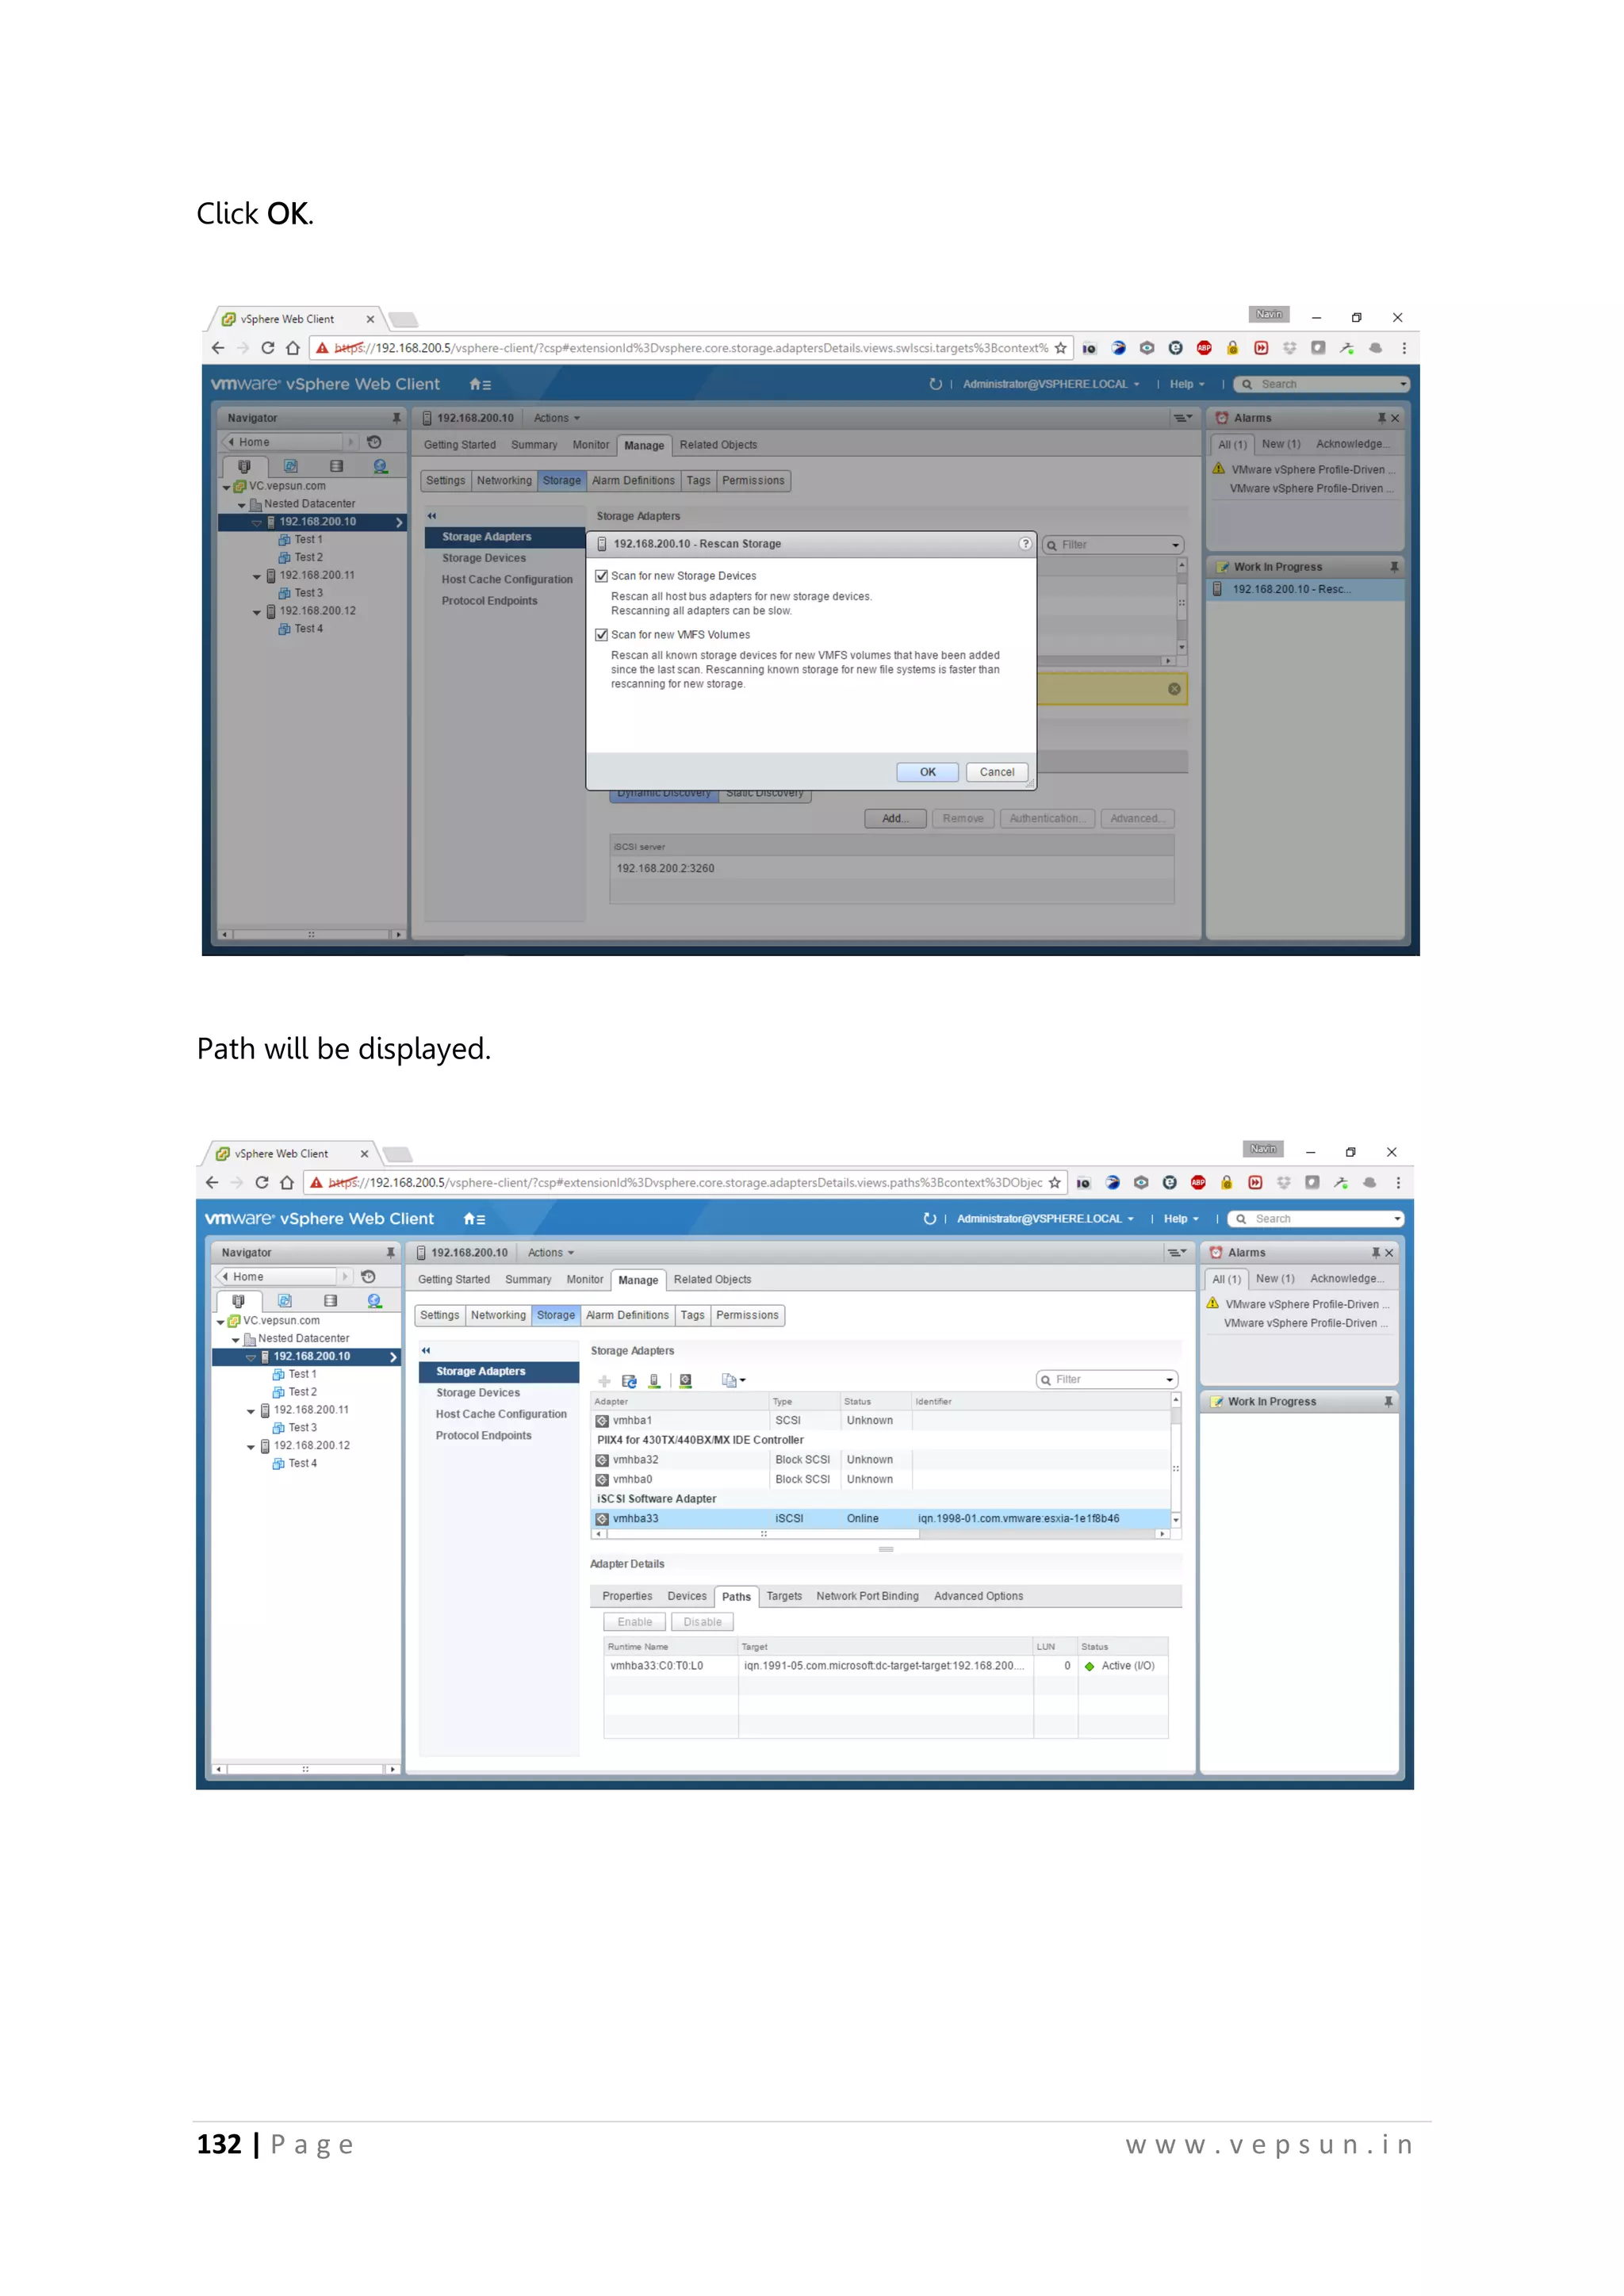
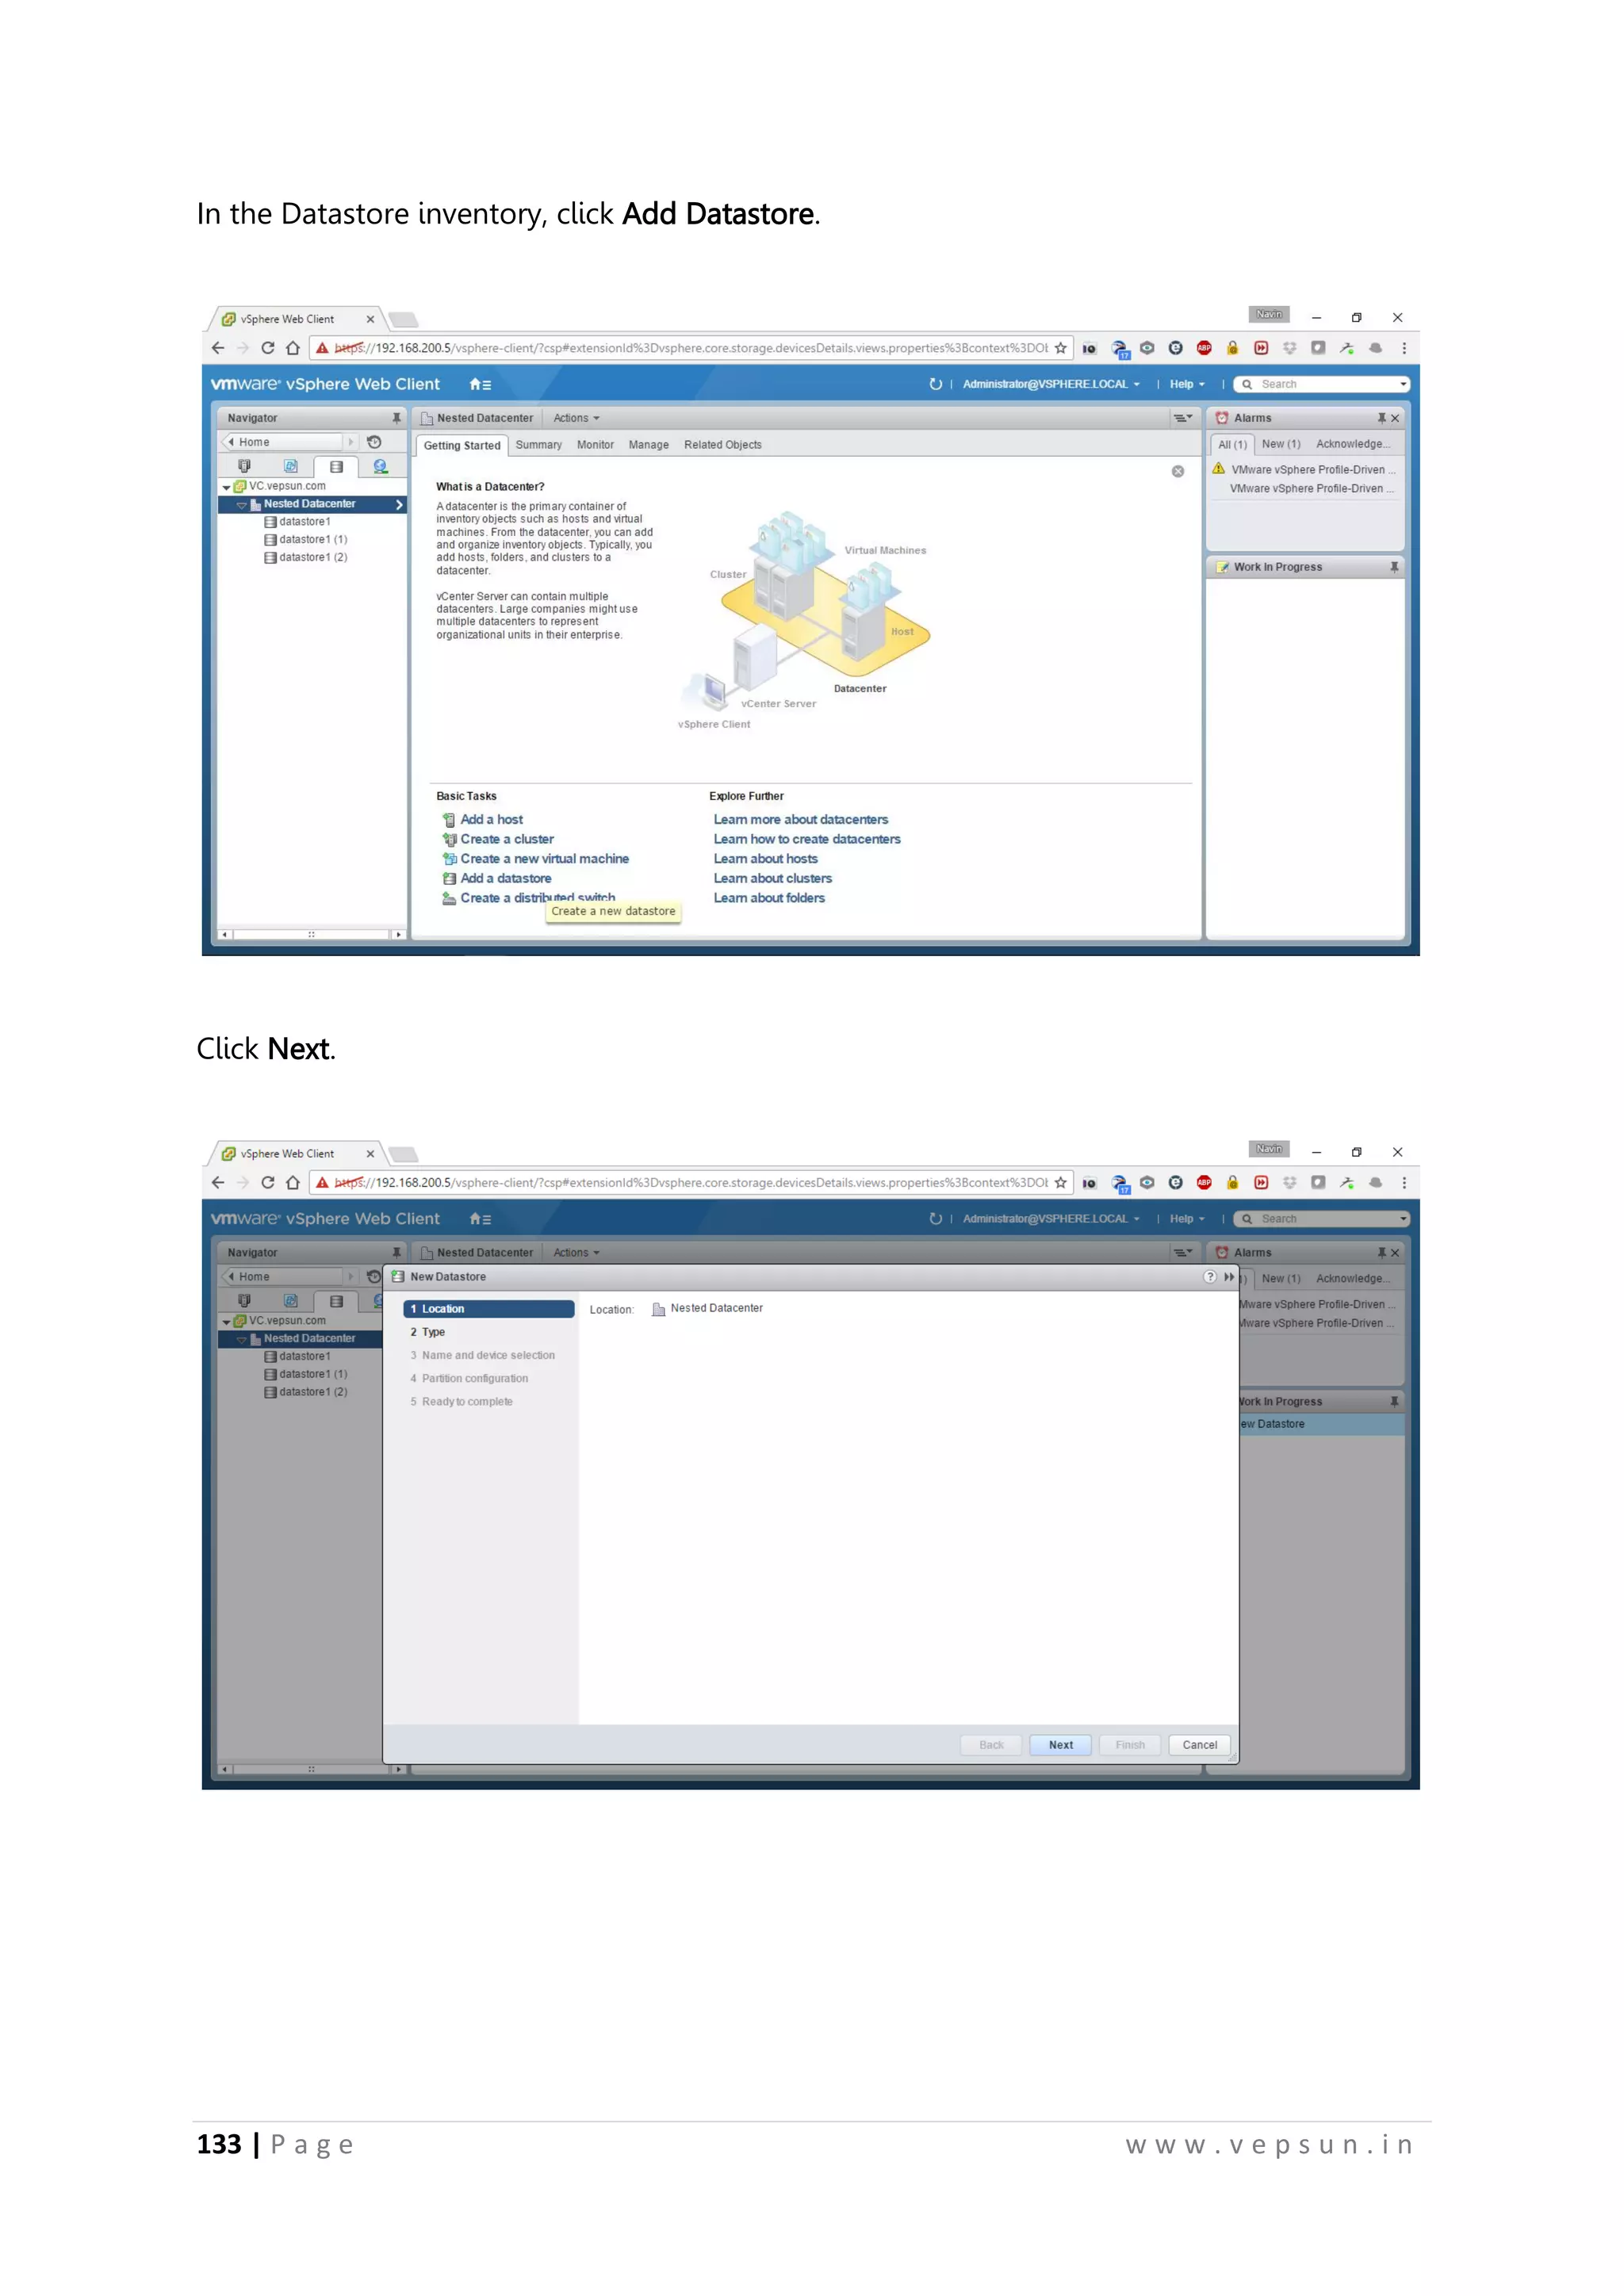
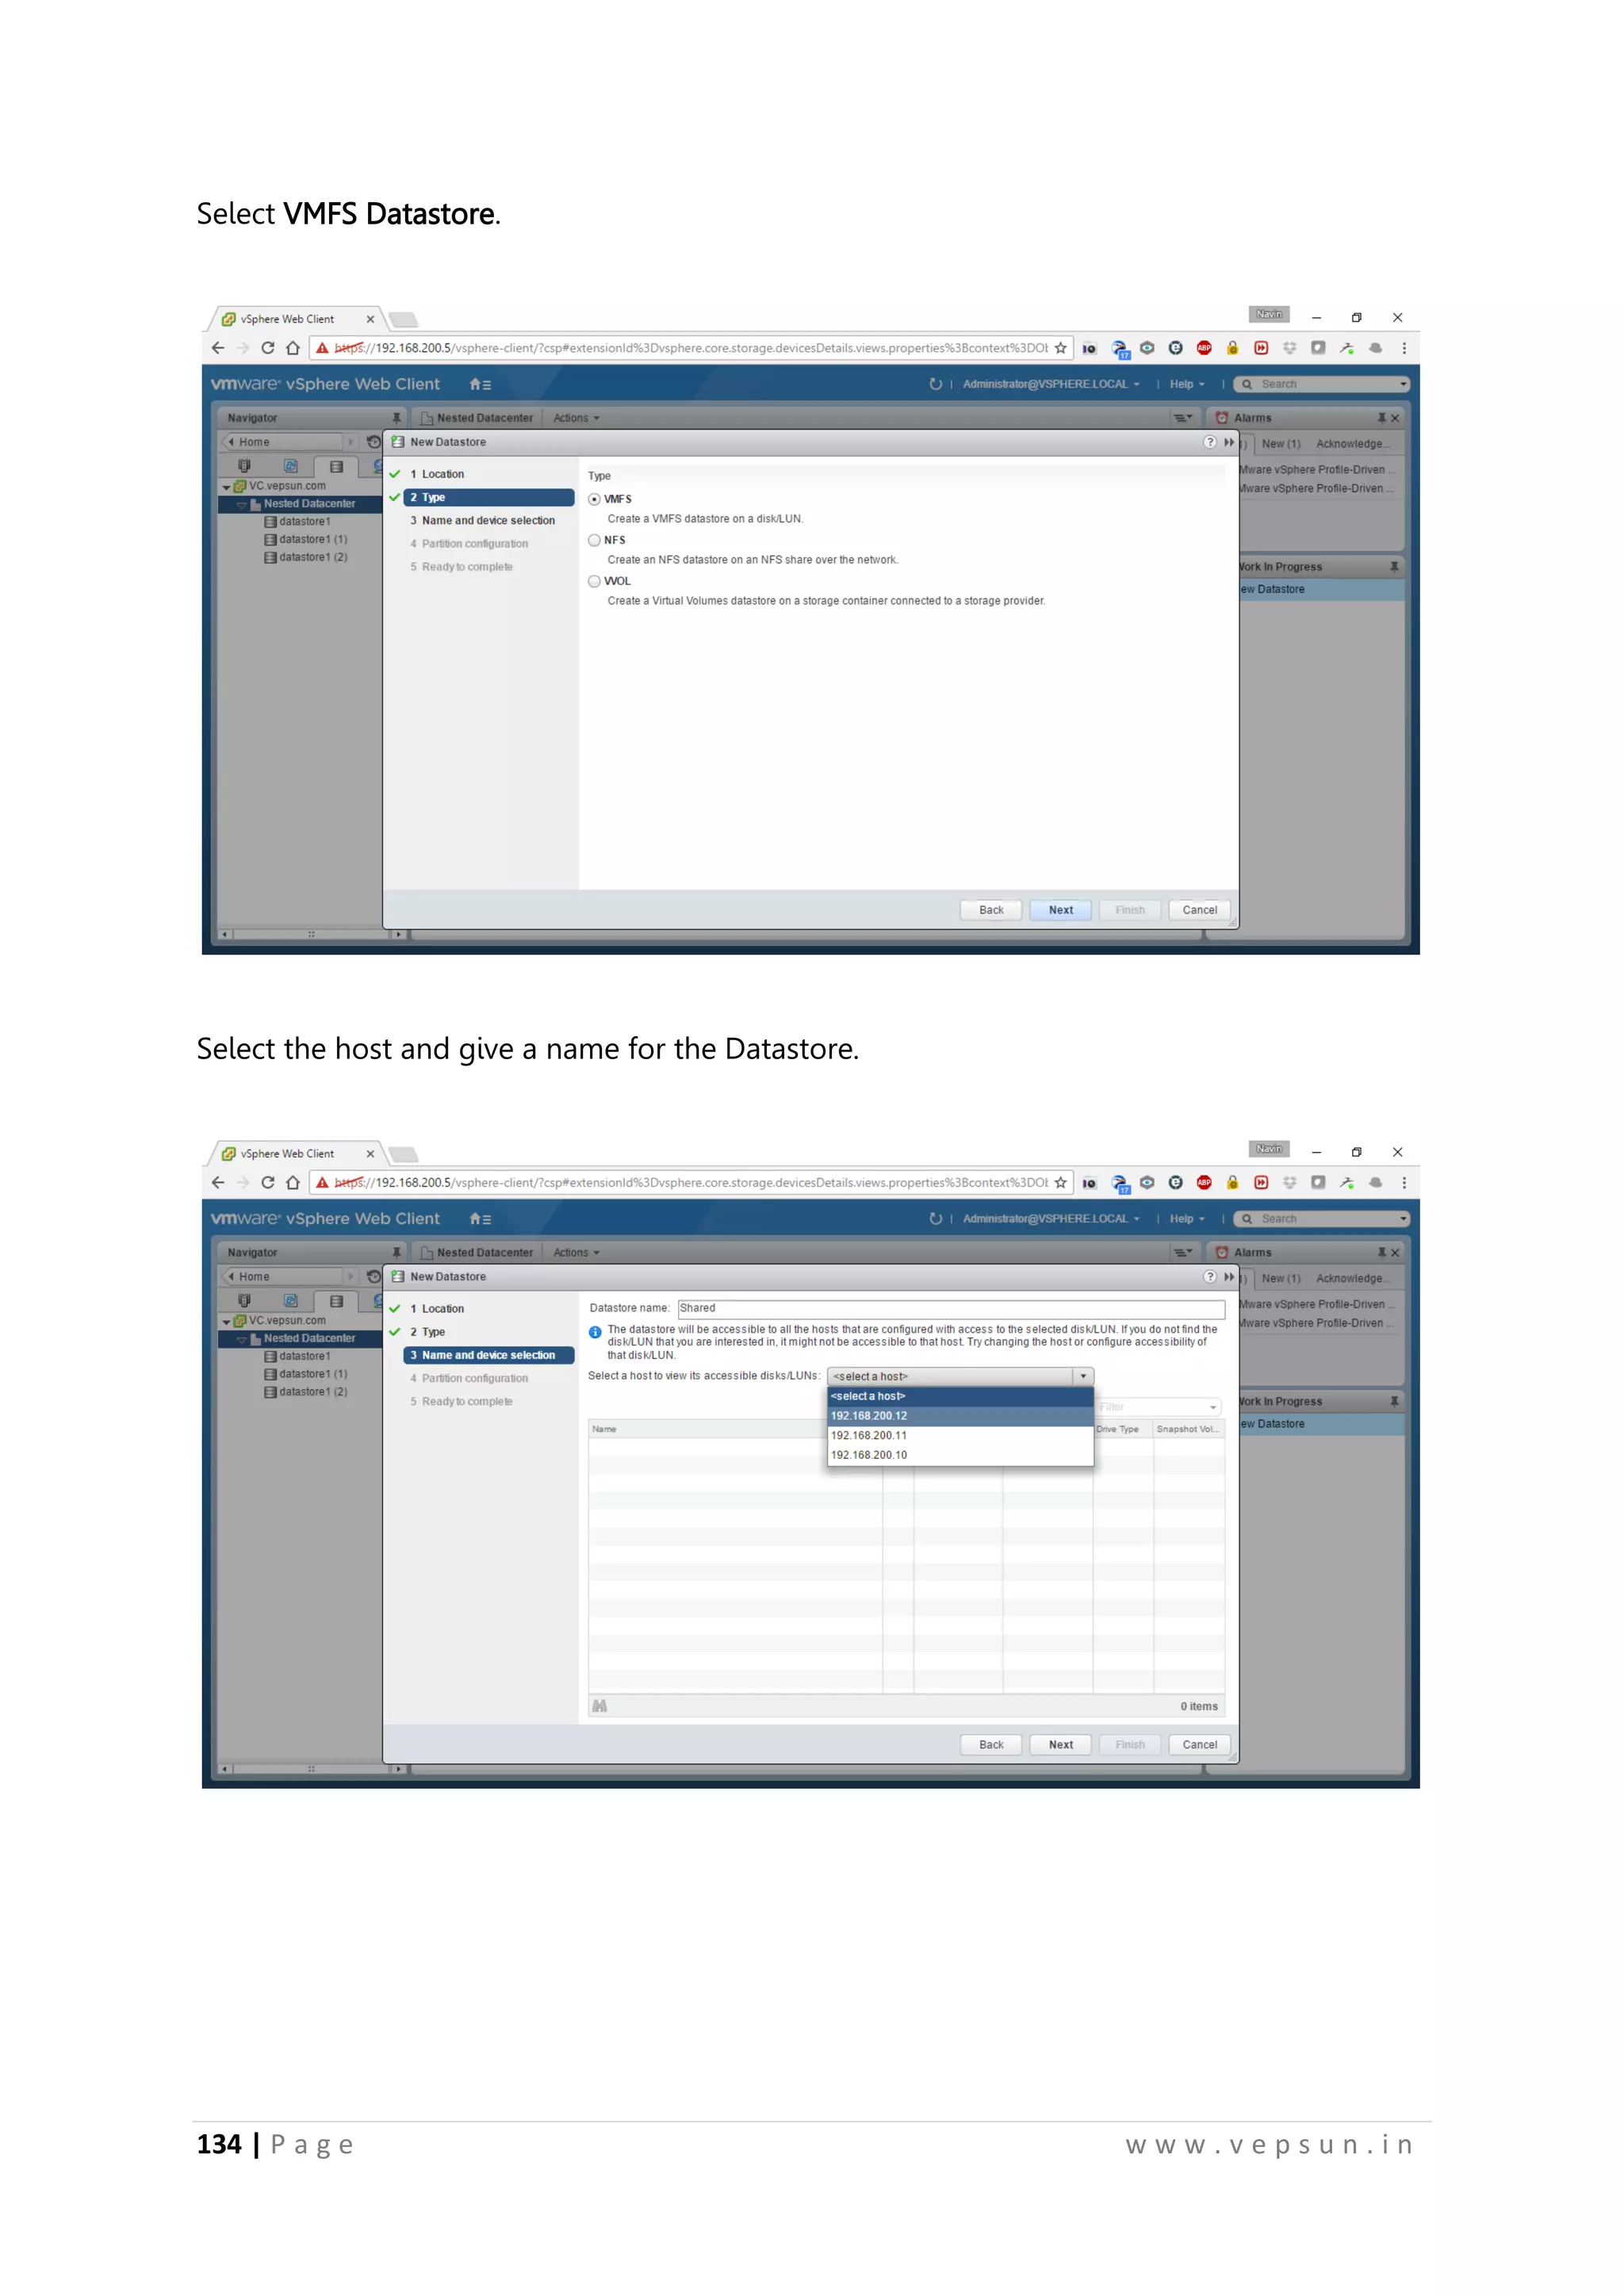
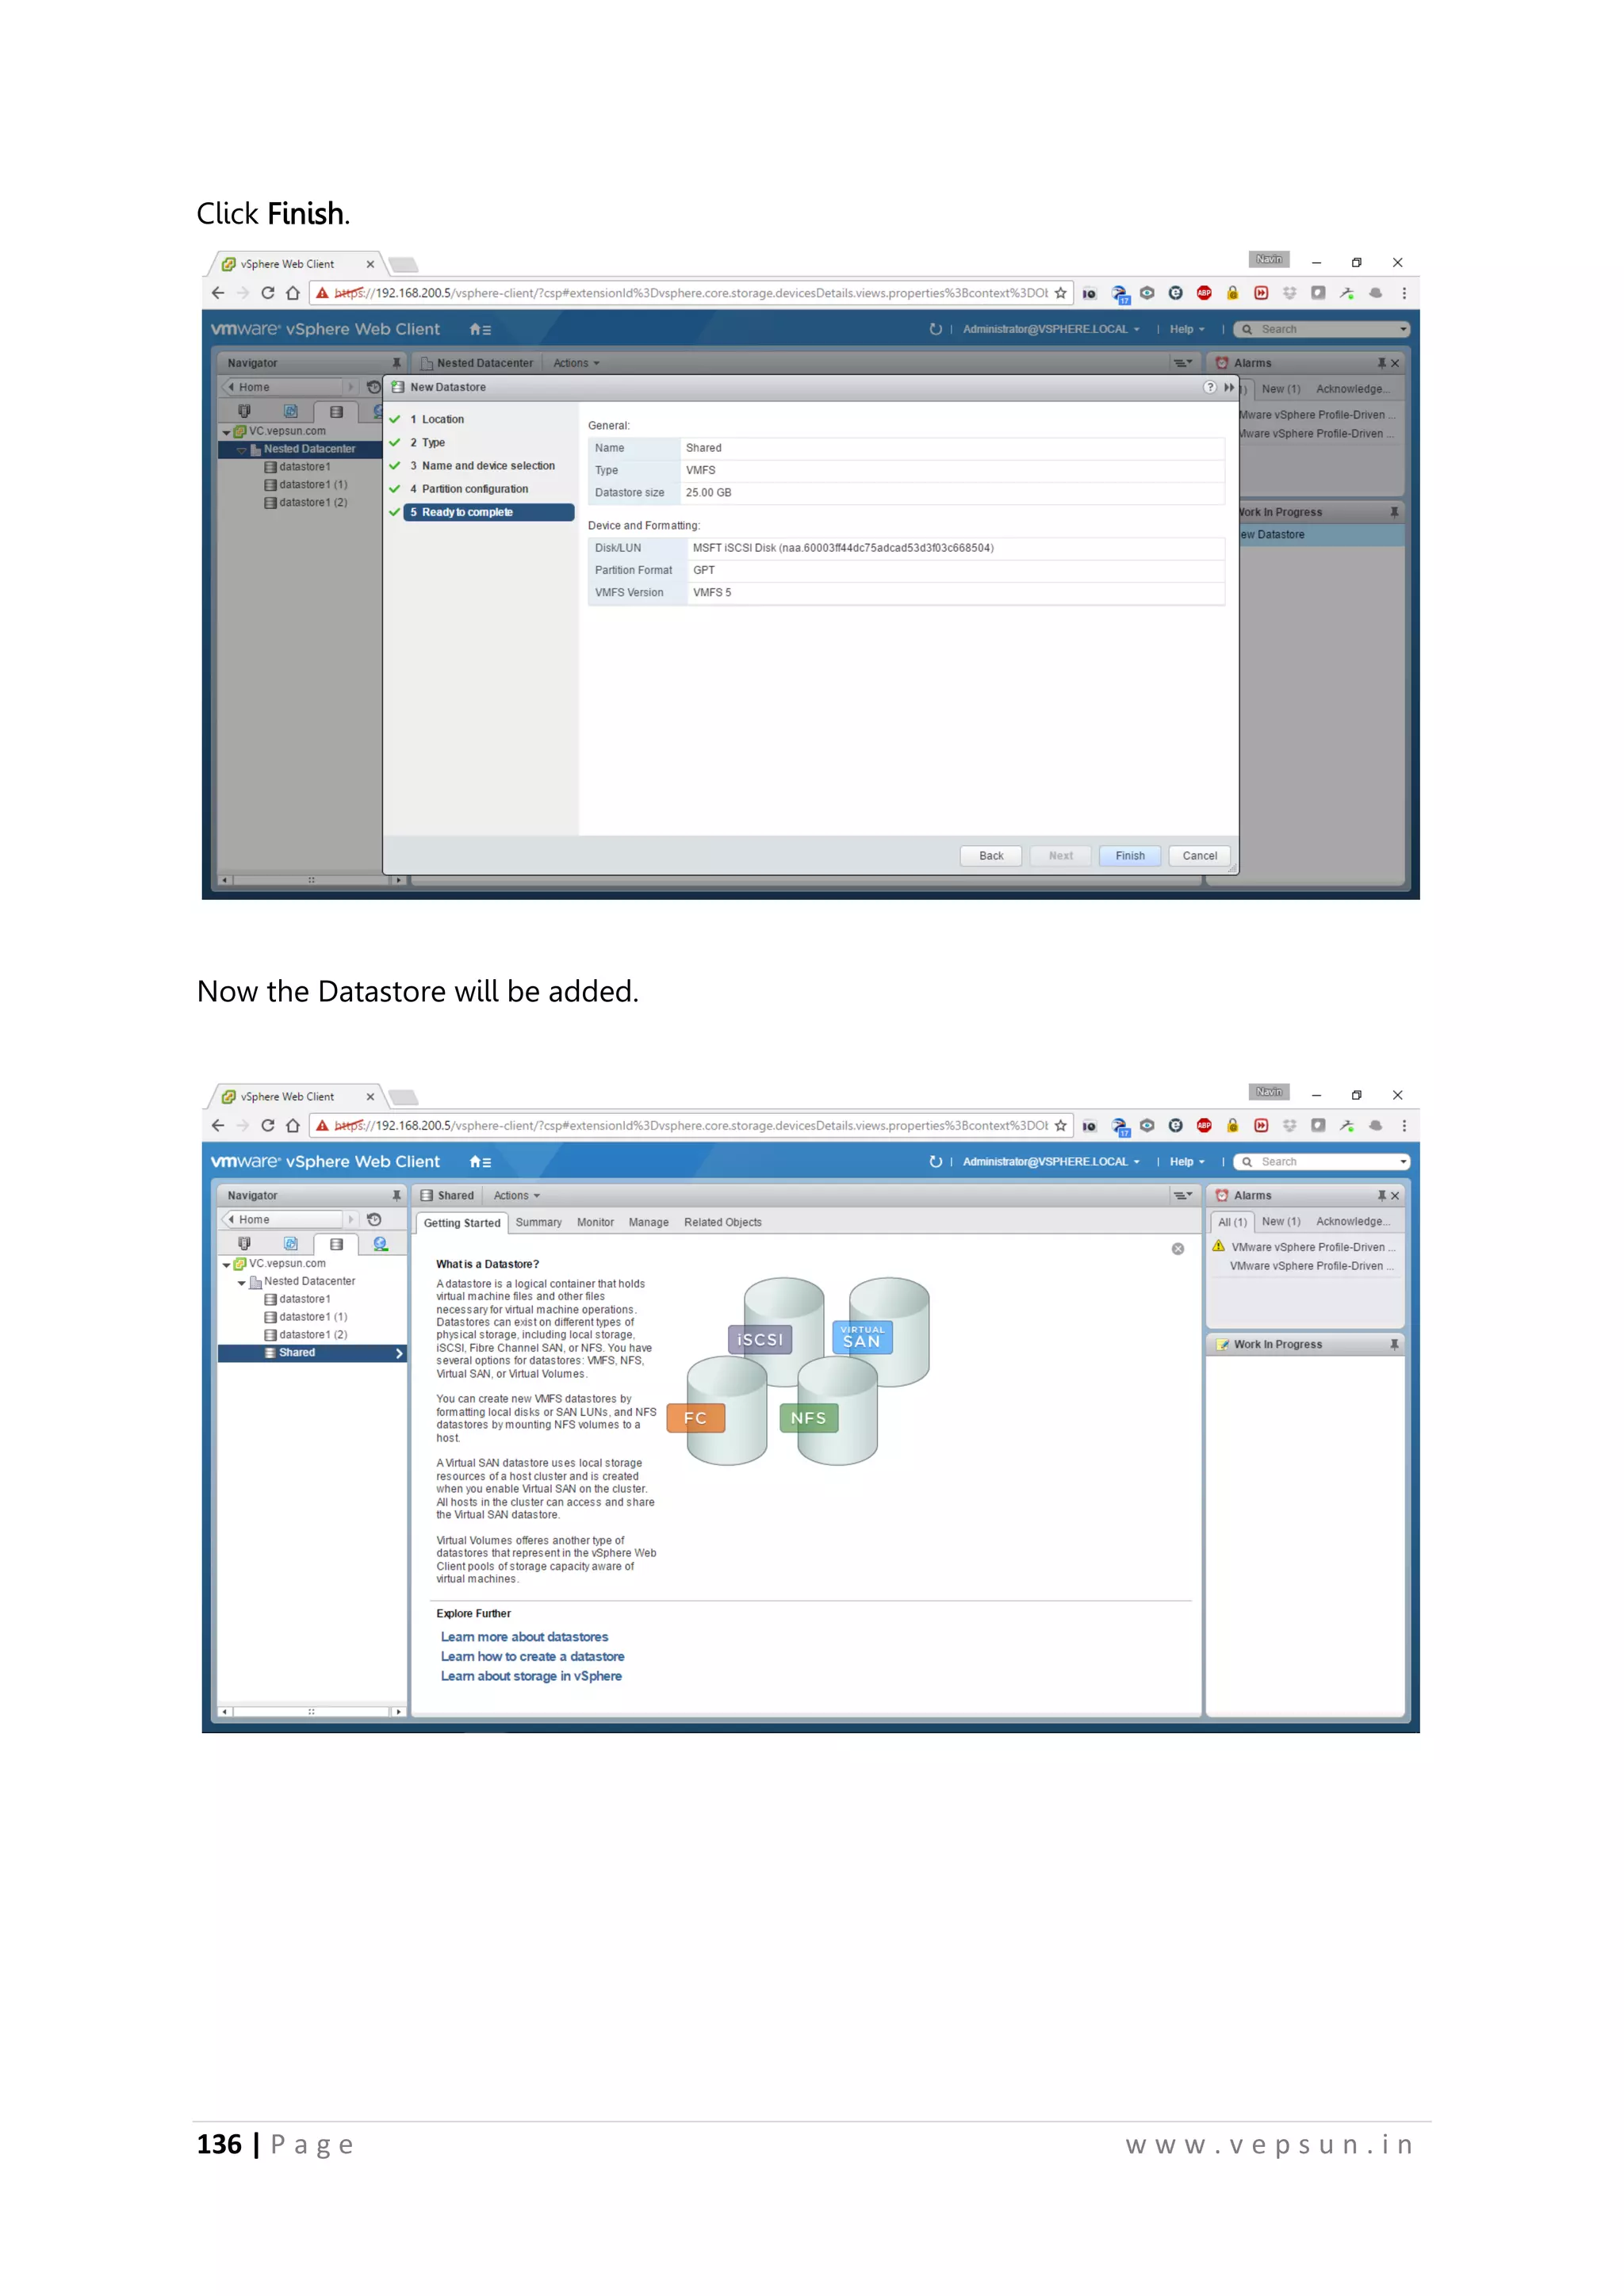
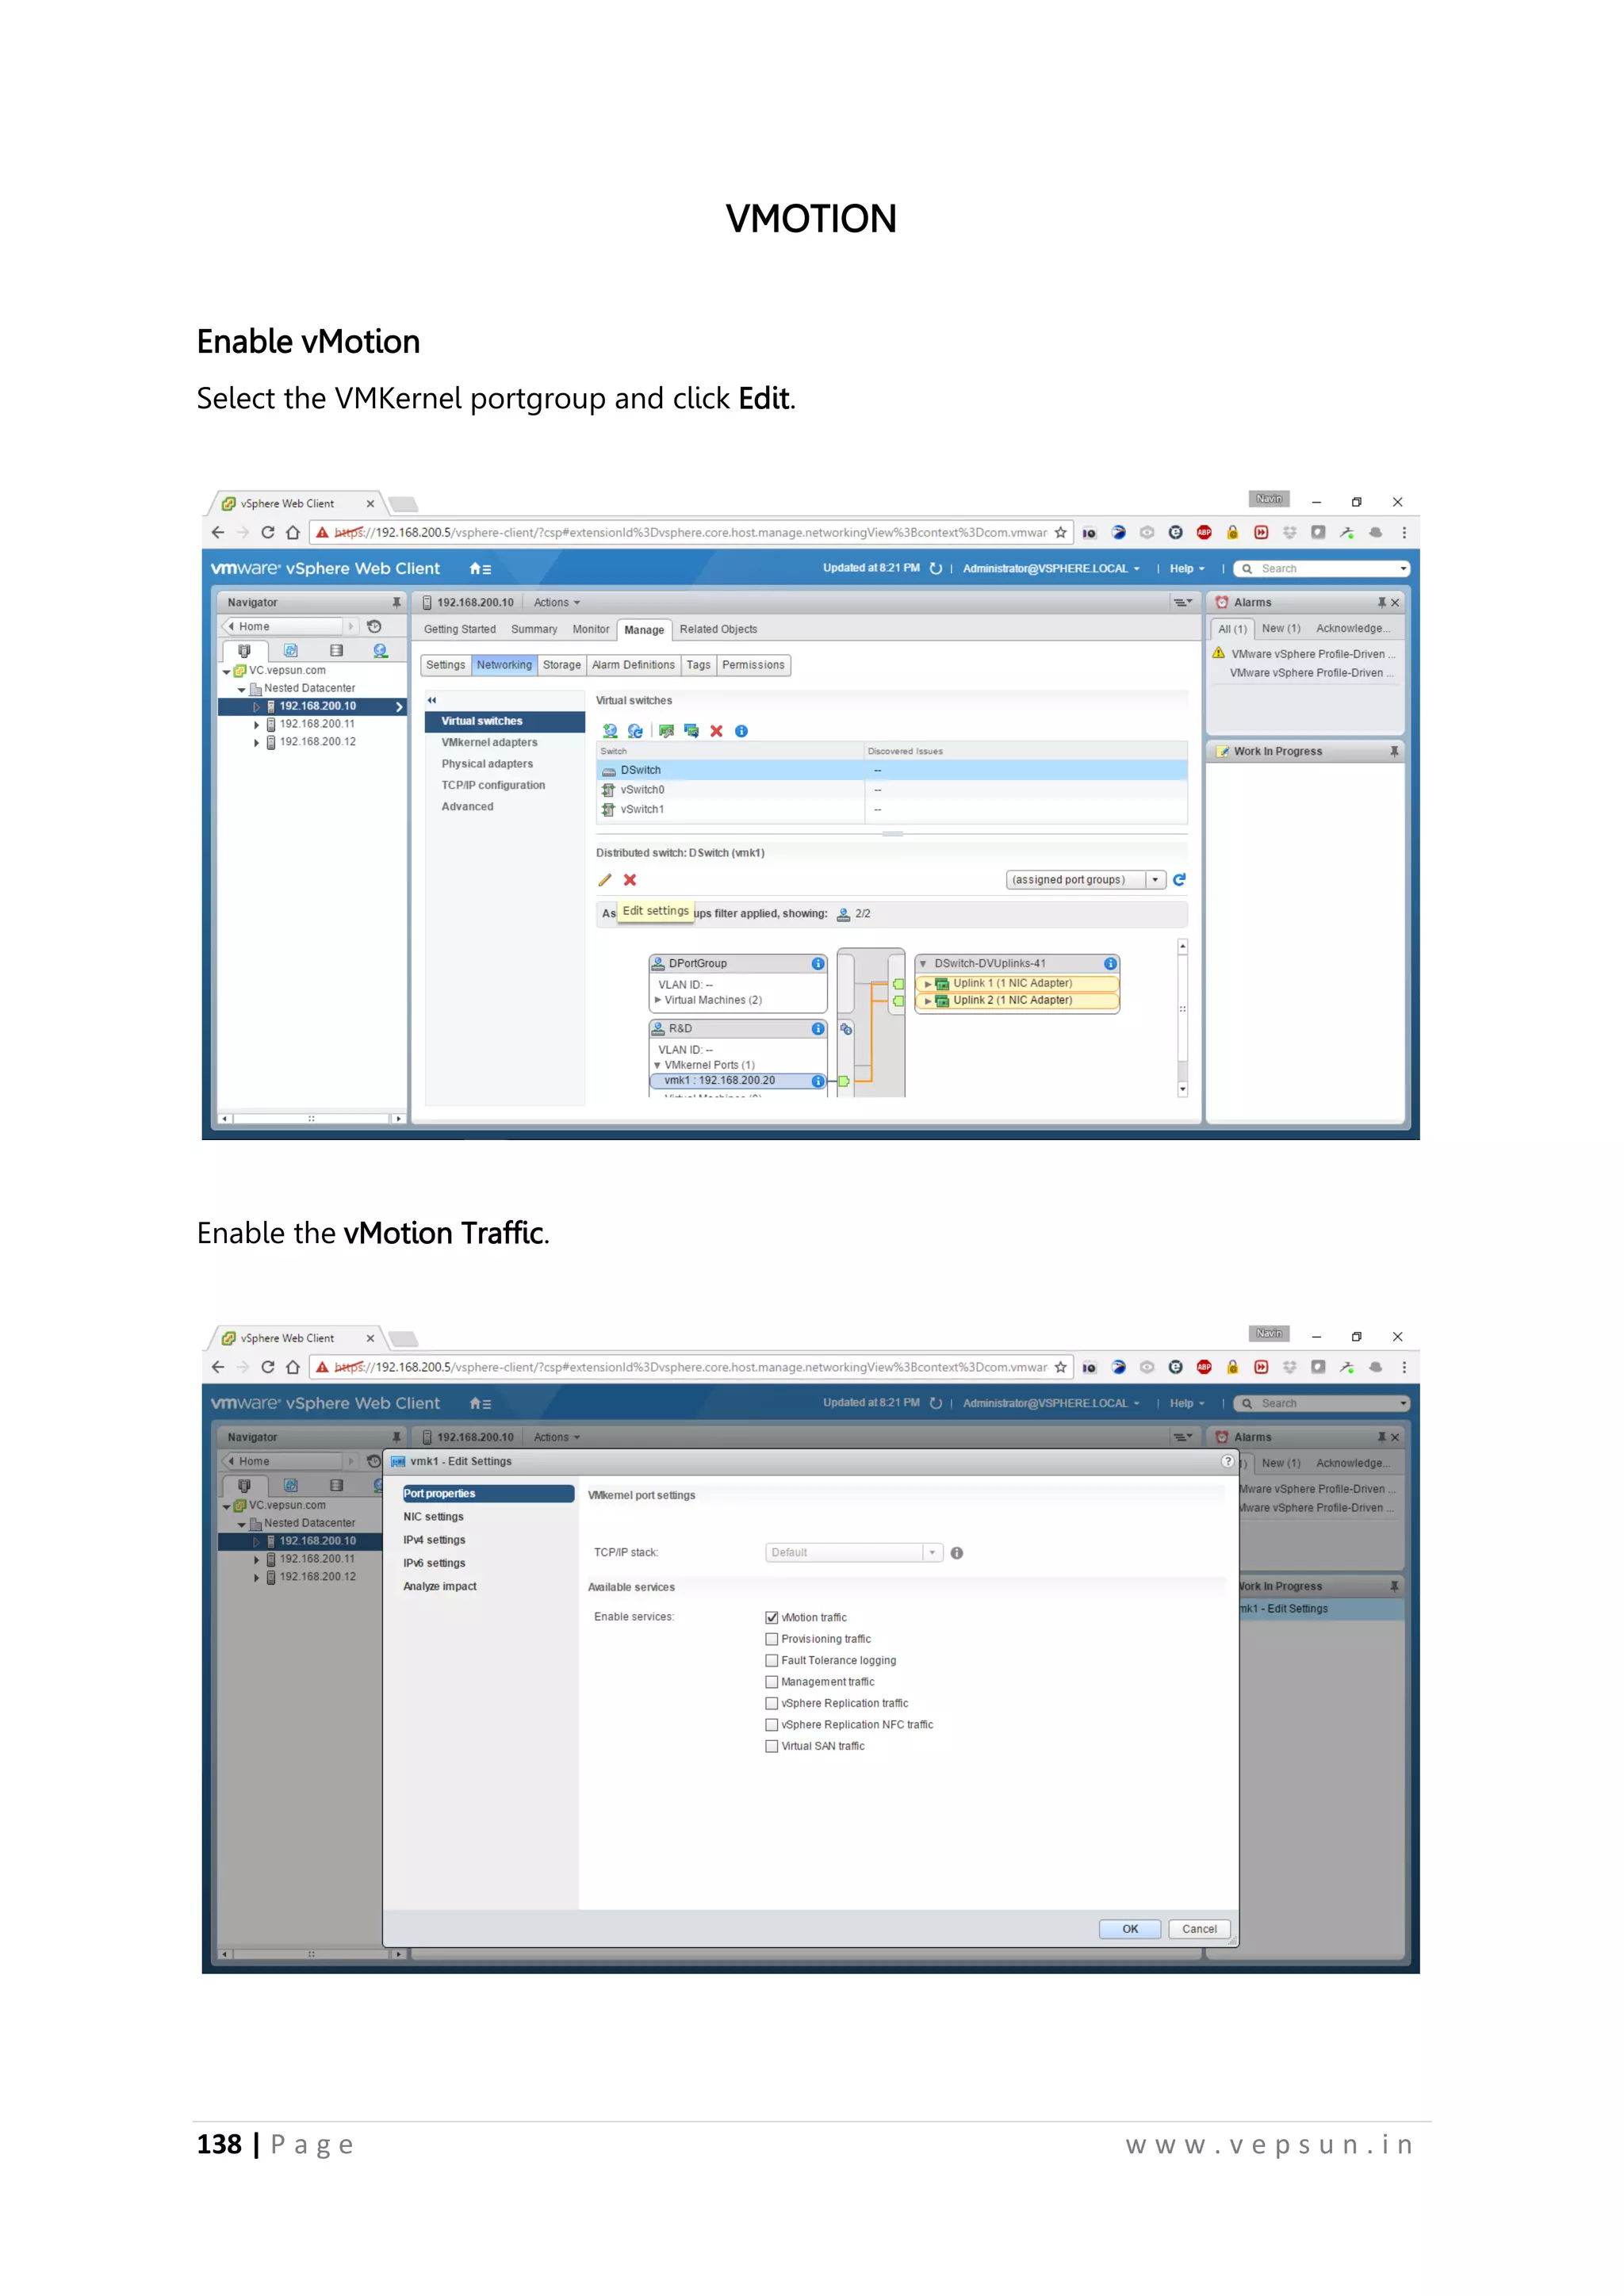
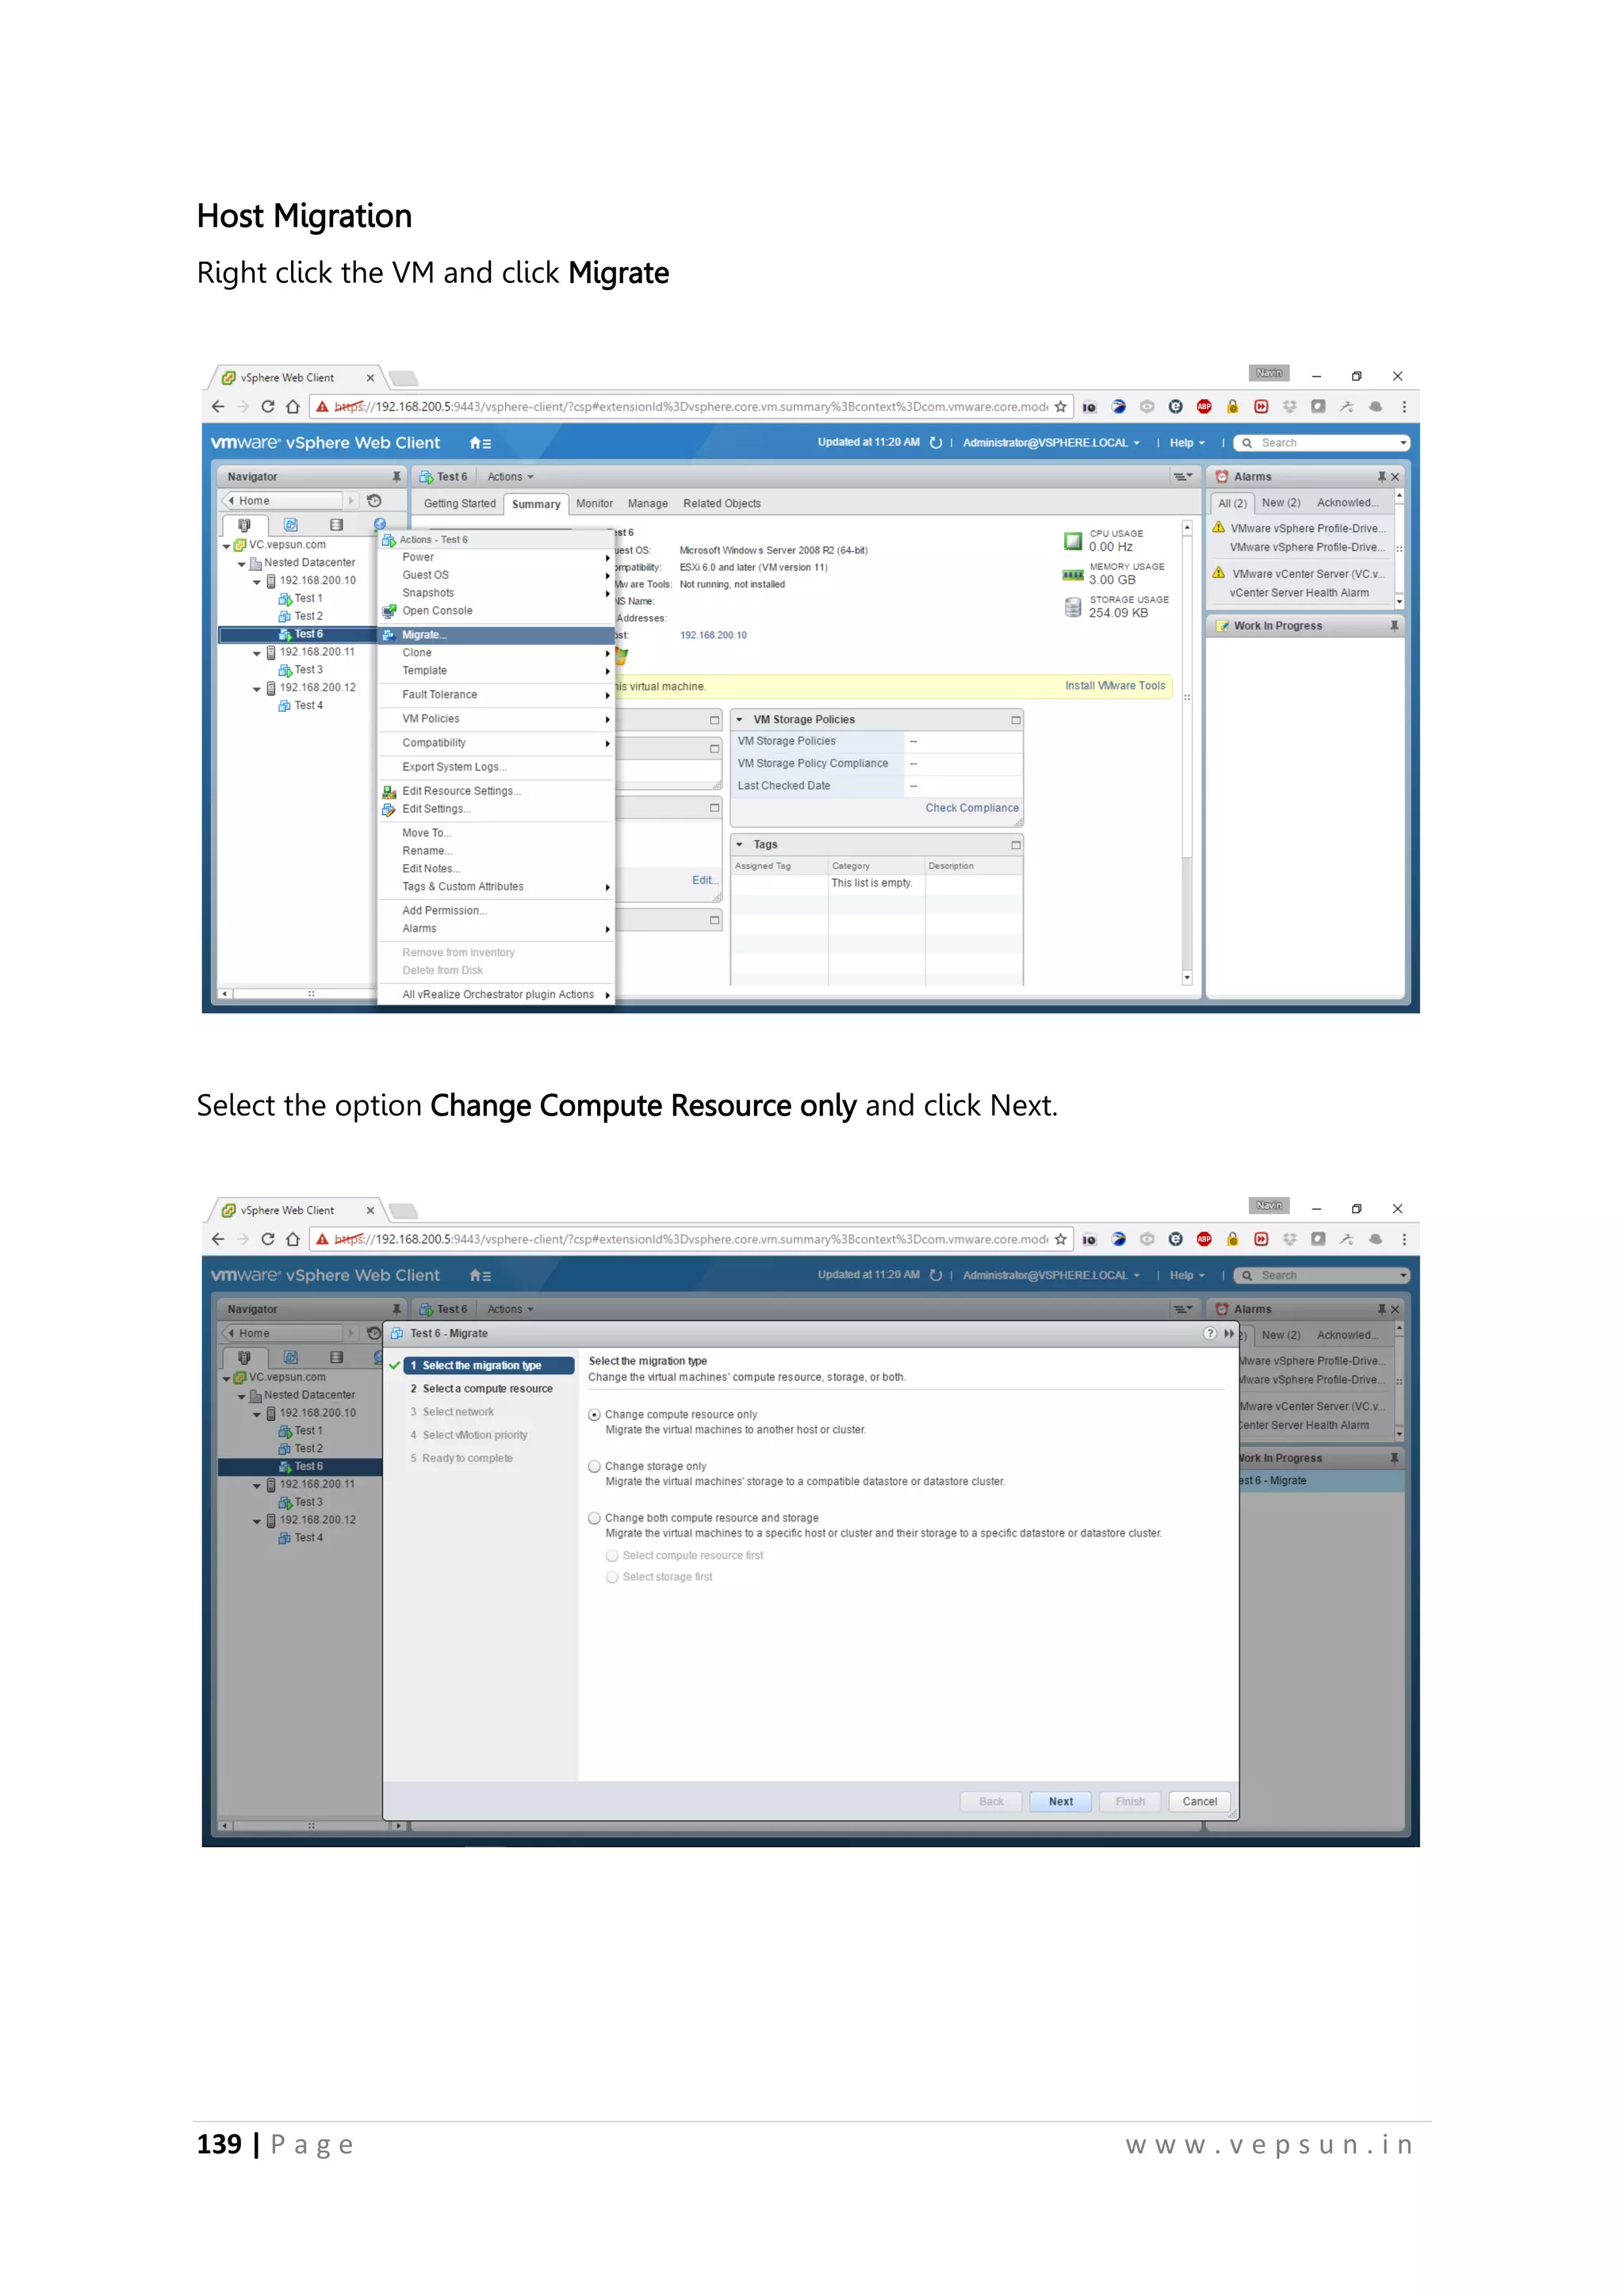
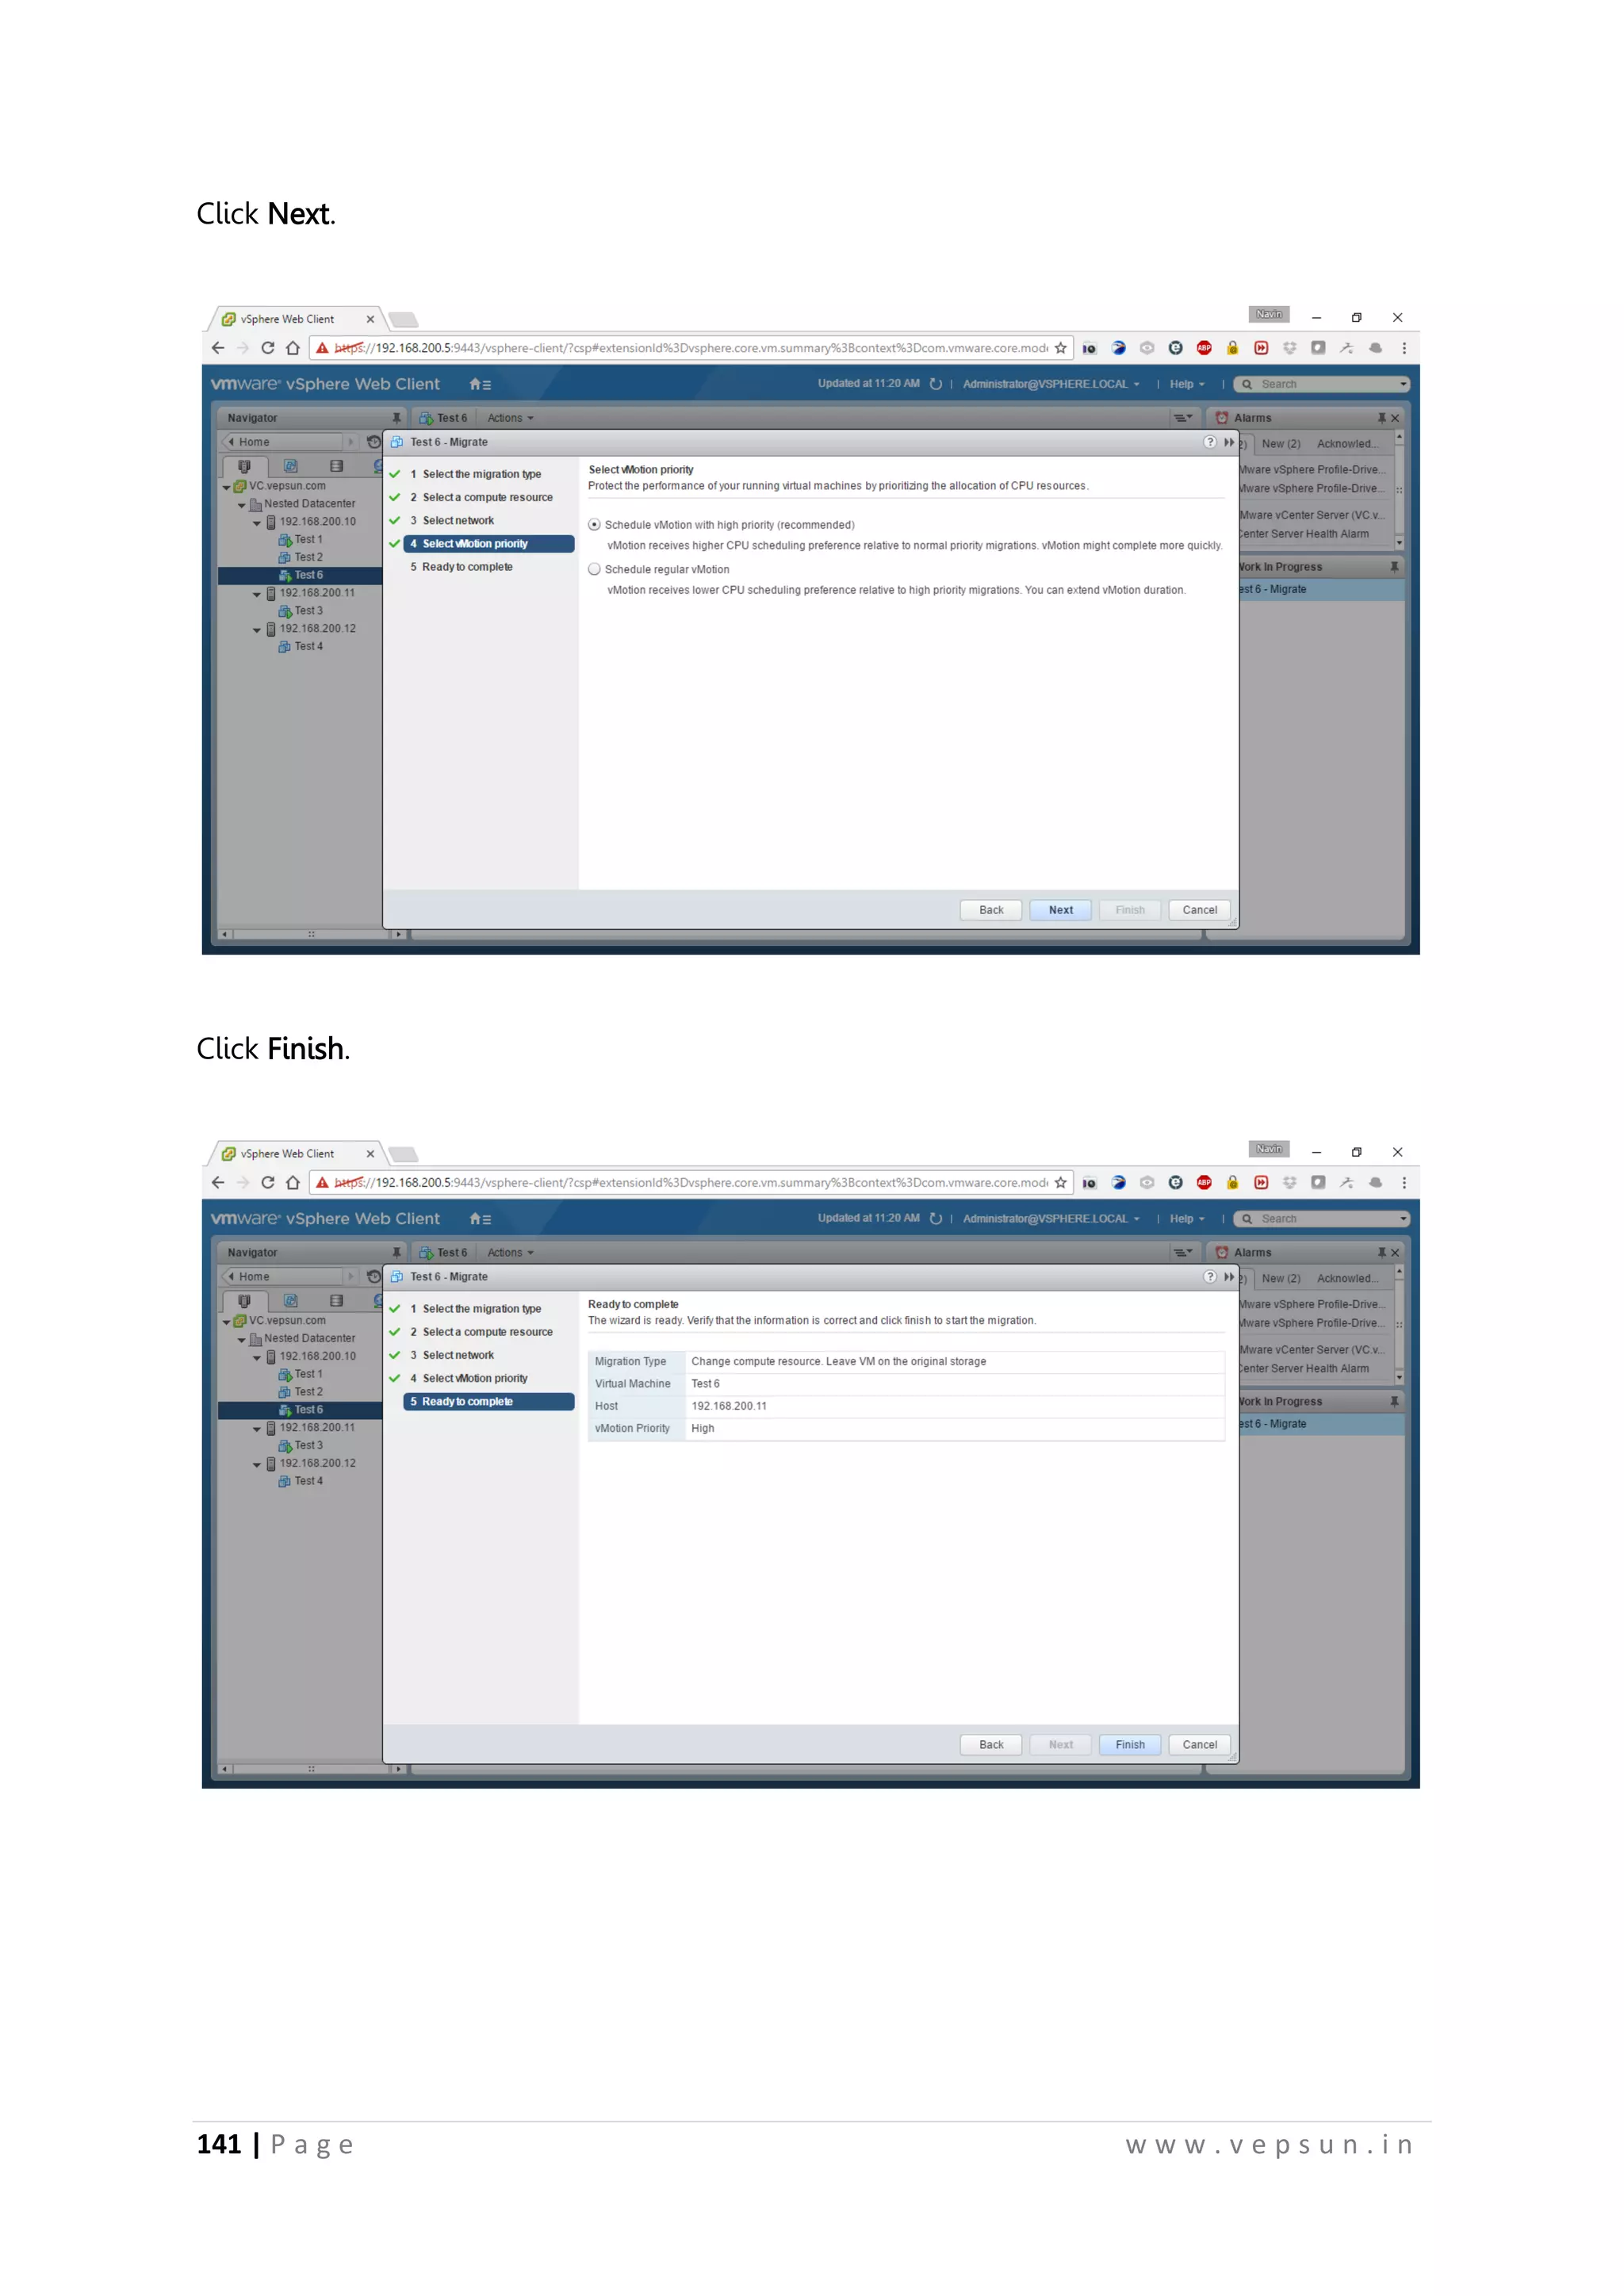
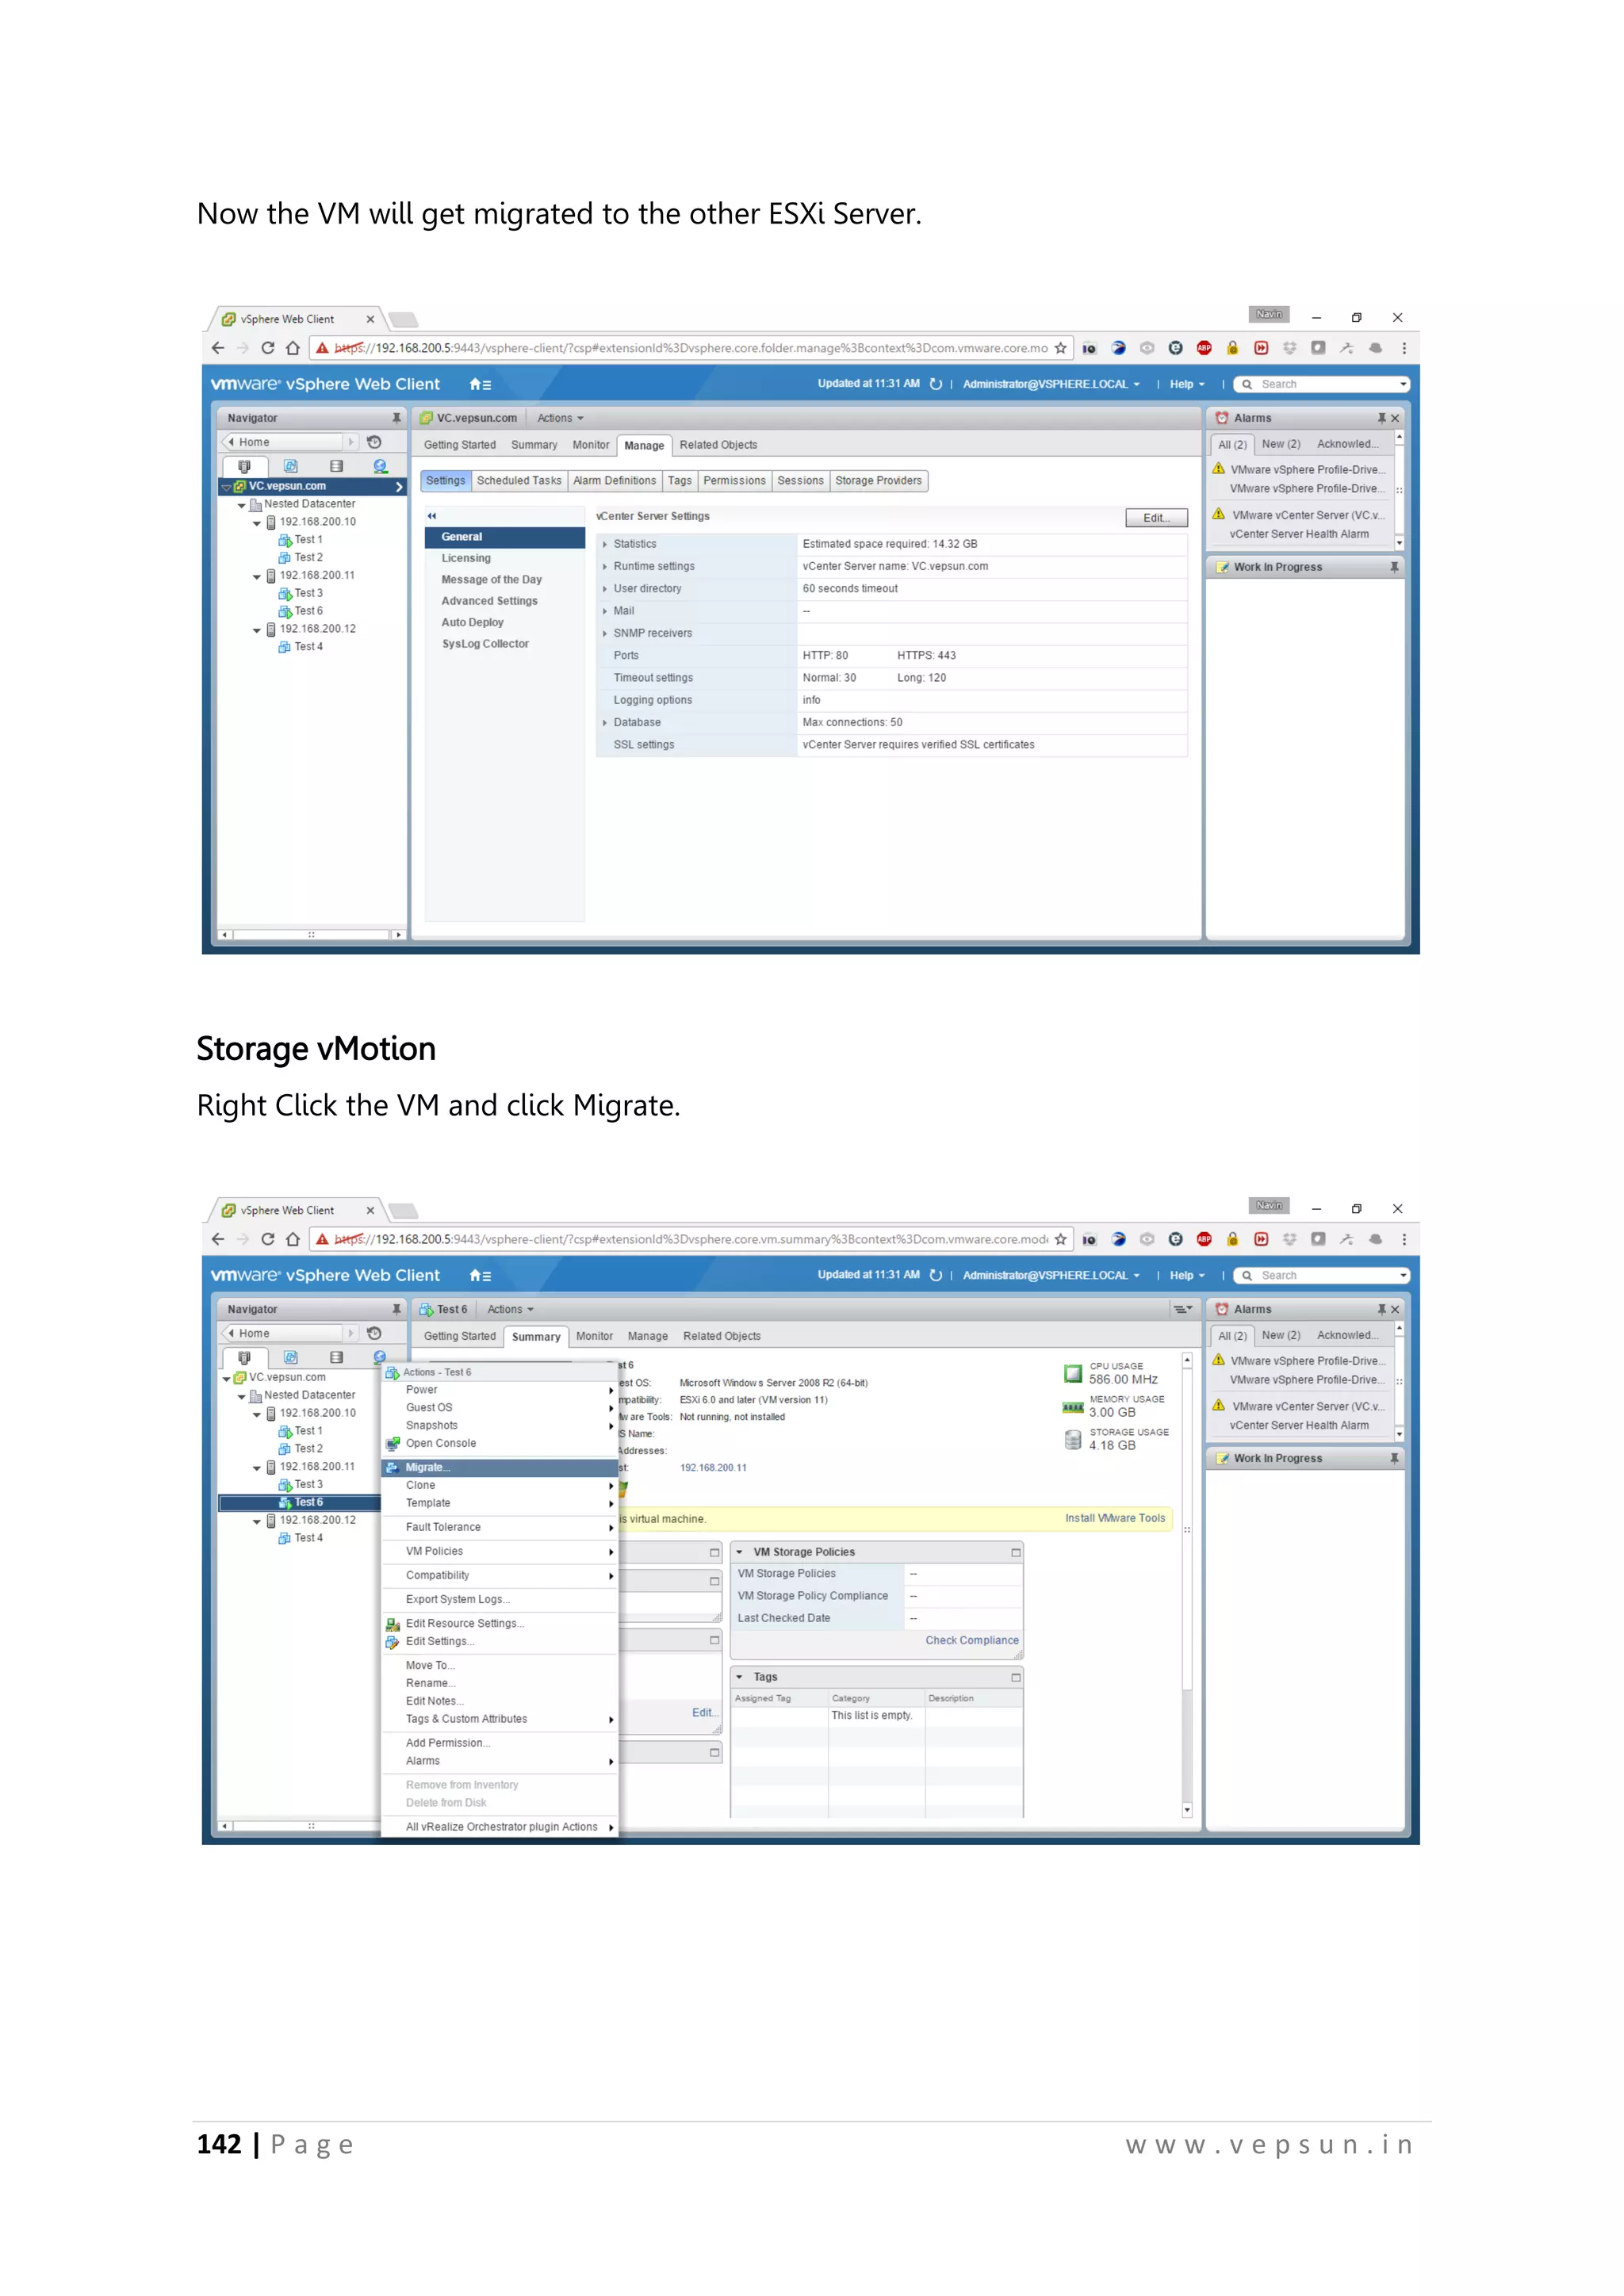
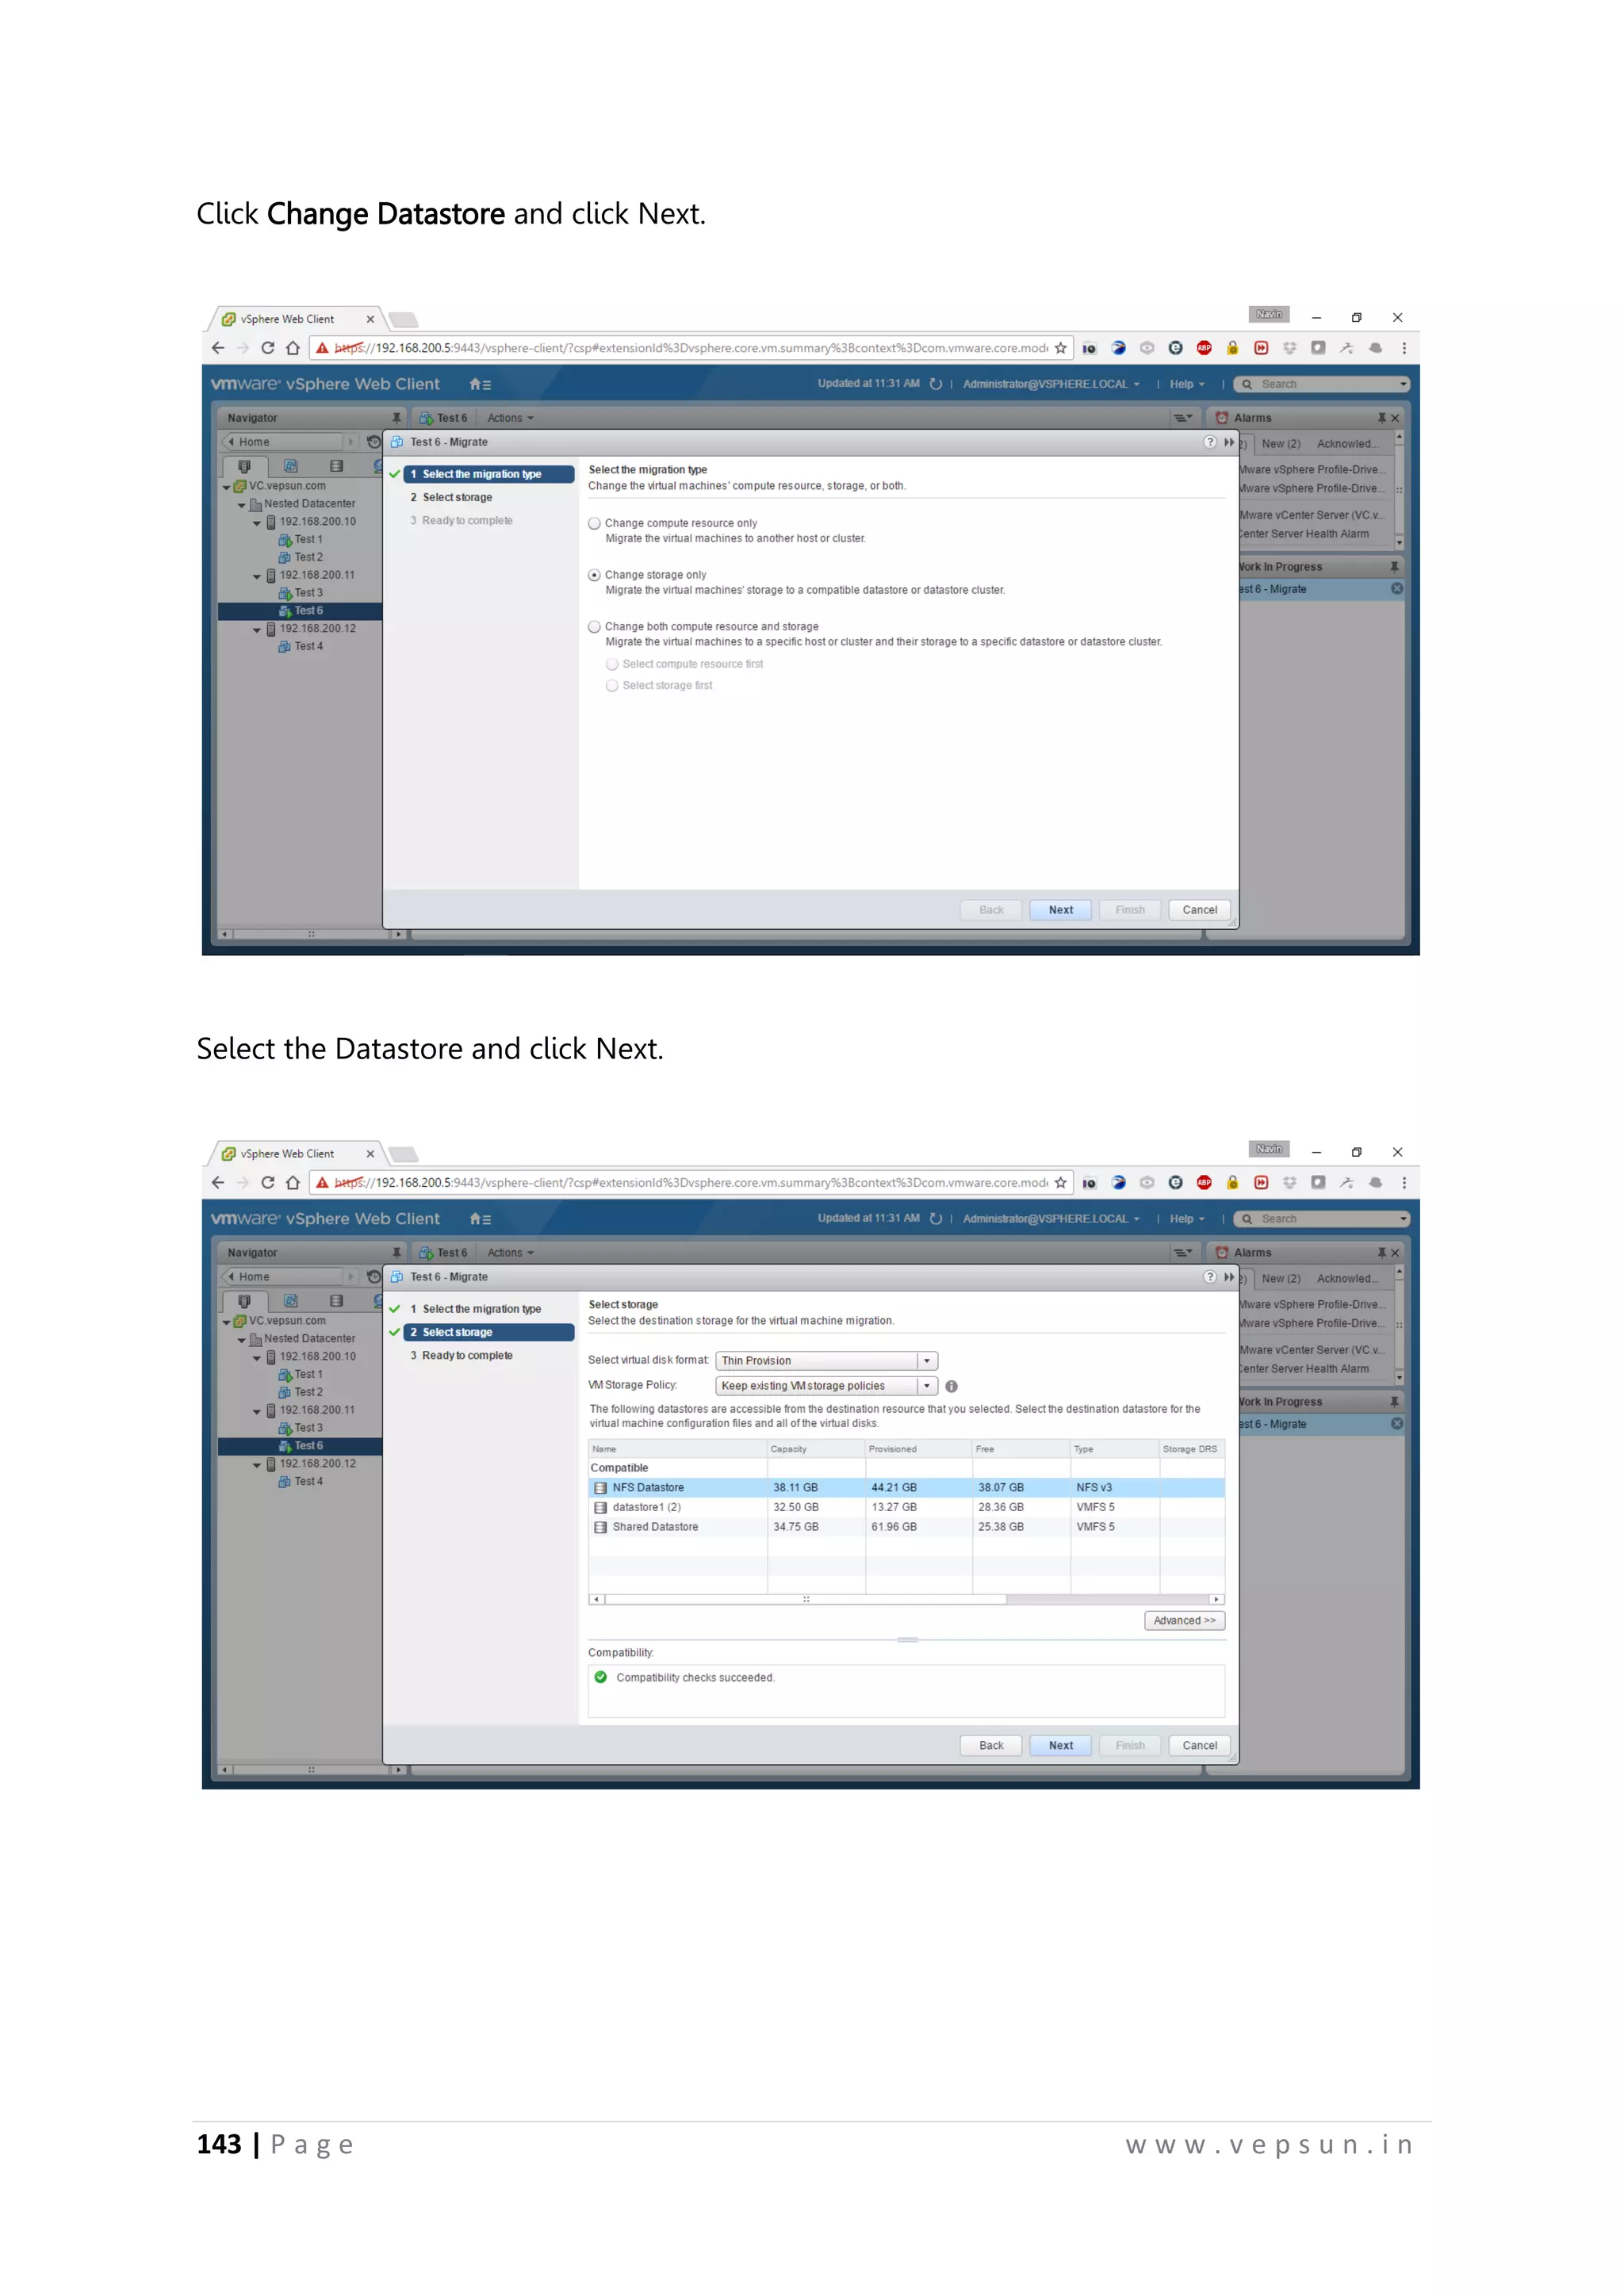
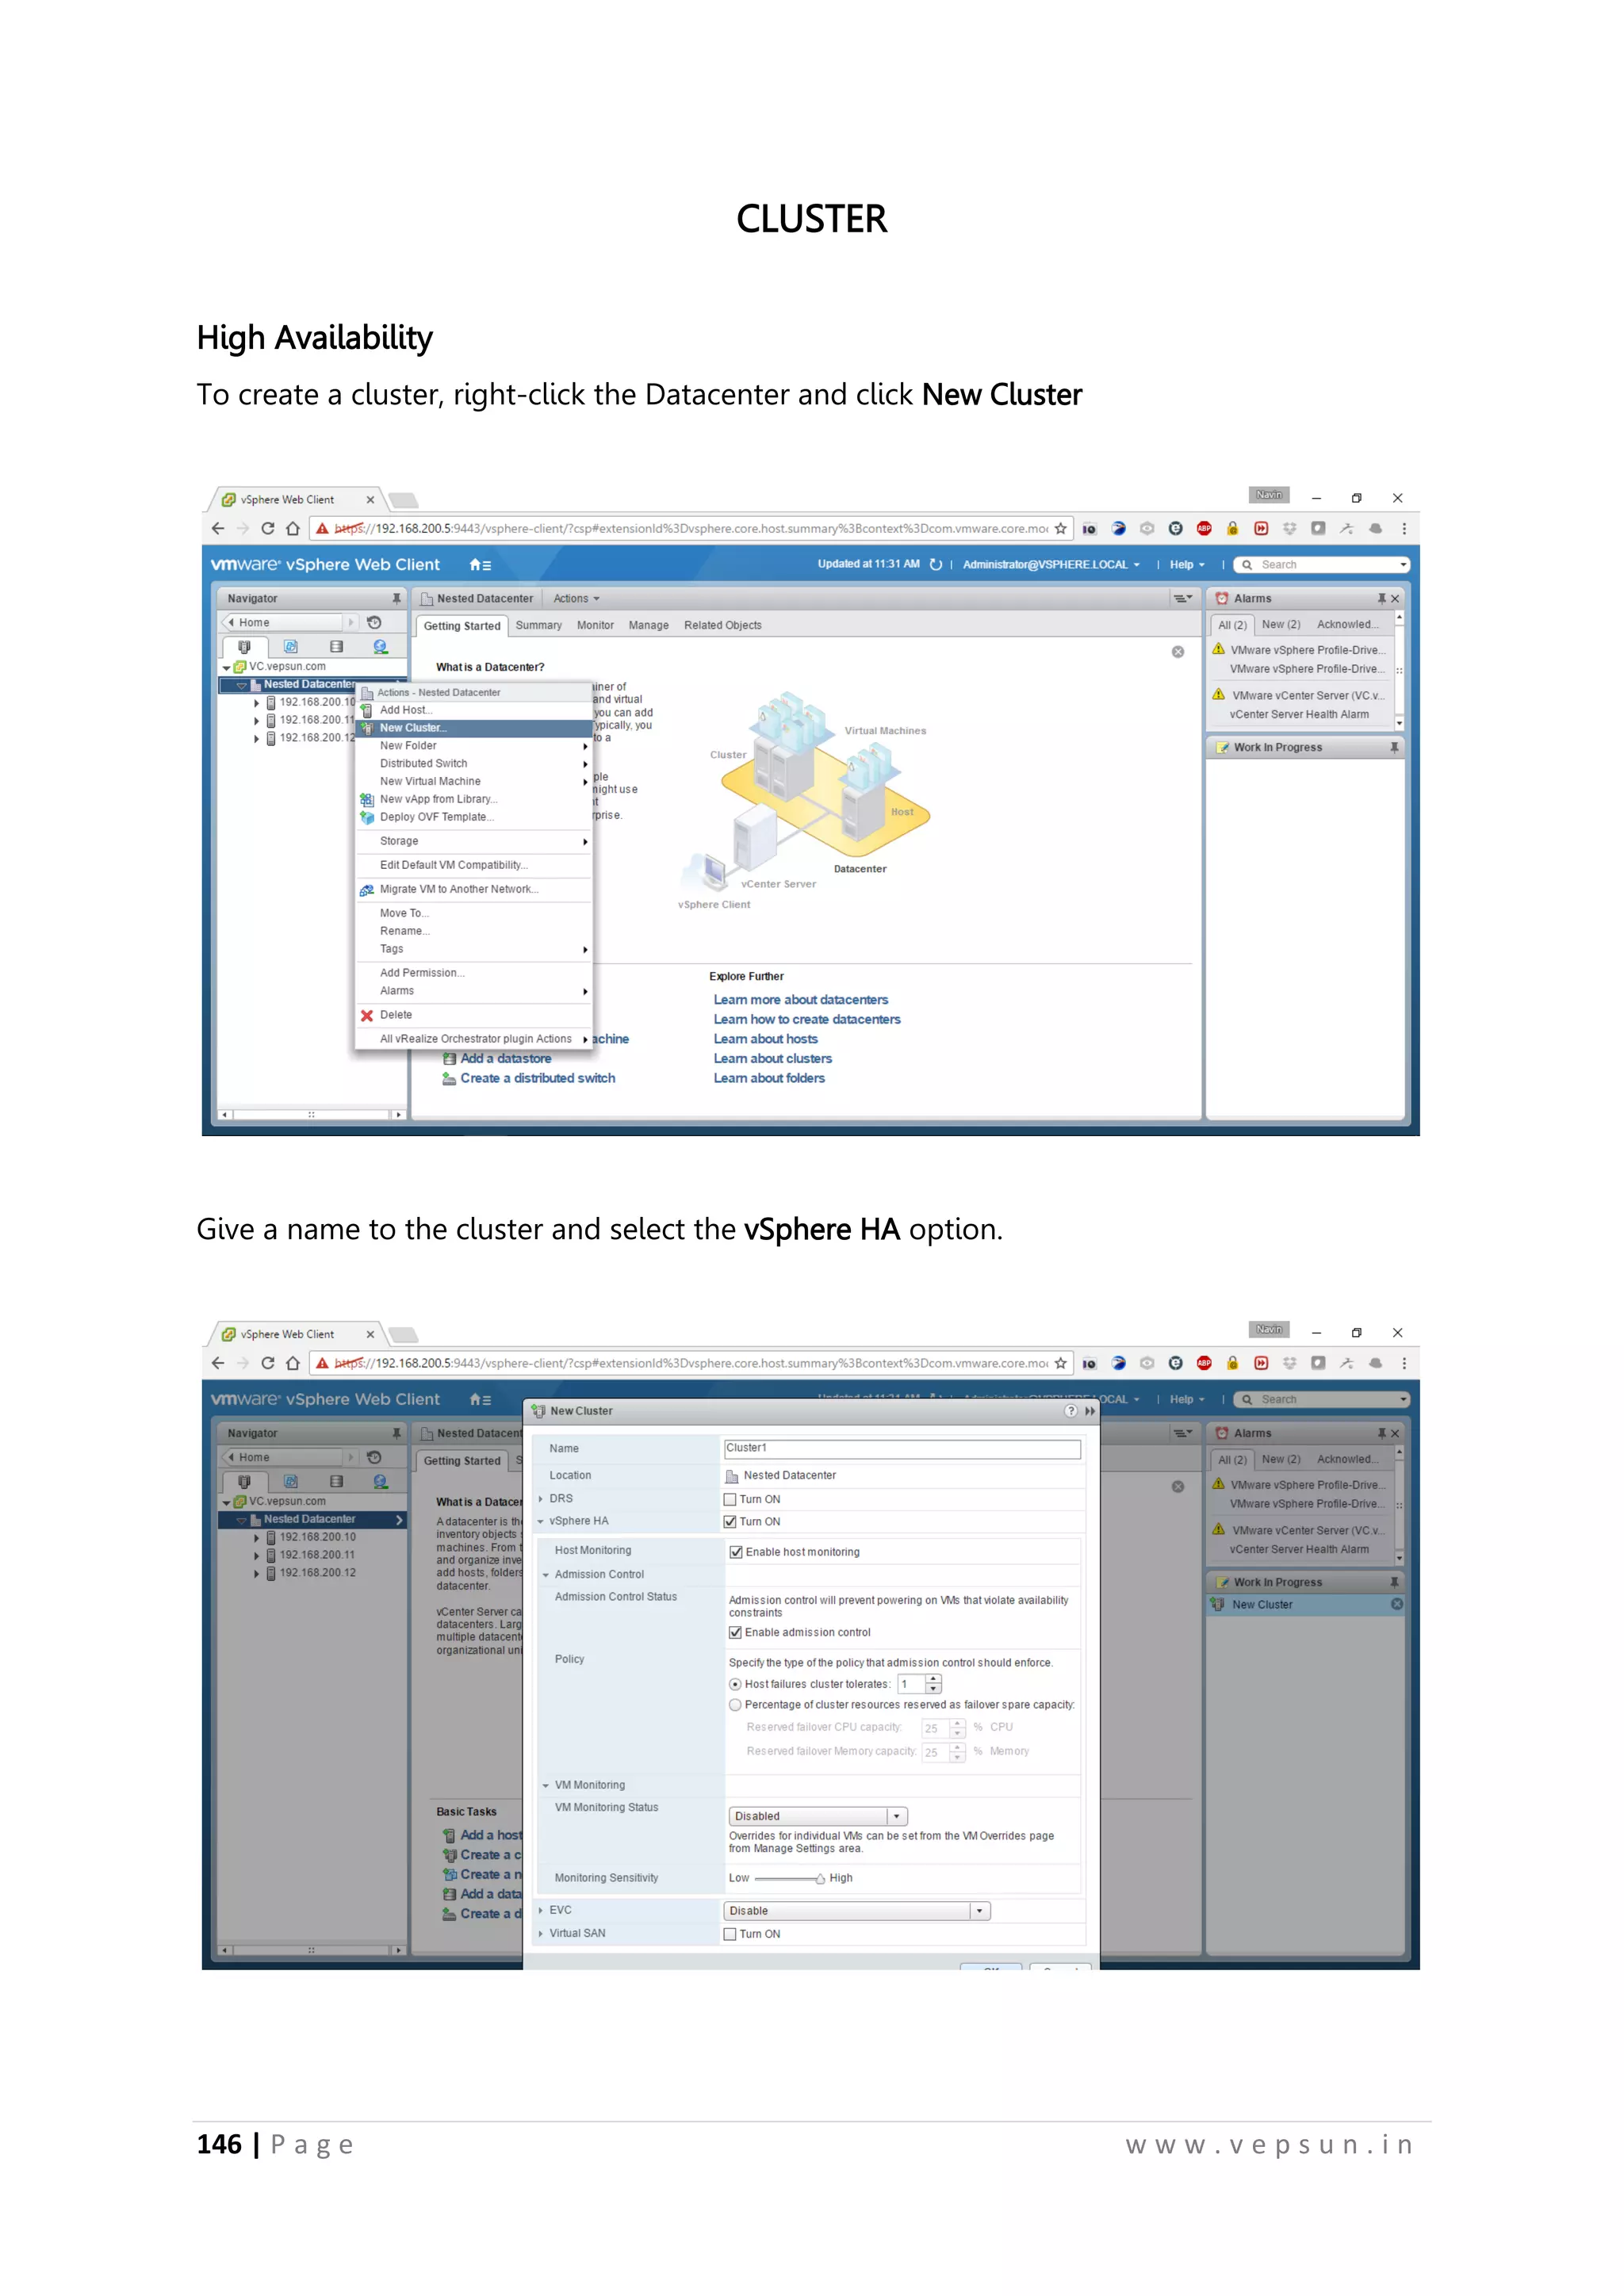
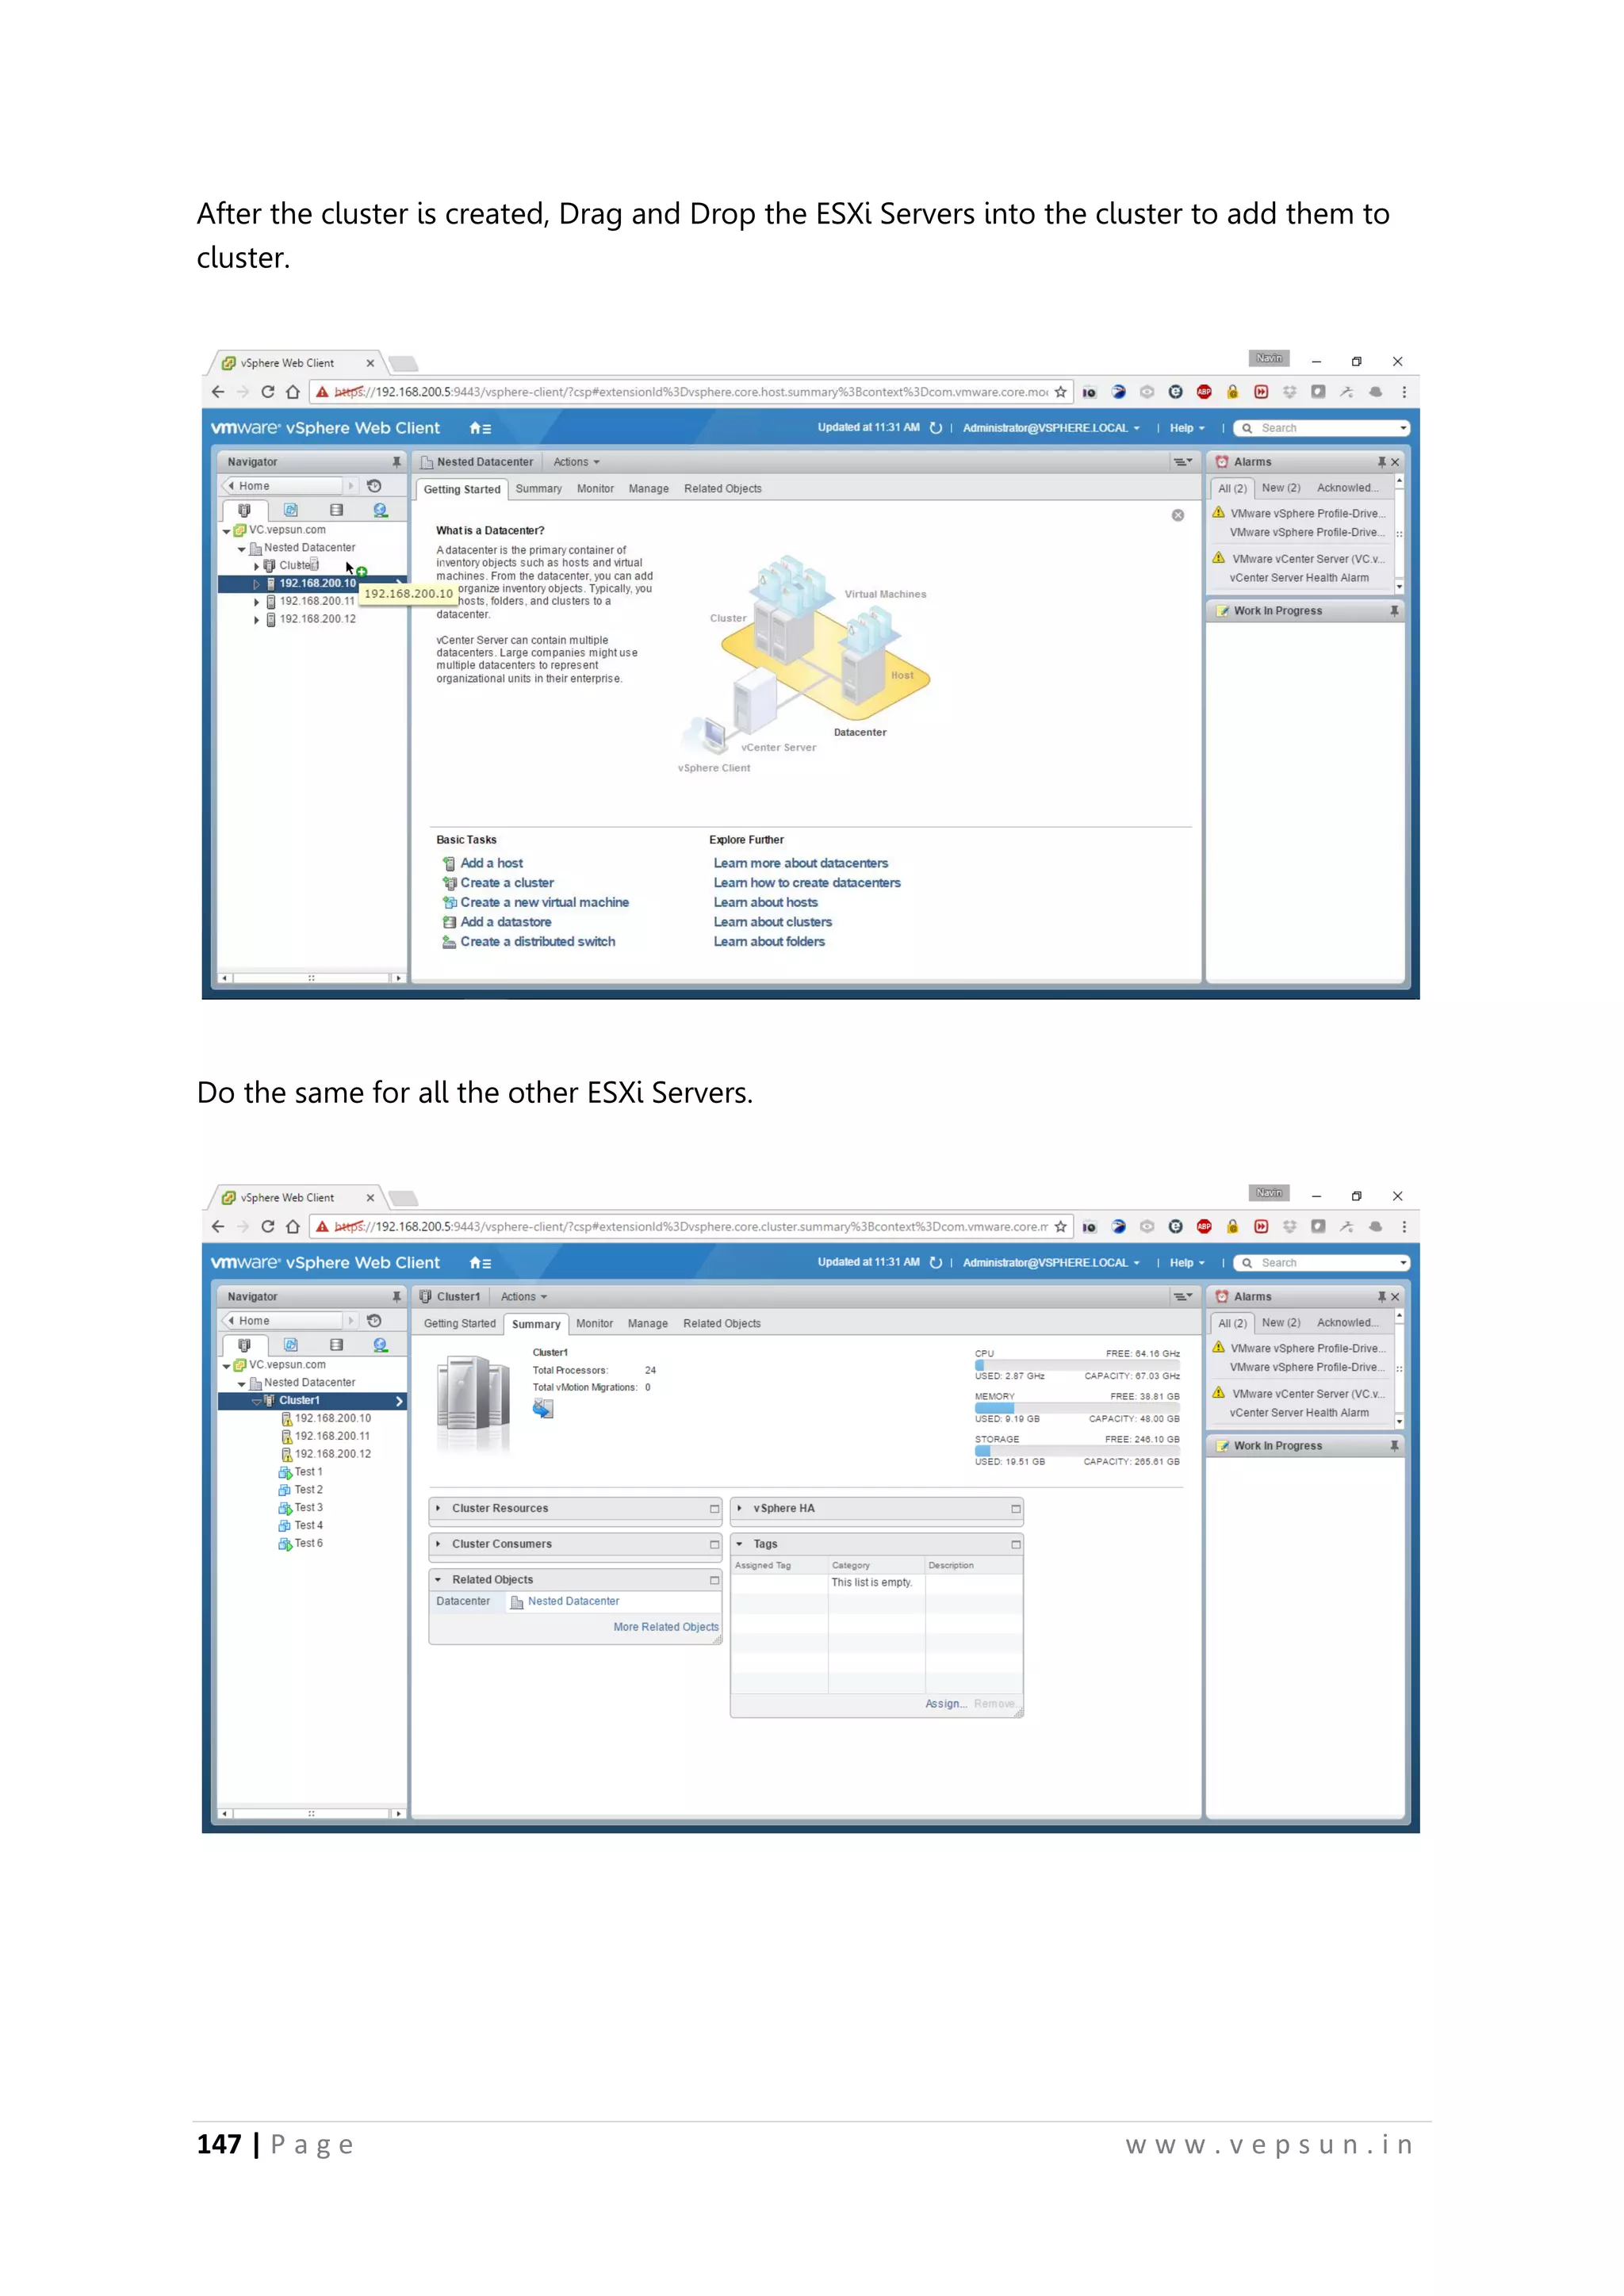
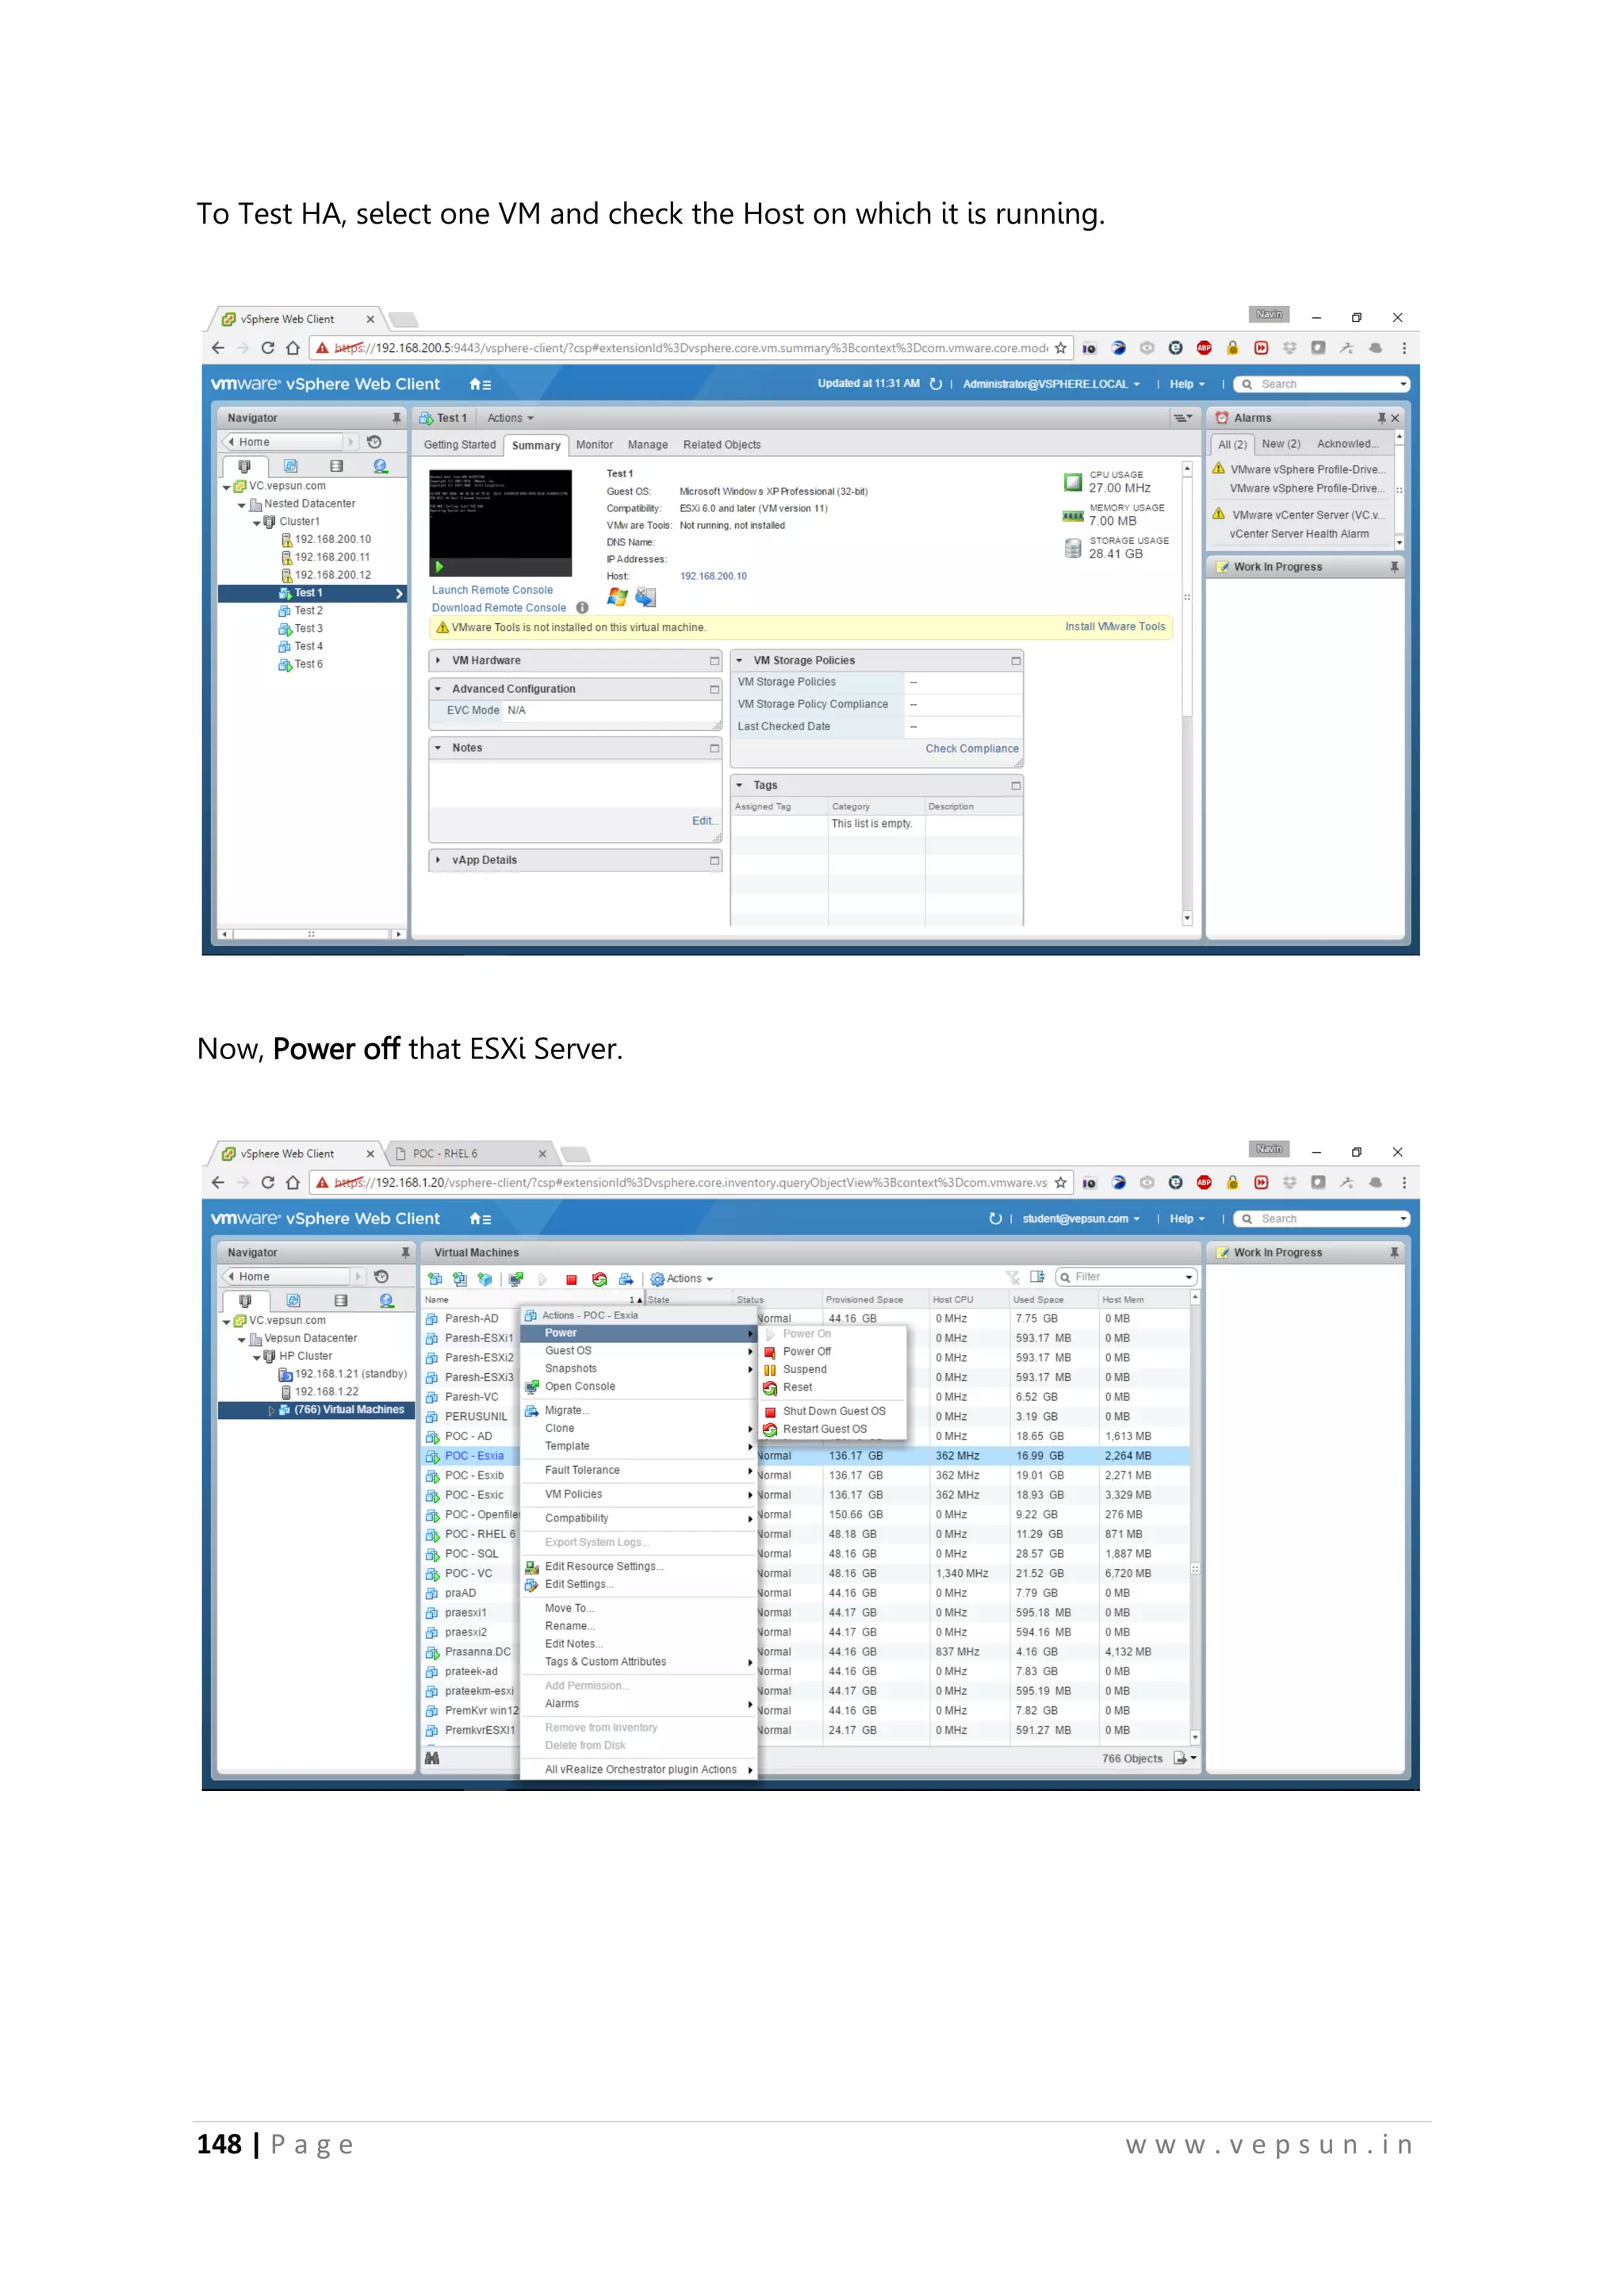
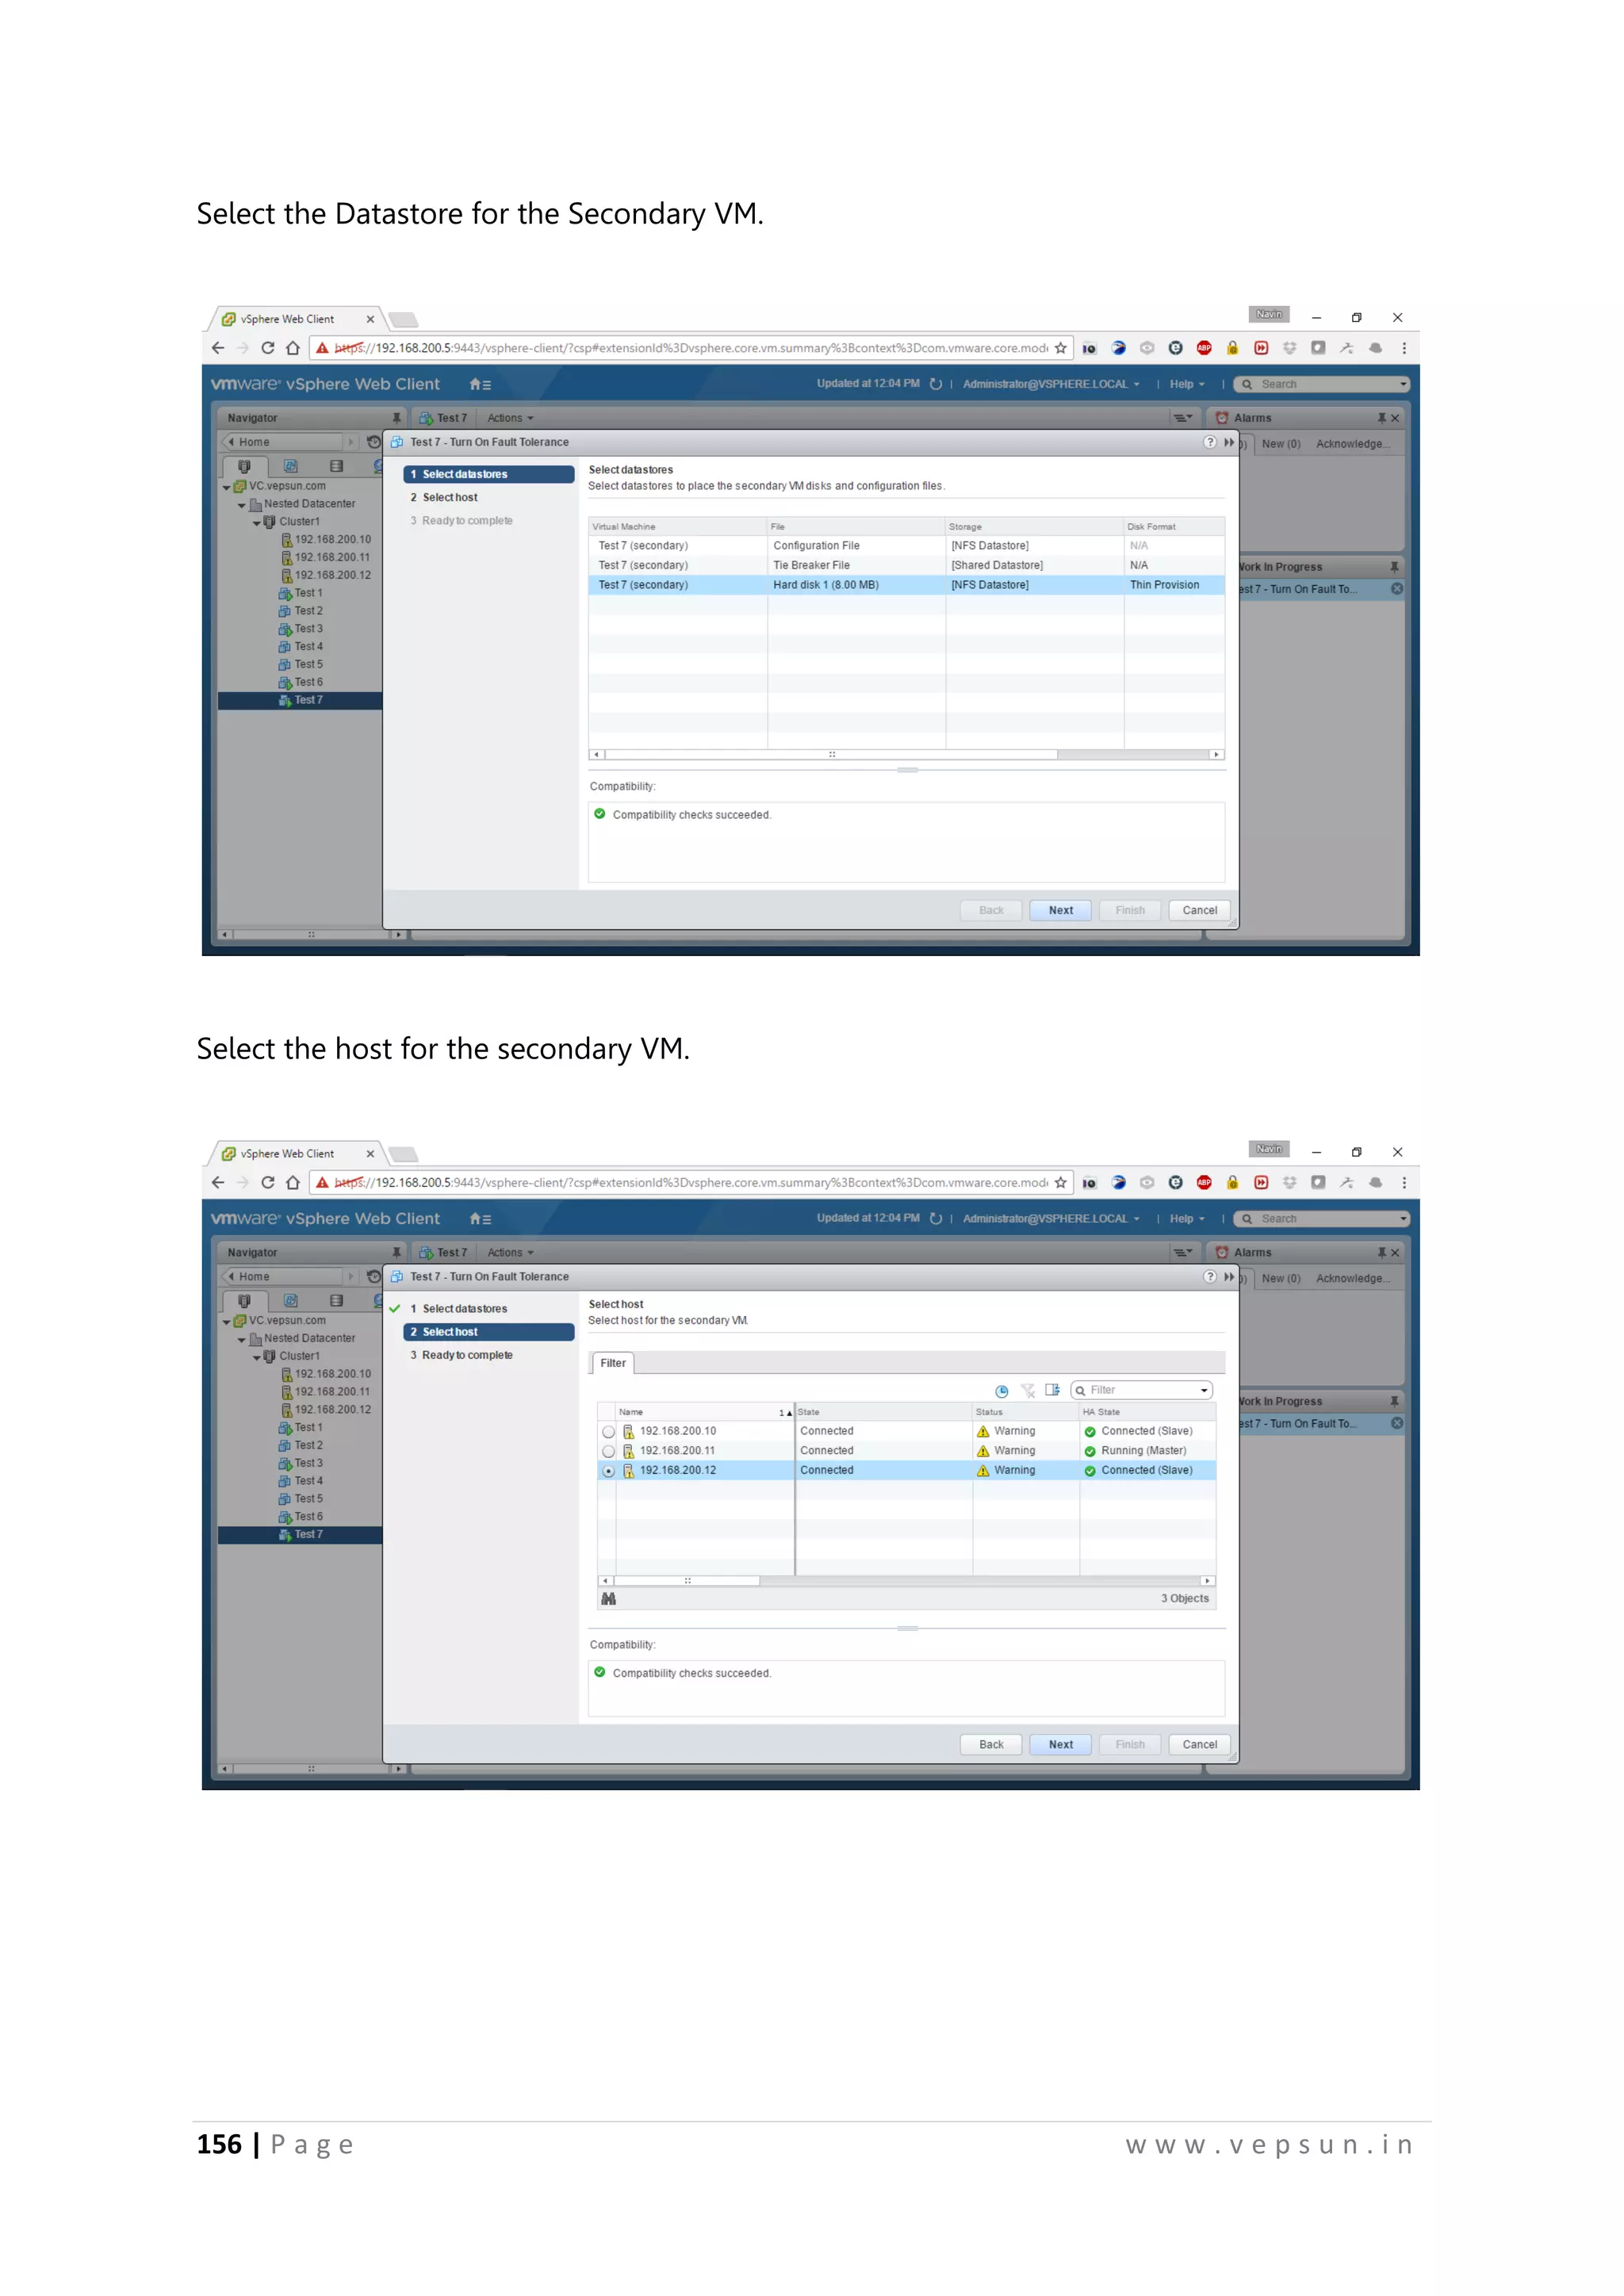
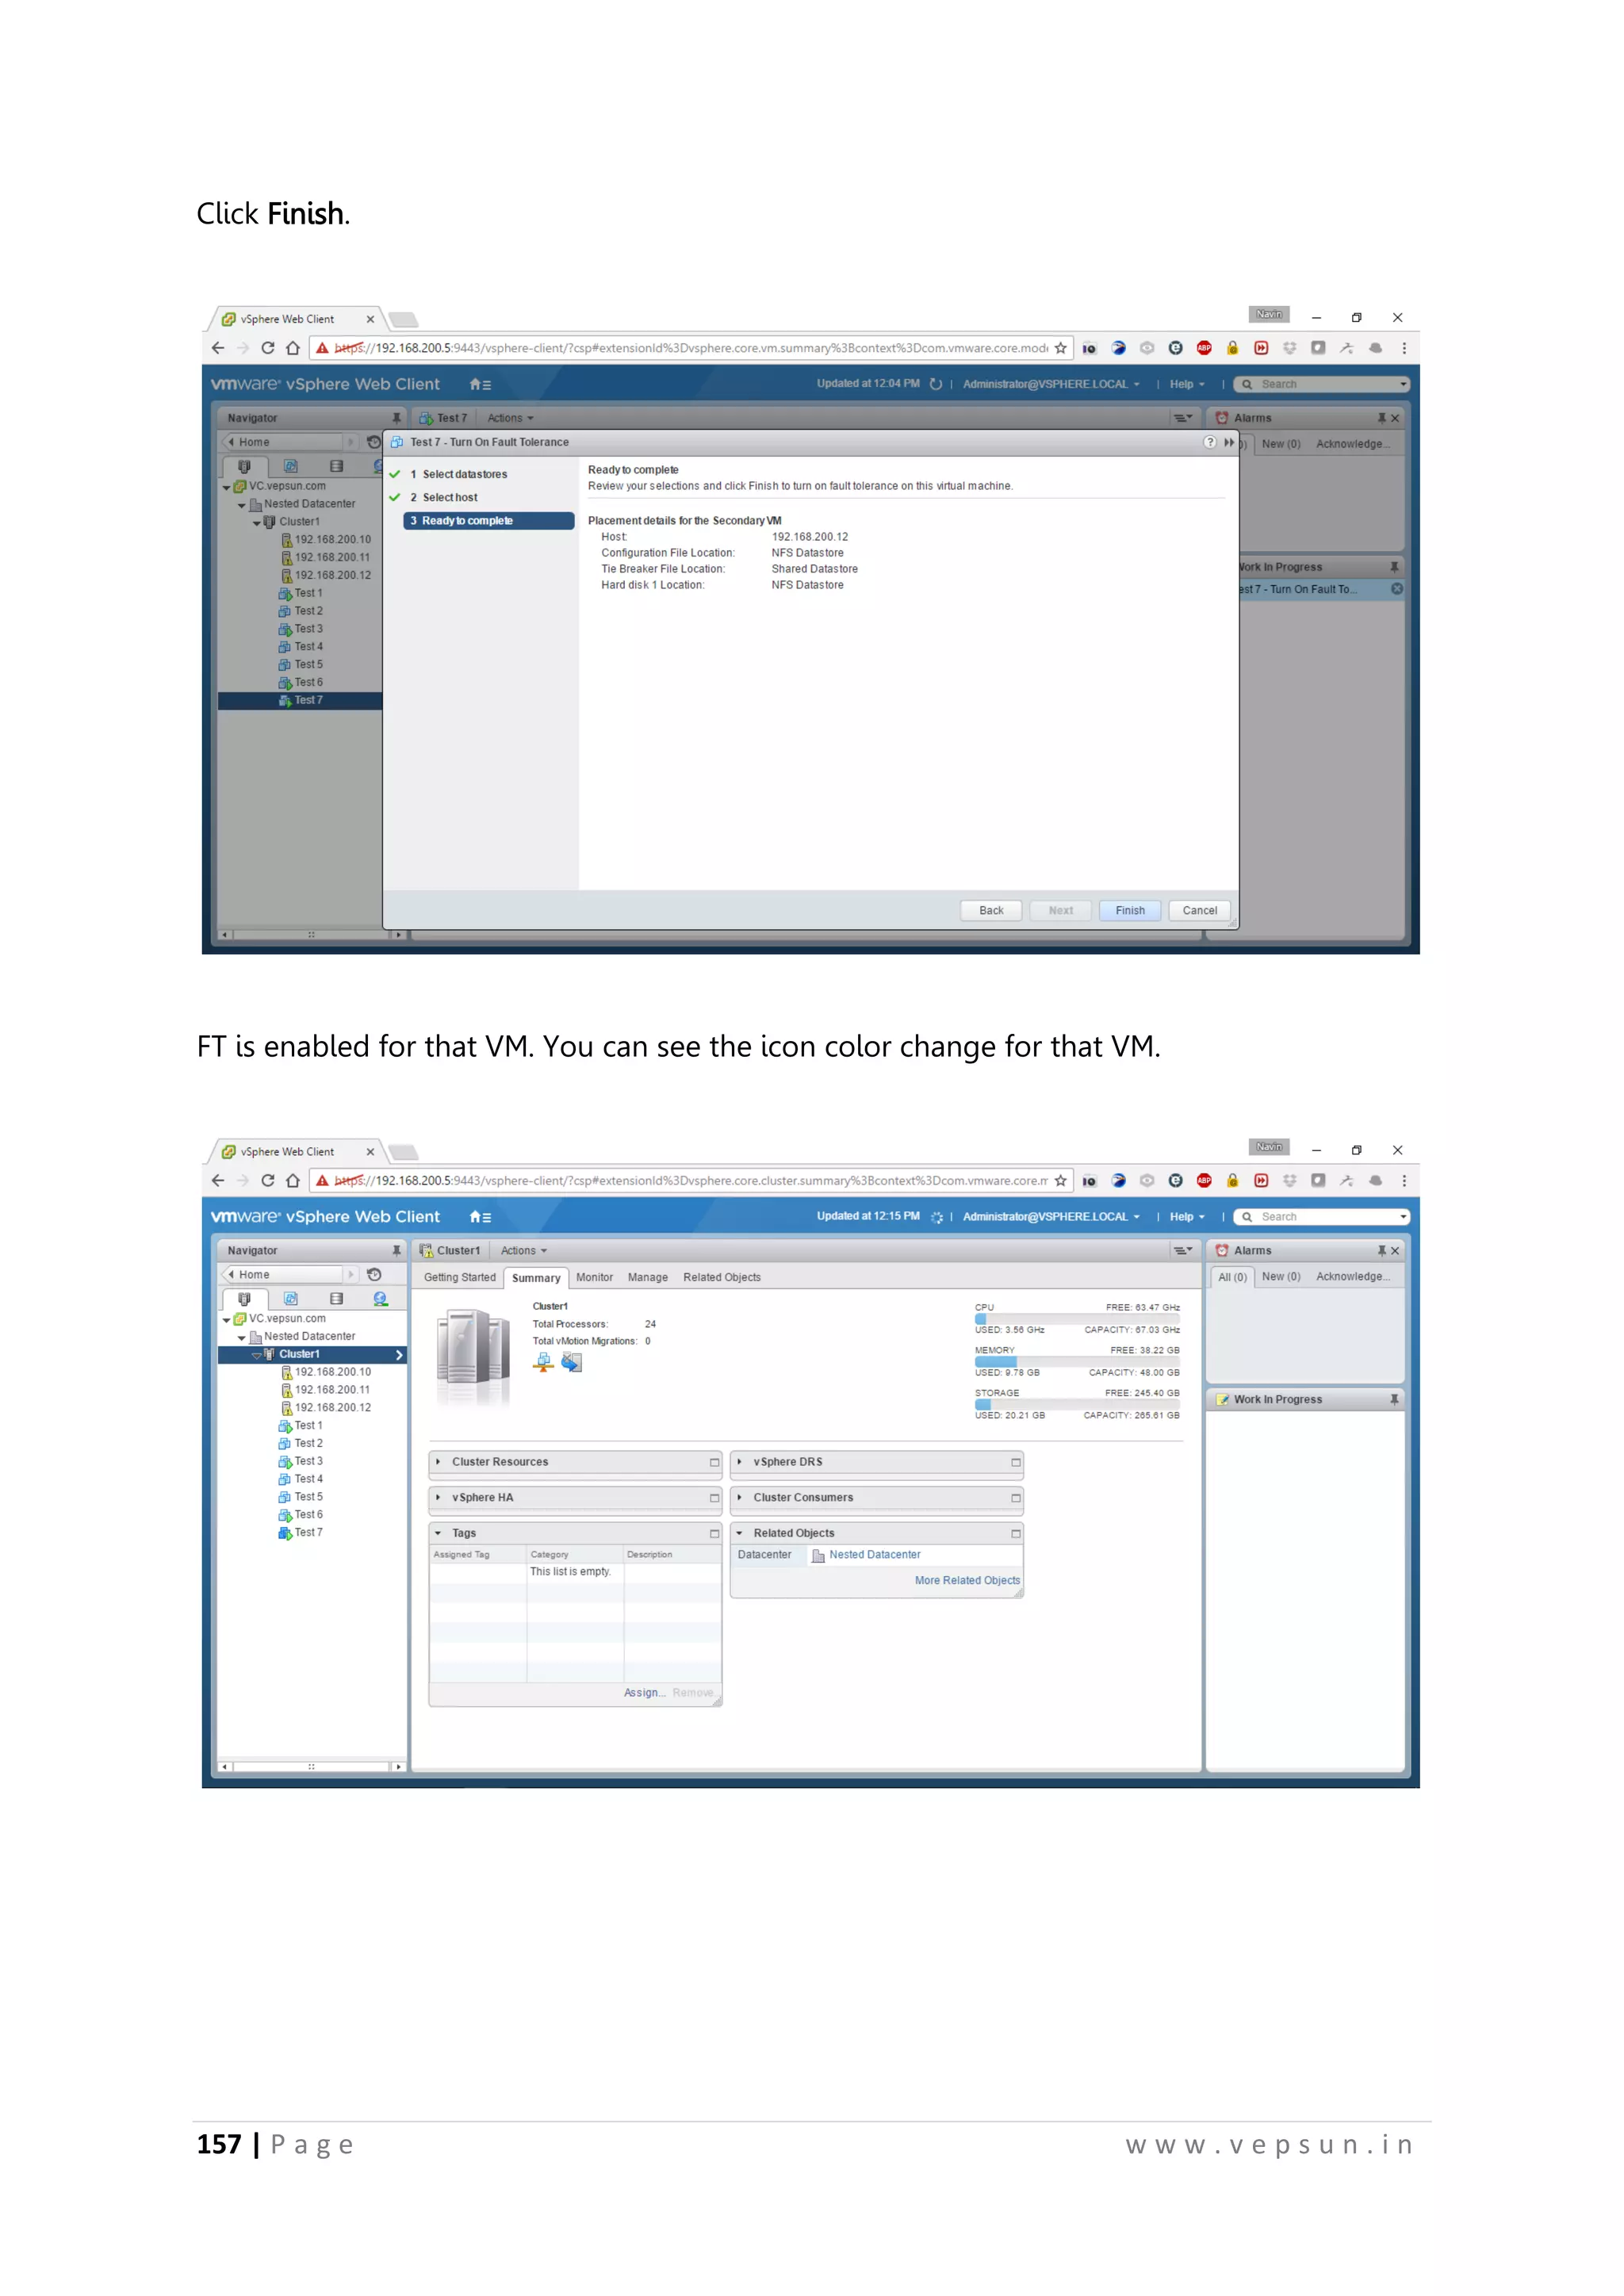
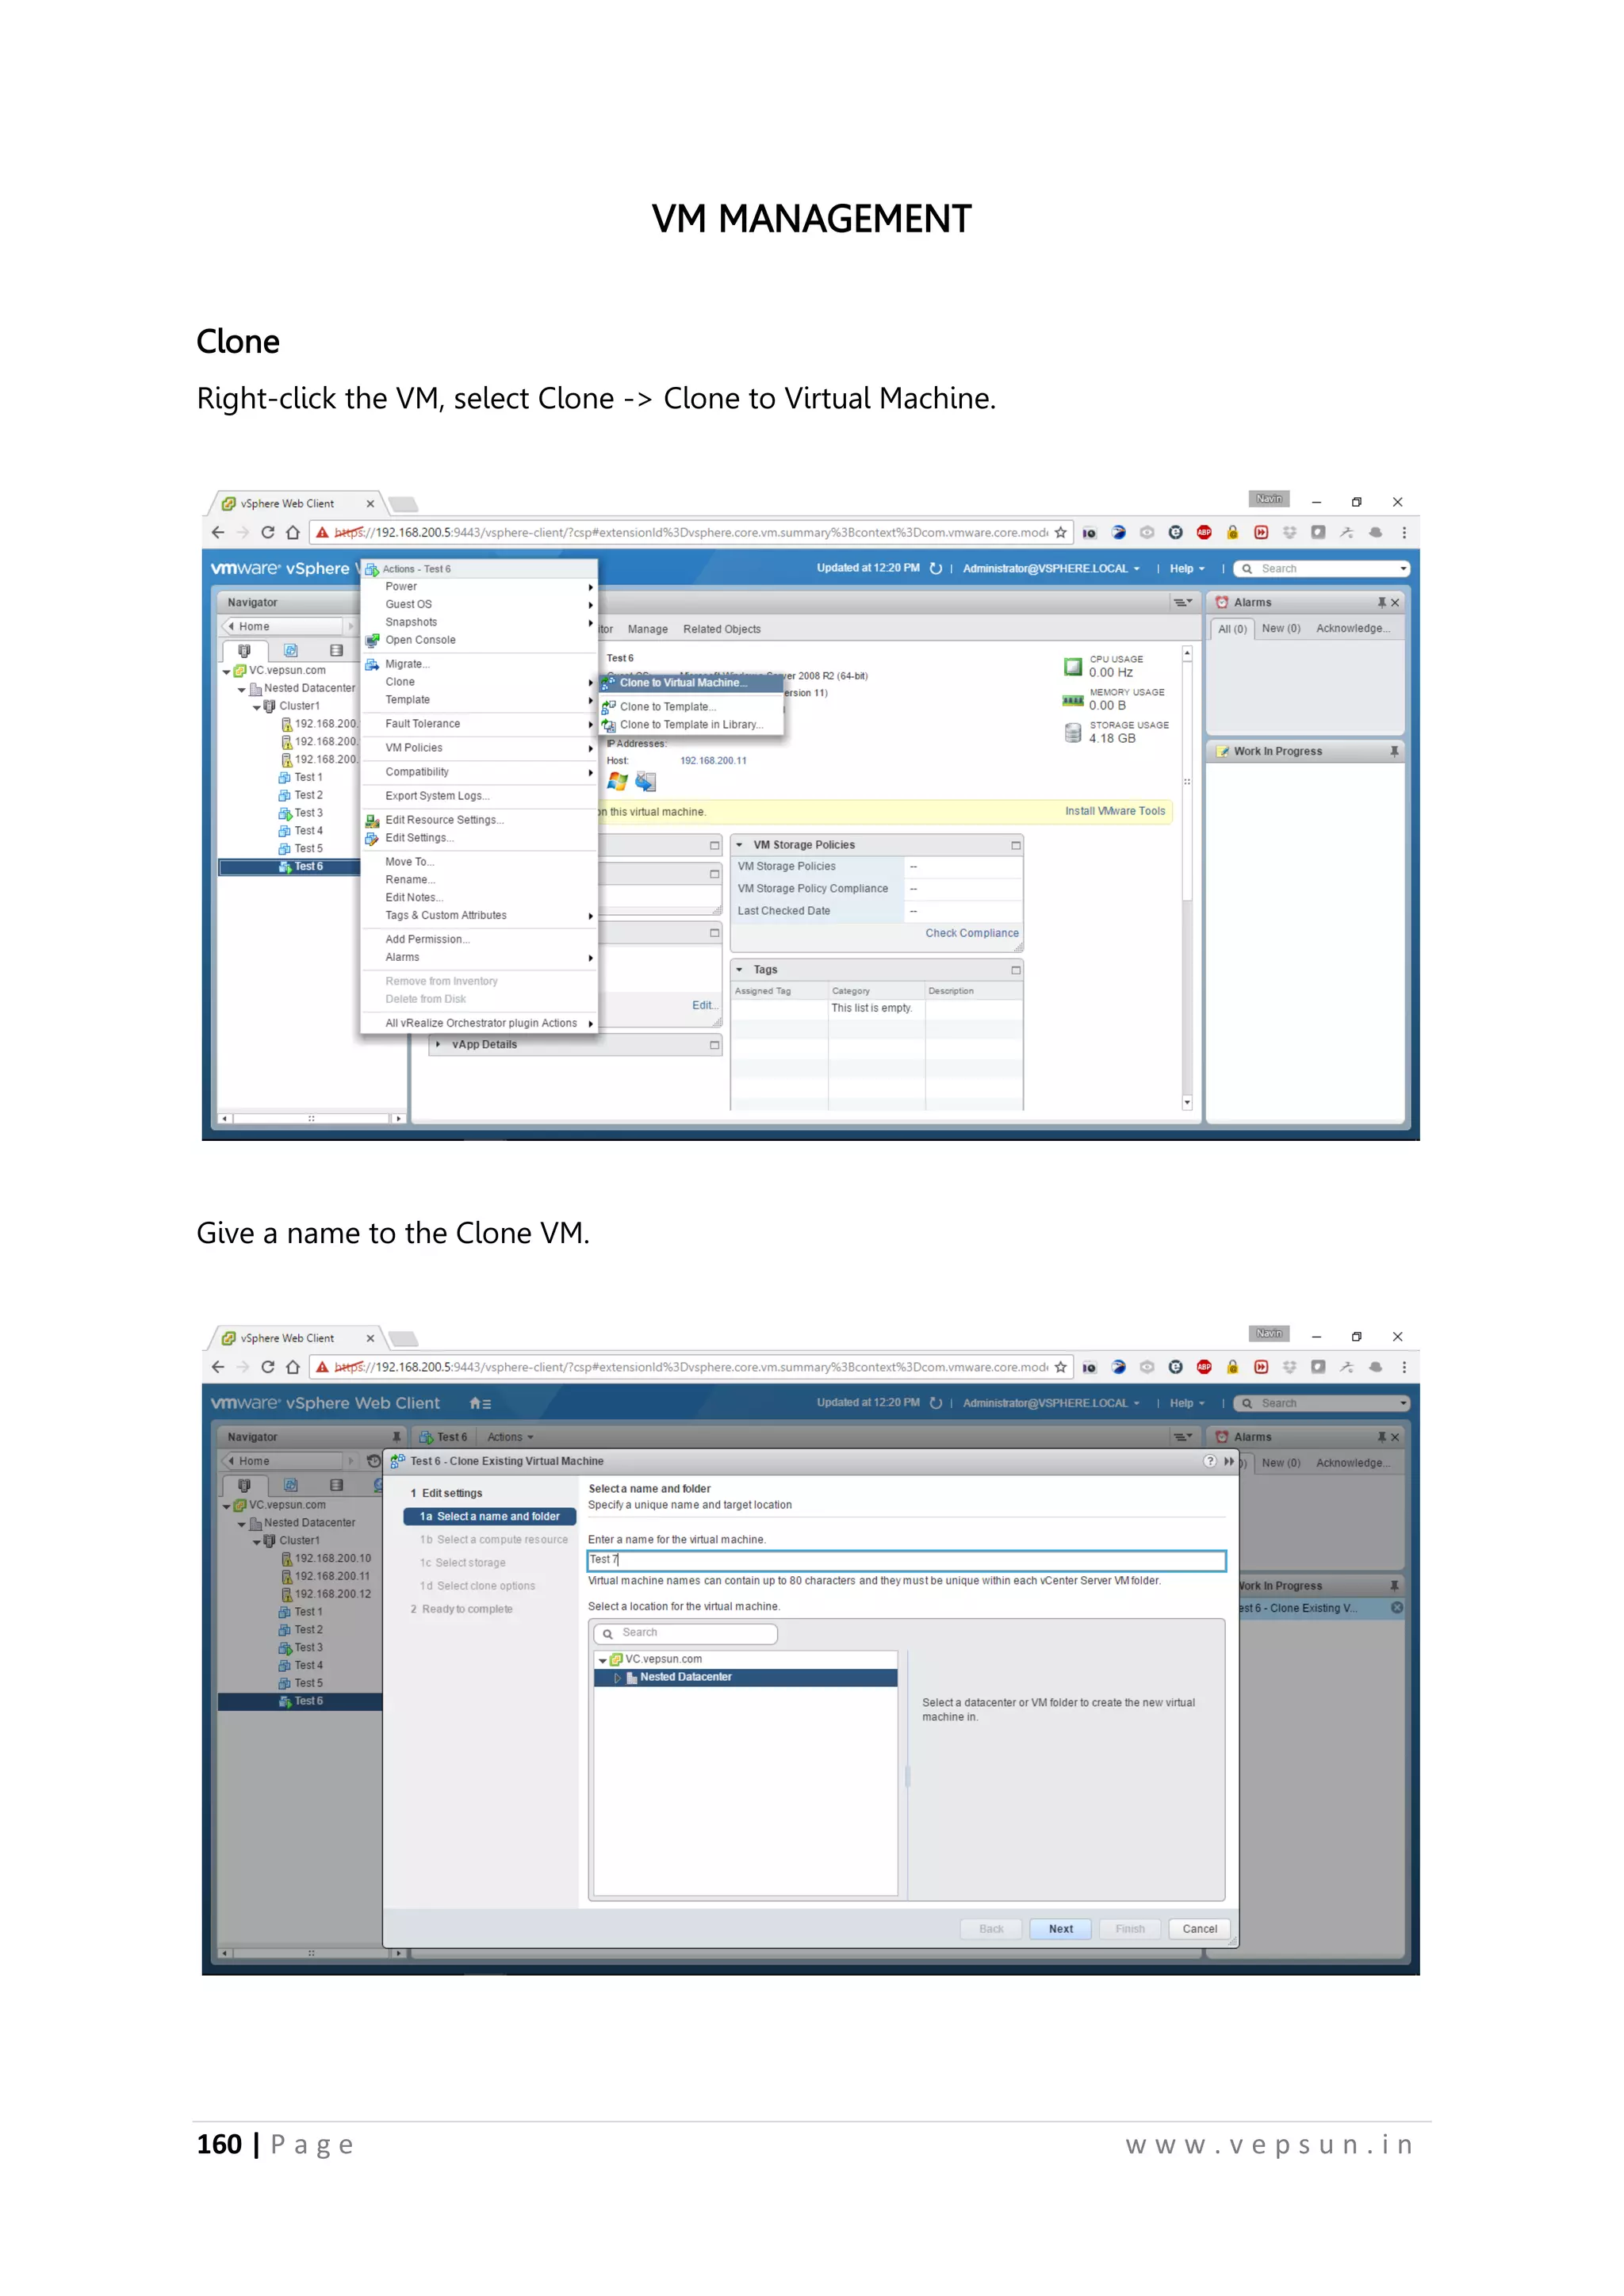
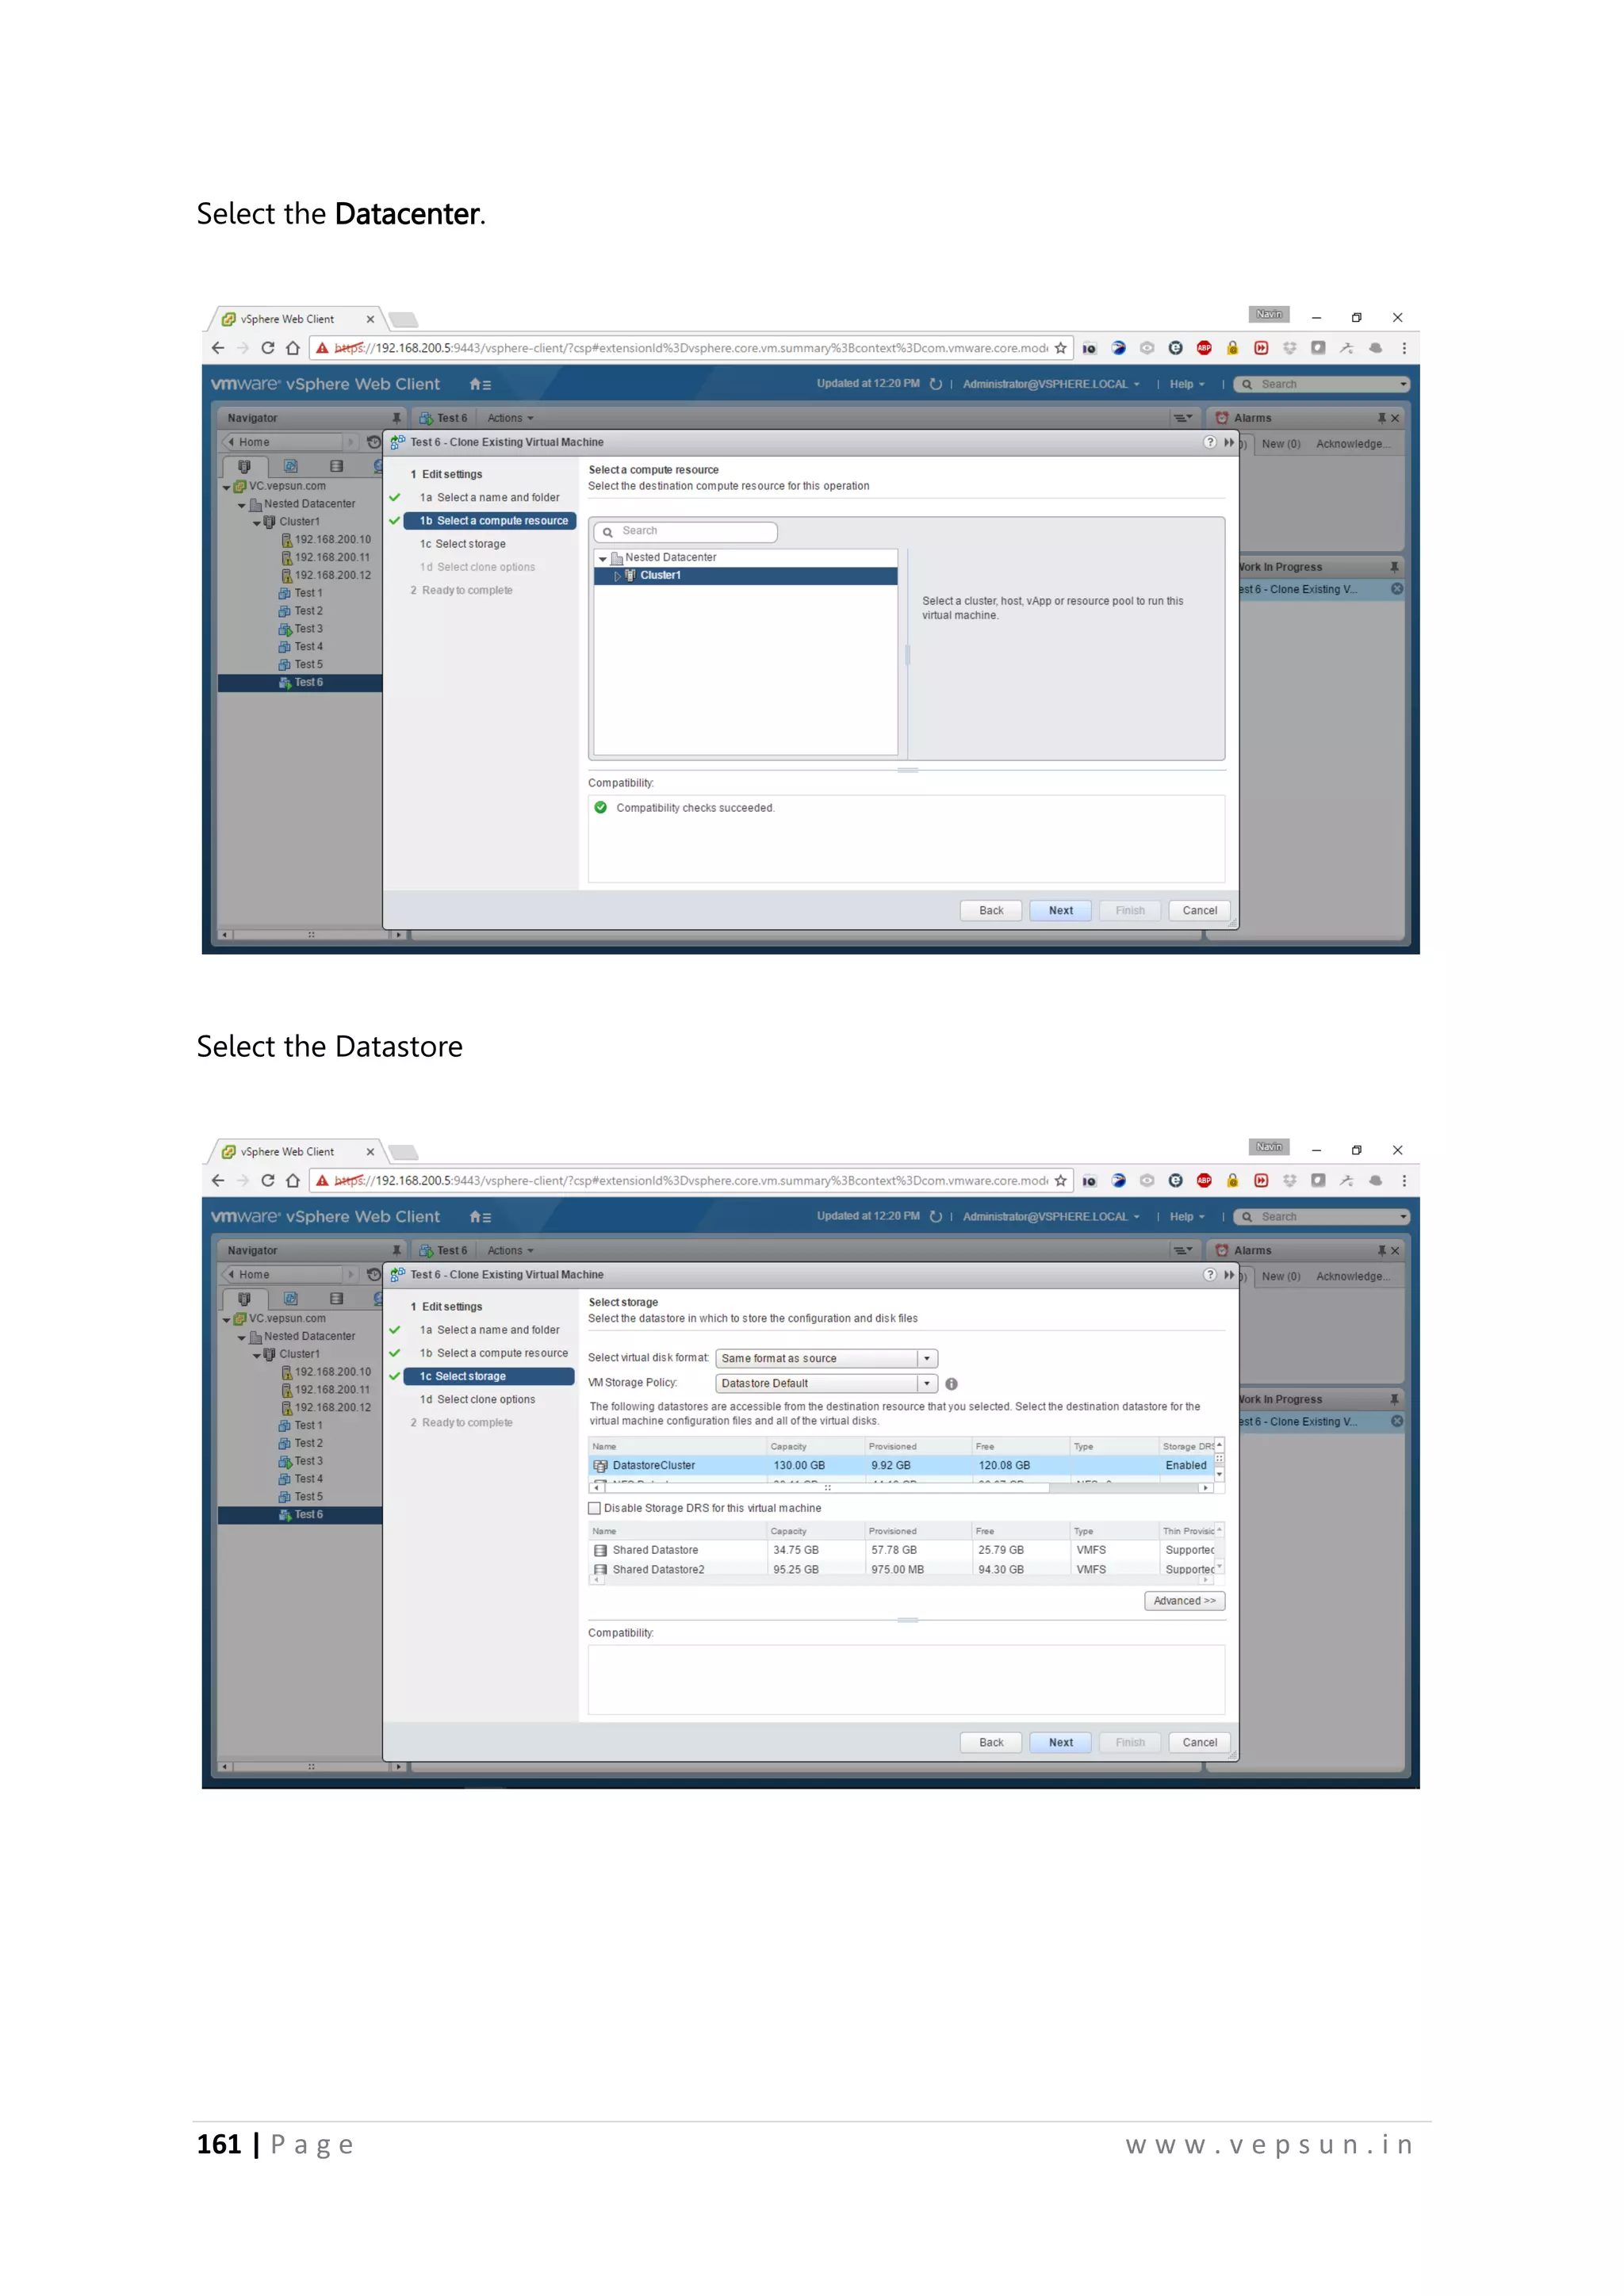
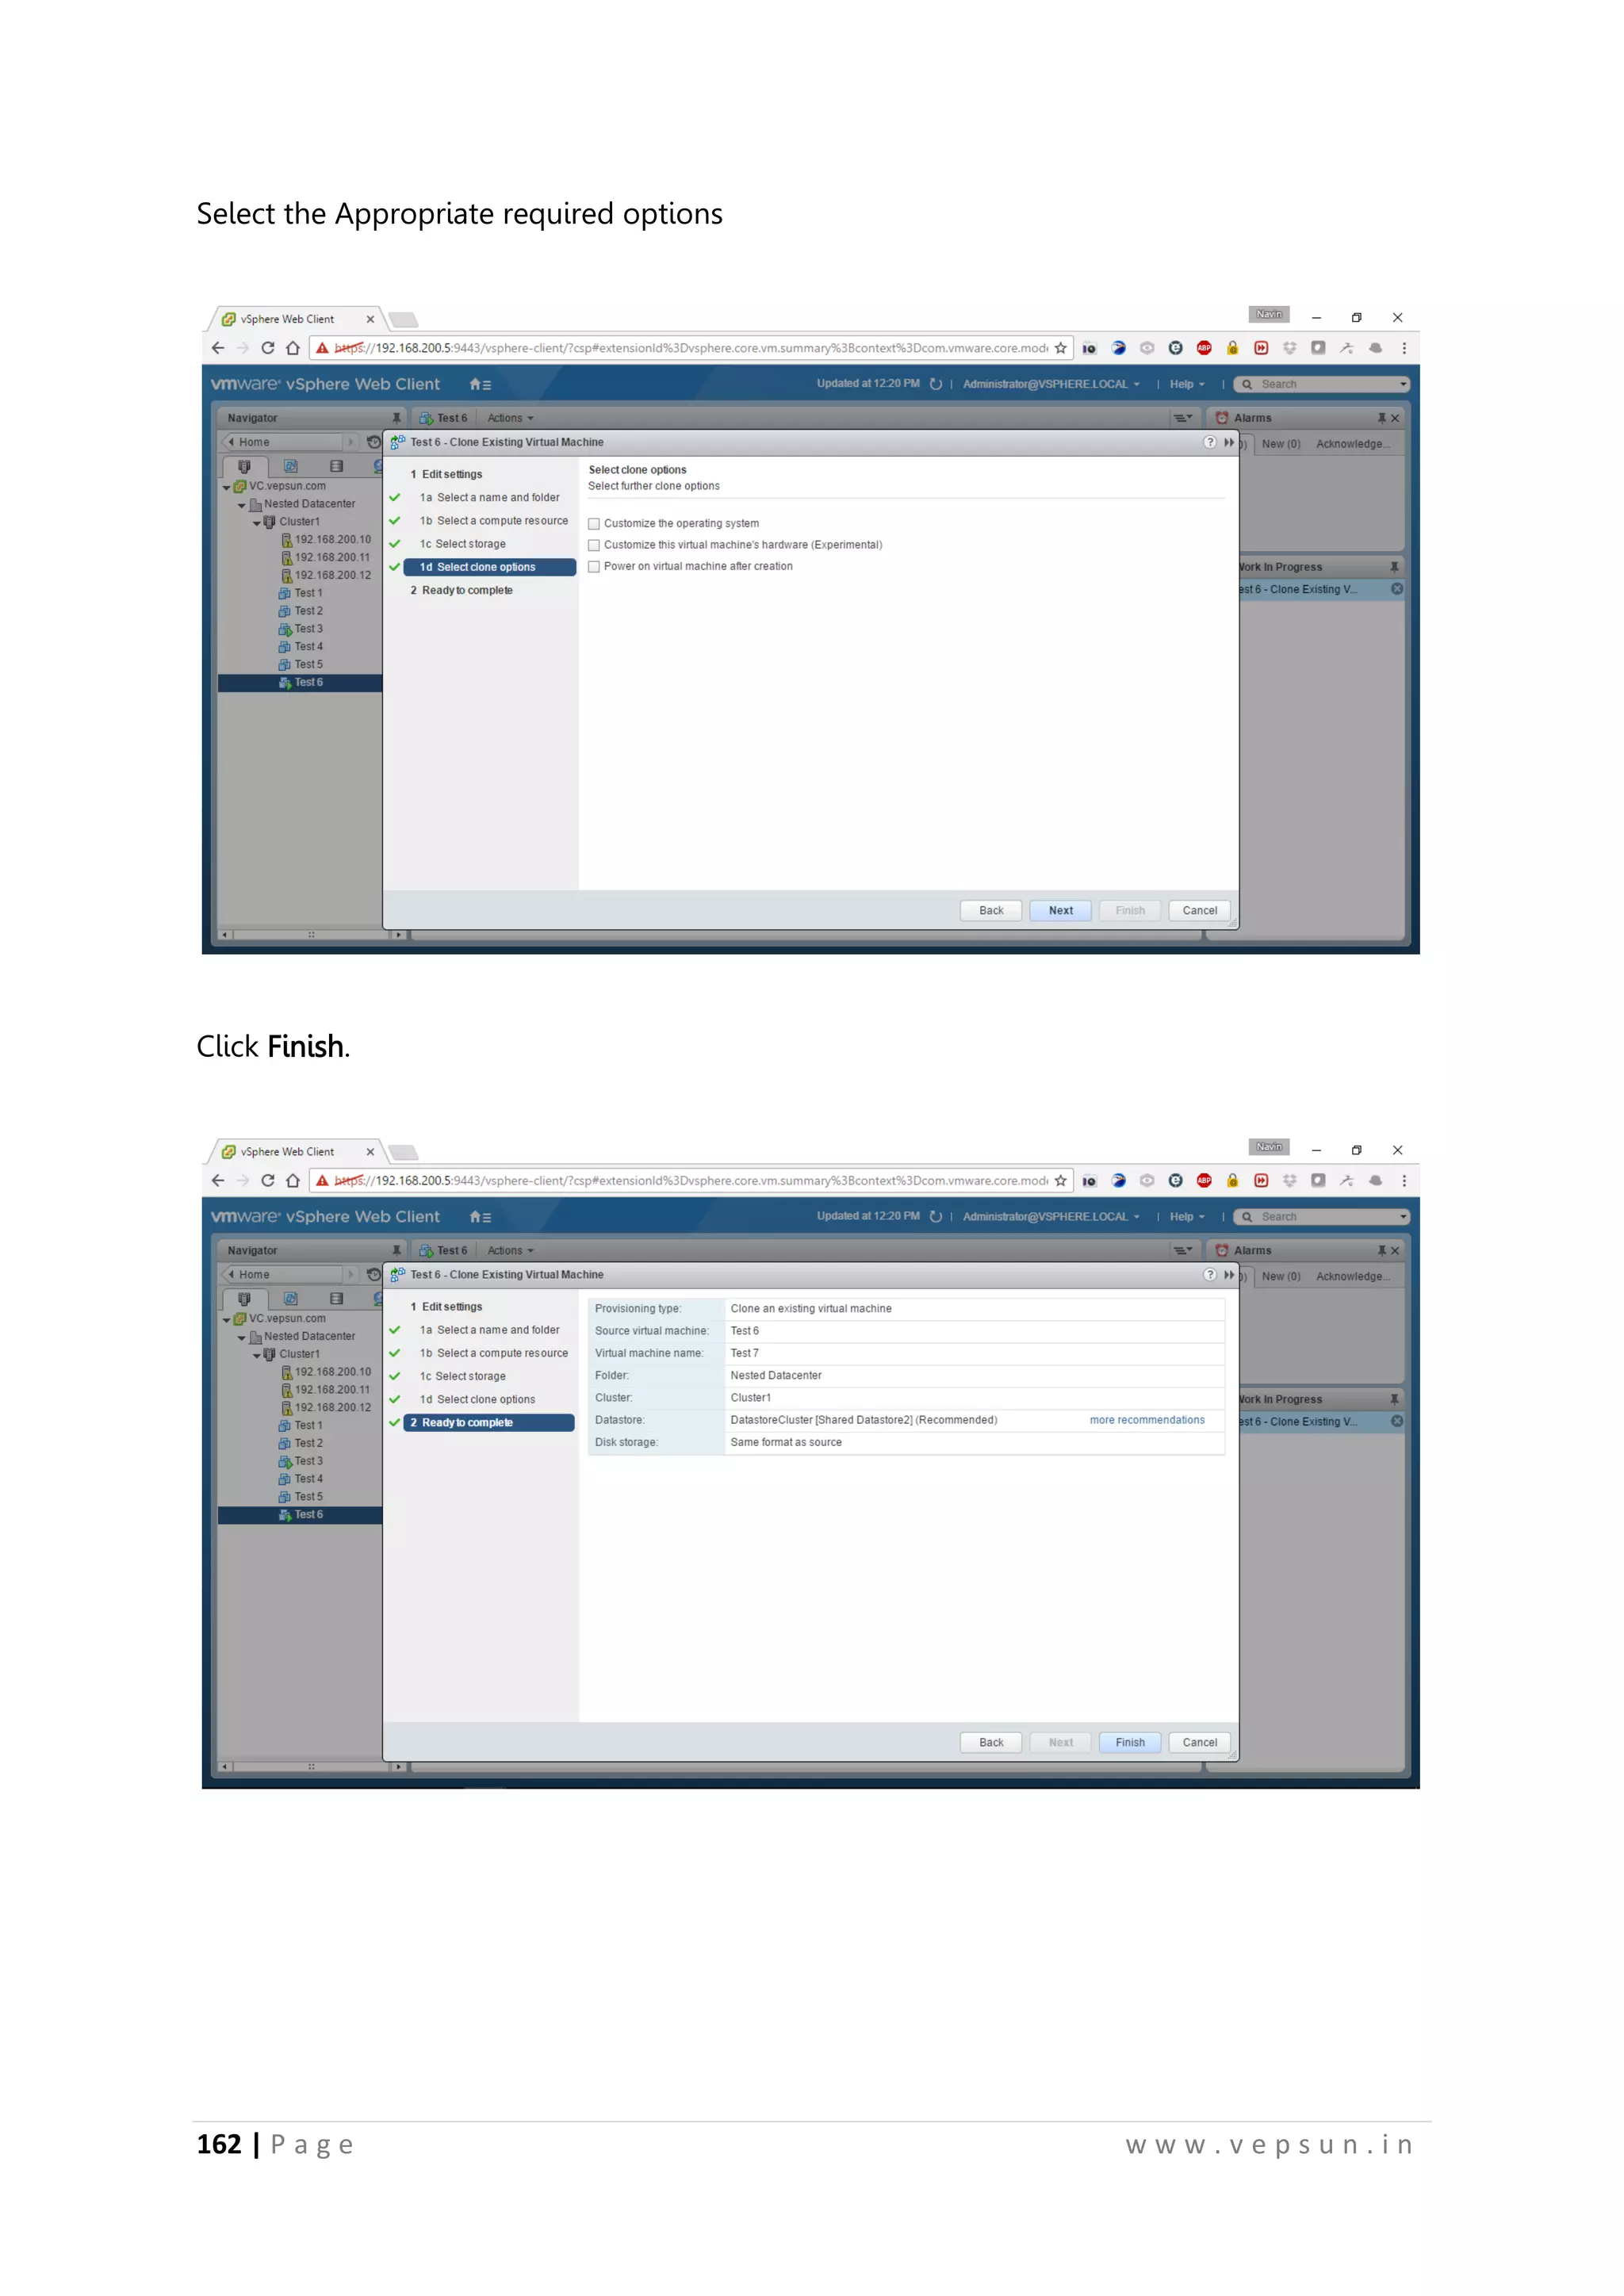
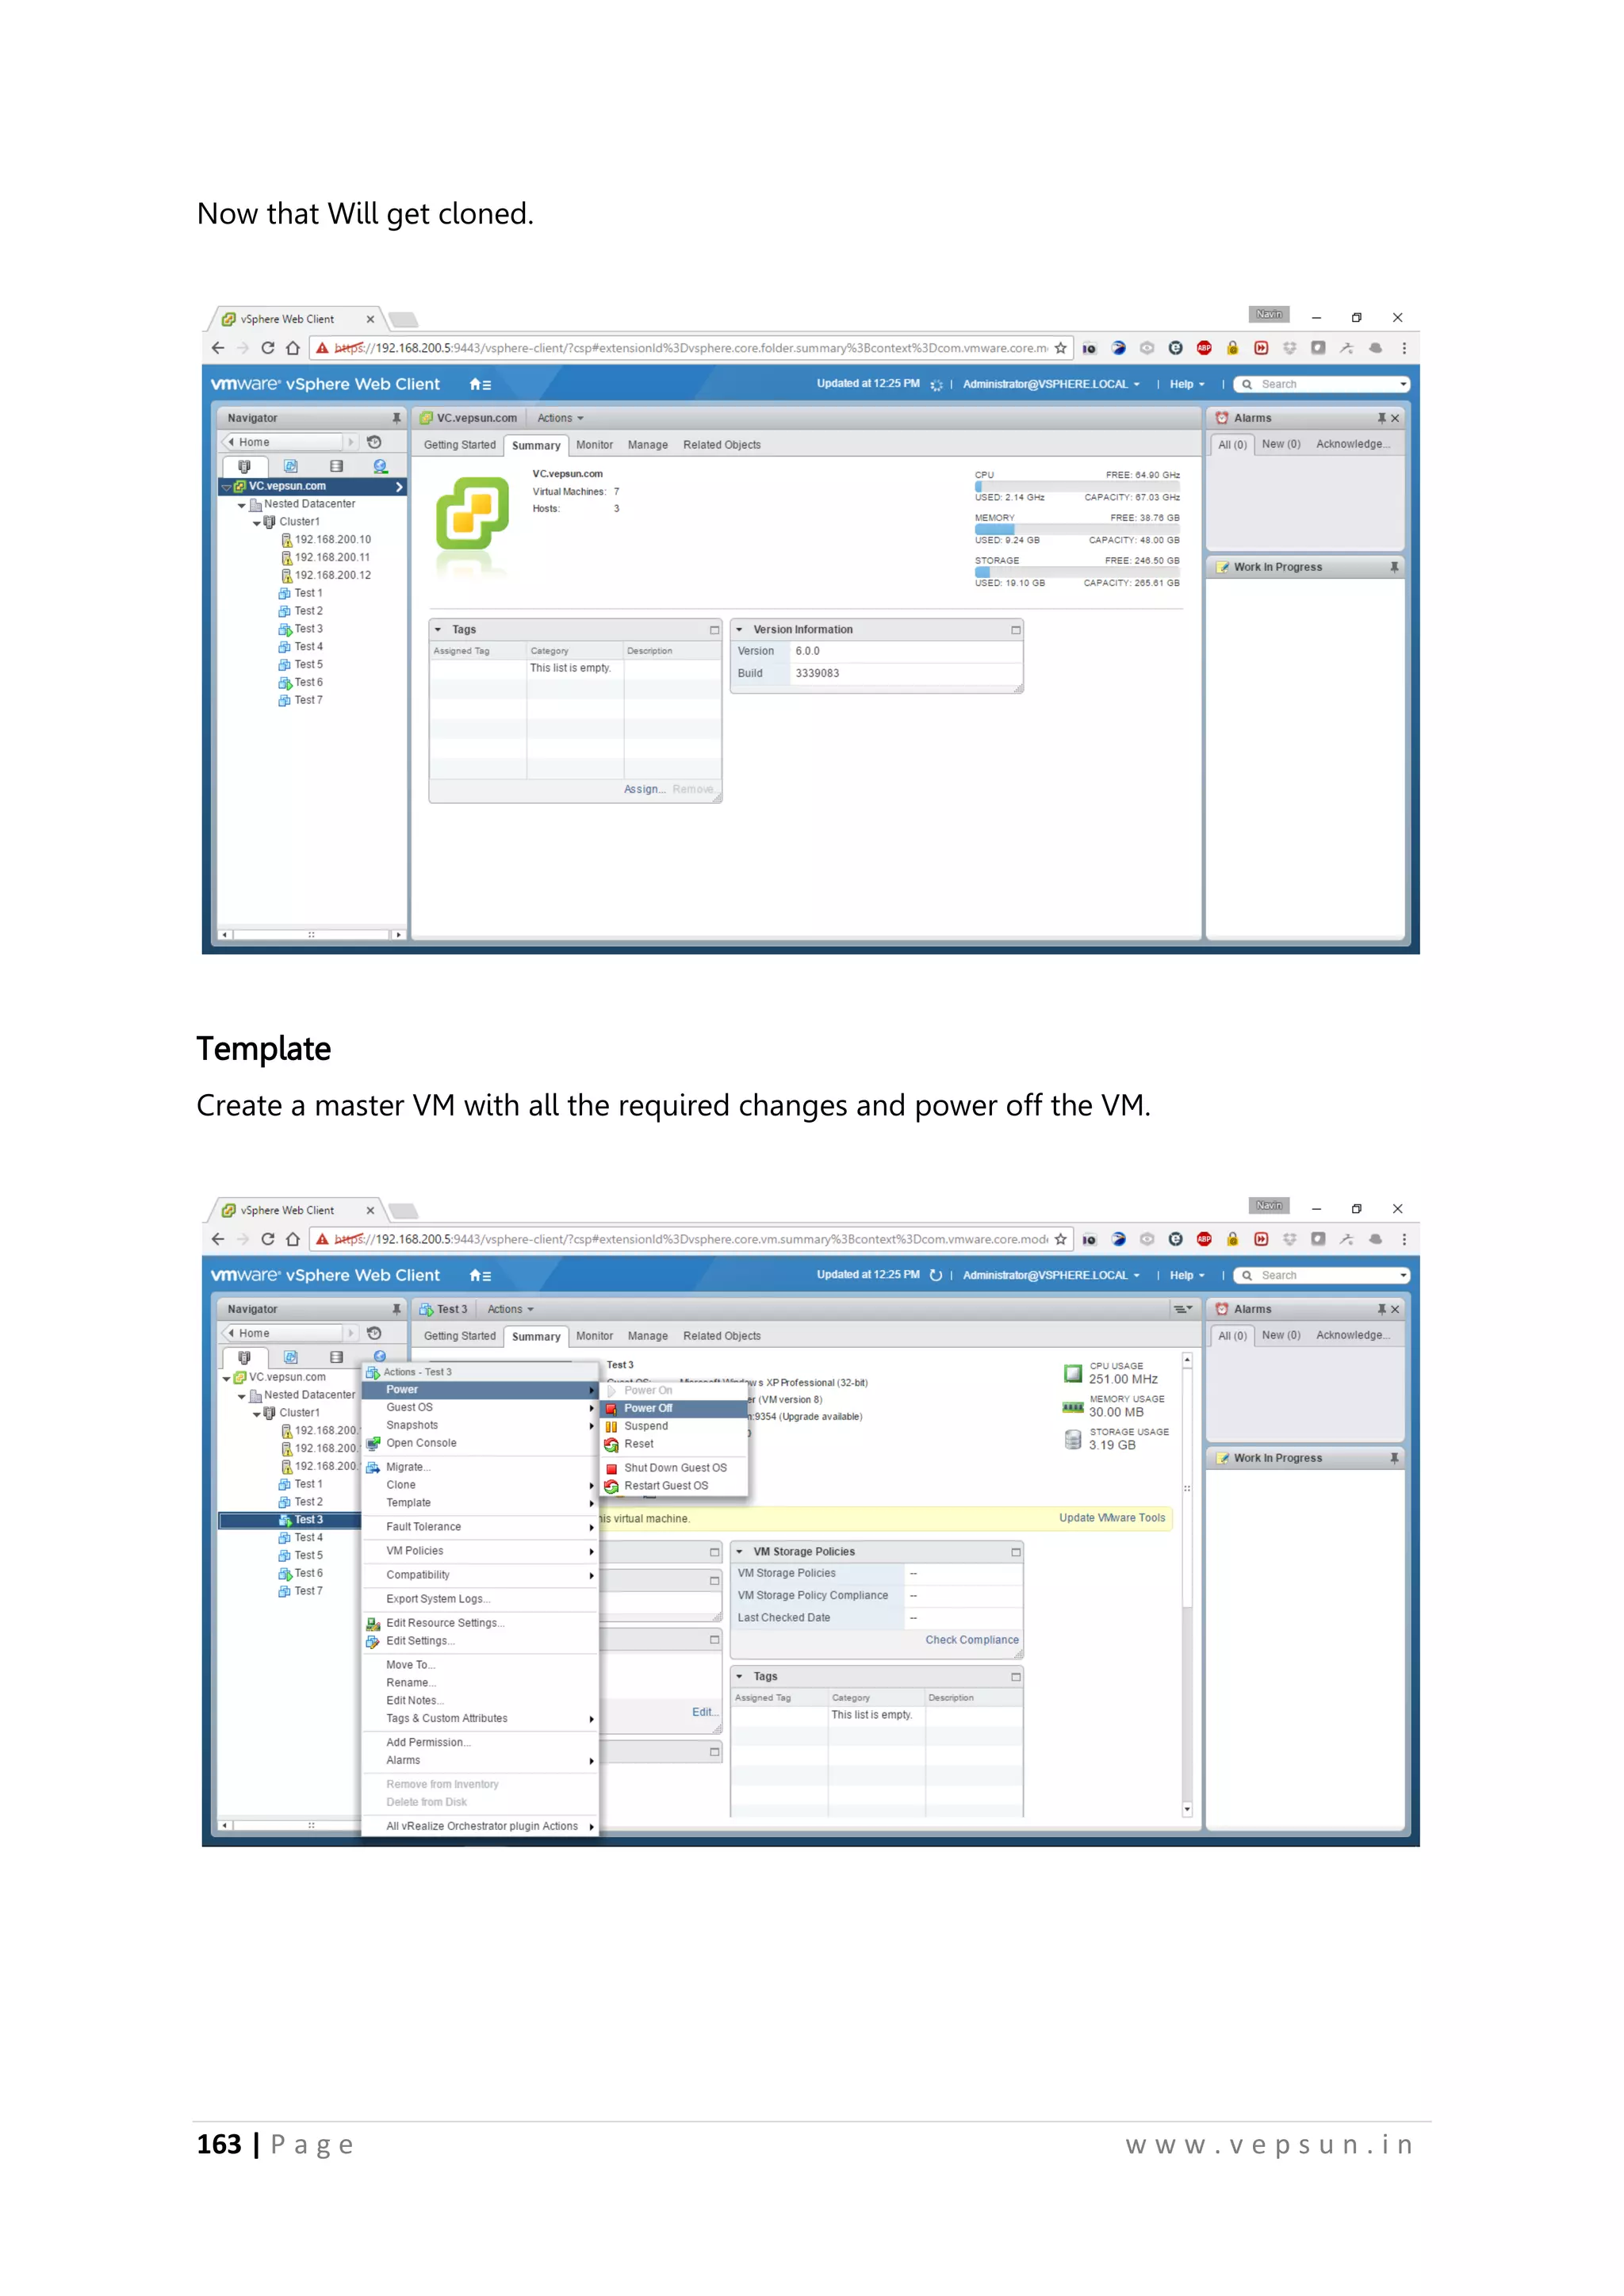
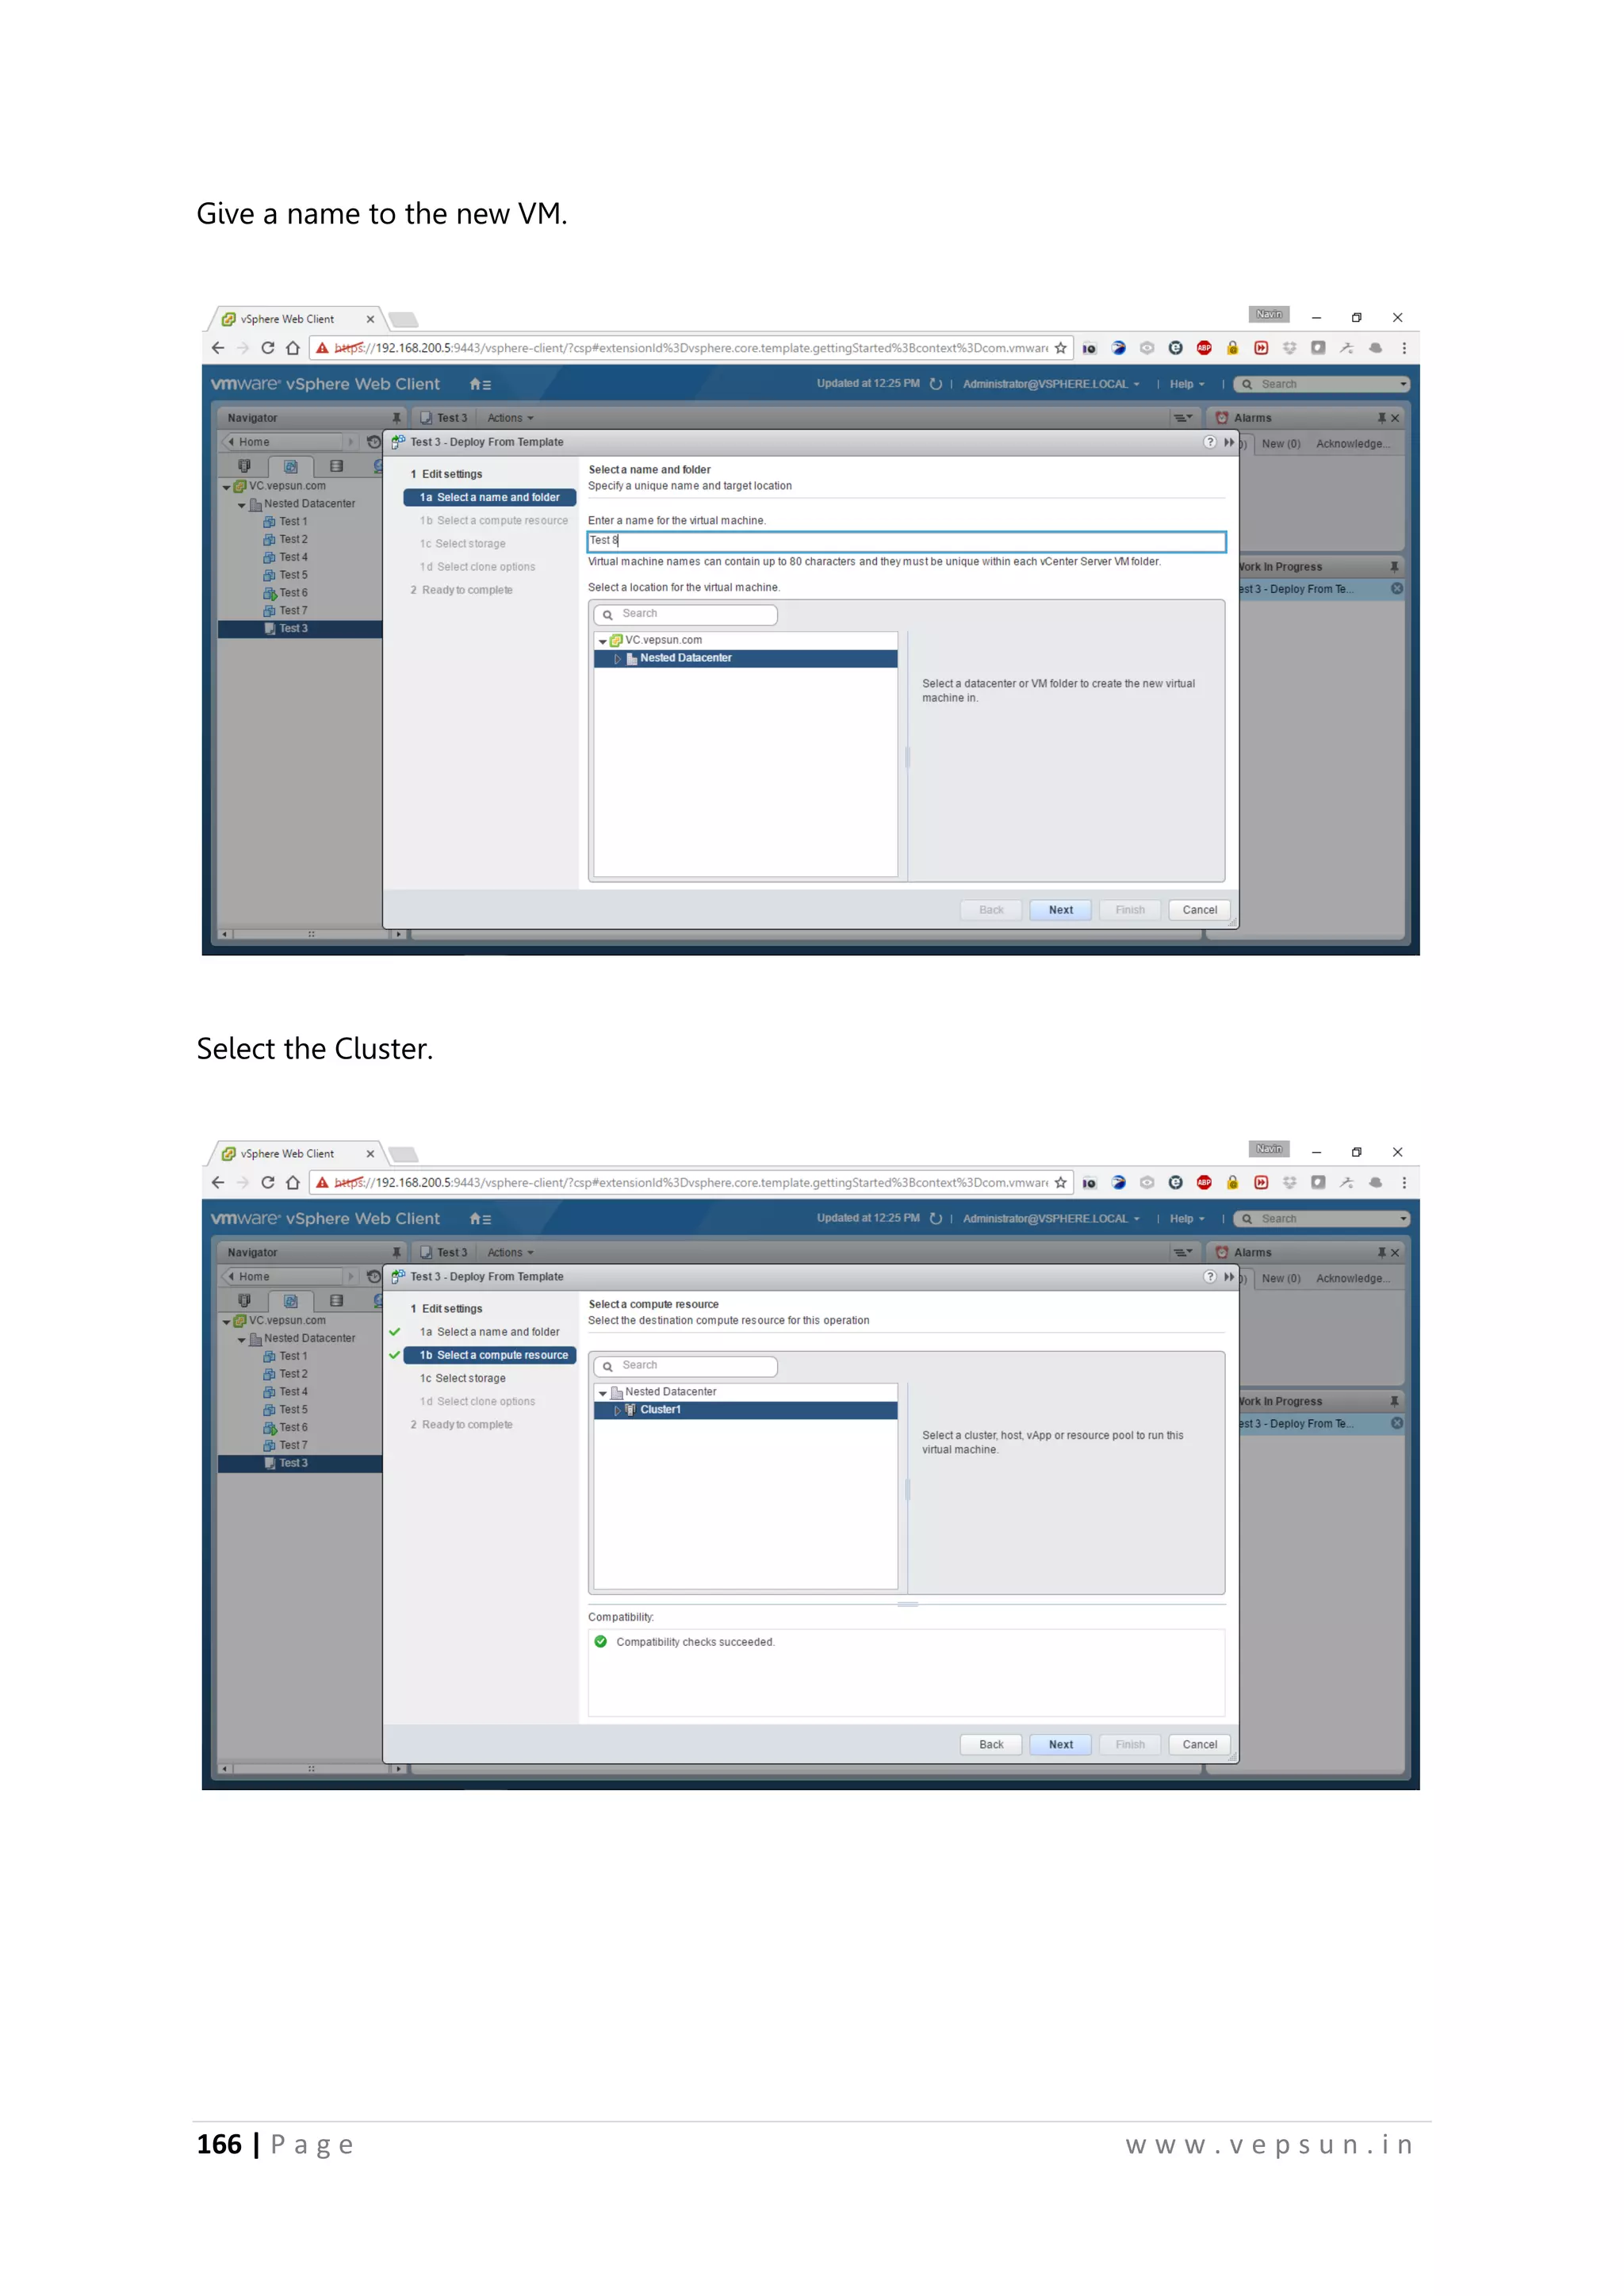
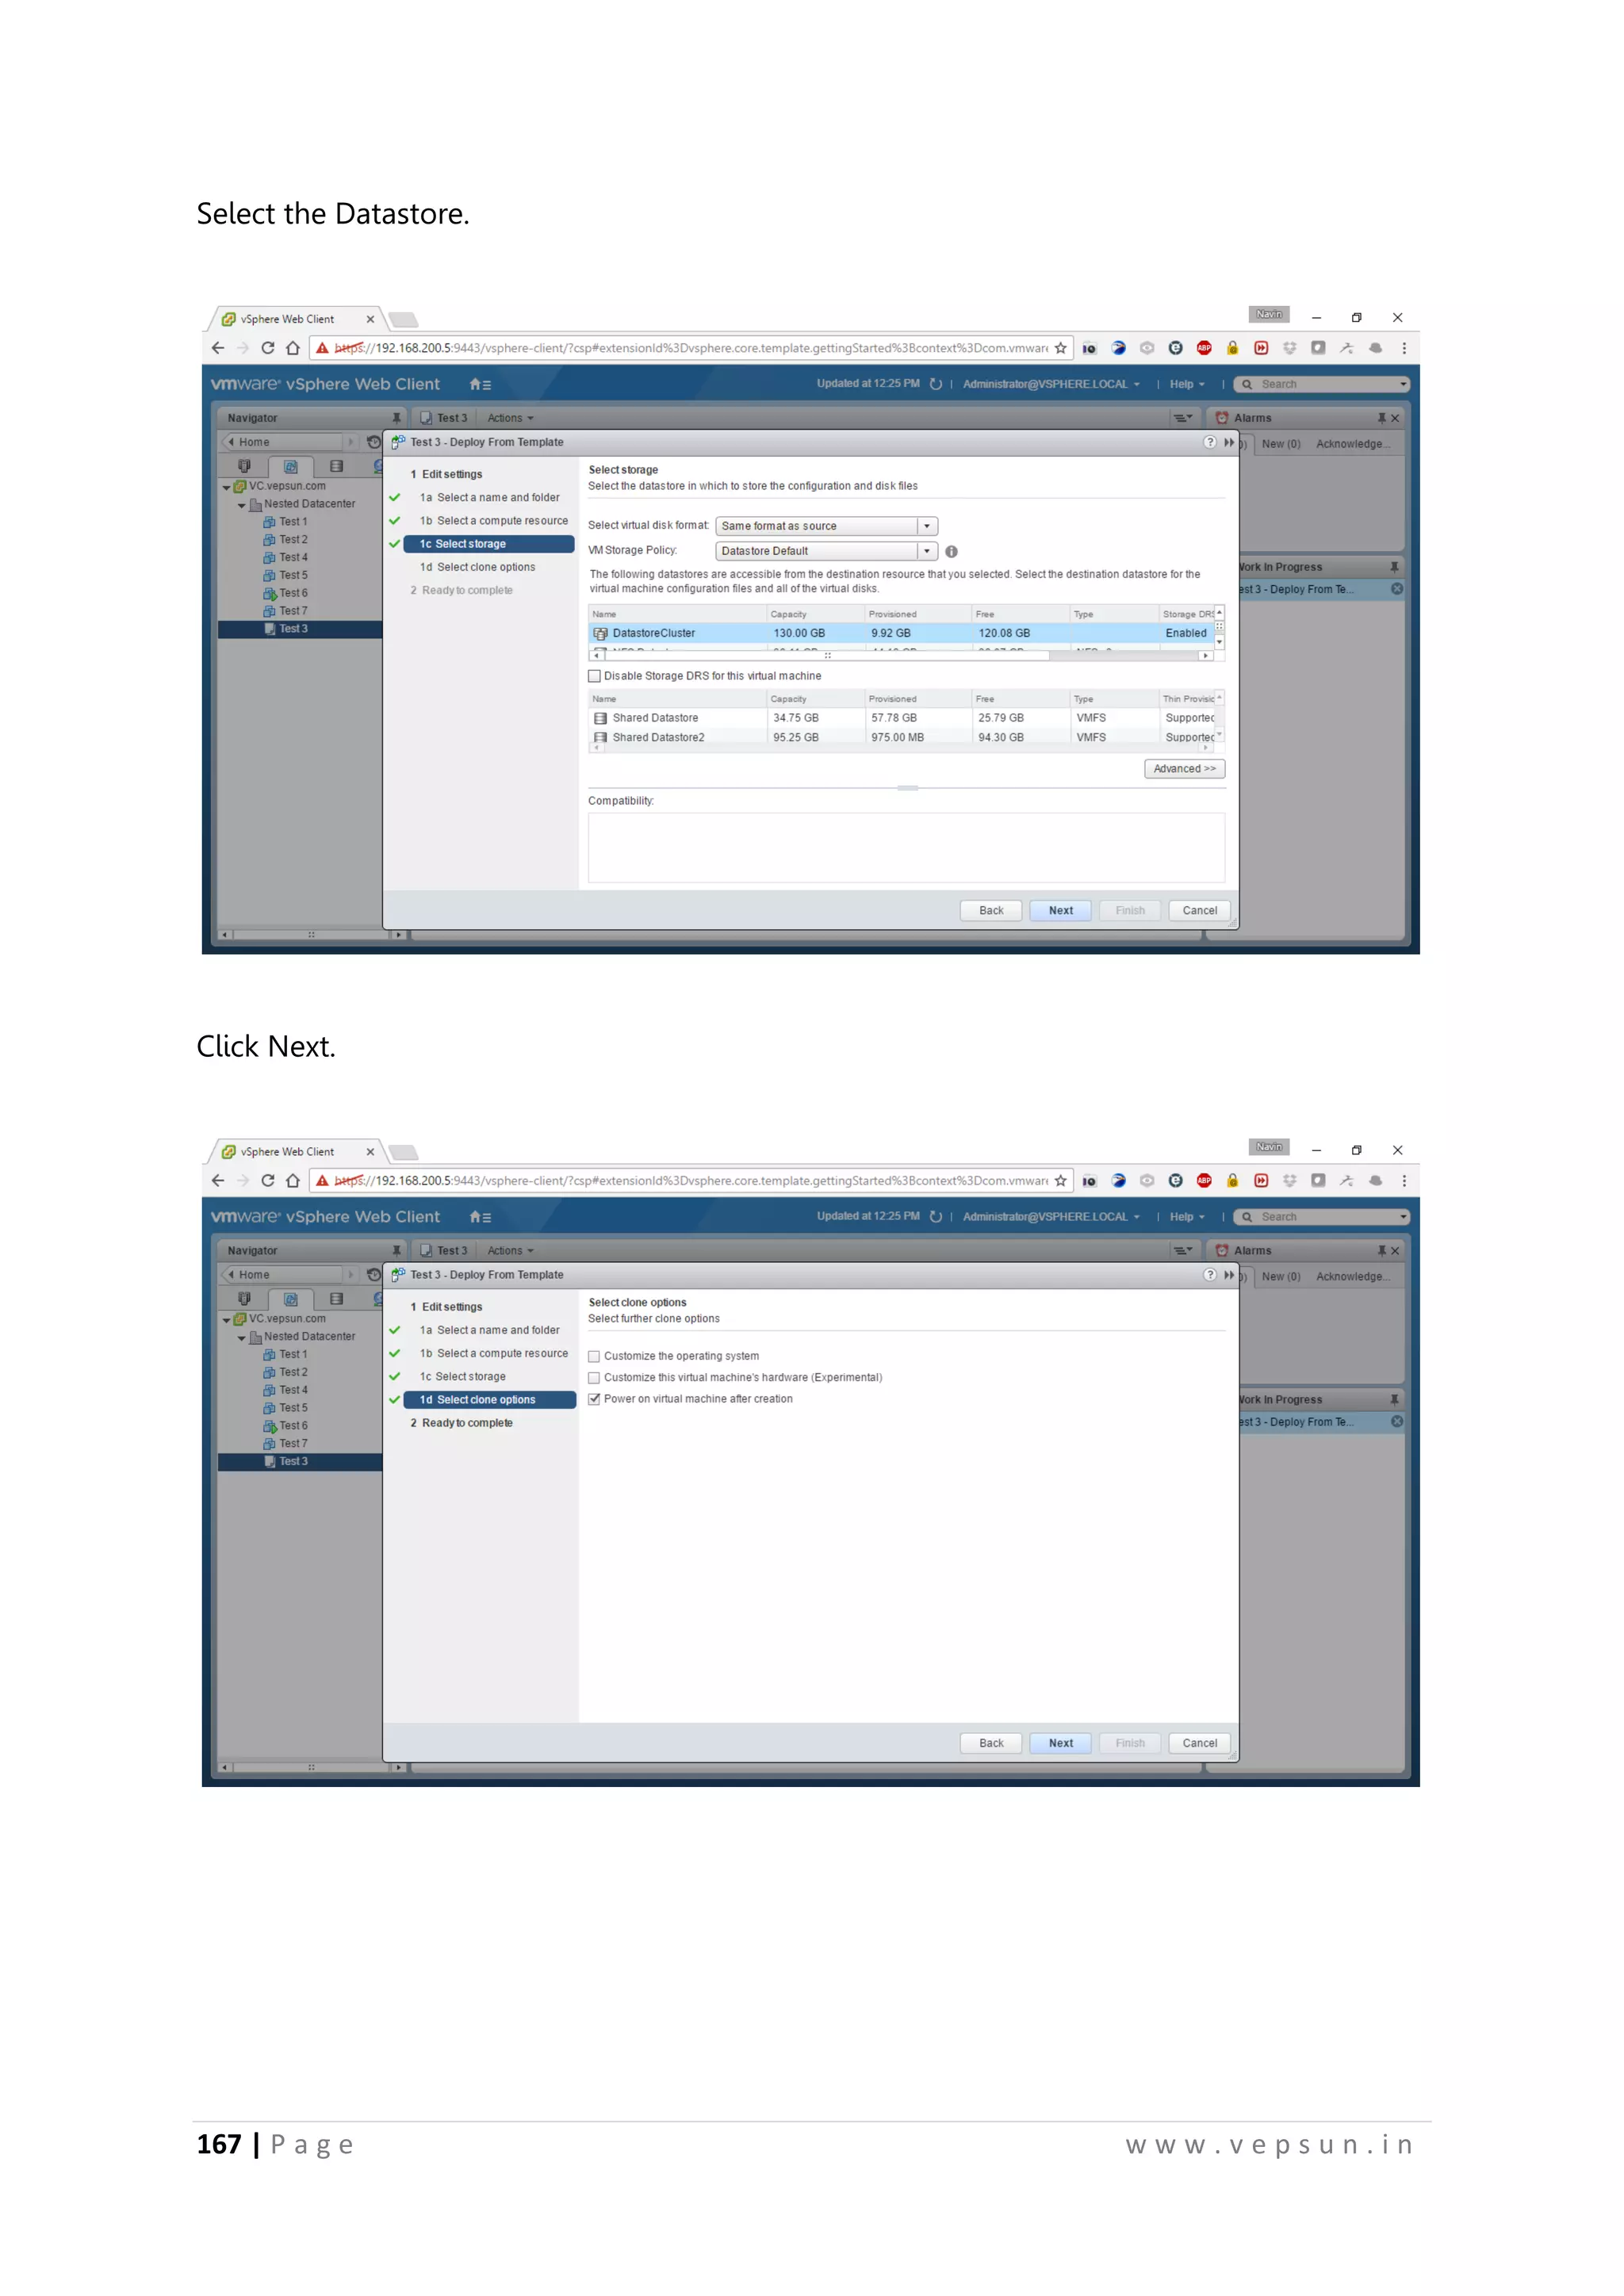
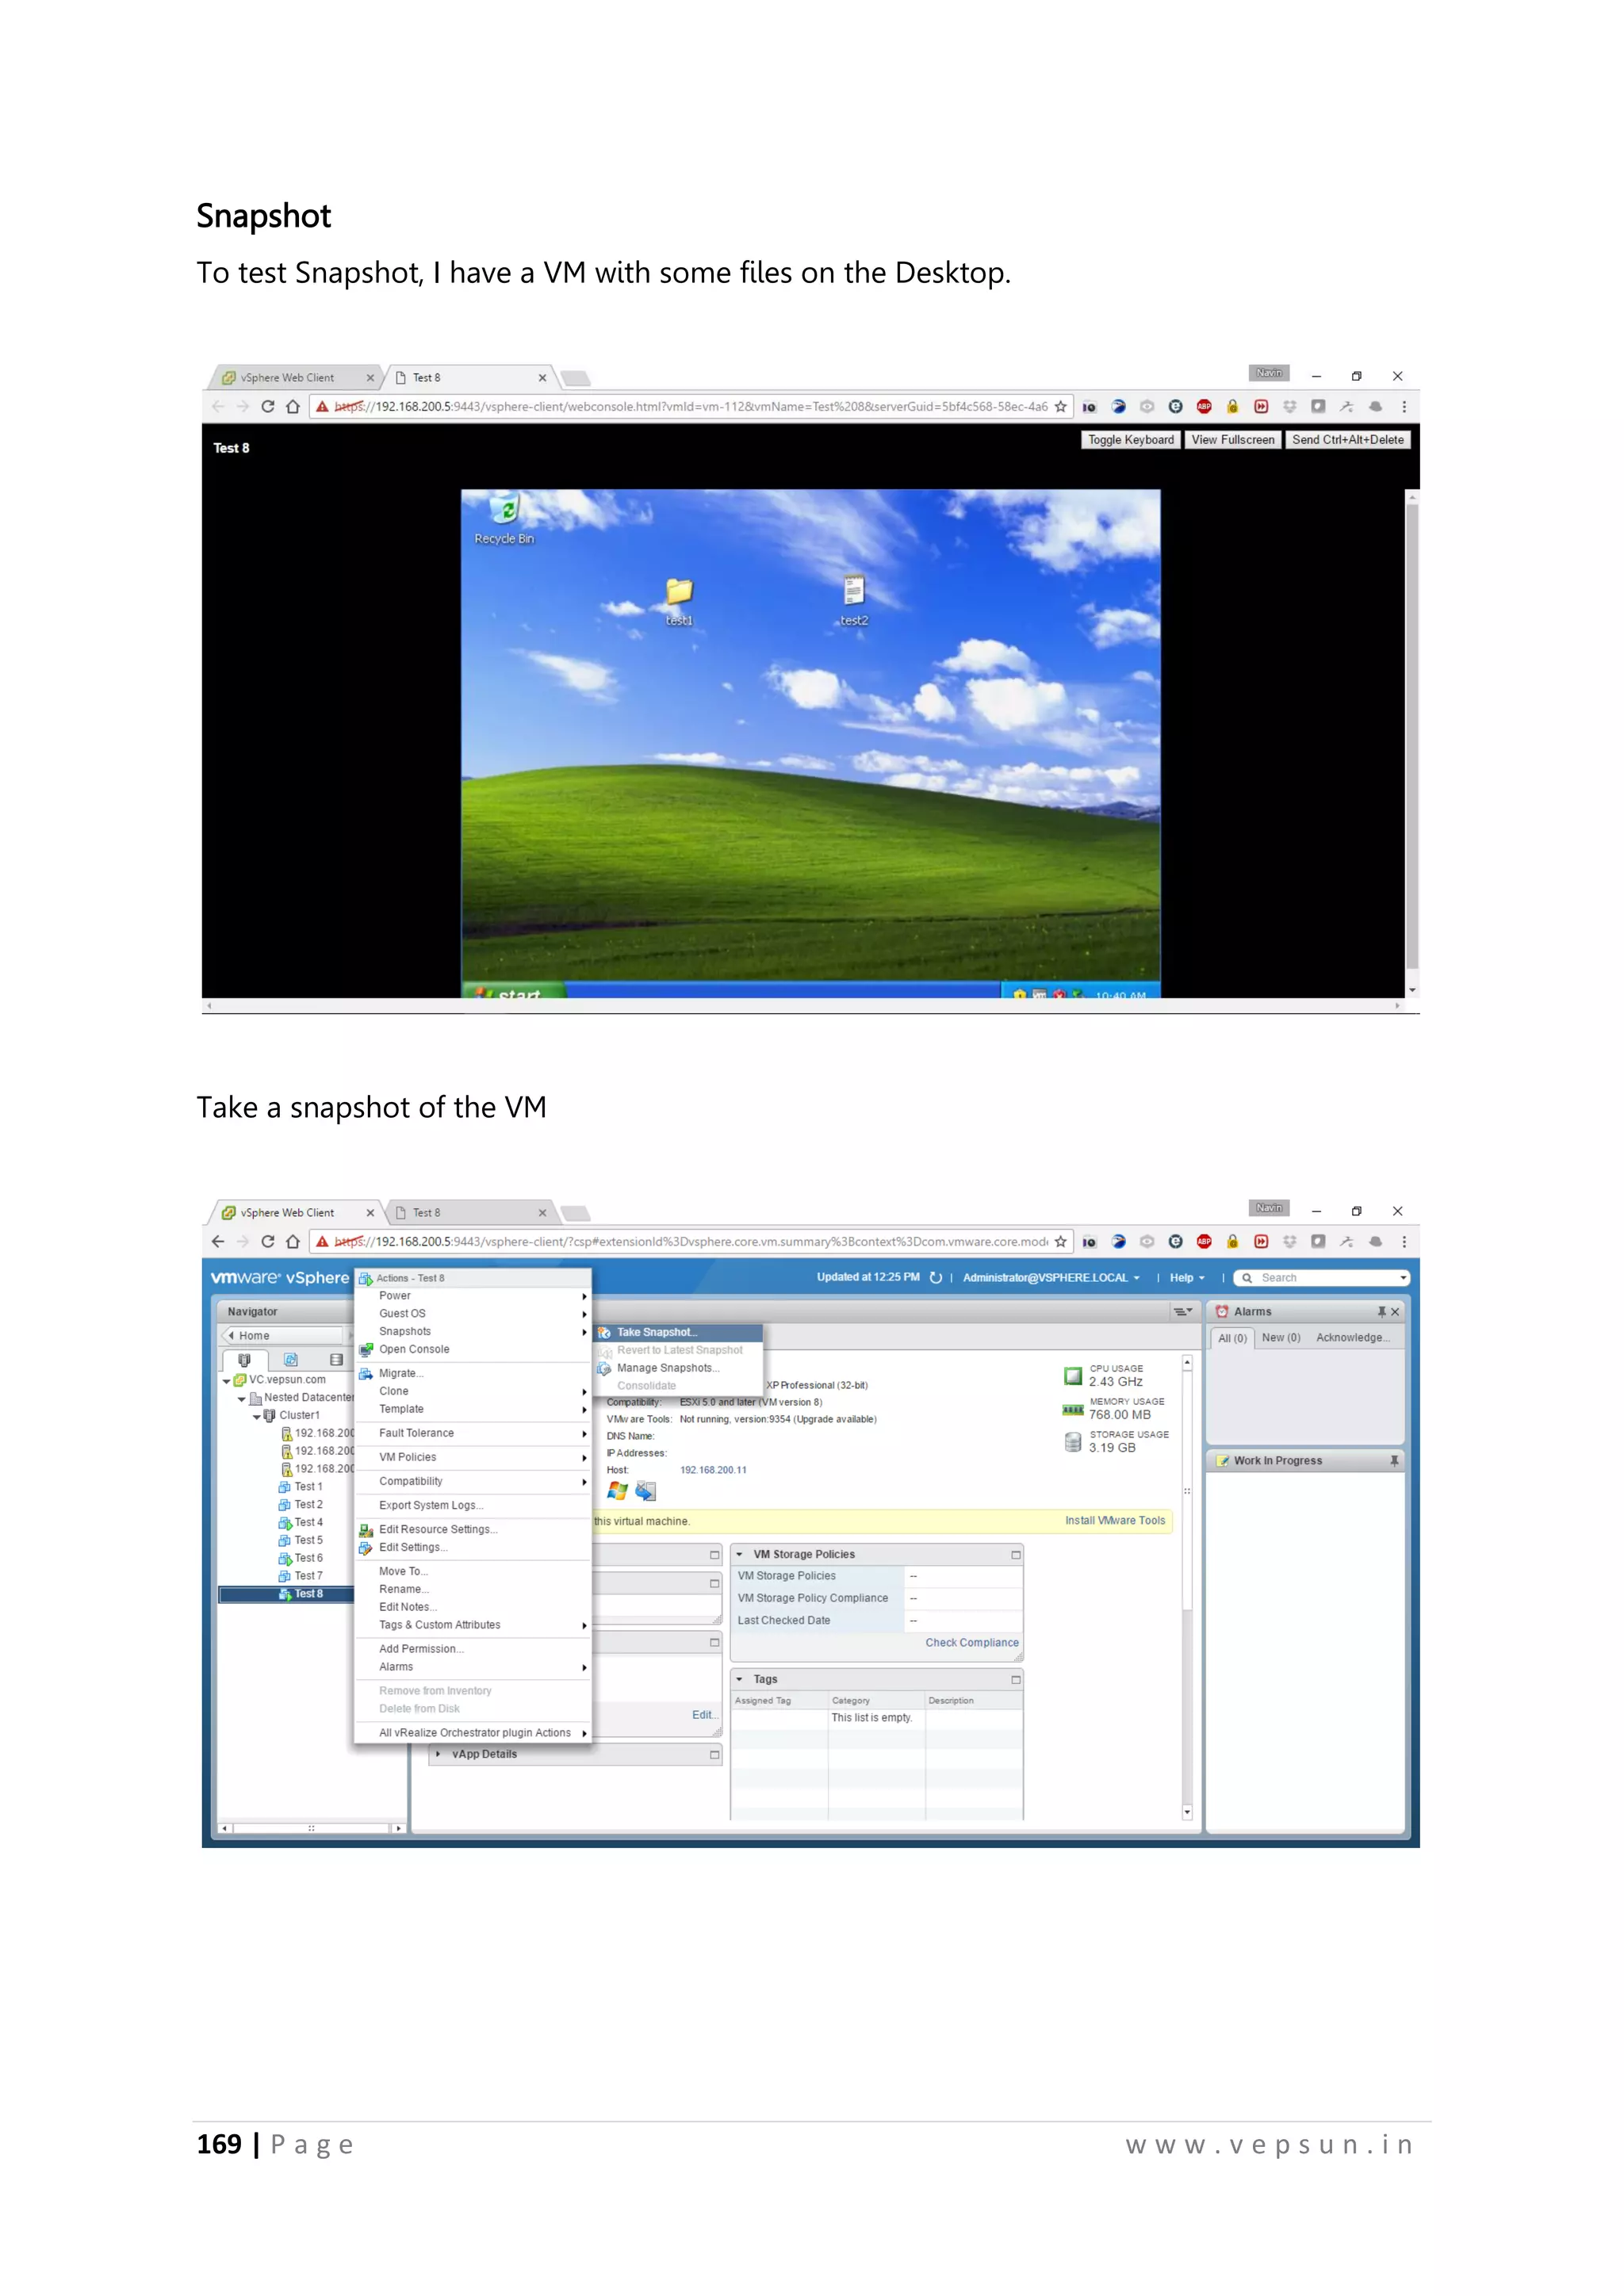
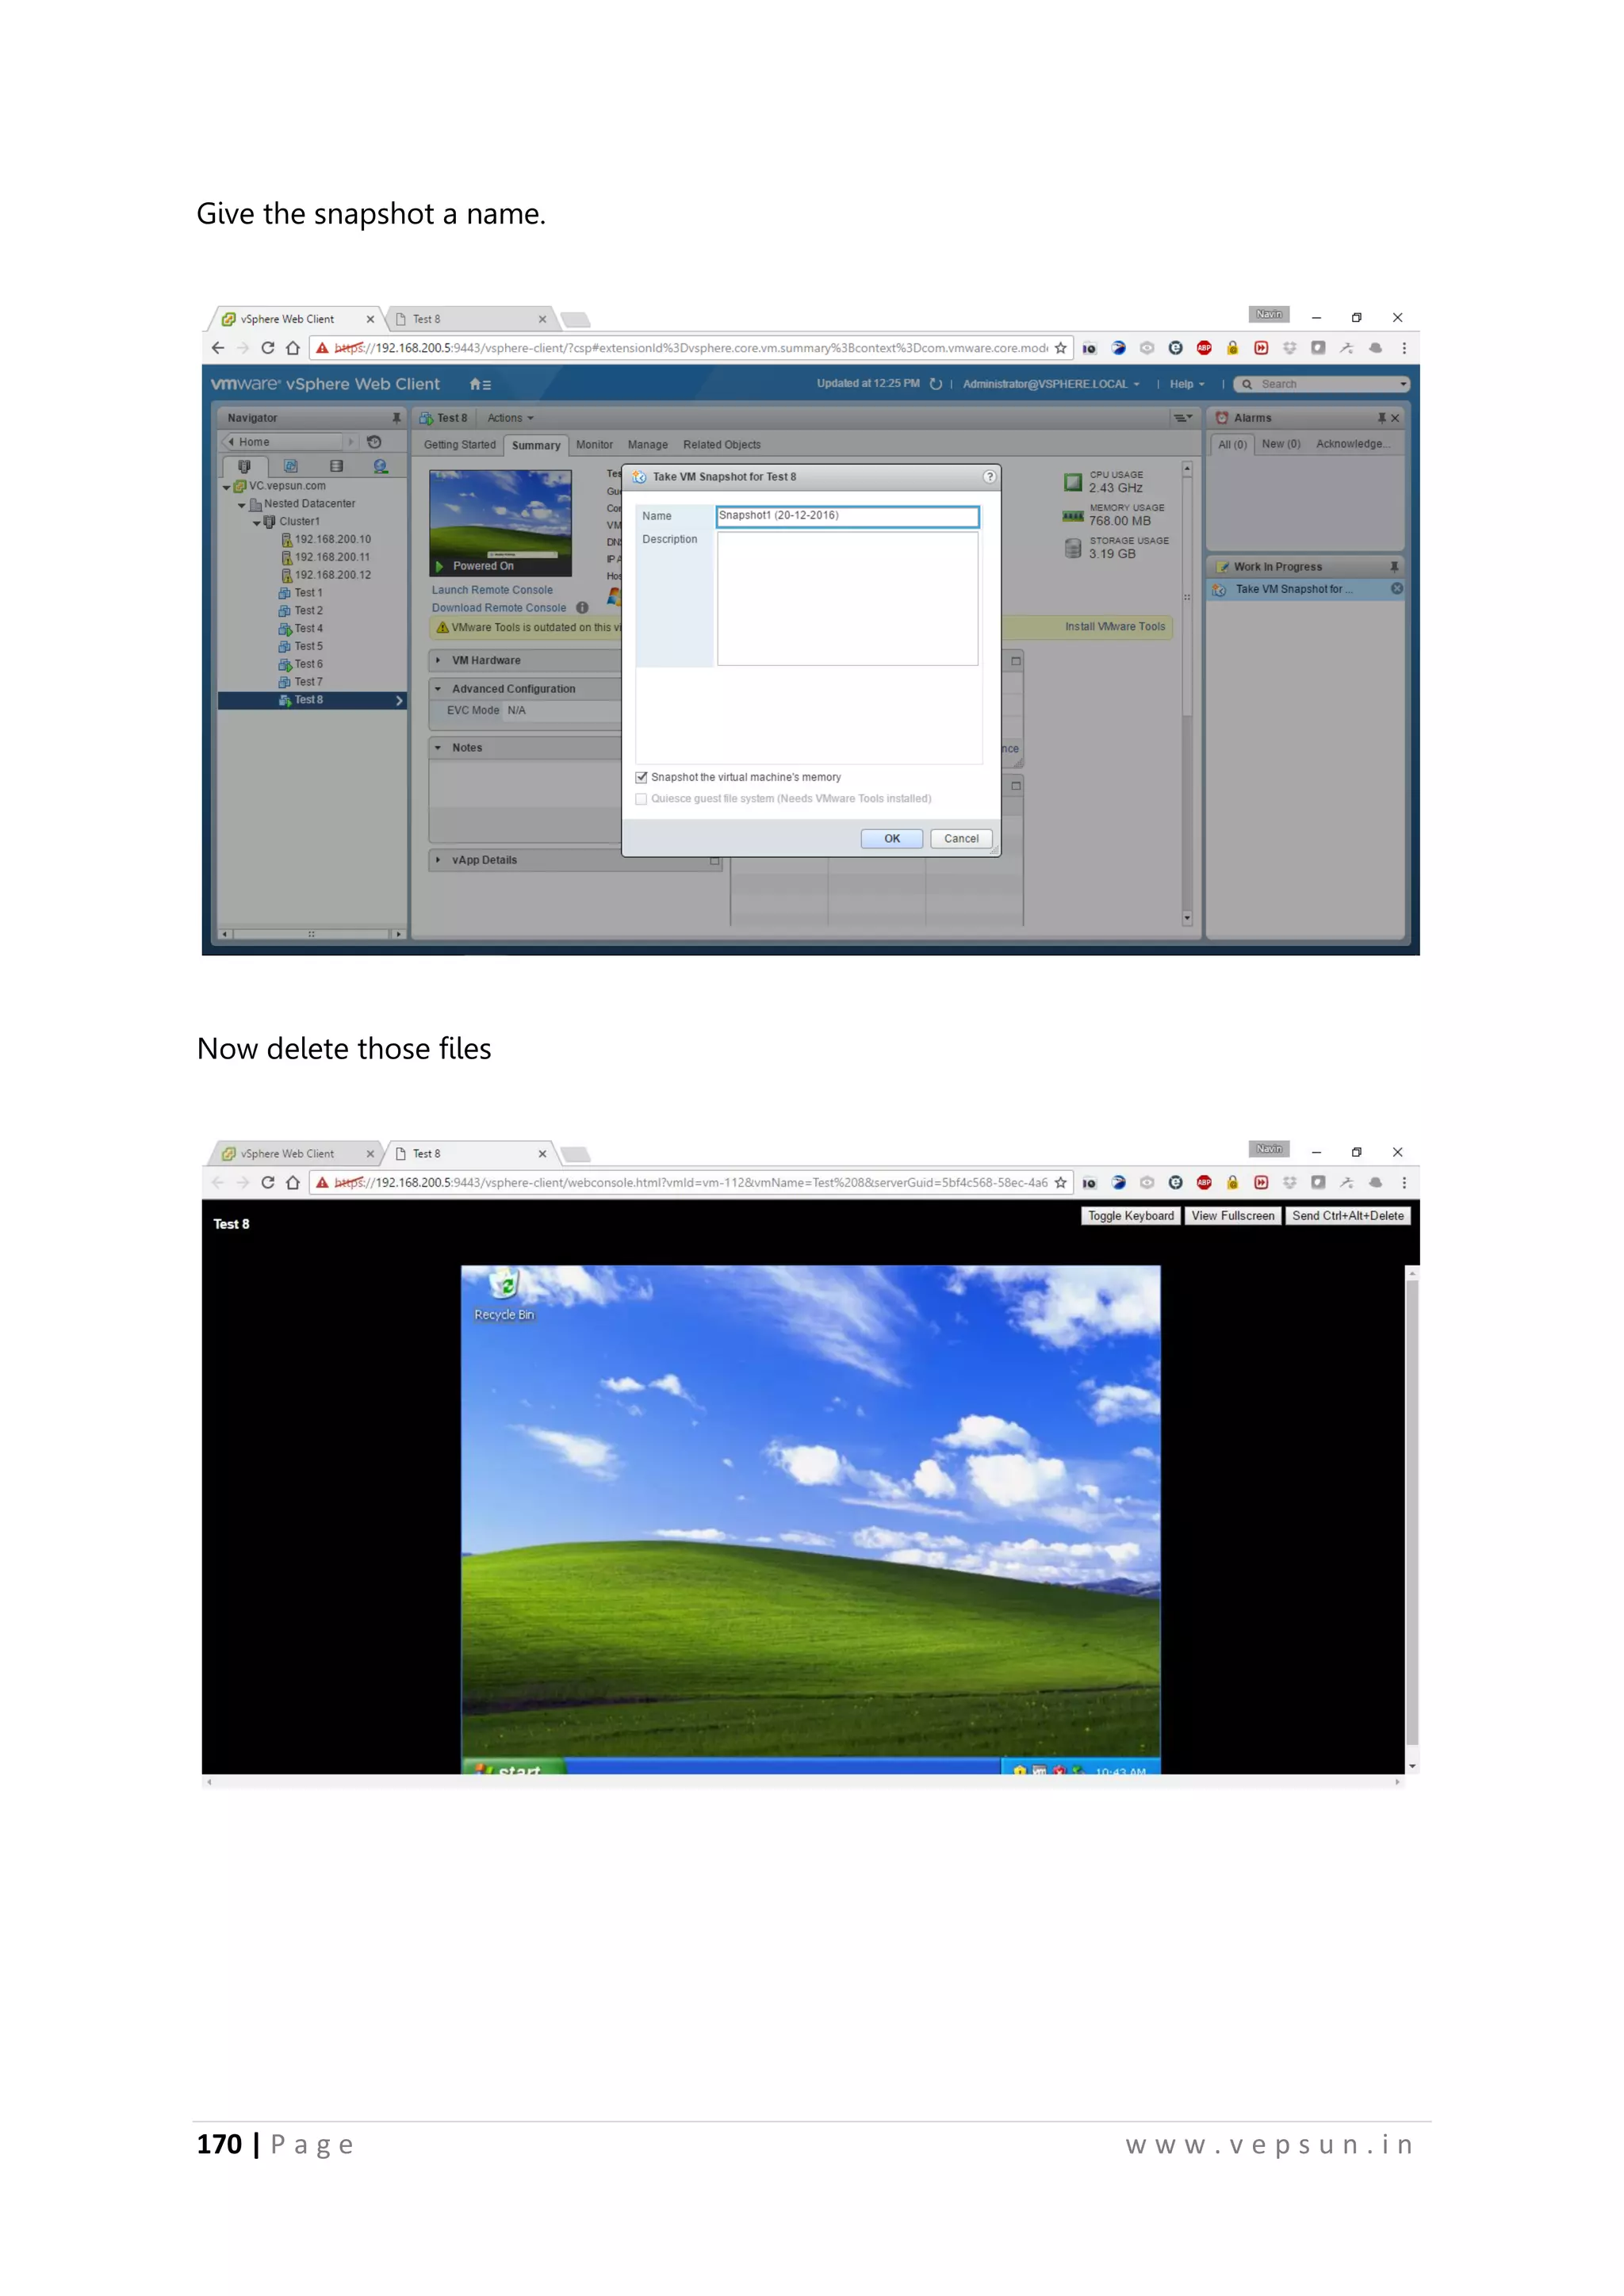
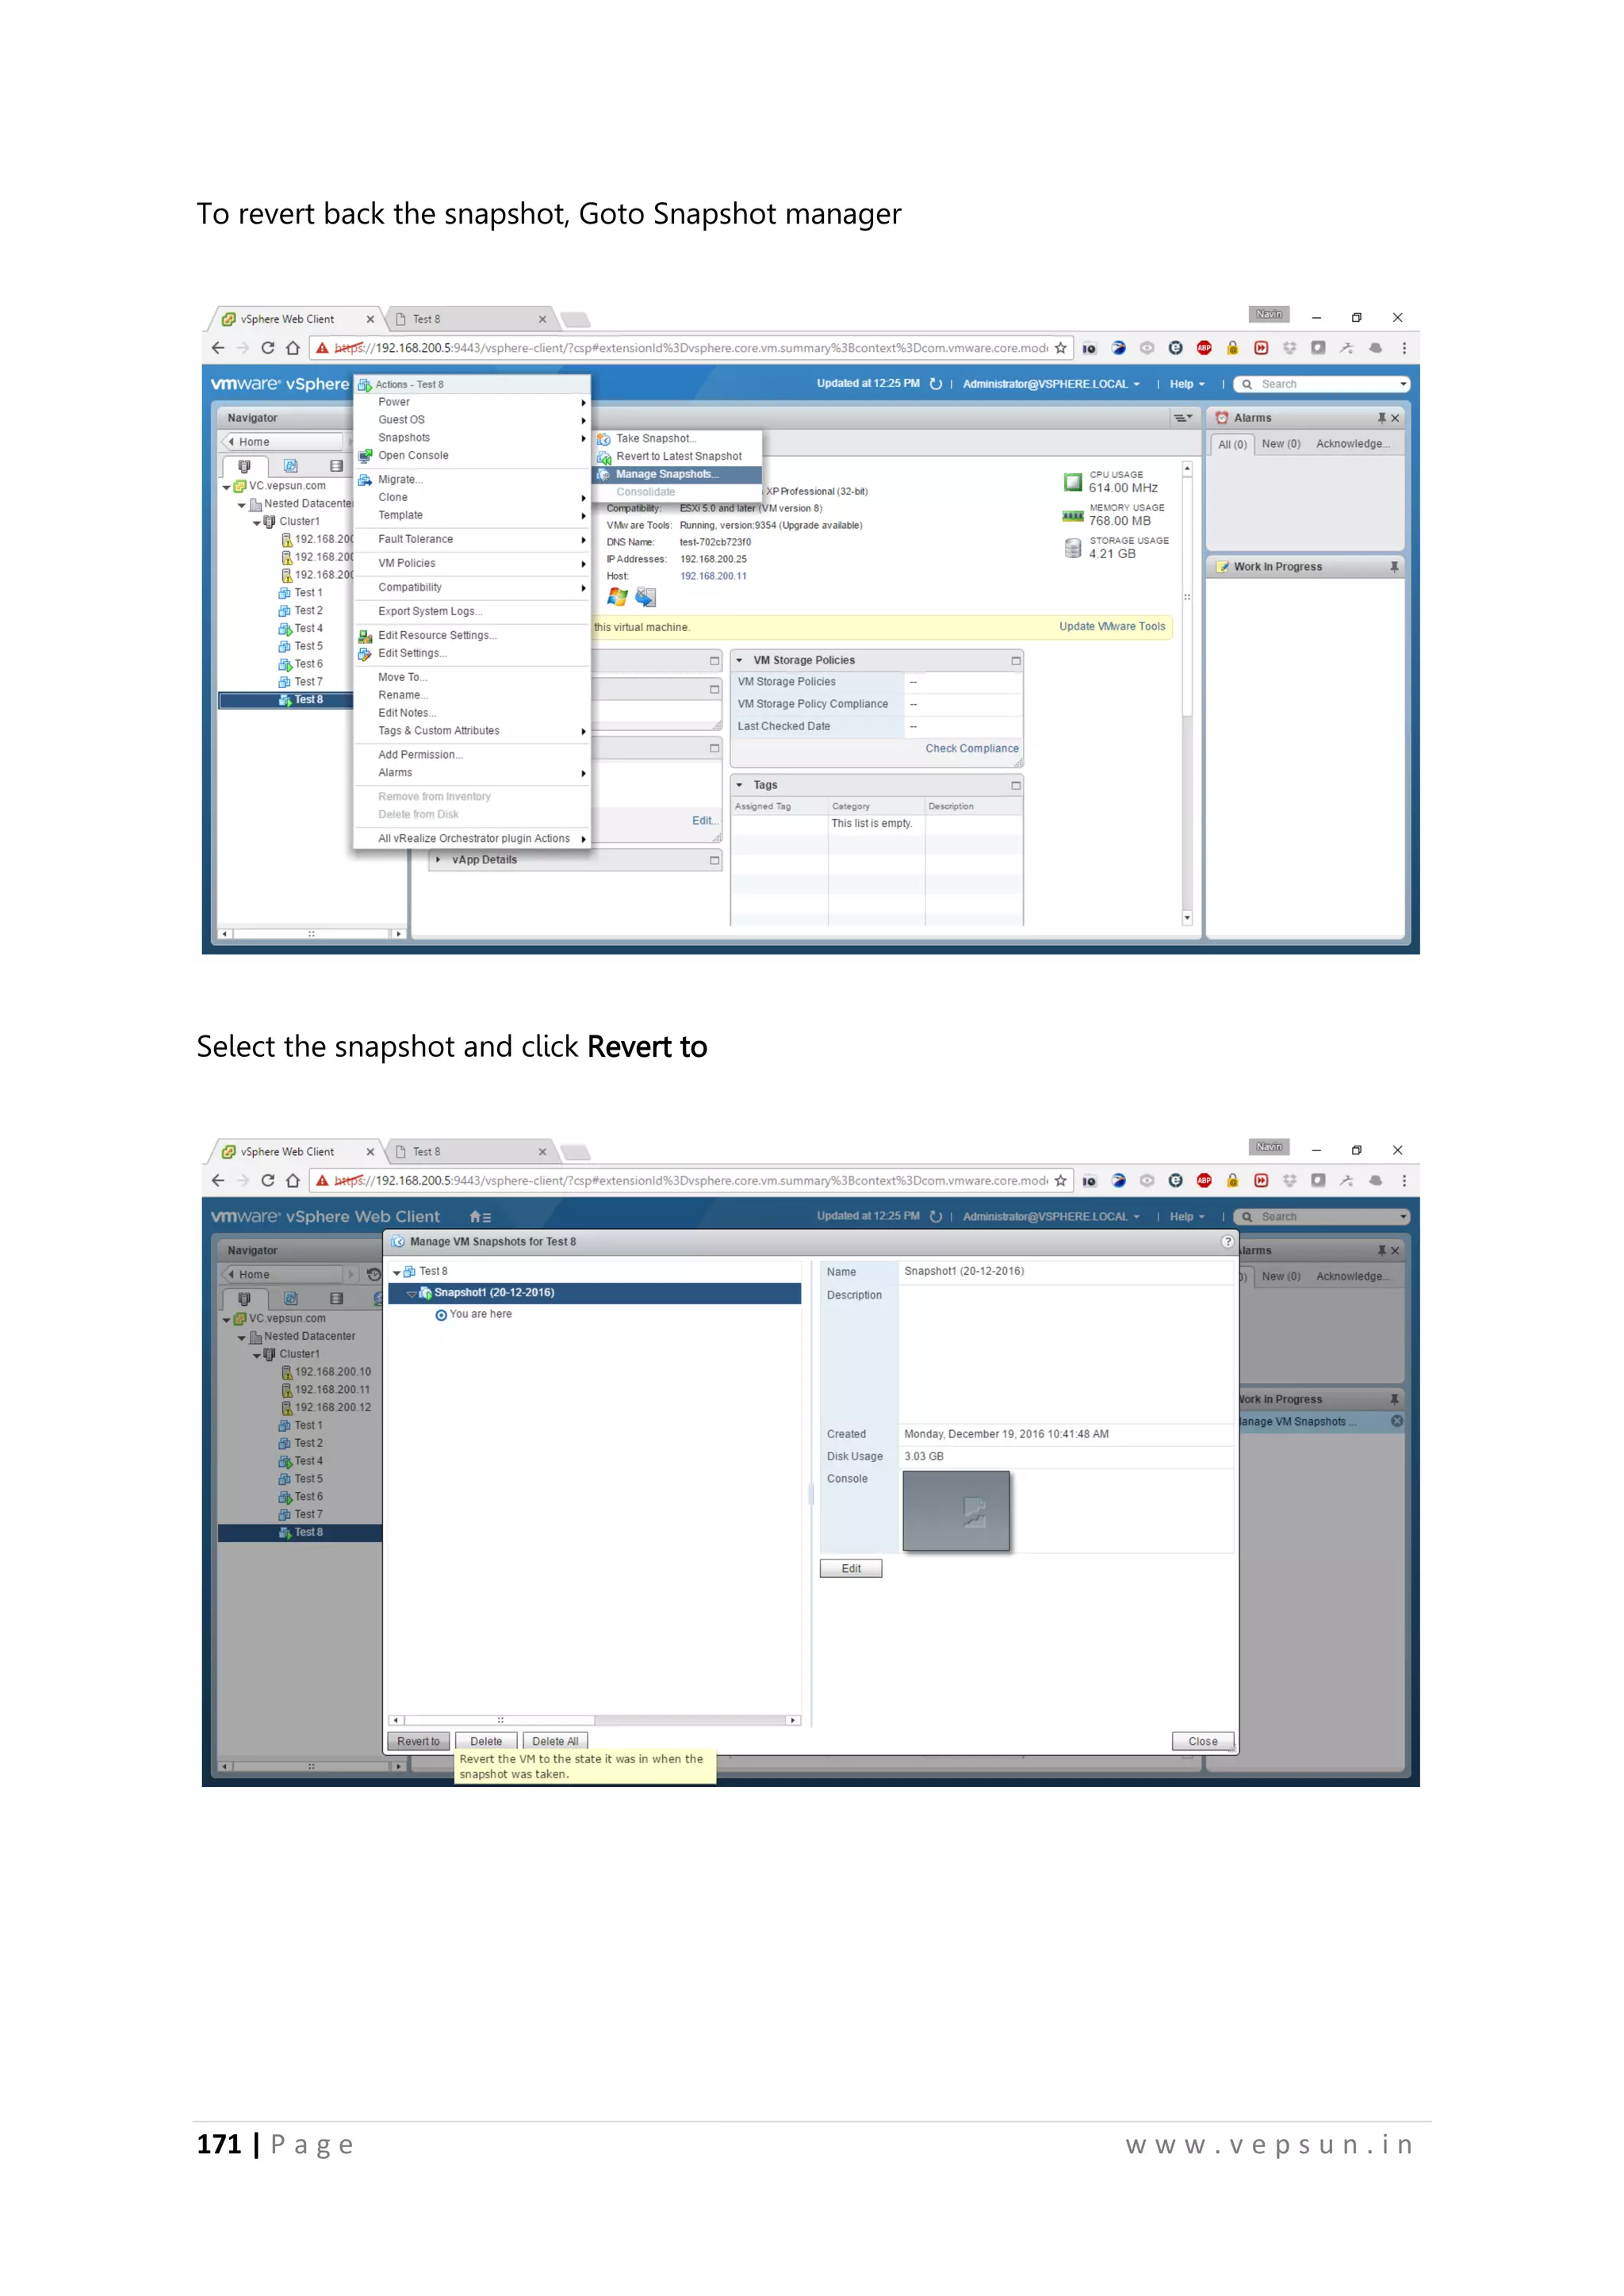
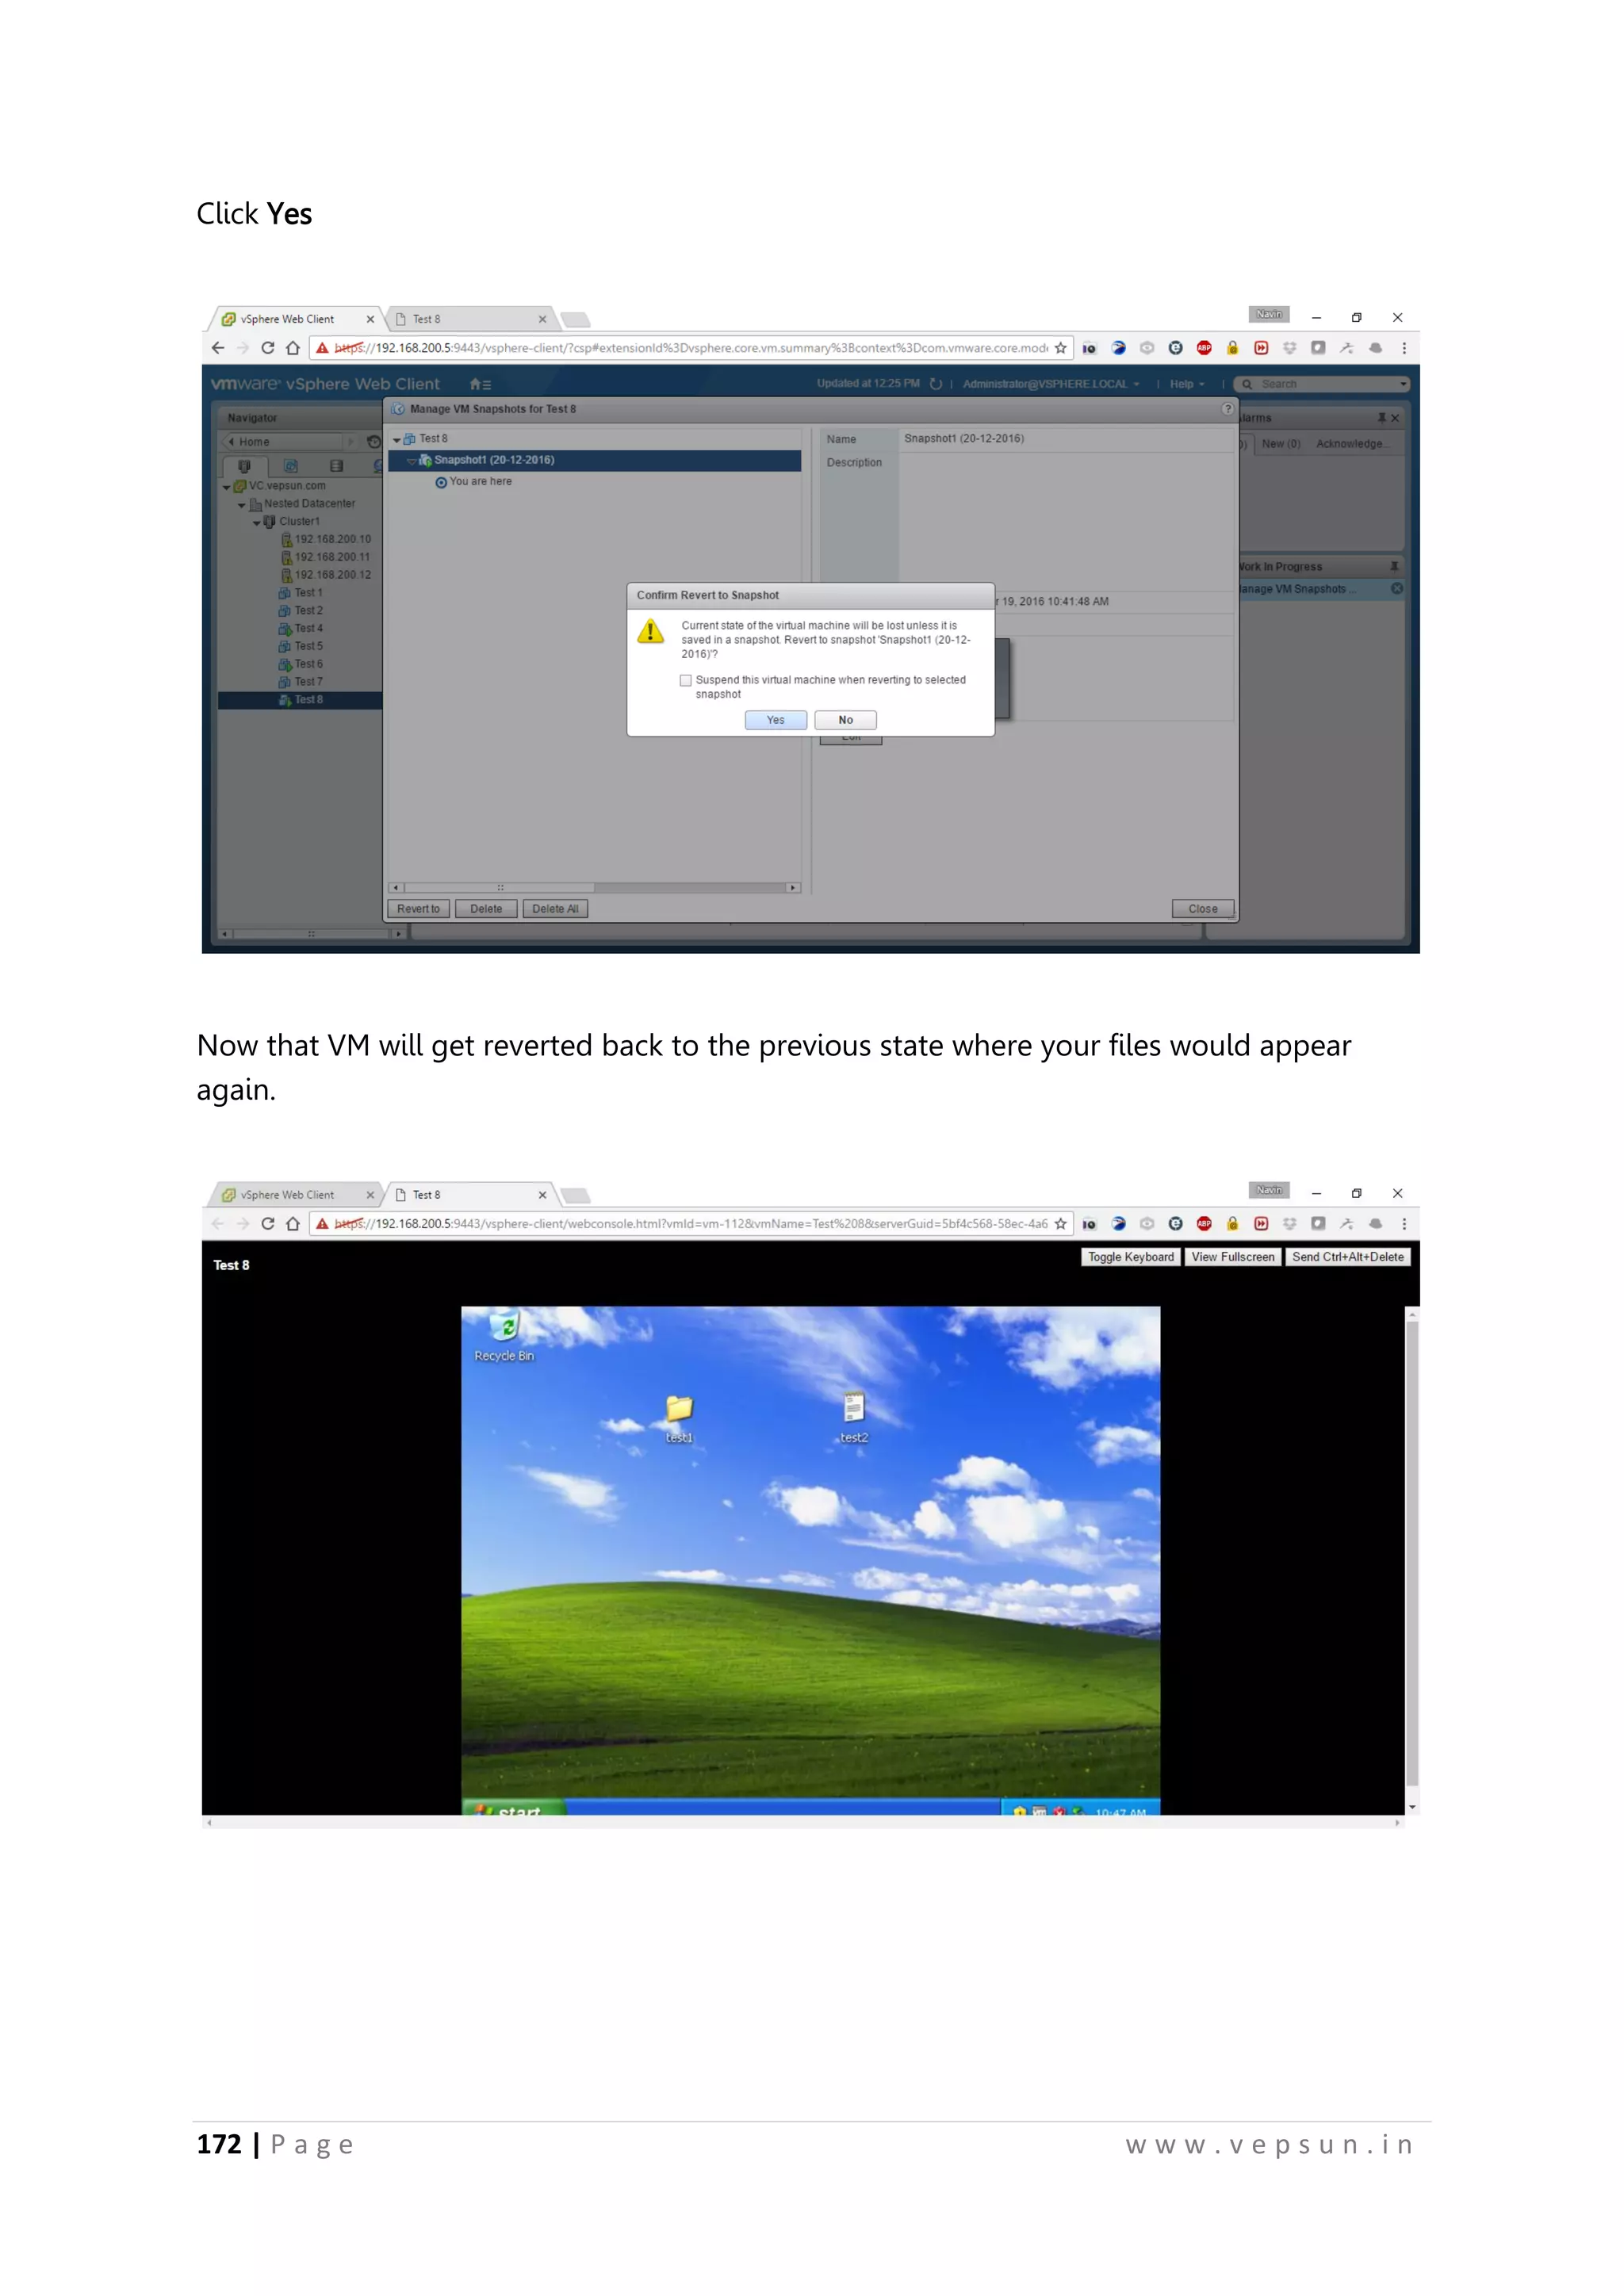
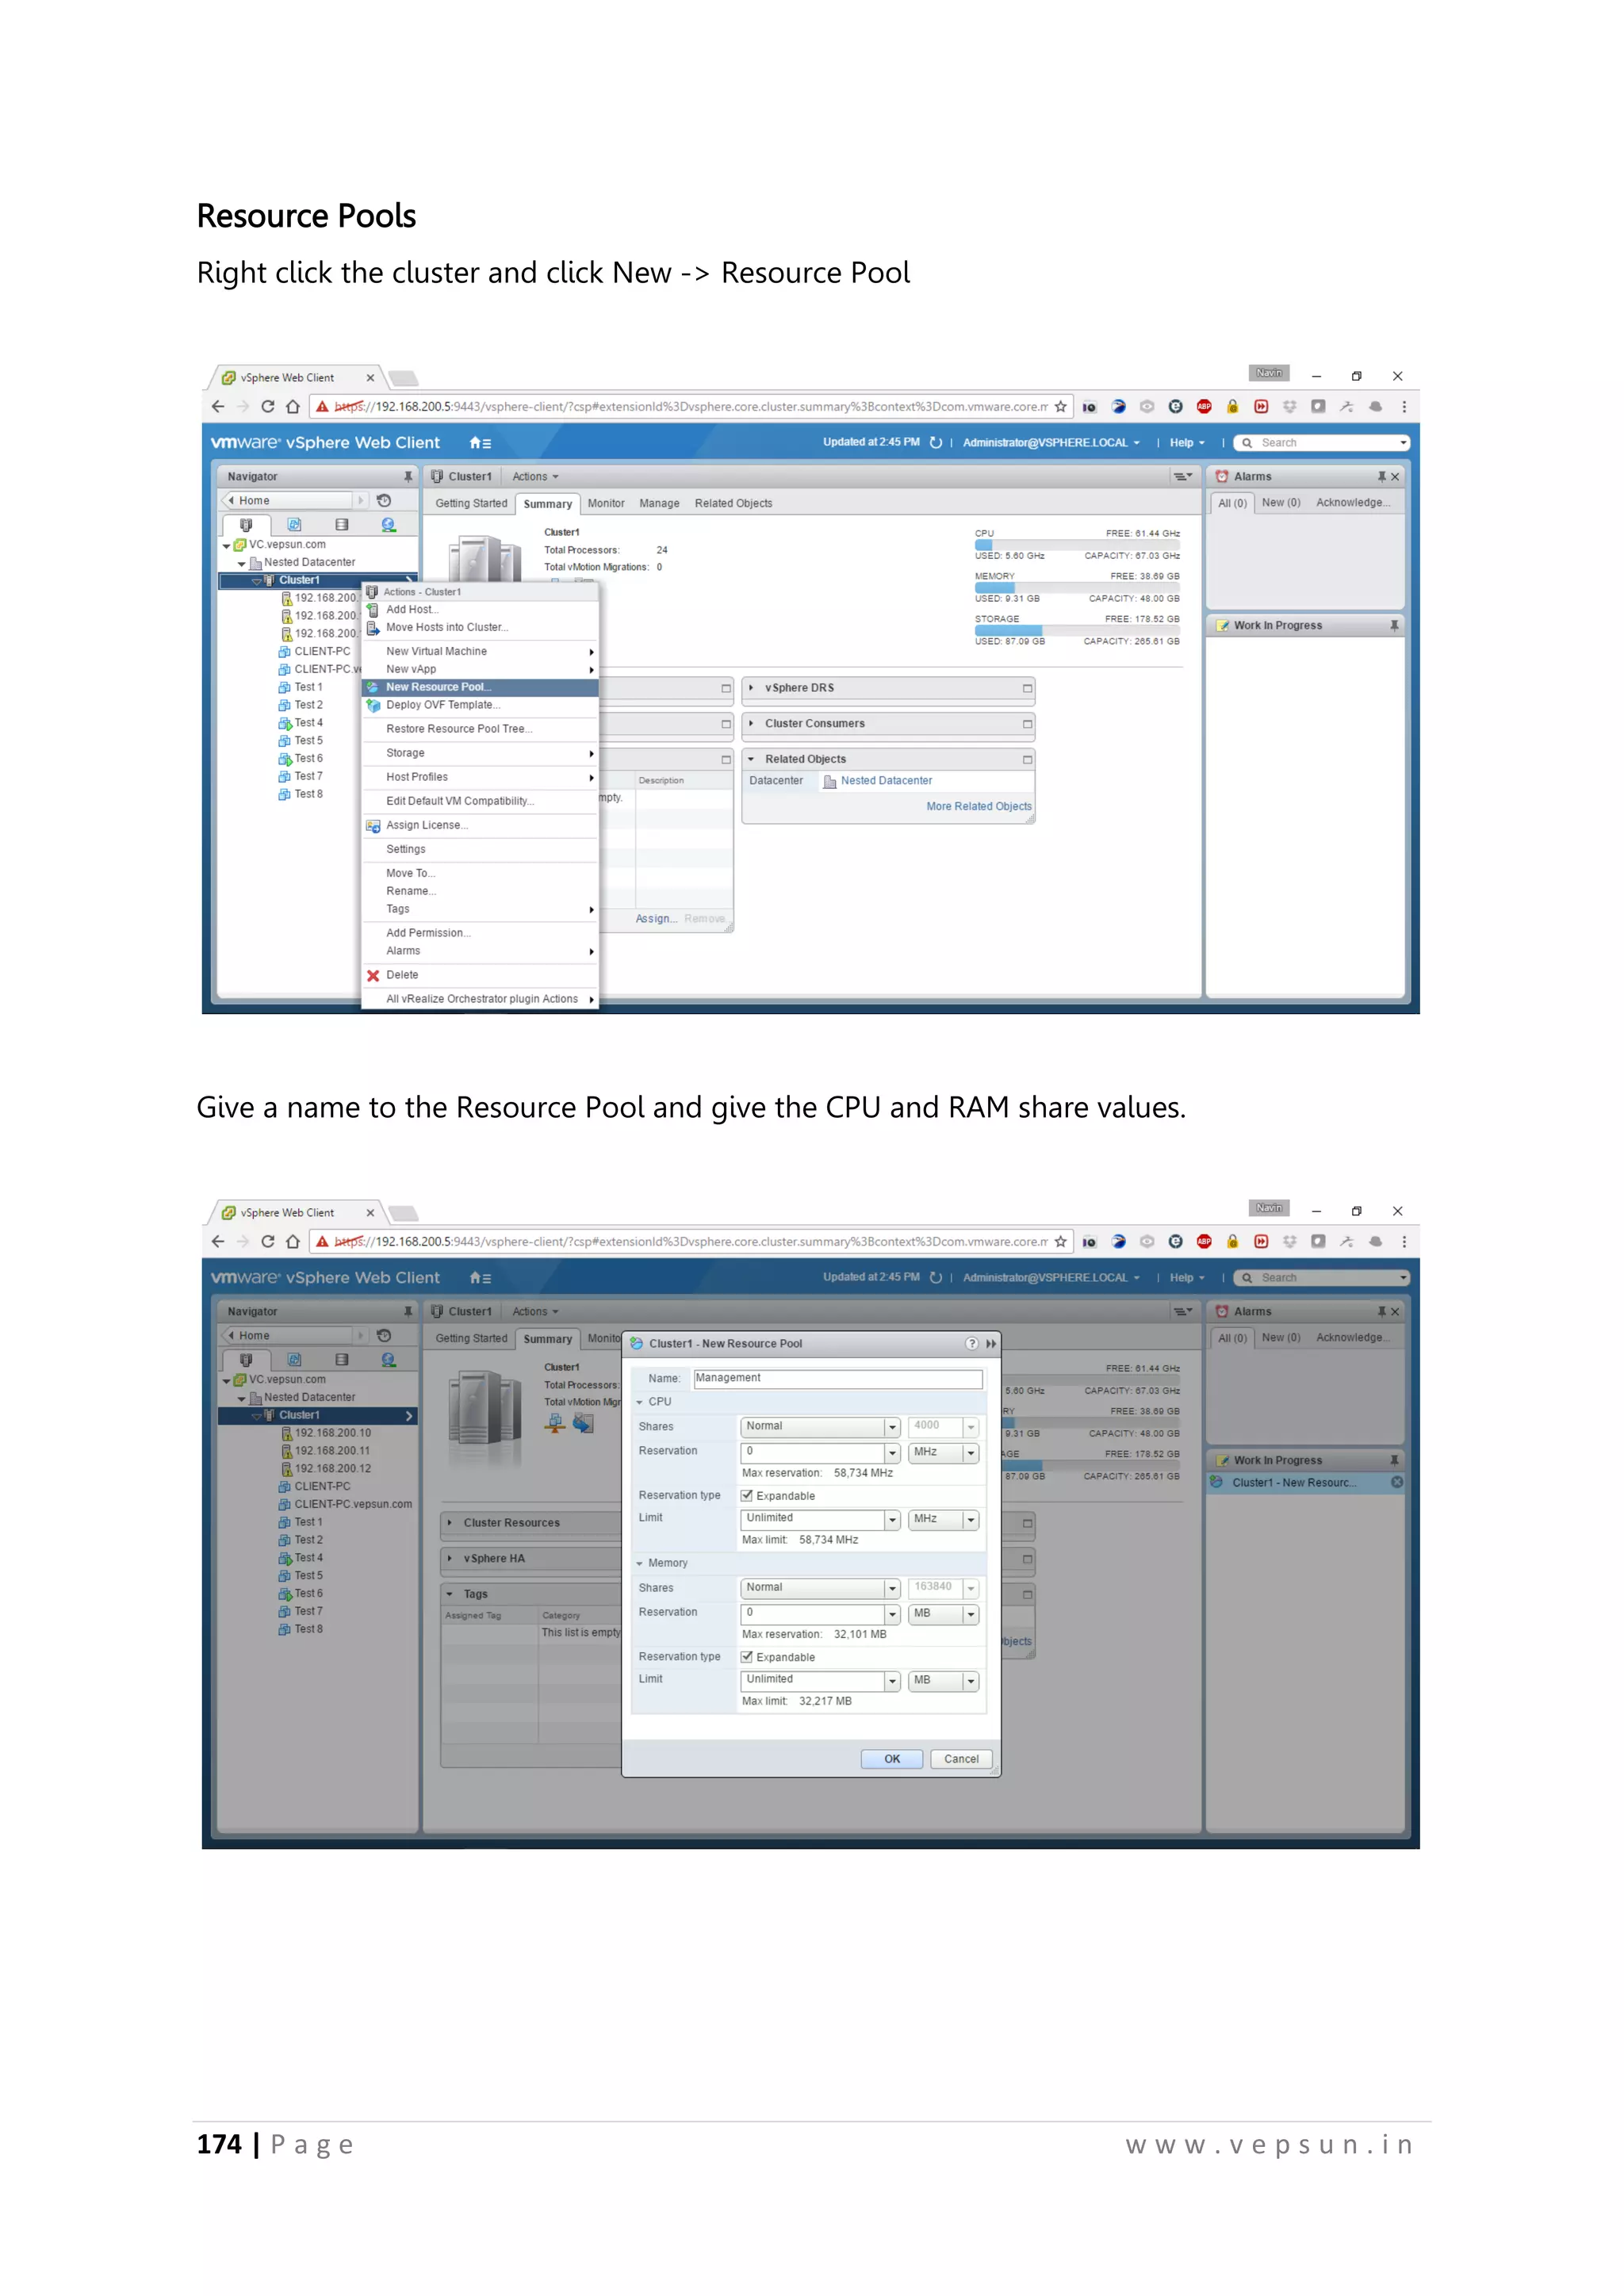
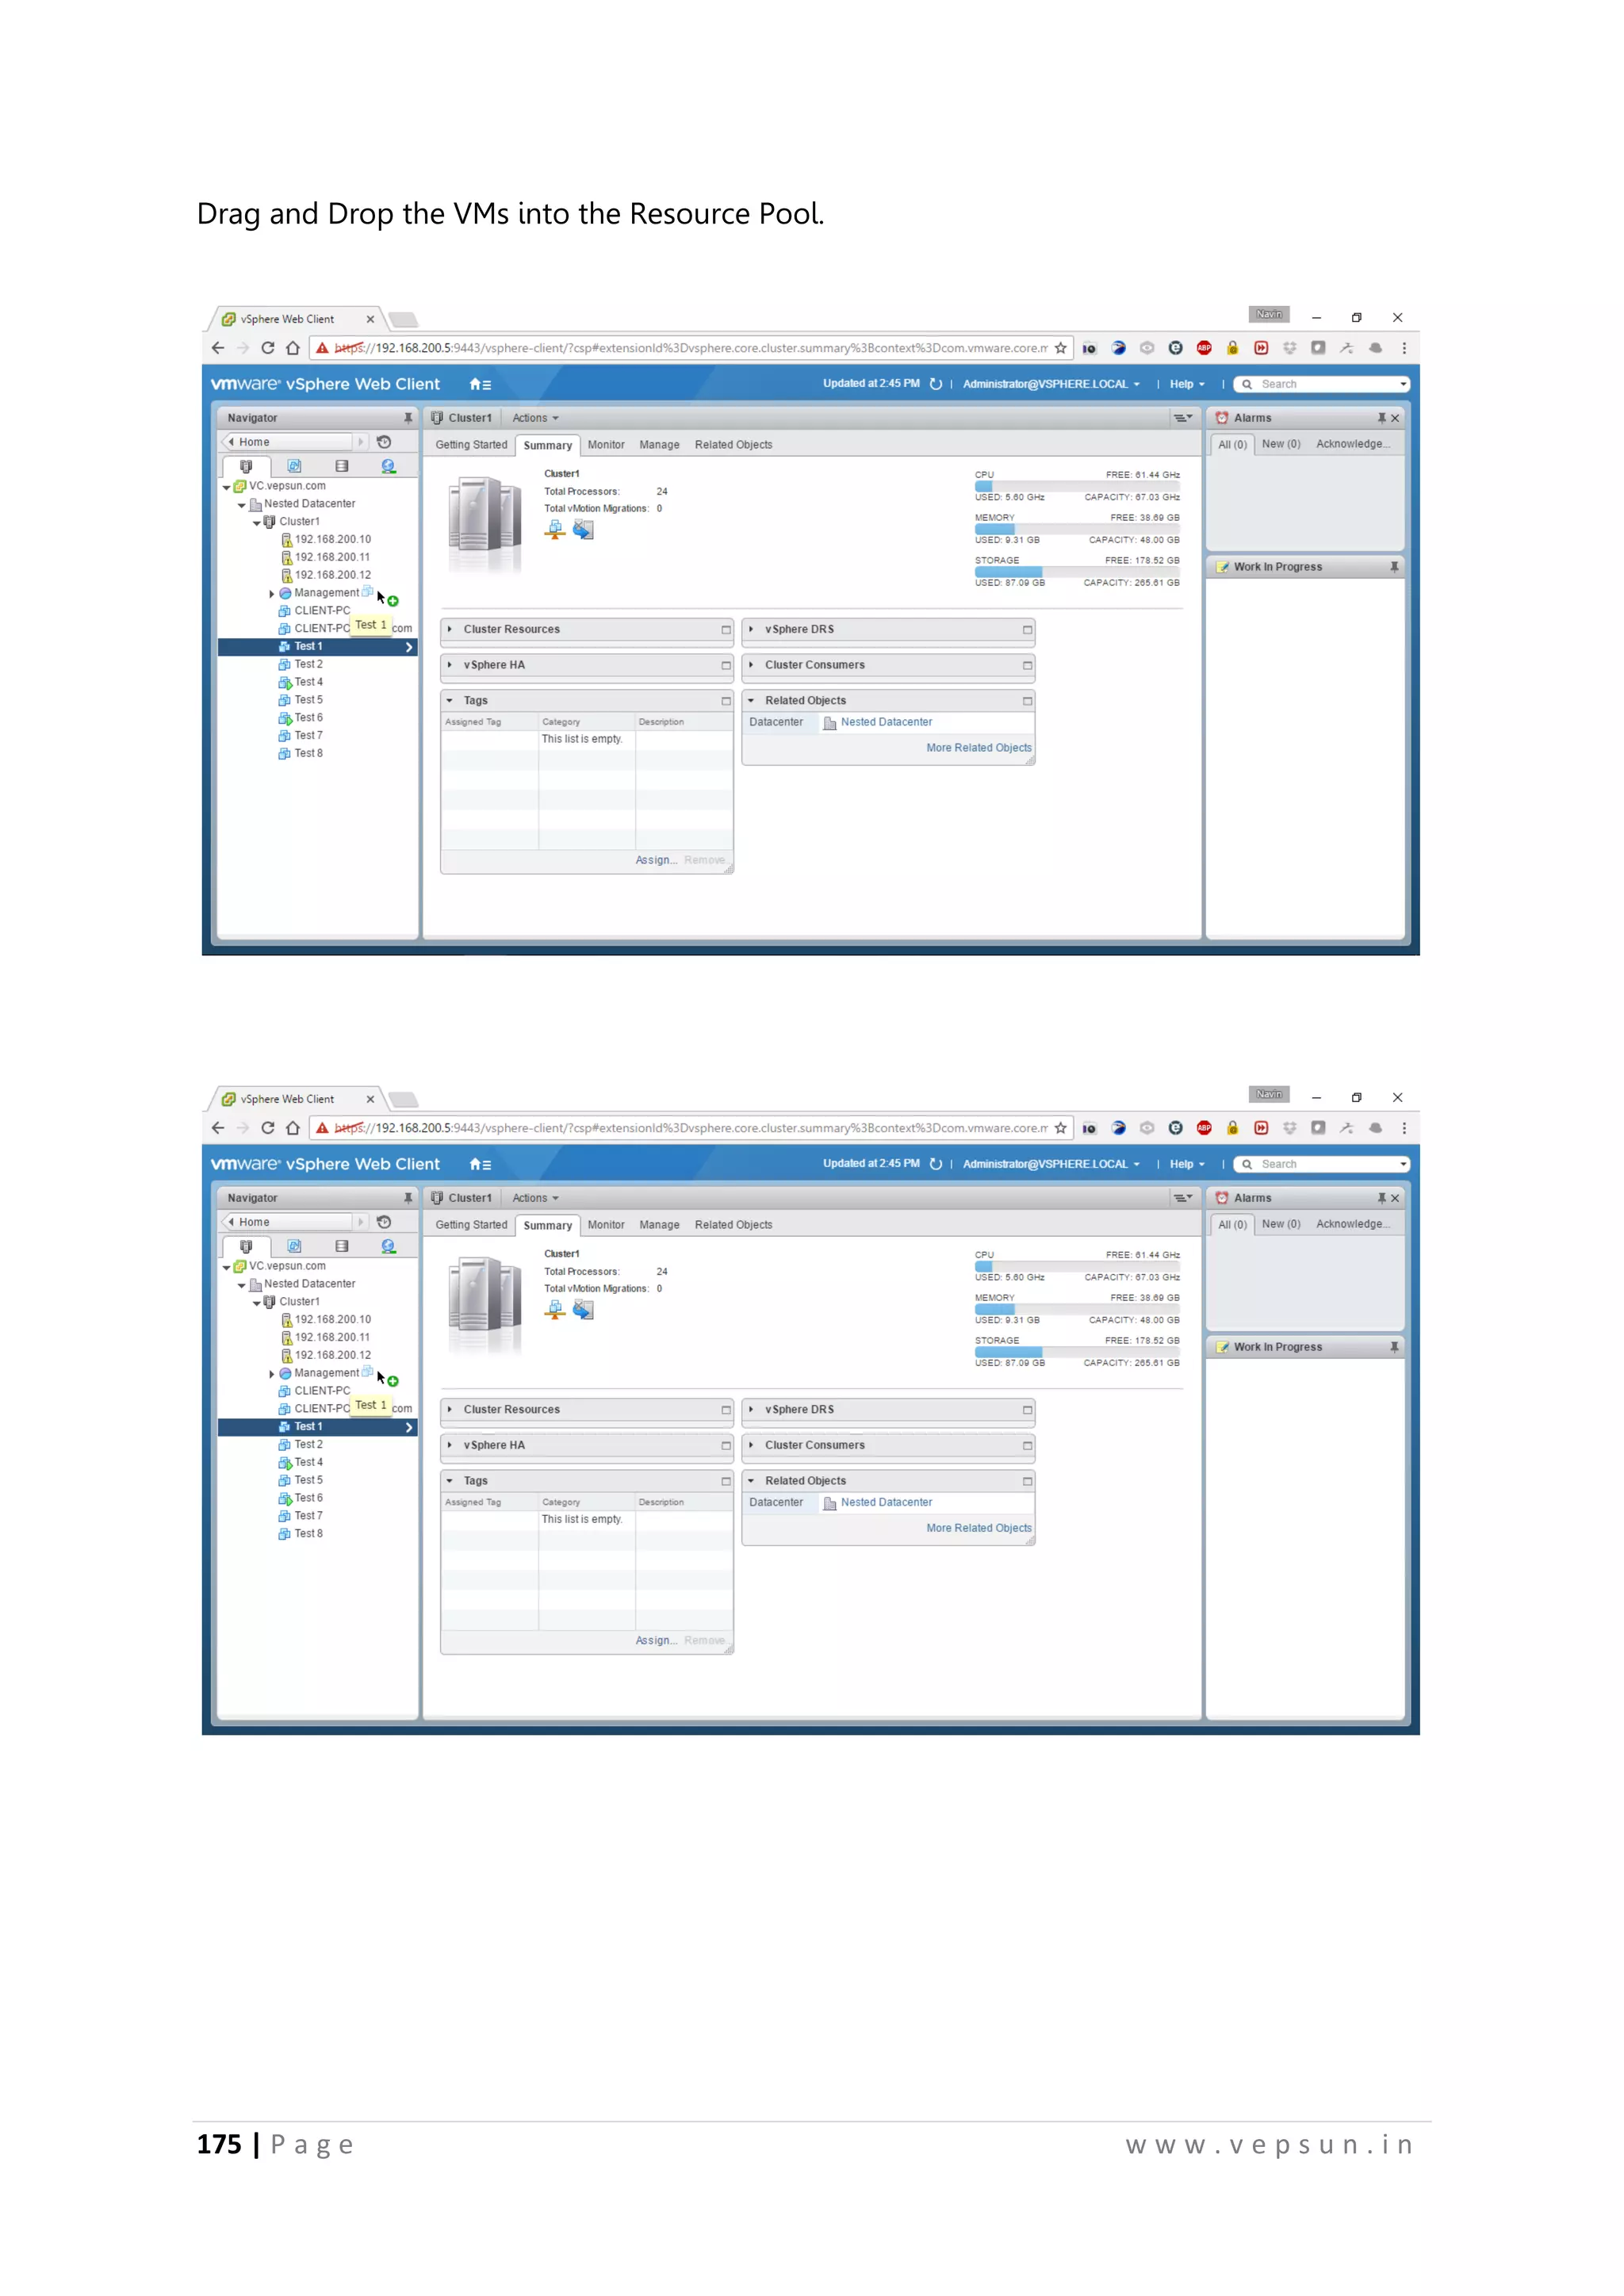
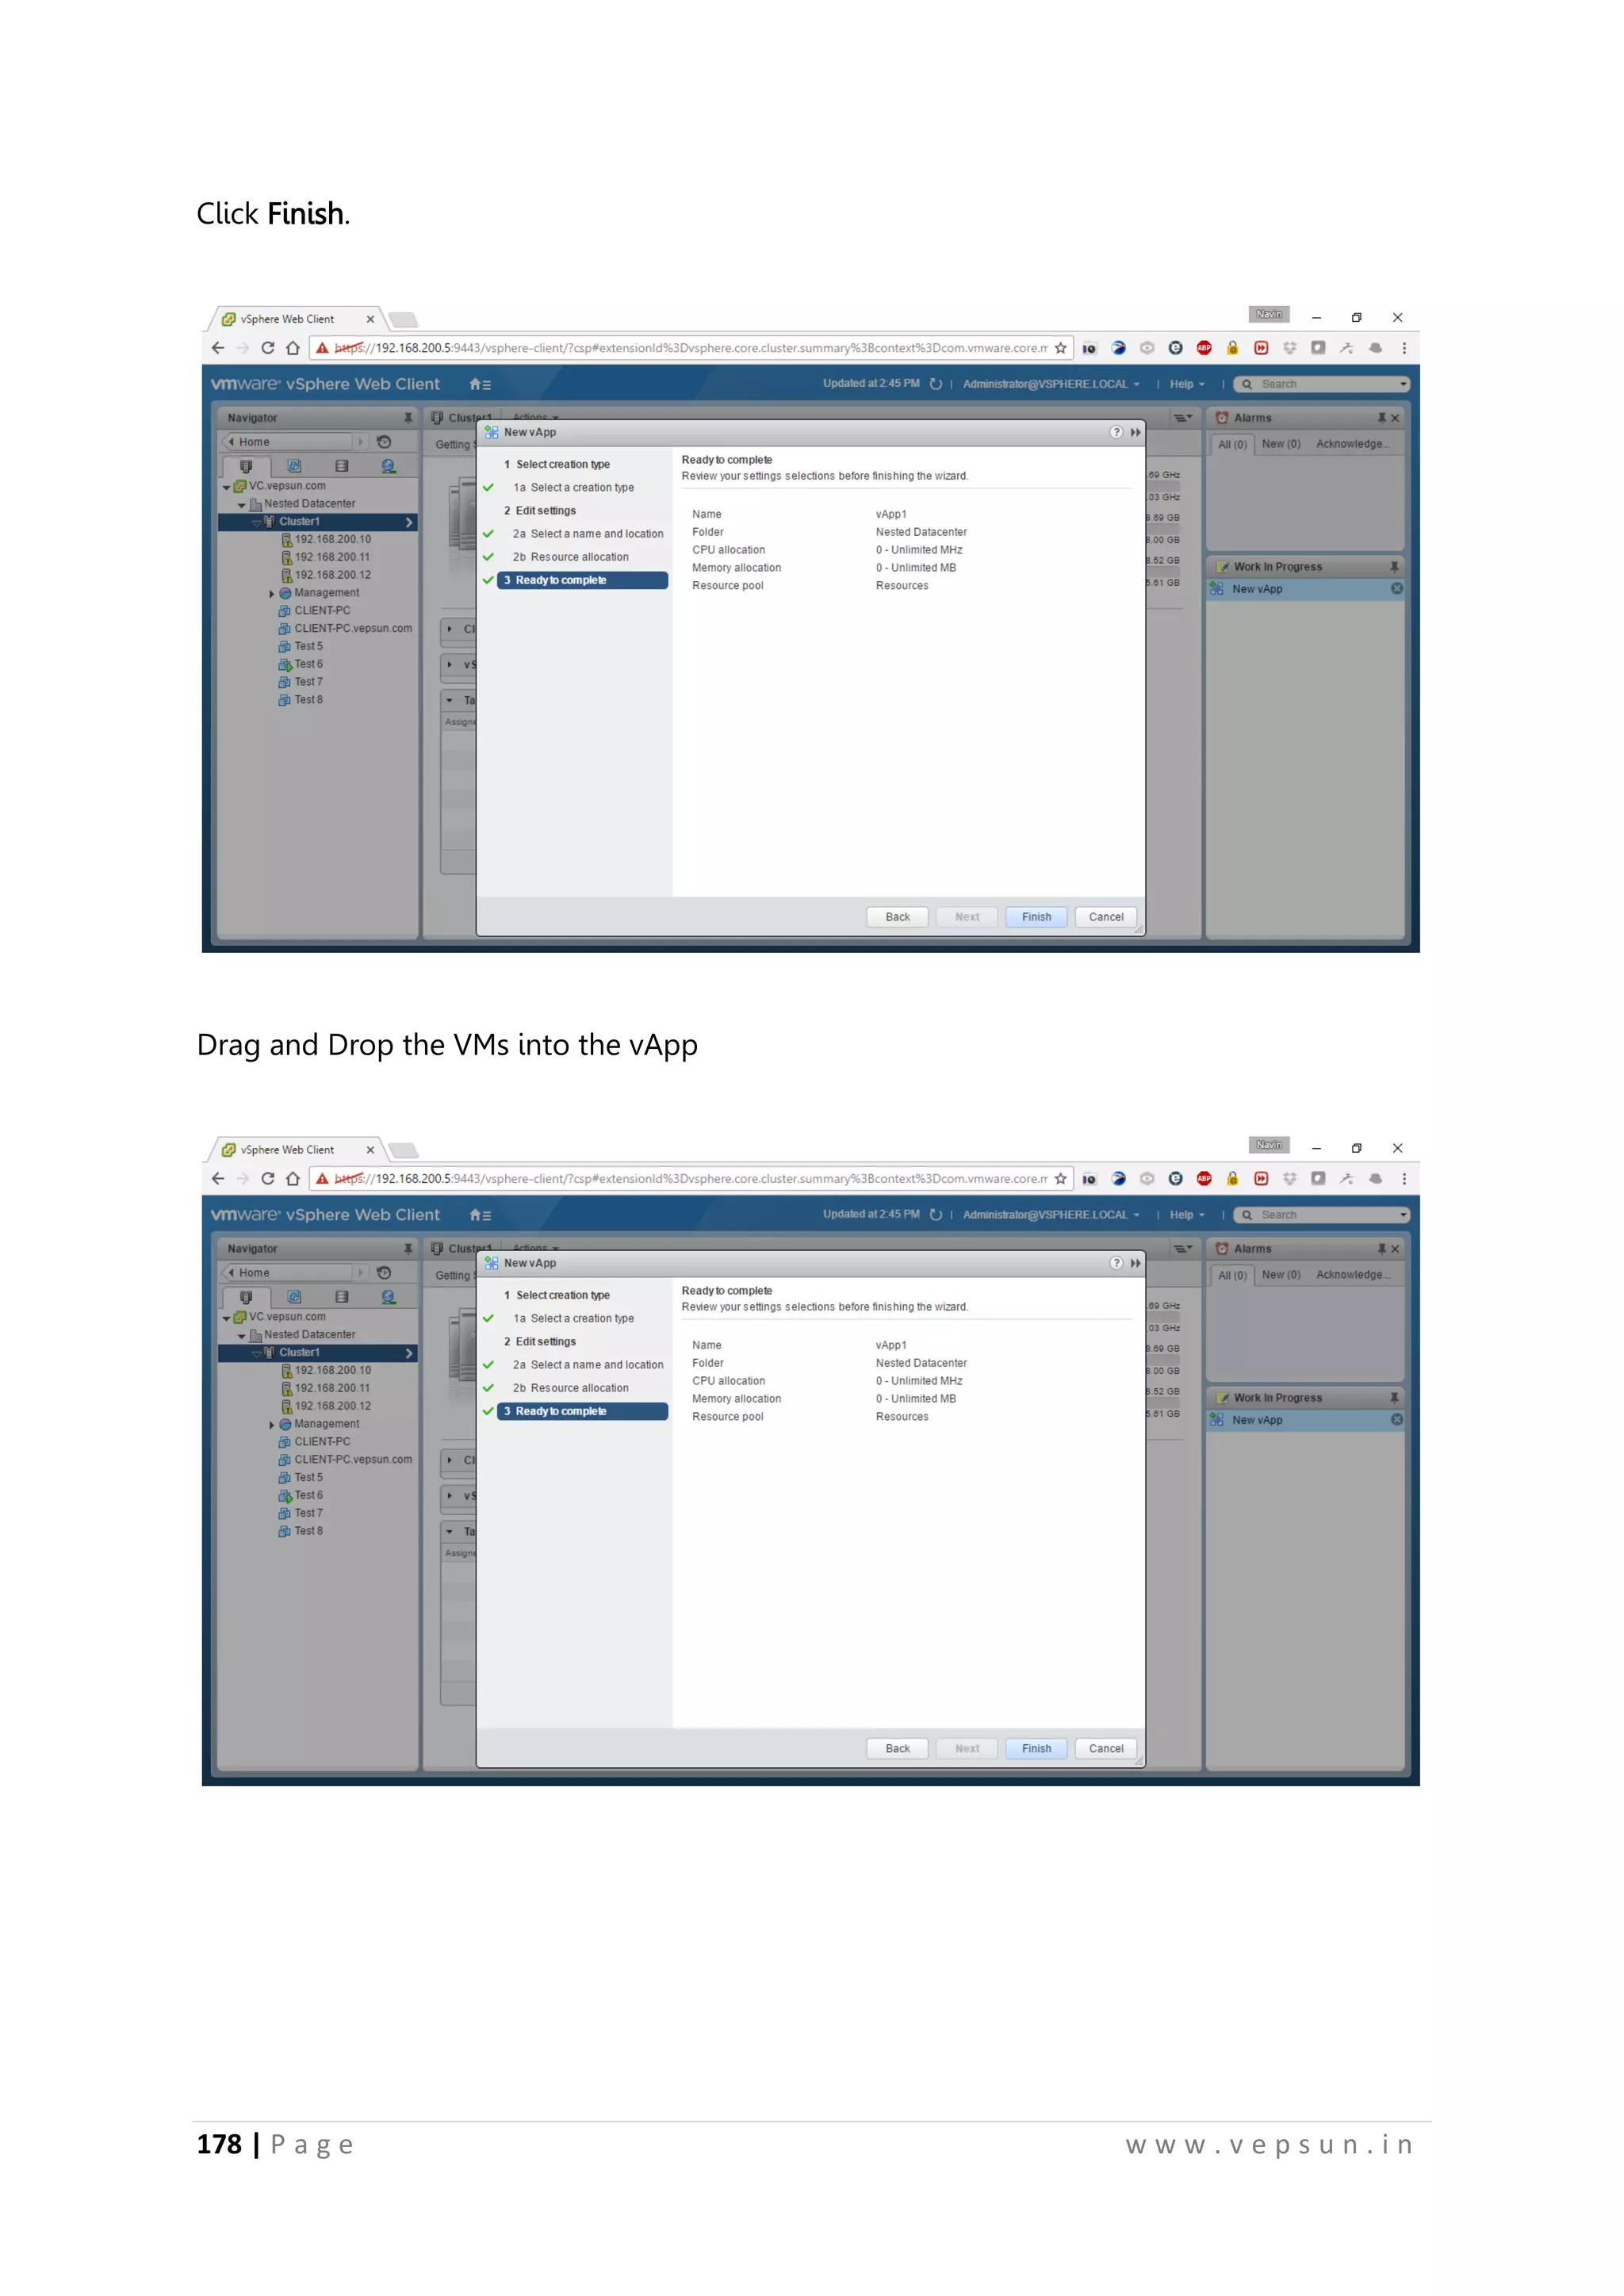
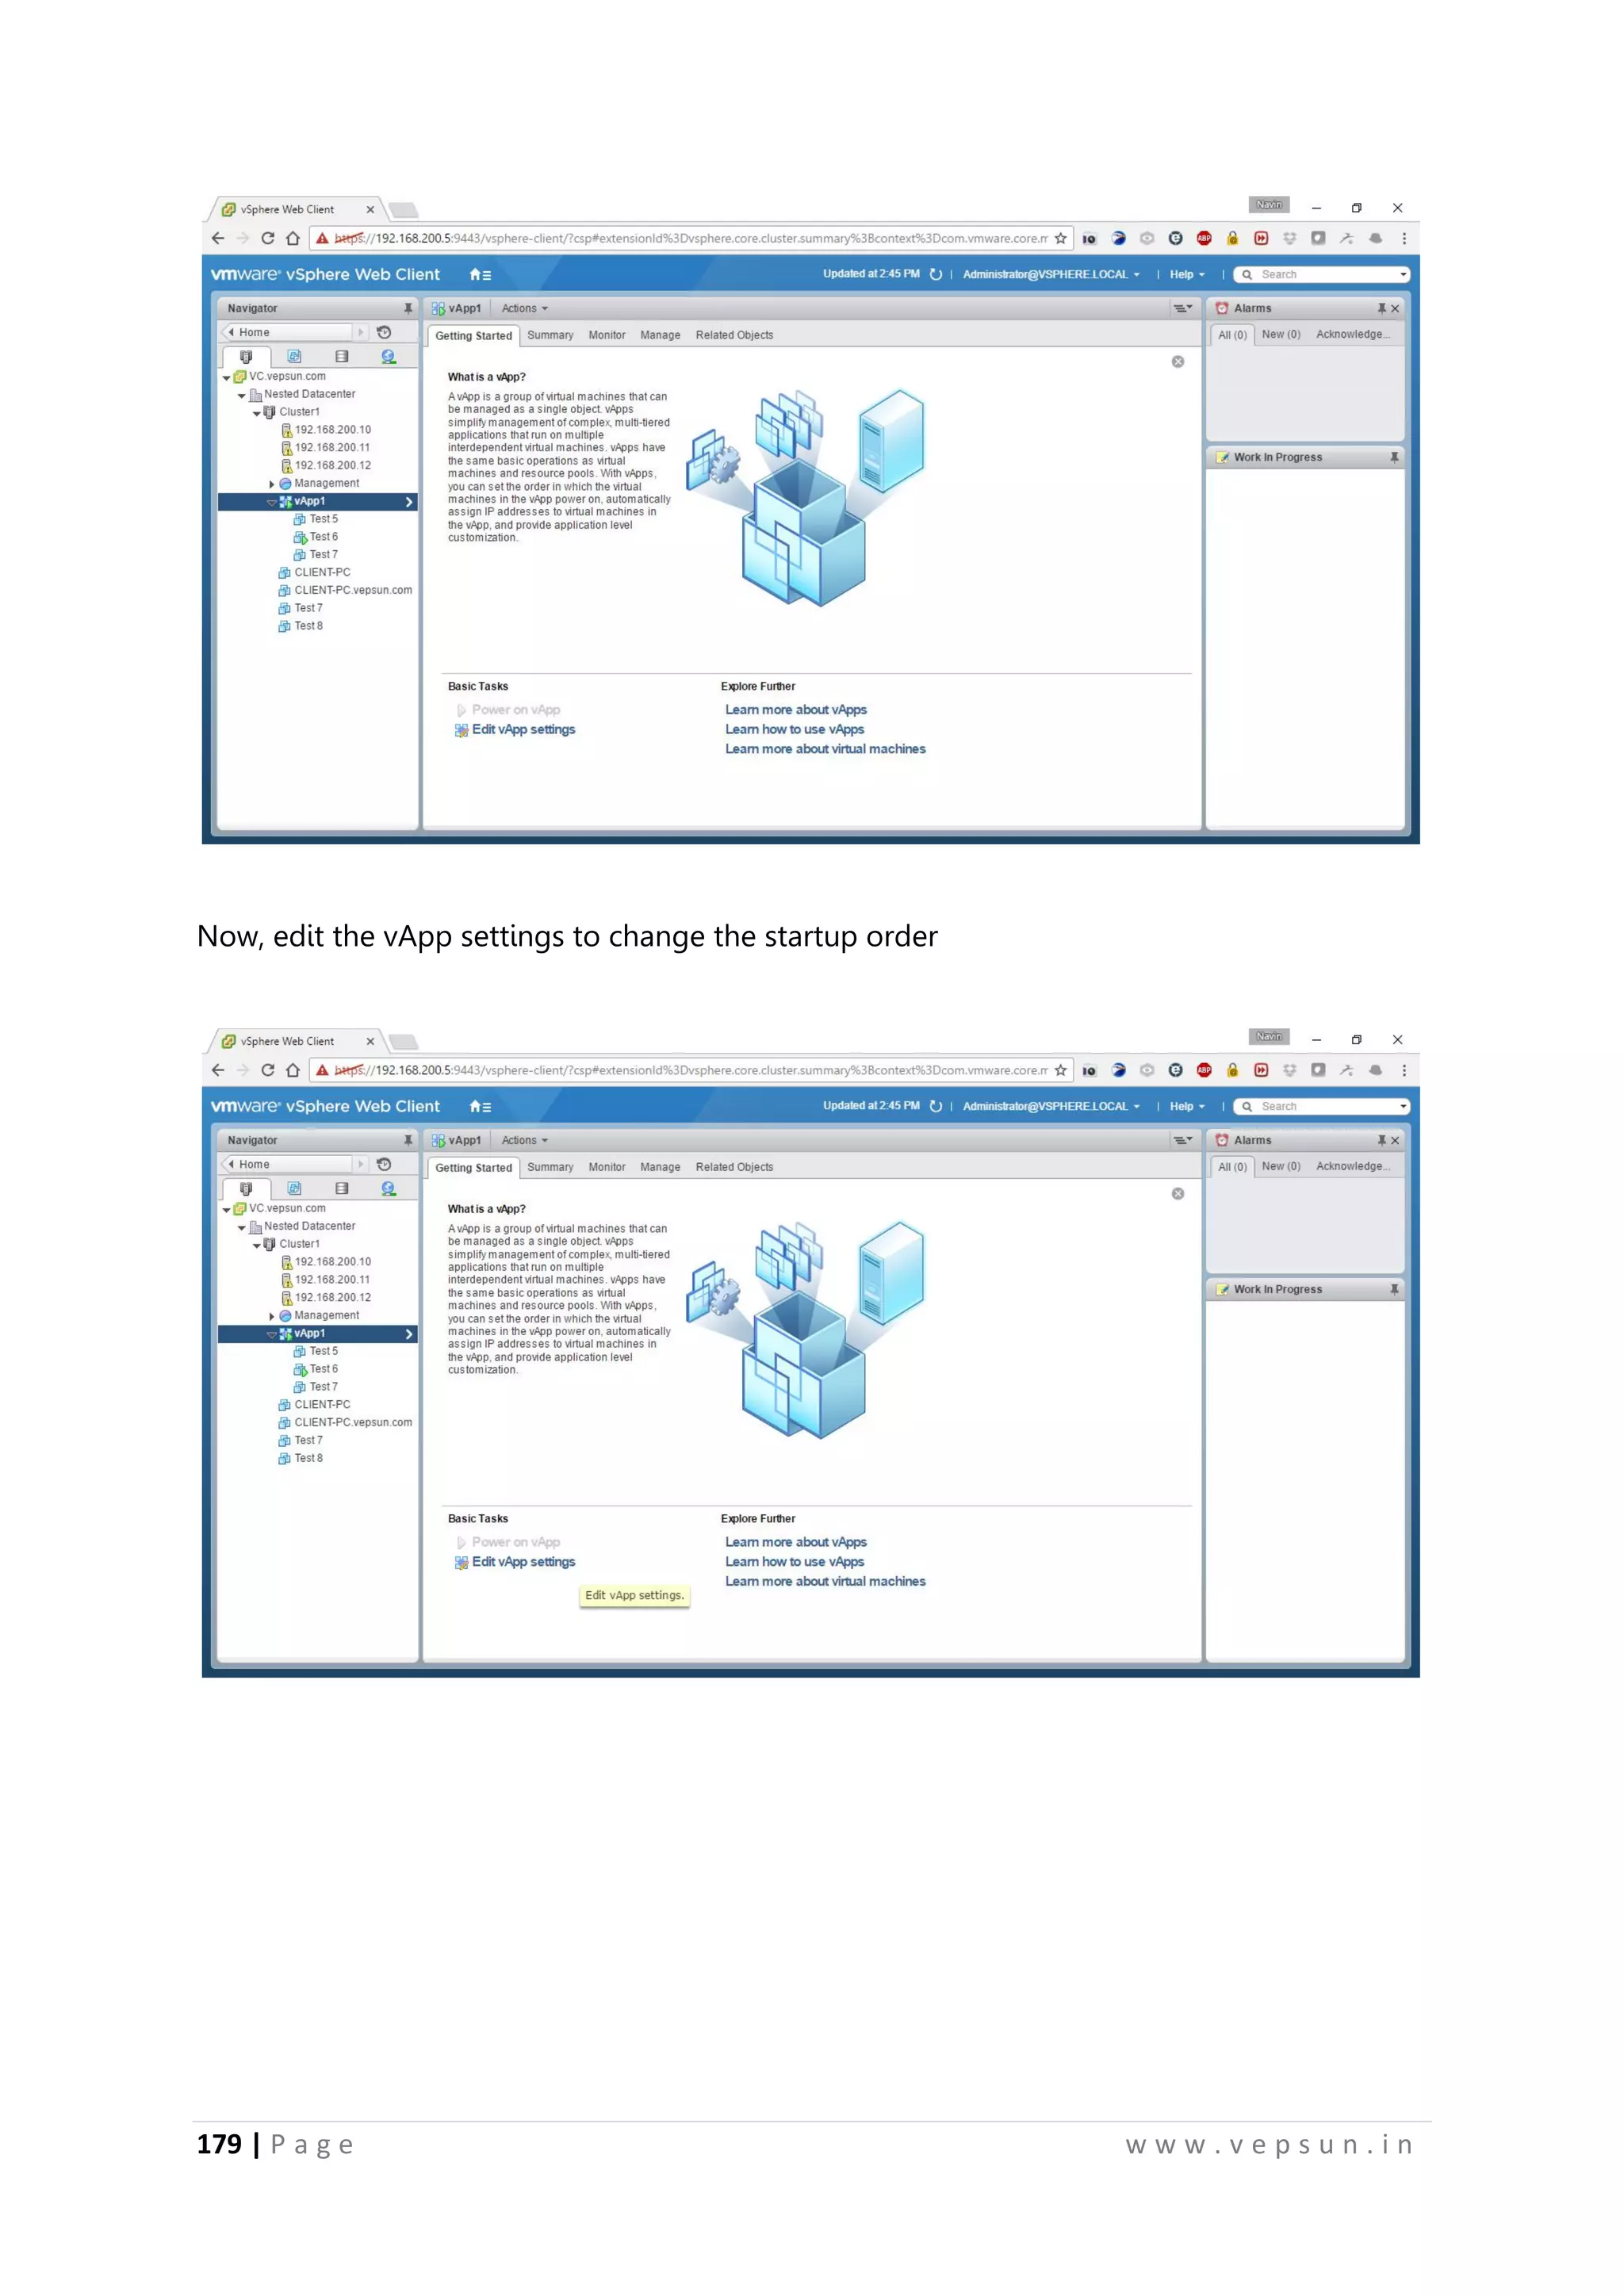
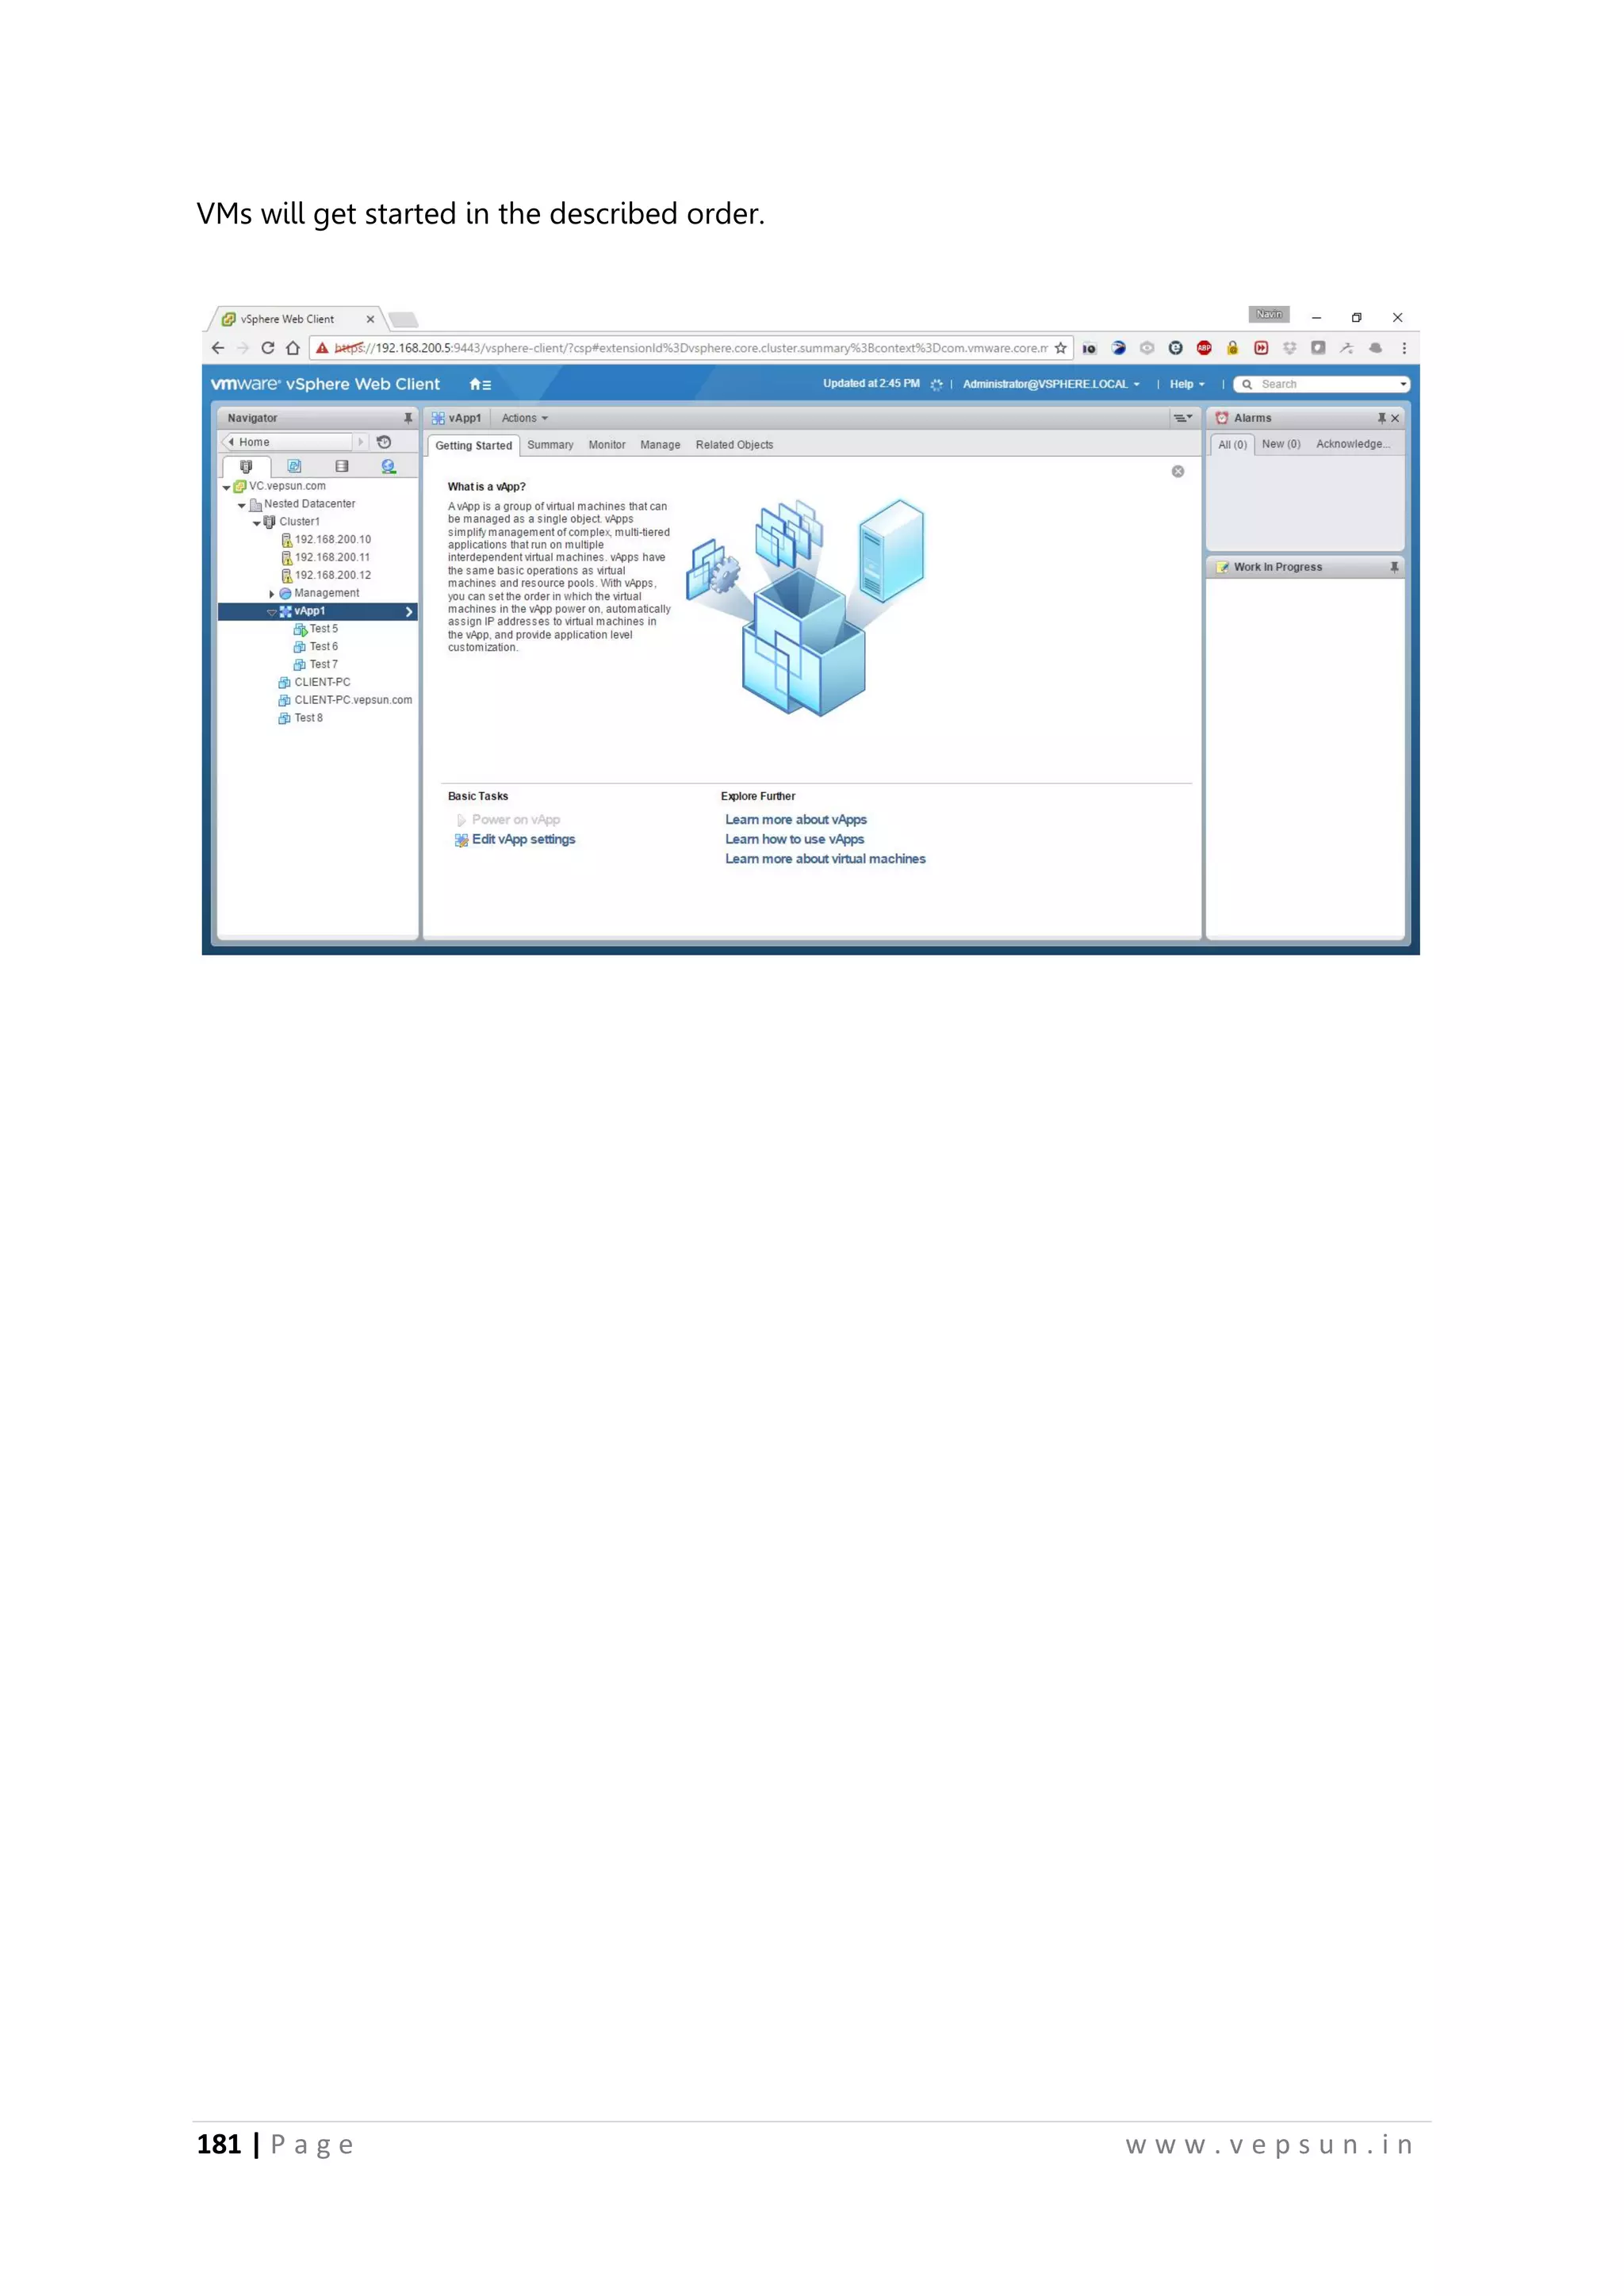
Steps to create storage with Windows Server 2012 for iSCSI connectivity and mapping LUN to ESXi. Enabling vMotion, migrating VMs between hosts, creating clusters for high availability and resource management. Cloning VMs, creating templates, managing snapshots, and organizing resource pools in vSphere.
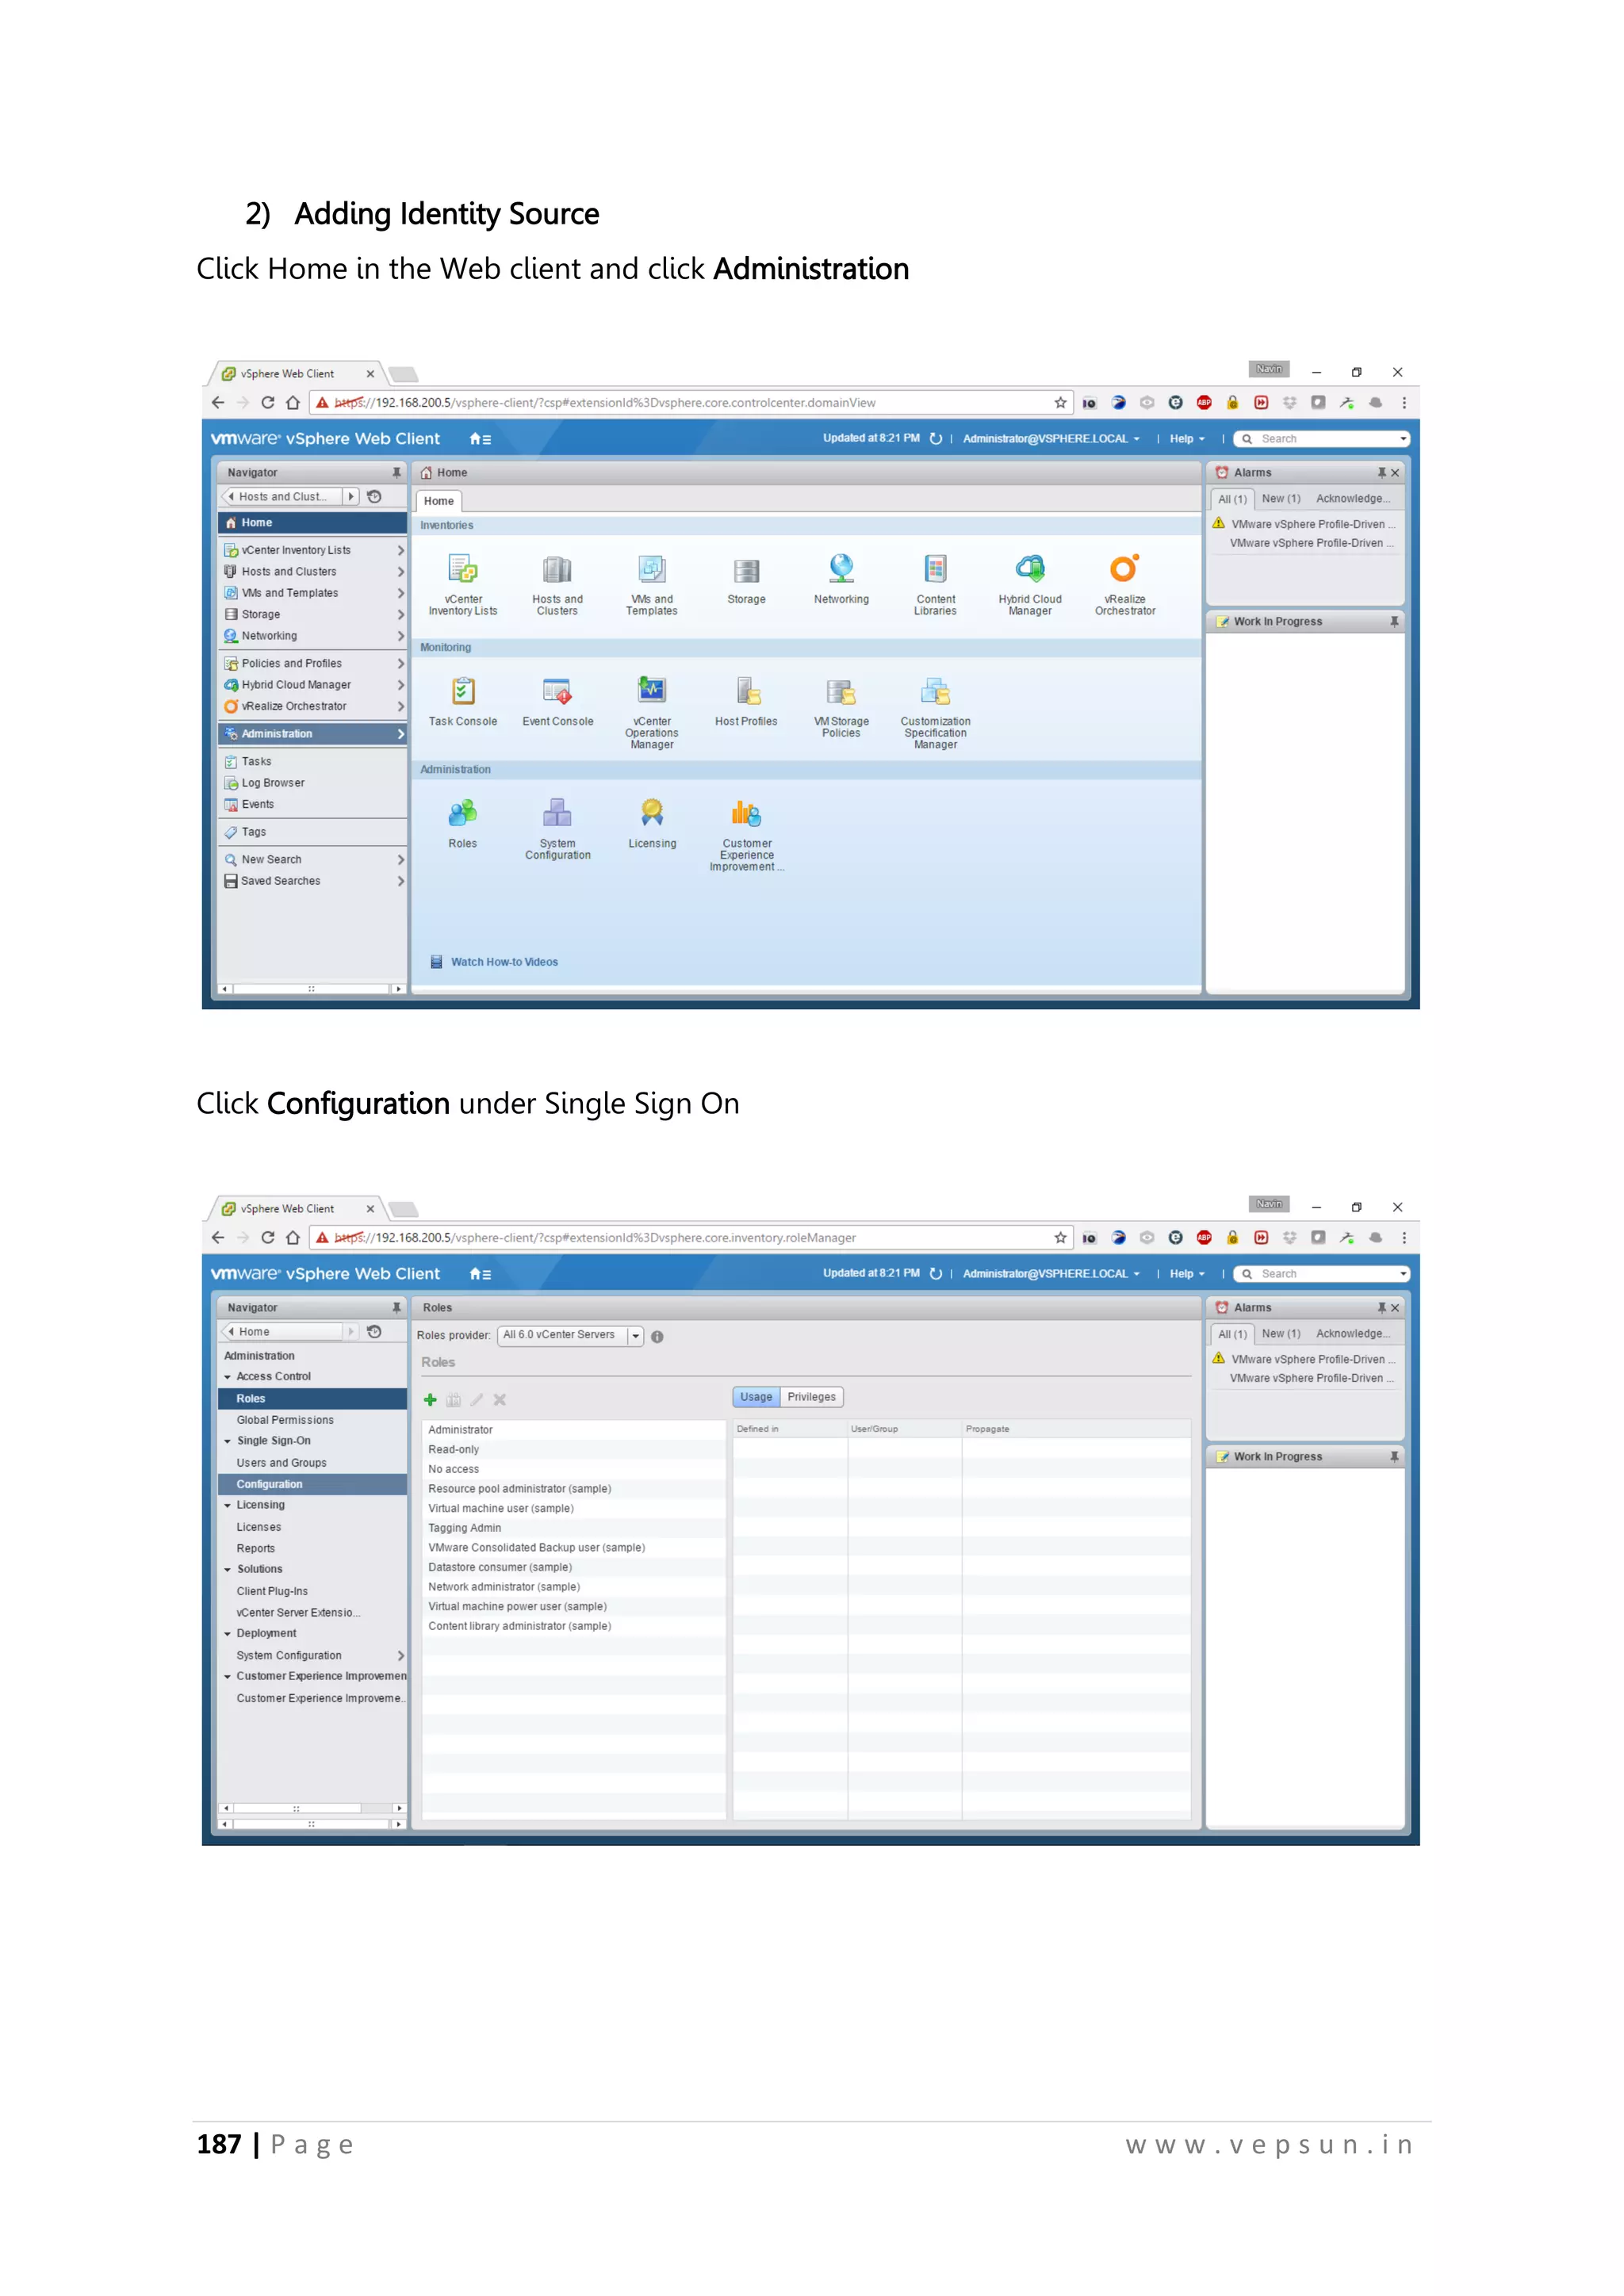
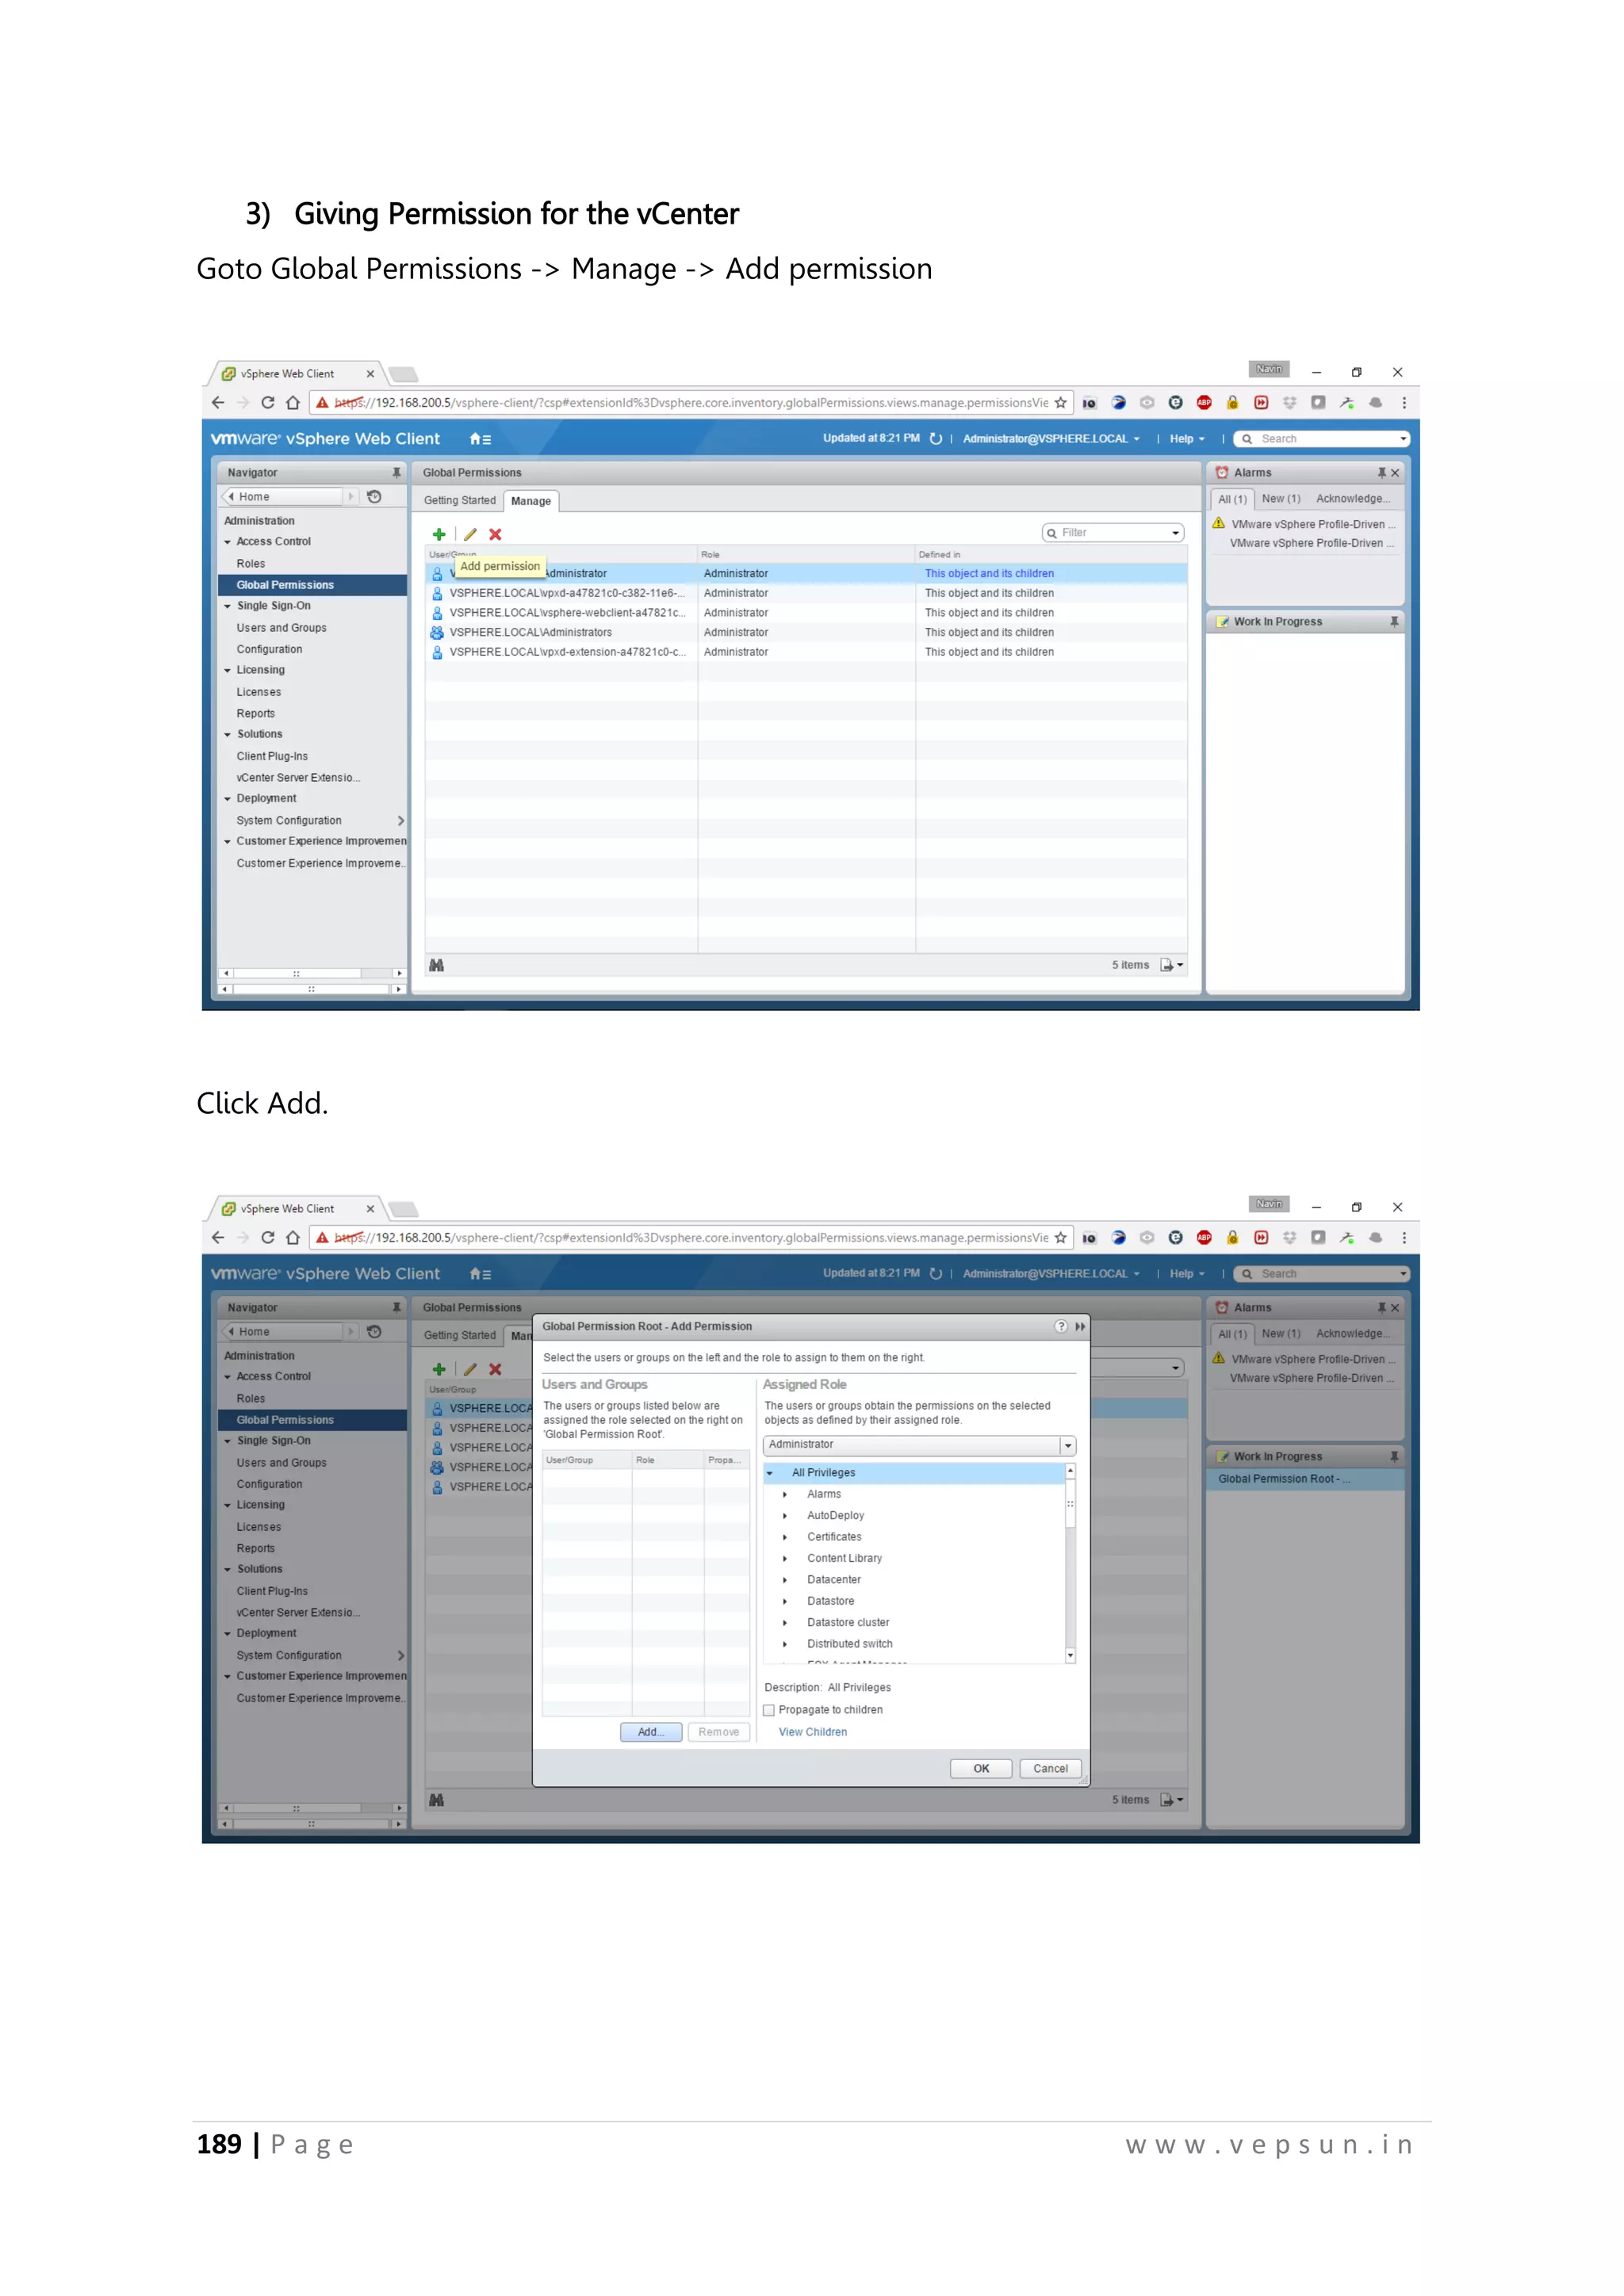
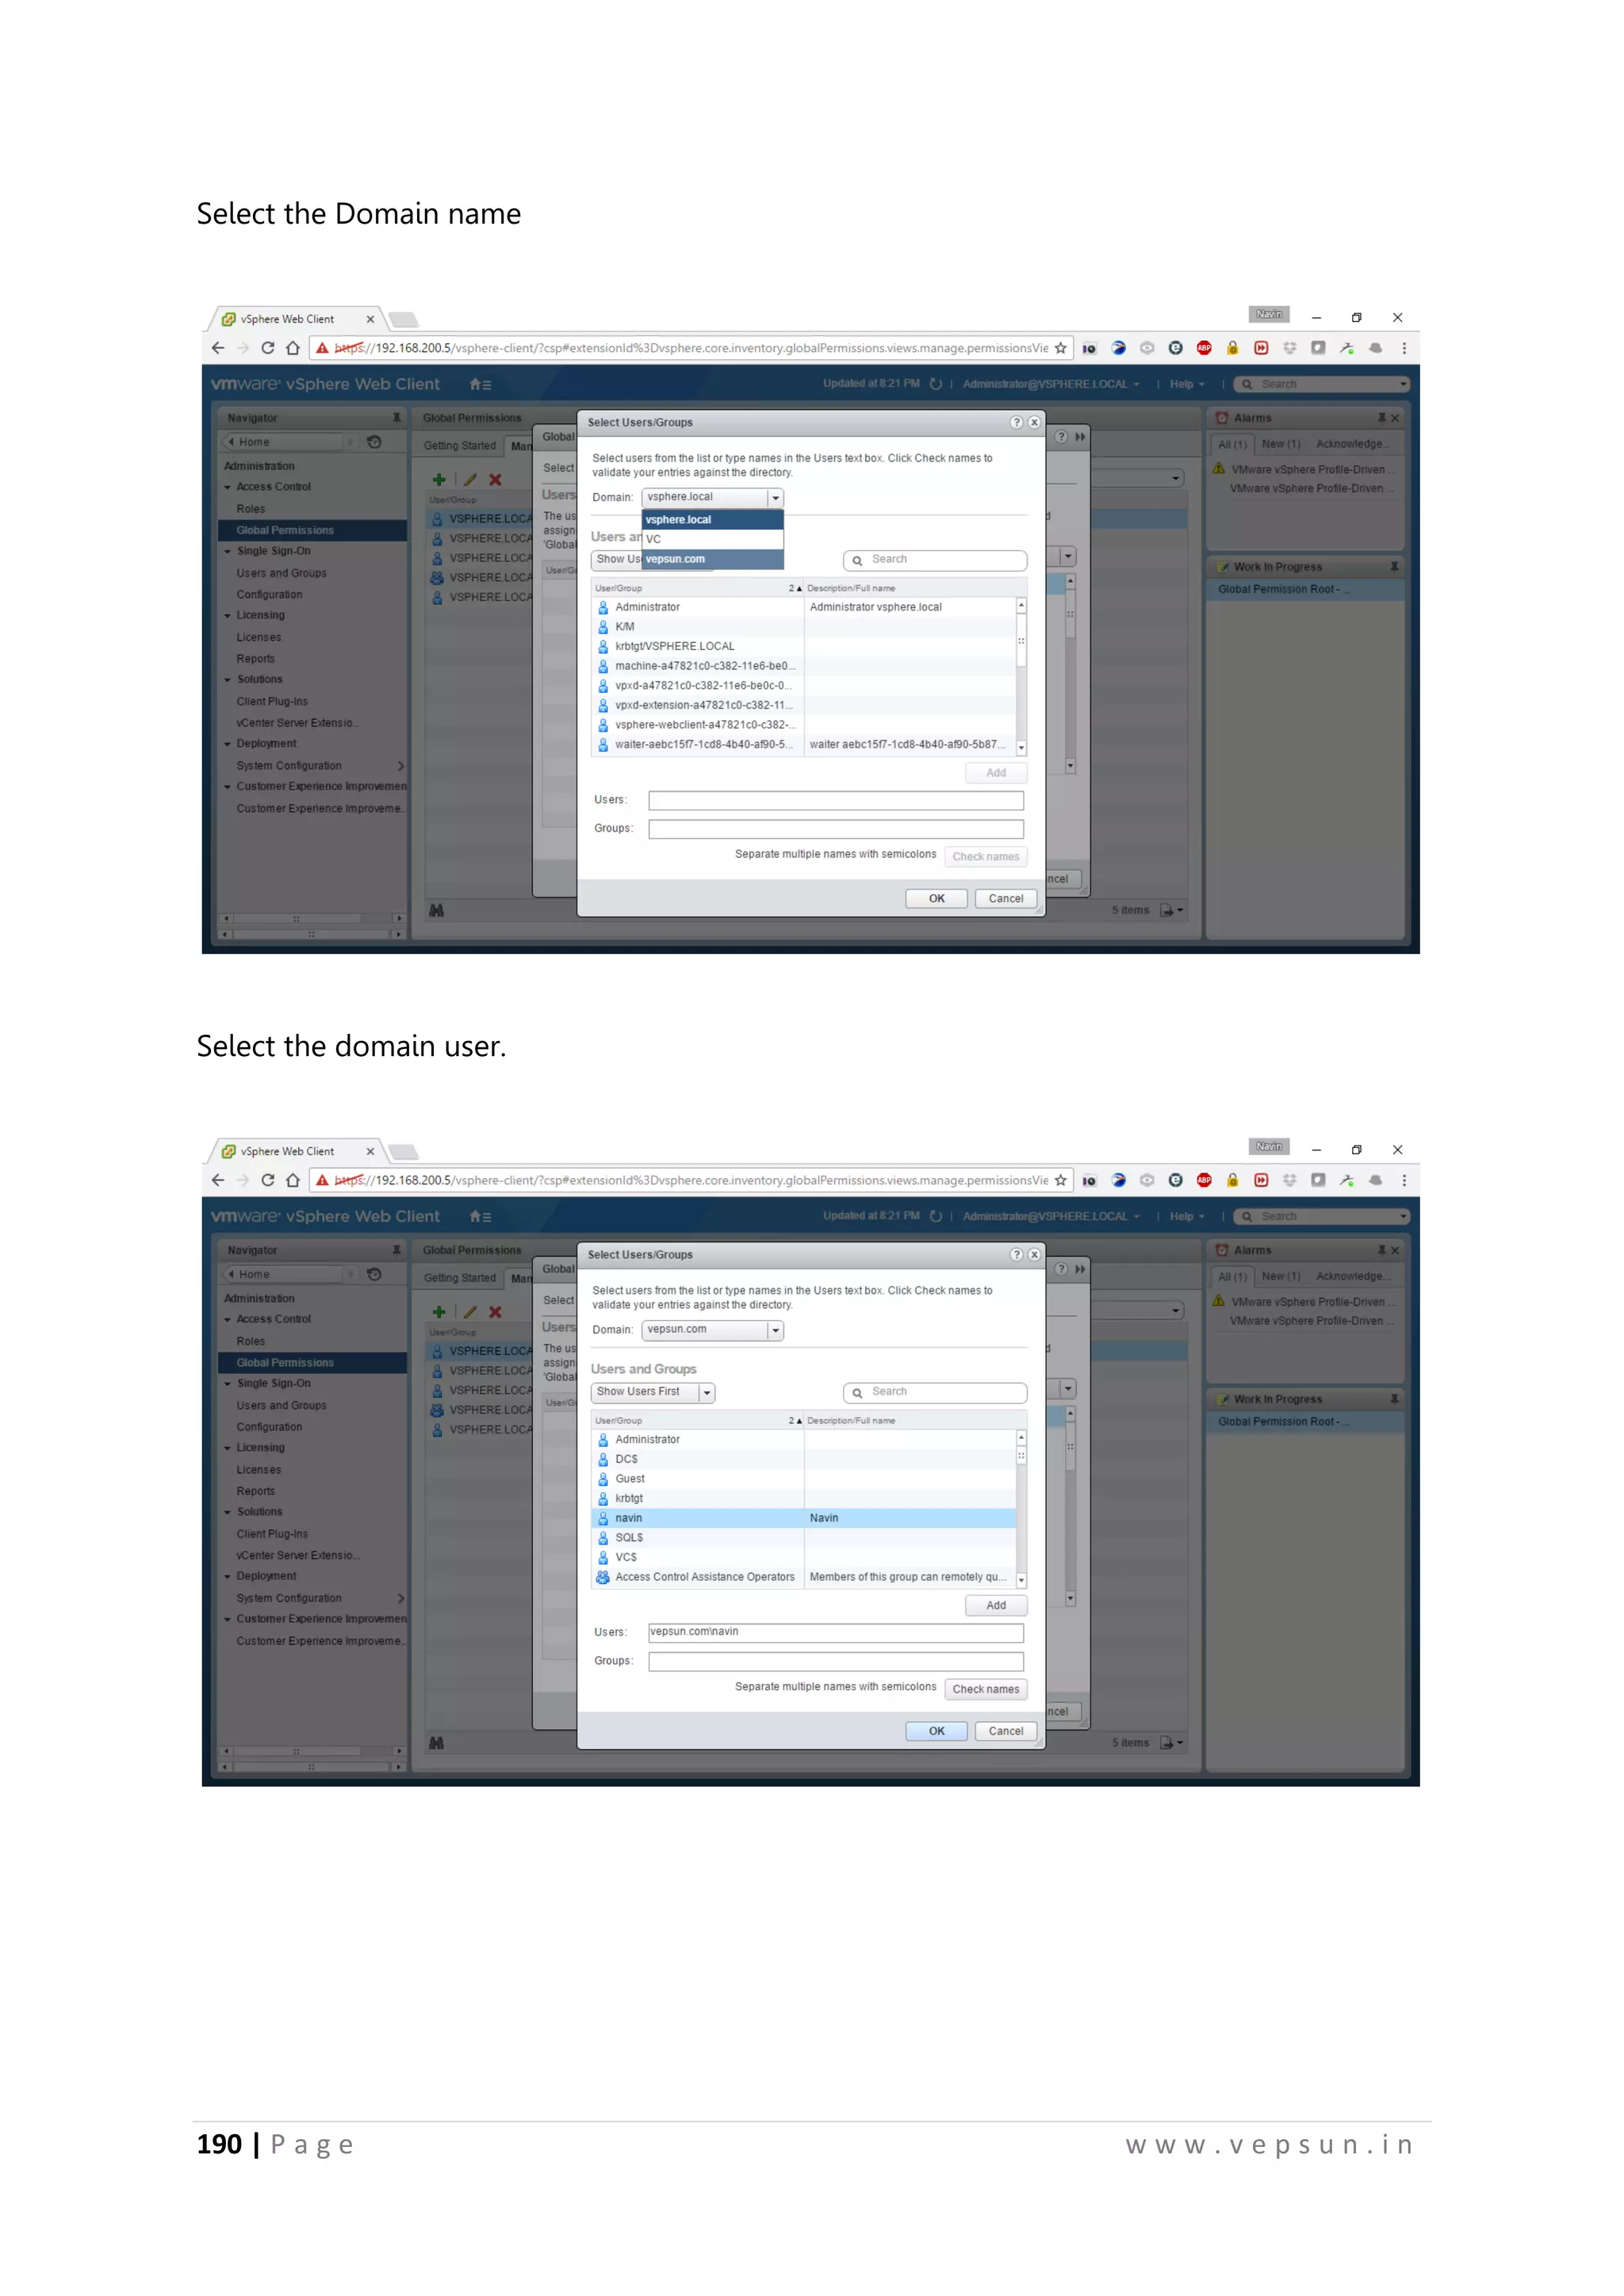
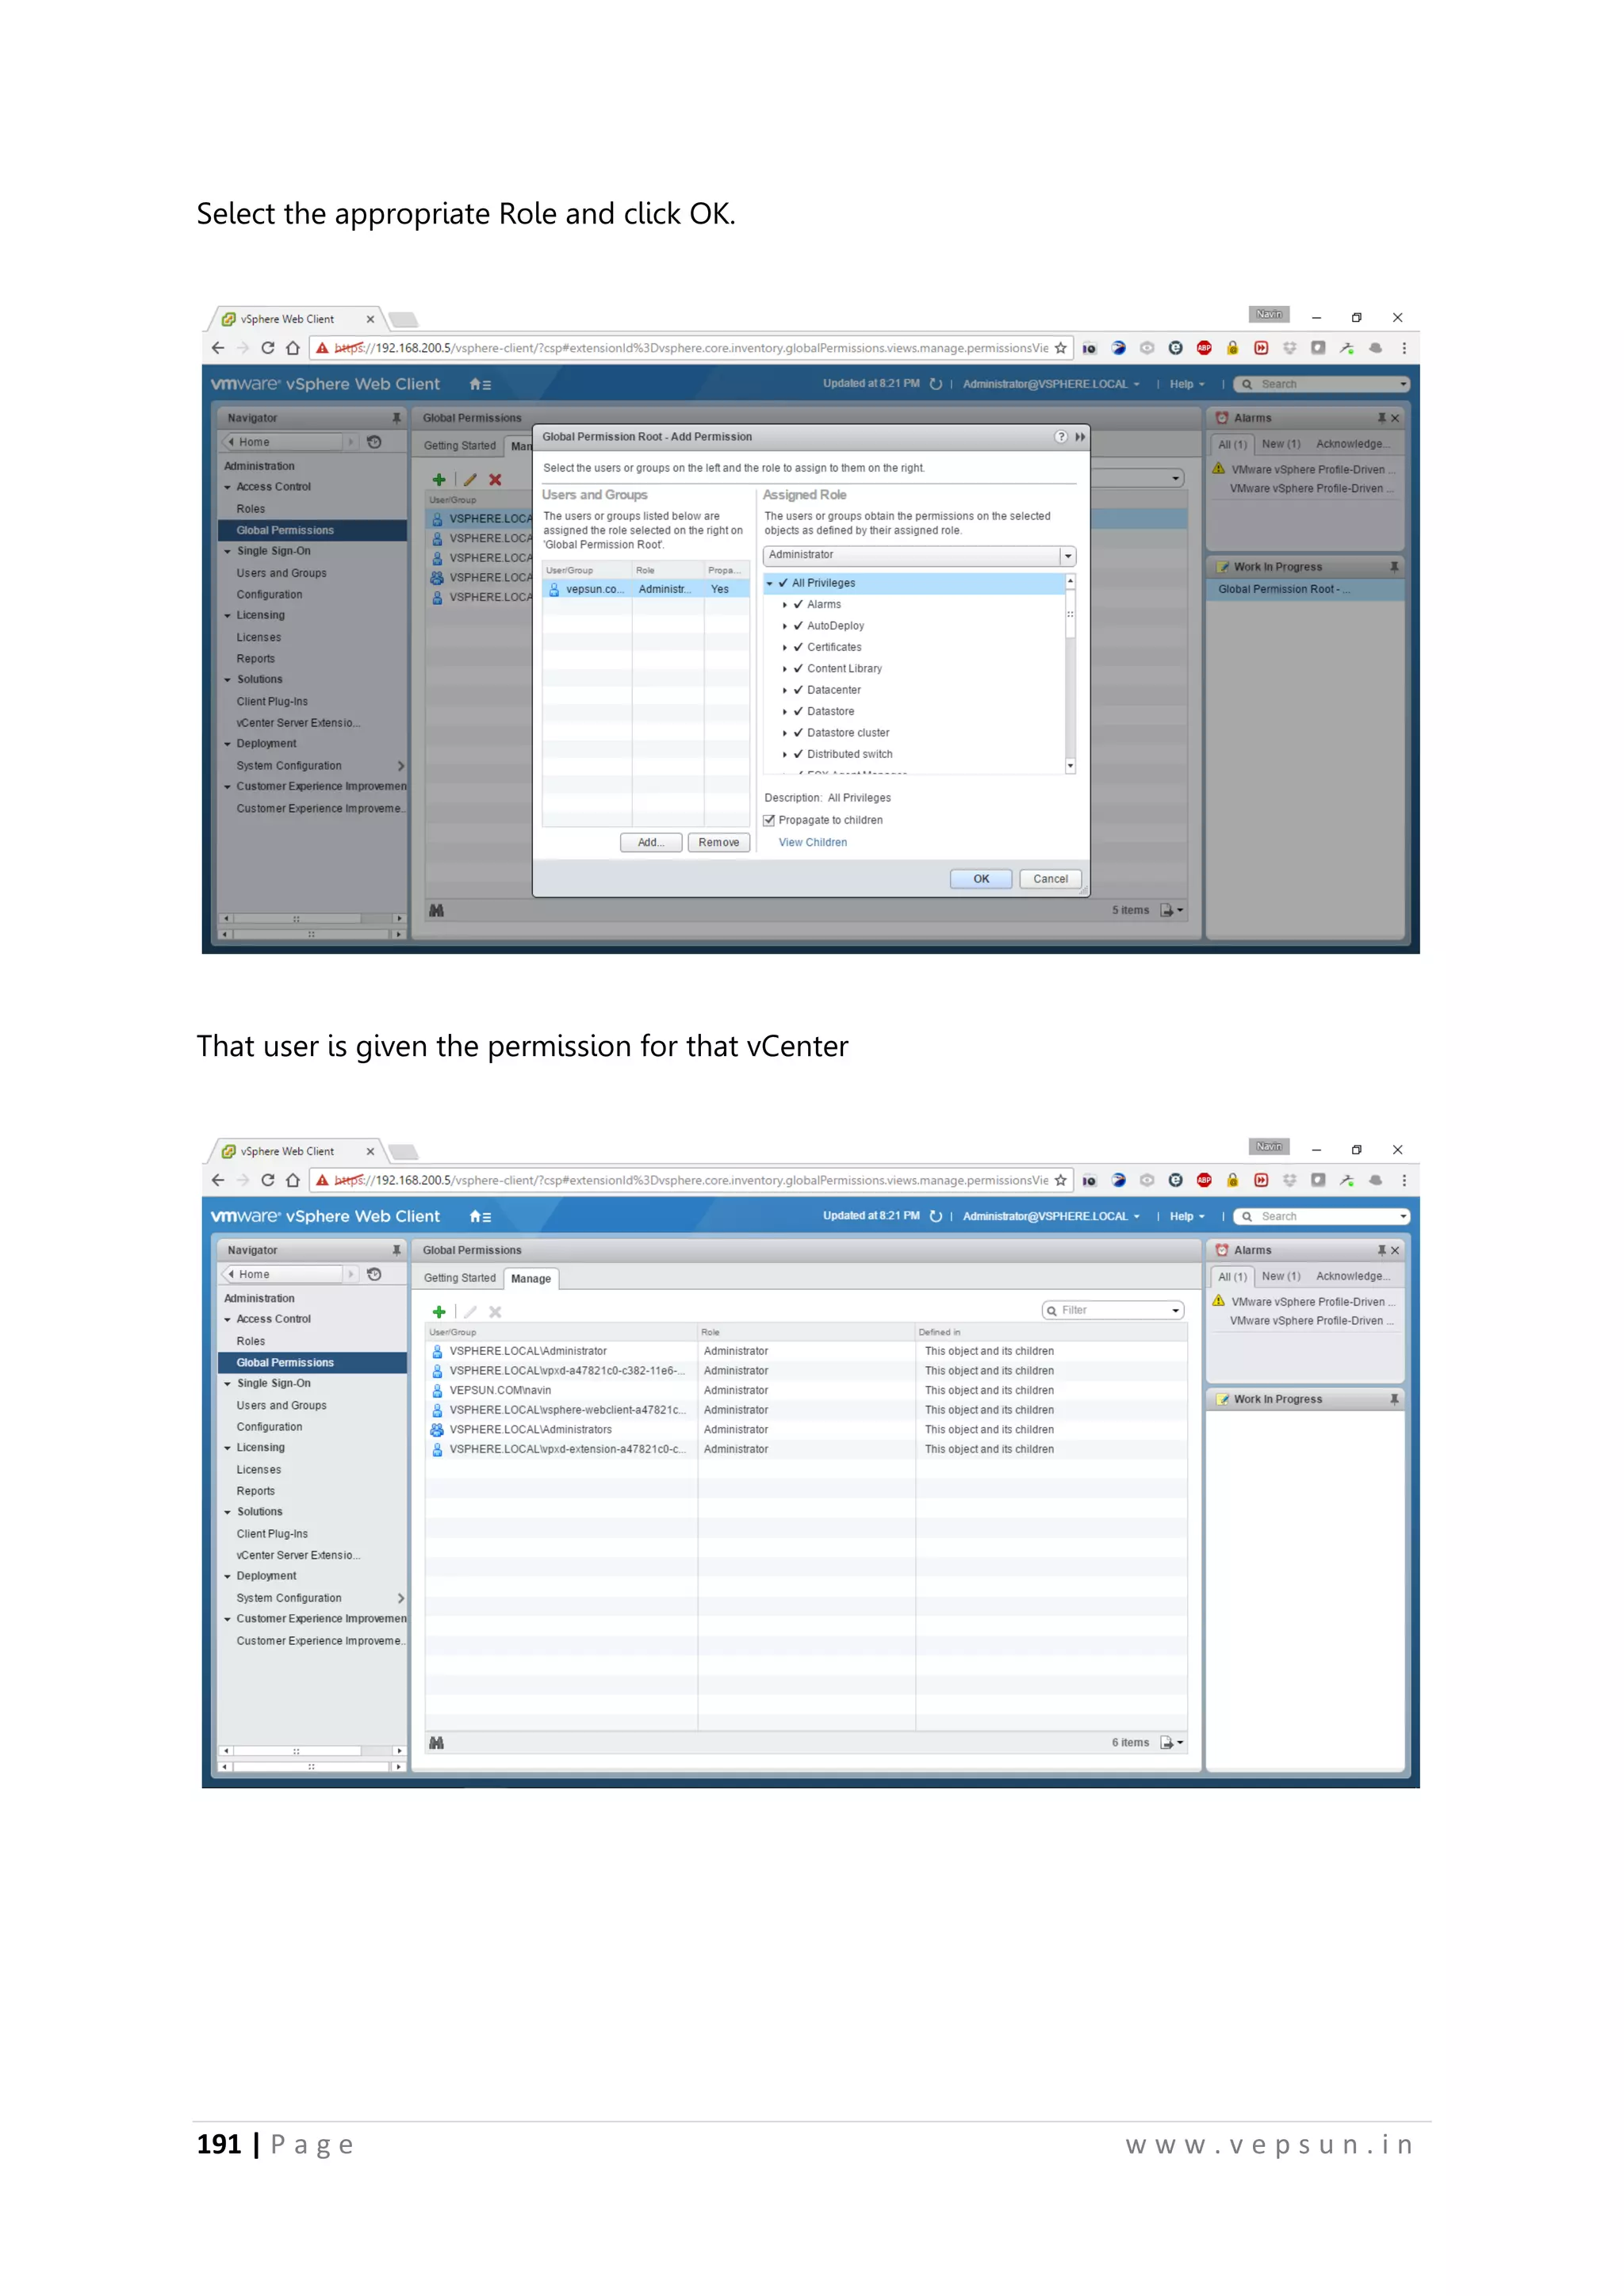
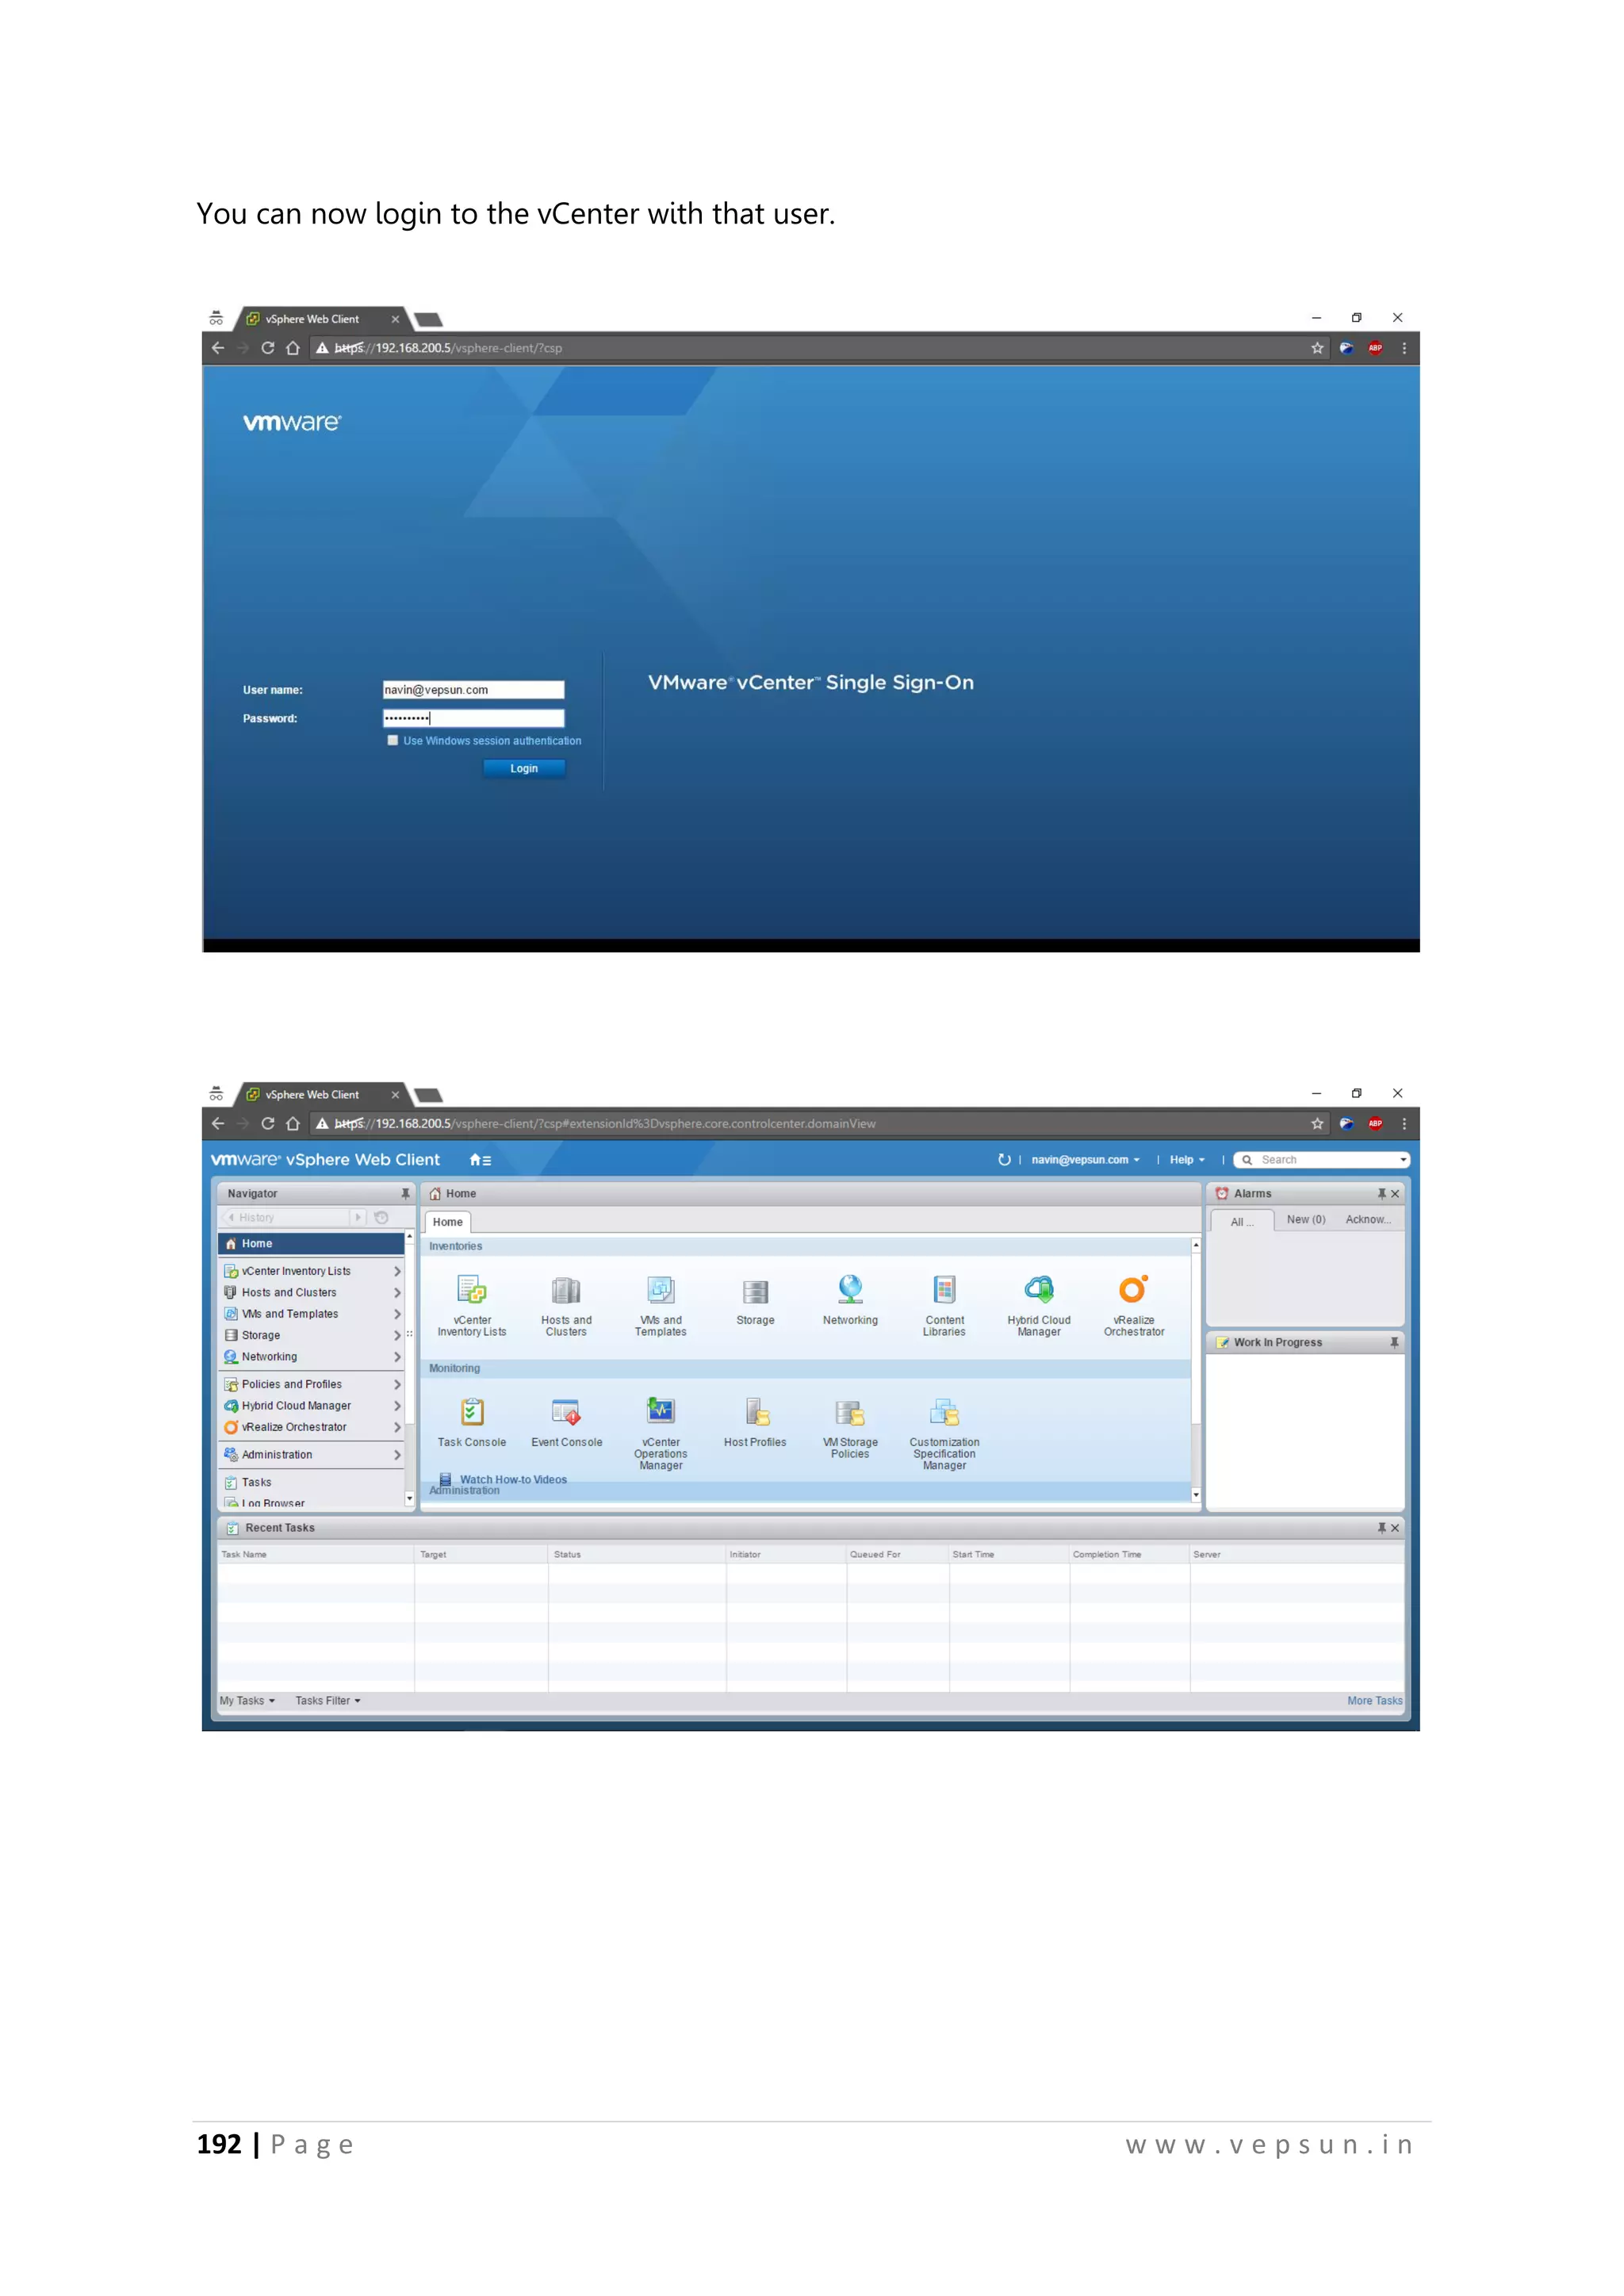
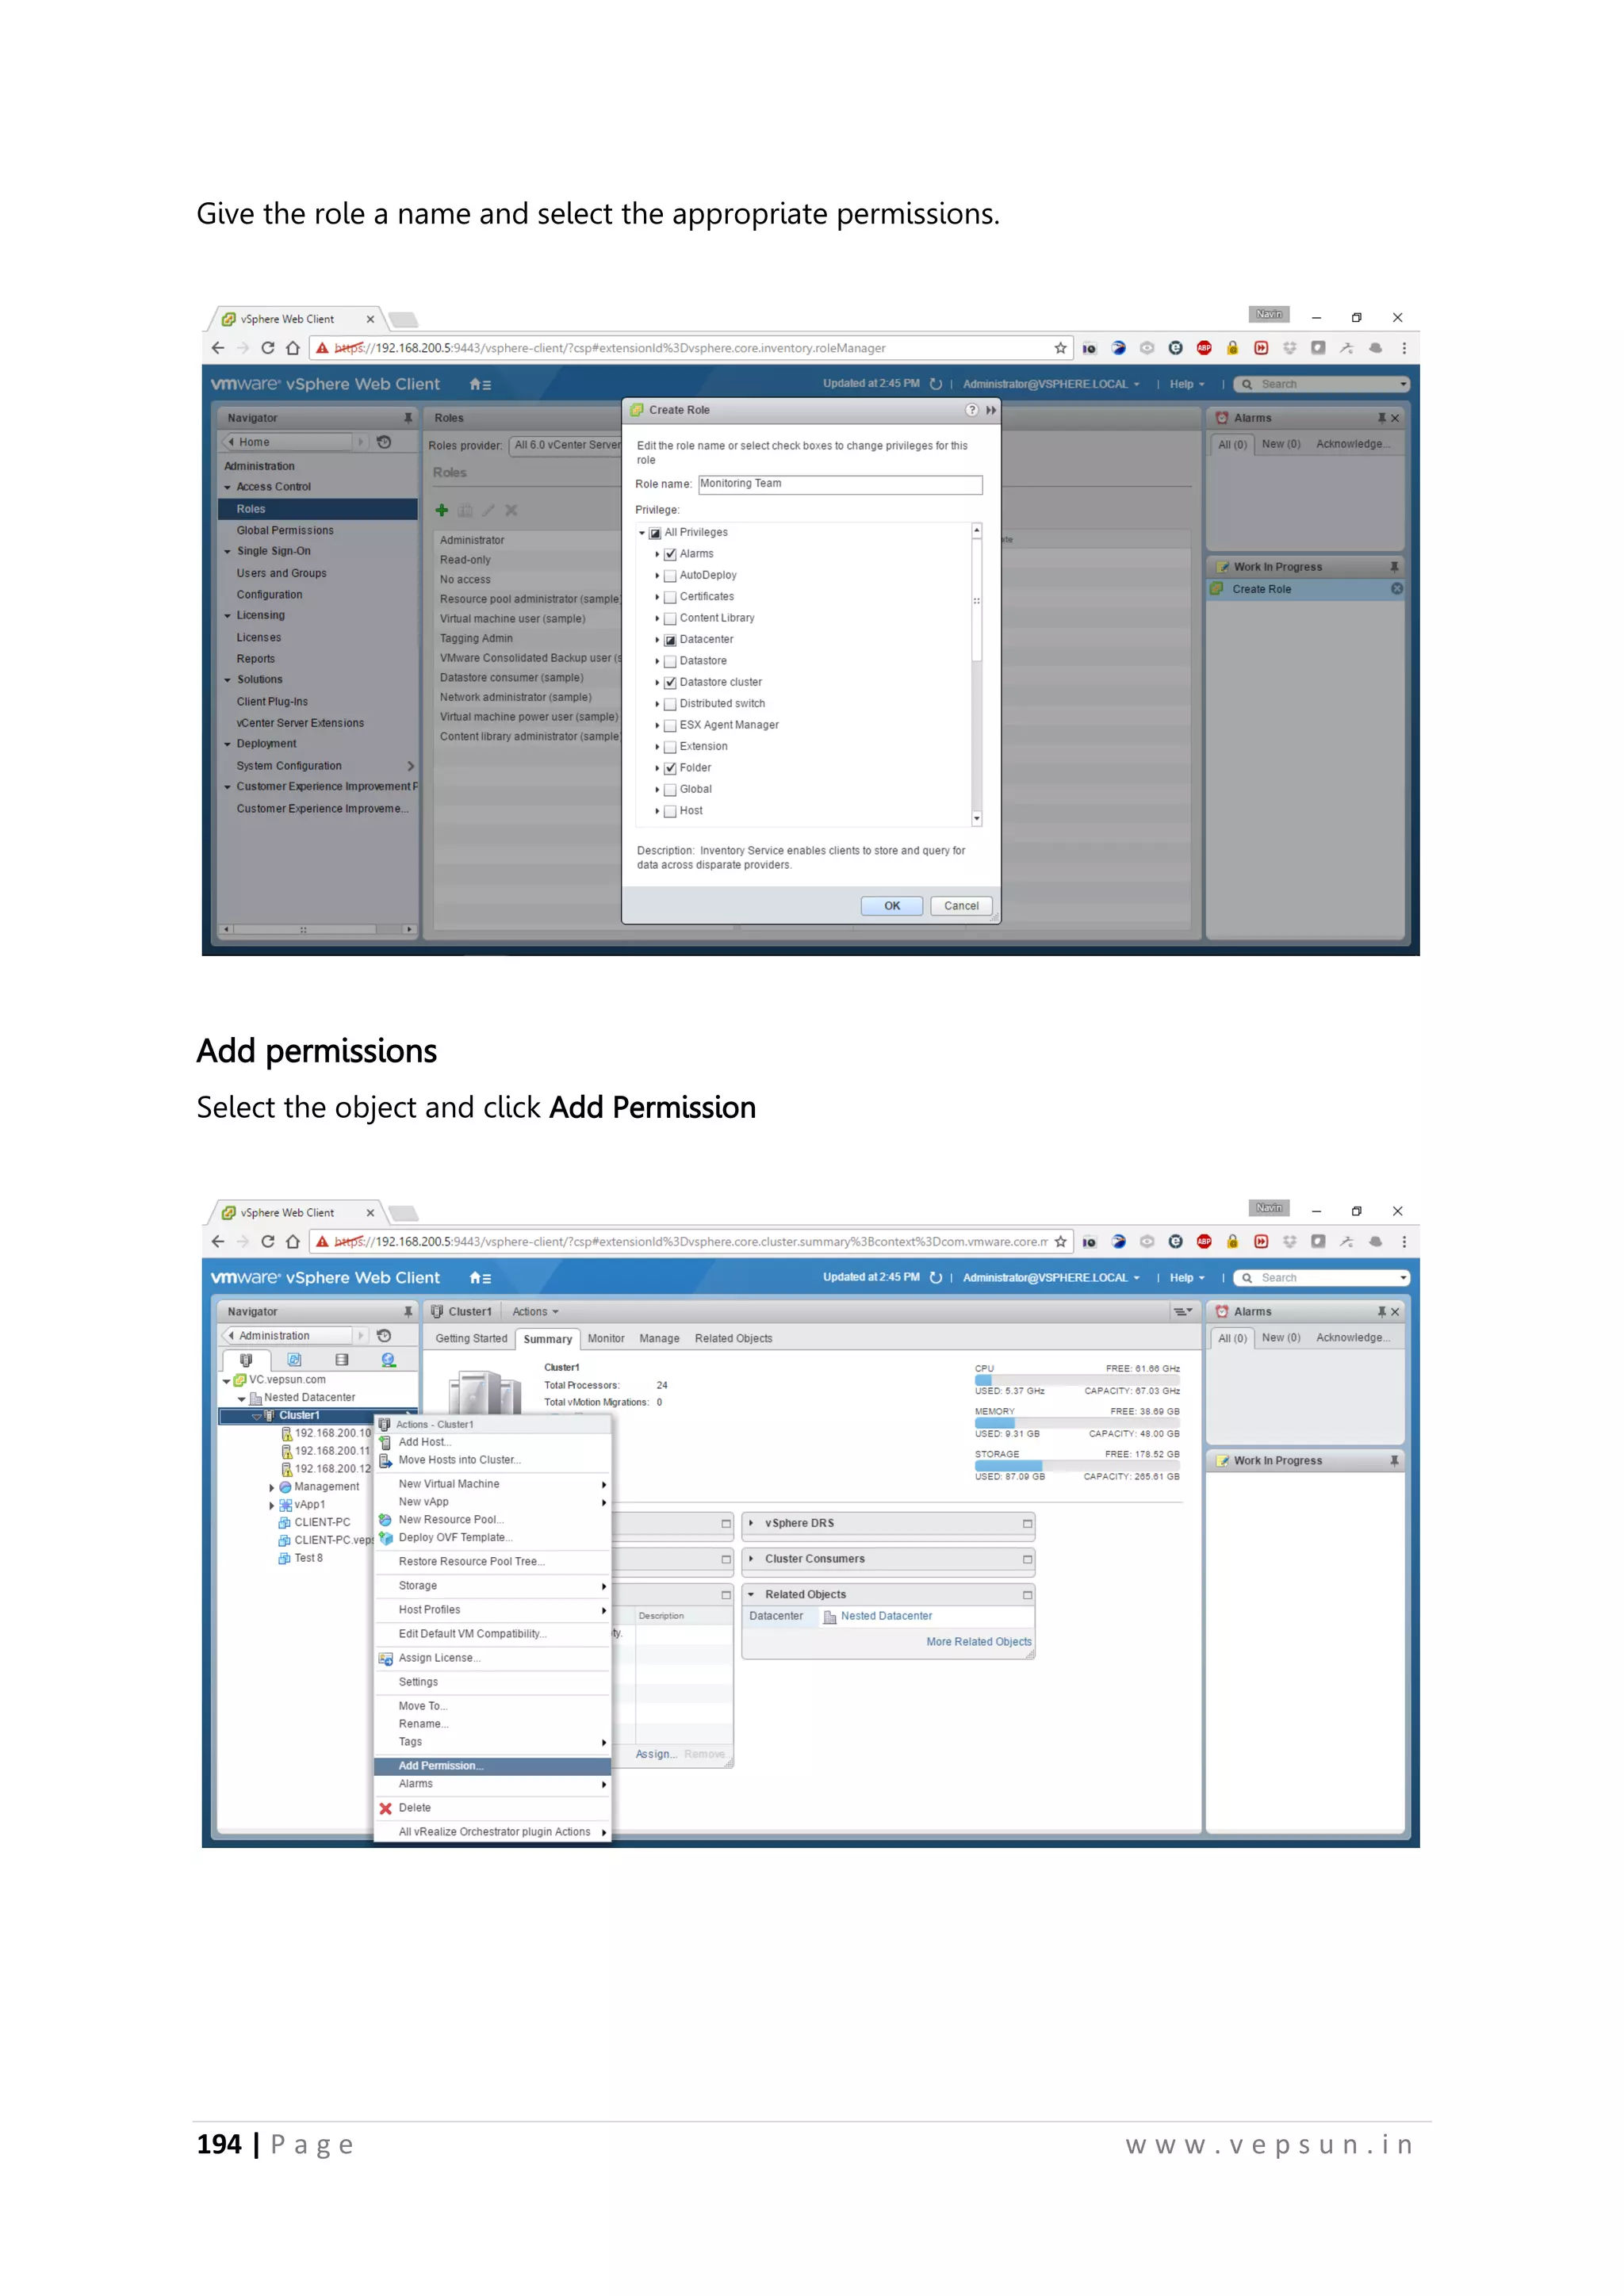
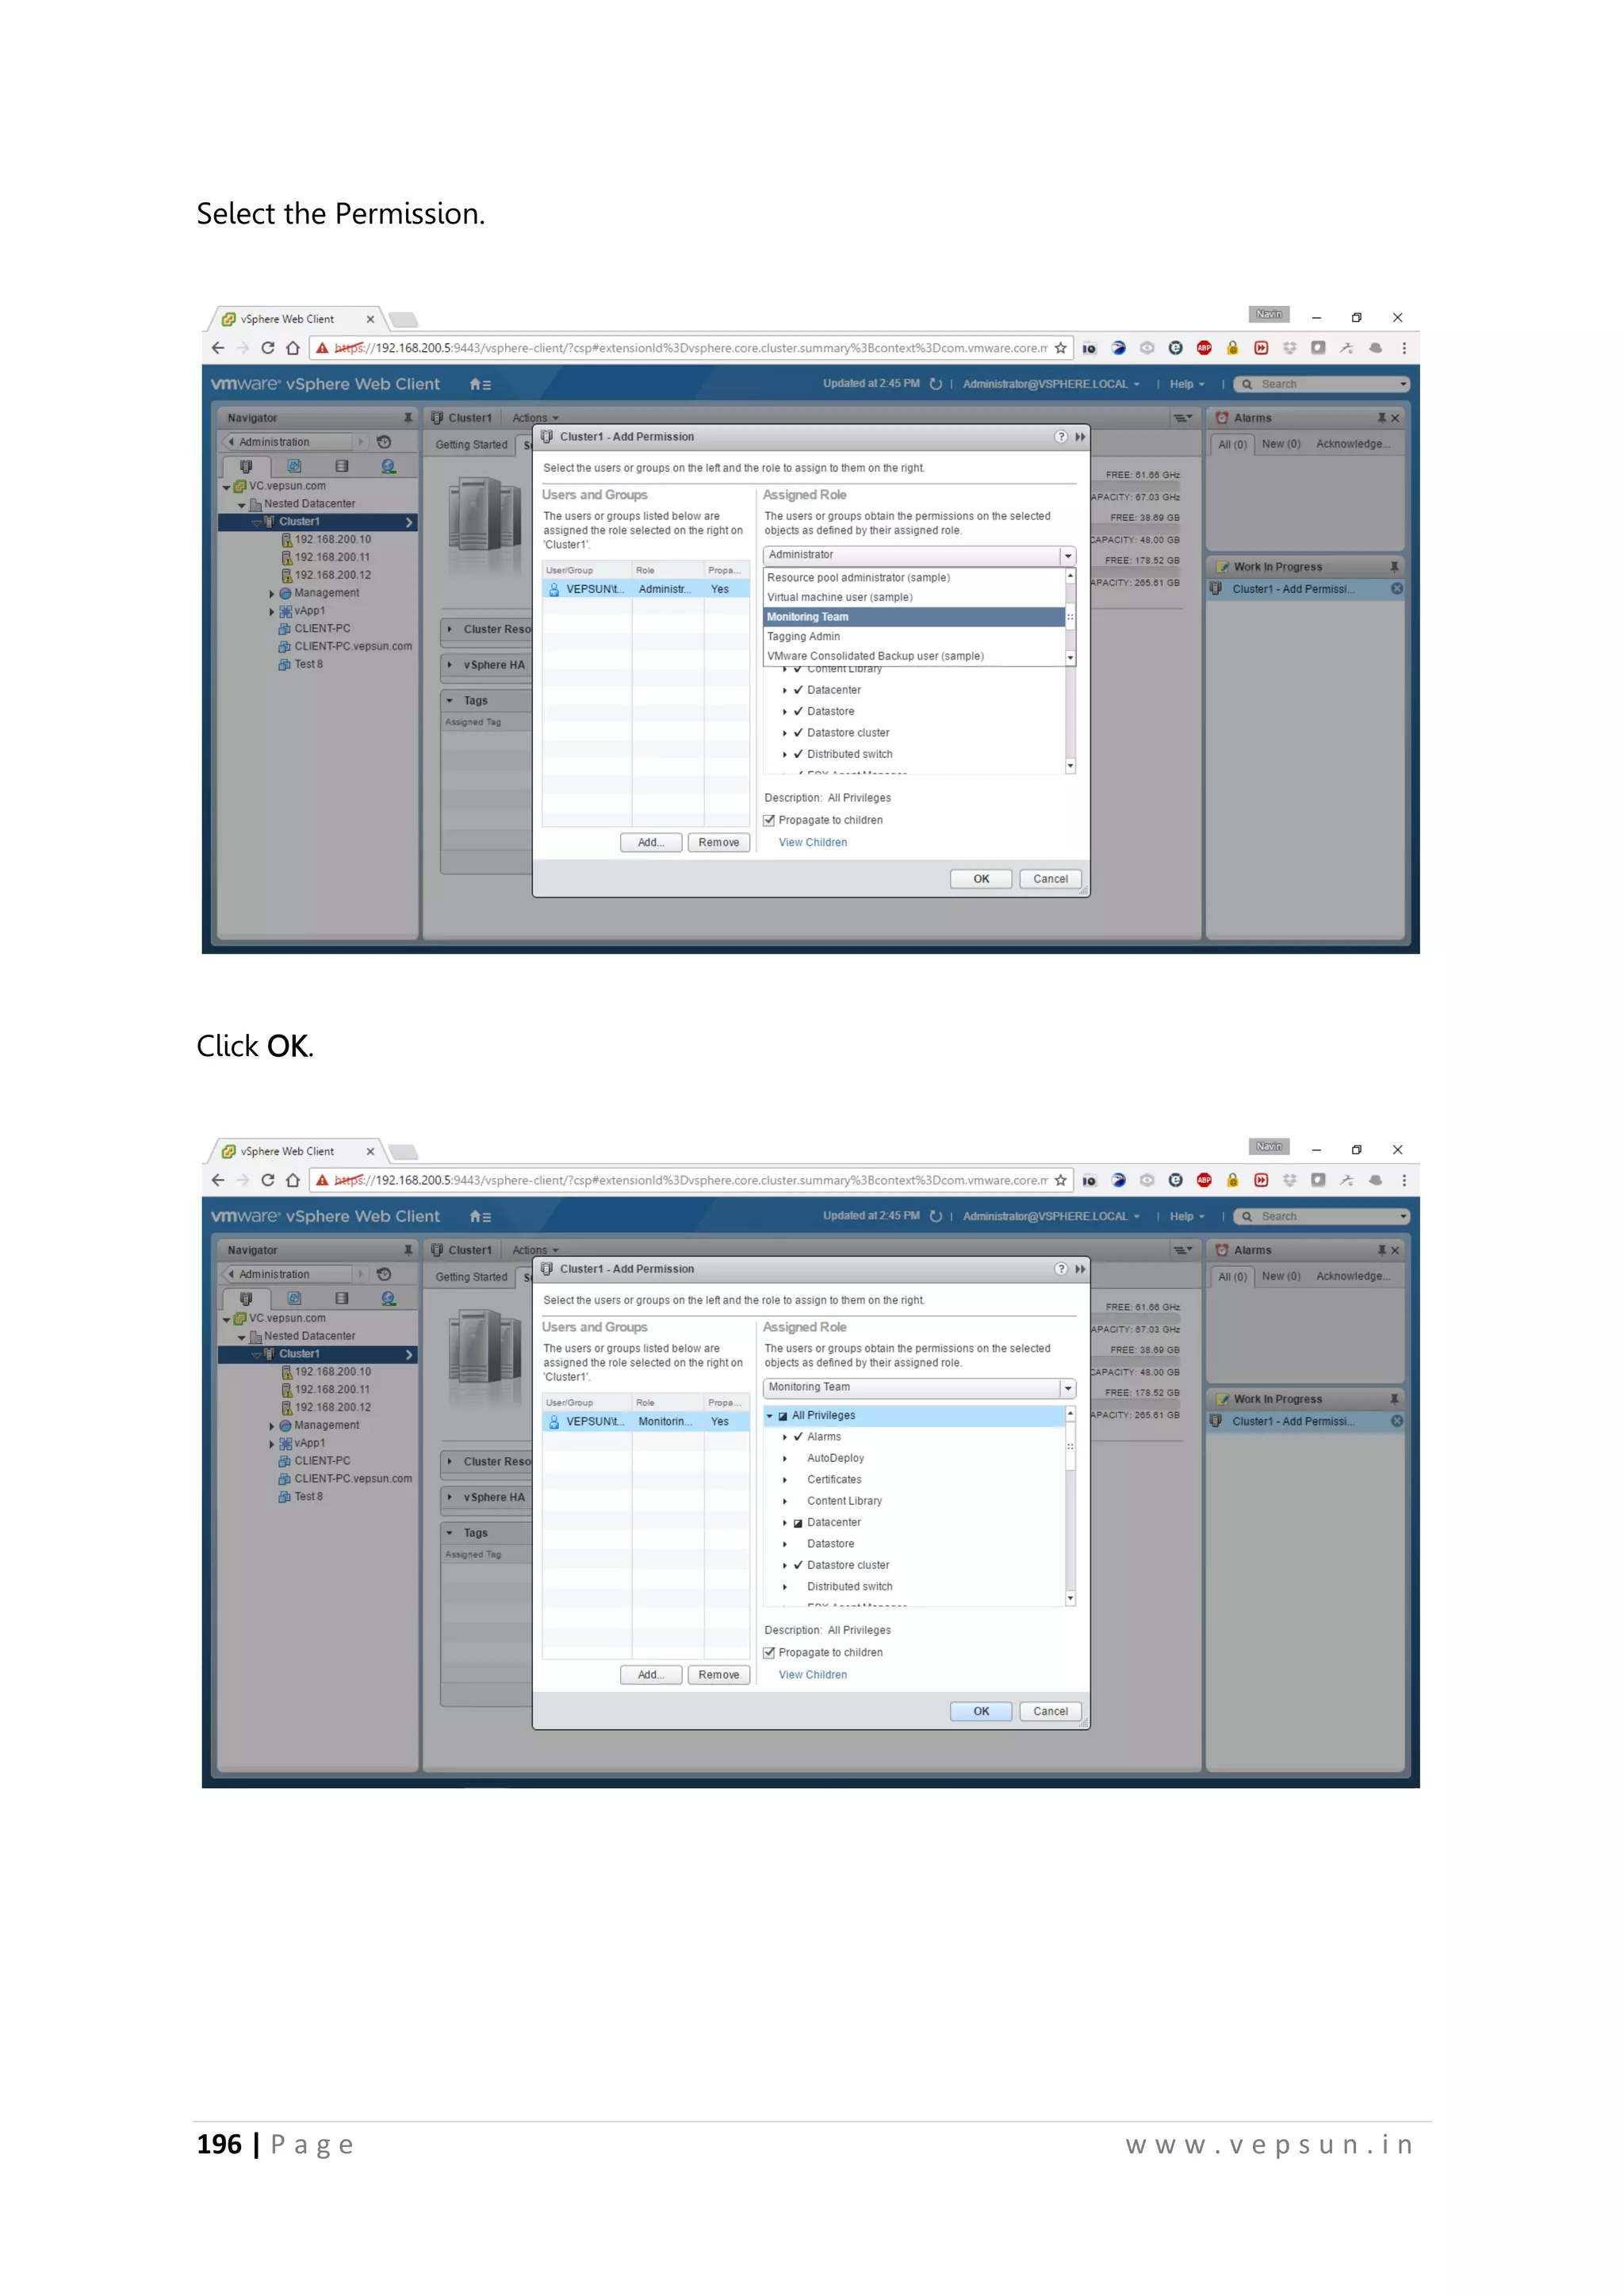
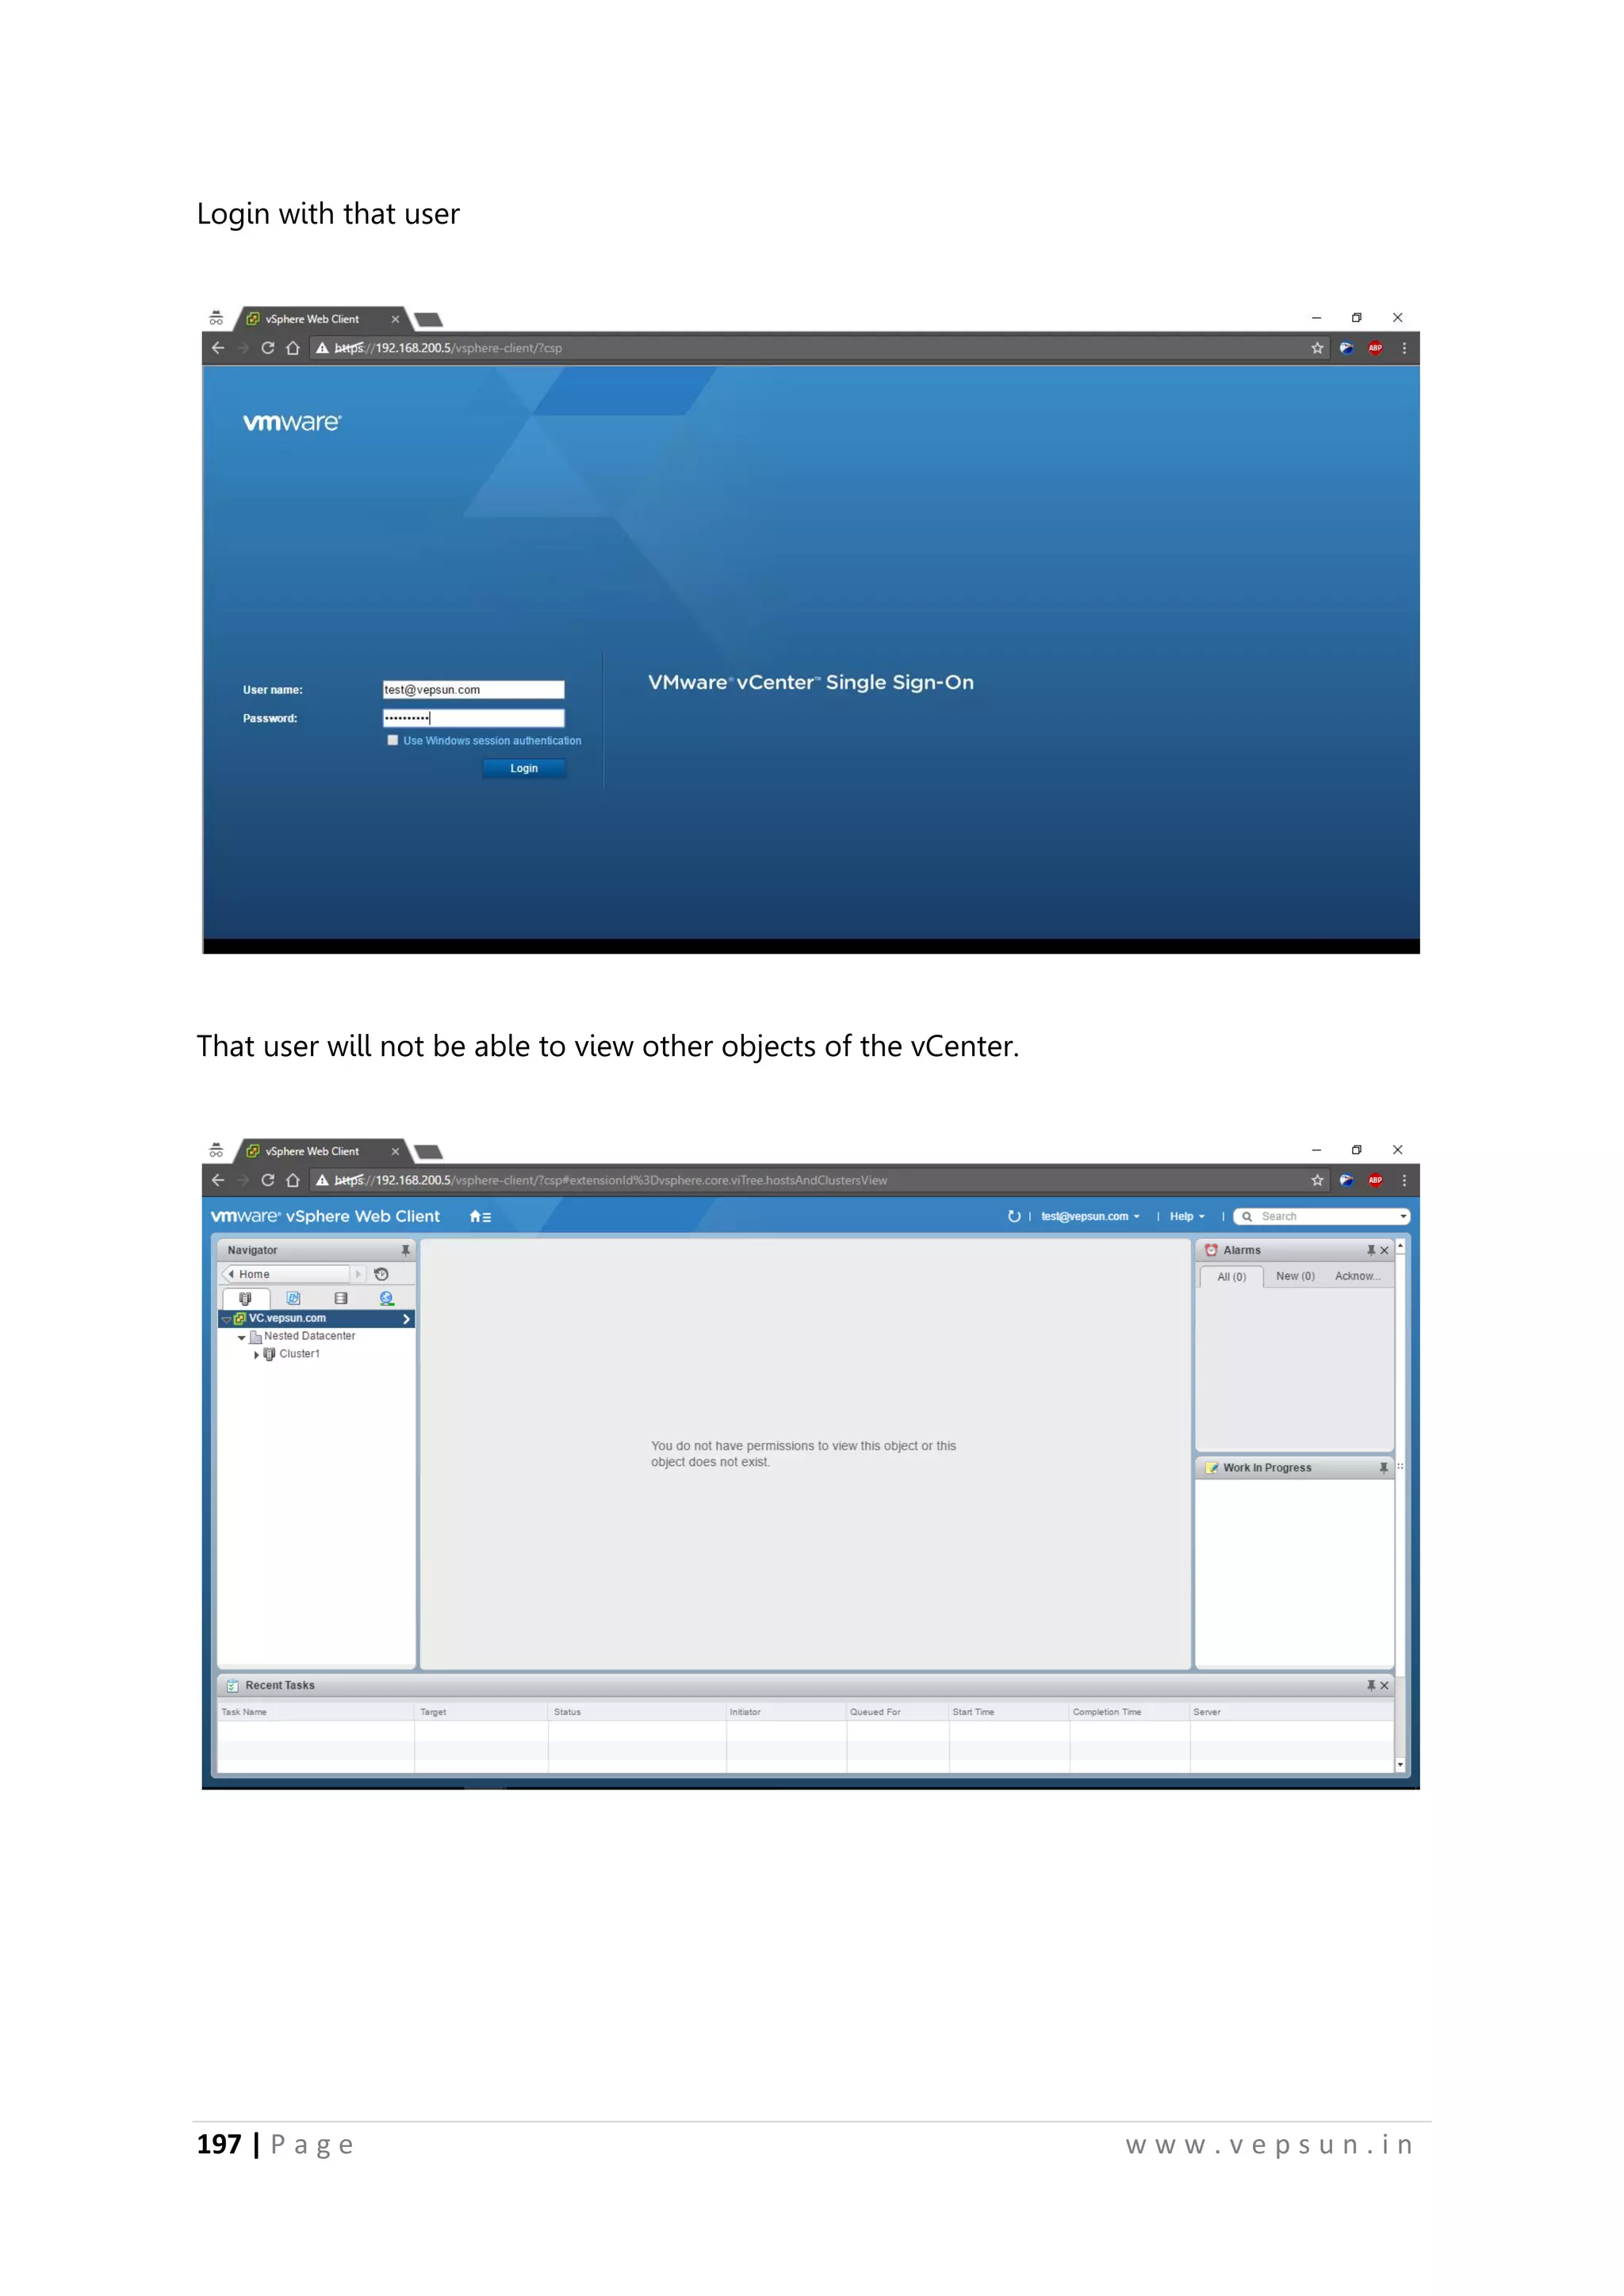
Overview of the lab guide contents including installation and management of VMware vSphere 6.0 components.Steps to create user roles, manage permissions for vCenter, and handle identity sources.
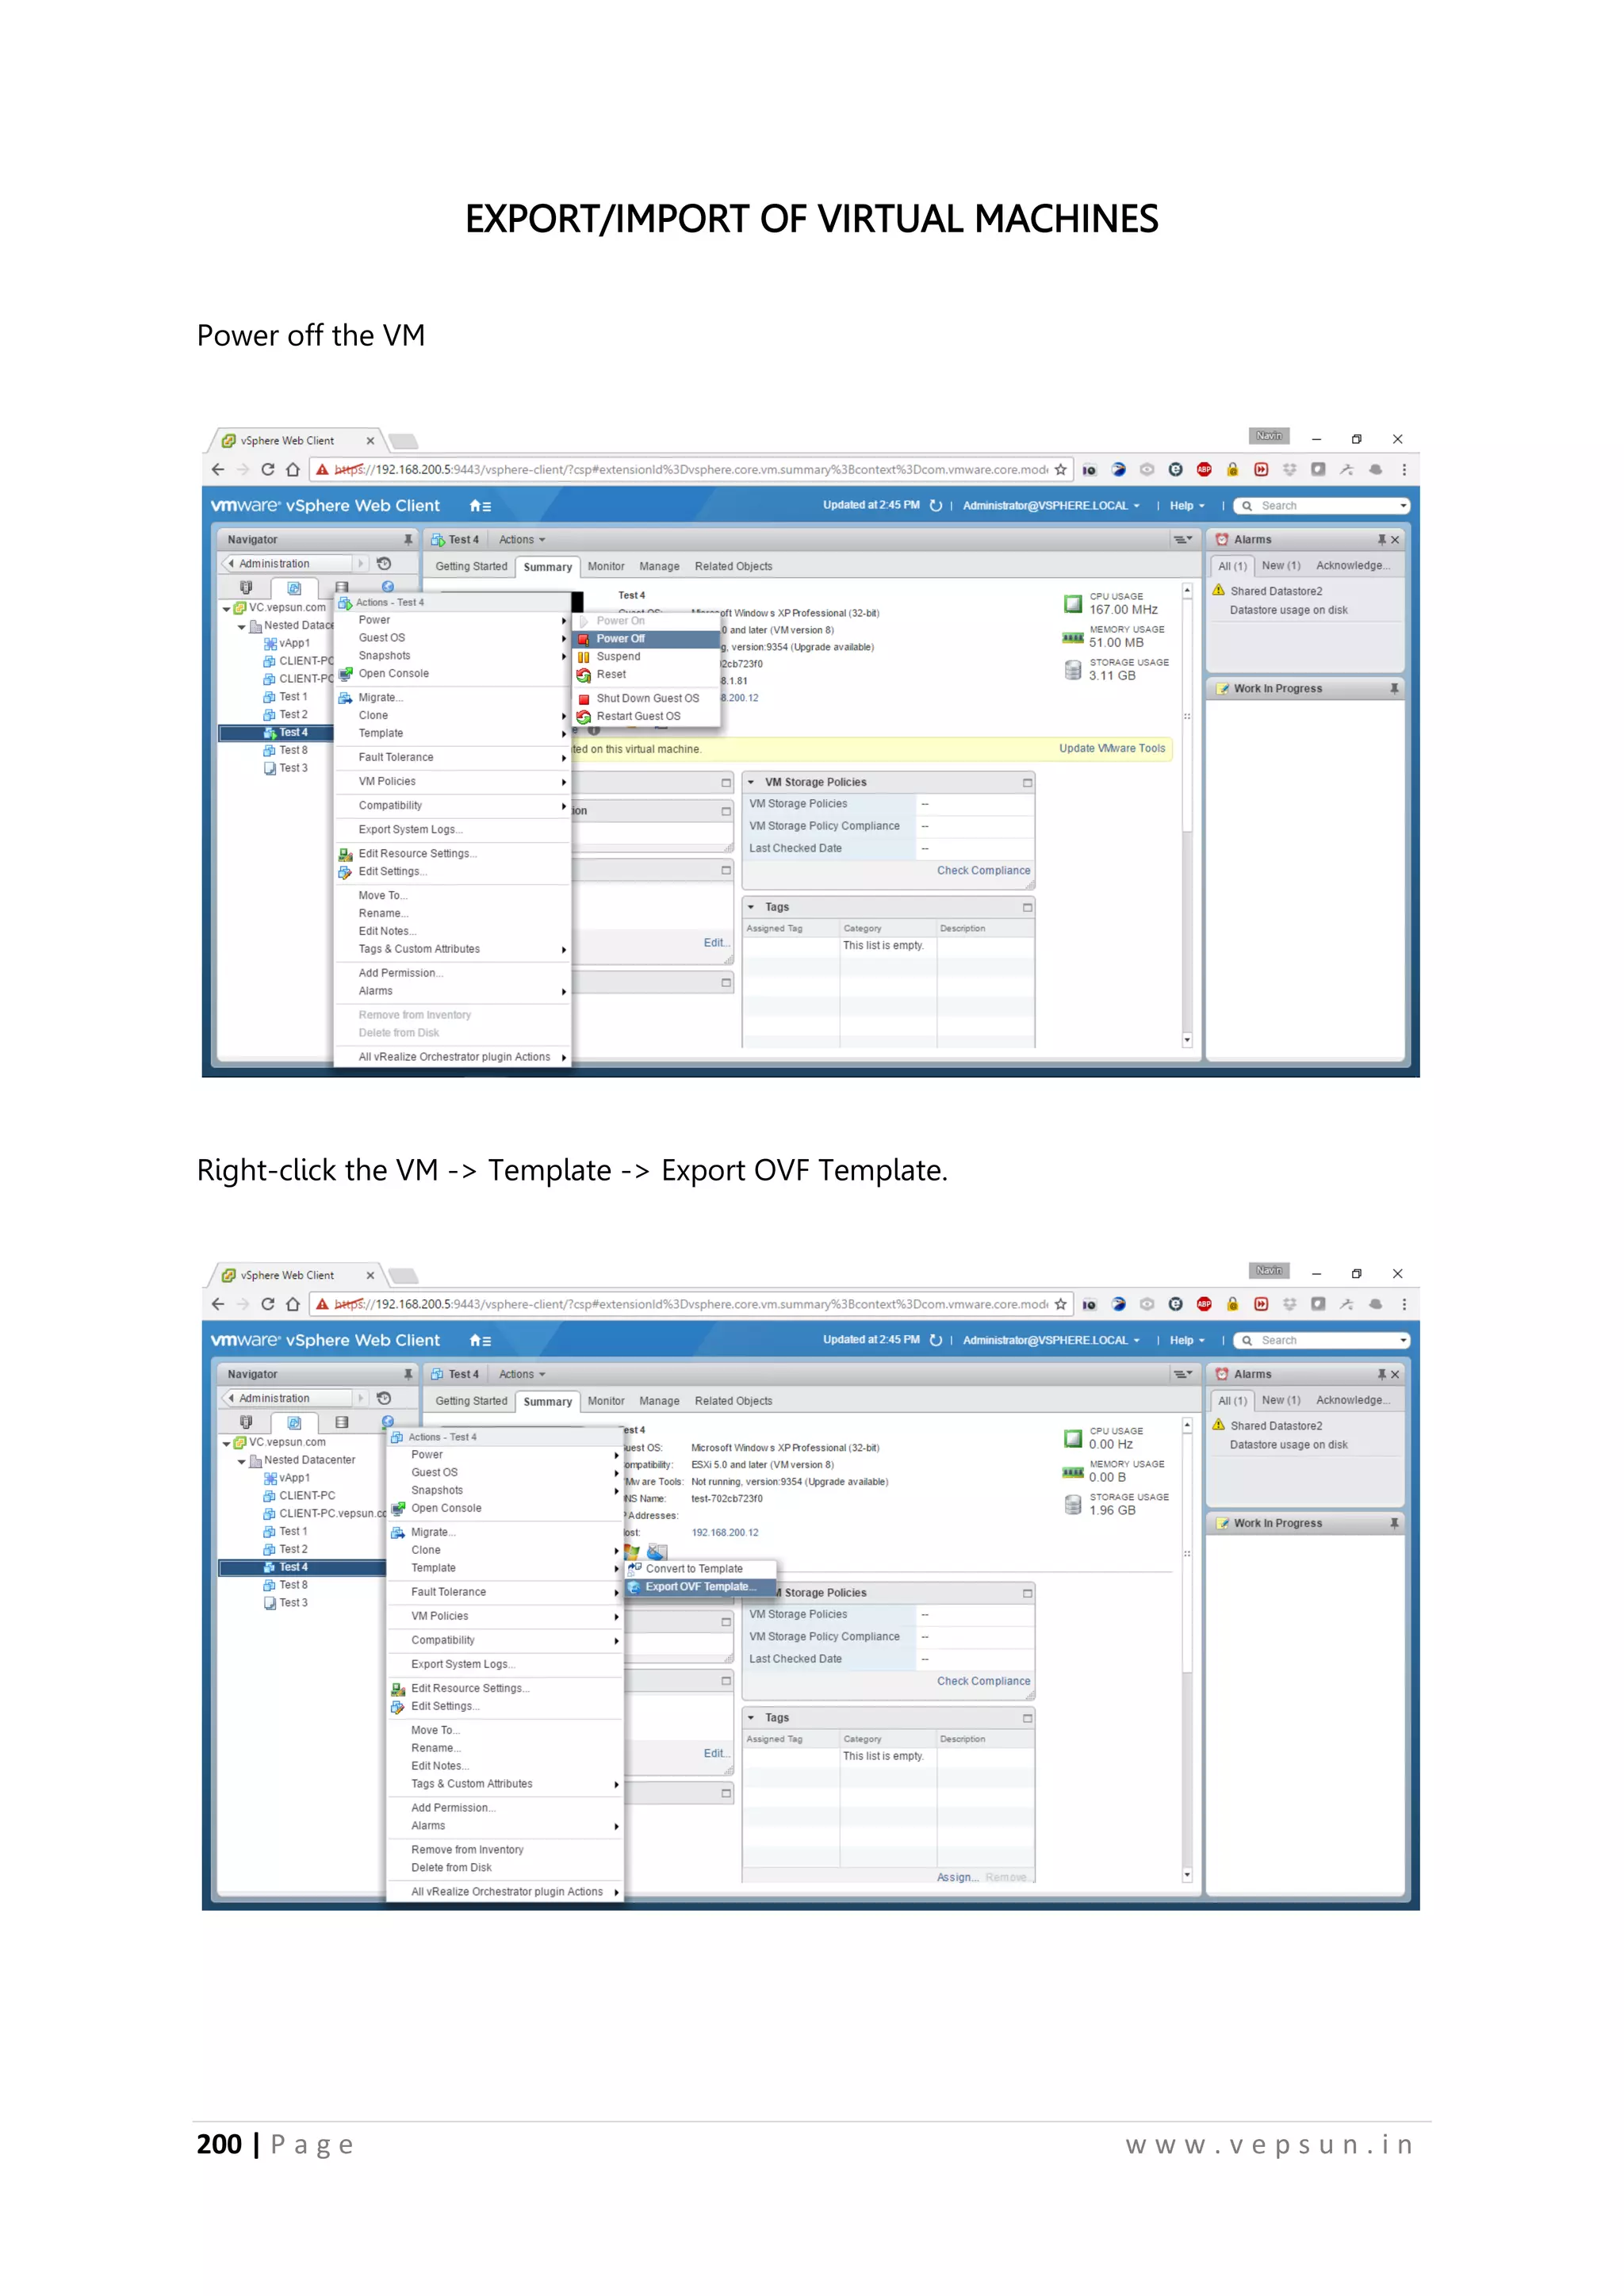
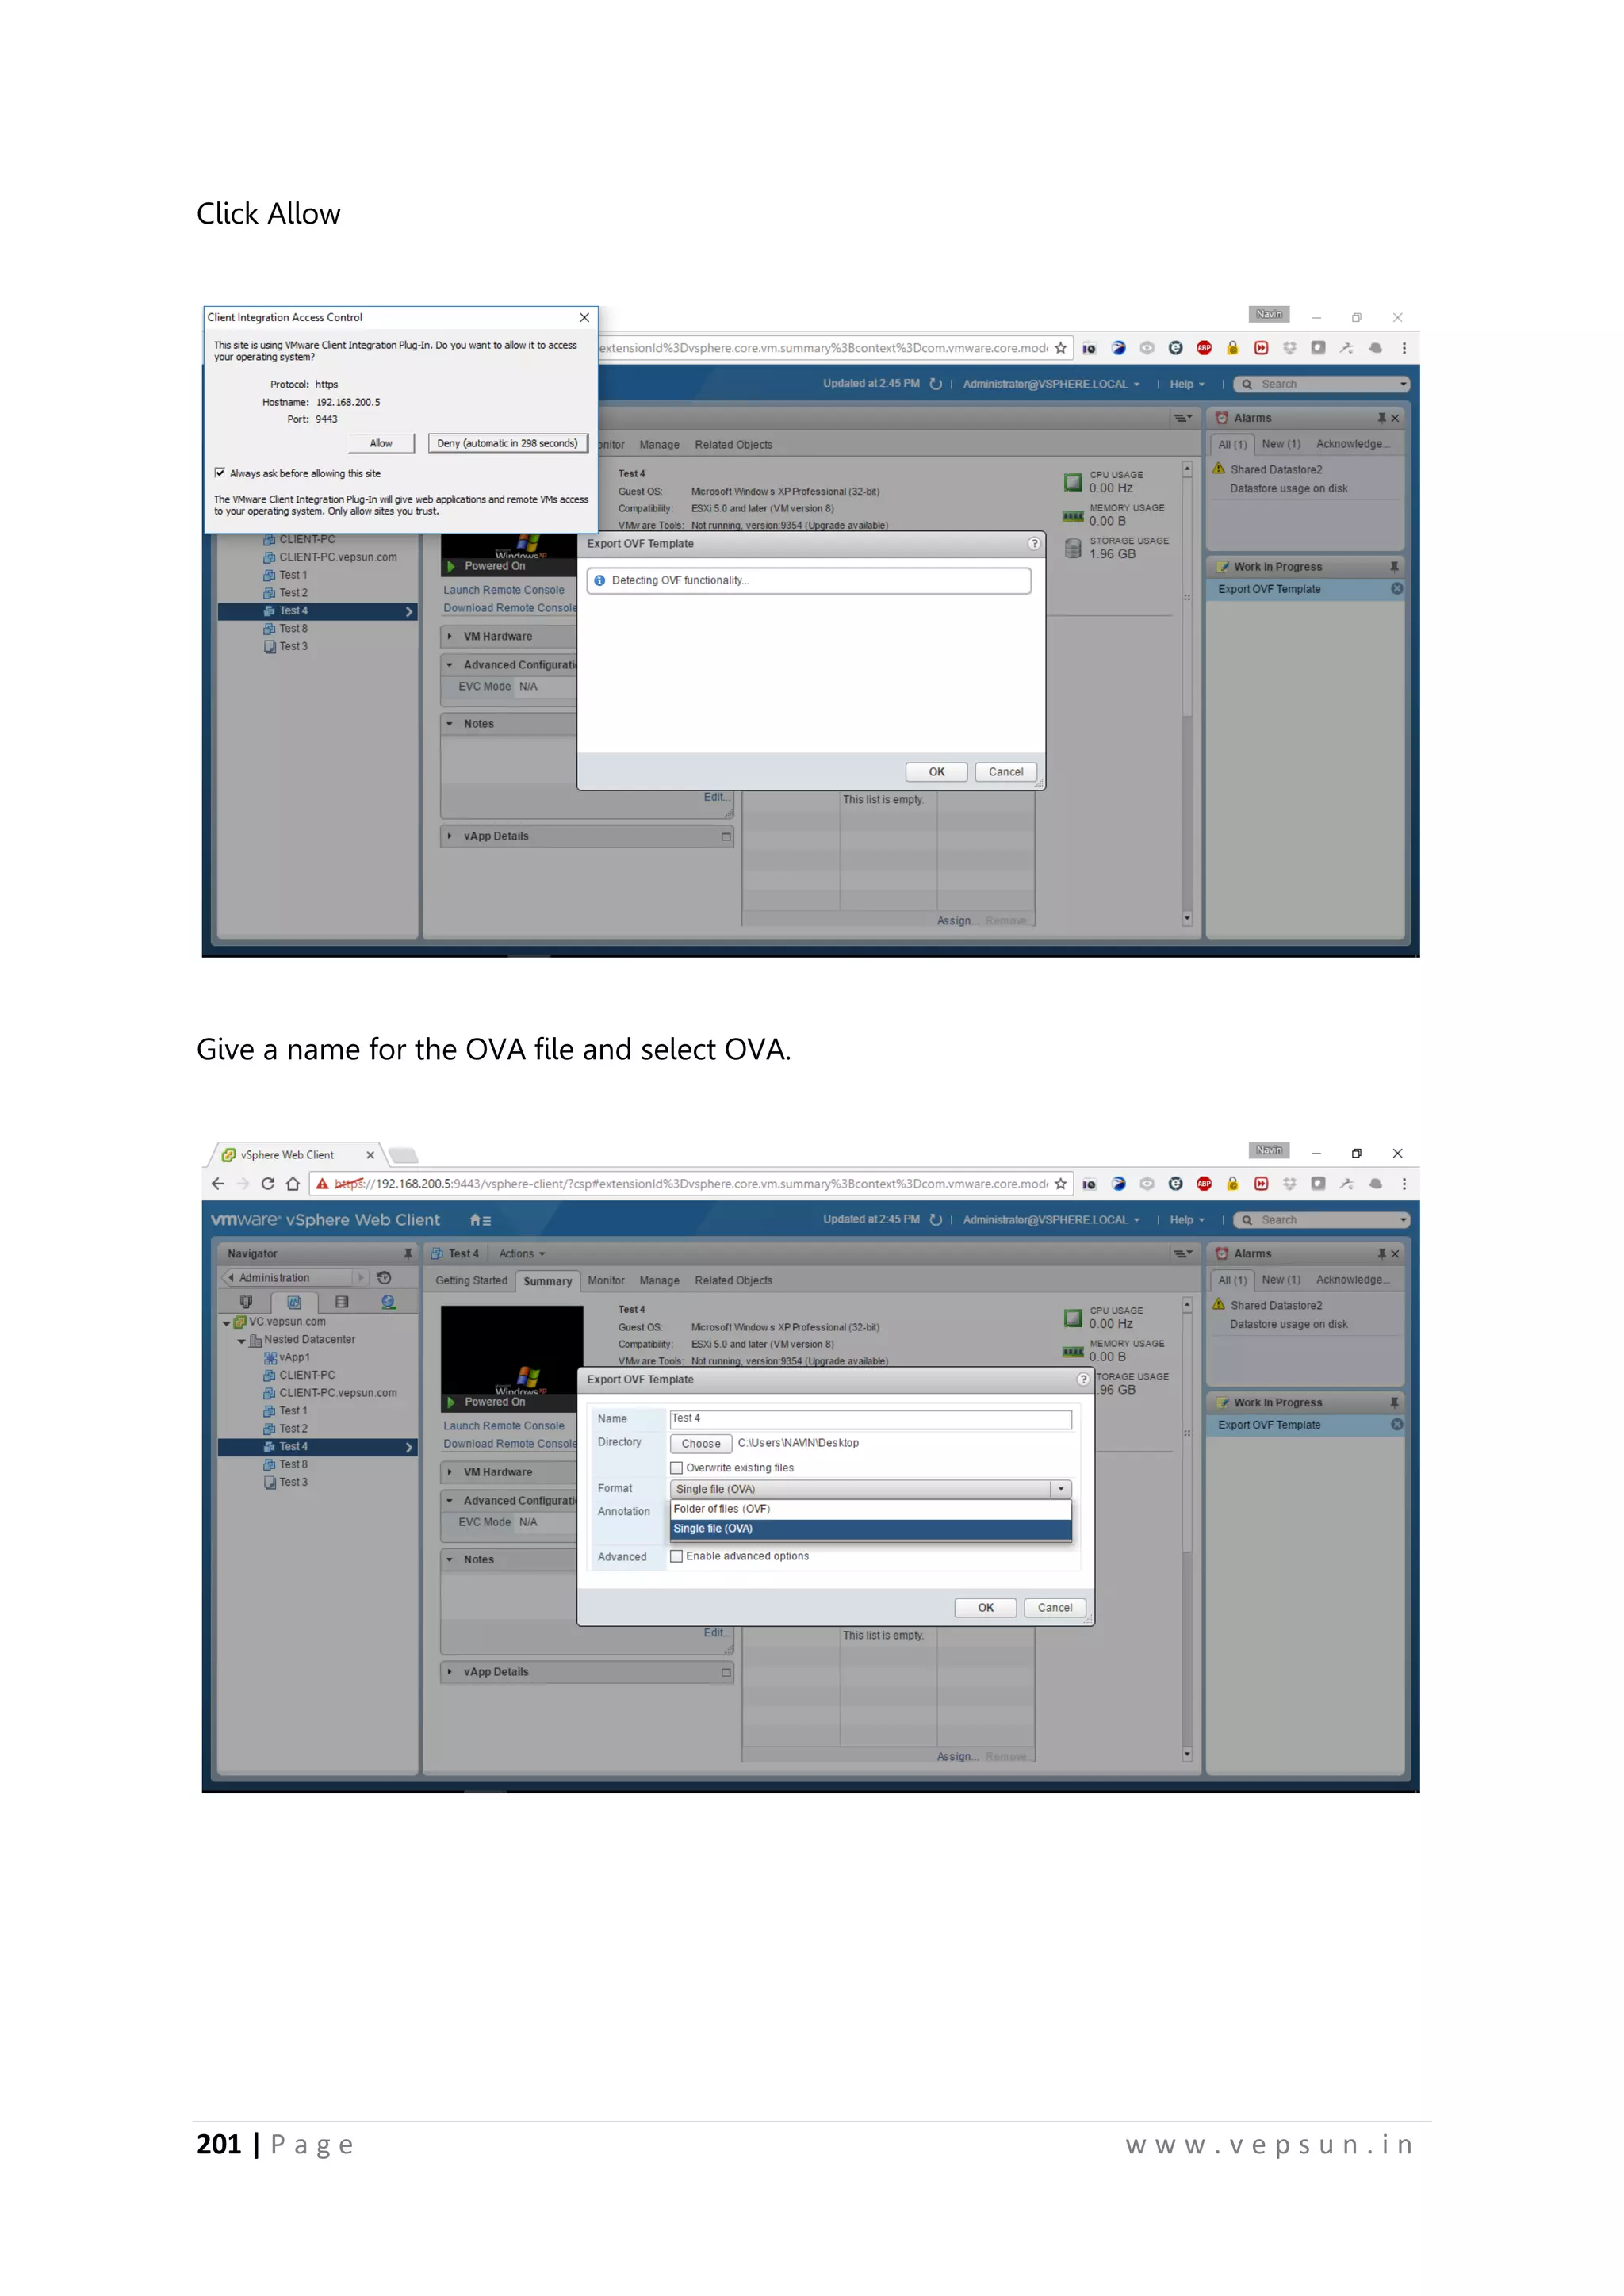
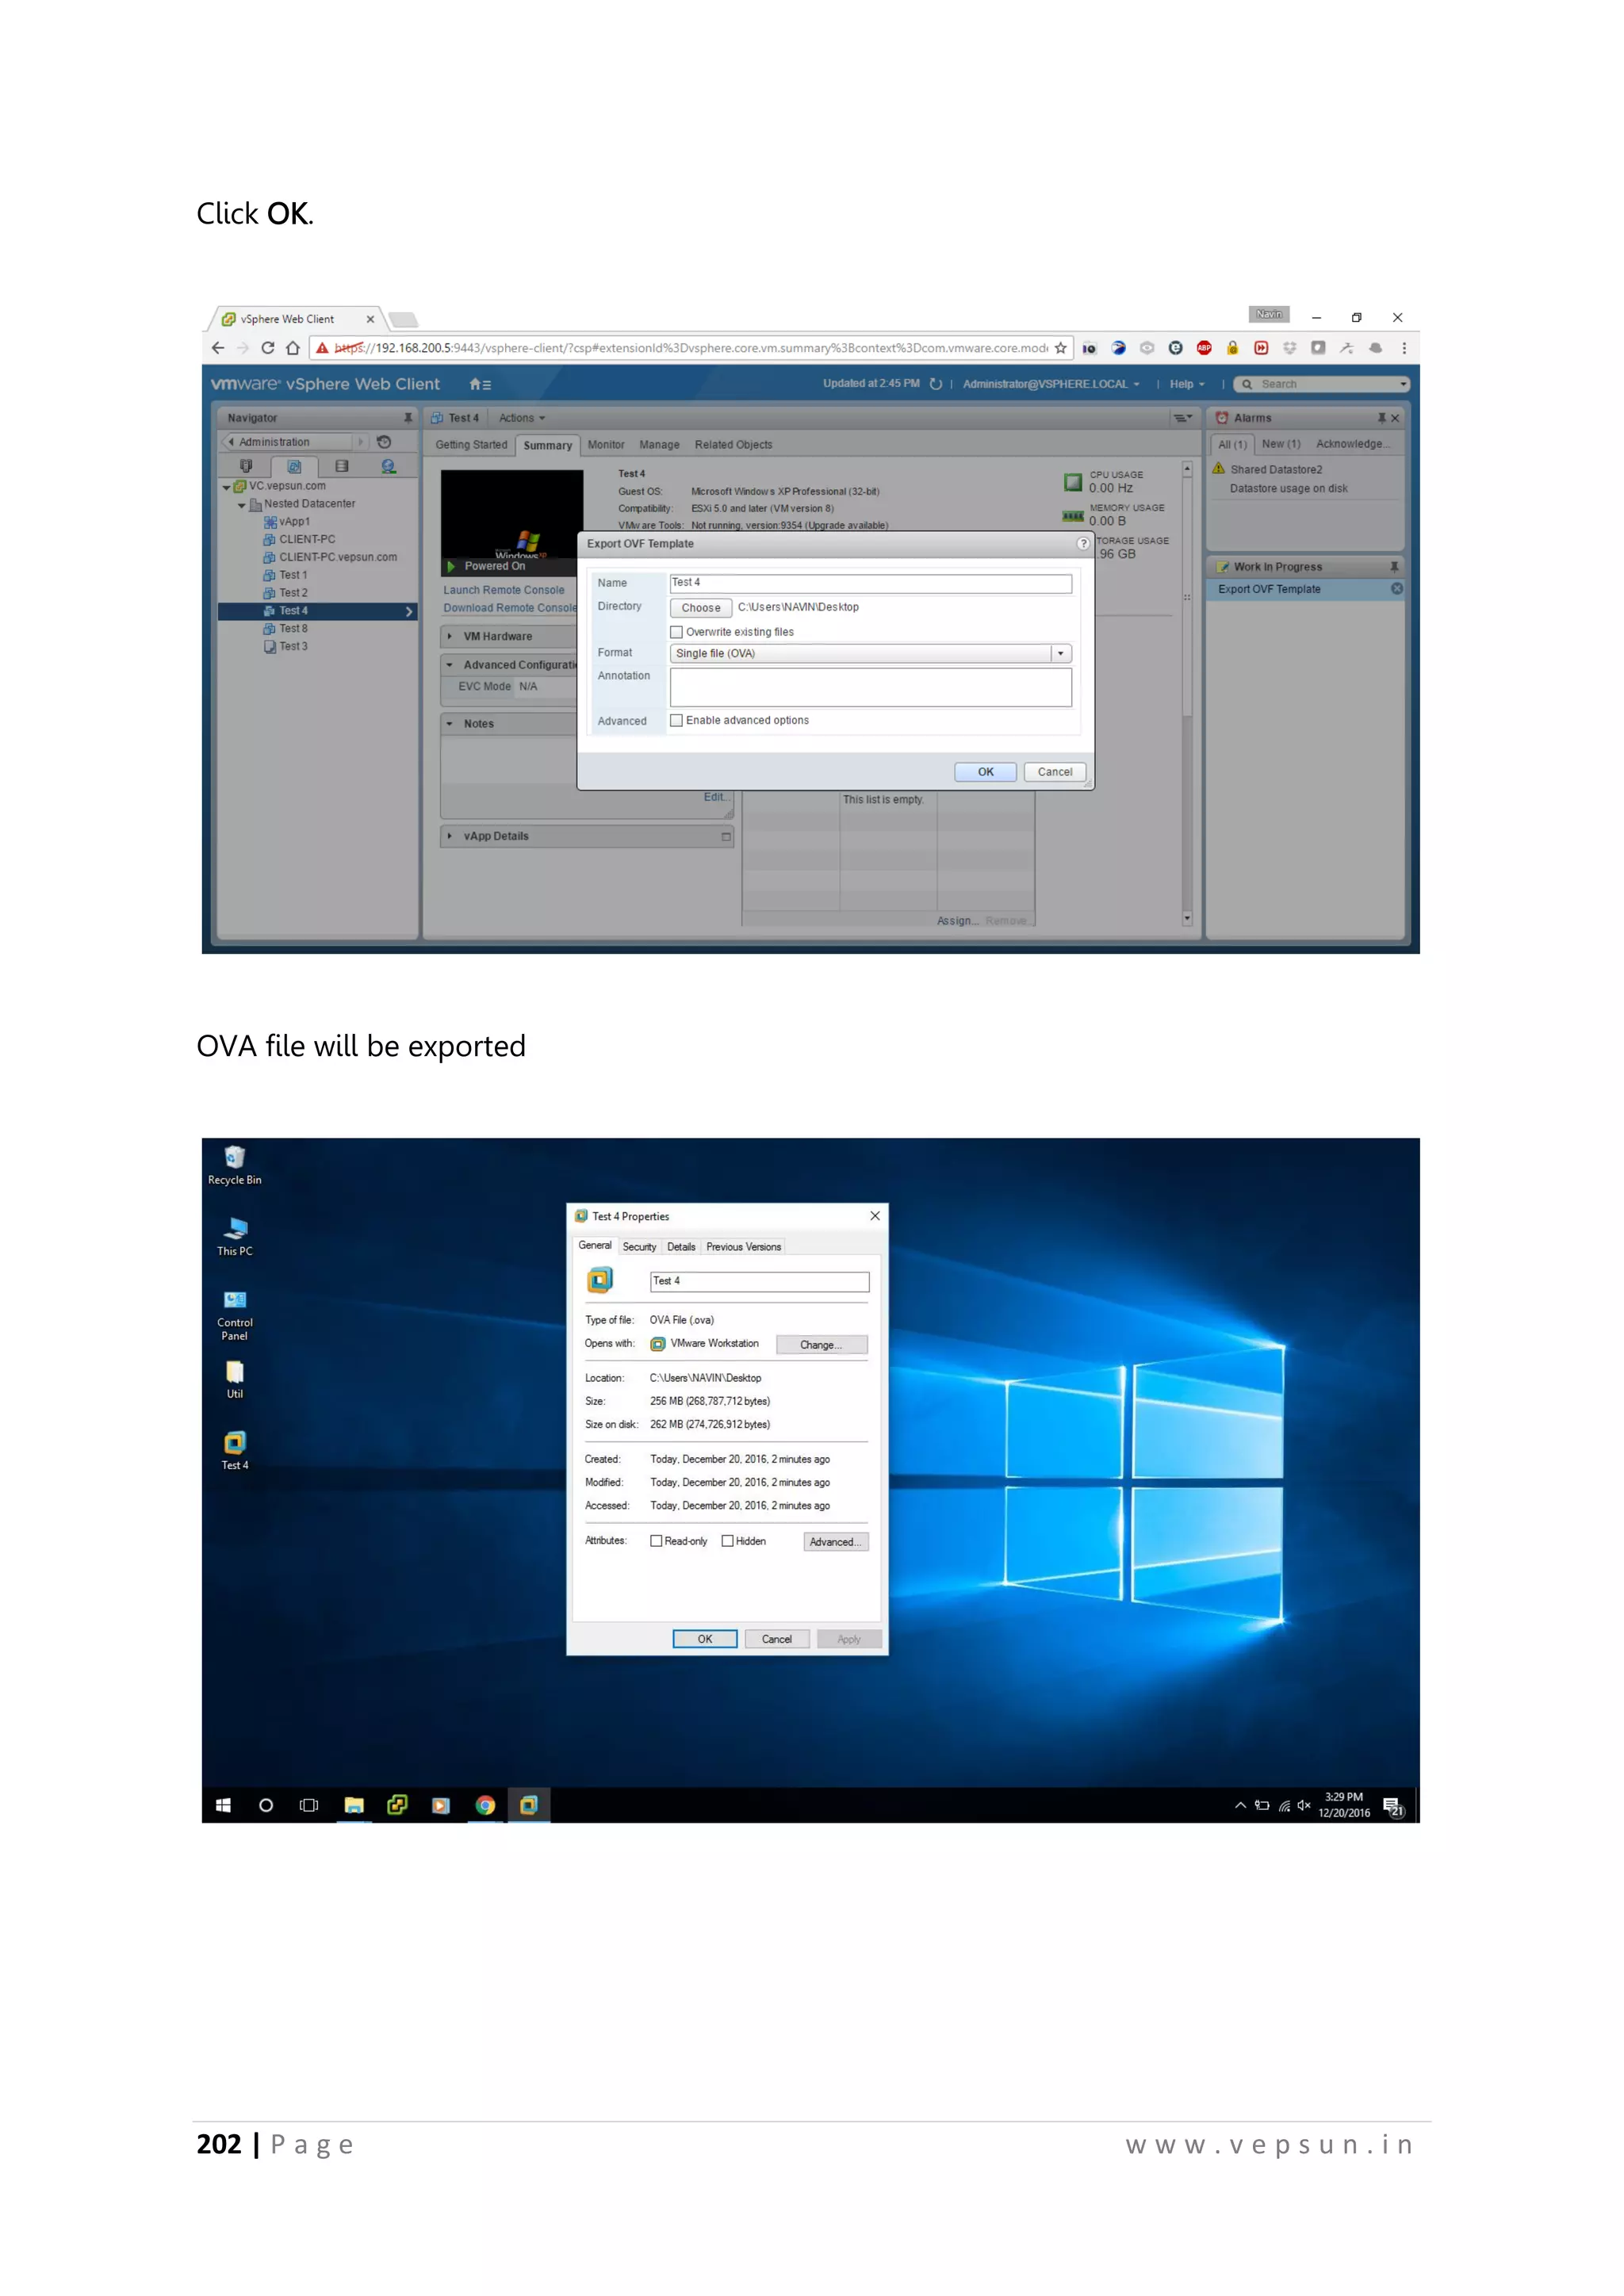
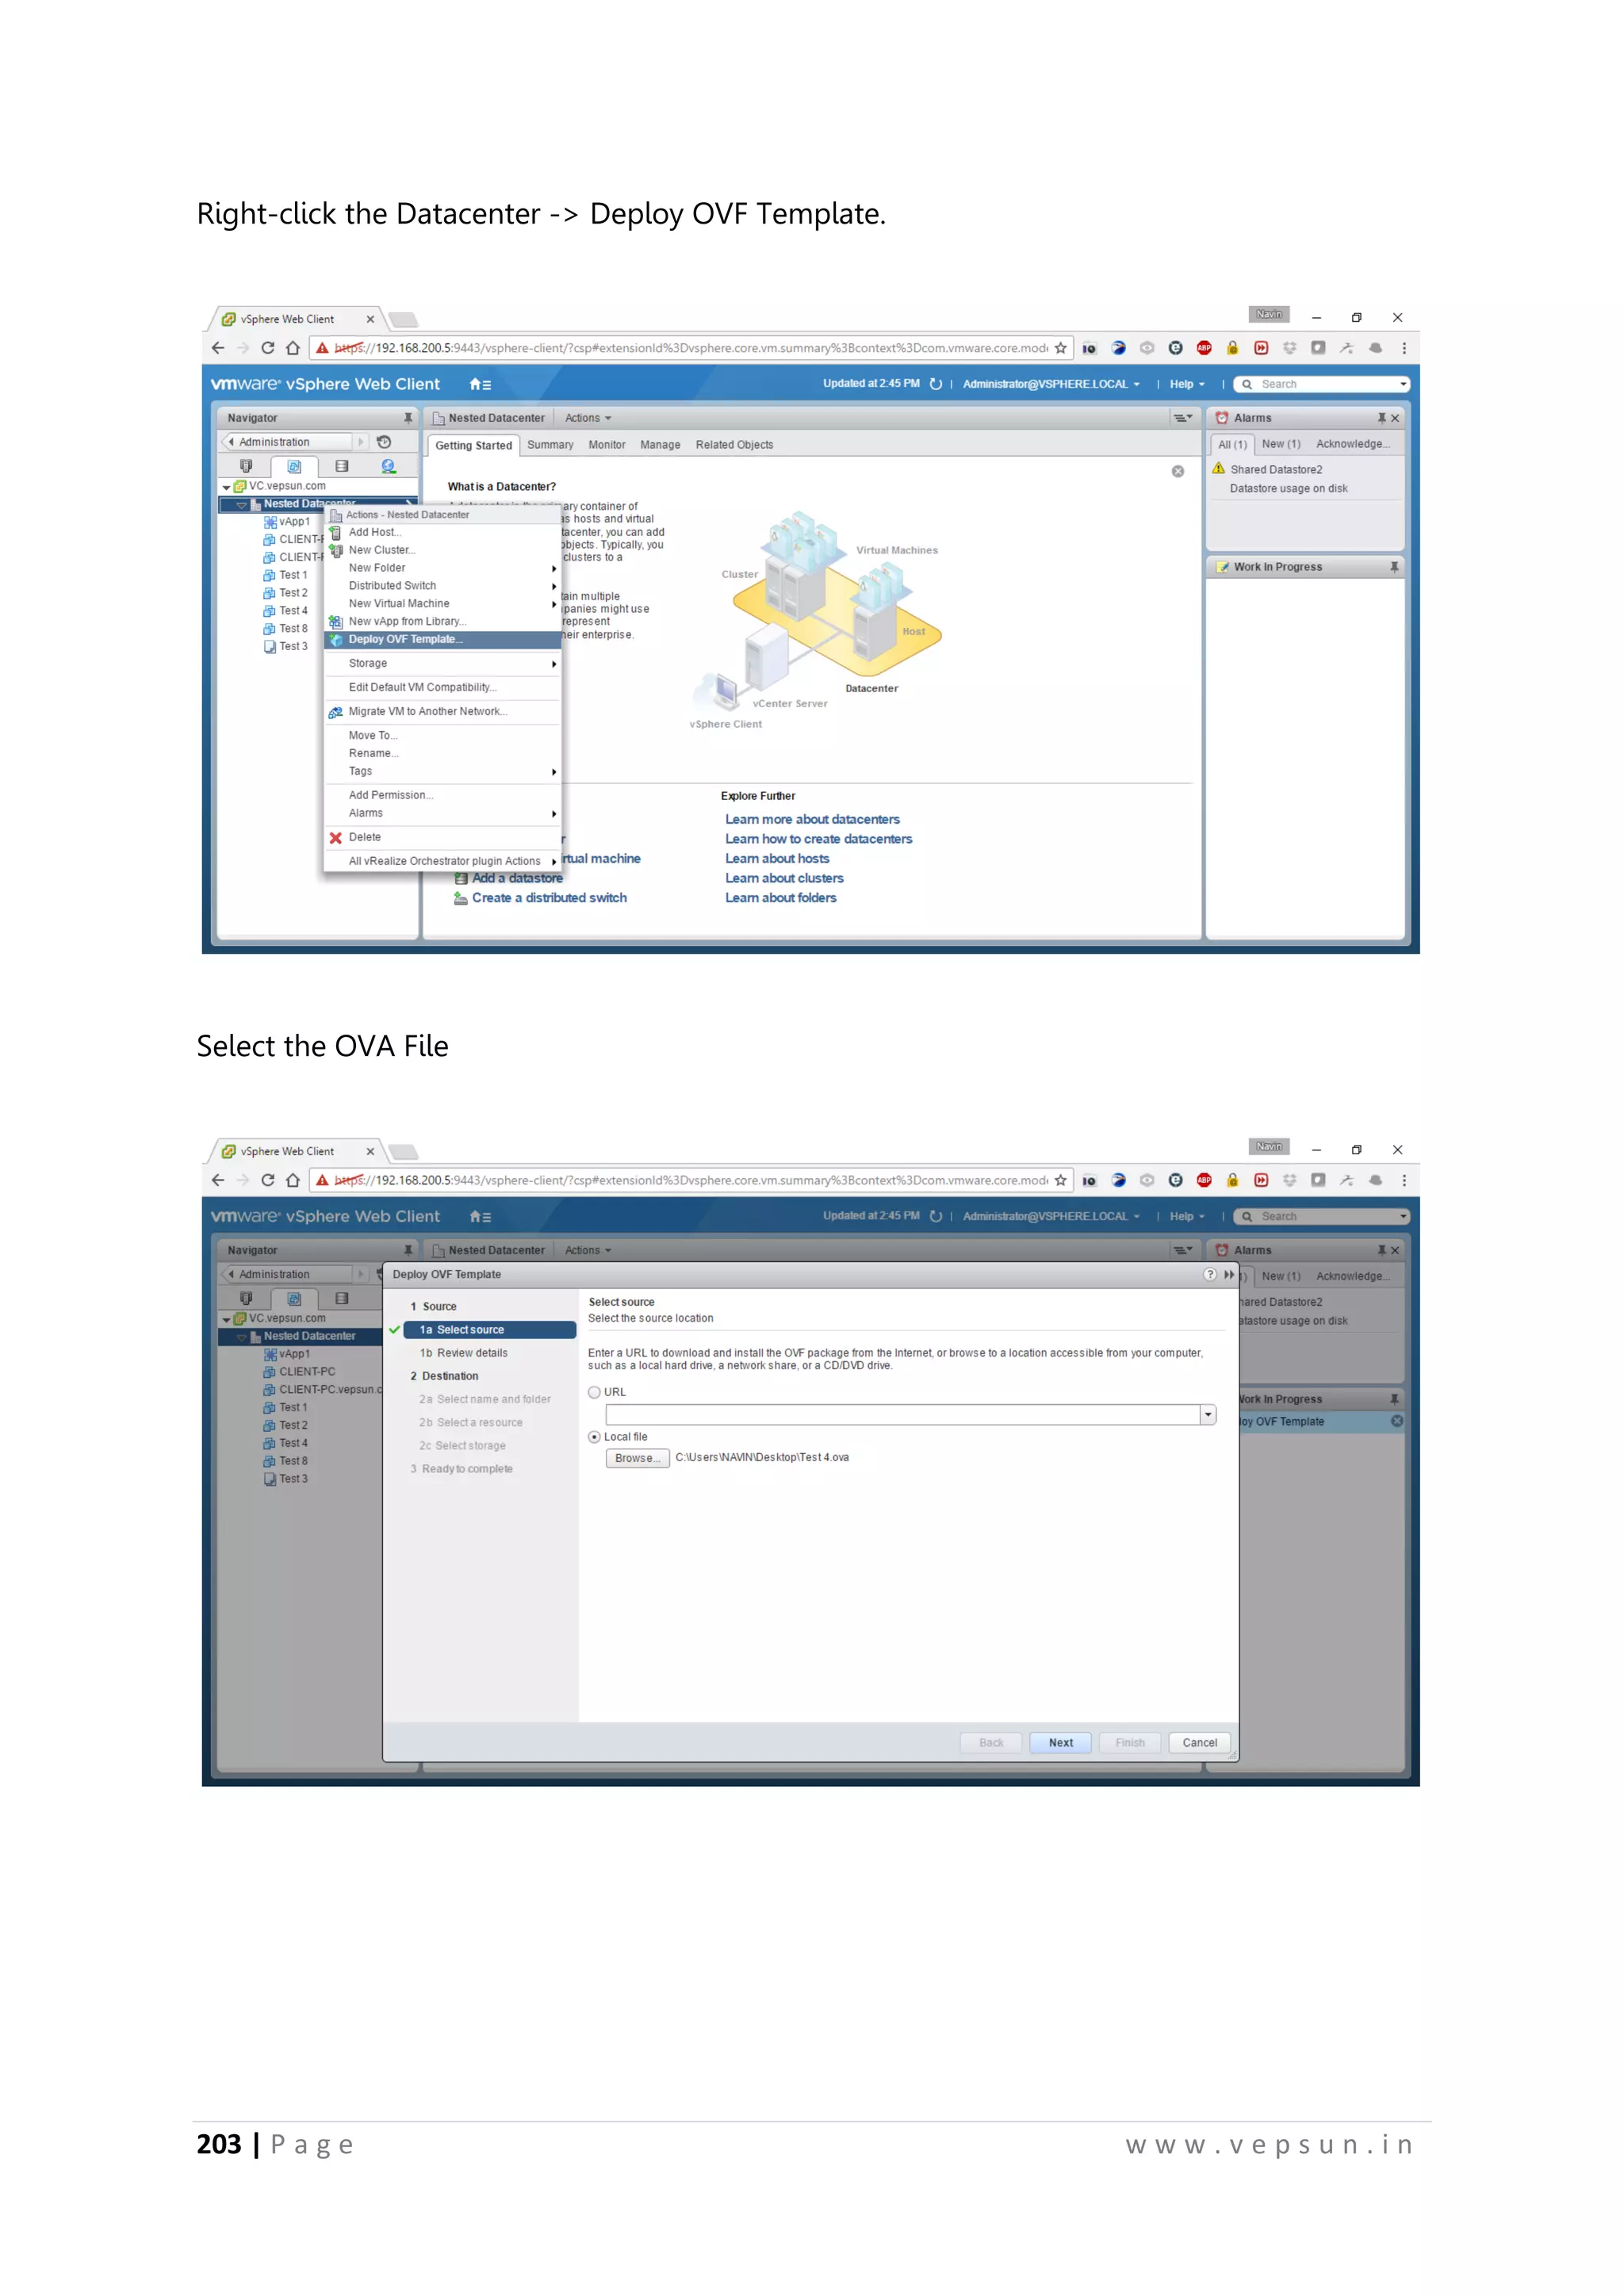
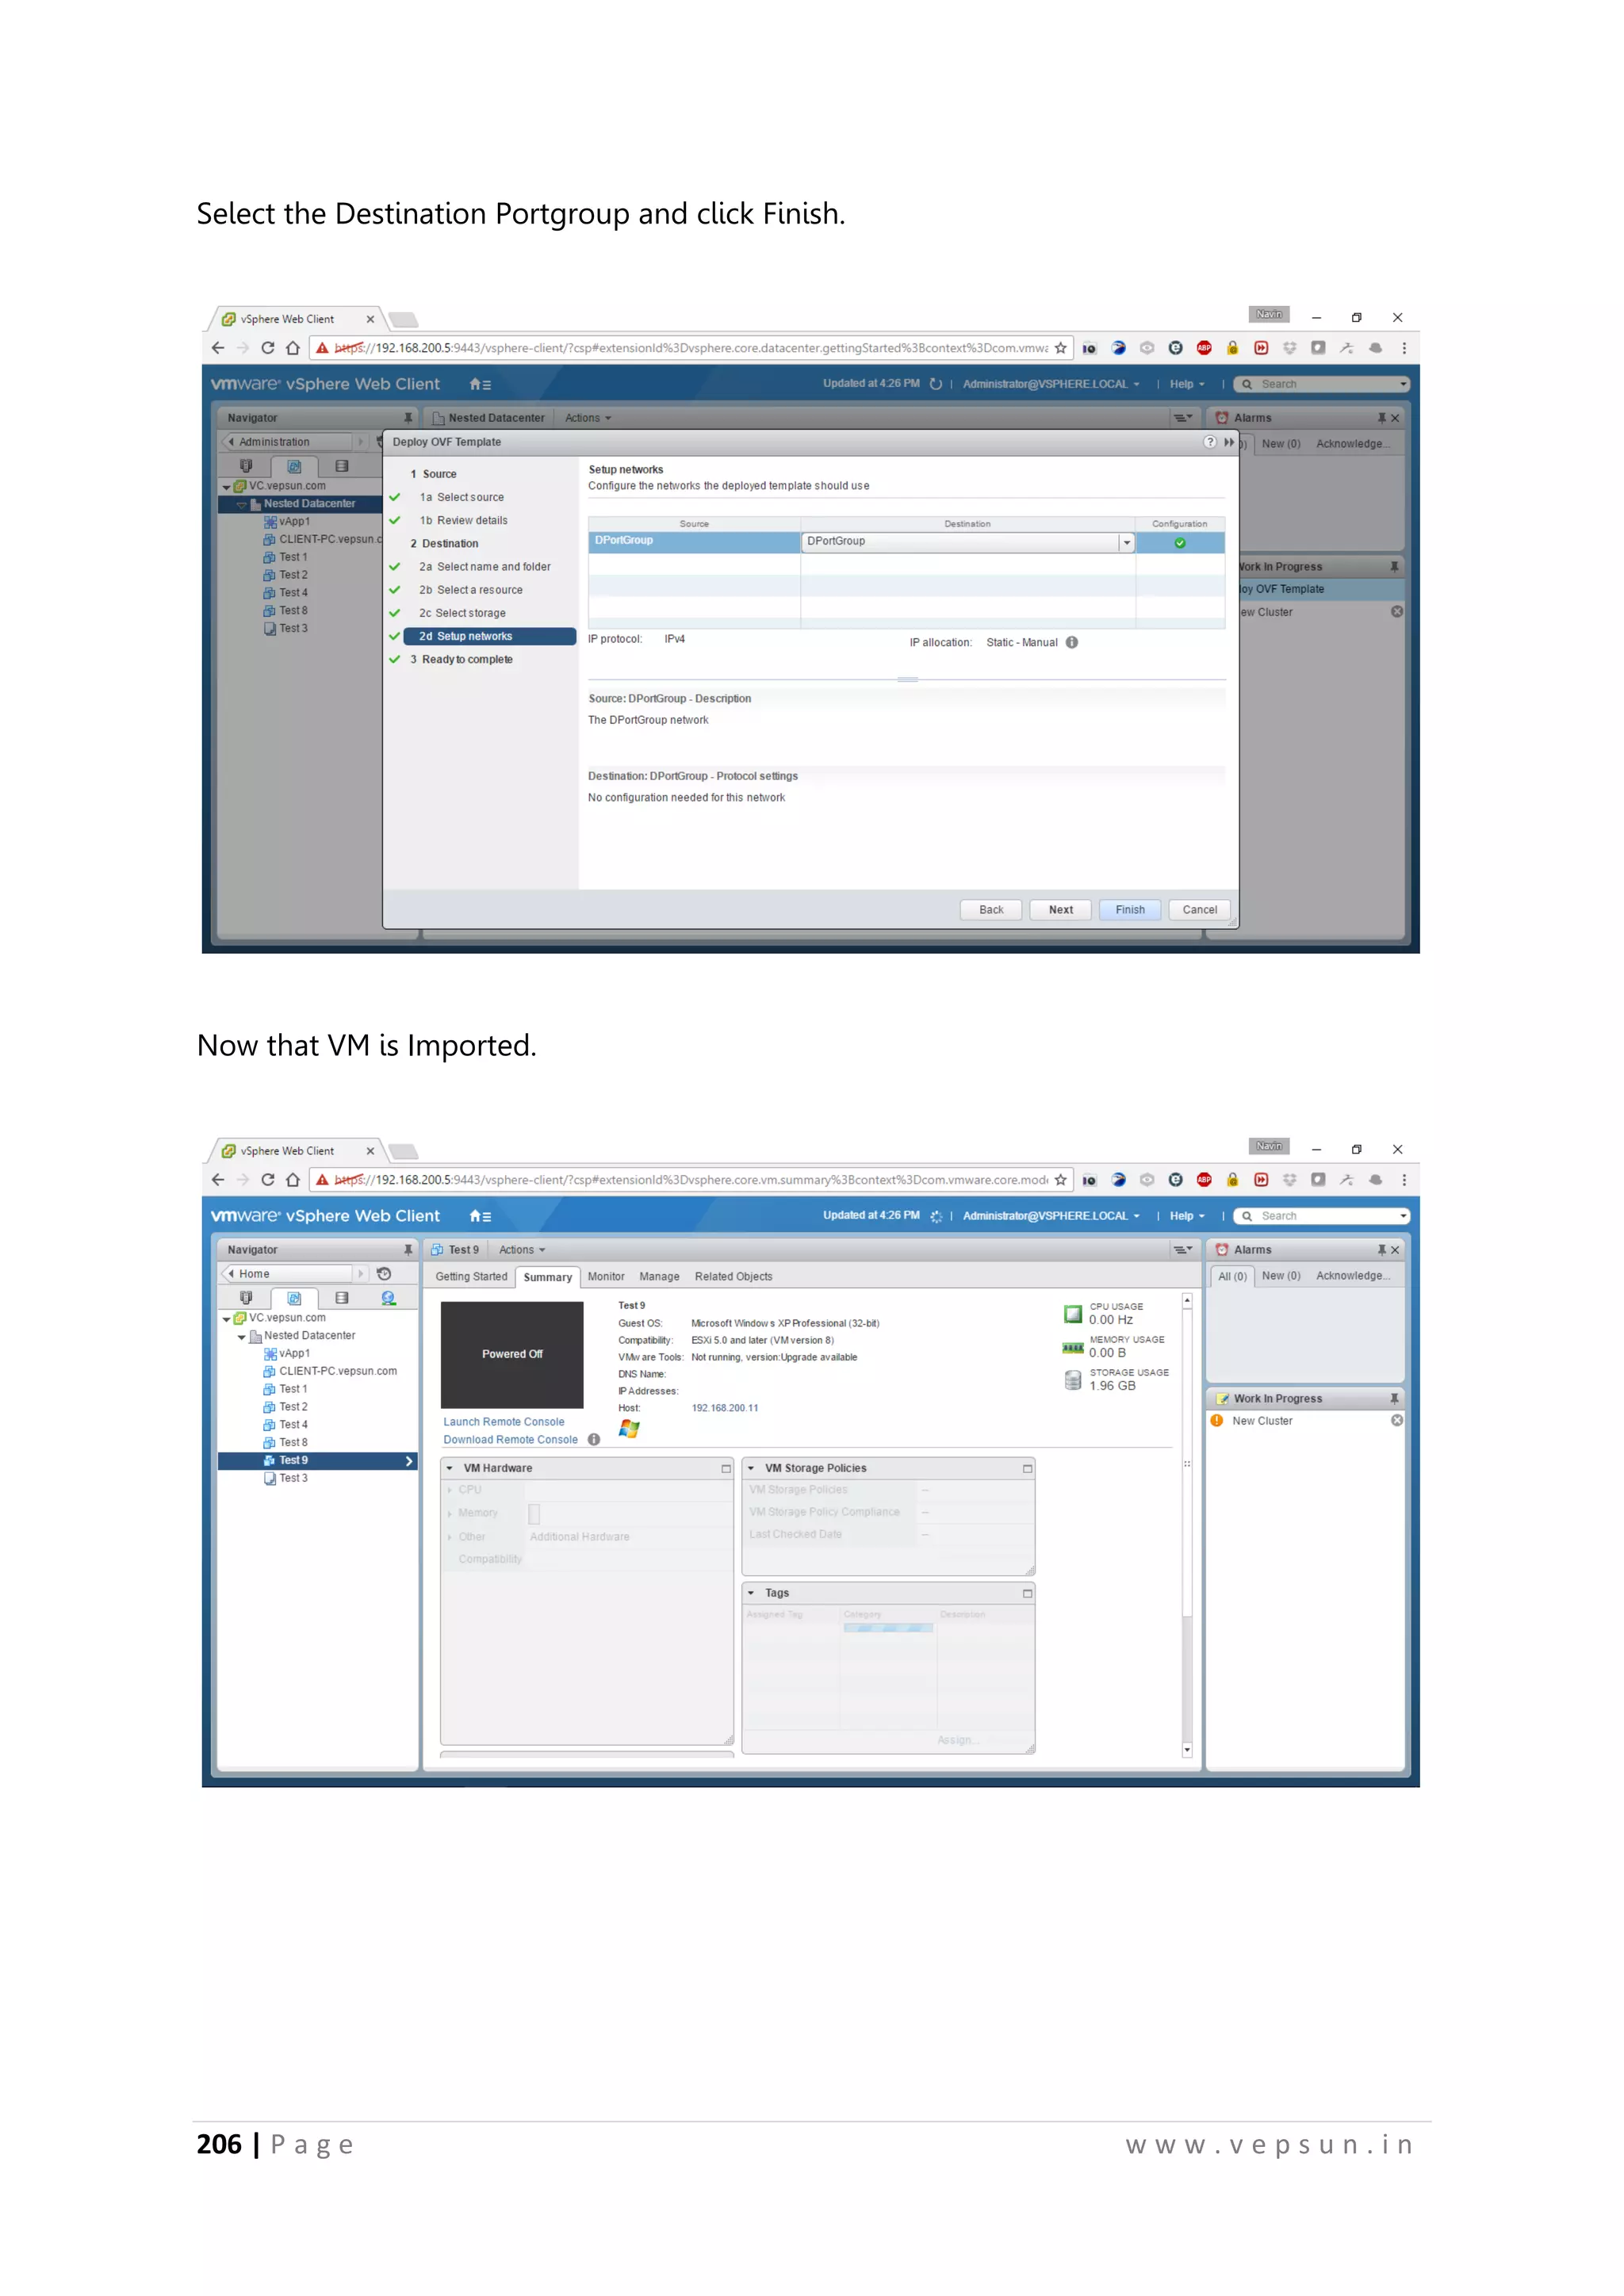
Overview of the lab guide contents including installation and management of VMware vSphere 6.0 components.Procedure to export VM templates and import them back into the vSphere environment.
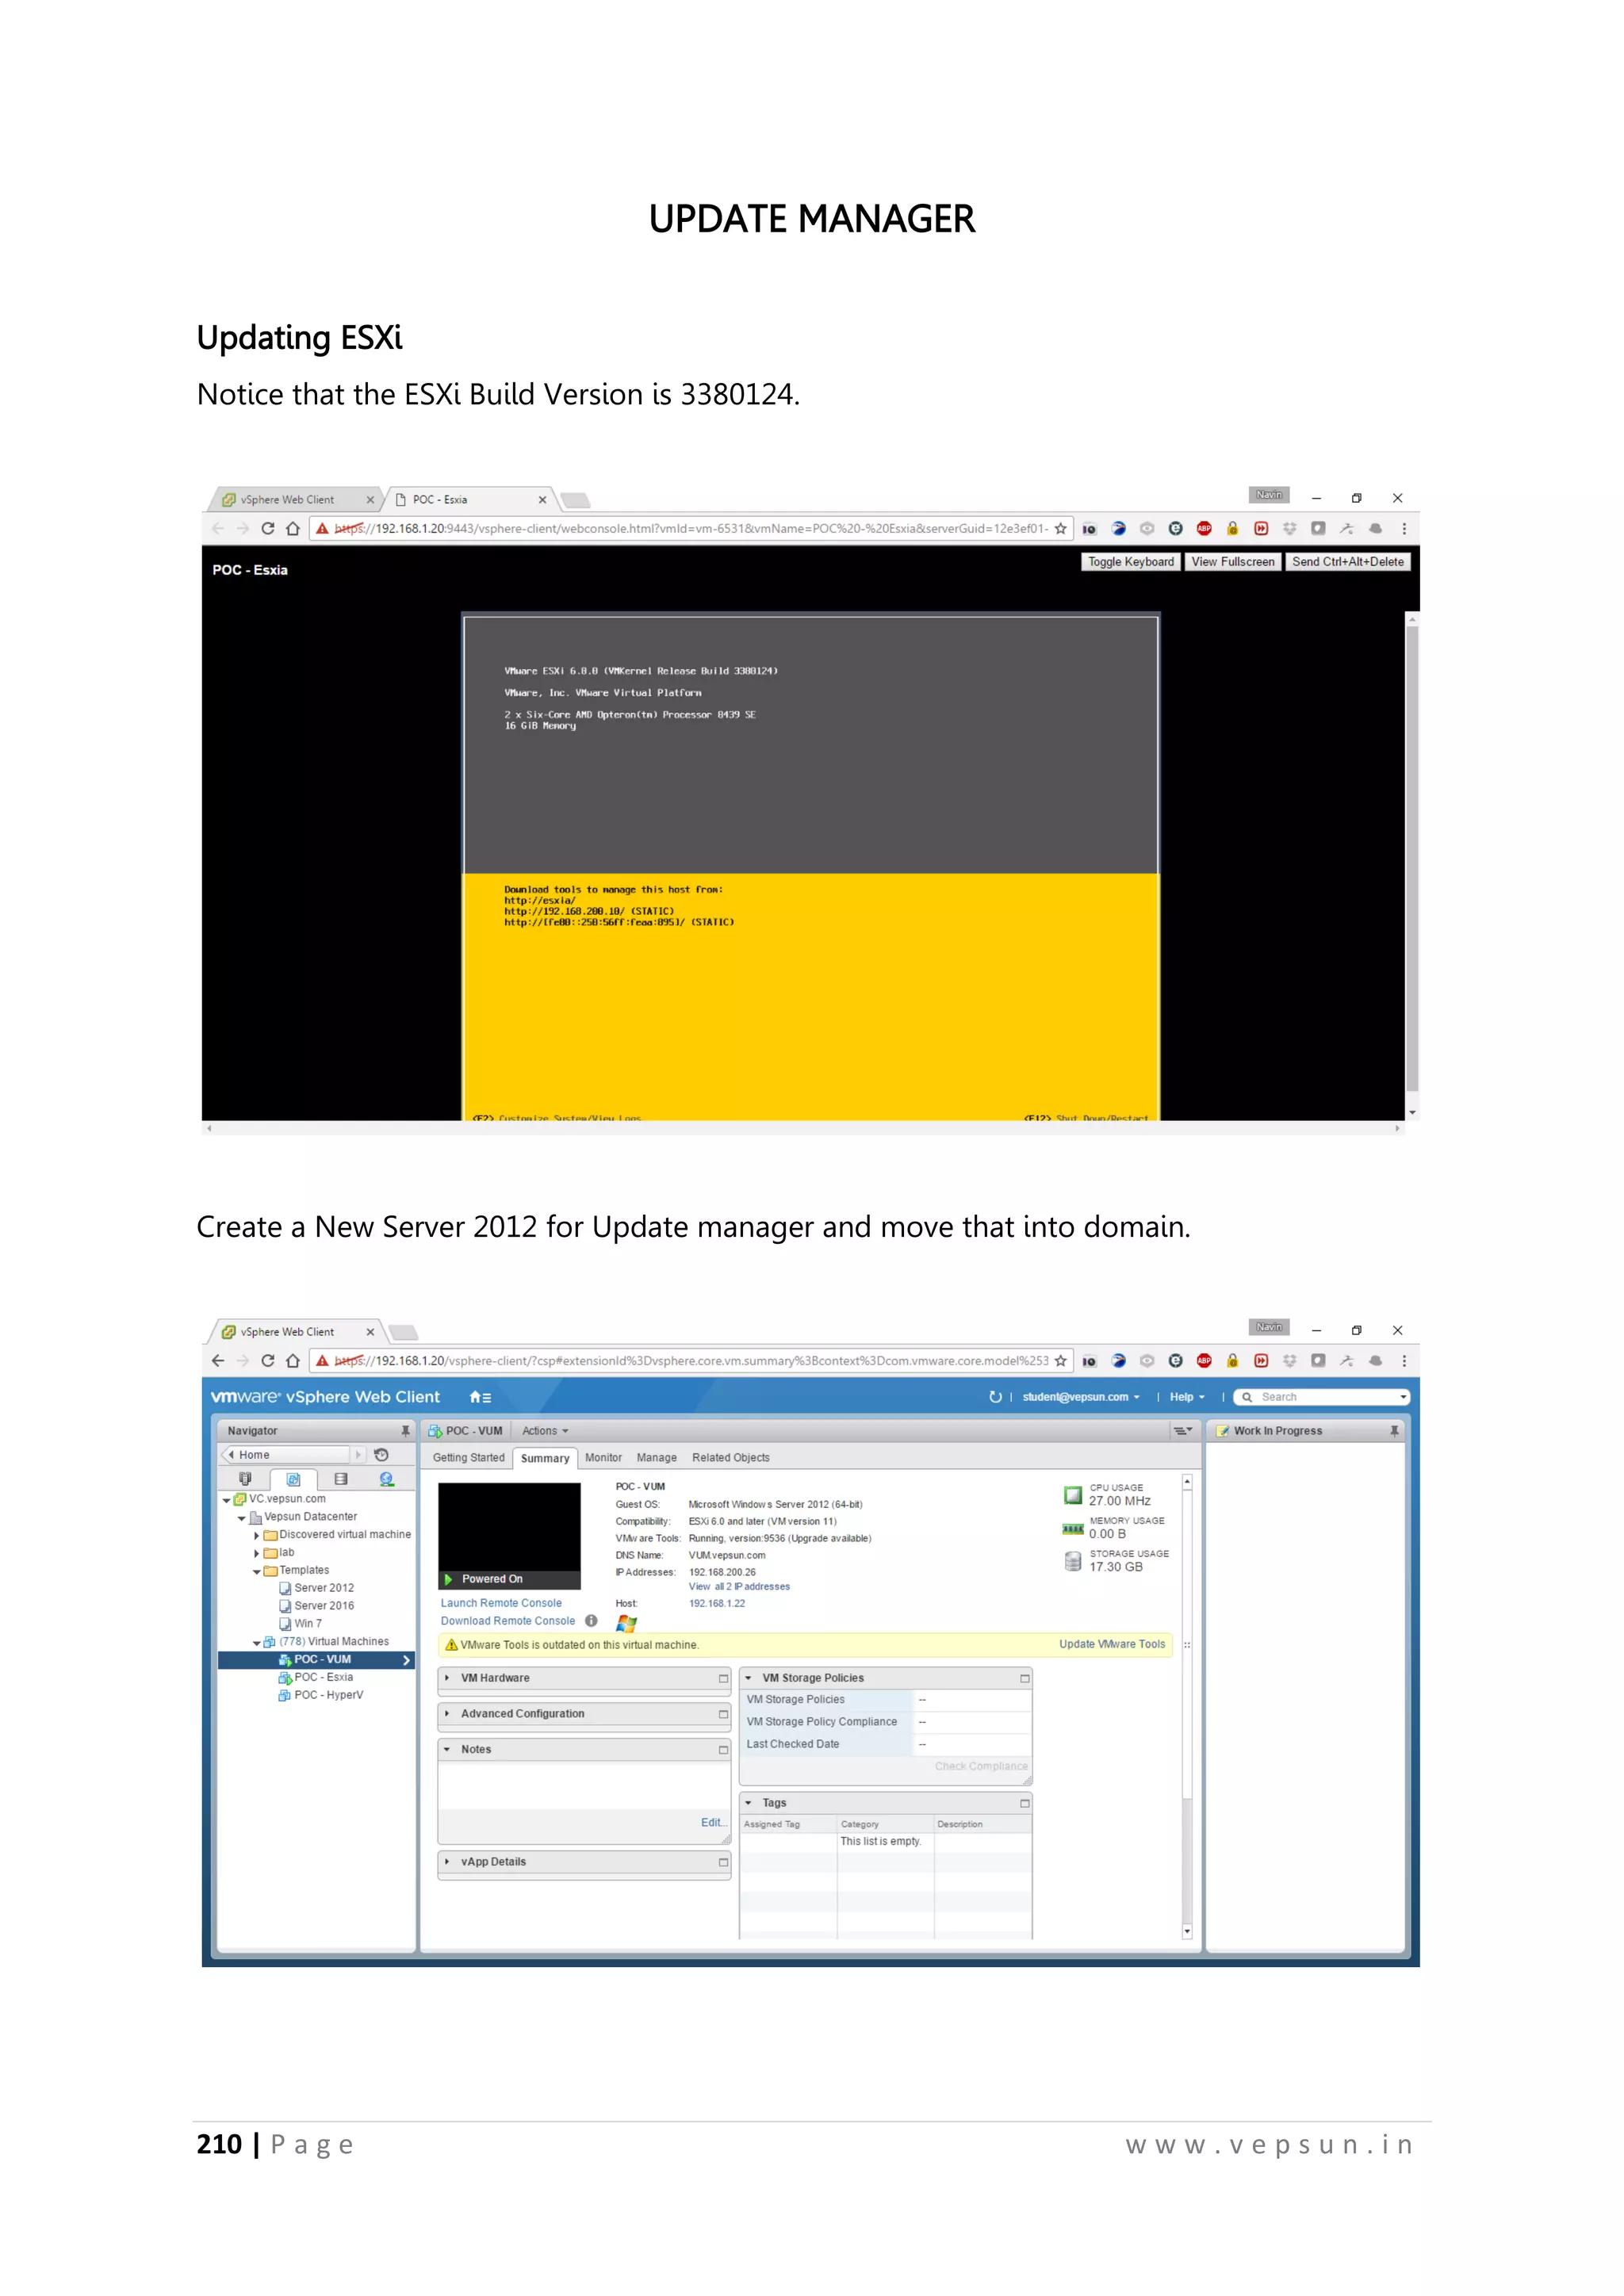
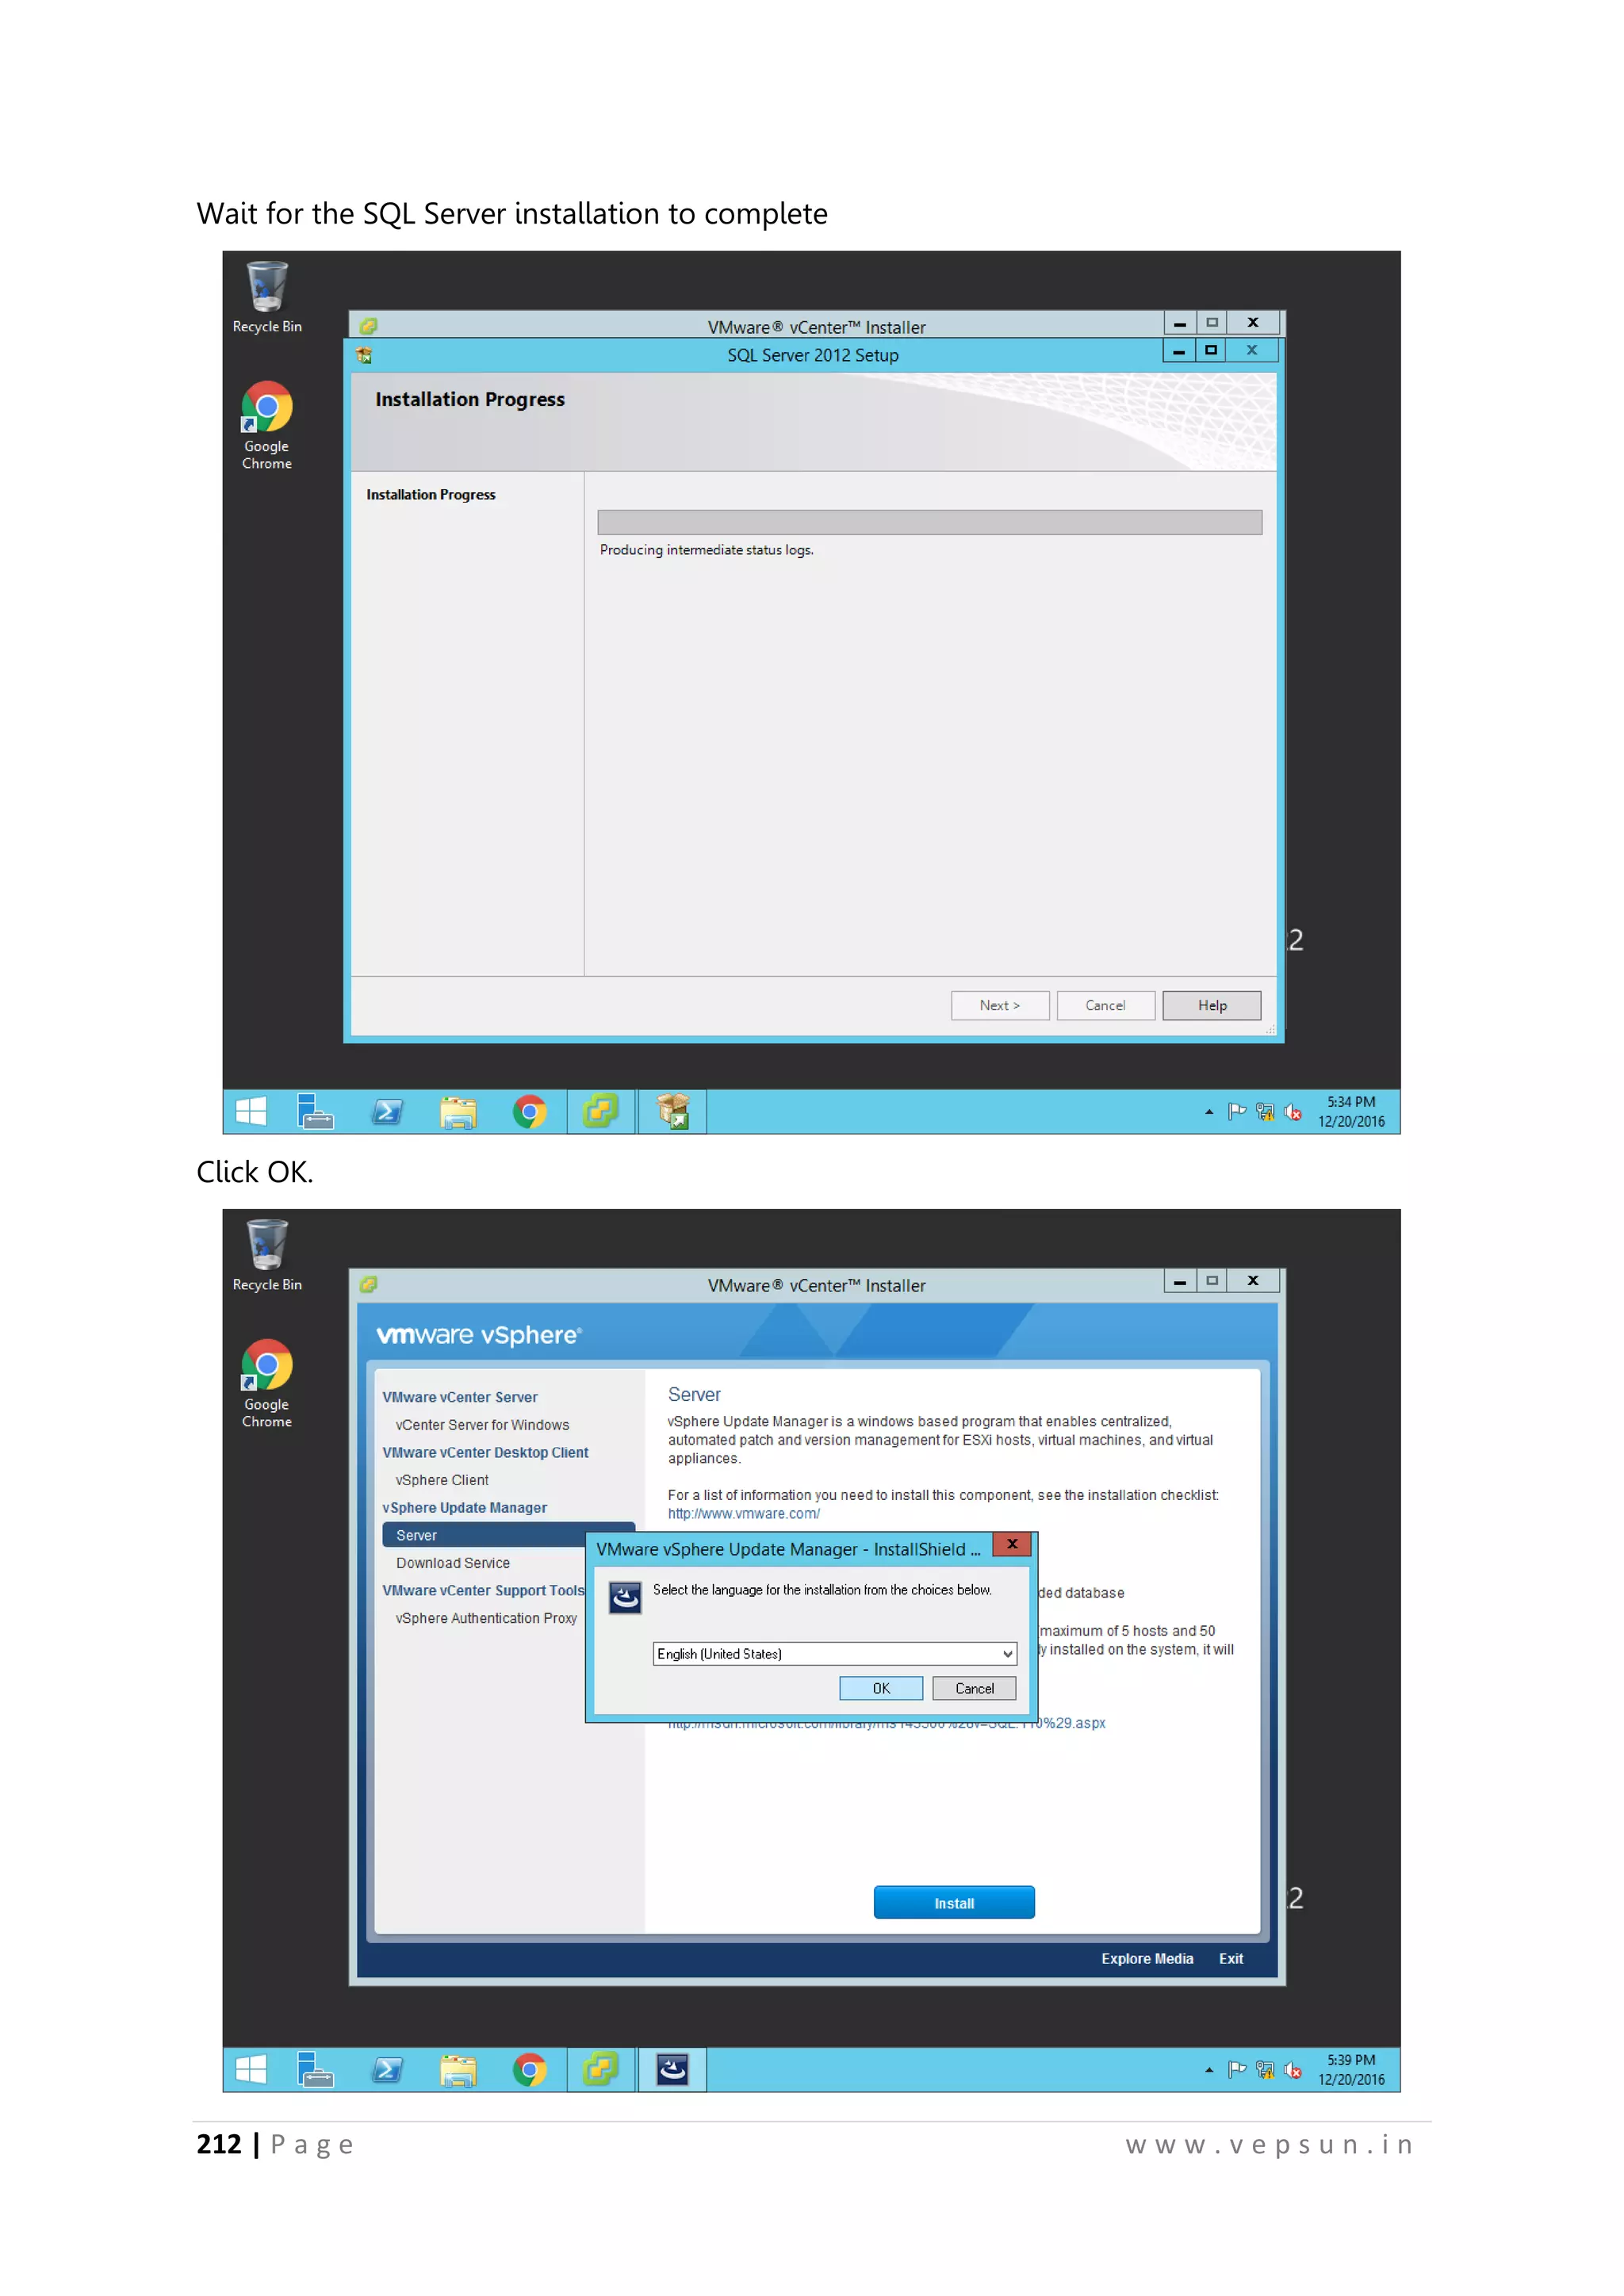
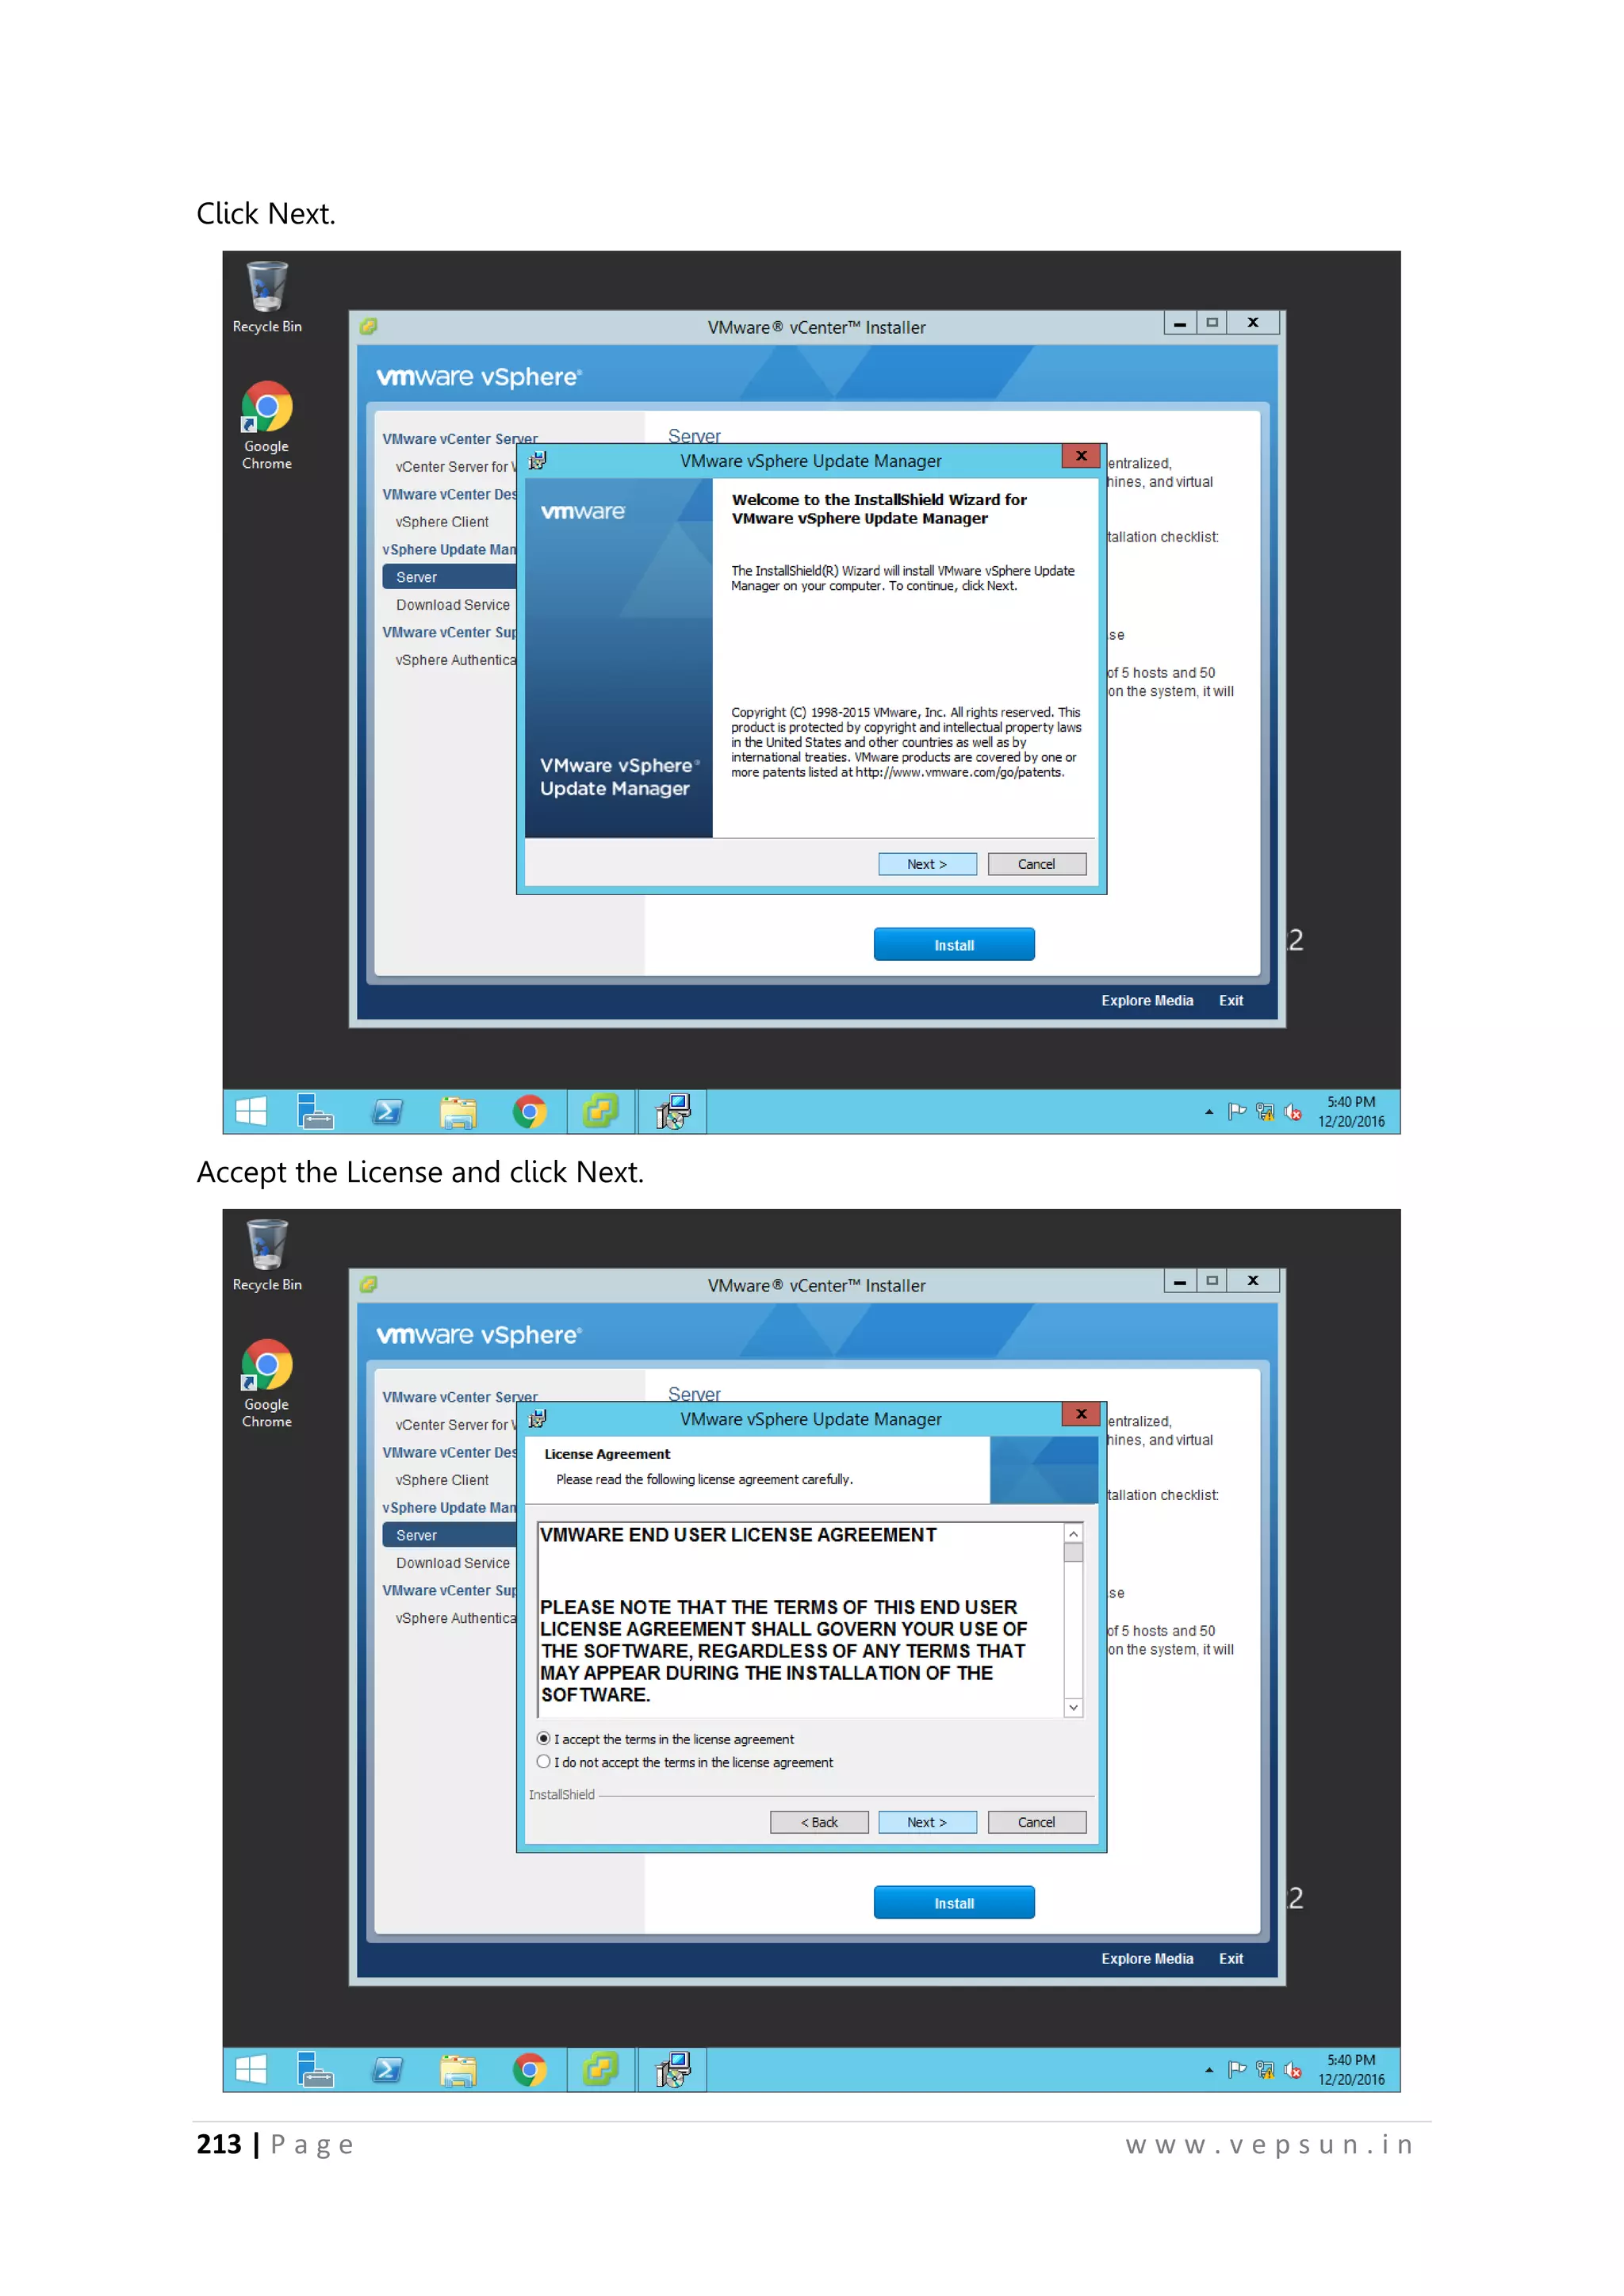
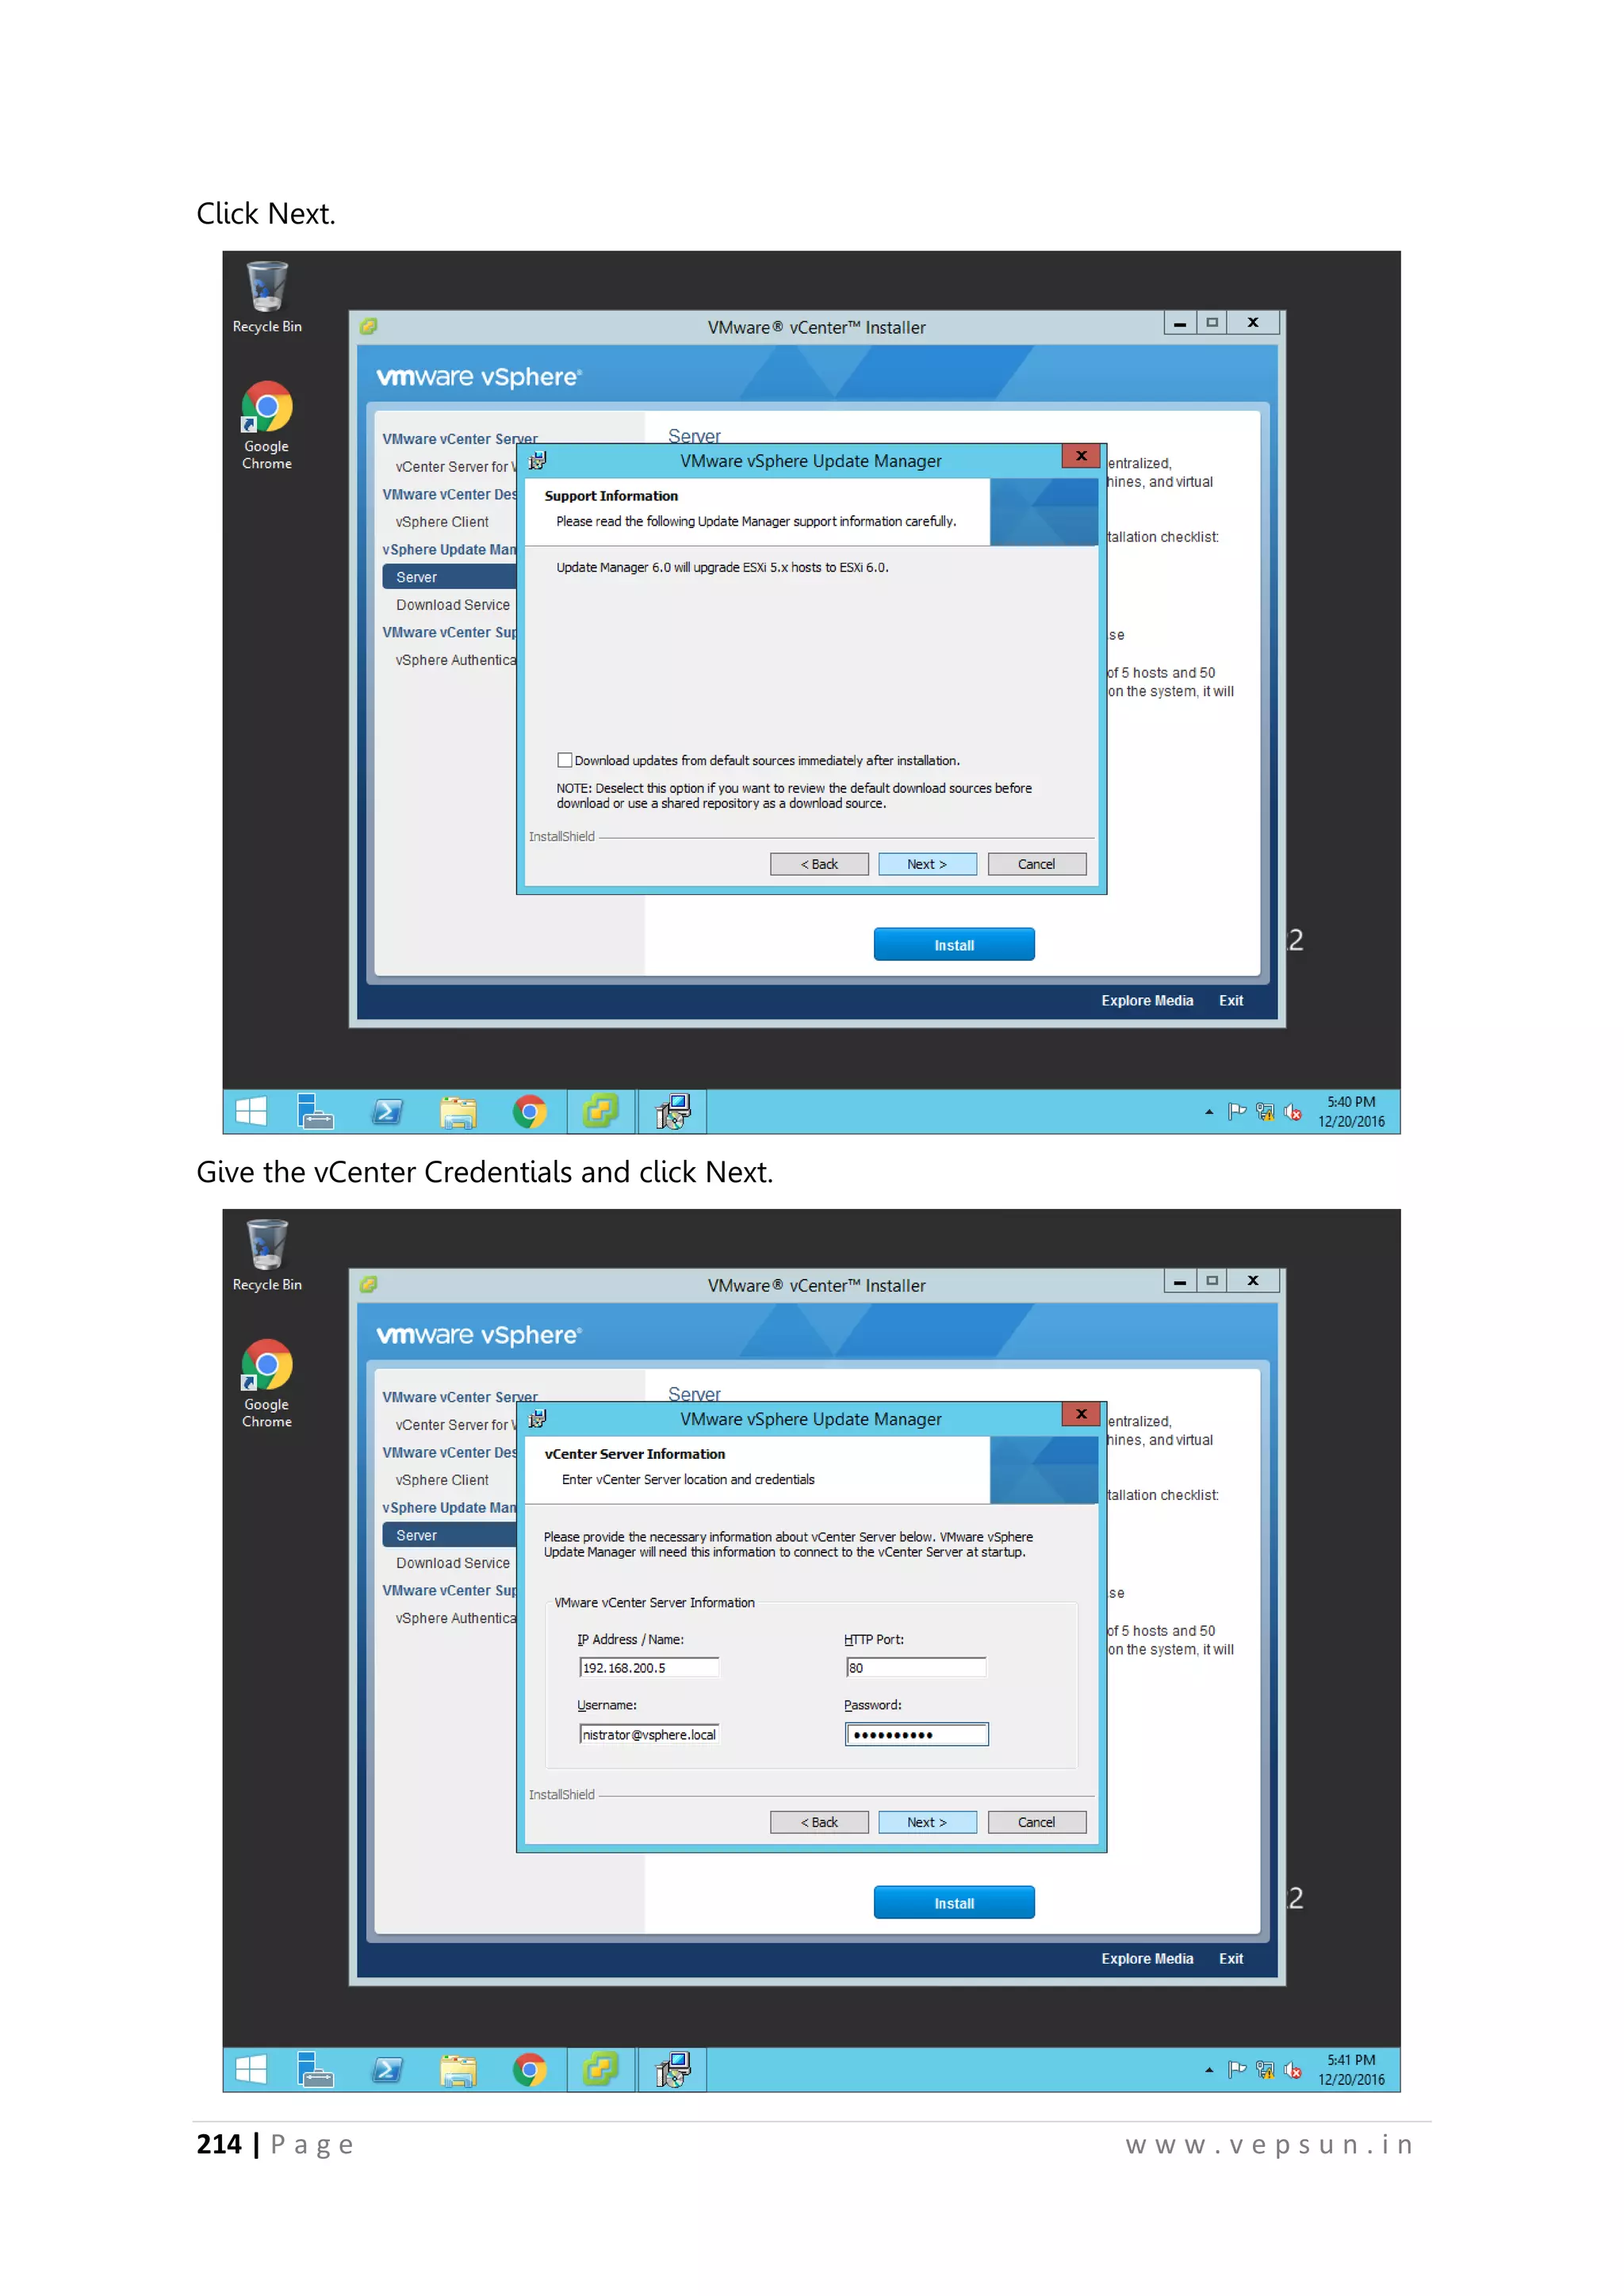
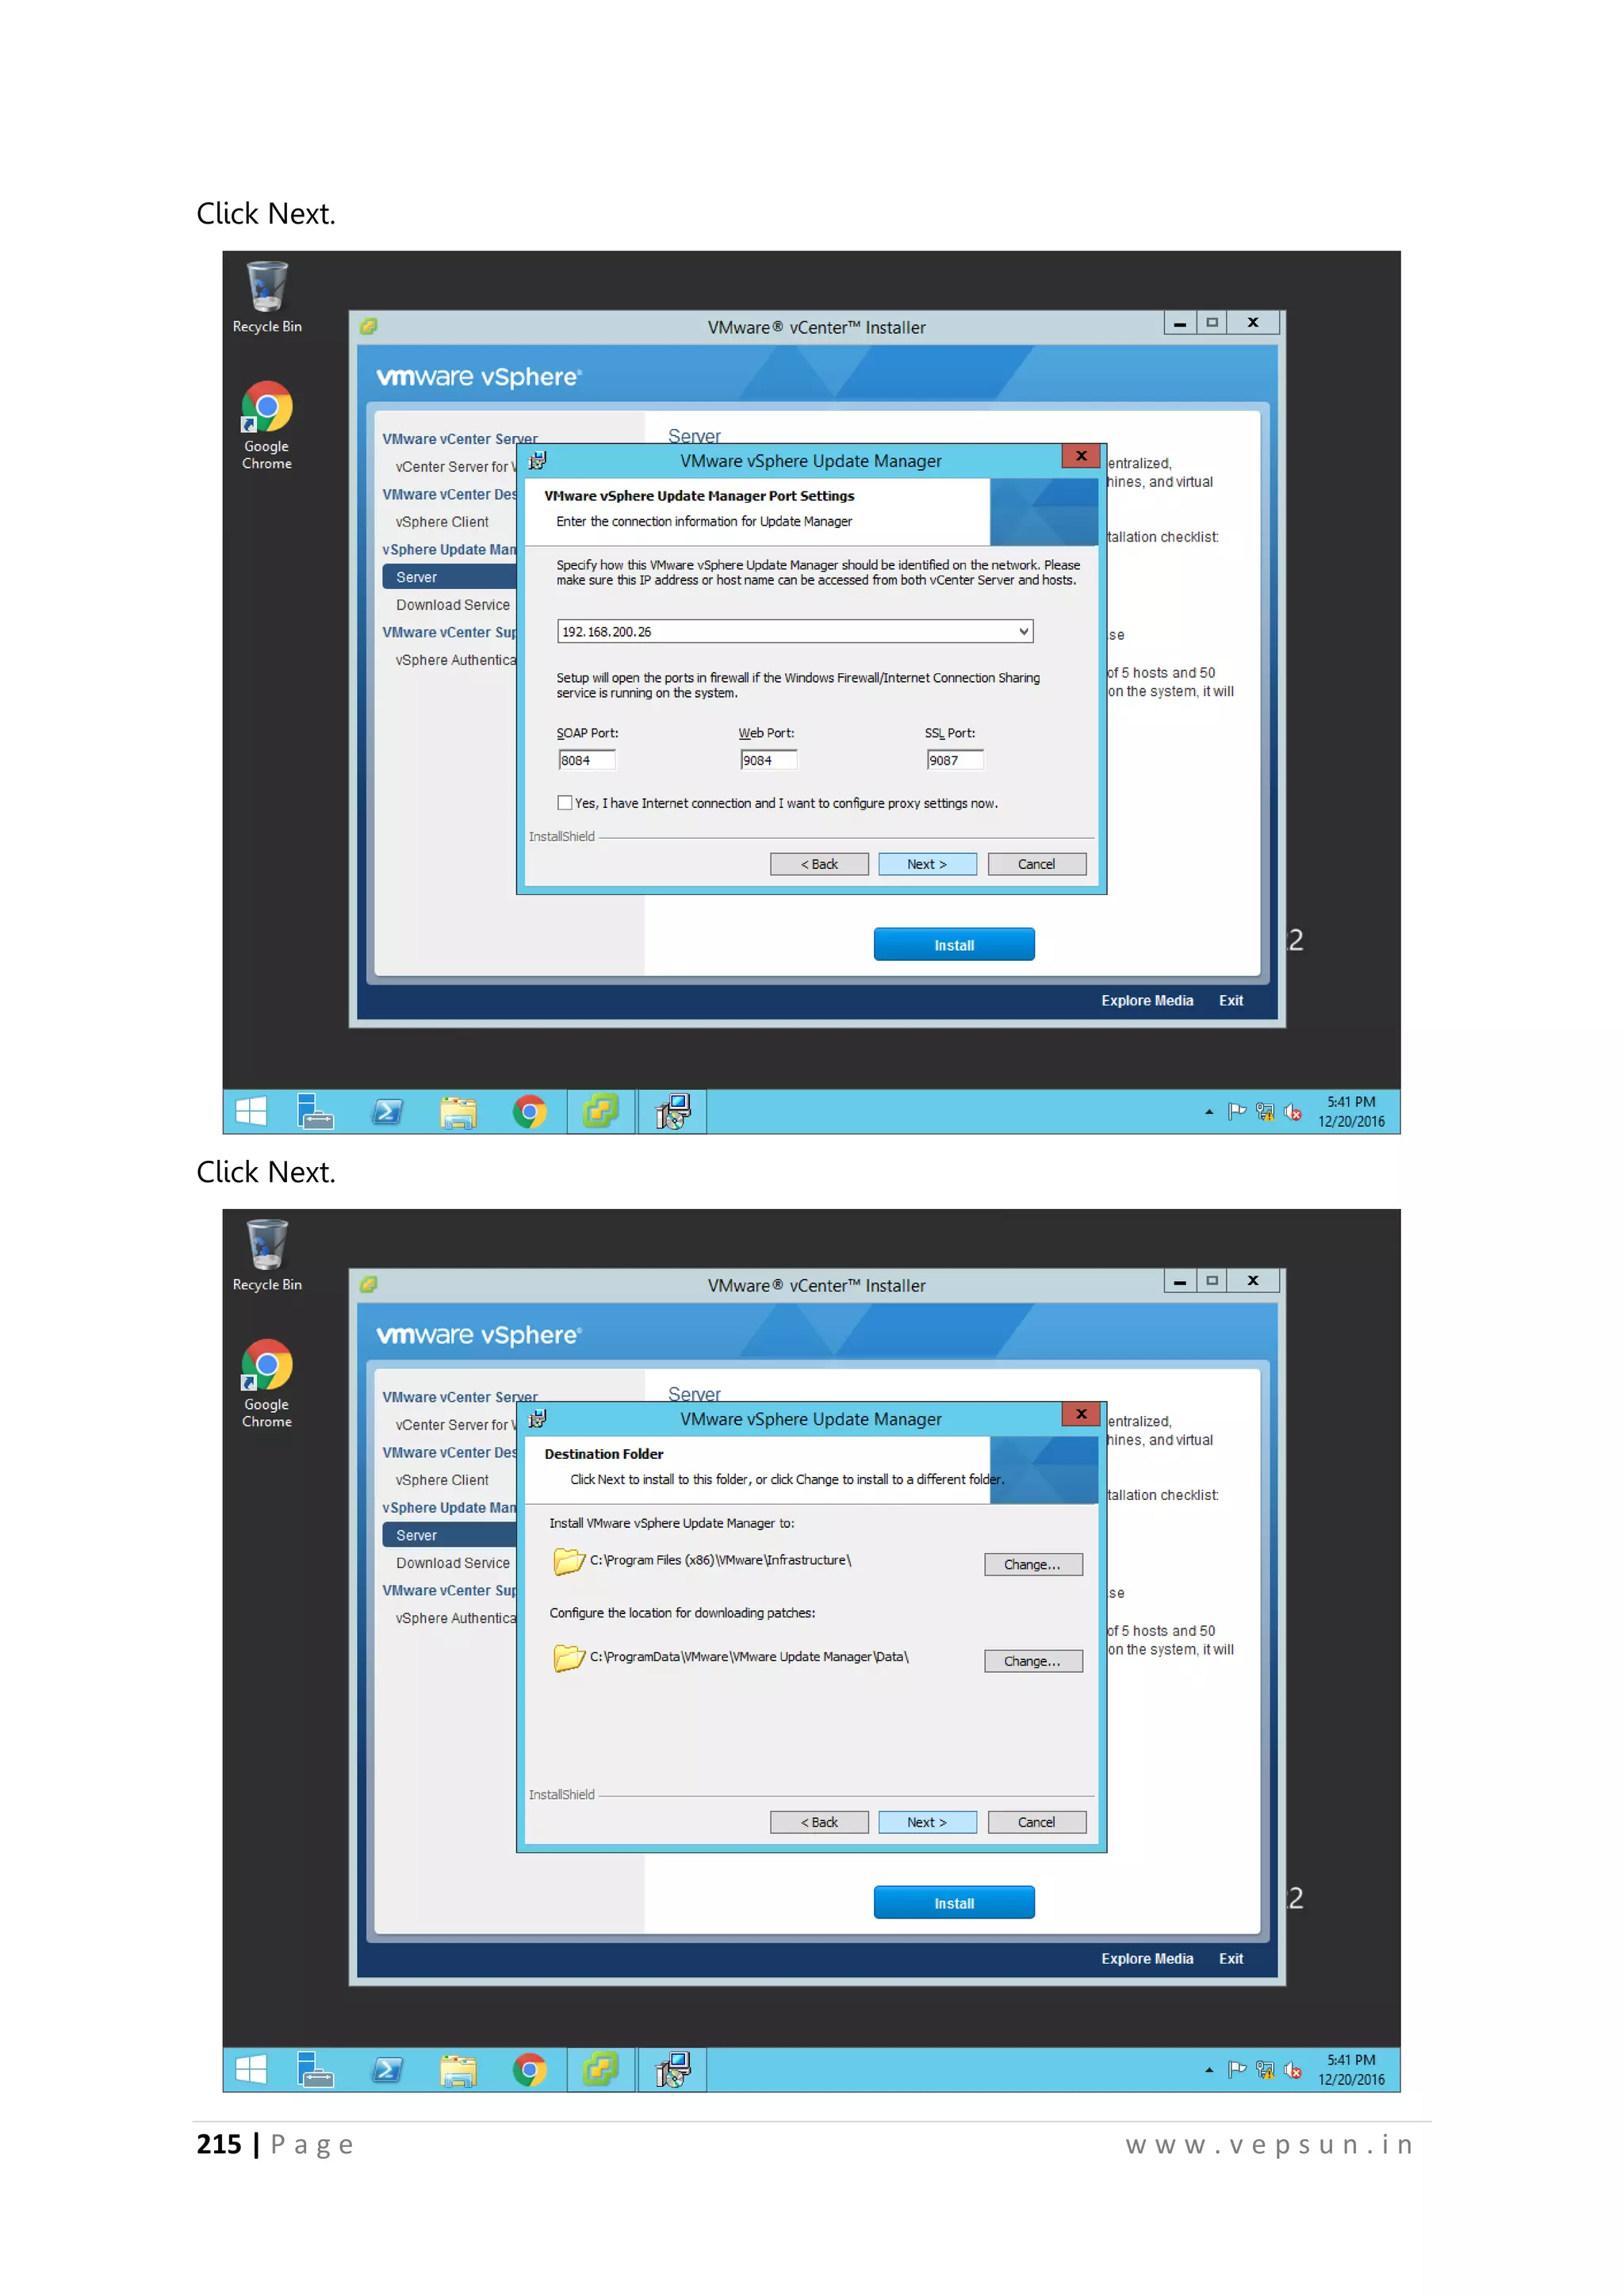
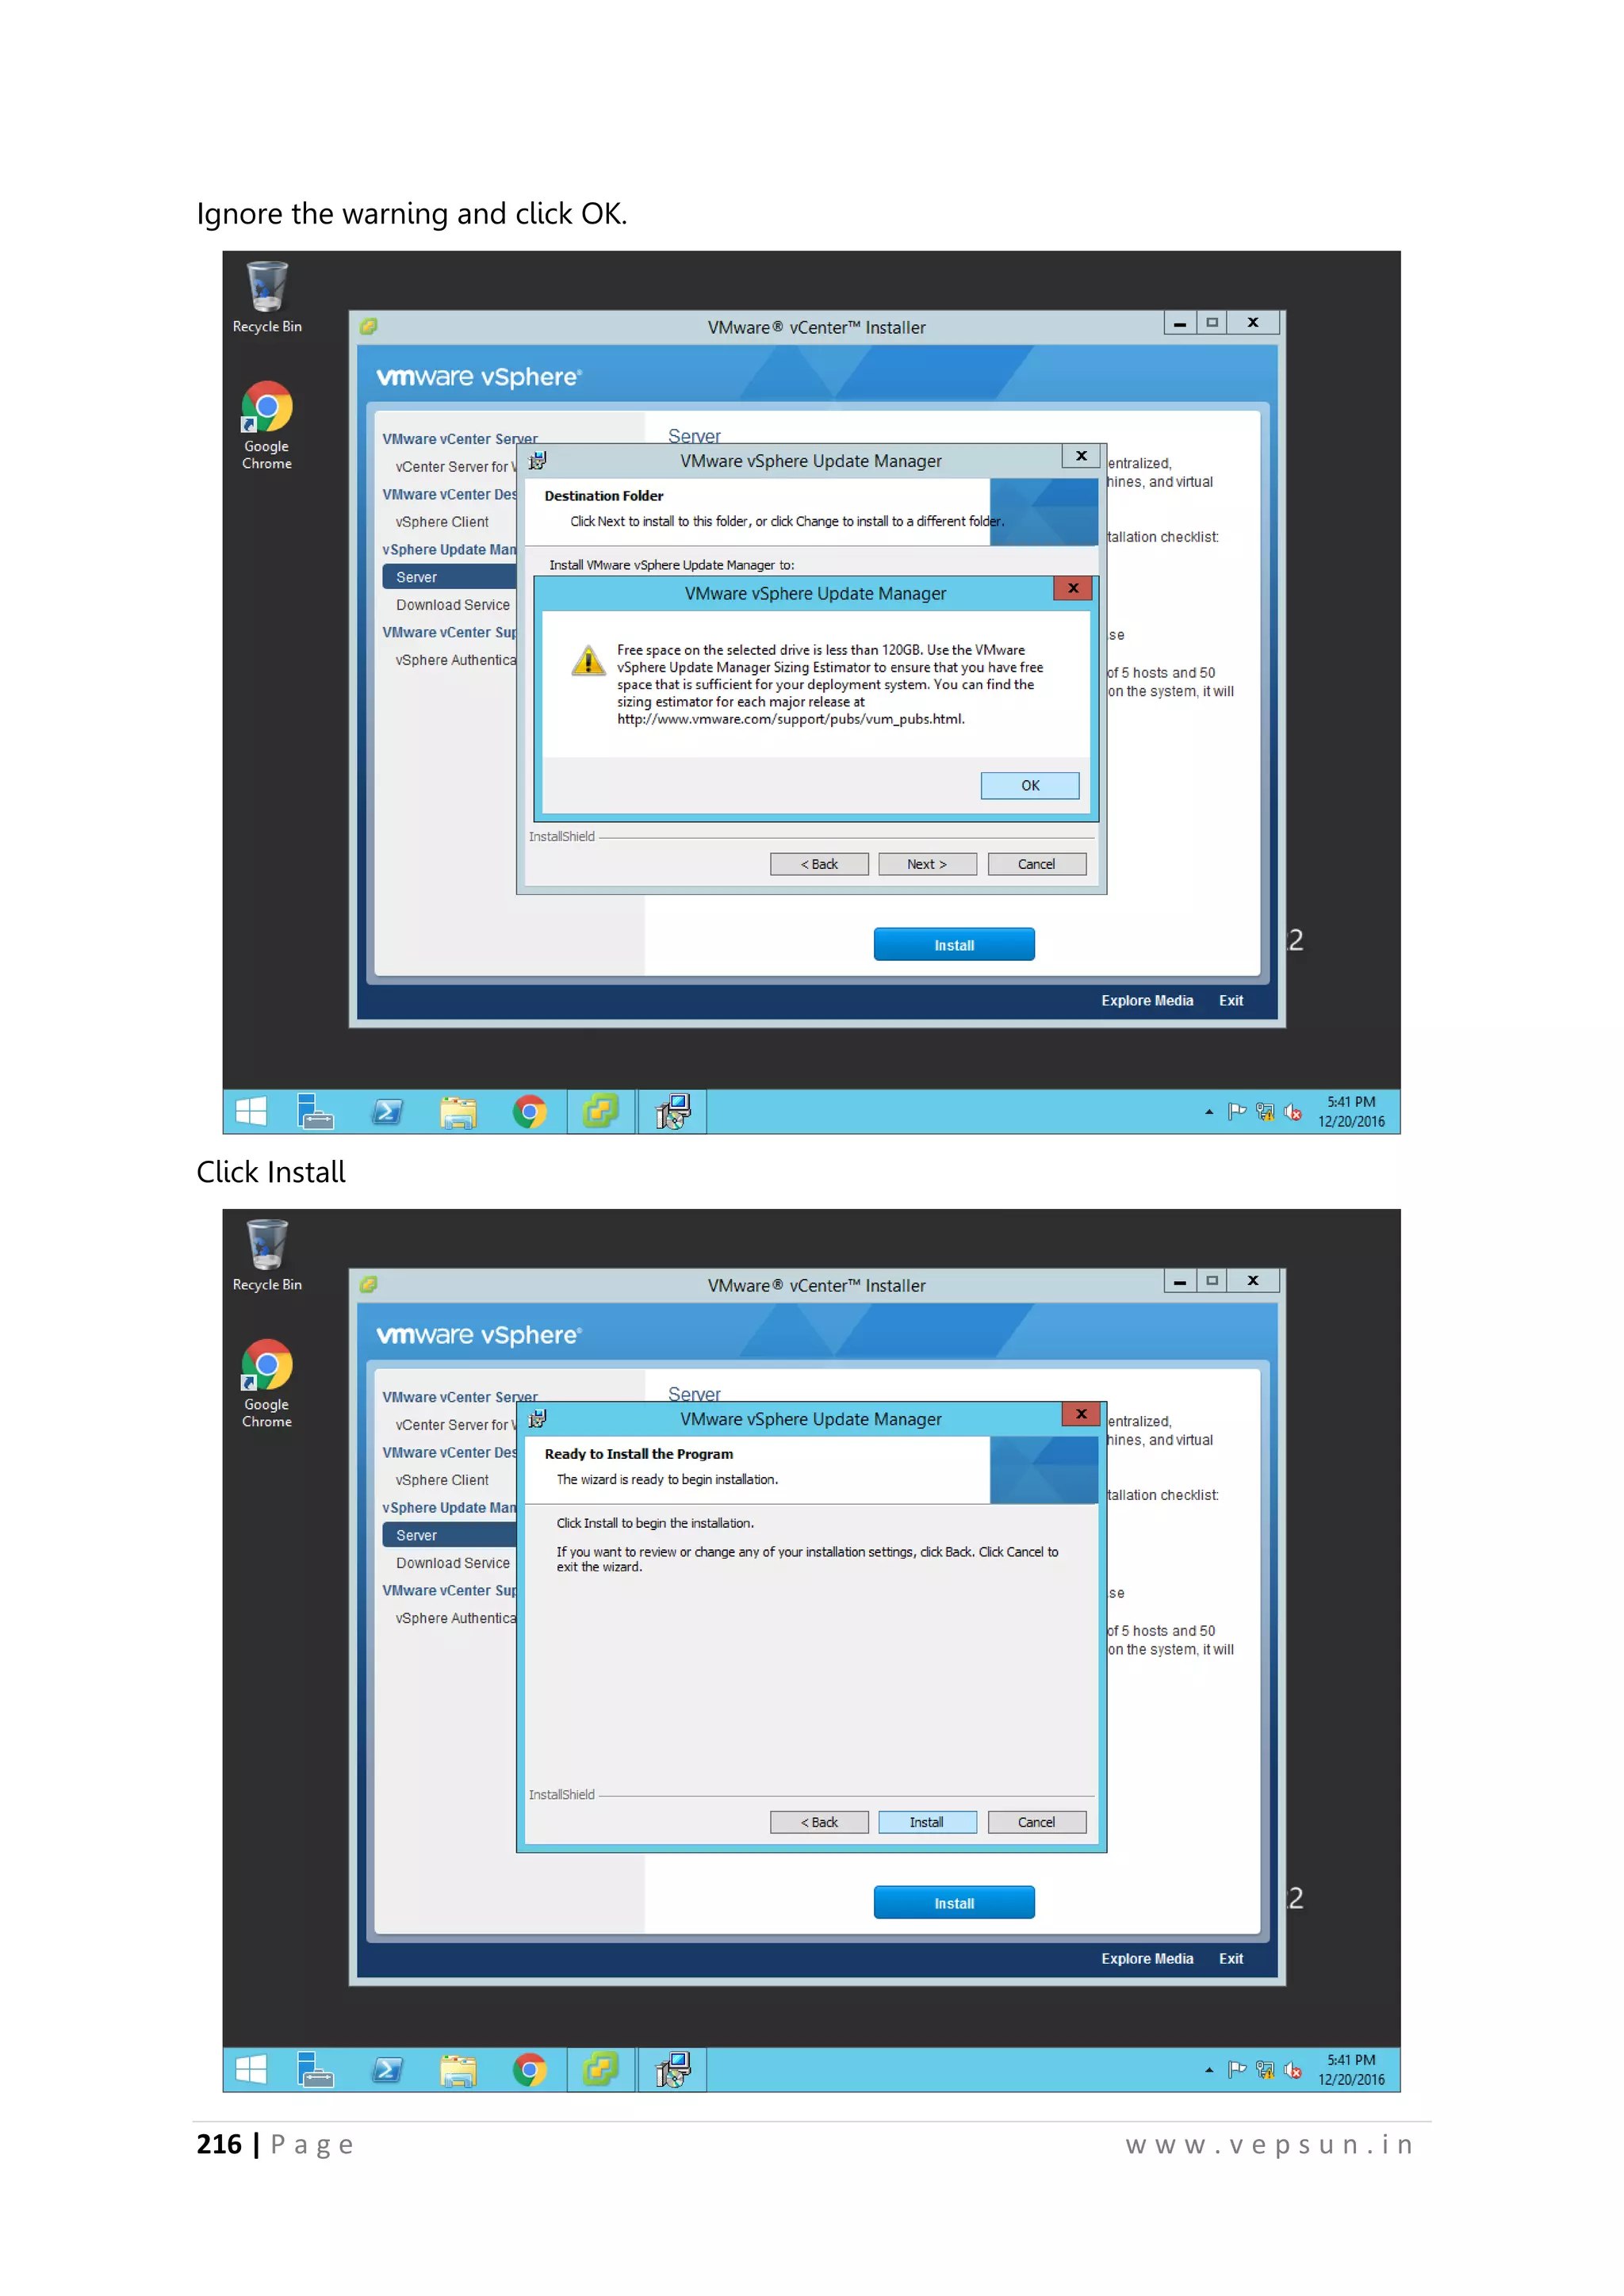
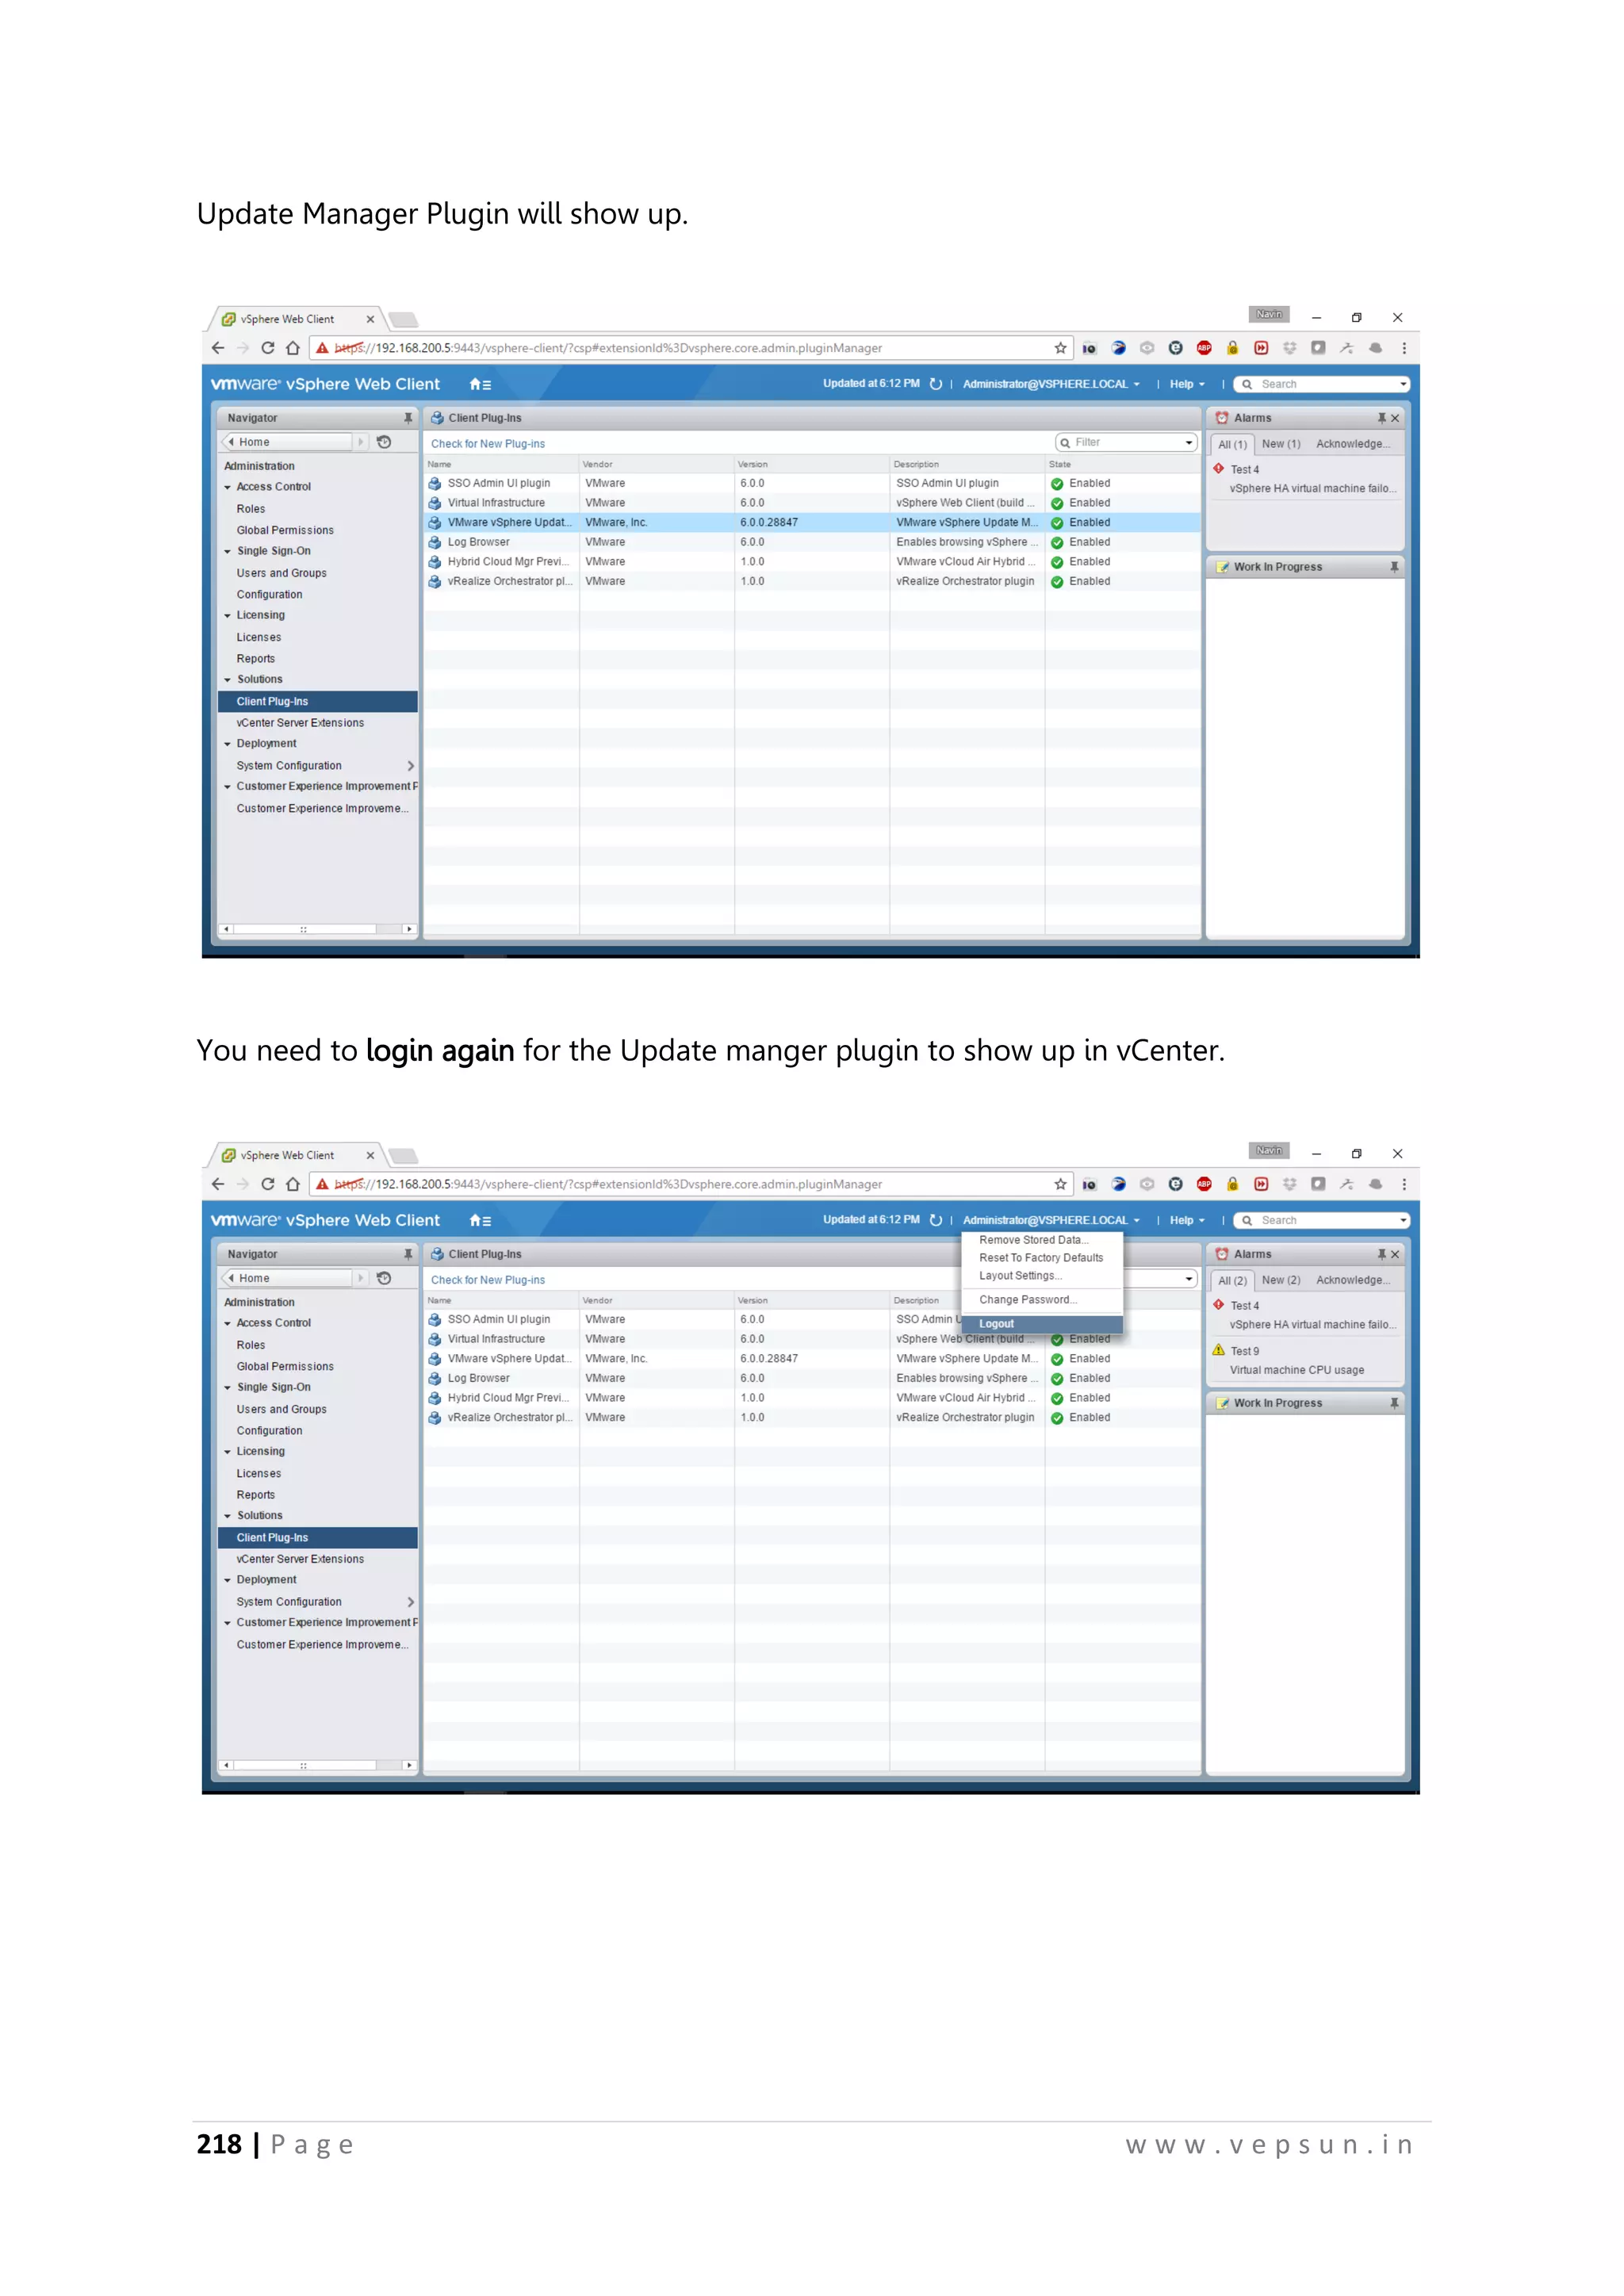
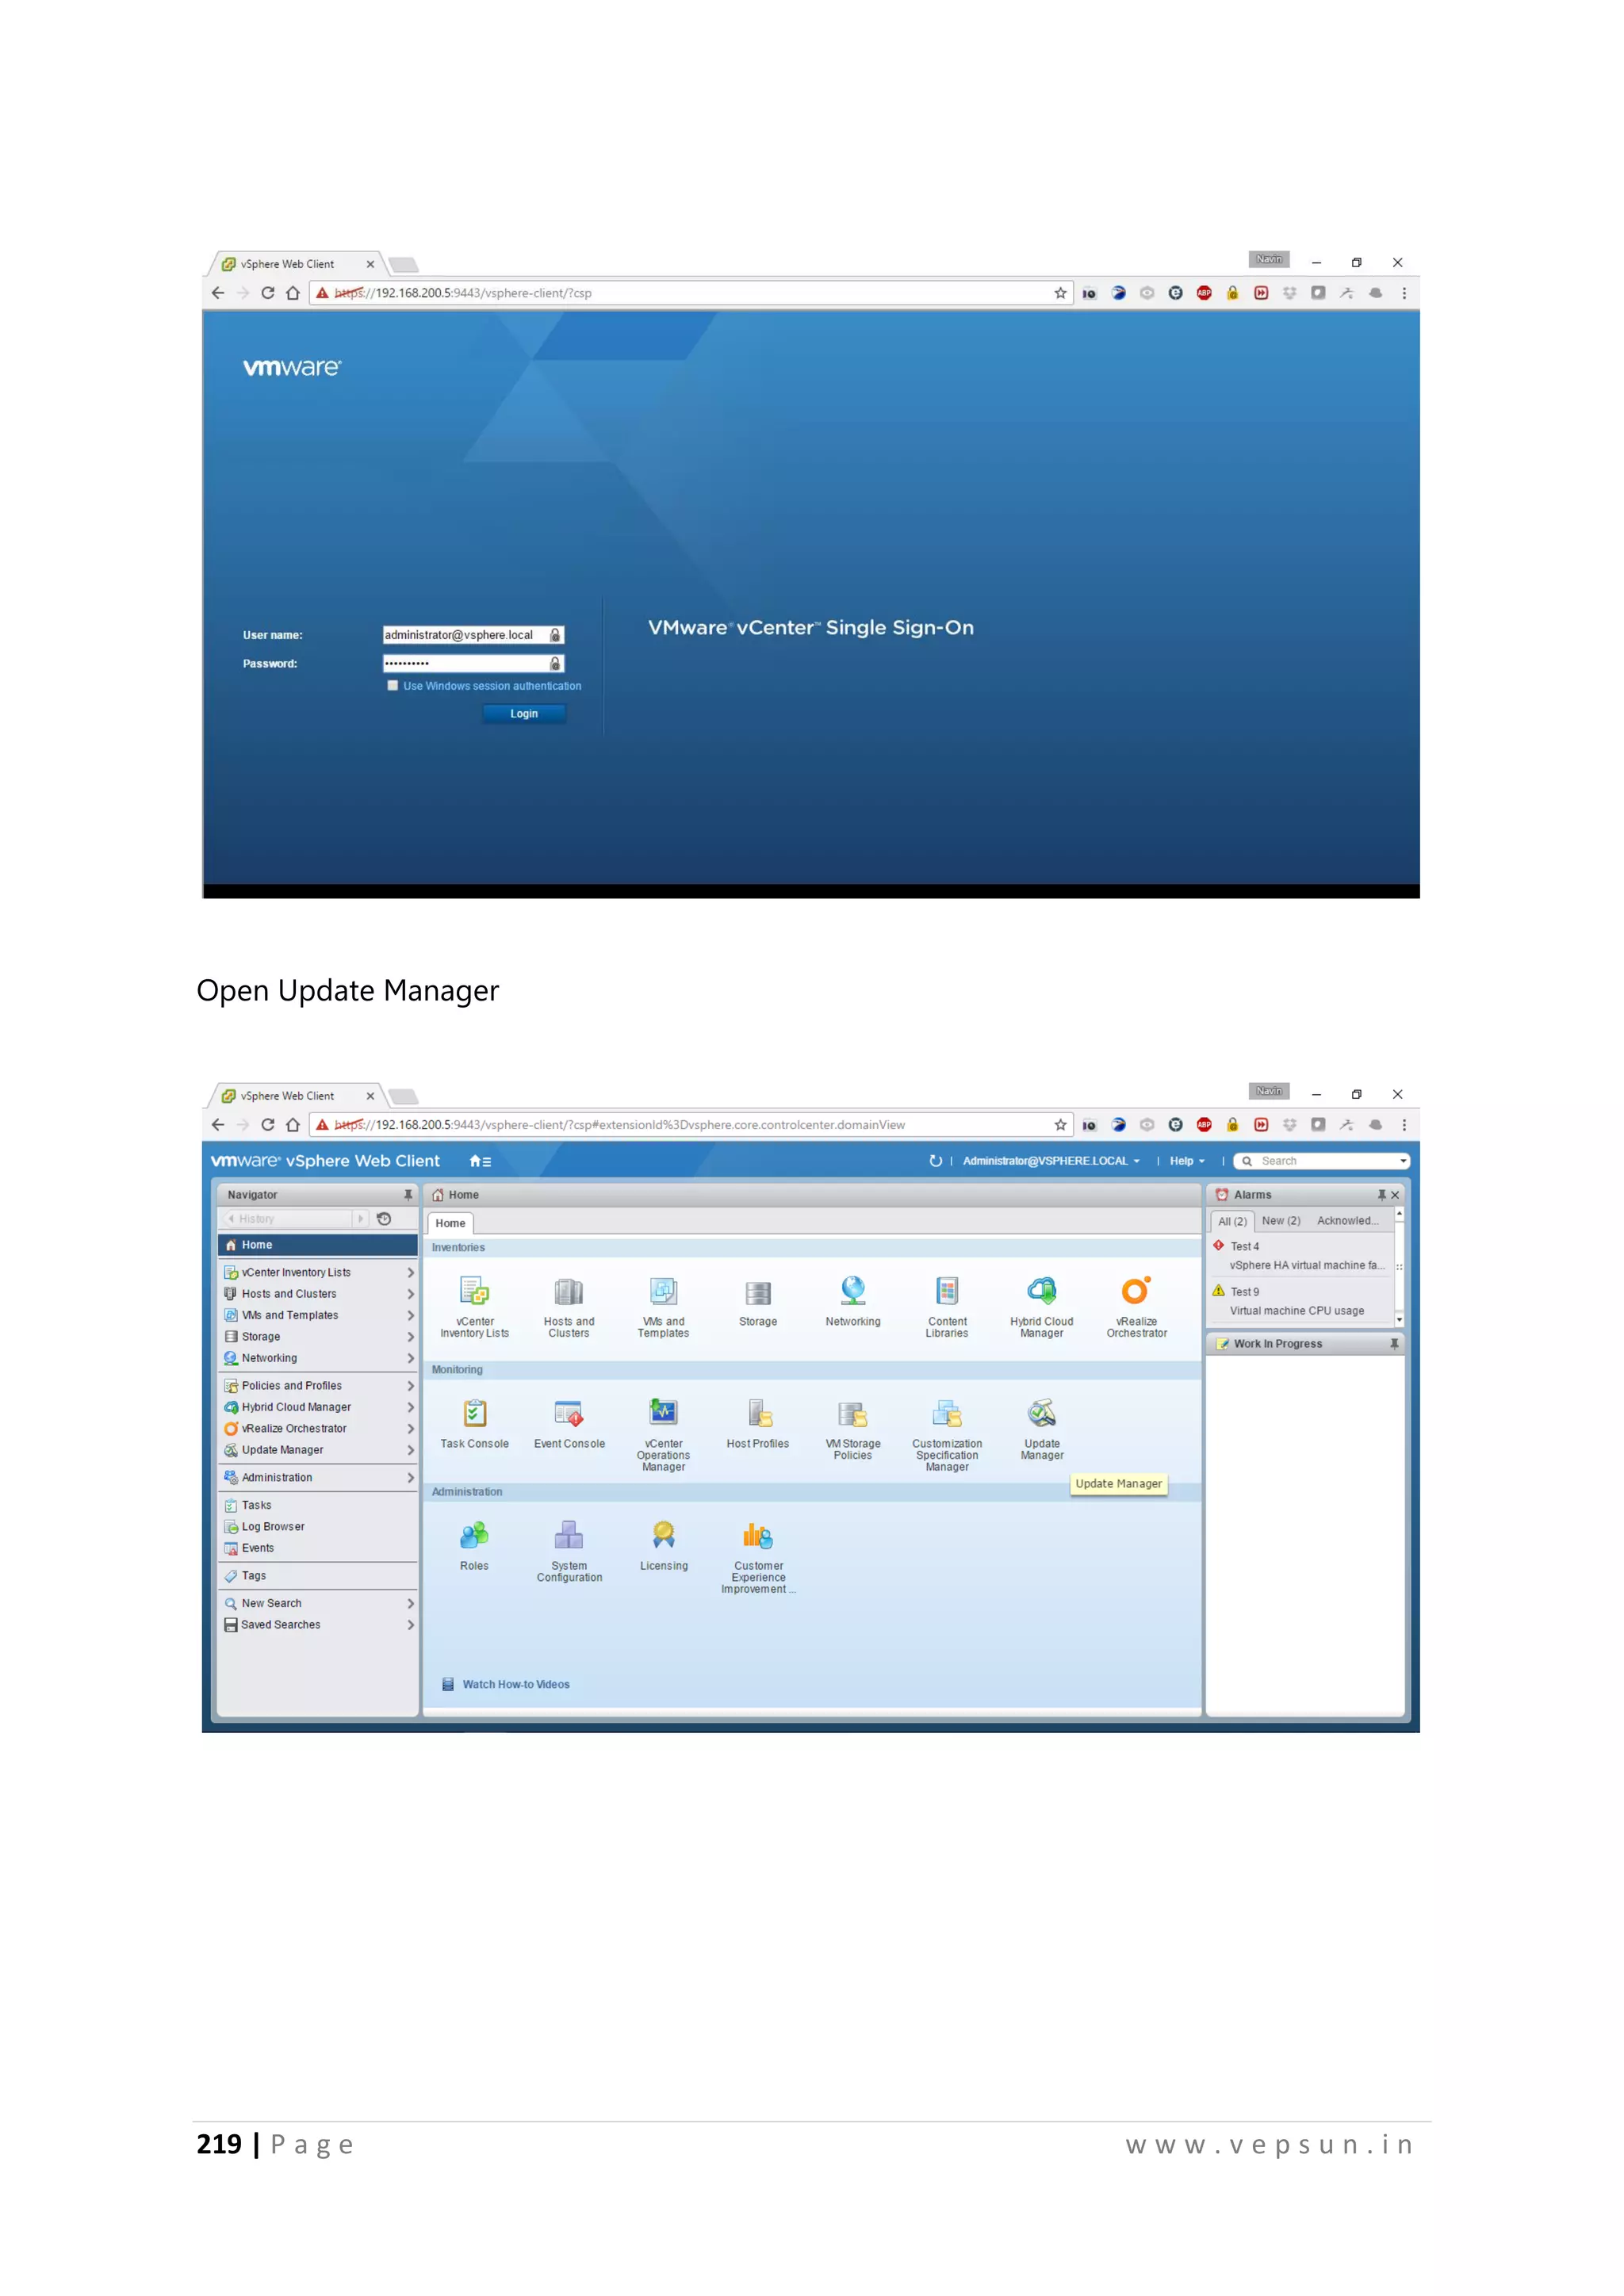
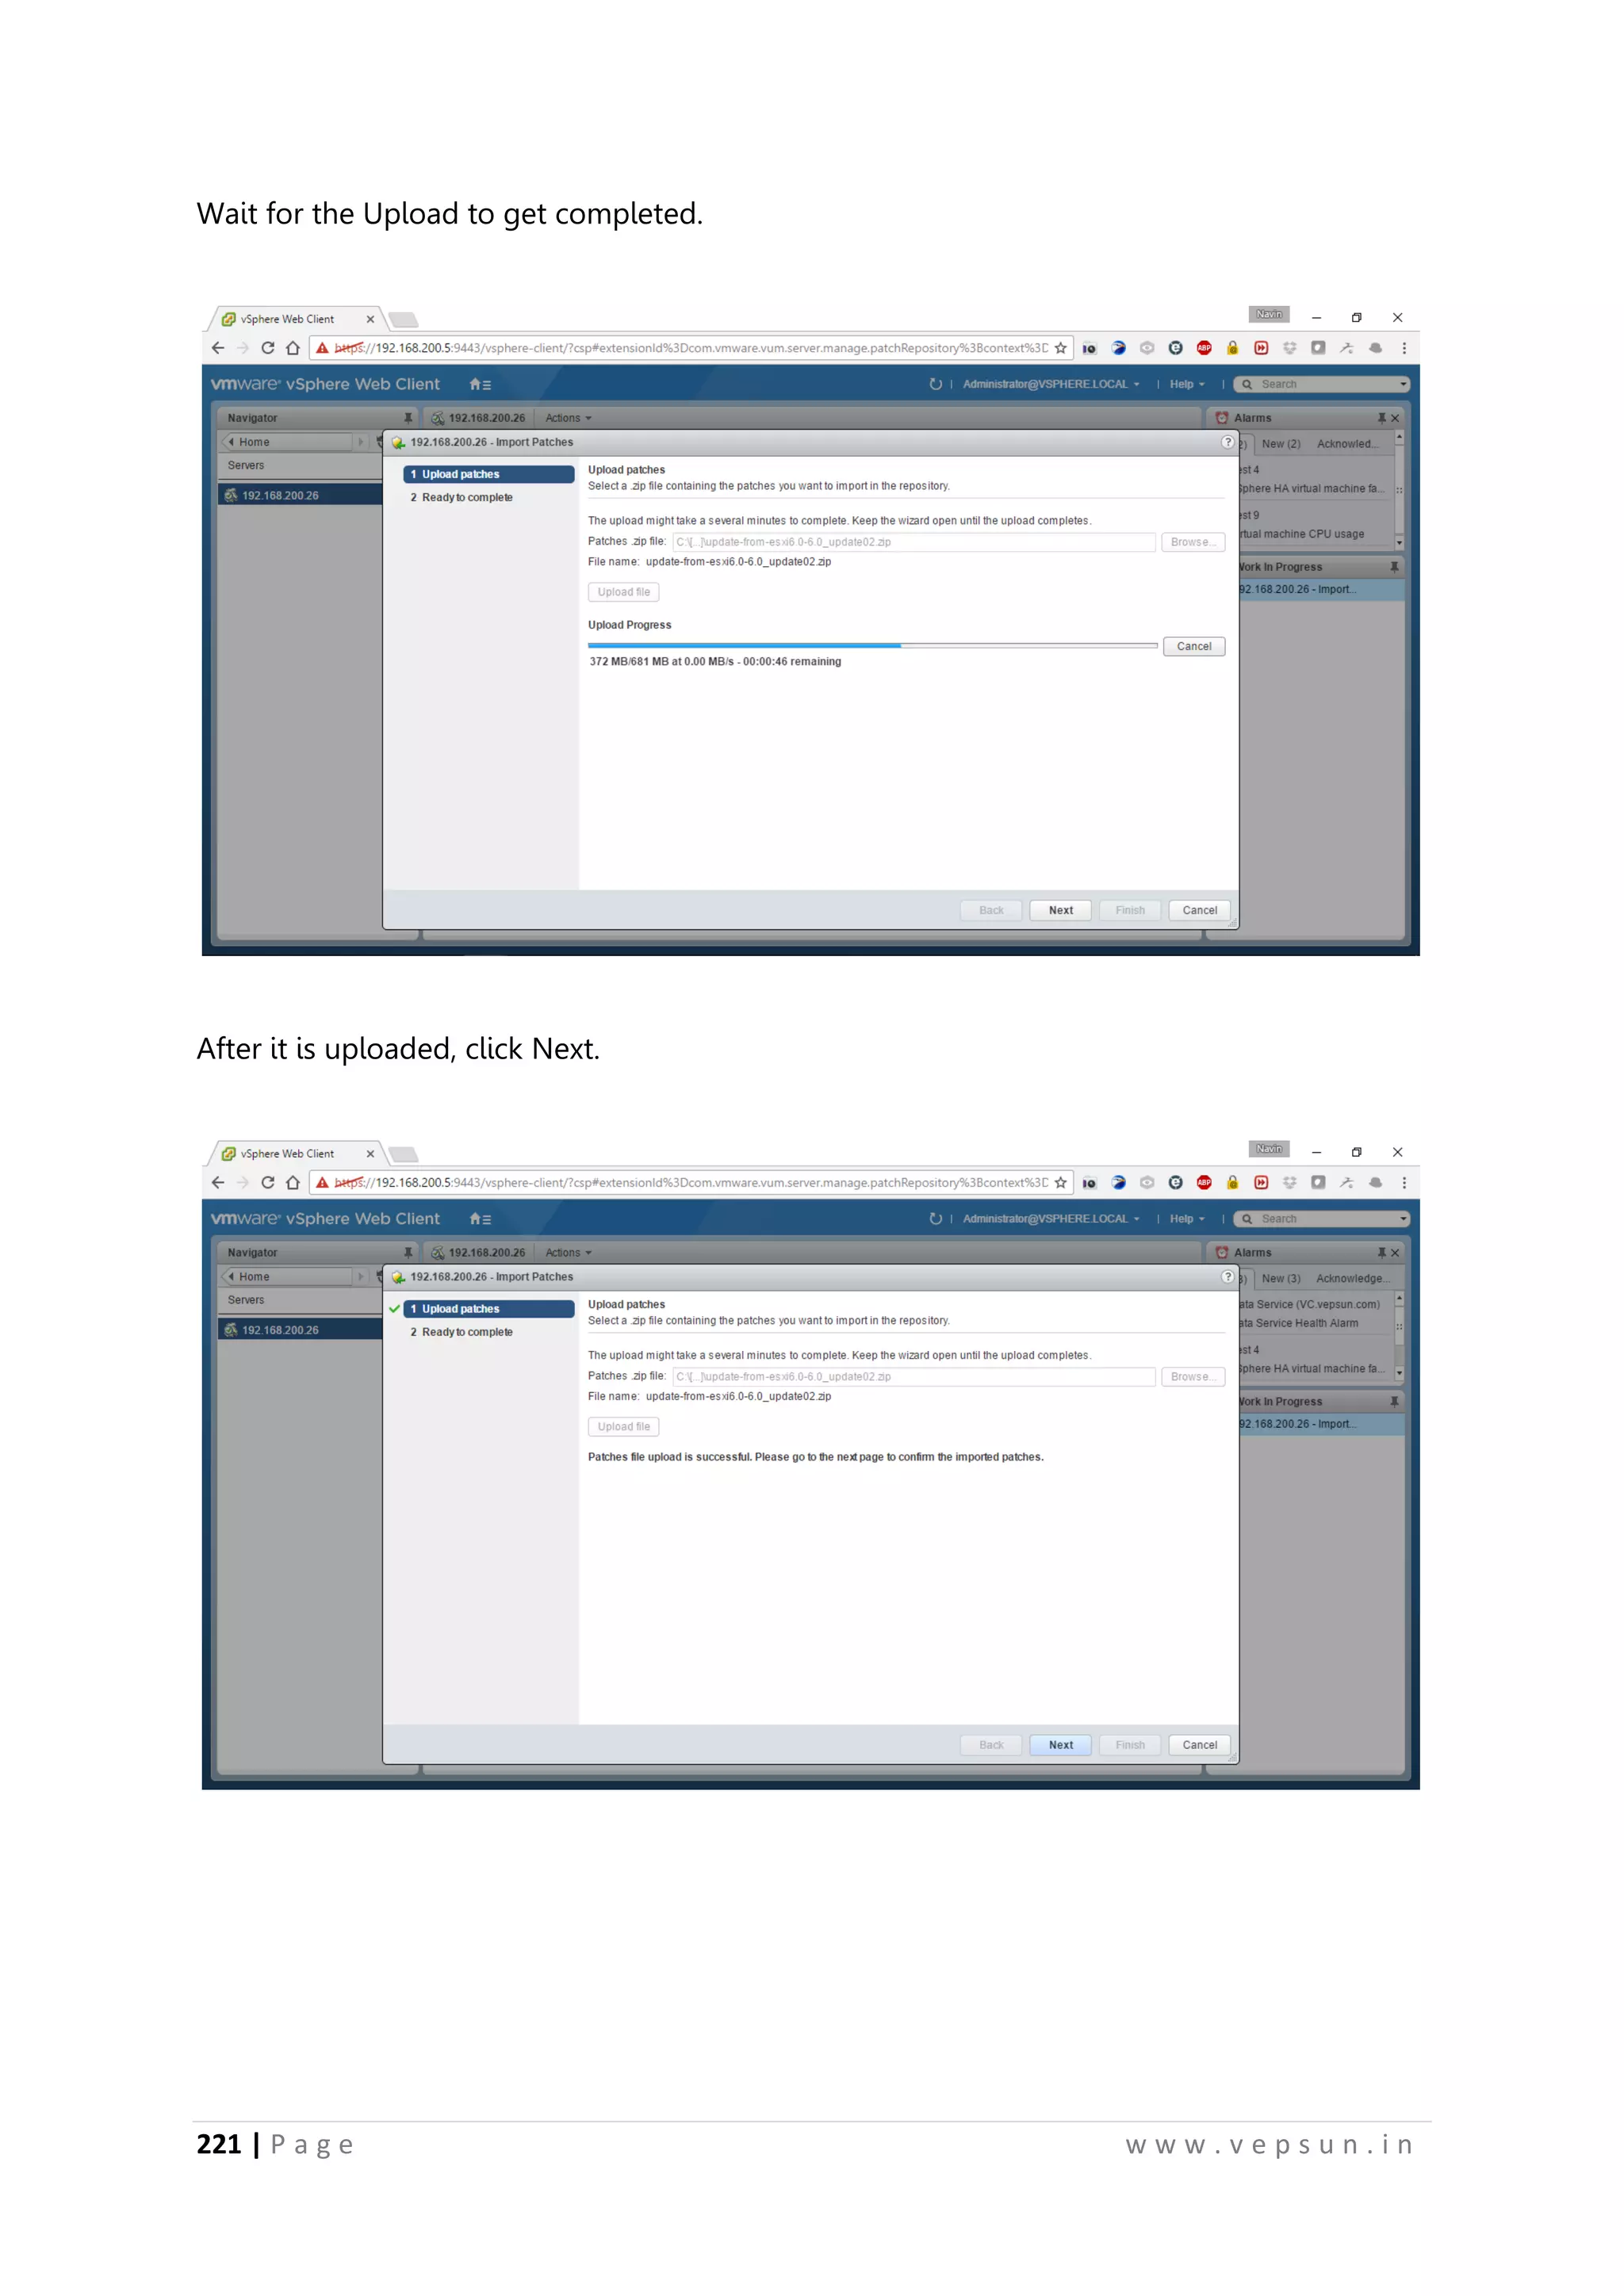
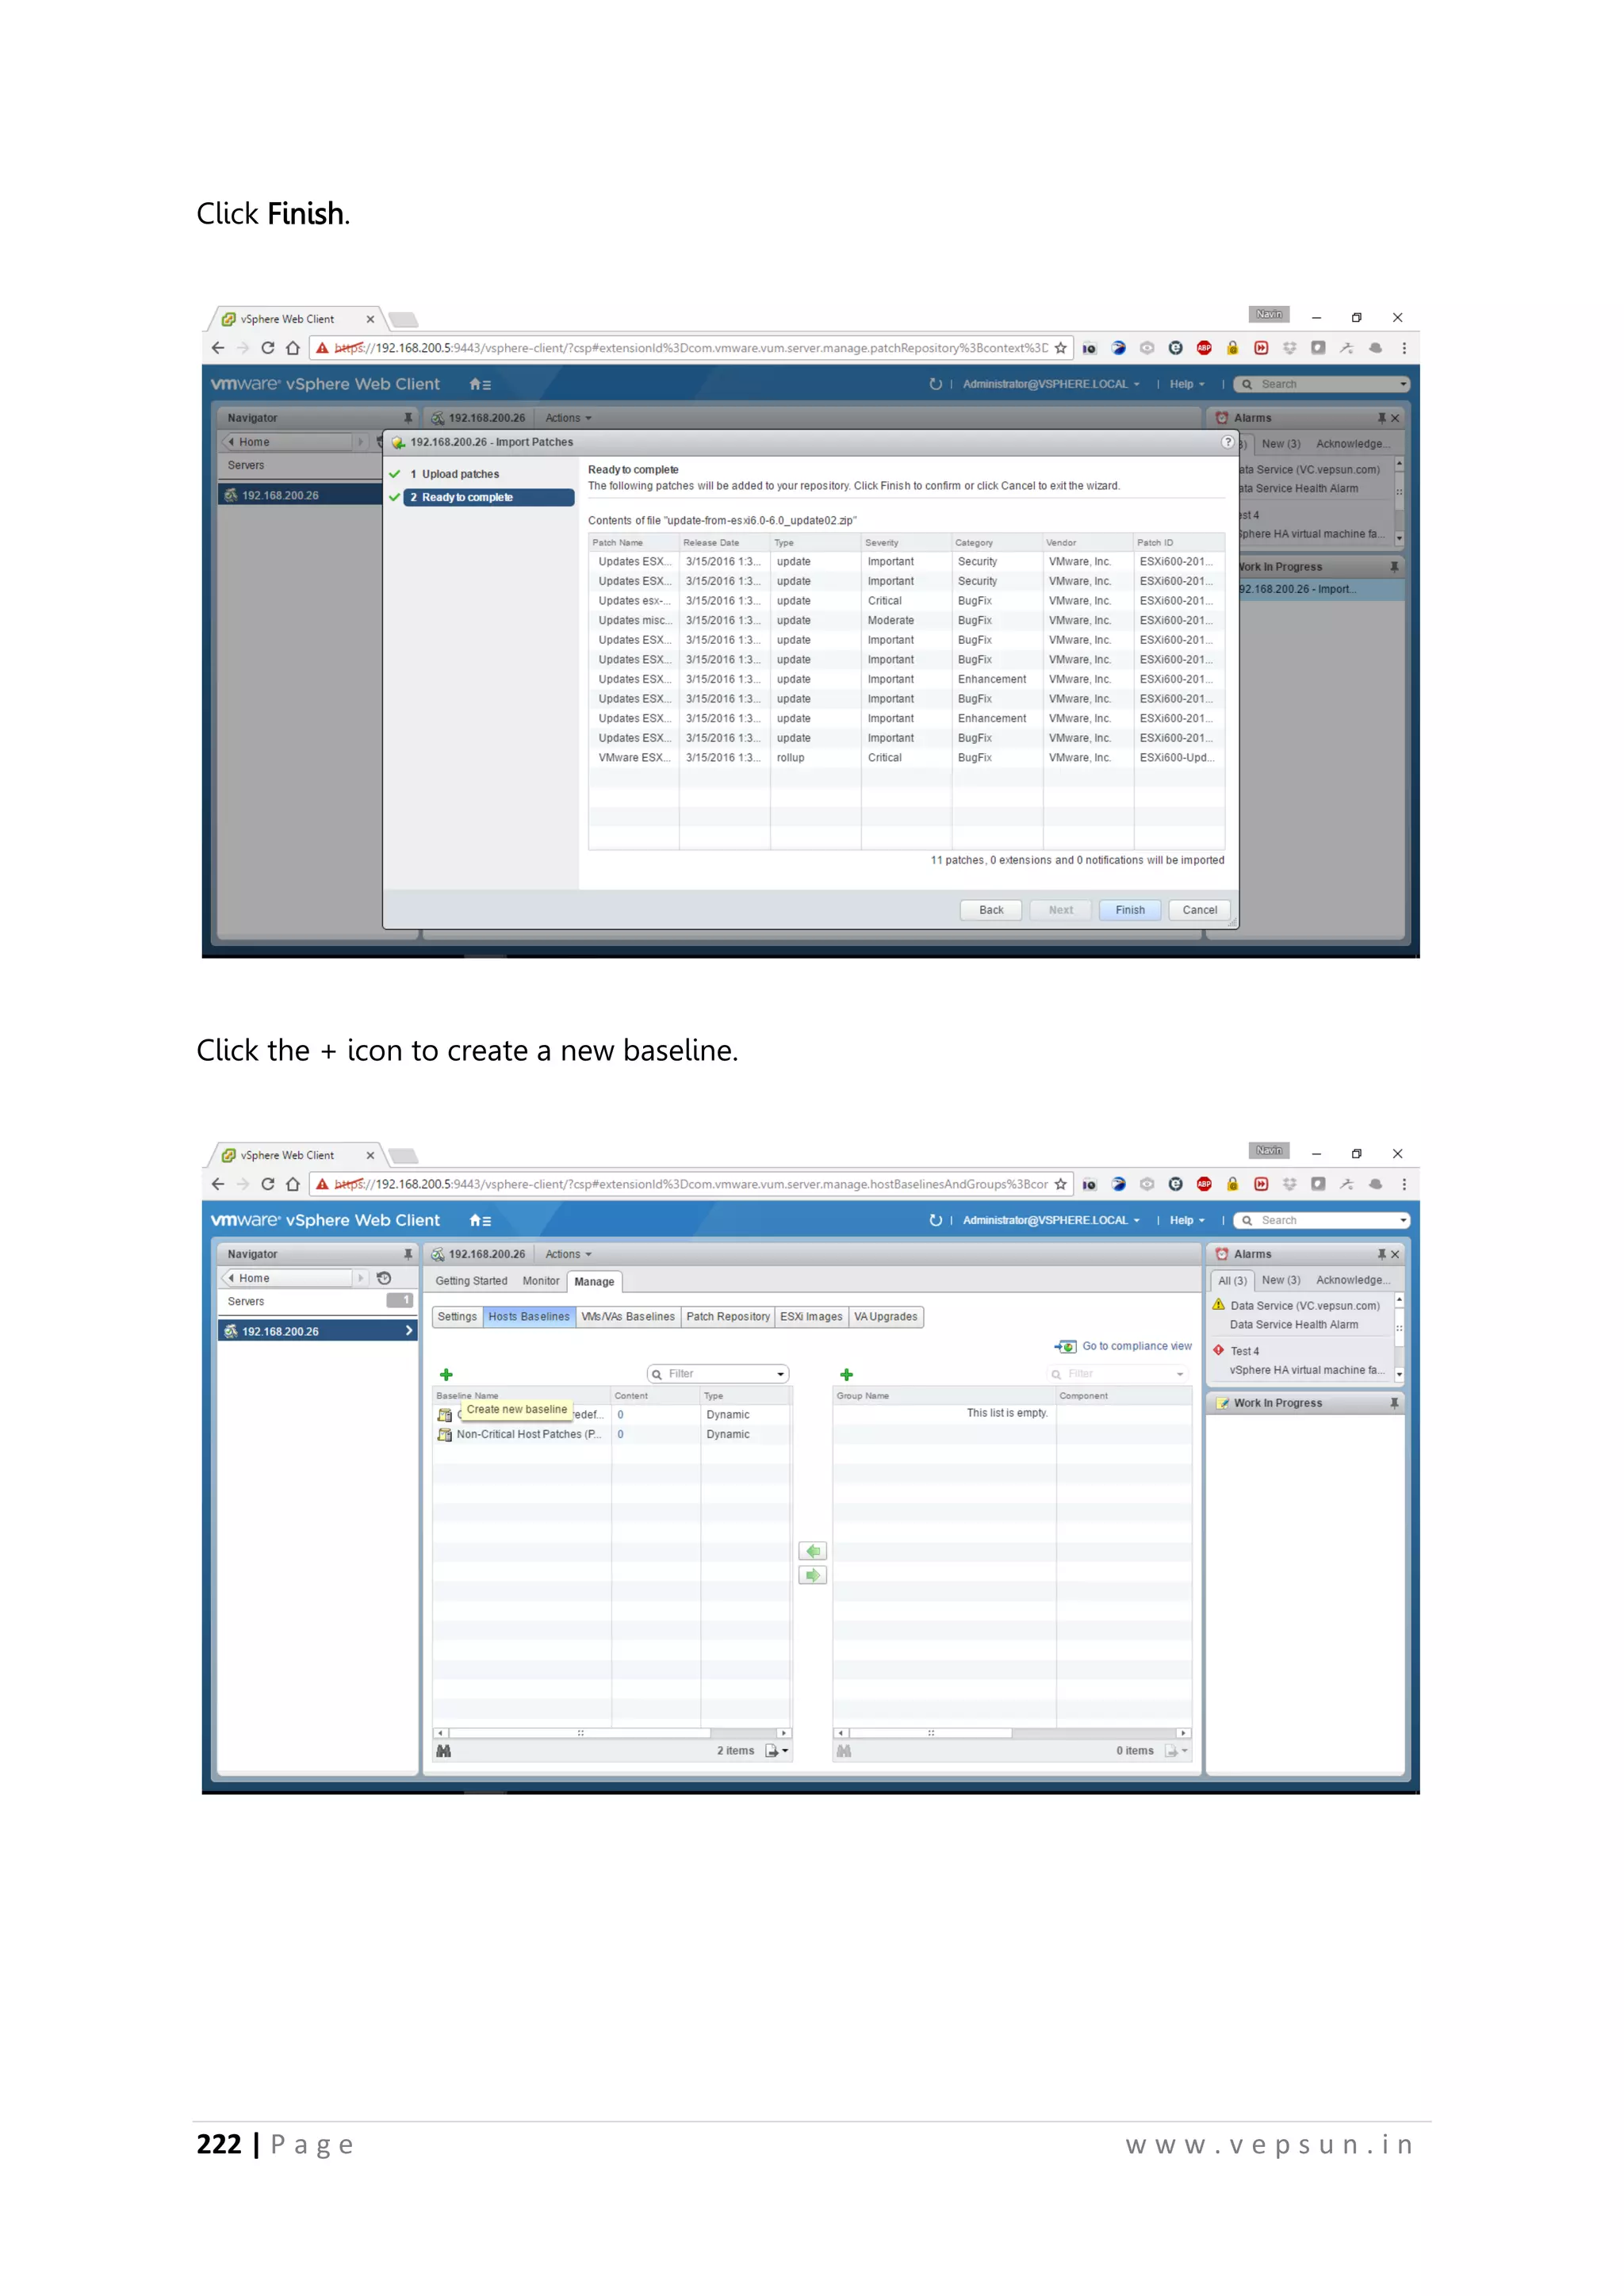
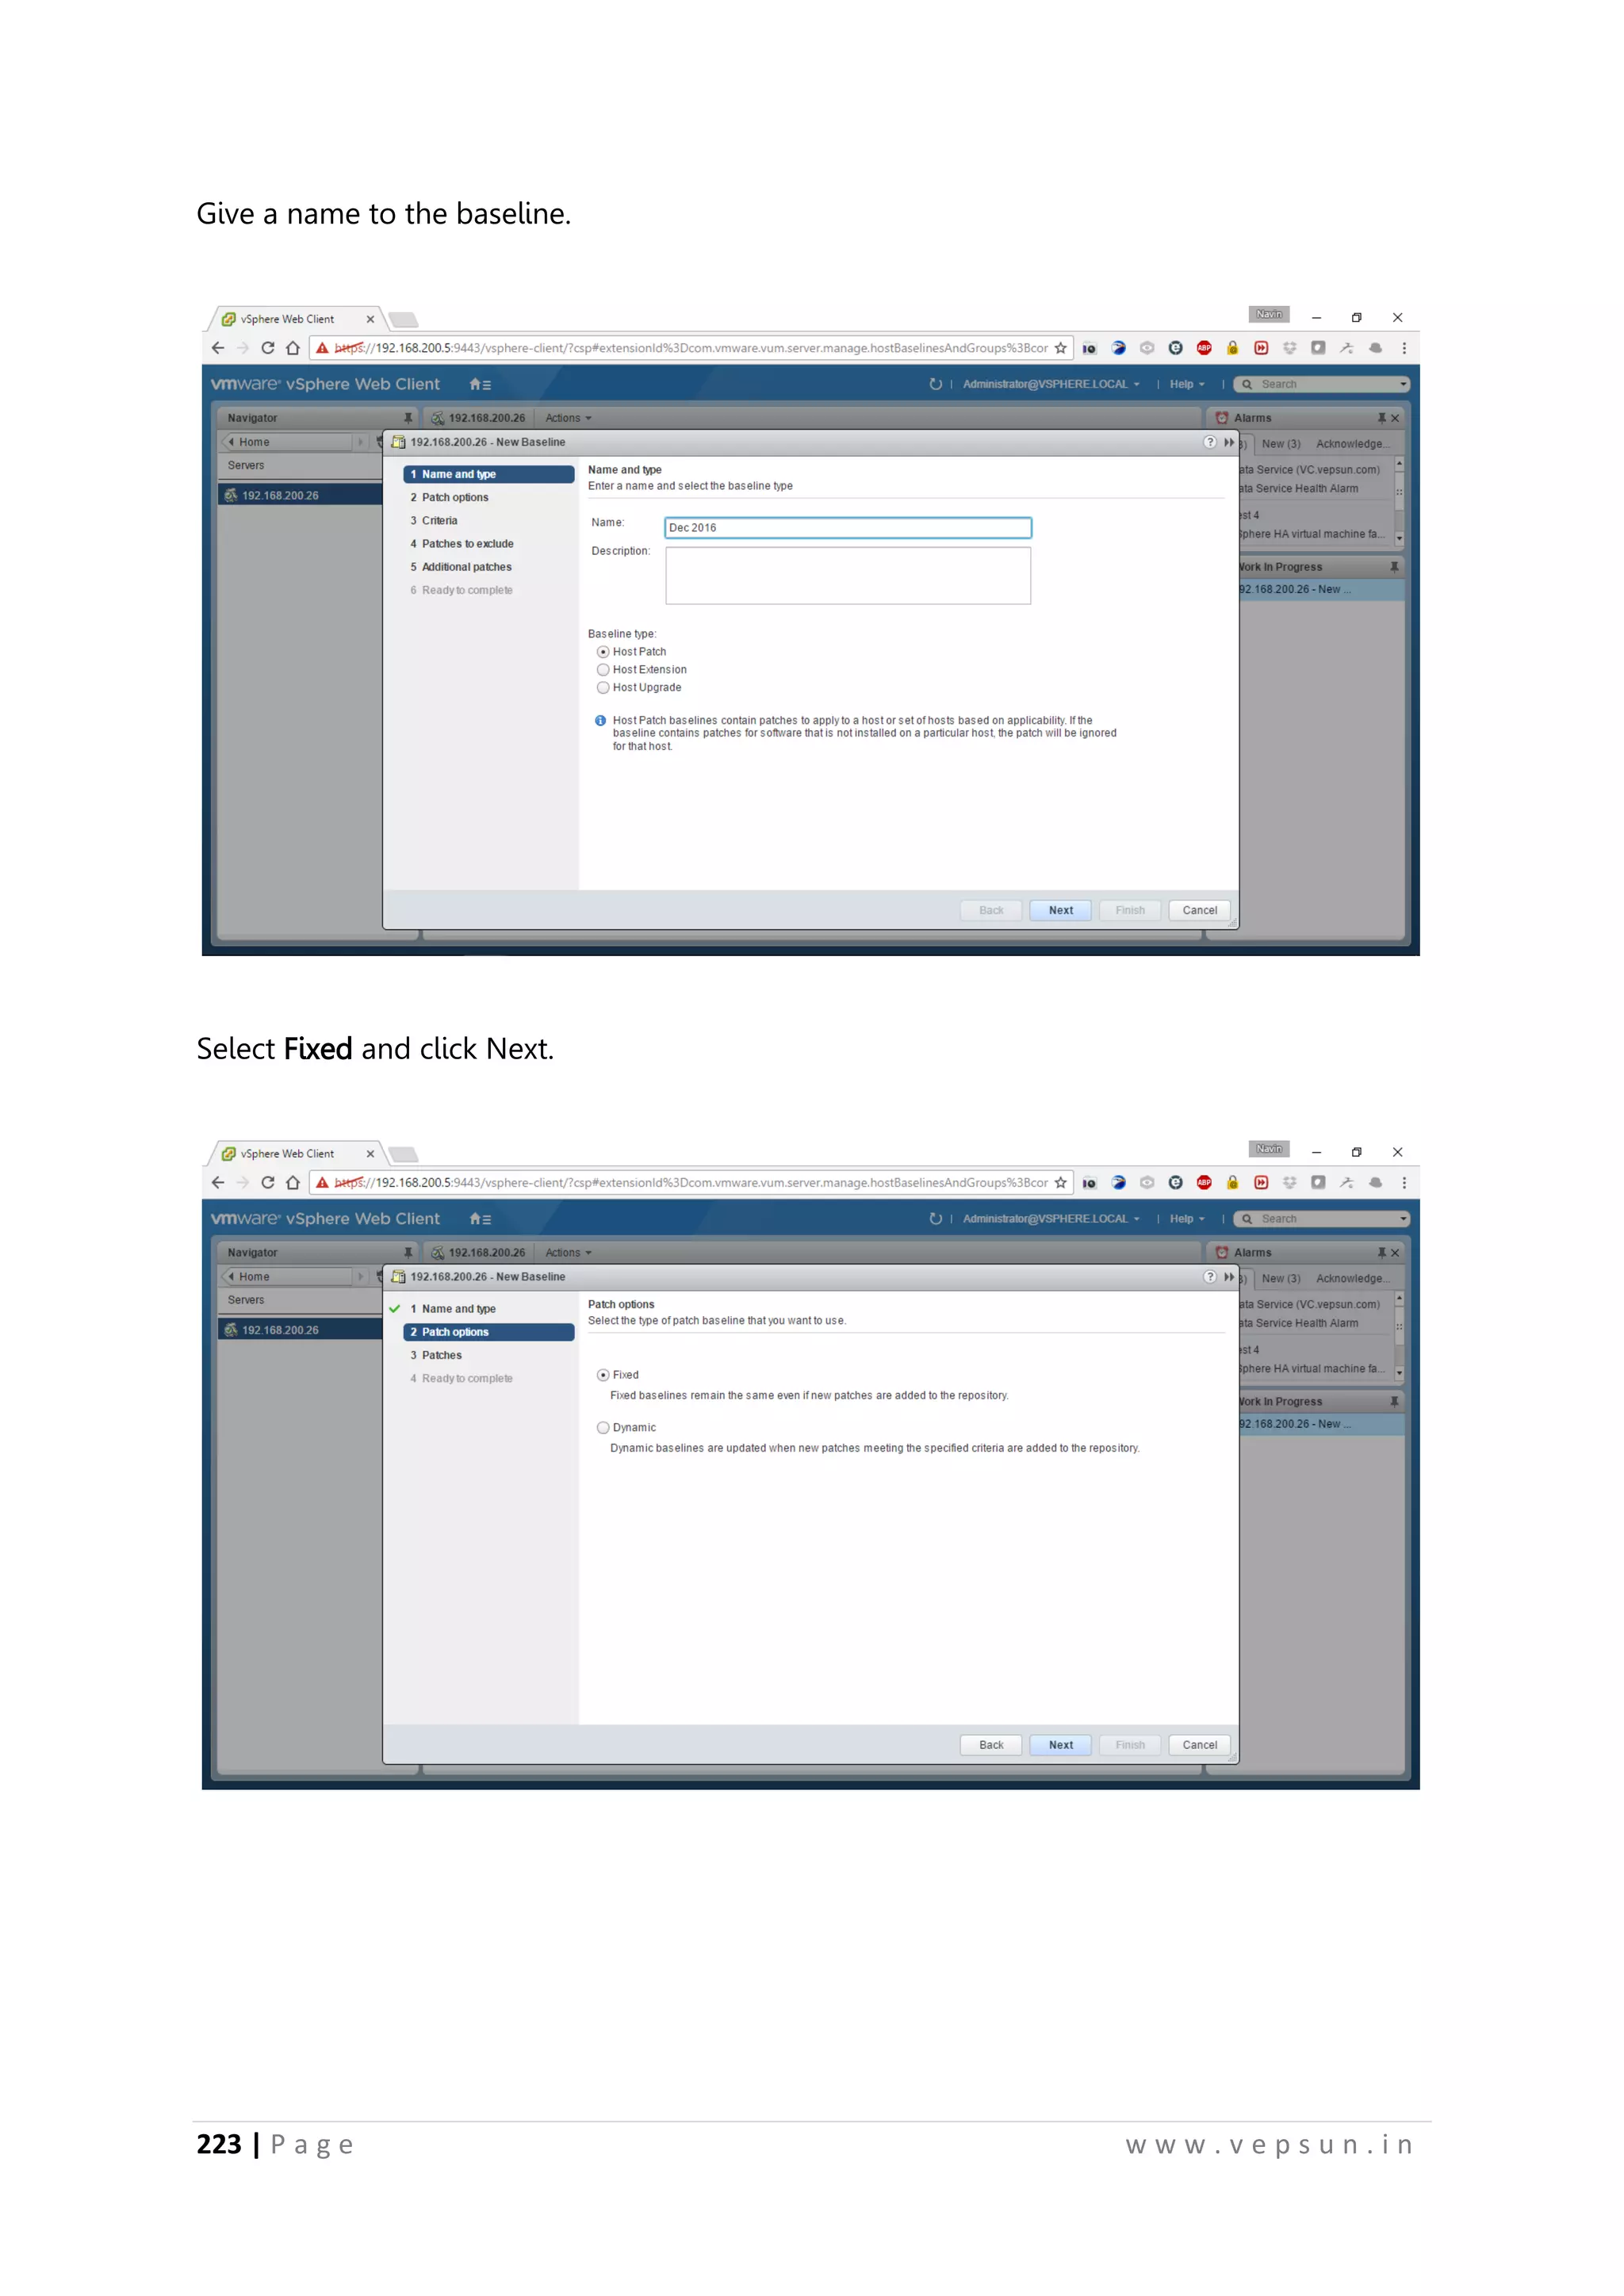
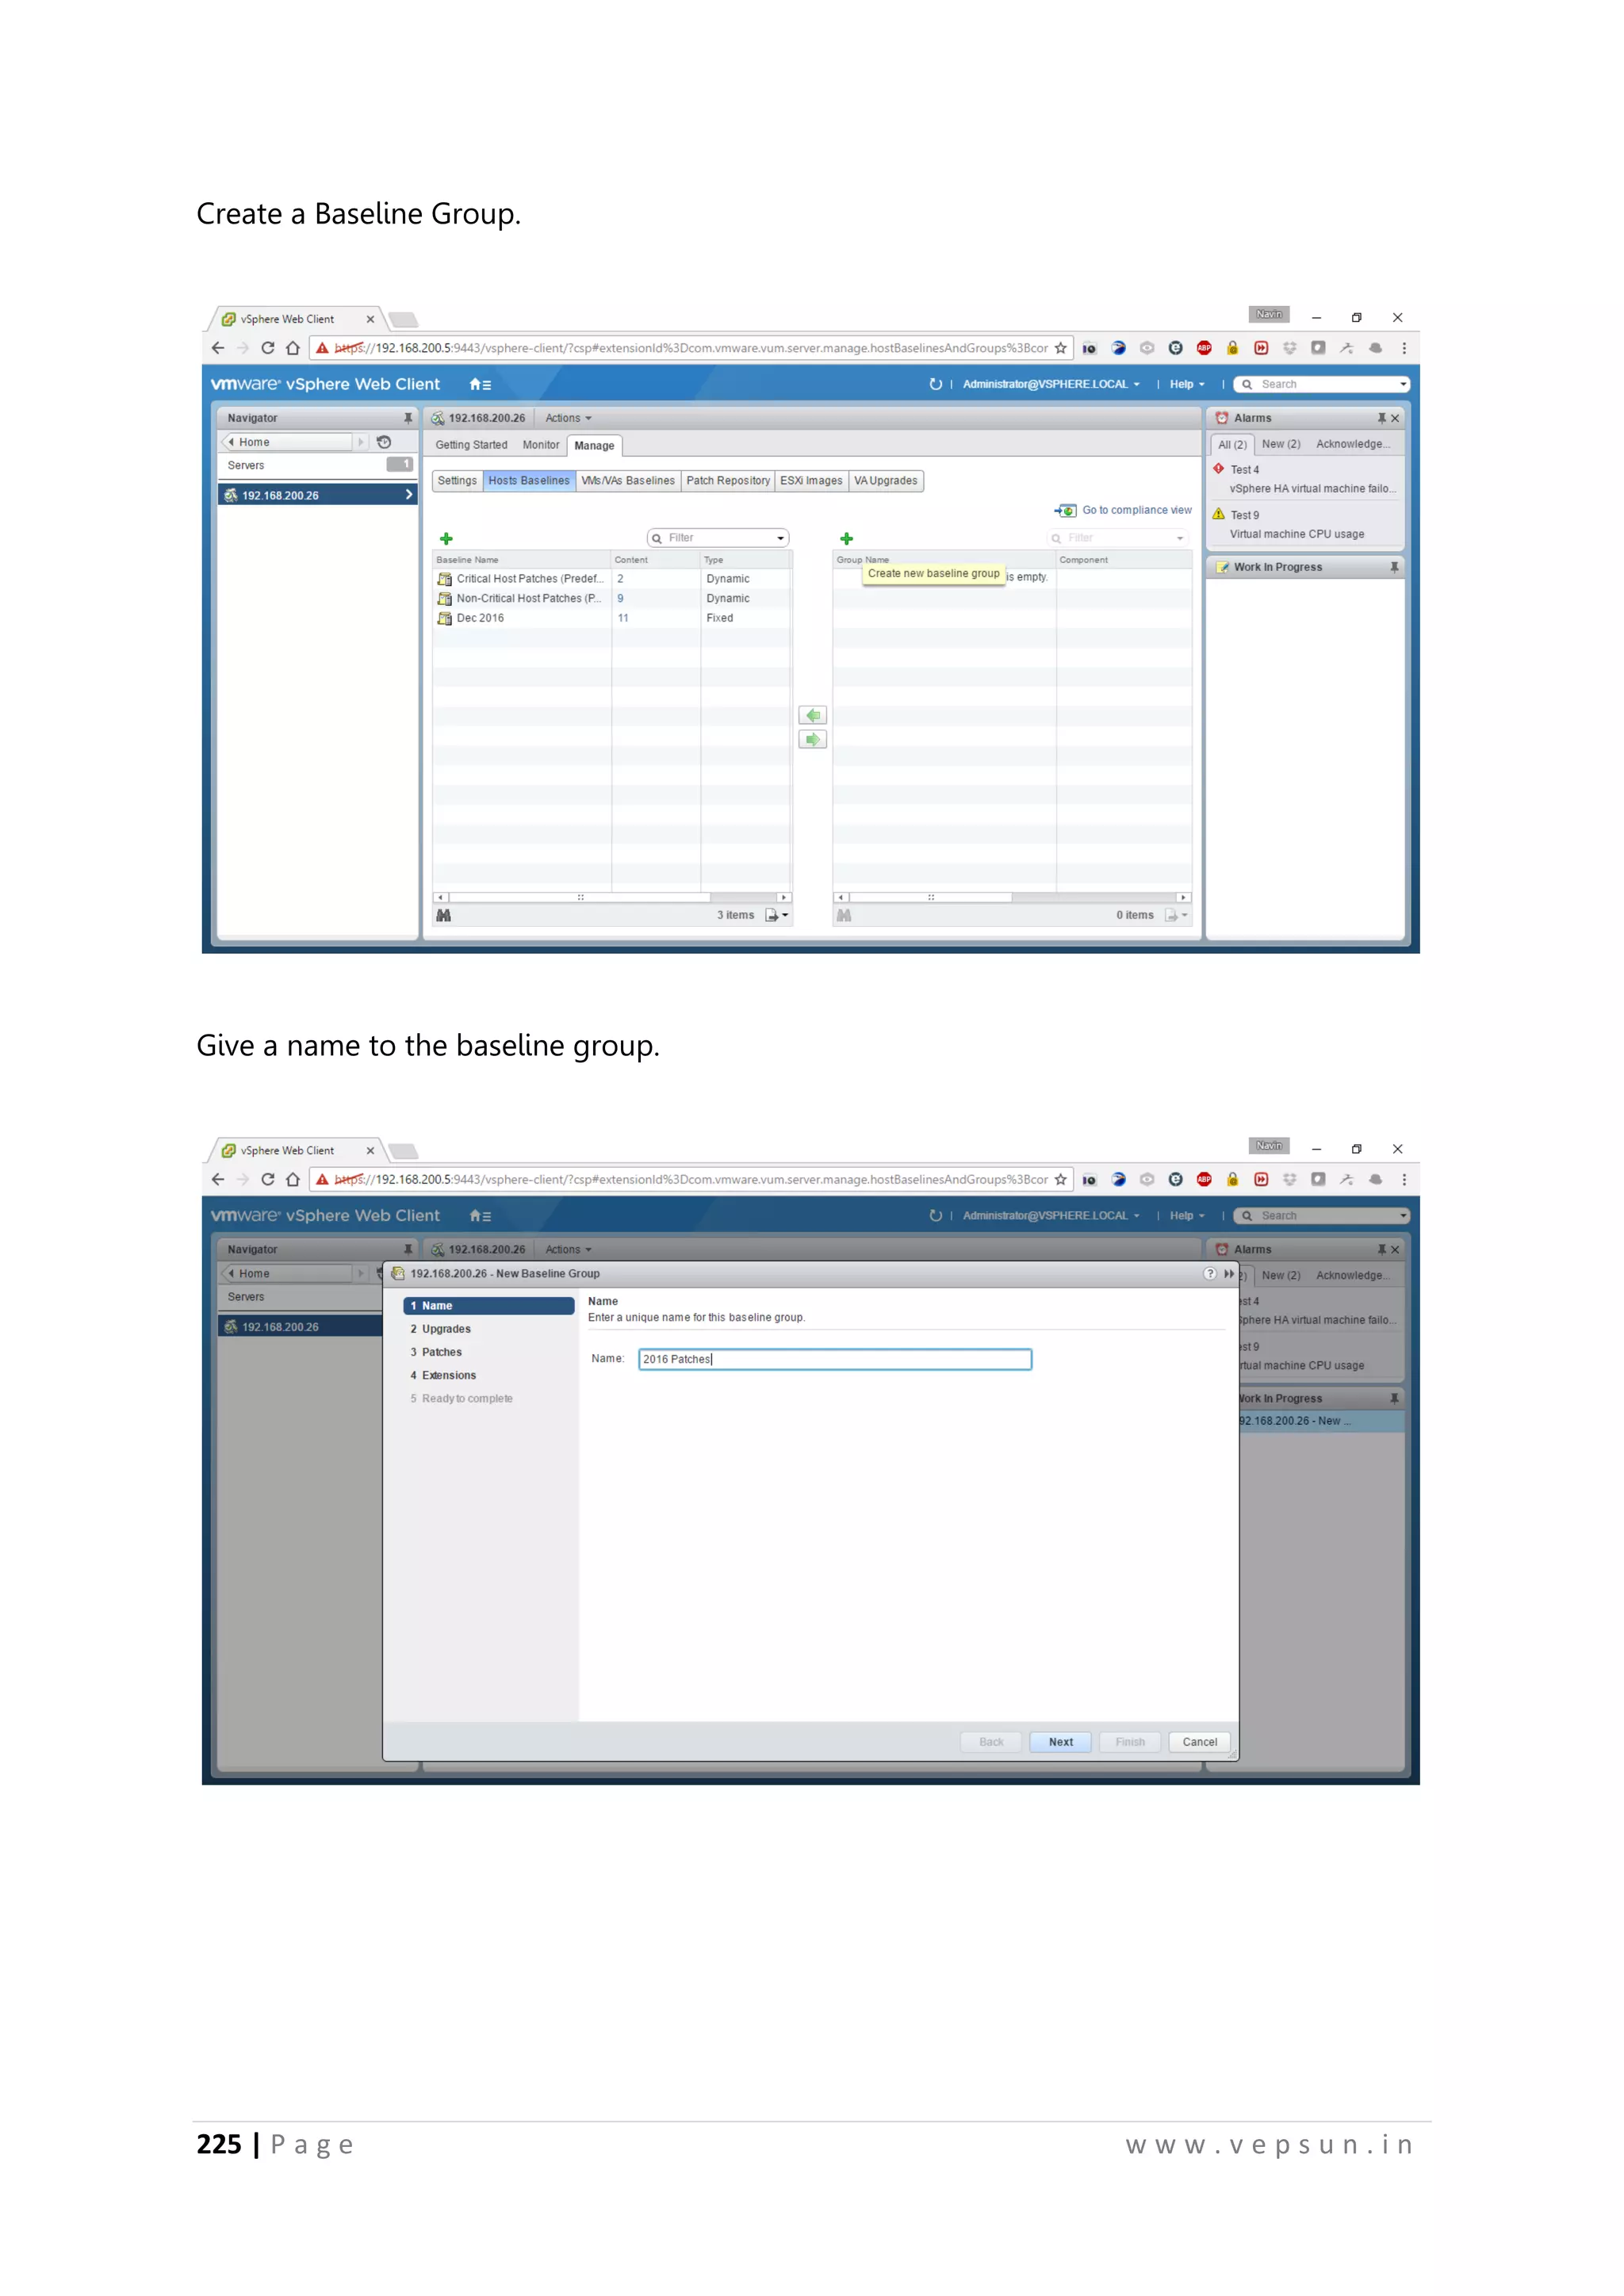
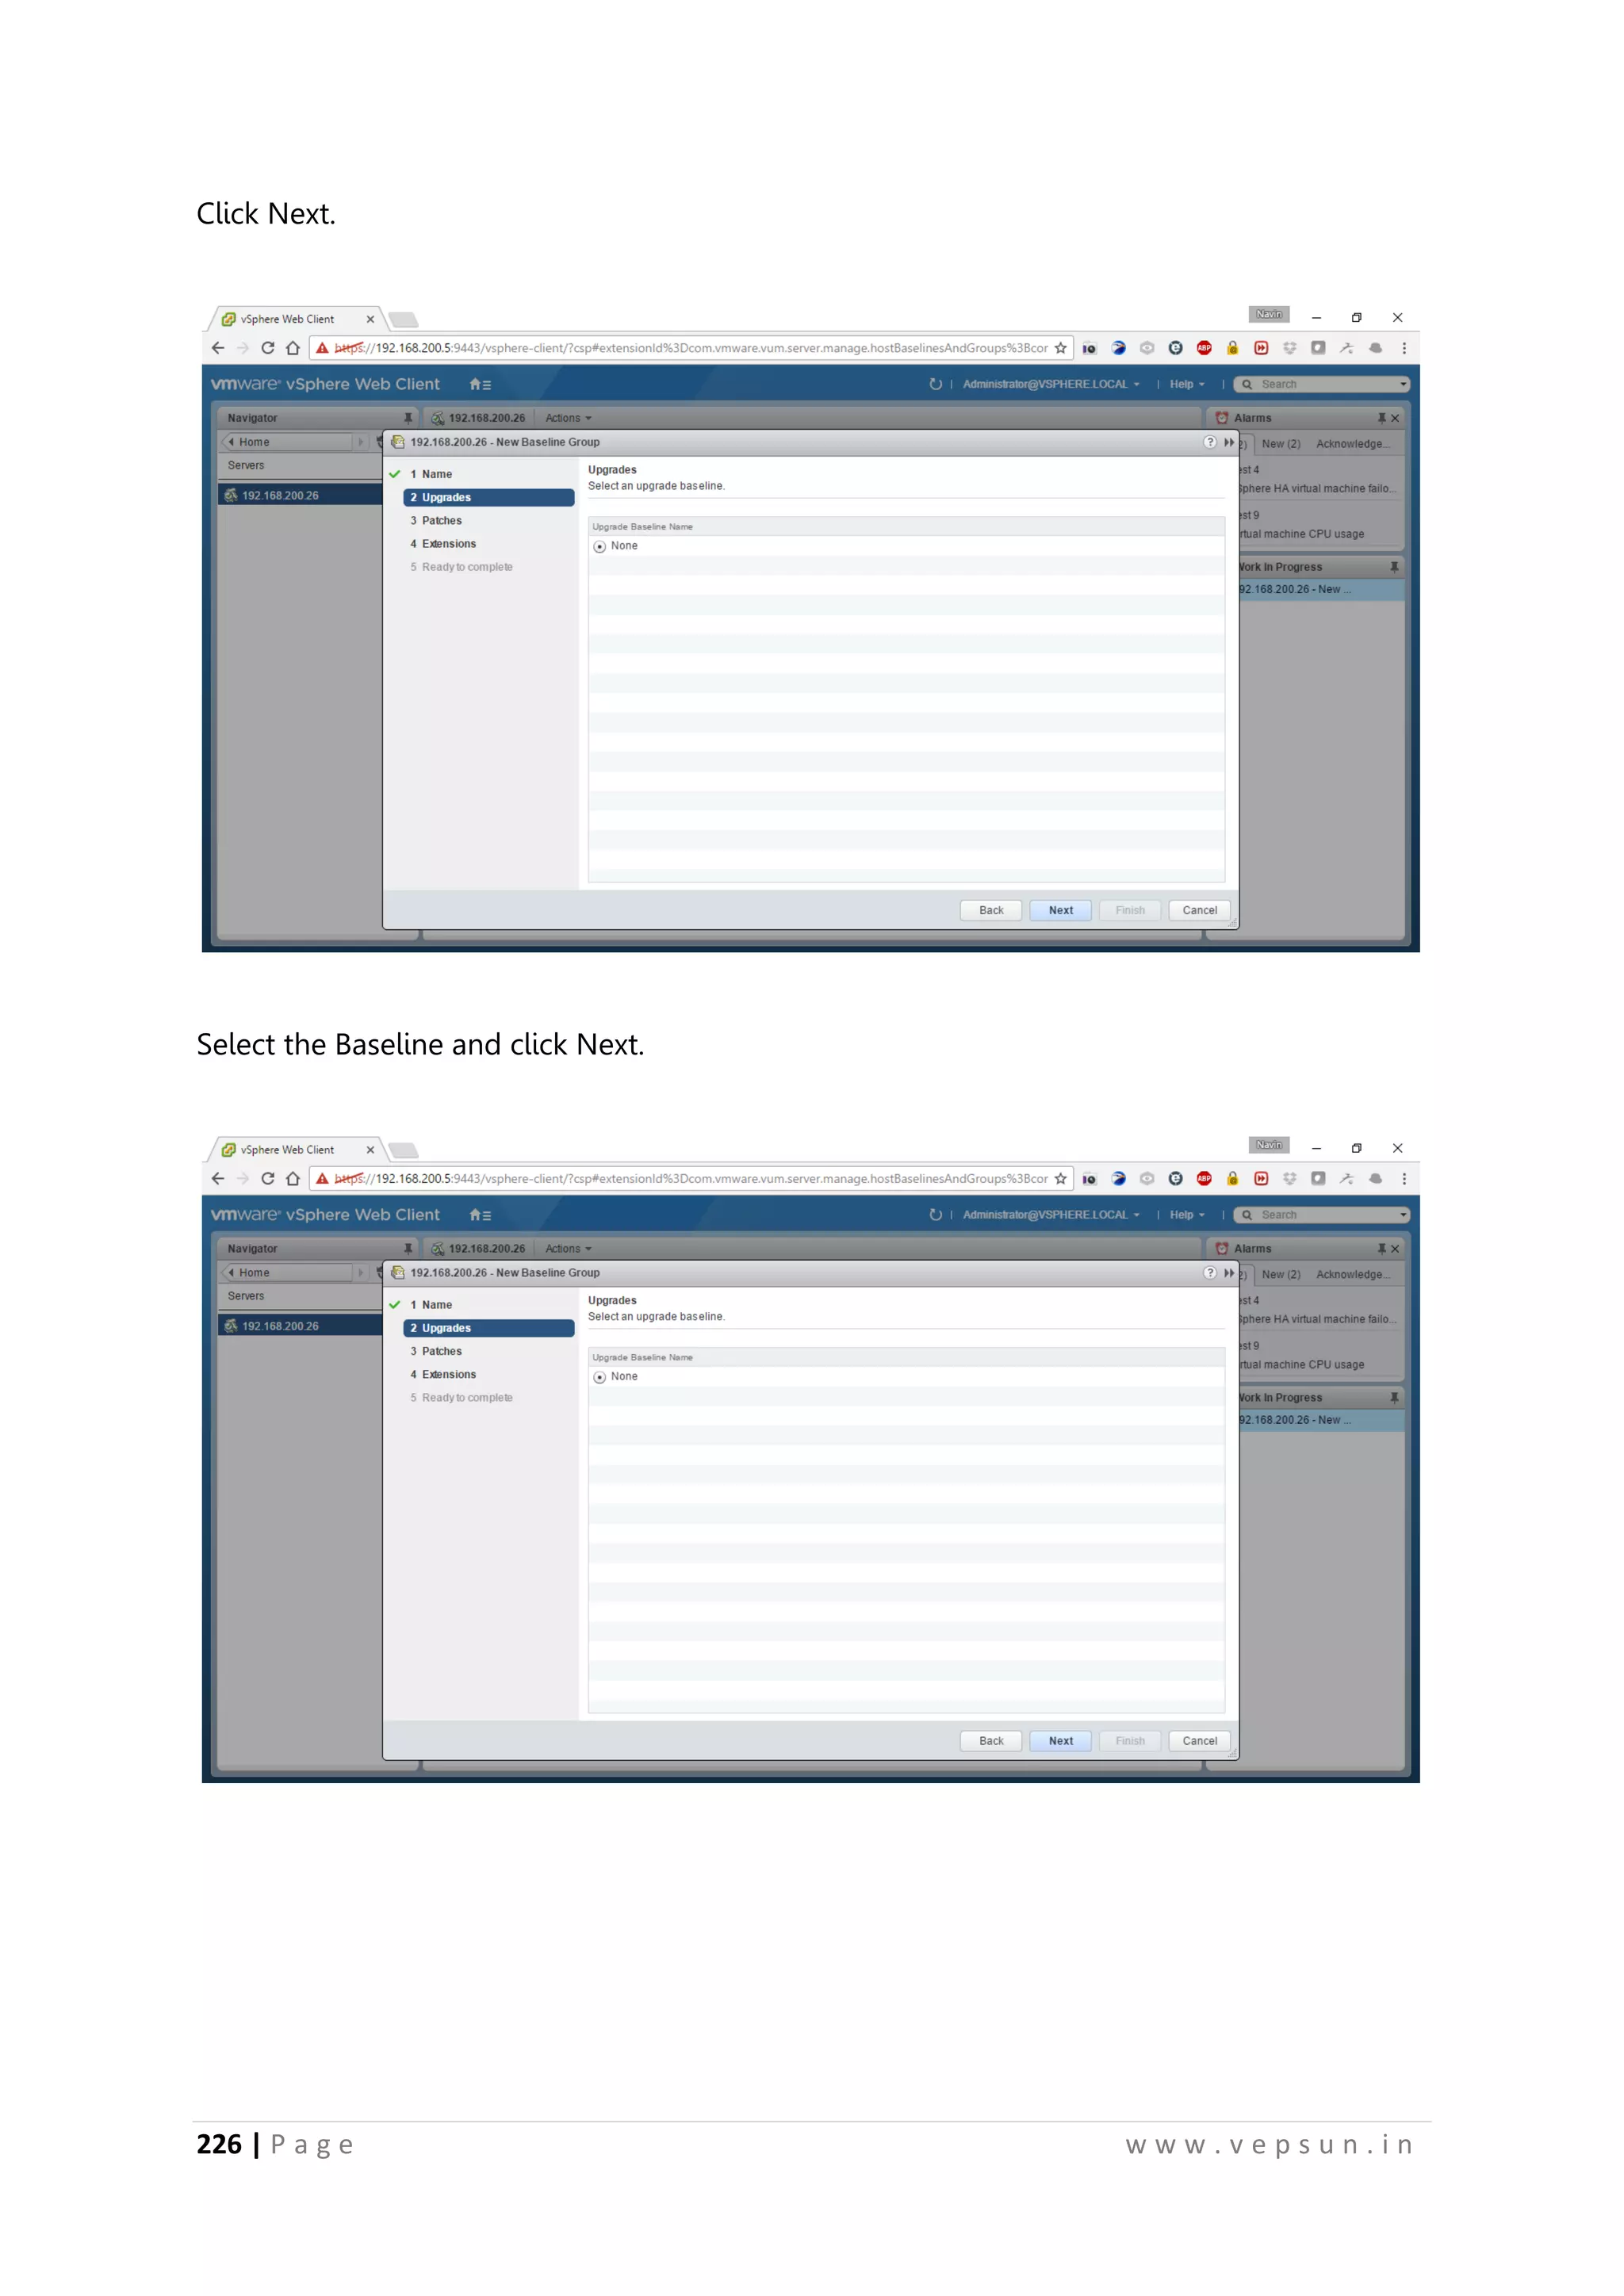
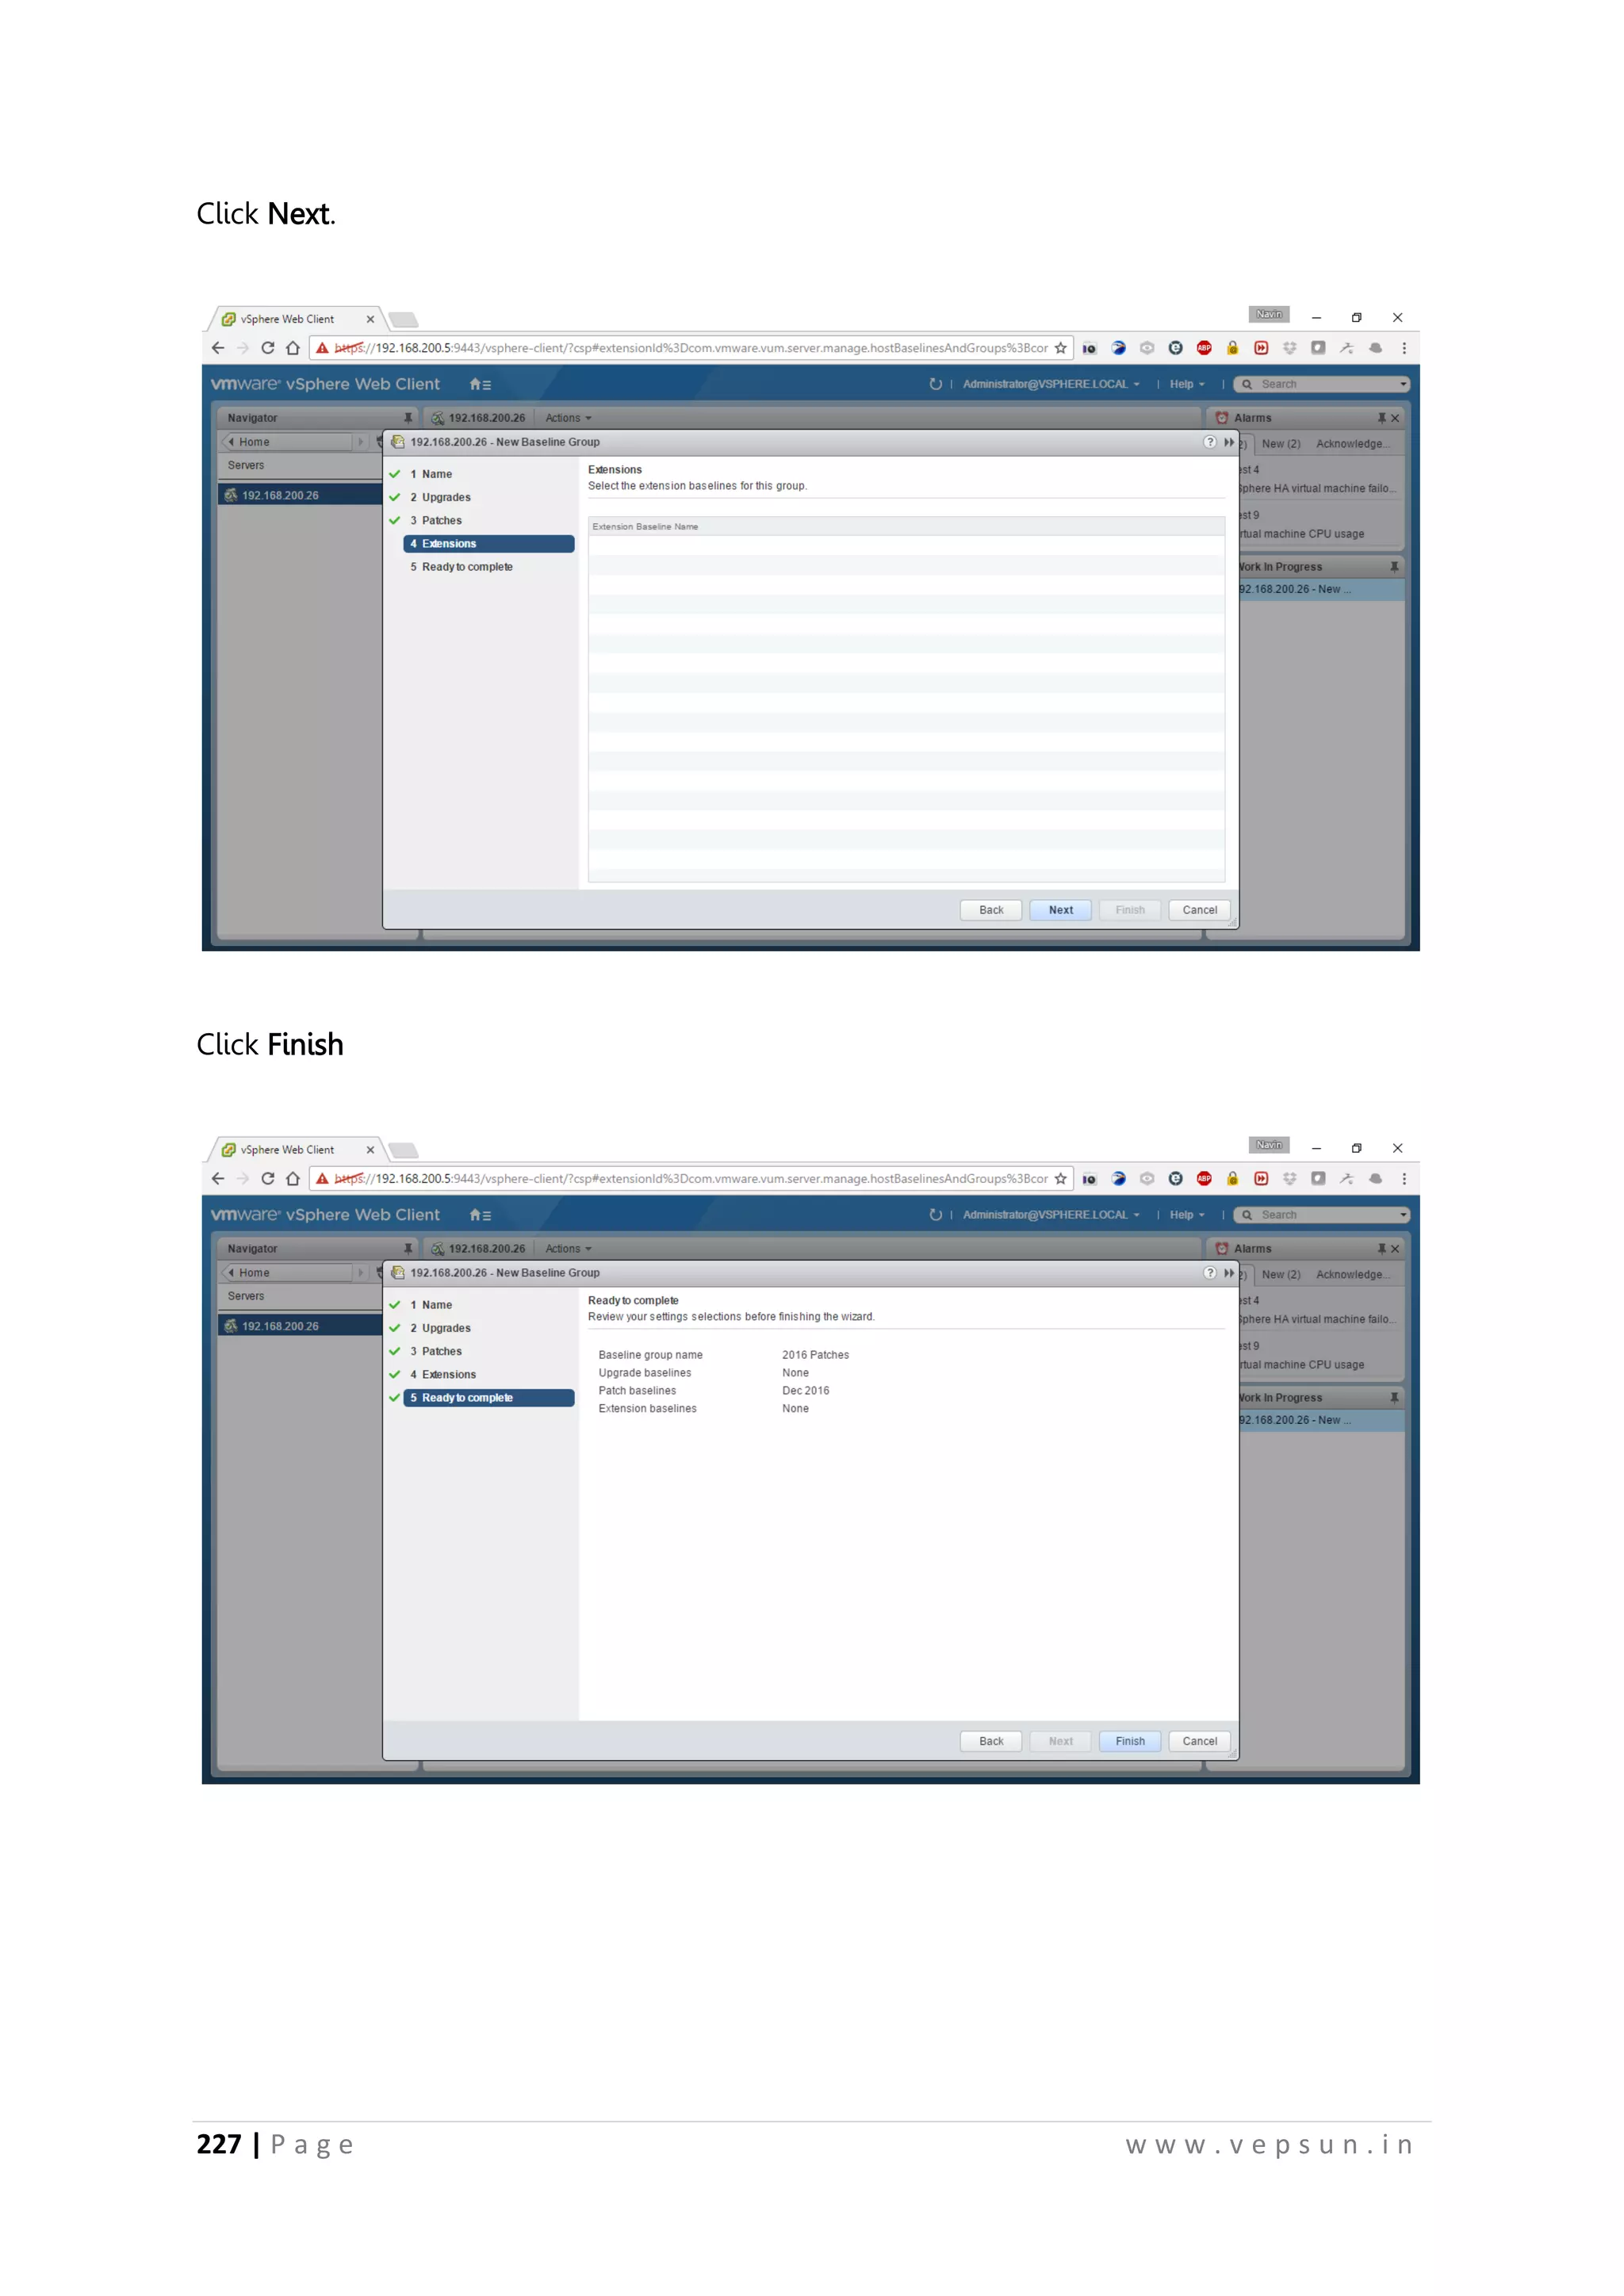
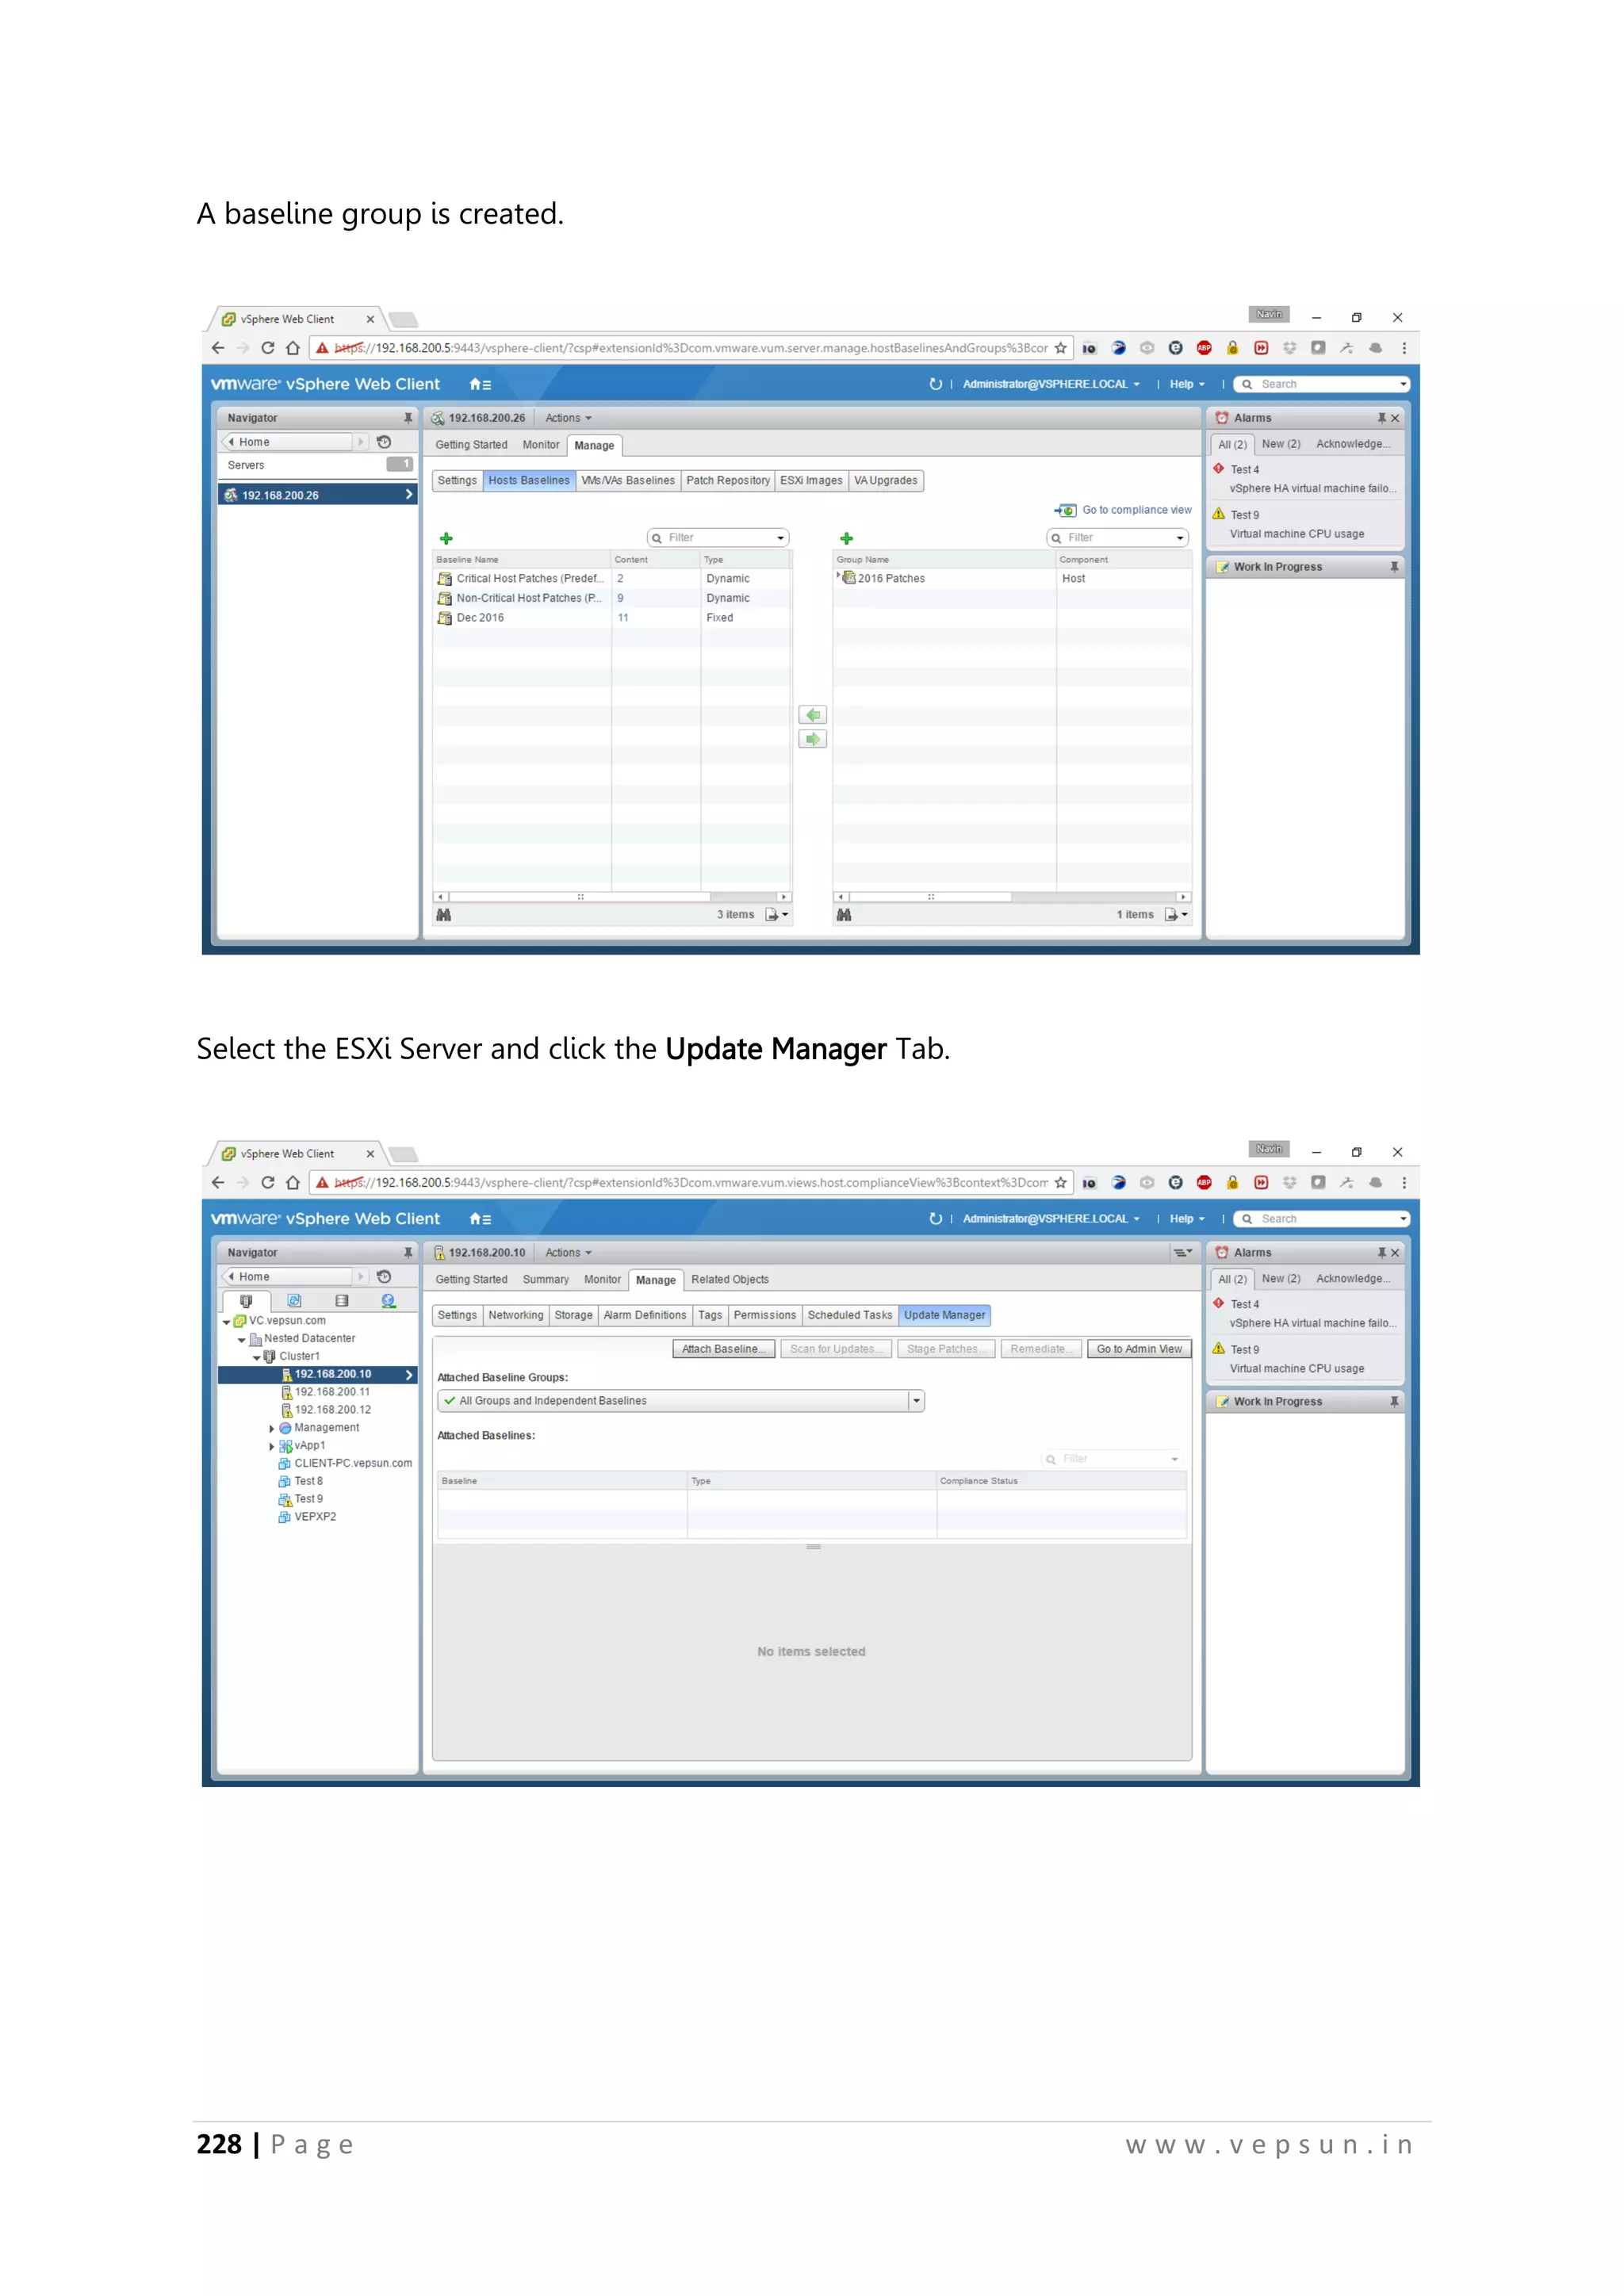
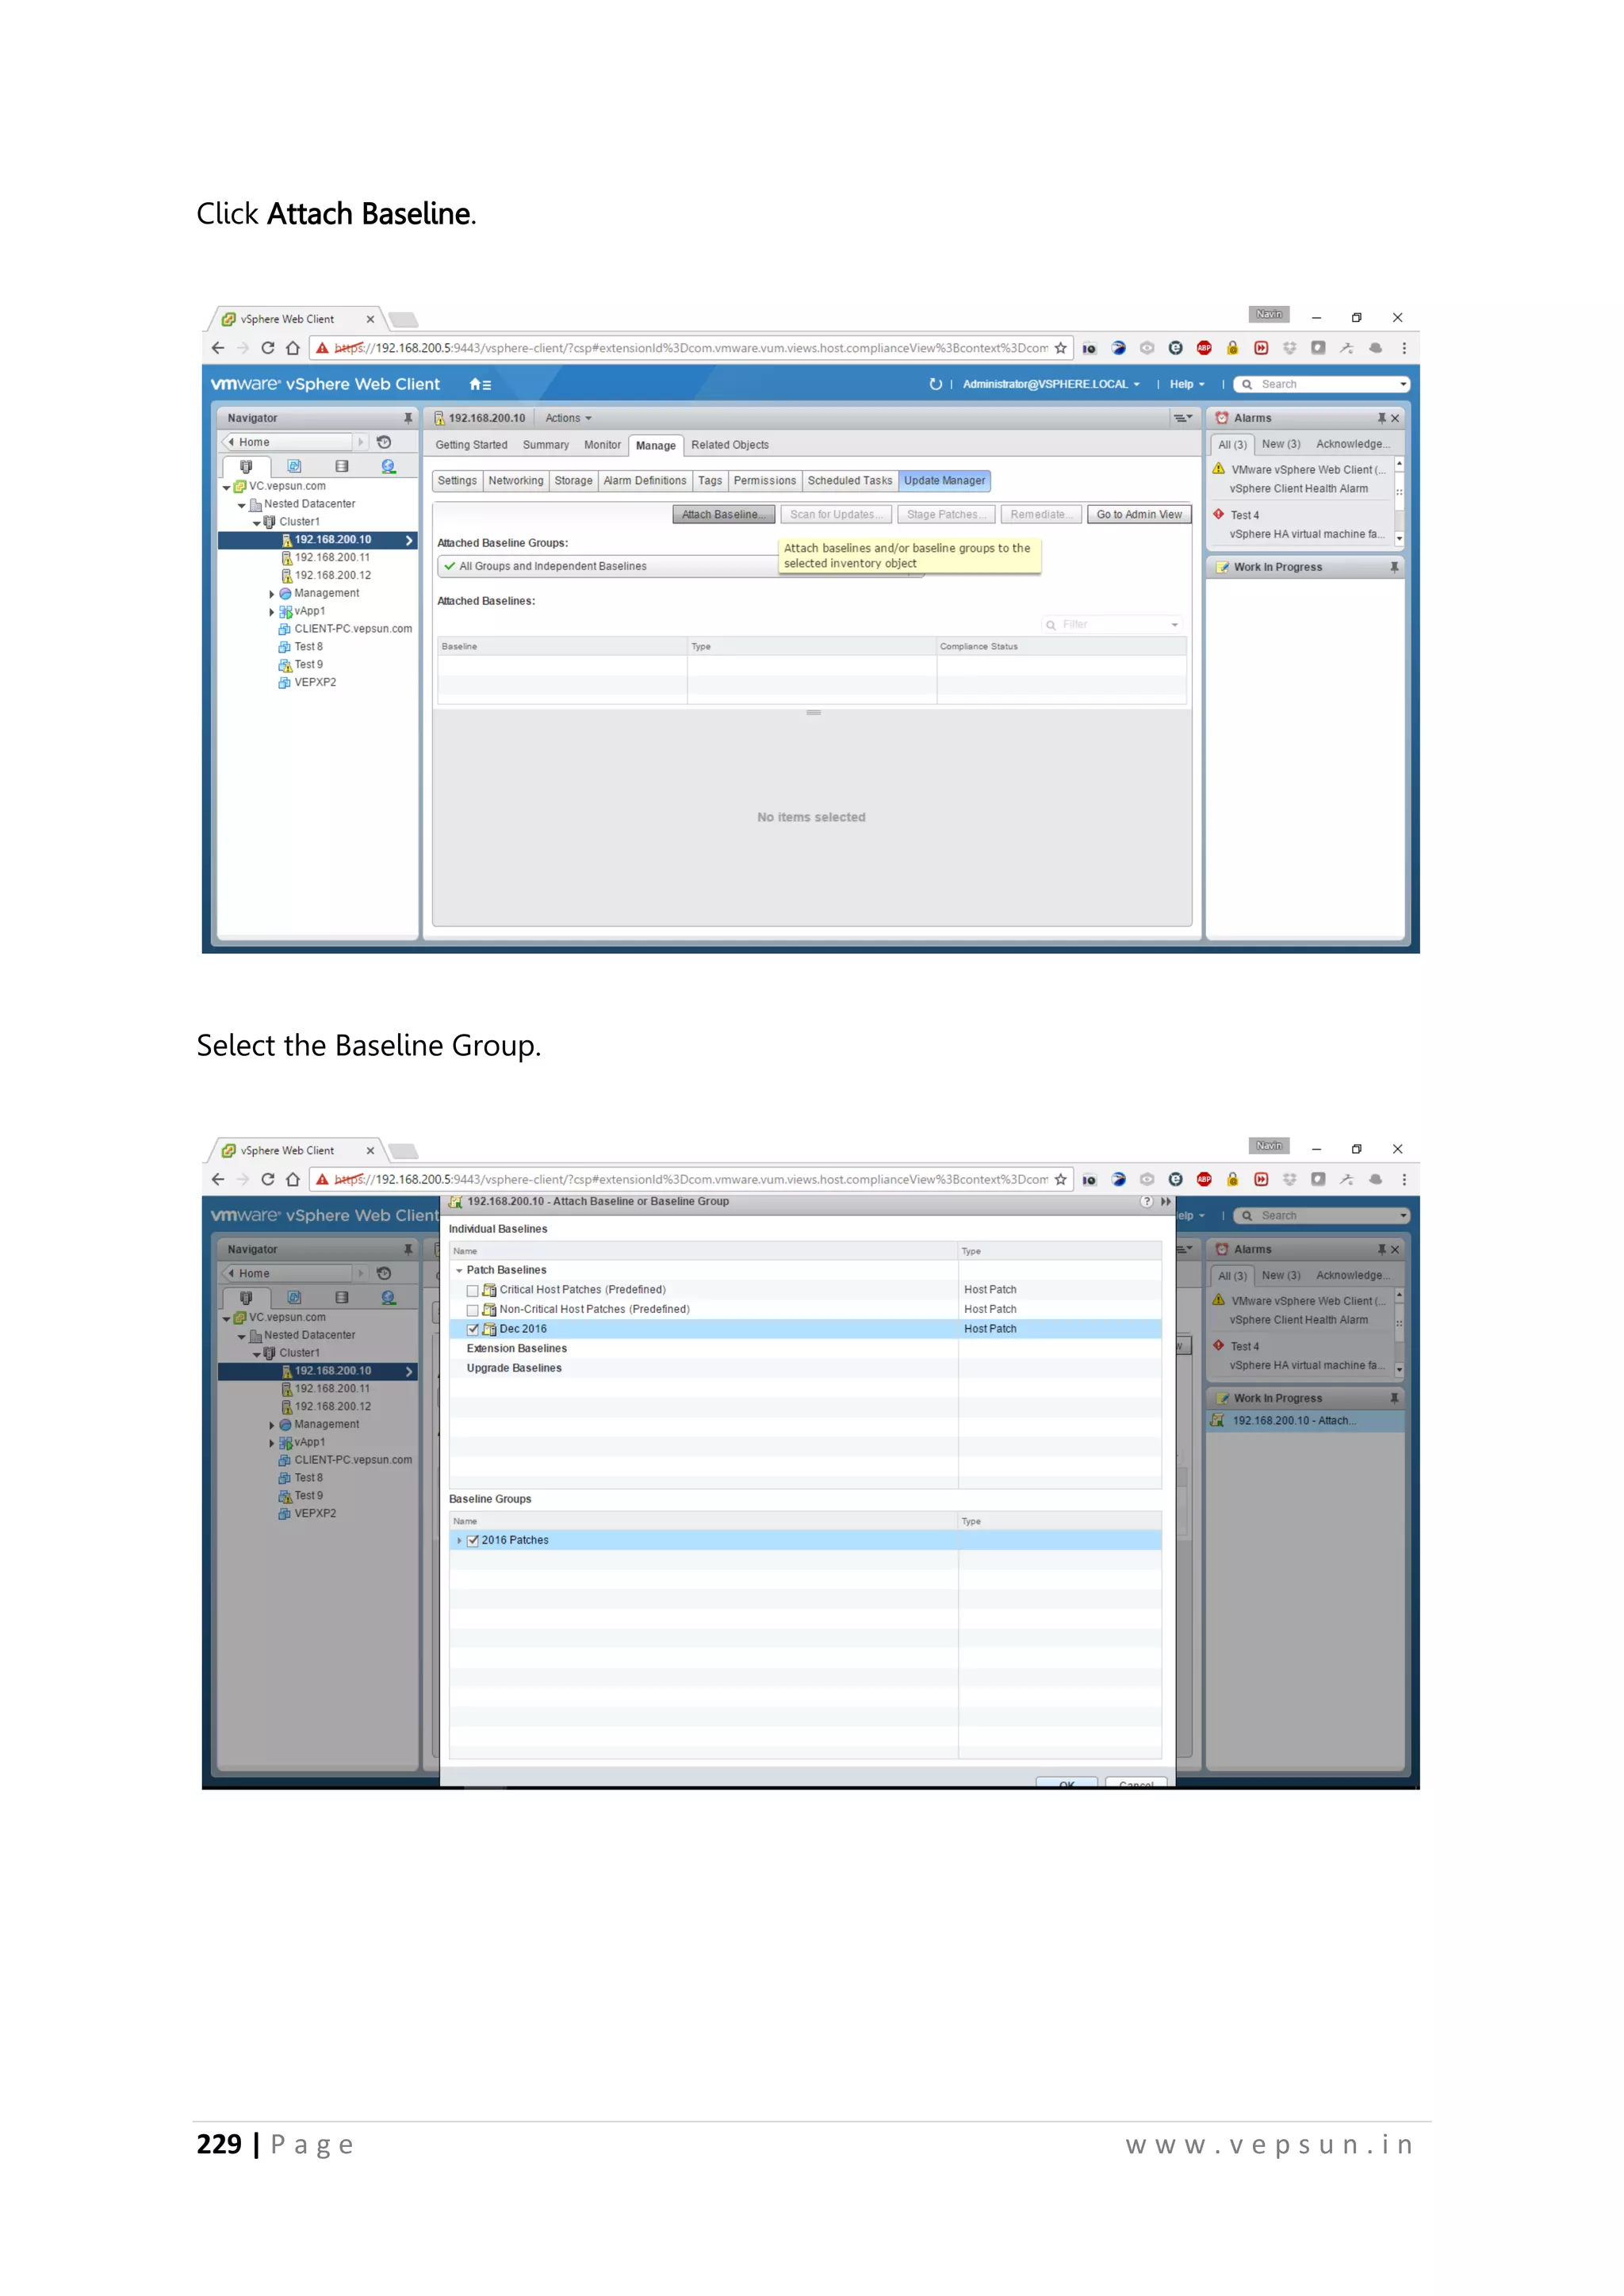
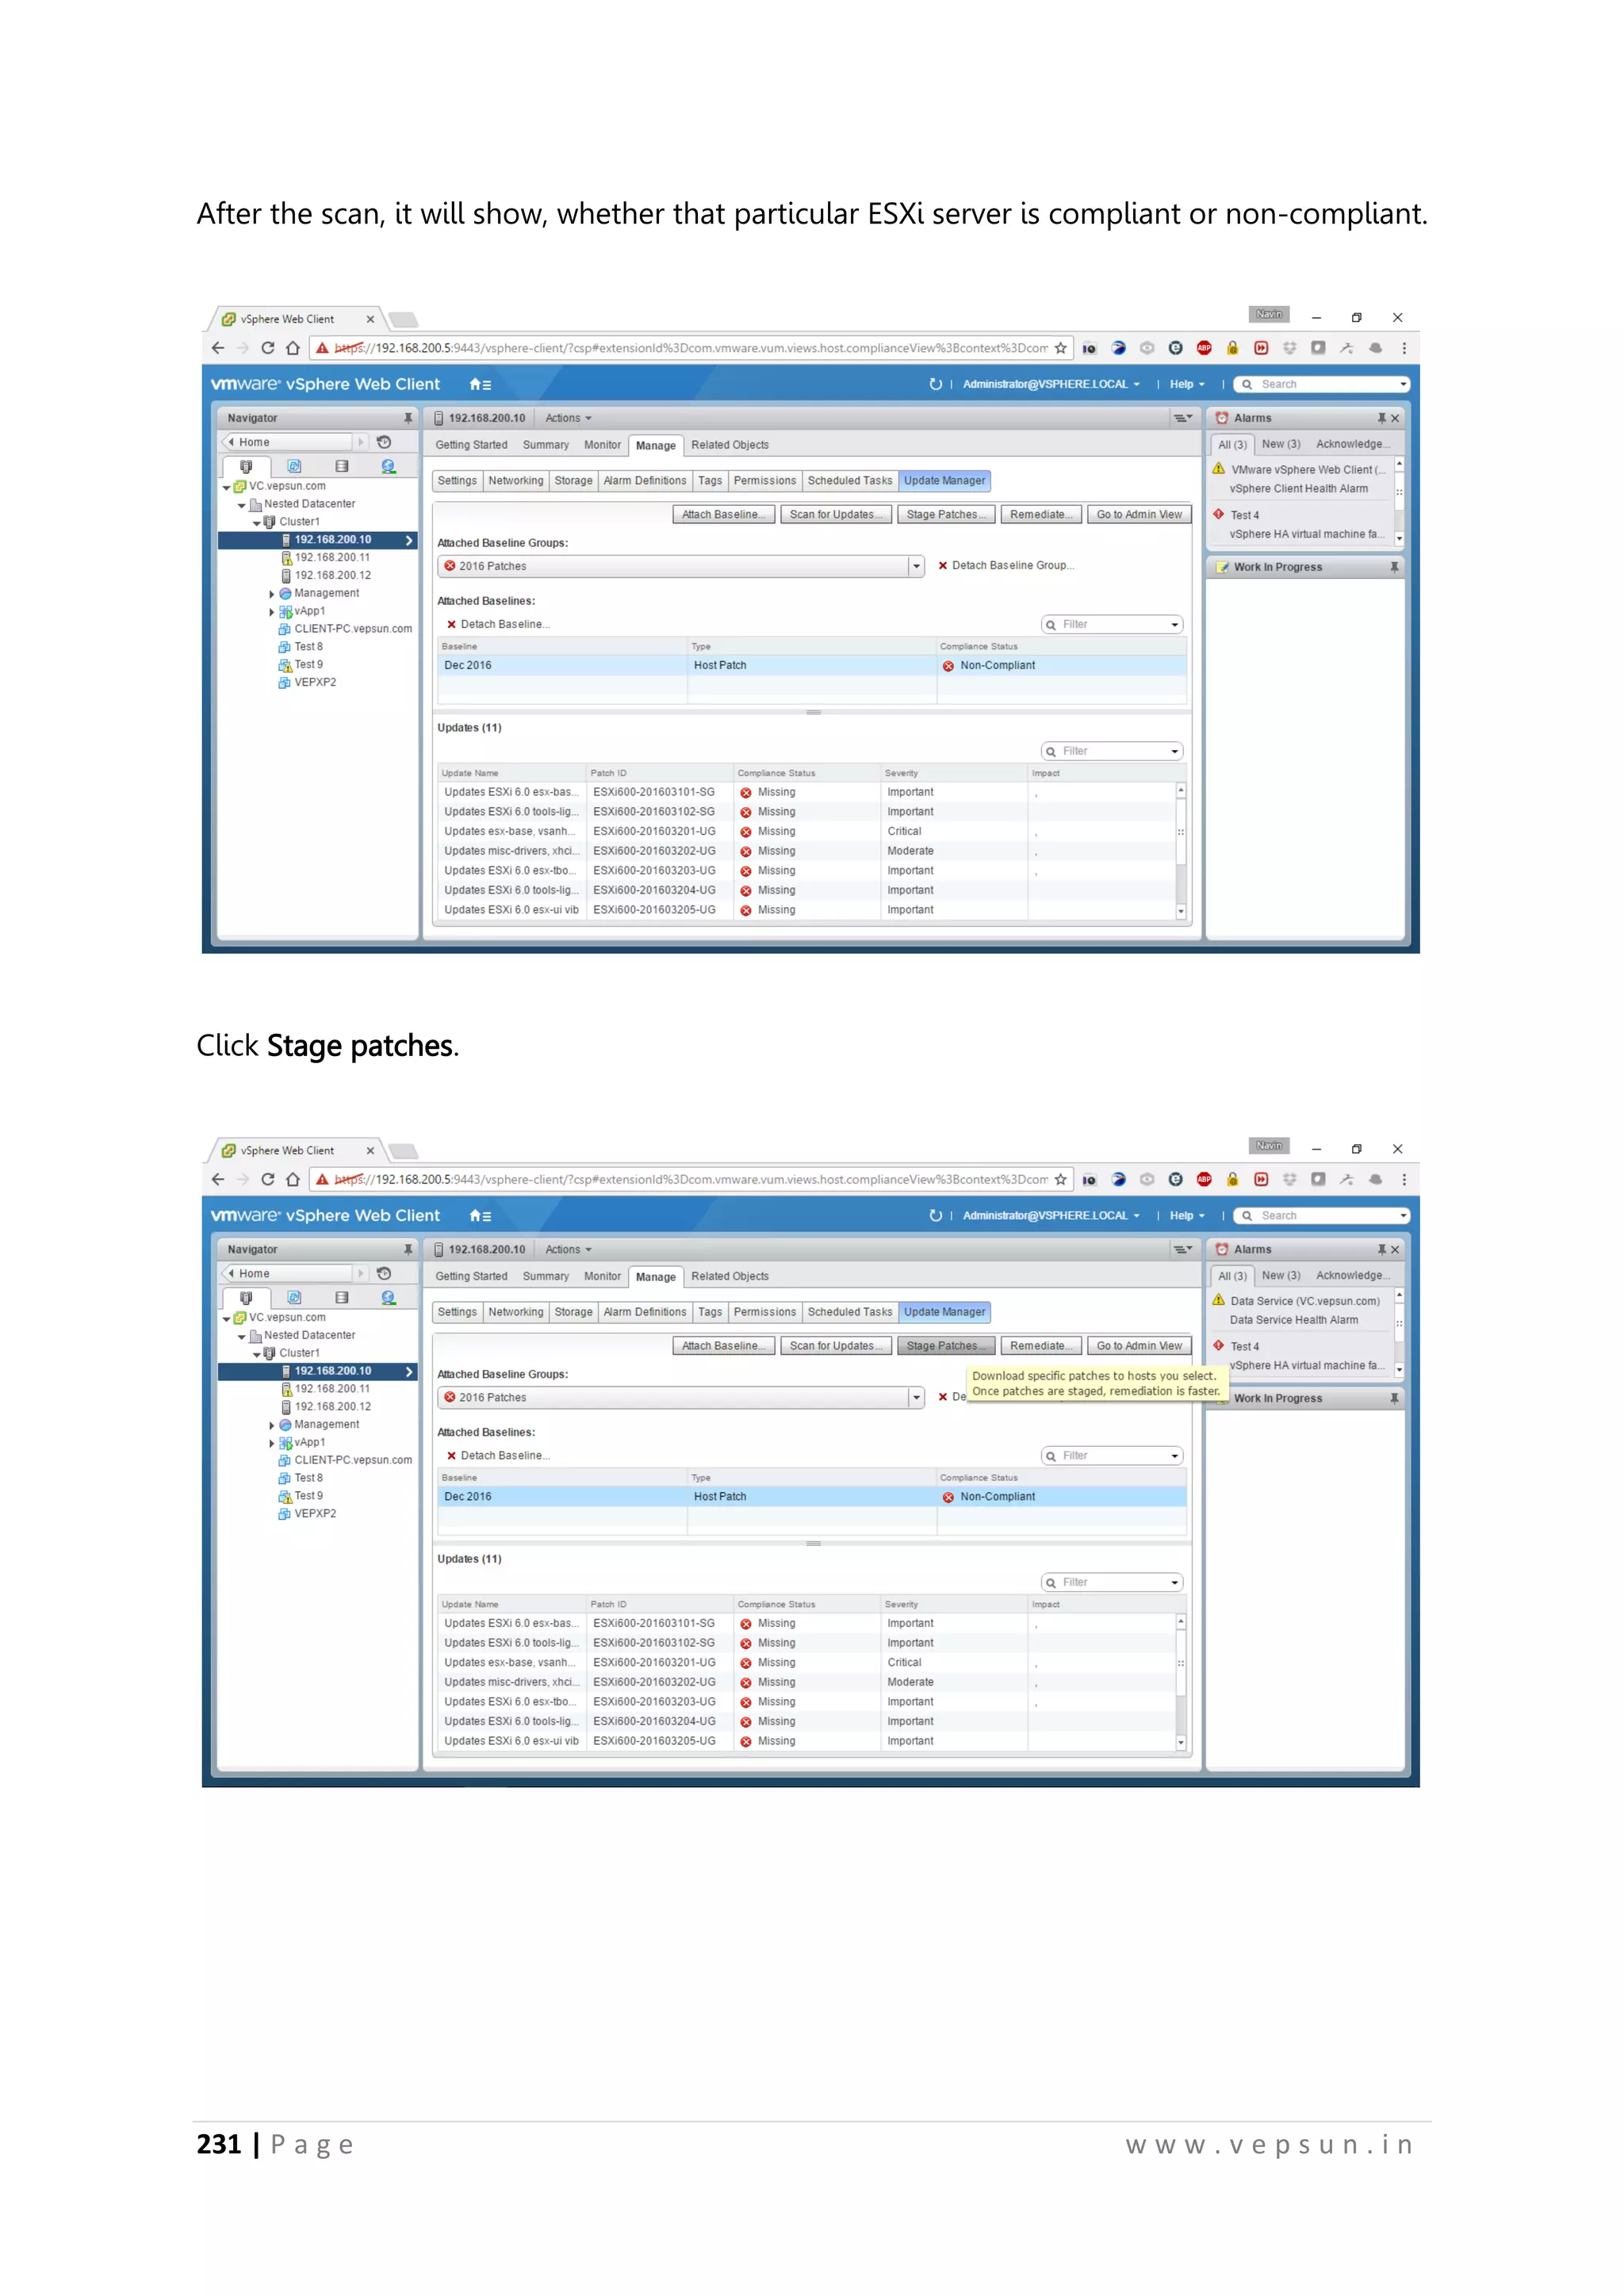
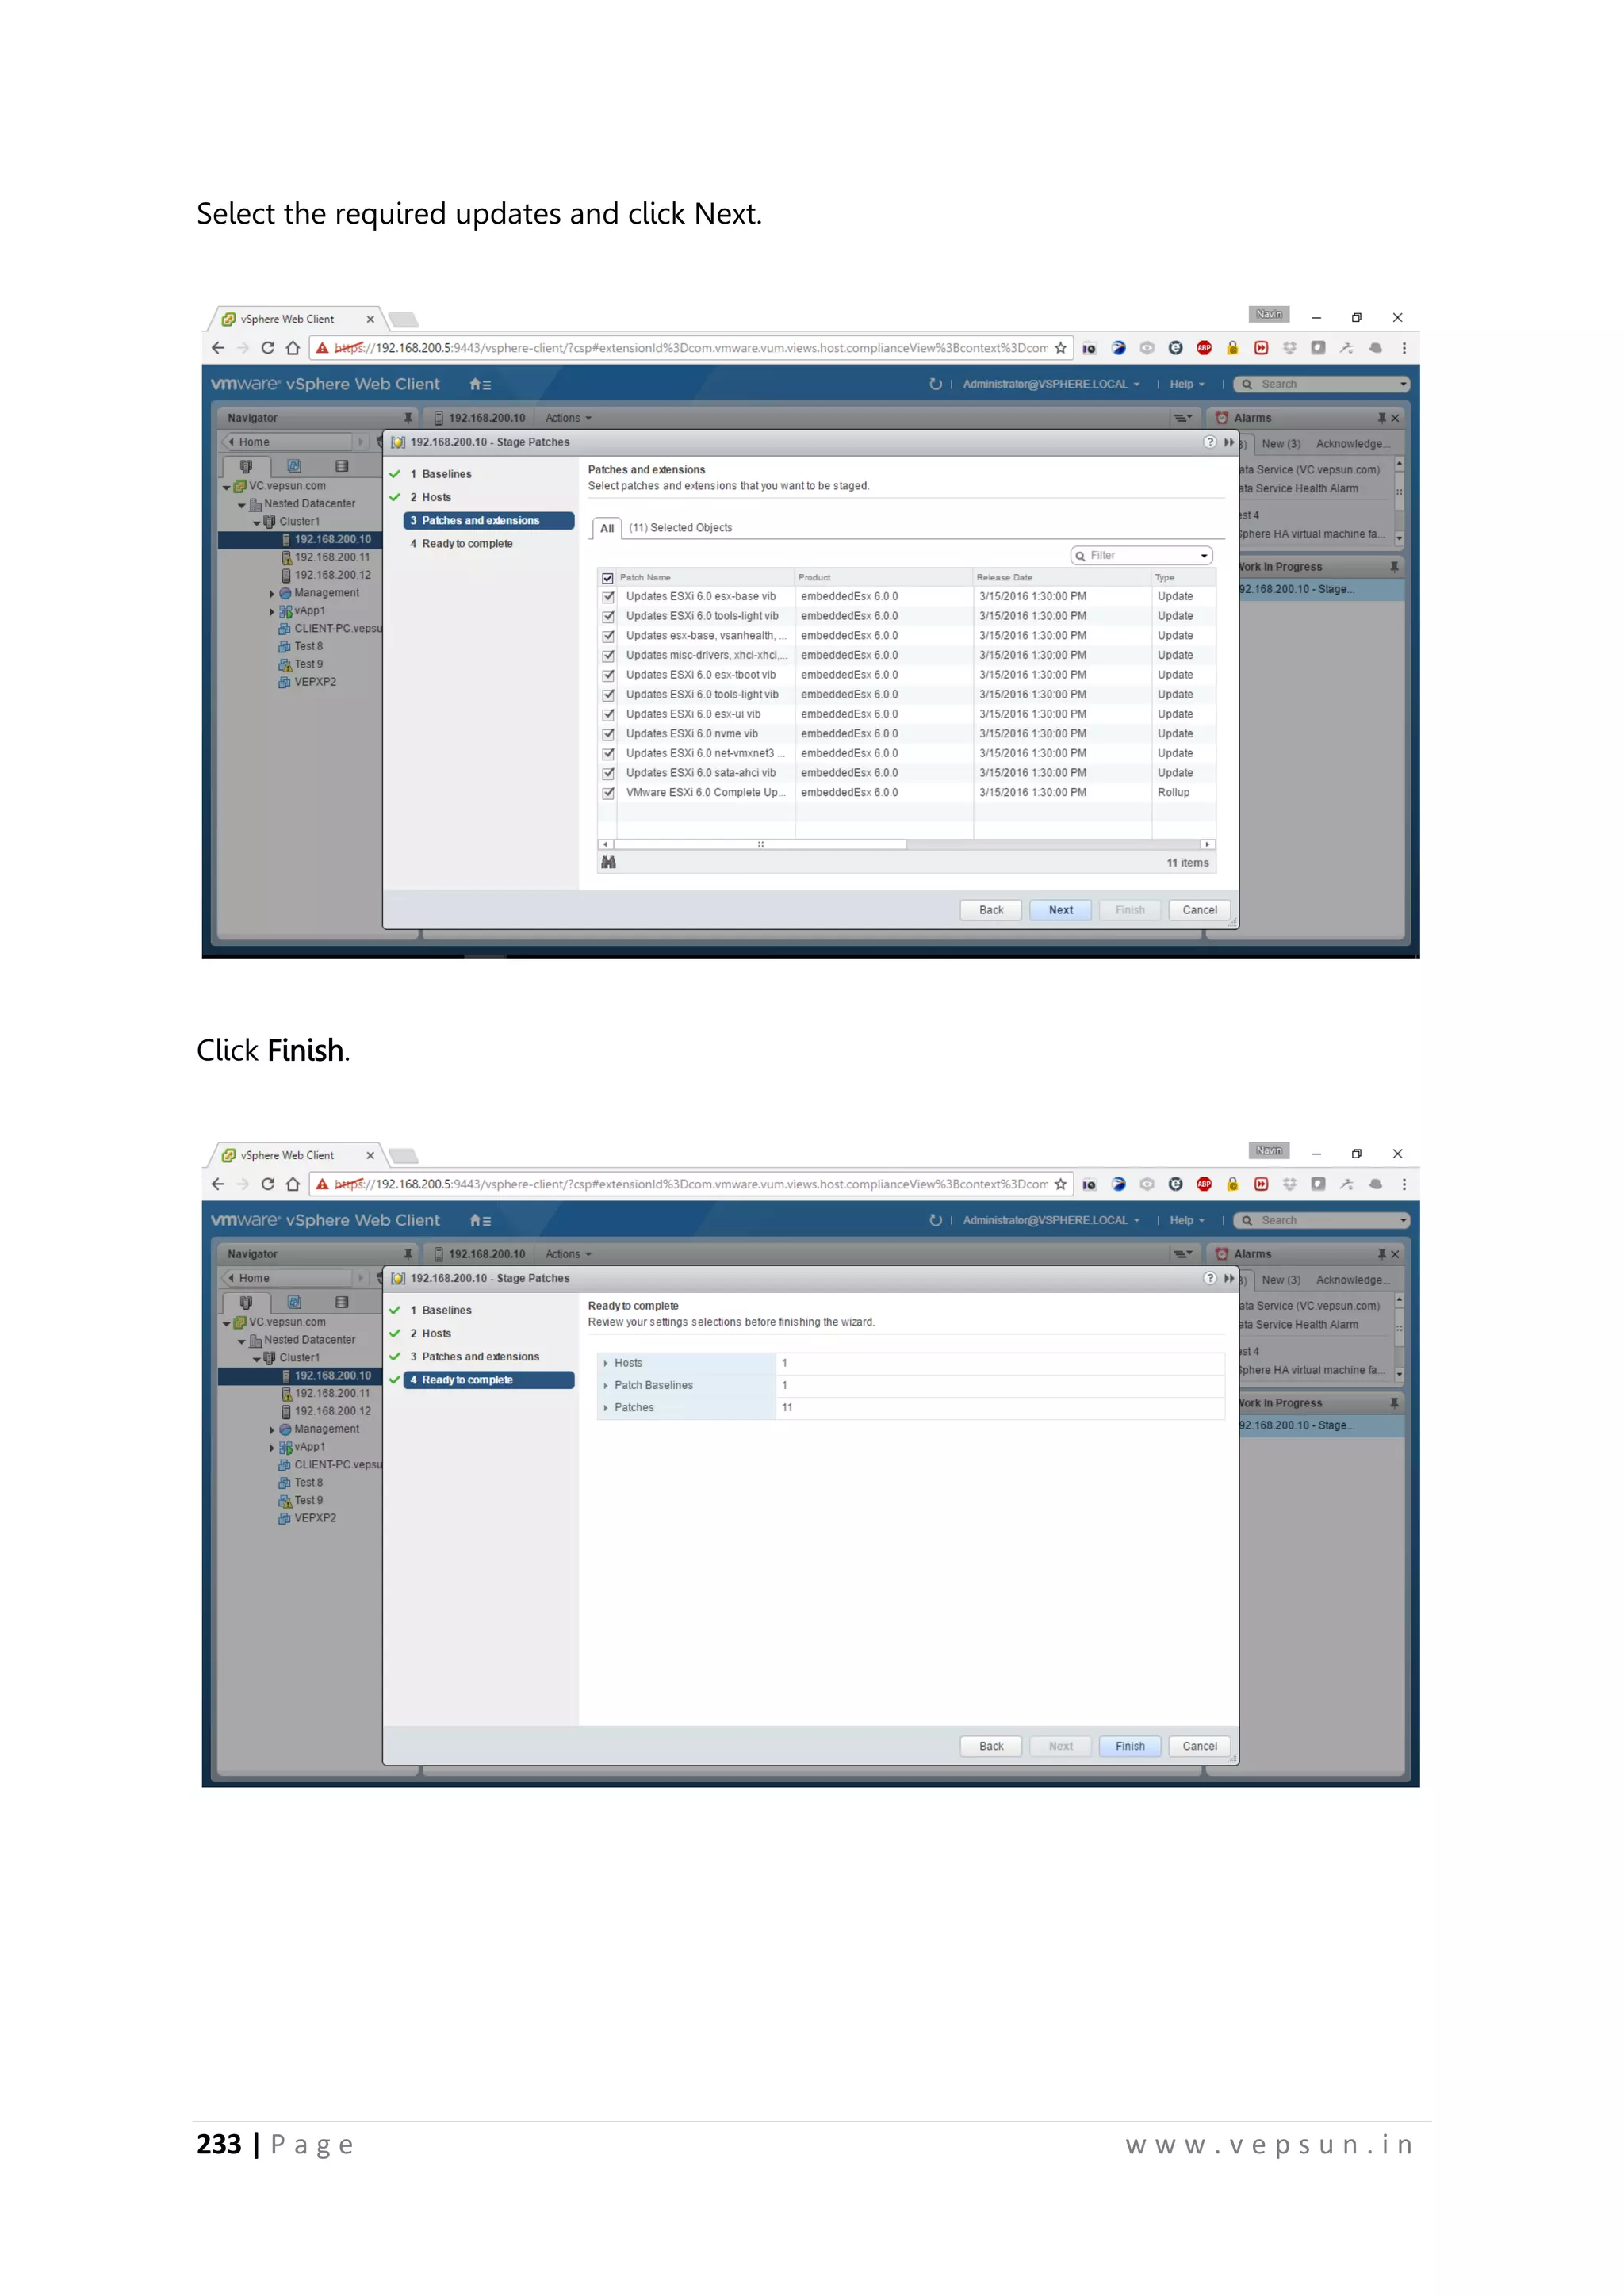
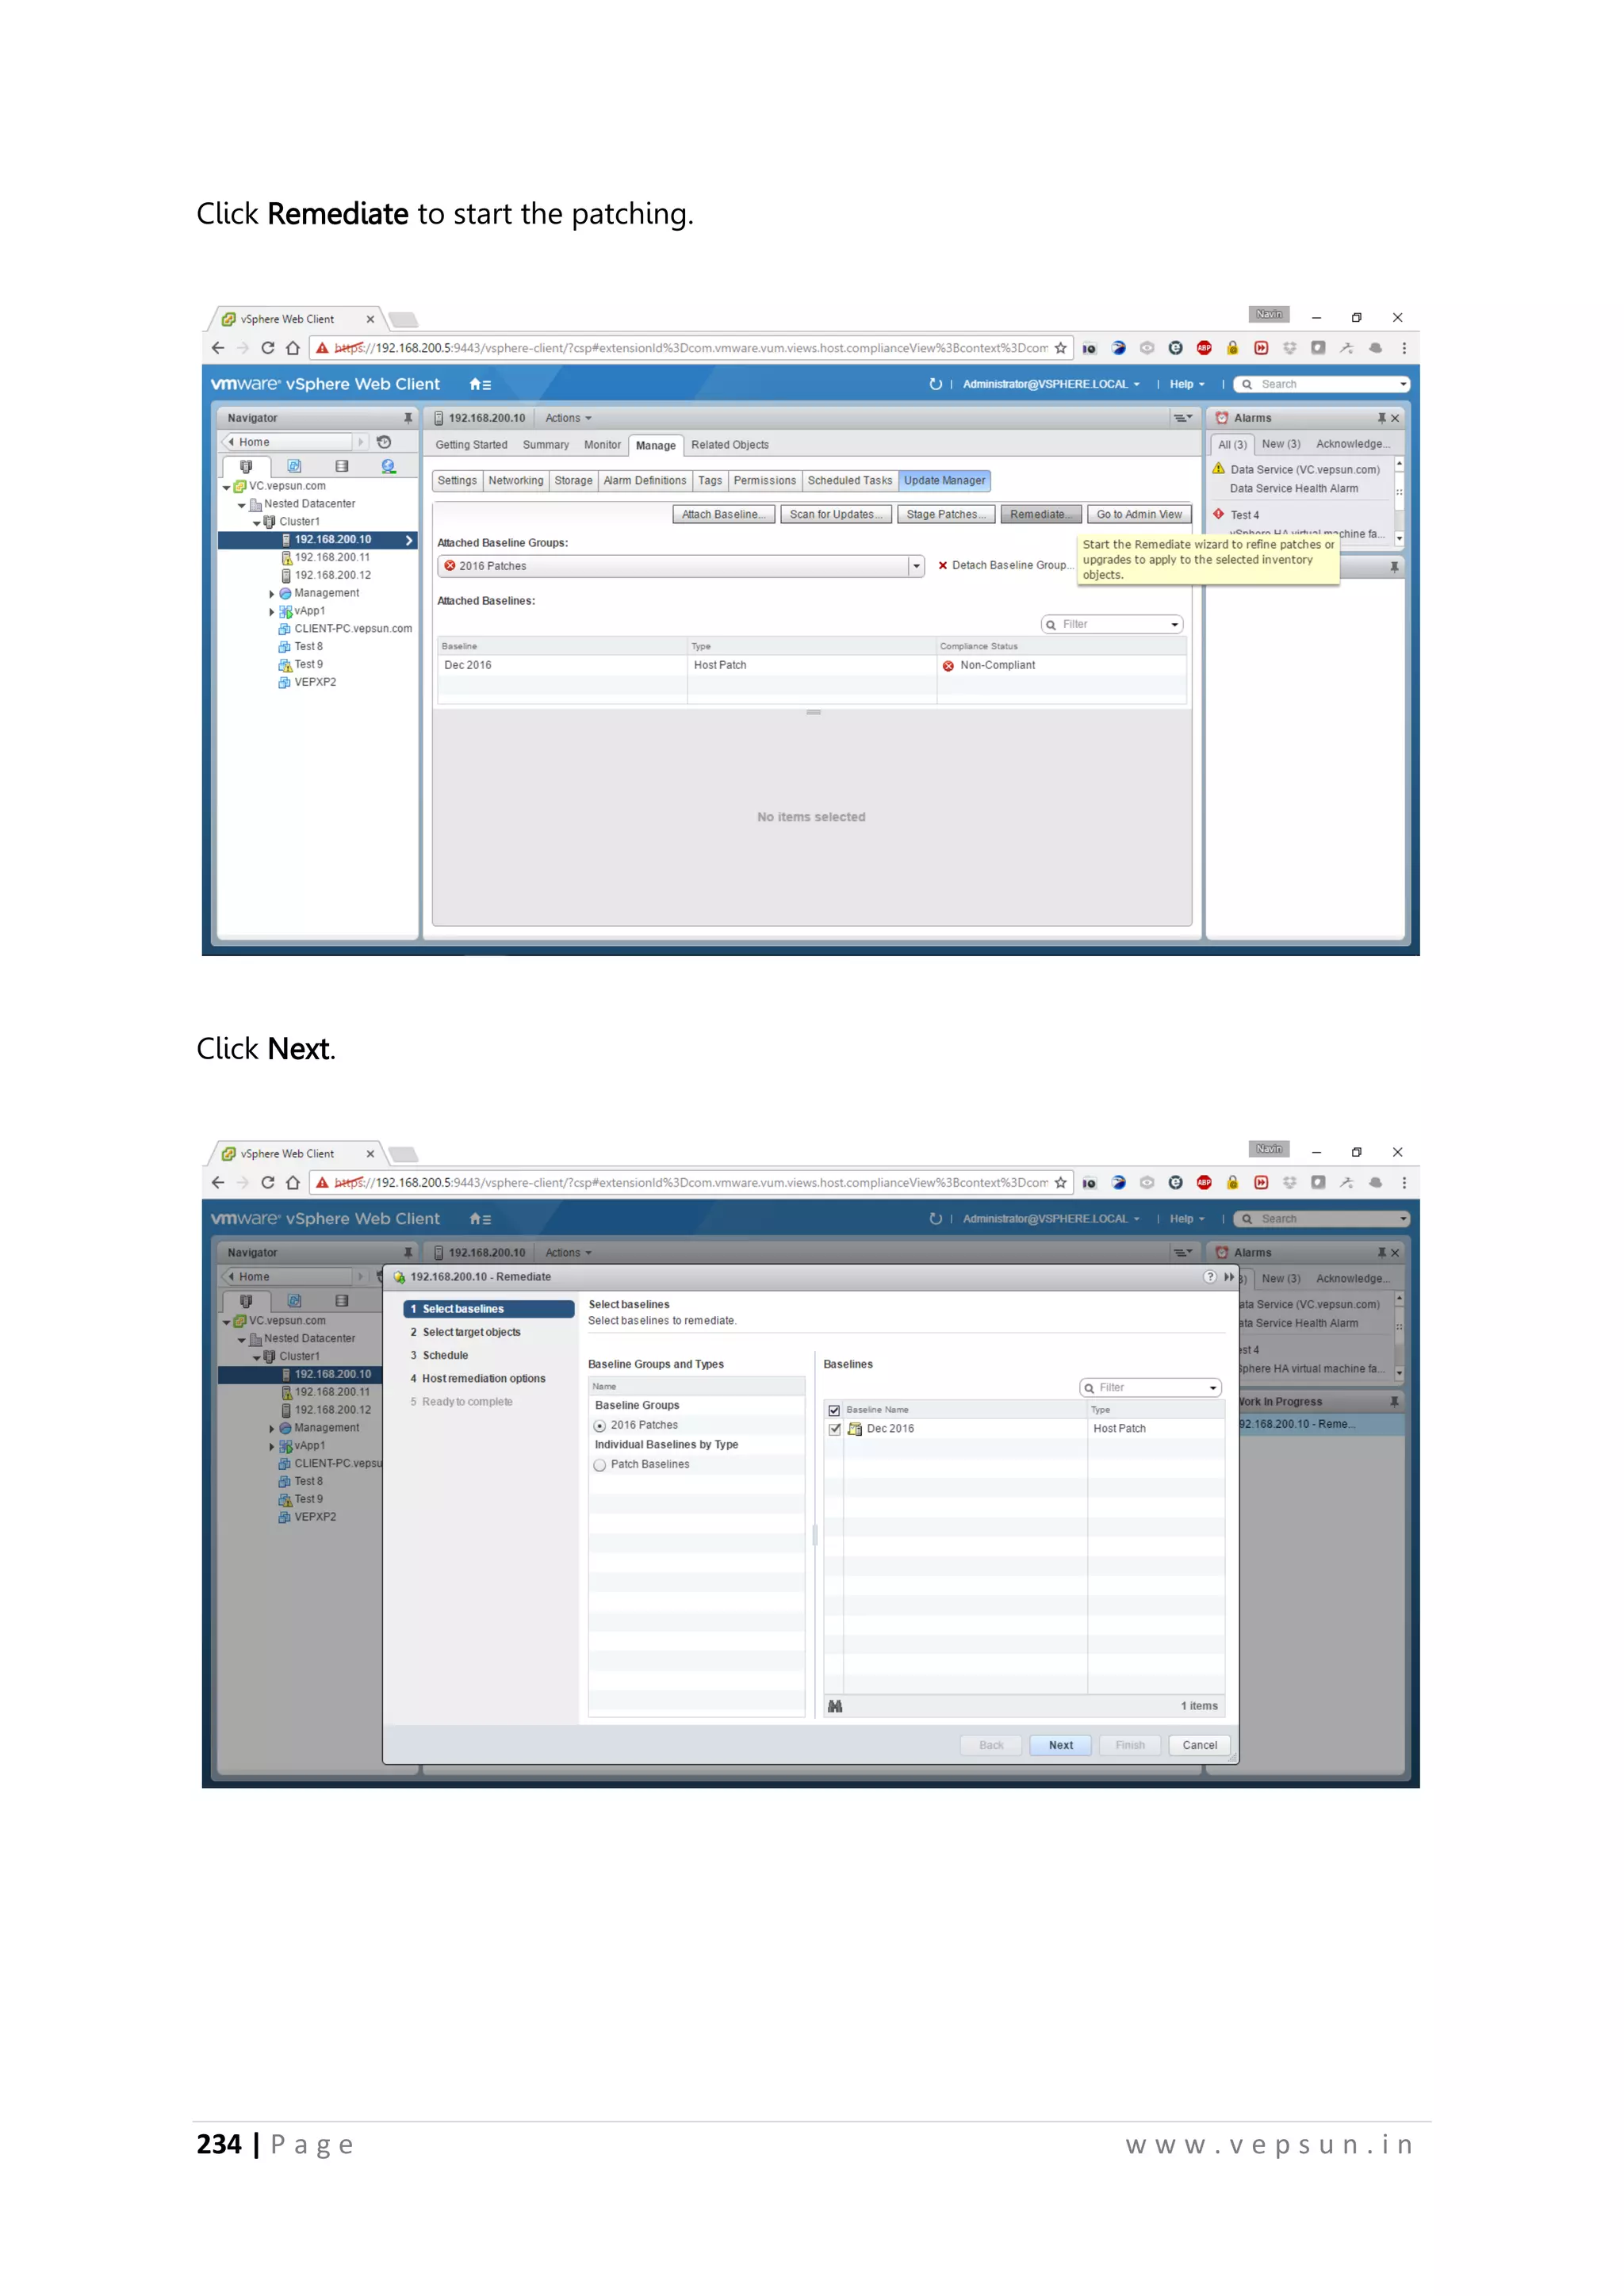
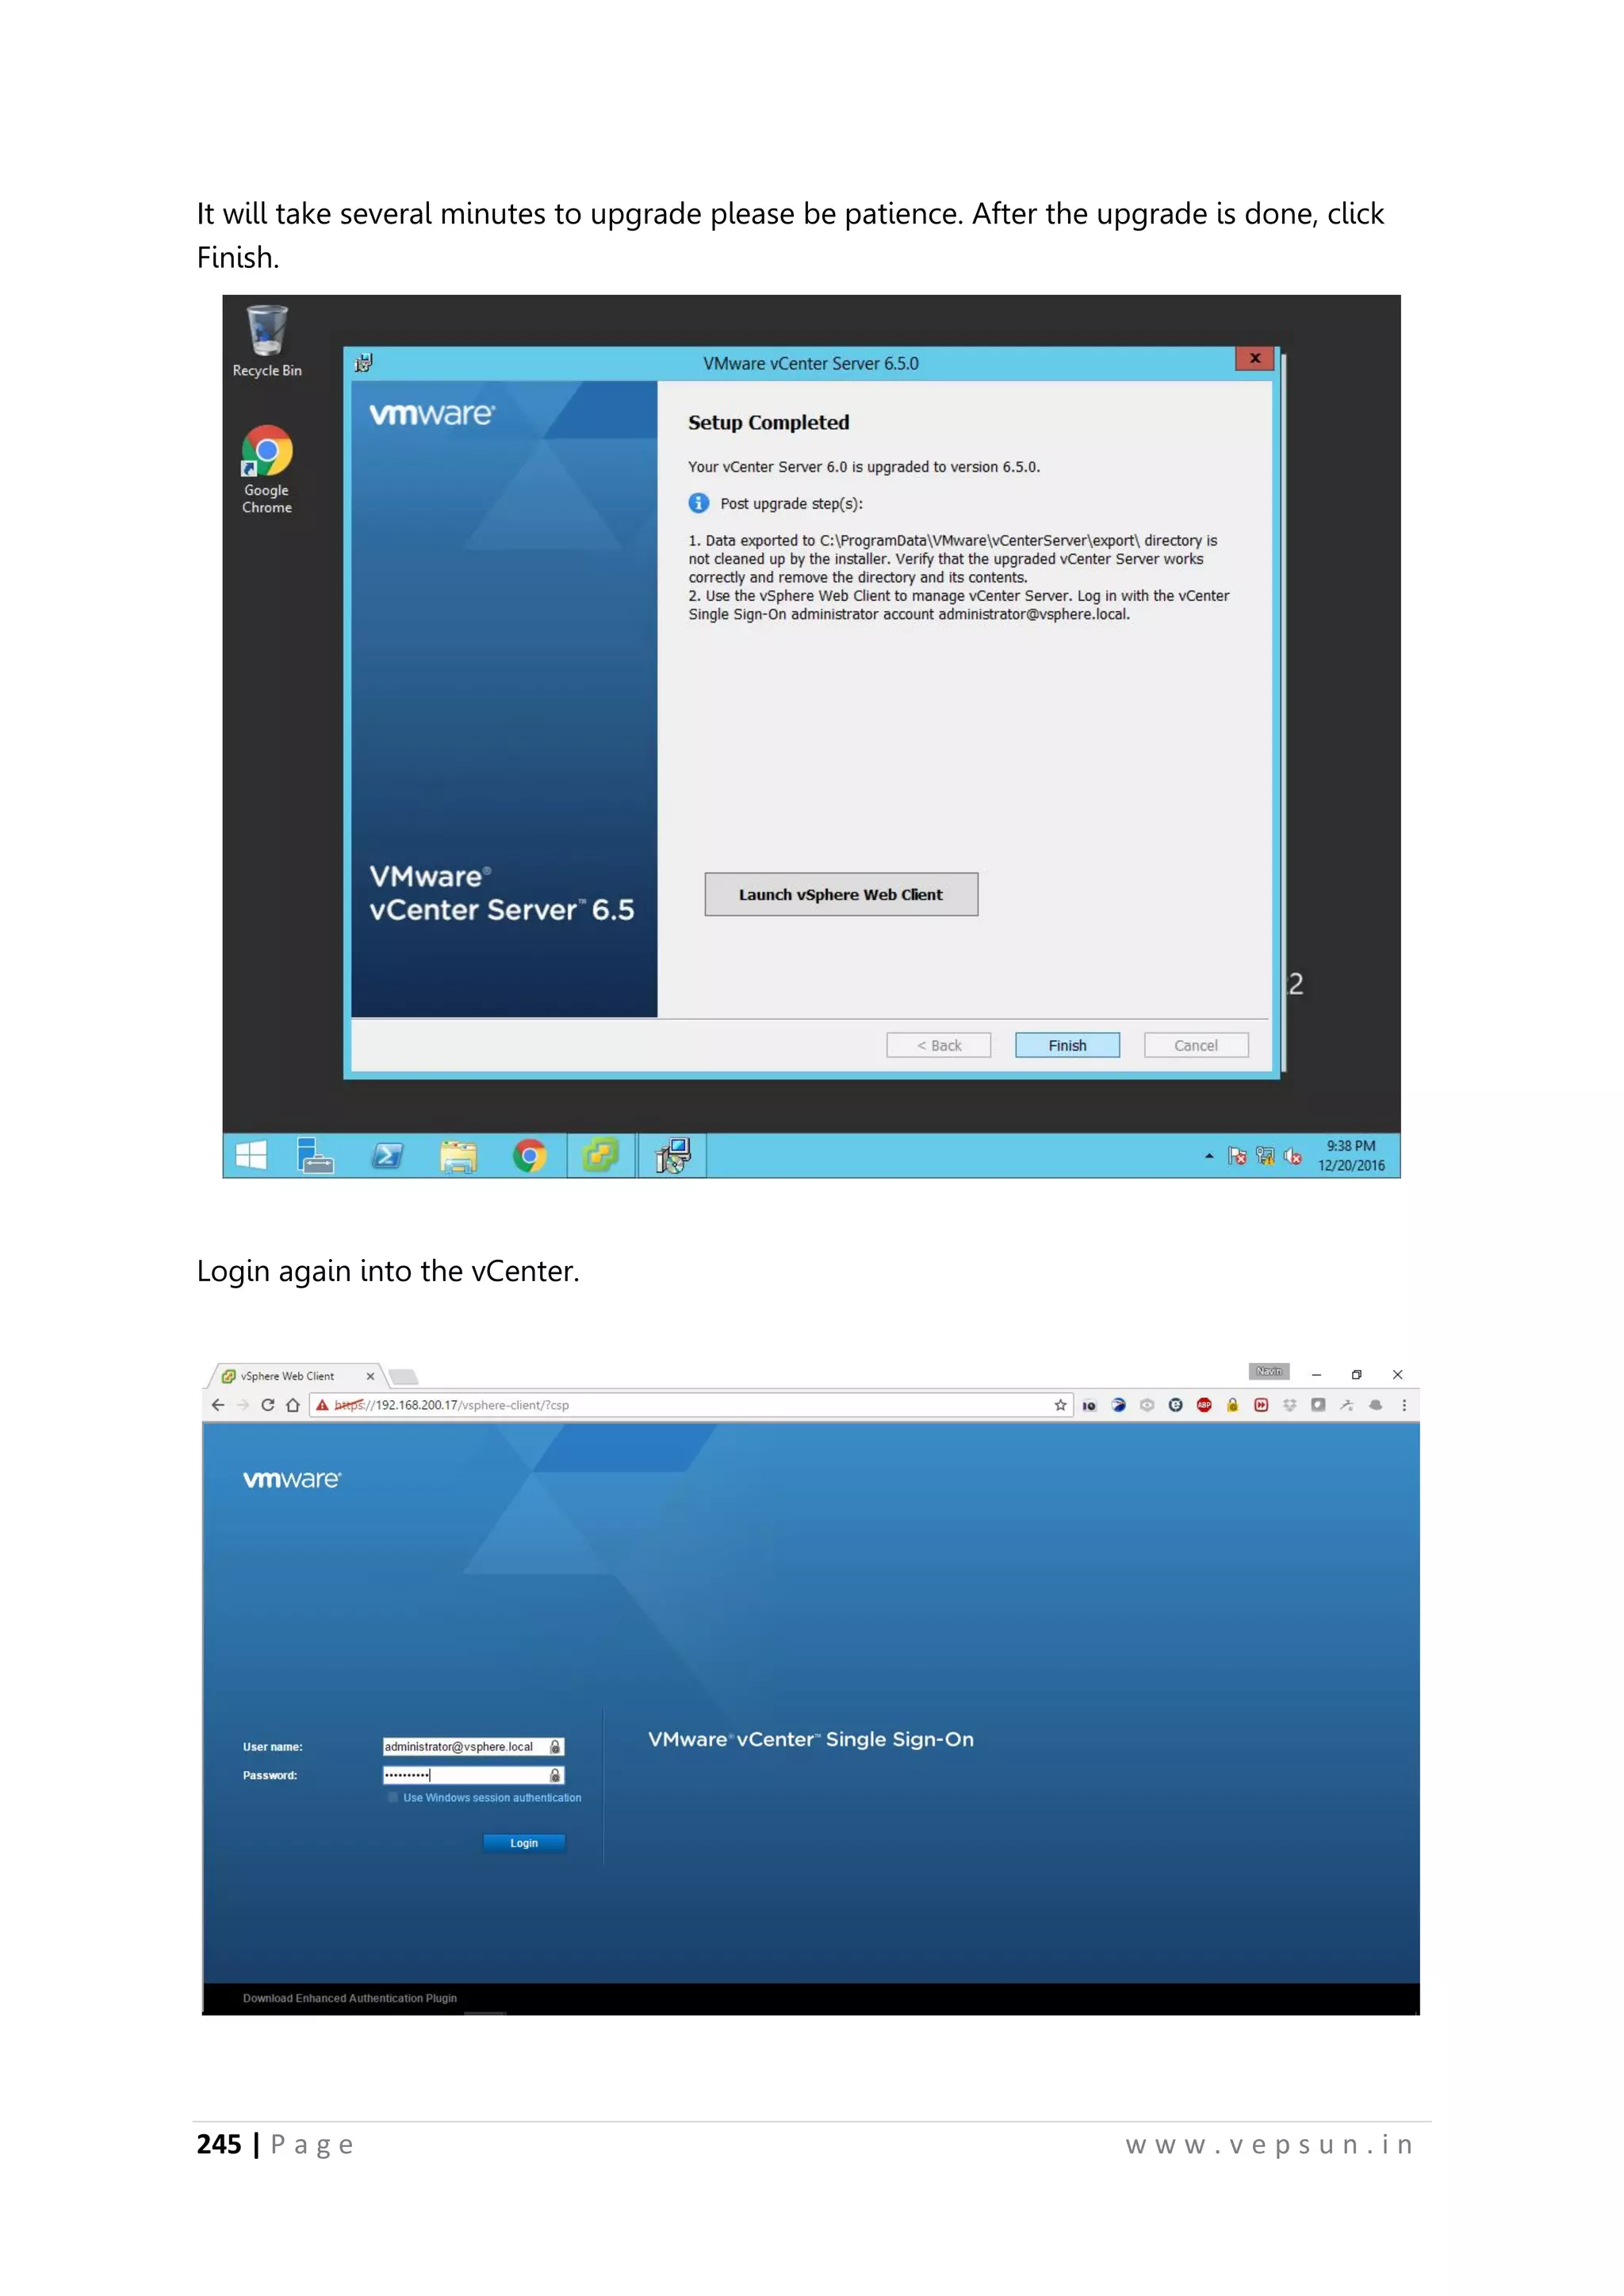
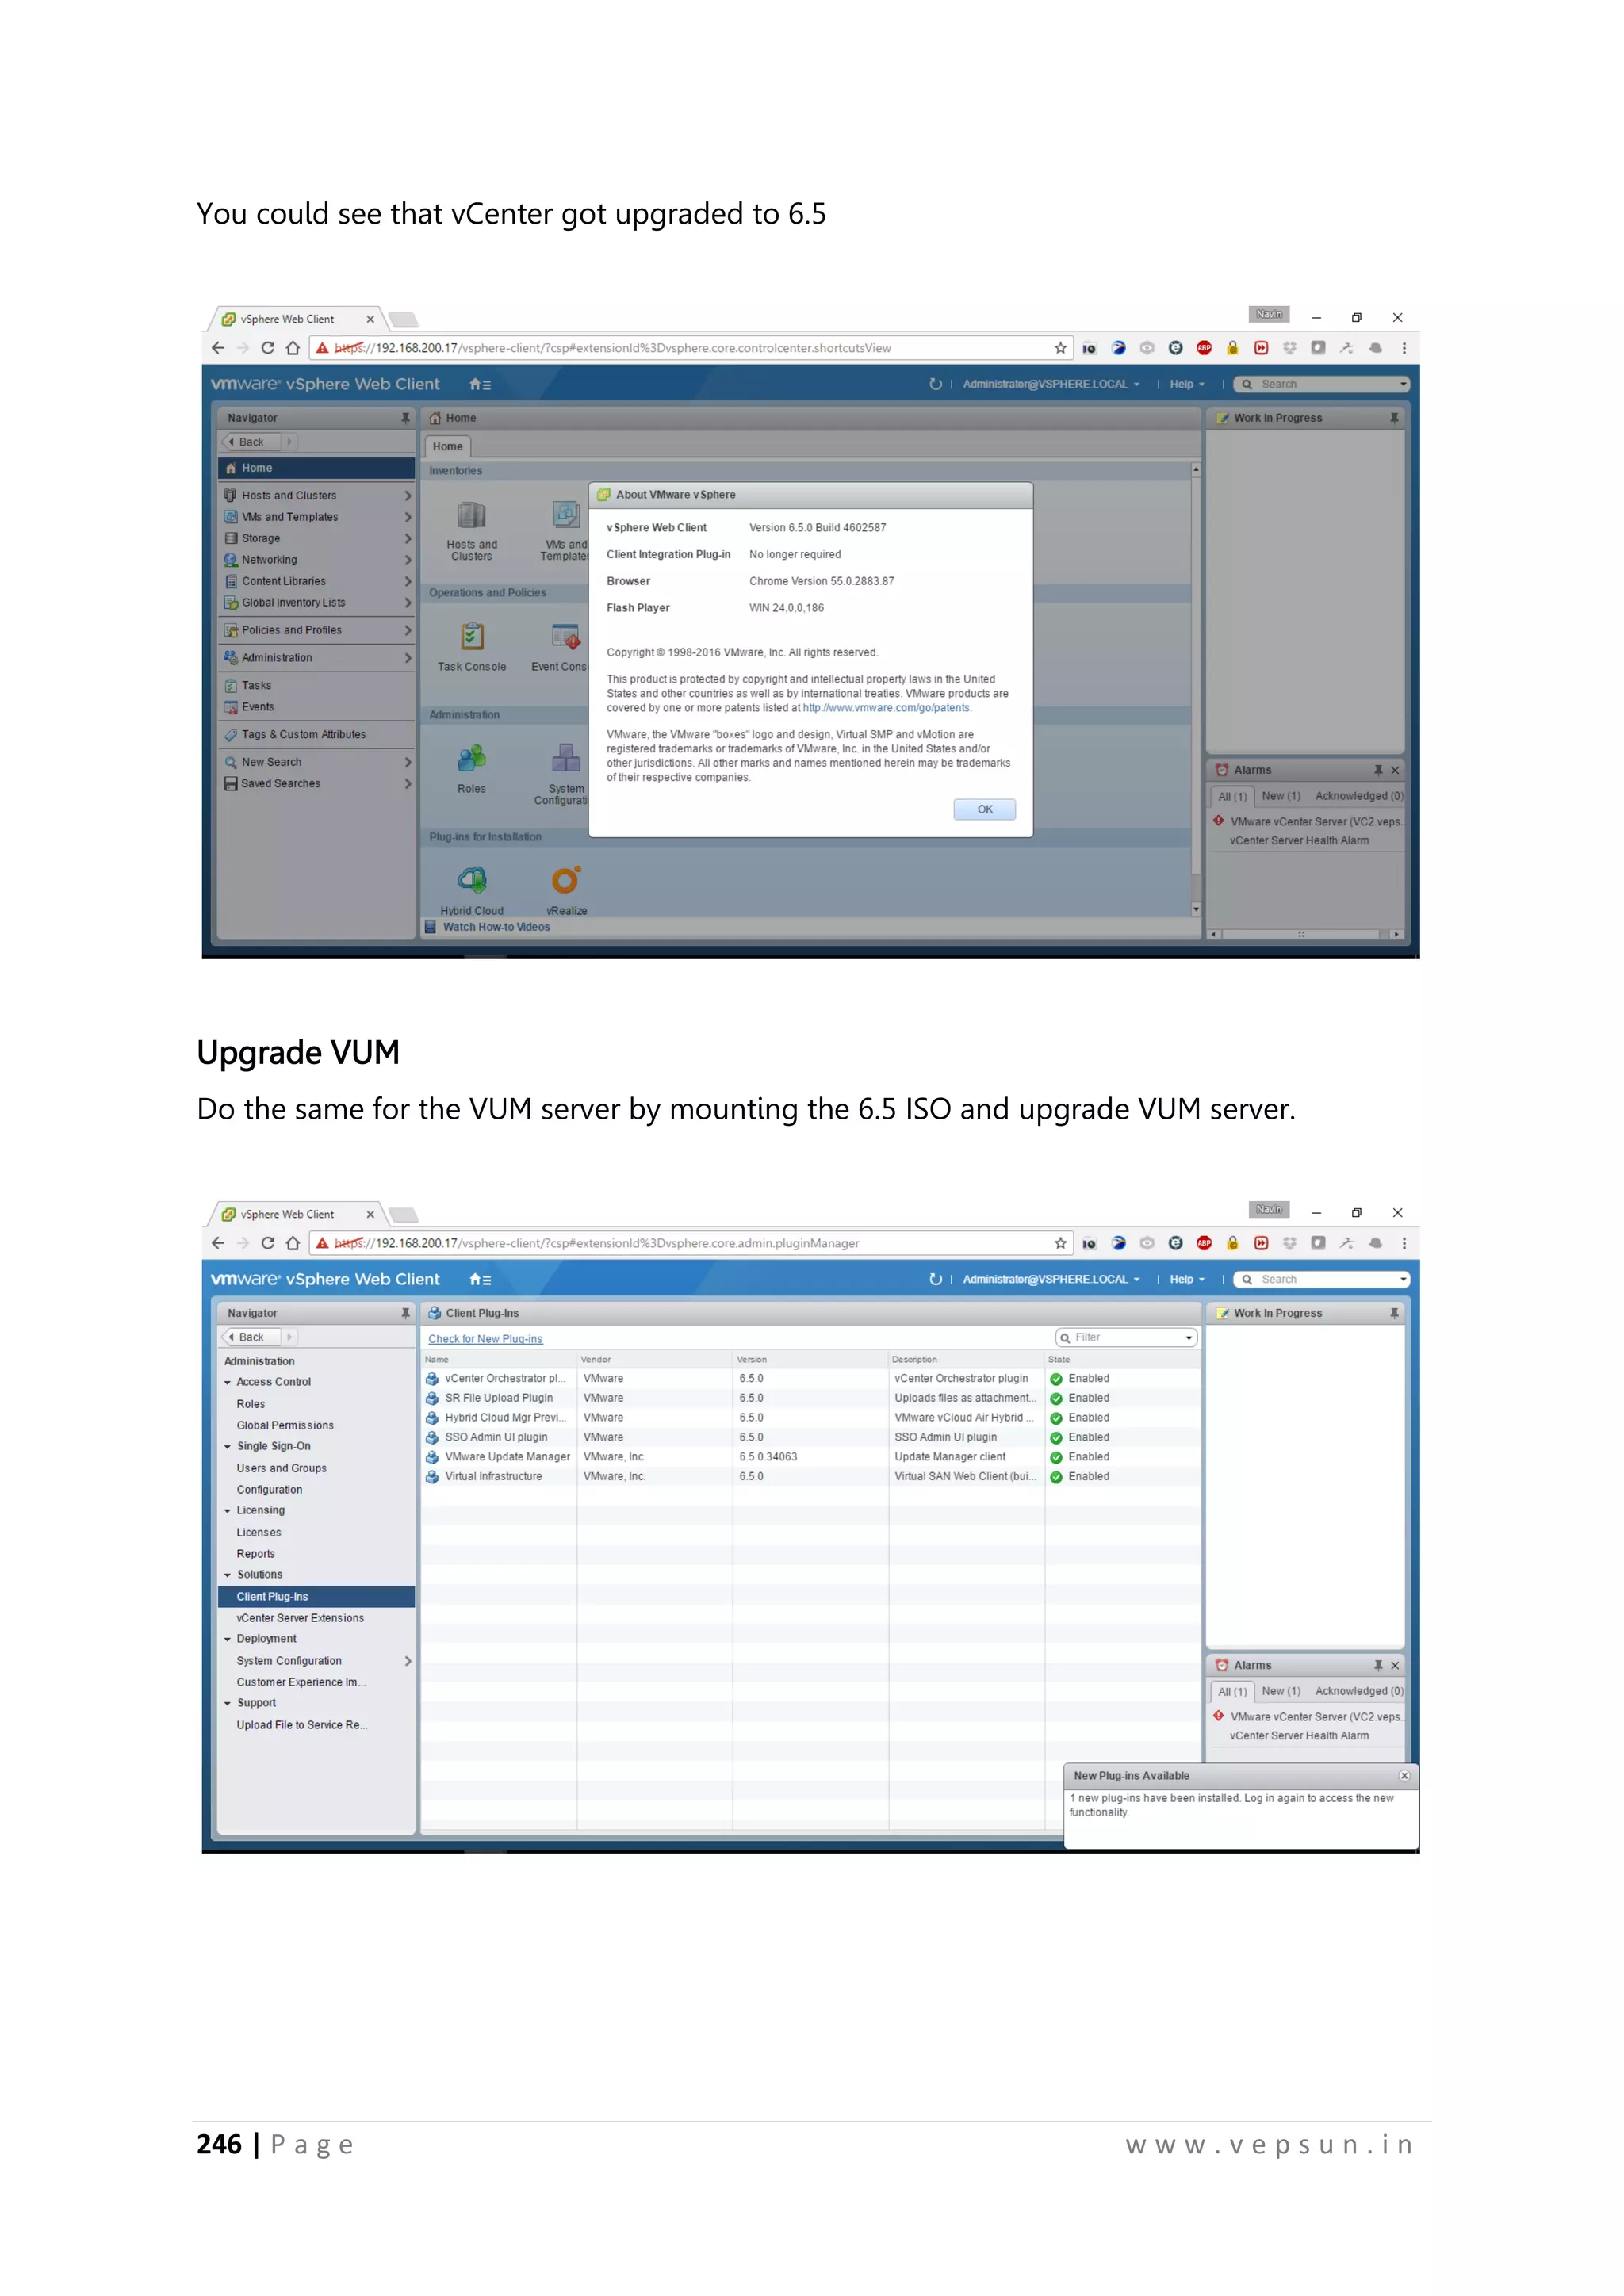
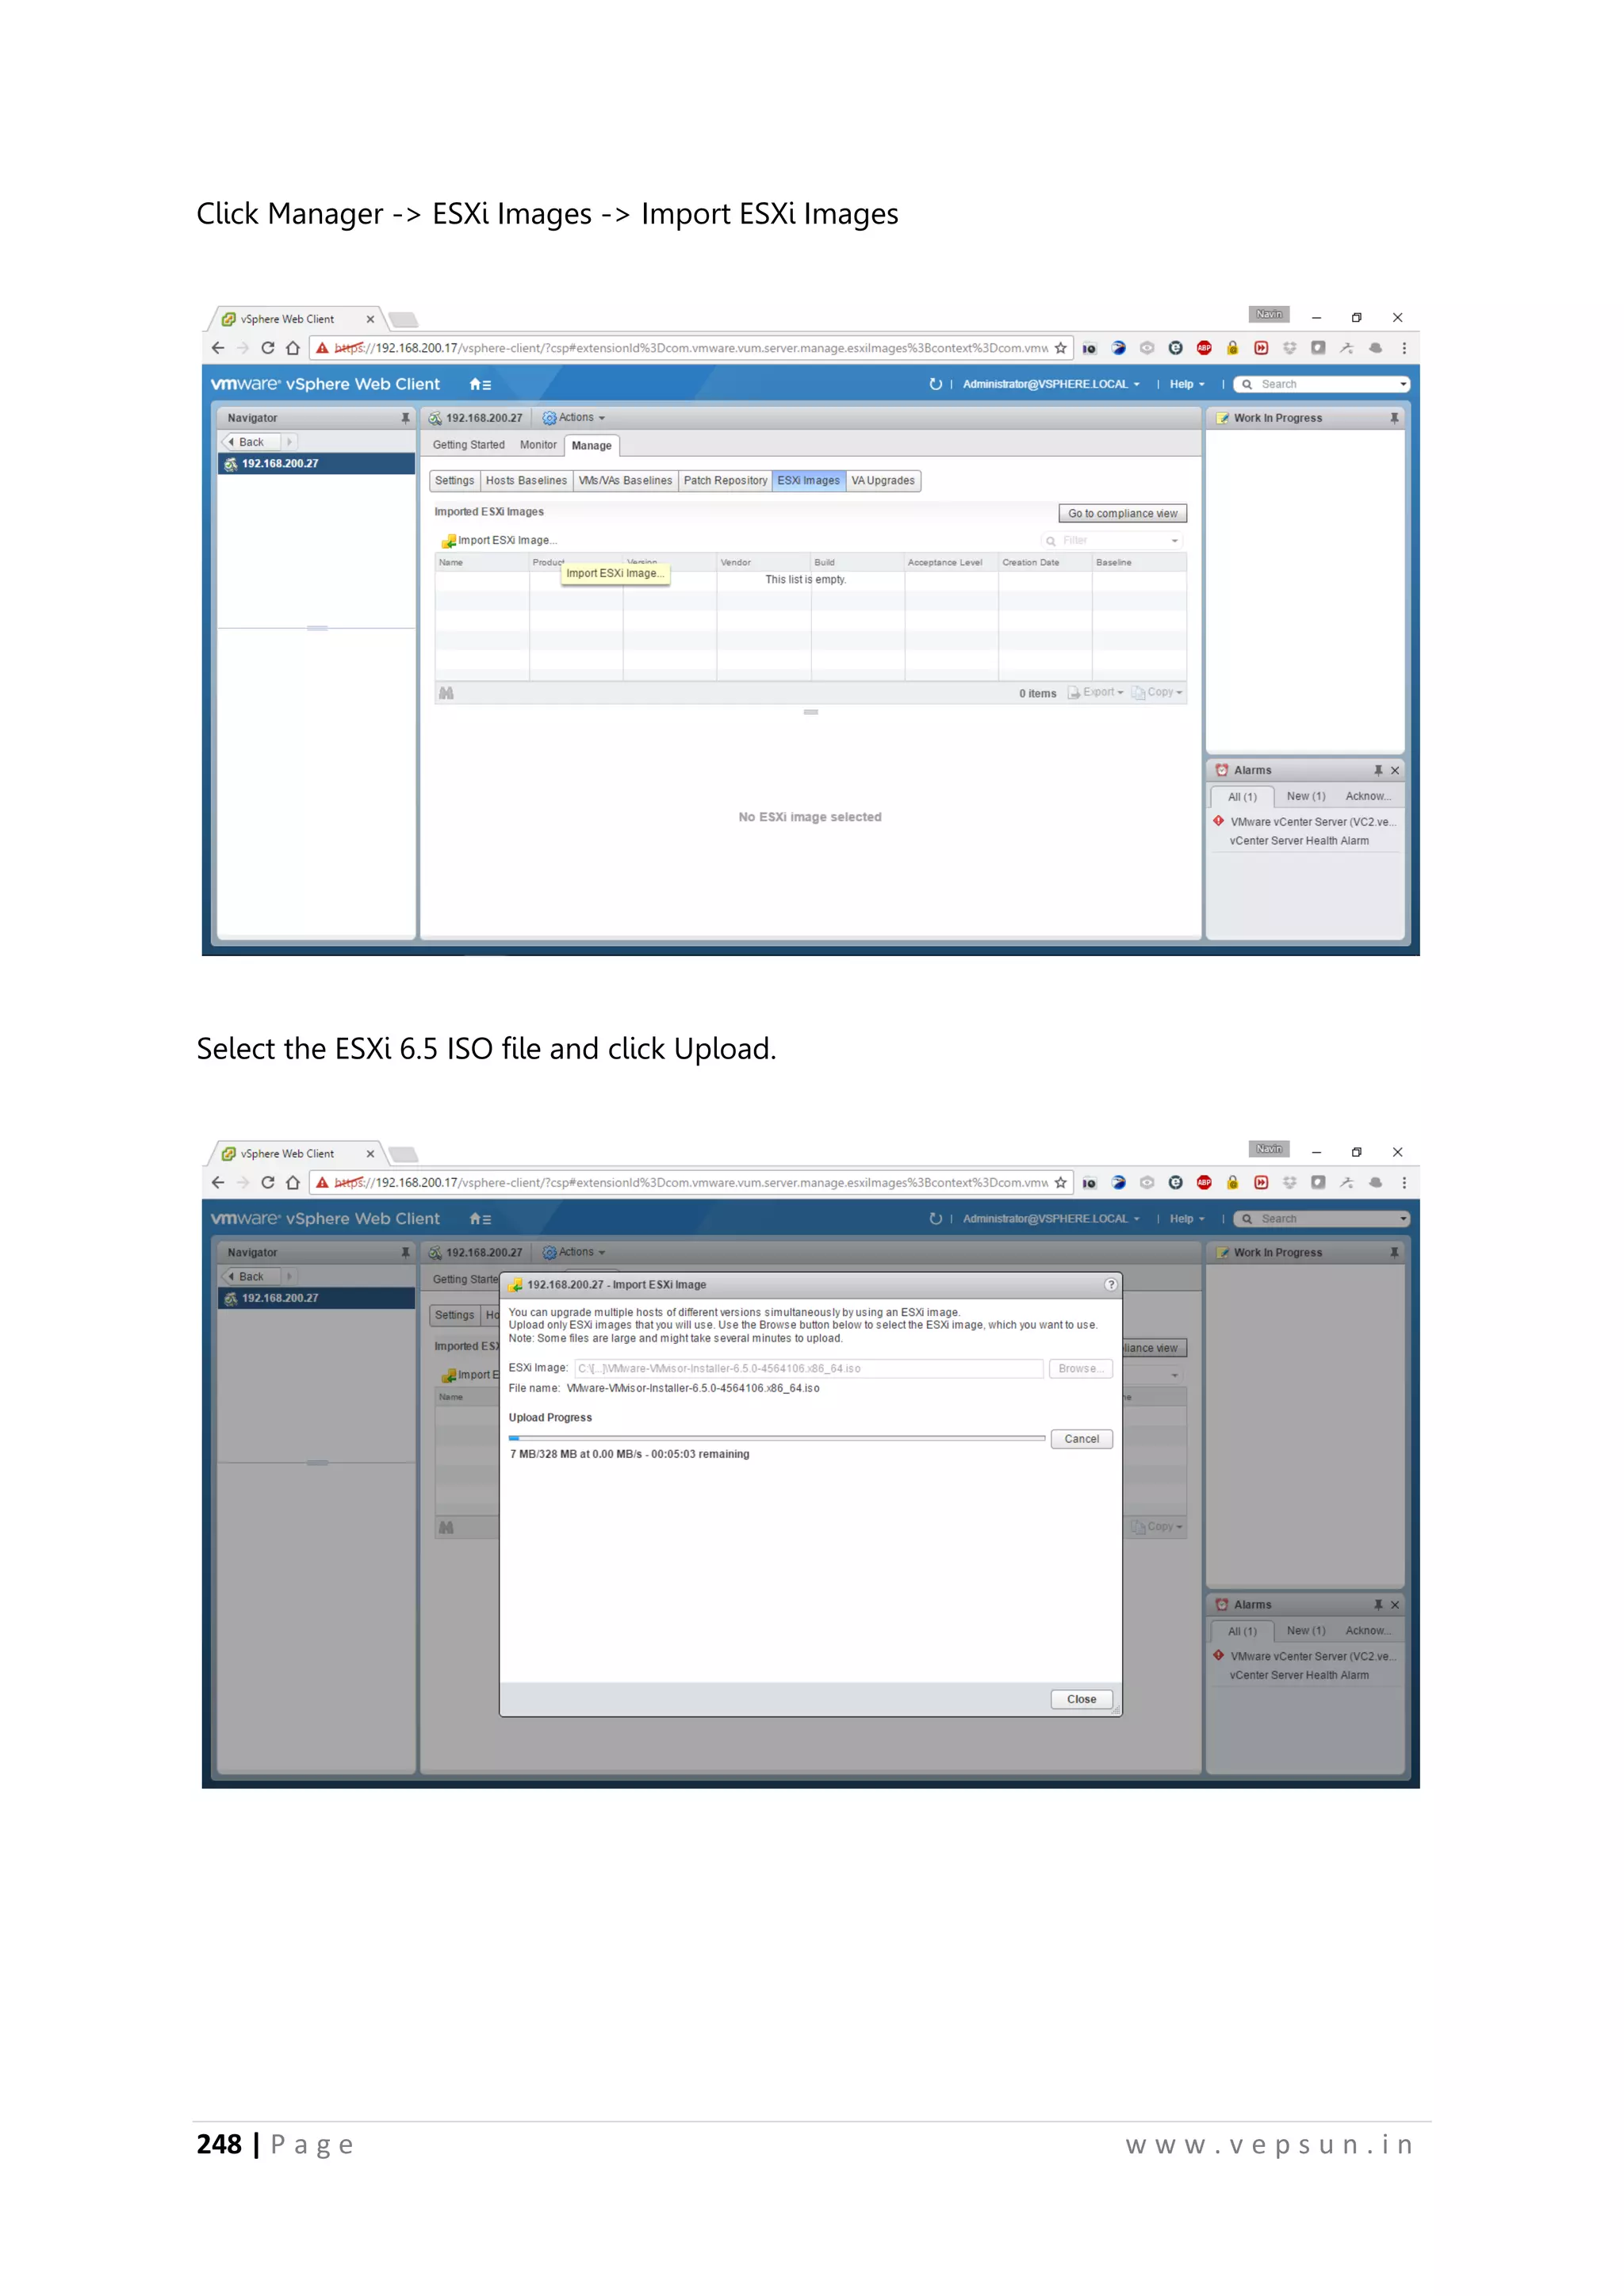
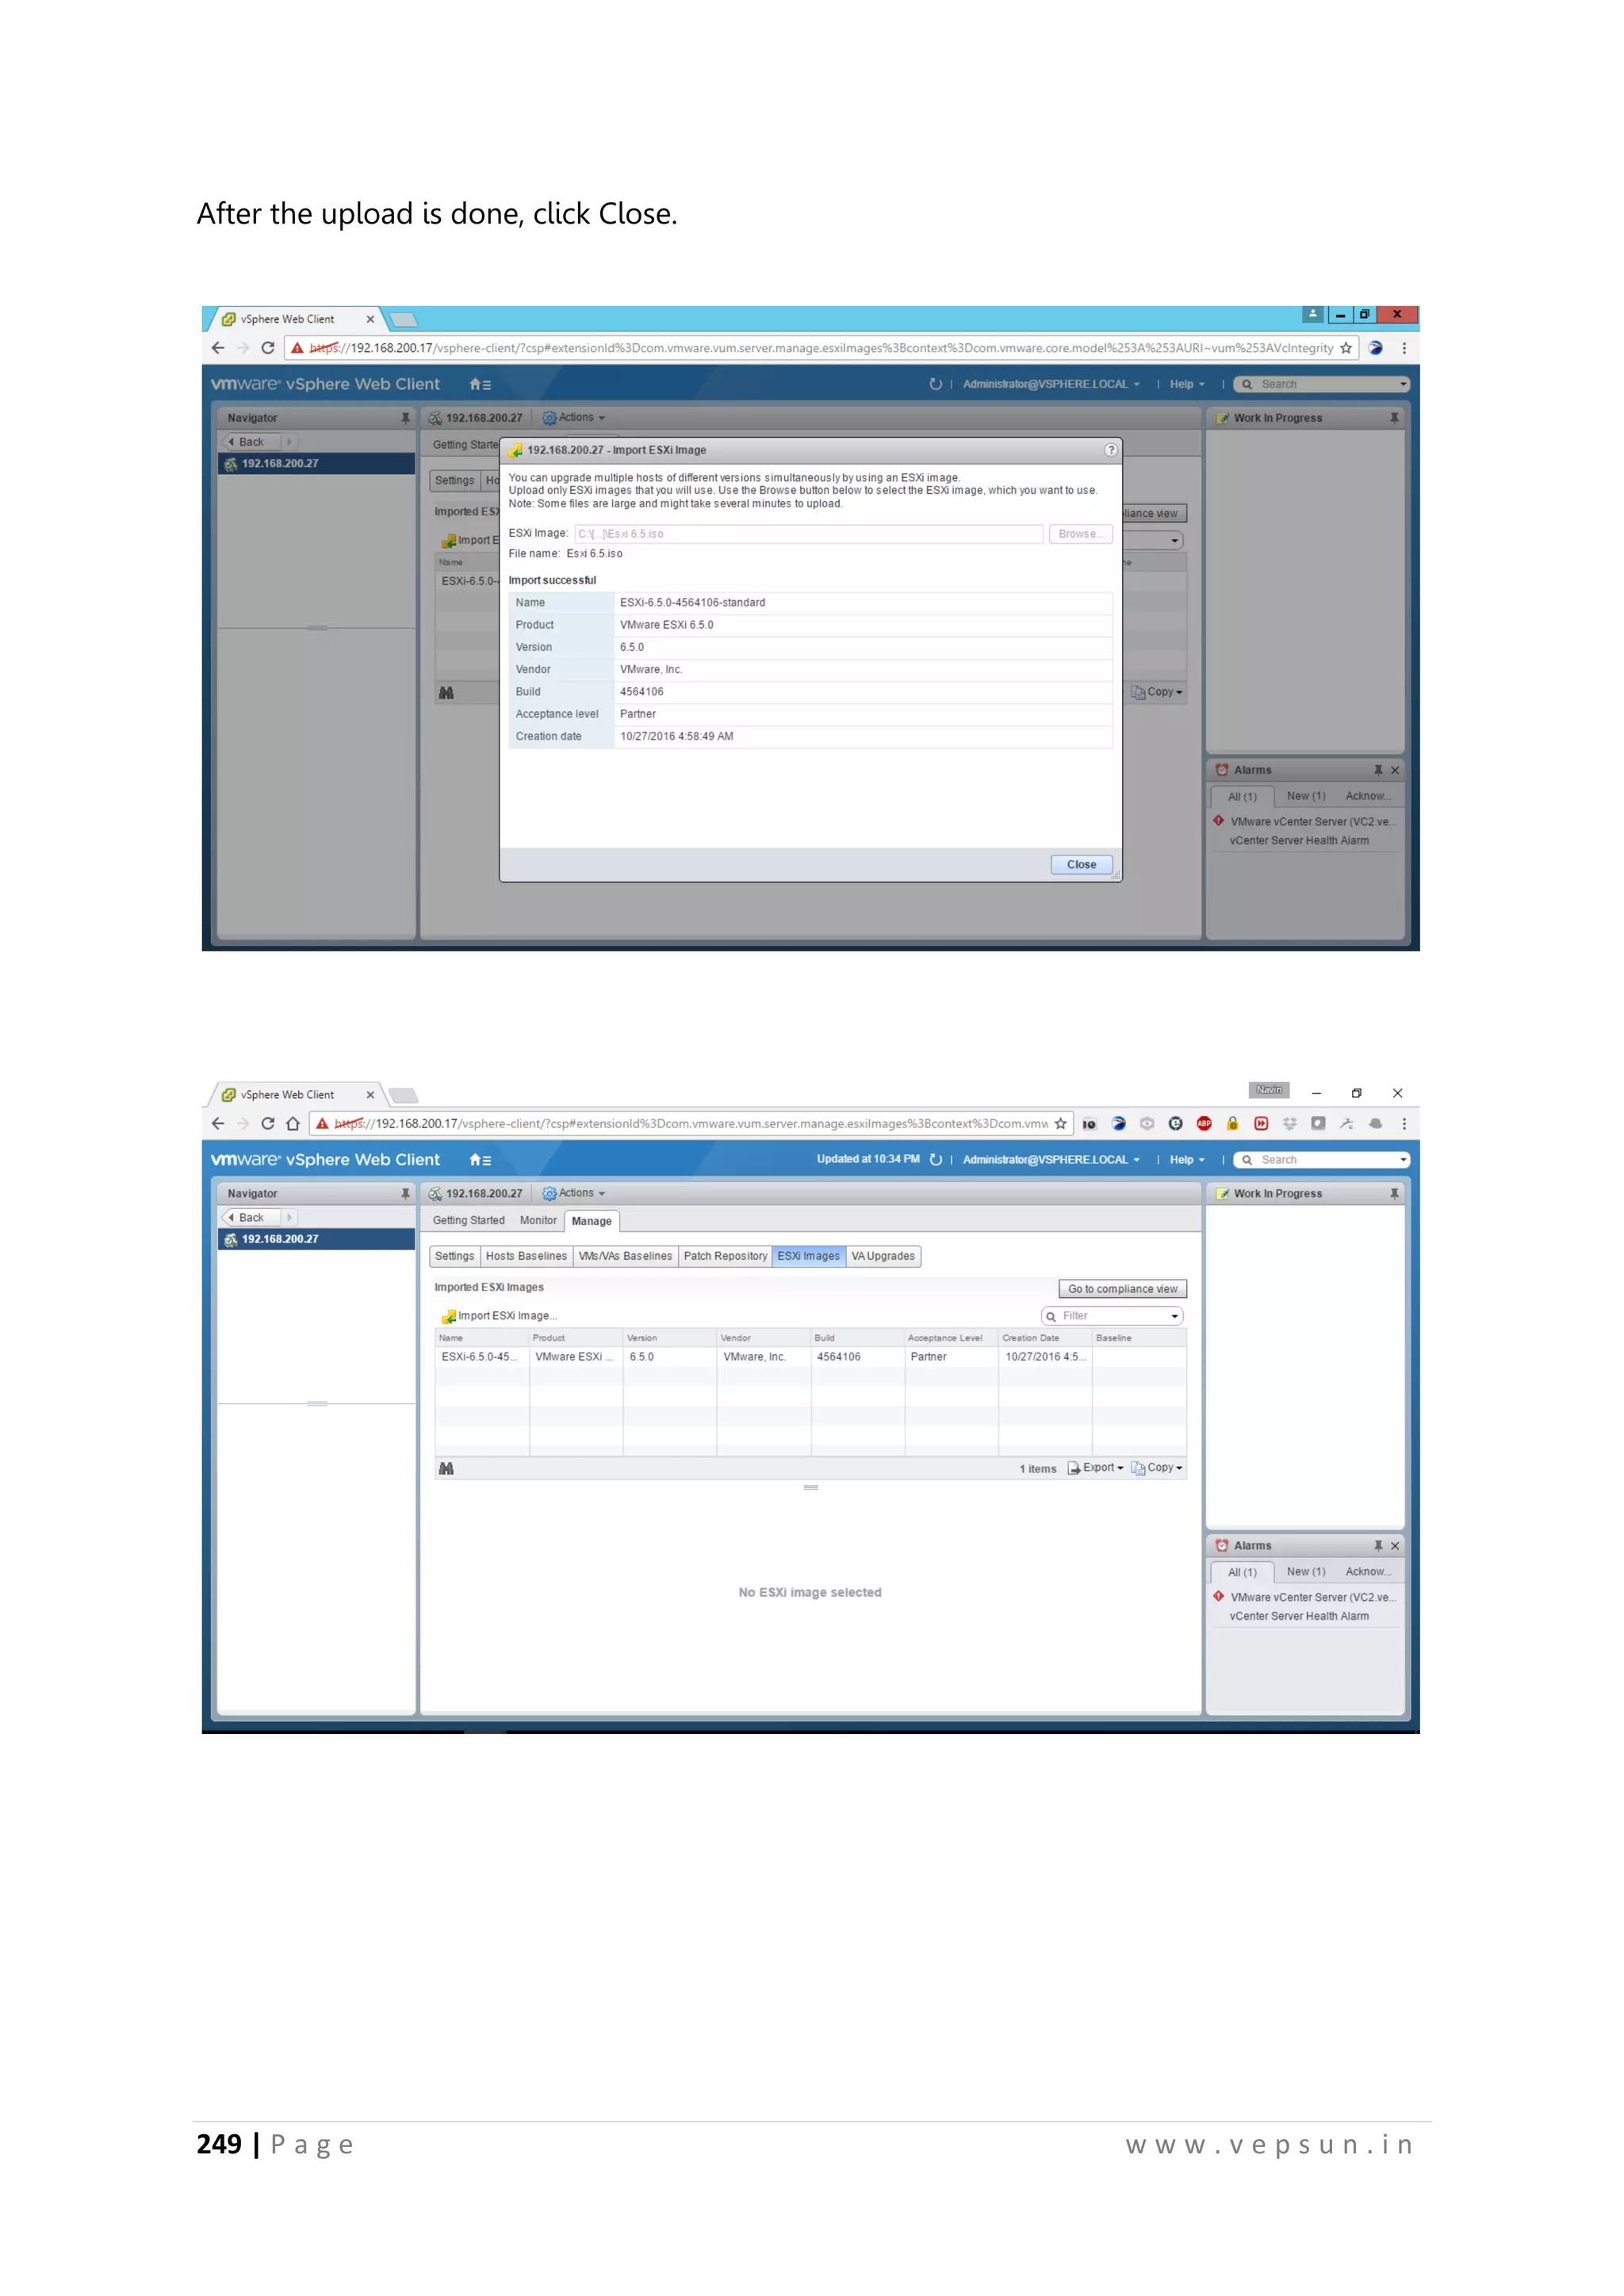
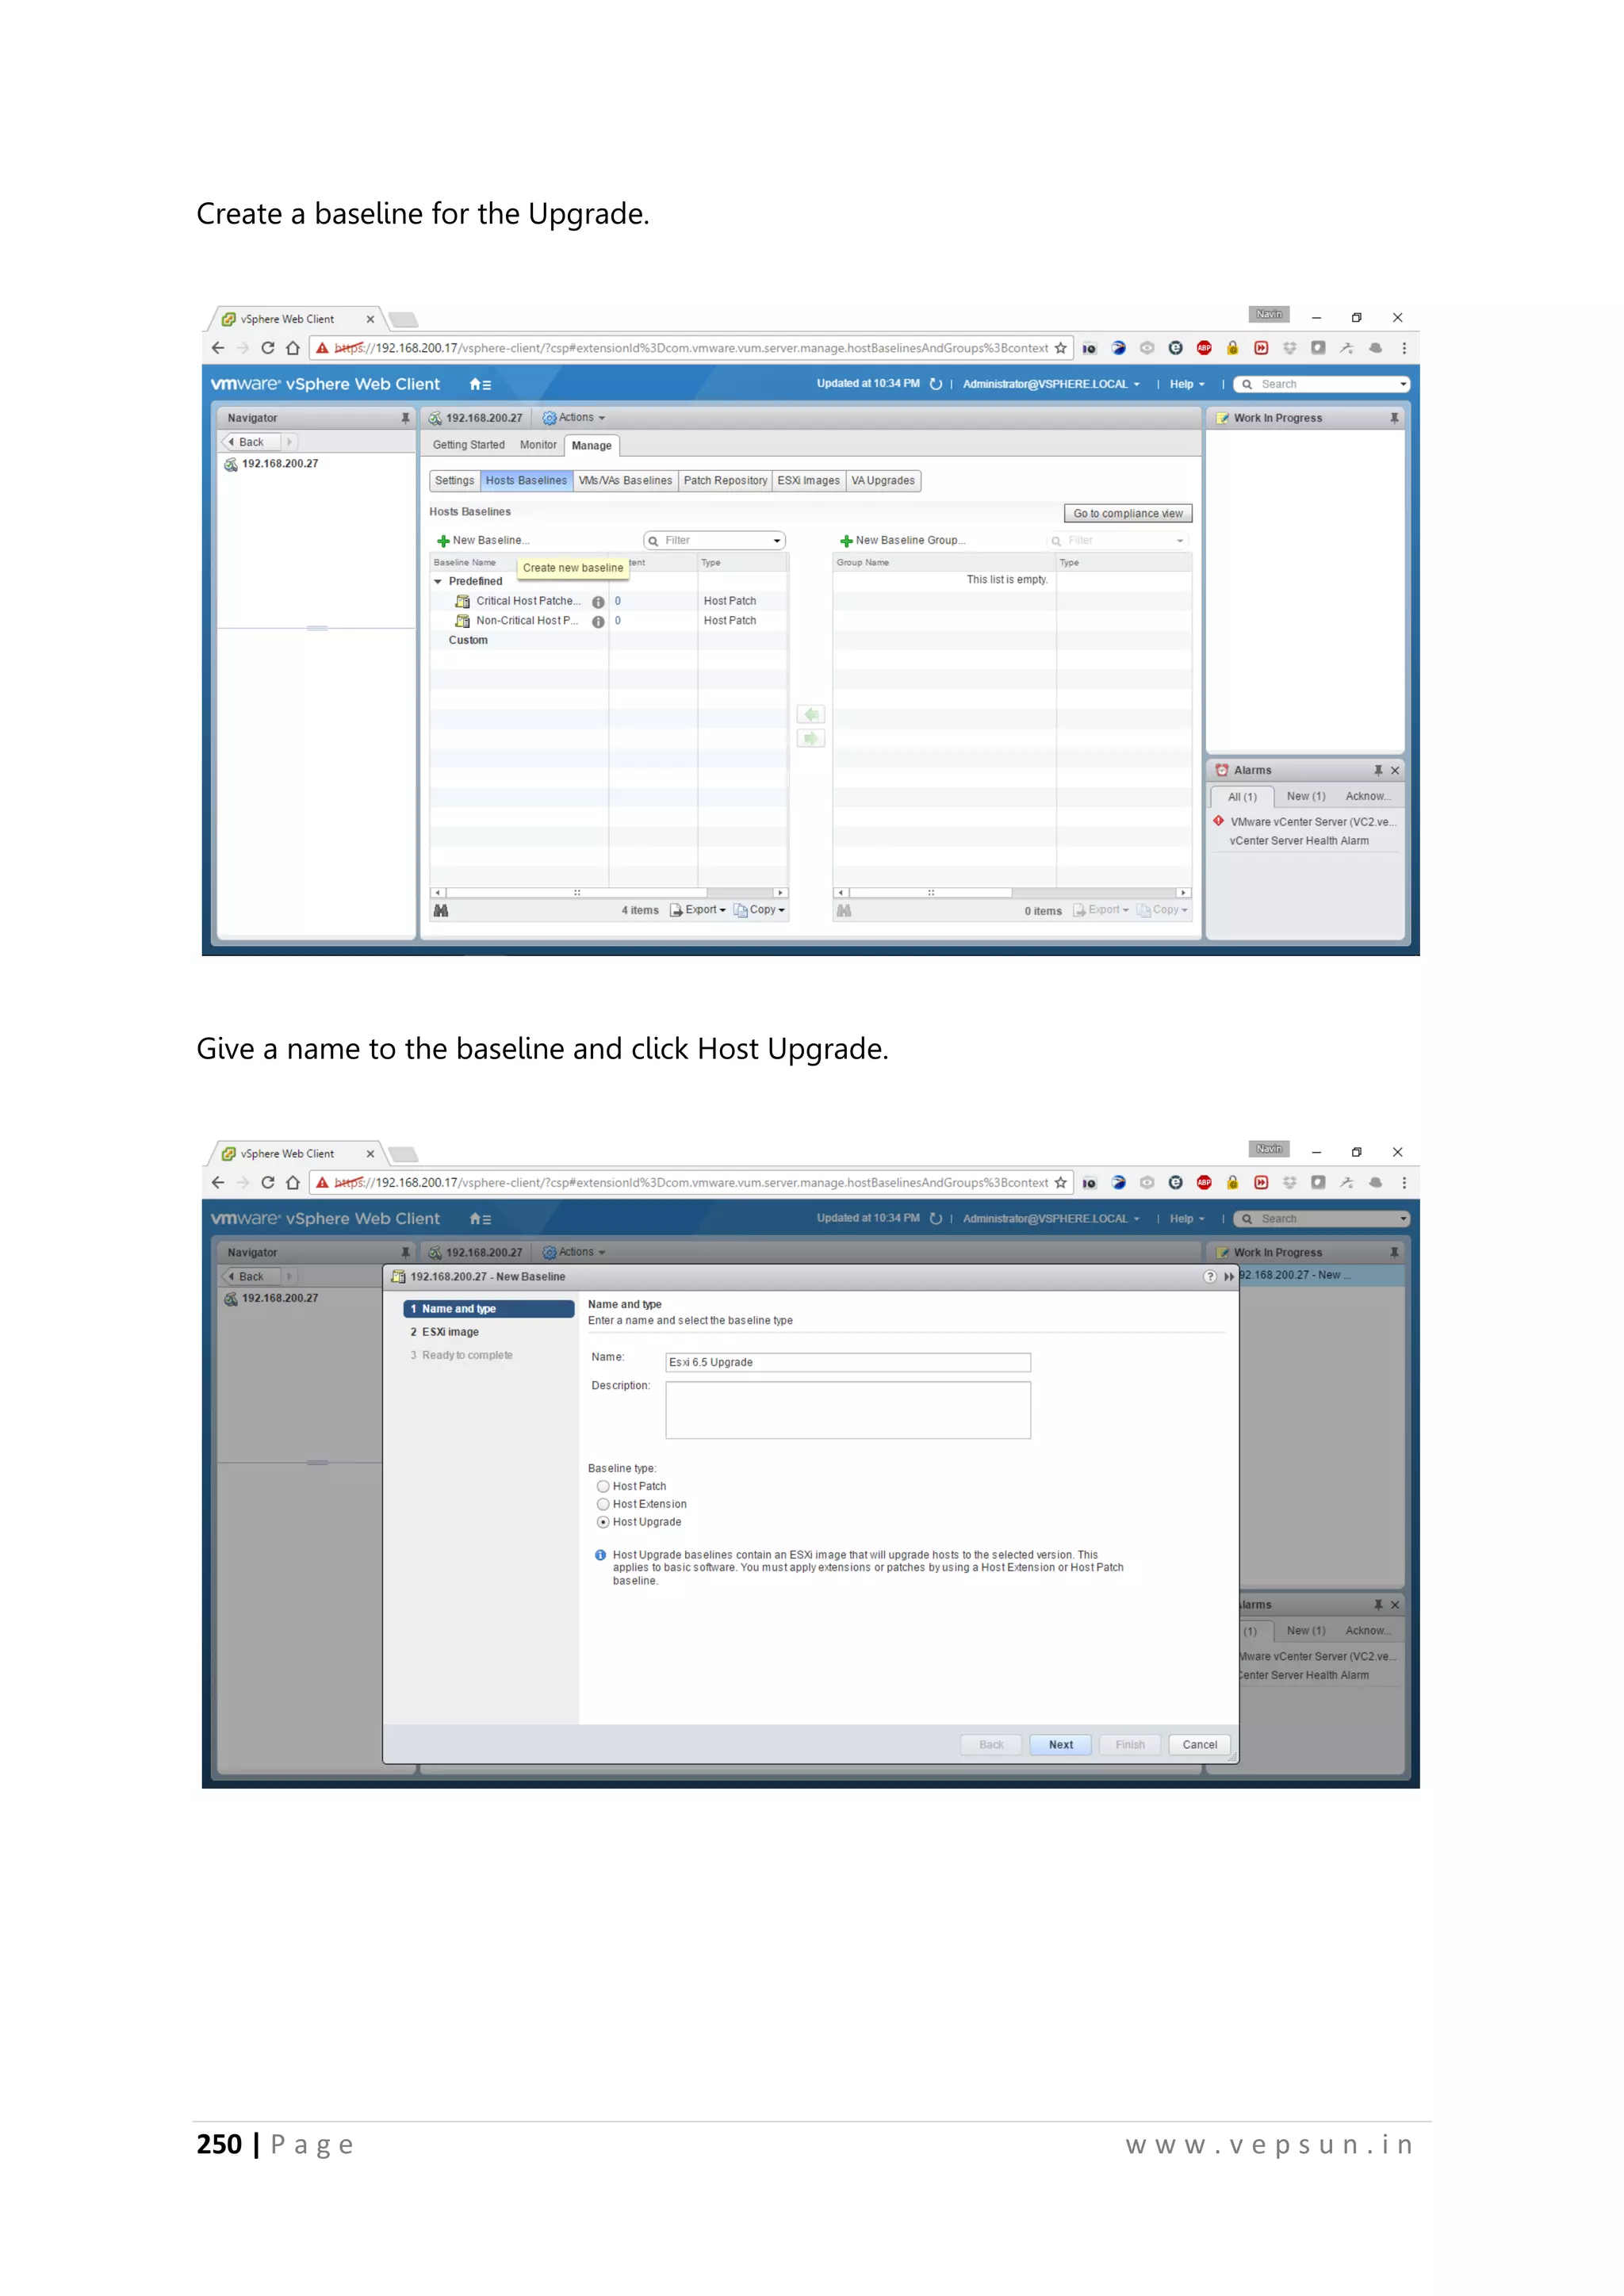
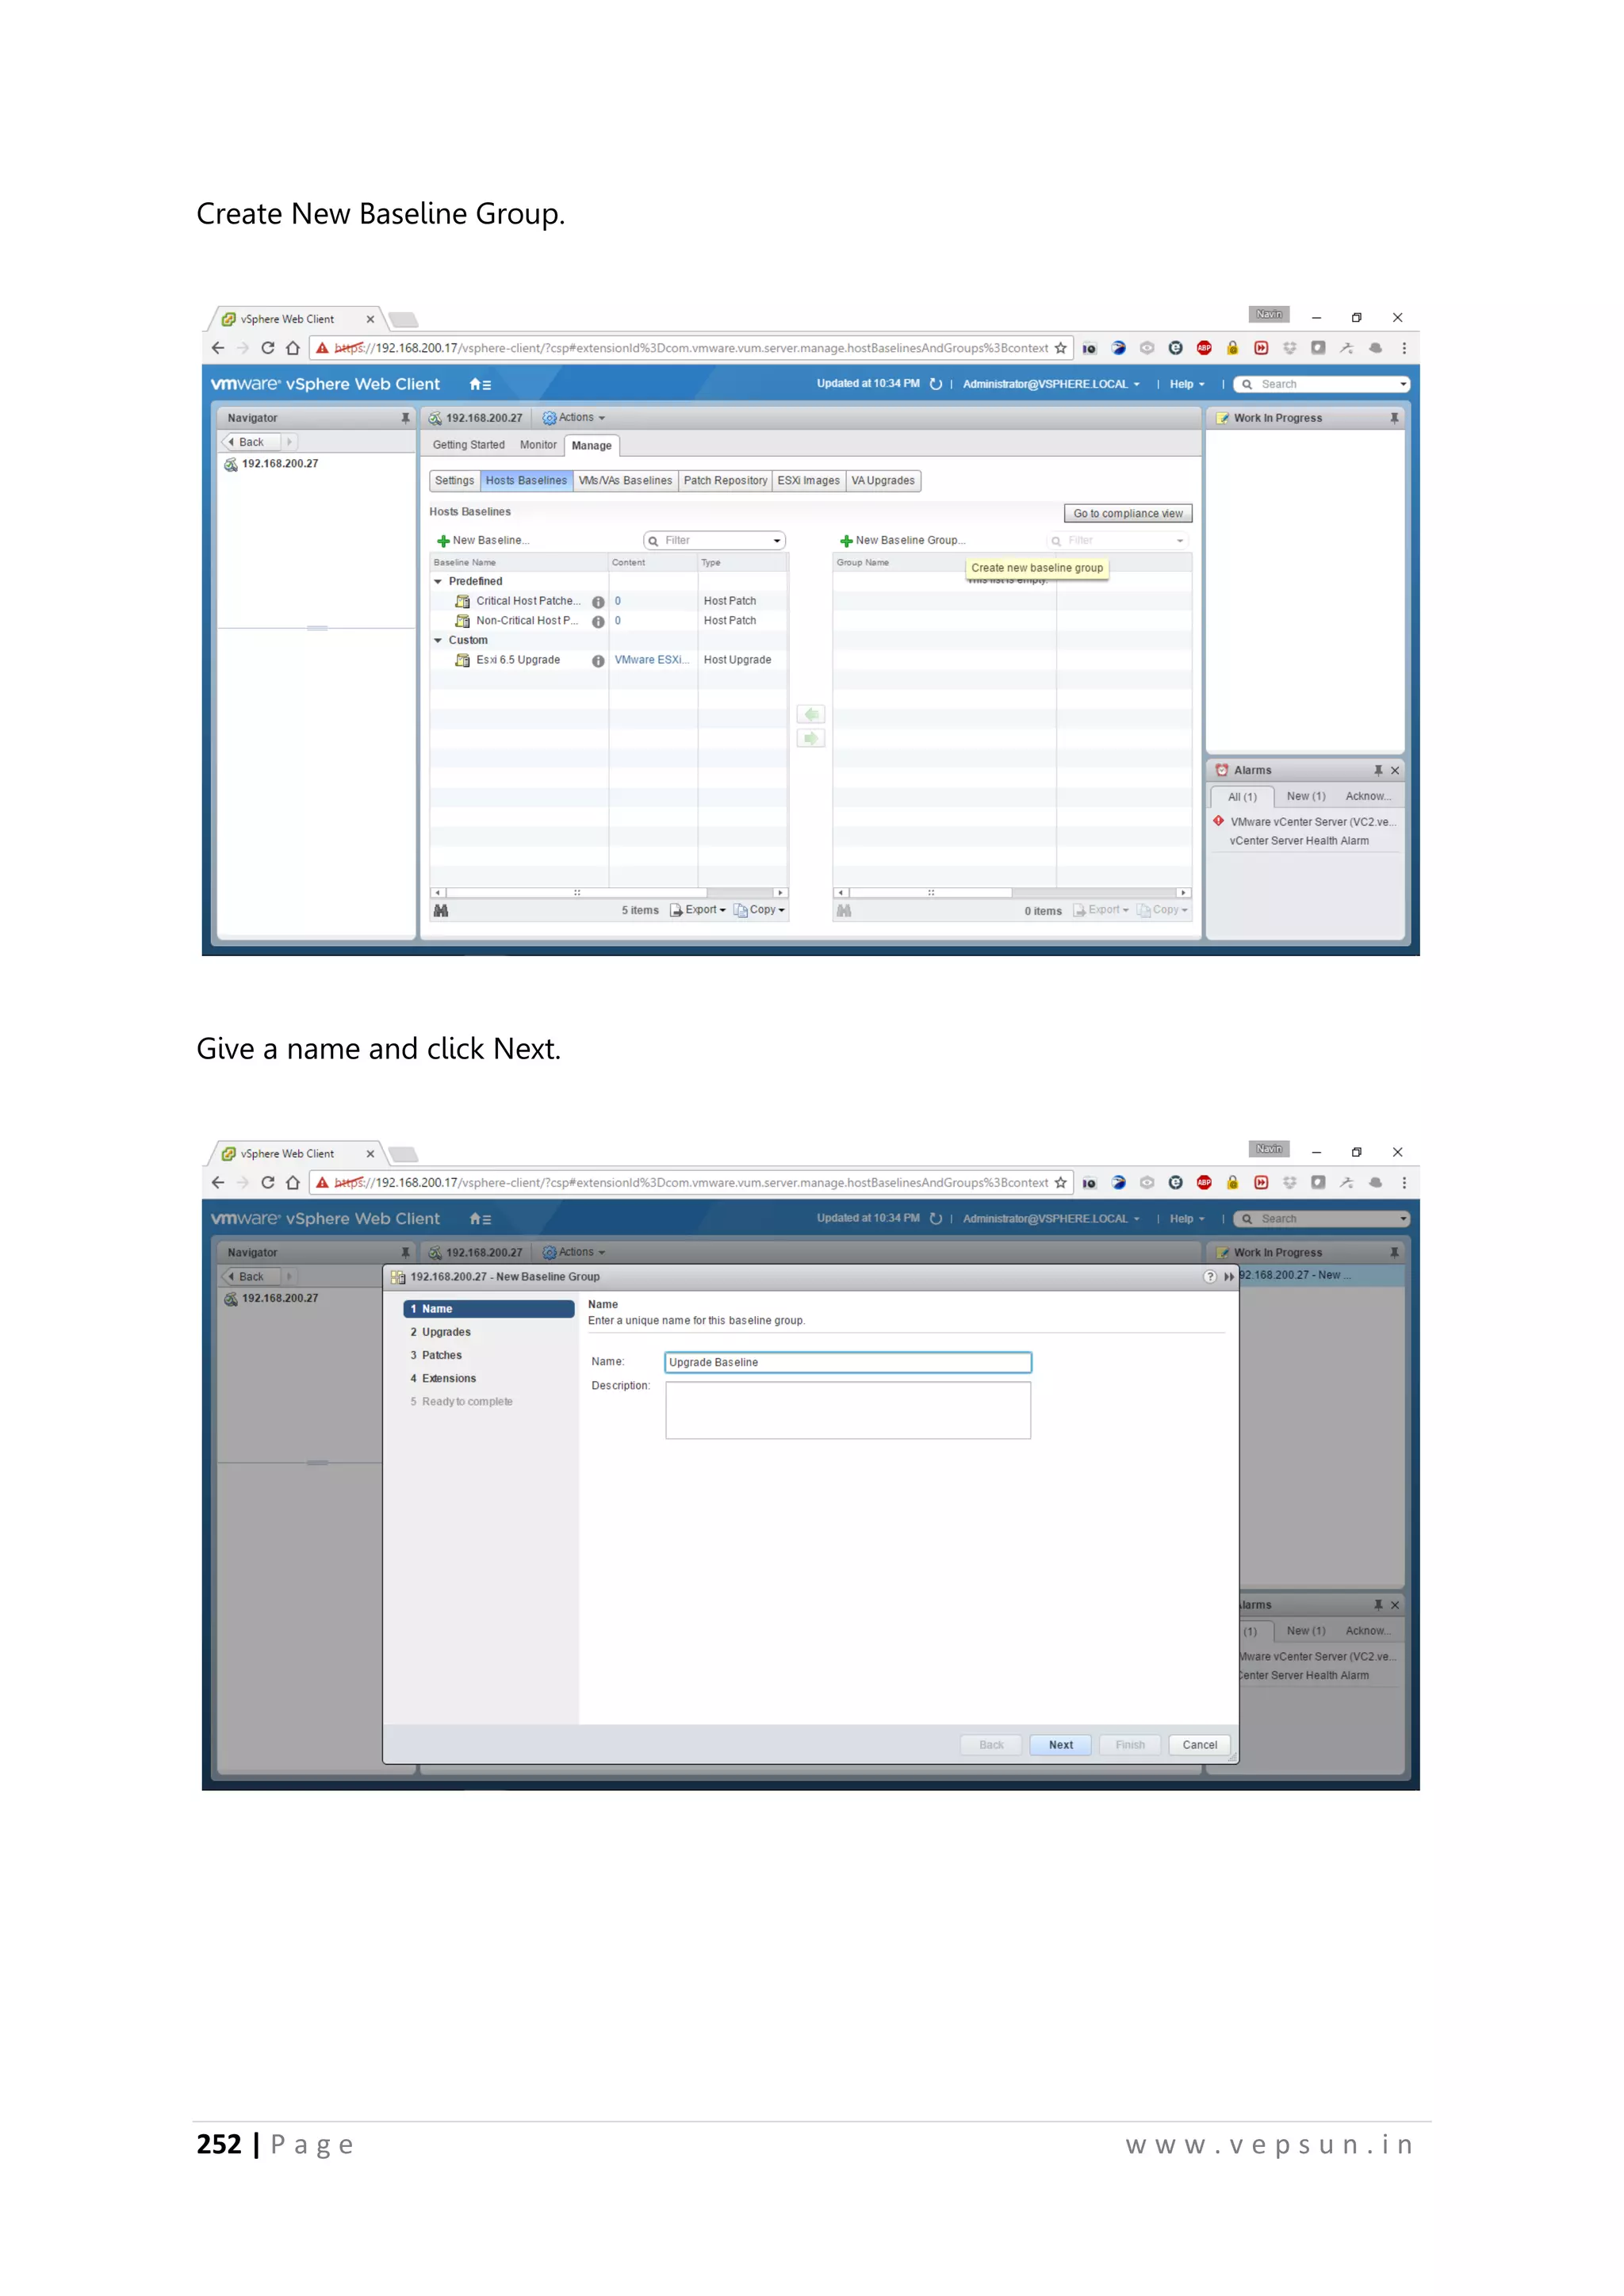
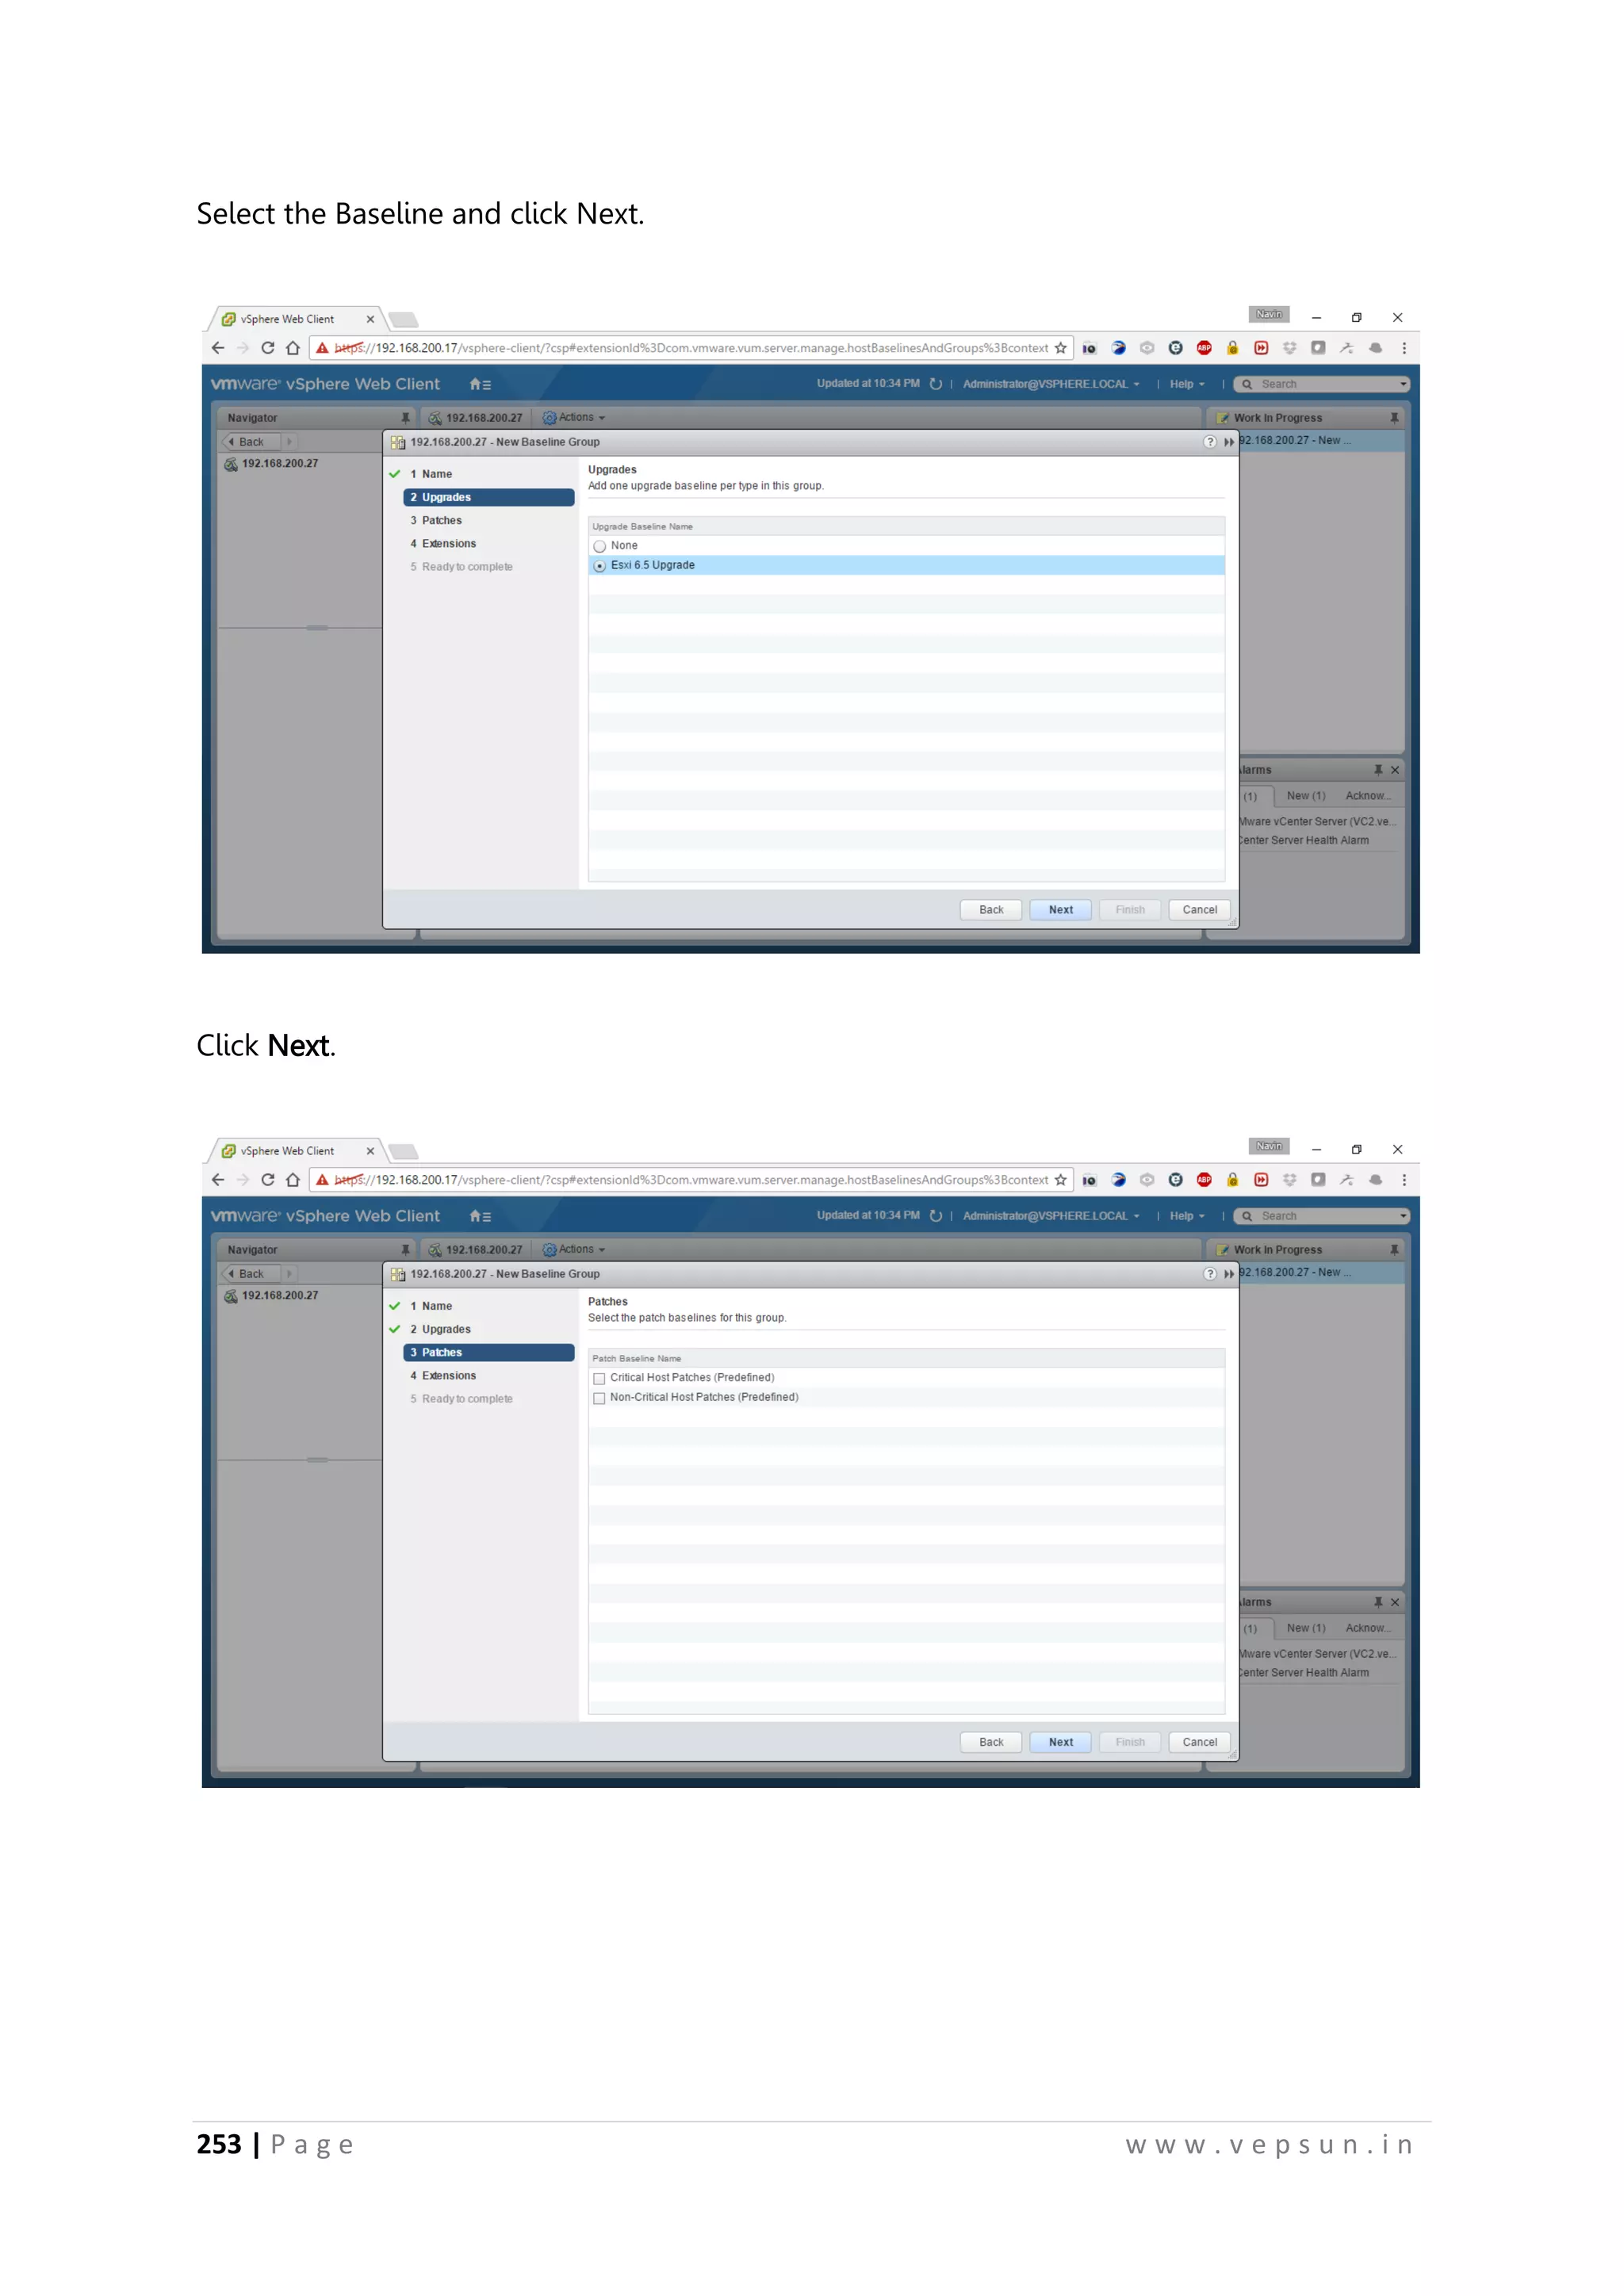
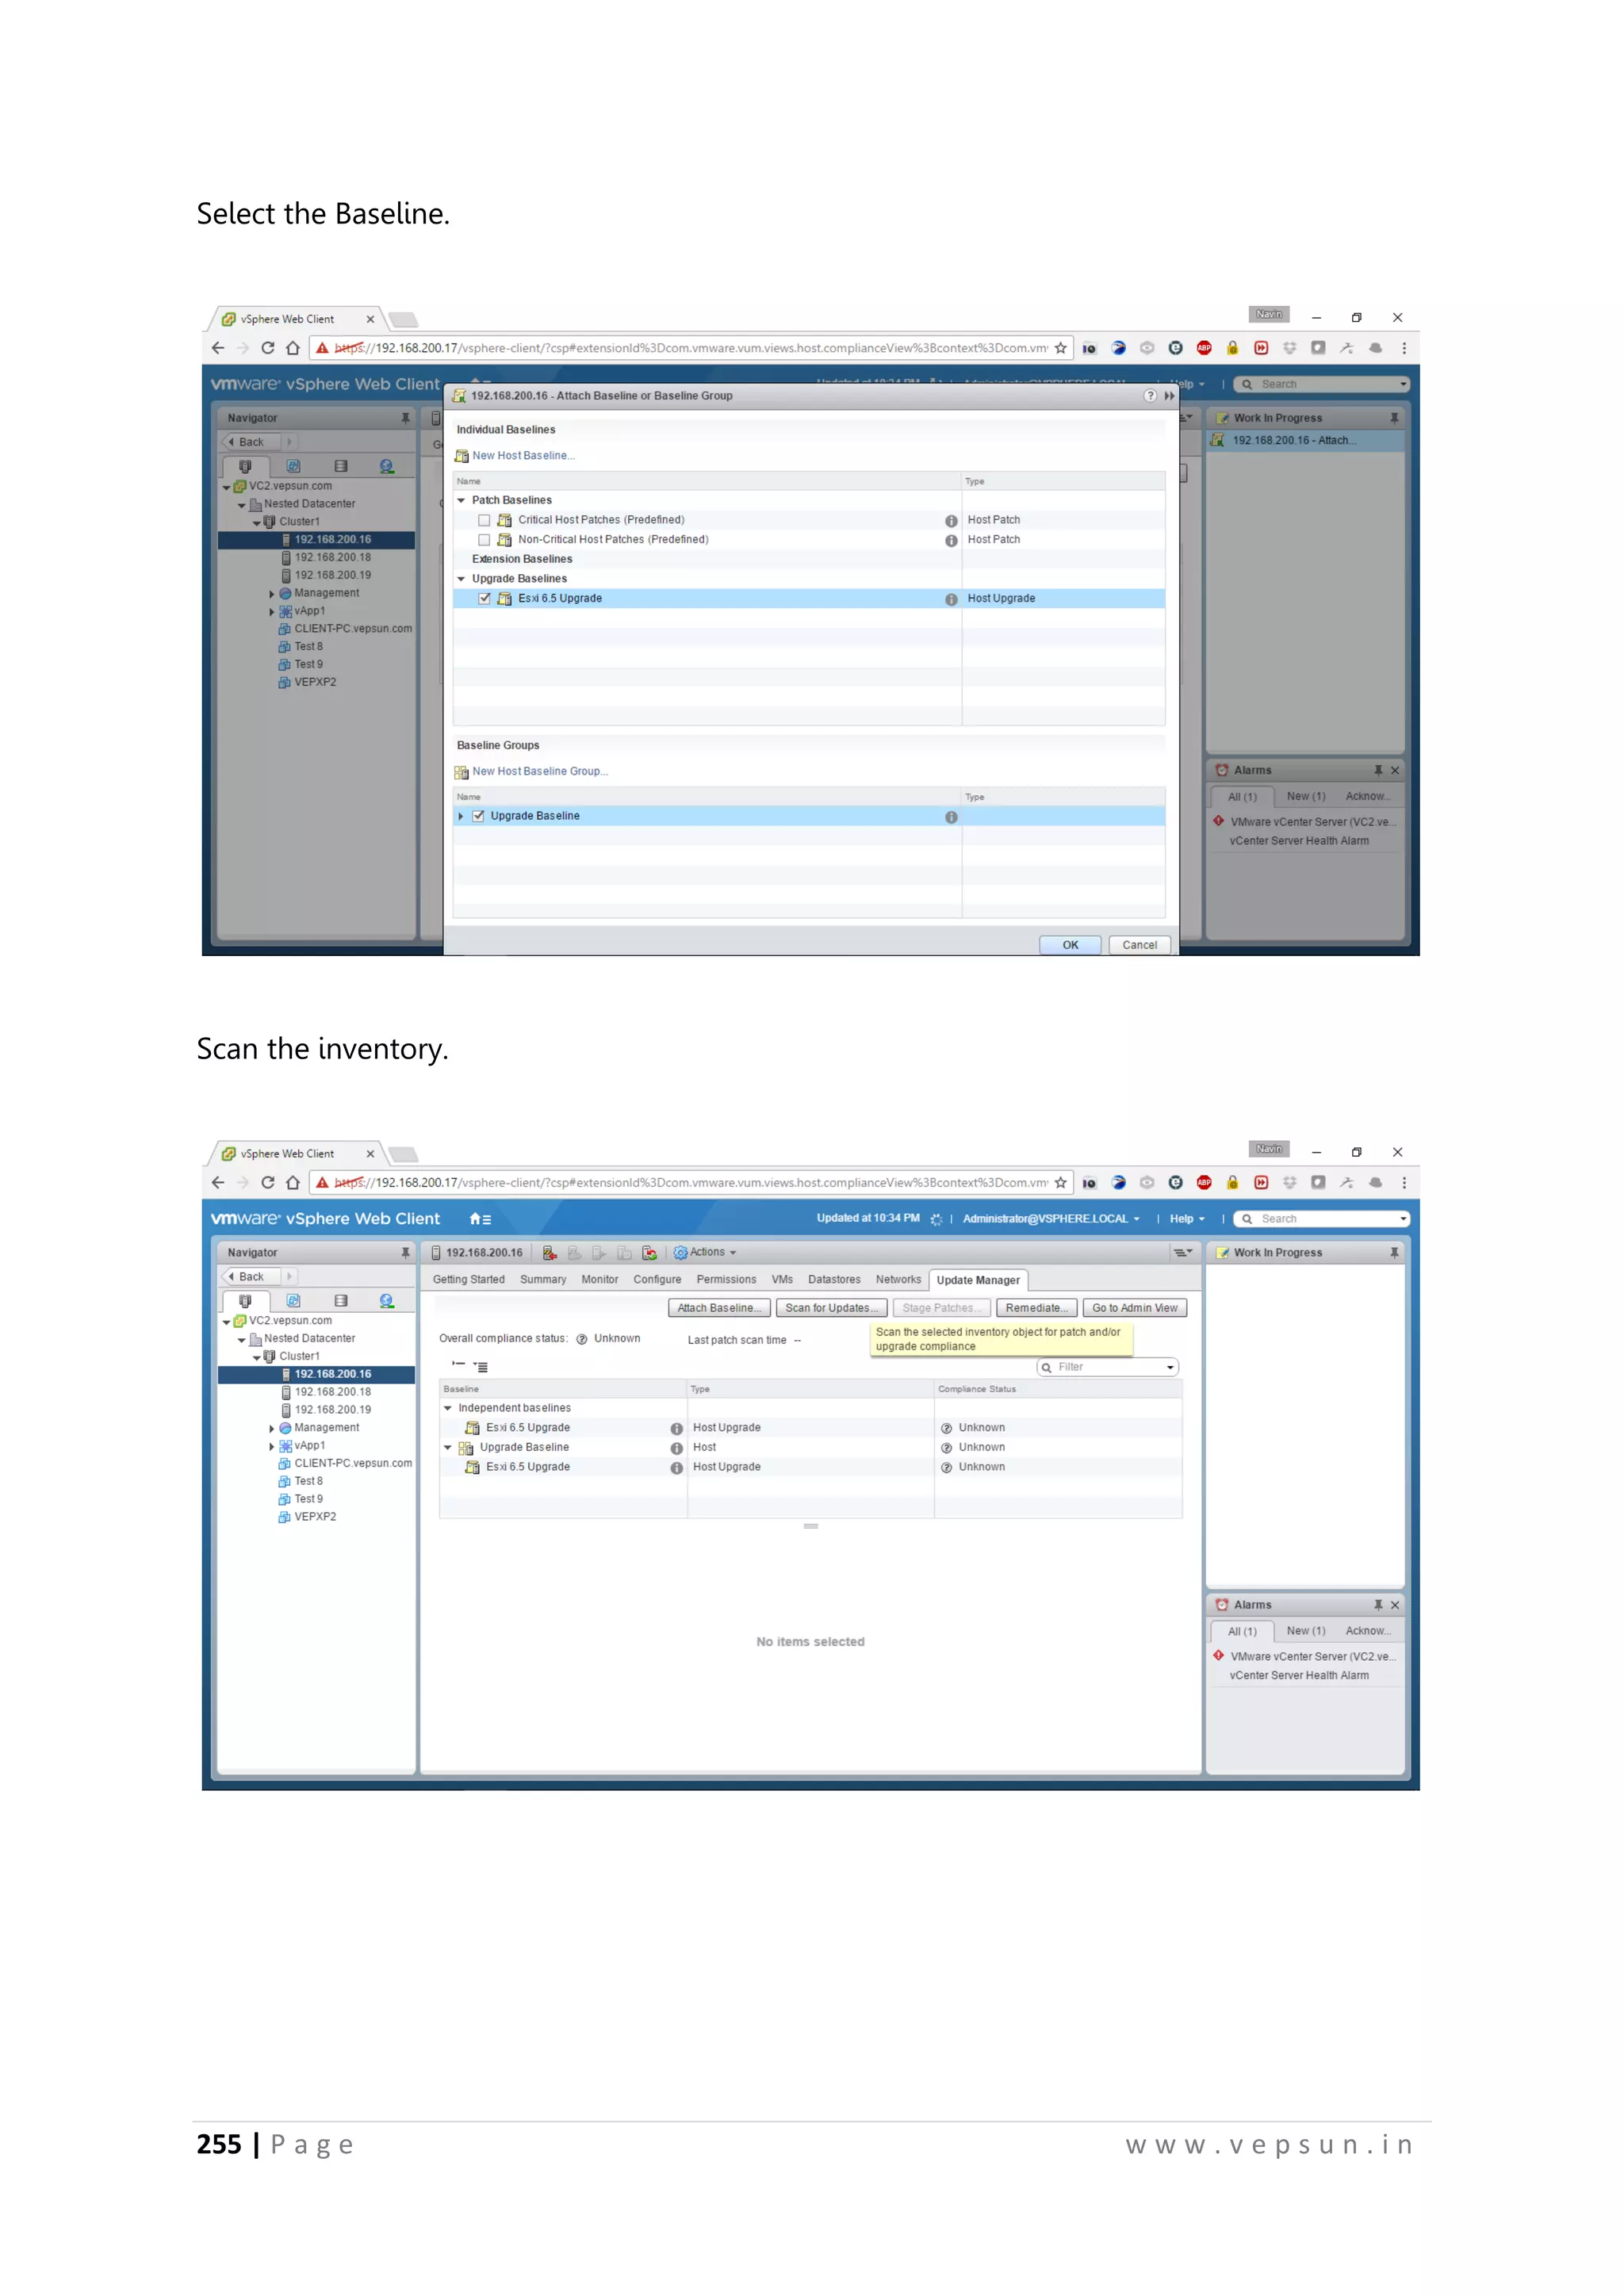
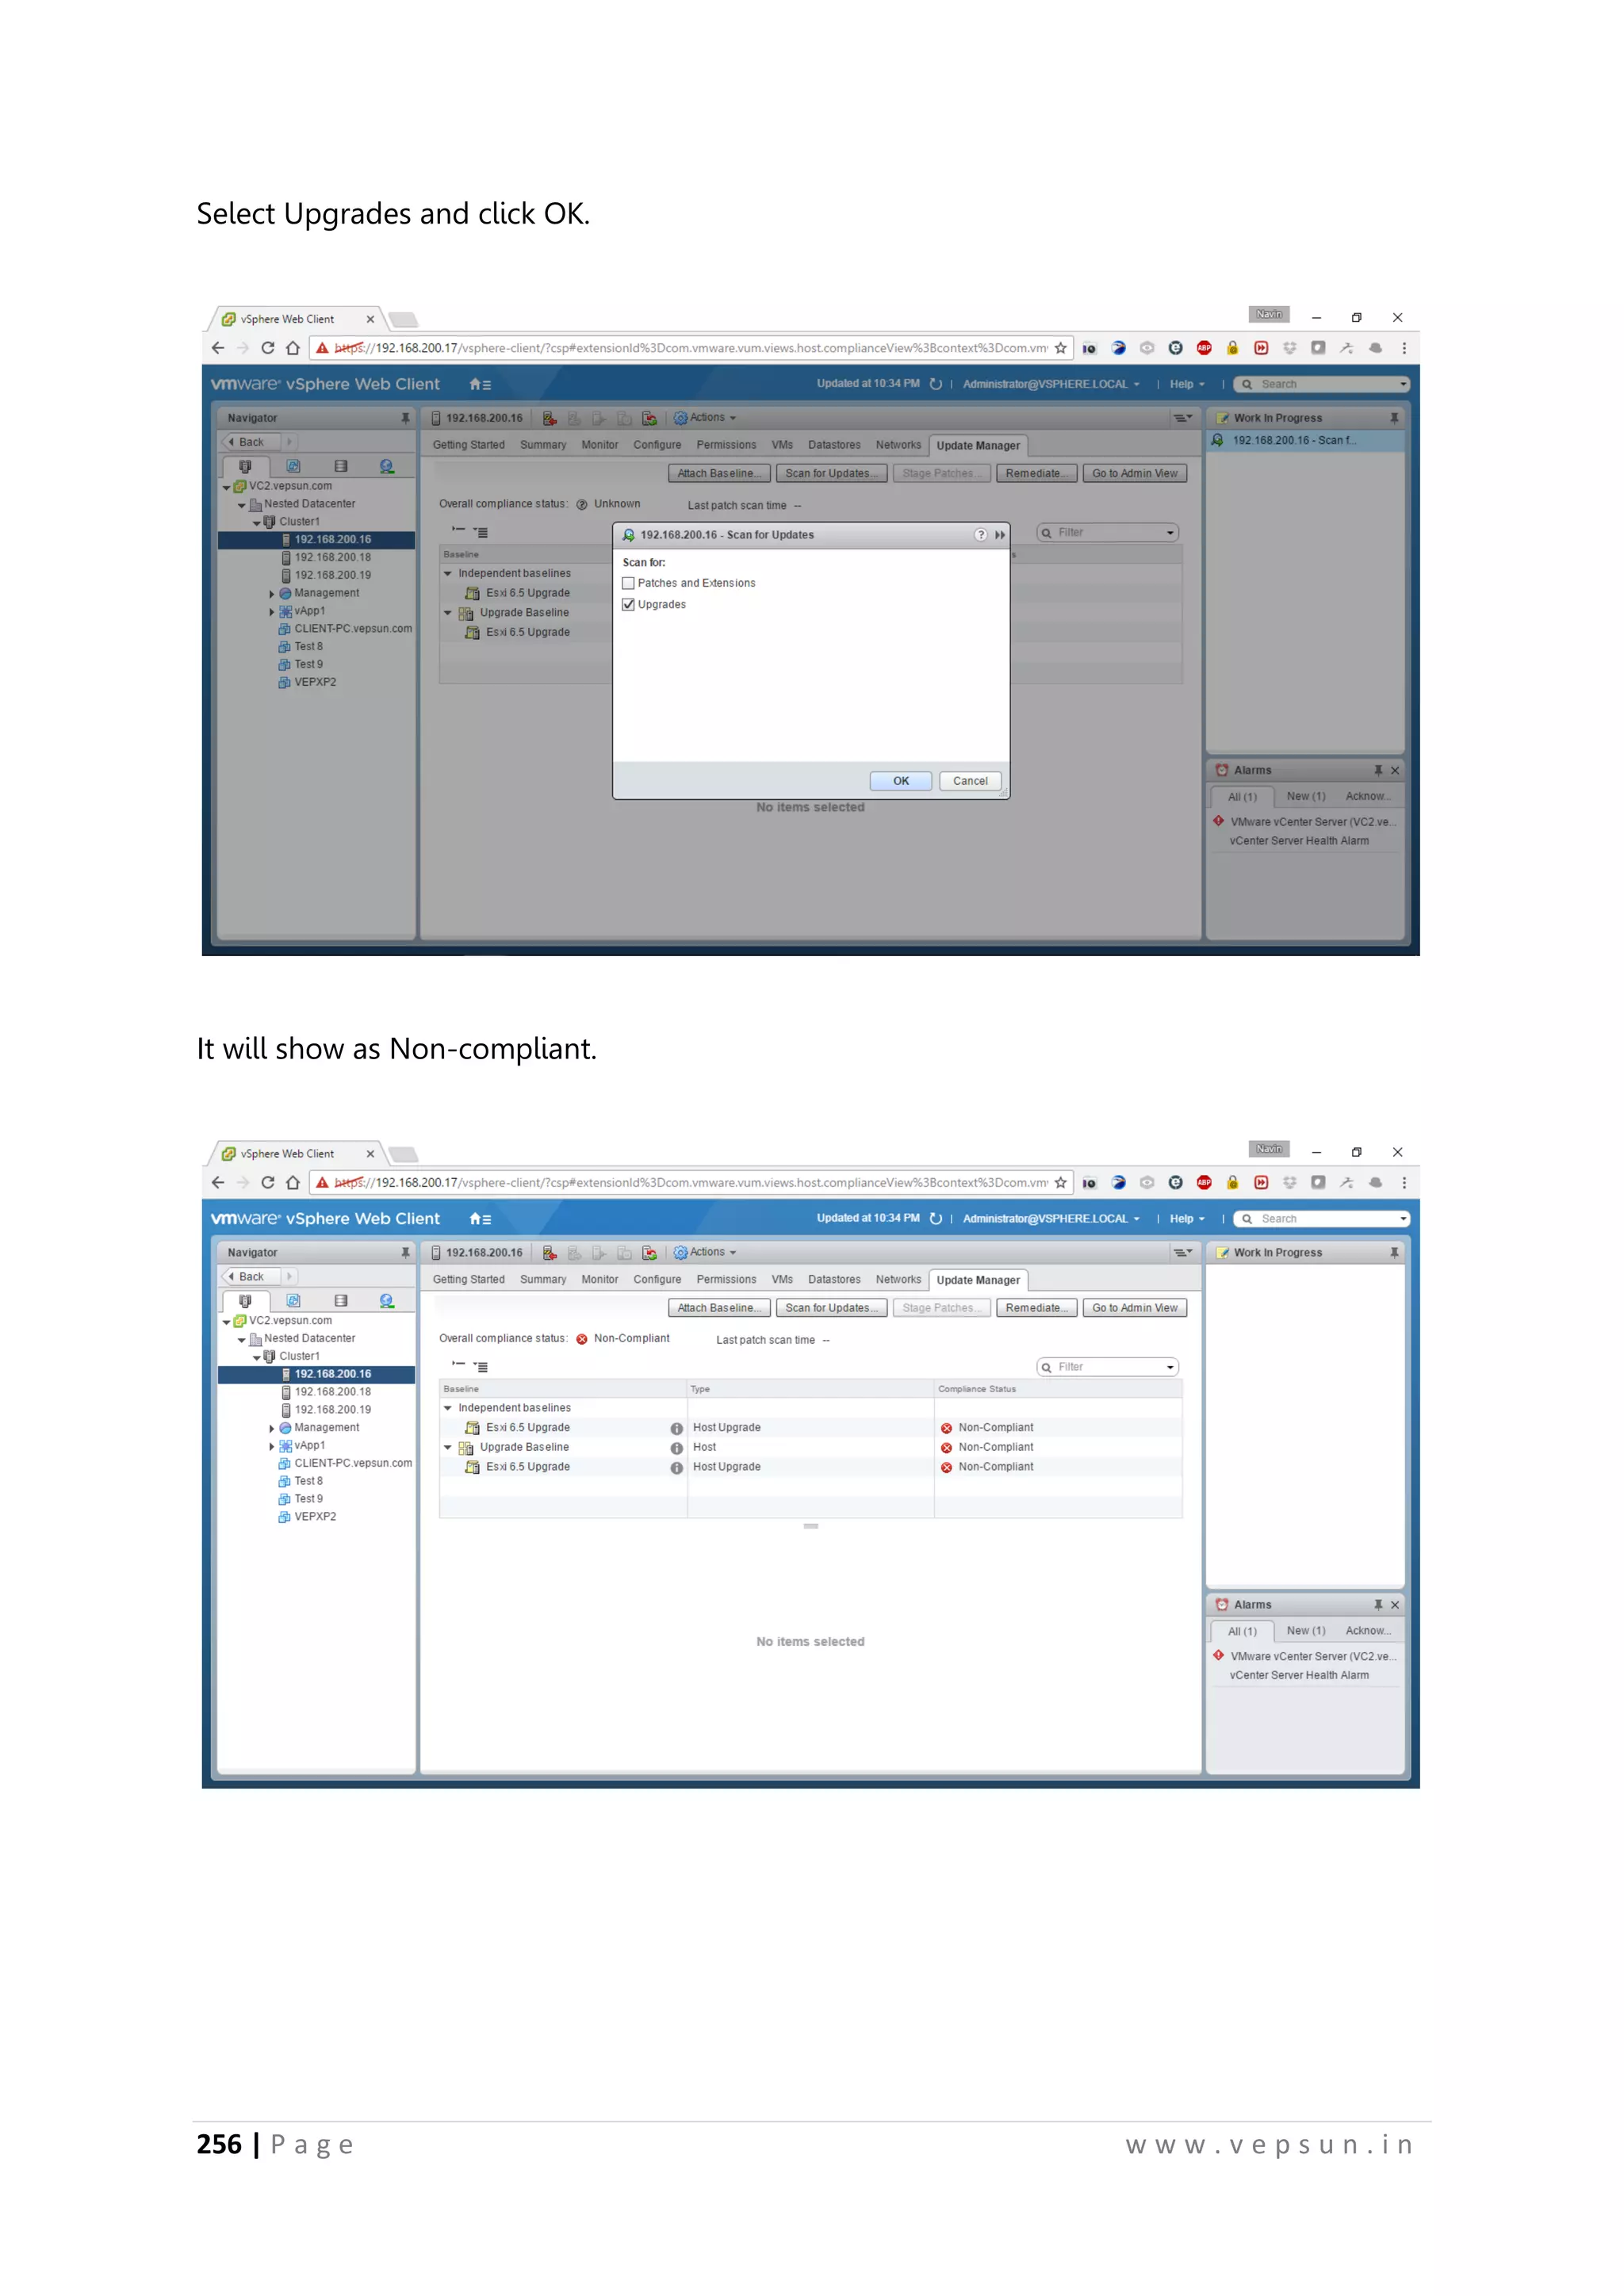
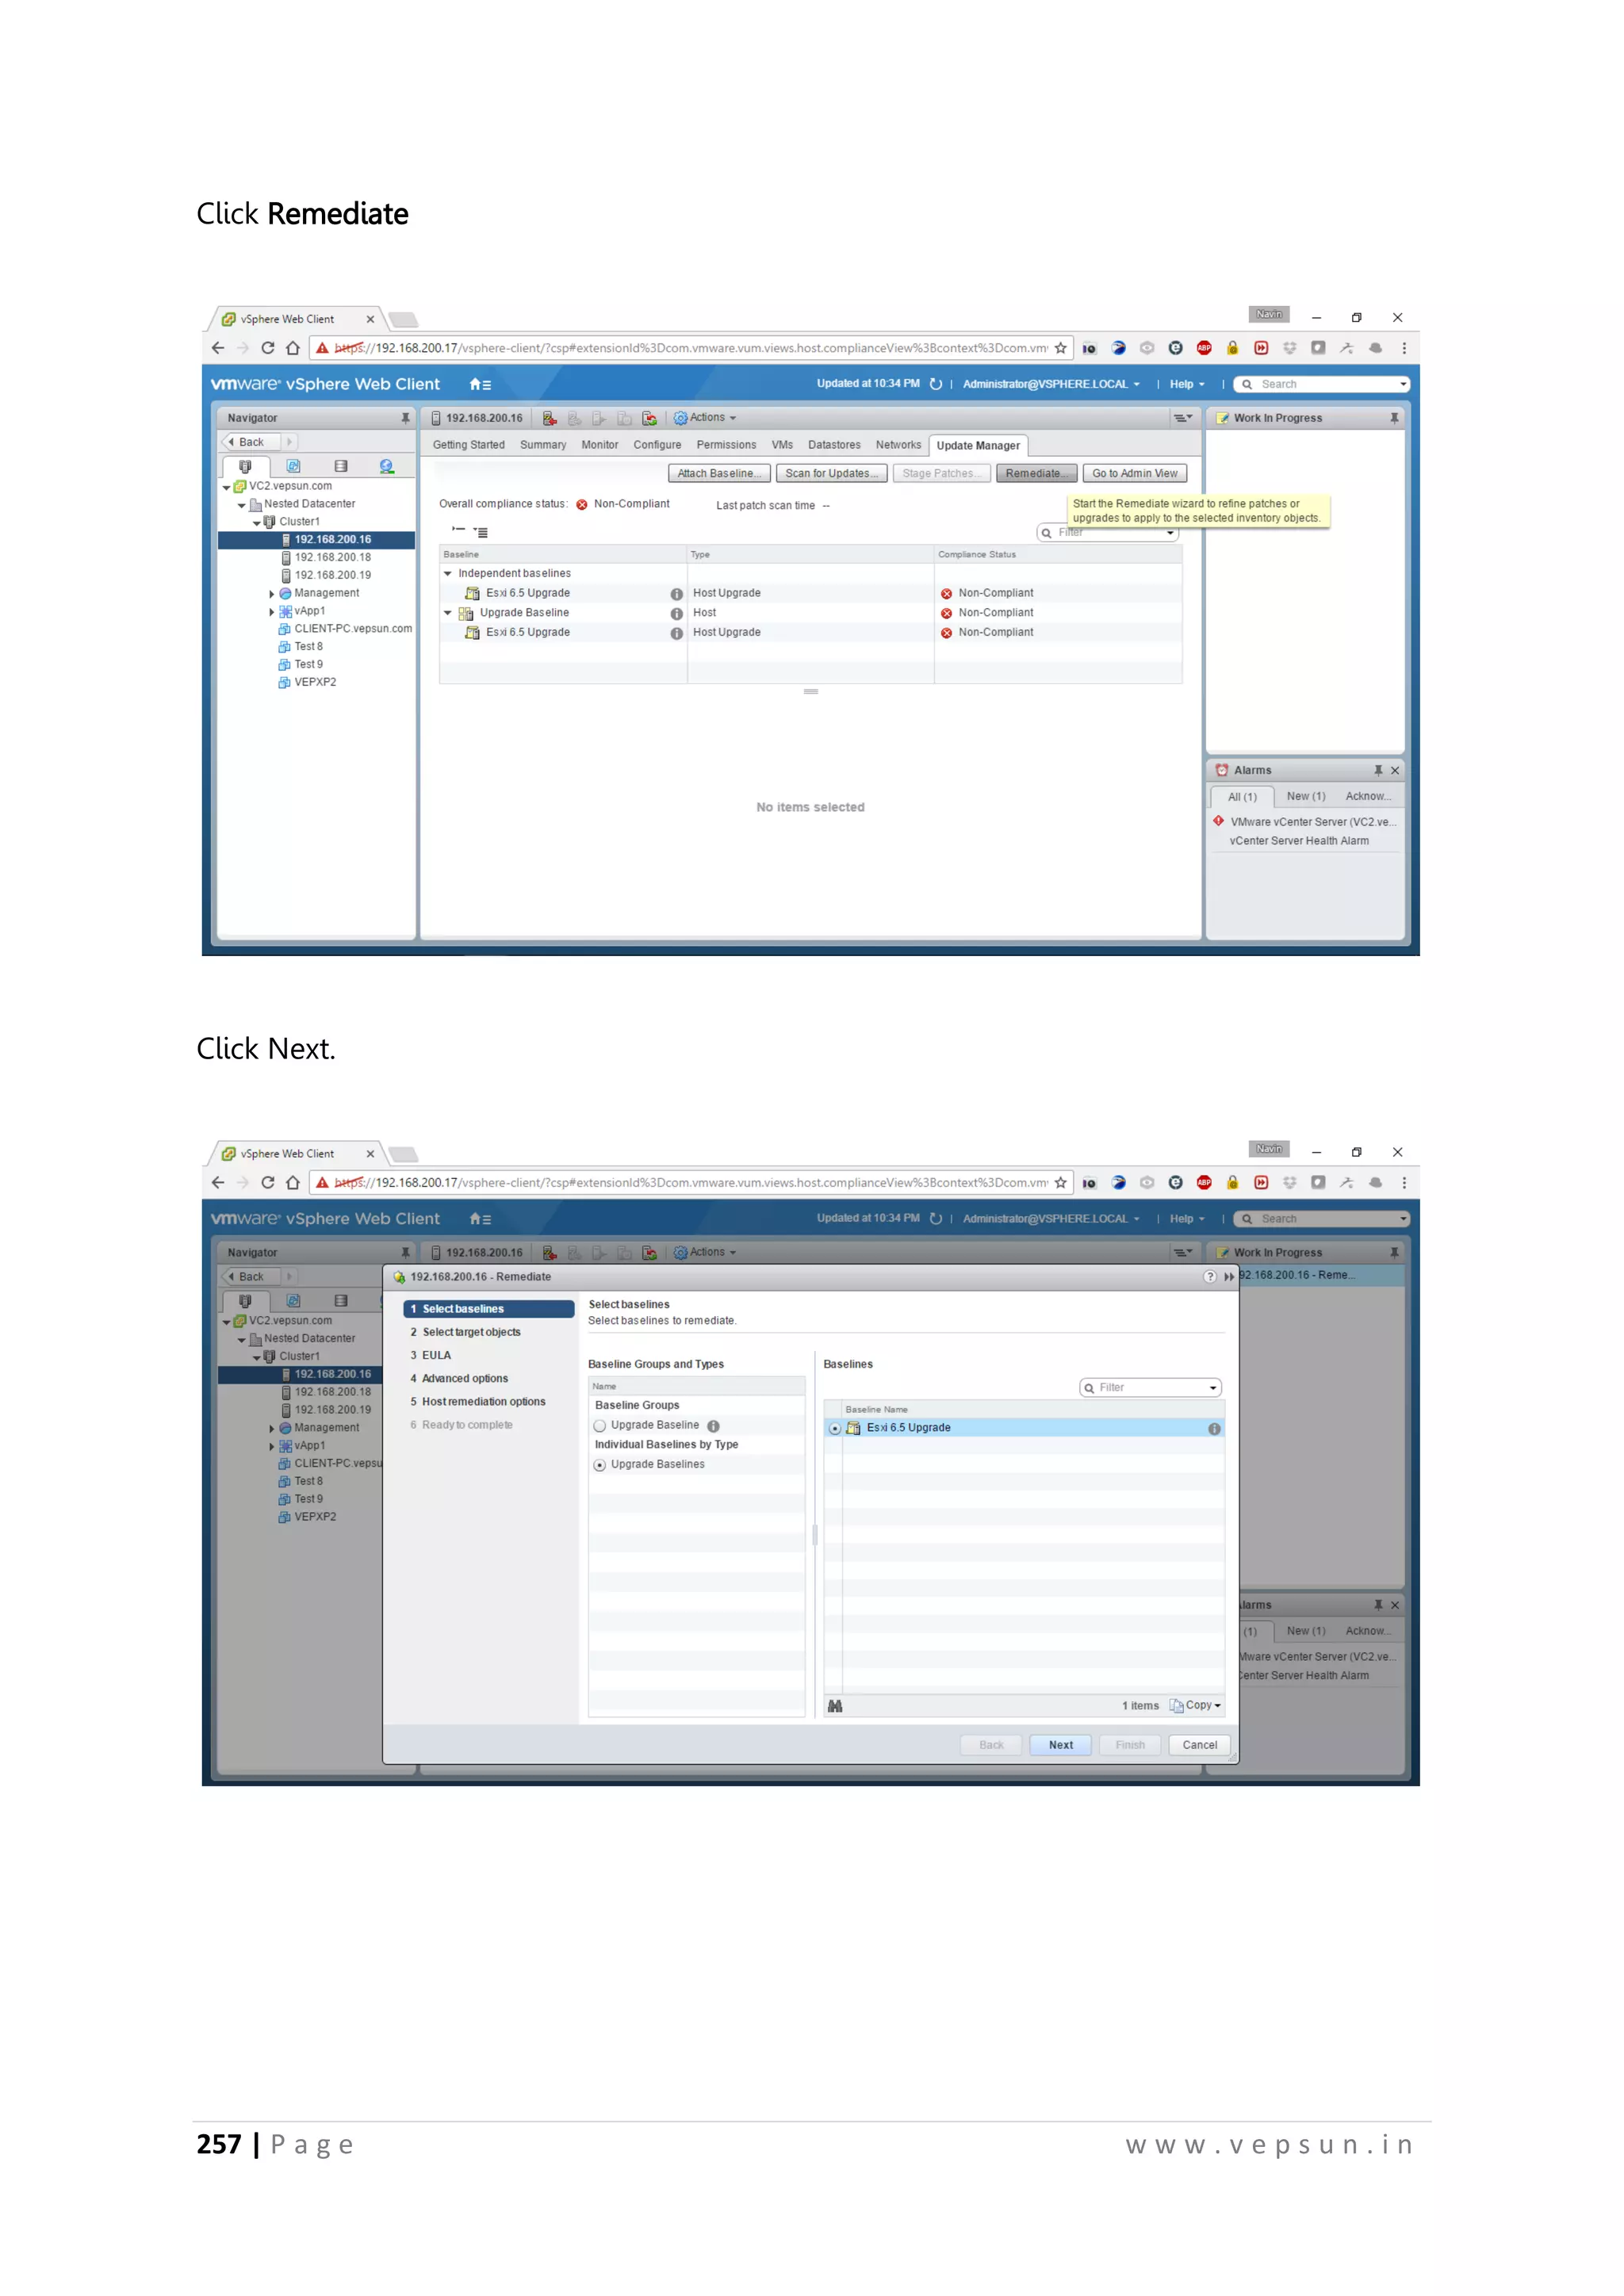
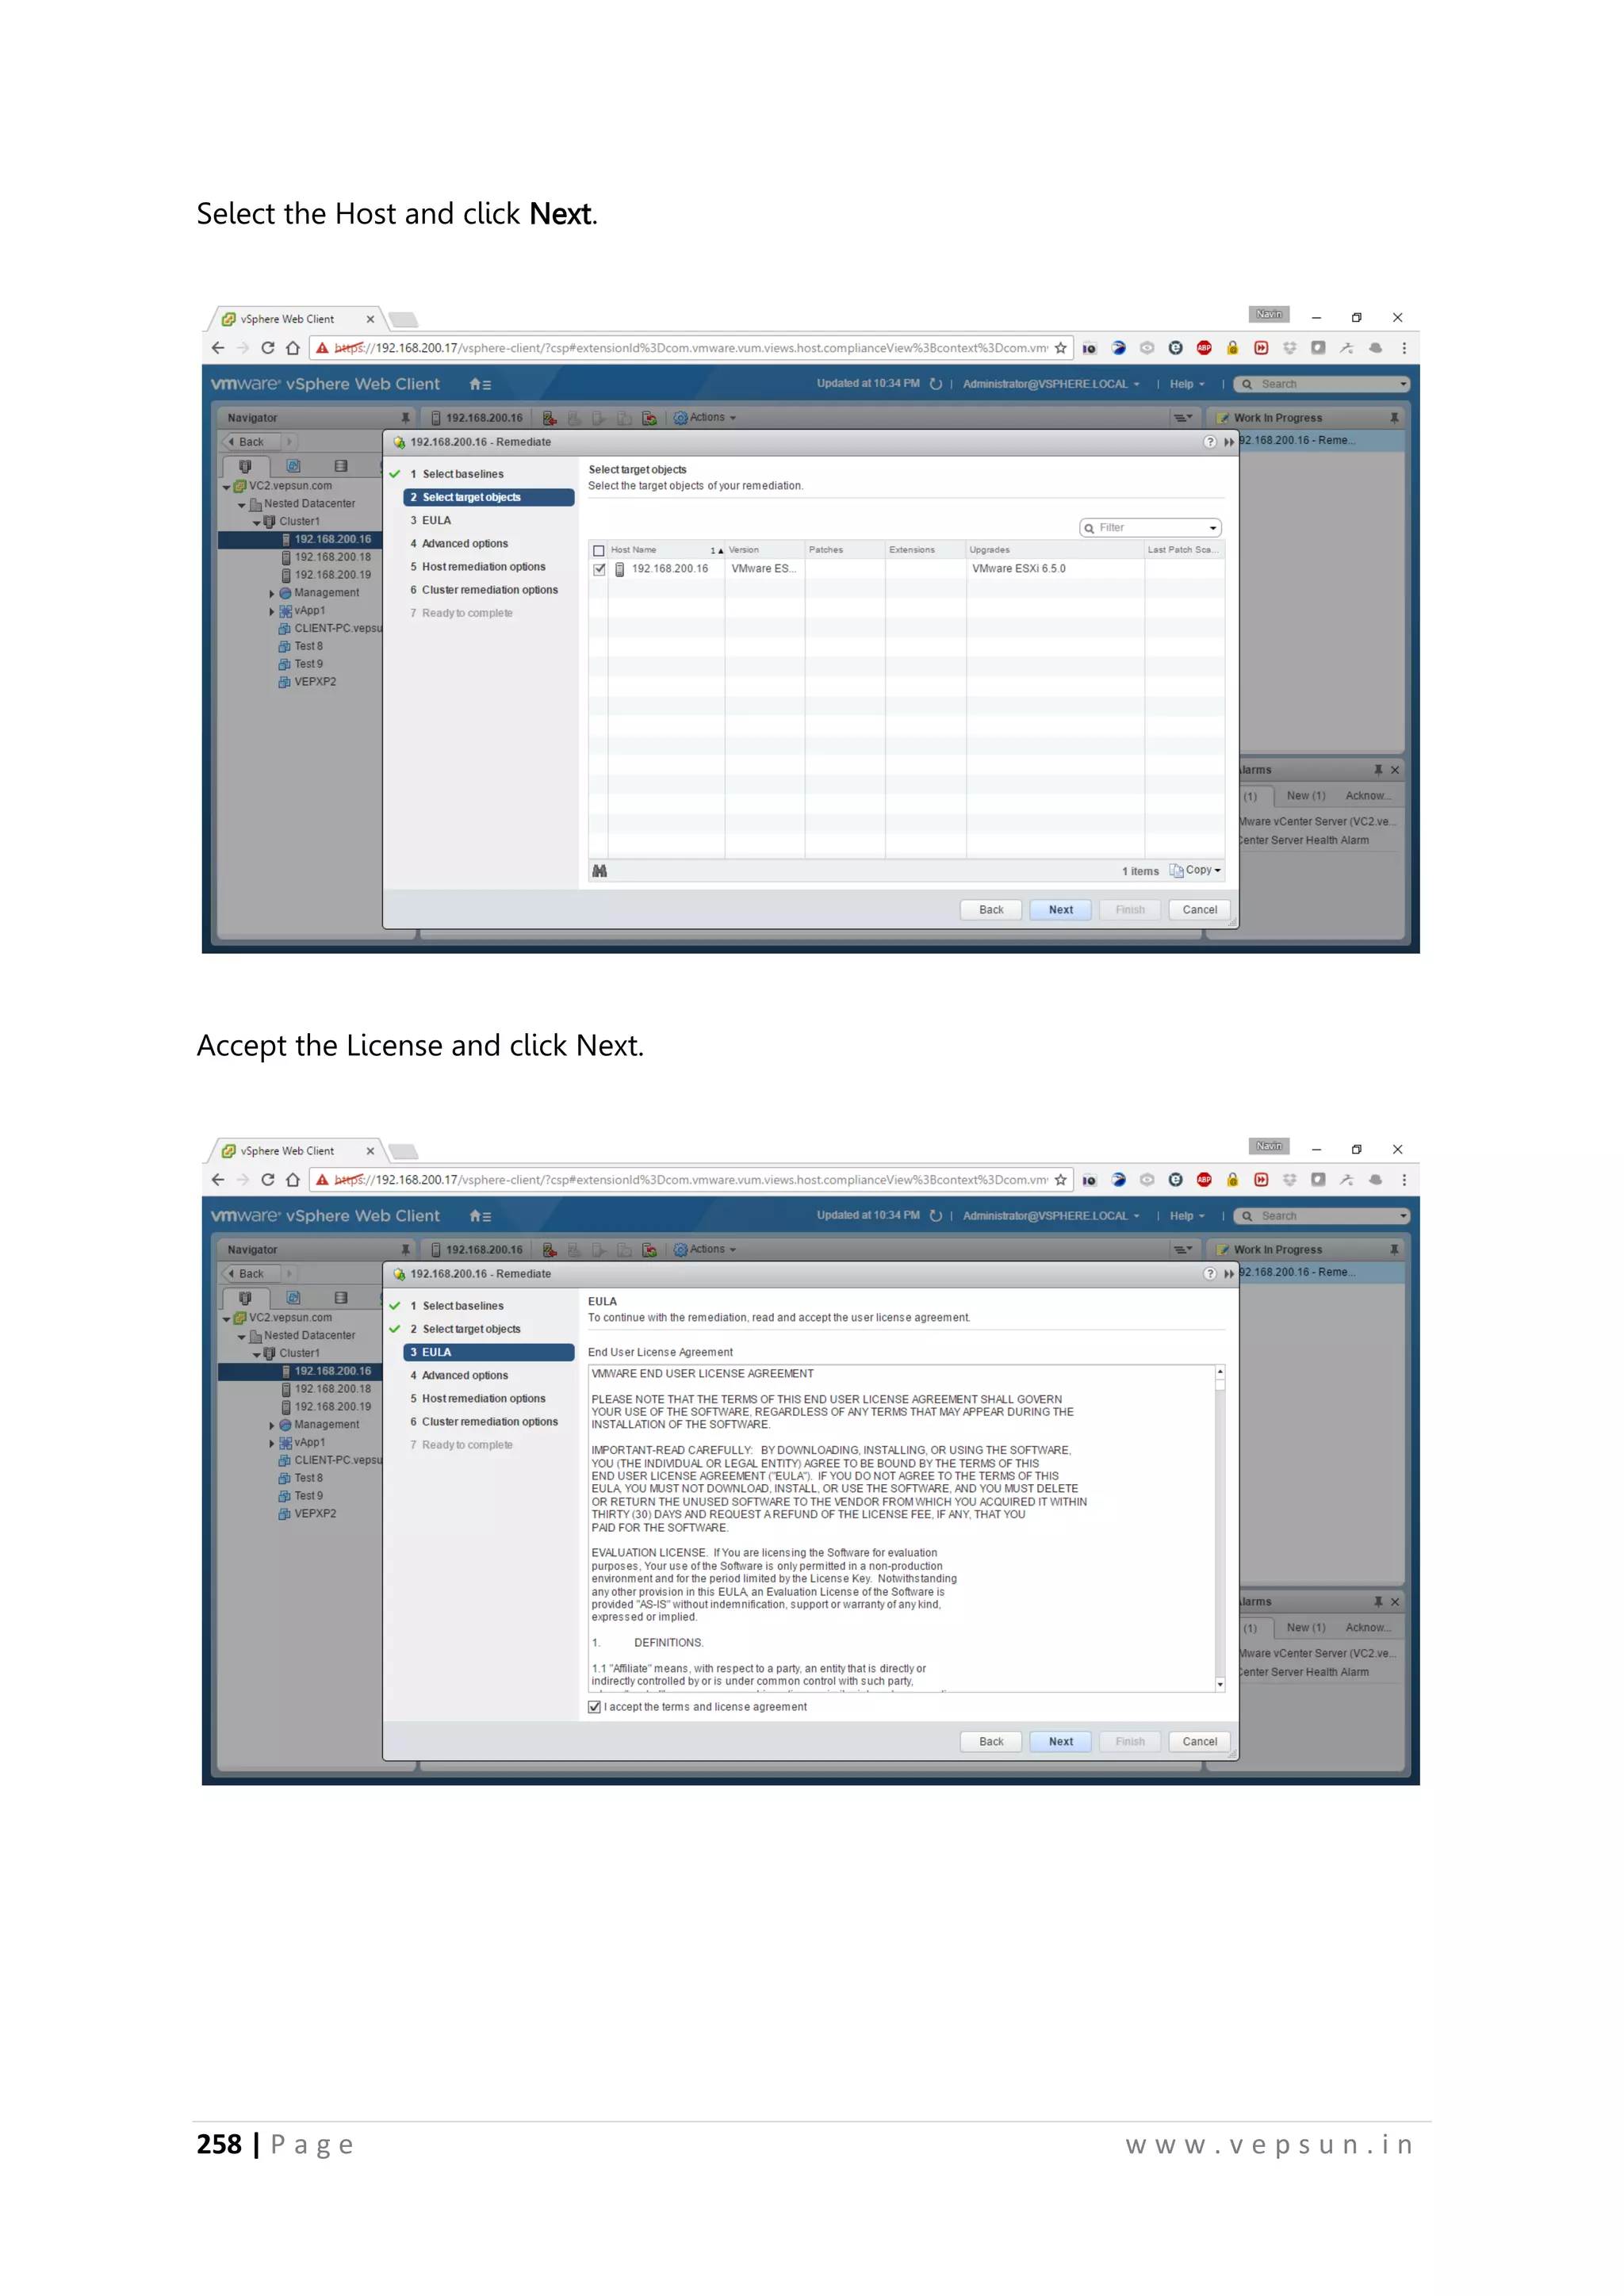
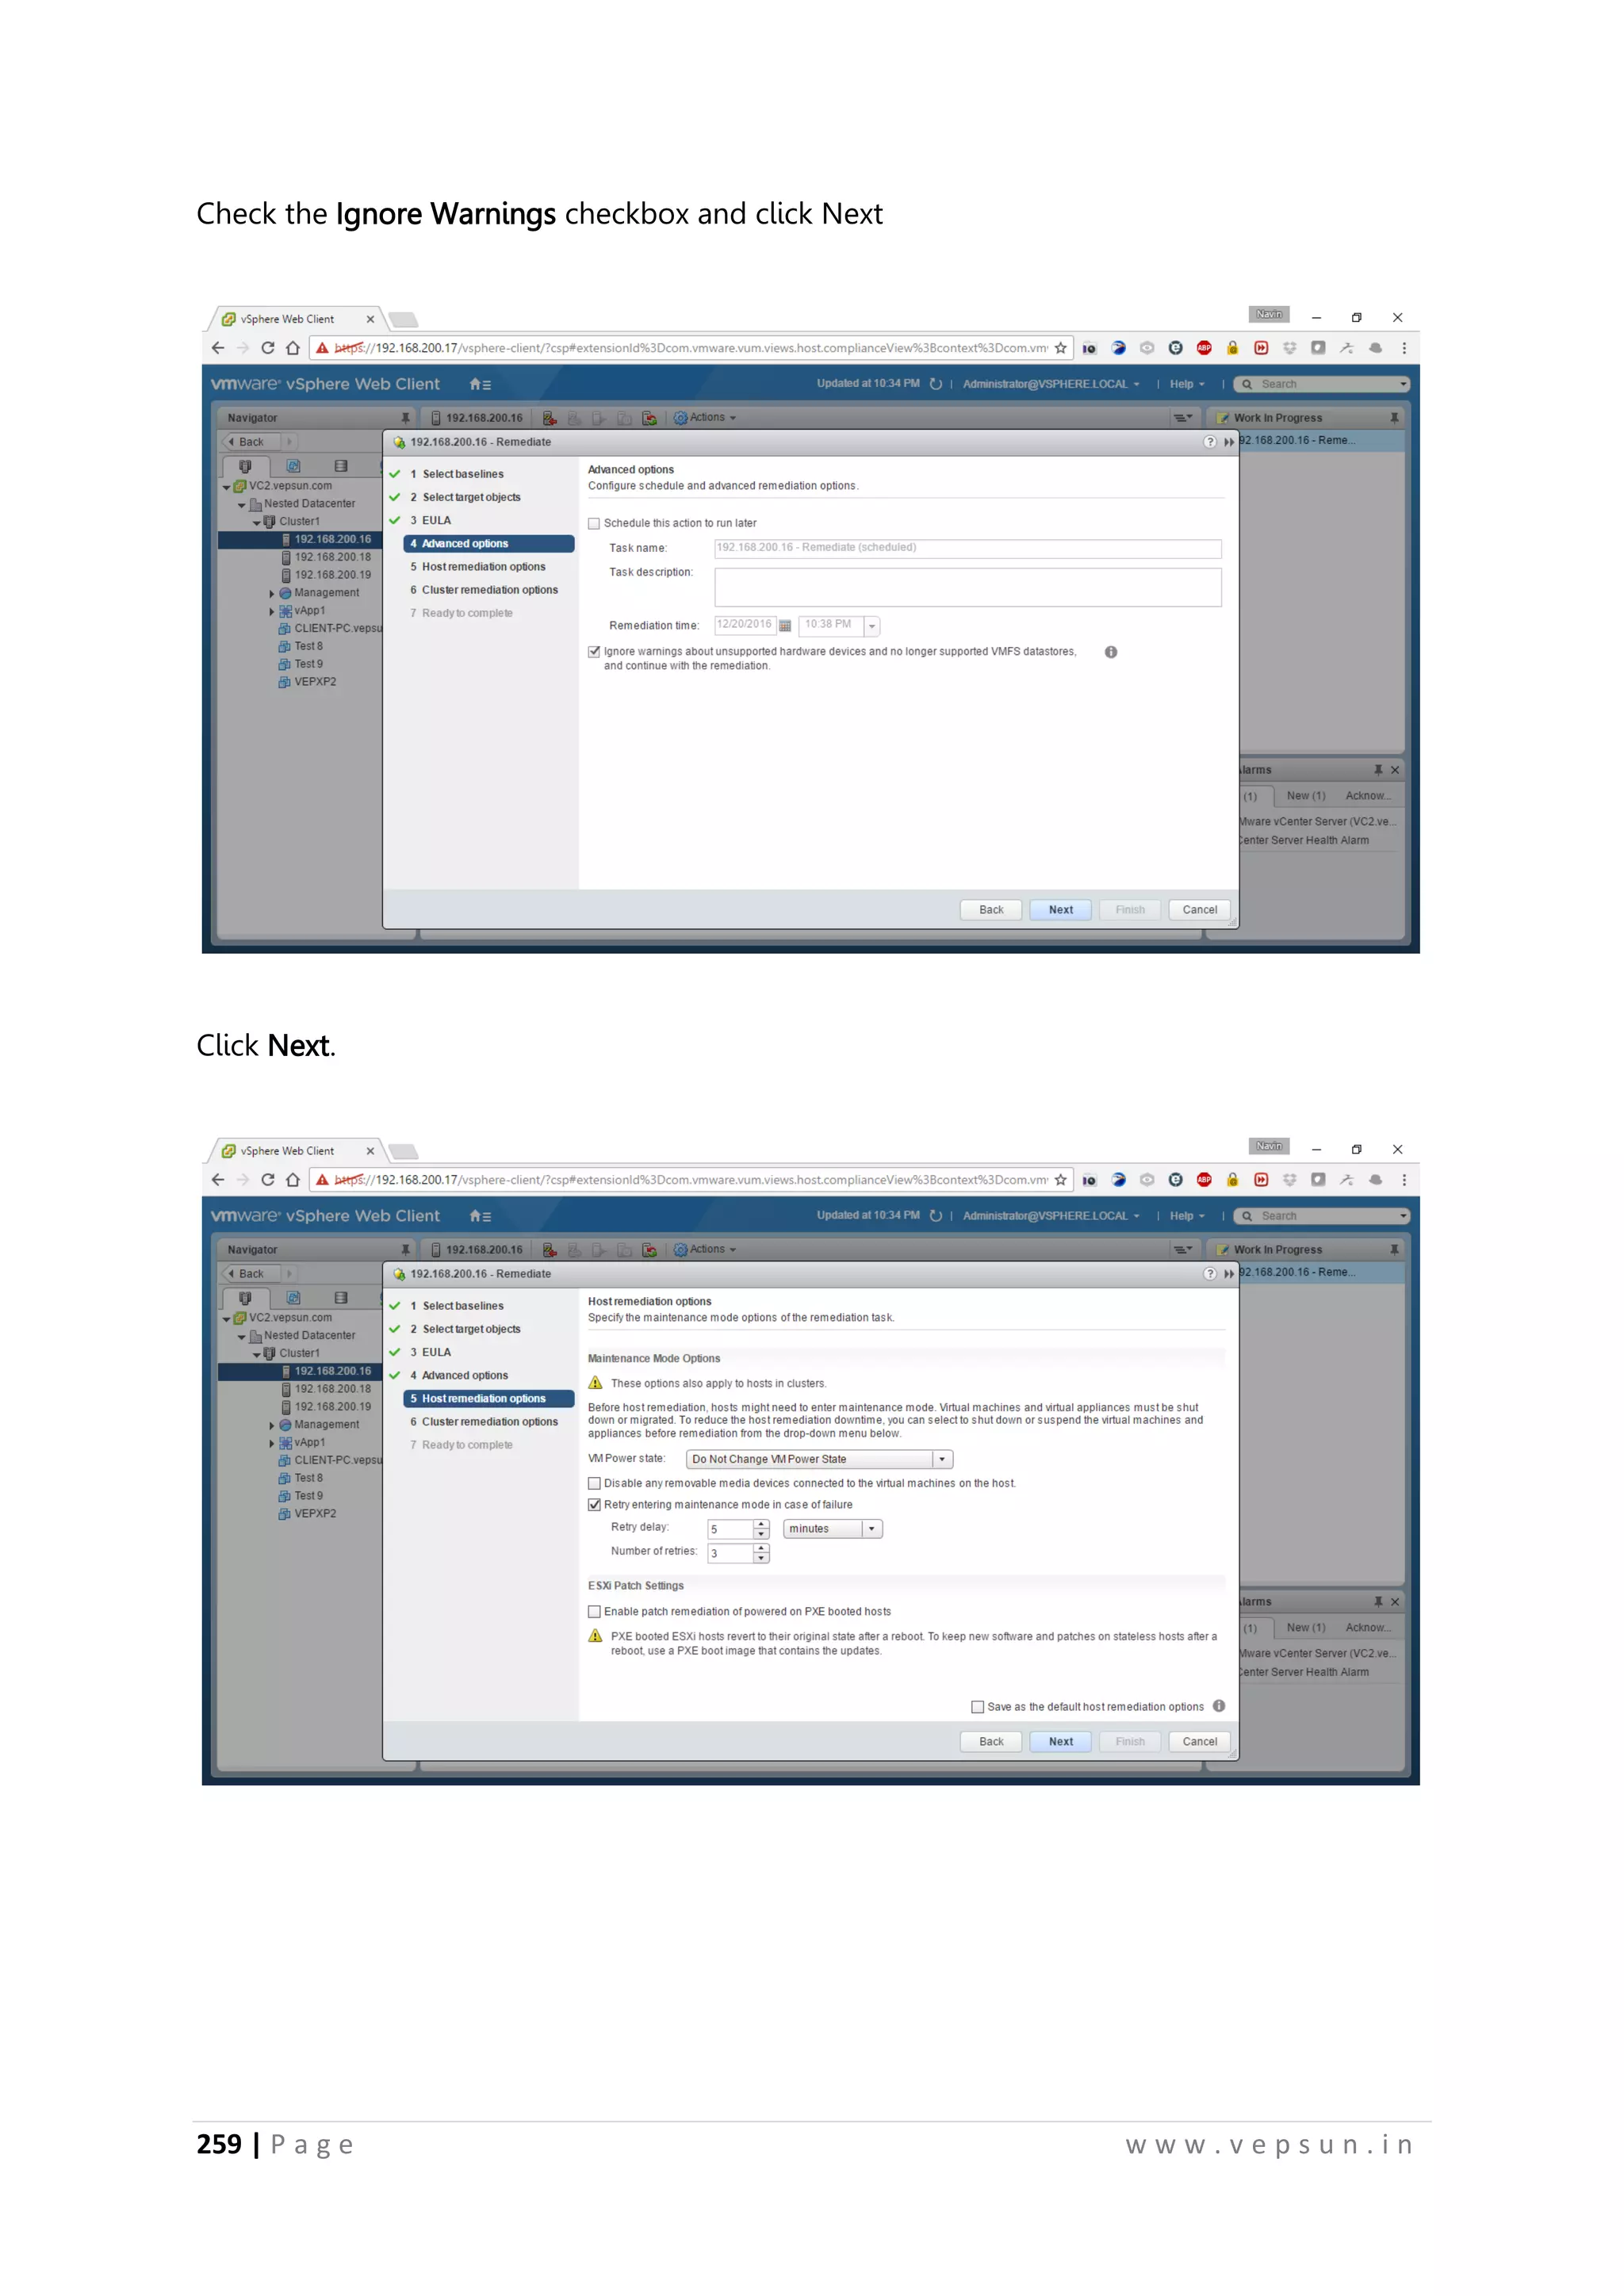
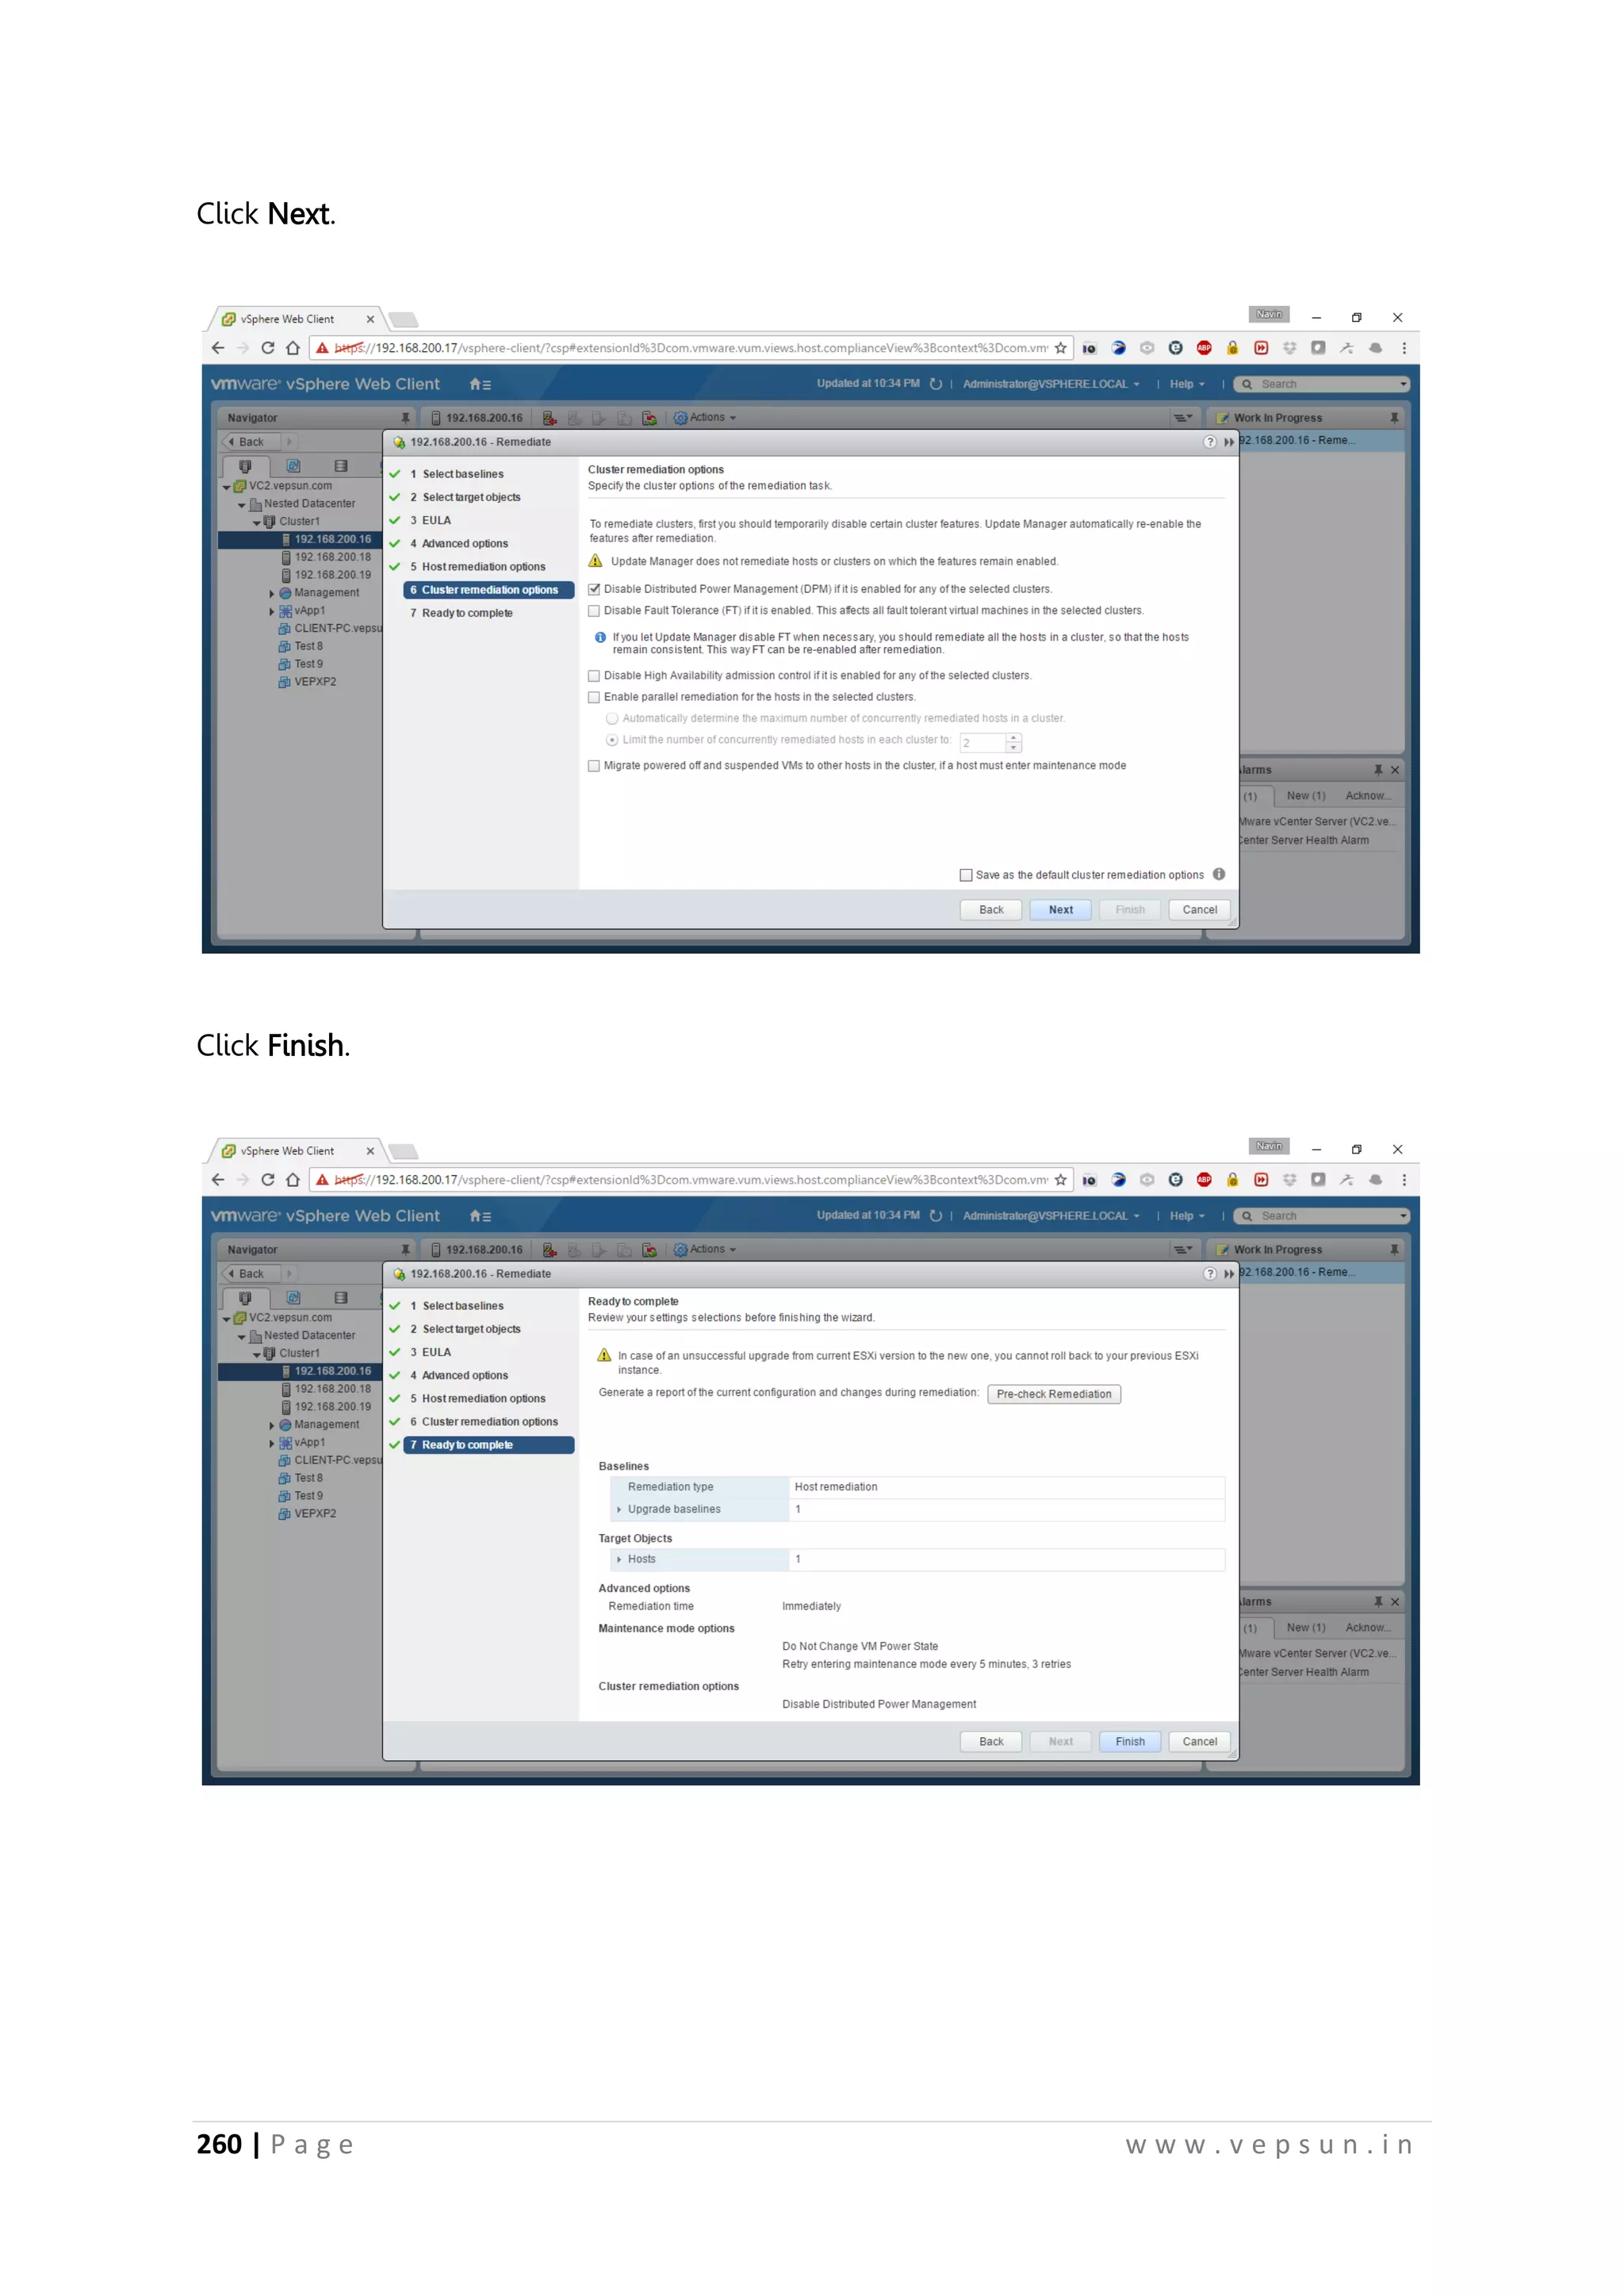
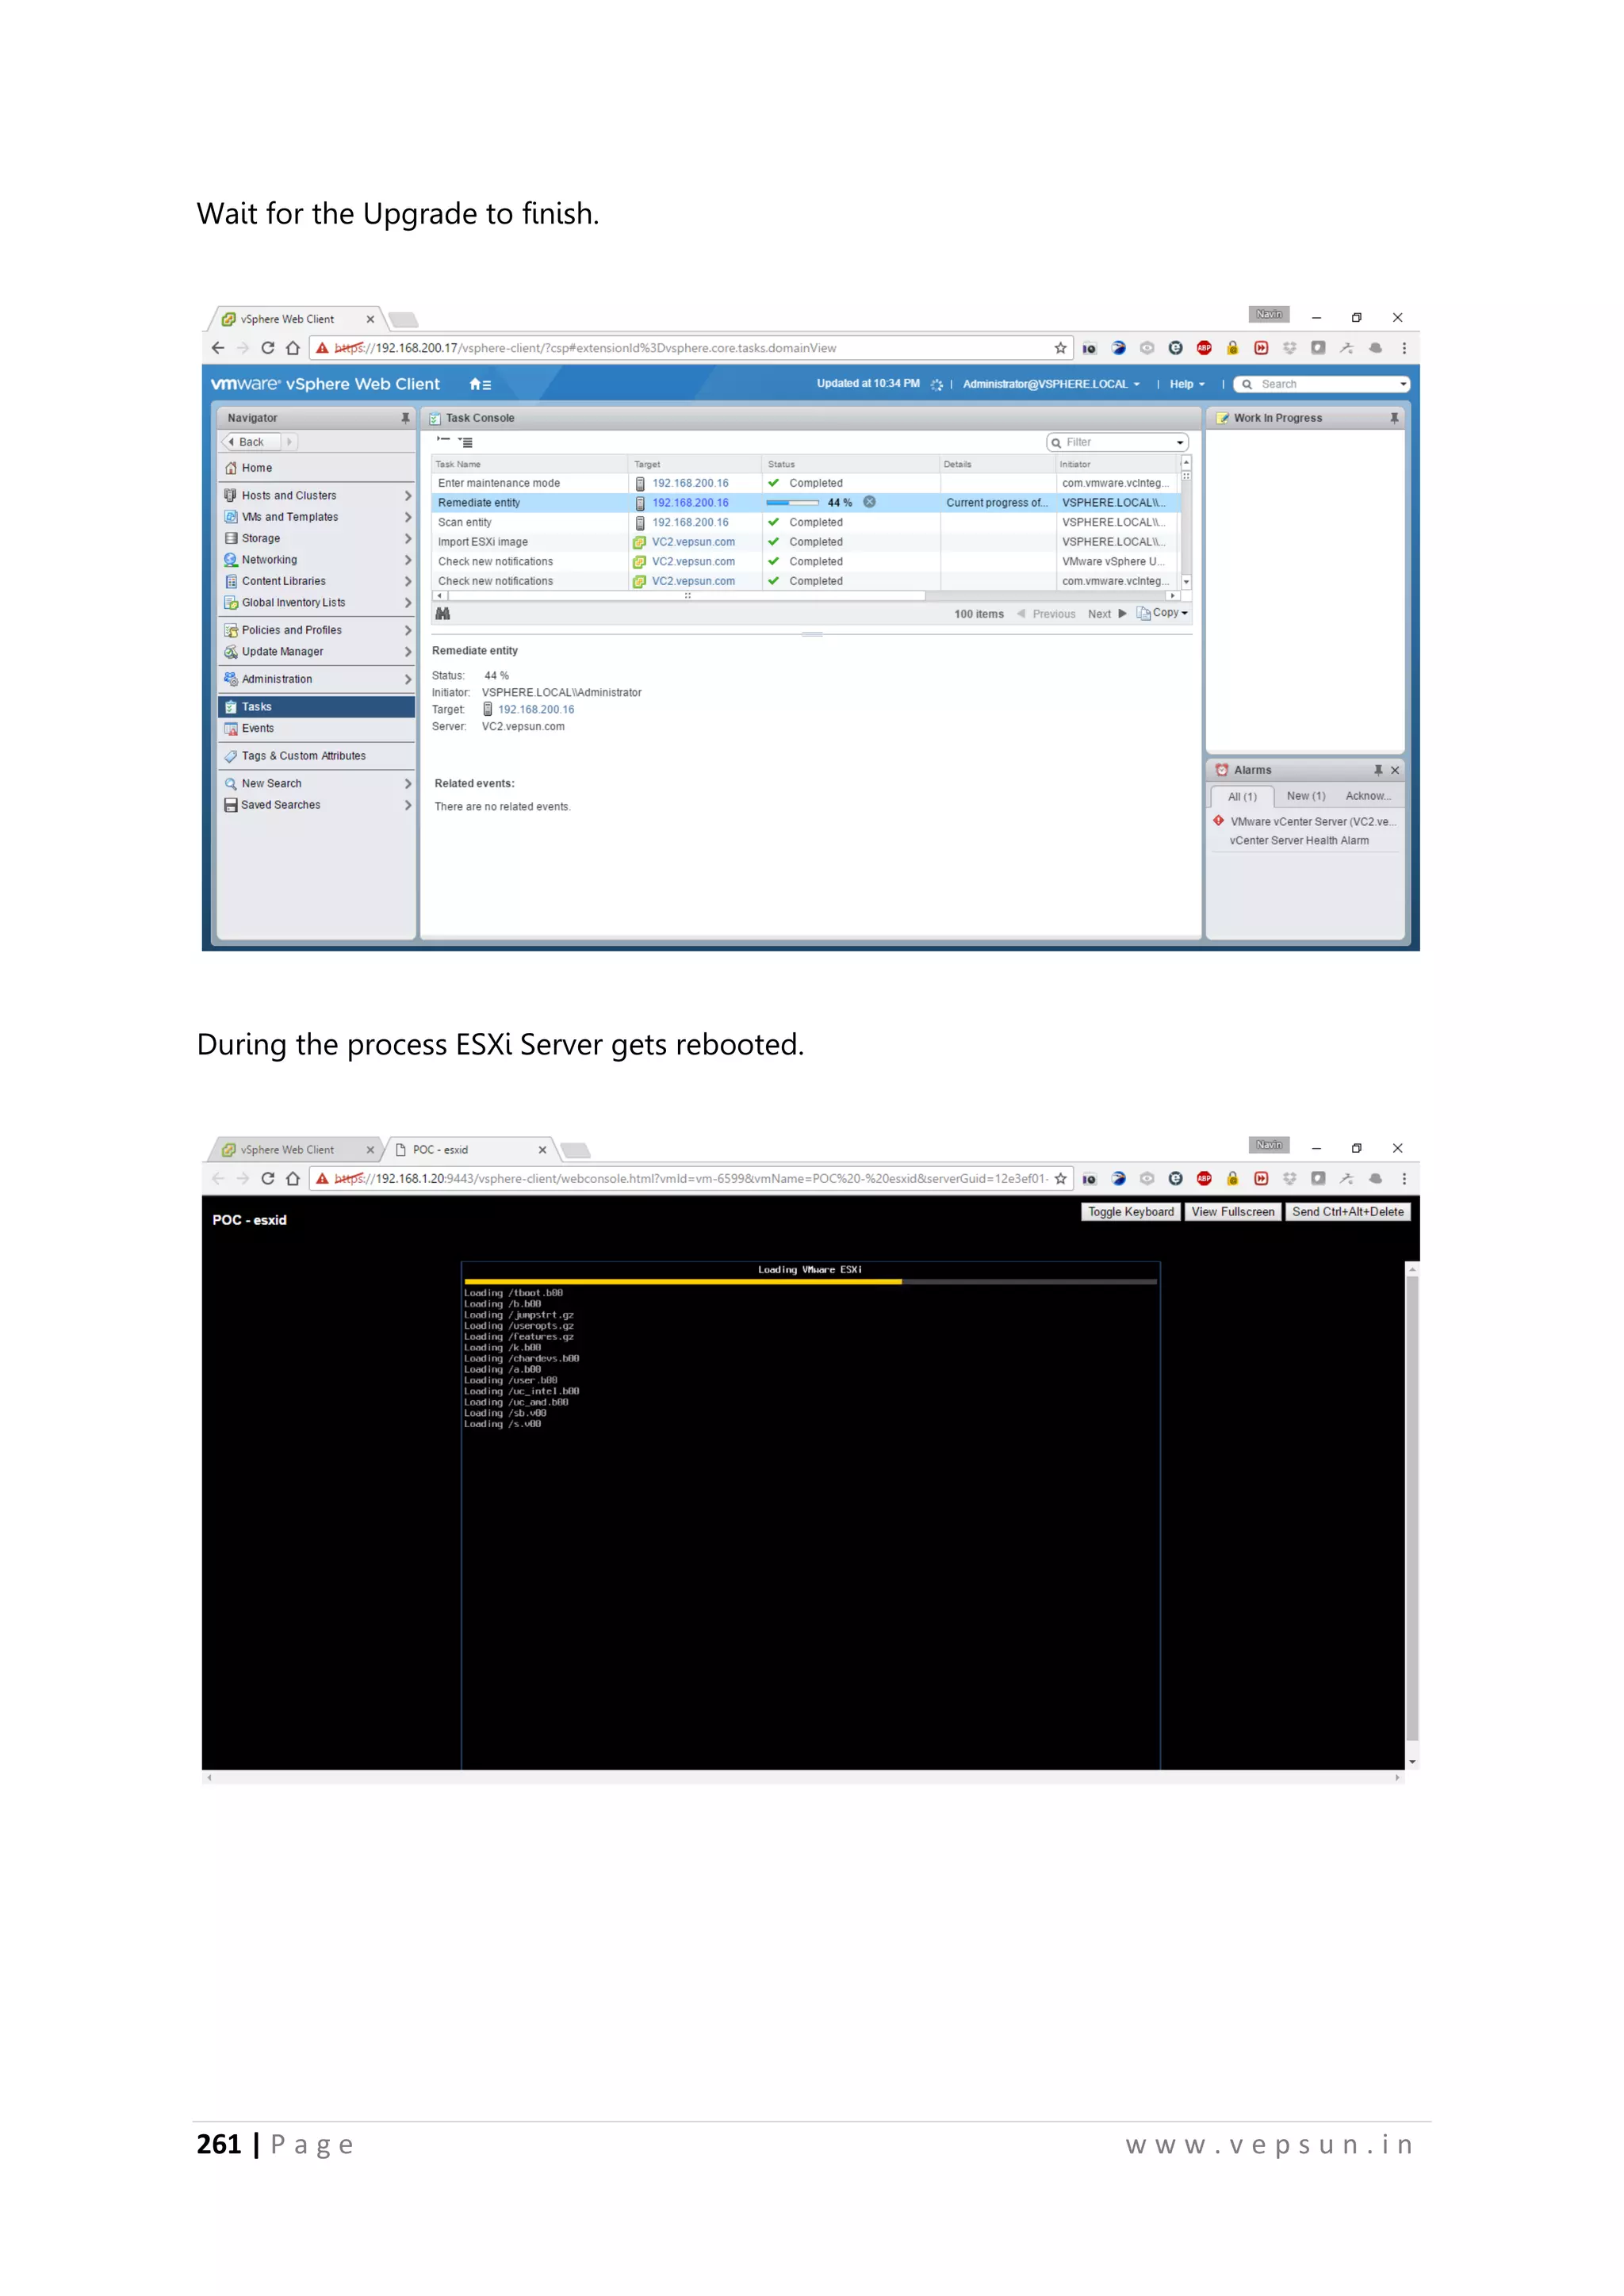
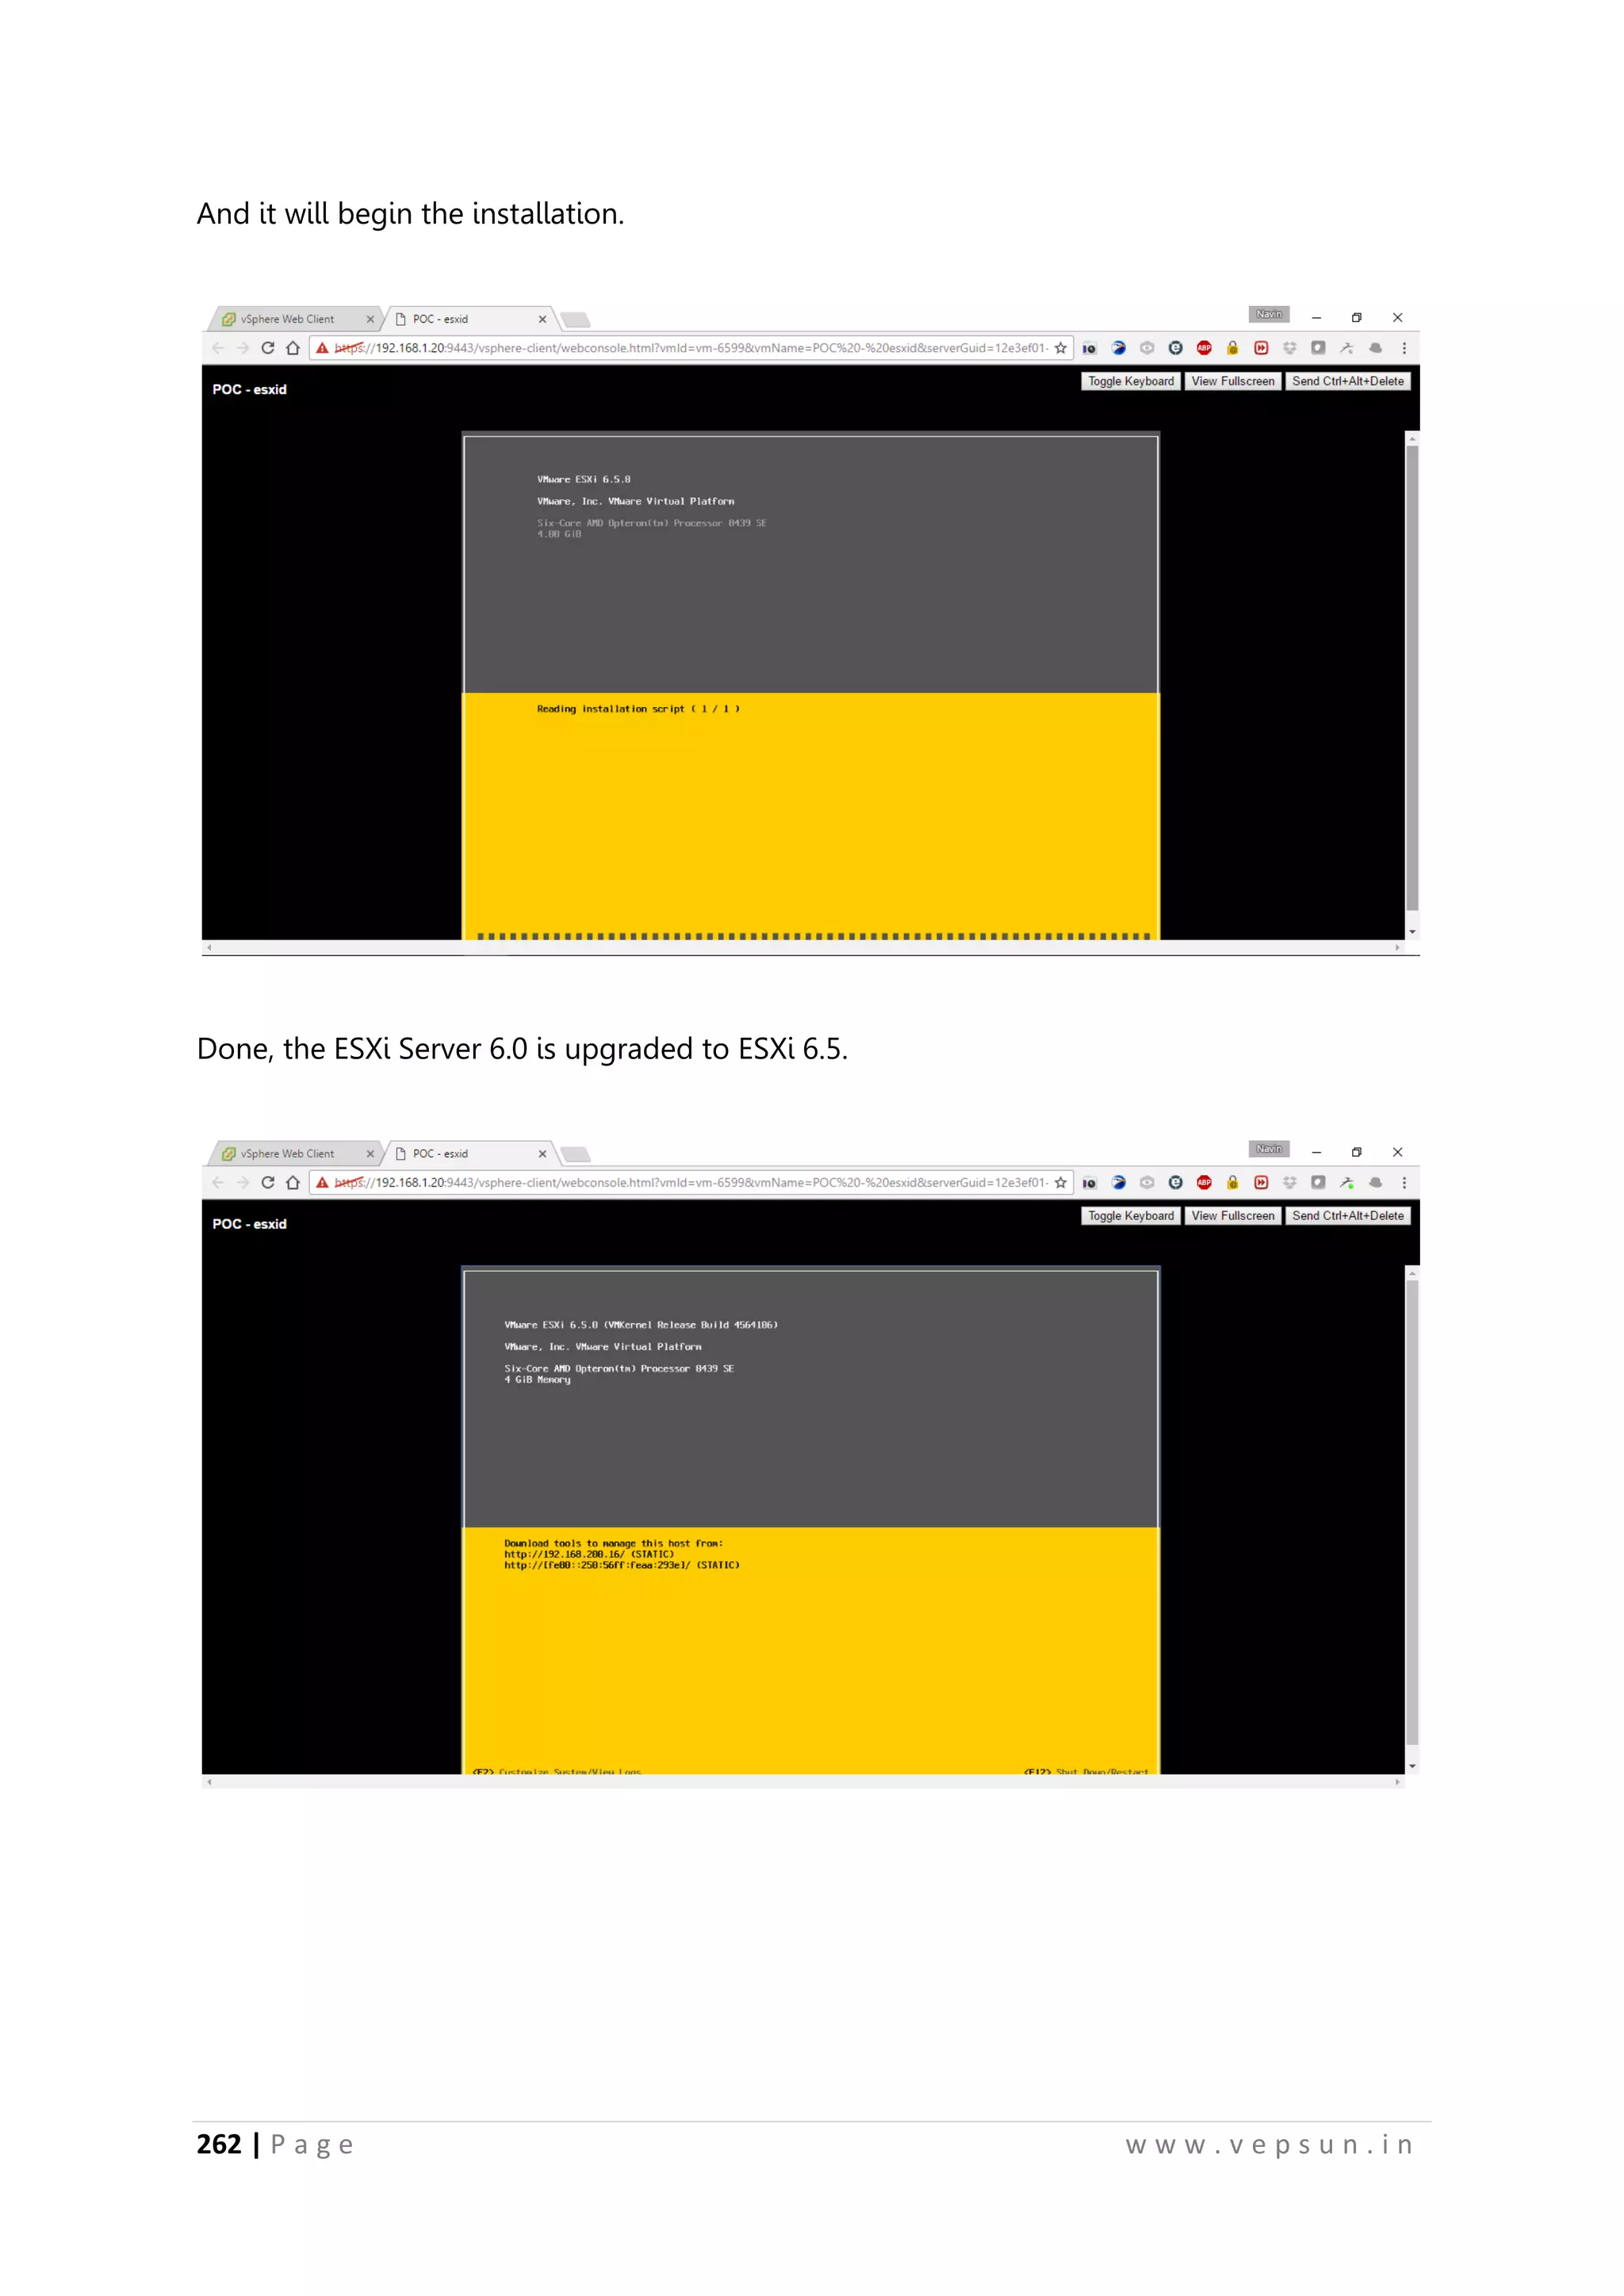
Instructions for integrating Update Manager to manage ESXi and vCenter updates and upgrades.


