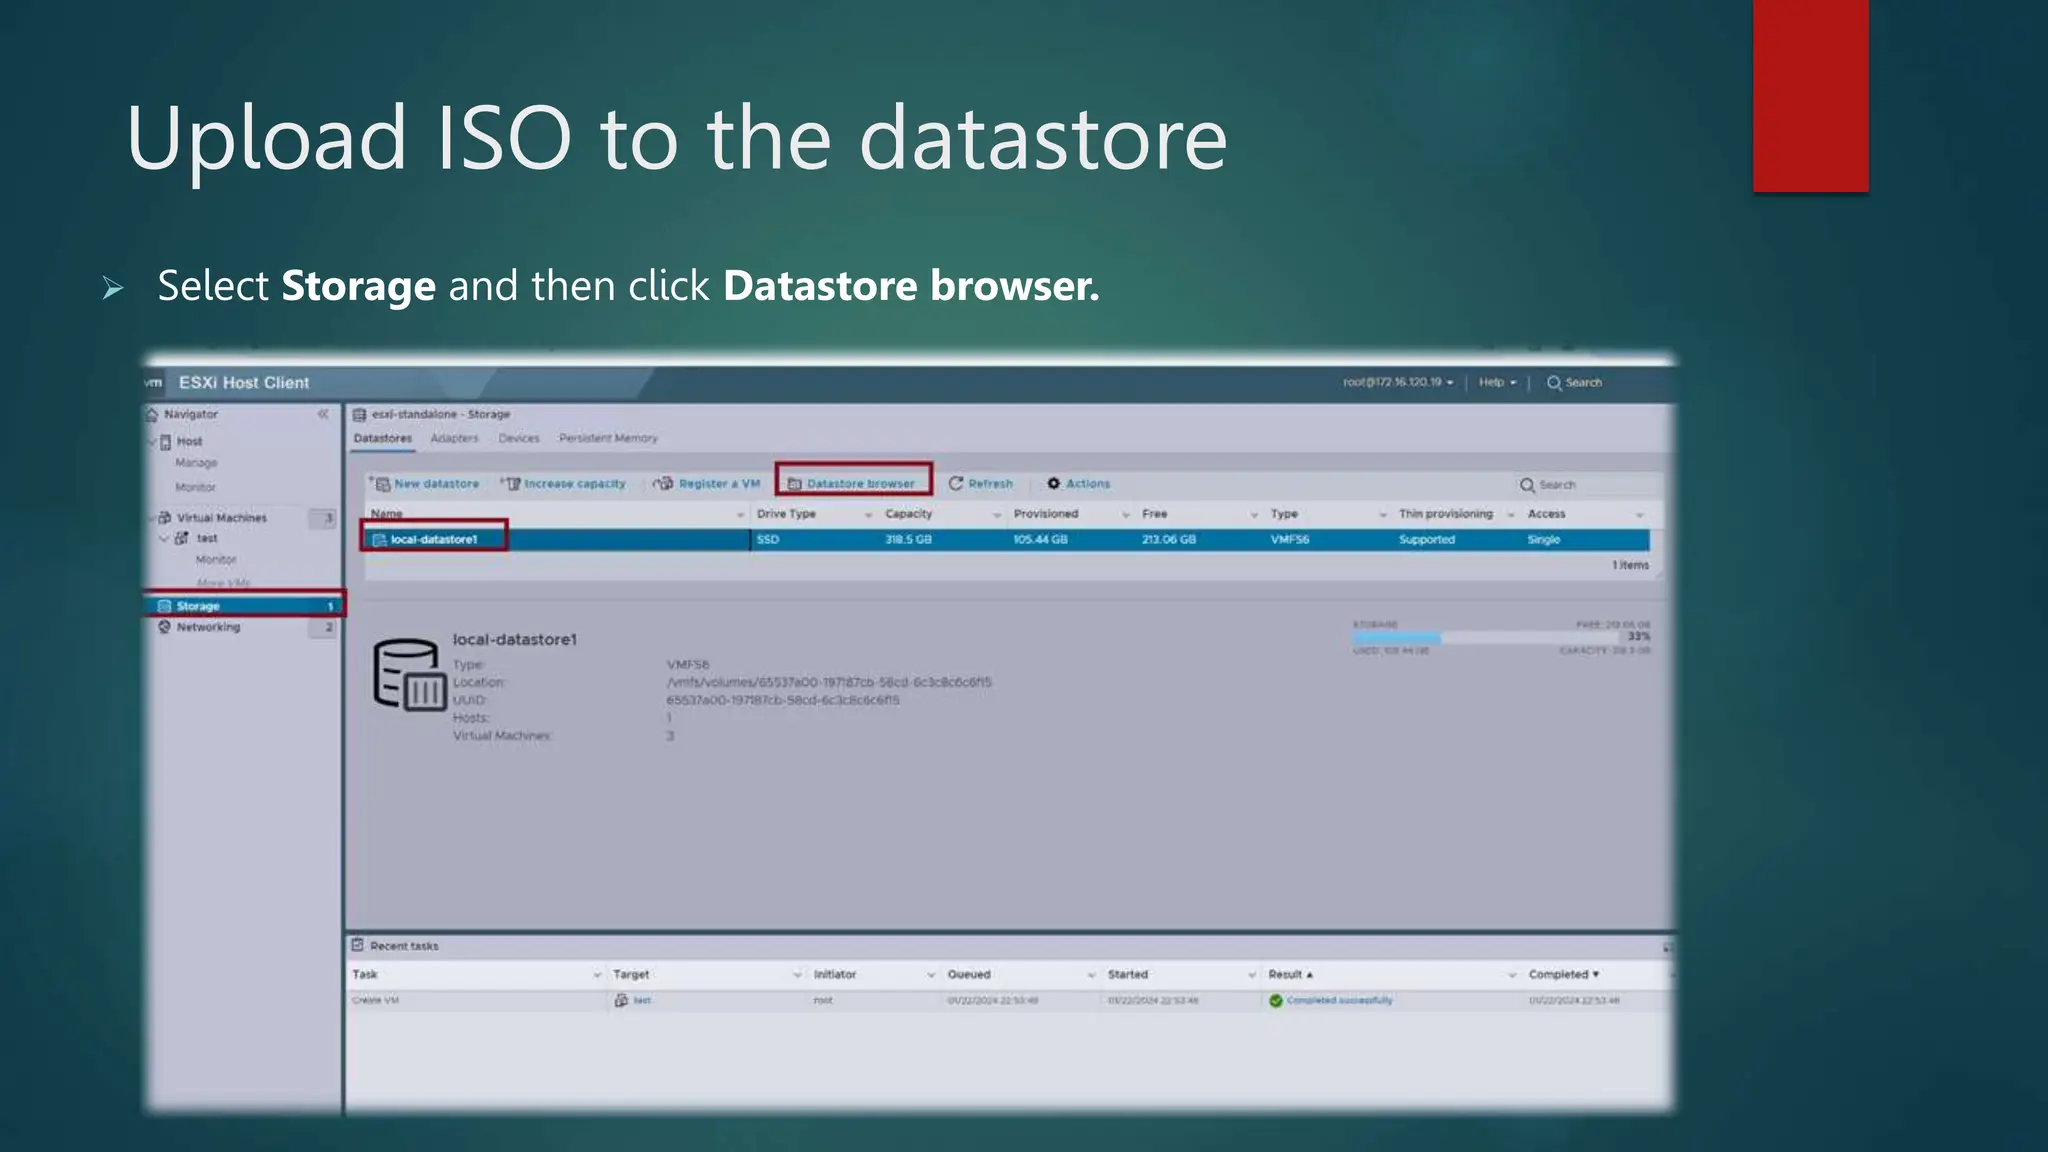
Downloaded 65 times

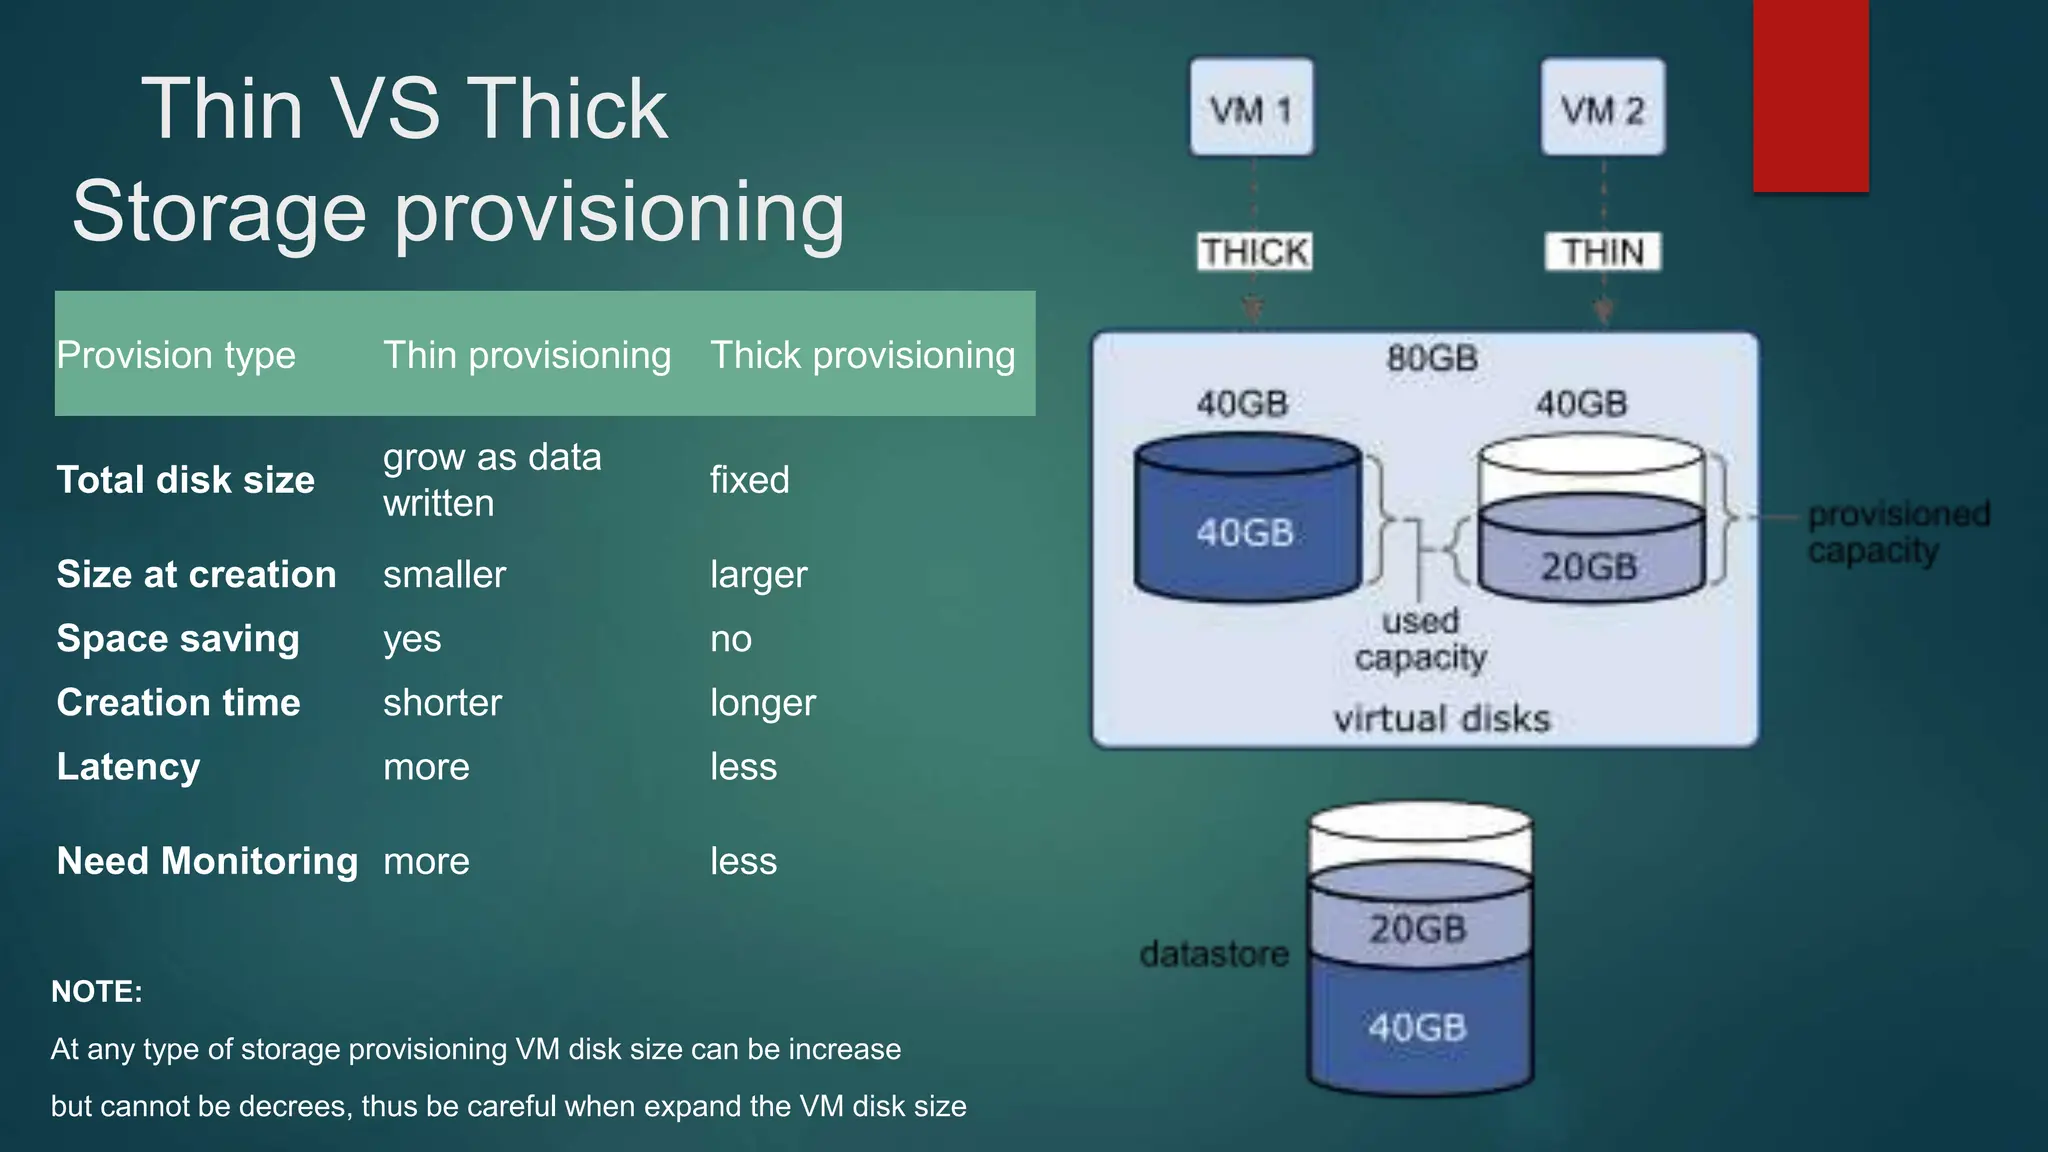
![Install ESXI
Download ESXI ISO for the intended version to you computer from the official link below
https://customerconnect.vmware.com/downloads/details?downloadGroup=ESXI70U3N&productId=1230
Choosing the Installation Method
Best practices for logs when booting from USB or similar.
Burn the download ISO into USB using any burn app like Rufus.
Attached this USB to your server and boot from this USB.
Start the installer using the arrow keys and
press [ENTER] to begin booting the ESXi installer.
A compatibility warning is displayed.
Press [ENTER] to proceed.
The End User License Agreement (EULA) displays.](https://image.slidesharecdn.com/vmwaredatacentervirtualization-240126052456-f9427dda/75/Vmware-Data-Center-Virtualization-ESXI-and-vCenter-11-2048.jpg)
![ Press [ENTER] to proceed. The End
User License Agreement (EULA)
displays.
Use the arrow keys to select the drive
you want to install ESXi, and then
press [ENTER] to continue.
Install ESXI](https://image.slidesharecdn.com/vmwaredatacentervirtualization-240126052456-f9427dda/75/Vmware-Data-Center-Virtualization-ESXI-and-vCenter-12-2048.jpg)
![ The Confirm Disk Selection window displays
Press [ENTER] to accept your selection and
continue.
Please select a keyboard layout window displays.
Select your desired keyboard layout using the arrow
keys and then press [ENTER]. The Enter a root
password window displays.
Install ESXI](https://image.slidesharecdn.com/vmwaredatacentervirtualization-240126052456-f9427dda/75/Vmware-Data-Center-Virtualization-ESXI-and-vCenter-13-2048.jpg)
![ Enter a root password in the Root password
field.
Confirm the password in the Confirm password
field and then press [ENTER] to proceed. The
installer rescans the system.
It then displays the Confirm Install window.
Press [F11] to proceed with the installation.
Install ESXI](https://image.slidesharecdn.com/vmwaredatacentervirtualization-240126052456-f9427dda/75/Vmware-Data-Center-Virtualization-ESXI-and-vCenter-14-2048.jpg)
![ The Complete Installation window displays
when the installation process is completed.
Press [ENTER] to reboot the system. (Make sure
your installation media has been ejected and your
bios set to the boot disk.)
It will can take several minutes to complete the
reboot.
The VMware ESXi screen displays when the boot
completes.
Install ESXI](https://image.slidesharecdn.com/vmwaredatacentervirtualization-240126052456-f9427dda/75/Vmware-Data-Center-Virtualization-ESXI-and-vCenter-15-2048.jpg)
![ Press [F2]. The Authentication Required window
displays.
Enter the root account credentials you created during
the installation process and press [ENTER]. The
System Customization screen displays.
Scroll down to select Configure Management
Network and then press [ENTER]. The Configure
Management Network window appears.
Install ESXI](https://image.slidesharecdn.com/vmwaredatacentervirtualization-240126052456-f9427dda/75/Vmware-Data-Center-Virtualization-ESXI-and-vCenter-16-2048.jpg)
![ Select the Network Adapters window and press
[ENTER].
Use the arrow keys to select the adapter to use as the
default management network and press [ENTER]. More
than one management network can be selected for
redundancy.
Use space to select vmnic0 and vmnic1 to make them as
team-NIC
Exit the menu with [ESC] and select the IPv4
Configuration window
Install ESXI](https://image.slidesharecdn.com/vmwaredatacentervirtualization-240126052456-f9427dda/75/Vmware-Data-Center-Virtualization-ESXI-and-vCenter-17-2048.jpg)
![ Press [ENTER] to apply the new DNS settings and
return to the Configure Management Network menu
Press [ESC] to exit the Configure Management
Network menu. The Confirm Management Network
popup window displays. Press [Y] to confirm your
selection.
After applying Yes, now you can go to your web
browser and request HTTPS with the same IP you
just set.
Install ESXI](https://image.slidesharecdn.com/vmwaredatacentervirtualization-240126052456-f9427dda/75/Vmware-Data-Center-Virtualization-ESXI-and-vCenter-18-2048.jpg)


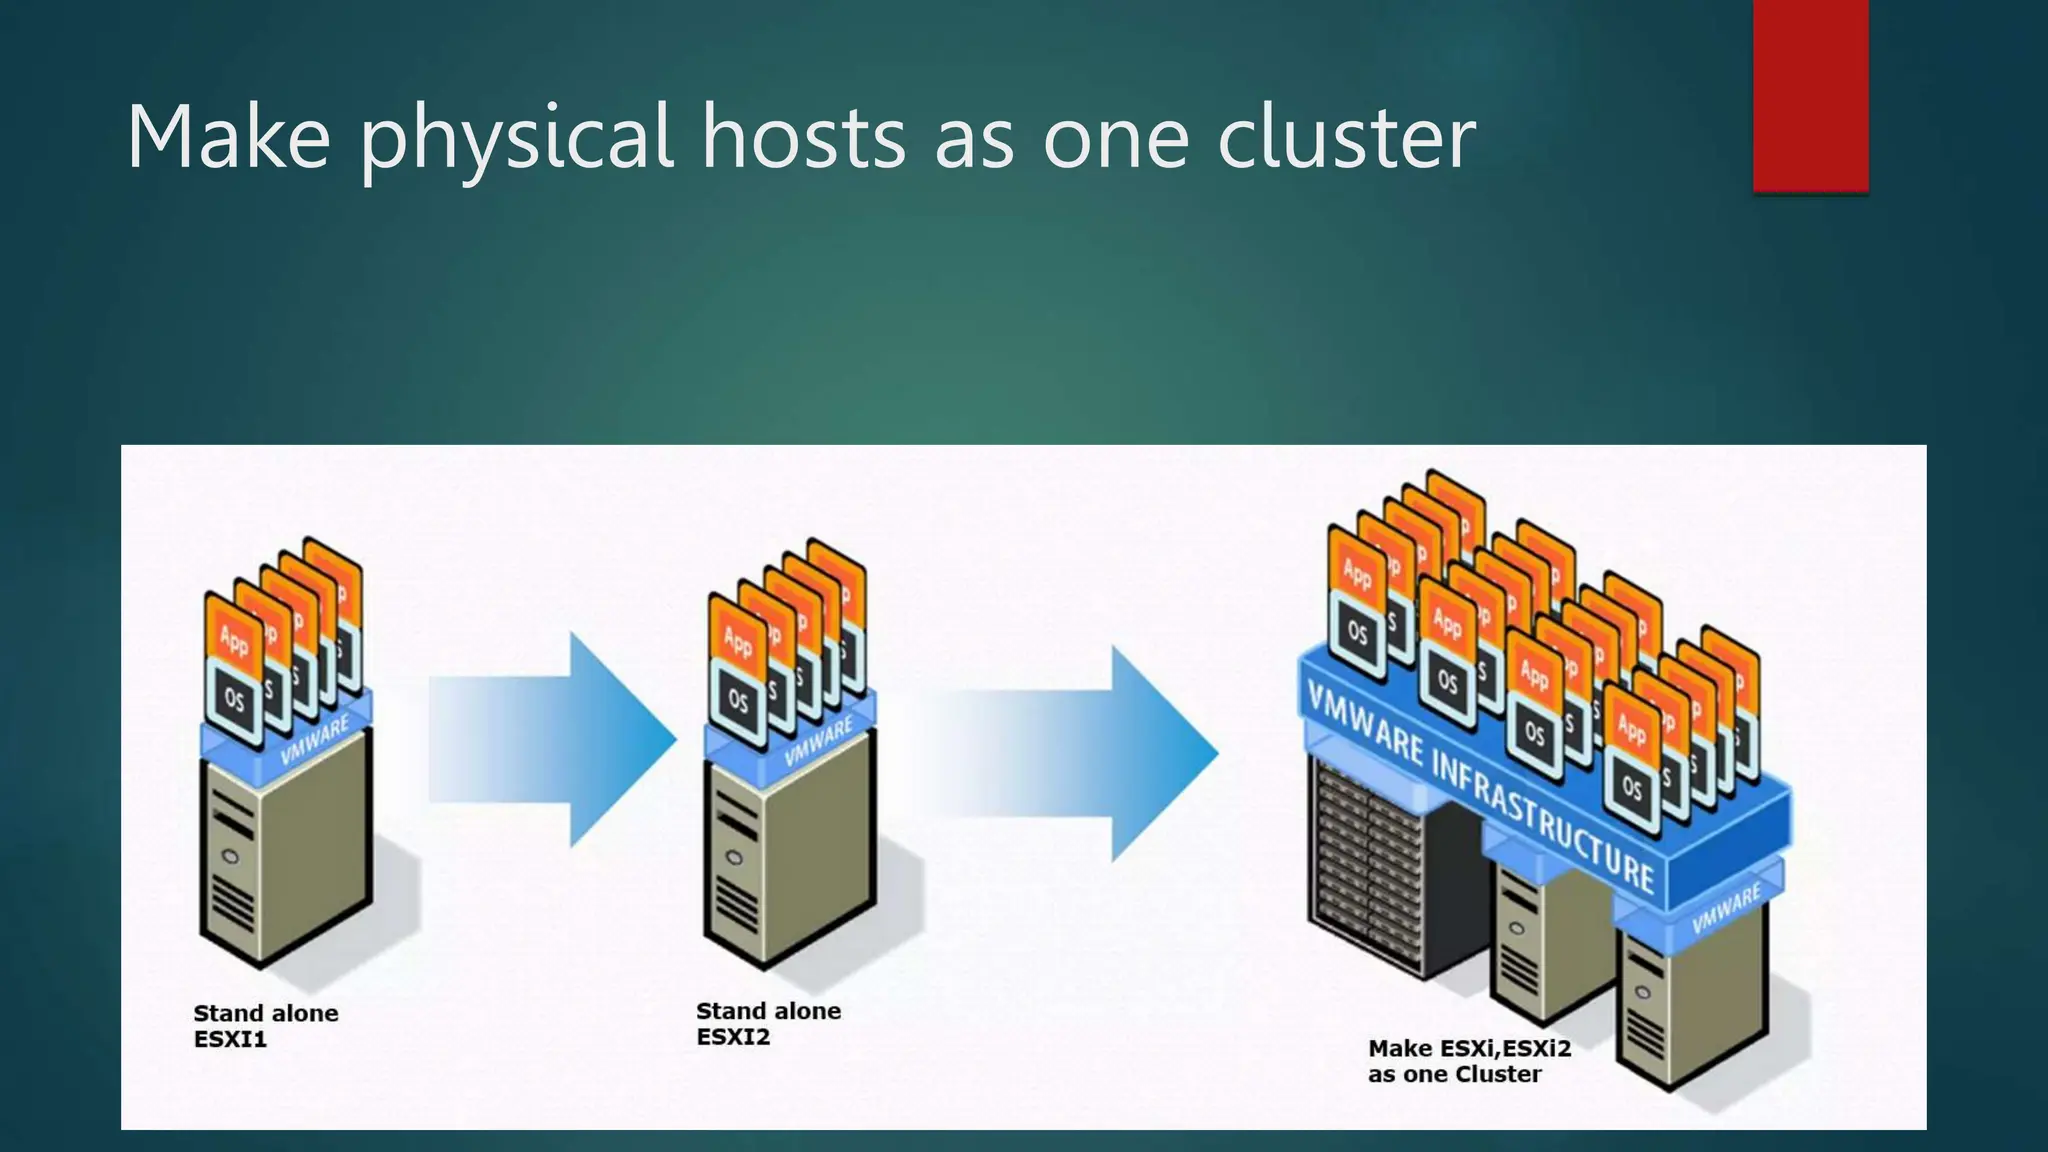

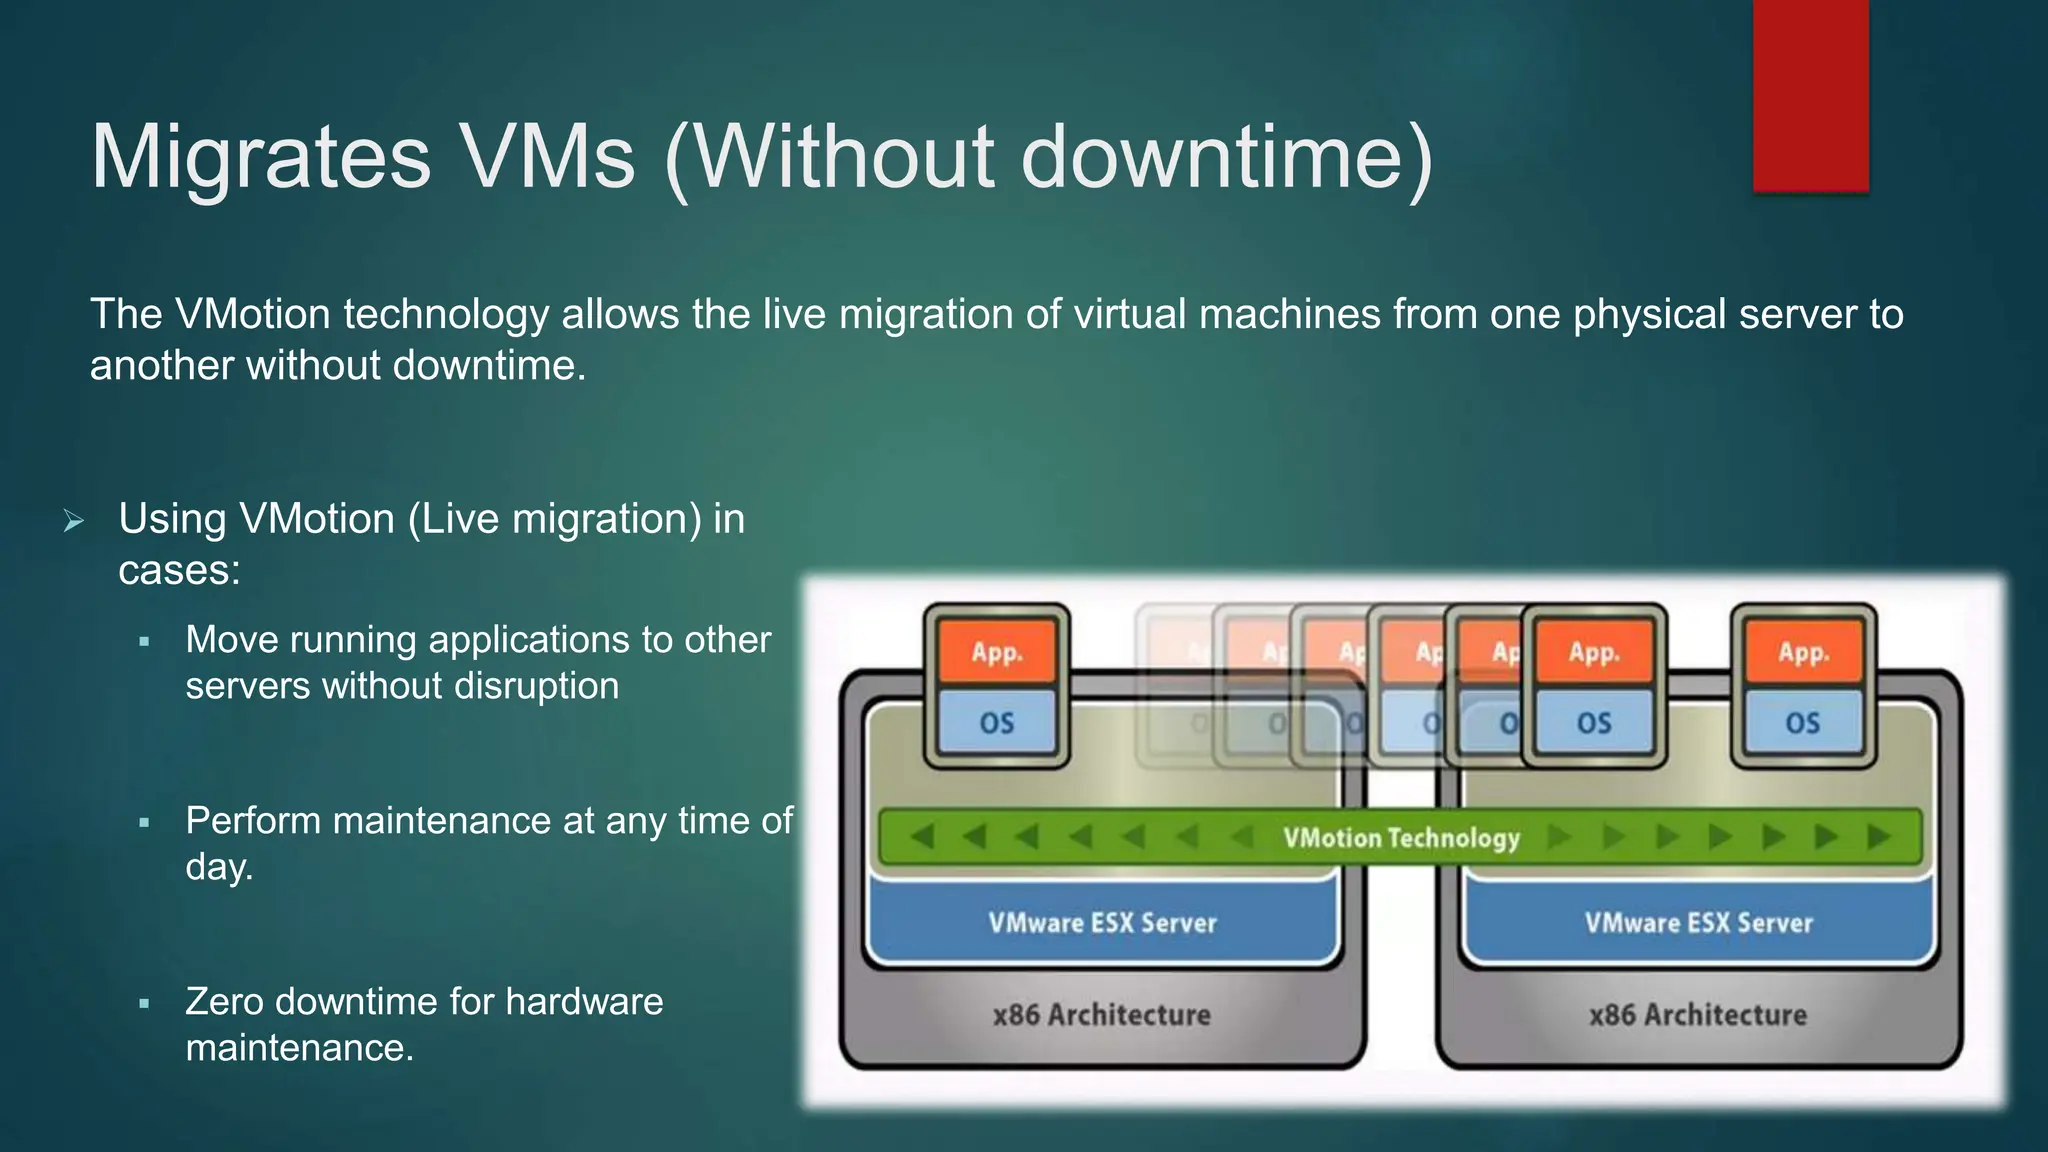
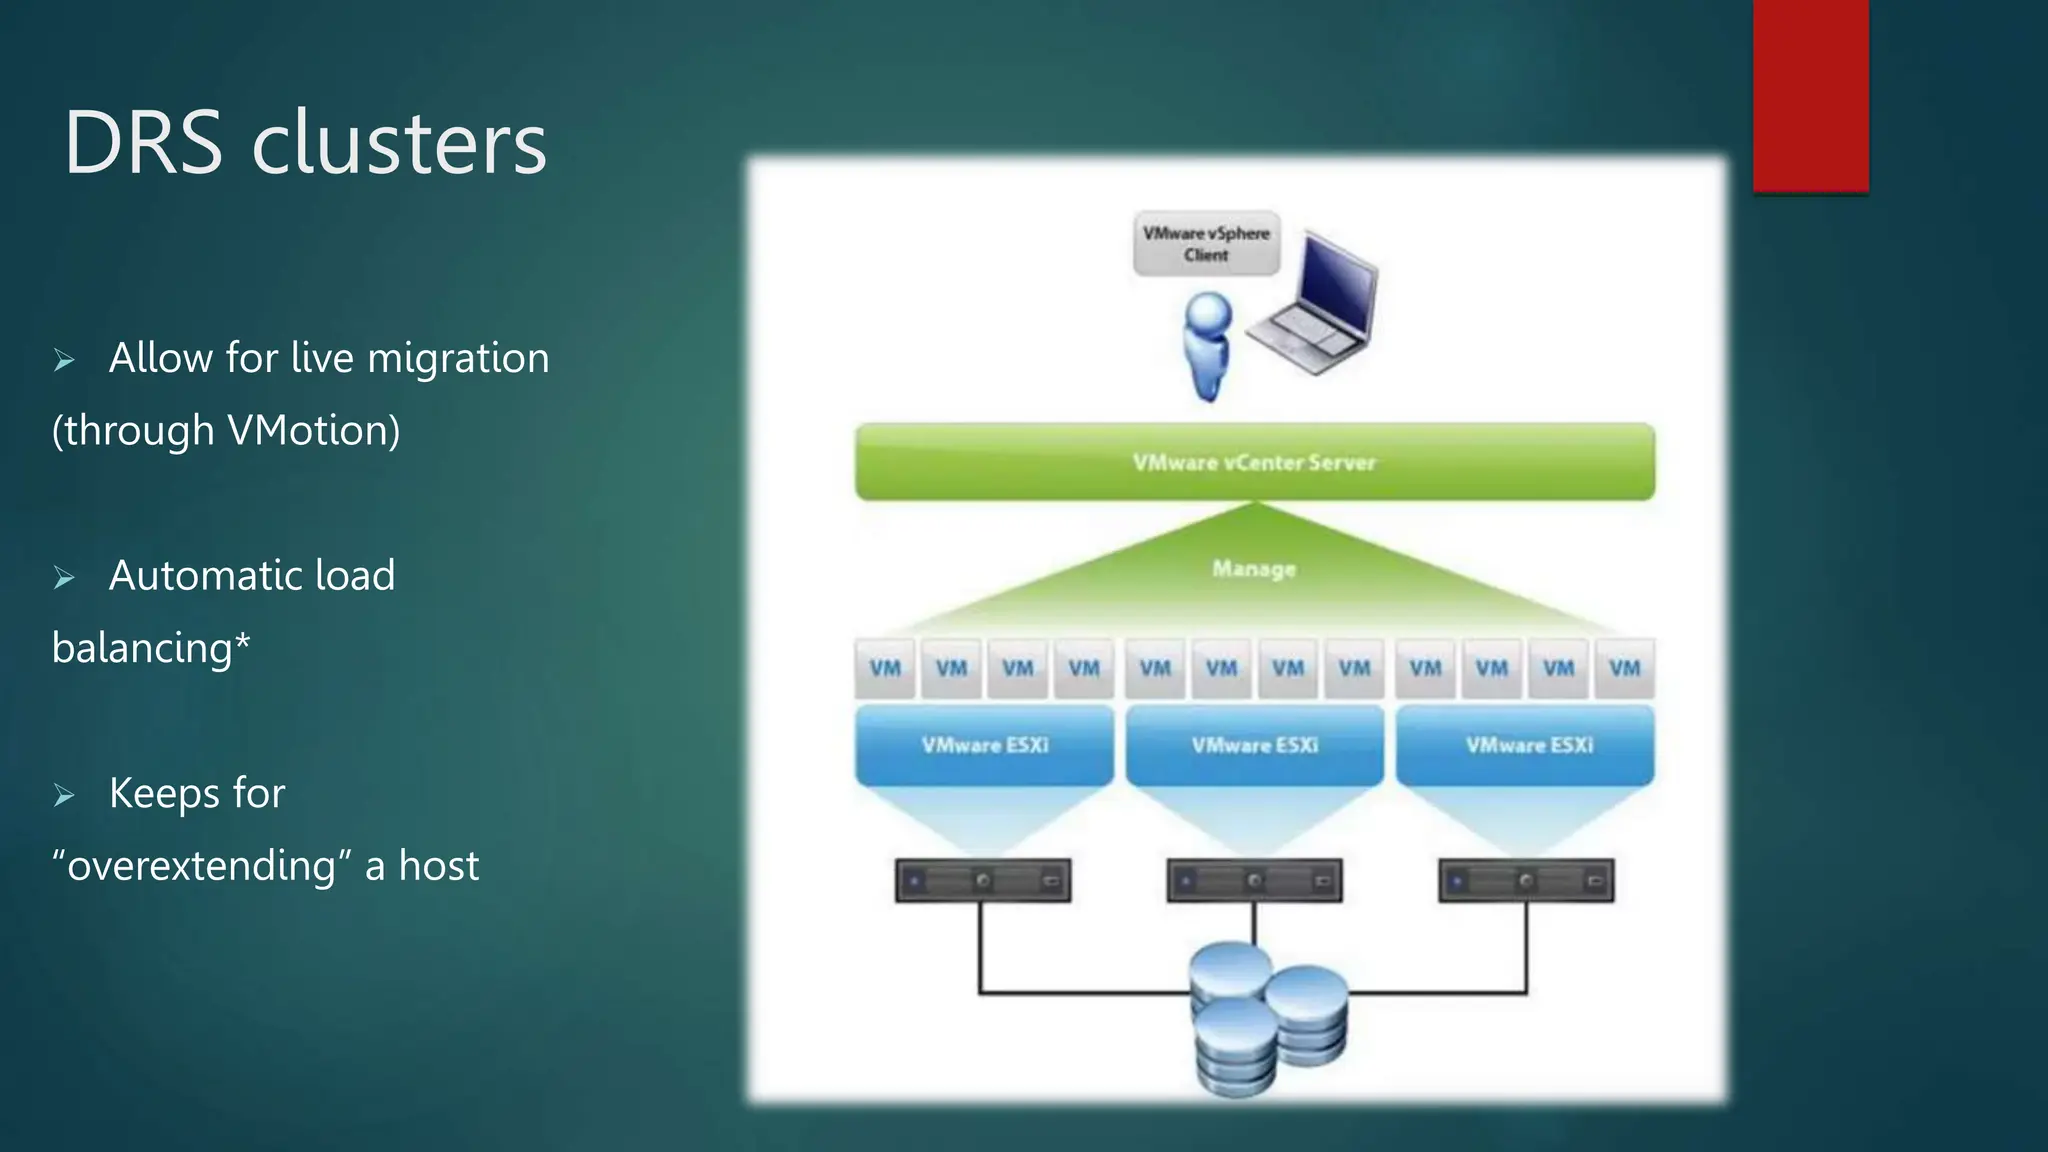
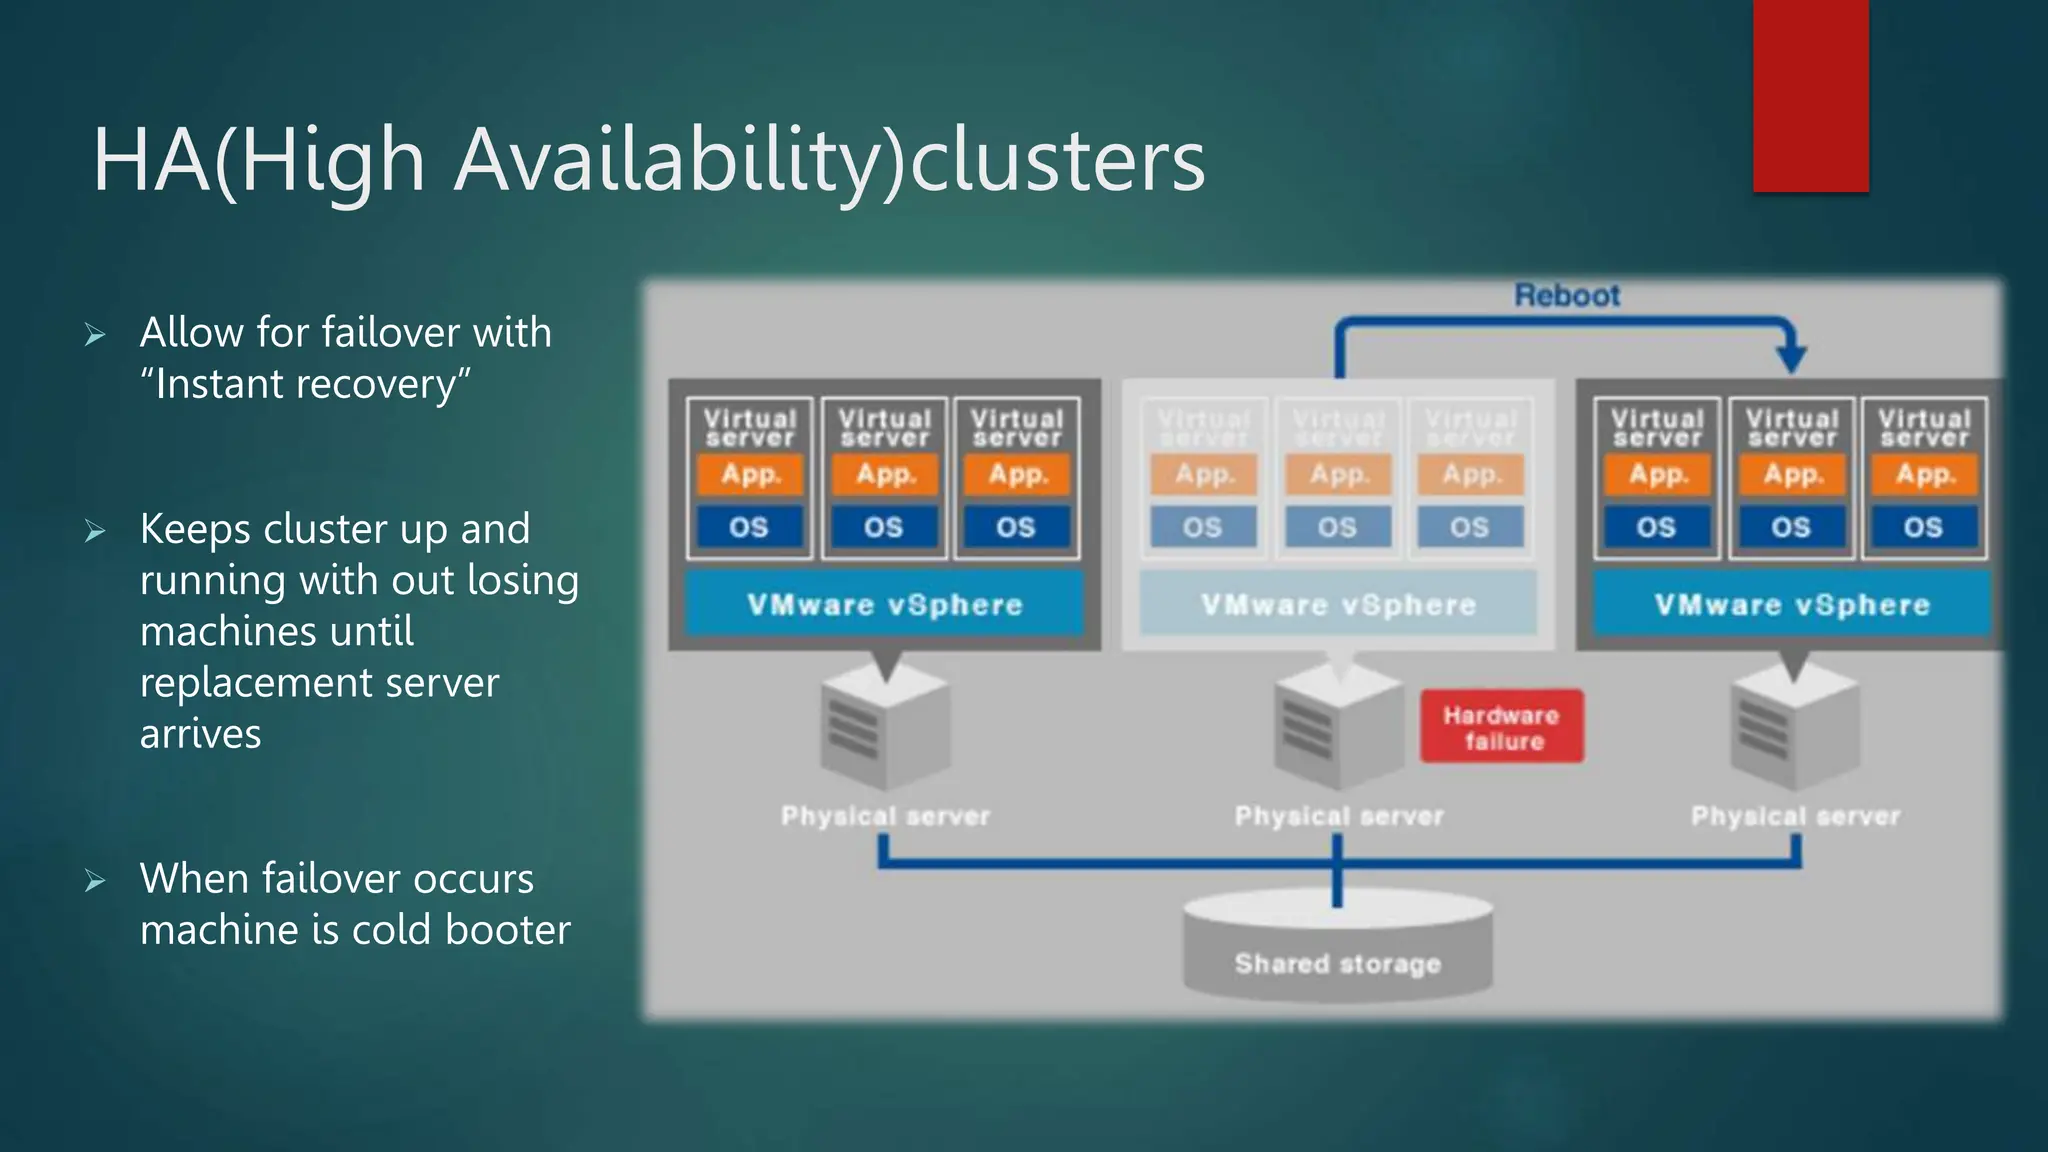
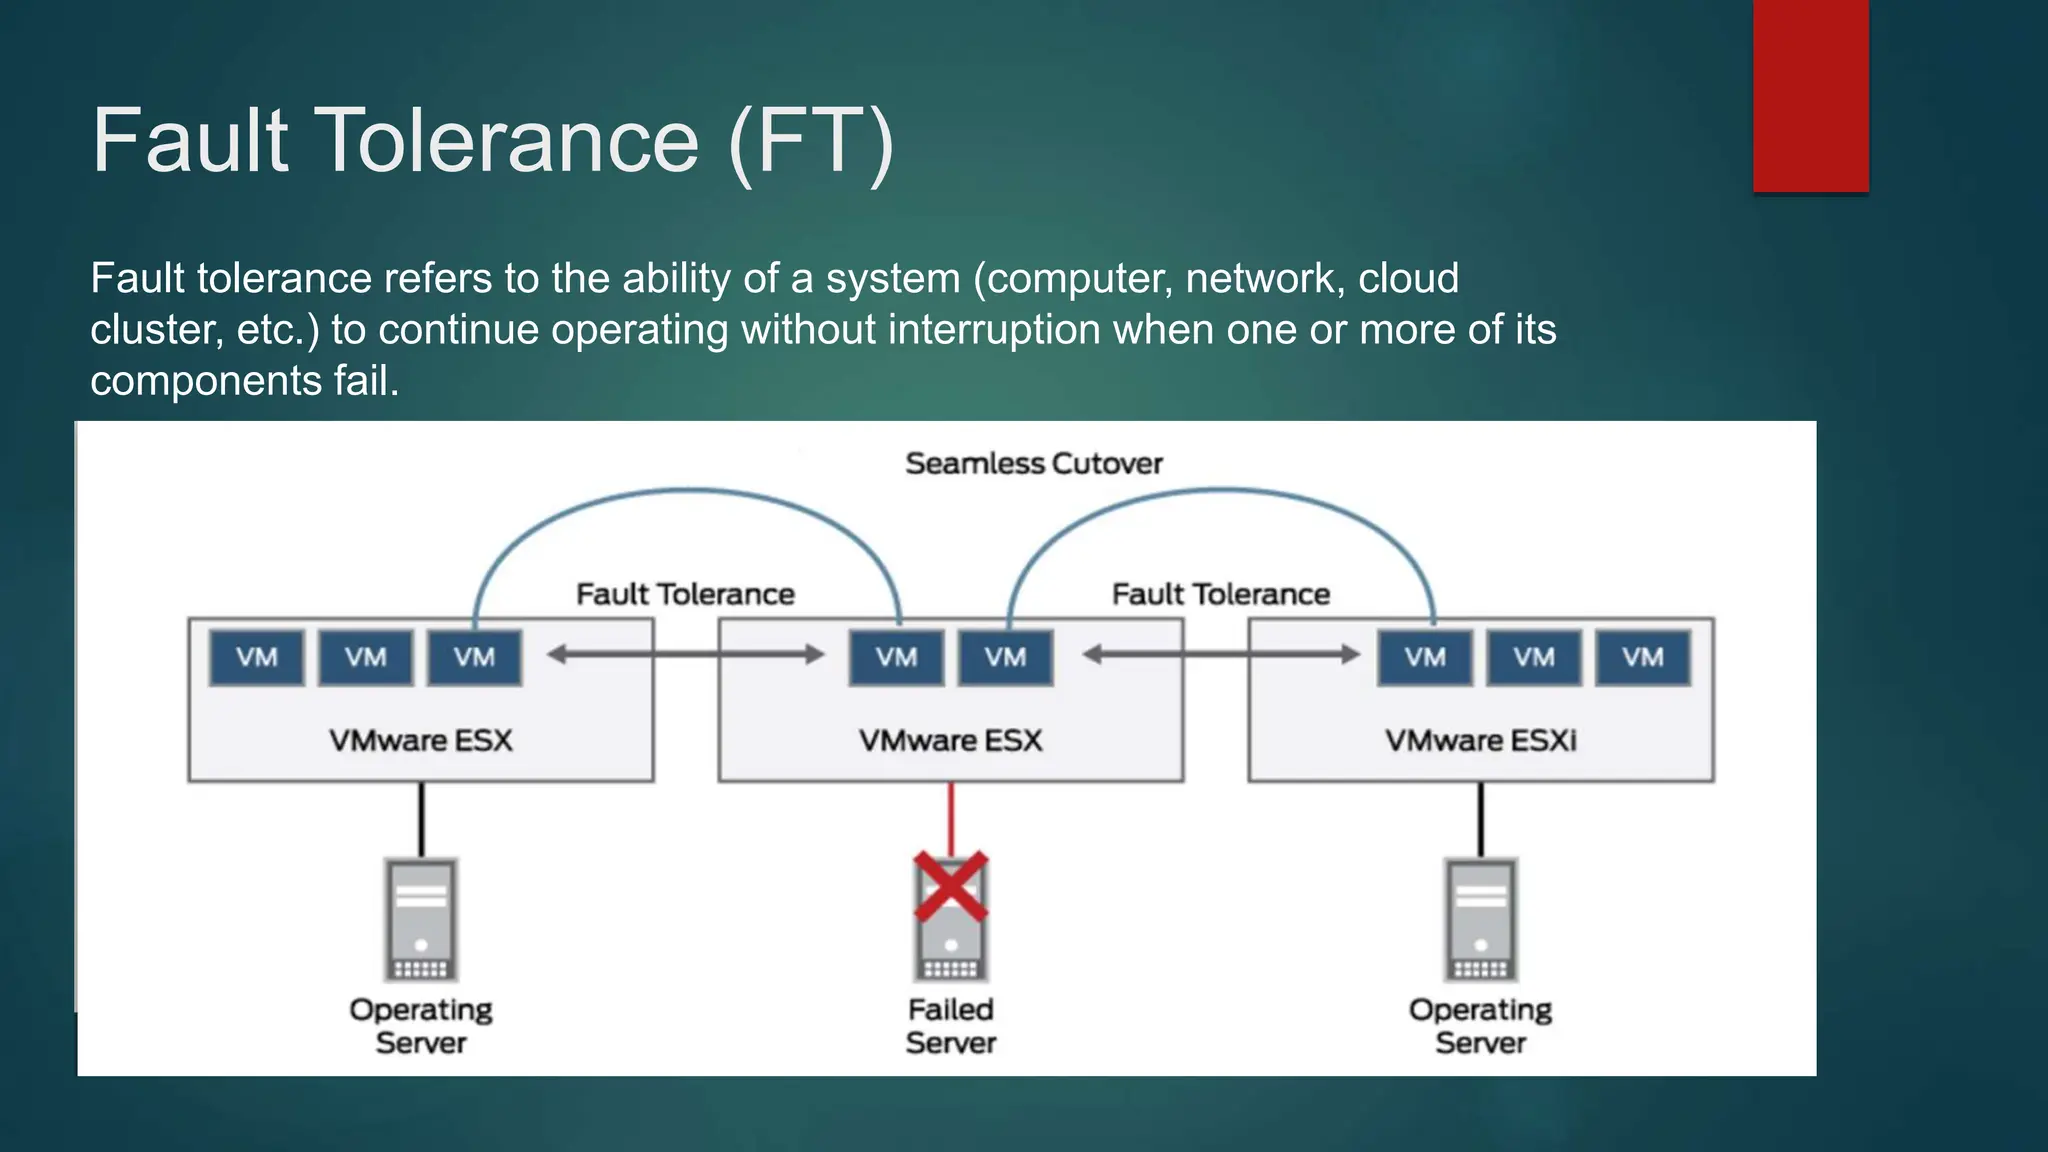
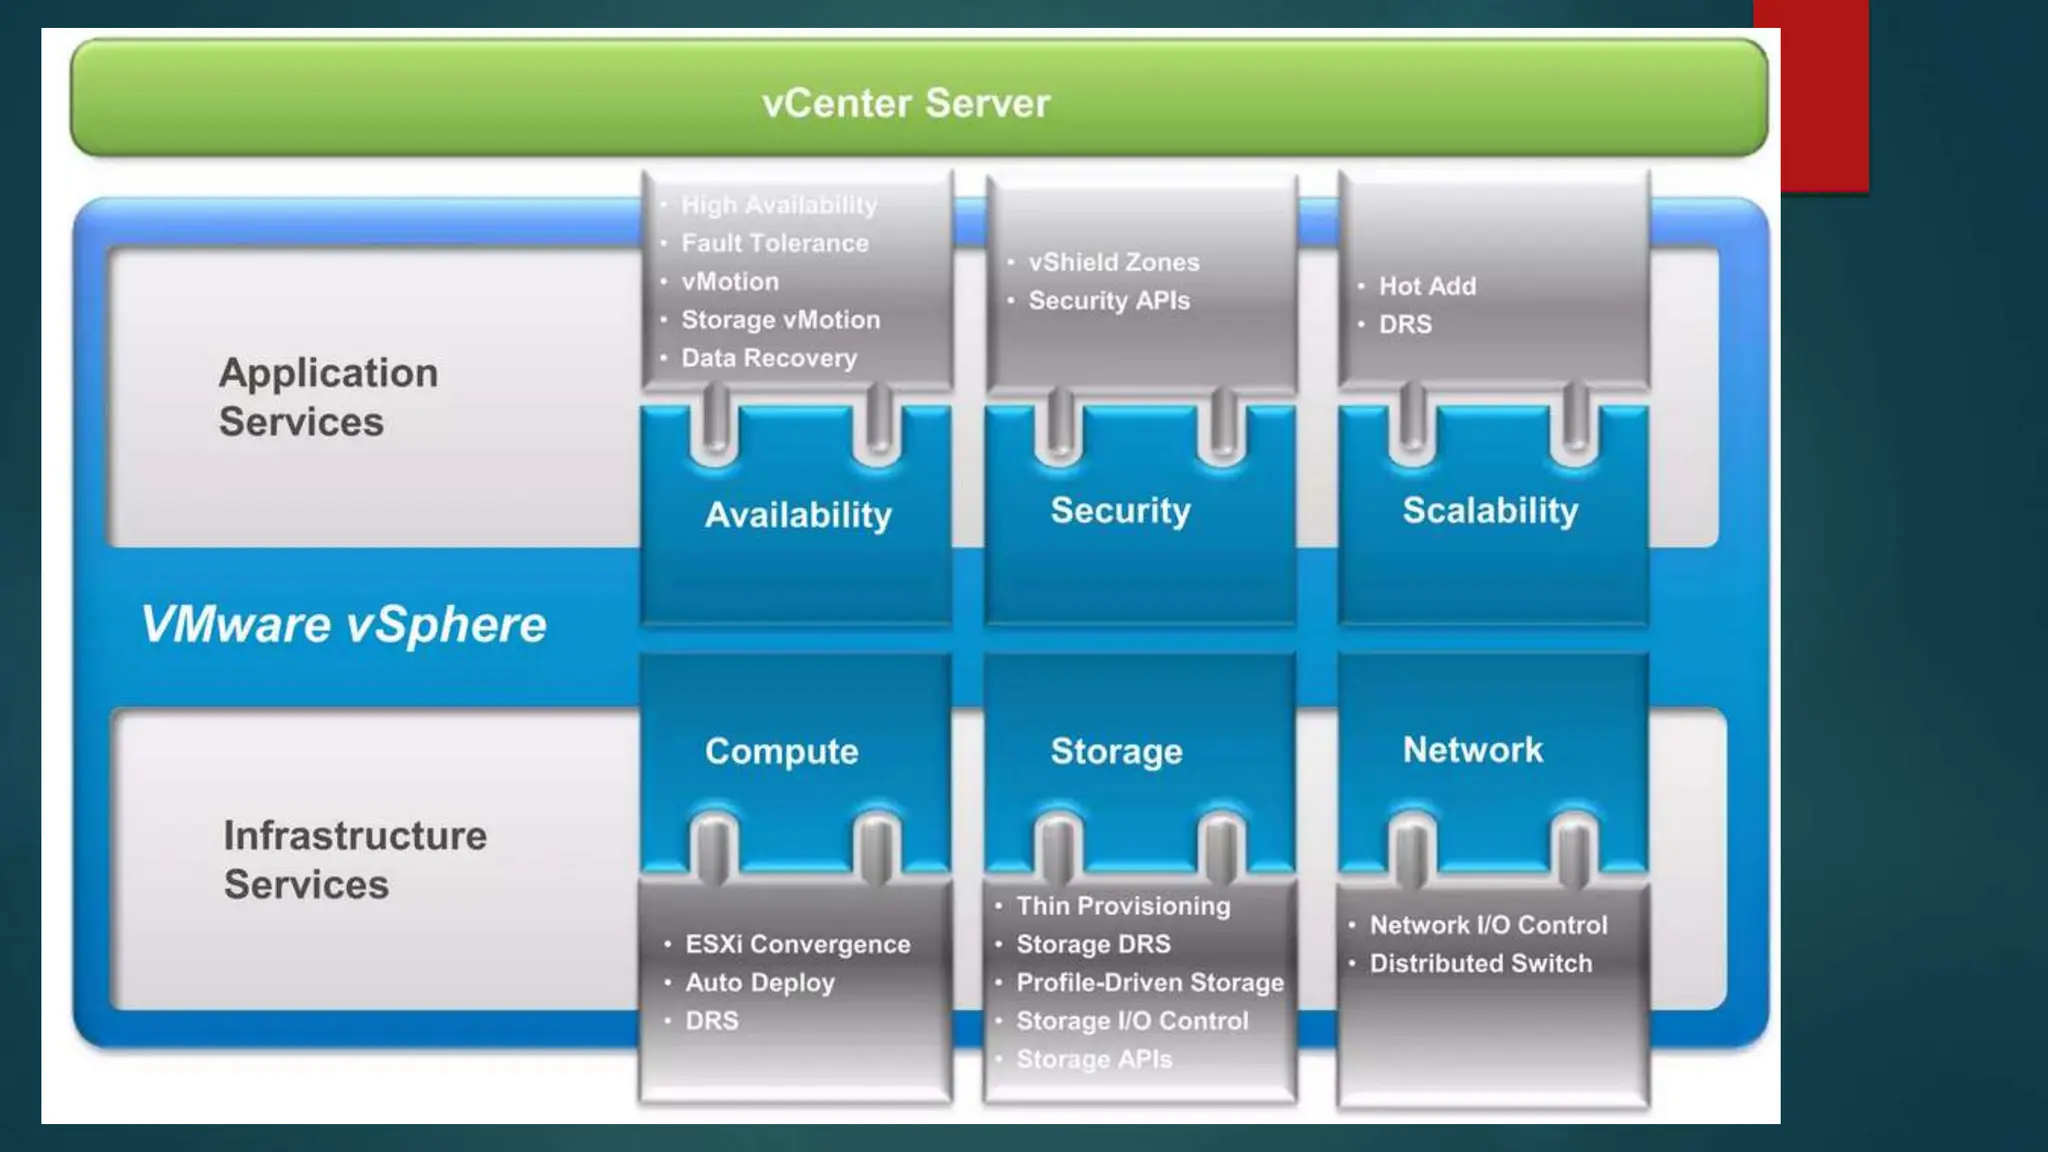


The document provides an overview of installing and configuring VMware ESXi and vCenter. It begins with an introduction and agenda. It then covers topics such as virtualization terminology, the differences between ESXi and Workstation, virtualization benefits, and storage provisioning types. The document provides step-by-step instructions for installing ESXi, creating virtual machines, uploading ISOs, and installing and configuring vCenter. It also discusses VMware features for live migration, high availability clusters, and fault tolerance.


![Vibe Coding vs. Spec-Driven Development [Free Meetup]](https://cdn.slidesharecdn.com/ss_thumbnails/vibecodingvsspecdrivendevelopment-251209105622-43f455e7-thumbnail.jpg?width=640&height=640&fit=bounds)


