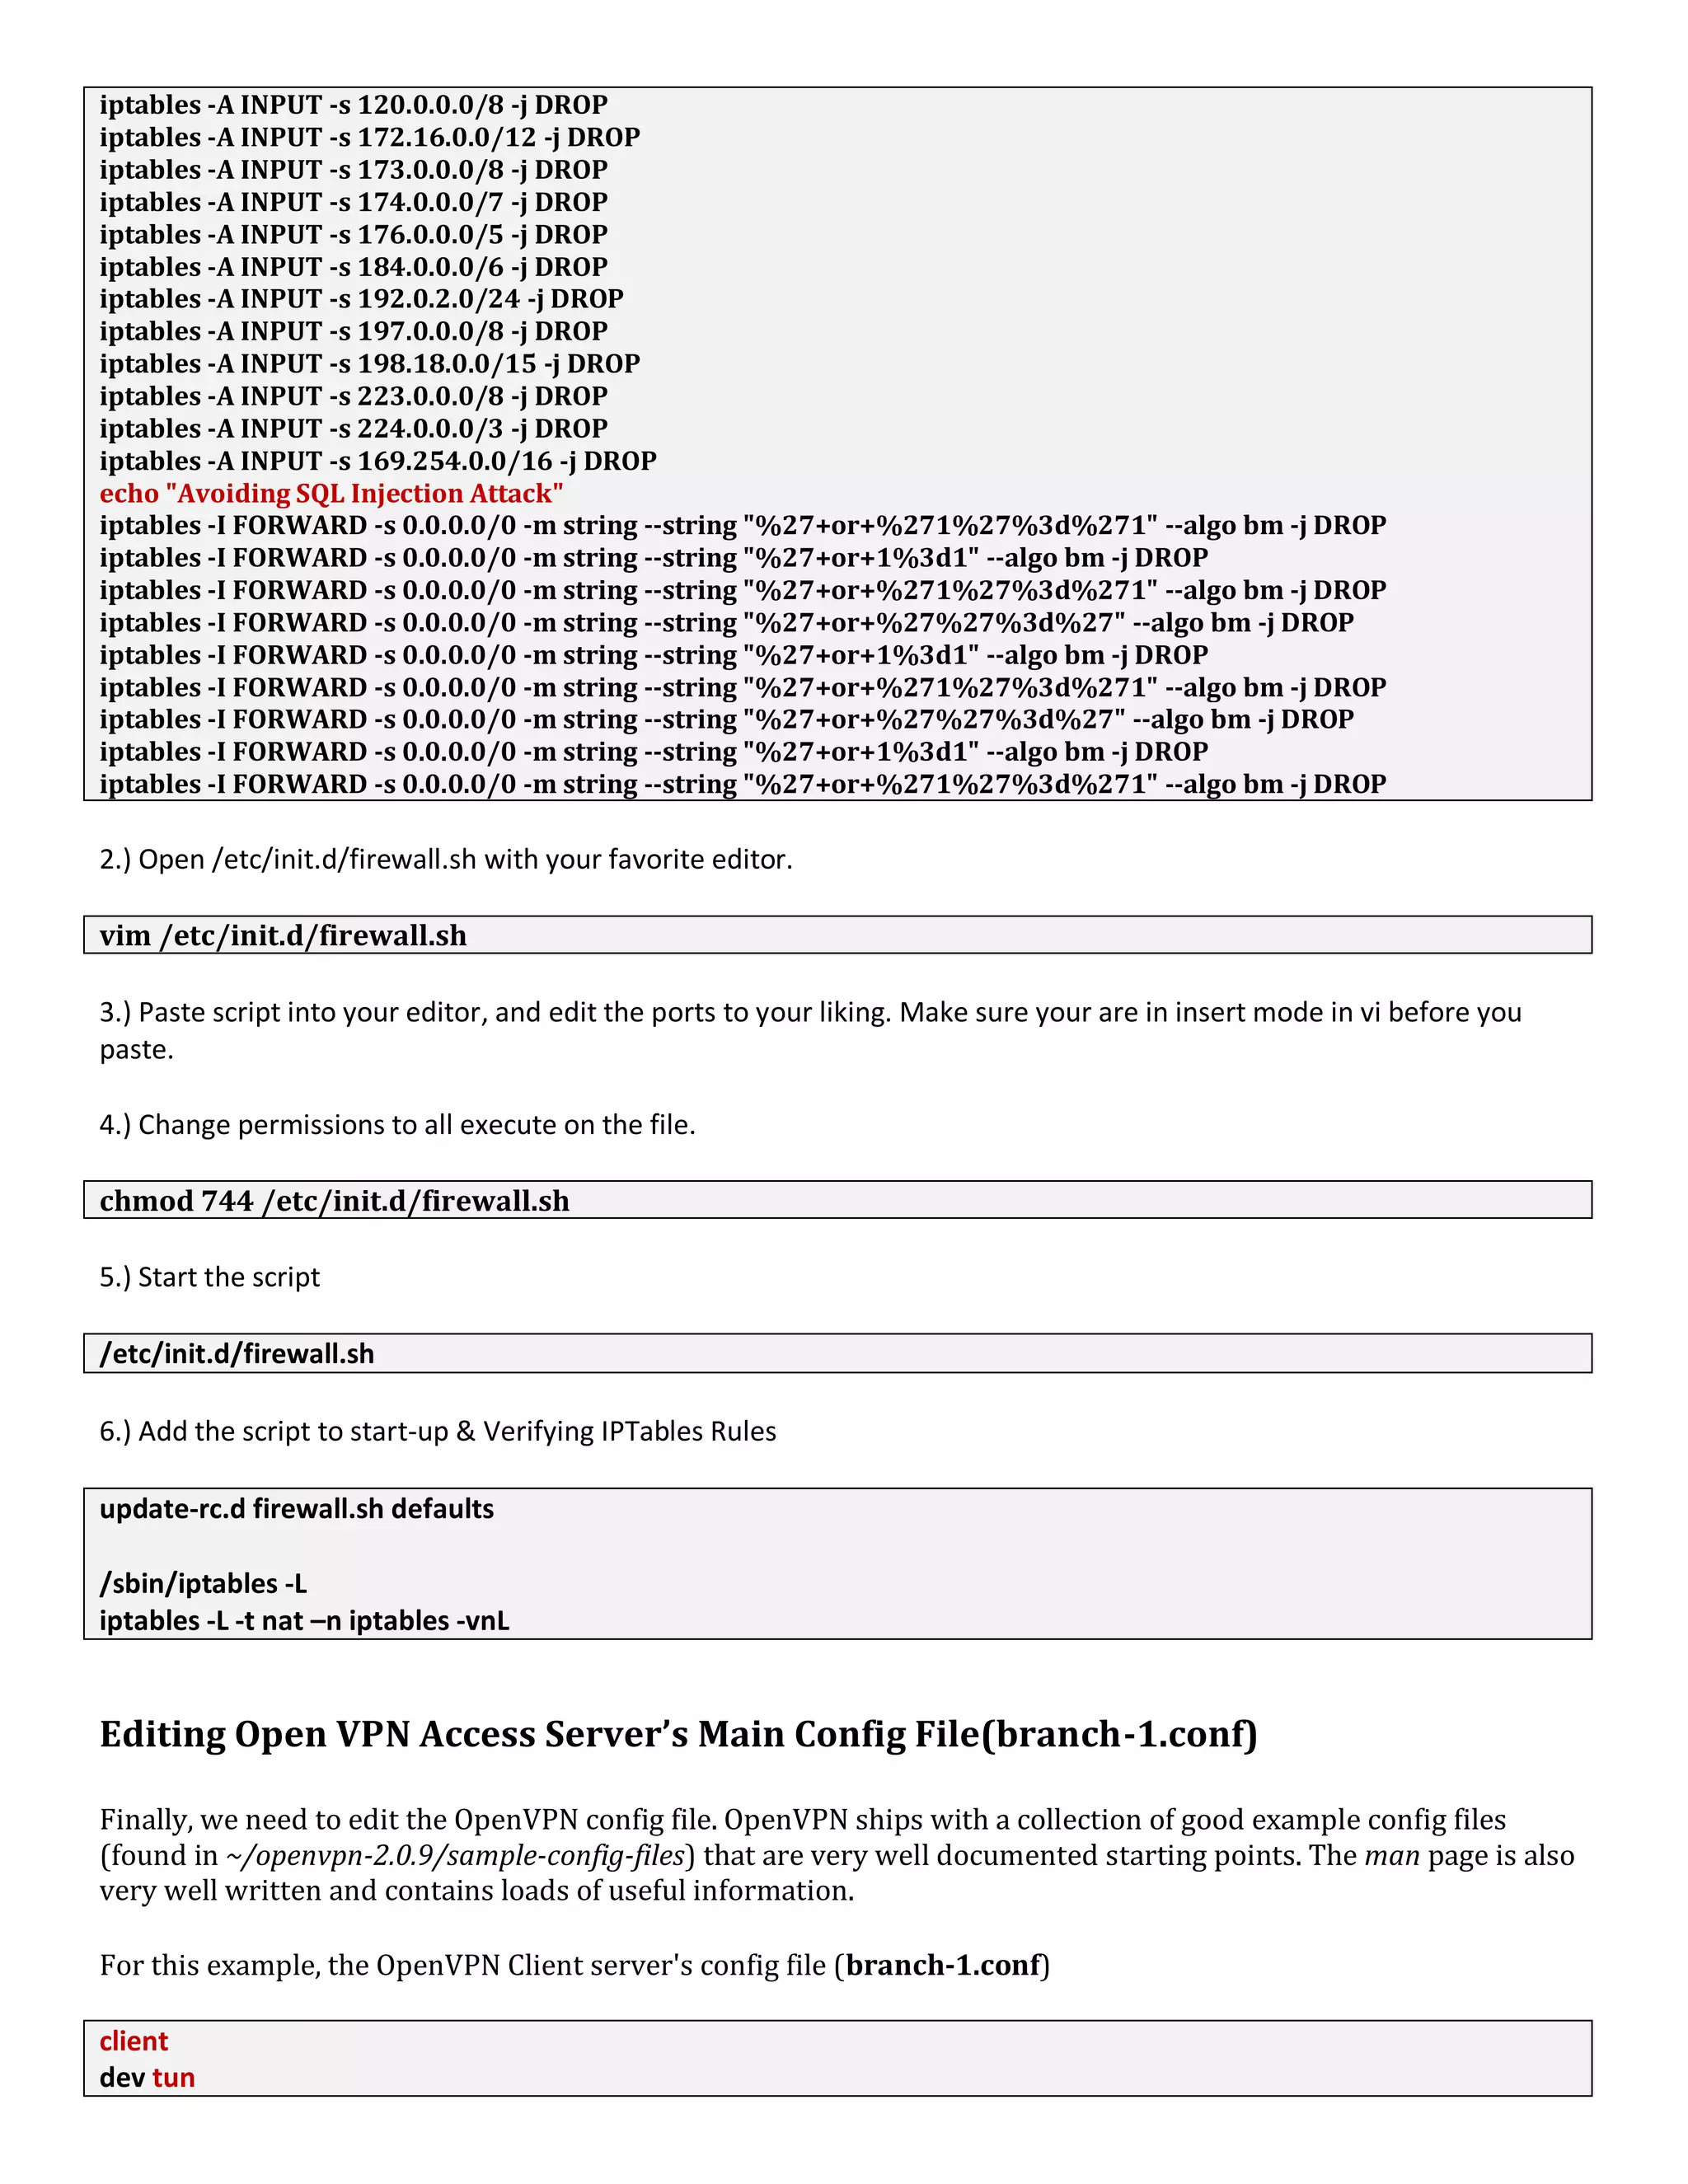
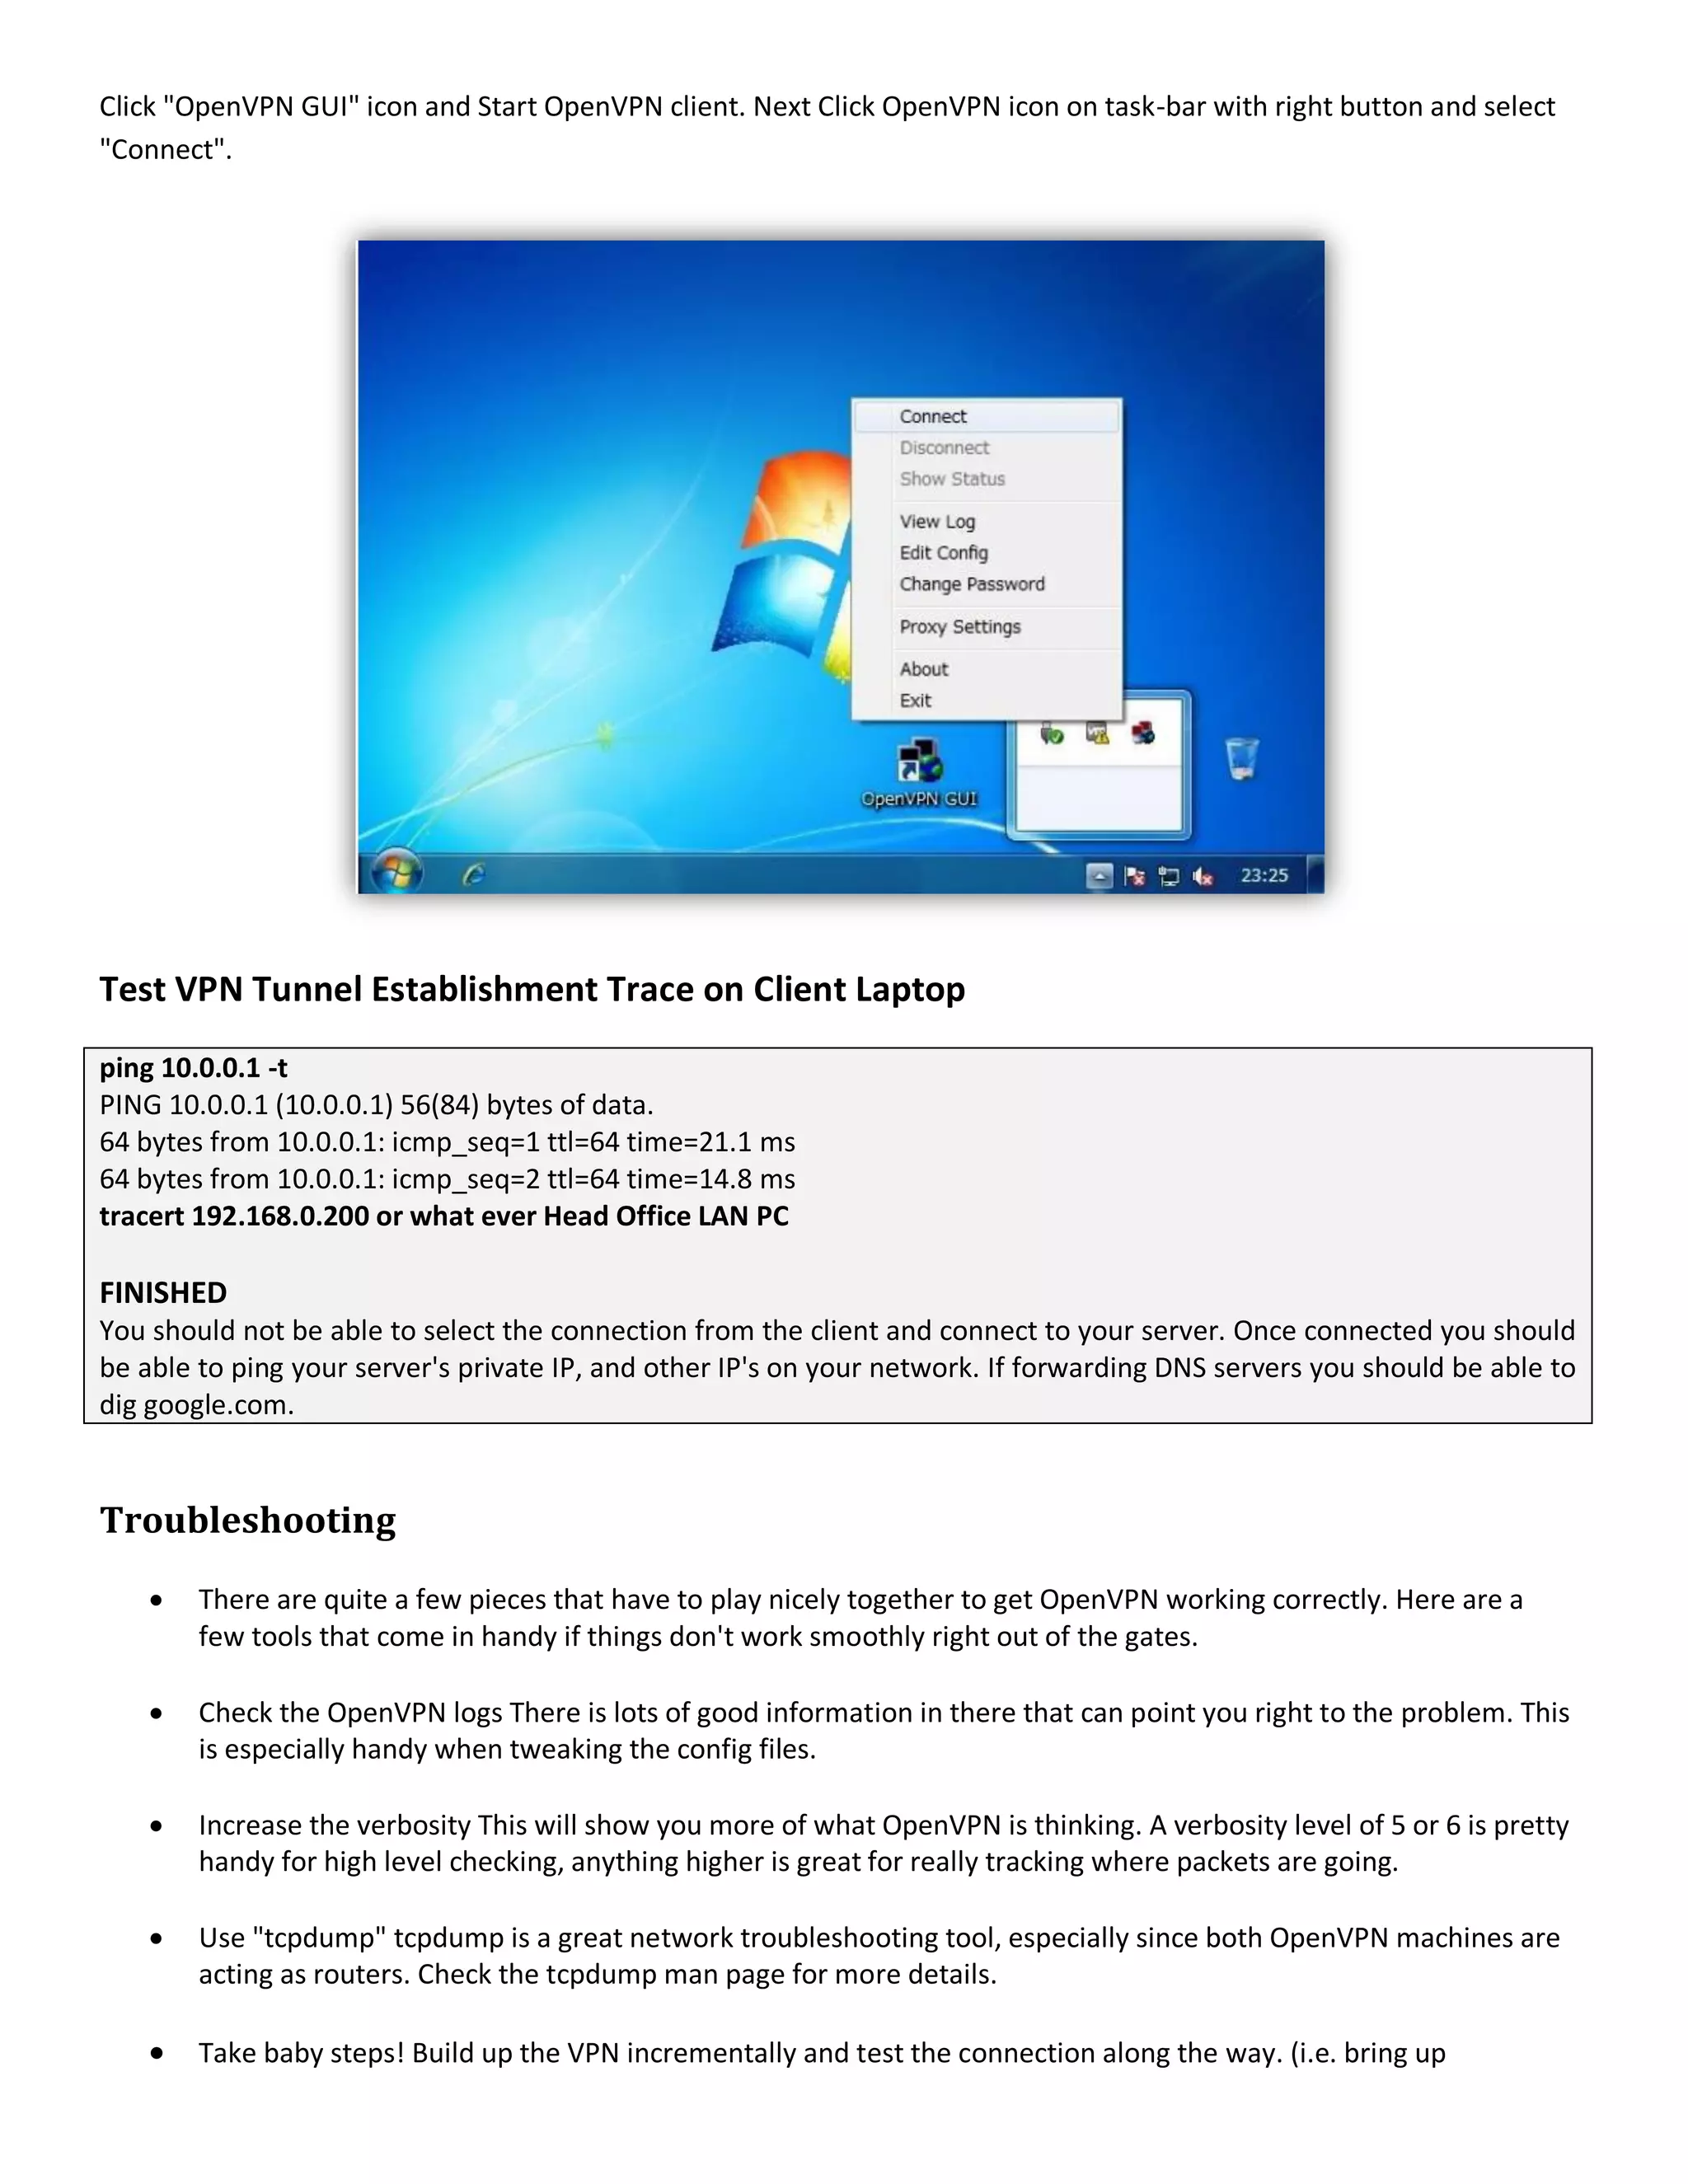
Download to read offline

![make
make install
Copy easy-rsa folder inside it to “/etc/openvpn/easy-rsa“. Easy-rsa contains files for creating
certificate and others need by OpenVPN:
mkdir -p /etc/openvpn
cp -r easy-rsa /etc/openvpn
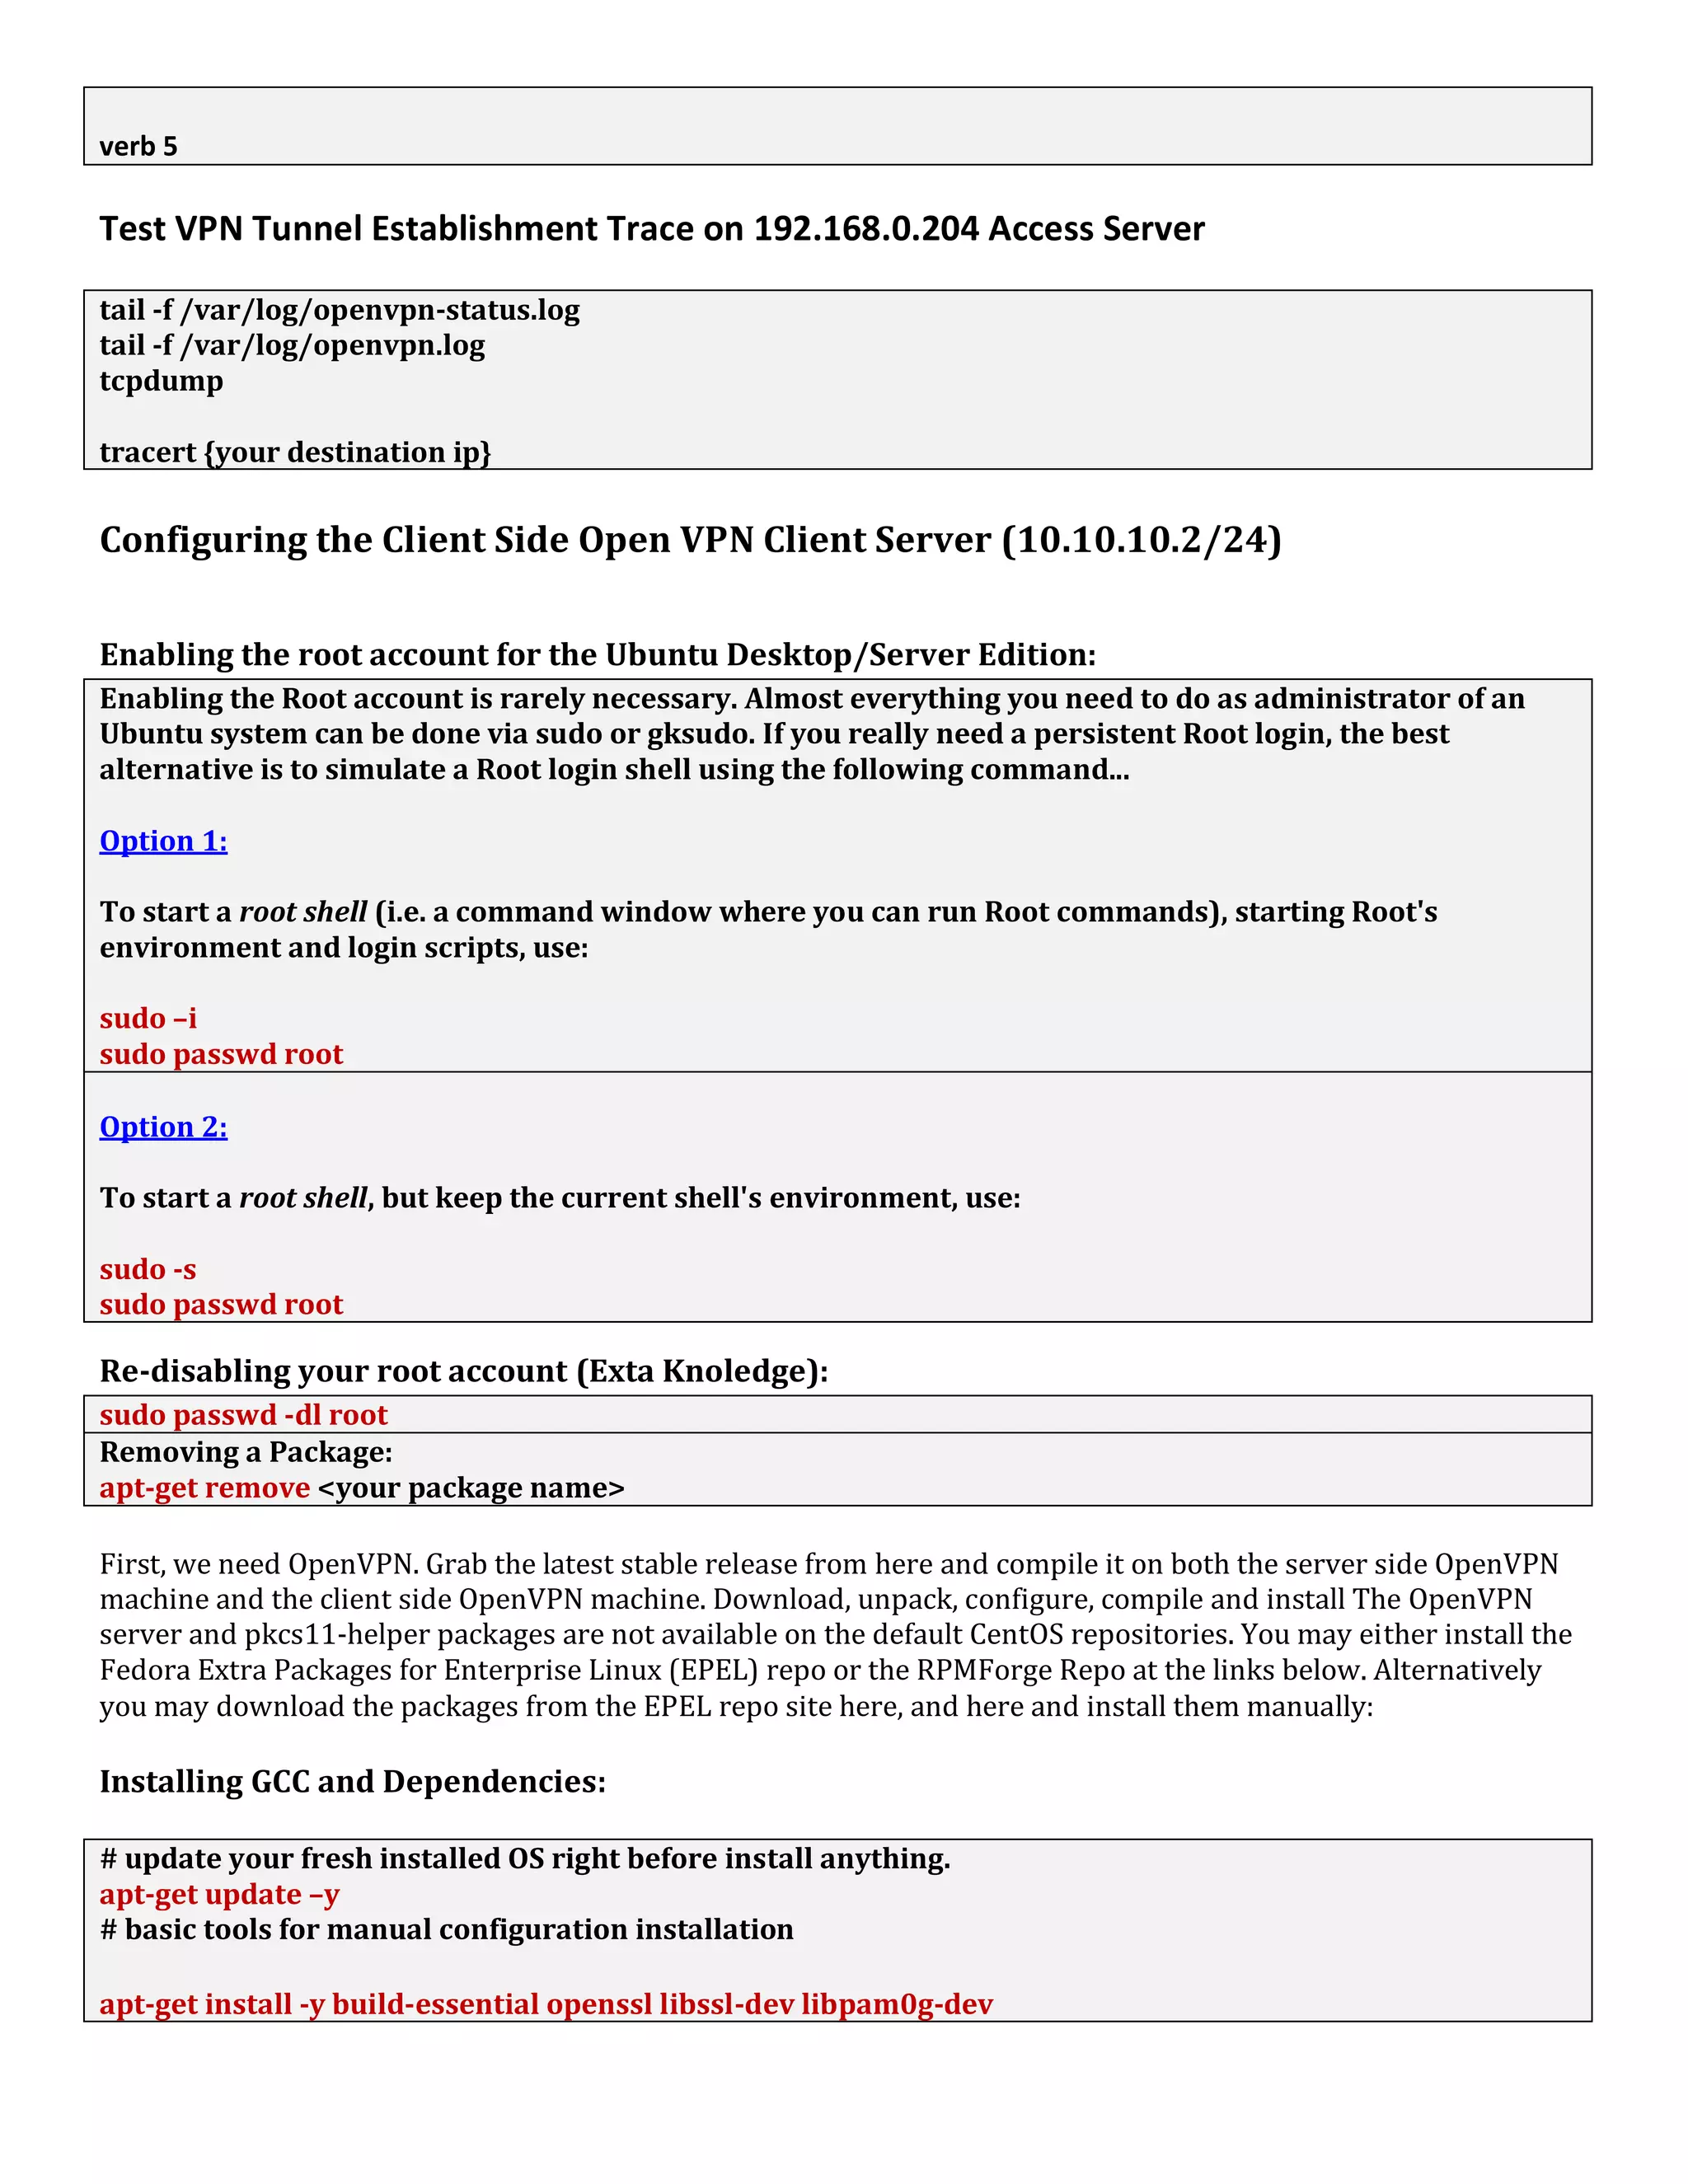
Openvpn authentication using SSH
cd plugin/auth-pam
make
cp openvpn-auth-pam.so /usr/lib
Client Configuration
Add user for OpenVPN authentication without SSH privilege and give it password
useradd -s /bin/false chanaka
passwd 12345567
Deleting User:
userdel [username]
This will simply remove the user account credentials, but all the files in /home/[username] directory is
not removed
userdel -r [username]
-r flag forces to remove /home/[username] directory as well while deleting the user.
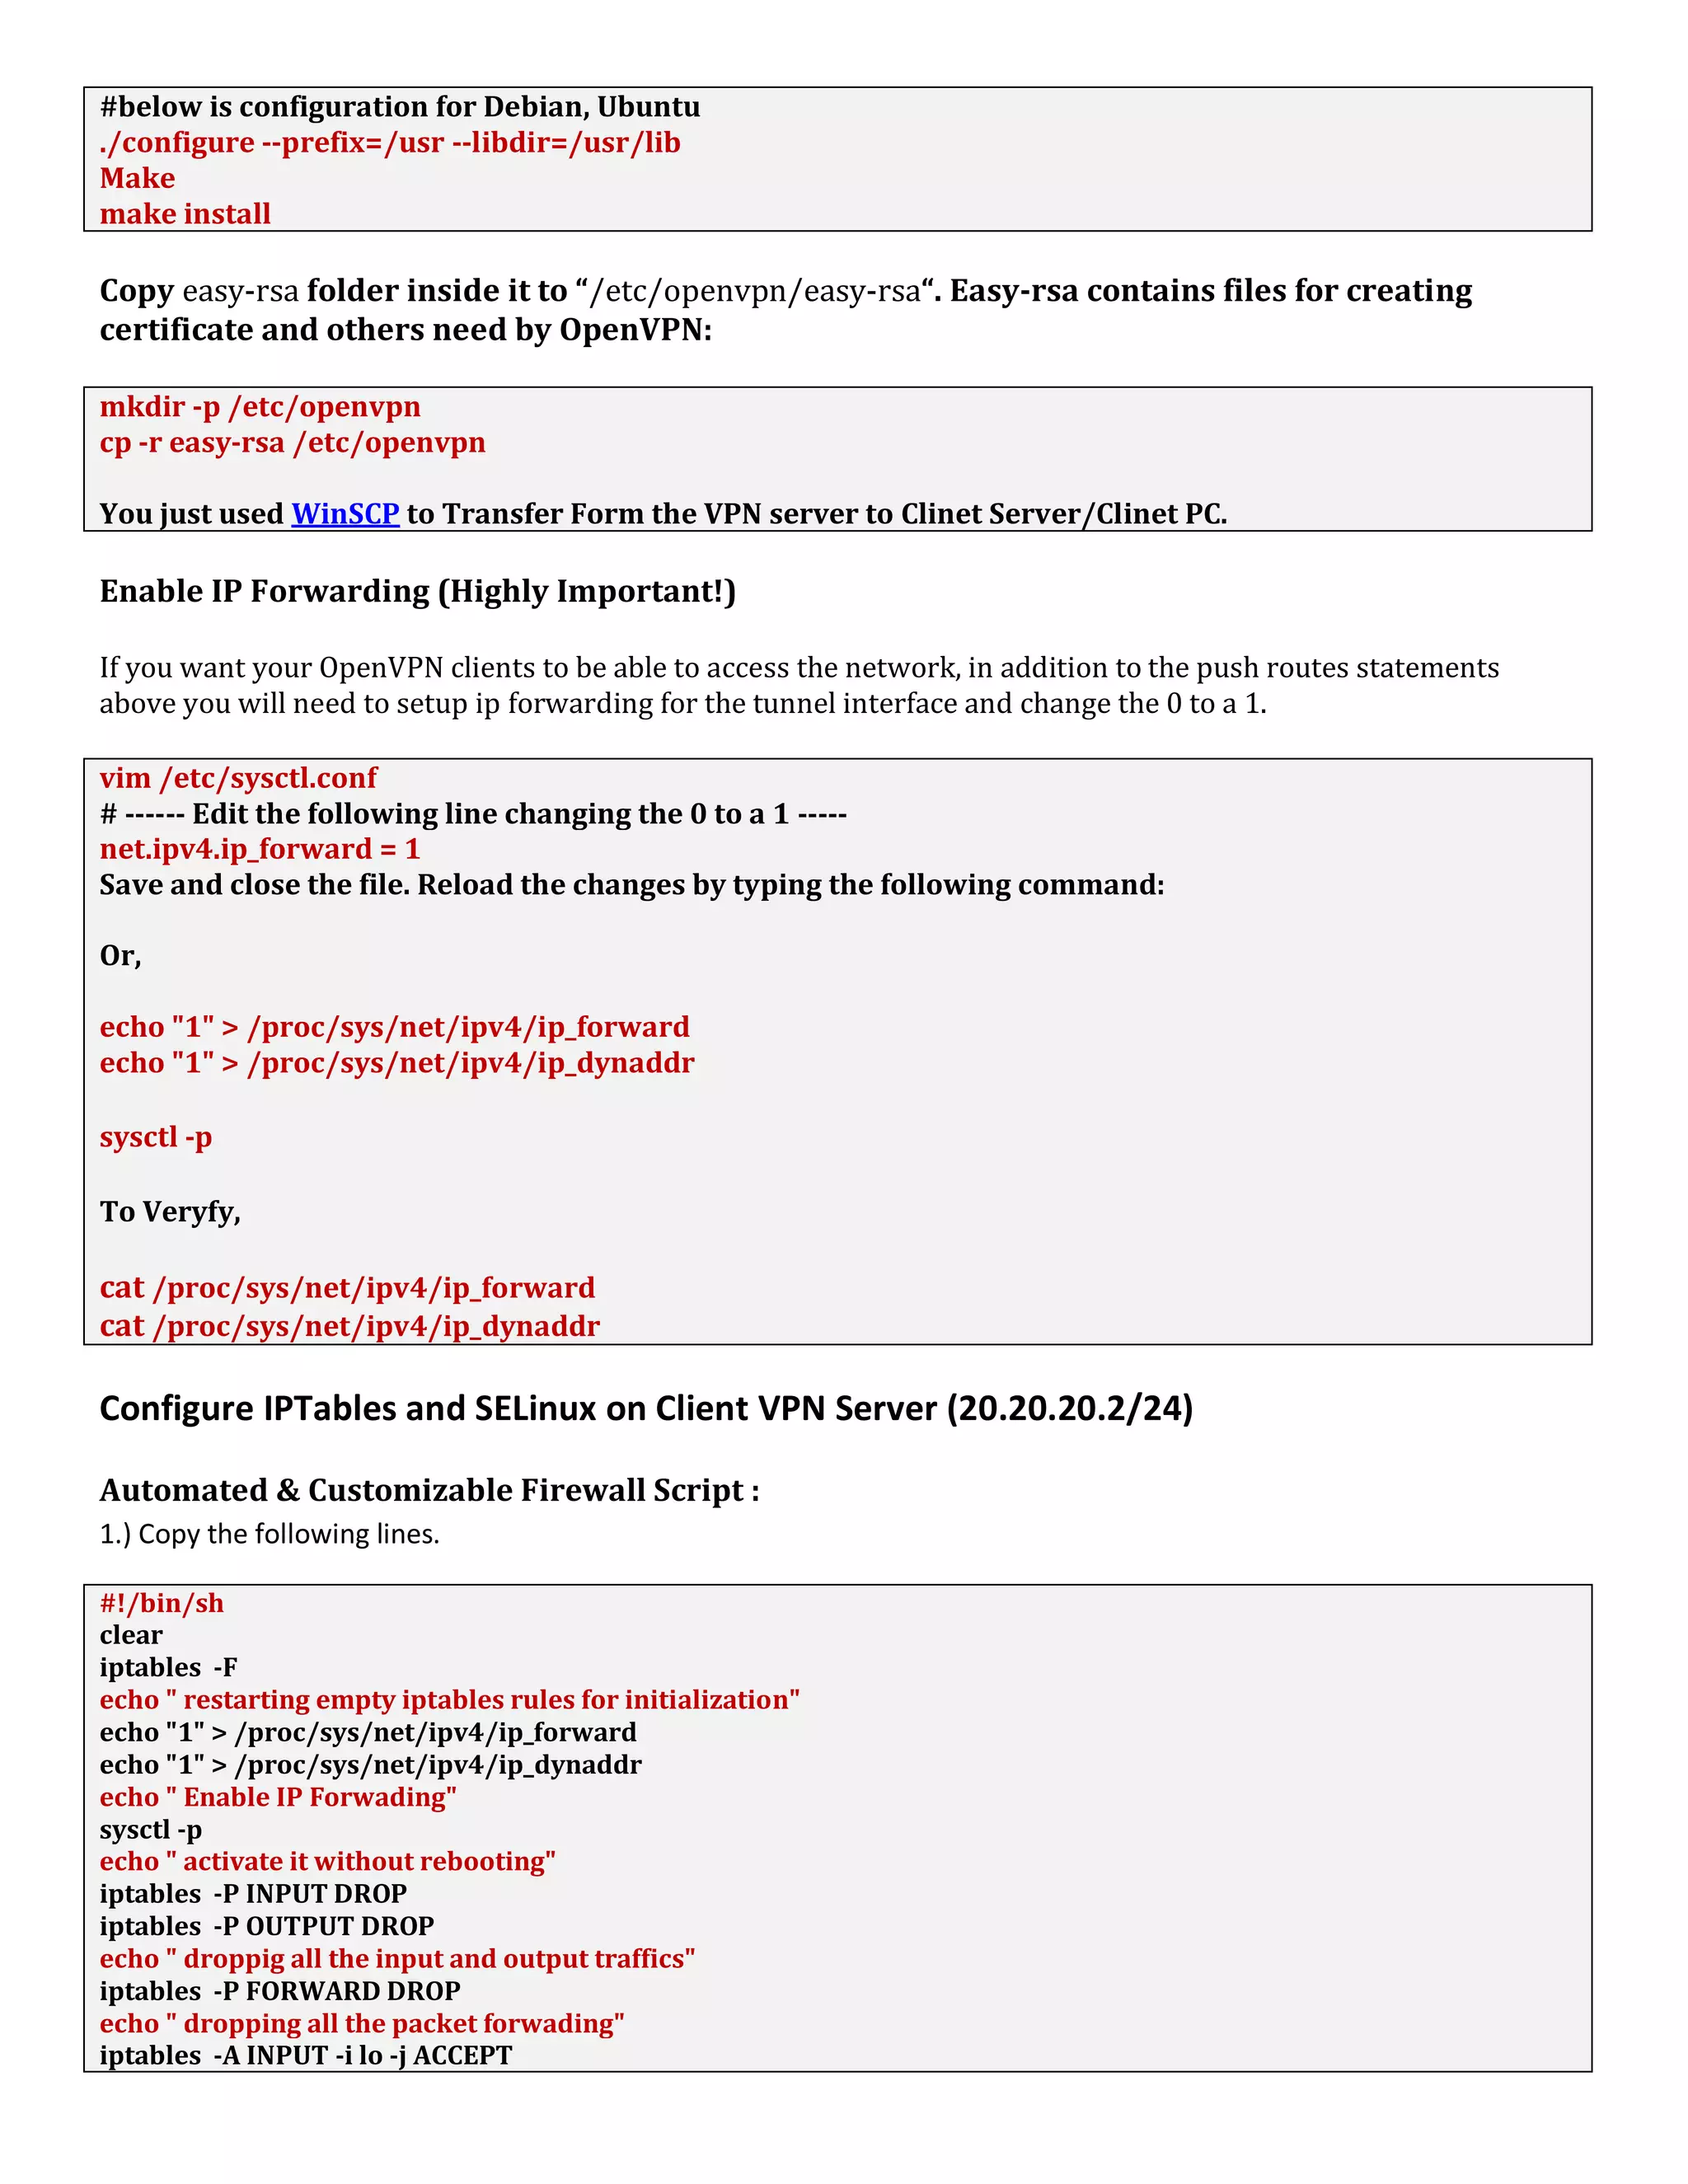
Creating Certificate and Key:
cd /etc/openvpn/easy-rsa/2.0
chmod 755 *
# ----- Edit the vars file to input your institution information -----
vim vars # note: don't worry about the "export PKCS11_MODULE_PATH=changeme" line
# You may change the export KEY_SIZE=2048 line to the key size you'd like
# ----- Execute the vars script to set environment variables and prepare -----
source ./vars
cp openssl-1.0.0.cnf openssl.cnf
./clean-all
# ----- Build Cerificate Authority certificates -----
./build-ca
# ----- Build Server Certificate -----
./build-key-server server
# ----- Build a Client Certificate (For as many unique clients as you'd like) -----
./build-key branch-1
source ./vars
./build-key branch-2
# OR if you need two-factor authentication with passphrase (i.e. for PCI compliance)
source ./vars
./build-key user-1
# ----- Build the Diffie-Hellman (DH) Parameters Certificate -----
./build-dh
# ----- Generate a ta key to help block DoS attacks and UDP port flooding -----](https://image.slidesharecdn.com/usrttoethernetconnectivityoverthewolrdcubieboardbords-200213033808/75/Usrt-to-ethernet-connectivity-over-the-wolrd-cubieboard-bords-13-2048.jpg)


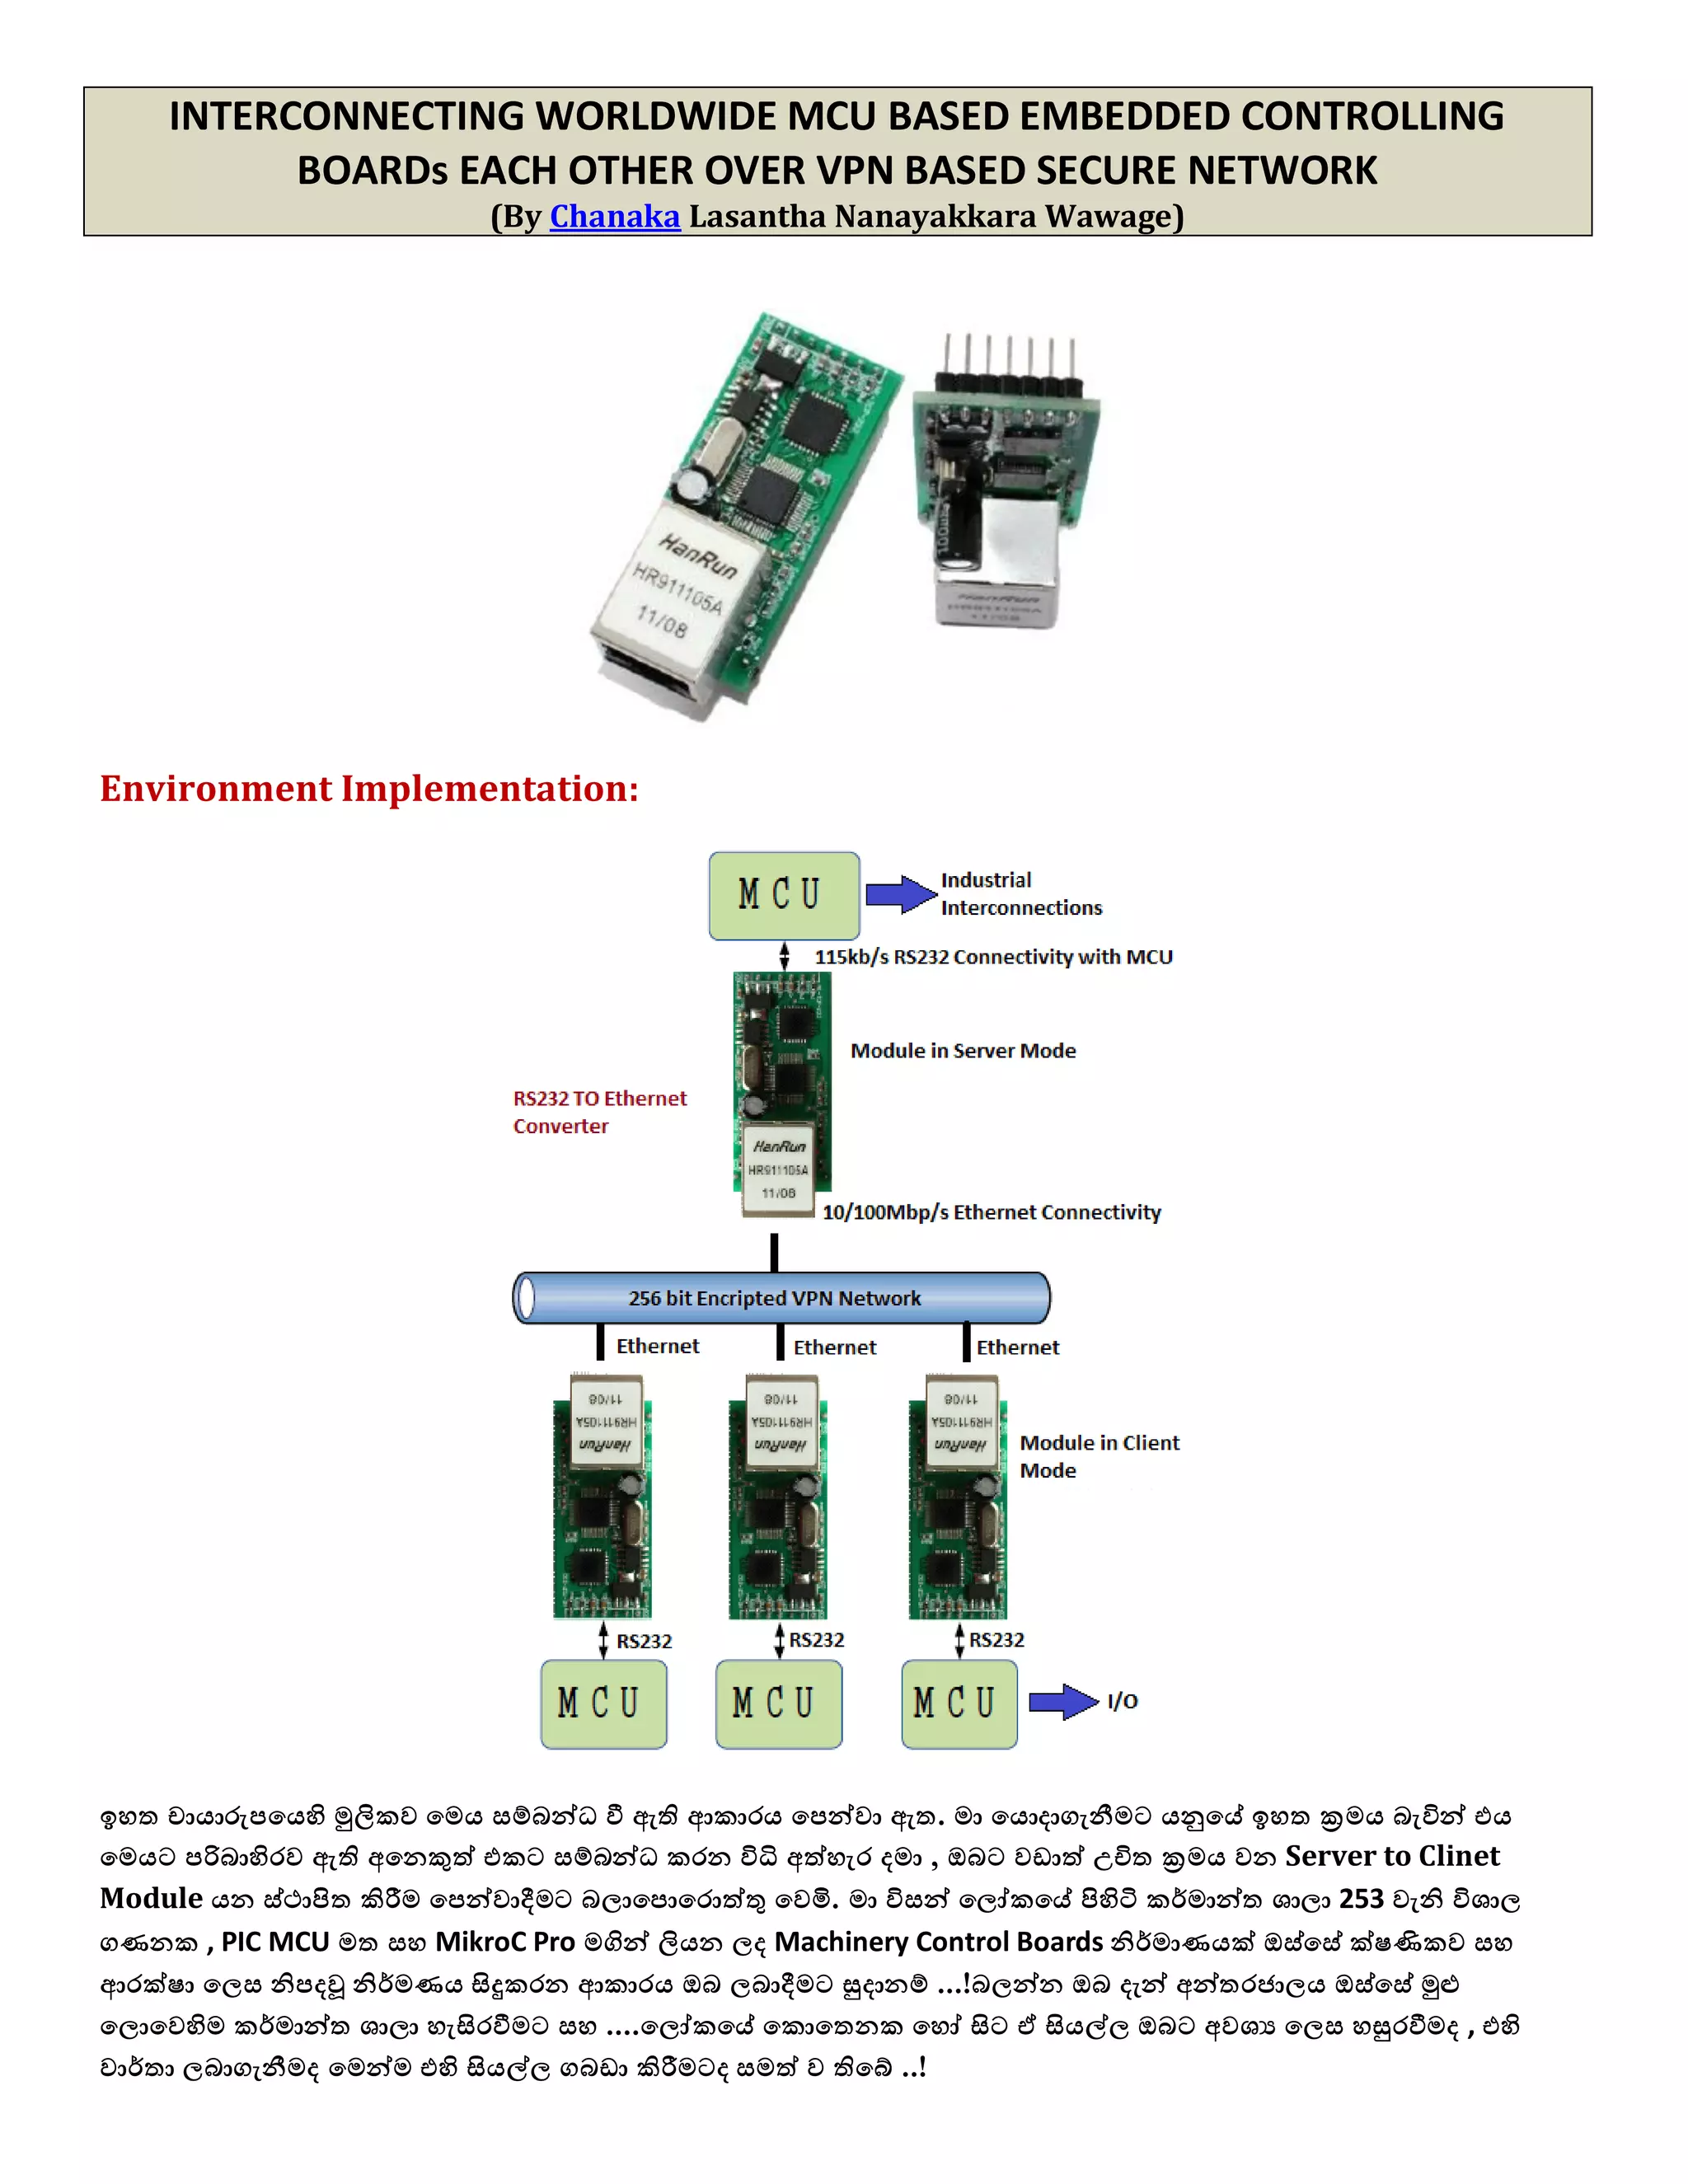
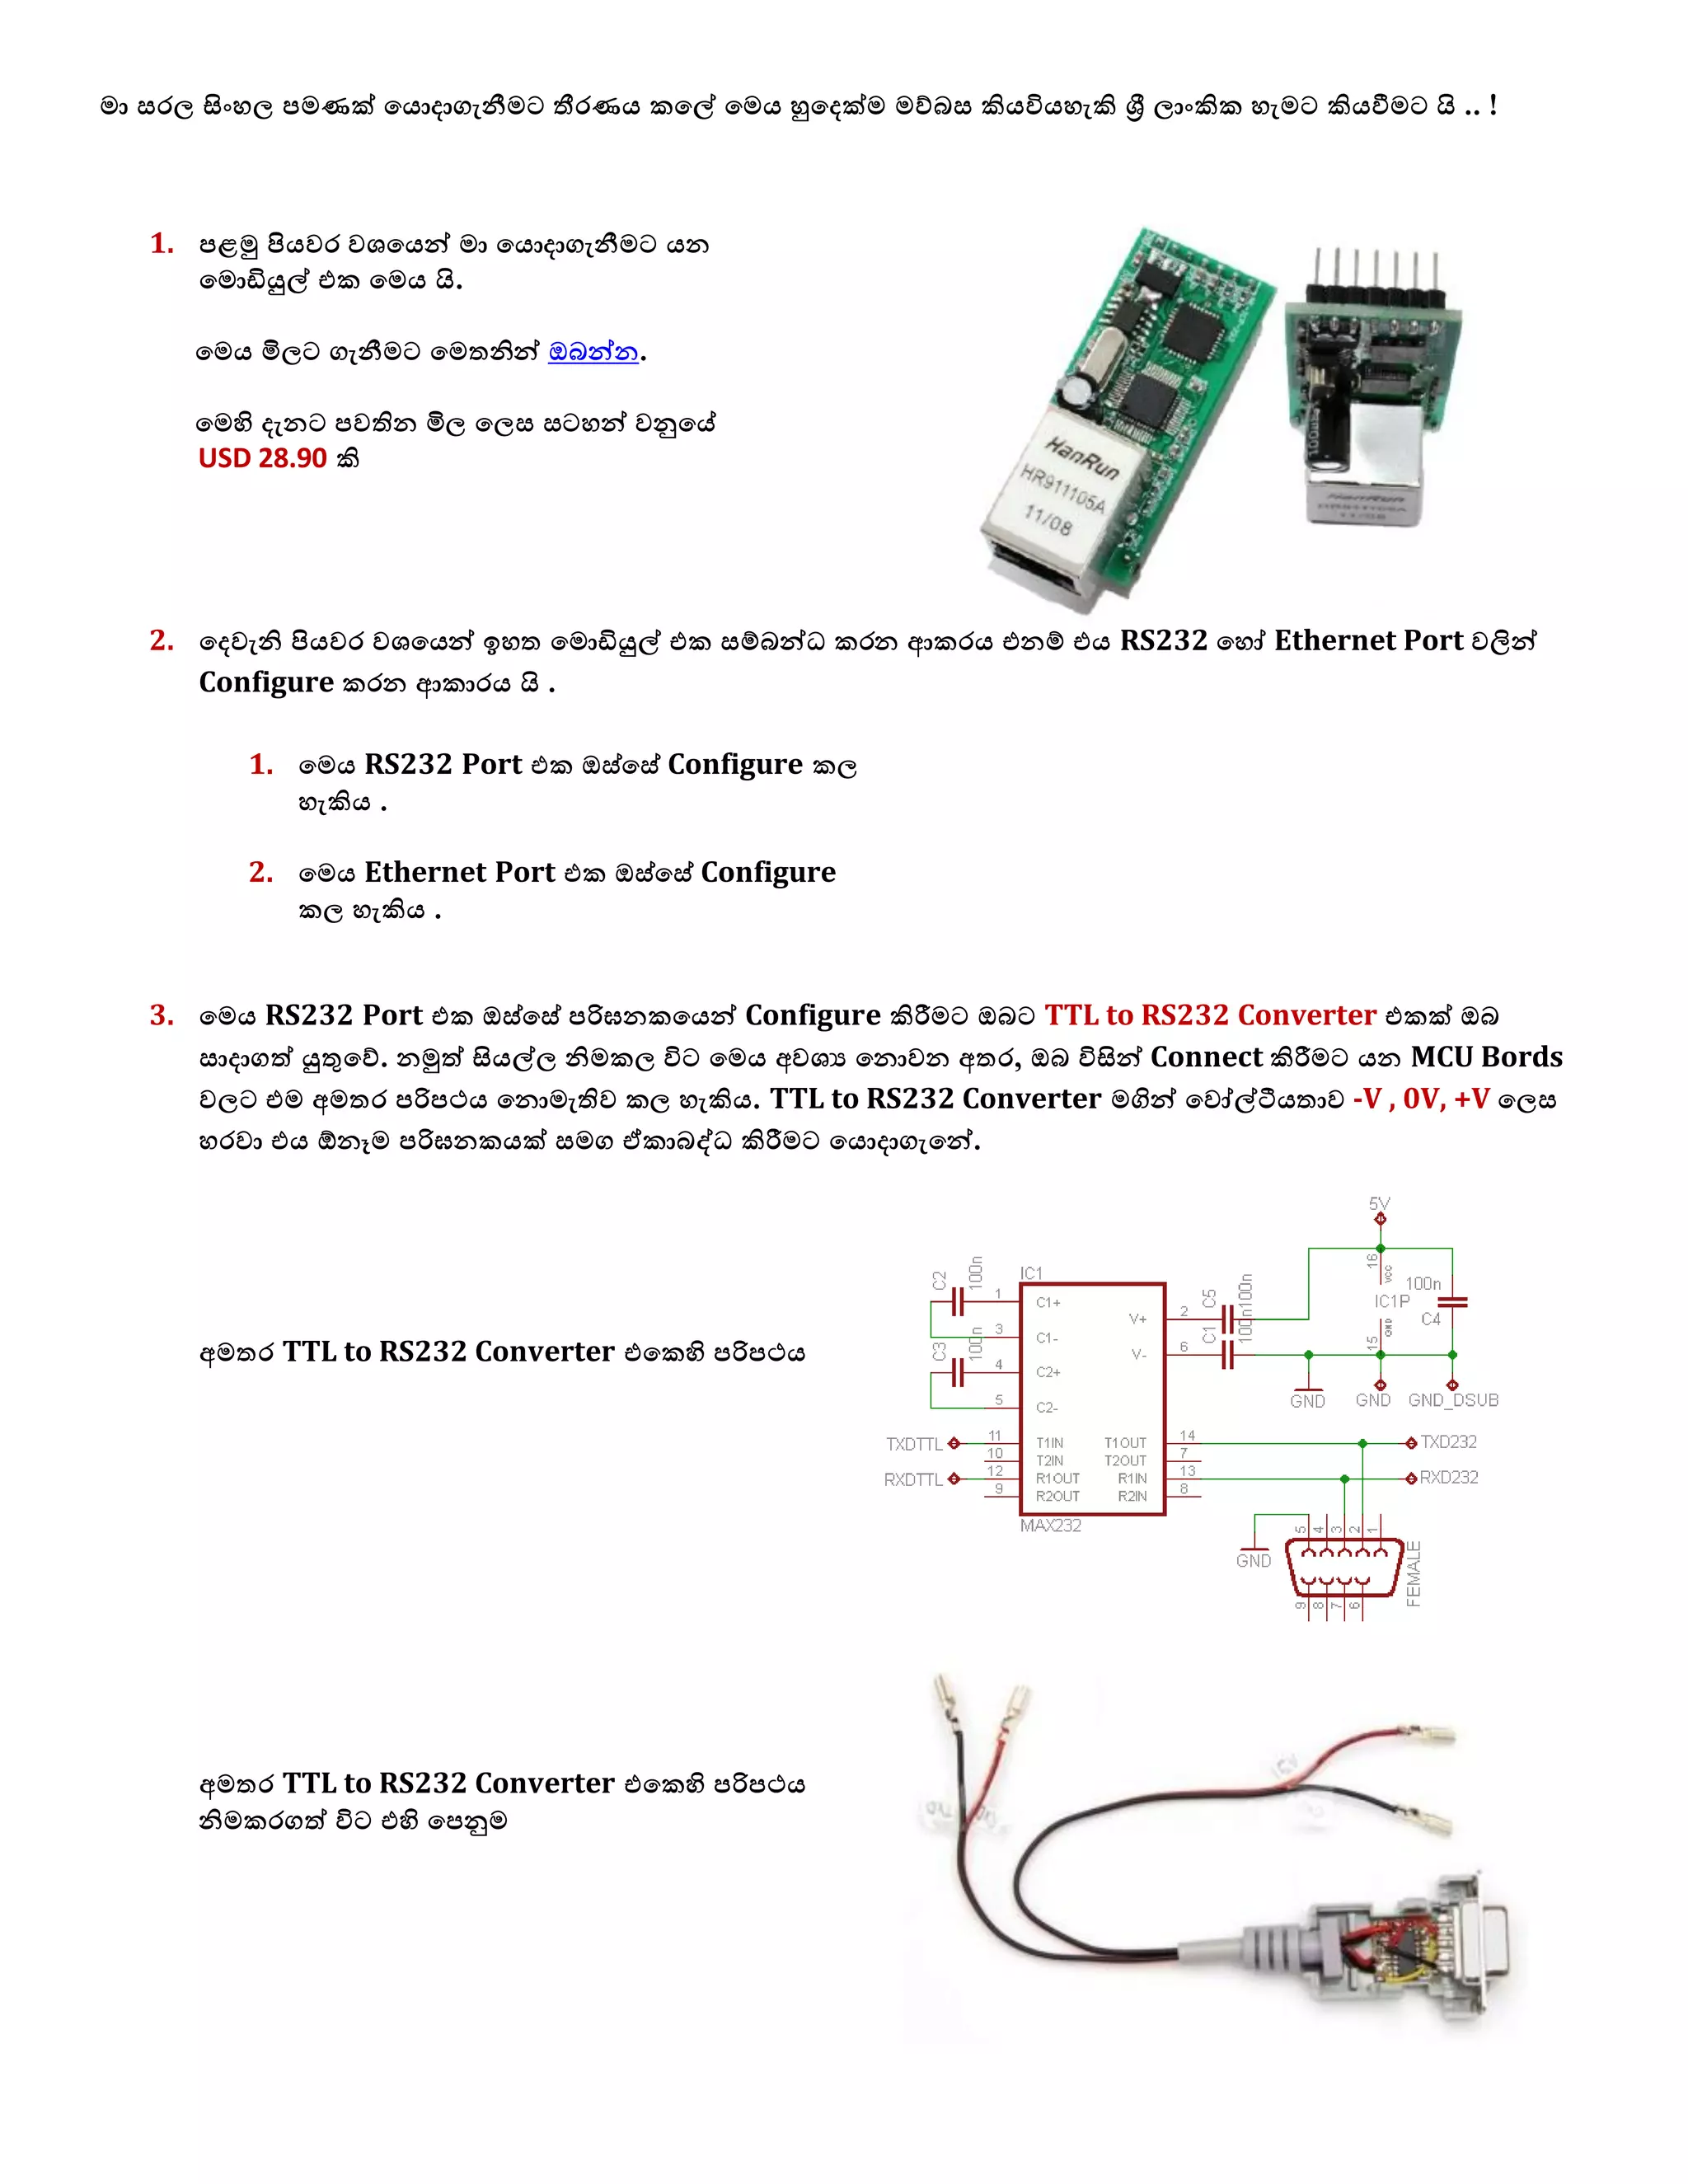
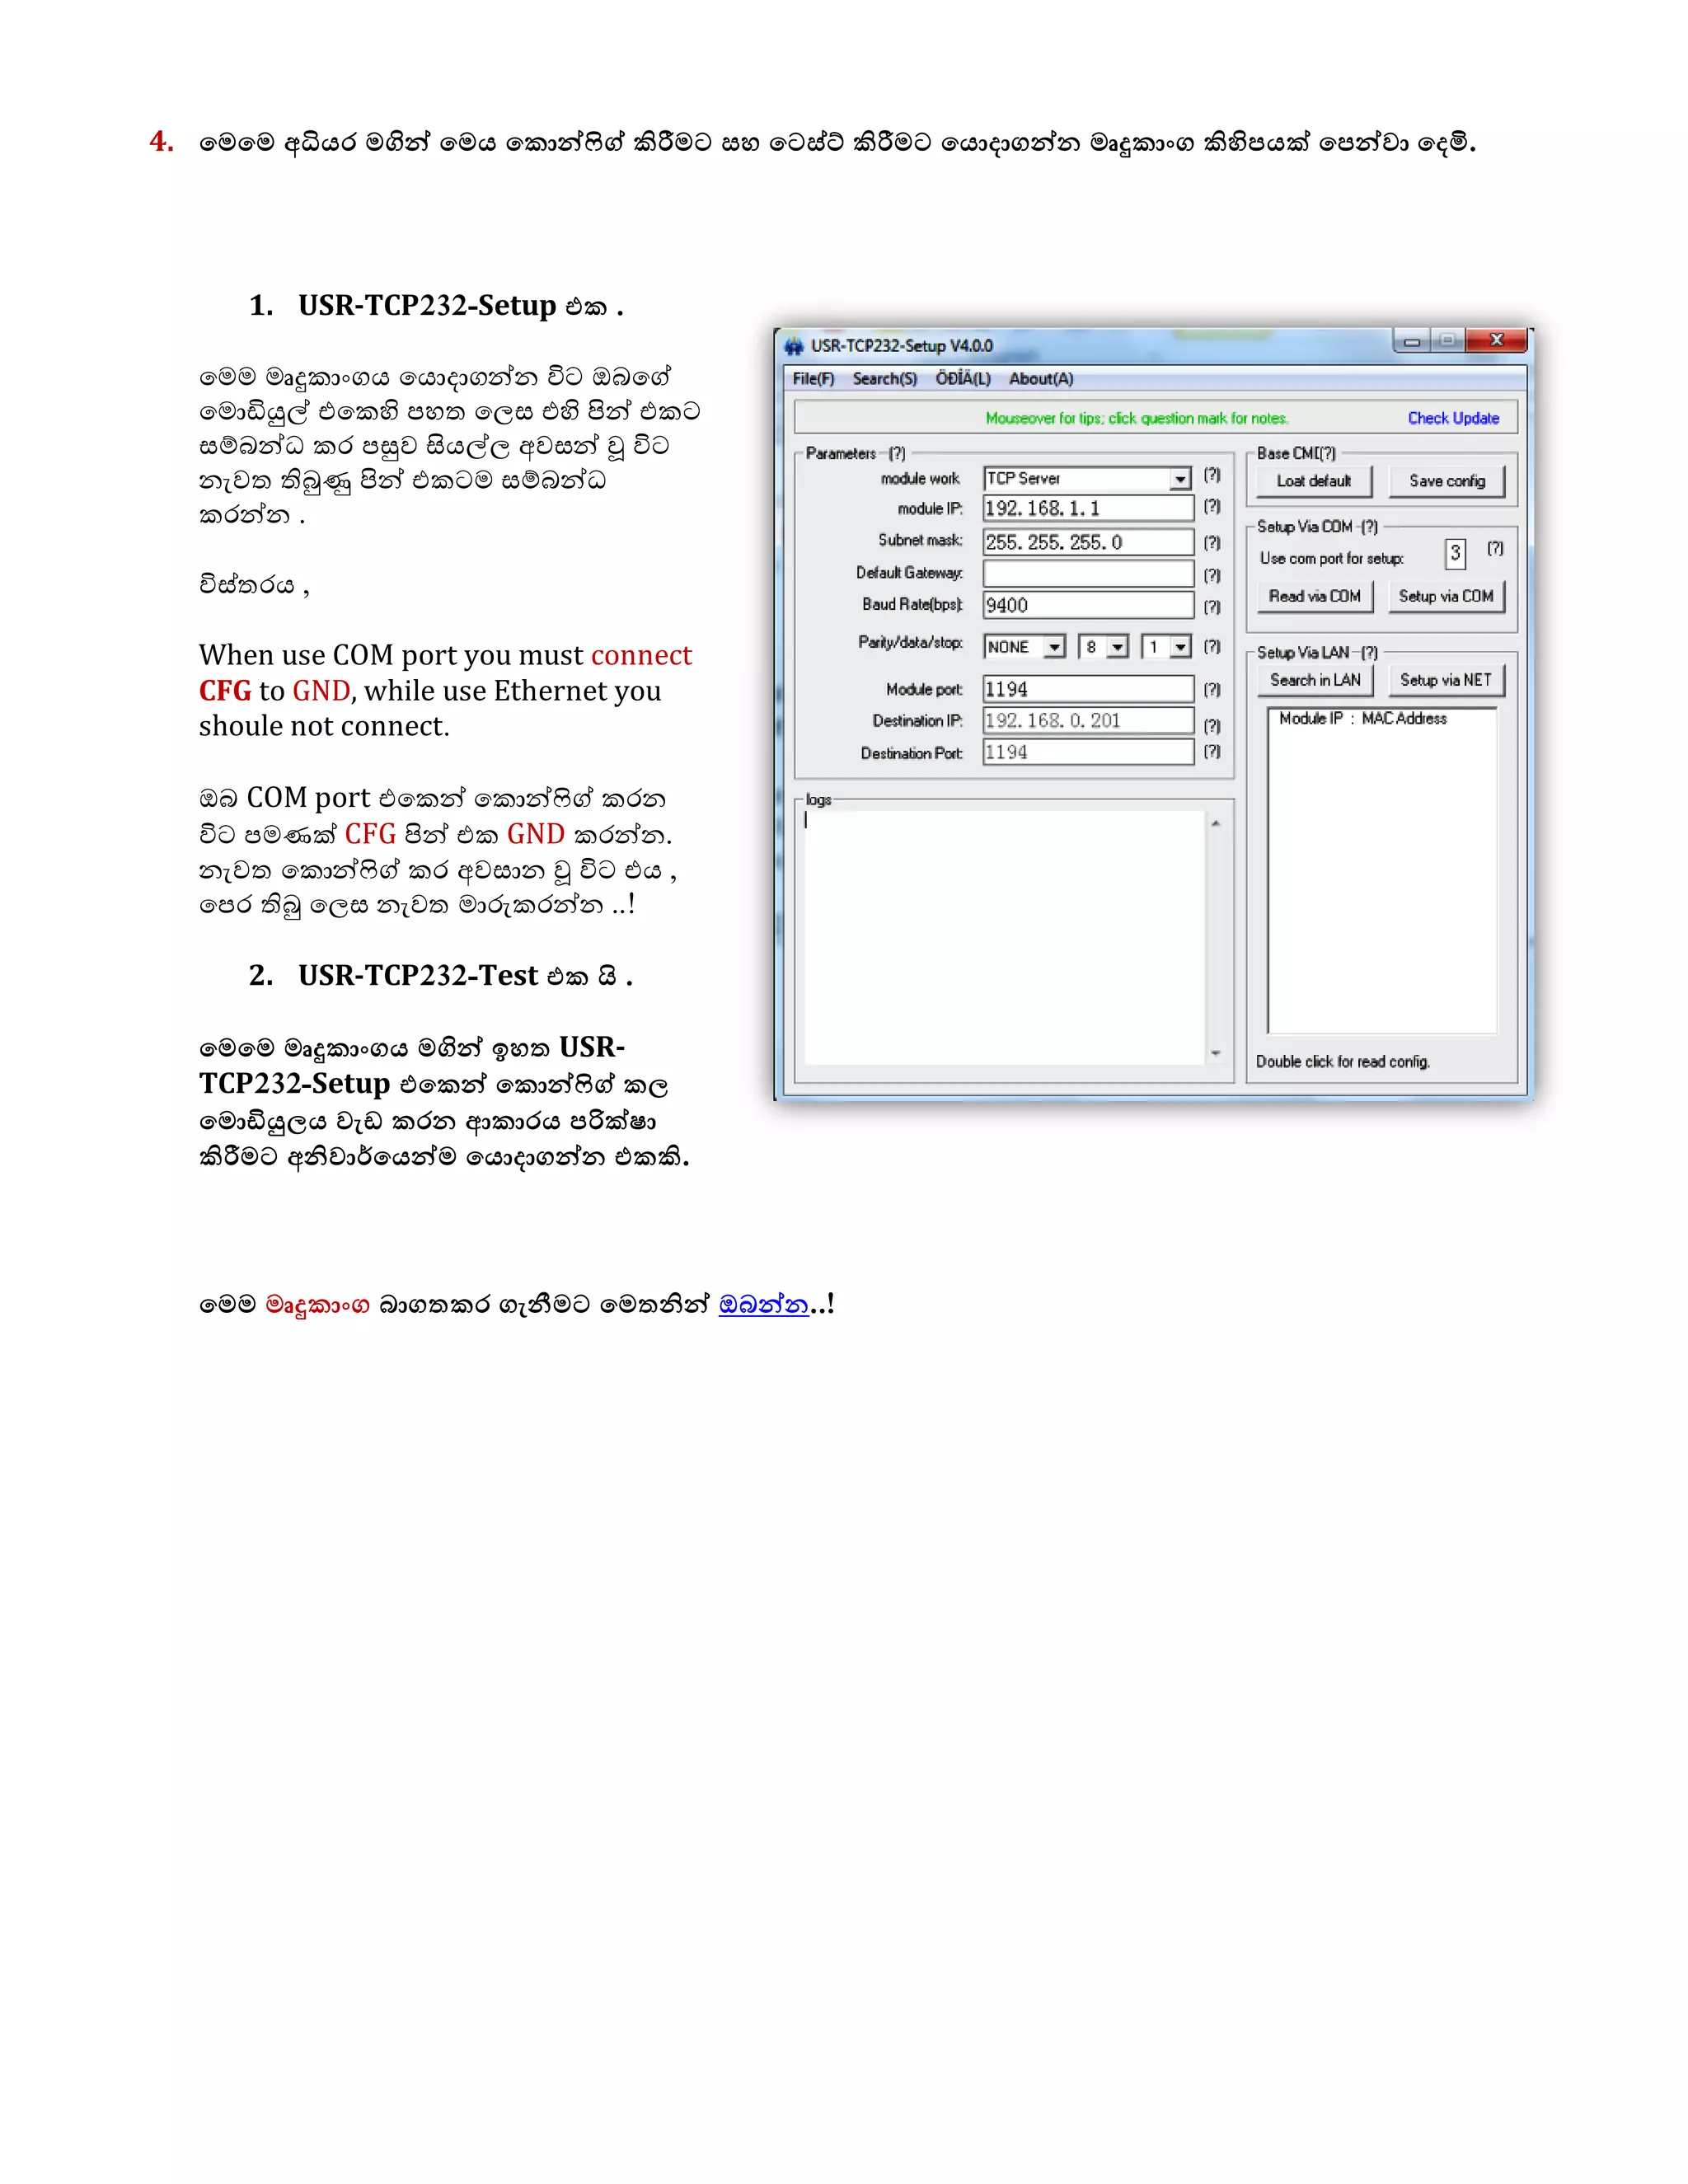
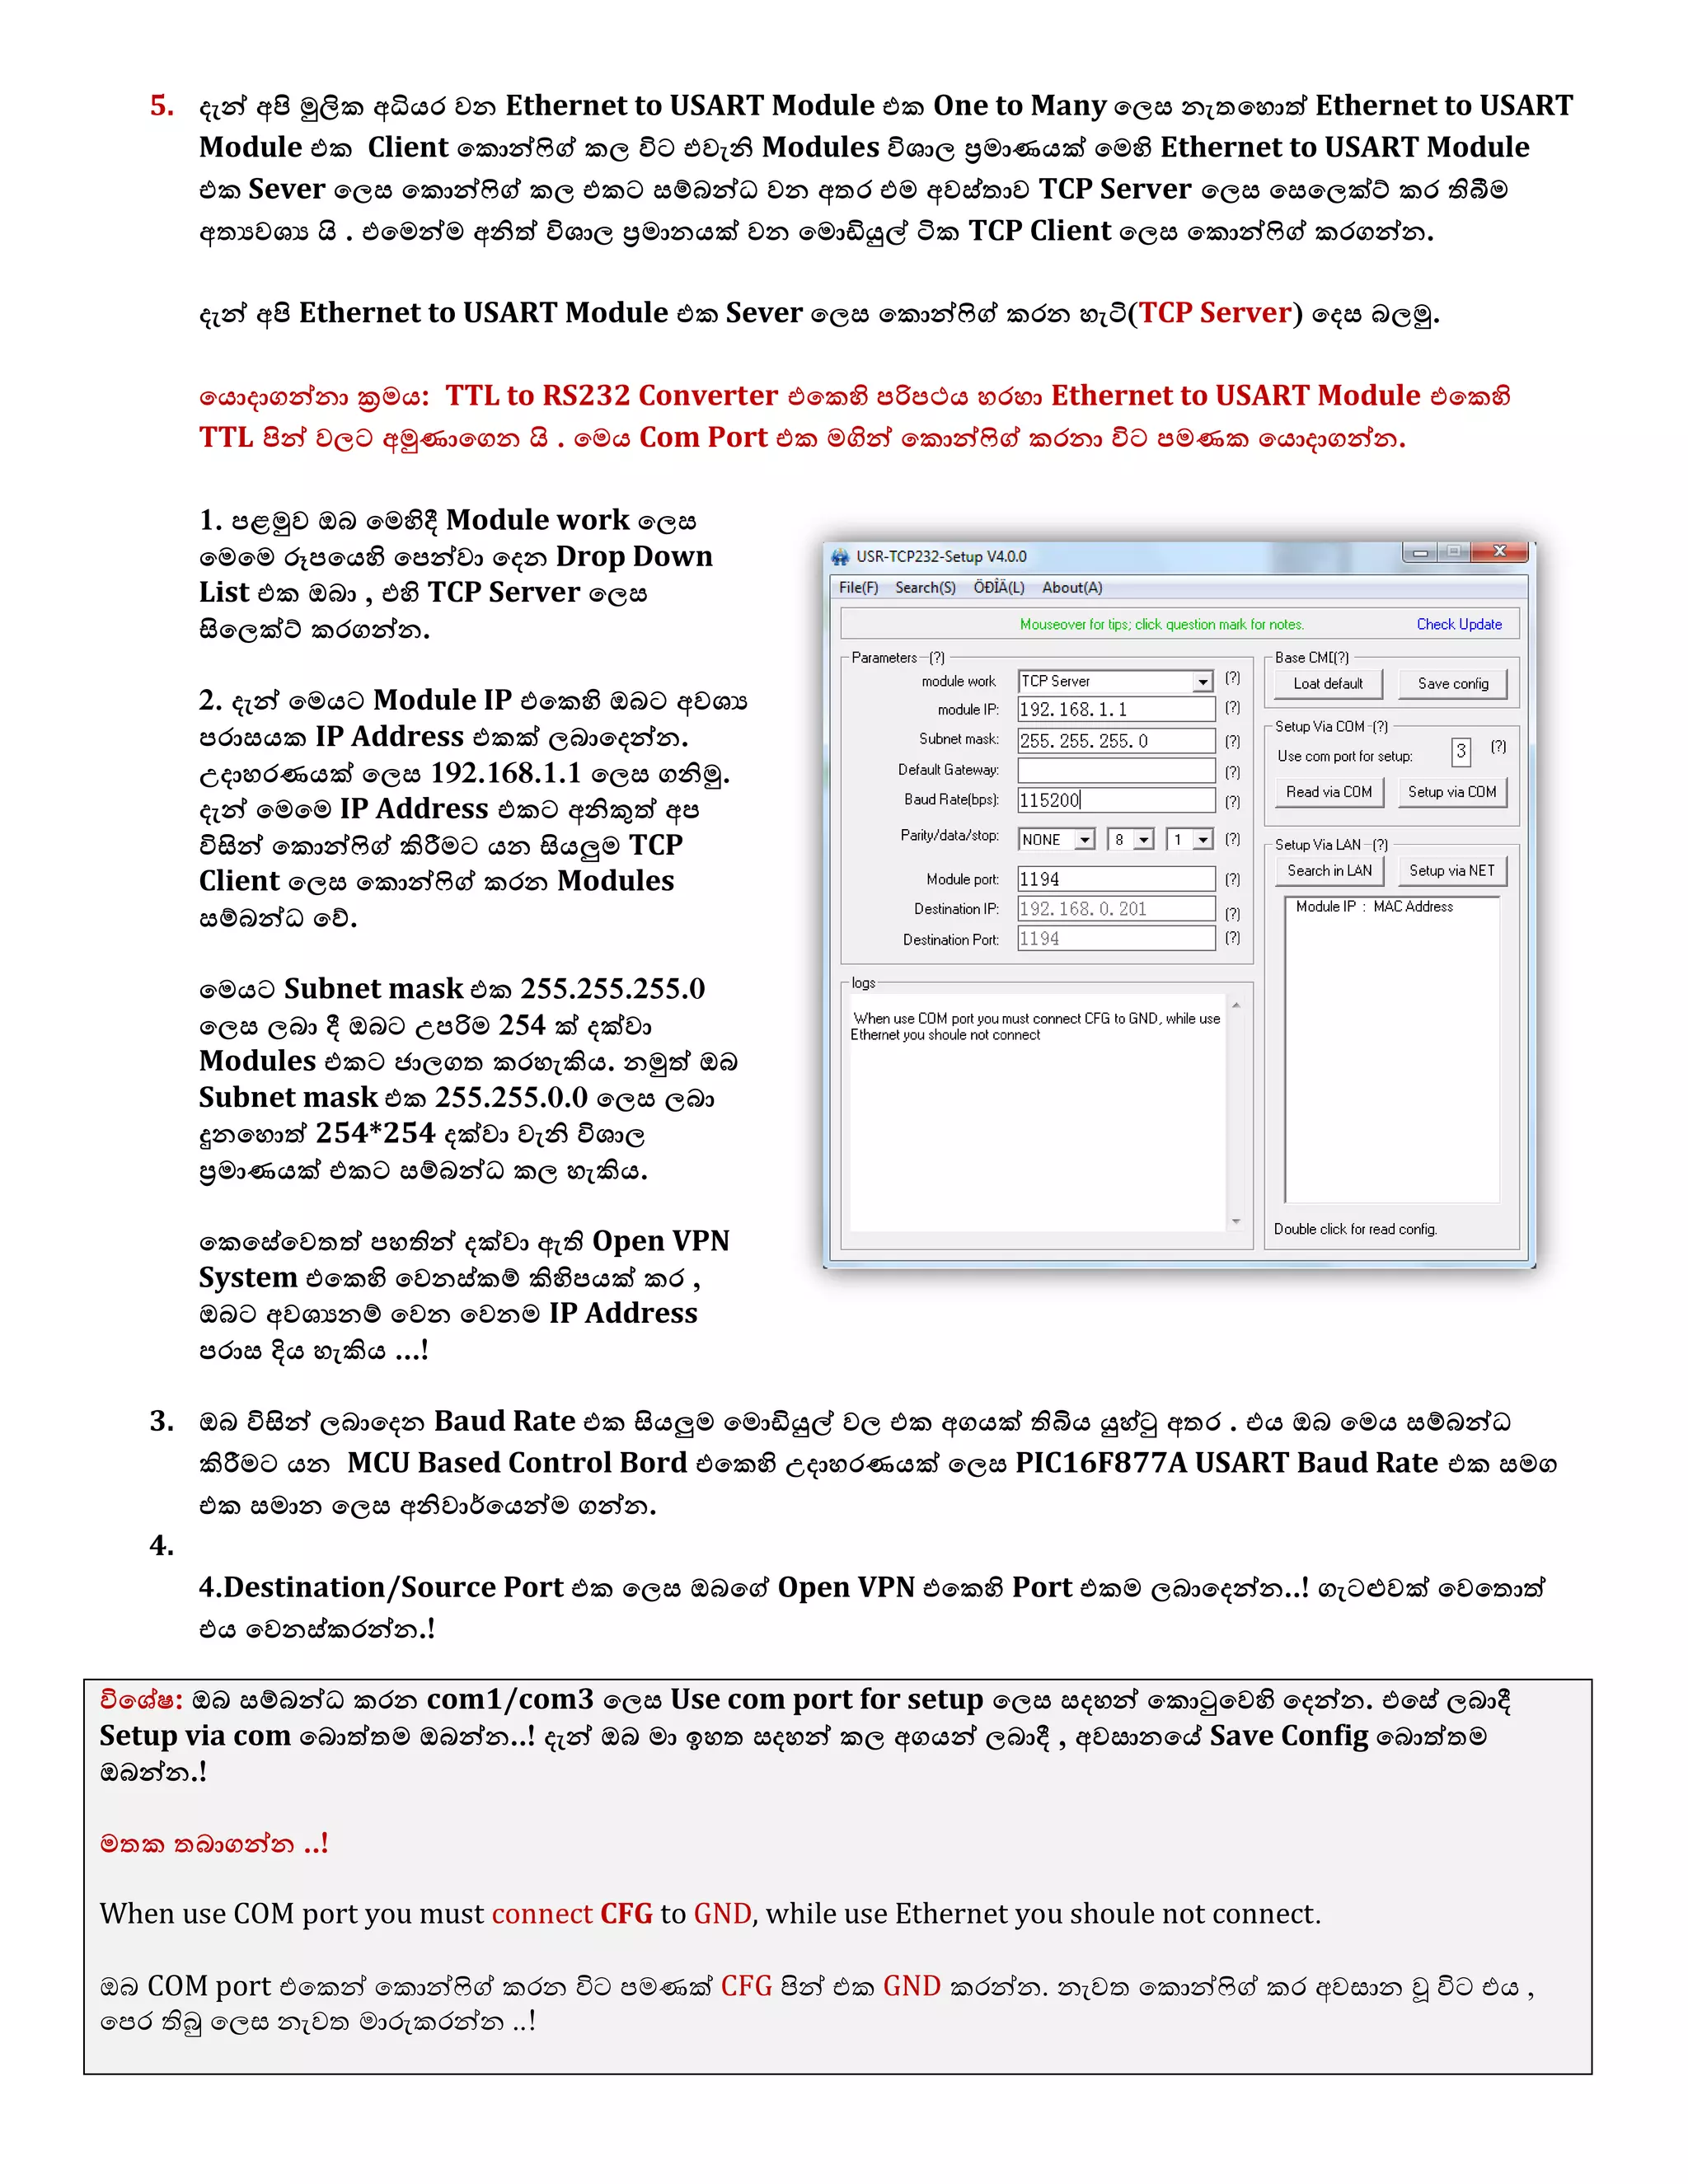
1. The document discusses connecting multiple microcontroller boards located worldwide over a secure VPN network. 2. It provides details on configuring the boards to connect via either RS232 or Ethernet ports and using software tools for setup and testing. 3. The goal is to enable interconnecting the boards in a one-to-many or client-server architecture over TCP/IP for monitoring and controlling remotely.


![Coded Agents – with UiPath SDK + LangGraph [Virtual Hands-on Workshop]](https://cdn.slidesharecdn.com/ss_thumbnails/codedagentsdeck-251215155422-5497c599-thumbnail.jpg?width=640&height=640&fit=bounds)


