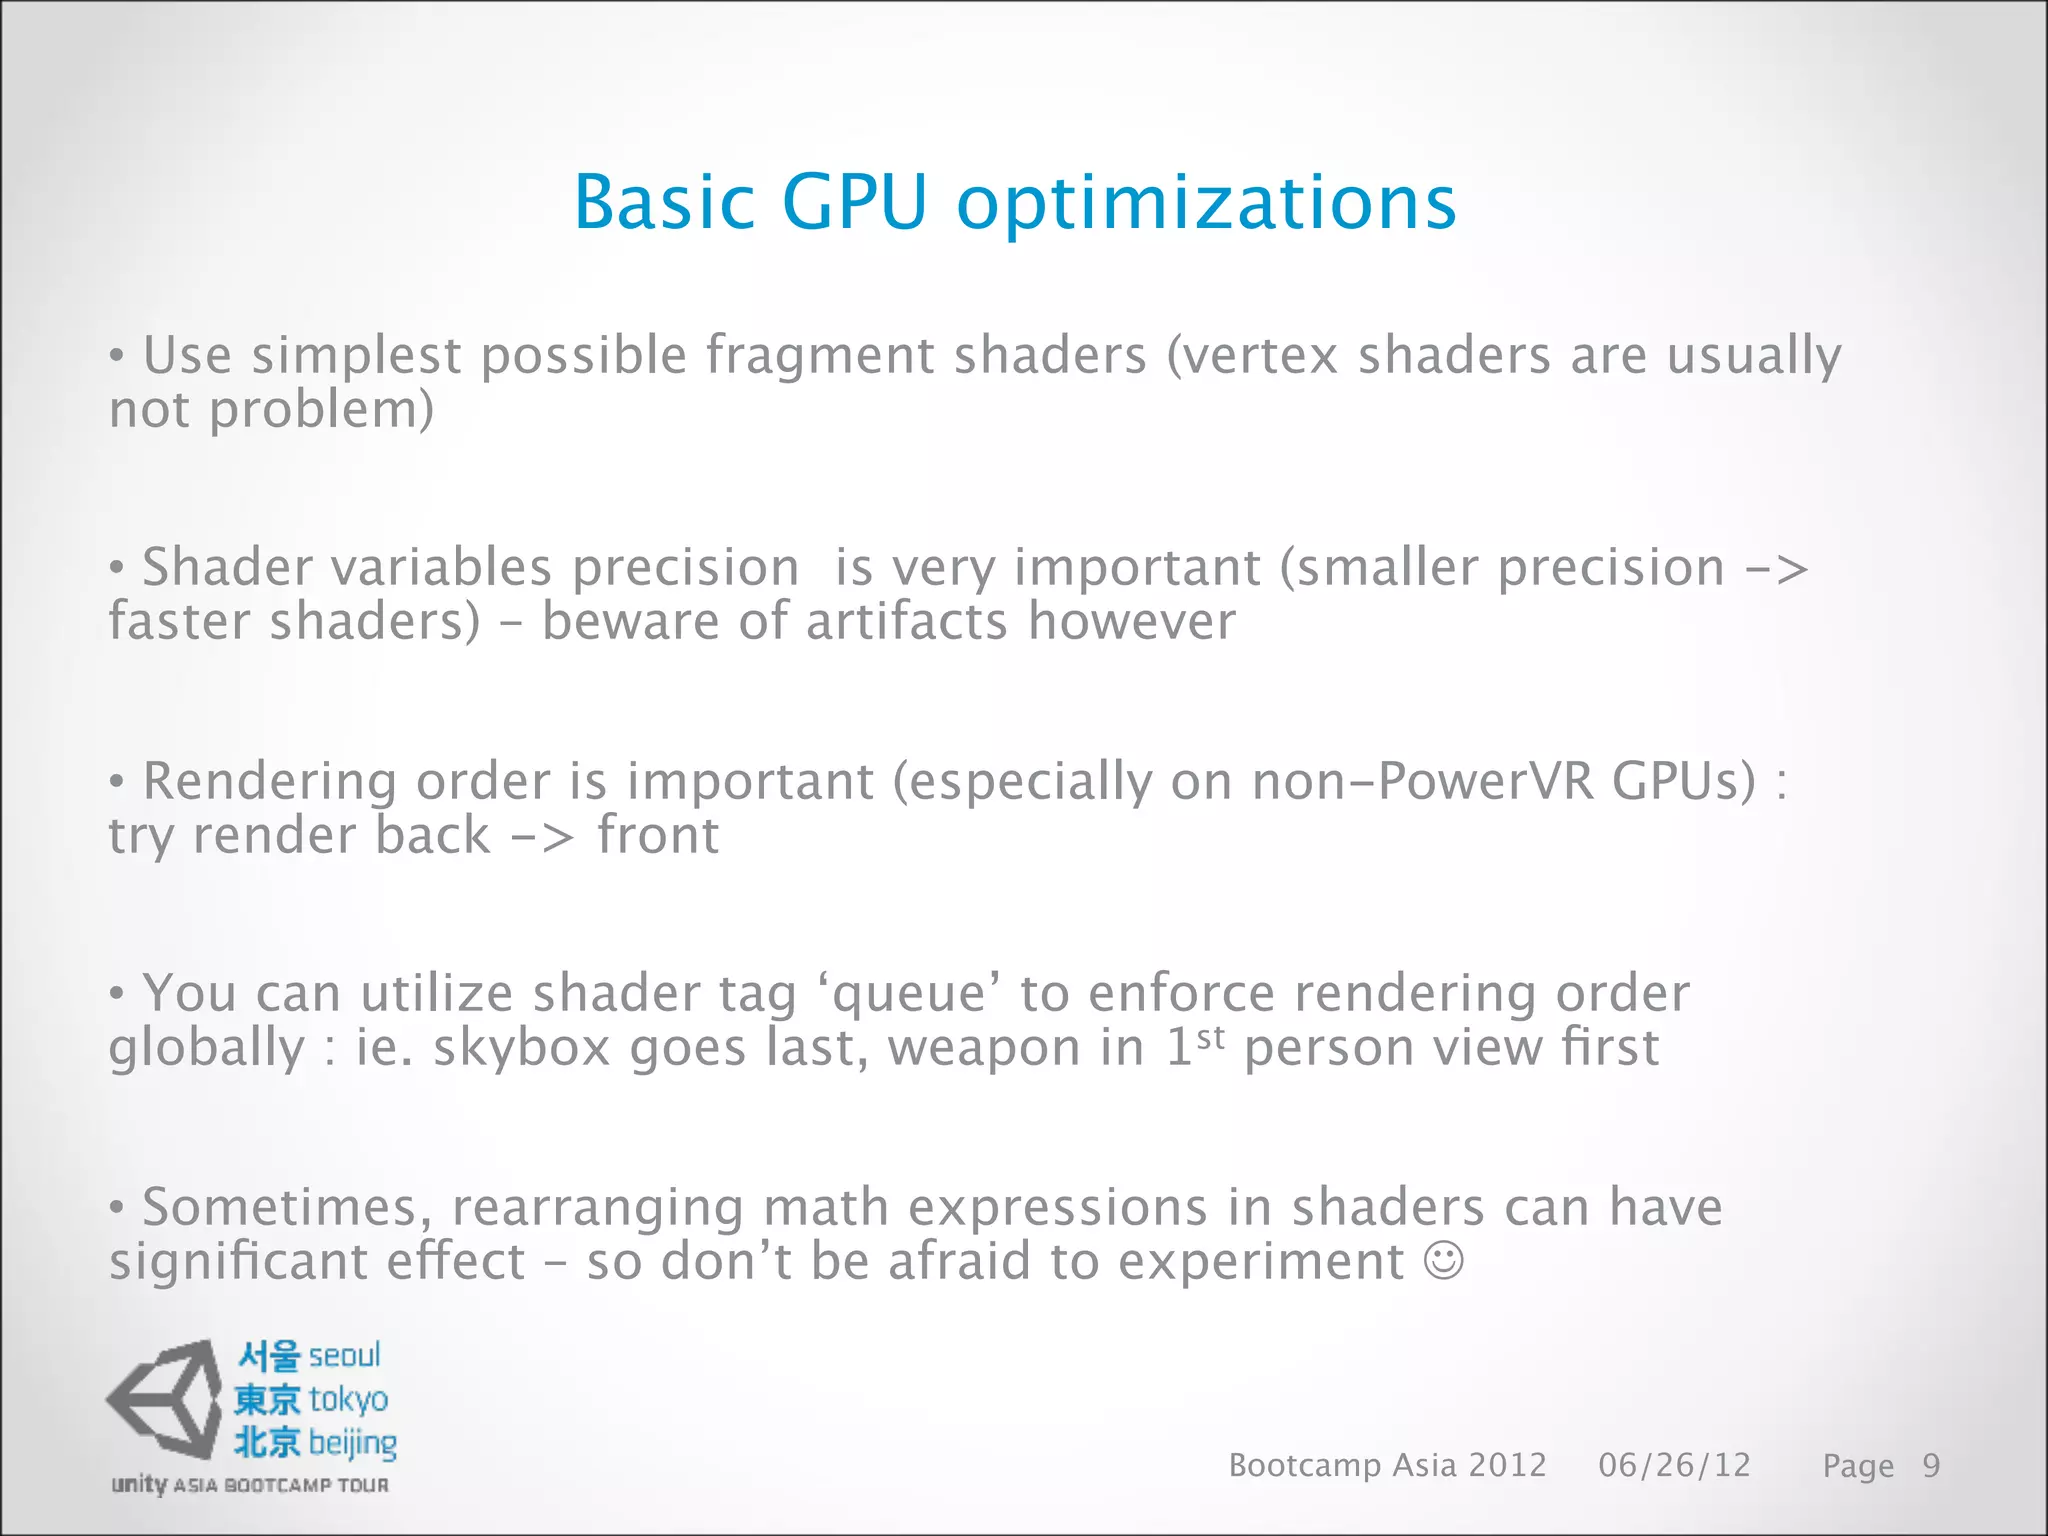
Basic GPU optimizations
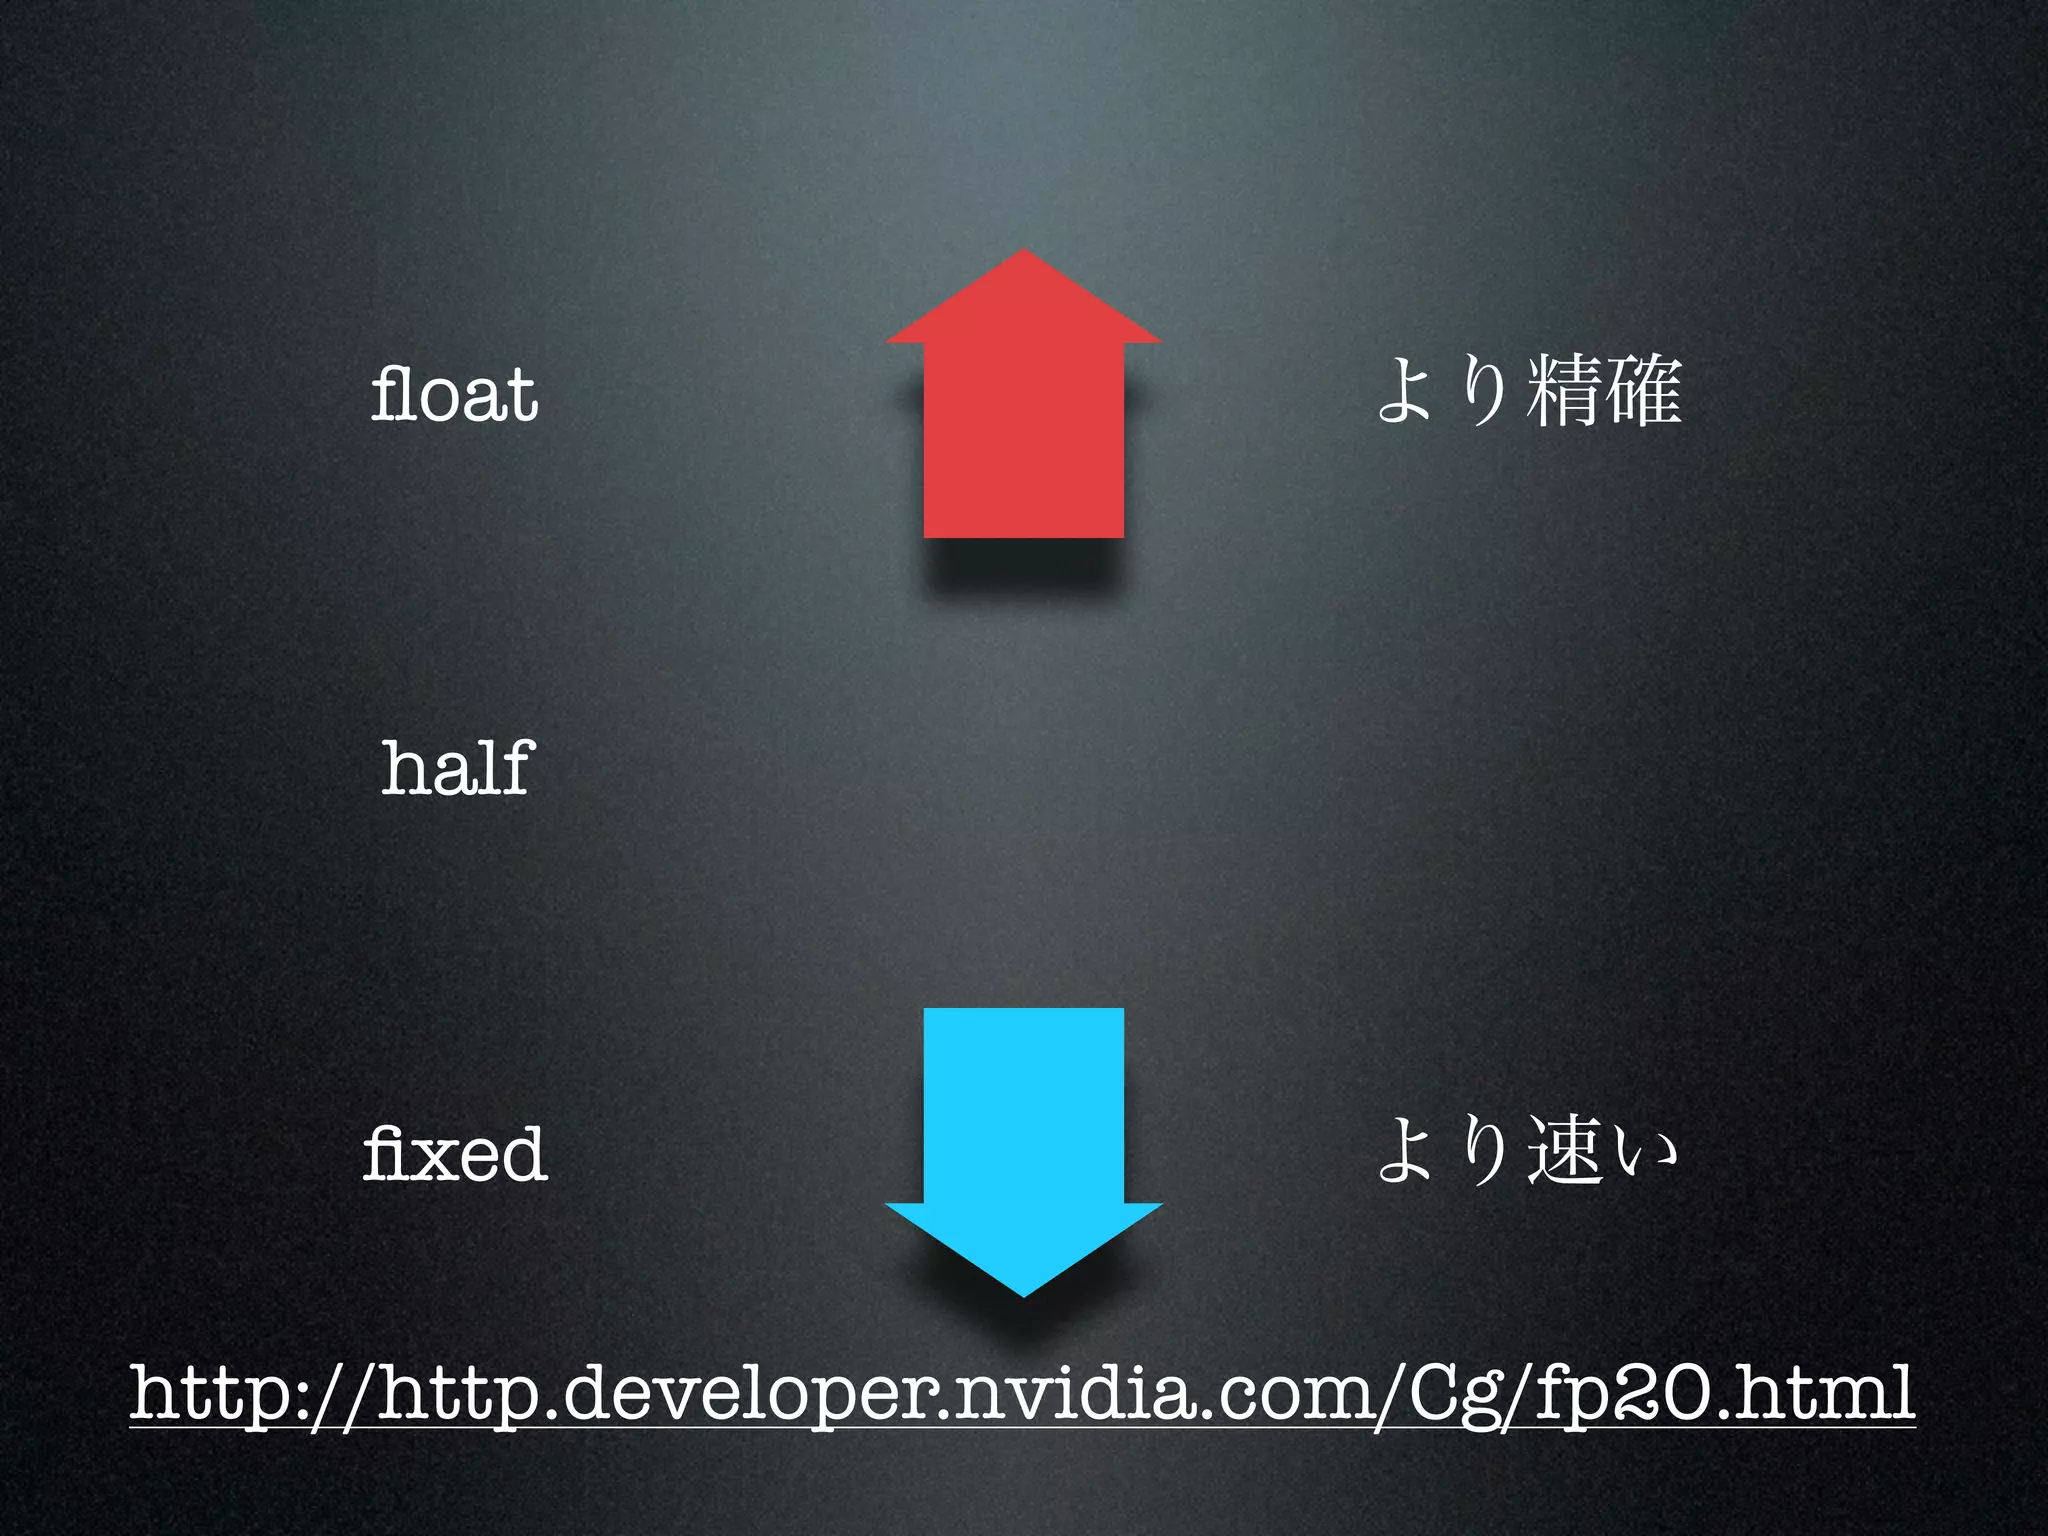
•Use simplest possible fragment shaders (vertex shaders are usually
not problem)
• Shader variables precision is very important (smaller precision ->
faster shaders) – beware of artifacts however
• Rendering order is important (especially on non-PowerVR GPUs) :
try render back -> front
• You can utilize shader tag ‘queue’ to enforce rendering order
globally : ie. skybox goes last, weapon in 1st person view first
• Sometimes, rearranging math expressions in shaders can have
significant effect – so don’t be afraid to experiment
Bootcamp Asia 2012 06/26/12 Page 9
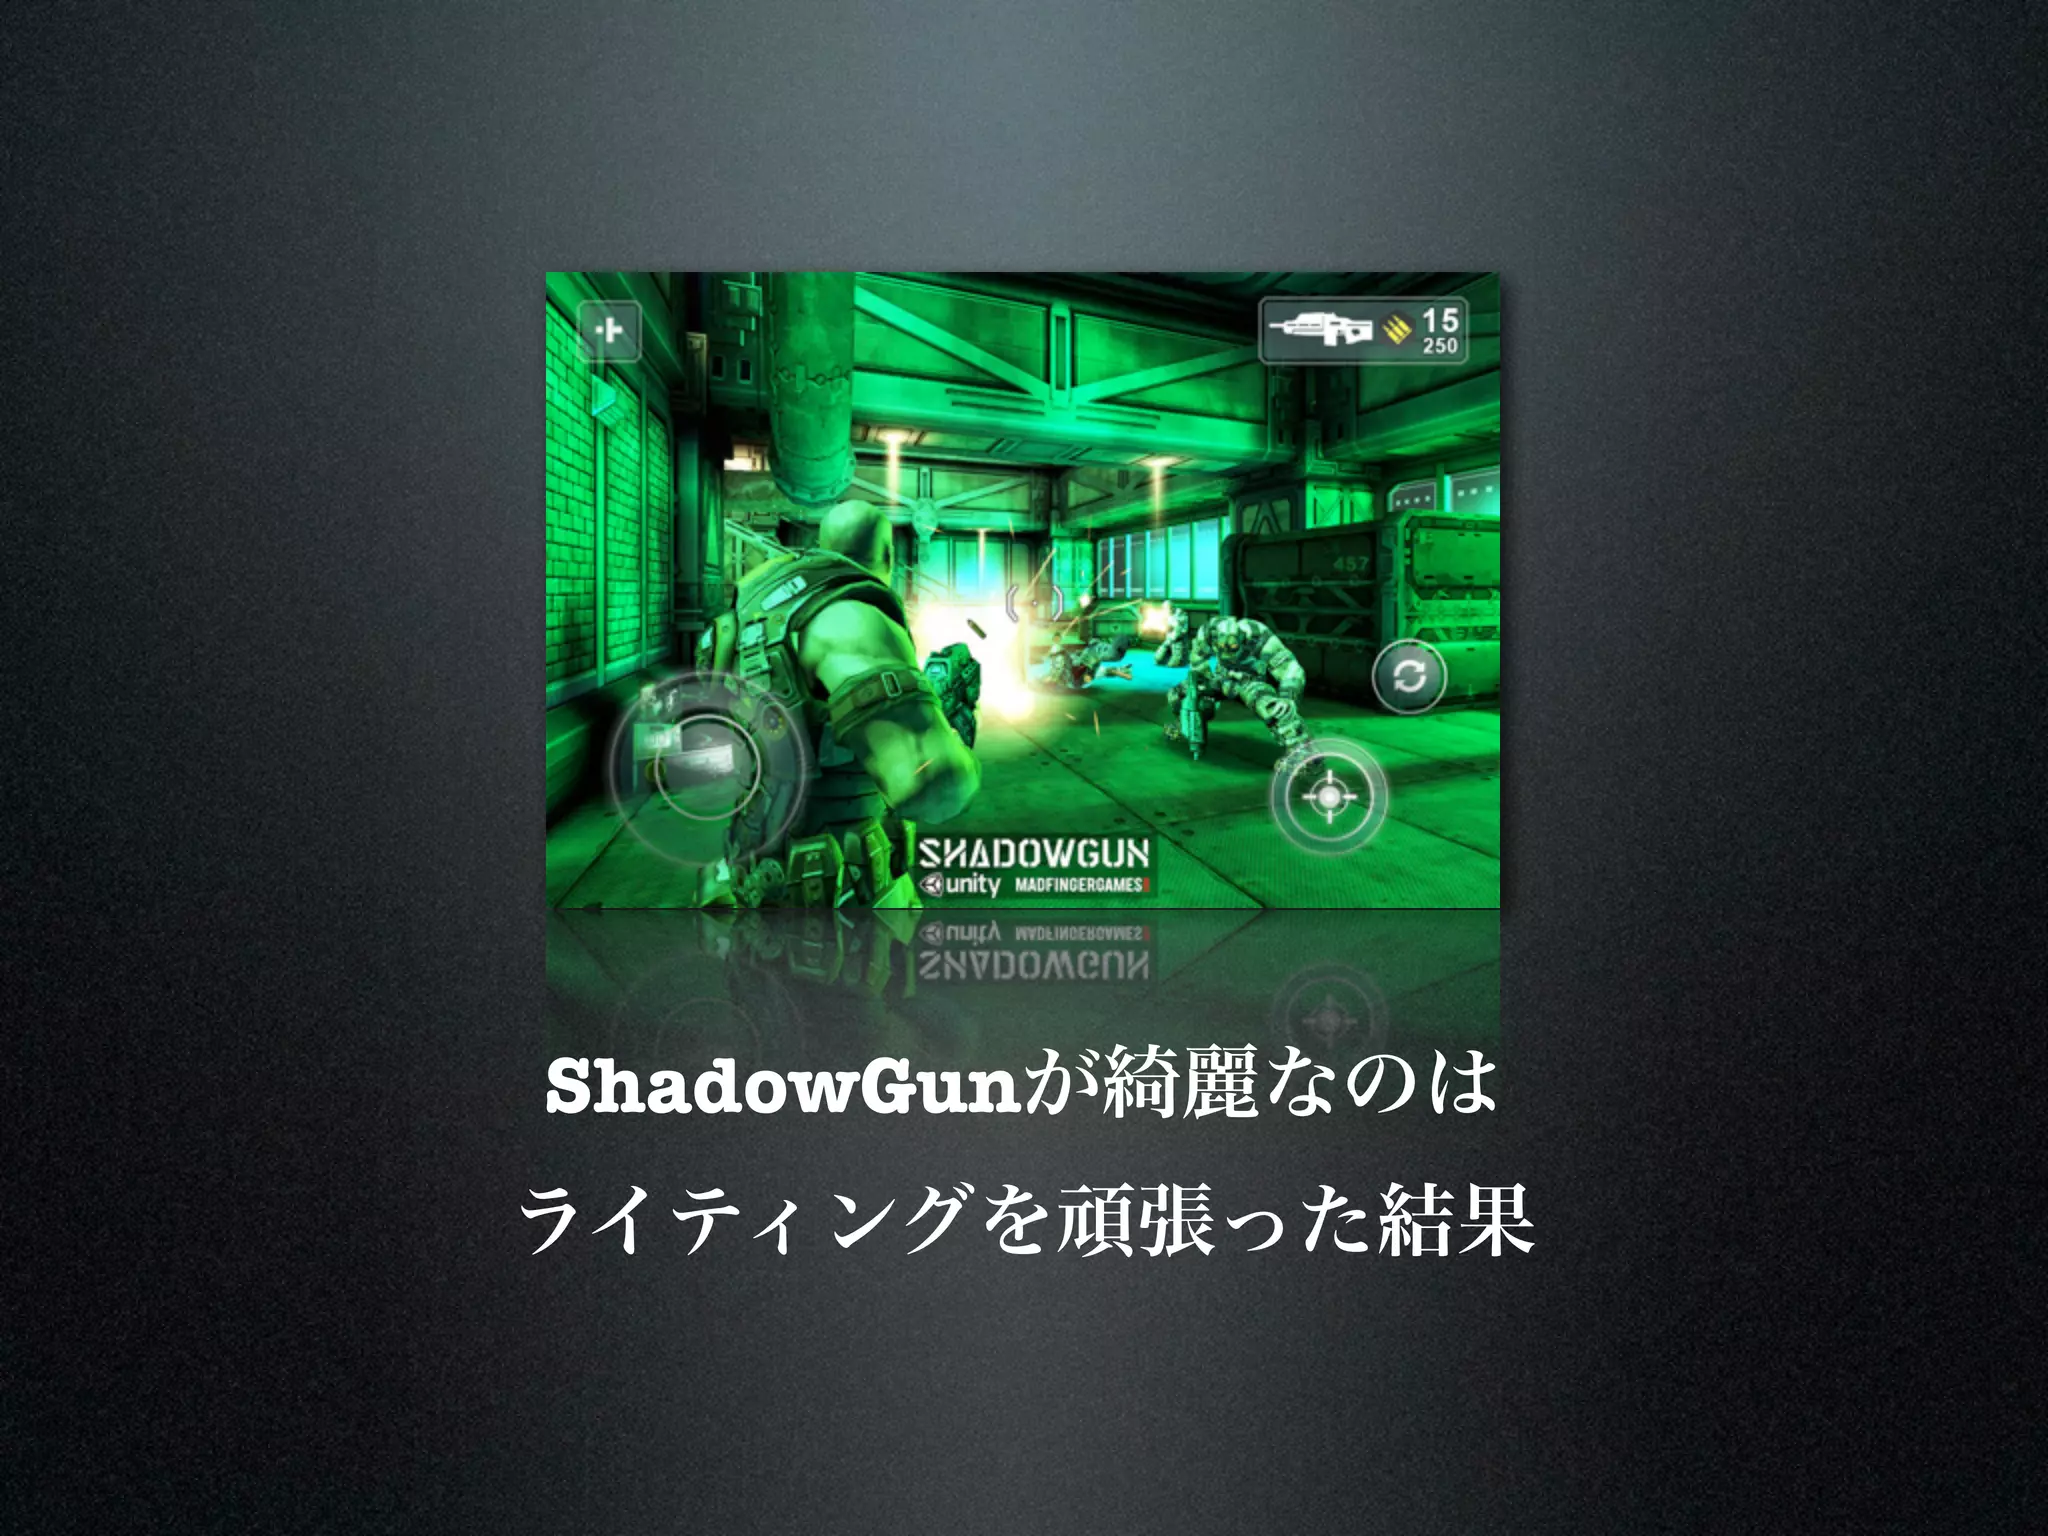
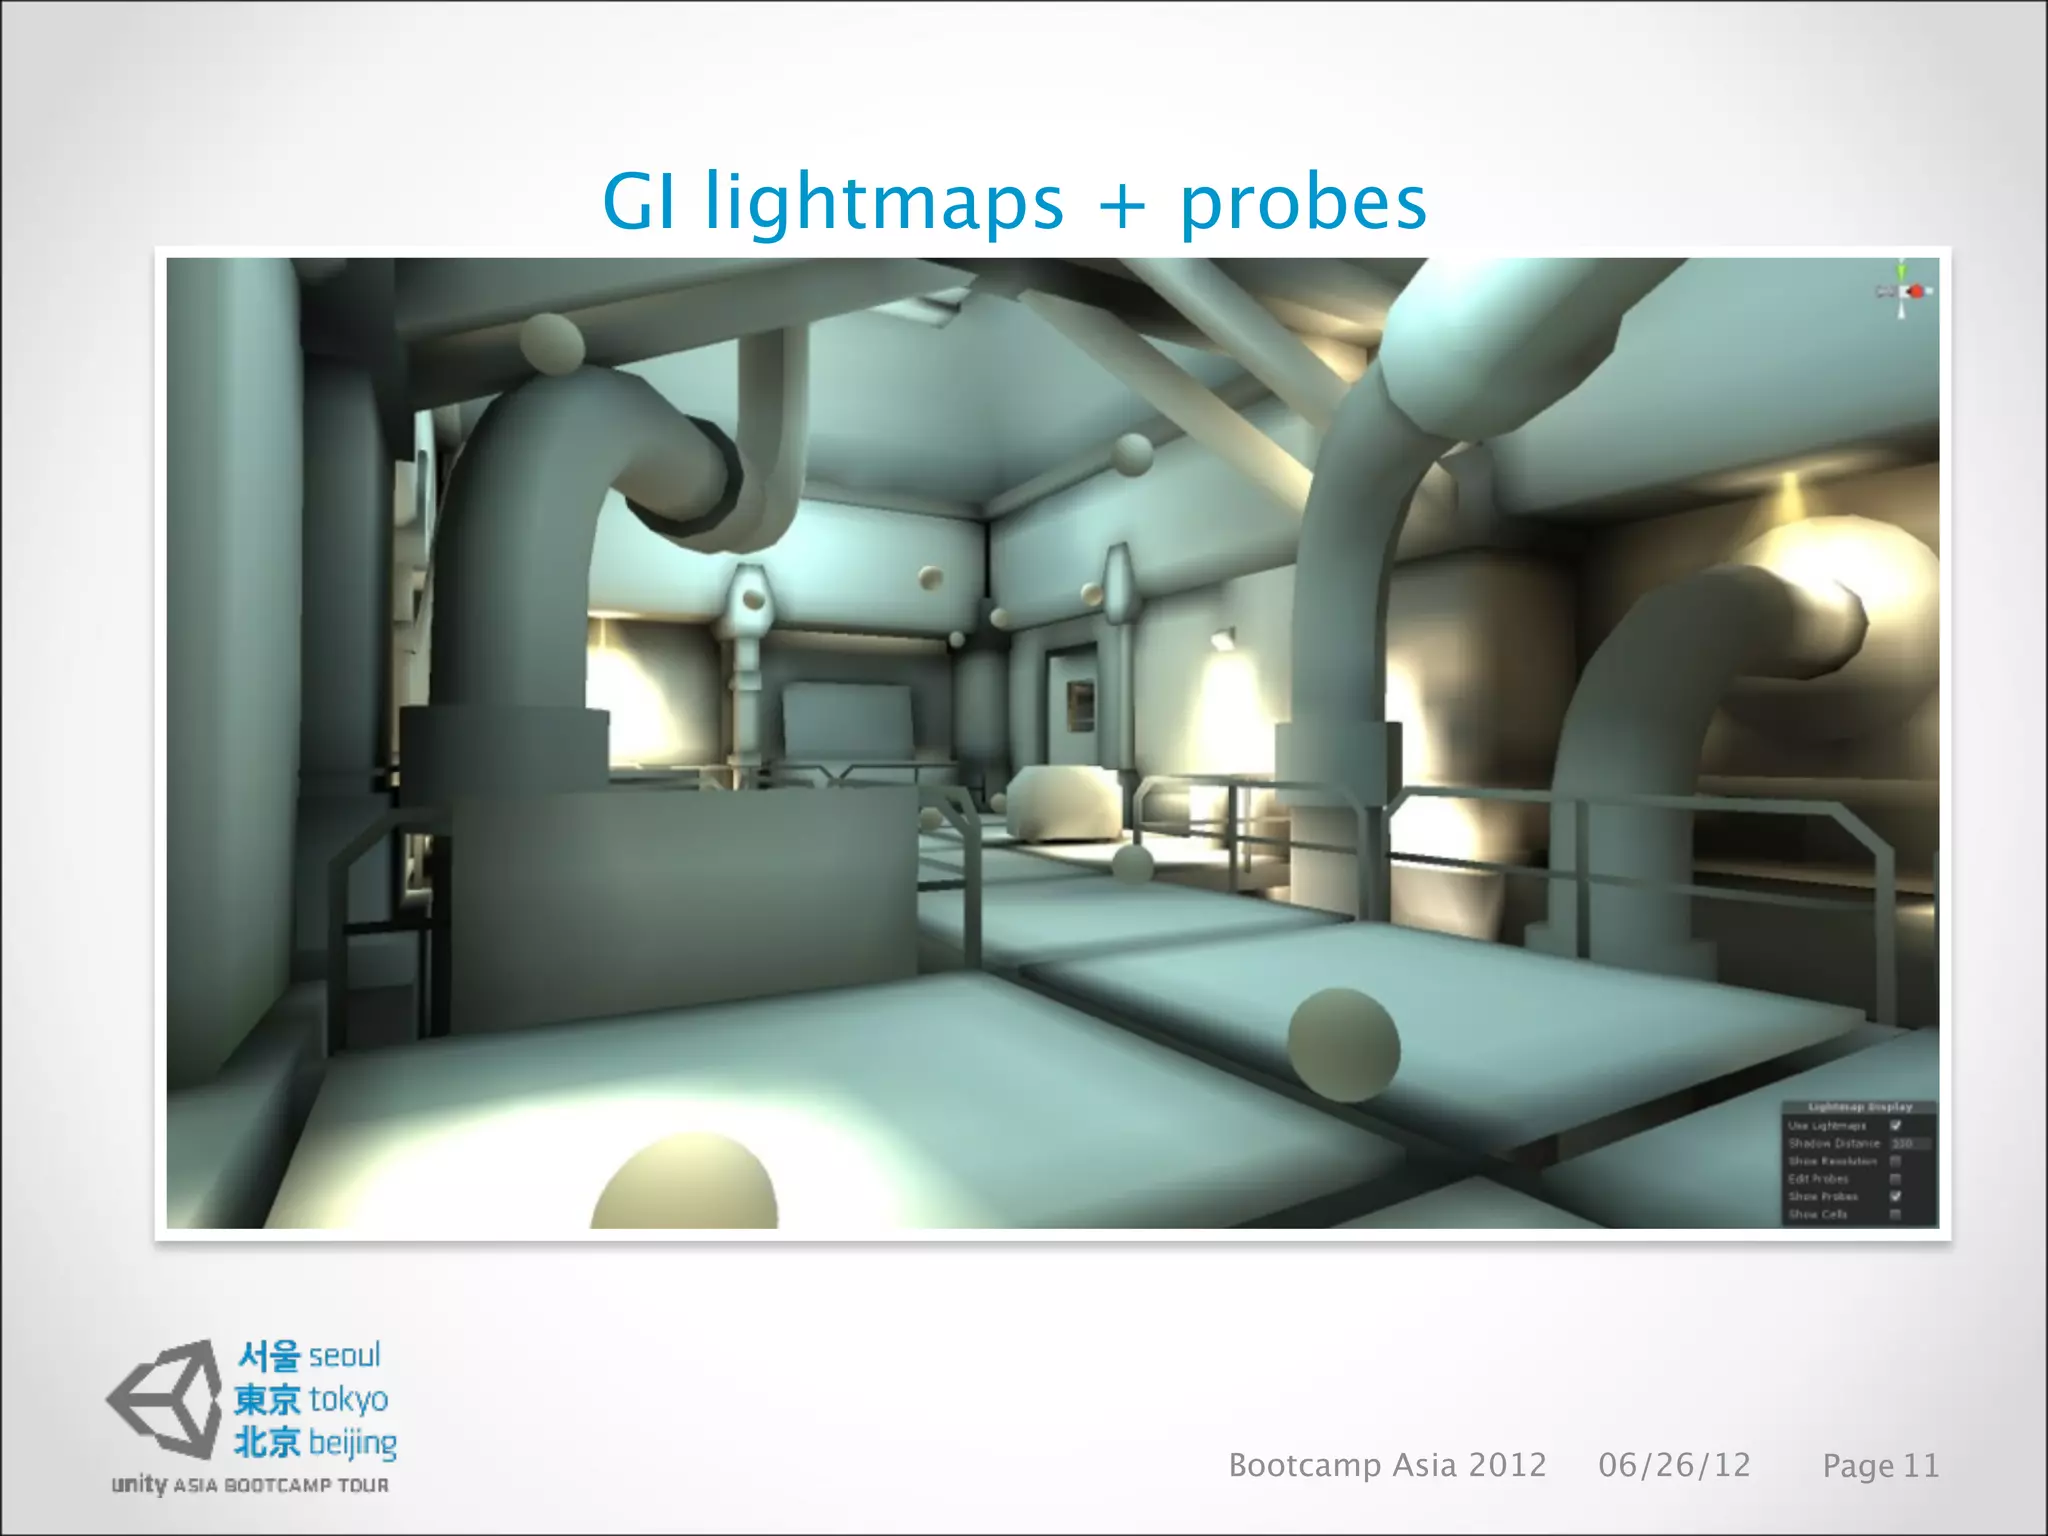
Lighting in Shadowgun
•Lighting has major impact for overall game look. GI makes
almost any graphics assets look nice
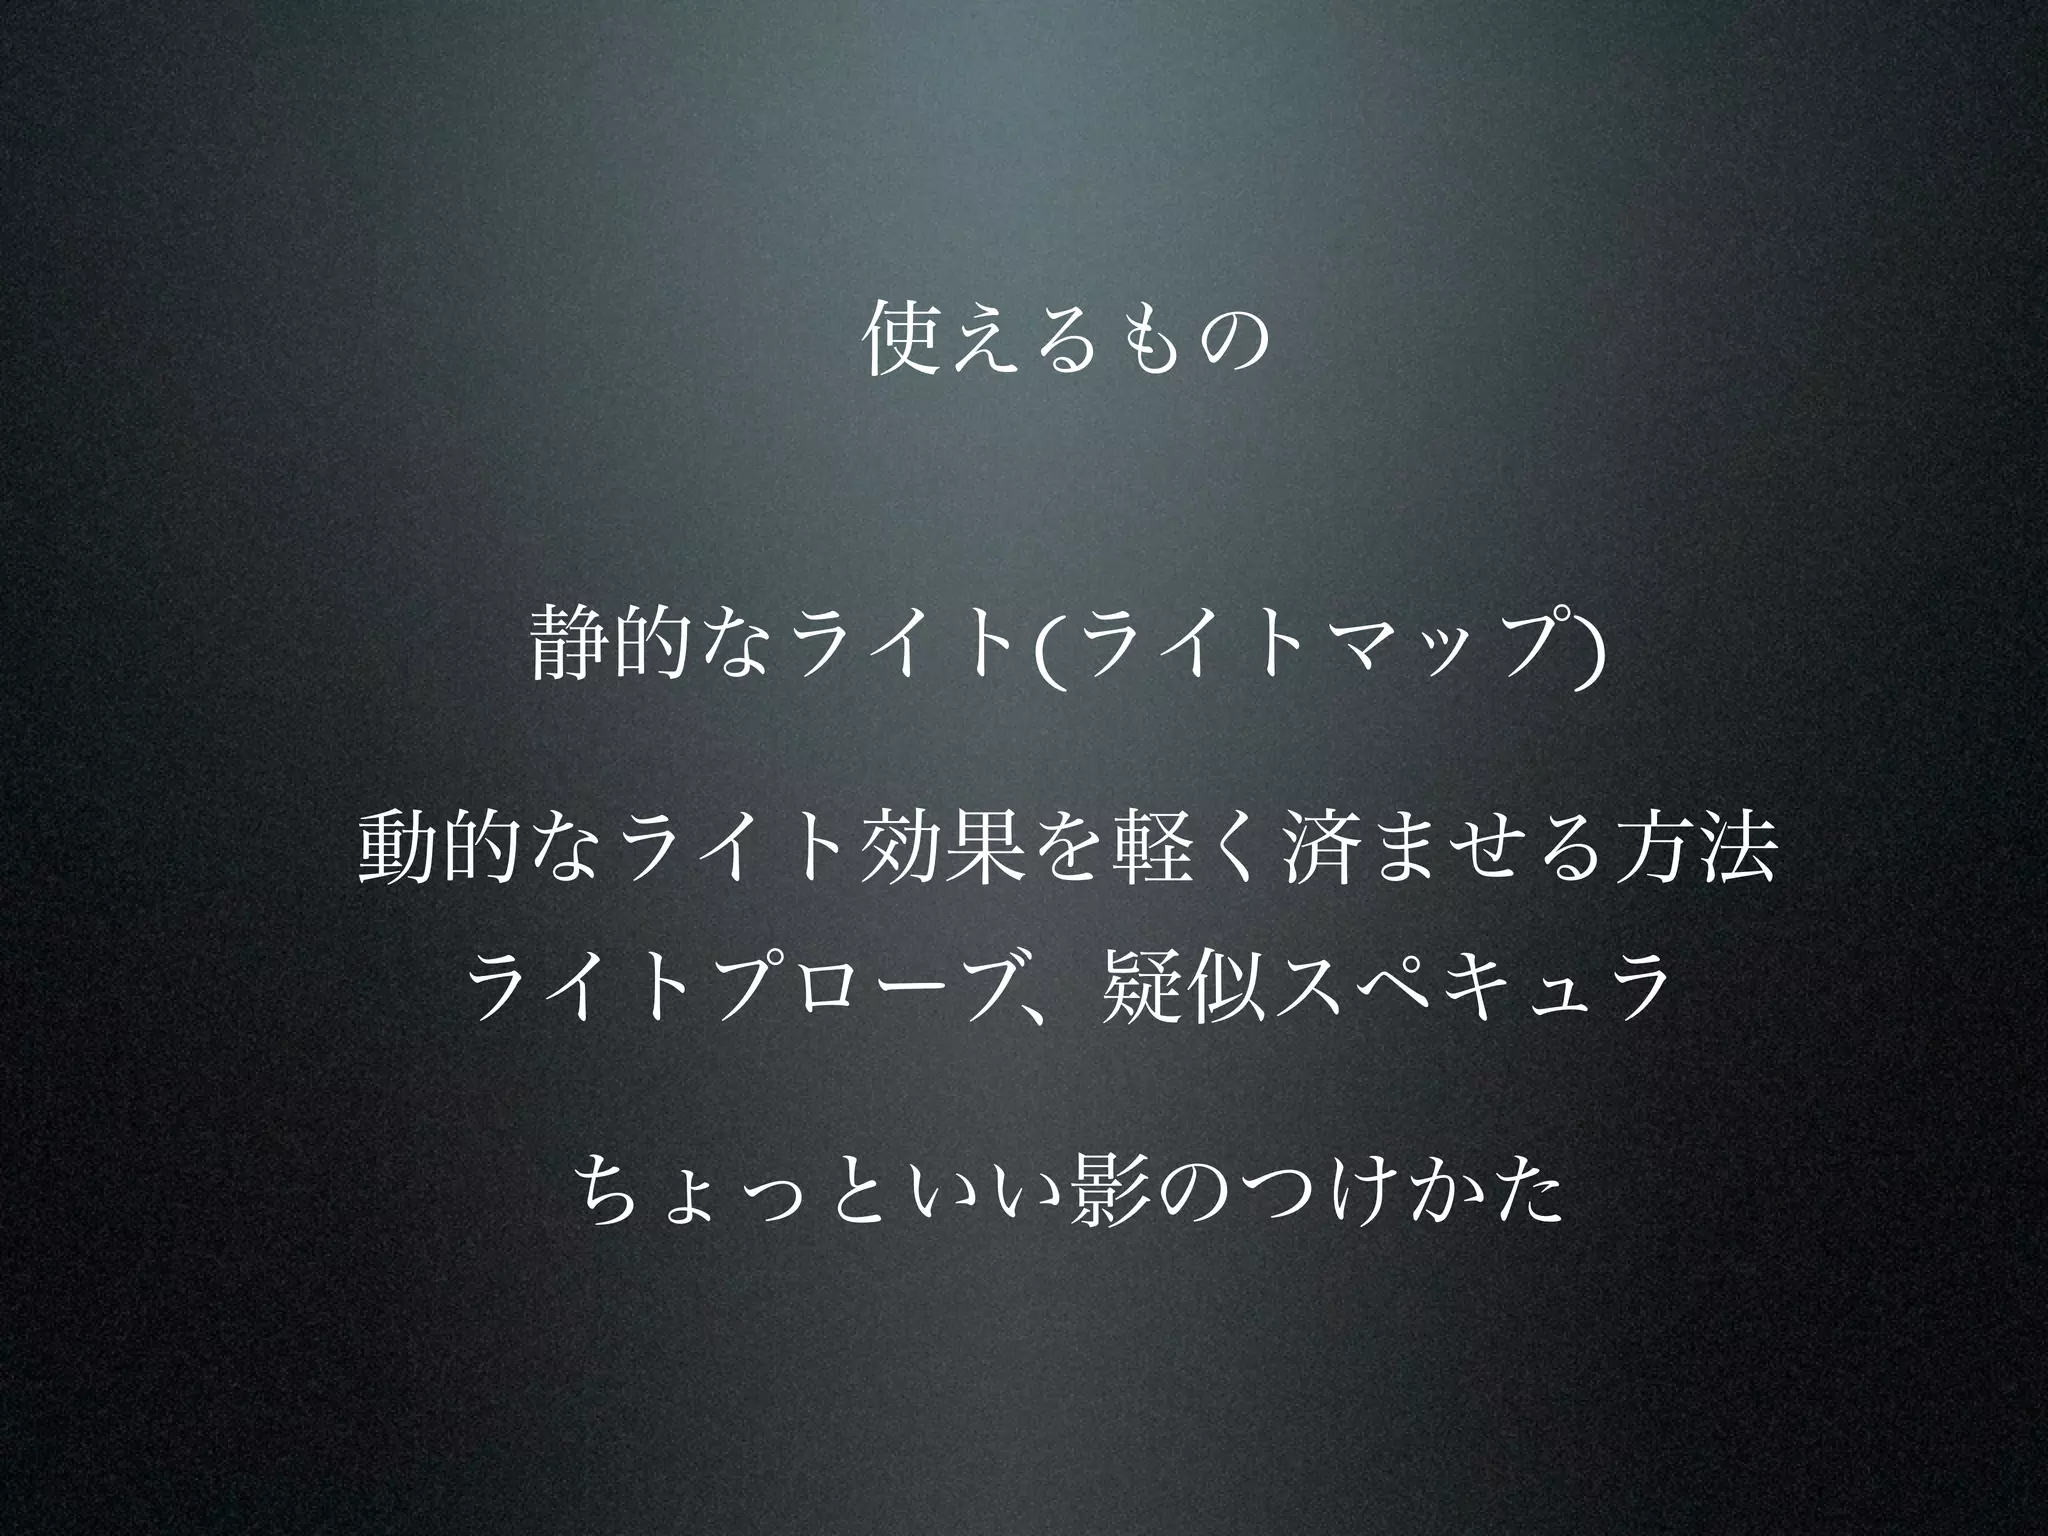
• We use lightmaps for static world geometry
• For dynamic objects ‘light probes’ are utilized : result is
consistent lighting for all surfaces (we have about ~500 light
probes per level, 3.5m spacing)
• There is usually one 1024x1024 lightmap per level
• Lightmaps are NOT compressed because of artifacts
Bootcamp Asia 2012 06/26/12 Page 10
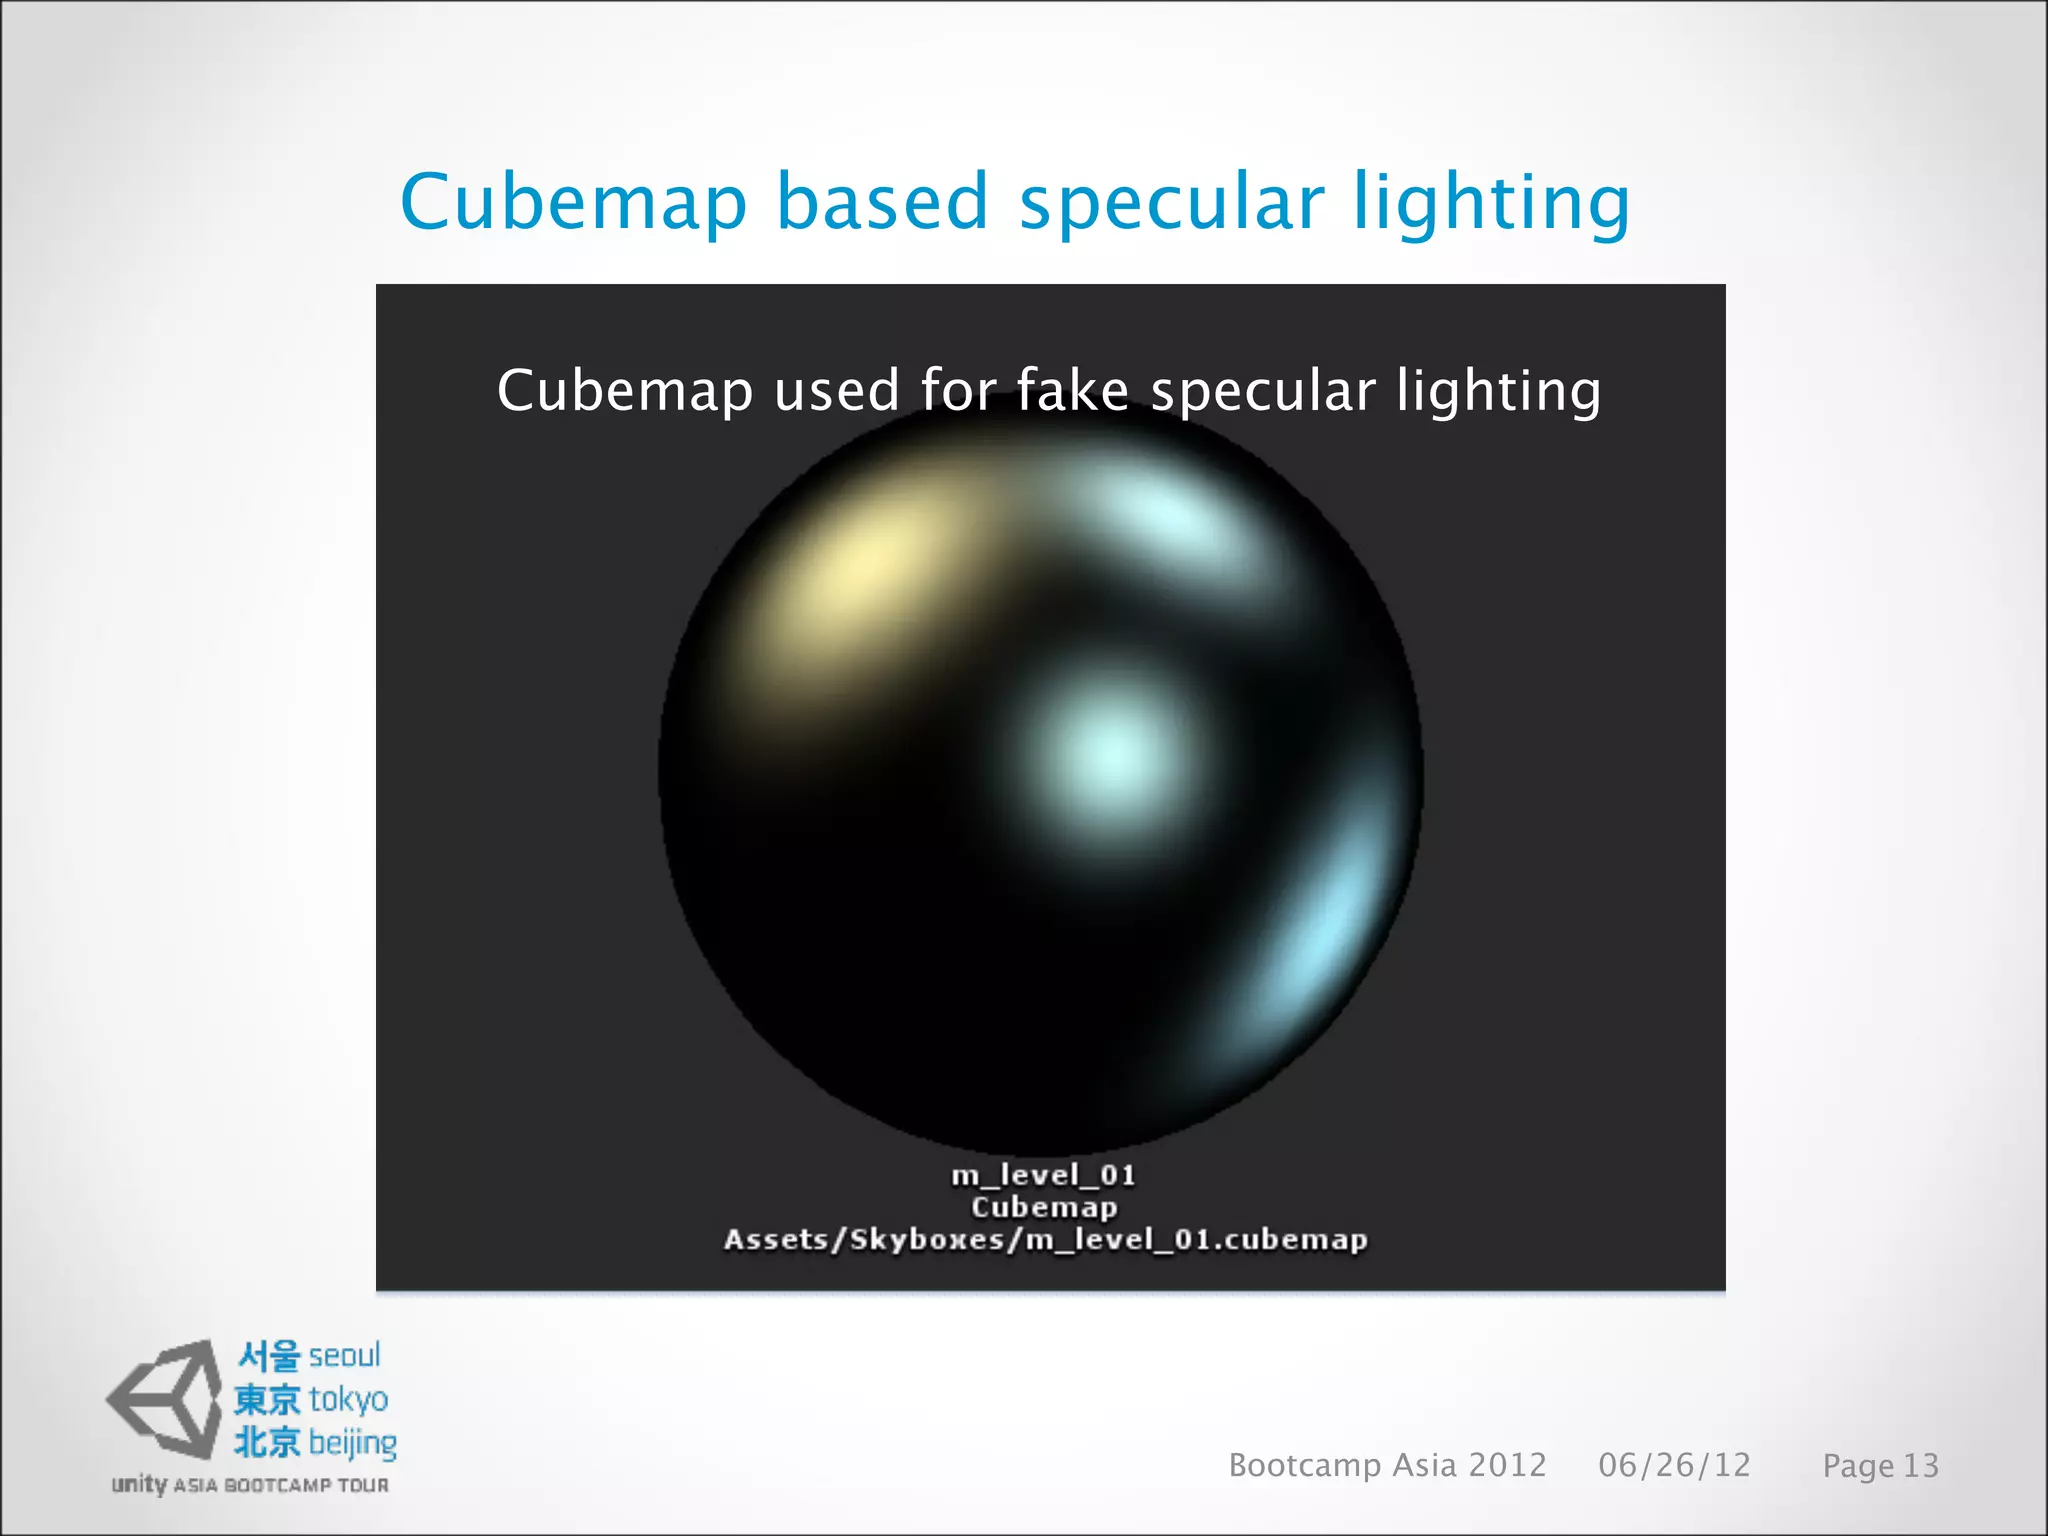
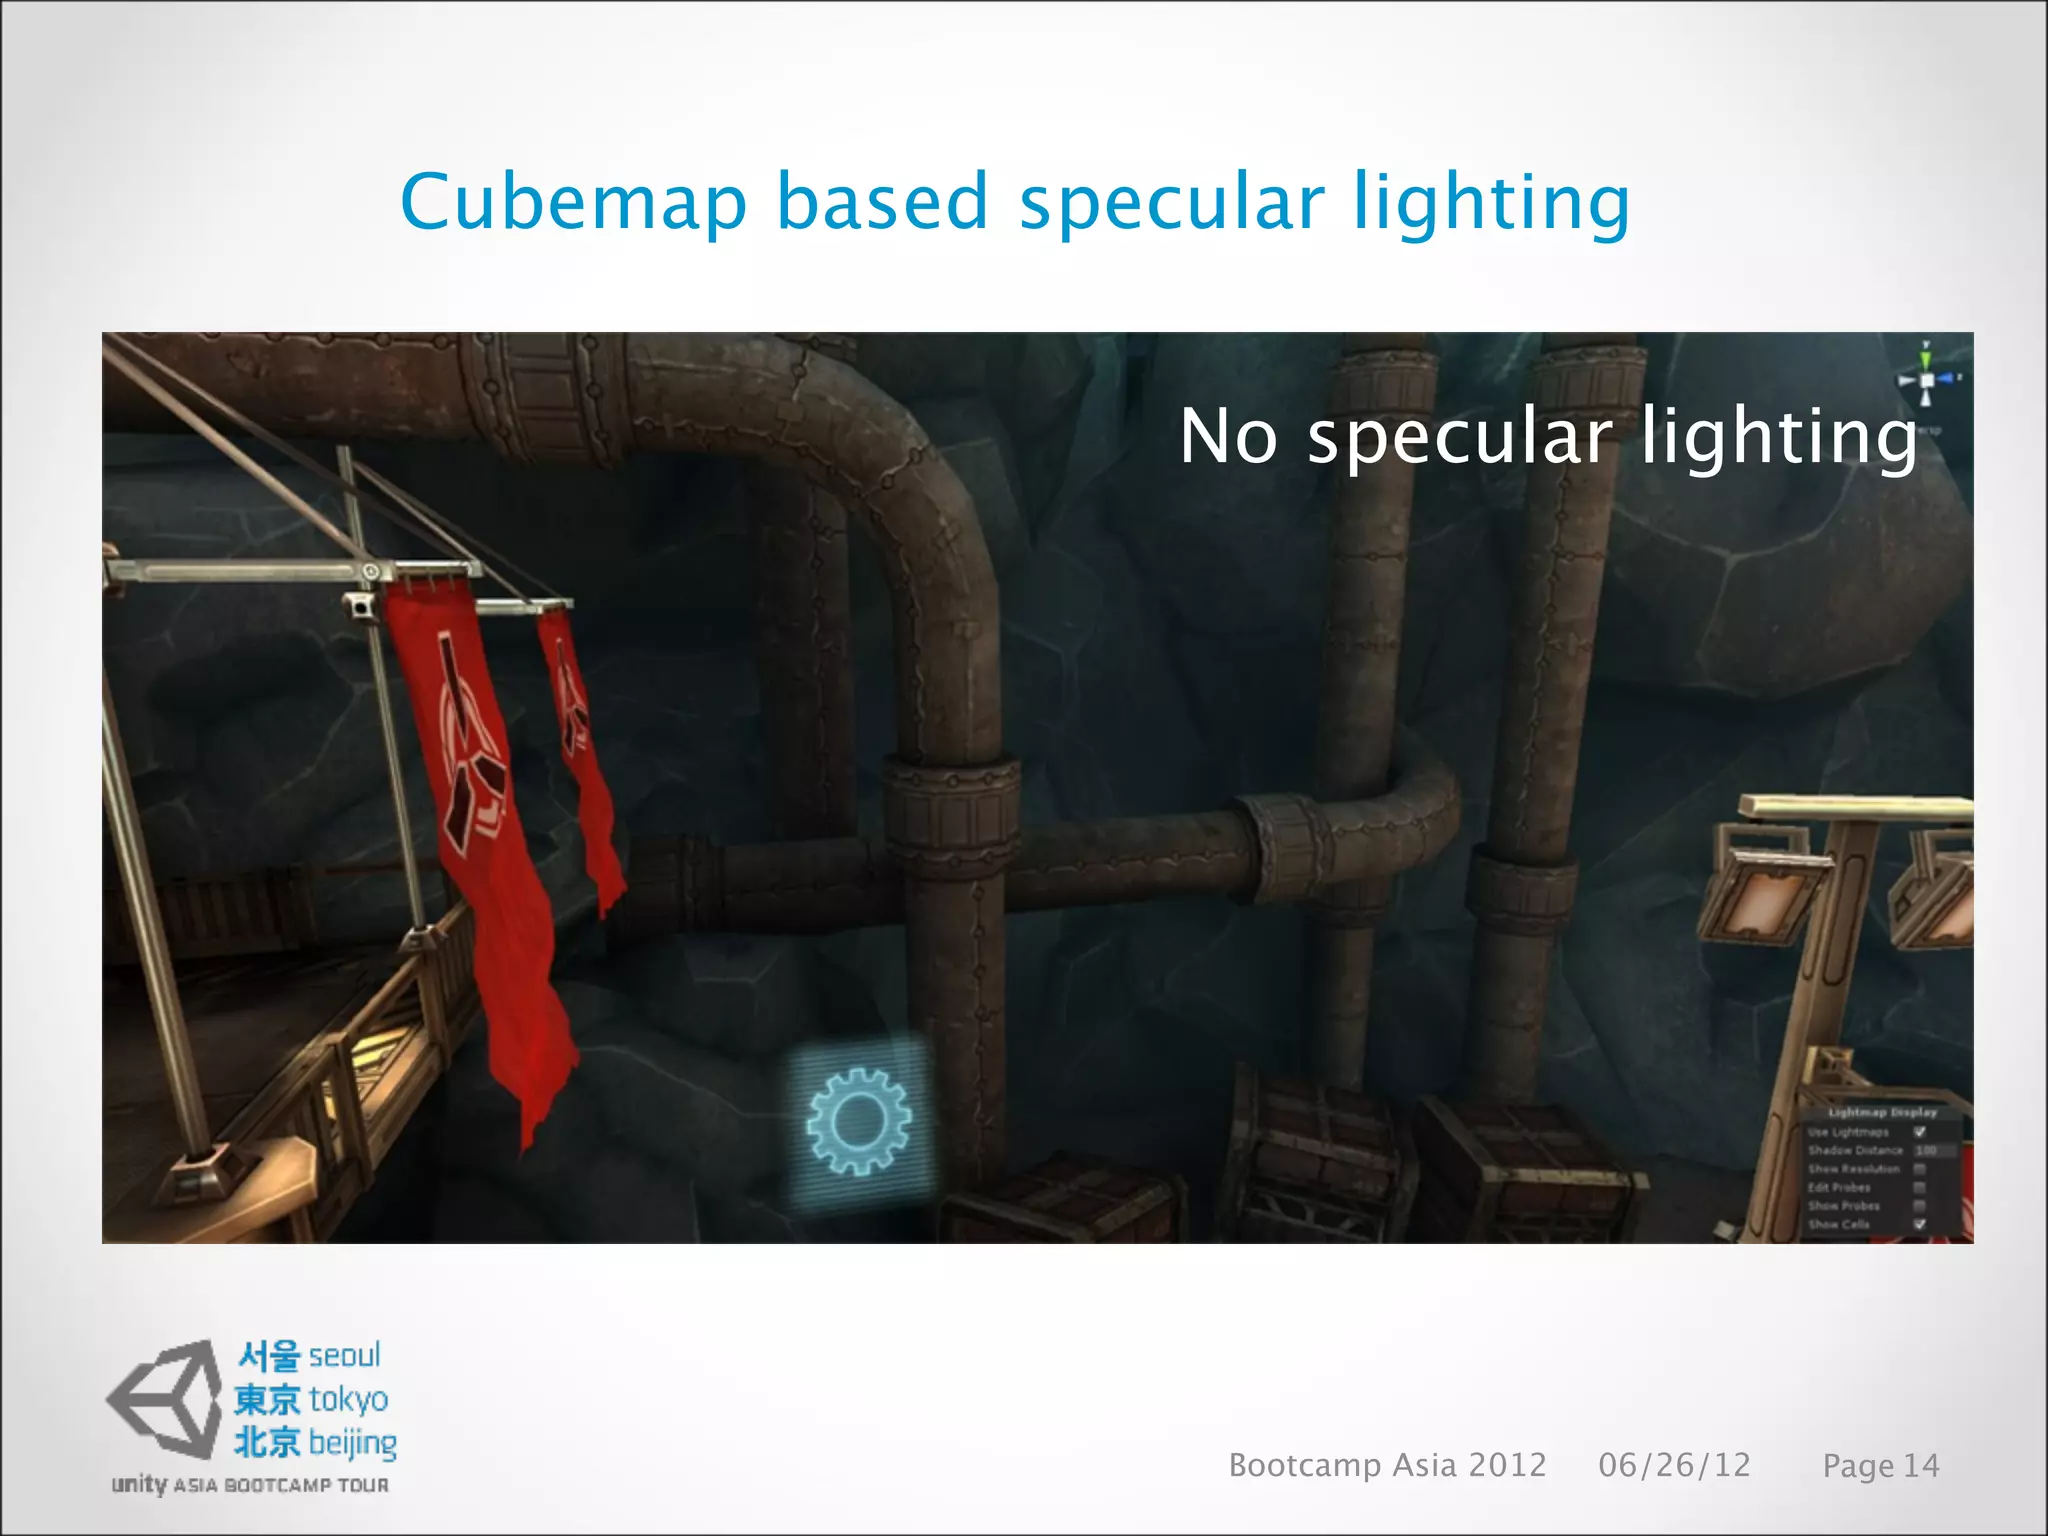
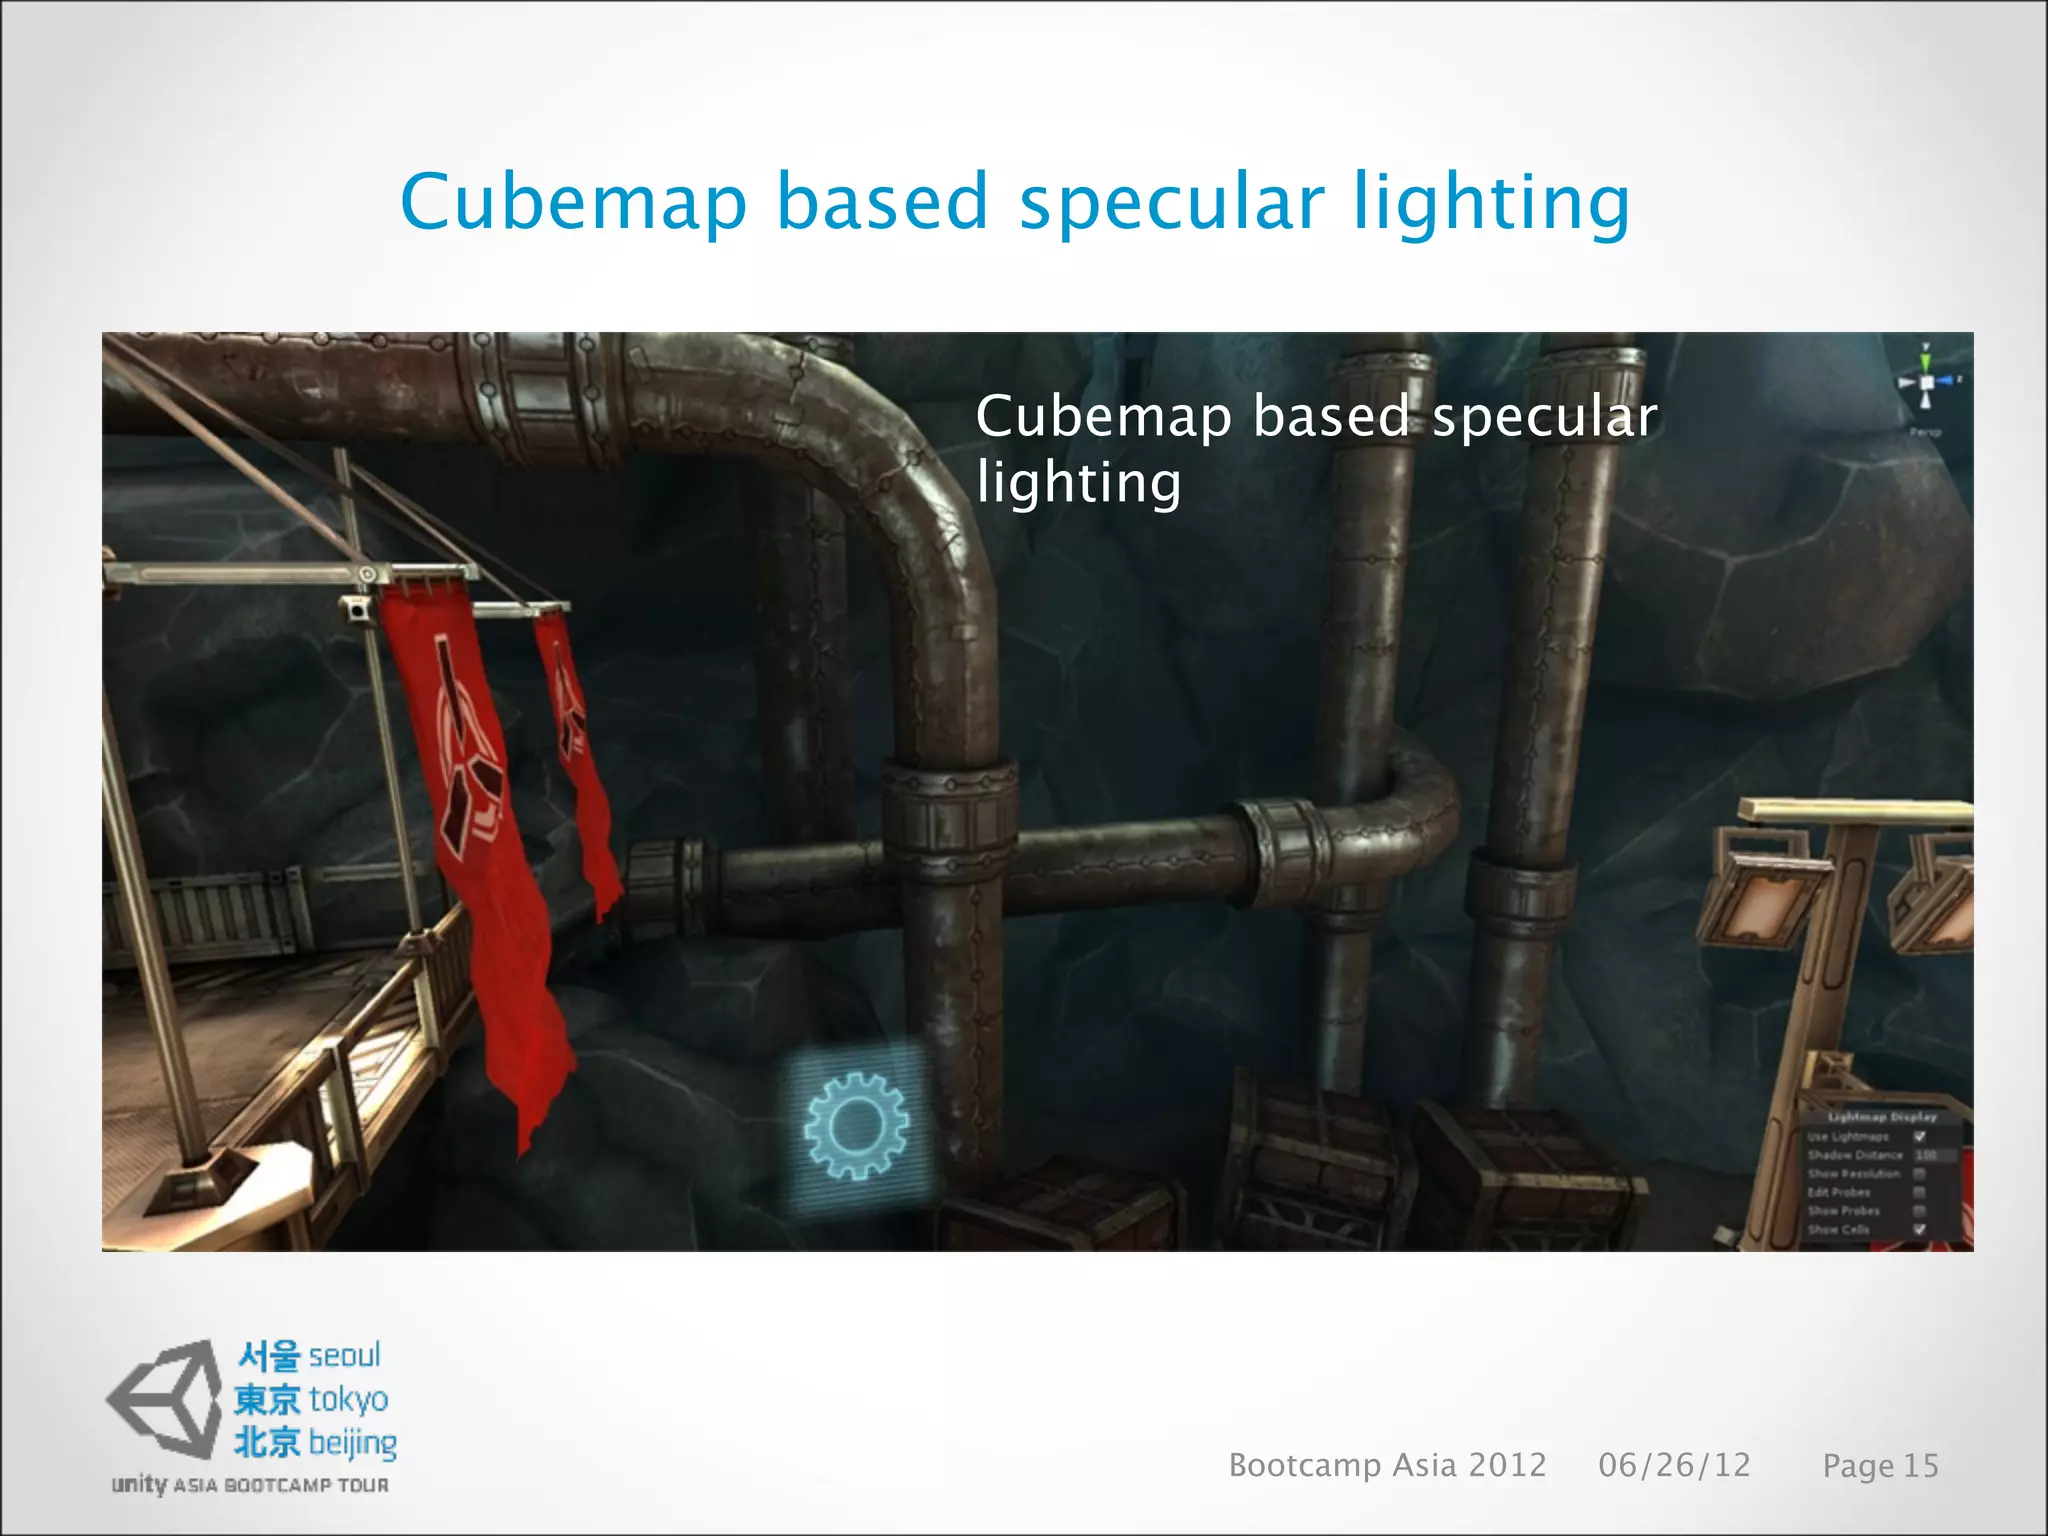
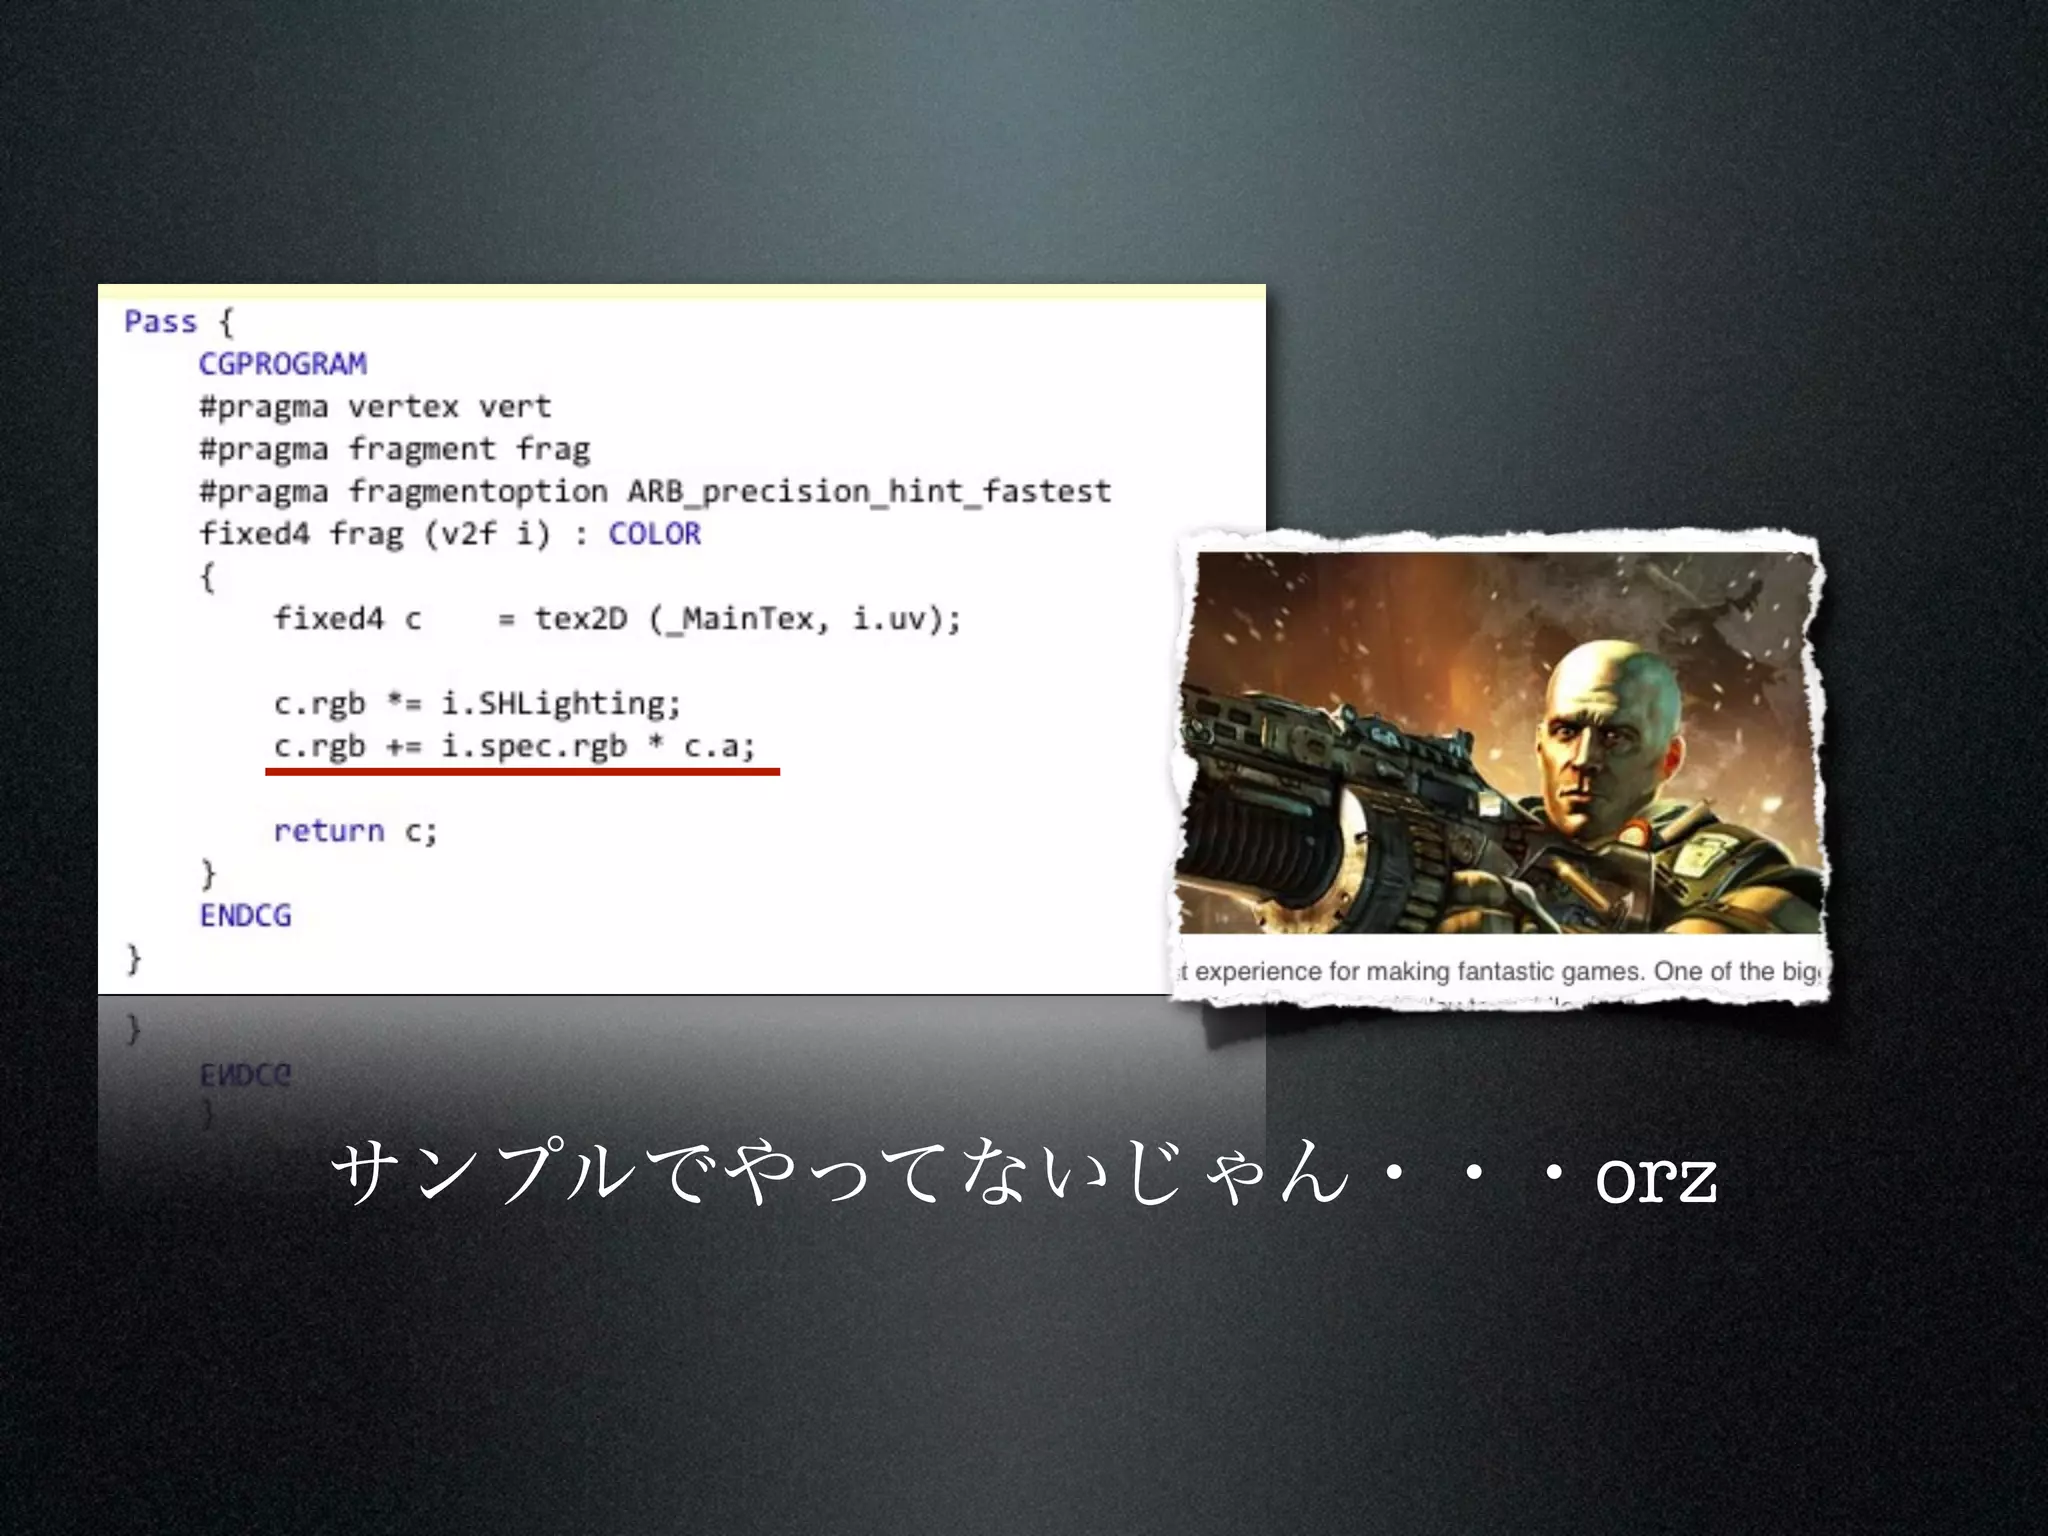
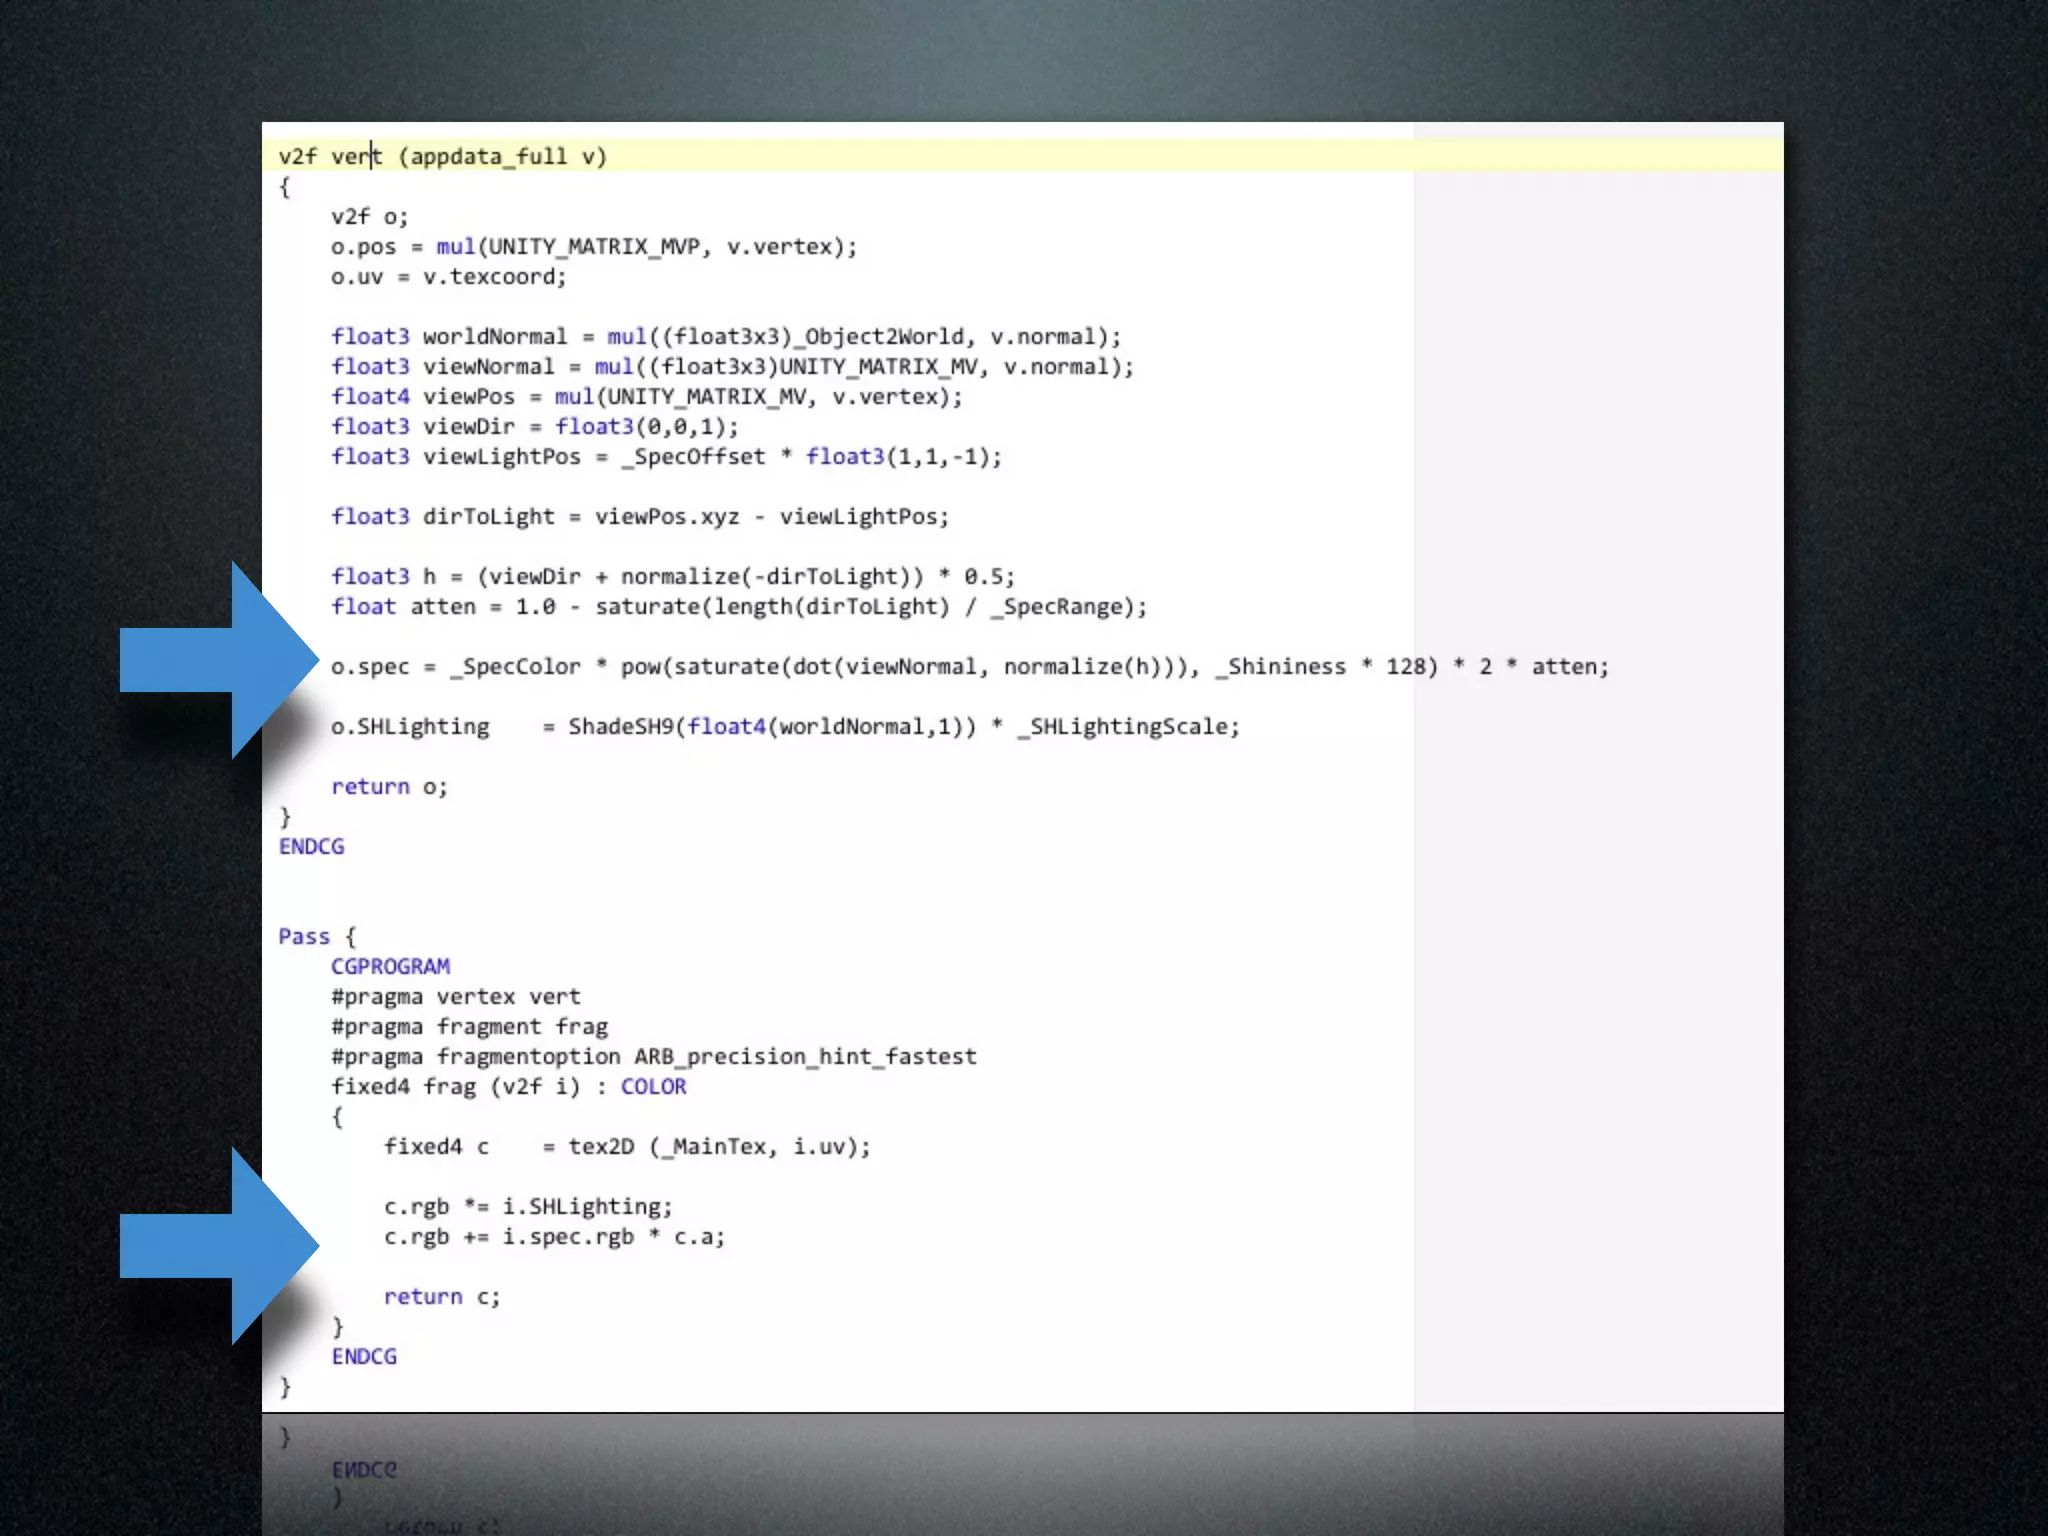
Specular lighting
• Precomputedlighting is perfect for diffuse lighting component
• Specular (view dependent) component however poses a problem
(solutions exists but not viable on current mobile platforms)
• This is where we start to cheat:
• We precompute ‘specular lighting cubemap’ (this is just set of artists
defined directional light projected to low-res cubemap)
• In runtime, we use this cubemap as standard environment map (additive)
• Artists create different specular cubemaps for different parts of level
• To make this fake specular lighting consistent with lightmapped geometry
we just modulate it with lightmap (yes, this has no physical basis, but looks
OK)
Bootcamp Asia 2012 06/26/12 Page 12
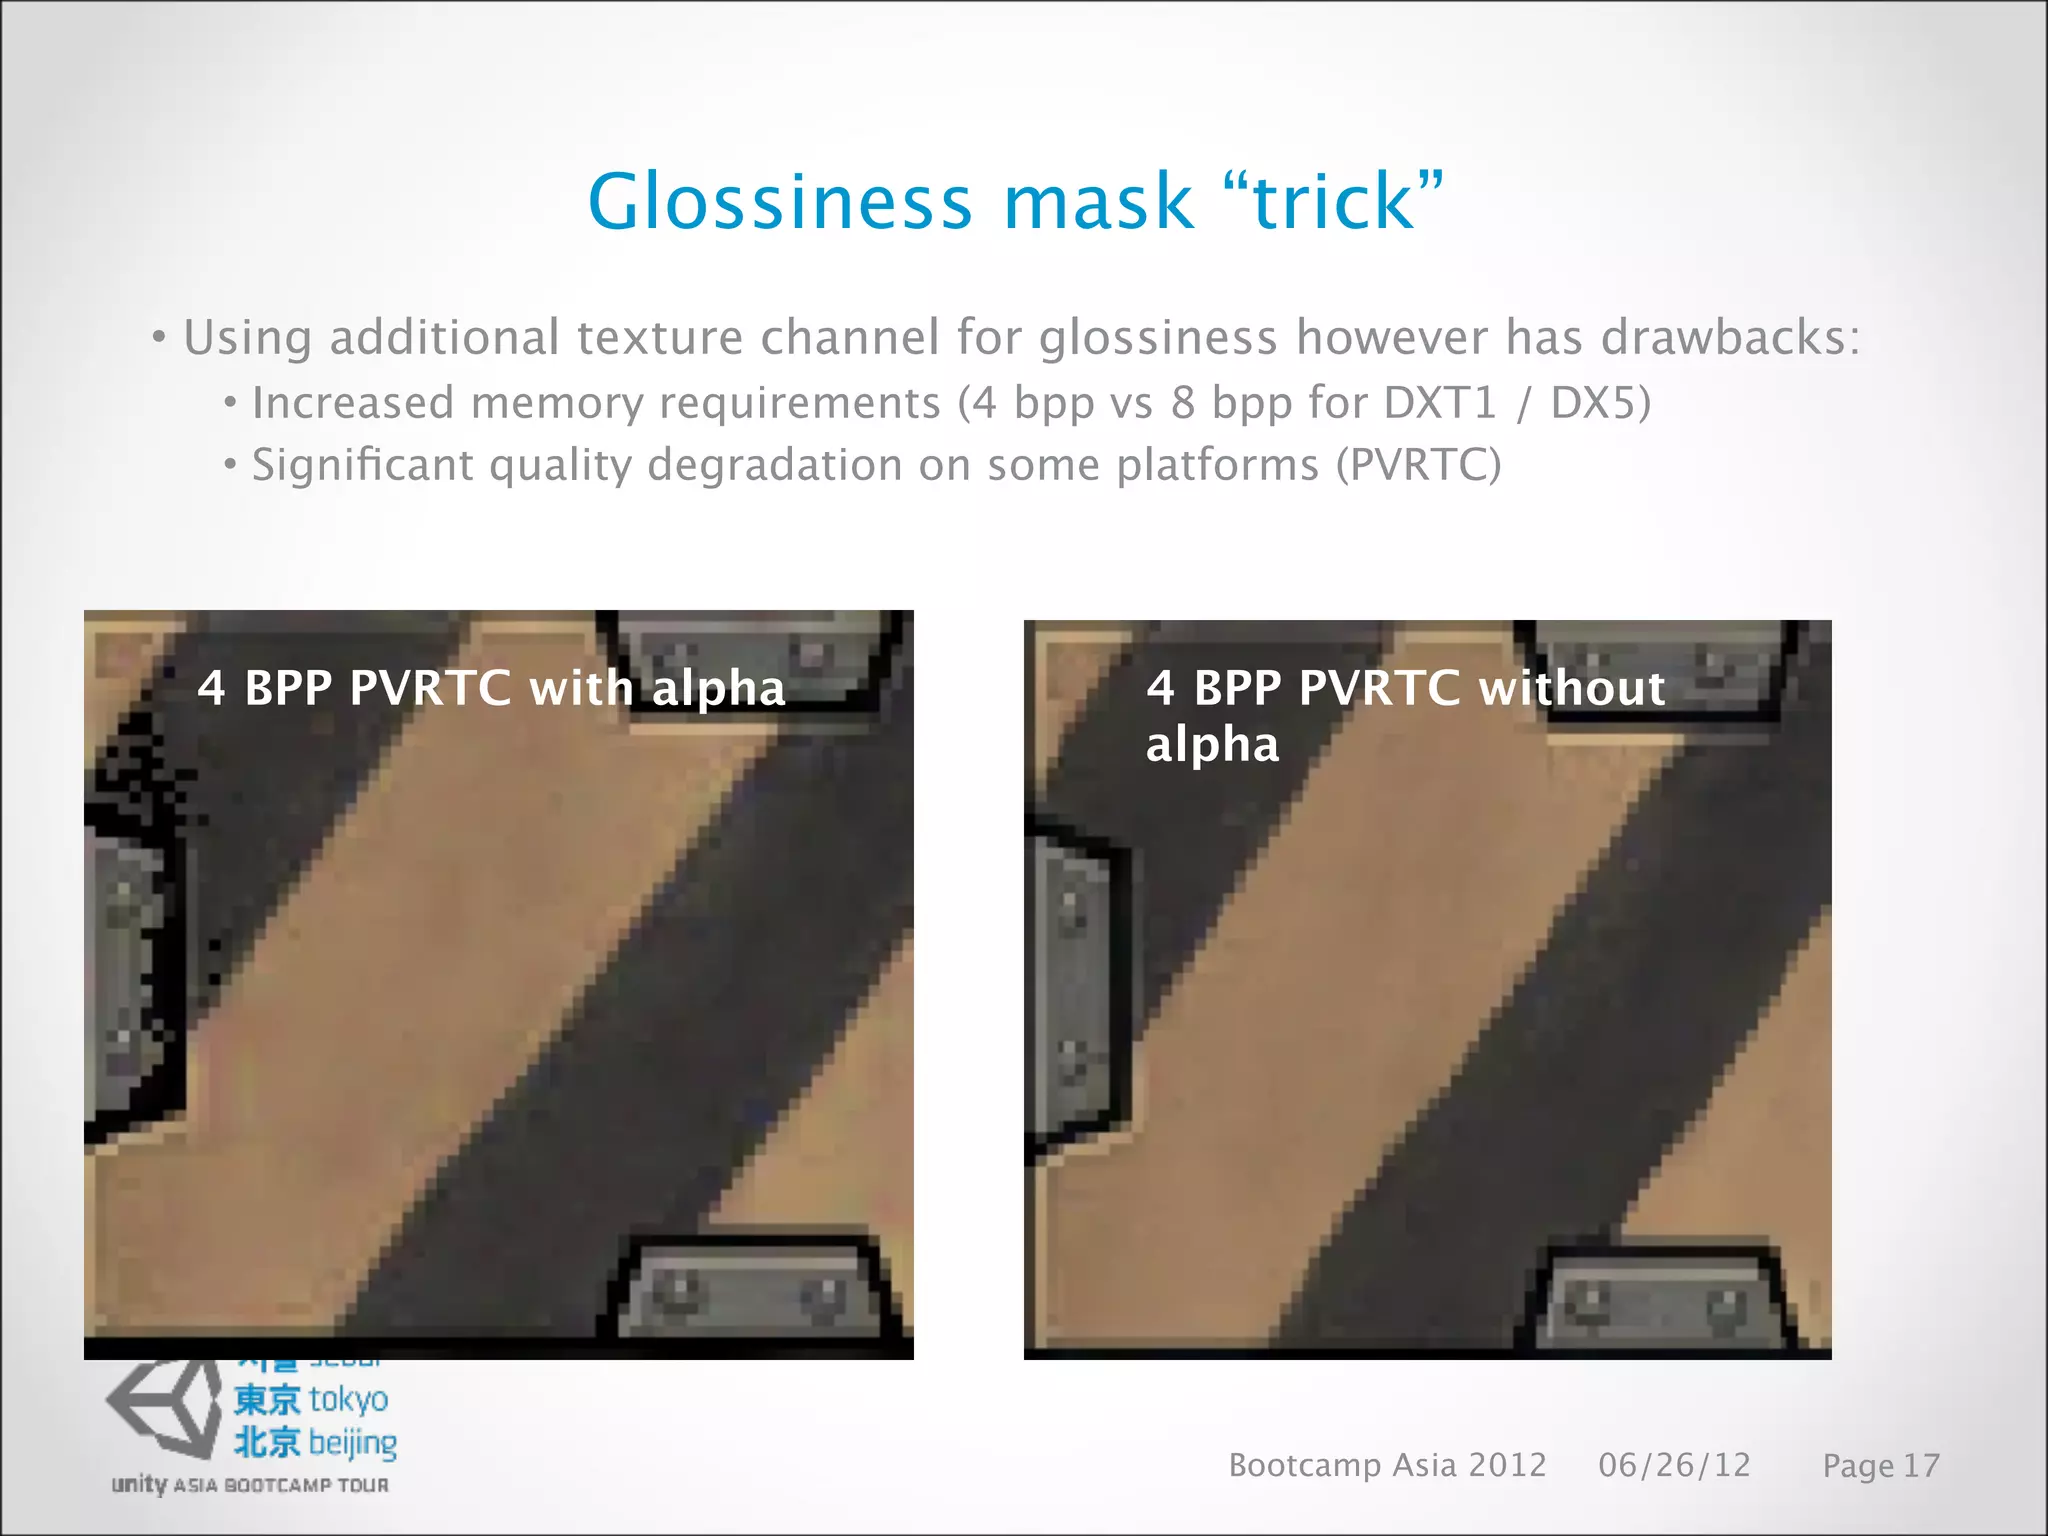
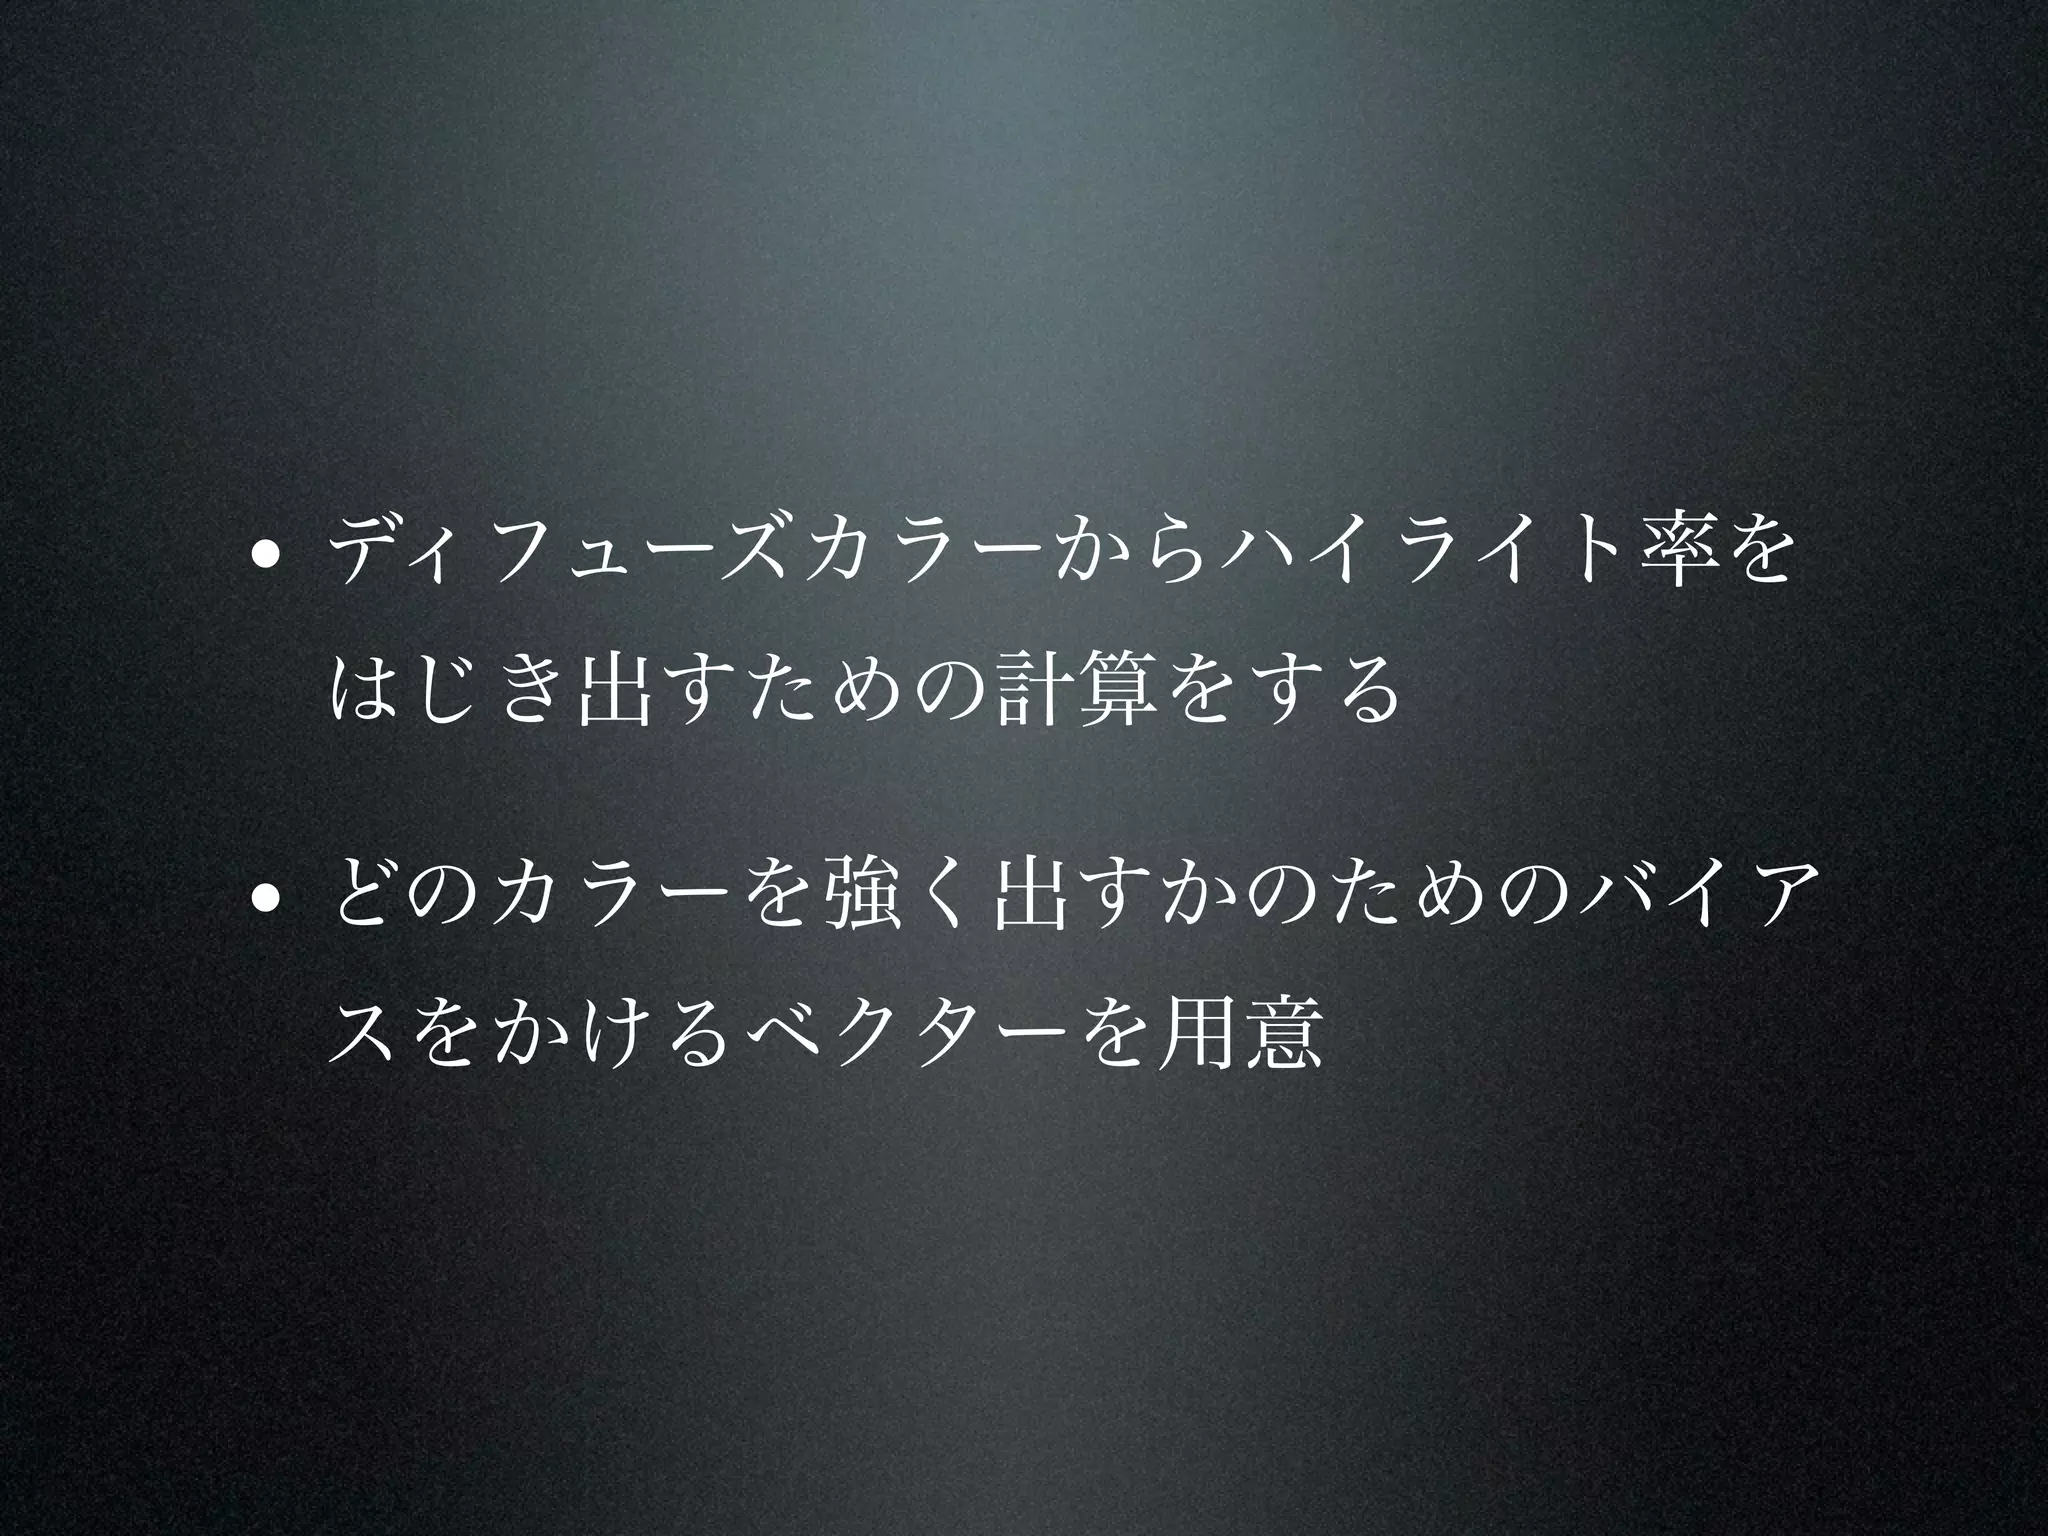
Glossiness mask “trick”
•For glossy surfaces we usually use some kind of mask, which defines actual
glossiness
• Common approach is to use alpha channel of diffuse texture to store
glossiness
Diffuse tex RGB Diffuse tex A (glossiness)
Bootcamp Asia 2012 06/26/12 Page 16
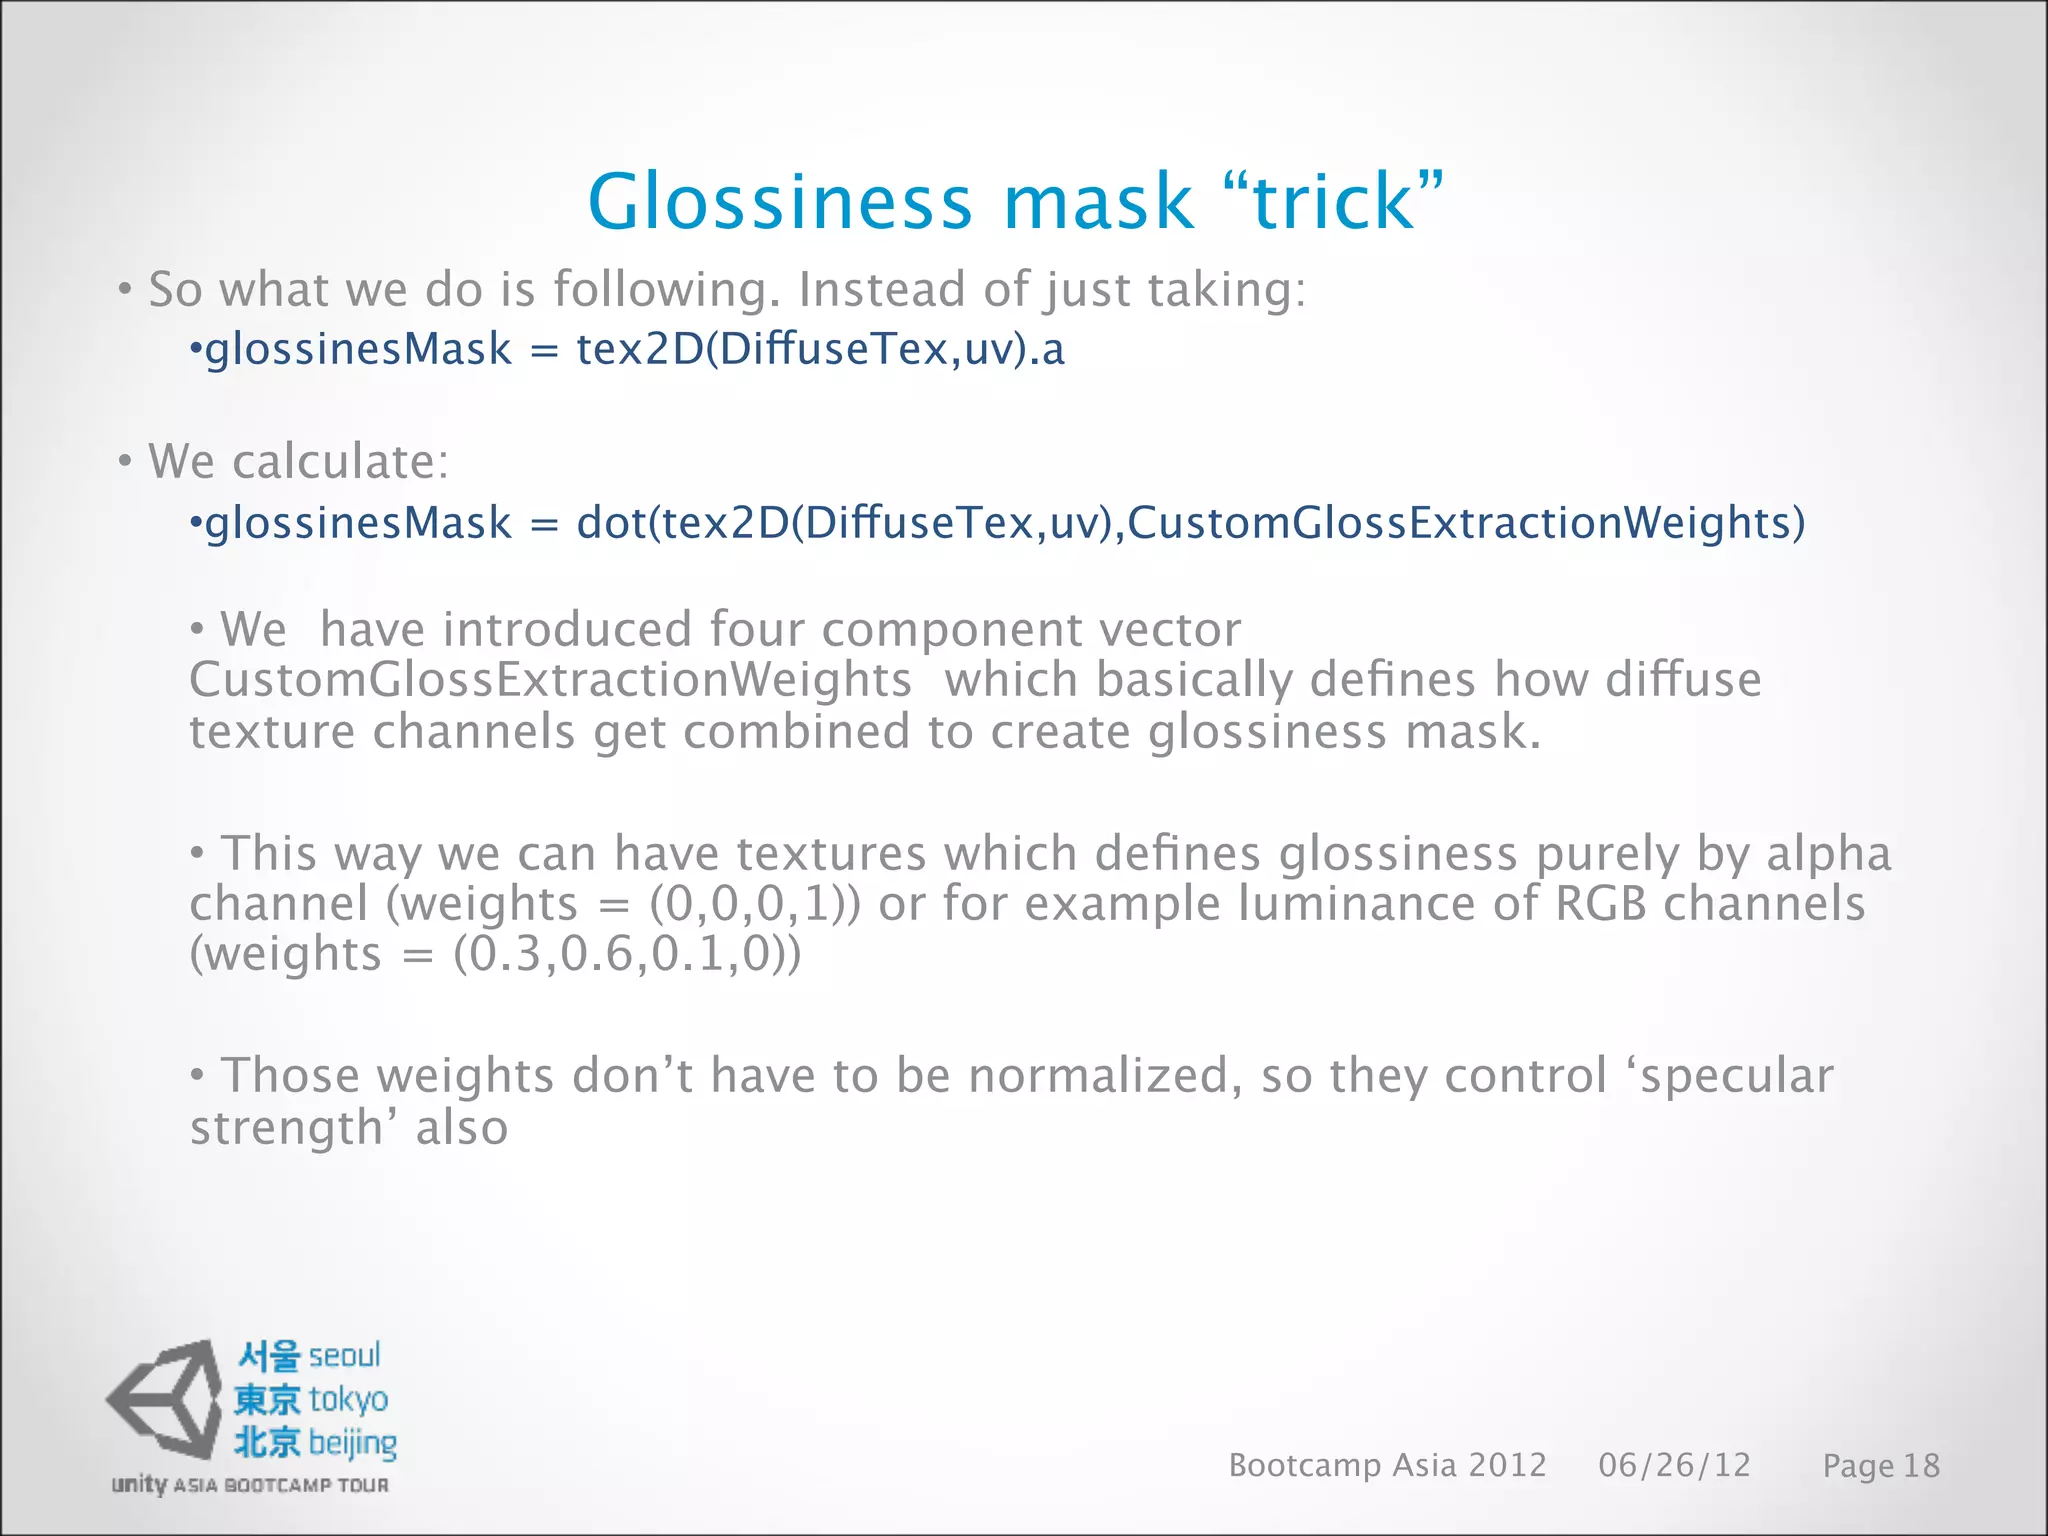
Glossiness mask “trick”
•So what we do is following. Instead of just taking:
•glossinesMask = tex2D(DiffuseTex,uv).a
• We calculate:
•glossinesMask = dot(tex2D(DiffuseTex,uv),CustomGlossExtractionWeights)
• We have introduced four component vector
CustomGlossExtractionWeights which basically defines how diffuse
texture channels get combined to create glossiness mask.
• This way we can have textures which defines glossiness purely by alpha
channel (weights = (0,0,0,1)) or for example luminance of RGB channels
(weights = (0.3,0.6,0.1,0))
• Those weights don’t have to be normalized, so they control ‘specular
strength’ also
Bootcamp Asia 2012 06/26/12 Page 18
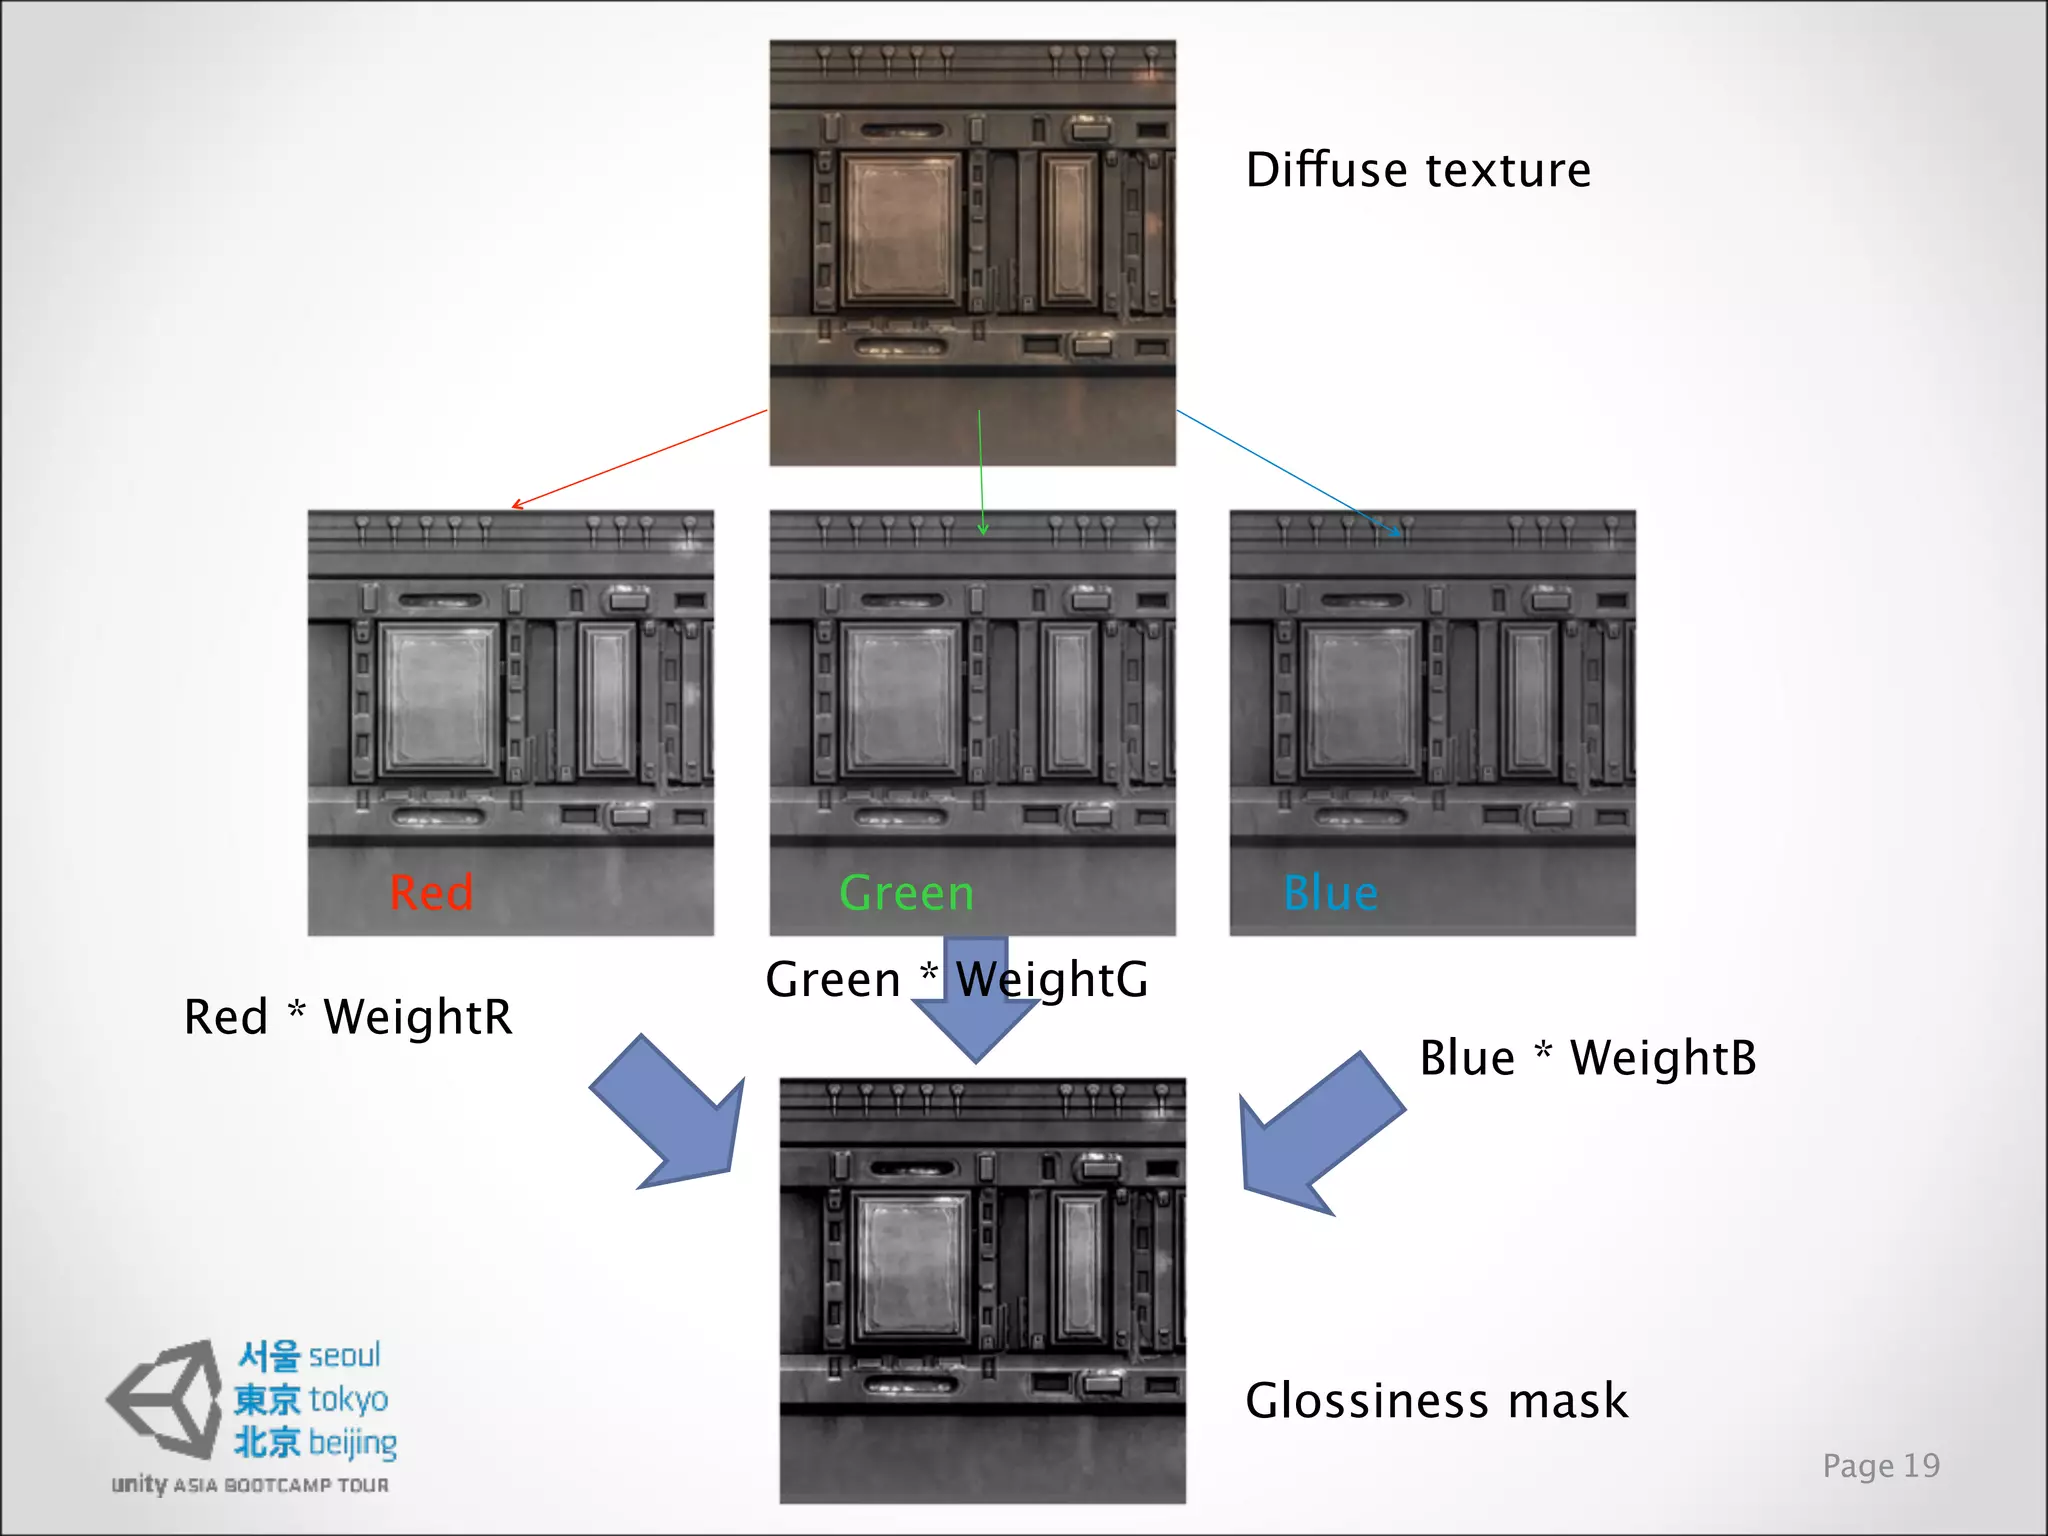
41.
Diffuse texture
Red Green Blue
Green * WeightG
Red * WeightR
Blue * WeightB
Glossiness mask
Page 19
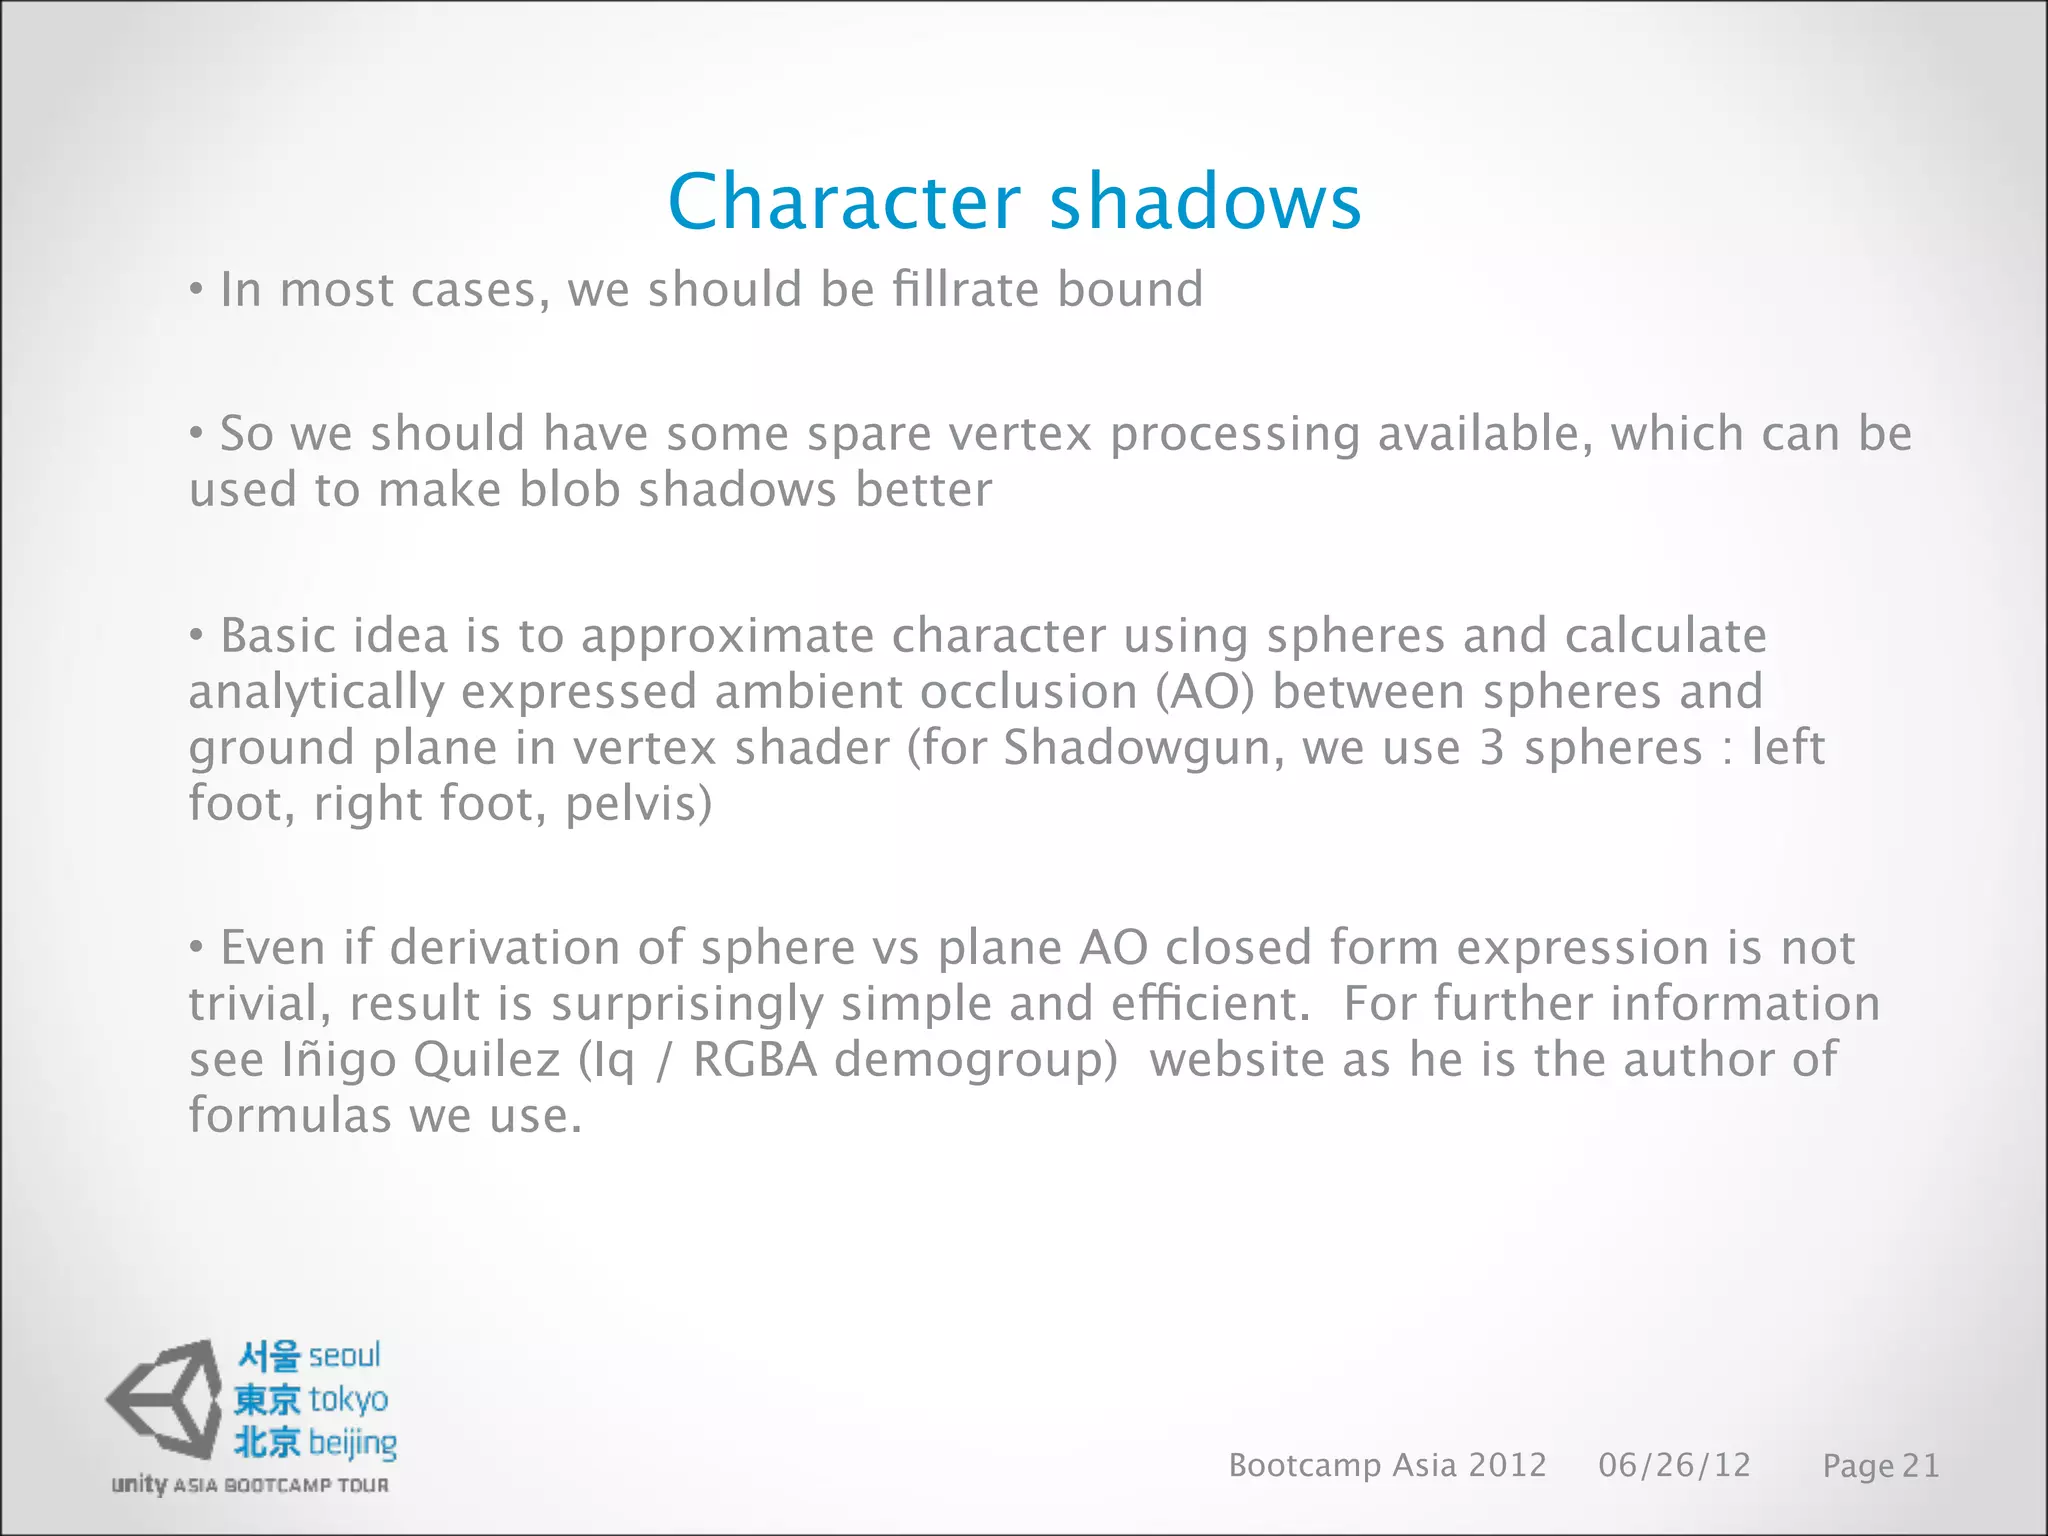
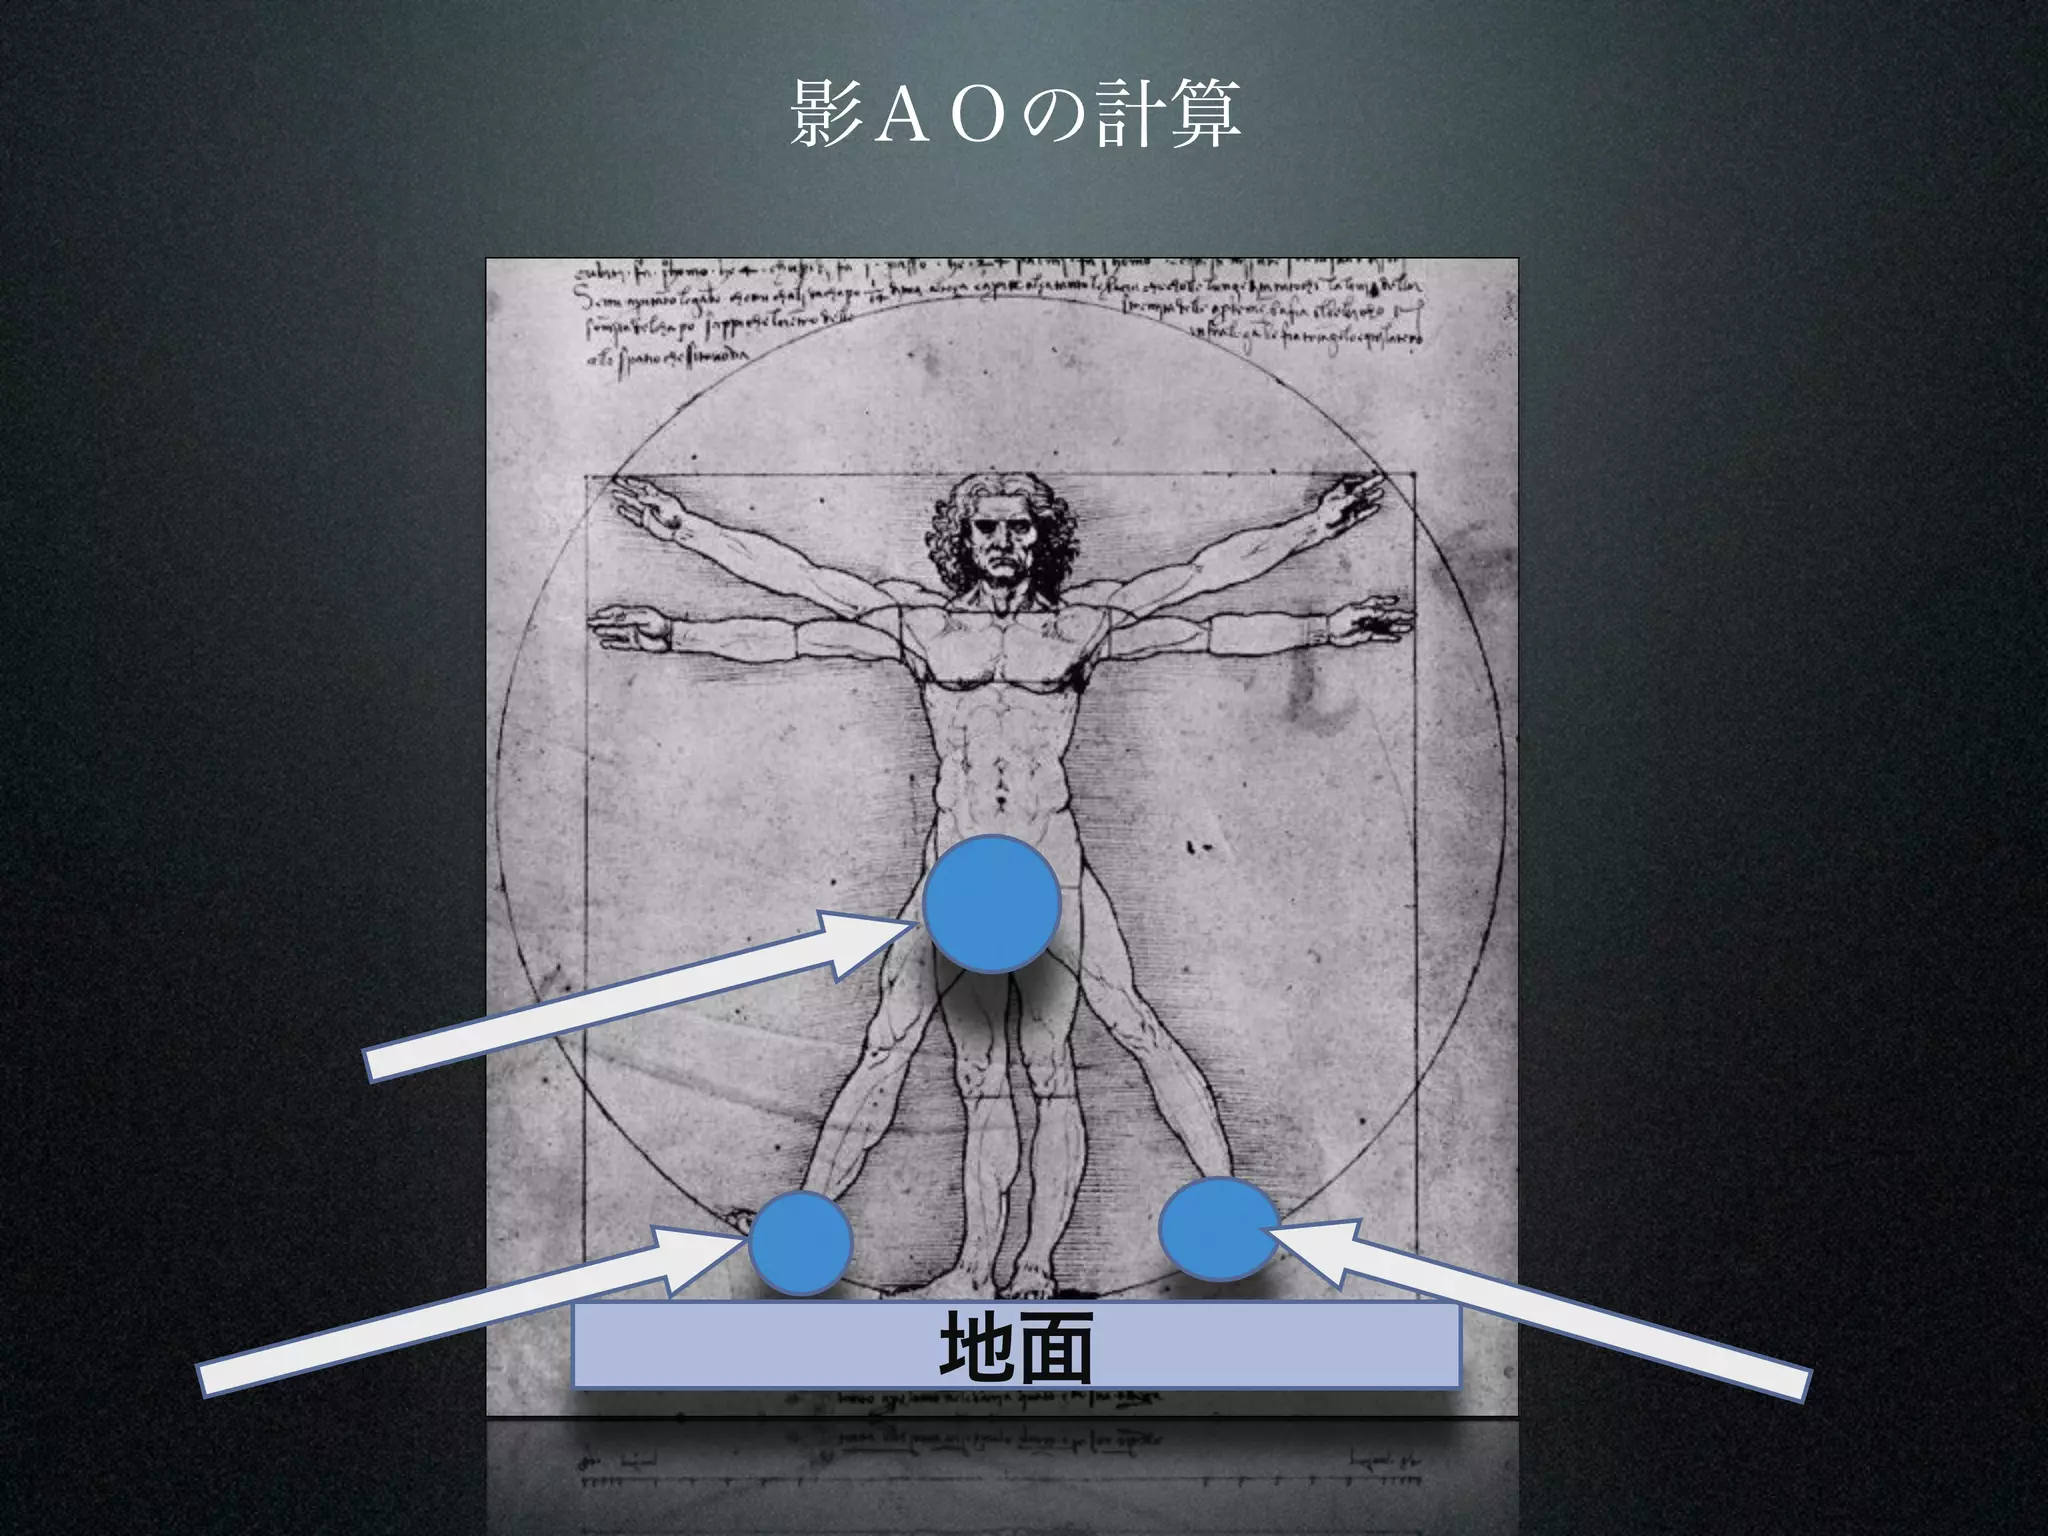
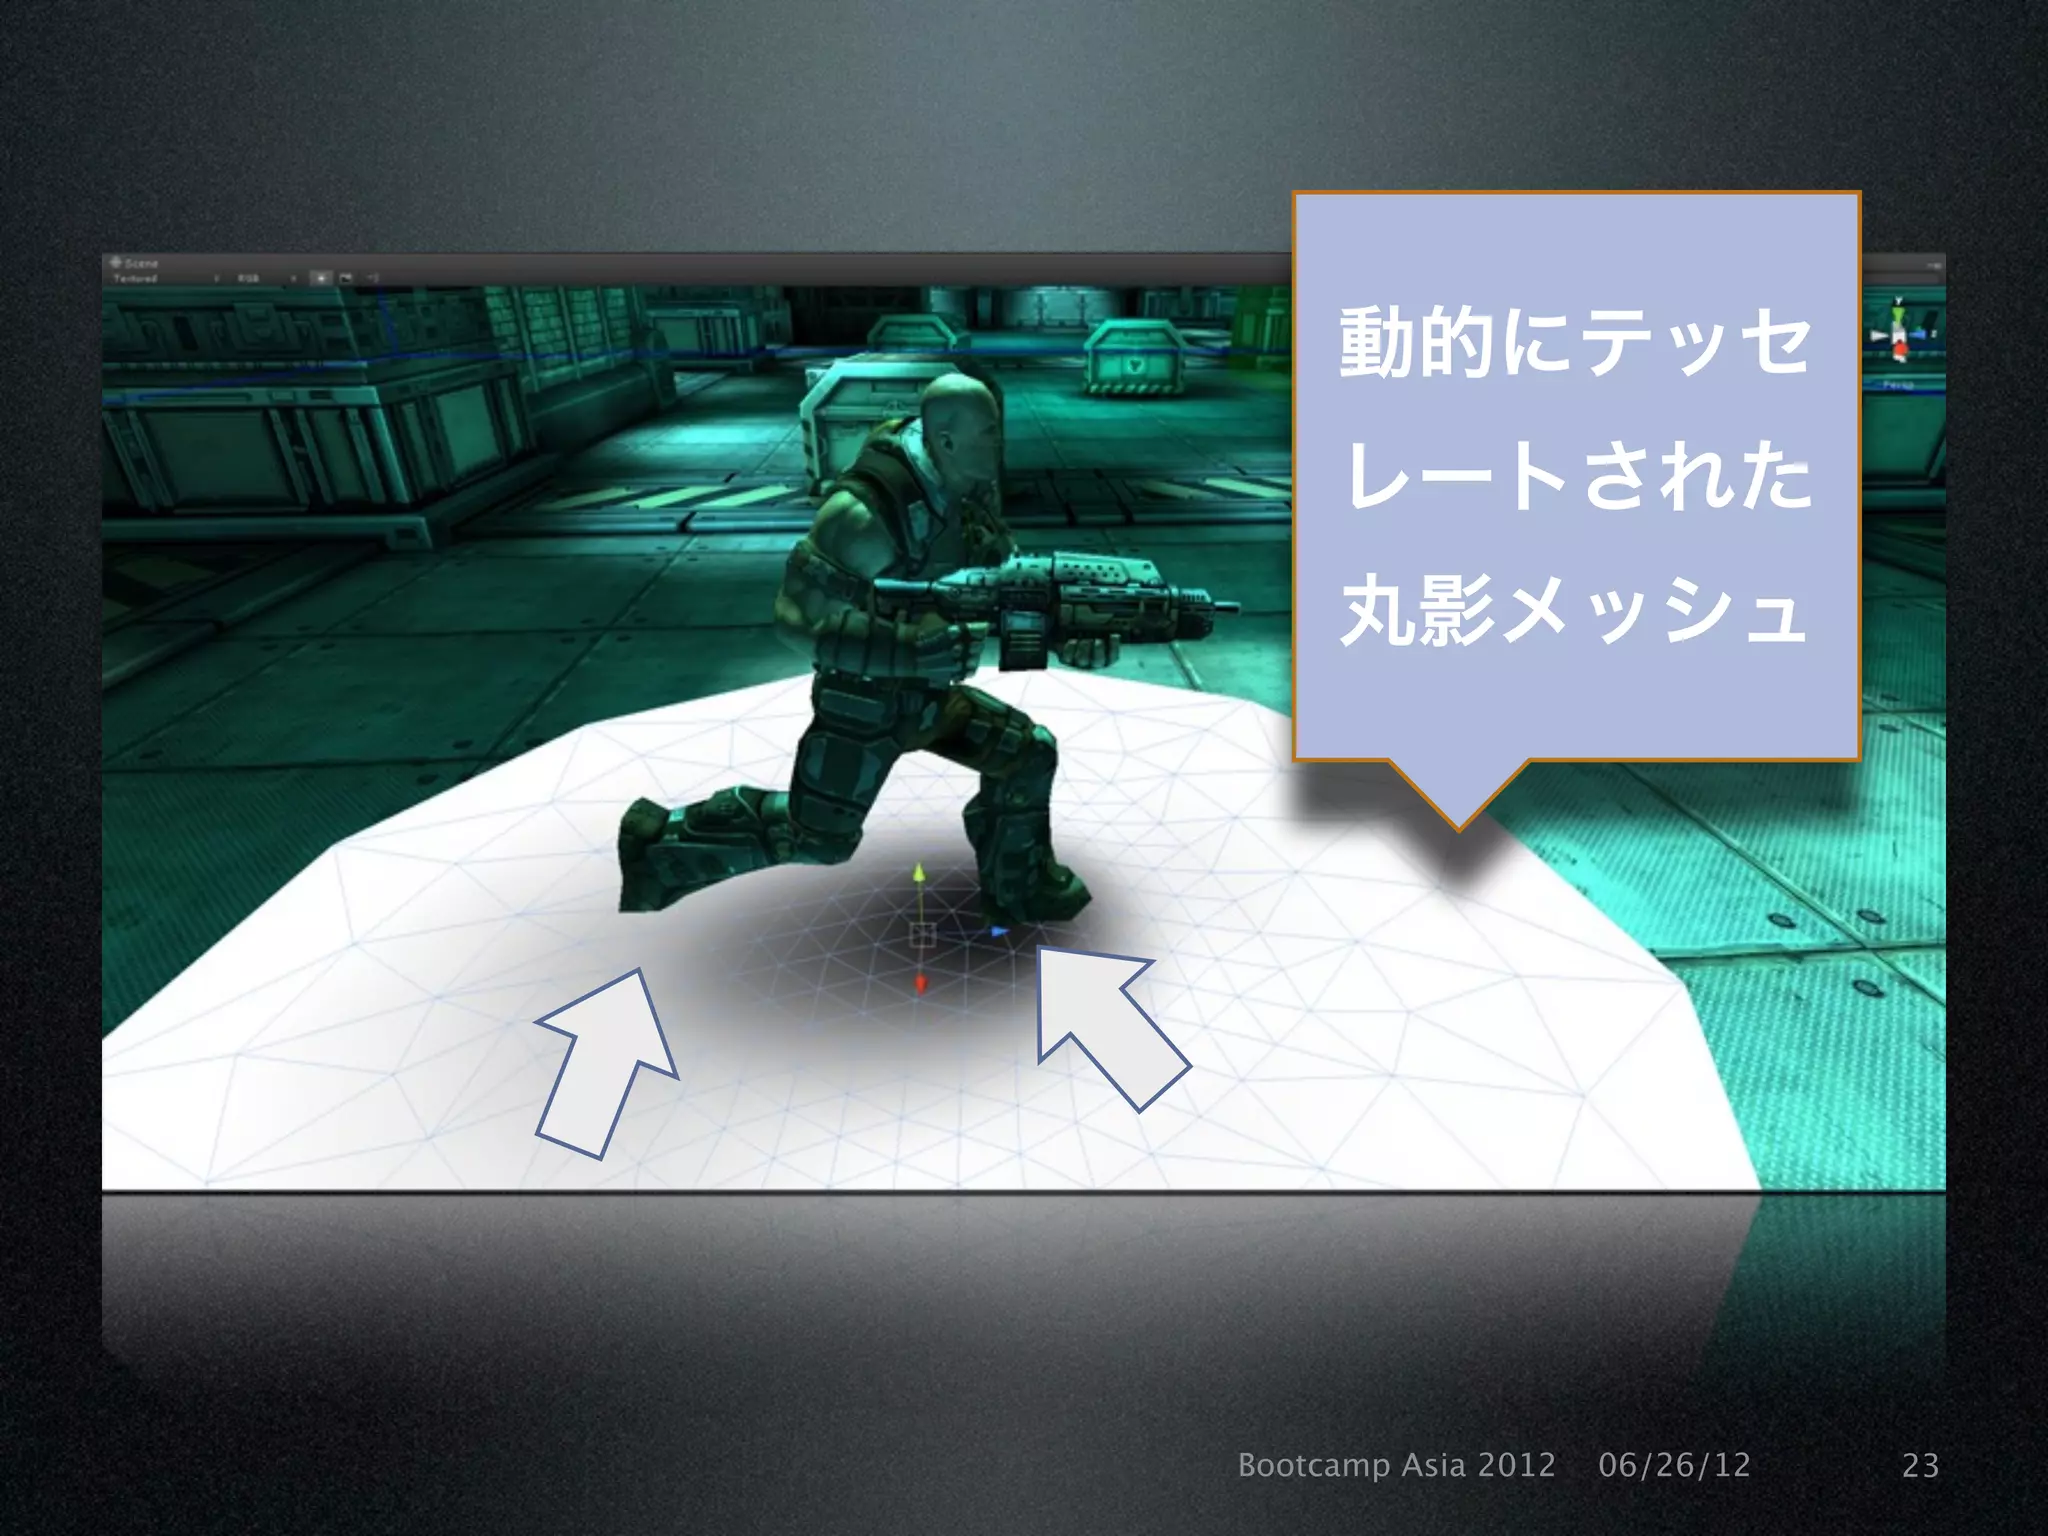
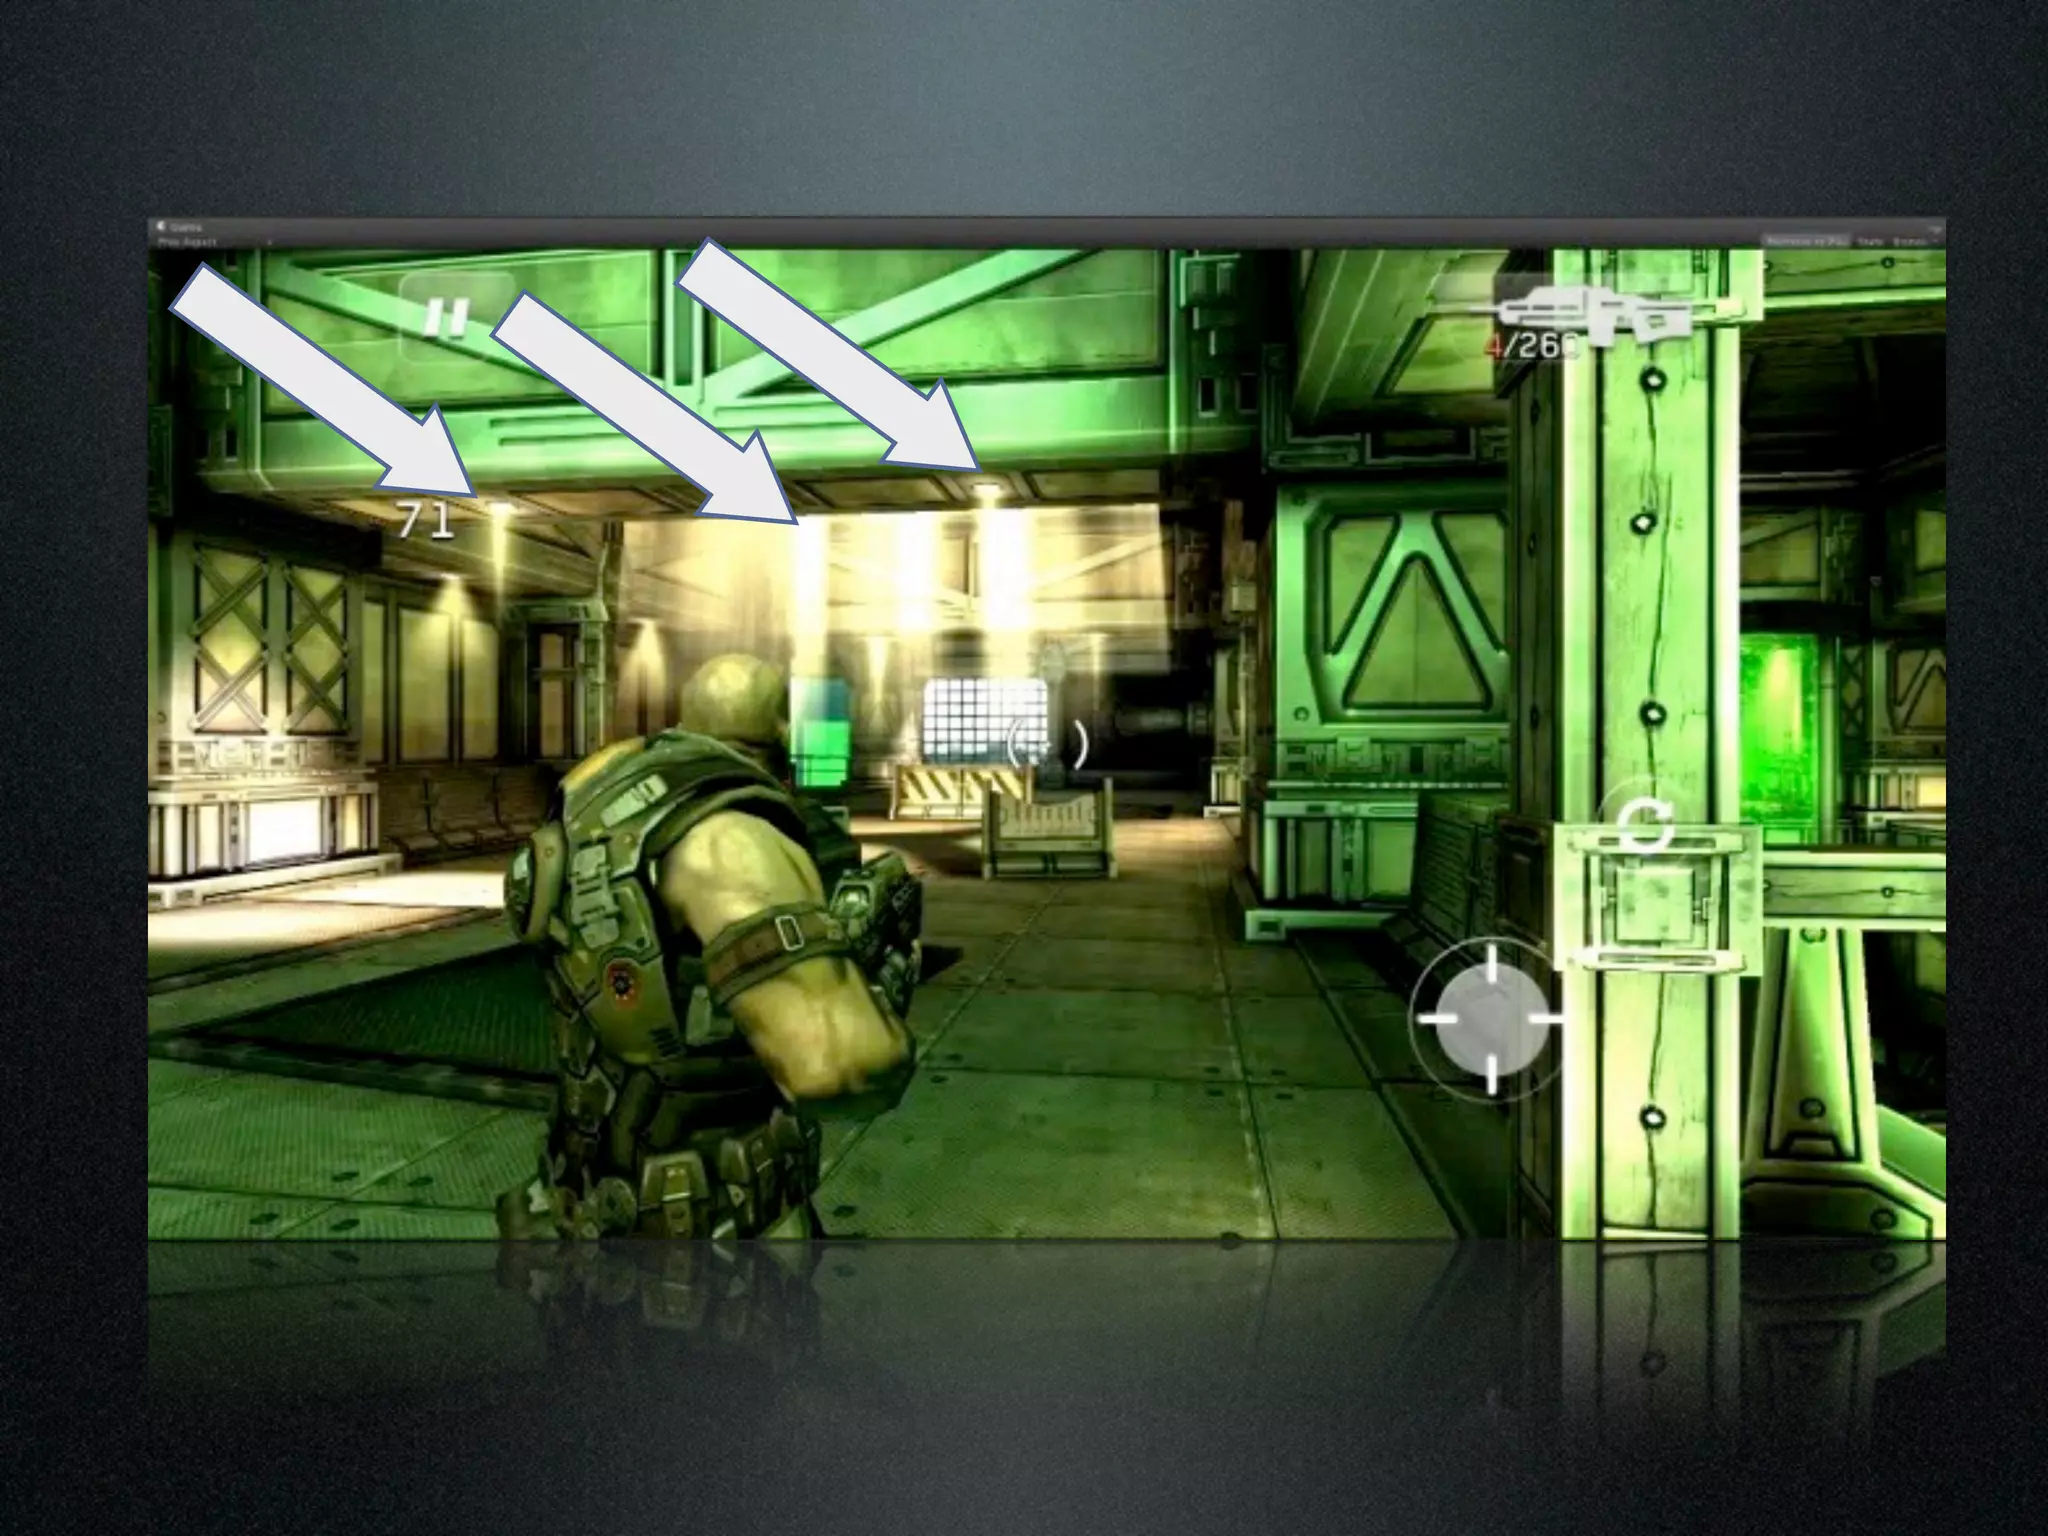
Character shadows
• Inmost cases, we should be fillrate bound
• So we should have some spare vertex processing available, which can be
used to make blob shadows better
• Basic idea is to approximate character using spheres and calculate
analytically expressed ambient occlusion (AO) between spheres and
ground plane in vertex shader (for Shadowgun, we use 3 spheres : left
foot, right foot, pelvis)
• Even if derivation of sphere vs plane AO closed form expression is not
trivial, result is surprisingly simple and efficient. For further information
see Iñigo Quilez (Iq / RGBA demogroup) website as he is the author of
formulas we use.
Bootcamp Asia 2012 06/26/12 Page 21
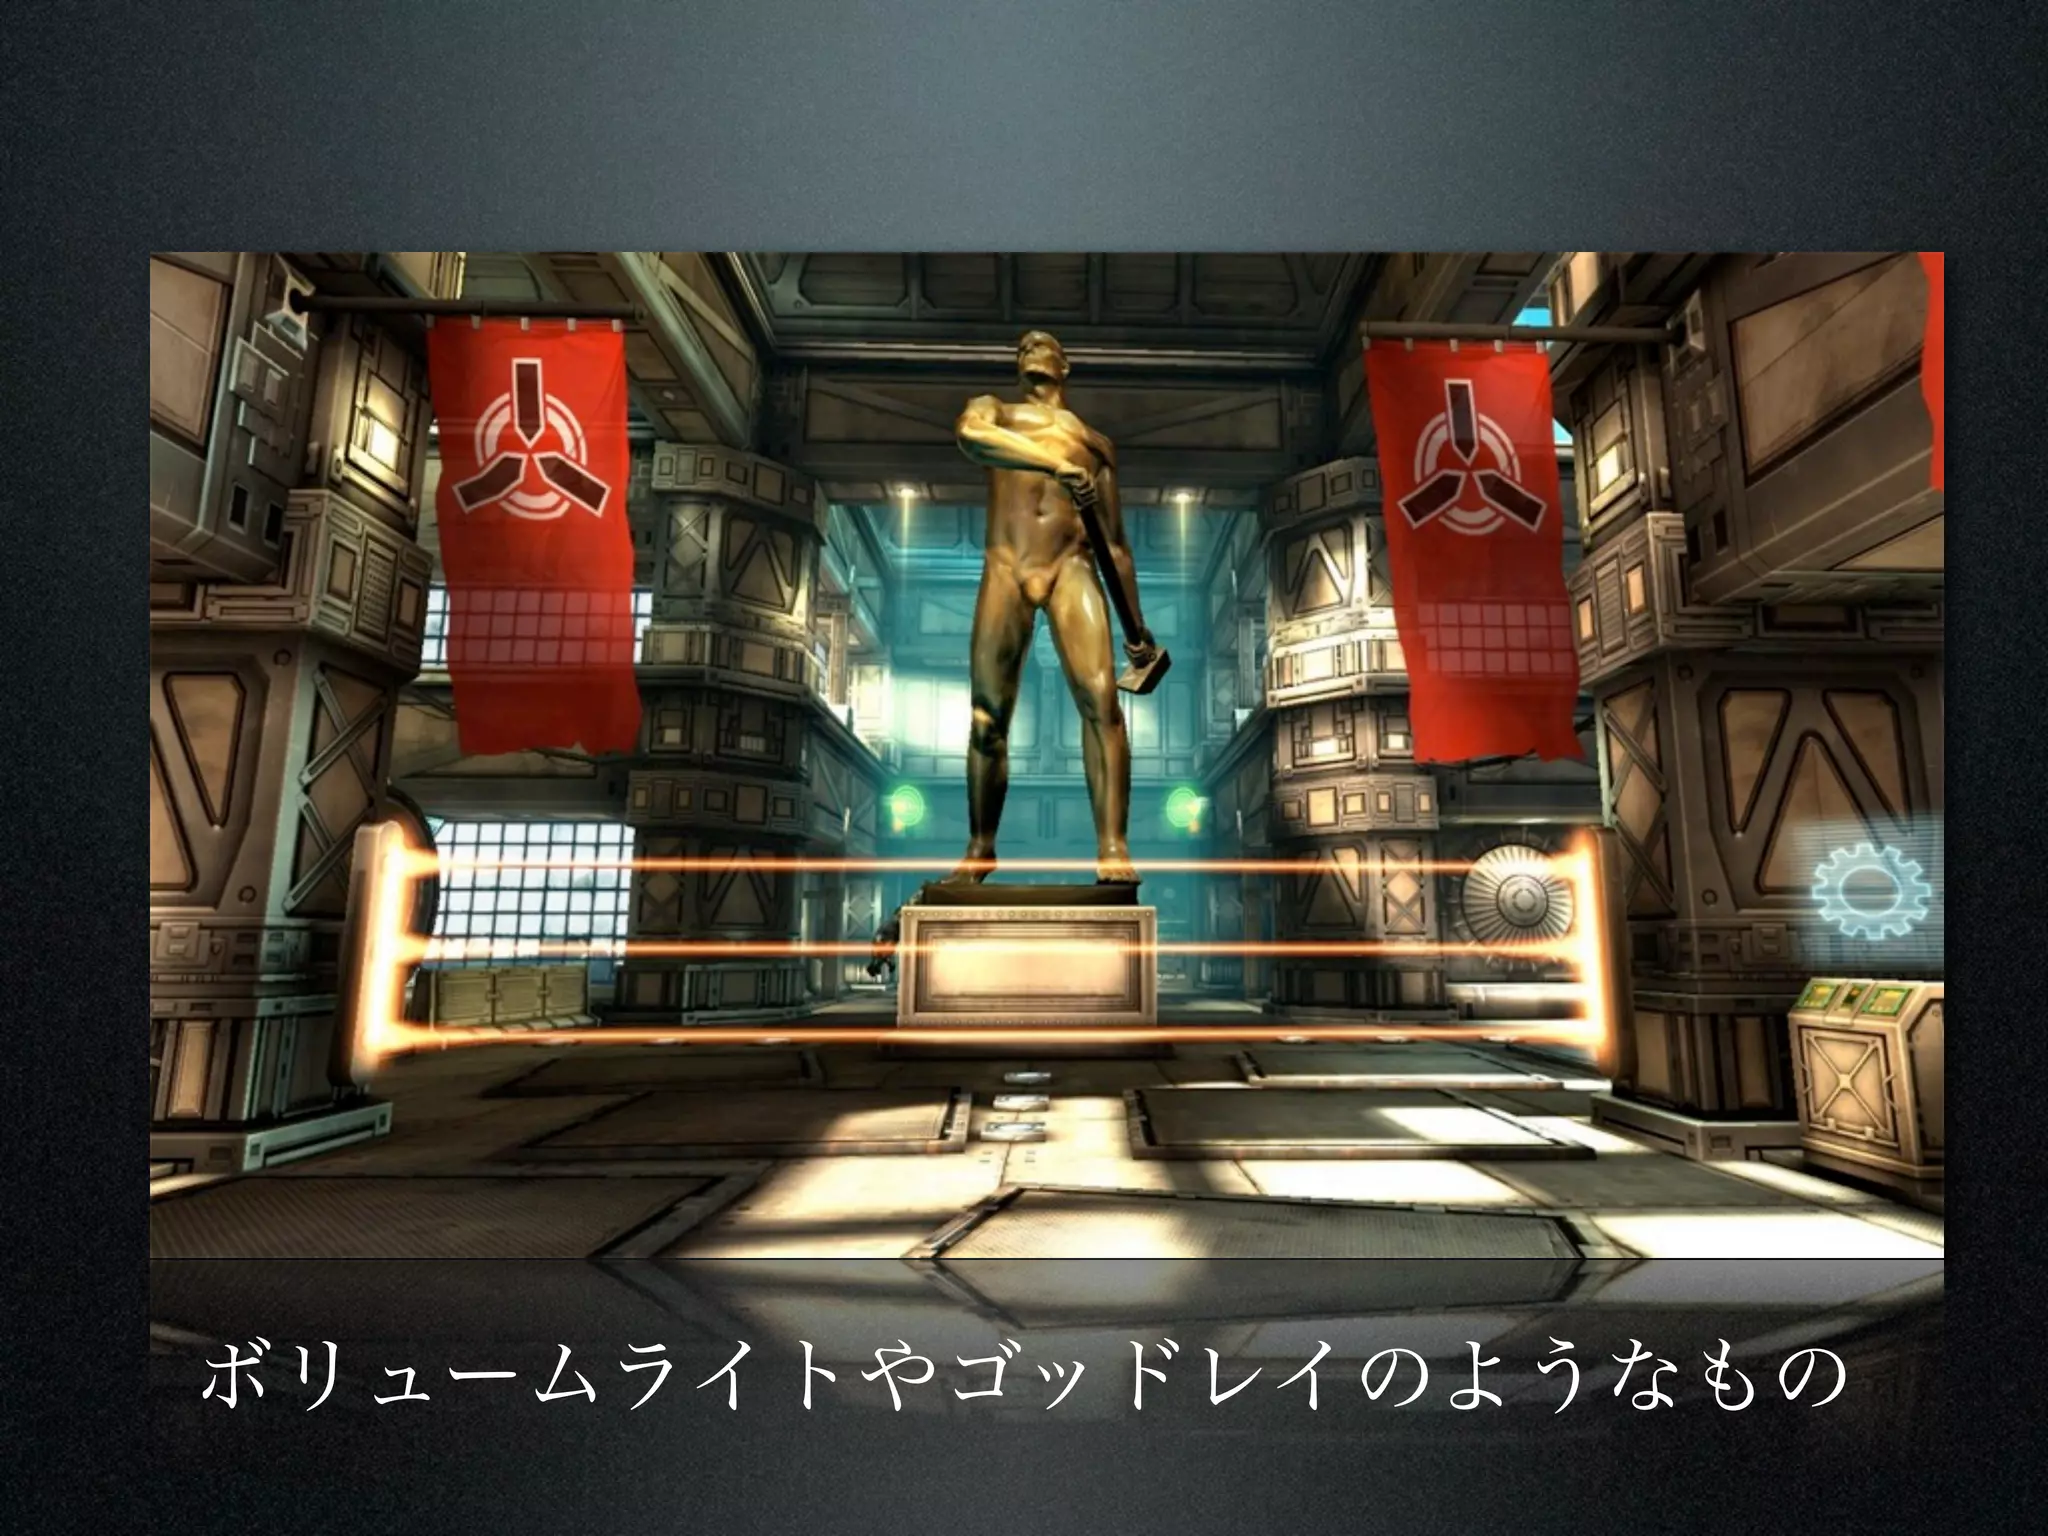
Volumetric FX –optimizing fillrate (1)
• First step is to use the simplest possible fragment
shader
• In many cases, we don’t even need to sample
texture
• Just procedurally calculate intensity per vertex (it is some kind of
gradient in most cases anyway)
• If it doesn’t look smooth enough …
• … just use more vertices
Bootcamp Asia 2012 06/26/12 Page 28
Volumetric FX –optimizing fillrate (2)
• Second step is to limit number of pixels we throw to
screen
• Decrease transparency as viewer is moving closer to
surface
• Once transparency is close to zero …
• Start to shrink surface
• shrink direction is controlled via normals
• takes place in vertex shader
• Eventually surface tris degenerate to lines and thus don’t
generate any pixels to rasterize
Bootcamp Asia 2012 06/26/12 Page 29


![[DL輪読会]NeRF: Representing Scenes as Neural Radiance Fields for View Synthesis](https://cdn.slidesharecdn.com/ss_thumbnails/nerfdlseminar1-200327021512-thumbnail.jpg?width=640&height=640&fit=bounds)


![[解説スライド] NeRF: Representing Scenes as Neural Radiance Fields for View Synthesis](https://cdn.slidesharecdn.com/ss_thumbnails/nerf20200327slideshare-200326131430-thumbnail.jpg?width=640&height=640&fit=bounds)


![[UniteKorea2013] Memory profiling in Unity](https://cdn.slidesharecdn.com/ss_thumbnails/memoryprofilinginunity-130509204713-phpapp01-thumbnail.jpg?width=640&height=640&fit=bounds)


![[UE4]マテリアルの注意すべきこと!~テクスチャロードとSwitch~](https://cdn.slidesharecdn.com/ss_thumbnails/ue4materialcaution-190309153116-thumbnail.jpg?width=640&height=640&fit=bounds)


![Unity名古屋セミナー [プログラミングなしでゲーム開発]](https://cdn.slidesharecdn.com/ss_thumbnails/nonprogramshort-120627230725-phpapp01-thumbnail.jpg?width=640&height=640&fit=bounds)
![Unity名古屋セミナー [Asset Store]](https://cdn.slidesharecdn.com/ss_thumbnails/unityassetstore-120627230856-phpapp01-thumbnail.jpg?width=640&height=640&fit=bounds)

![Unity 名古屋セミナー [Sprite Studio]](https://cdn.slidesharecdn.com/ss_thumbnails/unitye-120702203107-phpapp02-thumbnail.jpg?width=640&height=640&fit=bounds)


![Unity名古屋セミナー [GPU optimization]](https://cdn.slidesharecdn.com/ss_thumbnails/nagoyapresentationgpuoptimizationtechnique-120627235818-phpapp01-thumbnail.jpg?width=640&height=640&fit=bounds)


