Downloaded 12 times


![23
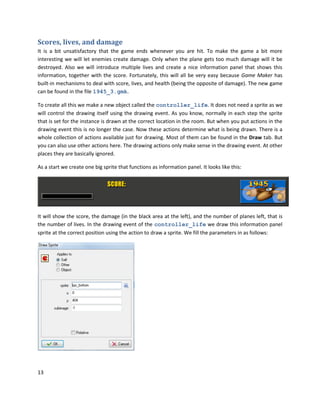
In this final section we will briefly indicate a different way of creating a scrolling shooter. In this
approach there is a big room through which the plane really moves. We use a so-called view such that
the player sees only part of the room at any time. To achieve this, a number of changes to the game are
required. We will briefly discuss them here.
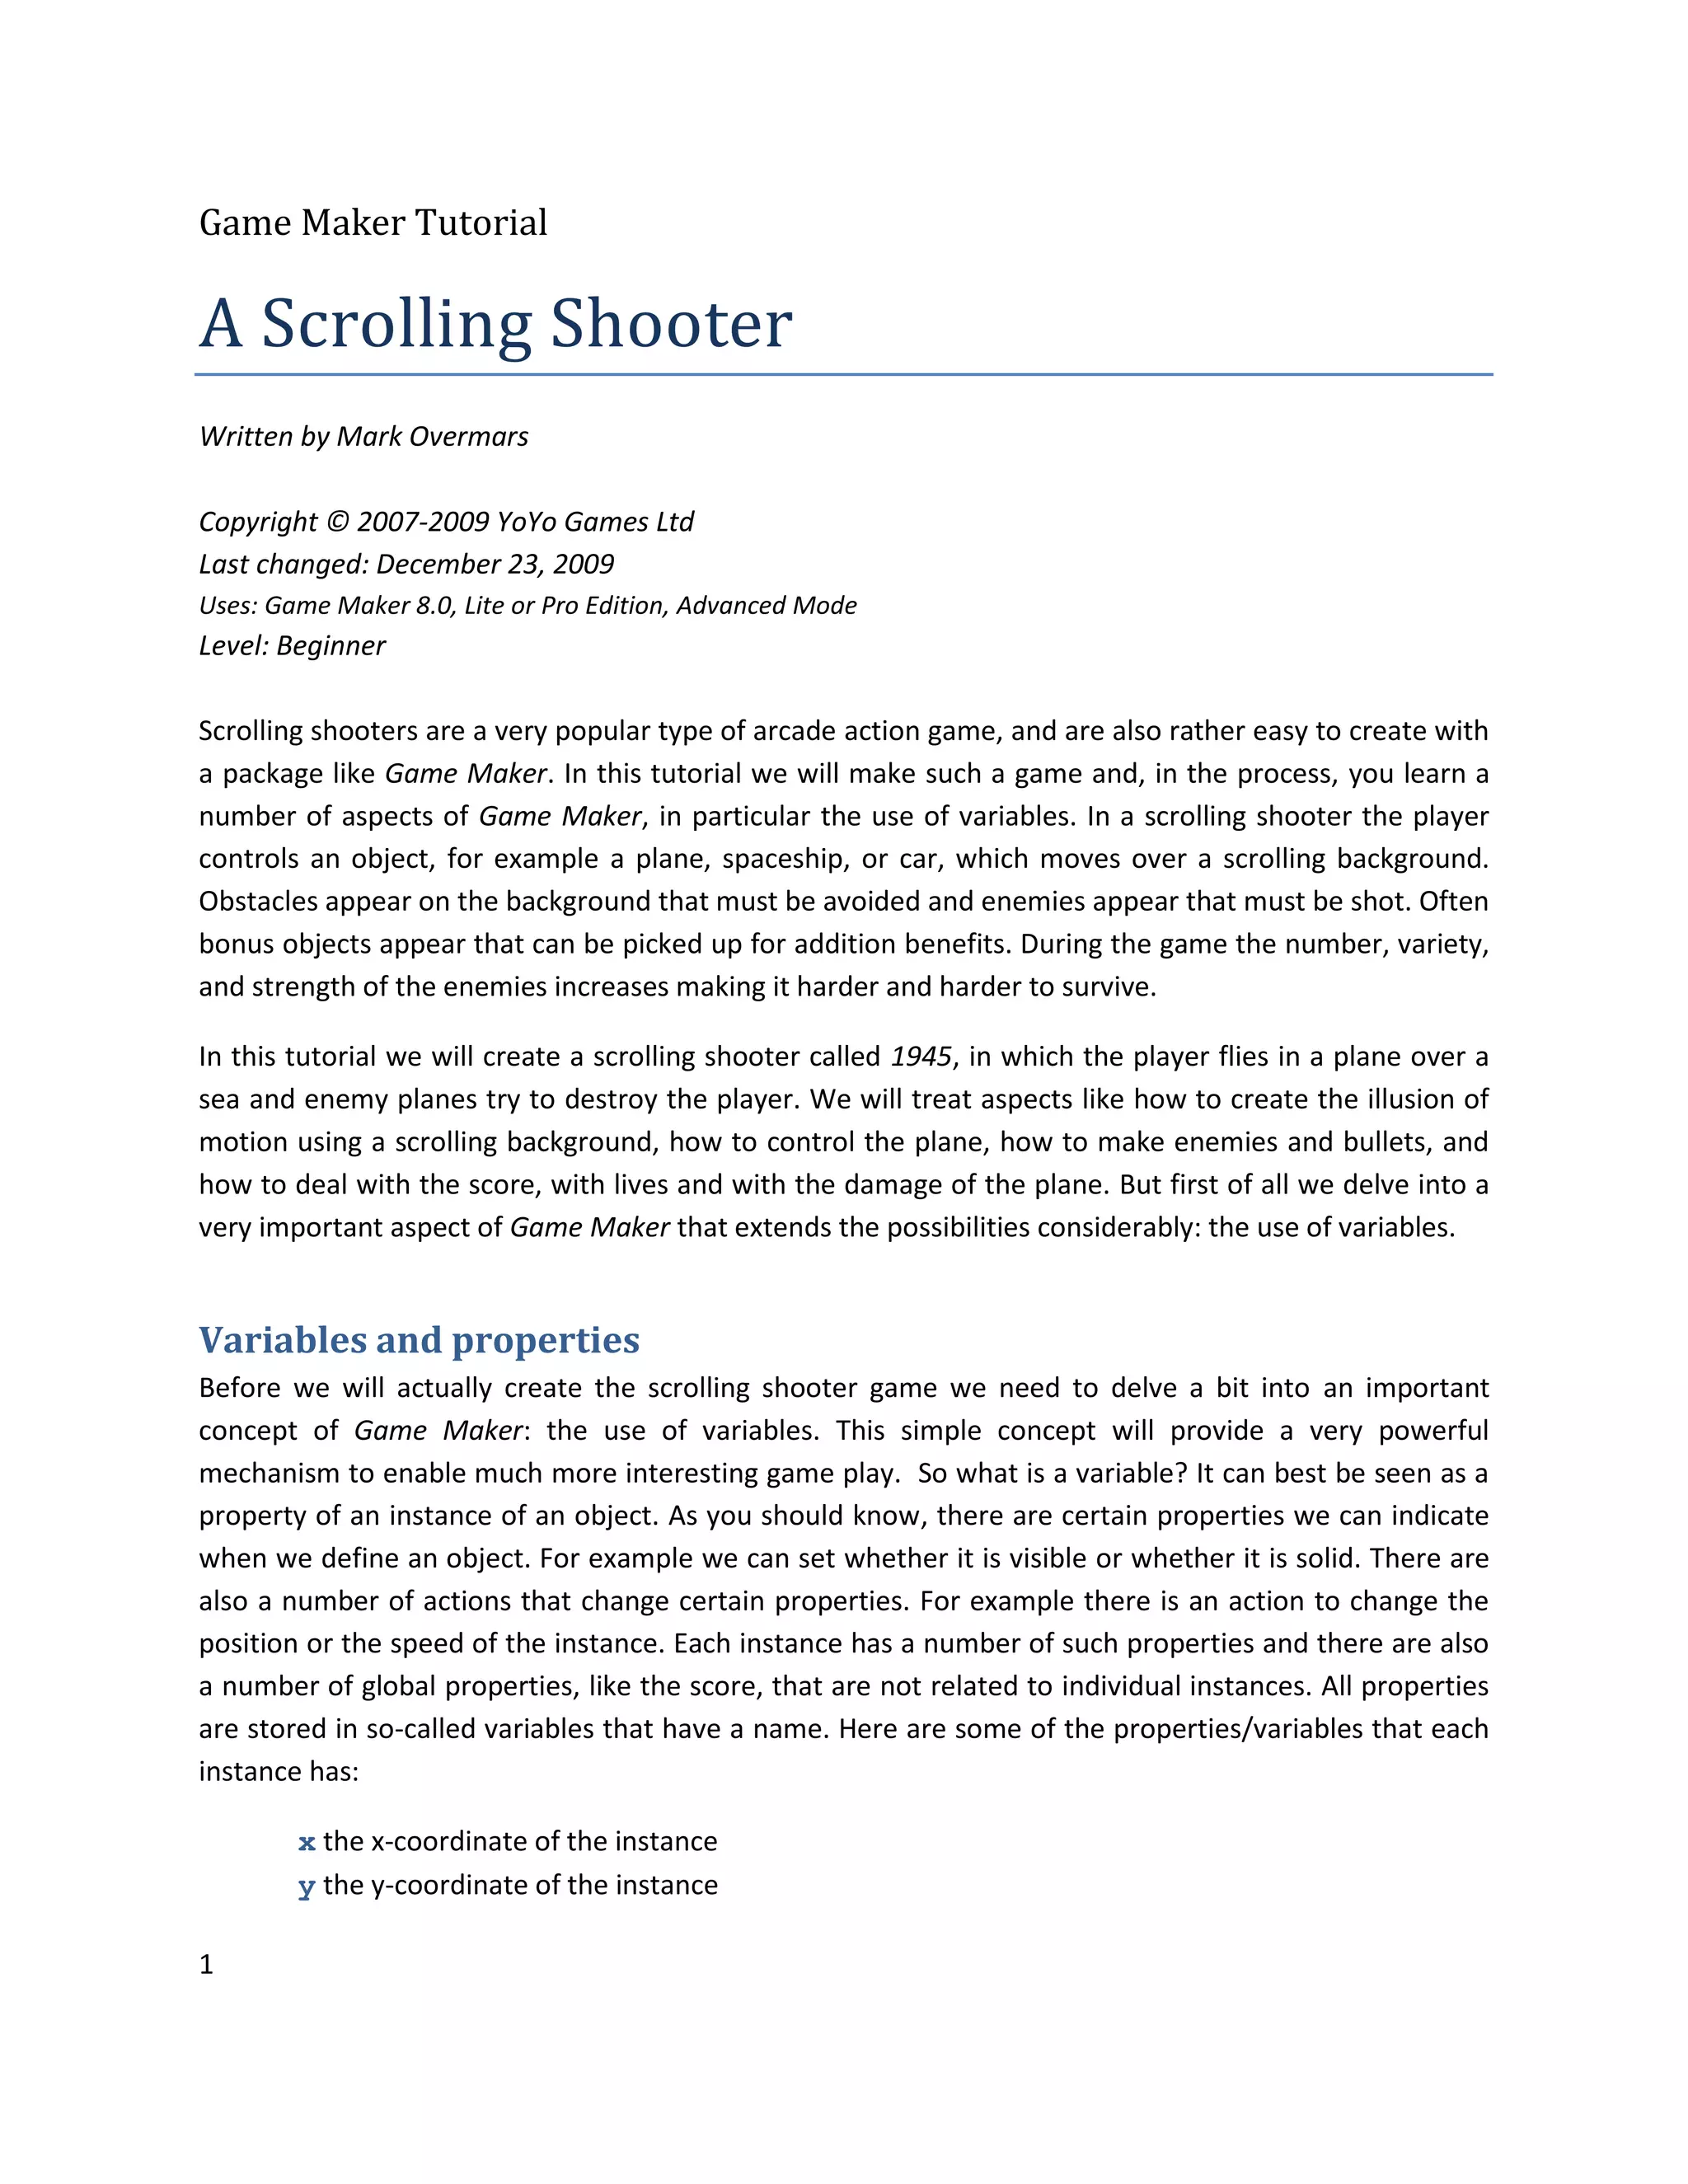
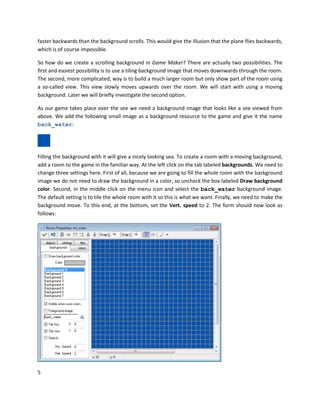
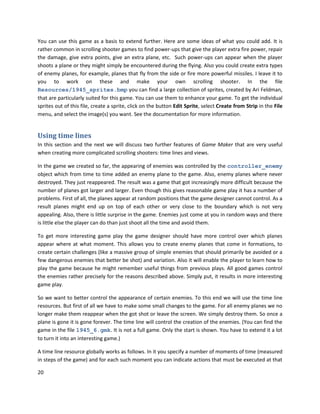
Let us first create the basic room. We give the room a width of 640 as before but now we give it a height
of 4800. The background image we no longer give a speed. We put islands at various places in the room.
The island objects no longer need a speed and we can also remove the step event. They are now fully
static objects. The plane we place at the bottom of the room and we give the plane, in its creation event,
a vertical speed of -2 to make sure that it flies with some speed if the user does nothing. Finally we
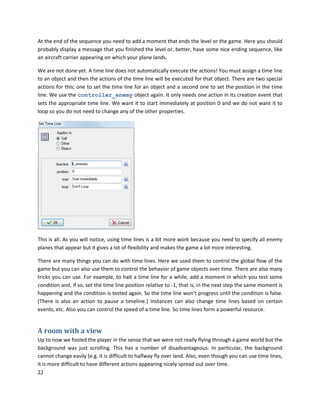
define the view. To this end, click on the views tab in the room form. Indicate that we want to enable
views. Define the first view and make it visible at the start. As a top position, indicate 4320, that is, the
view will be at the bottom of the room. So it looks as follows:
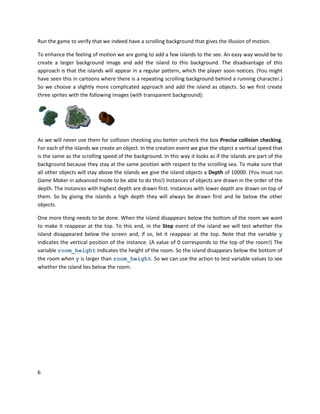
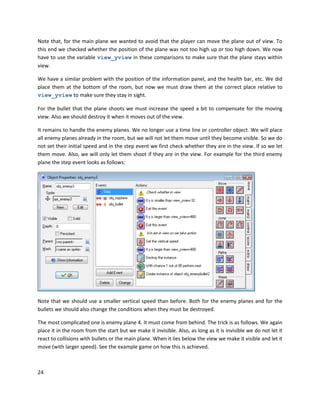
We have to make sure that view moves with constant speed. To this end we will (mis)use the step event
of the life controller object. In it we add the action to set a variable and set variable view_yview
relative to -2. Variable view_yview indicates the top position of the first view in the room. (When
there are multiple views you should use view_yview[0].) So in each step the position of the view
moves 2 pixels upwards creating the scrolling. There are many other variables related to views but we
won’t need them here. We should also check whether view_yview is larger than 0. If it becomes 0 the
view has reached the top and we should stop the game.](https://image.slidesharecdn.com/tutorial2scrollingshooter-130710022624-phpapp02/85/Tutorial2-scrolling-shooter-23-320.jpg)


1. The document provides instructions for creating a scrolling shooter game called "1945" in Game Maker. It describes creating a scrolling background, adding islands that reappear at the top of the screen, and programming the movement and boundaries of the player's plane. 2. Variables are introduced as a way to track game properties and control timing, such as only allowing the player to shoot every five steps. The document provides examples of setting and checking variable values. 3. The game involves the player controlling a plane to shoot down enemy planes that appear over a scrolling sea background. The goal is to survive as long as possible while destroying enemies.