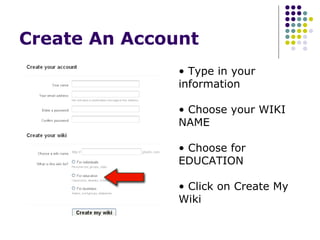
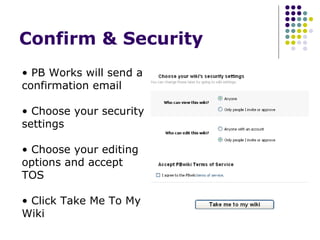
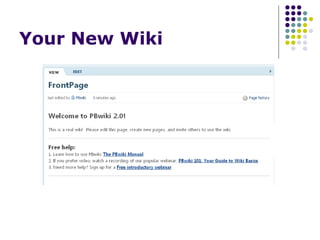
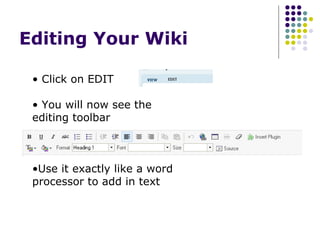
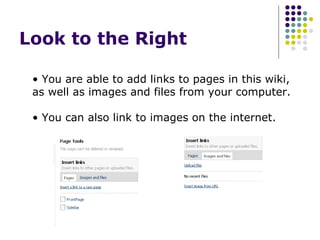
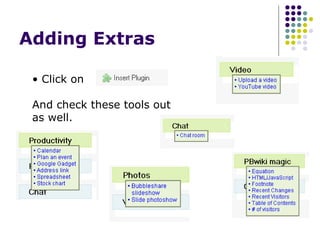
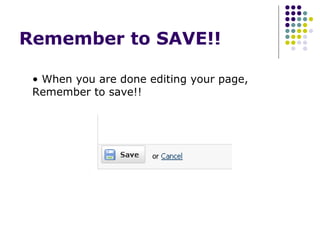
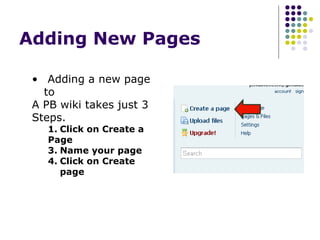
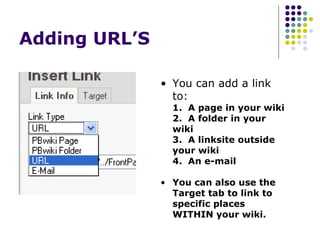
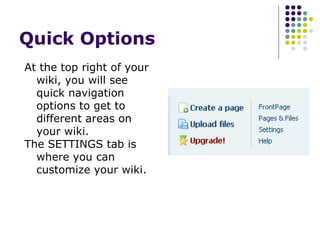
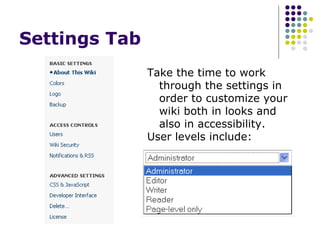
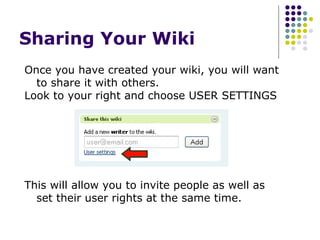
PBWorks Tutorial Jen Wagner
Before You Begin WHY A WIKI?? A wiki might be perfect for you if….. You’re tired of waiting for IT to help set your webpage up You want to increase student engagement using a safe online environment You want a no-hassle way to showcase your students work online
Before You Begin You want to eliminate excuses of lost homework or confusion on assignments You want a central location for your group to collaborate You want one place to put your thoughts & files to access them from anywhere You want to partner with someone online and share ideas and opportunities
Create An Account Type in your information Choose your WIKI NAME Choose for EDUCATION Click on Create My Wiki
Confirm & Security  PB Works will send a confirmation email Choose your security settings Choose your editing options and accept TOS Click Take Me To My Wiki
Your New Wiki
Editing Your Wiki  Click on EDIT You will now see the editing toolbar Use it exactly like a word processor to add in text
Look to the Right  You are able to add links to pages in this wiki, as well as images and files from your computer. You can also link to images on the internet.
Adding Extras  Click on  And check these tools out as well.
Remember to SAVE!!  When you are done editing your page, Remember to save!!
Adding New Pages  Adding a new page to A PB wiki takes just 3 Steps. Click on Create a Page Name your page Click on Create page
Adding URL’S  You can add a link to: 1.  A page in your wiki 2.  A folder in your wiki 3.  A linksite outside your wiki 4.  An e-mail You can also use the Target tab to link to specific places WITHIN your wiki.
Save Your Wiki  Make sure you save your wiki!! PB Works does save a history of your updated pages.  So if you ever need to restore an older edition, you do have that option. If you allow others to have editing rights, you can track their changes on pages.
Quick Options  At the top right of your wiki, you will see quick navigation options to get to different areas on your wiki.  The SETTINGS tab is where you can customize your wiki.
Settings Tab  Take the time to work through the settings in order to customize your wiki both in looks and also in accessibility.  User levels include:
Sharing Your Wiki  Once you have created your wiki, you will want to share it with others. Look to your right and choose USER SETTINGS This will allow you to invite people as well as set their user rights at the same time.
Enjoy your wiki  Whether you use your wiki for personal, classroom, or other professional work – enjoy the options that are now at your fingertips. Be sure to check out the more advanced opportunities in the Settings area such as setting up an RSS feed or using CSS to get that one of a kind look you might wish. Enjoy!  And welcome to the world of Wikis!
PBWorks Tutorial Jen Wagner

Tutorial for PBWorks

  • 1.
  • 2.
    Before You BeginWHY A WIKI?? A wiki might be perfect for you if….. You’re tired of waiting for IT to help set your webpage up You want to increase student engagement using a safe online environment You want a no-hassle way to showcase your students work online
  • 3.
    Before You BeginYou want to eliminate excuses of lost homework or confusion on assignments You want a central location for your group to collaborate You want one place to put your thoughts & files to access them from anywhere You want to partner with someone online and share ideas and opportunities
  • 4.
    Create An AccountType in your information Choose your WIKI NAME Choose for EDUCATION Click on Create My Wiki
  • 5.
    Confirm & Security PB Works will send a confirmation email Choose your security settings Choose your editing options and accept TOS Click Take Me To My Wiki
  • 6.
  • 7.
    Editing Your Wiki Click on EDIT You will now see the editing toolbar Use it exactly like a word processor to add in text
  • 8.
    Look to theRight You are able to add links to pages in this wiki, as well as images and files from your computer. You can also link to images on the internet.
  • 9.
    Adding Extras Click on And check these tools out as well.
  • 10.
    Remember to SAVE!! When you are done editing your page, Remember to save!!
  • 11.
    Adding New Pages Adding a new page to A PB wiki takes just 3 Steps. Click on Create a Page Name your page Click on Create page
  • 12.
    Adding URL’S You can add a link to: 1. A page in your wiki 2. A folder in your wiki 3. A linksite outside your wiki 4. An e-mail You can also use the Target tab to link to specific places WITHIN your wiki.
  • 13.
    Save Your Wiki Make sure you save your wiki!! PB Works does save a history of your updated pages. So if you ever need to restore an older edition, you do have that option. If you allow others to have editing rights, you can track their changes on pages.
  • 14.
    Quick Options At the top right of your wiki, you will see quick navigation options to get to different areas on your wiki. The SETTINGS tab is where you can customize your wiki.
  • 15.
    Settings Tab Take the time to work through the settings in order to customize your wiki both in looks and also in accessibility. User levels include:
  • 16.
    Sharing Your Wiki Once you have created your wiki, you will want to share it with others. Look to your right and choose USER SETTINGS This will allow you to invite people as well as set their user rights at the same time.
  • 17.
    Enjoy your wiki Whether you use your wiki for personal, classroom, or other professional work – enjoy the options that are now at your fingertips. Be sure to check out the more advanced opportunities in the Settings area such as setting up an RSS feed or using CSS to get that one of a kind look you might wish. Enjoy! And welcome to the world of Wikis!
  • 18.