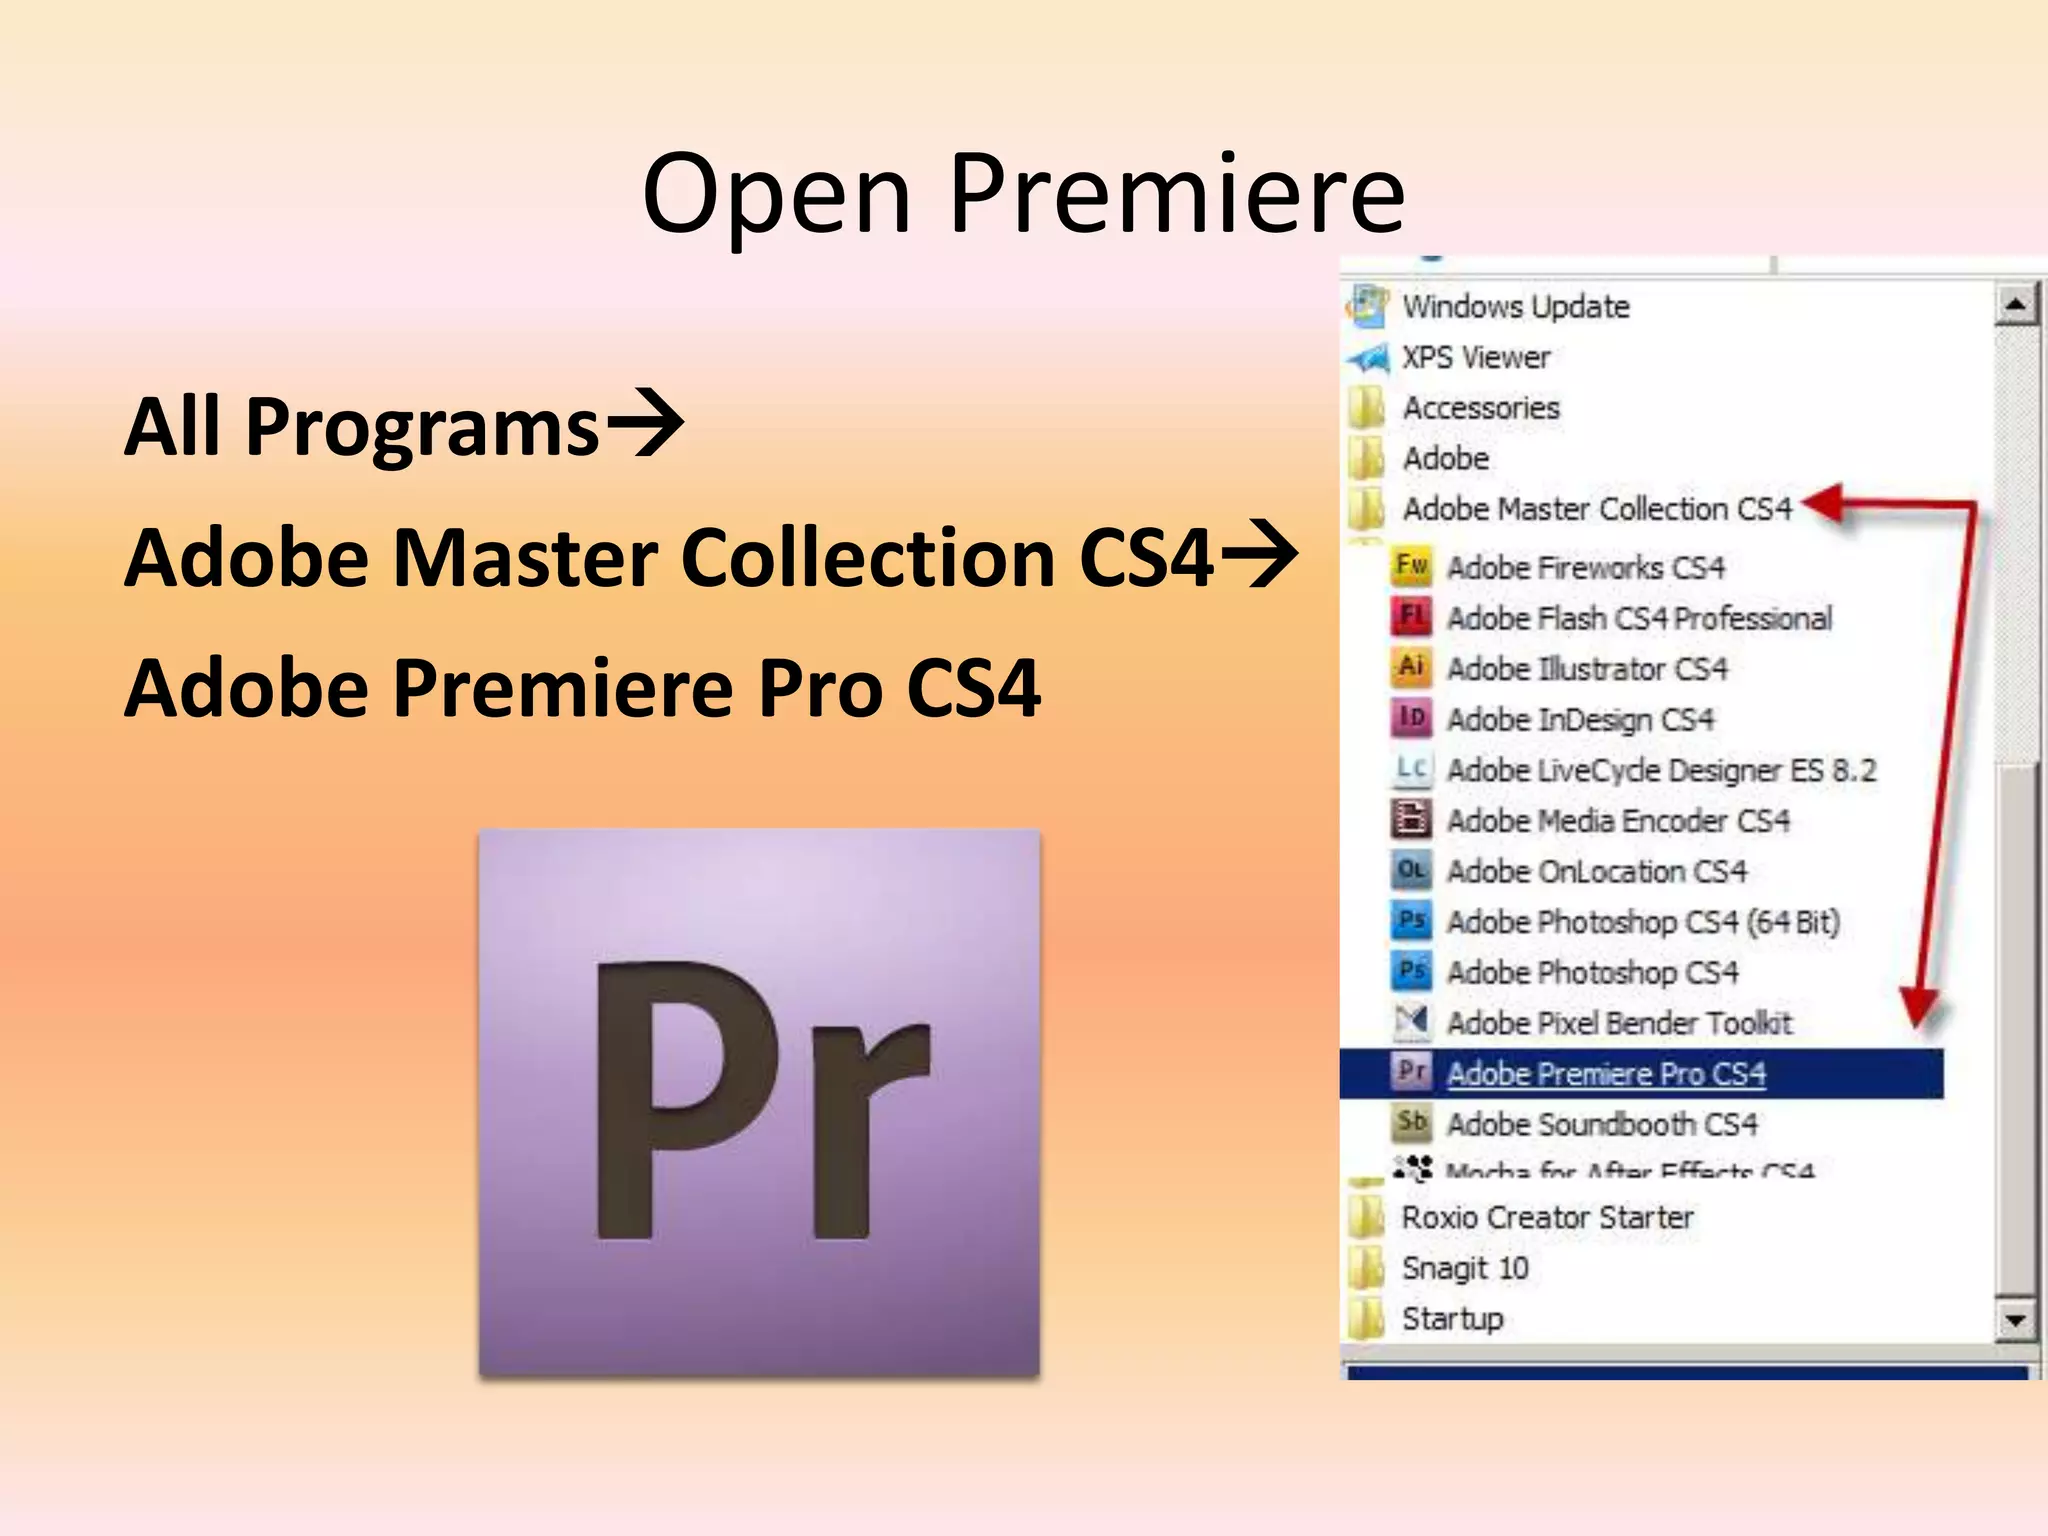
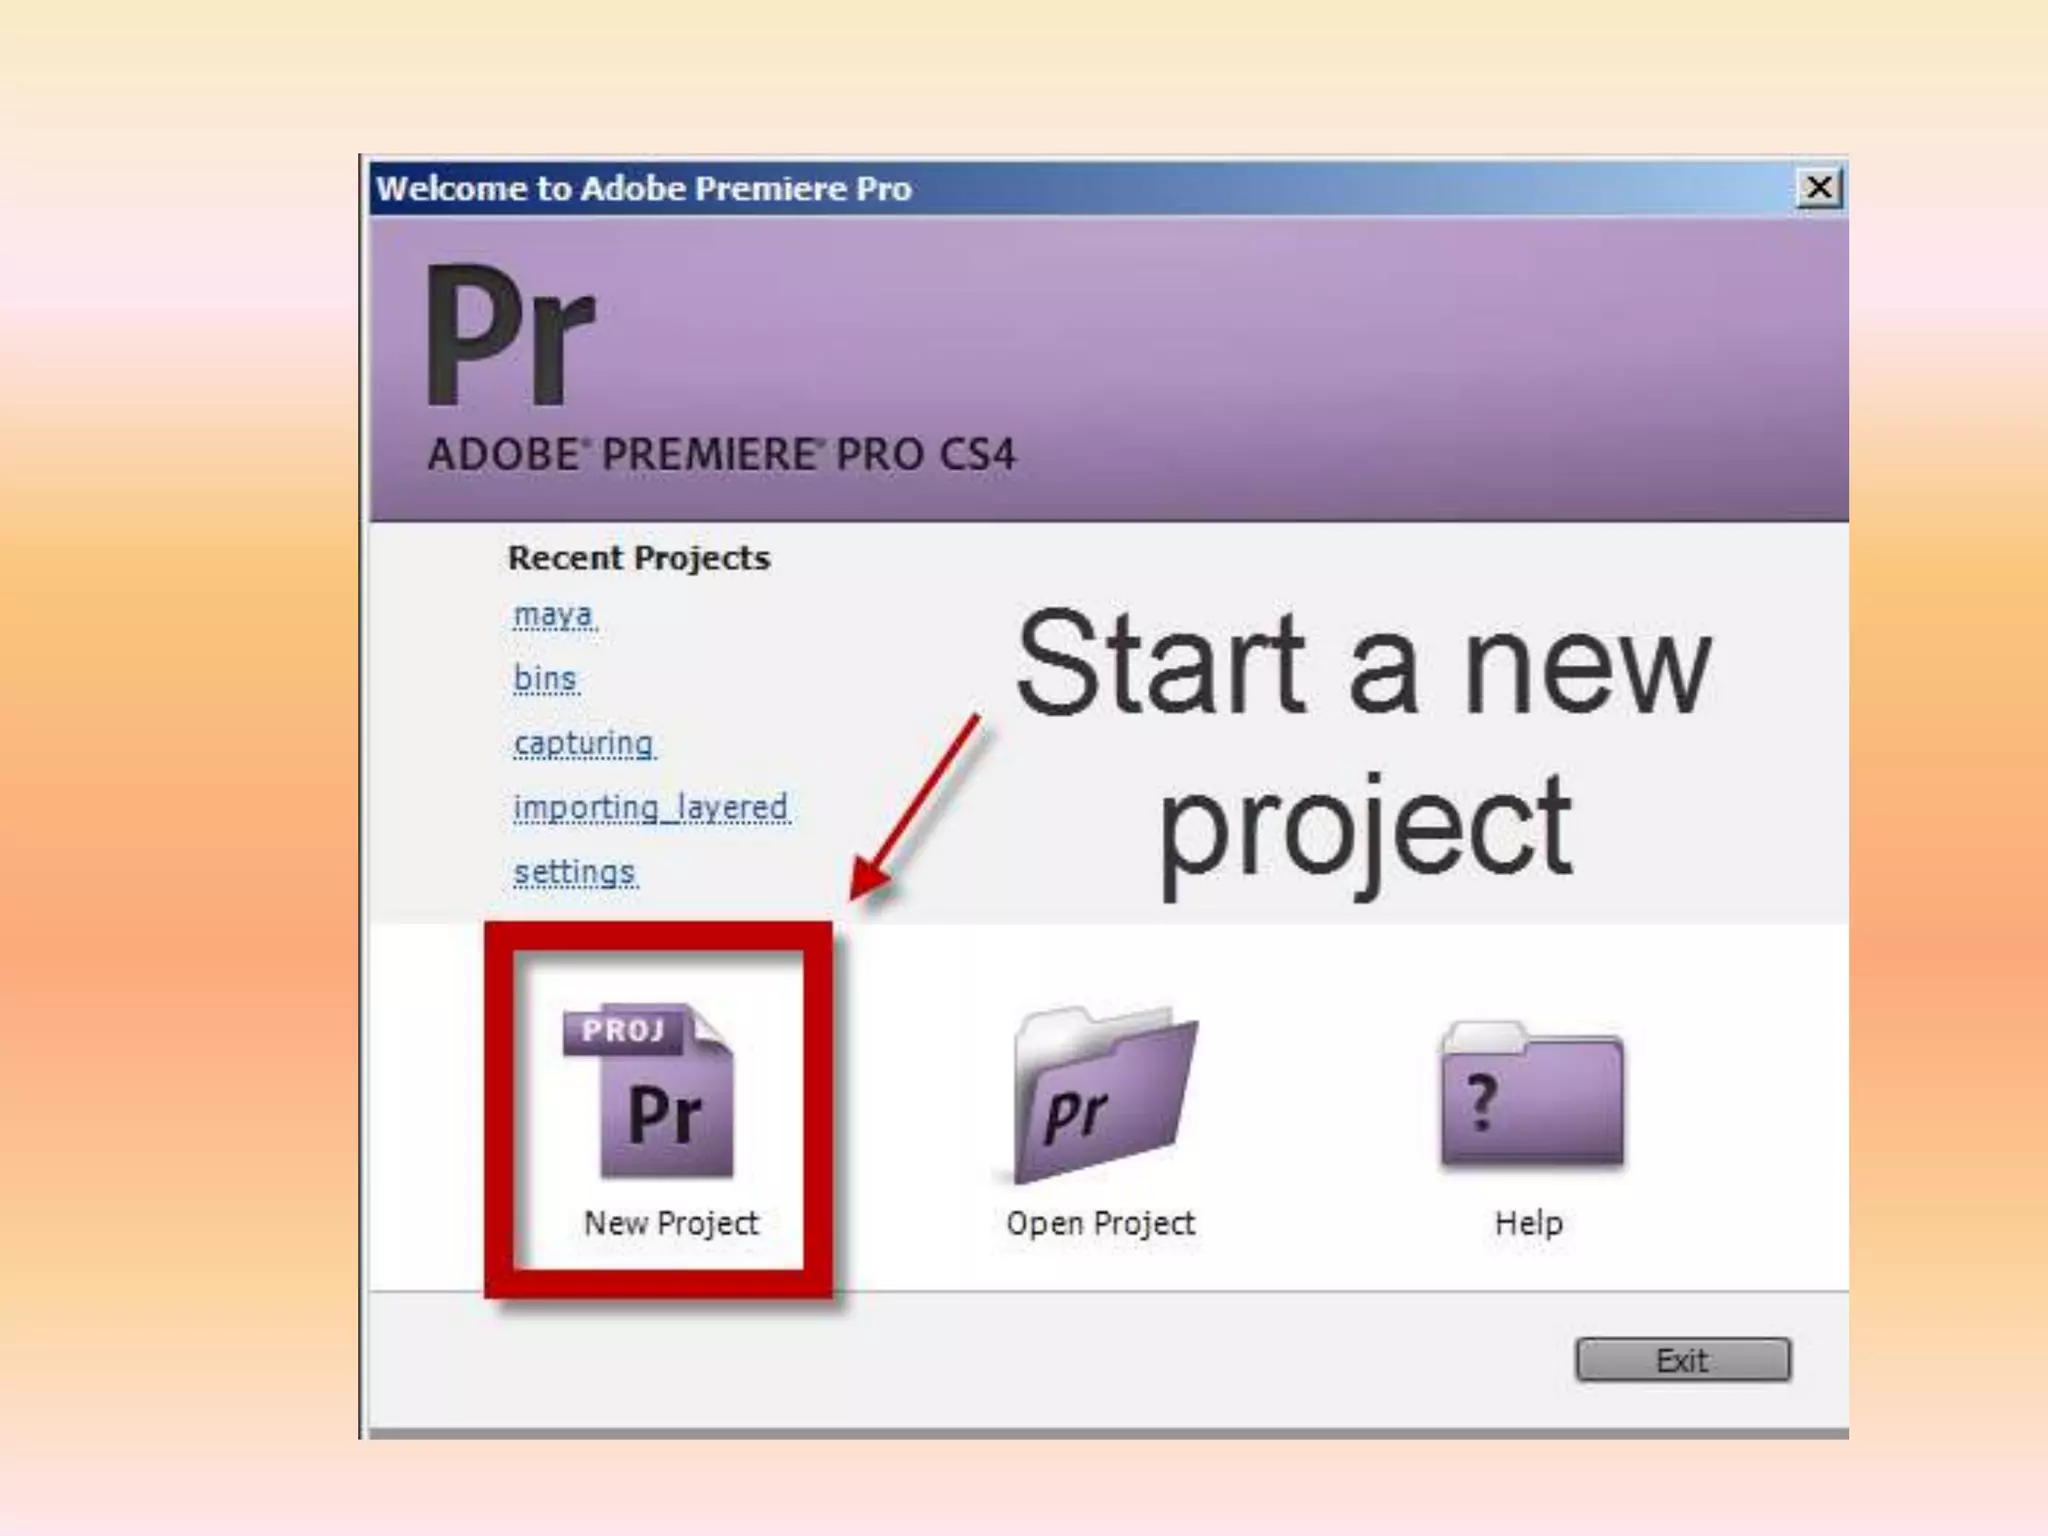
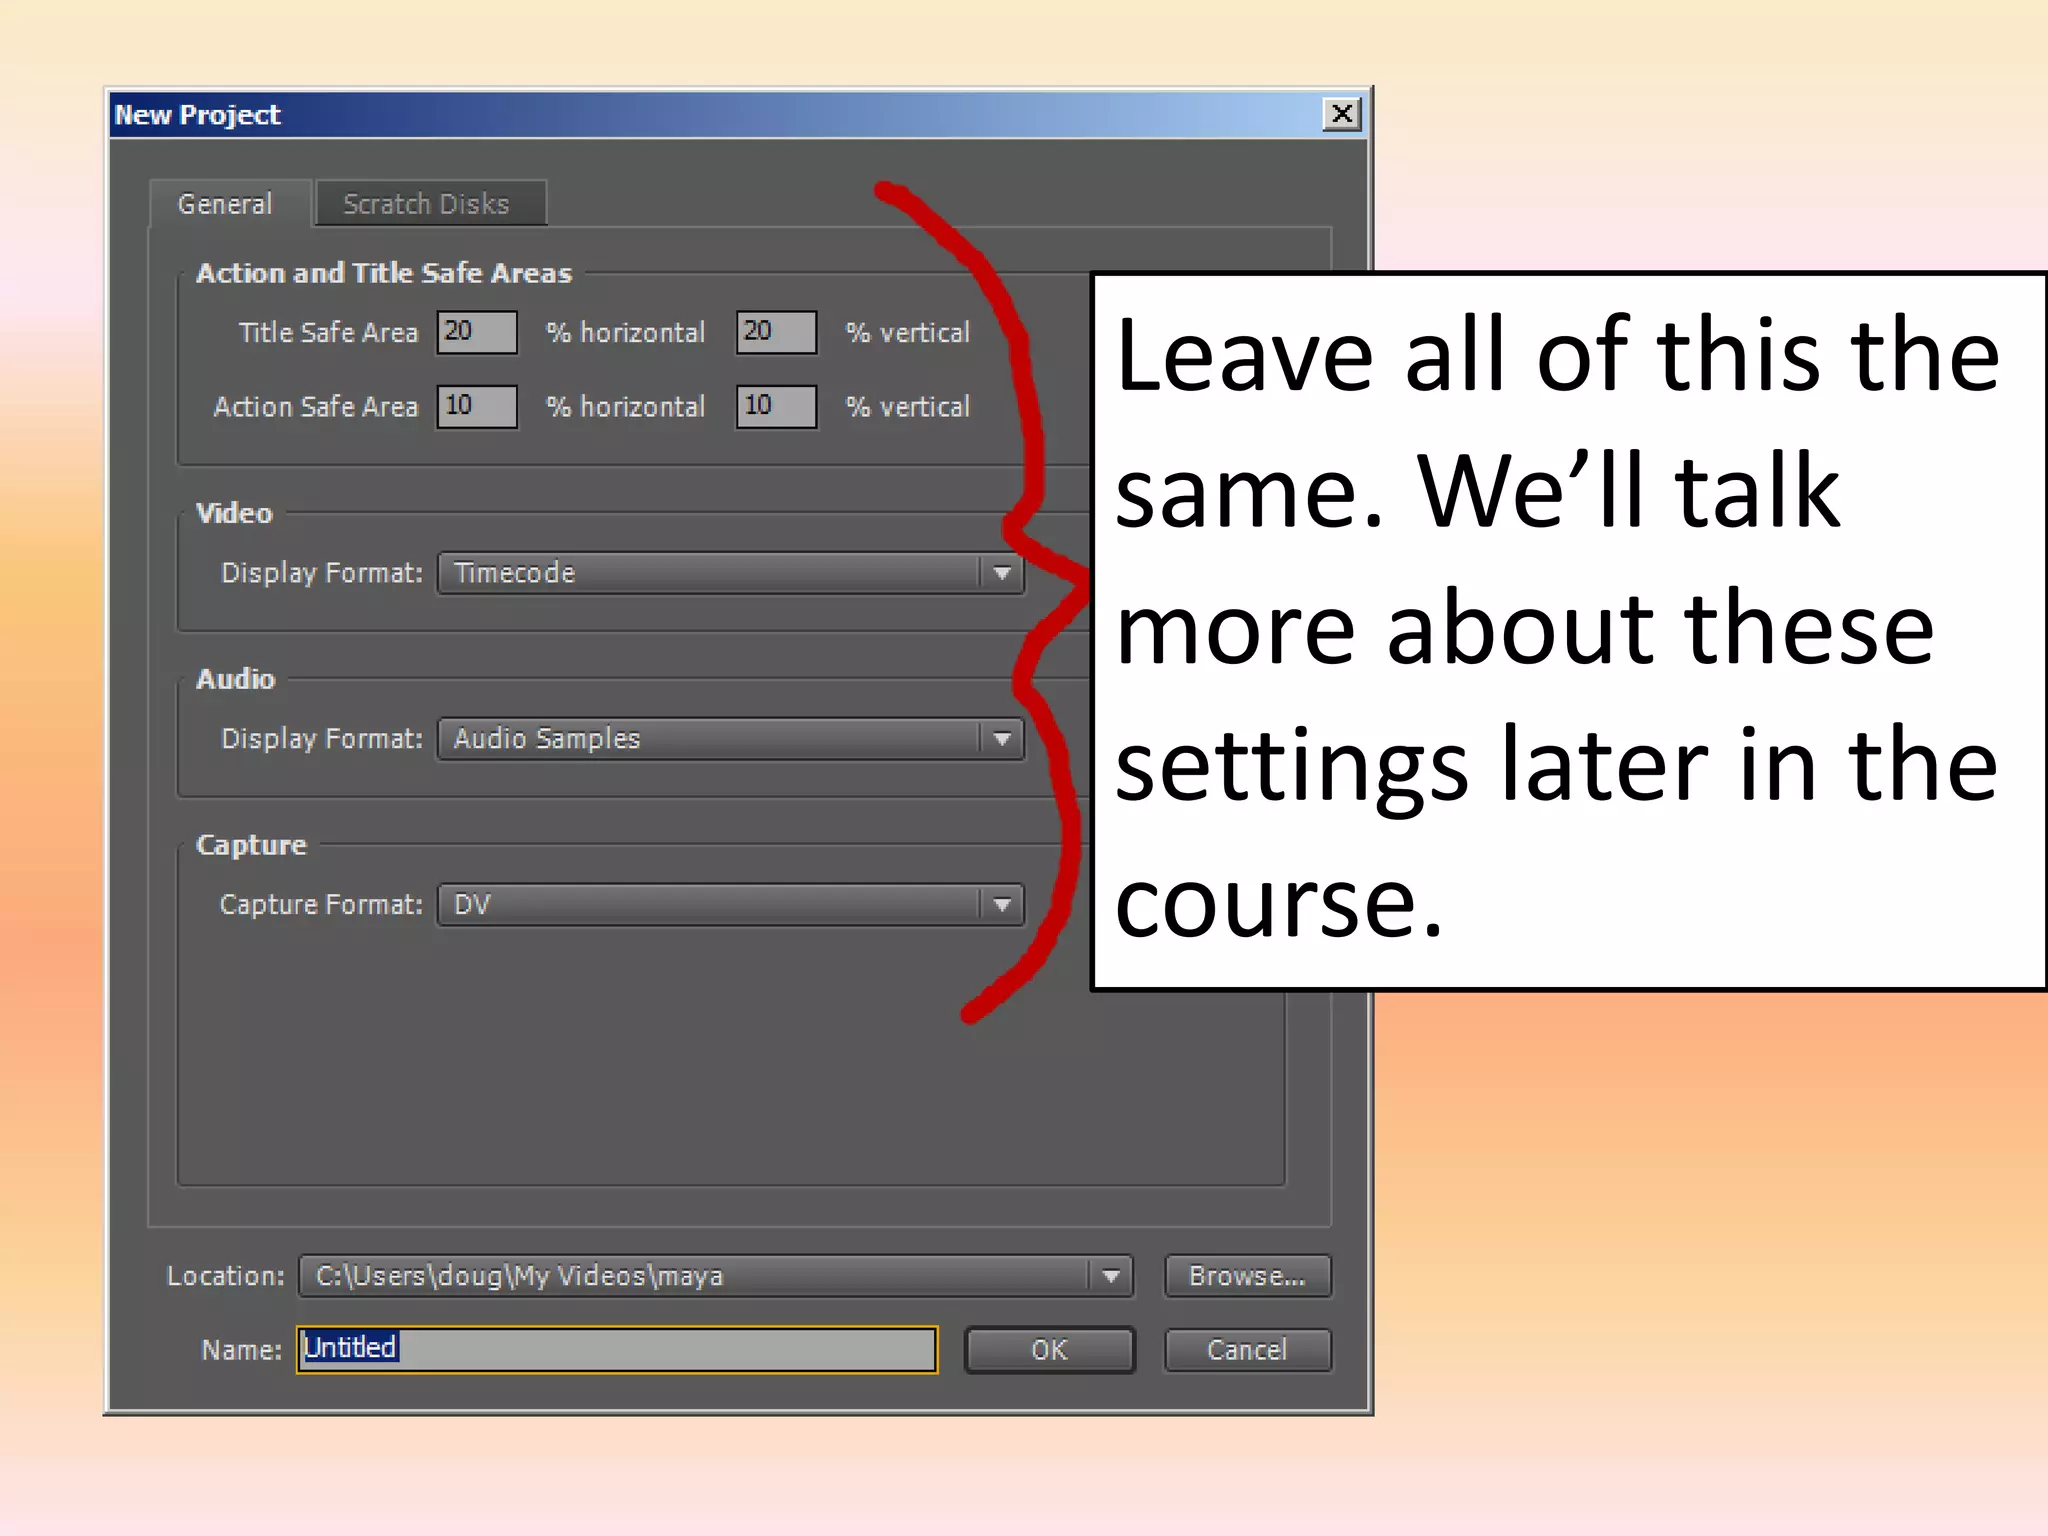
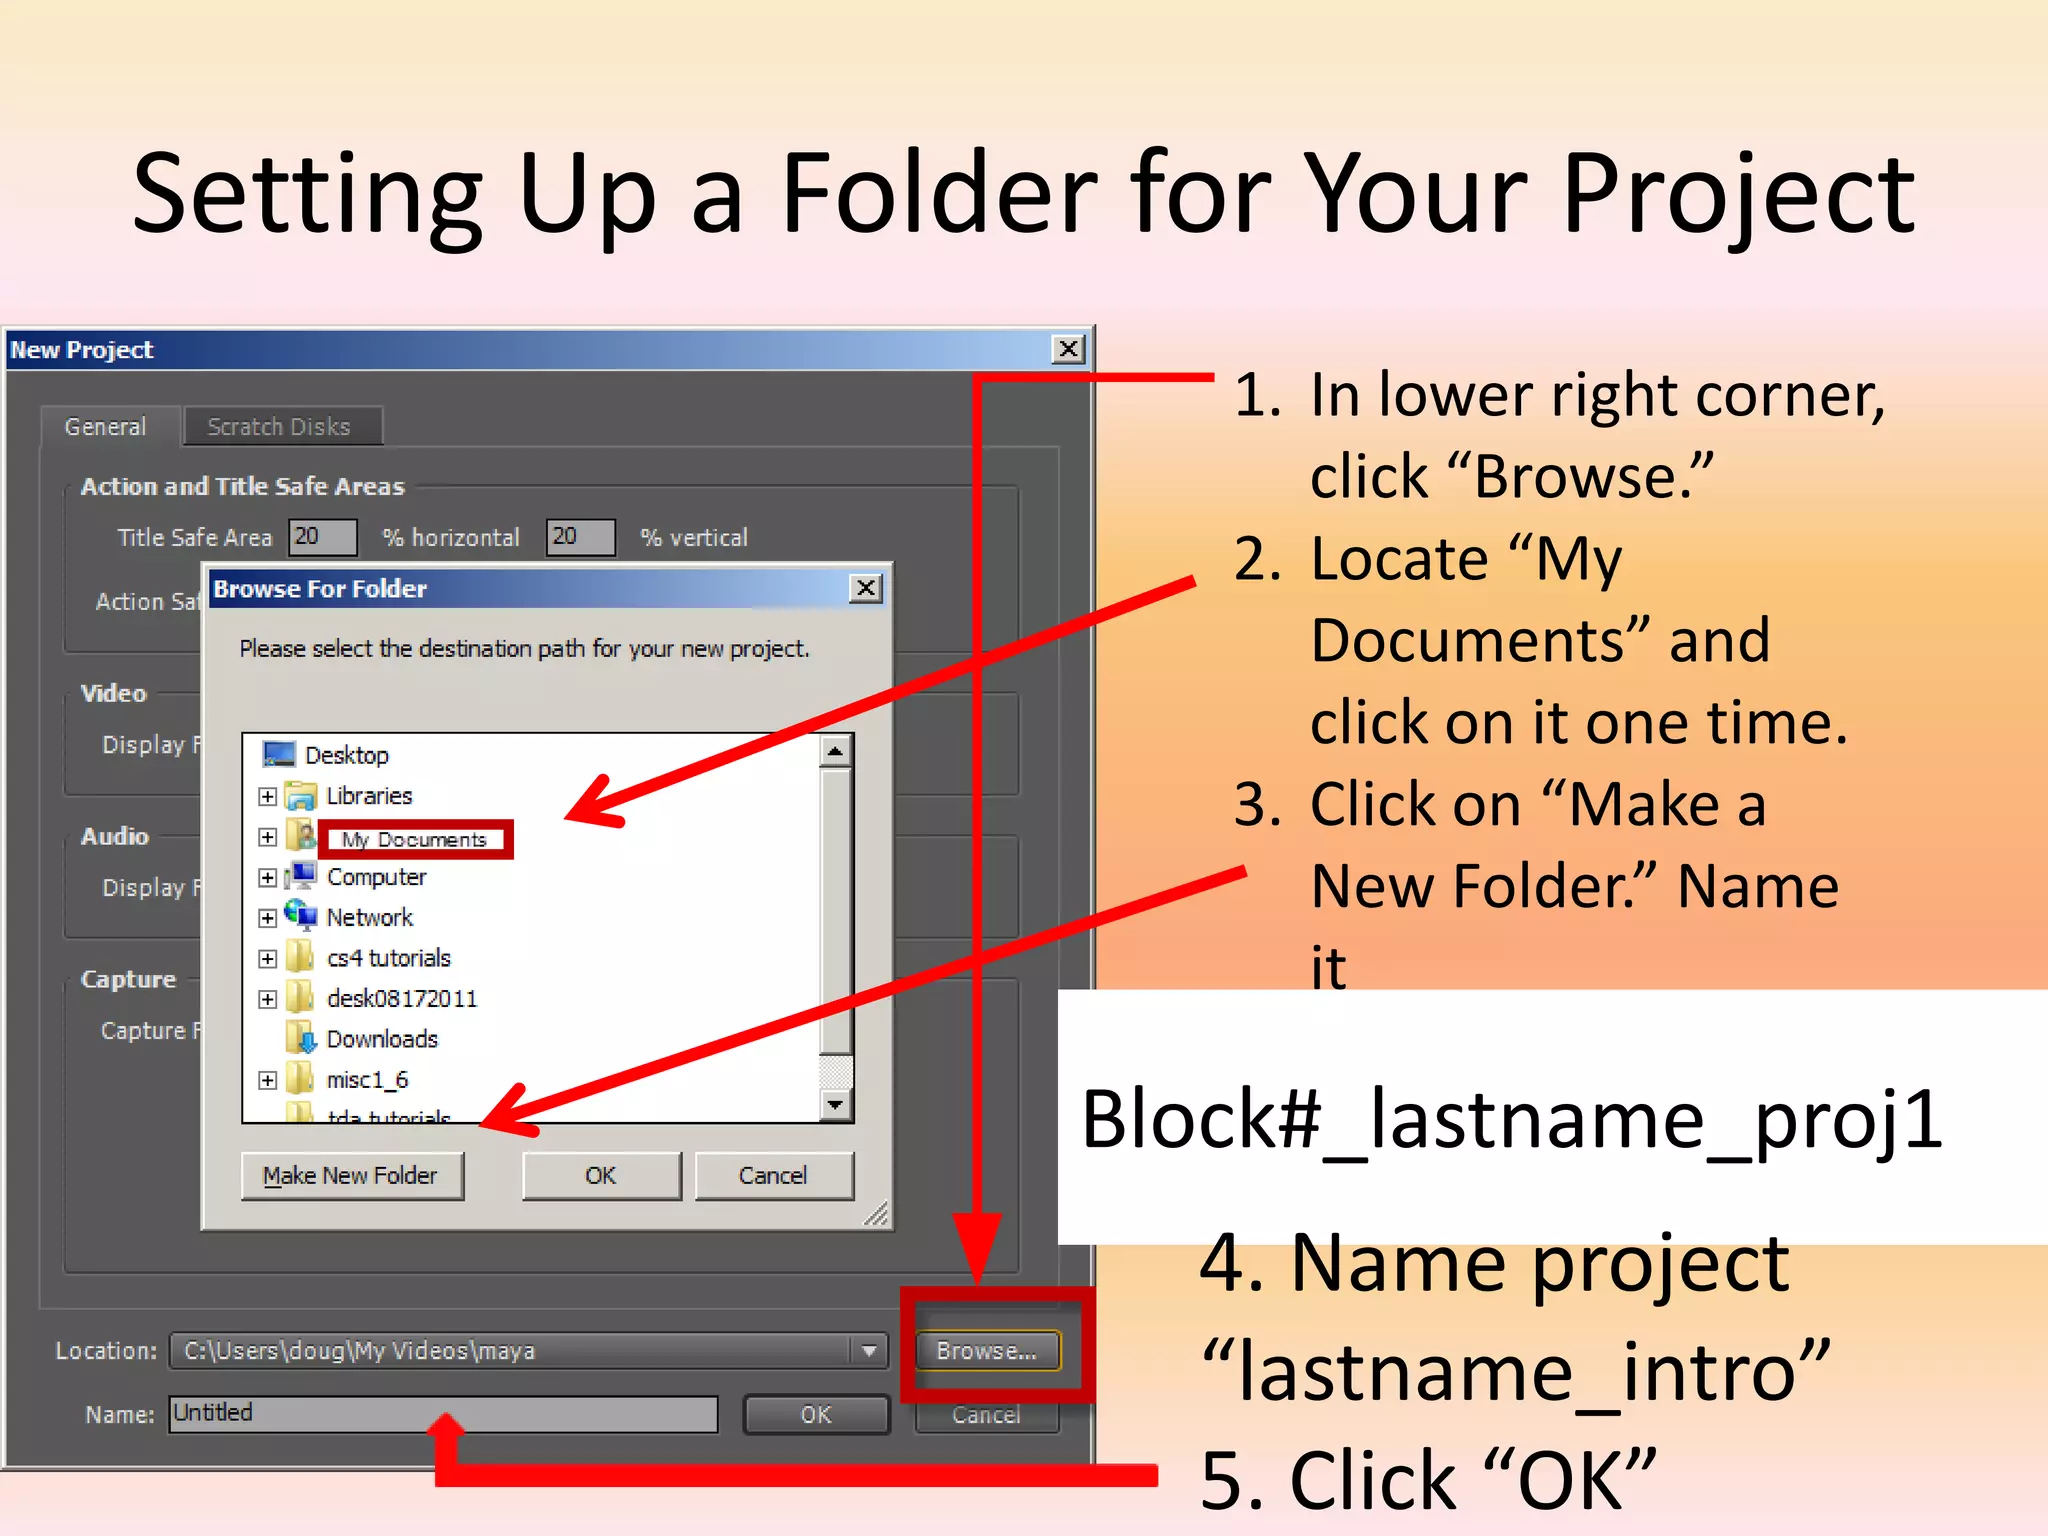
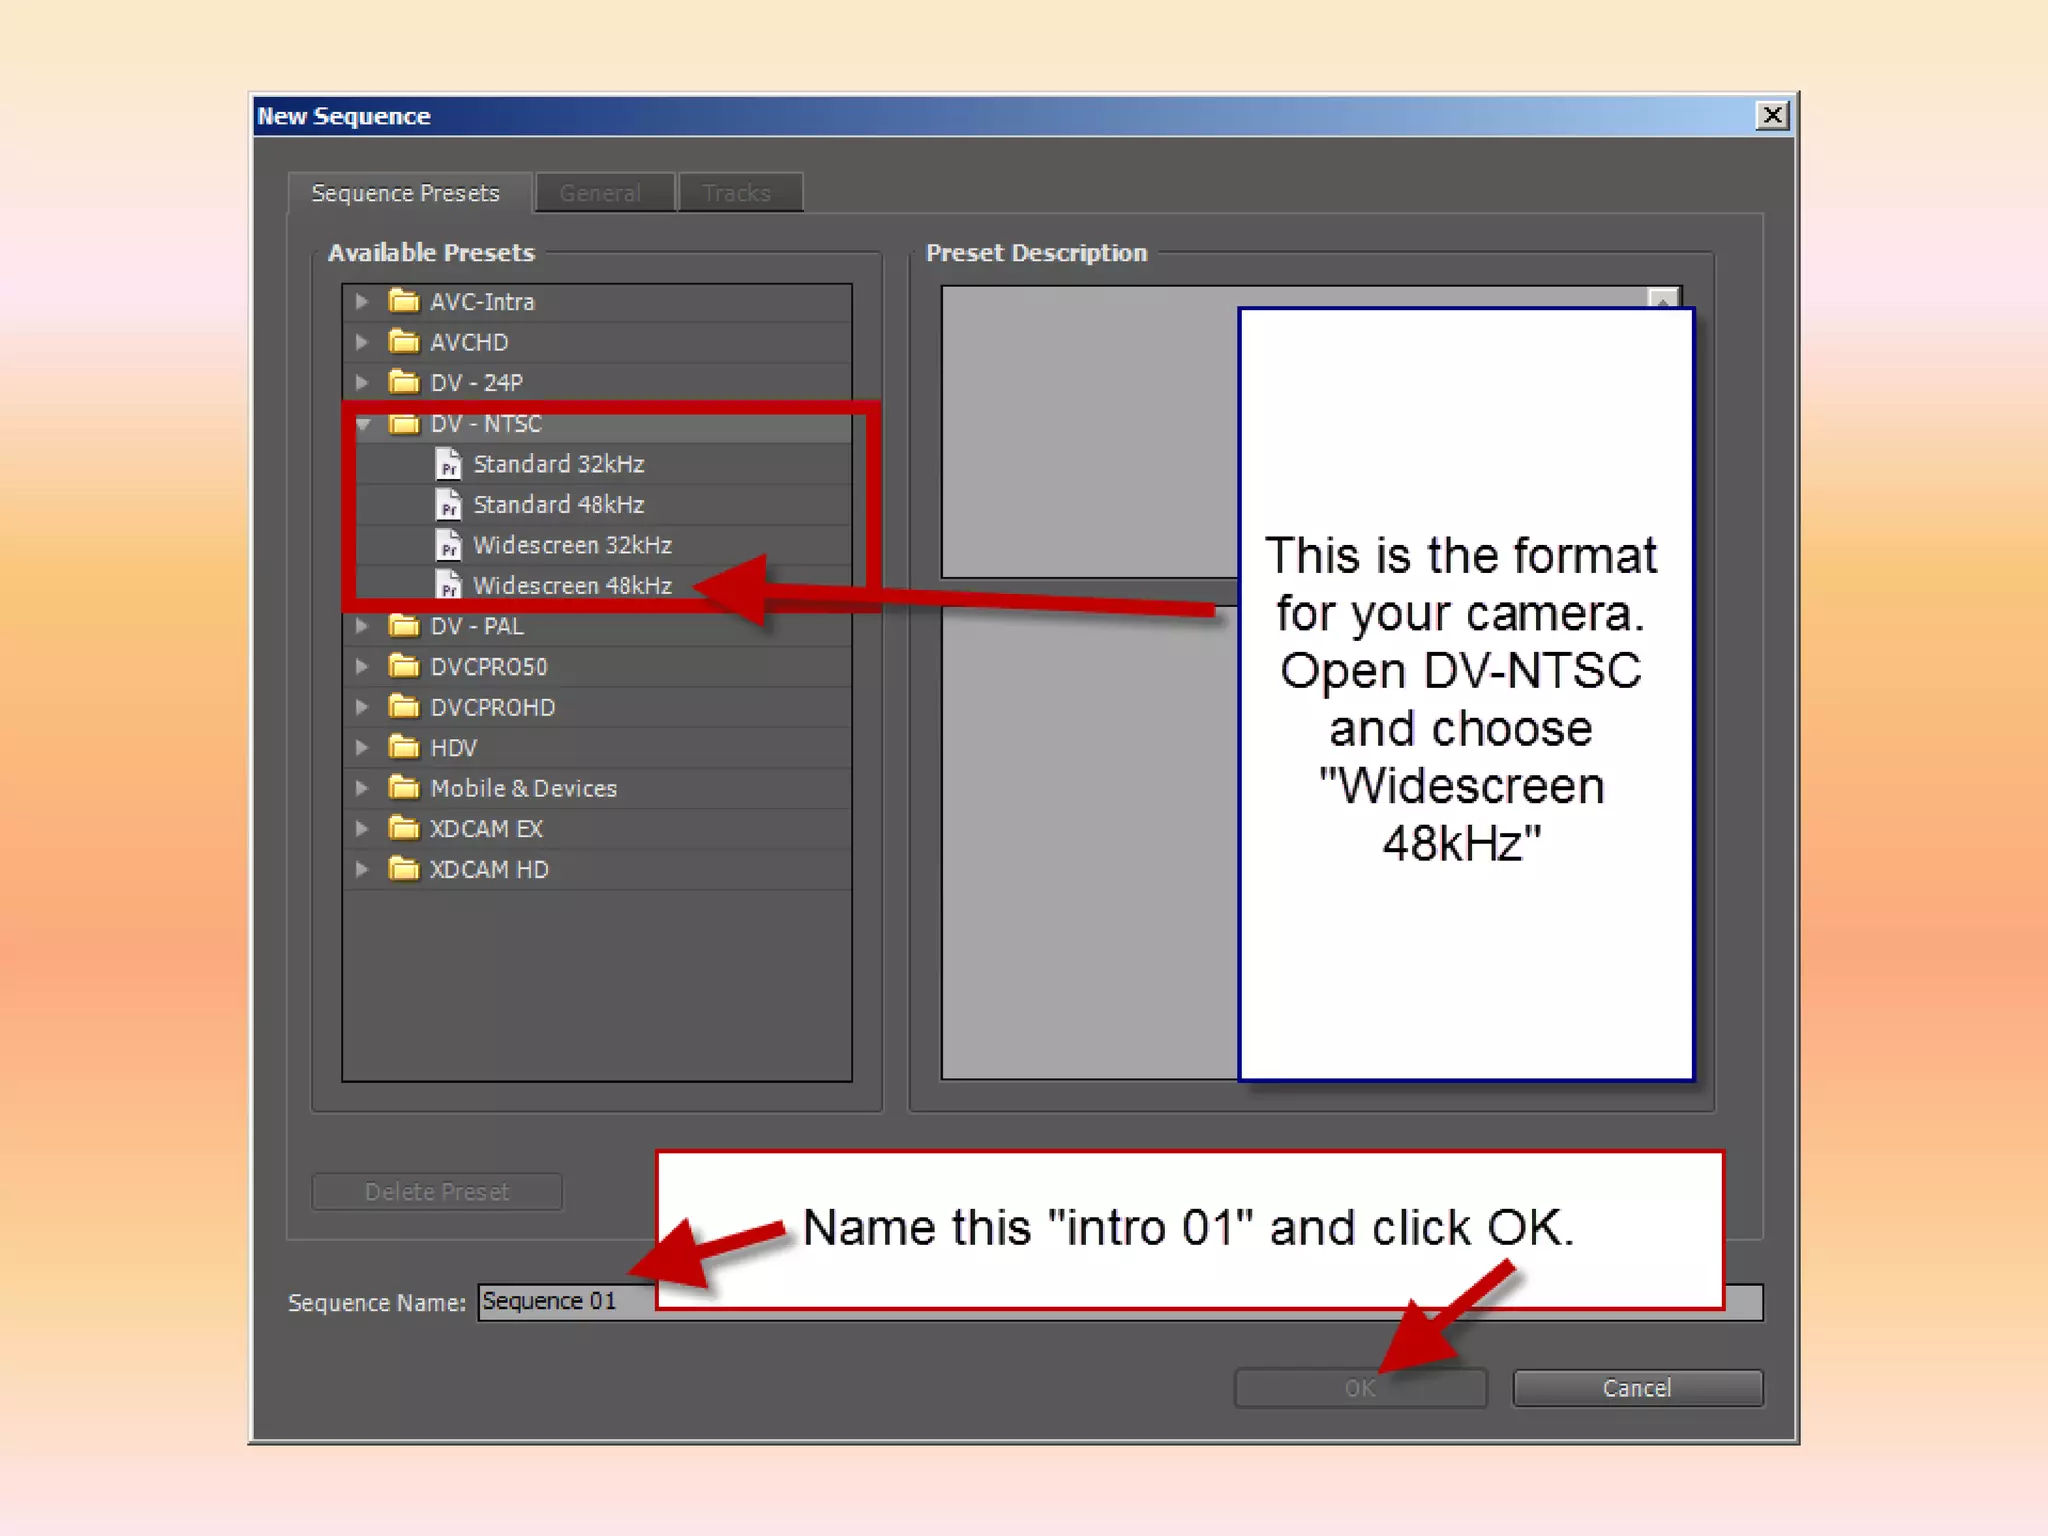
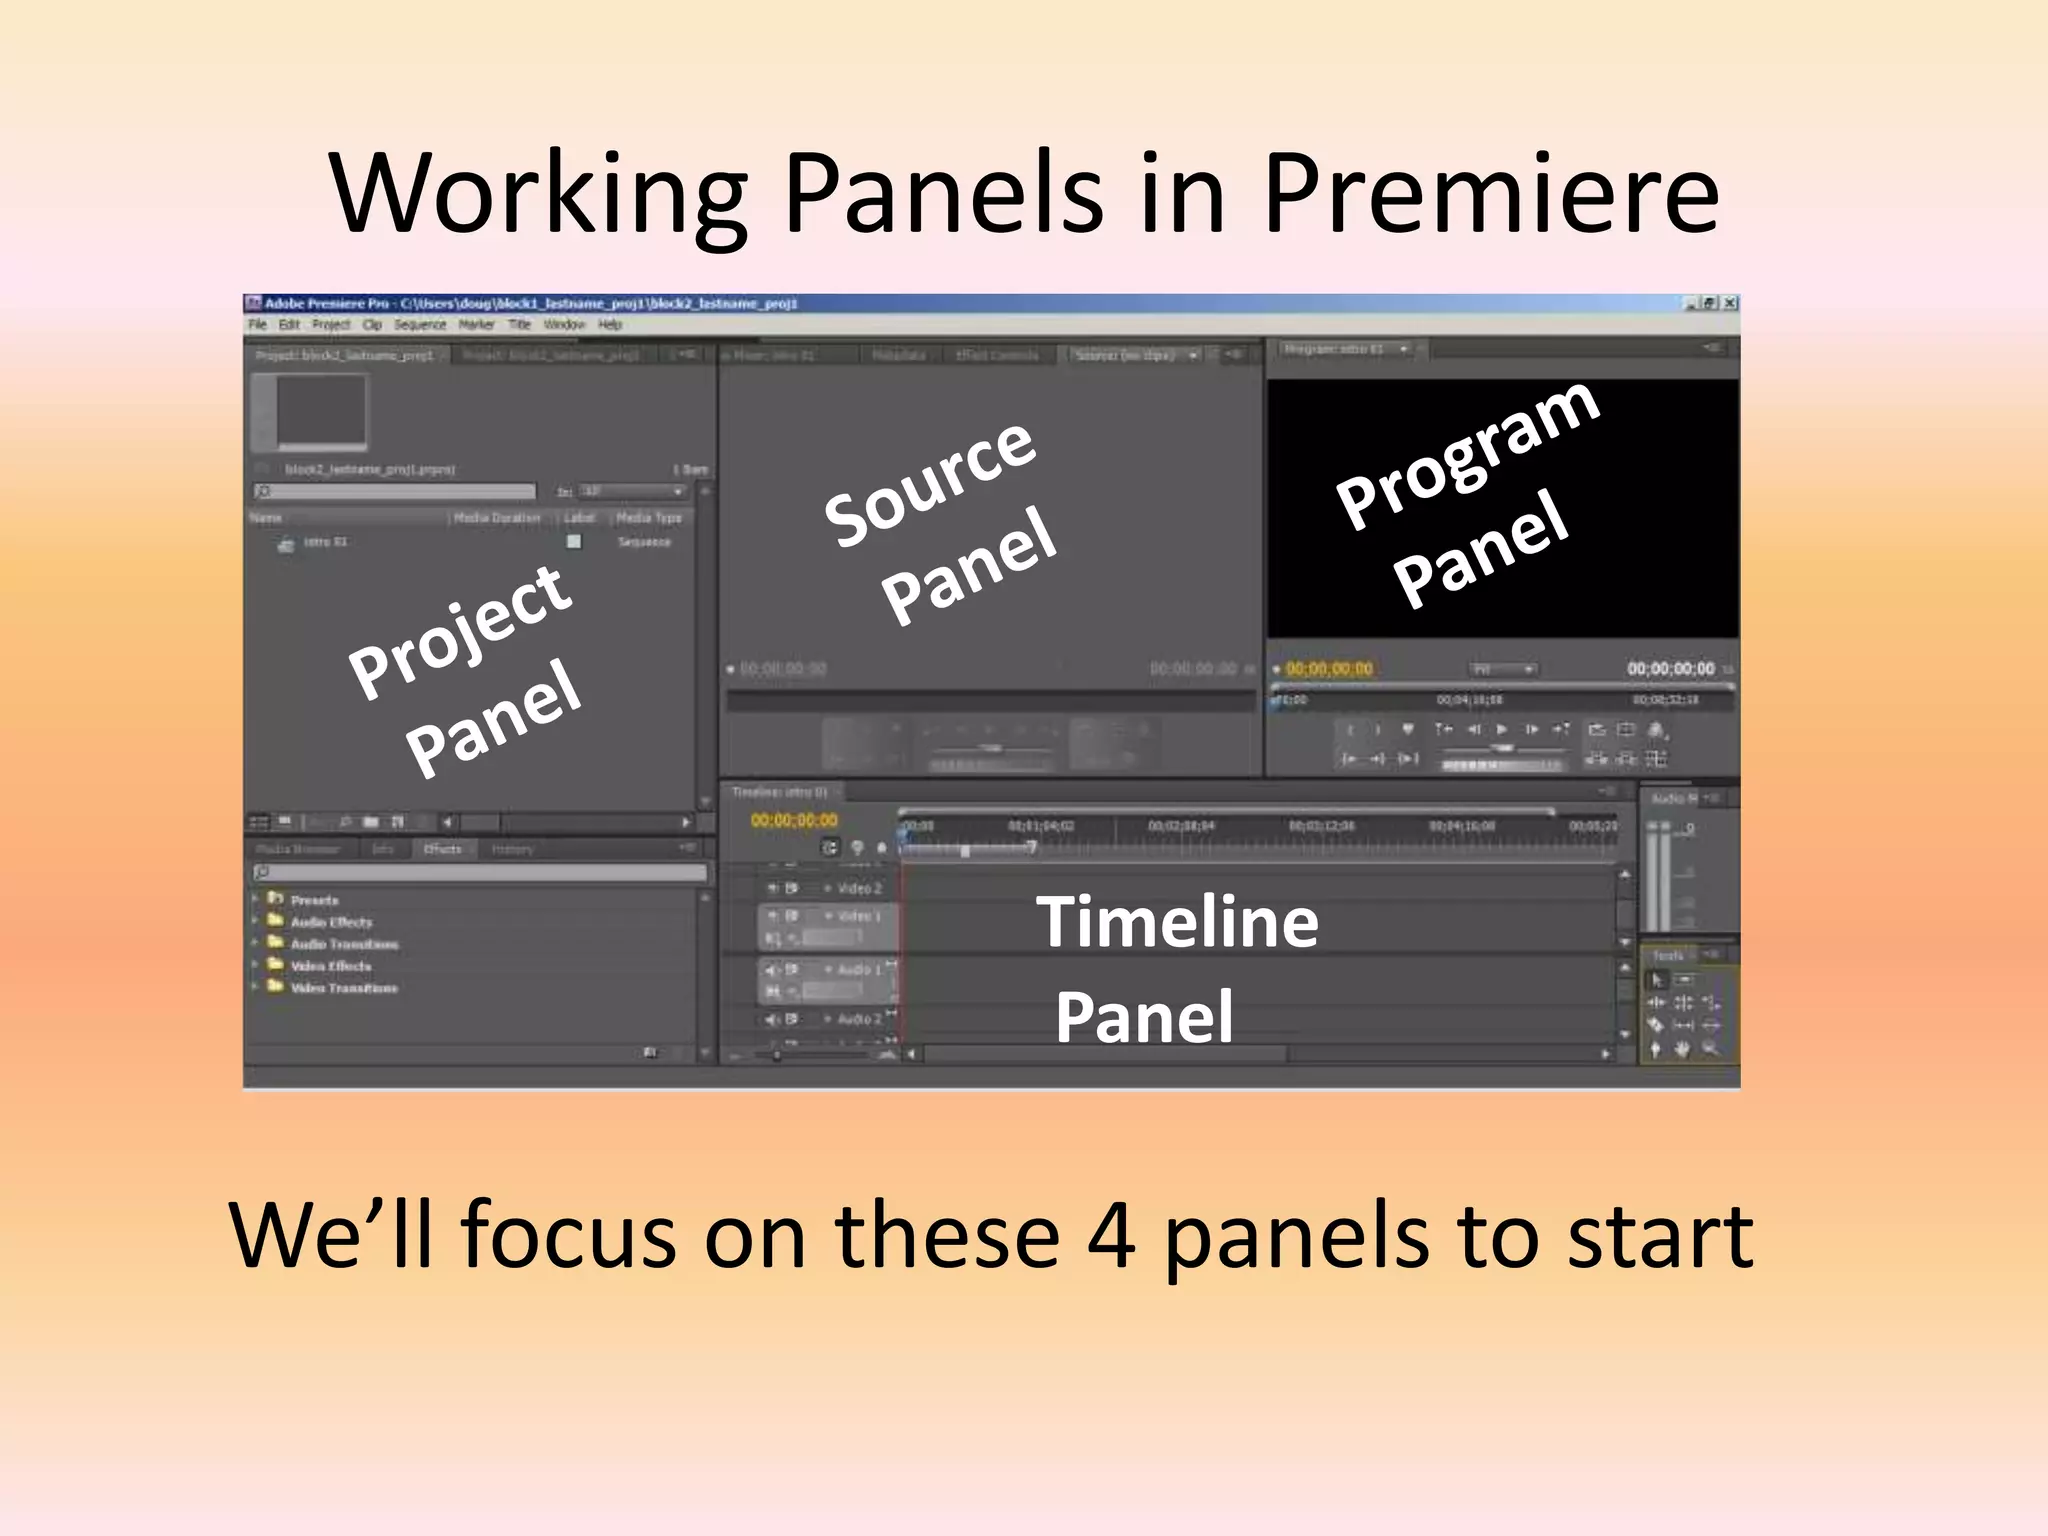
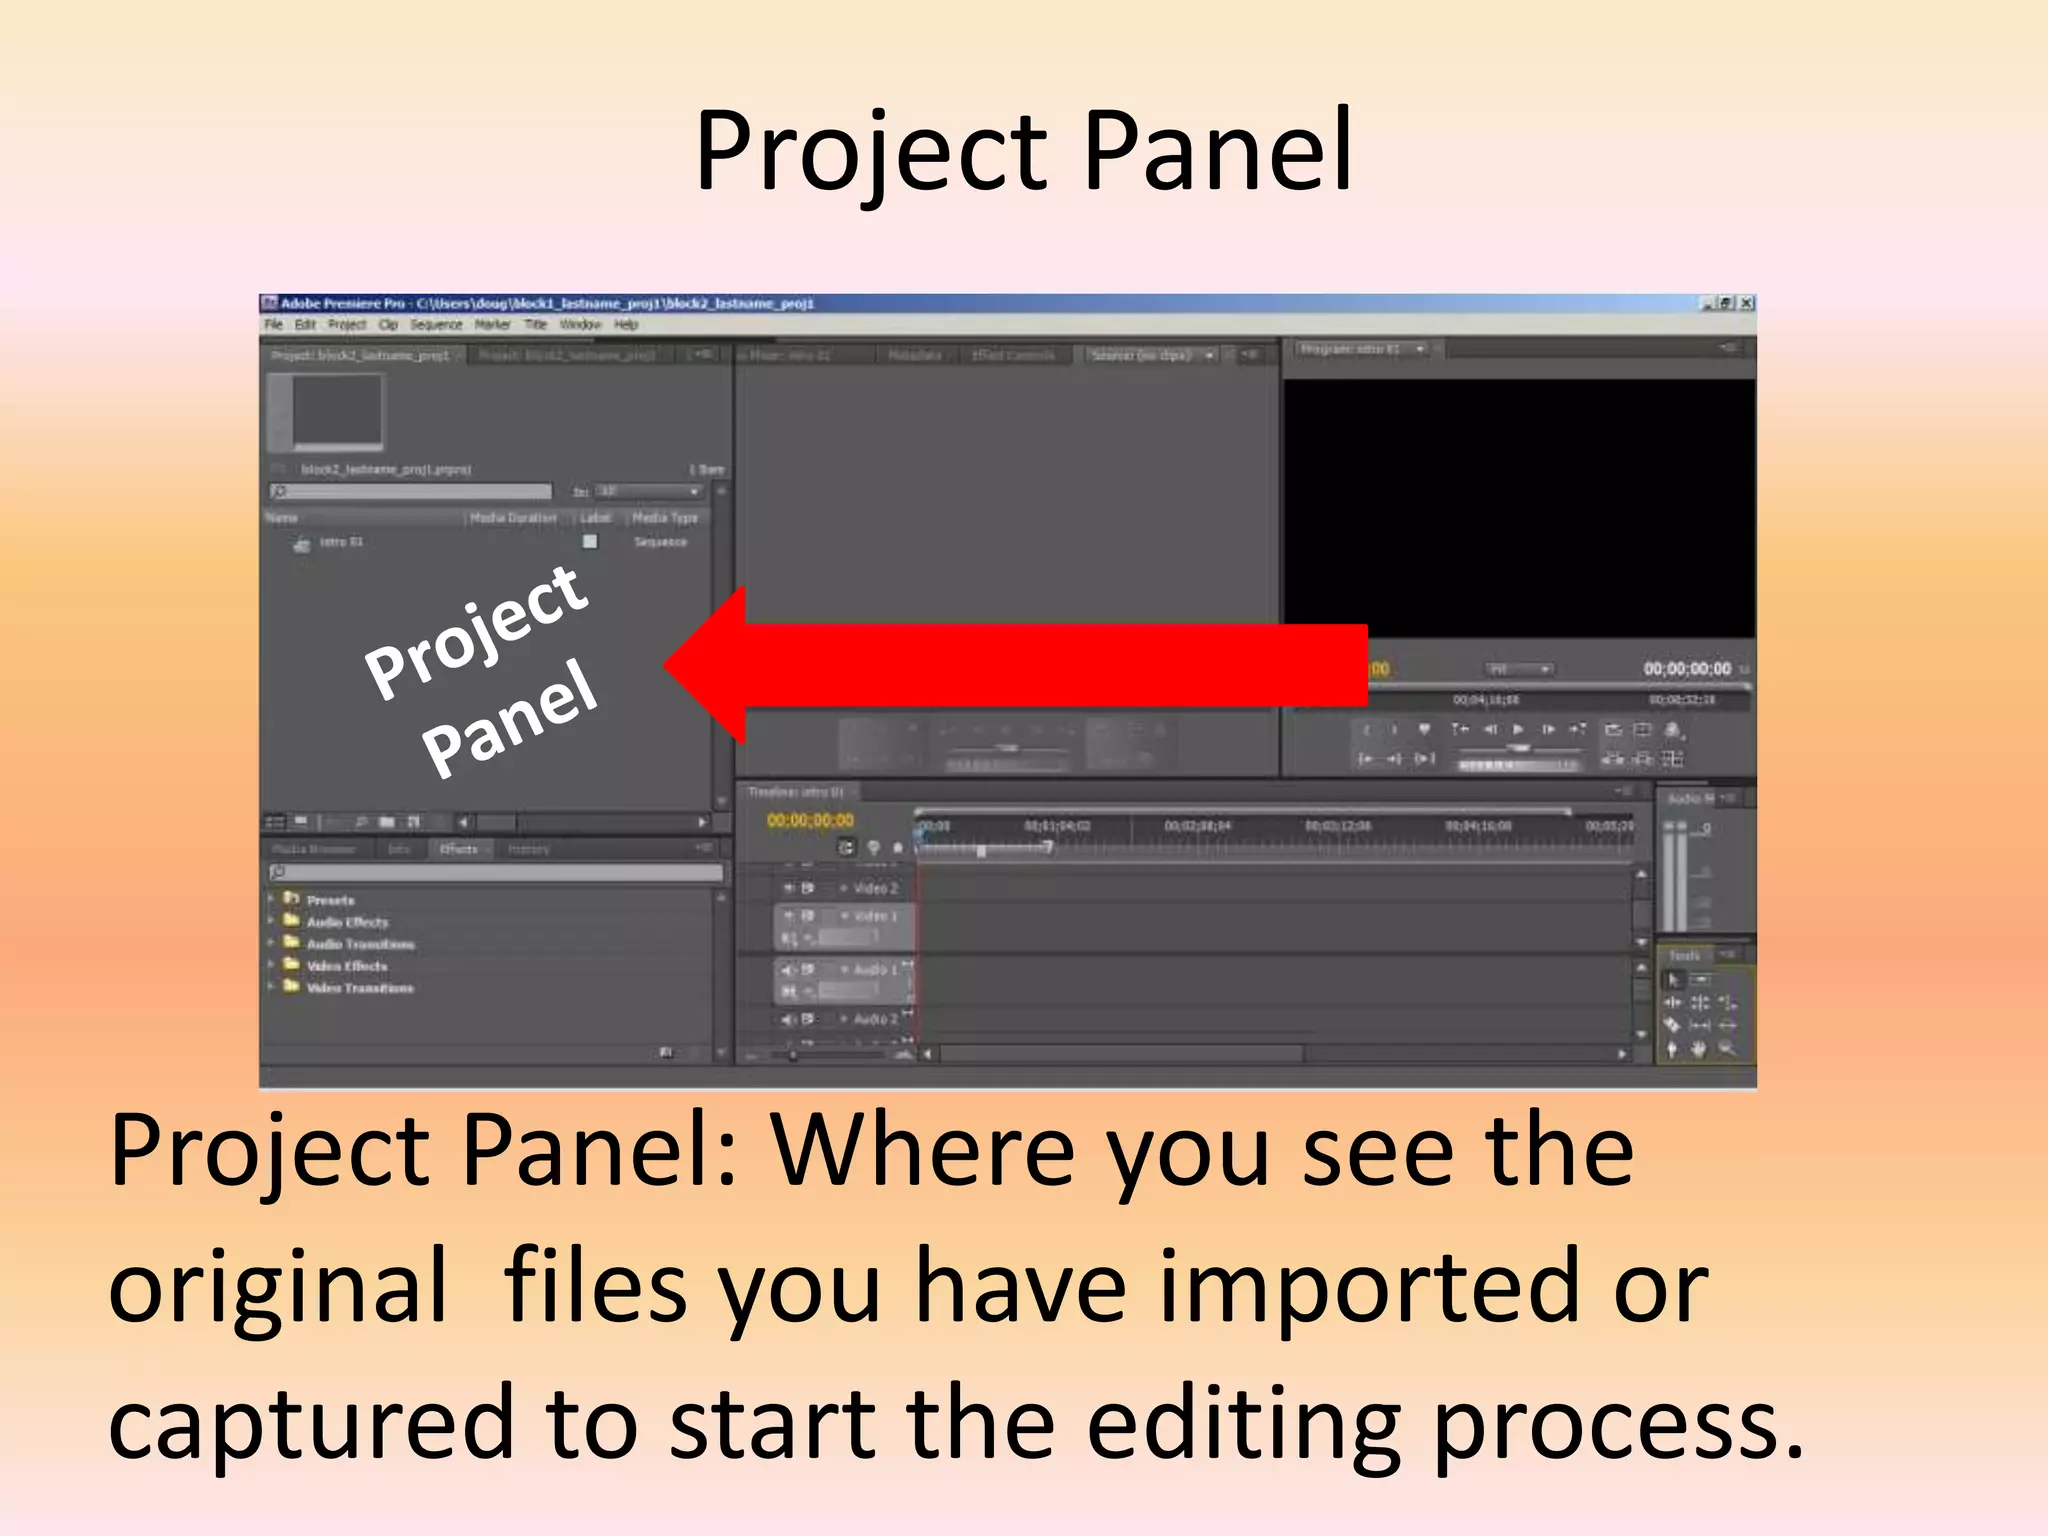
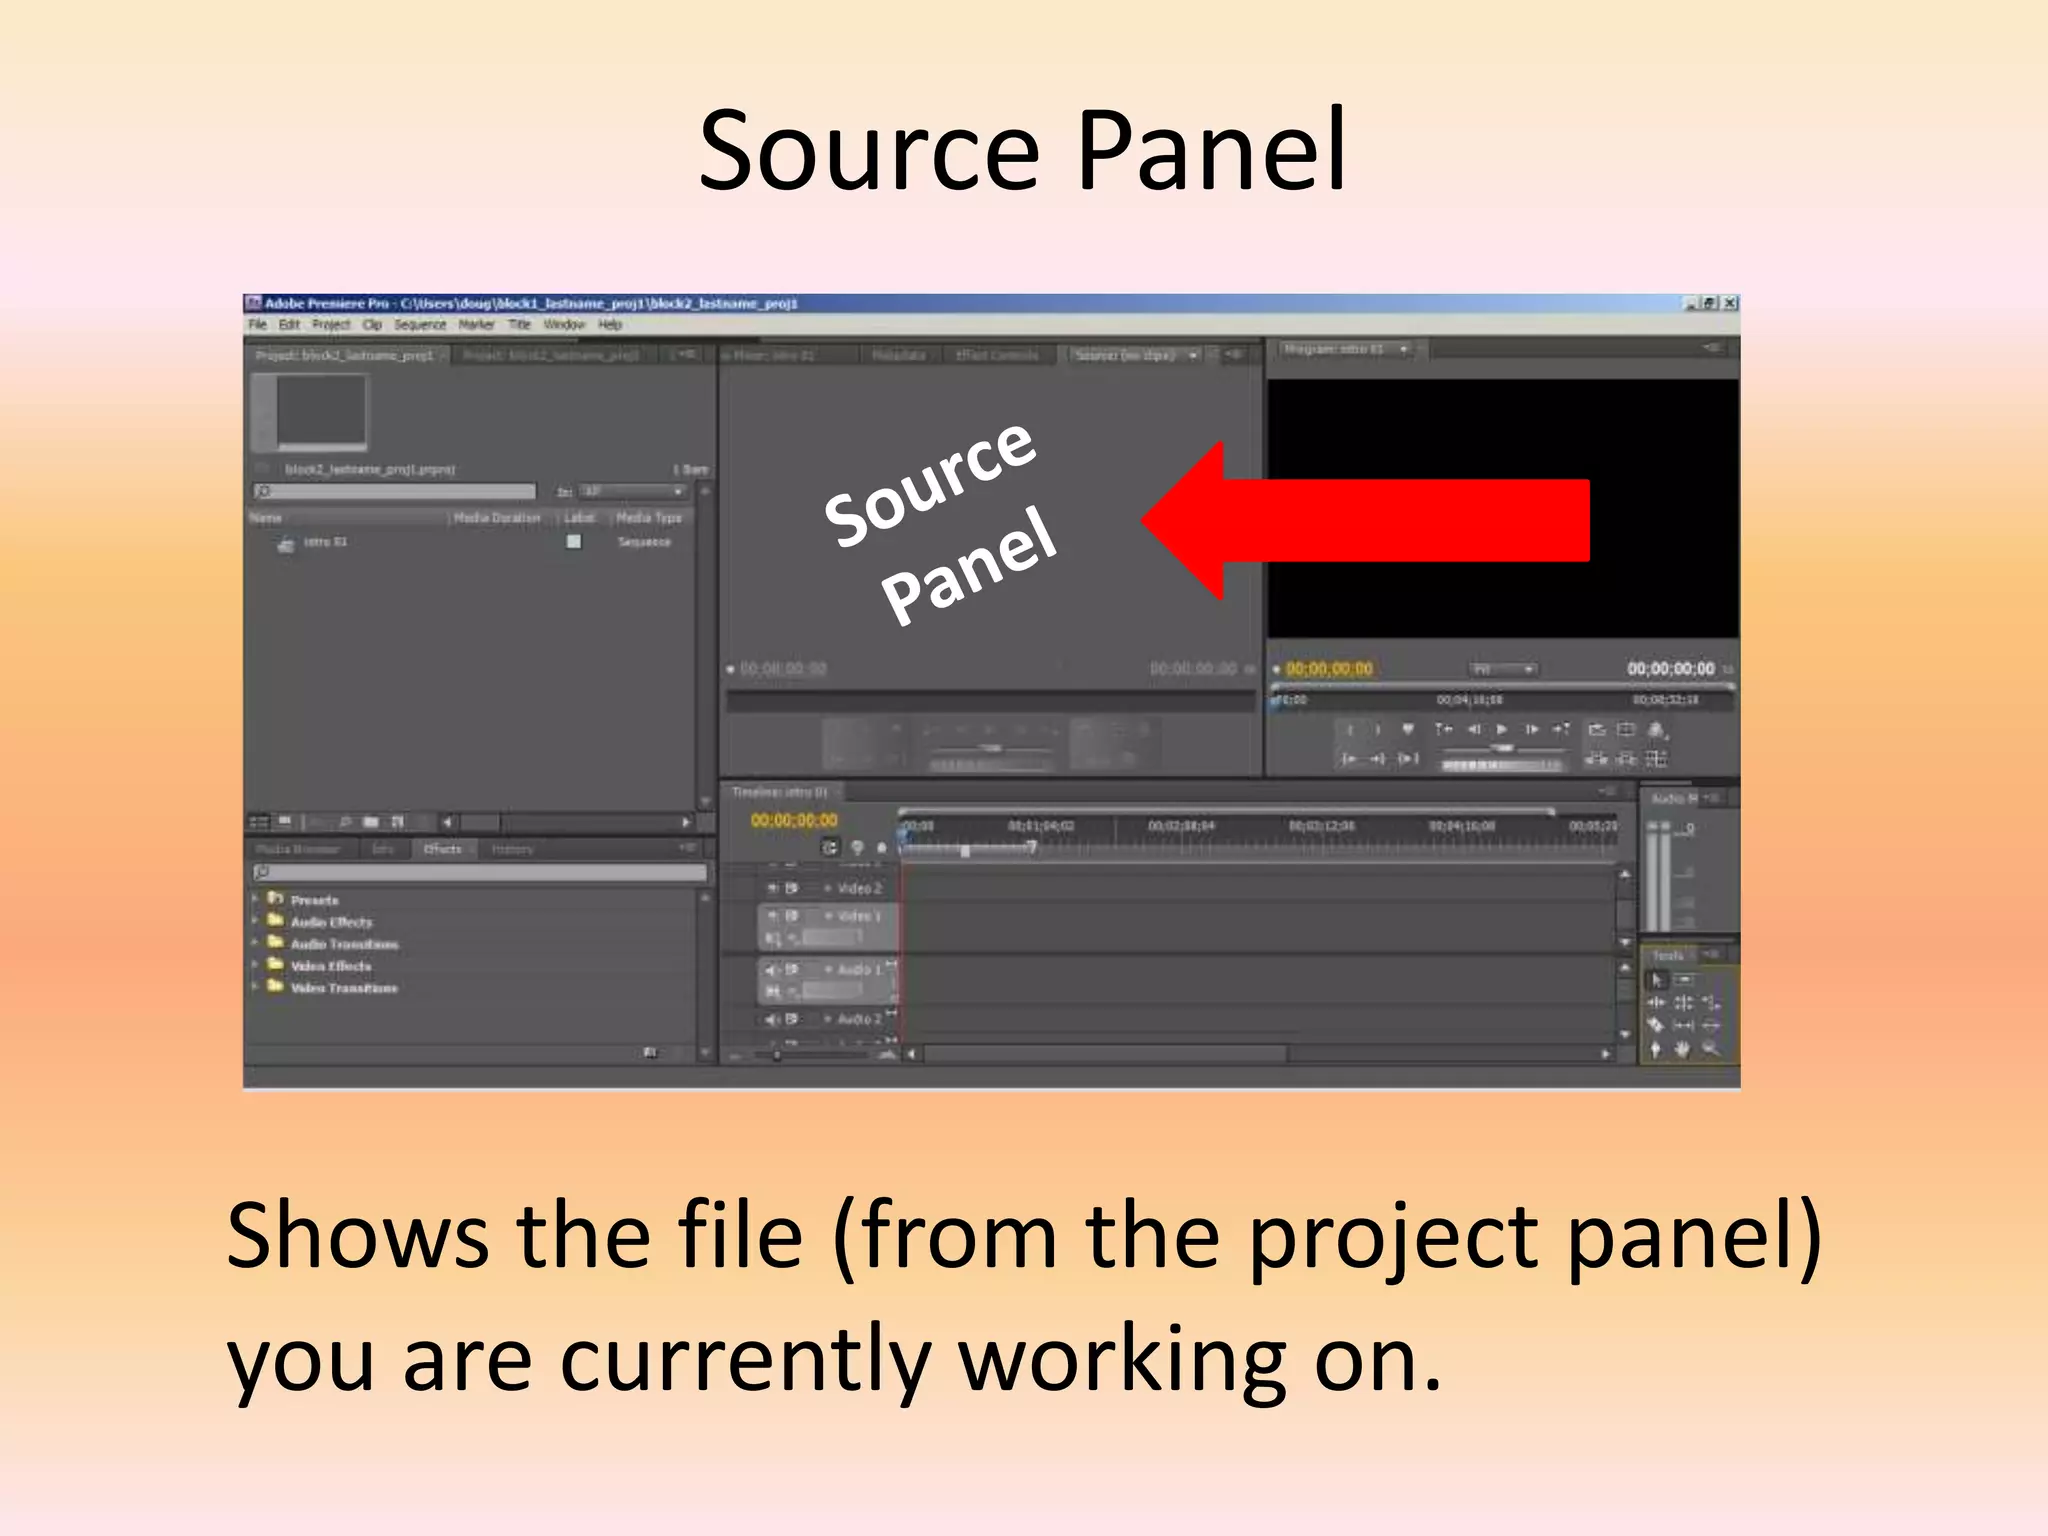
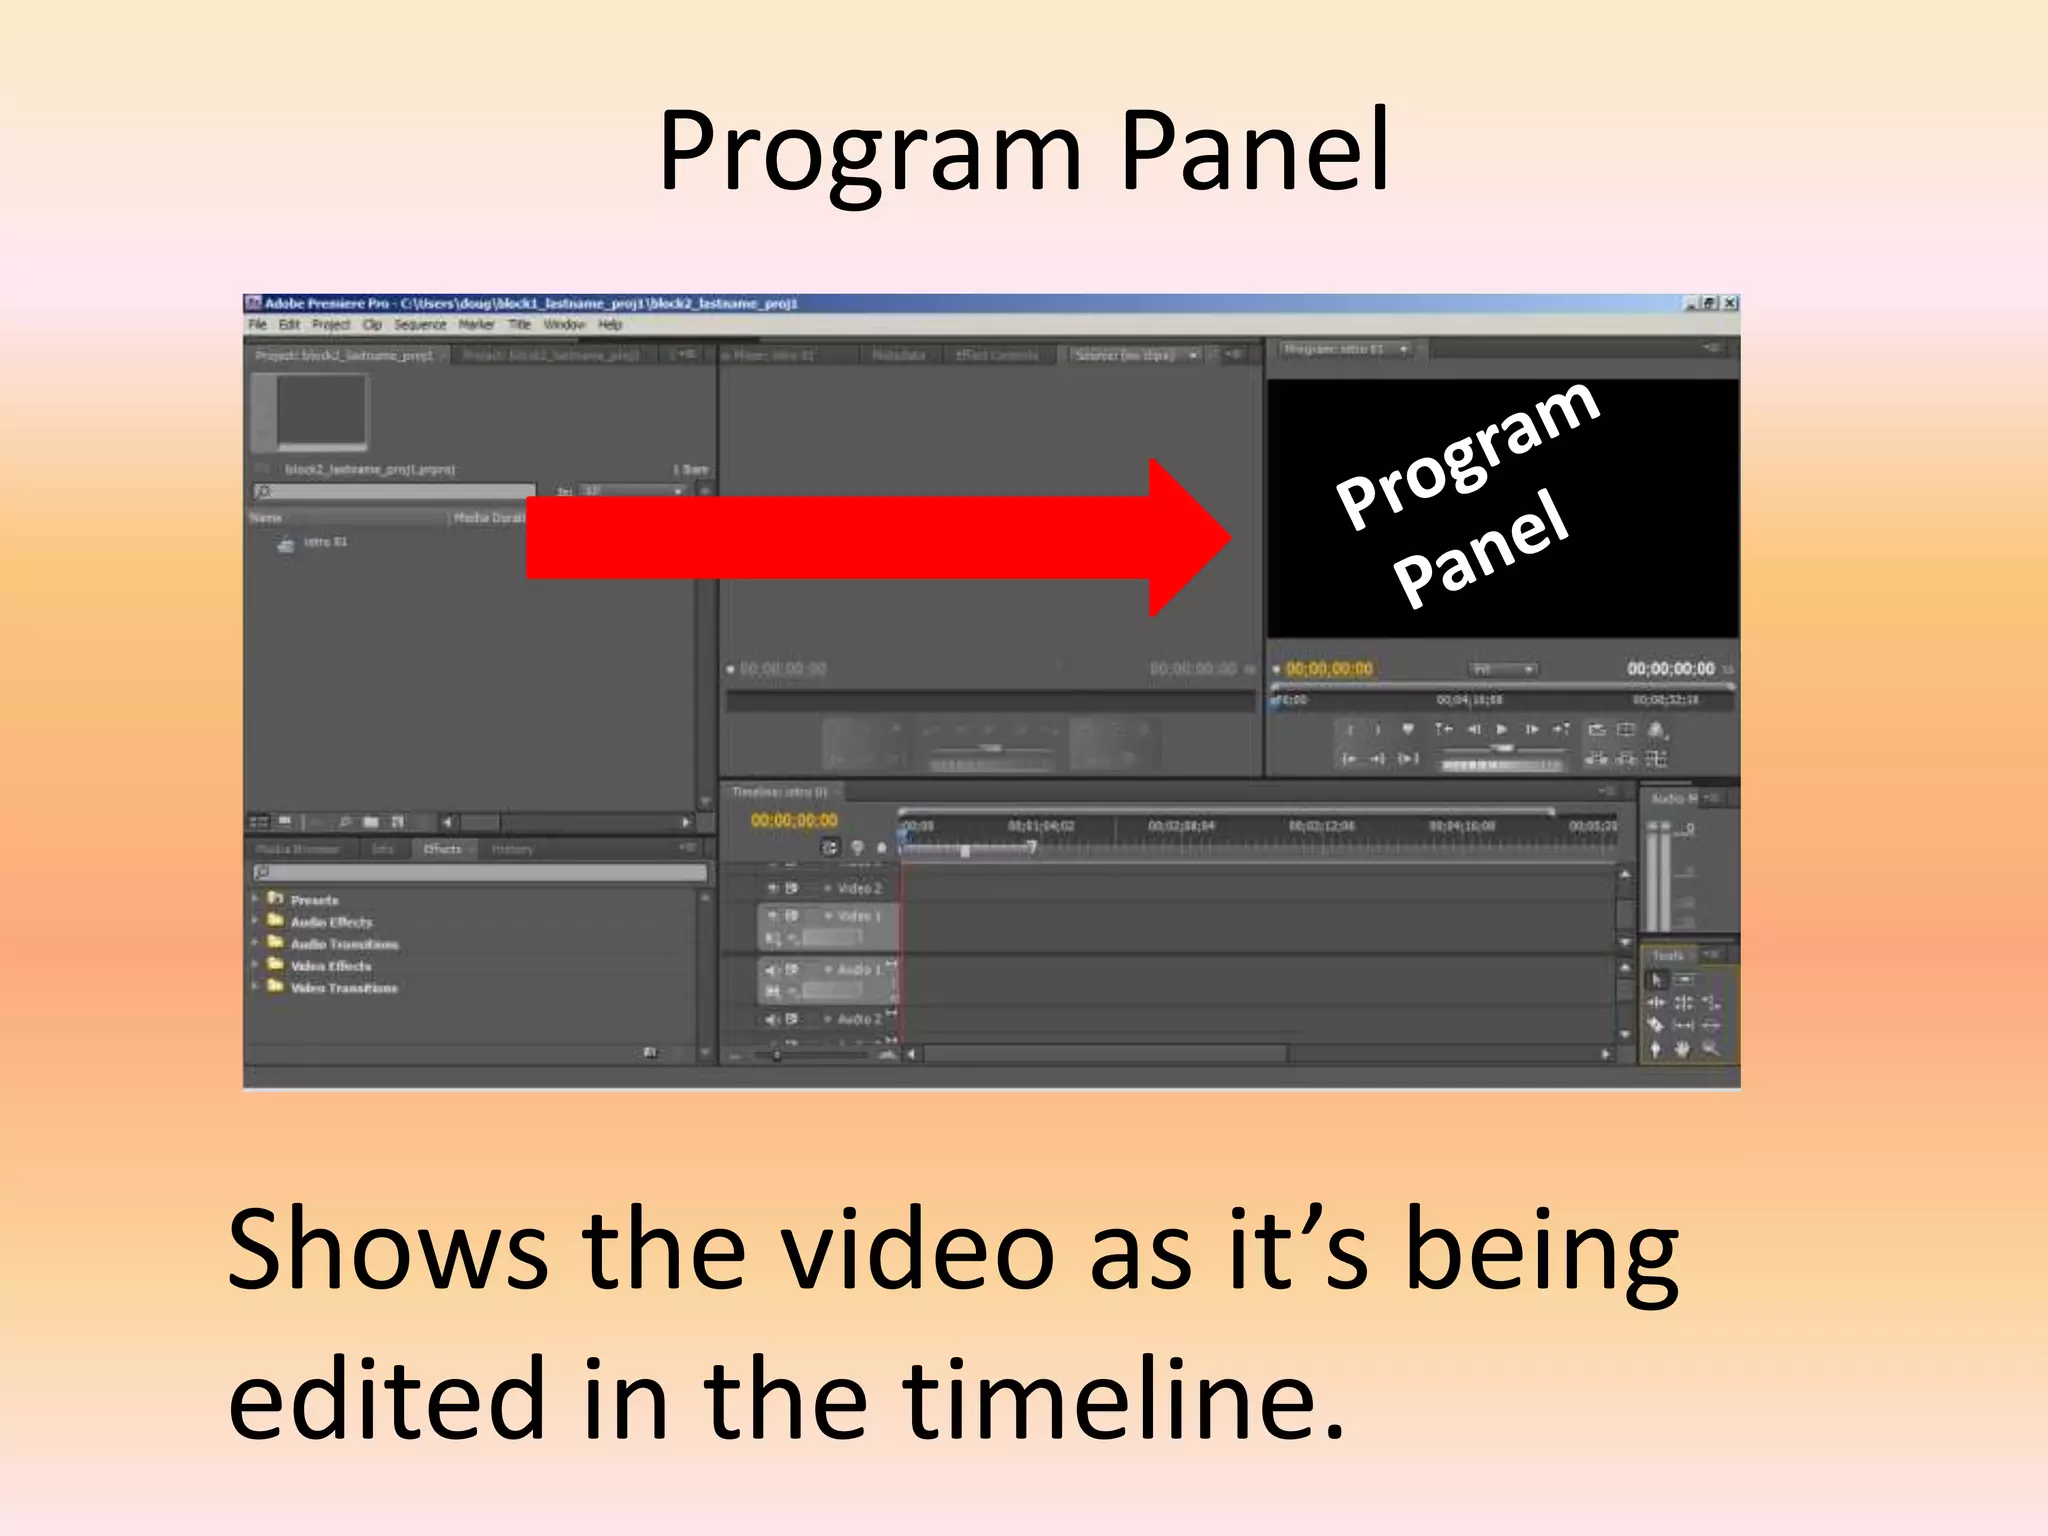
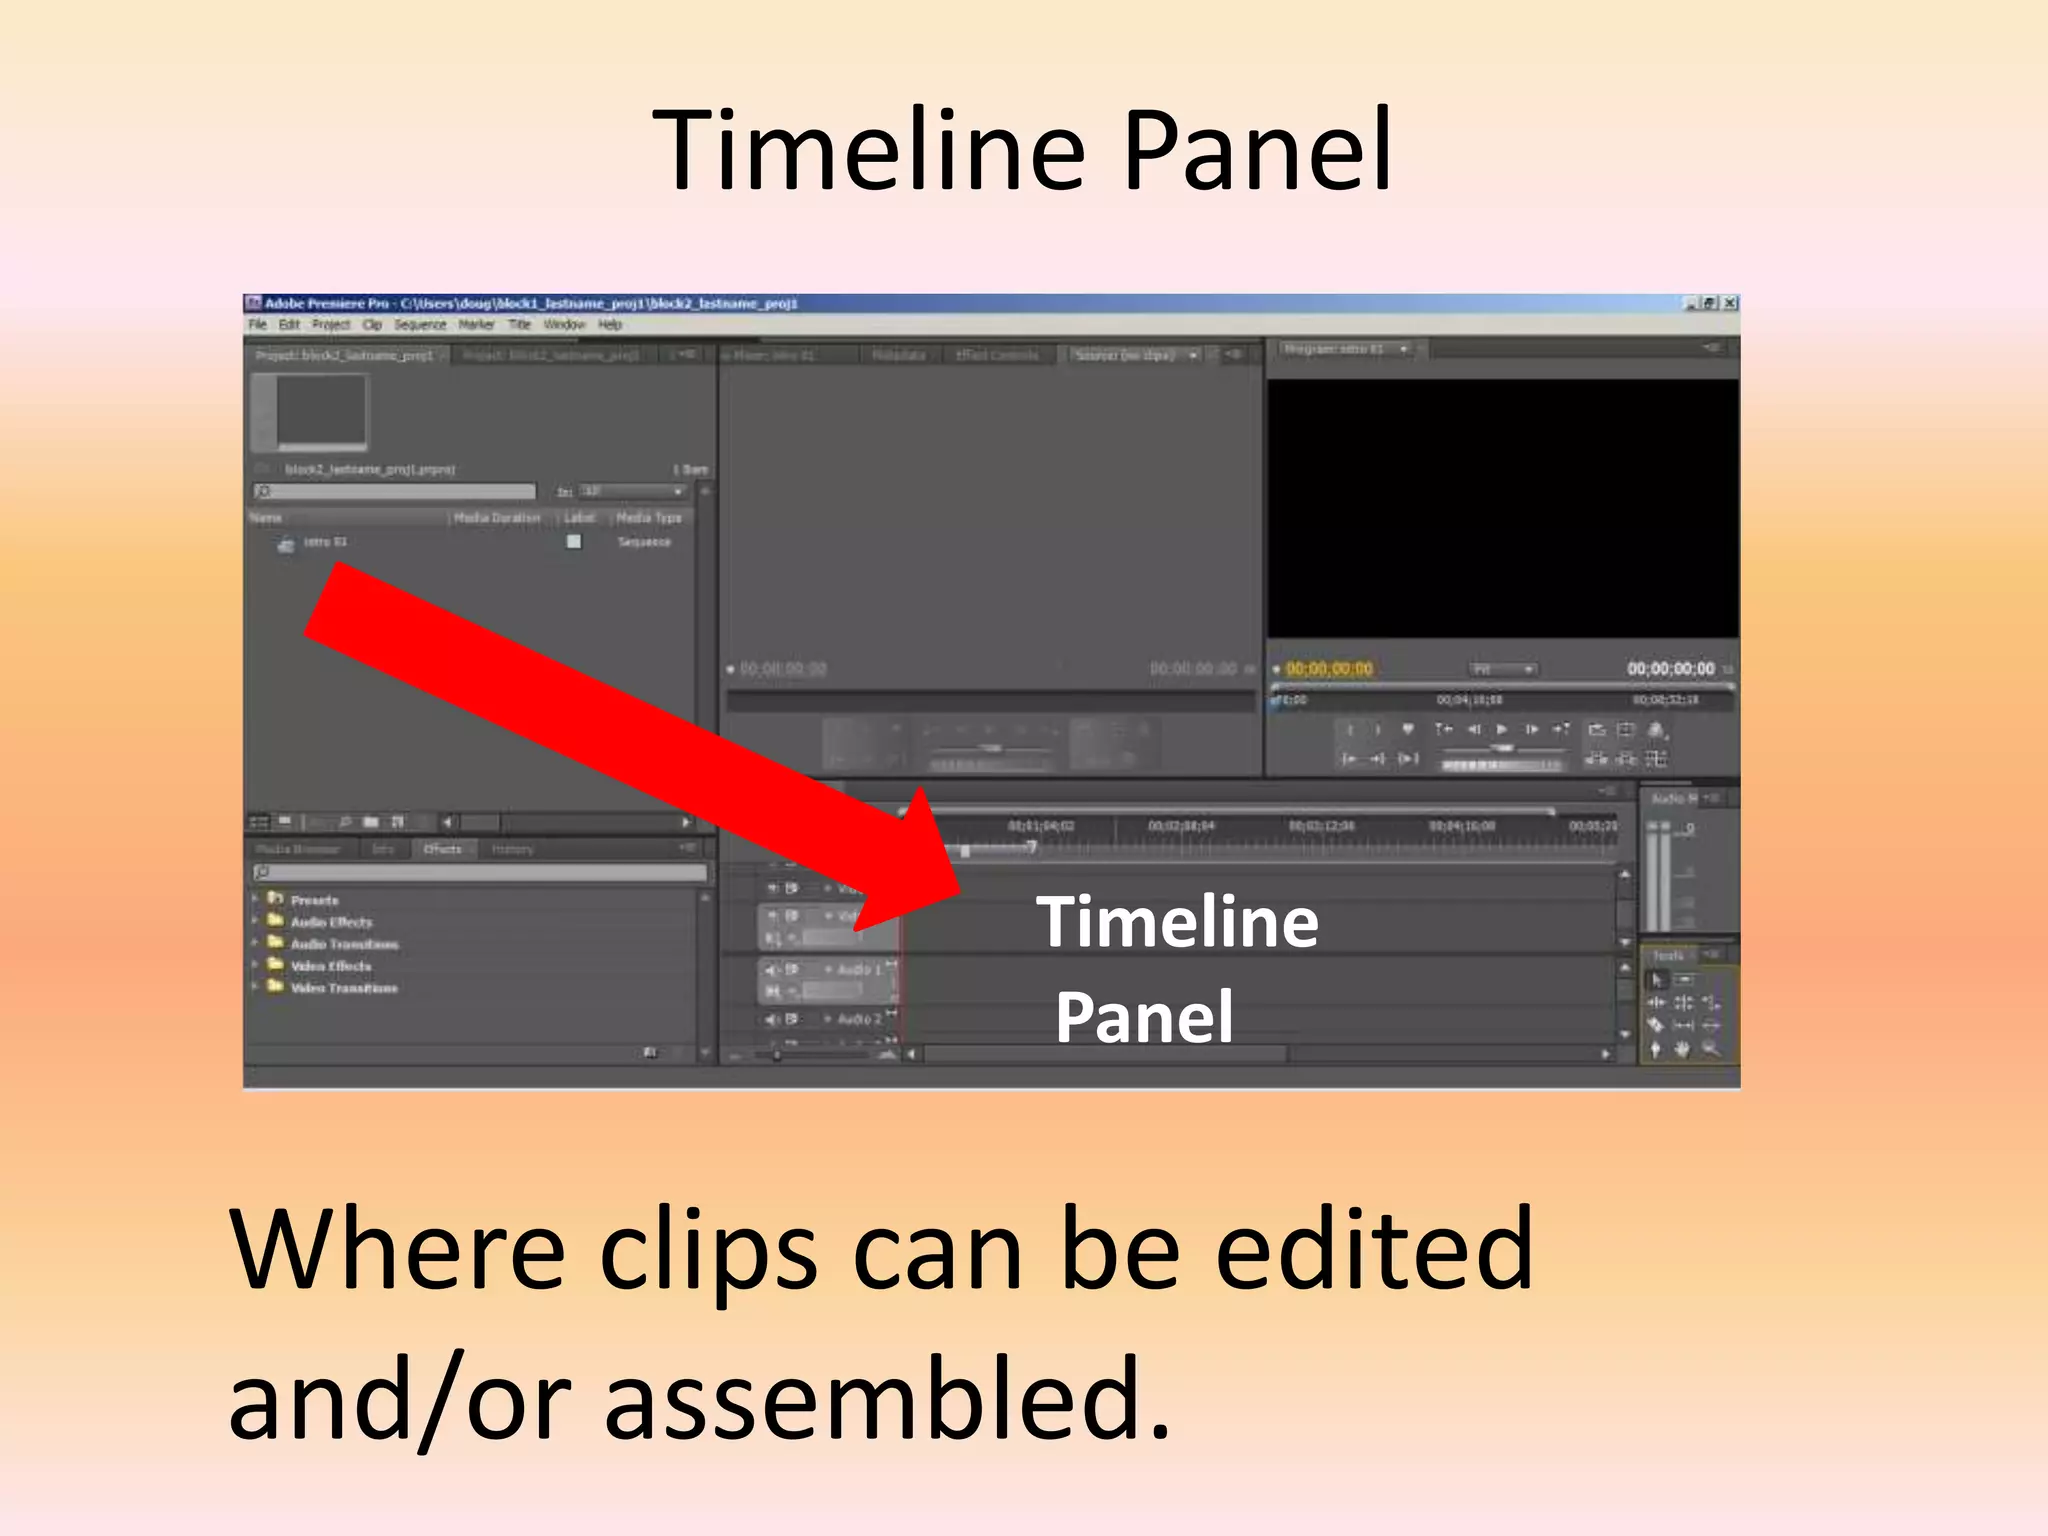
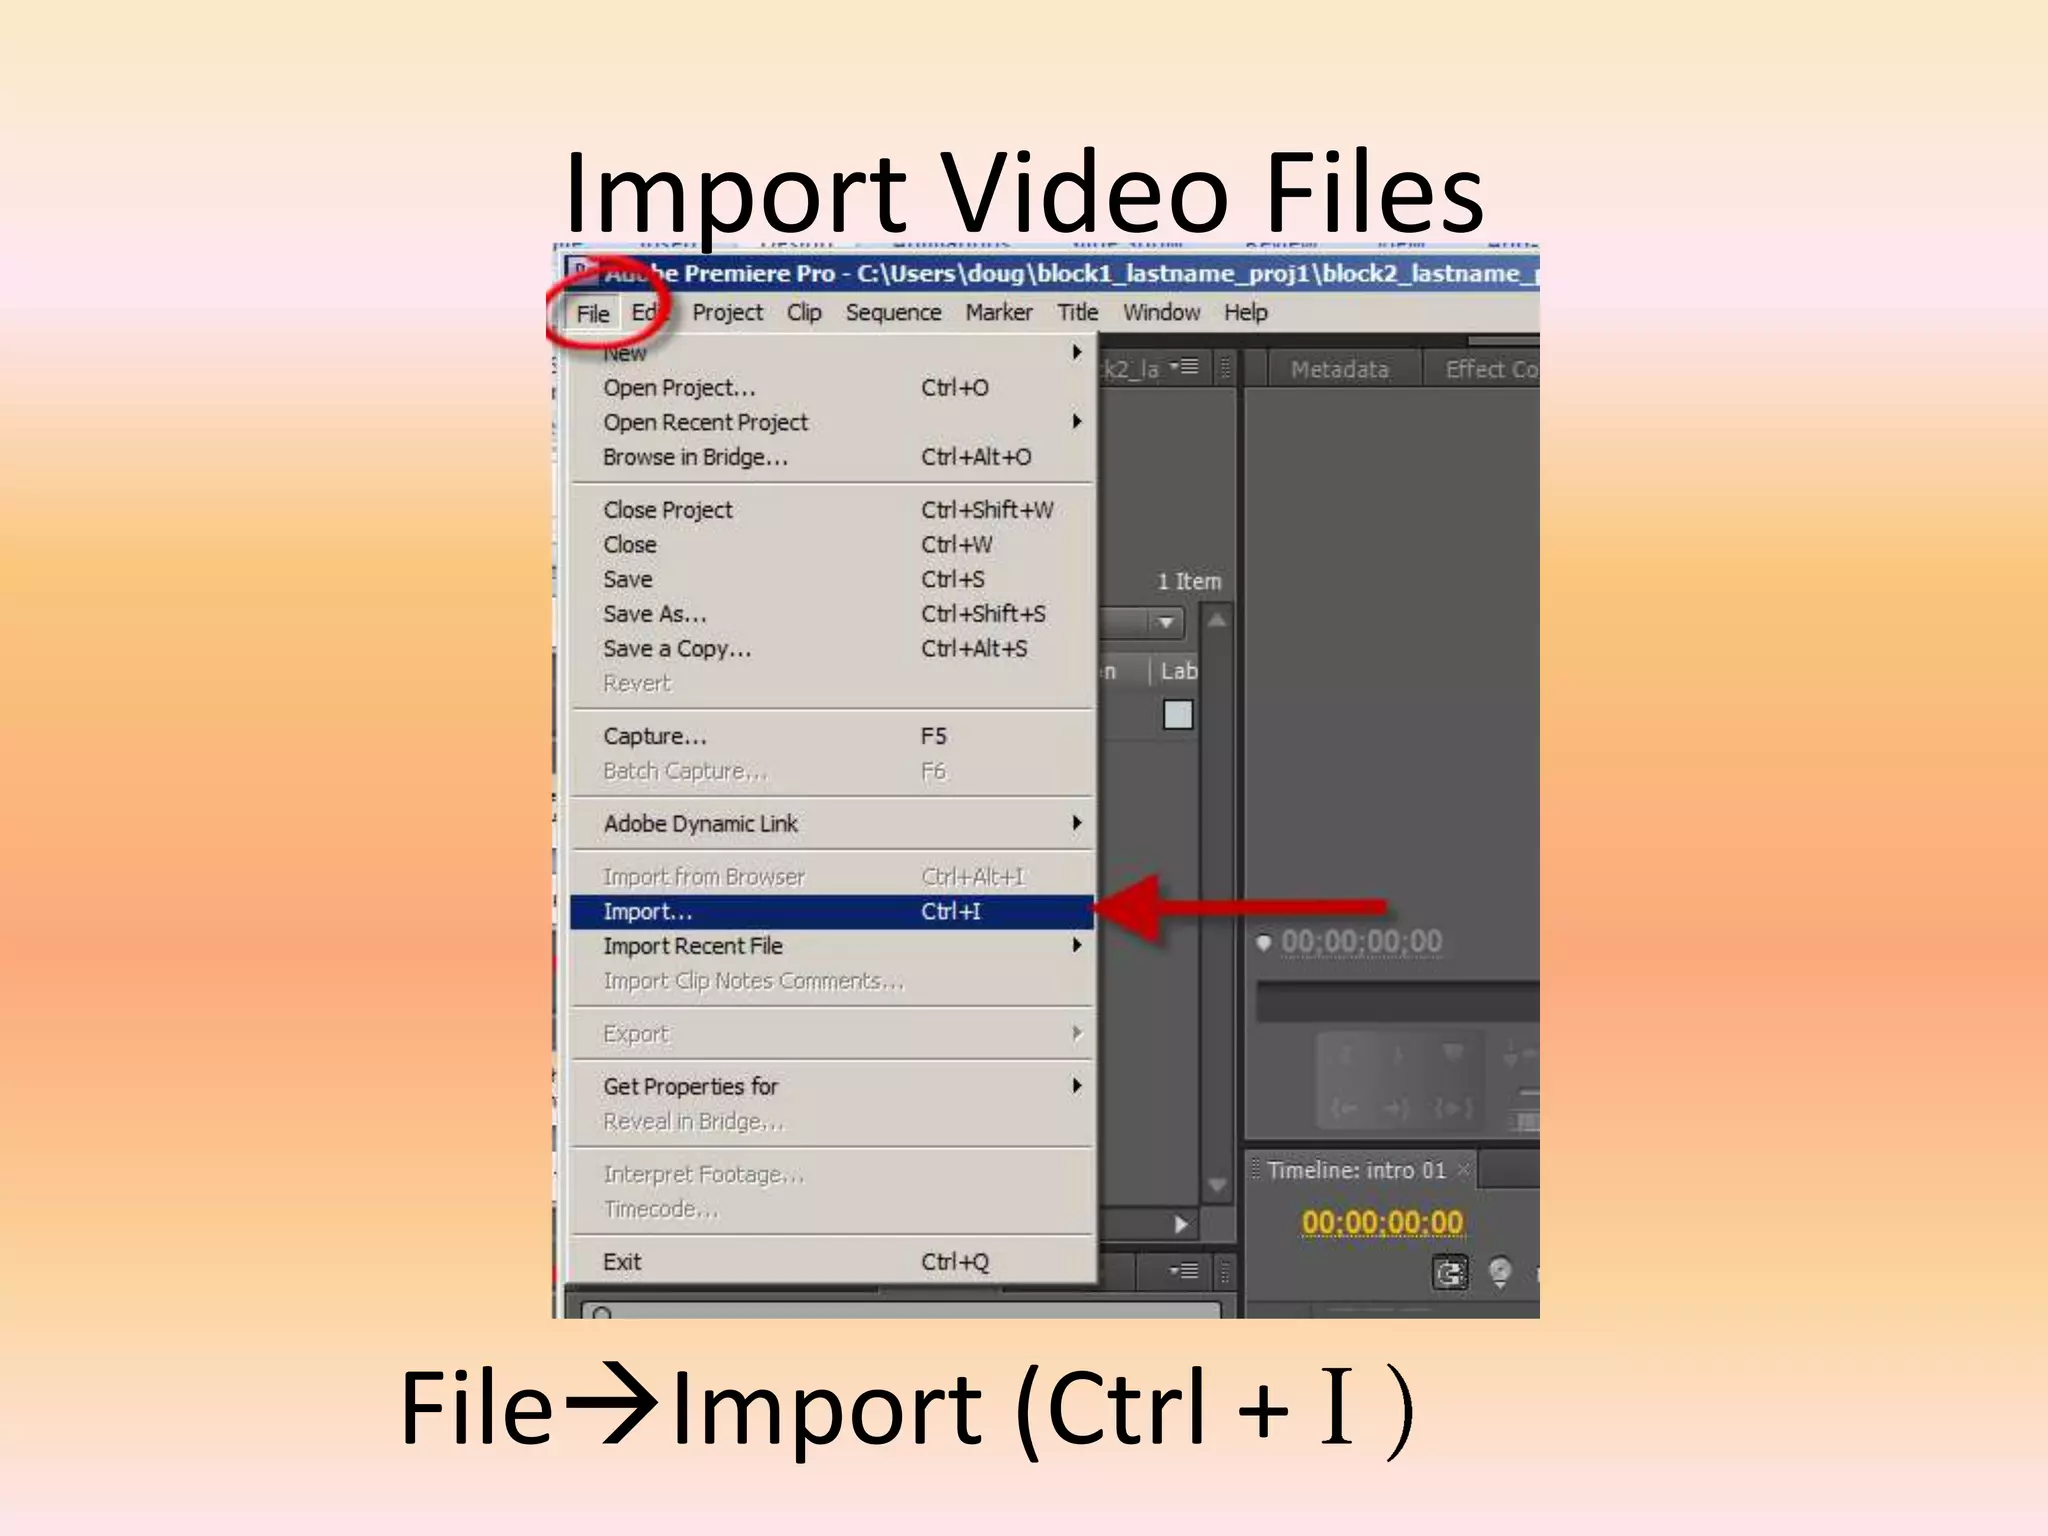
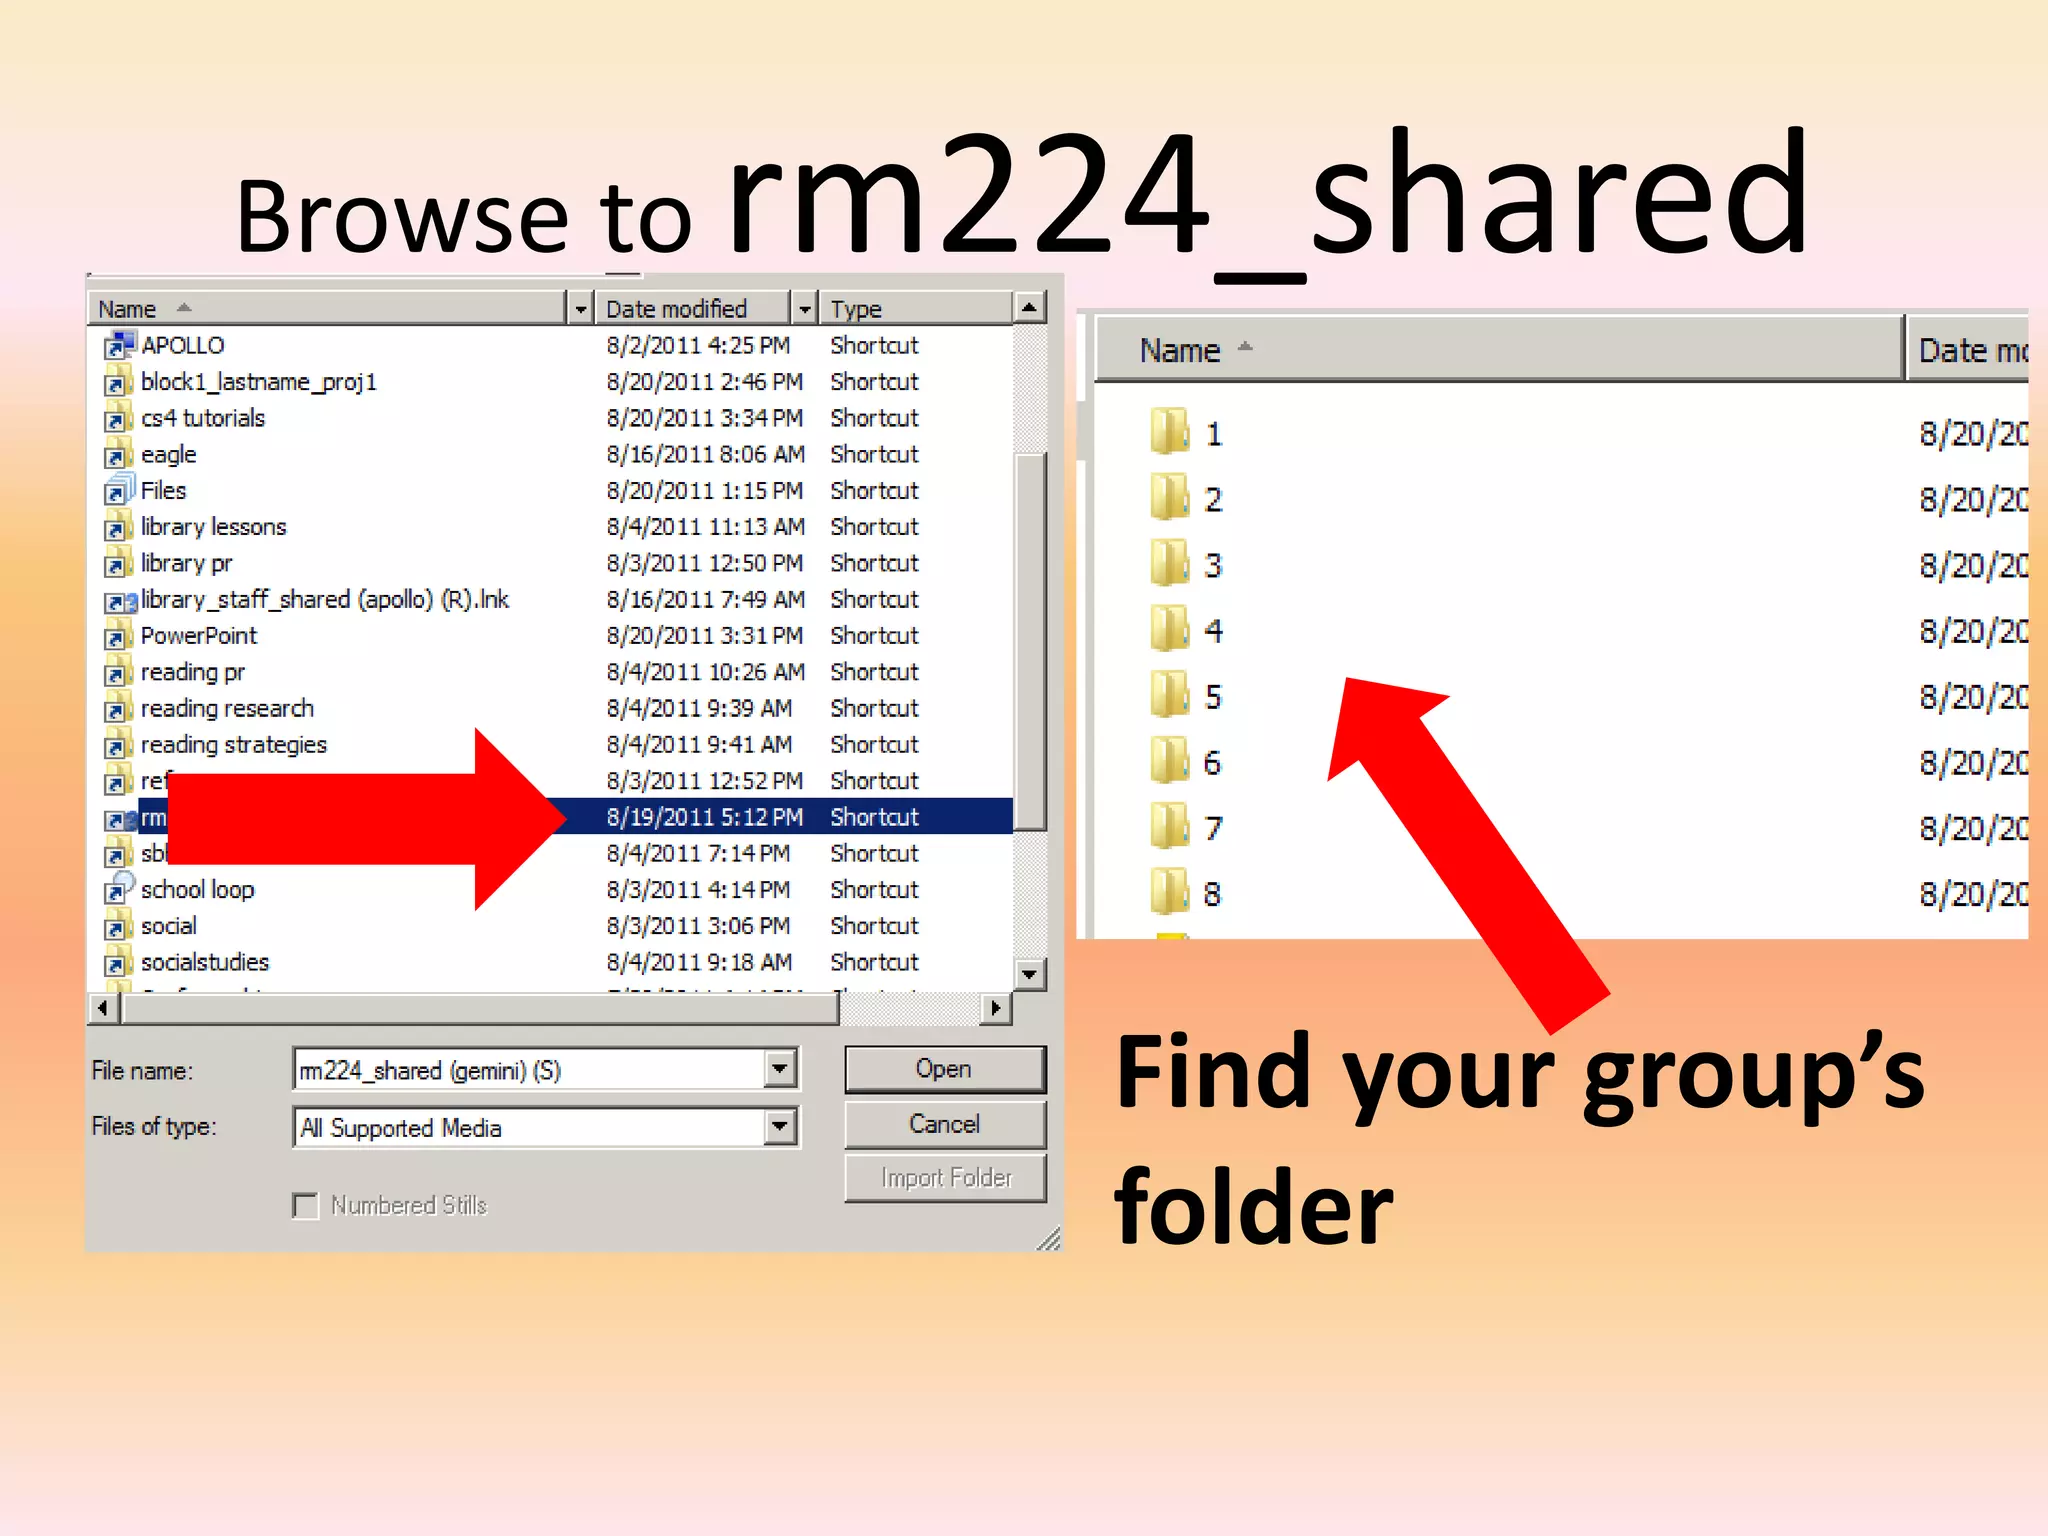
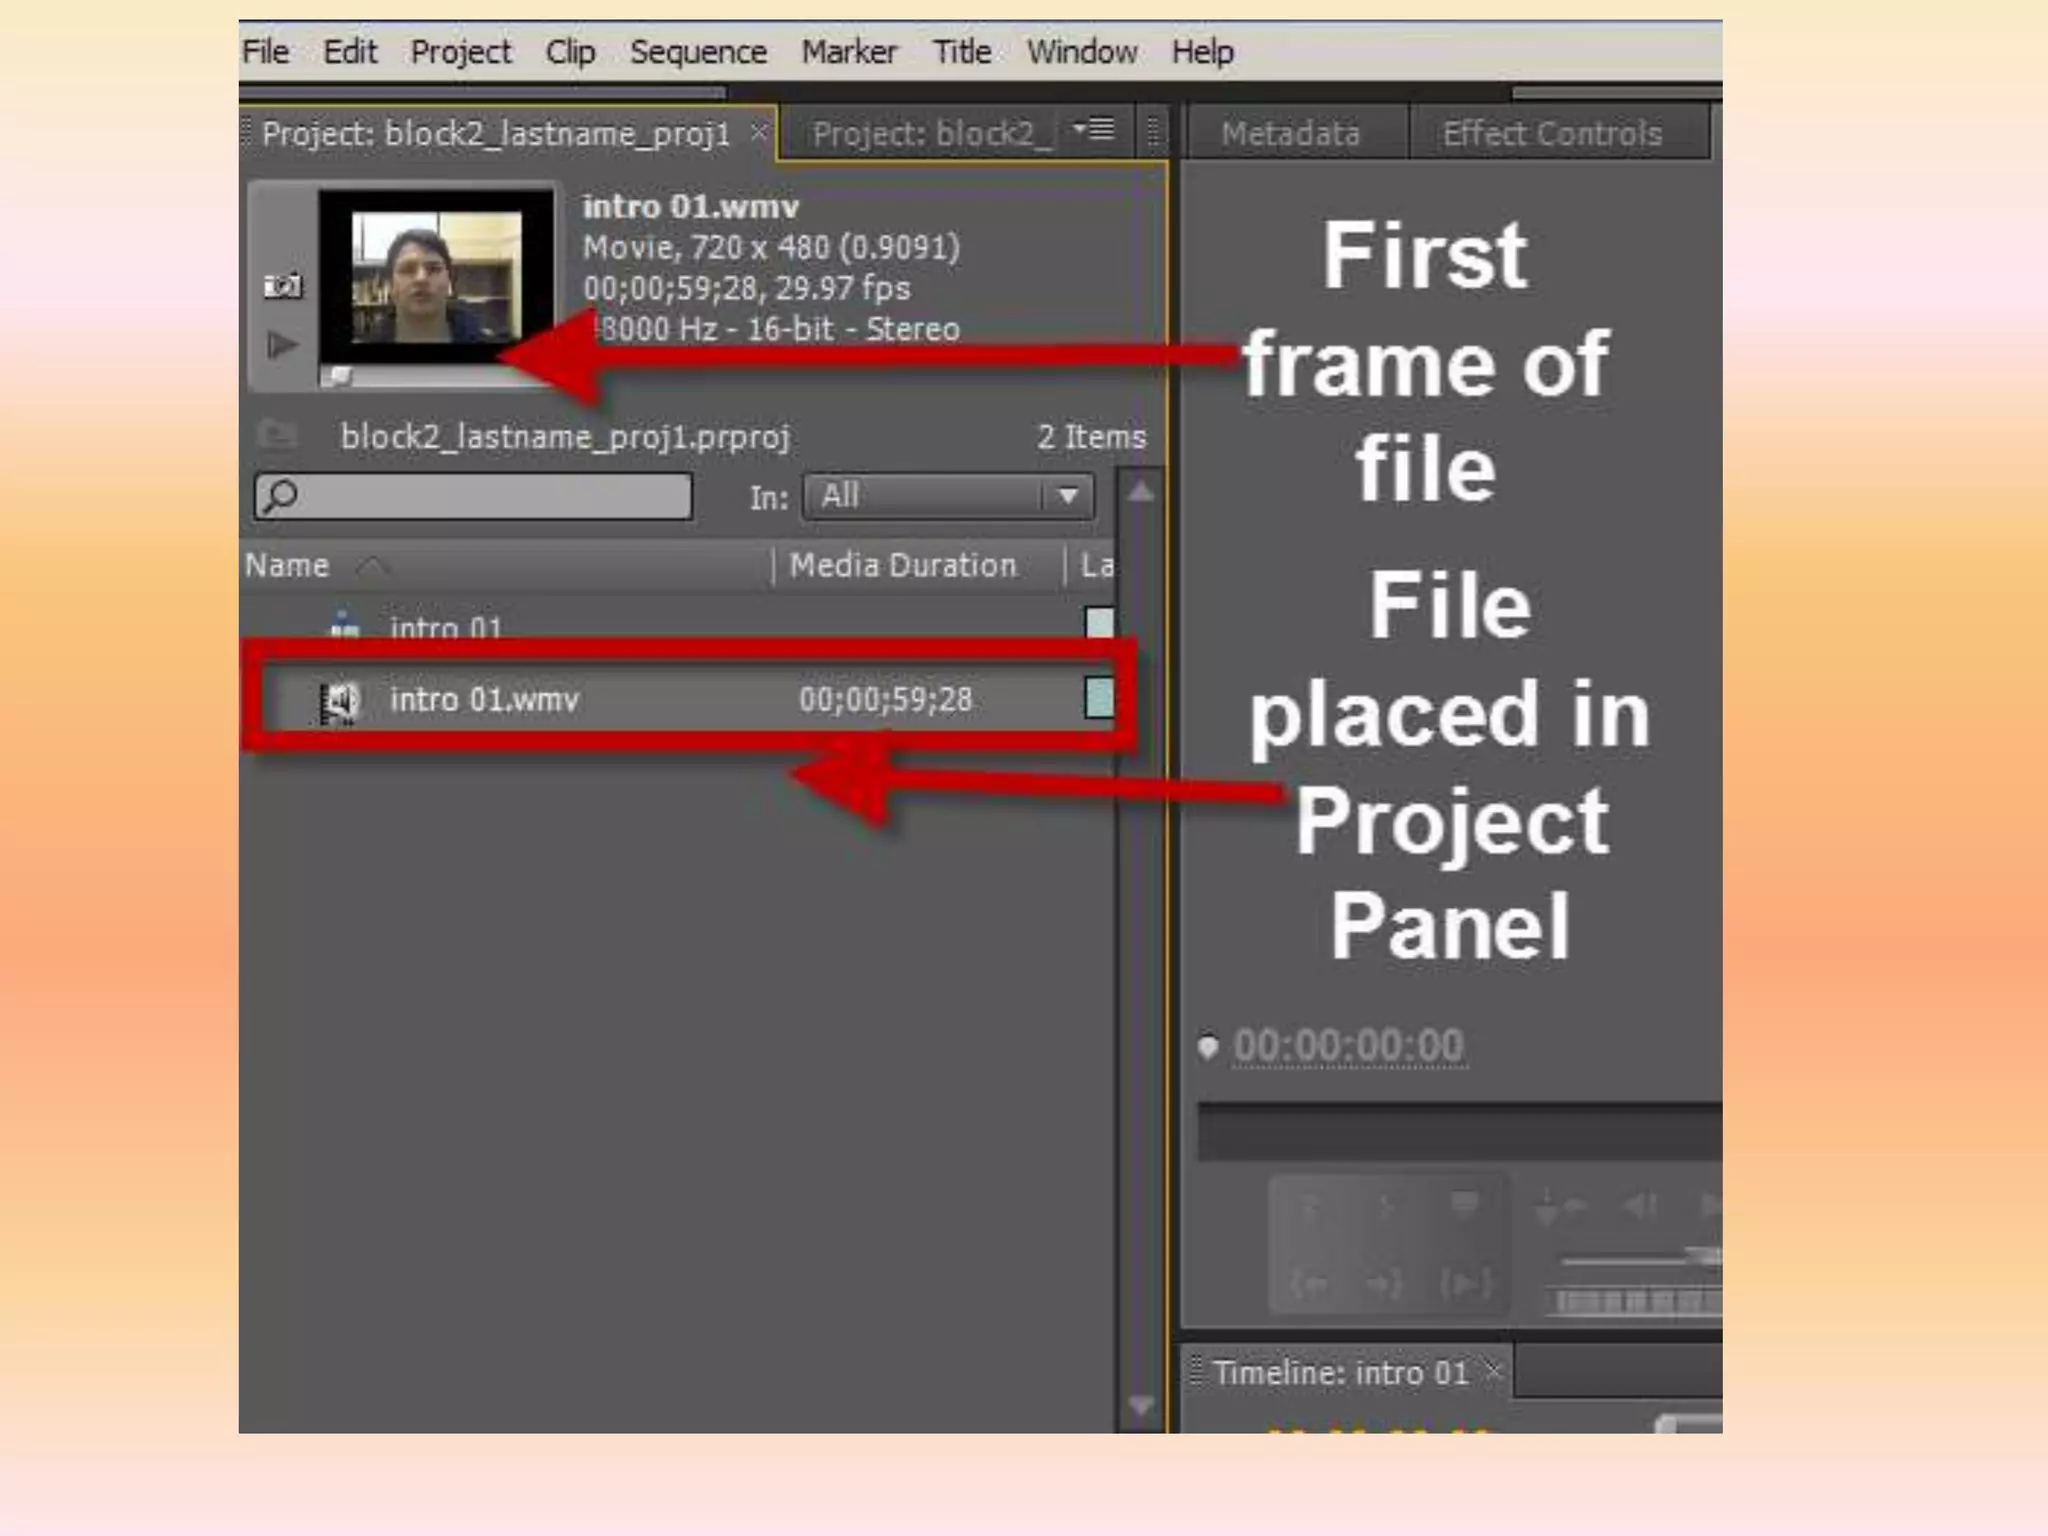
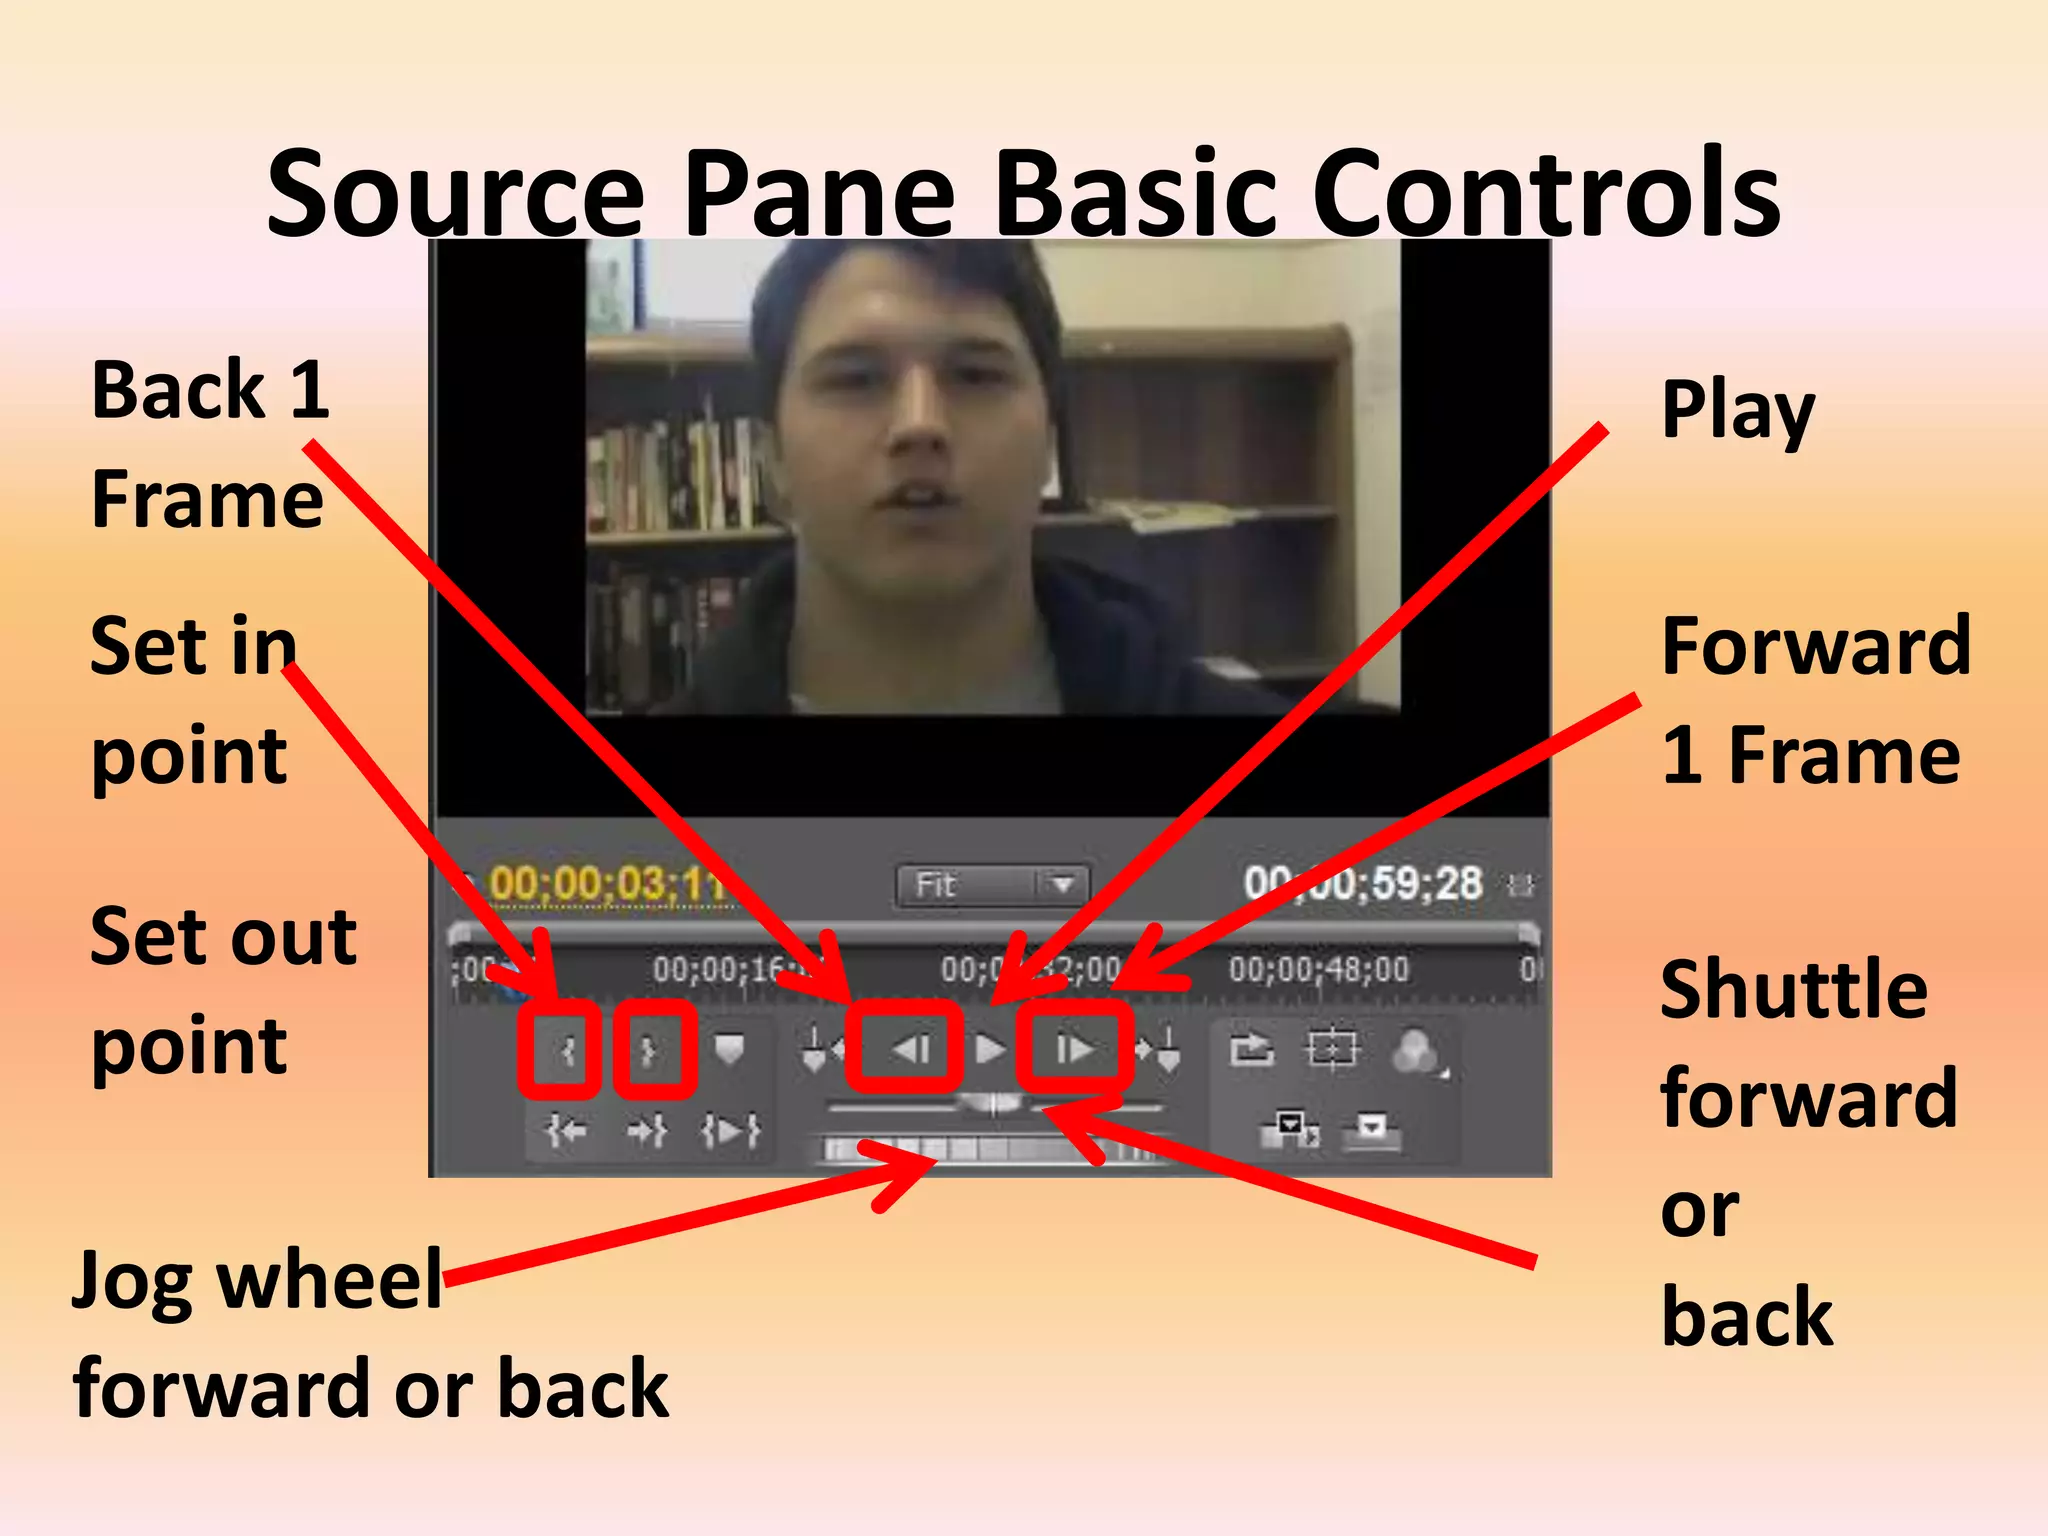
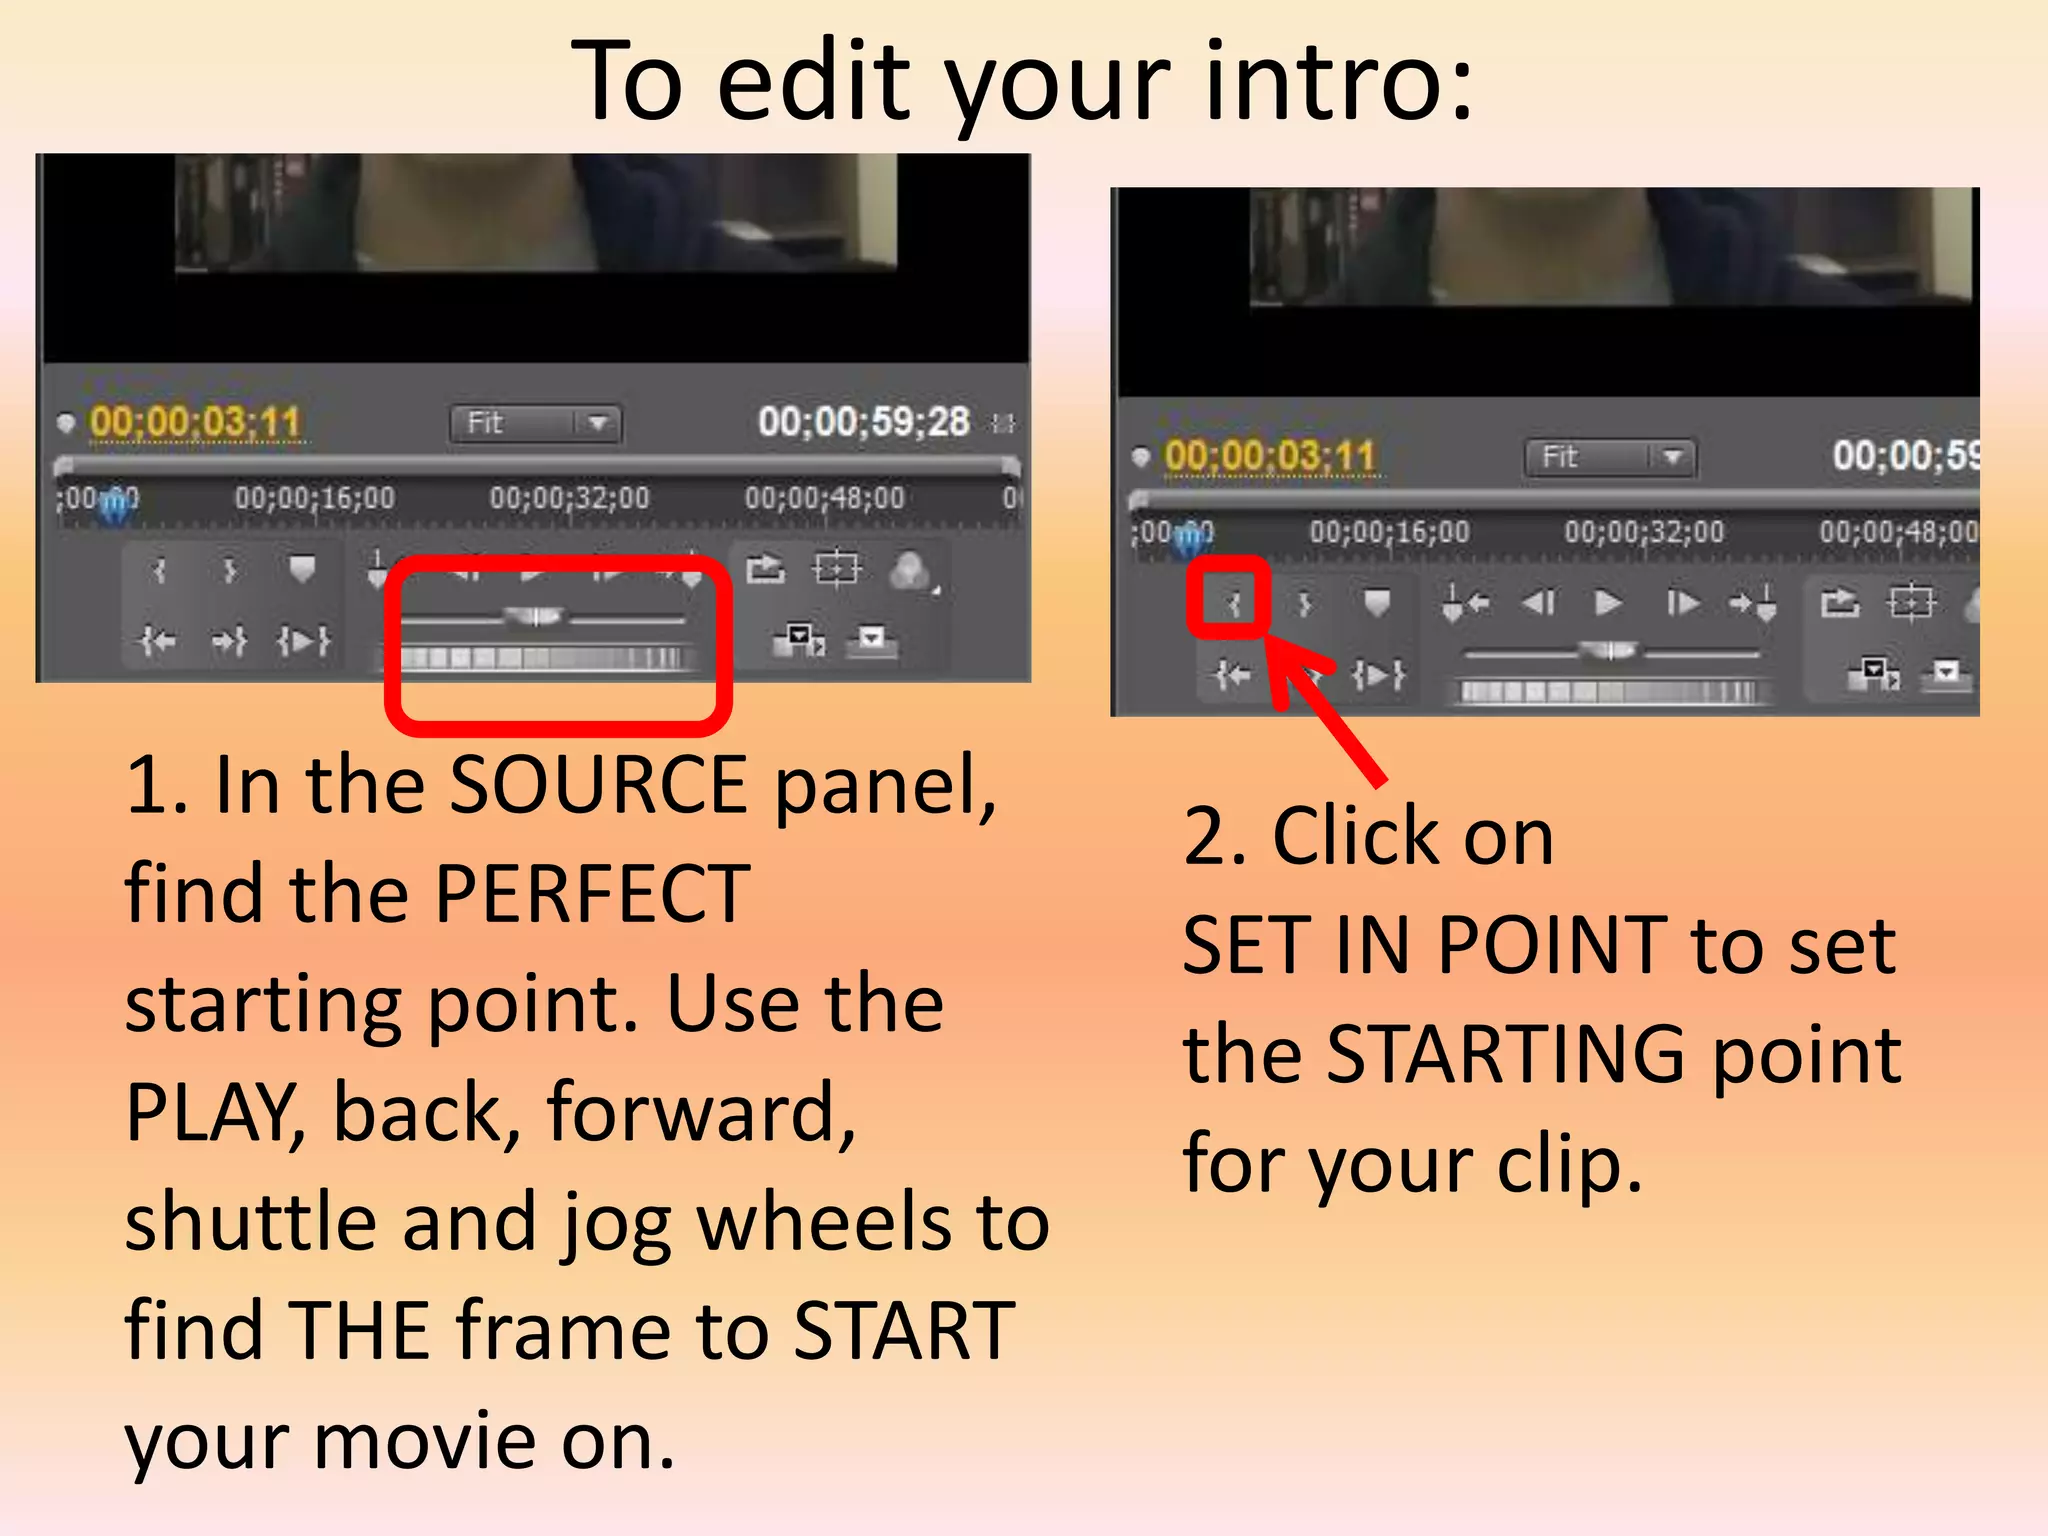
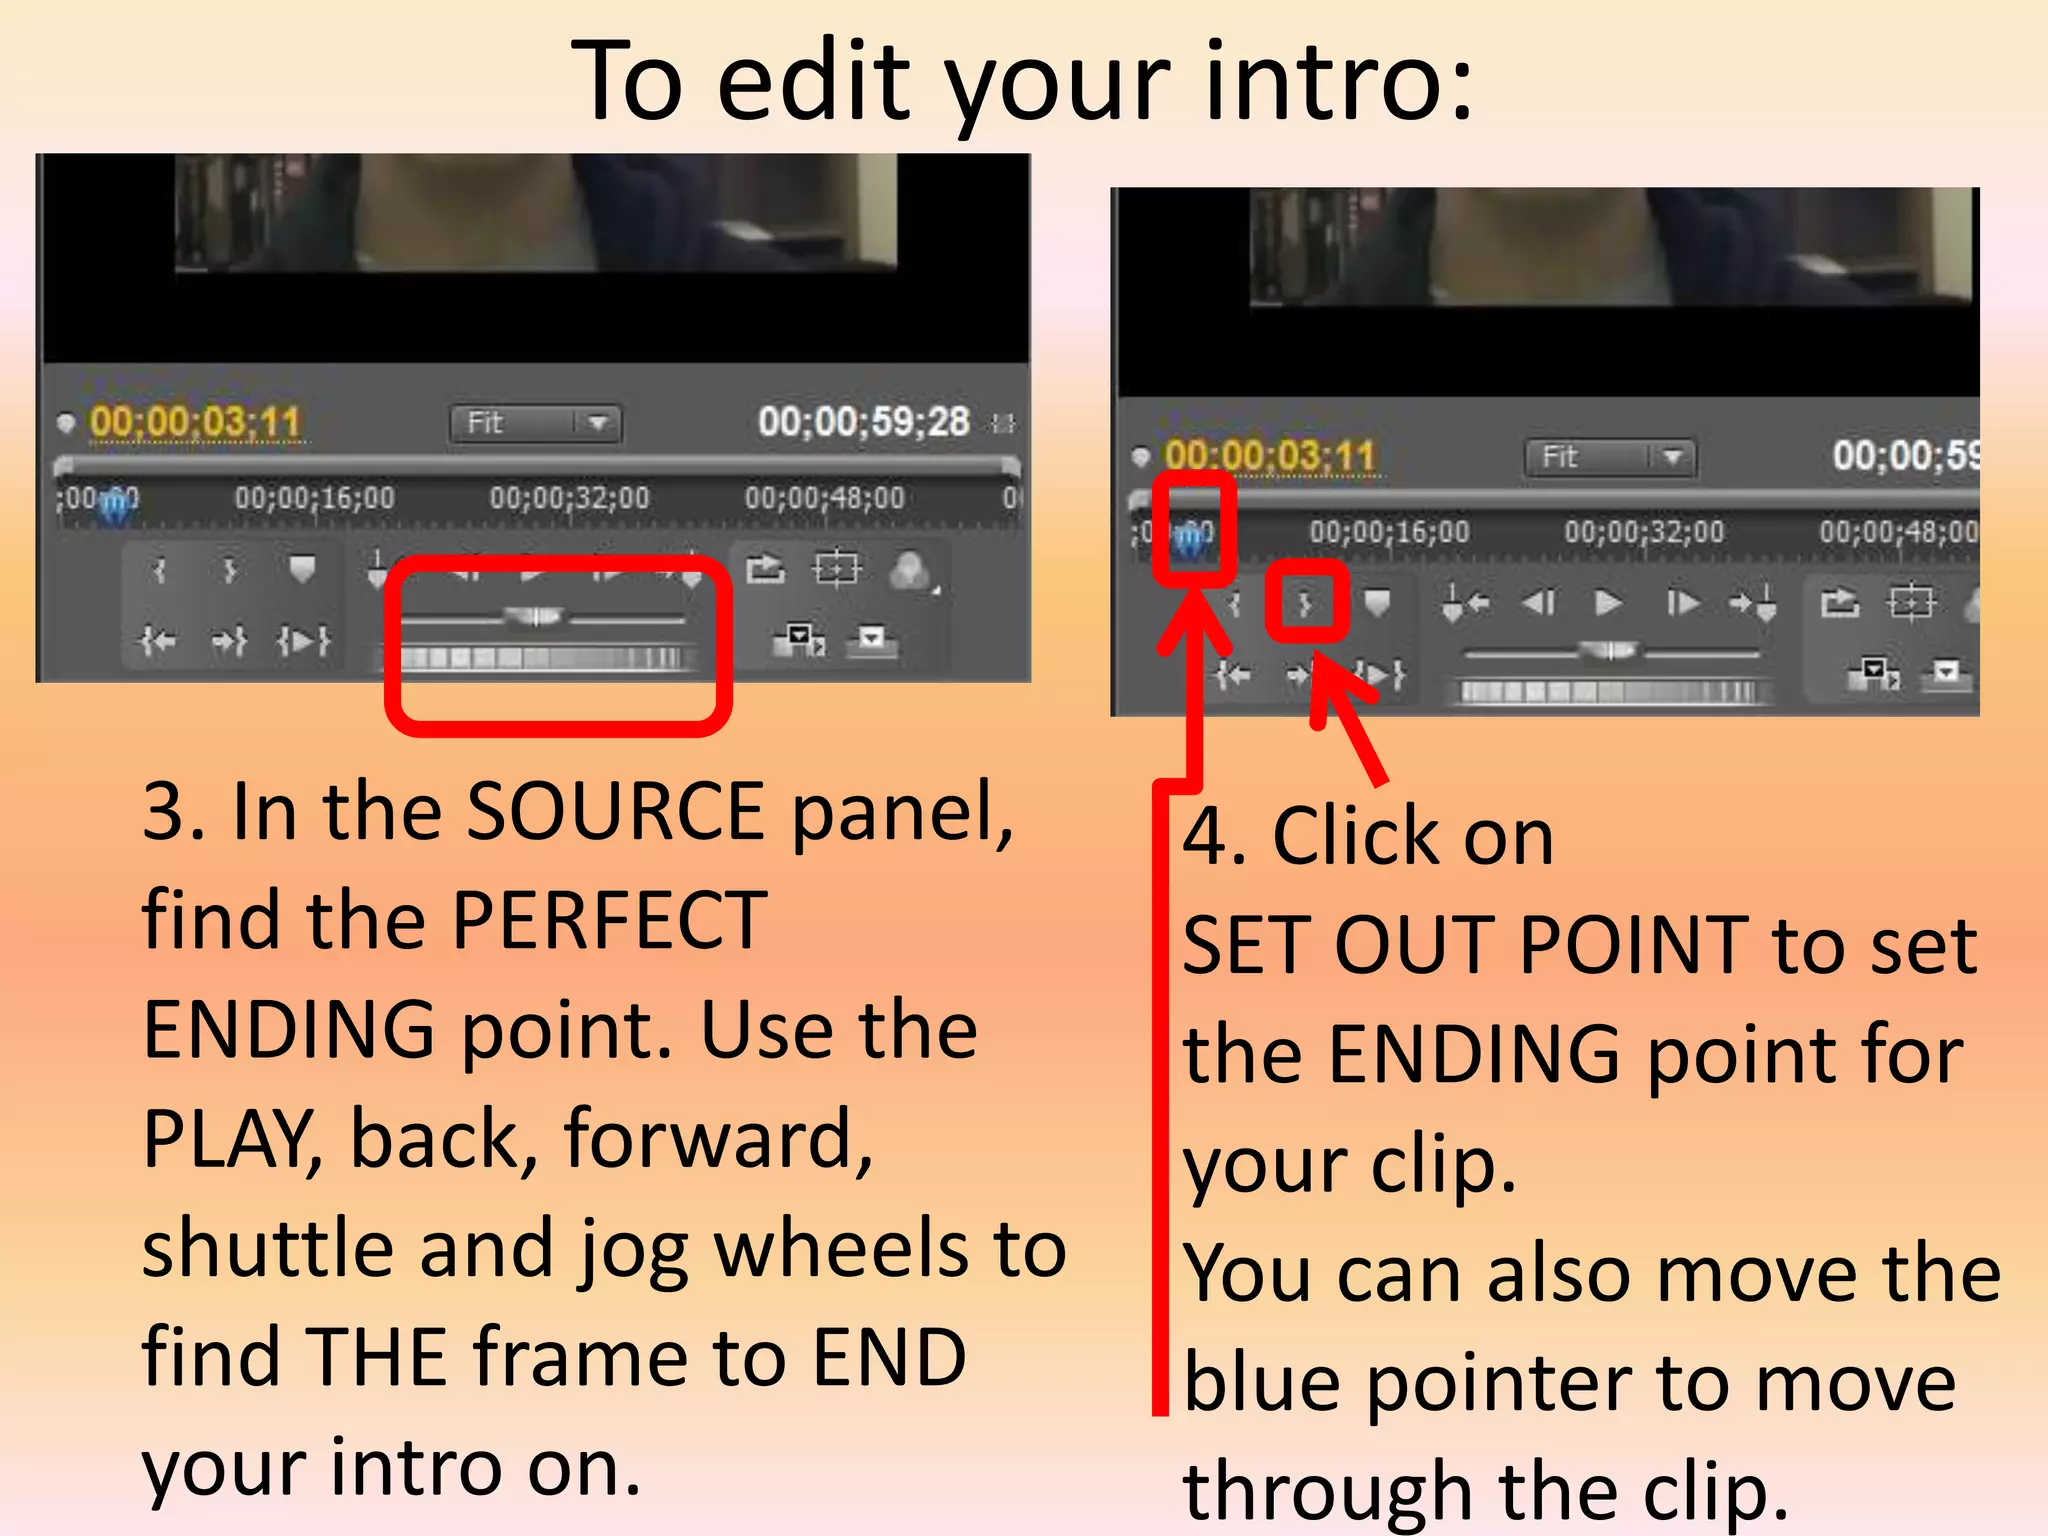
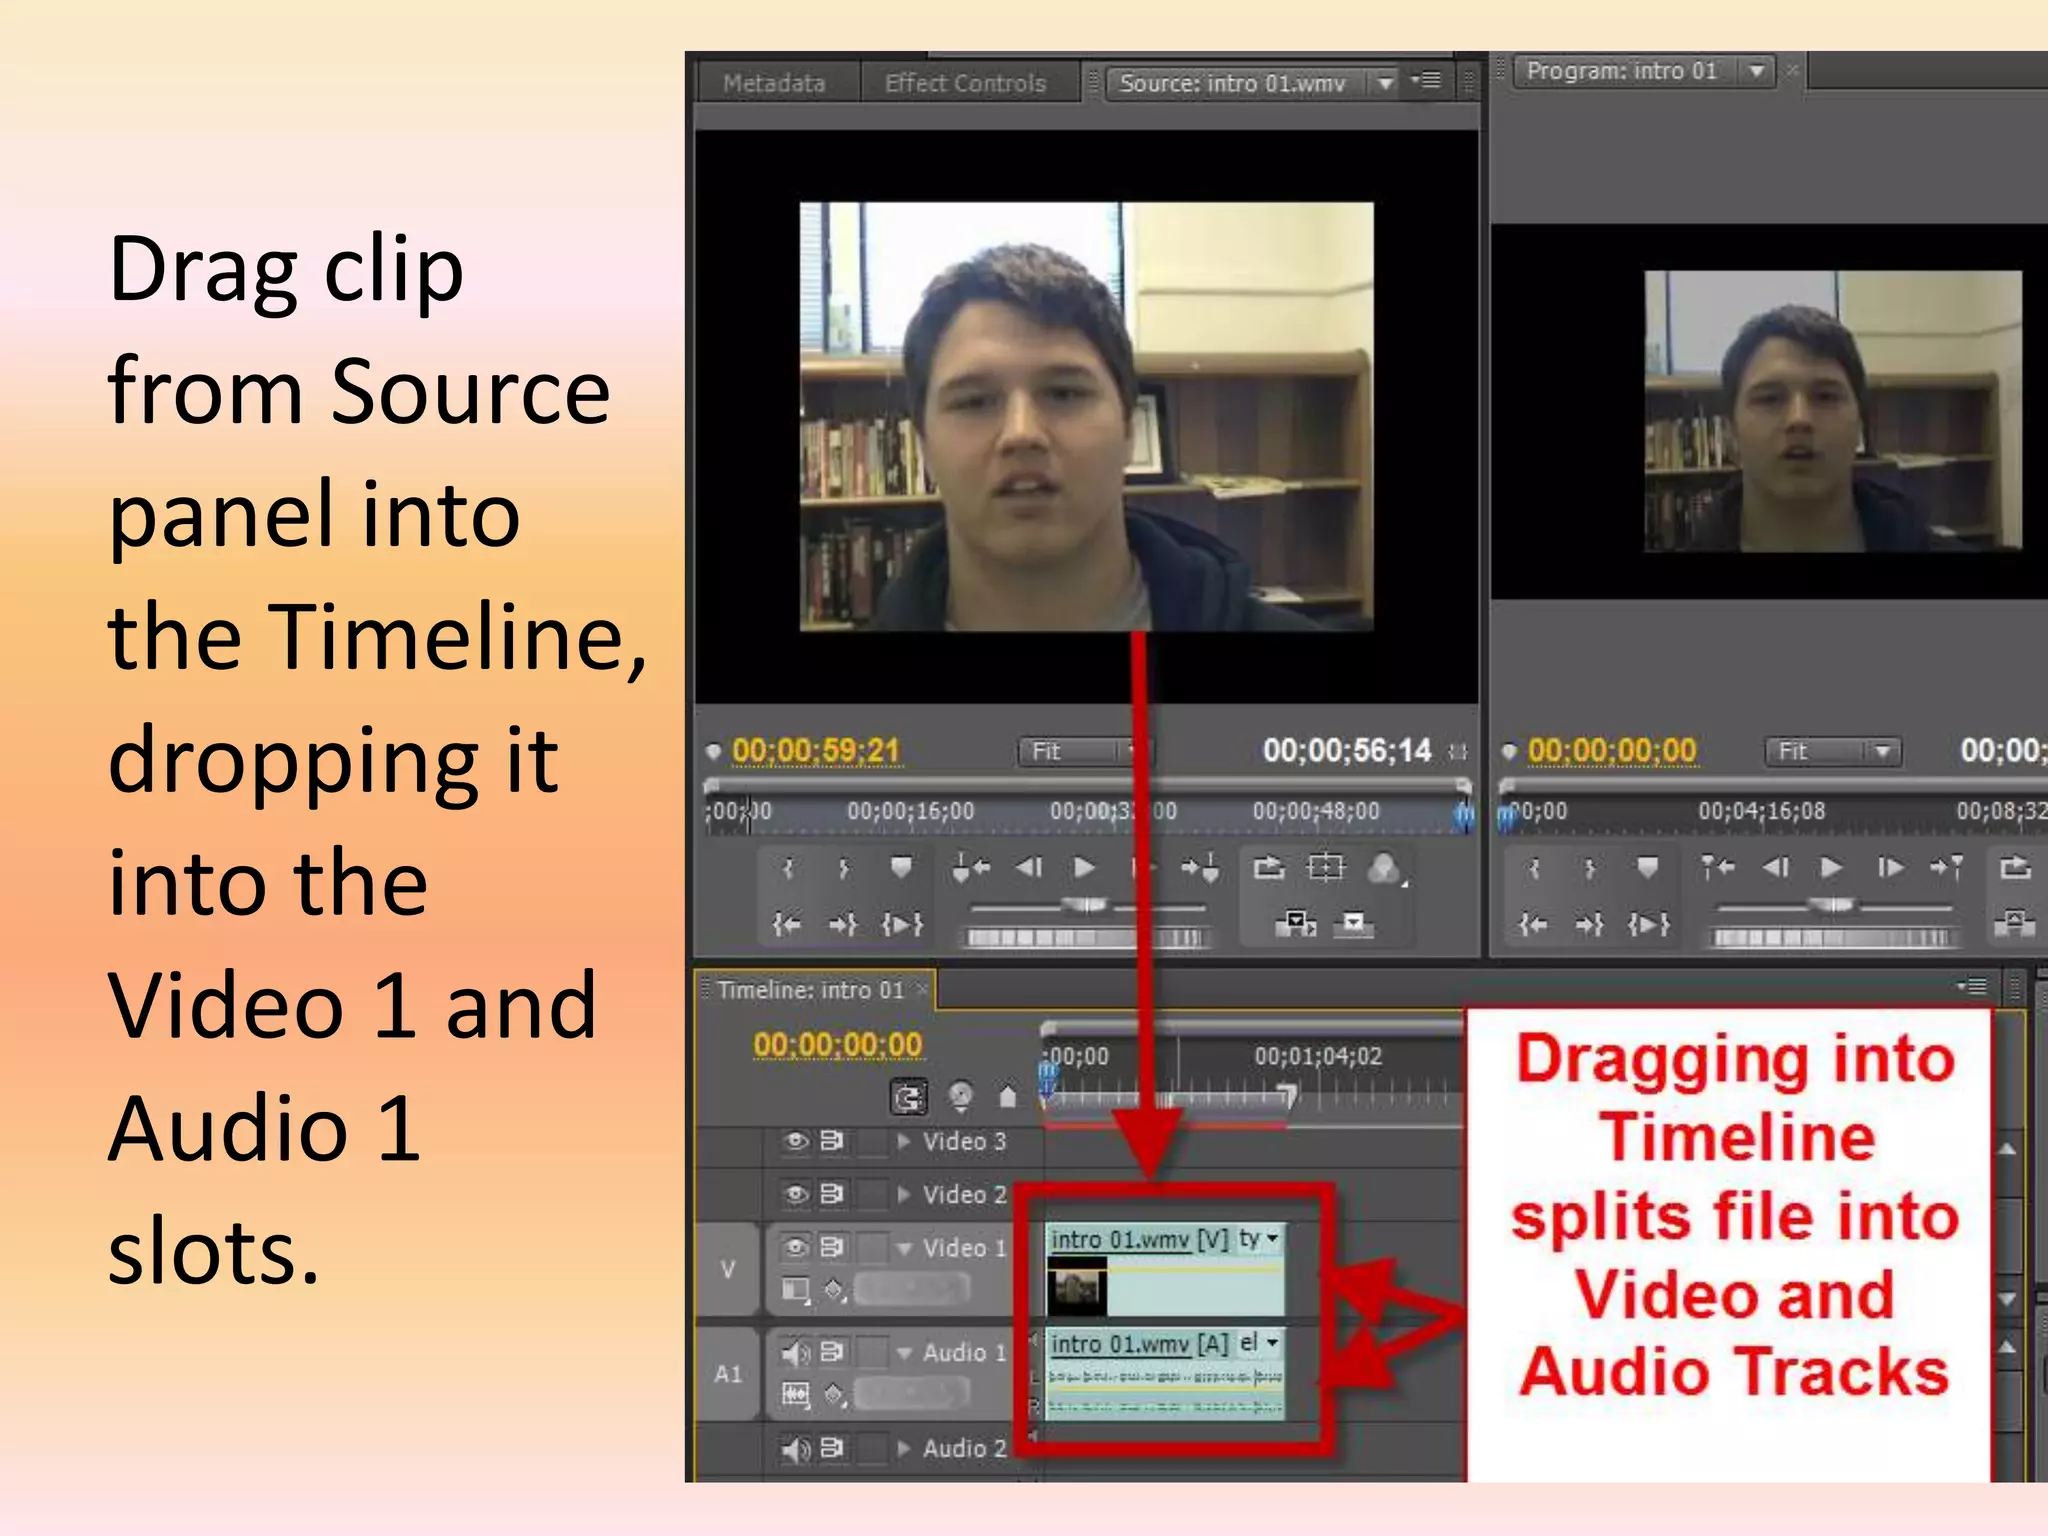
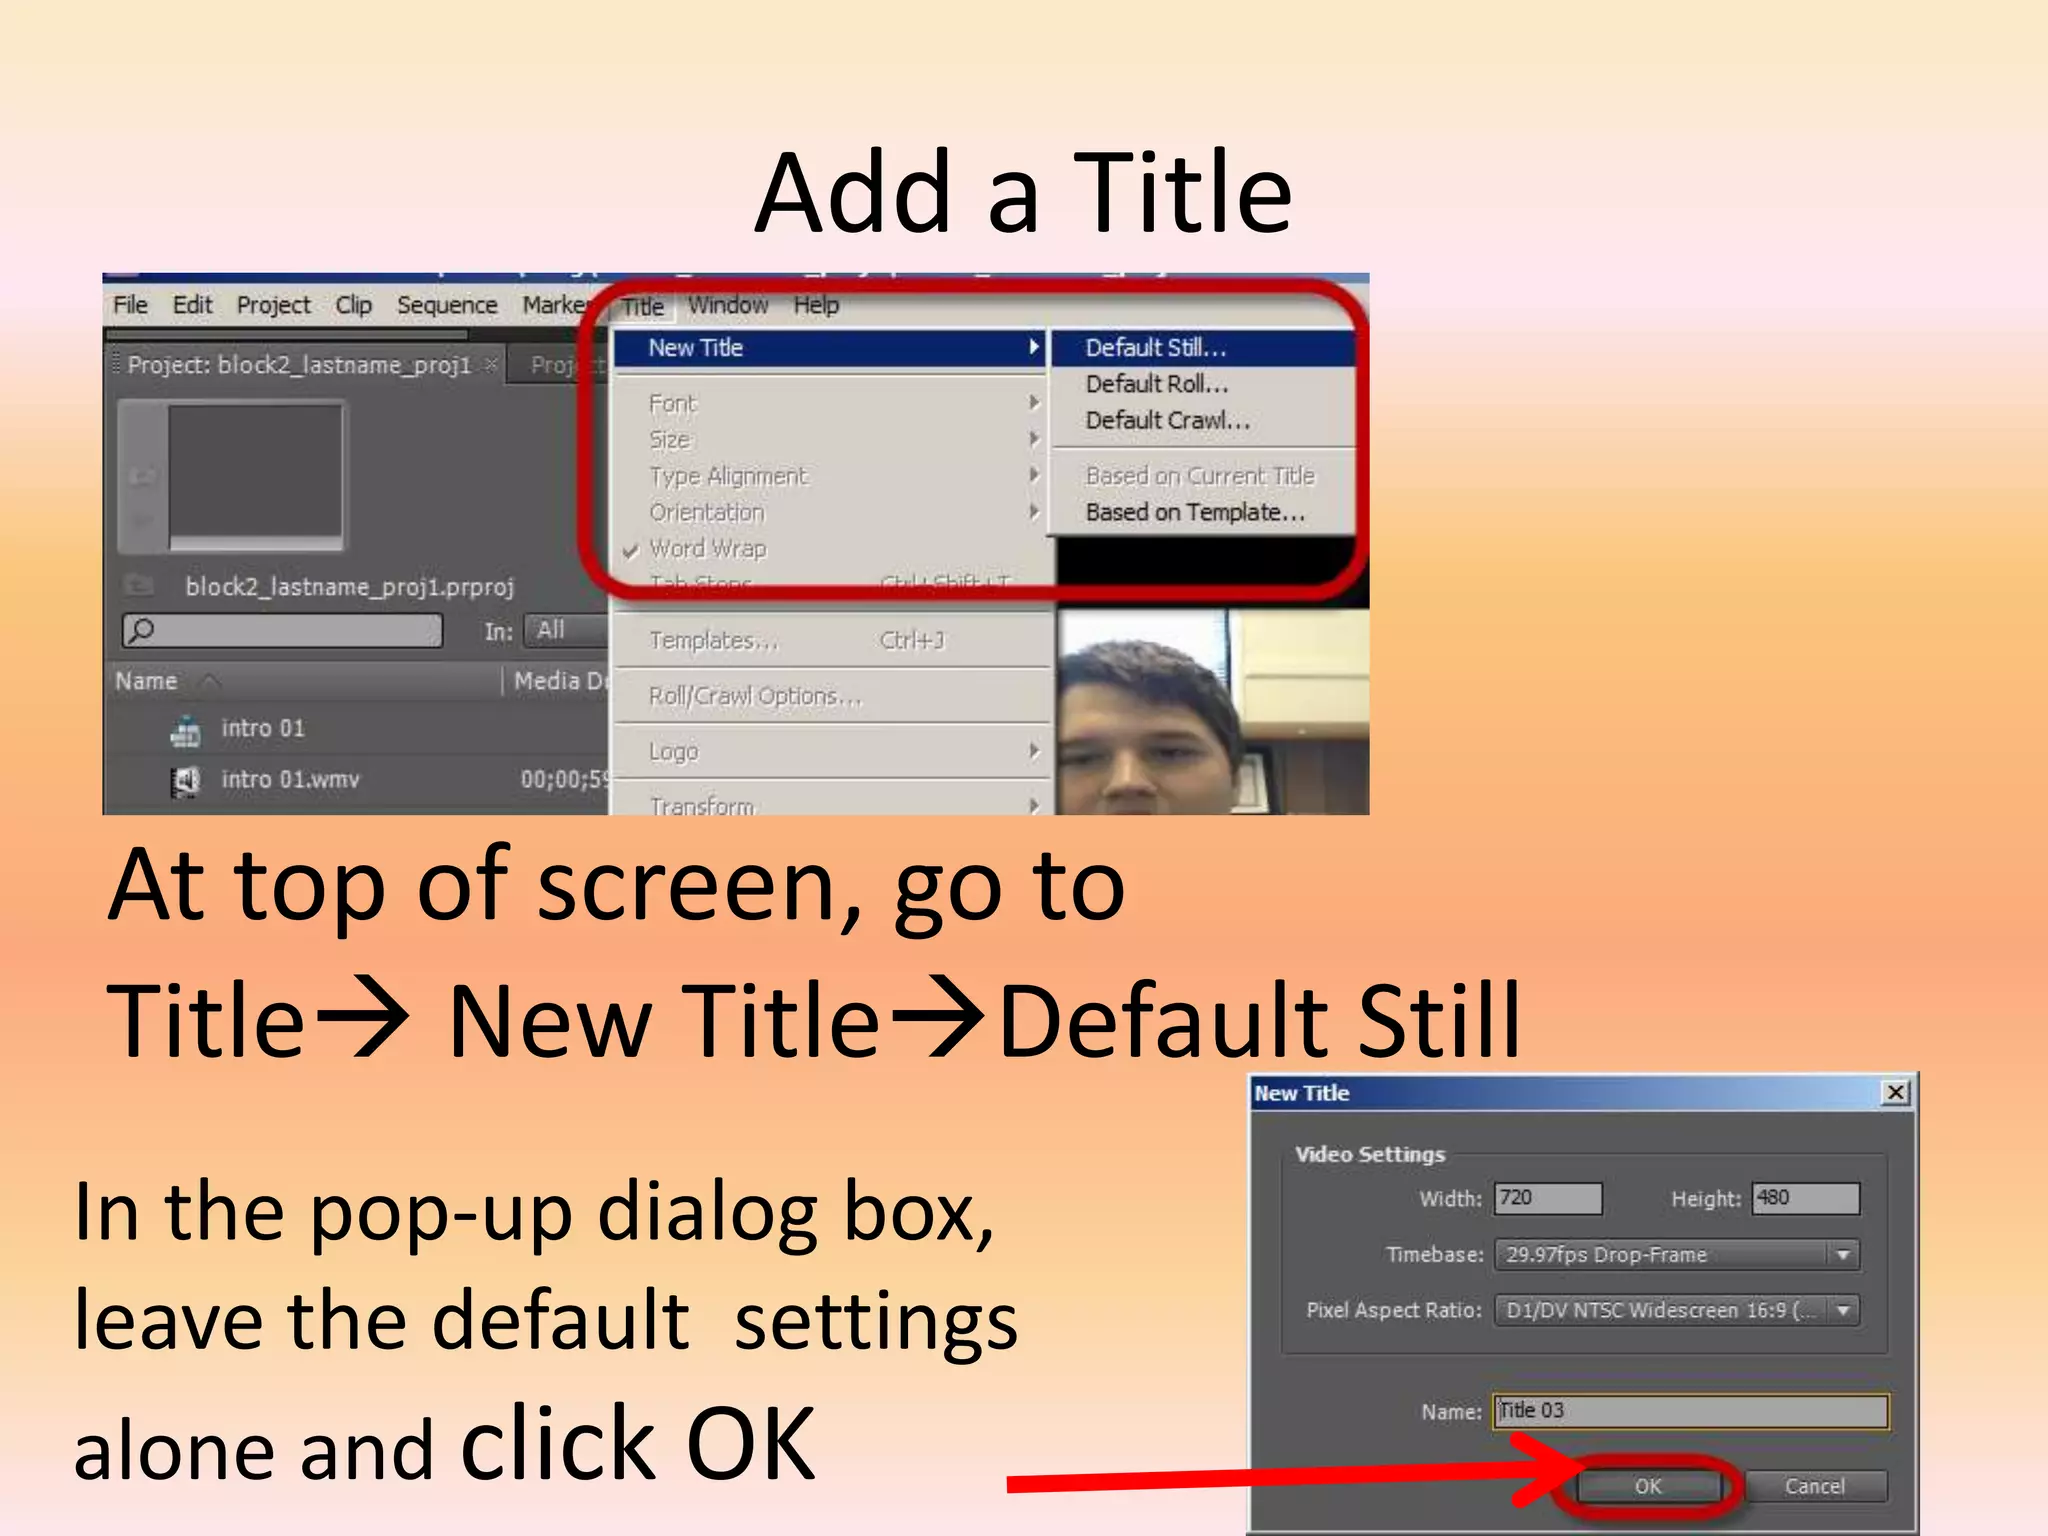
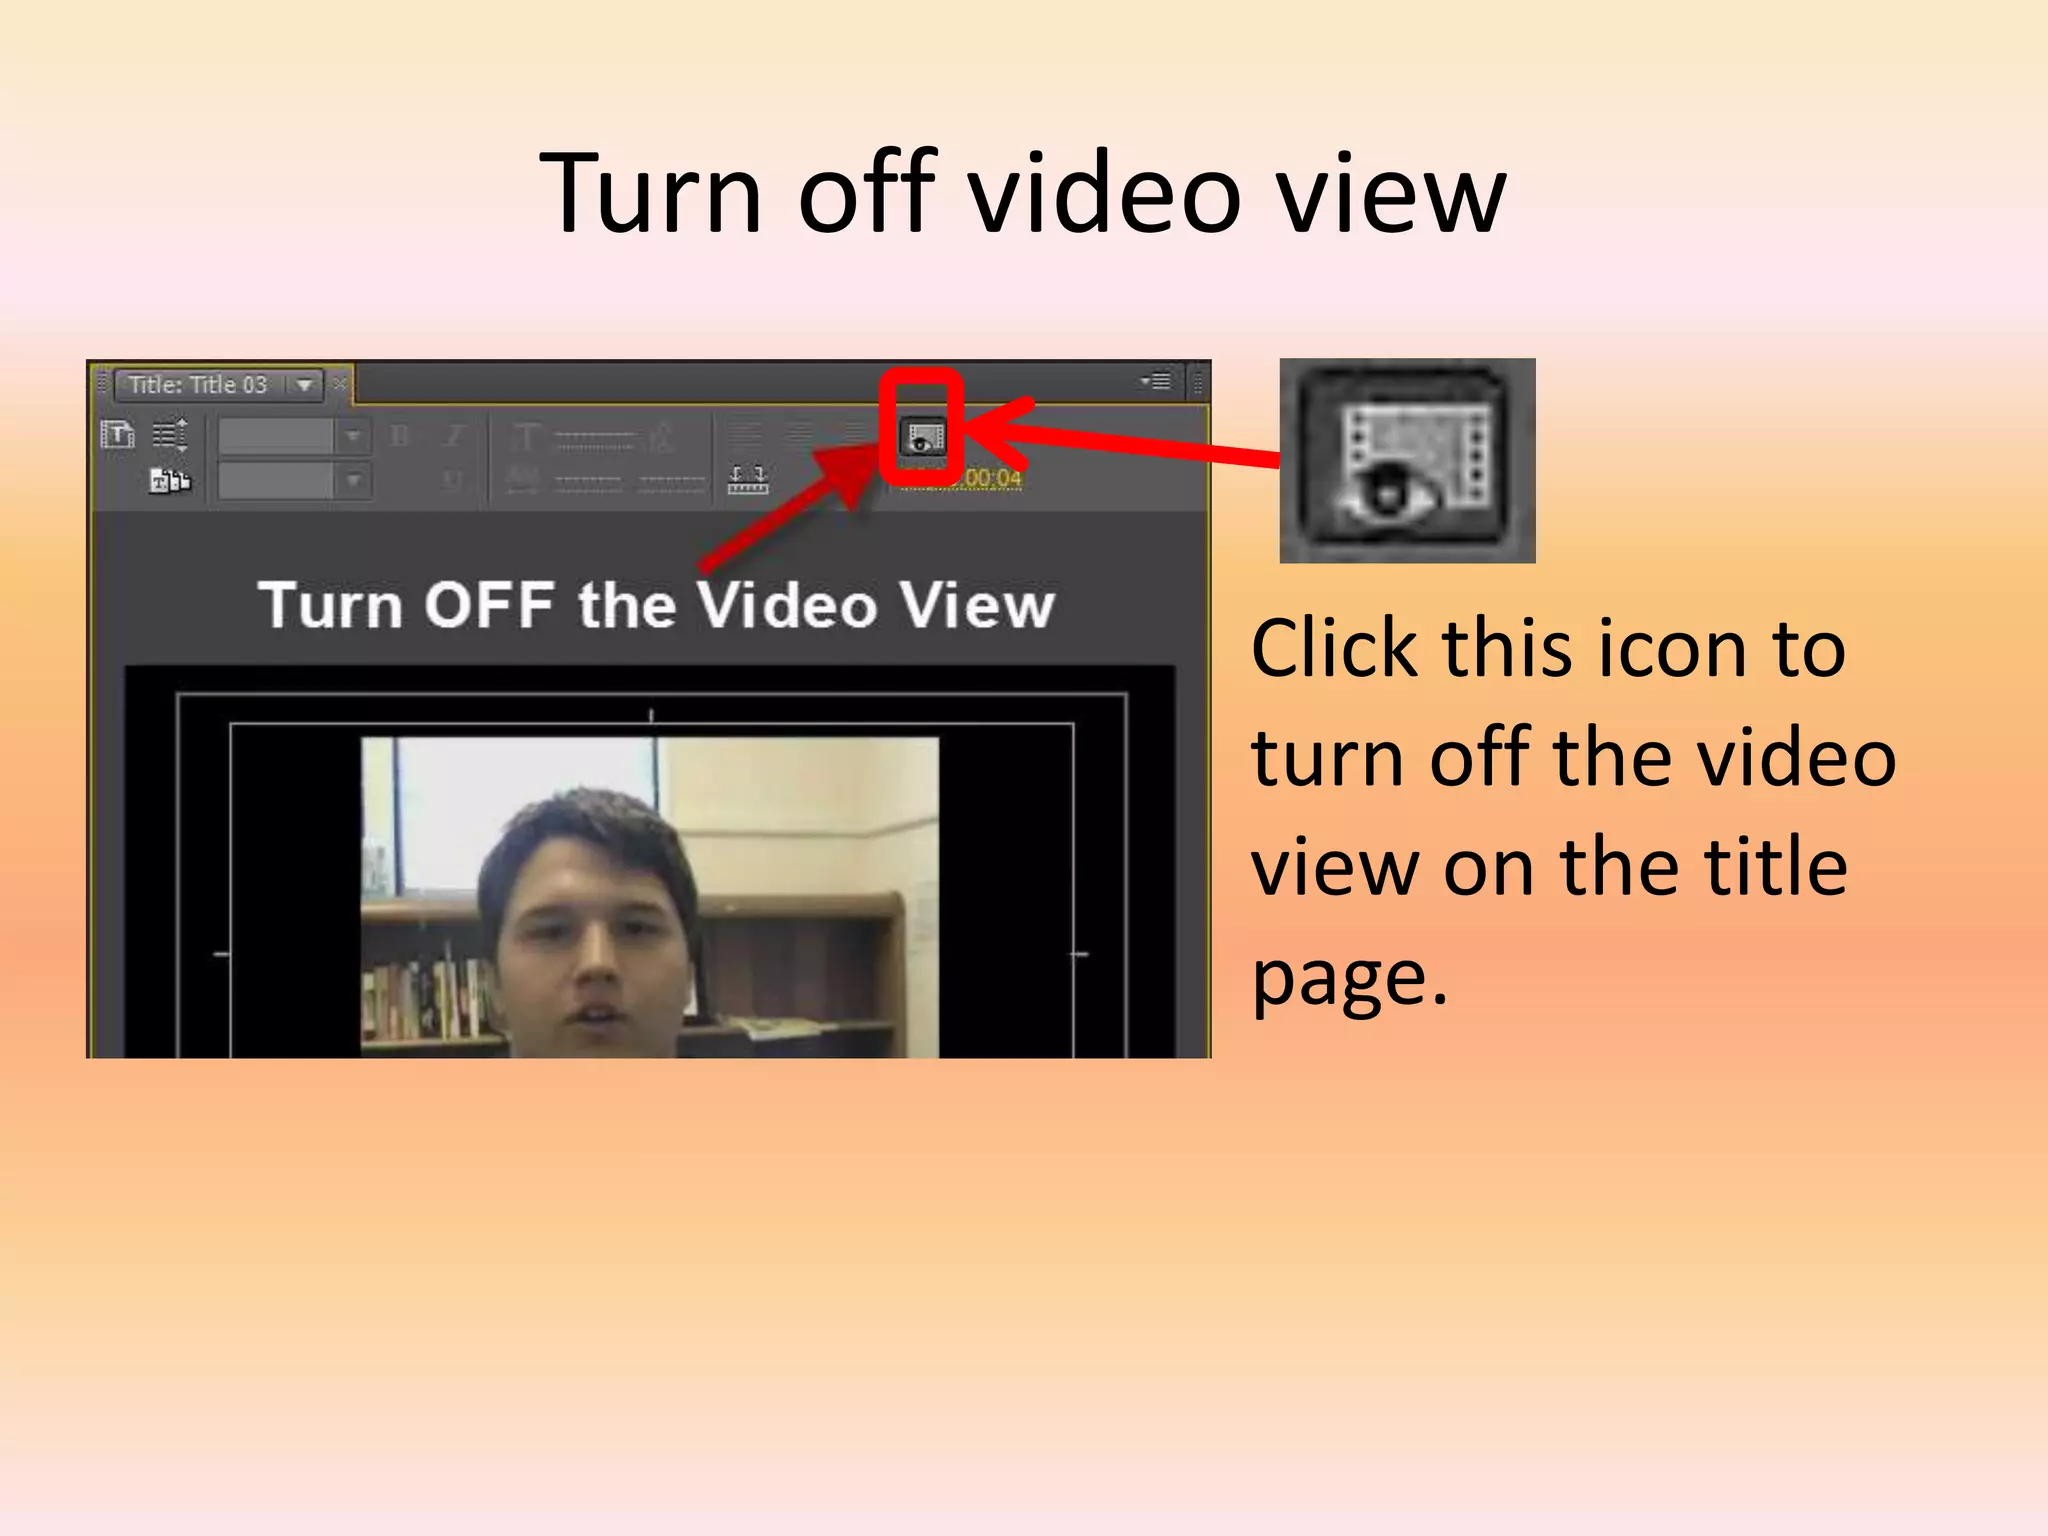
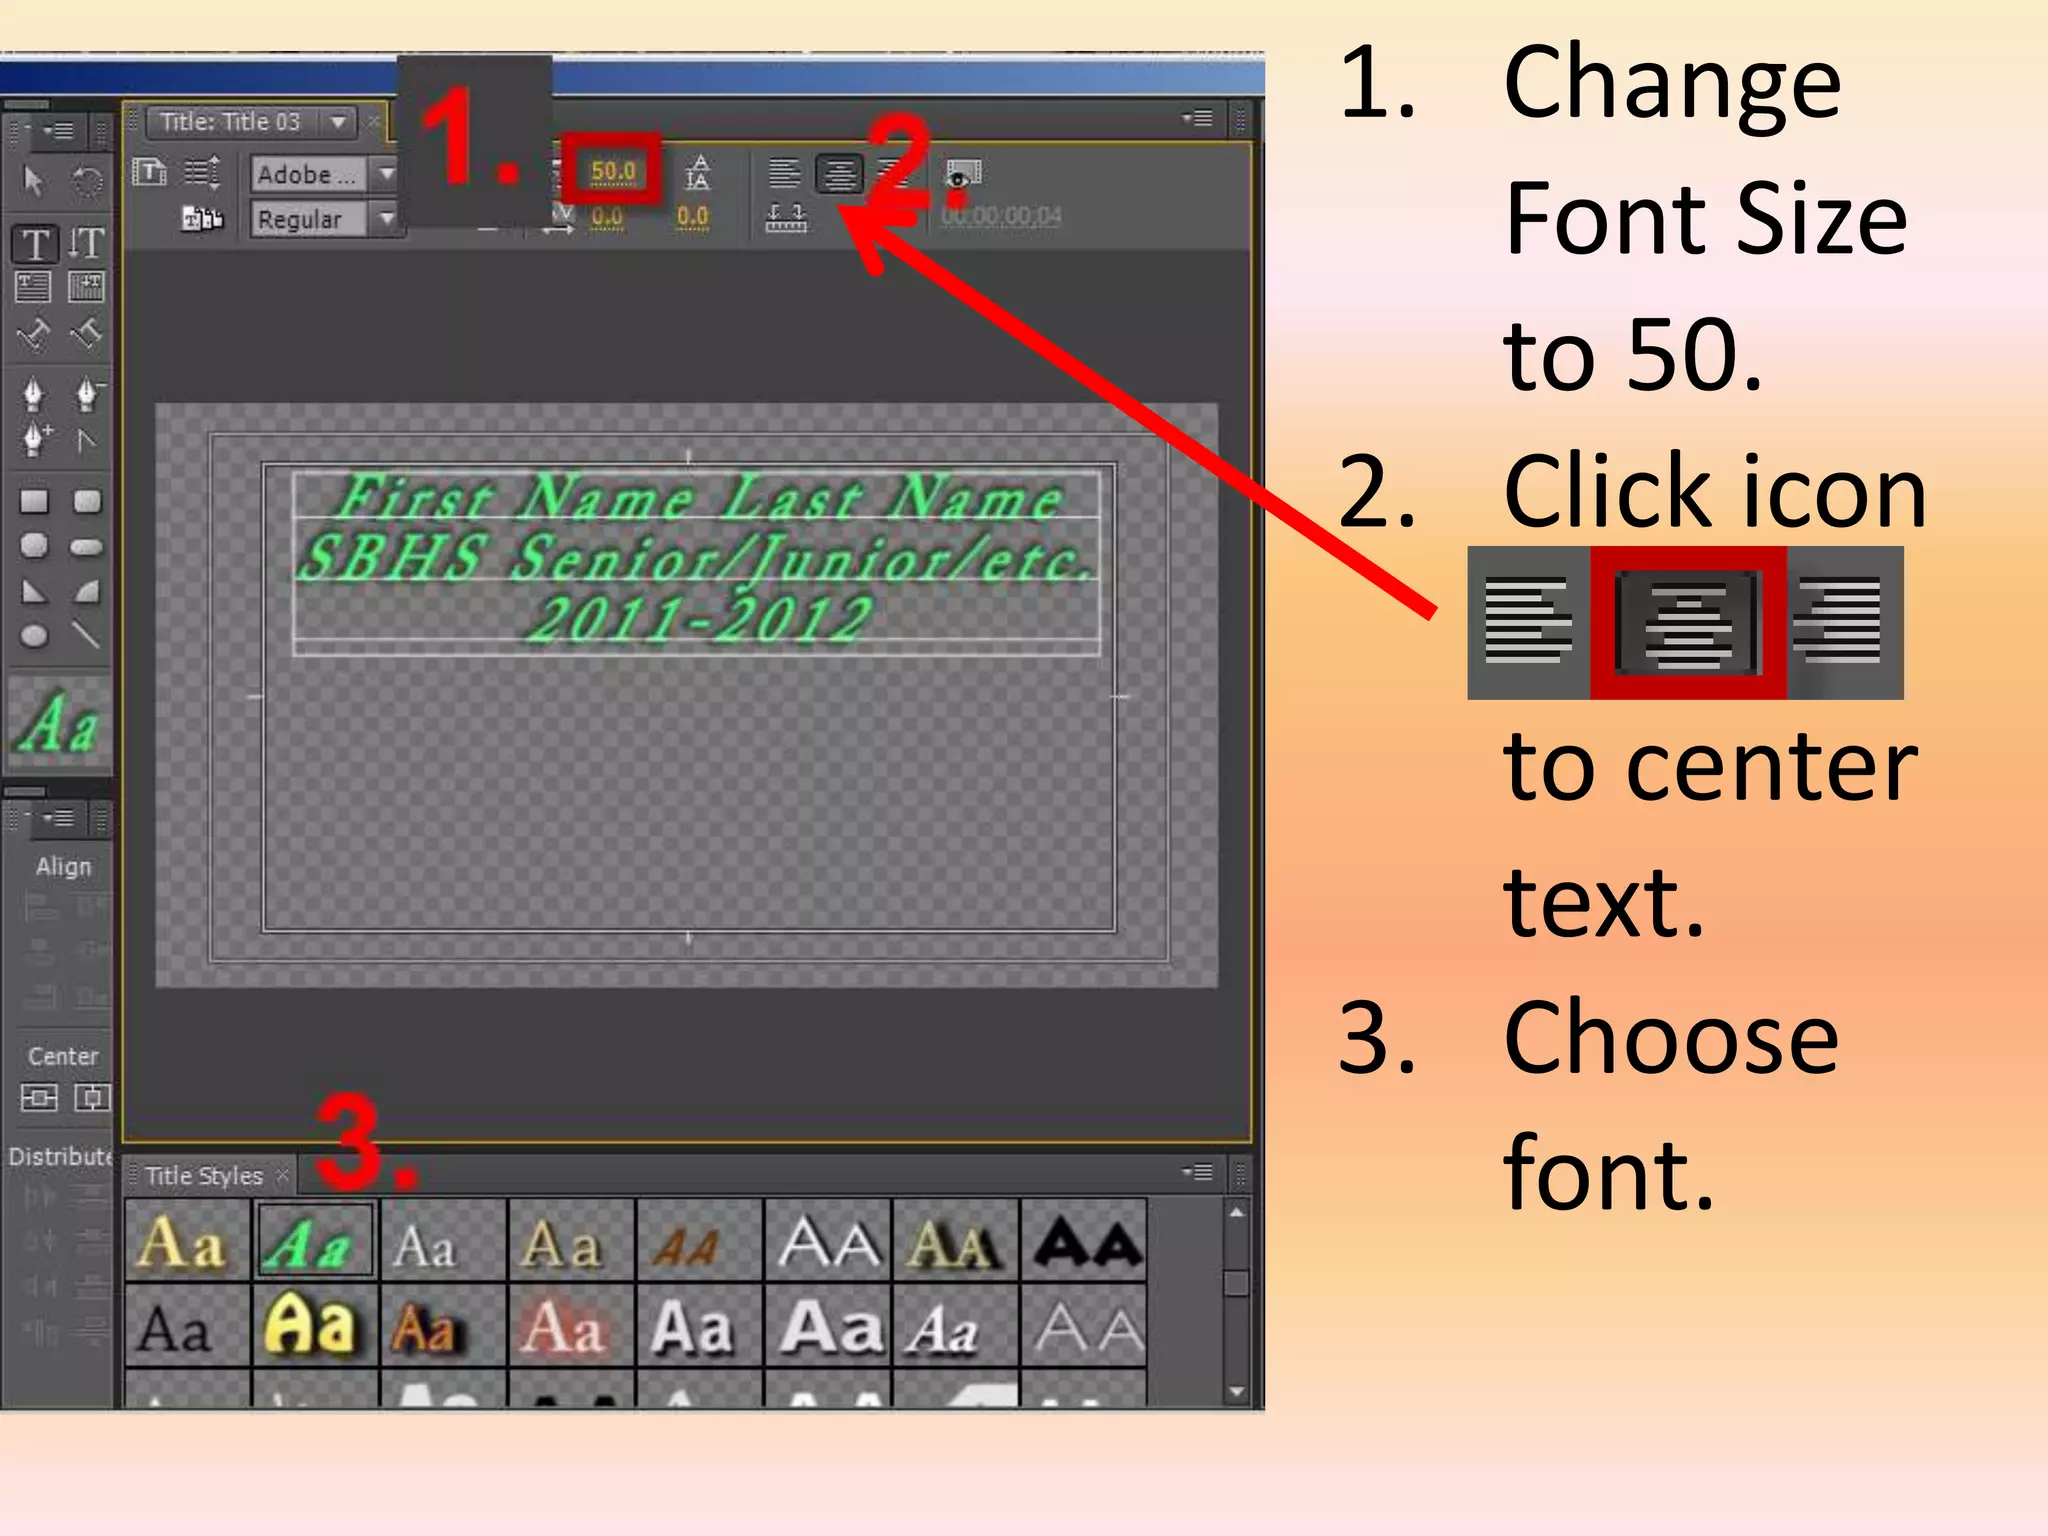
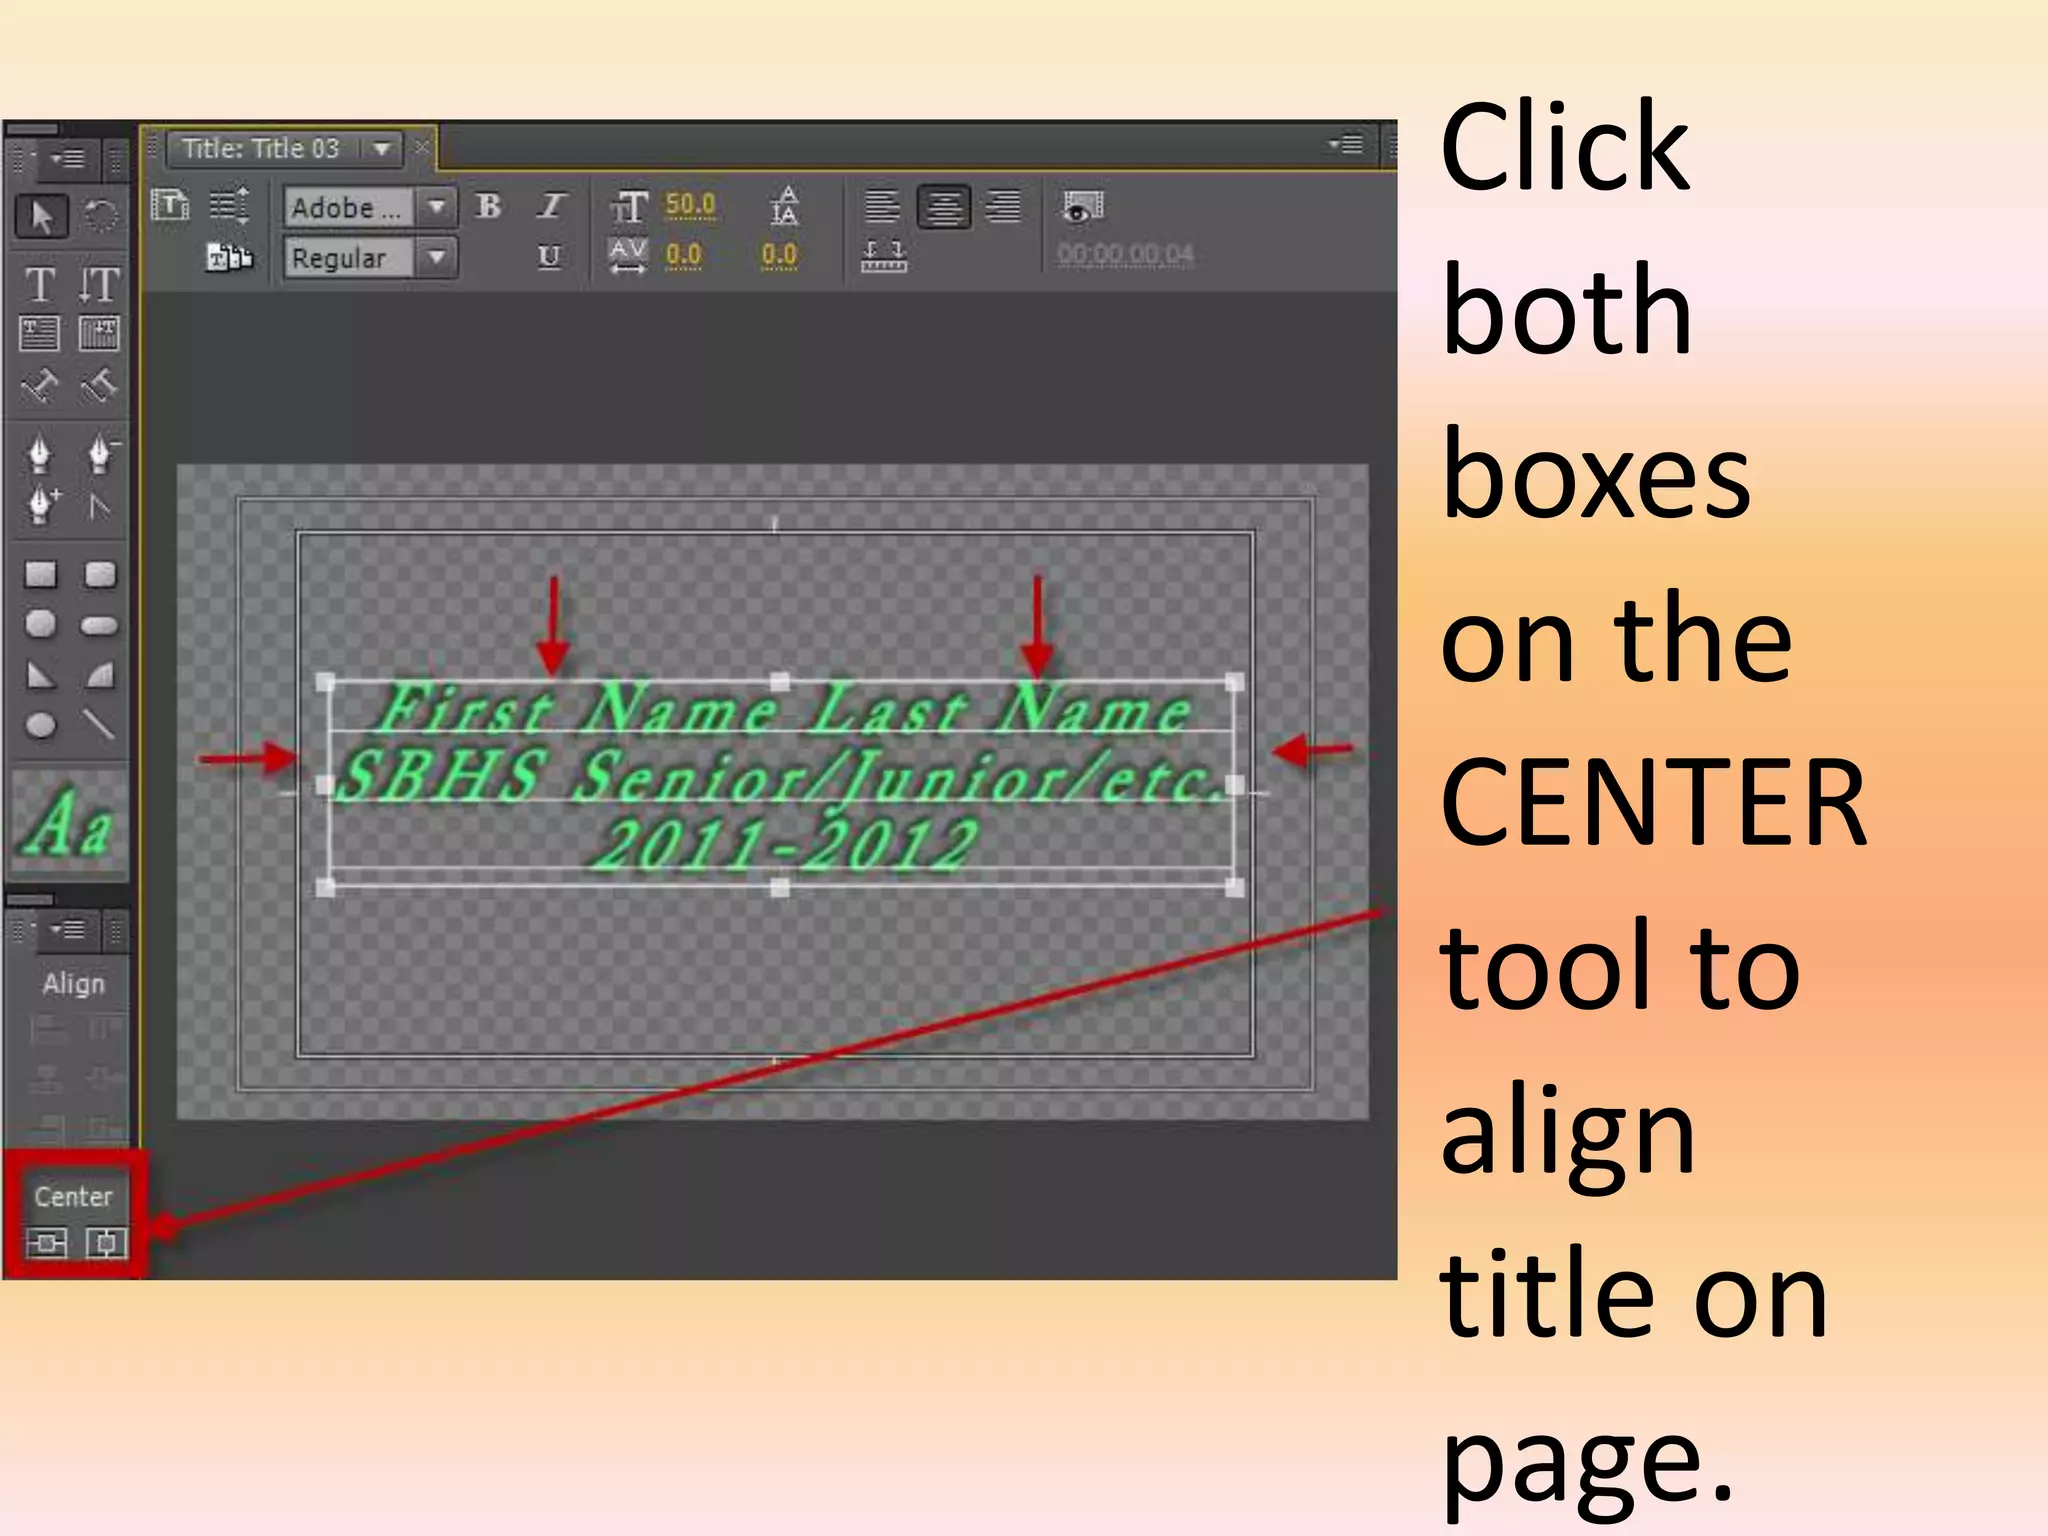
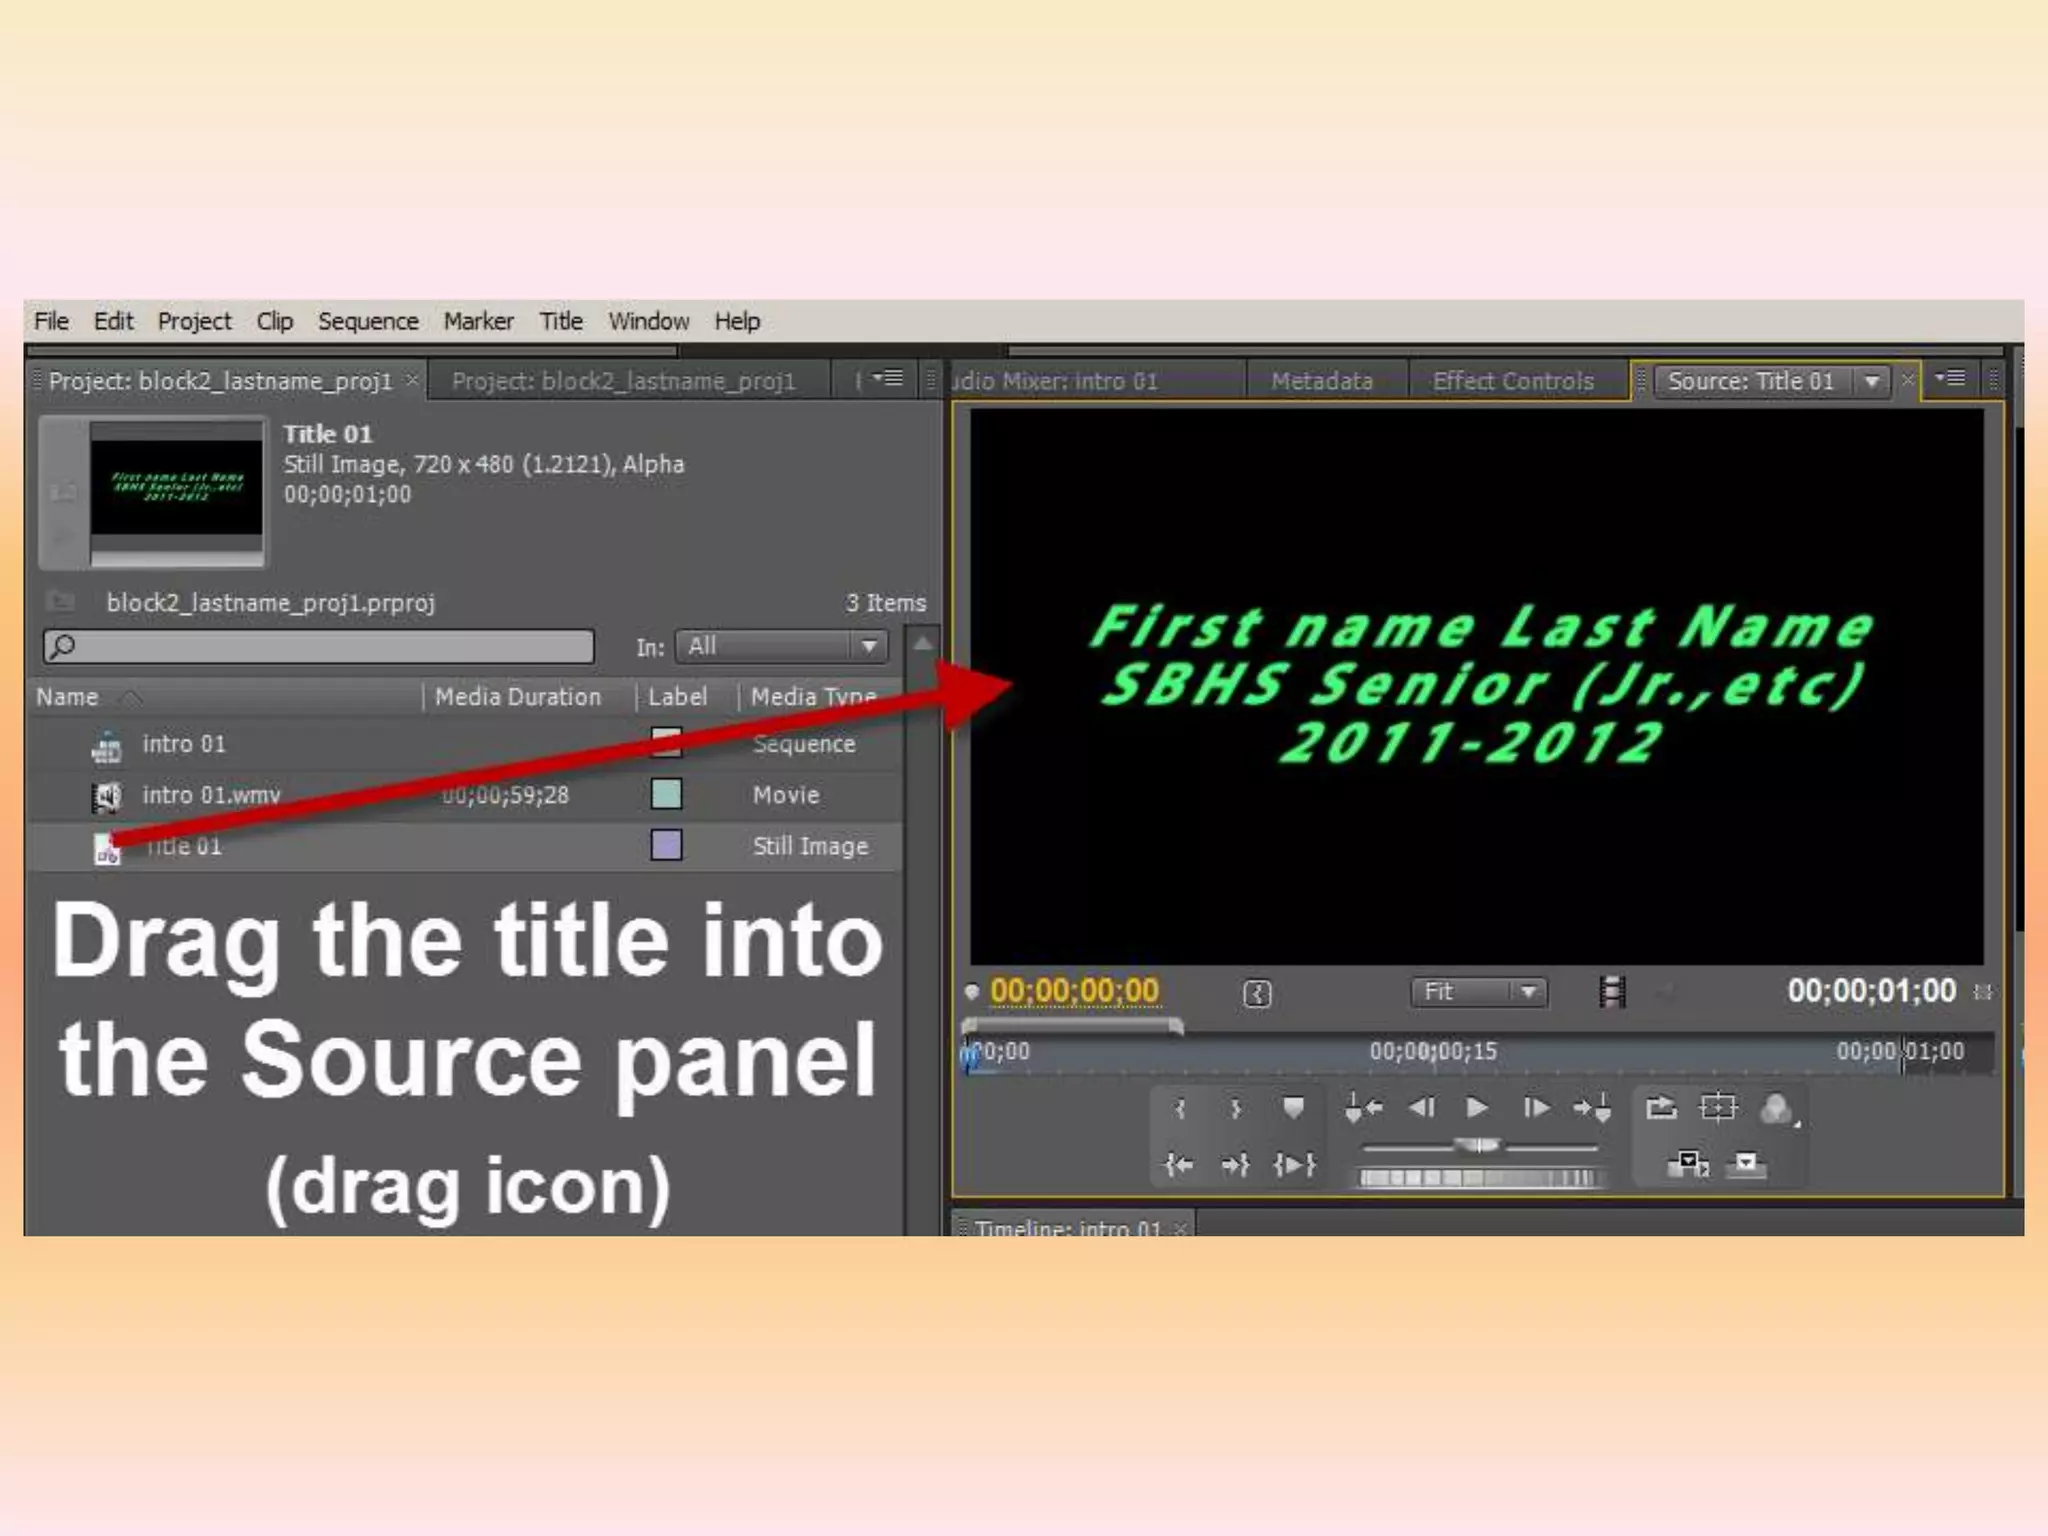
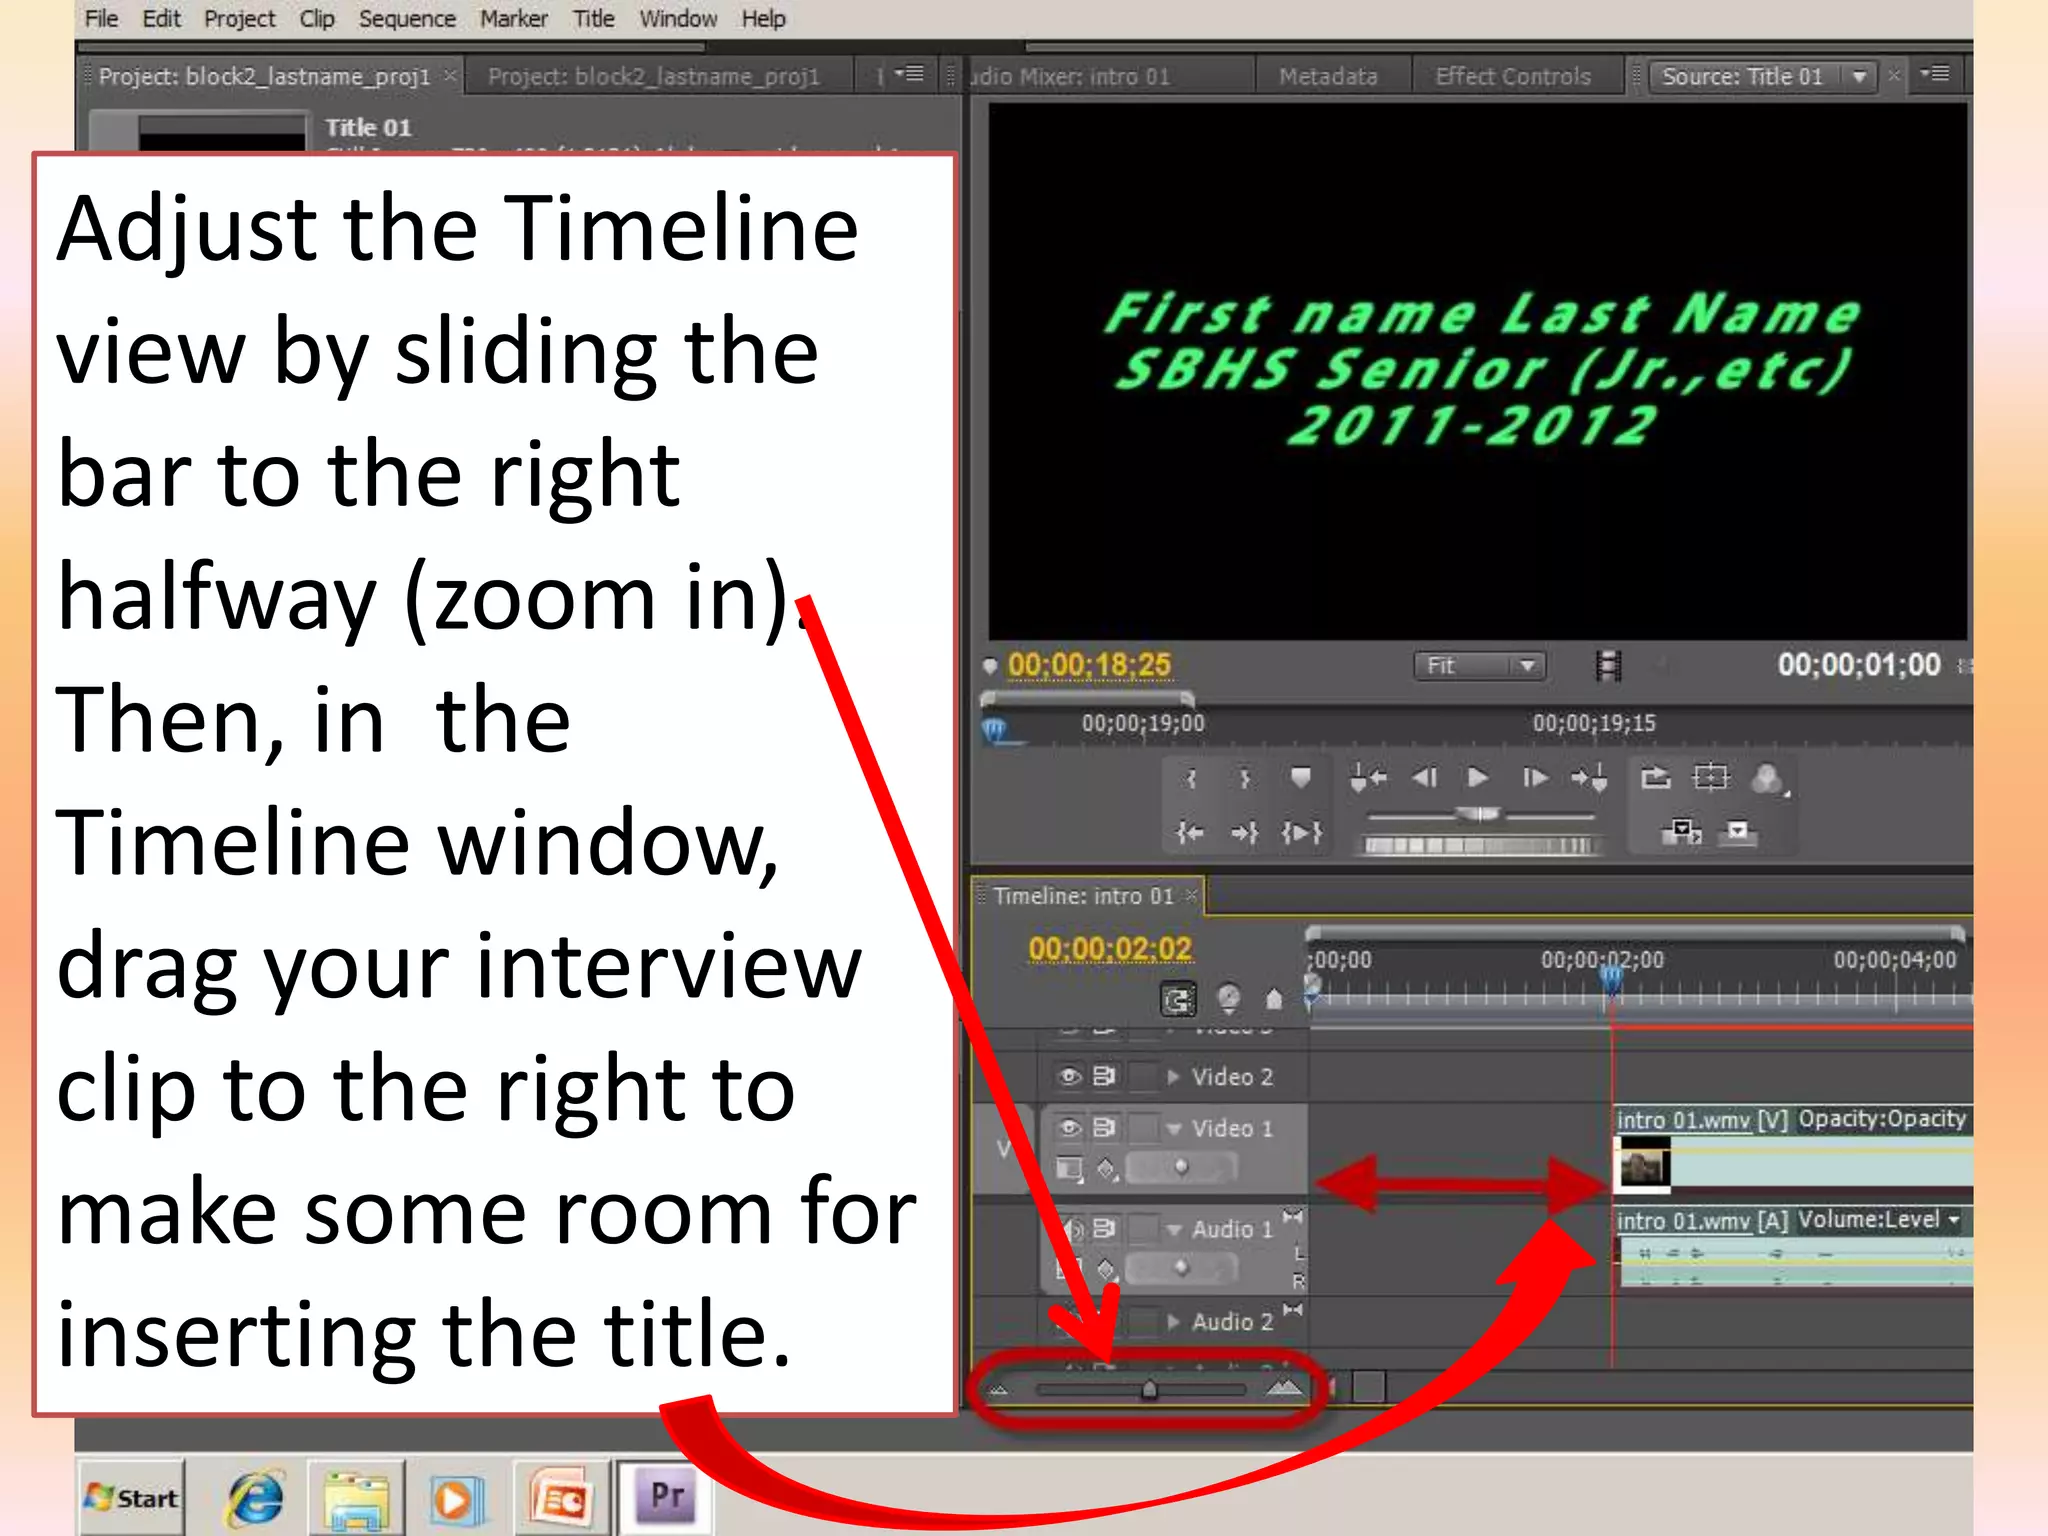
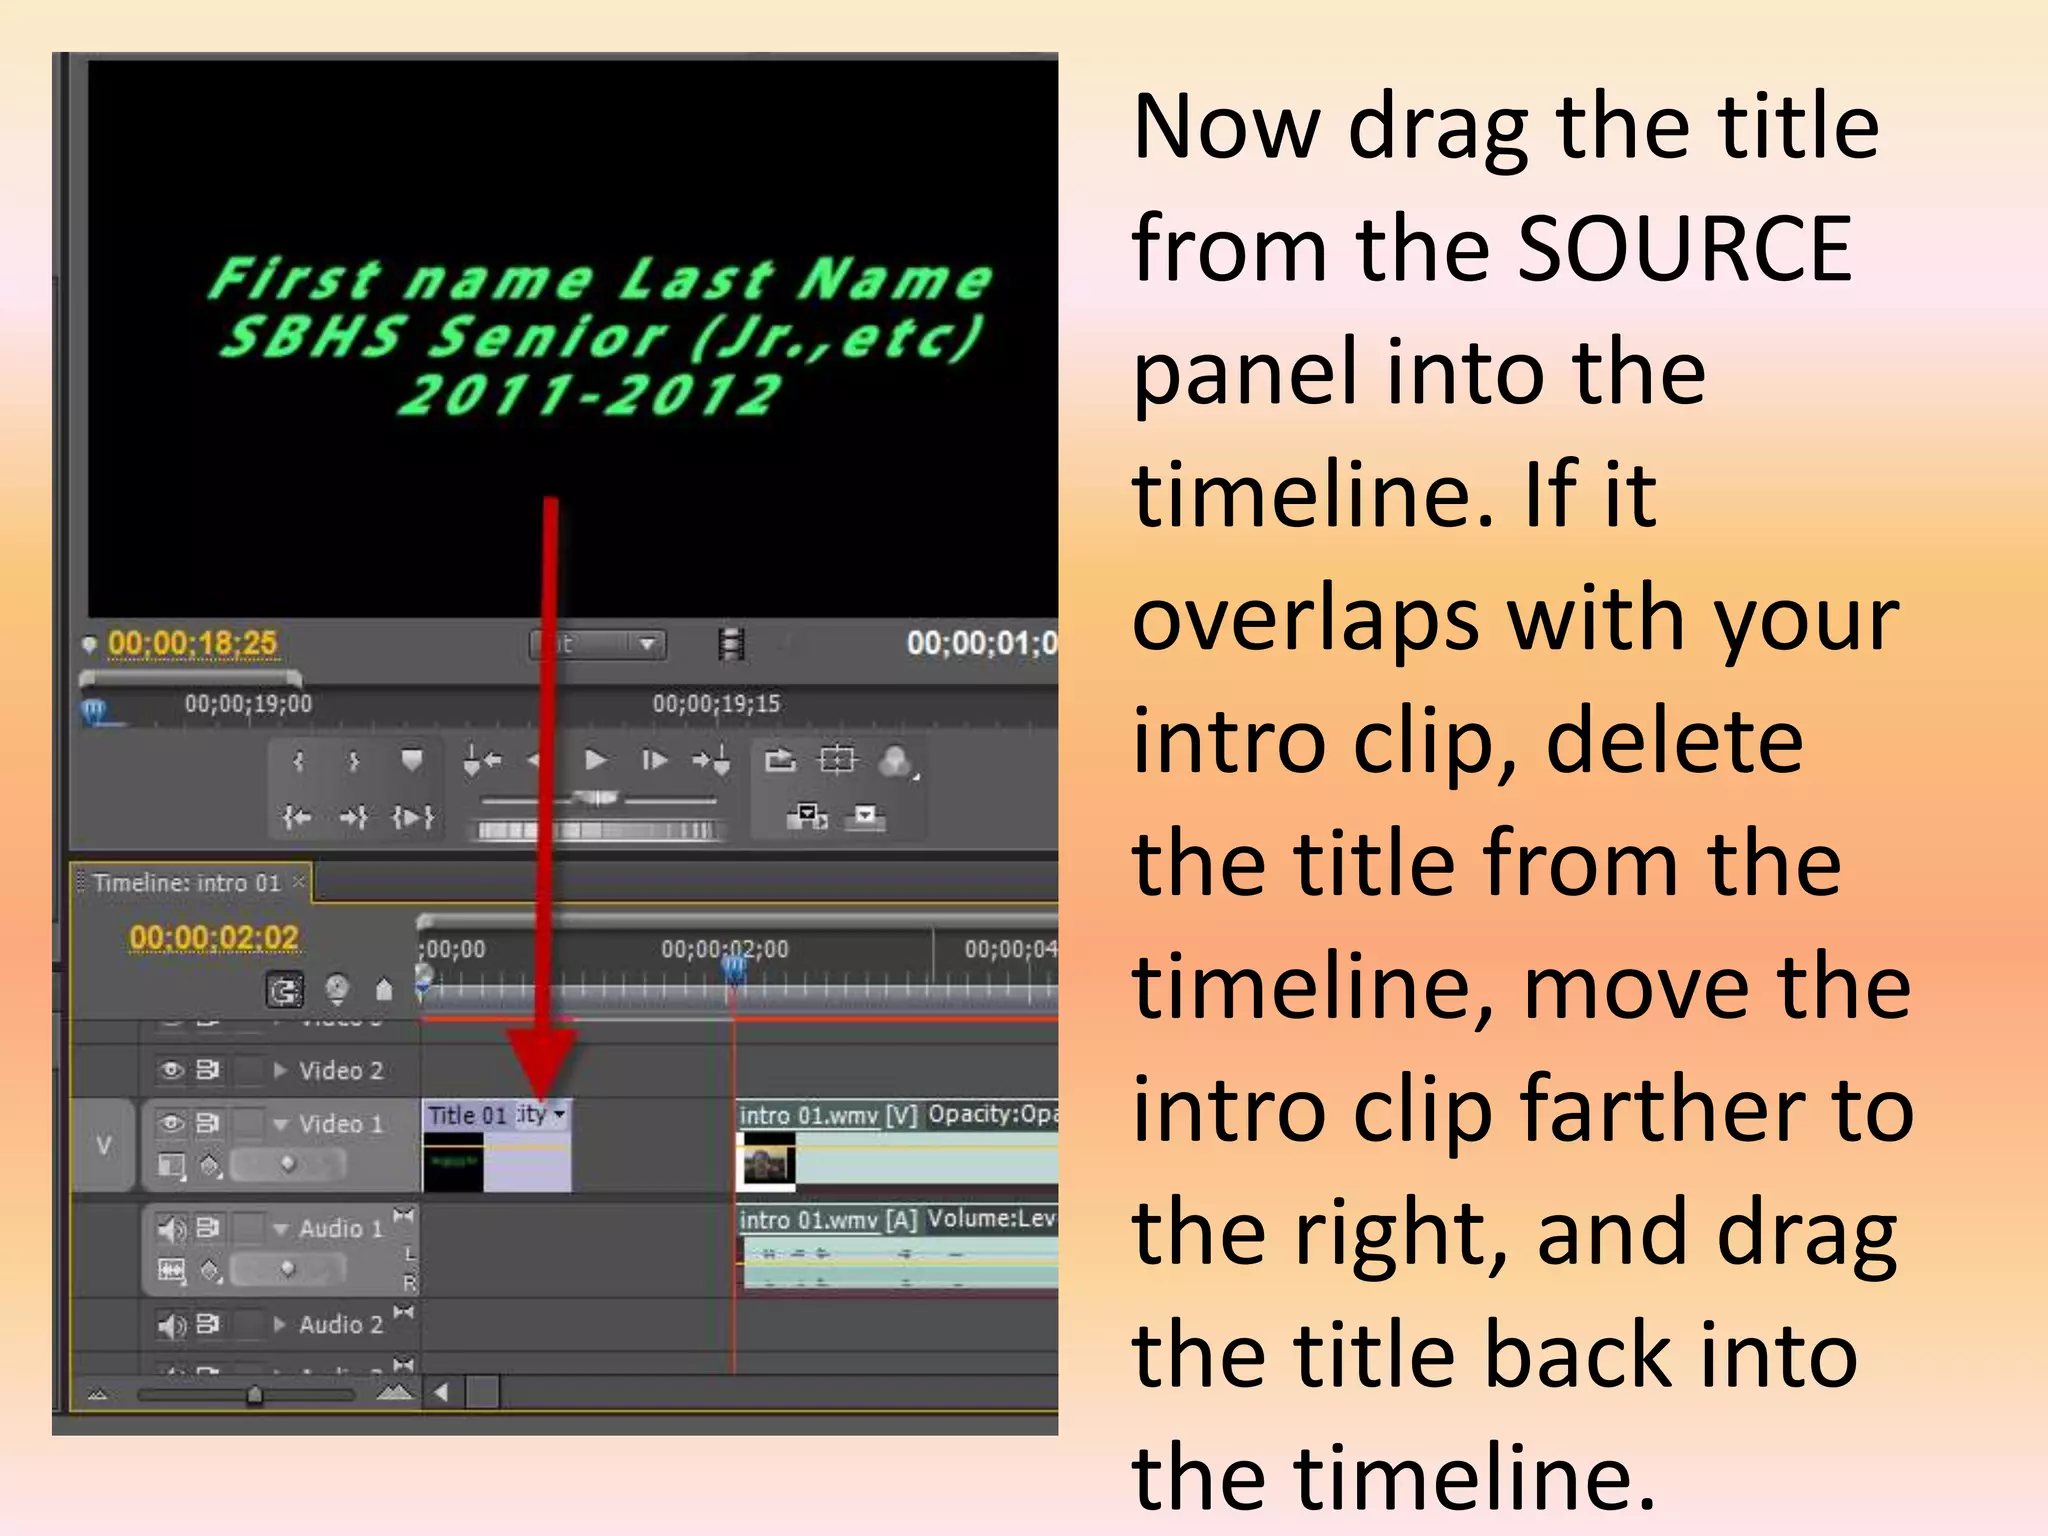
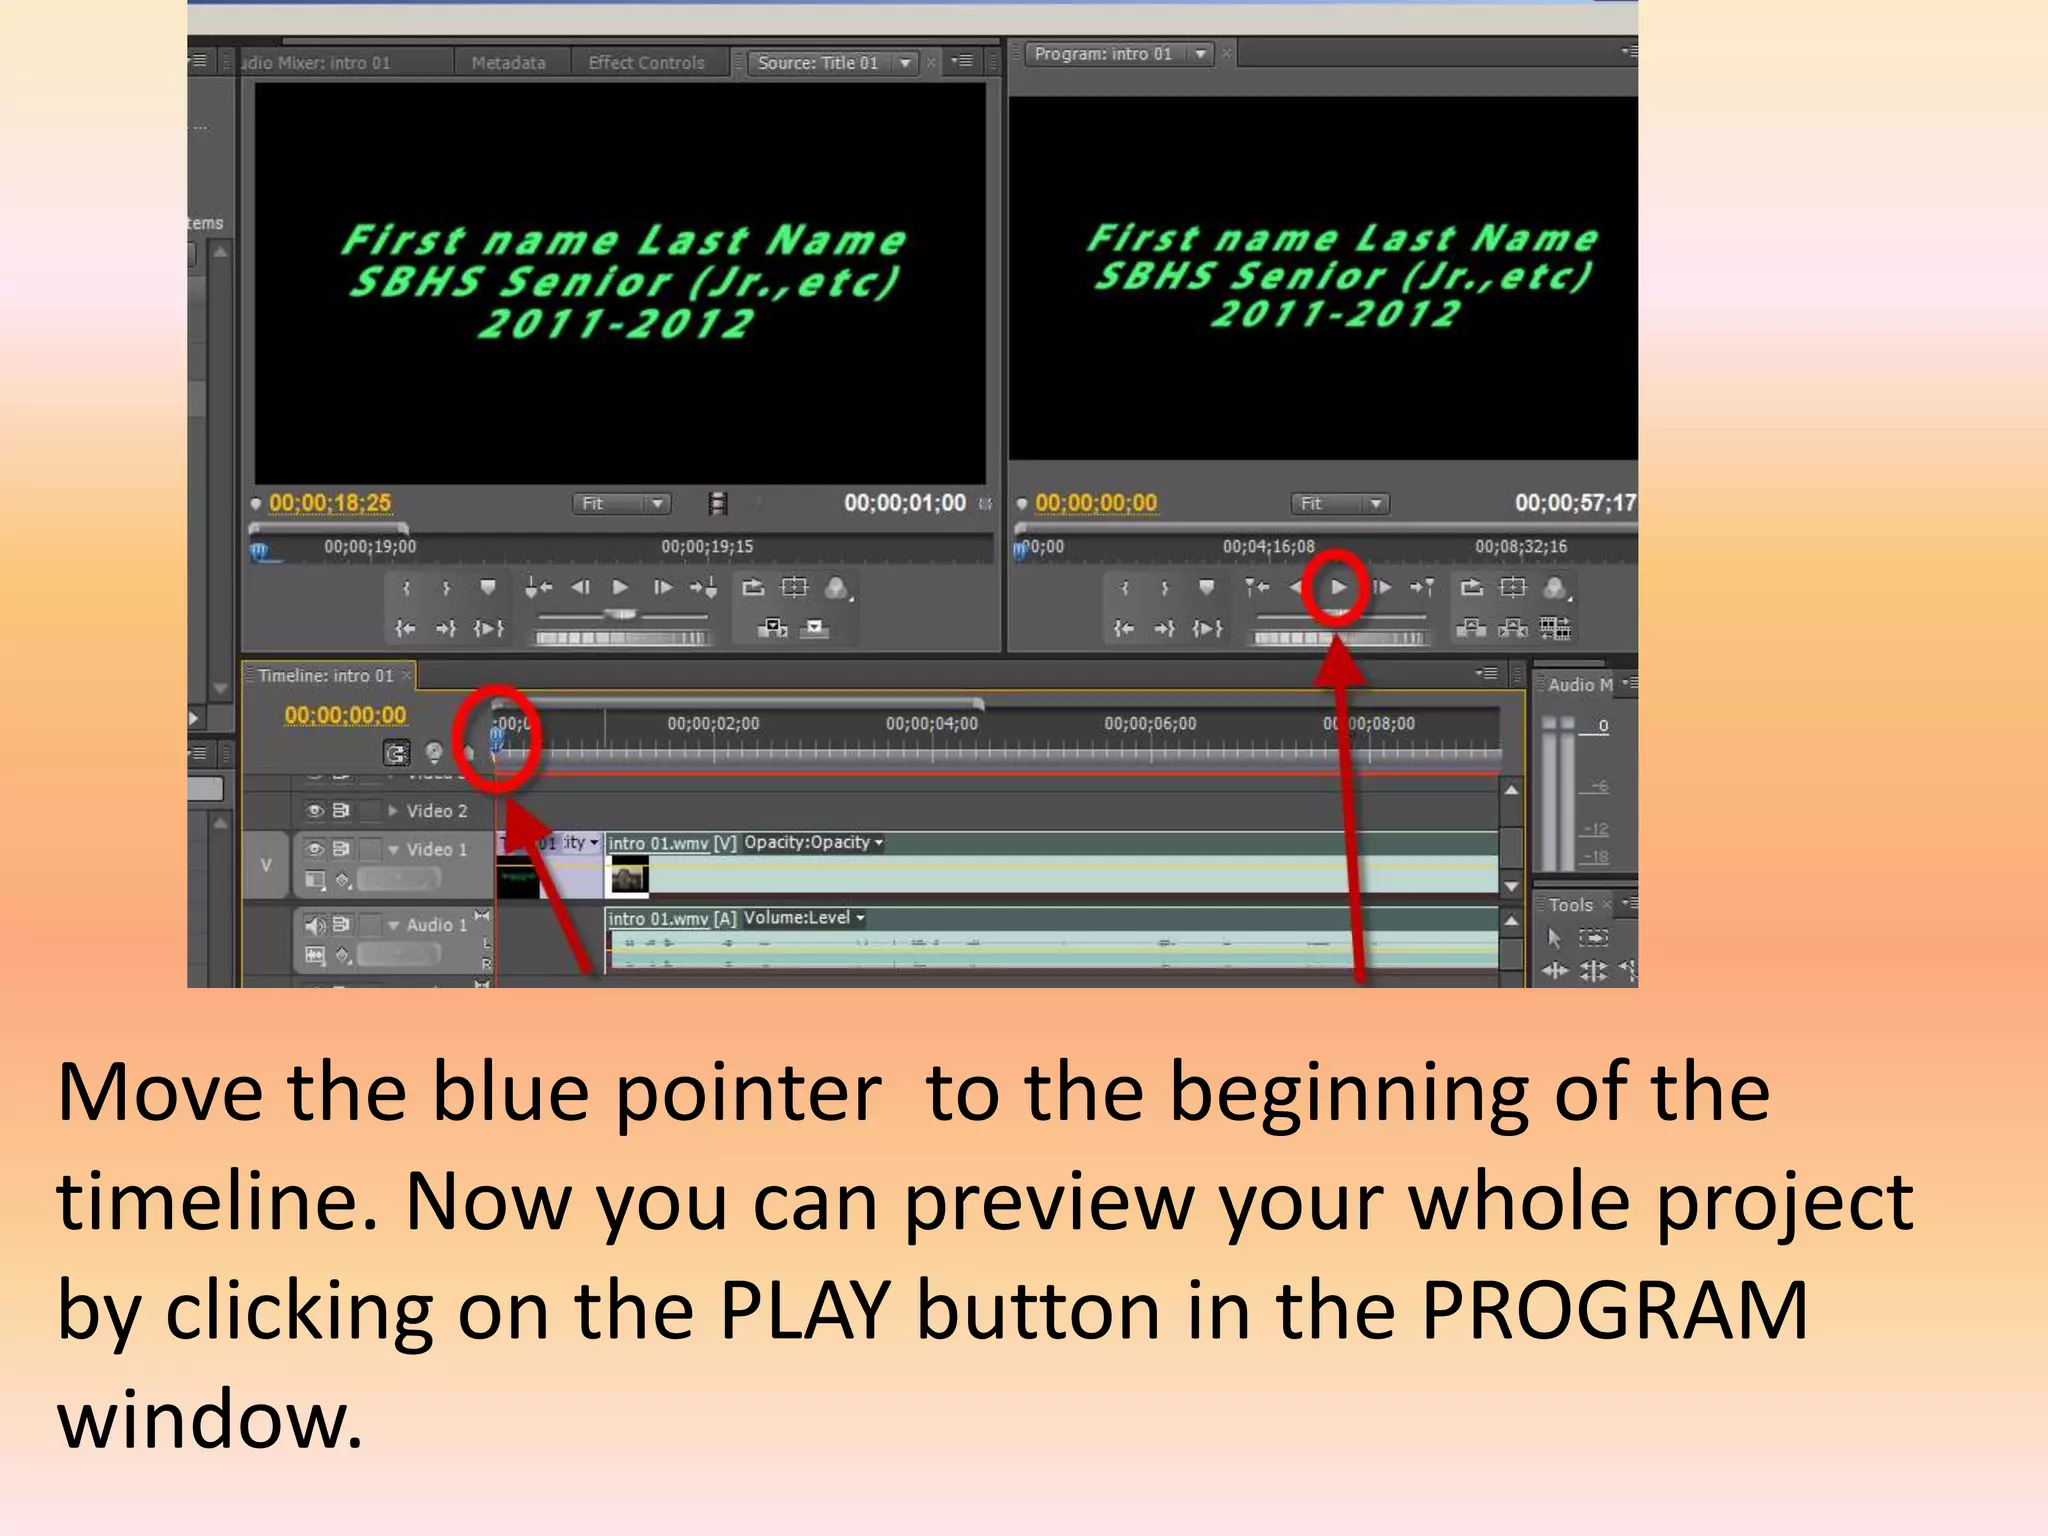
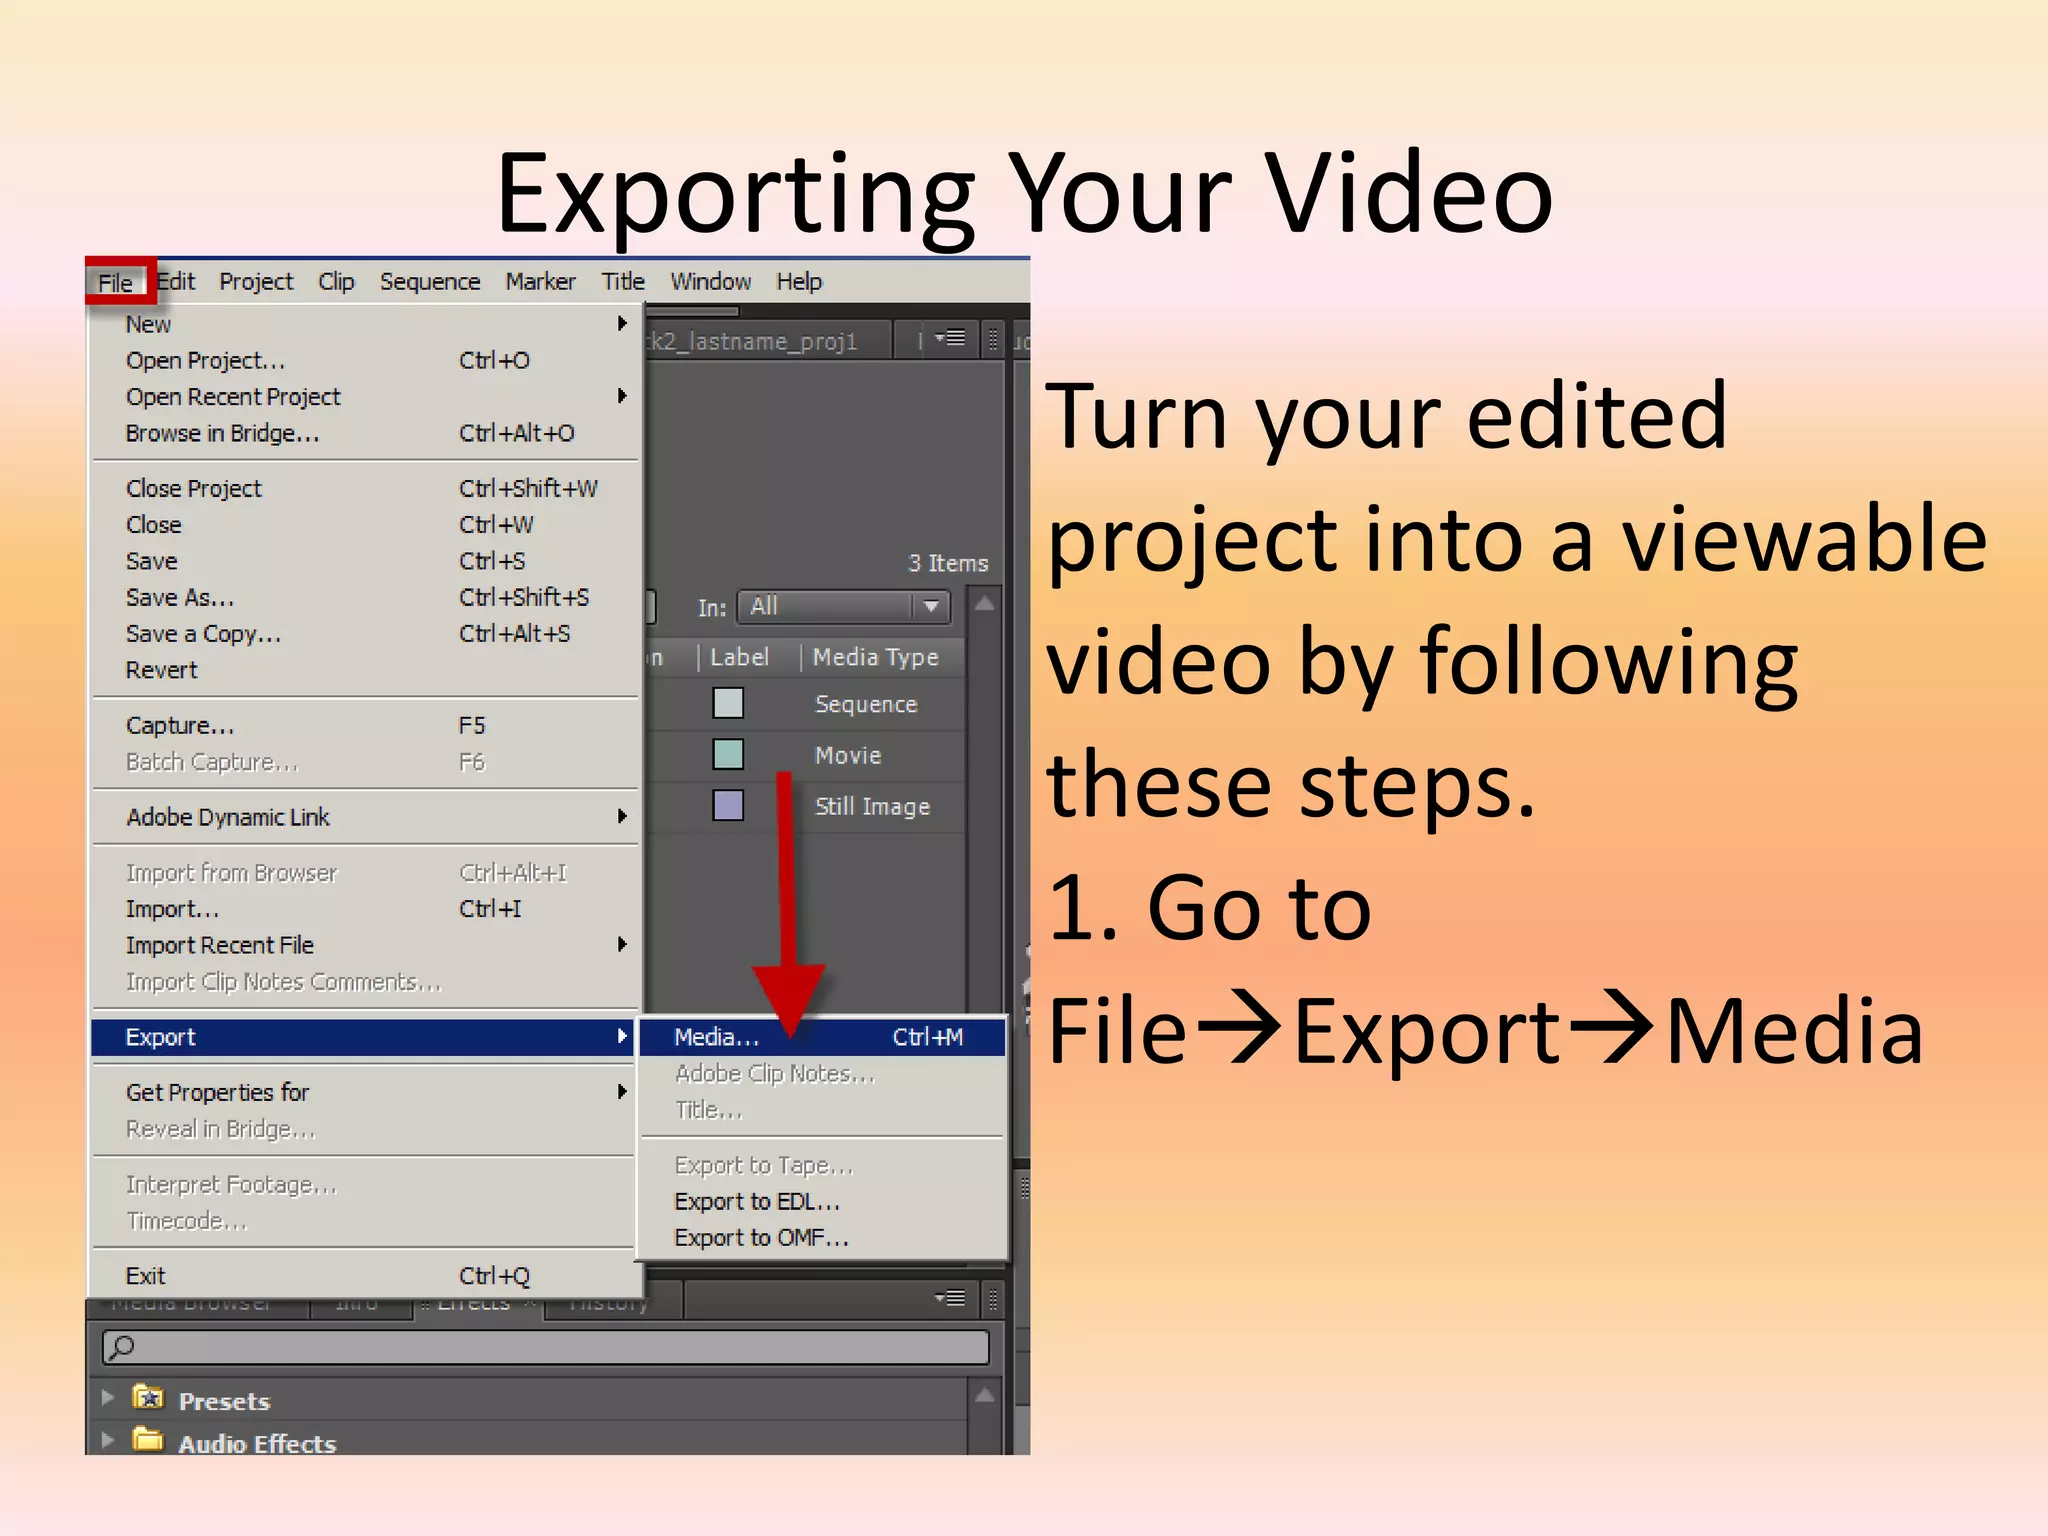
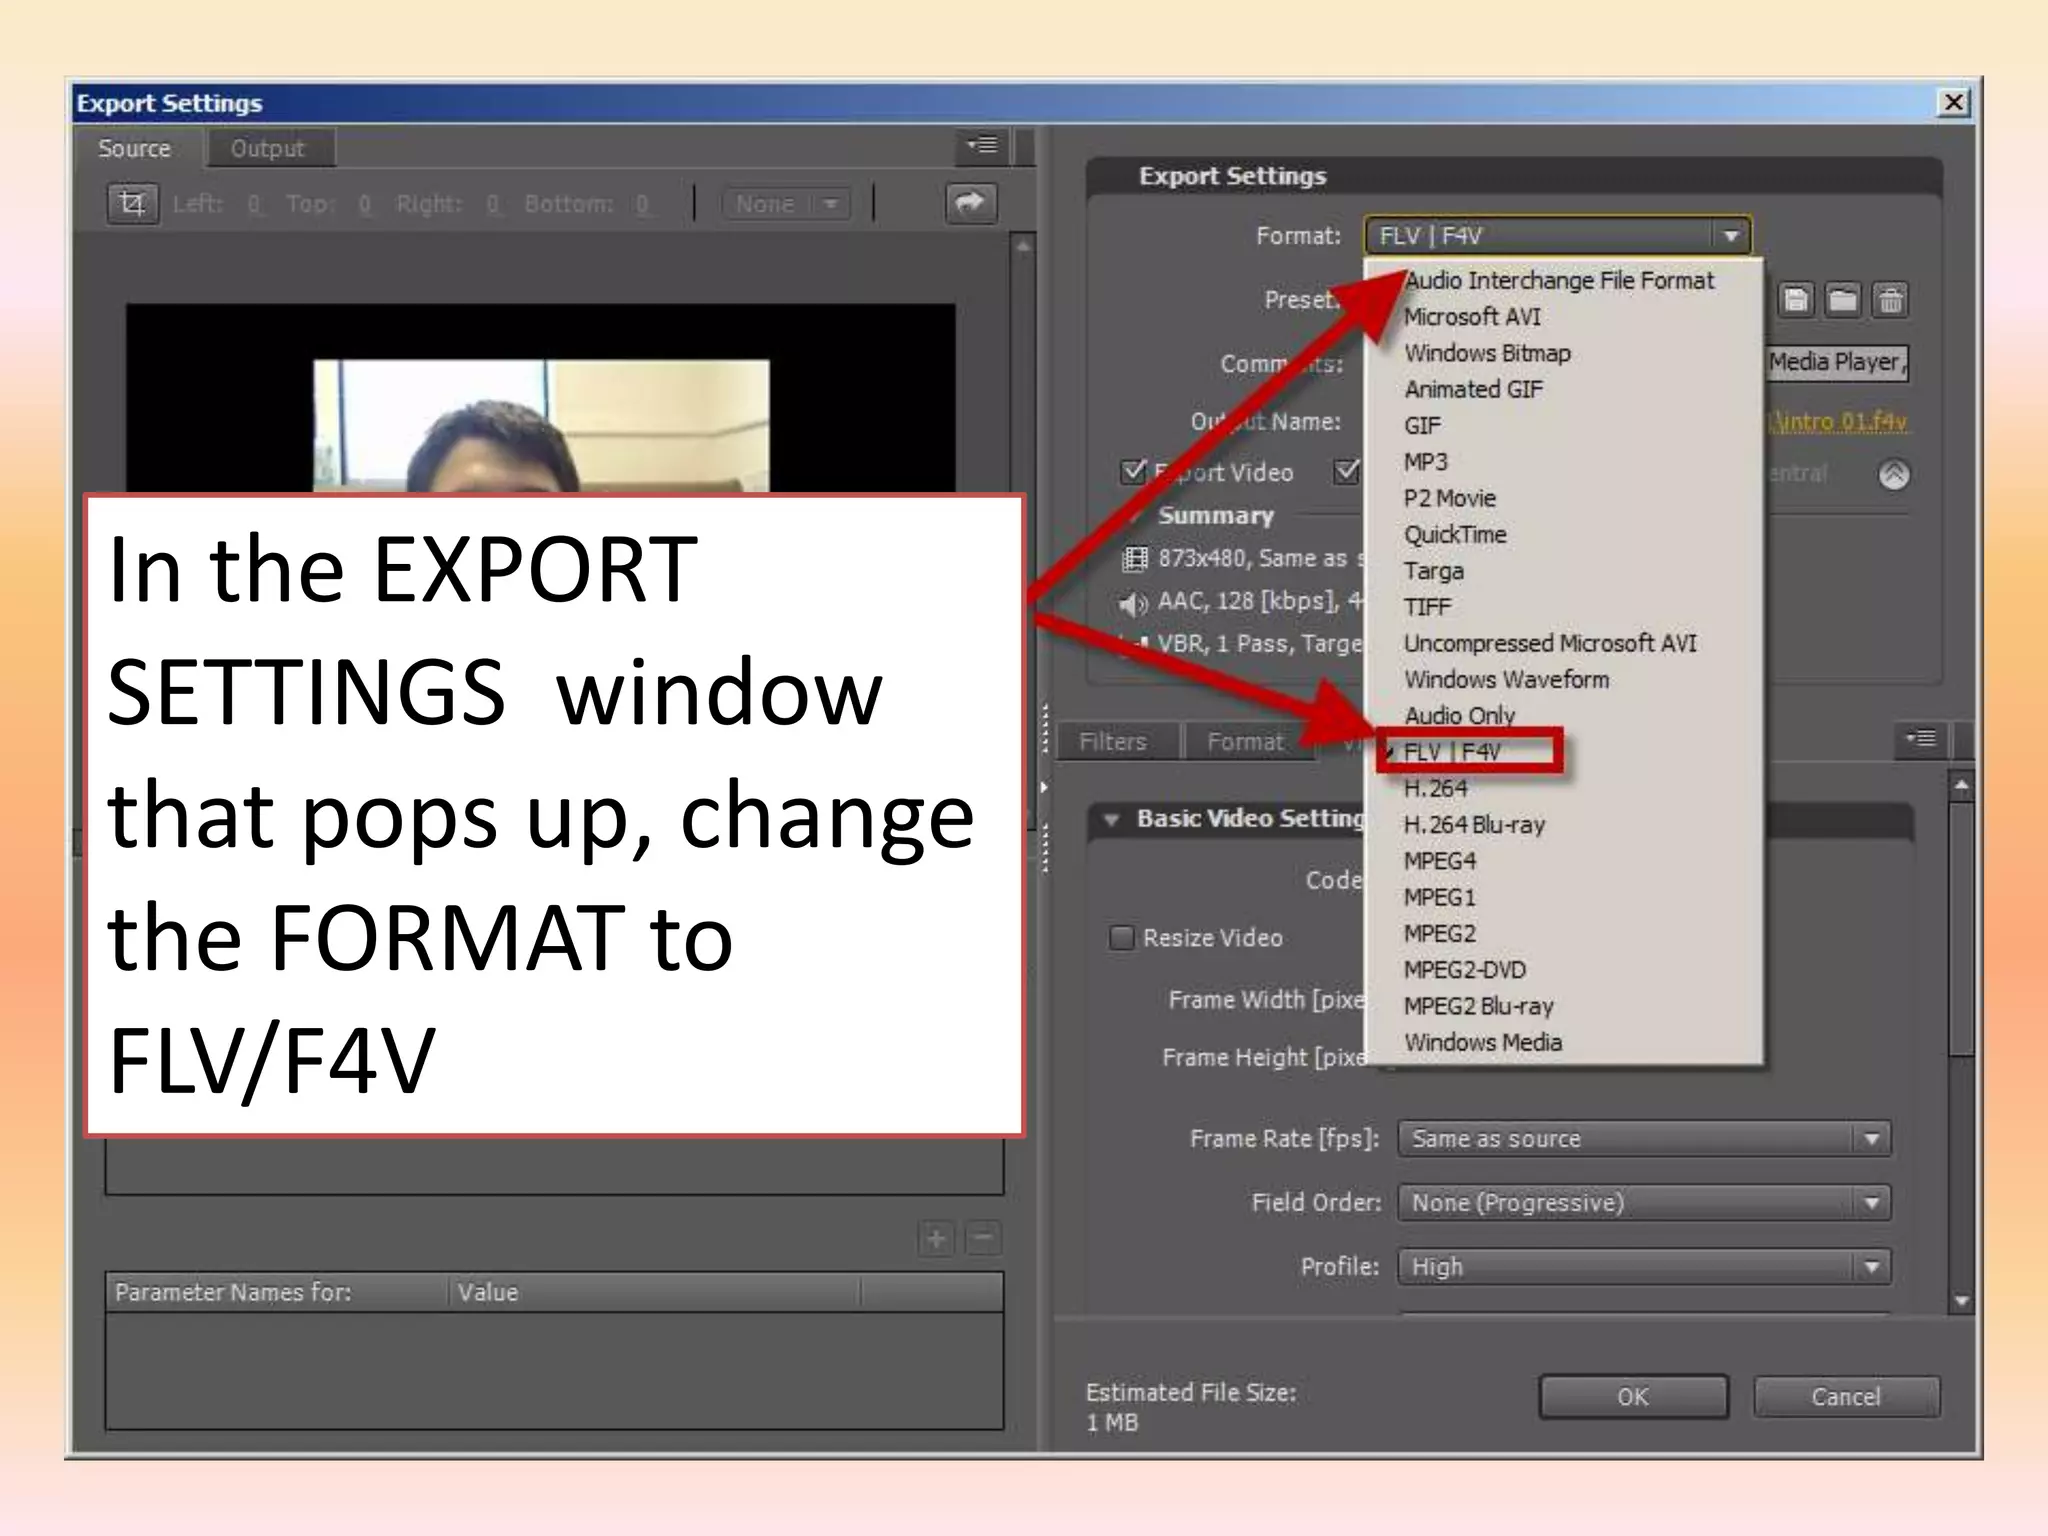
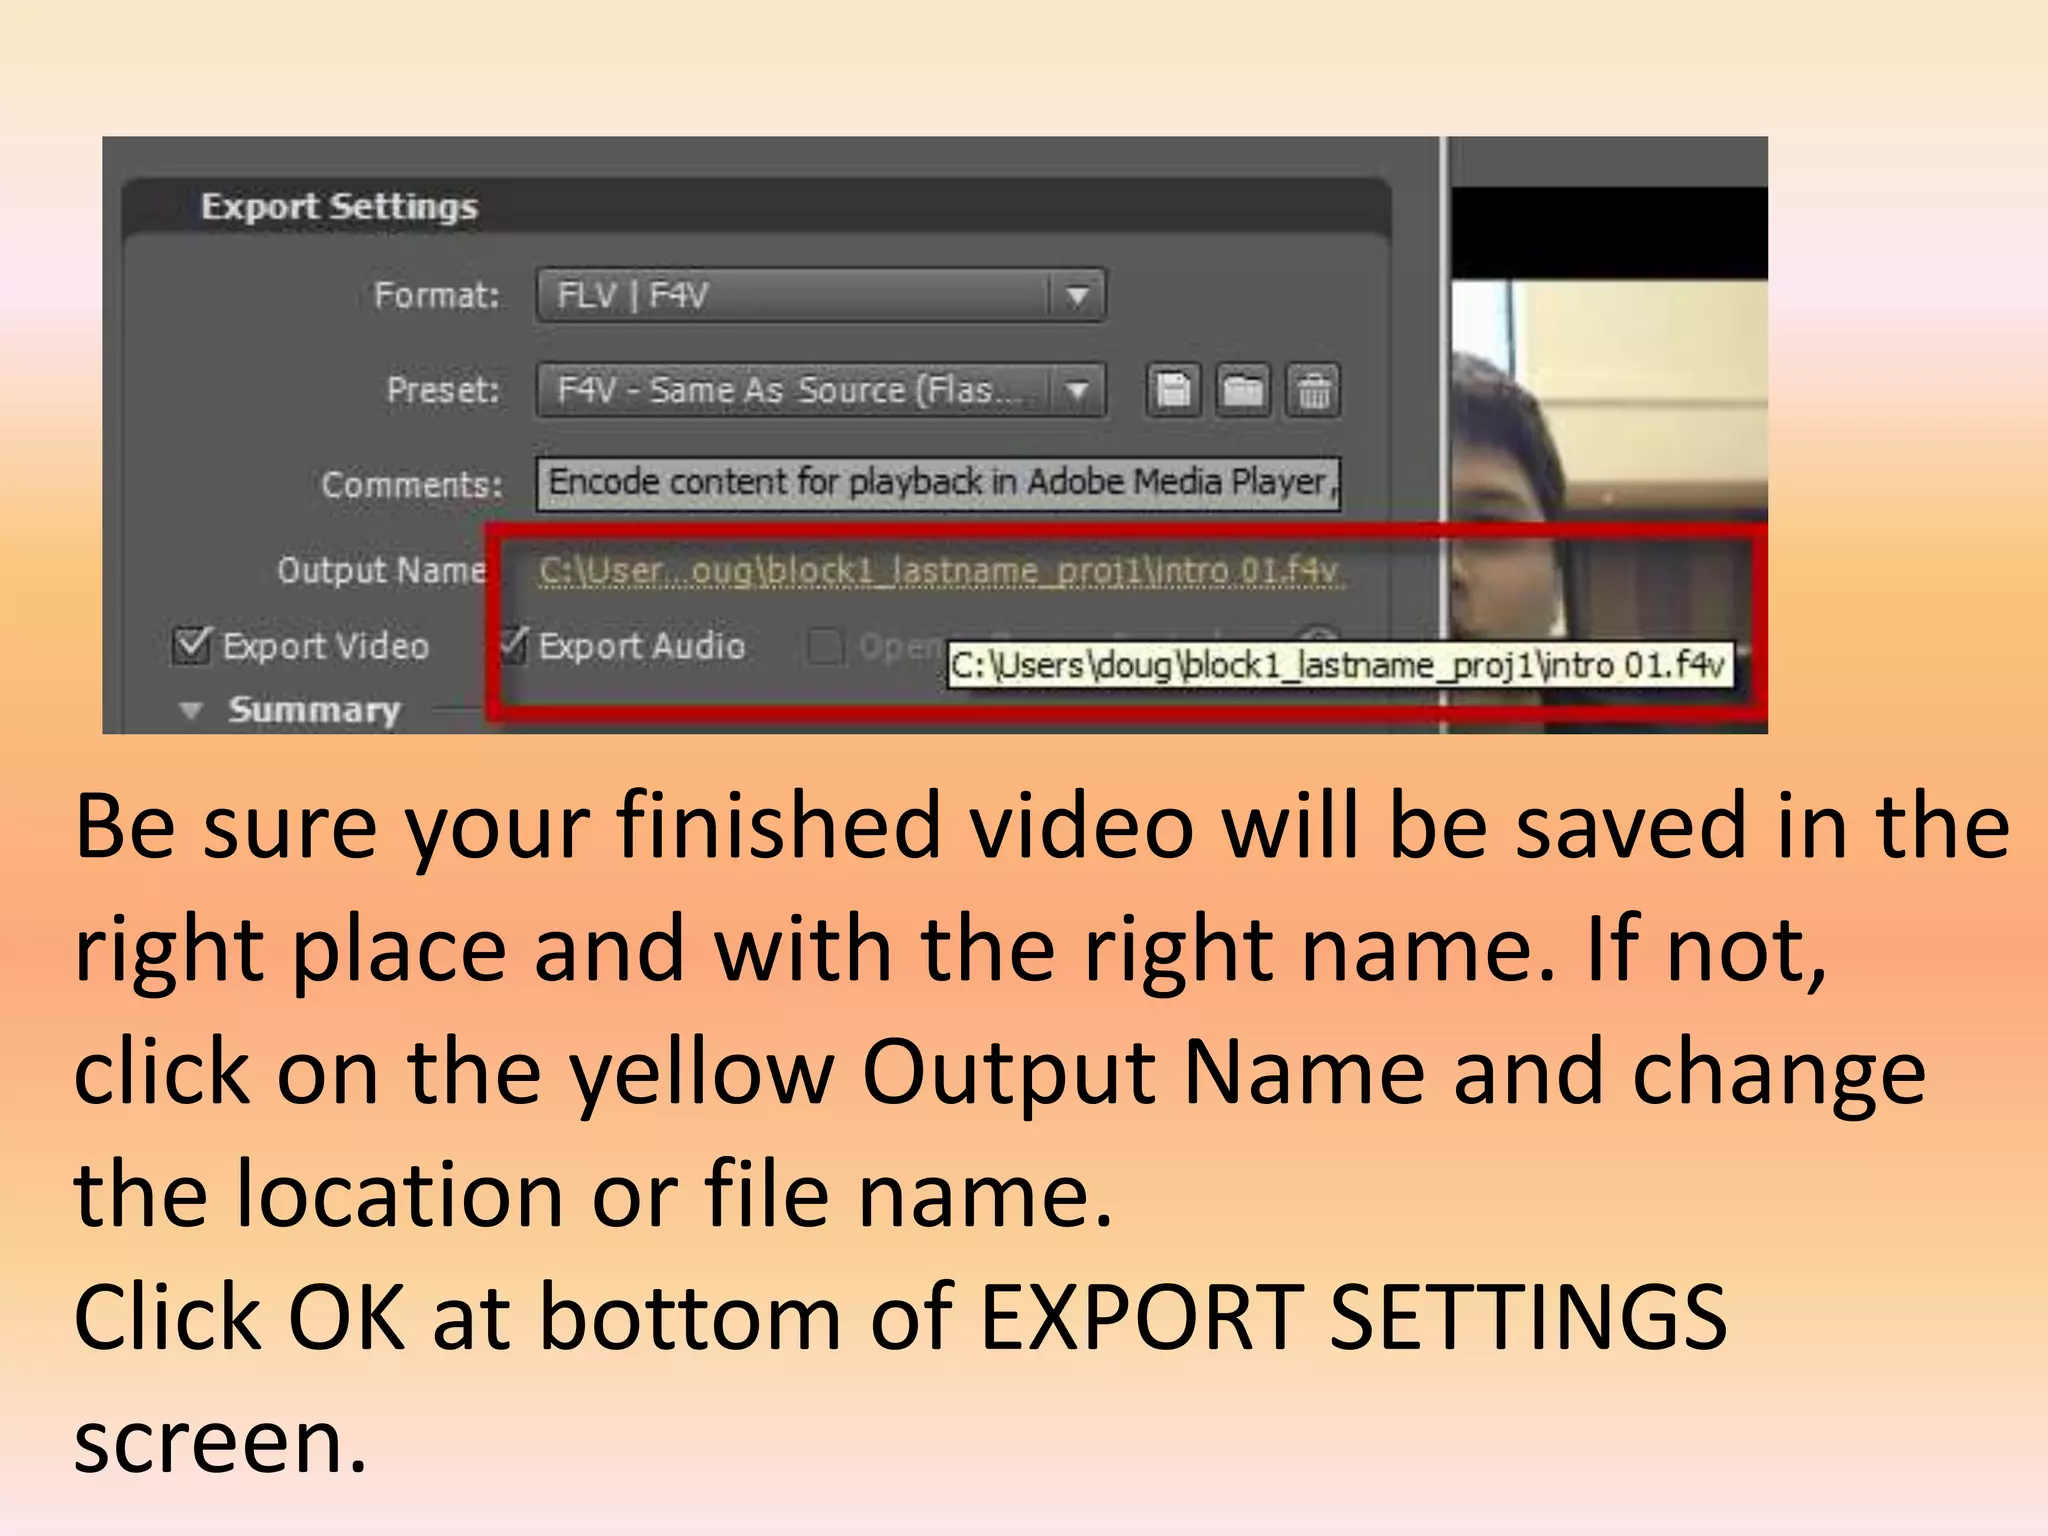
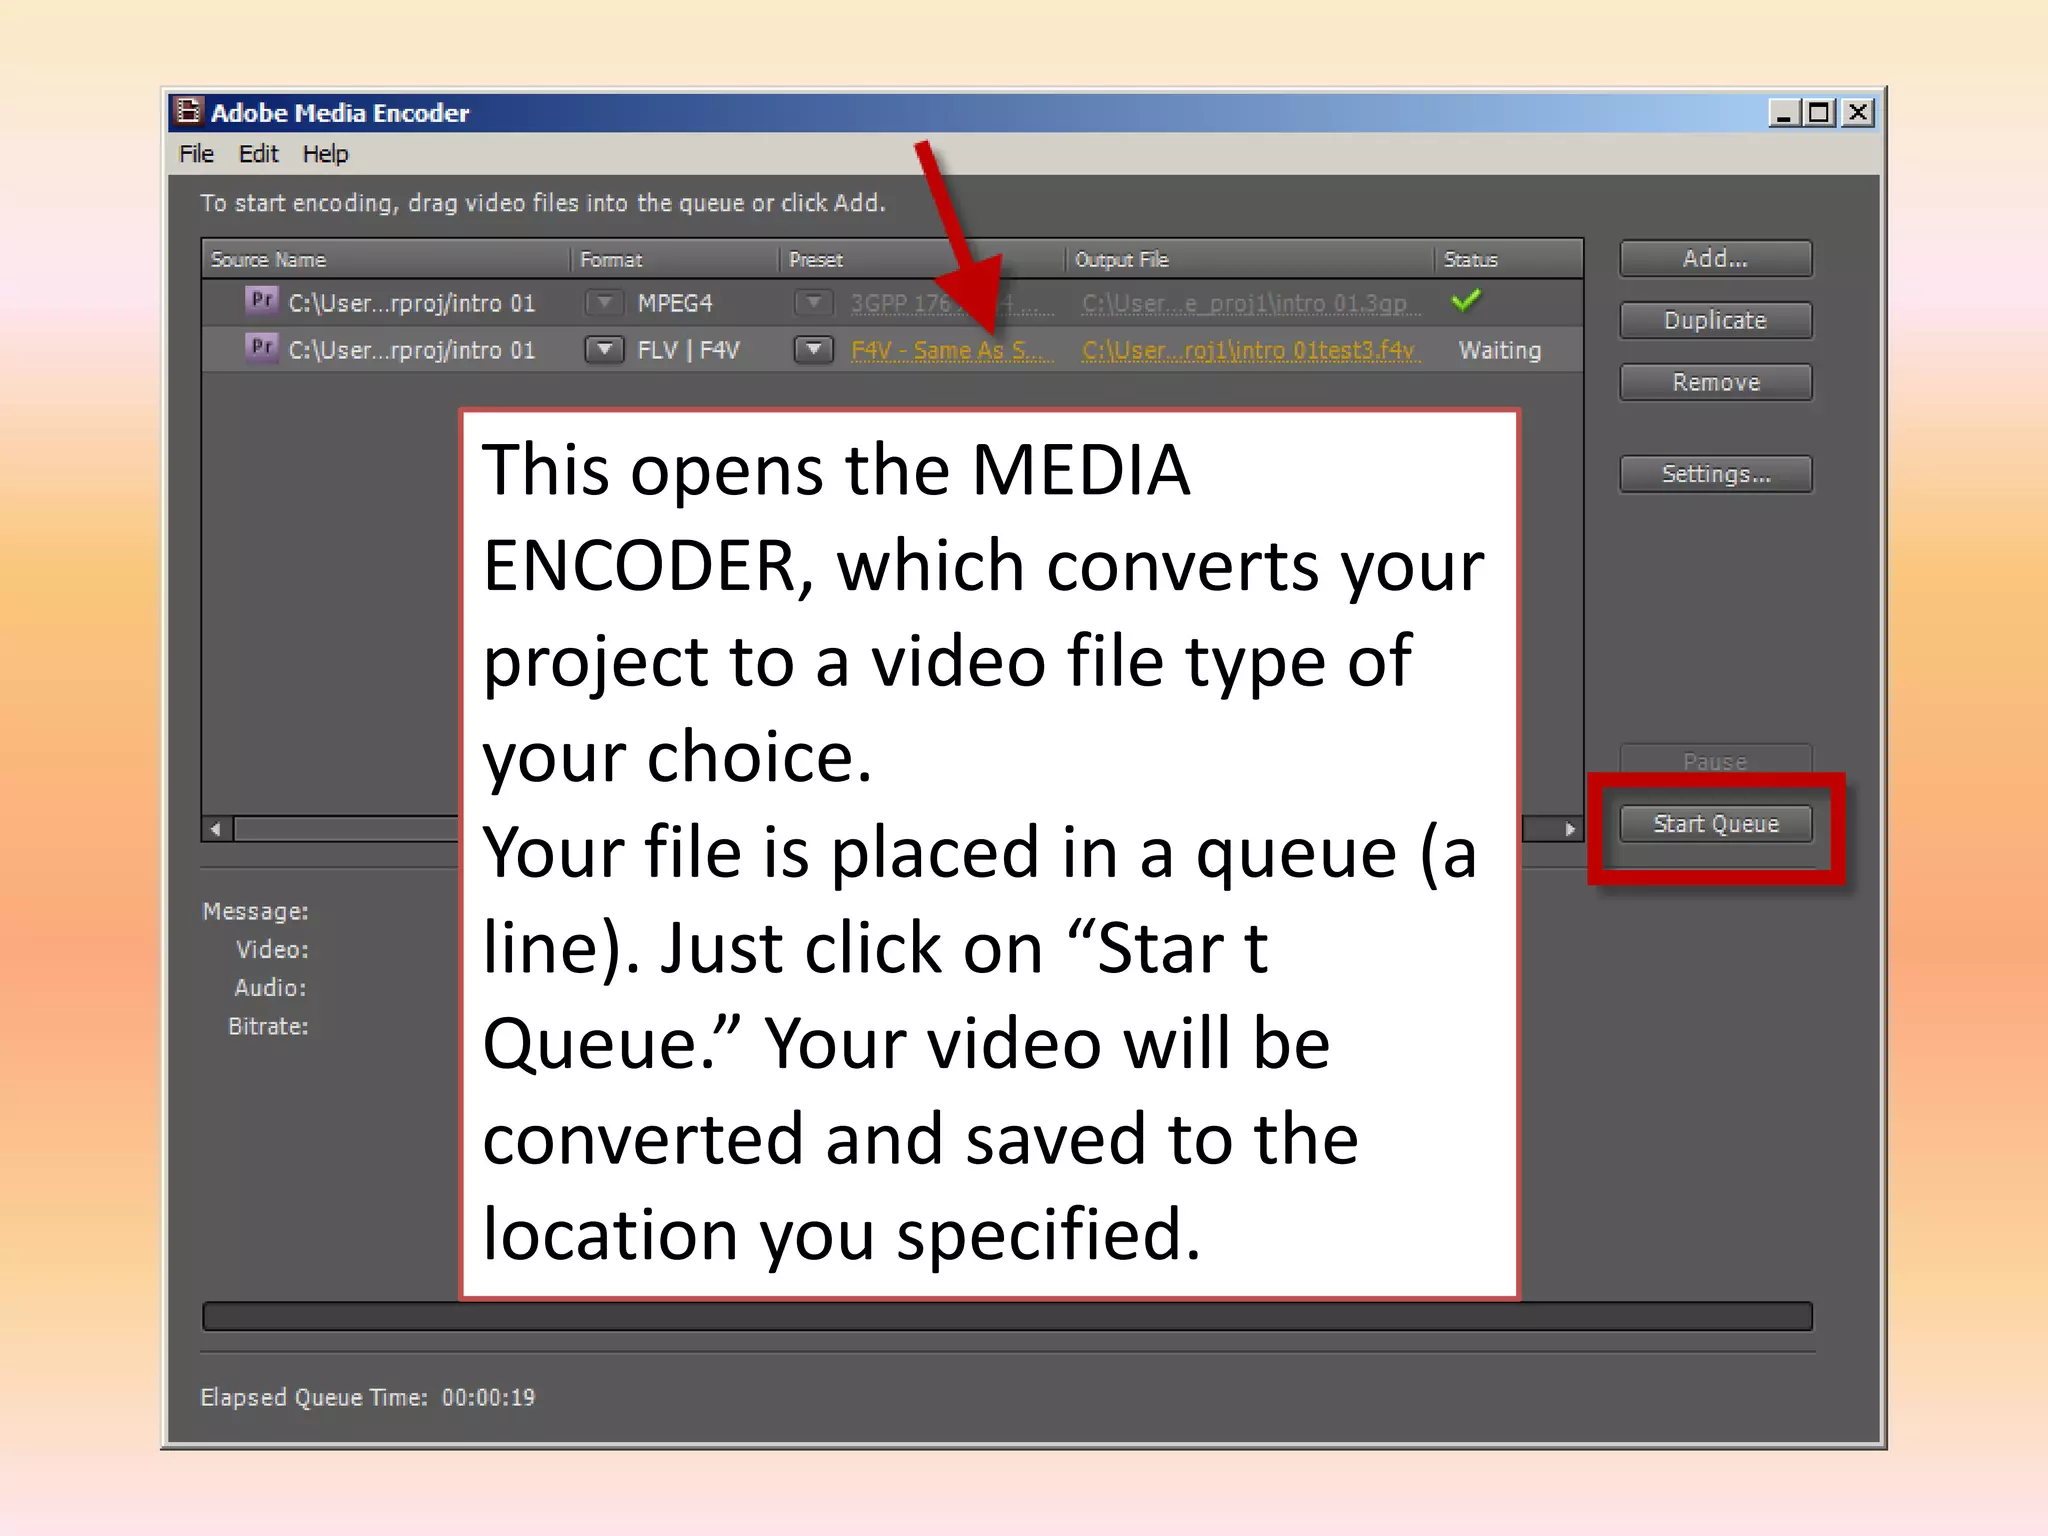
Importing Files,  Simple Editing, and Exporting Movies Using Premiere Pro CS4
Open PremiereAll ProgramsAdobe Master Collection CS4Adobe Premiere Pro CS4
Leave all of this the same. We’ll talk more about these settings later in the course.
Setting Up a Folder for Your ProjectIn lower right corner, click “Browse.” Locate “My Documents” and click on it one time.Click on “Make a New Folder.” Name it Block#_lastname_proj14. Name project “lastname_intro”5. Click “OK”
Working Panels in PremiereProgram PanelSource PanelProject PanelTimeline PanelWe’ll focus on these 4 panels to start
Project PanelProject PanelProject Panel: Where you see the original  files you have imported or captured to start the editing process.
Source PanelSource PanelShows the file (from the project panel) you are currently working on.
Program PanelProgram PanelShows the video as it’s being edited in the timeline.
Timeline PanelTimeline PanelWhere clips can be edited and/or assembled.
Import Video FilesFileImport (Ctrl + I )
Browse to rm224_sharedFind your group’s folder
Click and drag file from Project panel to the Source panel
Source Pane Basic ControlsBack 1 FramePlayForward 1 FrameSet inpointSet outpointShuttle forwardor backJog wheel forward or back
To edit your intro:1. In the SOURCE panel, find the PERFECT  starting point. Use the PLAY, back, forward, shuttle and jog wheels to find THE frame to START your movie on. 2. Click on SET IN POINT to set the STARTING point for your clip.
To edit your intro:3. In the SOURCE panel, find the PERFECT  ENDING point. Use the PLAY, back, forward, shuttle and jog wheels to find THE frame to END your intro on. 4. Click on SET OUT POINT to set the ENDING point for your clip.You can also move the blue pointer to move through the clip.
Drag clip from Source panel into the Timeline, dropping it into the Video 1 and Audio 1 slots.
Add a TitleAt top of screen, go to Title New TitleDefault StillIn the pop-up dialog box, leave the default  settings alone and click OK
Click this icon to turn off the video view on the title page.  Turn off video view
Change Font Size to 50.Click iconto center text.Choose font.
Click both boxes on the CENTER tool to align title on page.
Close Title WindowNo, you don’t have to save. Really!
Adjust the Timeline view by sliding the bar to the right halfway (zoom in).Then, in  the Timeline window, drag your interview clip to the right to make some room for inserting the title.
Now drag the title from the SOURCE panel into the timeline. If it overlaps with your intro clip, delete the title from the timeline, move the intro clip farther to the right, and drag the title back into the timeline.
Drag the intro clip so that it butts up against the title segment
Move the blue pointer  to the beginning of the timeline. Now you can preview your whole project by clicking on the PLAY button in the PROGRAM window.
Exporting Your VideoTurn your edited project into a viewable video by following these steps. 1. Go to FileExportMedia
In the EXPORT SETTINGS  window that pops up, change the FORMAT to FLV/F4V
Be sure your finished video will be saved in the right place and with the right name. If not, click on the yellow Output Name and change the location or file name.Click OK at bottom of EXPORT SETTINGS screen.
This opens the MEDIA ENCODER, which converts your project to a video file type of your choice. Your file is placed in a queue (a line). Just click on “Star t Queue.” Your video will be converted and saved to the location you specified.
Final StepsSave your Premiere PROJECT into the folder one last time. You can return to the PROJECT to re-edit if you need to. The finished, exported video should not be edited.Upload your video to your blog. You can do this either byA) Uploading to YouTube and embeddingB) Uploading the F4V file directly to a blog post.Tag your blog entry with these tags:Video_project1, Introductions, editing

Tda importing and editing in premiere1

  • 1.
    Importing Files, Simple Editing, and Exporting Movies Using Premiere Pro CS4
  • 2.
    Open PremiereAll ProgramsAdobeMaster Collection CS4Adobe Premiere Pro CS4
  • 4.
    Leave all ofthis the same. We’ll talk more about these settings later in the course.
  • 5.
    Setting Up aFolder for Your ProjectIn lower right corner, click “Browse.” Locate “My Documents” and click on it one time.Click on “Make a New Folder.” Name it Block#_lastname_proj14. Name project “lastname_intro”5. Click “OK”
  • 7.
    Working Panels inPremiereProgram PanelSource PanelProject PanelTimeline PanelWe’ll focus on these 4 panels to start
  • 8.
    Project PanelProject PanelProjectPanel: Where you see the original files you have imported or captured to start the editing process.
  • 9.
    Source PanelSource PanelShowsthe file (from the project panel) you are currently working on.
  • 10.
    Program PanelProgram PanelShowsthe video as it’s being edited in the timeline.
  • 11.
    Timeline PanelTimeline PanelWhereclips can be edited and/or assembled.
  • 12.
  • 13.
    Browse to rm224_sharedFindyour group’s folder
  • 15.
    Click and dragfile from Project panel to the Source panel
  • 16.
    Source Pane BasicControlsBack 1 FramePlayForward 1 FrameSet inpointSet outpointShuttle forwardor backJog wheel forward or back
  • 17.
    To edit yourintro:1. In the SOURCE panel, find the PERFECT starting point. Use the PLAY, back, forward, shuttle and jog wheels to find THE frame to START your movie on. 2. Click on SET IN POINT to set the STARTING point for your clip.
  • 18.
    To edit yourintro:3. In the SOURCE panel, find the PERFECT ENDING point. Use the PLAY, back, forward, shuttle and jog wheels to find THE frame to END your intro on. 4. Click on SET OUT POINT to set the ENDING point for your clip.You can also move the blue pointer to move through the clip.
  • 19.
    Drag clip fromSource panel into the Timeline, dropping it into the Video 1 and Audio 1 slots.
  • 20.
    Add a TitleAttop of screen, go to Title New TitleDefault StillIn the pop-up dialog box, leave the default settings alone and click OK
  • 21.
    Click this iconto turn off the video view on the title page. Turn off video view
  • 22.
    Change Font Sizeto 50.Click iconto center text.Choose font.
  • 23.
    Click both boxeson the CENTER tool to align title on page.
  • 24.
    Close Title WindowNo,you don’t have to save. Really!
  • 26.
    Adjust the Timelineview by sliding the bar to the right halfway (zoom in).Then, in the Timeline window, drag your interview clip to the right to make some room for inserting the title.
  • 27.
    Now drag thetitle from the SOURCE panel into the timeline. If it overlaps with your intro clip, delete the title from the timeline, move the intro clip farther to the right, and drag the title back into the timeline.
  • 28.
    Drag the introclip so that it butts up against the title segment
  • 29.
    Move the bluepointer to the beginning of the timeline. Now you can preview your whole project by clicking on the PLAY button in the PROGRAM window.
  • 30.
    Exporting Your VideoTurnyour edited project into a viewable video by following these steps. 1. Go to FileExportMedia
  • 31.
    In the EXPORTSETTINGS window that pops up, change the FORMAT to FLV/F4V
  • 32.
    Be sure yourfinished video will be saved in the right place and with the right name. If not, click on the yellow Output Name and change the location or file name.Click OK at bottom of EXPORT SETTINGS screen.
  • 33.
    This opens theMEDIA ENCODER, which converts your project to a video file type of your choice. Your file is placed in a queue (a line). Just click on “Star t Queue.” Your video will be converted and saved to the location you specified.
  • 34.
    Final StepsSave yourPremiere PROJECT into the folder one last time. You can return to the PROJECT to re-edit if you need to. The finished, exported video should not be edited.Upload your video to your blog. You can do this either byA) Uploading to YouTube and embeddingB) Uploading the F4V file directly to a blog post.Tag your blog entry with these tags:Video_project1, Introductions, editing