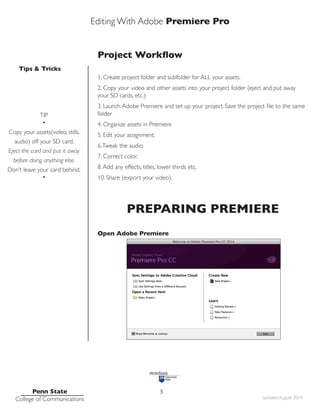
CC BASICS Tutorial
“Film editing is why people like movies. Because in the end, wouldn’t we all want
to edit our own lives? I think everybody would like to take out the bad parts,
take out the slow parts, and look deeper into the good parts.”
- Bob Cohen, director
v. 1.0
Adobe
Premiere
College of Communications
Editing With Adobe Premiere Pro
Penn State
College of Communications updated August 2014
2
					
TOPIC PAG E
Preparing your project 3
Set up Adobe Premiere 5
Premiere Overview 8
Importing Media 9
Editing Basics 10
Audio 16
Reconnecting Media 19
Color Correction 21
Titles 28
Exporting 30
Advanced Audio
Sizing Images
34
36
Table of Contents
Editing With Adobe Premiere Pro
Tips & Tricks
Penn State
College of Communications updated August 2014
3
Adobe Premiere is a non-linear video editor.
You can edit your video in any order you want, and access the beginning, middle
and end of your video simply and quickly.
It is also non-destructive.This means you can cut, delete, move, change, and adjust
your audio and video happy in the knowledge you haven’t destroyed anything.
This tutorial is designed as a get-started tutorial NOT a complete Everything
You Always WantedTo Know About Premiere And Were AfraidTo Ask tutorial.
IT is specifically written for Adobe Premiere CC 2014
GET READY
Preparing yourself and Premiere
Before you open the program it is extremely important to get organized. Video
editing is complicated..There are many files and folders and it is very easy to ‘lose’
stuff.
Get Organized. Stay Organized.
you will thank me later.
*Create a Project Folder for every, er, project.*
This folder will hold everything associated with your project. Here is a sample
system - the exact naming convention is less important than being consistent and
logical:
•
Many of the terms we use in
video editing come from the
days of film and razor blades
and linear,‘do it by hand’ edit-
ing.
•
•
There are two kinds of
people.Those with messy
sock drawers and those who
organize their socks.
Multimedia requires you to
organize your socks or pay
the price later.
•
Editing With Adobe Premiere Pro
Tips & Tricks
Penn State
College of Communications updated August 2014
4
FOLDER NAME: It should include your name and a one-word description of
your story. I use the year at the front to make it easy to find and sort
_AUDIO: Any audio captured separately from video.This could include interviews,
nat sound, sound effects, music, etc.
_GRAPHICS: Any graphics that will be used in your project.This could include
title slides or elements created in programs such as After Effects or Photoshop.
_OUTPUT: Where you will put your finished movie
_STILLS: Any still photos that are part of your project - they could be yours or
archival images from other sources
_VIDEO: All your video content
NOTE the two files at the bottom.These are created by Premiere when you first
save your project. MAKE SURE to save them to your project folder.
.prproj is your Premiere project file.
The preview files folder holds files Premiere creates to run the program.
DO THIS And your project will exist in a single place.You can copy it to another
drive, give it to another person to edit.
DON’T DO THIS and files will get lost. projects won’t work, your harddrive will
fill up and you will go crazy.
TIP
•
For bigger projects make sub-
folders. Break your video up
by day shot and/or content for
example by making subfolders
in the _VIDEO folder
•
TIP
•
For students working in Lubert
at Innovation Park:
Store your project folder on
the SAN
For all other students:
We strongly recommend using
a fast external hard-
drive with Firewire 800 or
USB 3.0
•
Editing With Adobe Premiere Pro
Tips & Tricks
Penn State
College of Communications updated August 2014
5
Project Workflow
1. Create project folder and subfolder for ALL your assets.
2. Copy your video and other assets into your project folder (eject and put away
your SD cards, etc.)
3. Launch Adobe Premiere and set up your project. Save the project file to the same
folder
4. Organize assets in Premiere
5. Edit your assignment.
6.Tweak the audio.
7. Correct color.
8.Add any effects, titles, lower thirds etc.
10. Share (export your video).
PREPARING PREMIERE
Open Adobe Premiere
TIP
•
Copy your assets(video, stills,
audio) off your SD card.
Eject the card and put it away
before doing anything else.
Don’t leave your card behind.
•
Editing With Adobe Premiere Pro
Tips & Tricks
Penn State
College of Communications updated August 2014
6
• New Project - select if you’re starting a new project
•. Open Project - select to continue working on a project
• Recent Projects - select from the list of projects
Select New Project
FOR New Projects you will get this window next
You only need to set the location and name.
1. Location: Click the Browse button and set the location to your Project folder
2. Name: Name your project - make sure to includeYOUR name
TIP
•
REMEMBER. Create a single
folder for each project and
save EVERYTHING to that
folder. Put all your original
content in that folder along
with all your Premiere files
and folders.
•
Editing With Adobe Premiere Pro
Tips & Tricks
Penn State
College of Communications updated August 2014
7
Click OK You should see this ‘New Sequence’ window.
(If not, create a new sequence File>New>Sequence)
A very confusing window with MANY options.This window is where we tell
Premiere what format we want to edit our video in.
Thankfully we can ignore this window and just click OK.We will set the time-
line automatically when we begin editing.
You can pick a setting closest to what you think OR do NOTHING and
Simply click OK and continue.
TIP
•
You could go through the steps
to set your Sequence settings
at this point to match your
video.
BUT it is much easier to do
this automatically when we
start editing.
*NOTE*
If you are shooting only stills,
no video, you MUST select
the proper Sequence Preset
manually. For audio slideshows
generally you can select the
DSLR 1080p30 setting
•
Editing With Adobe Premiere Pro
Tips & Tricks
Penn State
College of Communications updated August 2014
8
PREMIERE OVERVIEW
Below, an example of what a video project looks like.
Note how Premiere is organized into four panes plus tool bars.This is a pretty stan-
dard video editing environment.
SOURCE: This is where you will look at all your ‘stuff’ - video, stills, etc. and decide
what you want to use in your story.
PROGRAM: This is where you see your story as you build it on the timeline
below.The Program window shows you what is on your timeline, and will play back
your video.
SEQUENCE: This is your story. It is also called theTimeline.This is where you will
edit and create your project.
PROJECT: This is where all your content and assets are stored. Premiere does
not actually store your material - it simply points to wherever your material is.That
is why you need to stay organized and not move material around or leave it on the
wrong computer where Premiere can’t find it.
TOOLS: The various tools you’ll use when editing on the timeline.
•
BEFORE you import your
content, consider renam-
ing and organizing your
files. If you create folders, Pre-
miere can import your content
in those folders.
For example, you could put
your interviews in one folder,
your b-roll in another, your
tight details in a third. Or, you
could create separate folders
for separate interviews.
Spending the time to organize
your clips and other content in
advance can save you a LOT
of time once you begin editing.
A program like Photo Me-
chanic will let you look at all
your material and rename in
batches.A big time saver
•
Editing With Adobe Premiere Pro
Tips & Tricks
Penn State
College of Communications updated August 2014
9
IMPORTING CONTENT
There are multiple ways to bring your assets into Premiere.
The easy way:You can simply click File>Import. This works well for stills, audio and
DSLR video.
But this won’t work for all file types. For cameras that have a complicated file struc-
ture, the CanonVixias, Panasonics, etc., the best way to import is to use the Media
Browser in the Project Pane
Select the Media BrowserTab
• Navigate to your media: It can be displayed as either thumbnails or in list view
• Media Browser should automatically detect the types of files
• Select the clip(s) you want to use
• Control Click (right click) and select Import
•
There are keyboard shortcuts
for many actions in Premiere.
Learn the shortcuts and you’ll
be a much faster video editor.
S = Save (Remember to
save your project frequently
as you work)
•
•
Another GREAT shortcut
is the tilde key ~. The key
makes whatever pane you’re
working in full screen.Want
a close up of your Media
Browser or timeline? The ~
key is the answer.
•
Editing With Adobe Premiere Pro
Tips & Tricks
Penn State
College of Communications updated August 2014
10
MEDIA TYPES
There are many types of files that you can import into Premiere.
Audio files may be .mp3, aif, wav
Still images could be jpeg, tif, psd among others
Video files can be .mov, mp4, flv,AVCHD among many others
IMPORTANT
Some video cameras - including the CanonVixias and Panasonic video cameras we
use - create a complex file structure.
When copying your content from your SD card to your project folder you MUST
copy the entire folder and subfolders. DON’T delete any of the subfolders.
DON’T rename any of the subfolders.
EDITING BASICS
1. Use the Project Pane and source window to look at your content
2. Select which clips or parts of clips you want to use
3. Place clips on the timeline (sequence)
4. Cut, move, edit, arrange clips on the timeline
				
				 Double click on a clip in the Project Pane and it will
				 appear in hte Source Window
•
REMEMBER. If you just use
the File>Import command
you won’t be able to import
from cameras like theVixia
and Panasonic.
Use the Media Browser
•
•
SETTINGS:. If you’re
working in Lubert 115 at In-
novation Park take note and
set the following preferences:
Preferences > Audio Hardware
> Default Device > Built in
Line Output
Preferences > Audio > Default
Audio Tracks > Stereo Media:
Use Mono
•
Editing With Adobe Premiere Pro
Tips & Tricks
Penn State
College of Communications updated August 2014
11
Editing starts with deciding what to include and what not to use in your project.
You shot a lot of video, maybe took a lot of photos – but you won’t use everything.
You can look at all your material in either the Project Pane or in the Source Pane.
After looking through a clip you will make a decision:
1.You don’t want anything from the clip. That’s easy, just ignore it
2.You want all of the clip on your timeline
3.You want part of the clip (or parts)
Getting an entire clip (or still image) onto the timeline can be done in several ways.
1.You can drag it directly to the timeline from either the Project or Source Panes,
place it wherever you like and release.
2. Use the Insert or Overwrite buttons to place the clip on the timeline.This only
works with a clip in the Source Pane.
The first button is the Insert button.This will put the clip on the timeline, starting
at wherever you have placed the playhead on the timeline and push all other content
forward, out of the way.
The second button is the Overwrite button.This will put the clip on the timeline
starting at the playhead, but overwrite(erase) whatever is underneath it.
PLEASE PLEASE read the tip on this page. It isVITAL that the first clip you place
on your timeline be video NOT a still photo or audio (unless you are editing a slide-
show with no video of course)
•
The FIRST clip you place on
the timeline MUST be video.
Because we are using this clip
to set the timeline to match
your video format.
You will get this box:
You DEFINITELY DEFINITELY
DEFINITELY want to select
“Change Sequence Settings”
This will set the sequence to
the proper settings for your
video. If you drag audio or stills
first, your timeline will be wrong.
•
Editing With Adobe Premiere Pro
Tips & Tricks
Penn State
College of Communications updated August 2014
12
Using part of a clip. Often, we only want part of a particular clip –
a key quote or moment.
IN and OUT points
Select part of a clip using IN and OUT points. In the Source window, as you play the
video, use the ‘I’ and ‘O’ keys to establish the start (In) and end (Out) of the video you
actually want to use.
The lighter grey vbar shows the selection made using the In and Out points. It is a
subset of the full clip.You can use the buttons to set In and Out, or the I and O keys
on the keyboard.
Change either point by playing the video and reselecting I or O.
IMPORTANT
Premiere is non-destructive. Even though you select part of a clip, it is easy to use
more or less of that clip once it is on the timeline.
So don’t worry about making this edit perfectly precise. It is easy to change later.
•
More SHORTCUTS
Space Bar - will stop
and start a video in either
the Source pane or on the
Timeline
OR
Use the J,K,L keys to con-
trol the play of video.
J - play in reverse
K - stop
L - play forward
BONUS POINTS
Hit the J or L keys multiple
times to speed up the video
playback
•
Editing With Adobe Premiere Pro
Tips & Tricks
Penn State
College of Communications updated August 2014
13
•
More J,K,L goodness::
Hold the K key, then tap the
J or L keys to advance or
retreat one frame at a time.
OR
Press the K and L keys at
the same time to play in slow
motion
•
Basic Editing
• Trimming
• Cutting
• Moving
Trimming is shortening (or lengthening) a clip from either end
Cutting is separating a clip in the middle
Moving is, obviously, moving a clip to a new position on the timeline
SelectTool (V)
Track Select ForwardTool (A)
Track Select BackwardTool (Shift + A)
Ripple EditTool (B)
Rolling EditTool (N)
Editing With Adobe Premiere Pro
Tips & Tricks
Penn State
College of Communications updated August 2014
14
Use the standard Select Tool(V) to lengthen or shorten a clip from either end. With this
tool, shortening a clip will leave a gap, lengthening a clip over another clip will overwrite
that second clip. NOTE: If you reach the end of your clip, you obviously won’t be able to
make it any longer.
The cursor turns to a red arrow symbol when using the standard SelectTool(V) to trim.
The Track Select Tool(A or Shift+A) allows you to select all the tracks ahead of or behind
the cursor.This is useful if you want to move multiple clips at the same time. By default,
the tool selects all clips on all tracks ahead of(or behind in the case of Shift+A) the cursor.
Hold down the Shift key to select all the clips on just one track.
The Ripple Edit Tool(B) lets you shorten a clip and at the same time remove the gap that
would be created – two steps in one.
NOTE:The RippleTool changes the duration of your video.
The cursor turns to a yellow arrow symbol for the Ripple EditTool(B).
The Rolling Edit Tool(N) is used to change the edit point between two clips. If one clip,
for example, were too long, and the next clip too short or you’re concerned about where
the edit is for timing or other reasons, you can easily move that edit point to better bal-
ance the length of the clips.
NOTE: the Rolling EditTool(N) does NOT change the duration of your video, It simply
moves an edit point.
This cursor is for the Rolling EditTool(N).
•
It’s worth learning as many
keyboard shortcuts as you
can to speed up the editing
process.
Fast editing means more time
for other things like shooting
(or sleeping)
•
•
Another cool shortcut – for
the Rolling EditTool.(N). If
you know exactly where you
want to move your edit point
to, put the playhead at the
new point, and press ‘E’.Your
edit point will move to that
point. Cool.
Especially useful for audio
slideshows and still images.
•
Editing With Adobe Premiere Pro
Tips & Tricks
Penn State
College of Communications updated August 2014
15
To begin editing, start with the basics (Imagine Julie Andrews singing Do Re Mi)
UseThe Select tool(V) to move clips around and shorten and lengthen them from the
ends.
Use the Blade tool(C) to cut clips, breaking them into parts or cut out a section in the
middle - get rid of that annoying ‘um’ or longer sections that distract or go off point.
Those two tools (remember the keyboard shortcuts –V for the select tool and C for the
blade tool) will allow you to do most of your basic editing.
In writing, words sentences and paragraphs are your building blocks.
In video it is clips and sequences and edits.
The clips are your basic content - if you didn’t shoot good material, or enough material,
you will struggle, and do better next time.
Sequences are a series of clips that connect together the way words form sentences
form paragraphs – It forms the narrative of the story.
You need to avoid the basics mistakes such as jump cuts, but you also need to create
something that makes sense narratively.
And finally, the edit establishes the rhythm of your piece – think about the sound, and
the narrative. Cuts between shots should feel natural and be invisible to your viewer.
The transition between shots and between scenes establishes a rhythm and feel for your
video.
•
The best way to learn is by
doing. Shoot, edit, and then go
shoot again.
There are also nearly limitless
tutorials online. Lynda.Com is
a great and free resource for
Penn State students.
And some great books on the
subject of filmmaking.
One of my favorites is
“InThe Blink Of An Eye”
by the amazing film editor
Walter Murch
Editing With Adobe Premiere Pro
Tips & Tricks
Penn State
College of Communications updated August 2014
16
Audio
Your audio may be part of a video clip or recorded separately. In either case you can edit
and adjust your audio in Premiere.
By default, Premiere imports stereo audio on one track. IF you set your preferences to
fit our style (see tip at left), your audio should be on two tracks - this allows you to edit
each track separately.
Useful if you have recorded with two different mics, or at different levels.
IF your stereo audio is on one track and you need to split it, control click on the file in
the Project Window and select Modify>Audio Channels. (fig. 1)
Change the ‘Preset’ from ‘Use File’ to ‘Mono (fig. 2)
fig. 1
fig. 2
•
SETTINGS:. If you’re work-
ing in Lubert 115 at Innova-
tion Park take note: the fol-
lowing preferences have been
set on those computers:
Preferences > Audio Hardware
> Default Device > Built in Line
Output
Preferences > Audio > Default
Audio Tracks > Stereo Media:
Use Mono
•
•
File Types
If you’re not sure what kind of
file you’re working with, video
or audio, control or right click
on the file in the Project Win-
dow and select ‘properties...’
•
Editing With Adobe Premiere Pro
Tips & Tricks
Penn State
College of Communications updated August 2014
17
Adjusting Audio on the Timeline
If you can’t see the waveform of the audio, deepen the height of the track.
Note how the select tool changes shape and allows you grab the edge of the track
and pull down.
You can turn off the volume,‘mute’ a track by clicking the speaker icon.
The white line controls the volume of the track. Click and drag it up to make a track
louder, down to make it quieter. IF you don’t see that white line, click on the diamond
icon and select’ Show Clip Keyframes’
Your goal is to have your audio adjusted so it is consistent throughout your video. You
don’t want listeners screaming in pain as they rip off headphones because of blaring
sounds, nor do you want them missing critical sounds because everything suddenly be-
came too quiet.
For the web, we aim for our audio to peak around -6db. Use the audio meter in Pre-
miere to monitor your clips. Click and drag the yellow
line on the waveform to raise or lower the volume.
The waveform will
bounce as your audio
plays.You want your
typical sounds to hover
around -6db.
Editing With Adobe Premiere Pro
Tips & Tricks
Penn State
College of Communications updated August 2014
18
Balancing Audio
IF your audio is only in one channel. (you only hear it in one speaker, and only see audio
in the meter on one channel):
Find the clip or audio file in in your project pane and open it in the Source Pane.
Go to Clip>Modify>Audio Channels
IF, for example, you only had audio on the left channel, you would change both Source
Channels to the ‘left’.Then your sound should come out both speakers.
Editing With Adobe Premiere Pro
Tips & Tricks
Penn State
College of Communications updated August 2014
19
Reconnection Media
Remember that an Adobe Premiere project doesn’t actually contain all your video/audio/
image files.The project simply points to those files.
IF those files get moved or renamed, and Premiere can’t find them, you will need to ‘re-
connect’ the media to the project.
Note the various warnings: ‘Media Offline’ in bright red and the question marks next to
each file in the Project Panel. Bad news.
Assuming the files were just moved and not deleted, it is easy to reconnect them.
Typically, when you open a project, if media is ‘offline’ or ‘disconnected’ you’ll get a dialogue
box asking you to find the missing media.
If you get this warning while working, or skip that message, you can open the reconnect
box by right click (control click) on any of the files in the Project folder and select ‘link
media’. You will get a dialogue box asking you to find the ‘missing media’.
•
Another shameless plug for
being organized. IF you set
up your project folder prop-
erly, and made sure to place
all your assets – video, audio,
graphics, stills, whatever – in
your folder,...well...
...then I don’t get to tell you ‘I
told you so’.
This problem most commonly
happens when we have sloppy
work habits and leave files on
the desktop, or on our SD
cards.
Stay organized.
If you’re working at Innovation
Park, keep that project folder
on the SAN in your student
folder.
•
Editing With Adobe Premiere Pro
Tips & Tricks
Penn State
College of Communications updated August 2014
20
At the top of the box is the name of the missing clip and its original file name. (In this
case they are the same)
Offline: Tells Premiere to stop bothering you about this missing file
Offline All: Tells Premiere to stop bothering you about all missings files
If Premiere can’t find the missing file, click ‘Locate’
By clicking the ‘Display Only Exact Name Matches’ only files with that exact name (or
folders) are active..
Simply select the file, and click ‘OK’ to reconnect the file to the project.
NOTE:This requires that you know where the file is!!! If you can’t find the original media
file you are in a mess of trouble.
•
If you have many ‘missing’ or
‘disconnected’ files, select
them them all in your project
panel.
Then, right click (control click)
on one of them and select
‘Link Media’.
When you reconnect that one
file, Premiere will automati-
cally reconnect all the missing
files in that folder.
If you have other folders, you
will need to reconnect those
files manually.
•
Editing With Adobe Premiere Pro
Tips & Tricks
Penn State
College of Communications updated August 2014
21
Color Correction
Ideally of course, you shot your video at the perfect exposure, with your white balance
exactly right.Yes?
Hmmmm.....No?Your footage is underexposed?Your colors don’t look right?
Premiere allows us to correct some mistakes in our video - but NOT all mistakes are
fixable. It’s definitely true that you’ll get the best results by starting with the best original
material - so remember to set your exposure and white balance before you shoot.
There are many, many, many, did I say many, ways to adjust your video. I will show you
some very basic techniques.
Video Effects
Video effects in Premiere can be found under the effects tab in the Project Panel in the
lower left of the screen.
Click on the EffectsTab. For color correction we will be looking in theVideo Effects folder.
BUT note the search box!! Great way to find what you need.
We will be using theThree-Way Color Corrector.
NOTE what happens wnen we type ‘three’ in the search box:
•
With great power comes
great responsibility.
Premiere is a very powerful
video editor complete with
many special effects, gadgets
and super powers.
Just because you can make
your video spherize, twirl,
wave warp, and turbulent
displace, doesn’t mean you
should.
Edit with purpose.Avoid
those special effects unless
there is a compelling reason
to use them.
•
Editing With Adobe Premiere Pro
Tips & Tricks
Penn State
College of Communications updated August 2014
22
Type in ‘three’ and our three-way color corrector is magically revealed.
Or, if you prefer,
open theVideo EffectsTab,
open up Color correction,
scroll down toThree-Way Color
Corrector....
To apply any filter to a clip, simply
drag it from the list onto the clip
in the timeline.
A few things to note.We are in the basic video editing mode at this point.
Editing With Adobe Premiere Pro
Tips & Tricks
Penn State
College of Communications updated August 2014
23
You can change that if you like by going up to the top of the screen:
Window>Workspace>Color Correction.This will rearrange the panels and show more
controls for color correction.
But for this tutorial we will stay in this view.
If you have correctly dragged theThree-Way Color Corrector filter onto your clip in the
timeline,AND if the playhead is over the clip, you will see the clip in the Program win-
dow (top right).
You MAY also see it in the Source window, top left.To view the effects, click on the Effect
Controls tab at the top of the Source window.
TheThree-Way Color Corrector gets its name from the fact that you can control the
shadows, midtones and highlights separately. (clever).
It’s a powerful tool that will allow you to adjust brightness and contrast as well as color.
Editing With Adobe Premiere Pro
Tips & Tricks
Penn State
College of Communications updated August 2014
24
It can be our one-stop shopping for much of our work. Just a few basics, then just ex-
plore and see what you can do.
We will concentrate on this top half of the corrector.
The three circles correspond to the shadow, midtone and highlights of your clip.
You can control each separately OR click on the master button and work on the entire
tonal range at once.This can be useful if you have an overall colorcast to your image for
example.
Typically, it’s best to adjust contrast and brightness BEFORE color correcting.
Use the sliders below the wheels. Drag the black ‘input’ triangle to the right to add black
to your image. Or, the white triangle to the left to brighten the whites. By doing both
you are making the image contrastier.The middle gray arrow can be used to brighten or
darken the middle range of tones
The eye droppers next to each circle can set a neutral tone for that range. Use the white
eyedropper on a white piece of paper, for example, to neutralize a colorcast in the high-
lights.
•
There are so many ways to
color correct and adjust your
image.There are books on the
subject and a million resourc-
es online.
Lynda.com is a great place to
start, and free to Penn State
Students.
lynda.psu.edu and log in to get
started.
•
Editing With Adobe Premiere Pro
Tips & Tricks
Penn State
College of Communications updated August 2014
25
As shot, her face is a little dark and too yellow/orange.
The top image is the original version, and too yellow. By using the con-
trols, in this case the midtone and highlights, we corrected the colorcast.
We also adjusted the ‘input’ levels - adding some black and contrast back
into the photo after color correcting.
Editing With Adobe Premiere Pro
Tips & Tricks
Penn State
College of Communications updated August 2014
26
Notice the changes
I adjusted the black, midtone and white triangles on the Input slider. The middle one first,
opened up the shadows on her face.The black and white sliders added some contrast.
THEN I adjusted the color, first using the eyedroppers and then manually moving the
center circles within each tone to remove some of the yellow and orange color cast.
Two other things to note.
The little ‘fx’ symbol at top left is a button. Click it to disable the filter.You can ‘turn off’
the three-way corrector to see where you started. Leave it off if you don’t want to apply
the correction.
The circular arrow at top right will reset your filter, allowing you to start over if you don’t
like your current results.
•
‘Pasting Attributes’
If you have multiple clips, shot
under the same conditions, you
don’t have to tone each one
separately.
Tone one clip, then select it on
the timeline and ‘copy’ it using
command-c or Edit>Copy.
Select any similar clips.
Right click, (or Control Click)
and select ‘Paste Atrributes’
This will apply the same cor-
rections to any and all clips you
have selected.
•
Editing With Adobe Premiere Pro
Tips & Tricks
Penn State
College of Communications updated August 2014
27
•
Is this perfect? NO.Absolutely
not.
The biggest problem is that
the lighting is not very good to
begin with - she is backlit by a
very bright doorway and the
light overhead is not daylight.
Mixed lighting, backlighting,
poor lighting cannot be fixed in
Premiere.
When possible, look for scenes
with better light. Be aware of
the direction and quality as you
shoot.
•
Our Original, untoned clip After adjusting and color correcting
Converting to B&W
Creating a Black and White clip is one of many special effects that are possible in Pre-
miere, and one of the least offensive.
One method that works well is to use three filters in combination.
• Black & White - converts a clip to B&W but has no adjustments. it’s an all or nothing
filter.
• Equalize - it controls contrast and separation between tones.
• Three-Way Color Corrector - our old friend.
All three filters are in theVideo Effects folder.
Apply all three filters by dragging them, one at a time, onto the clip you wish to convert.
Use the Equalize filter to create the right amount of contrast and separation between
different shades of gray
Use theThree-Way to open up midtones, add to the black or white and fine tune the
‘look’ of your clip.
Then apply the Black and White filter
Editing With Adobe Premiere Pro
Tips & Tricks
Penn State
College of Communications updated August 2014
28
Titles
Adding type to your show is pretty easy. Premiere offers a powerful type tool. If you are
interested in getting beyond the basics, you’ll need to learn a program like Adobe After
Effects.
The title tool is hidden at the top of the screen under theTitle menu.
For a basic title, selectTitle>NewTitle>Default Still
(Roll and crawl will create moving titles and the template is a place to start if you want
something prebuilt)
You should get this dialogue box
Name your title, so you can find it and remember it.The rest of the settings should sim-
ply match your existing project, so you can click OK and proceed.
Editing With Adobe Premiere Pro
Tips & Tricks
Penn State
College of Communications updated August 2014
29
This is the Title Window
It is full of tools for creating your titles, lower thirds, etc.
When you finish working on a title, just click the red button to close the window (top
left).Your title will automatically be saved into your Project Folder.
NOTE: If you have selected a folder within your Project Folder, and then create aTitle, it
will be saved into that folder. (I have misplaced many a title this way)
After saving your title, drag it onto your timeline and place it on a track above your video.
A few basics:
You can see the image behind your title by positioning the playhead on the timeline. If
you find this distracting, click the little ‘eye’ icon at the top and the background video will
be hidden.
Editing With Adobe Premiere Pro
Tips & Tricks
Penn State
College of Communications updated August 2014
30
The two rectangles displayed inside the window are guides. ForTV some information
can be cropped off your image. So it is safest to keep your titles inside the boxes. On the
web this isn’t as important since we see the entire video. But it’s probably a good rule to
at least stay within the second box and not let your type go right to the edge.
Use the tools at the left for creating shapes as well as type.TheT tool for type, the arrow
tool for moving your type around.
On the far right is a long list of attributes you can change - color, size, spacing, etc.
At the bottom are some preset effects - drop shadows, glow, colors.
LESS IS MORE. Don’t go overboard with gimmicks.
Once you’ve finished a title, drag it from the Projects folder onto the top video layer
of your timeline. To make changes, double click on the clip and reopen theTitle editing
window.
Exporting
The last step is to export your video. Creating a playable movie file for all the world to
see.
File>Export>Media... or M
The export window is big and complicated. There are MANY options for exporting your
video and the settings depend on what you need.
Are you creating a high quality archive for your flies?
Do you need to post to a specific site such asYouTube,Vimeo or our Commedia web-
Editing With Adobe Premiere Pro
Tips & Tricks
Penn State
College of Communications updated August 2014
31
site?
Is it for broadcast on television?
Do you have a client with a specific need?
All of these will influence how you export your video.
Step one is deciding what to export. Do you want to export everything on the timeline,
or just part of a project.
Premiere lets you designate a ‘work area’ on the timeline.
By dragging the yellow tabs you can select part of your timeline.This can be useful if you
want to export a test of your project, or to just make sure you’re only exporting the
right part of the timeline.
•
A common mistake when
exporting is to forget about
clips you’ve left at the end of
a timeline. Maybe you dragged
them there ‘just in case’.
Those ‘orphaned’ clips will
make your export time very
long, and create much em-
barrassment when you play
back your piece and odd clips
appear after the show is sup-
posed to end. Setting a work
area guarantees only what you
want is exported
•
•
A work area can also be used
when rendering. If you need
to render a piece of your
project, set the work area.This
will allow you to render more
quickly, by only rendering what
you need at the moment.
•
Editing With Adobe Premiere Pro
Tips & Tricks
Penn State
College of Communications updated August 2014
32
Source Range: Work area will export what you have designated. Other option
includes Entire Sequence to simply export the whole timeline.
Output Name: Click to rename and set a destination for your video file. IF you’re
organized, you’ll have an ‘output’ folder, in your project folder. Save your finished video
there and you and your teacher can find it!
Format & Preset: Establishes the the file type for your exported movie. For
Penn State Communication students, use one of the presets we’ve created, depending
on your need:
ComMedia CMS 2013 – for posting to the Commedia website
•
Export settings specific to the
workflow in the classroom.
FOR COMM 481
Export your videoTWICE
Once for showing in class and
once for posting to Commedia
1. FOR CLASS
Use Quicktime
Select ‘Hi-Res Archive’ 		
preset
2.For Commedia:
Use h.264
Select ComMedia Preset
Other Export presets:
Select H.264
Vimeo - specific for posting to
Vimeo orYouTube
Editing With Adobe Premiere Pro
Tips & Tricks
Penn State
College of Communications updated August 2014
33
Hi-Res Archive – a high quality version for Comm 481 classes
TVControlRoom – specific to the needs in the Innovation Park control room
Vimeo/YouTube – an HD setting suitable for online services.
Video Codec and BasicVideo Settings: If you want to change the presets, adjust settings
here.
Queue vs. Export To start the export process, select either Queue or Export.
Export will start exporting immediately, using Premiere.This means you won’t be able to
do anything else in Premiere until exporting is complete.
Queue will open Adobe Media Encoder, a separate program.You can load up multiple
exports (for example, you want a highest quality version for yourself, and a lower quality
version forYouTube).You can then start Media Encoder and continue working in Pre-
miere.
When it’s finished exporting, watch it!! Make sure there are no mistakes including, but
not limited to:
typos
dropped audio
gaps between clips
uneven audio
bad edits
bad color/toning
extra clips at the end
missing lower thirds
missing titles
missing credit
things you don’t like
Go back, fix them, rexport, and watch it again.
When it’s perfect, youre done!!
Editing With Adobe Premiere Pro
Tips & Tricks
Penn State
College of Communications updated August 2014
34
ADVANCED AUDIO
Live Adjustments
You can adjust audio ‘live’, adding fades and adjusting levels while the track is playing.
(And then fine tune it afterwards)
For the track you wish to adjust, select “ShowTrack Keyframe”
Change your Workspace to Audio:
Window>Workspace>Audio
Editing With Adobe Premiere Pro
Tips & Tricks
Penn State
College of Communications updated August 2014
35
In the Audio workspace, make sure it is set to Keyframe Mode Latch, then select the ‘write
keyframes’ button. vWhile playing the track, use the volume control slider to adjust the
audio ‘on the fly’.
When you stop the track, you will see that keyframes have been generated to match the
changes you made.
Each keyframe can be manually adjusted or deleted to tweak what you’ve done.
To delete multiple keyframes (or all the keyframes and ‘undo’ what you’ve done) use the
Pen tool to click and drag and select a range of keyframes.Then hit delete.
•
The adjustments you are making
this way are applied to the track
NOT to the audio itself.
If you decide to change audio
(for example, it’s a music track
and you decide to substitute
a different piece of music) the
fades and adjustments will remain
attached to the track.
•
Editing With Adobe Premiere Pro
Tips & Tricks
Penn State
College of Communications updated August 2014
36
SizingVideo & Stills
Sometimes it is necessary to change the size of your video or photographs.
Remember that your timeline is set up for a particular size – usually 1920 pixels x 1080
pixels.
If you import a high resolution still photo it will look cropped on the timeline and need to
be resized.
You may also want to crop a video clip, or resize it for another reason.
The technique is the same for stills & video
In this example, I imported a photo, 09.29.2013.tif. You can see the whole image in the
Source window on the left.
Placed on the timeline, it doesn’t fit.The high resolution image has many more pixels than
the 1920x1080 timeline.
Notice the ‘fit’ button in the program window.This sets the window to fit the screen
NOT the image itself.
We want to resize the image to fit the timeline.
Editing With Adobe Premiere Pro
Tips & Tricks
Penn State
College of Communications updated August 2014
37
We want to resize the window so we can see the boundary of the entire image.
Click the ‘Fit’ button and change it to 10%
Double click on the image
click and drag a corner of the white box to resize your image
Editing With Adobe Premiere Pro
Tips & Tricks
Penn State
College of Communications updated August 2014
38
MOST photos are a different shape than our video.You’ll probably need to crop a little off
the top or bottom.
Don’t show the black around the photo in the video window.We don’t want distracting
black borders showing up in our video.
Drag the white cropping tool just to the edge of the video window.
Re-select ‘Fit’ to make the video window big again.
Voila, you’re done!

PremierePro_CC_2014_Tutorial_in detail.pdf

  • 1.
    CC BASICS Tutorial “Filmediting is why people like movies. Because in the end, wouldn’t we all want to edit our own lives? I think everybody would like to take out the bad parts, take out the slow parts, and look deeper into the good parts.” - Bob Cohen, director v. 1.0 Adobe Premiere College of Communications
  • 2.
    Editing With AdobePremiere Pro Penn State College of Communications updated August 2014 2 TOPIC PAG E Preparing your project 3 Set up Adobe Premiere 5 Premiere Overview 8 Importing Media 9 Editing Basics 10 Audio 16 Reconnecting Media 19 Color Correction 21 Titles 28 Exporting 30 Advanced Audio Sizing Images 34 36 Table of Contents
  • 3.
    Editing With AdobePremiere Pro Tips & Tricks Penn State College of Communications updated August 2014 3 Adobe Premiere is a non-linear video editor. You can edit your video in any order you want, and access the beginning, middle and end of your video simply and quickly. It is also non-destructive.This means you can cut, delete, move, change, and adjust your audio and video happy in the knowledge you haven’t destroyed anything. This tutorial is designed as a get-started tutorial NOT a complete Everything You Always WantedTo Know About Premiere And Were AfraidTo Ask tutorial. IT is specifically written for Adobe Premiere CC 2014 GET READY Preparing yourself and Premiere Before you open the program it is extremely important to get organized. Video editing is complicated..There are many files and folders and it is very easy to ‘lose’ stuff. Get Organized. Stay Organized. you will thank me later. *Create a Project Folder for every, er, project.* This folder will hold everything associated with your project. Here is a sample system - the exact naming convention is less important than being consistent and logical: • Many of the terms we use in video editing come from the days of film and razor blades and linear,‘do it by hand’ edit- ing. • • There are two kinds of people.Those with messy sock drawers and those who organize their socks. Multimedia requires you to organize your socks or pay the price later. •
  • 4.
    Editing With AdobePremiere Pro Tips & Tricks Penn State College of Communications updated August 2014 4 FOLDER NAME: It should include your name and a one-word description of your story. I use the year at the front to make it easy to find and sort _AUDIO: Any audio captured separately from video.This could include interviews, nat sound, sound effects, music, etc. _GRAPHICS: Any graphics that will be used in your project.This could include title slides or elements created in programs such as After Effects or Photoshop. _OUTPUT: Where you will put your finished movie _STILLS: Any still photos that are part of your project - they could be yours or archival images from other sources _VIDEO: All your video content NOTE the two files at the bottom.These are created by Premiere when you first save your project. MAKE SURE to save them to your project folder. .prproj is your Premiere project file. The preview files folder holds files Premiere creates to run the program. DO THIS And your project will exist in a single place.You can copy it to another drive, give it to another person to edit. DON’T DO THIS and files will get lost. projects won’t work, your harddrive will fill up and you will go crazy. TIP • For bigger projects make sub- folders. Break your video up by day shot and/or content for example by making subfolders in the _VIDEO folder • TIP • For students working in Lubert at Innovation Park: Store your project folder on the SAN For all other students: We strongly recommend using a fast external hard- drive with Firewire 800 or USB 3.0 •
  • 5.
    Editing With AdobePremiere Pro Tips & Tricks Penn State College of Communications updated August 2014 5 Project Workflow 1. Create project folder and subfolder for ALL your assets. 2. Copy your video and other assets into your project folder (eject and put away your SD cards, etc.) 3. Launch Adobe Premiere and set up your project. Save the project file to the same folder 4. Organize assets in Premiere 5. Edit your assignment. 6.Tweak the audio. 7. Correct color. 8.Add any effects, titles, lower thirds etc. 10. Share (export your video). PREPARING PREMIERE Open Adobe Premiere TIP • Copy your assets(video, stills, audio) off your SD card. Eject the card and put it away before doing anything else. Don’t leave your card behind. •
  • 6.
    Editing With AdobePremiere Pro Tips & Tricks Penn State College of Communications updated August 2014 6 • New Project - select if you’re starting a new project •. Open Project - select to continue working on a project • Recent Projects - select from the list of projects Select New Project FOR New Projects you will get this window next You only need to set the location and name. 1. Location: Click the Browse button and set the location to your Project folder 2. Name: Name your project - make sure to includeYOUR name TIP • REMEMBER. Create a single folder for each project and save EVERYTHING to that folder. Put all your original content in that folder along with all your Premiere files and folders. •
  • 7.
    Editing With AdobePremiere Pro Tips & Tricks Penn State College of Communications updated August 2014 7 Click OK You should see this ‘New Sequence’ window. (If not, create a new sequence File>New>Sequence) A very confusing window with MANY options.This window is where we tell Premiere what format we want to edit our video in. Thankfully we can ignore this window and just click OK.We will set the time- line automatically when we begin editing. You can pick a setting closest to what you think OR do NOTHING and Simply click OK and continue. TIP • You could go through the steps to set your Sequence settings at this point to match your video. BUT it is much easier to do this automatically when we start editing. *NOTE* If you are shooting only stills, no video, you MUST select the proper Sequence Preset manually. For audio slideshows generally you can select the DSLR 1080p30 setting •
  • 8.
    Editing With AdobePremiere Pro Tips & Tricks Penn State College of Communications updated August 2014 8 PREMIERE OVERVIEW Below, an example of what a video project looks like. Note how Premiere is organized into four panes plus tool bars.This is a pretty stan- dard video editing environment. SOURCE: This is where you will look at all your ‘stuff’ - video, stills, etc. and decide what you want to use in your story. PROGRAM: This is where you see your story as you build it on the timeline below.The Program window shows you what is on your timeline, and will play back your video. SEQUENCE: This is your story. It is also called theTimeline.This is where you will edit and create your project. PROJECT: This is where all your content and assets are stored. Premiere does not actually store your material - it simply points to wherever your material is.That is why you need to stay organized and not move material around or leave it on the wrong computer where Premiere can’t find it. TOOLS: The various tools you’ll use when editing on the timeline. • BEFORE you import your content, consider renam- ing and organizing your files. If you create folders, Pre- miere can import your content in those folders. For example, you could put your interviews in one folder, your b-roll in another, your tight details in a third. Or, you could create separate folders for separate interviews. Spending the time to organize your clips and other content in advance can save you a LOT of time once you begin editing. A program like Photo Me- chanic will let you look at all your material and rename in batches.A big time saver •
  • 9.
    Editing With AdobePremiere Pro Tips & Tricks Penn State College of Communications updated August 2014 9 IMPORTING CONTENT There are multiple ways to bring your assets into Premiere. The easy way:You can simply click File>Import. This works well for stills, audio and DSLR video. But this won’t work for all file types. For cameras that have a complicated file struc- ture, the CanonVixias, Panasonics, etc., the best way to import is to use the Media Browser in the Project Pane Select the Media BrowserTab • Navigate to your media: It can be displayed as either thumbnails or in list view • Media Browser should automatically detect the types of files • Select the clip(s) you want to use • Control Click (right click) and select Import • There are keyboard shortcuts for many actions in Premiere. Learn the shortcuts and you’ll be a much faster video editor. S = Save (Remember to save your project frequently as you work) • • Another GREAT shortcut is the tilde key ~. The key makes whatever pane you’re working in full screen.Want a close up of your Media Browser or timeline? The ~ key is the answer. •
  • 10.
    Editing With AdobePremiere Pro Tips & Tricks Penn State College of Communications updated August 2014 10 MEDIA TYPES There are many types of files that you can import into Premiere. Audio files may be .mp3, aif, wav Still images could be jpeg, tif, psd among others Video files can be .mov, mp4, flv,AVCHD among many others IMPORTANT Some video cameras - including the CanonVixias and Panasonic video cameras we use - create a complex file structure. When copying your content from your SD card to your project folder you MUST copy the entire folder and subfolders. DON’T delete any of the subfolders. DON’T rename any of the subfolders. EDITING BASICS 1. Use the Project Pane and source window to look at your content 2. Select which clips or parts of clips you want to use 3. Place clips on the timeline (sequence) 4. Cut, move, edit, arrange clips on the timeline Double click on a clip in the Project Pane and it will appear in hte Source Window • REMEMBER. If you just use the File>Import command you won’t be able to import from cameras like theVixia and Panasonic. Use the Media Browser • • SETTINGS:. If you’re working in Lubert 115 at In- novation Park take note and set the following preferences: Preferences > Audio Hardware > Default Device > Built in Line Output Preferences > Audio > Default Audio Tracks > Stereo Media: Use Mono •
  • 11.
    Editing With AdobePremiere Pro Tips & Tricks Penn State College of Communications updated August 2014 11 Editing starts with deciding what to include and what not to use in your project. You shot a lot of video, maybe took a lot of photos – but you won’t use everything. You can look at all your material in either the Project Pane or in the Source Pane. After looking through a clip you will make a decision: 1.You don’t want anything from the clip. That’s easy, just ignore it 2.You want all of the clip on your timeline 3.You want part of the clip (or parts) Getting an entire clip (or still image) onto the timeline can be done in several ways. 1.You can drag it directly to the timeline from either the Project or Source Panes, place it wherever you like and release. 2. Use the Insert or Overwrite buttons to place the clip on the timeline.This only works with a clip in the Source Pane. The first button is the Insert button.This will put the clip on the timeline, starting at wherever you have placed the playhead on the timeline and push all other content forward, out of the way. The second button is the Overwrite button.This will put the clip on the timeline starting at the playhead, but overwrite(erase) whatever is underneath it. PLEASE PLEASE read the tip on this page. It isVITAL that the first clip you place on your timeline be video NOT a still photo or audio (unless you are editing a slide- show with no video of course) • The FIRST clip you place on the timeline MUST be video. Because we are using this clip to set the timeline to match your video format. You will get this box: You DEFINITELY DEFINITELY DEFINITELY want to select “Change Sequence Settings” This will set the sequence to the proper settings for your video. If you drag audio or stills first, your timeline will be wrong. •
  • 12.
    Editing With AdobePremiere Pro Tips & Tricks Penn State College of Communications updated August 2014 12 Using part of a clip. Often, we only want part of a particular clip – a key quote or moment. IN and OUT points Select part of a clip using IN and OUT points. In the Source window, as you play the video, use the ‘I’ and ‘O’ keys to establish the start (In) and end (Out) of the video you actually want to use. The lighter grey vbar shows the selection made using the In and Out points. It is a subset of the full clip.You can use the buttons to set In and Out, or the I and O keys on the keyboard. Change either point by playing the video and reselecting I or O. IMPORTANT Premiere is non-destructive. Even though you select part of a clip, it is easy to use more or less of that clip once it is on the timeline. So don’t worry about making this edit perfectly precise. It is easy to change later. • More SHORTCUTS Space Bar - will stop and start a video in either the Source pane or on the Timeline OR Use the J,K,L keys to con- trol the play of video. J - play in reverse K - stop L - play forward BONUS POINTS Hit the J or L keys multiple times to speed up the video playback •
  • 13.
    Editing With AdobePremiere Pro Tips & Tricks Penn State College of Communications updated August 2014 13 • More J,K,L goodness:: Hold the K key, then tap the J or L keys to advance or retreat one frame at a time. OR Press the K and L keys at the same time to play in slow motion • Basic Editing • Trimming • Cutting • Moving Trimming is shortening (or lengthening) a clip from either end Cutting is separating a clip in the middle Moving is, obviously, moving a clip to a new position on the timeline SelectTool (V) Track Select ForwardTool (A) Track Select BackwardTool (Shift + A) Ripple EditTool (B) Rolling EditTool (N)
  • 14.
    Editing With AdobePremiere Pro Tips & Tricks Penn State College of Communications updated August 2014 14 Use the standard Select Tool(V) to lengthen or shorten a clip from either end. With this tool, shortening a clip will leave a gap, lengthening a clip over another clip will overwrite that second clip. NOTE: If you reach the end of your clip, you obviously won’t be able to make it any longer. The cursor turns to a red arrow symbol when using the standard SelectTool(V) to trim. The Track Select Tool(A or Shift+A) allows you to select all the tracks ahead of or behind the cursor.This is useful if you want to move multiple clips at the same time. By default, the tool selects all clips on all tracks ahead of(or behind in the case of Shift+A) the cursor. Hold down the Shift key to select all the clips on just one track. The Ripple Edit Tool(B) lets you shorten a clip and at the same time remove the gap that would be created – two steps in one. NOTE:The RippleTool changes the duration of your video. The cursor turns to a yellow arrow symbol for the Ripple EditTool(B). The Rolling Edit Tool(N) is used to change the edit point between two clips. If one clip, for example, were too long, and the next clip too short or you’re concerned about where the edit is for timing or other reasons, you can easily move that edit point to better bal- ance the length of the clips. NOTE: the Rolling EditTool(N) does NOT change the duration of your video, It simply moves an edit point. This cursor is for the Rolling EditTool(N). • It’s worth learning as many keyboard shortcuts as you can to speed up the editing process. Fast editing means more time for other things like shooting (or sleeping) • • Another cool shortcut – for the Rolling EditTool.(N). If you know exactly where you want to move your edit point to, put the playhead at the new point, and press ‘E’.Your edit point will move to that point. Cool. Especially useful for audio slideshows and still images. •
  • 15.
    Editing With AdobePremiere Pro Tips & Tricks Penn State College of Communications updated August 2014 15 To begin editing, start with the basics (Imagine Julie Andrews singing Do Re Mi) UseThe Select tool(V) to move clips around and shorten and lengthen them from the ends. Use the Blade tool(C) to cut clips, breaking them into parts or cut out a section in the middle - get rid of that annoying ‘um’ or longer sections that distract or go off point. Those two tools (remember the keyboard shortcuts –V for the select tool and C for the blade tool) will allow you to do most of your basic editing. In writing, words sentences and paragraphs are your building blocks. In video it is clips and sequences and edits. The clips are your basic content - if you didn’t shoot good material, or enough material, you will struggle, and do better next time. Sequences are a series of clips that connect together the way words form sentences form paragraphs – It forms the narrative of the story. You need to avoid the basics mistakes such as jump cuts, but you also need to create something that makes sense narratively. And finally, the edit establishes the rhythm of your piece – think about the sound, and the narrative. Cuts between shots should feel natural and be invisible to your viewer. The transition between shots and between scenes establishes a rhythm and feel for your video. • The best way to learn is by doing. Shoot, edit, and then go shoot again. There are also nearly limitless tutorials online. Lynda.Com is a great and free resource for Penn State students. And some great books on the subject of filmmaking. One of my favorites is “InThe Blink Of An Eye” by the amazing film editor Walter Murch
  • 16.
    Editing With AdobePremiere Pro Tips & Tricks Penn State College of Communications updated August 2014 16 Audio Your audio may be part of a video clip or recorded separately. In either case you can edit and adjust your audio in Premiere. By default, Premiere imports stereo audio on one track. IF you set your preferences to fit our style (see tip at left), your audio should be on two tracks - this allows you to edit each track separately. Useful if you have recorded with two different mics, or at different levels. IF your stereo audio is on one track and you need to split it, control click on the file in the Project Window and select Modify>Audio Channels. (fig. 1) Change the ‘Preset’ from ‘Use File’ to ‘Mono (fig. 2) fig. 1 fig. 2 • SETTINGS:. If you’re work- ing in Lubert 115 at Innova- tion Park take note: the fol- lowing preferences have been set on those computers: Preferences > Audio Hardware > Default Device > Built in Line Output Preferences > Audio > Default Audio Tracks > Stereo Media: Use Mono • • File Types If you’re not sure what kind of file you’re working with, video or audio, control or right click on the file in the Project Win- dow and select ‘properties...’ •
  • 17.
    Editing With AdobePremiere Pro Tips & Tricks Penn State College of Communications updated August 2014 17 Adjusting Audio on the Timeline If you can’t see the waveform of the audio, deepen the height of the track. Note how the select tool changes shape and allows you grab the edge of the track and pull down. You can turn off the volume,‘mute’ a track by clicking the speaker icon. The white line controls the volume of the track. Click and drag it up to make a track louder, down to make it quieter. IF you don’t see that white line, click on the diamond icon and select’ Show Clip Keyframes’ Your goal is to have your audio adjusted so it is consistent throughout your video. You don’t want listeners screaming in pain as they rip off headphones because of blaring sounds, nor do you want them missing critical sounds because everything suddenly be- came too quiet. For the web, we aim for our audio to peak around -6db. Use the audio meter in Pre- miere to monitor your clips. Click and drag the yellow line on the waveform to raise or lower the volume. The waveform will bounce as your audio plays.You want your typical sounds to hover around -6db.
  • 18.
    Editing With AdobePremiere Pro Tips & Tricks Penn State College of Communications updated August 2014 18 Balancing Audio IF your audio is only in one channel. (you only hear it in one speaker, and only see audio in the meter on one channel): Find the clip or audio file in in your project pane and open it in the Source Pane. Go to Clip>Modify>Audio Channels IF, for example, you only had audio on the left channel, you would change both Source Channels to the ‘left’.Then your sound should come out both speakers.
  • 19.
    Editing With AdobePremiere Pro Tips & Tricks Penn State College of Communications updated August 2014 19 Reconnection Media Remember that an Adobe Premiere project doesn’t actually contain all your video/audio/ image files.The project simply points to those files. IF those files get moved or renamed, and Premiere can’t find them, you will need to ‘re- connect’ the media to the project. Note the various warnings: ‘Media Offline’ in bright red and the question marks next to each file in the Project Panel. Bad news. Assuming the files were just moved and not deleted, it is easy to reconnect them. Typically, when you open a project, if media is ‘offline’ or ‘disconnected’ you’ll get a dialogue box asking you to find the missing media. If you get this warning while working, or skip that message, you can open the reconnect box by right click (control click) on any of the files in the Project folder and select ‘link media’. You will get a dialogue box asking you to find the ‘missing media’. • Another shameless plug for being organized. IF you set up your project folder prop- erly, and made sure to place all your assets – video, audio, graphics, stills, whatever – in your folder,...well... ...then I don’t get to tell you ‘I told you so’. This problem most commonly happens when we have sloppy work habits and leave files on the desktop, or on our SD cards. Stay organized. If you’re working at Innovation Park, keep that project folder on the SAN in your student folder. •
  • 20.
    Editing With AdobePremiere Pro Tips & Tricks Penn State College of Communications updated August 2014 20 At the top of the box is the name of the missing clip and its original file name. (In this case they are the same) Offline: Tells Premiere to stop bothering you about this missing file Offline All: Tells Premiere to stop bothering you about all missings files If Premiere can’t find the missing file, click ‘Locate’ By clicking the ‘Display Only Exact Name Matches’ only files with that exact name (or folders) are active.. Simply select the file, and click ‘OK’ to reconnect the file to the project. NOTE:This requires that you know where the file is!!! If you can’t find the original media file you are in a mess of trouble. • If you have many ‘missing’ or ‘disconnected’ files, select them them all in your project panel. Then, right click (control click) on one of them and select ‘Link Media’. When you reconnect that one file, Premiere will automati- cally reconnect all the missing files in that folder. If you have other folders, you will need to reconnect those files manually. •
  • 21.
    Editing With AdobePremiere Pro Tips & Tricks Penn State College of Communications updated August 2014 21 Color Correction Ideally of course, you shot your video at the perfect exposure, with your white balance exactly right.Yes? Hmmmm.....No?Your footage is underexposed?Your colors don’t look right? Premiere allows us to correct some mistakes in our video - but NOT all mistakes are fixable. It’s definitely true that you’ll get the best results by starting with the best original material - so remember to set your exposure and white balance before you shoot. There are many, many, many, did I say many, ways to adjust your video. I will show you some very basic techniques. Video Effects Video effects in Premiere can be found under the effects tab in the Project Panel in the lower left of the screen. Click on the EffectsTab. For color correction we will be looking in theVideo Effects folder. BUT note the search box!! Great way to find what you need. We will be using theThree-Way Color Corrector. NOTE what happens wnen we type ‘three’ in the search box: • With great power comes great responsibility. Premiere is a very powerful video editor complete with many special effects, gadgets and super powers. Just because you can make your video spherize, twirl, wave warp, and turbulent displace, doesn’t mean you should. Edit with purpose.Avoid those special effects unless there is a compelling reason to use them. •
  • 22.
    Editing With AdobePremiere Pro Tips & Tricks Penn State College of Communications updated August 2014 22 Type in ‘three’ and our three-way color corrector is magically revealed. Or, if you prefer, open theVideo EffectsTab, open up Color correction, scroll down toThree-Way Color Corrector.... To apply any filter to a clip, simply drag it from the list onto the clip in the timeline. A few things to note.We are in the basic video editing mode at this point.
  • 23.
    Editing With AdobePremiere Pro Tips & Tricks Penn State College of Communications updated August 2014 23 You can change that if you like by going up to the top of the screen: Window>Workspace>Color Correction.This will rearrange the panels and show more controls for color correction. But for this tutorial we will stay in this view. If you have correctly dragged theThree-Way Color Corrector filter onto your clip in the timeline,AND if the playhead is over the clip, you will see the clip in the Program win- dow (top right). You MAY also see it in the Source window, top left.To view the effects, click on the Effect Controls tab at the top of the Source window. TheThree-Way Color Corrector gets its name from the fact that you can control the shadows, midtones and highlights separately. (clever). It’s a powerful tool that will allow you to adjust brightness and contrast as well as color.
  • 24.
    Editing With AdobePremiere Pro Tips & Tricks Penn State College of Communications updated August 2014 24 It can be our one-stop shopping for much of our work. Just a few basics, then just ex- plore and see what you can do. We will concentrate on this top half of the corrector. The three circles correspond to the shadow, midtone and highlights of your clip. You can control each separately OR click on the master button and work on the entire tonal range at once.This can be useful if you have an overall colorcast to your image for example. Typically, it’s best to adjust contrast and brightness BEFORE color correcting. Use the sliders below the wheels. Drag the black ‘input’ triangle to the right to add black to your image. Or, the white triangle to the left to brighten the whites. By doing both you are making the image contrastier.The middle gray arrow can be used to brighten or darken the middle range of tones The eye droppers next to each circle can set a neutral tone for that range. Use the white eyedropper on a white piece of paper, for example, to neutralize a colorcast in the high- lights. • There are so many ways to color correct and adjust your image.There are books on the subject and a million resourc- es online. Lynda.com is a great place to start, and free to Penn State Students. lynda.psu.edu and log in to get started. •
  • 25.
    Editing With AdobePremiere Pro Tips & Tricks Penn State College of Communications updated August 2014 25 As shot, her face is a little dark and too yellow/orange. The top image is the original version, and too yellow. By using the con- trols, in this case the midtone and highlights, we corrected the colorcast. We also adjusted the ‘input’ levels - adding some black and contrast back into the photo after color correcting.
  • 26.
    Editing With AdobePremiere Pro Tips & Tricks Penn State College of Communications updated August 2014 26 Notice the changes I adjusted the black, midtone and white triangles on the Input slider. The middle one first, opened up the shadows on her face.The black and white sliders added some contrast. THEN I adjusted the color, first using the eyedroppers and then manually moving the center circles within each tone to remove some of the yellow and orange color cast. Two other things to note. The little ‘fx’ symbol at top left is a button. Click it to disable the filter.You can ‘turn off’ the three-way corrector to see where you started. Leave it off if you don’t want to apply the correction. The circular arrow at top right will reset your filter, allowing you to start over if you don’t like your current results. • ‘Pasting Attributes’ If you have multiple clips, shot under the same conditions, you don’t have to tone each one separately. Tone one clip, then select it on the timeline and ‘copy’ it using command-c or Edit>Copy. Select any similar clips. Right click, (or Control Click) and select ‘Paste Atrributes’ This will apply the same cor- rections to any and all clips you have selected. •
  • 27.
    Editing With AdobePremiere Pro Tips & Tricks Penn State College of Communications updated August 2014 27 • Is this perfect? NO.Absolutely not. The biggest problem is that the lighting is not very good to begin with - she is backlit by a very bright doorway and the light overhead is not daylight. Mixed lighting, backlighting, poor lighting cannot be fixed in Premiere. When possible, look for scenes with better light. Be aware of the direction and quality as you shoot. • Our Original, untoned clip After adjusting and color correcting Converting to B&W Creating a Black and White clip is one of many special effects that are possible in Pre- miere, and one of the least offensive. One method that works well is to use three filters in combination. • Black & White - converts a clip to B&W but has no adjustments. it’s an all or nothing filter. • Equalize - it controls contrast and separation between tones. • Three-Way Color Corrector - our old friend. All three filters are in theVideo Effects folder. Apply all three filters by dragging them, one at a time, onto the clip you wish to convert. Use the Equalize filter to create the right amount of contrast and separation between different shades of gray Use theThree-Way to open up midtones, add to the black or white and fine tune the ‘look’ of your clip. Then apply the Black and White filter
  • 28.
    Editing With AdobePremiere Pro Tips & Tricks Penn State College of Communications updated August 2014 28 Titles Adding type to your show is pretty easy. Premiere offers a powerful type tool. If you are interested in getting beyond the basics, you’ll need to learn a program like Adobe After Effects. The title tool is hidden at the top of the screen under theTitle menu. For a basic title, selectTitle>NewTitle>Default Still (Roll and crawl will create moving titles and the template is a place to start if you want something prebuilt) You should get this dialogue box Name your title, so you can find it and remember it.The rest of the settings should sim- ply match your existing project, so you can click OK and proceed.
  • 29.
    Editing With AdobePremiere Pro Tips & Tricks Penn State College of Communications updated August 2014 29 This is the Title Window It is full of tools for creating your titles, lower thirds, etc. When you finish working on a title, just click the red button to close the window (top left).Your title will automatically be saved into your Project Folder. NOTE: If you have selected a folder within your Project Folder, and then create aTitle, it will be saved into that folder. (I have misplaced many a title this way) After saving your title, drag it onto your timeline and place it on a track above your video. A few basics: You can see the image behind your title by positioning the playhead on the timeline. If you find this distracting, click the little ‘eye’ icon at the top and the background video will be hidden.
  • 30.
    Editing With AdobePremiere Pro Tips & Tricks Penn State College of Communications updated August 2014 30 The two rectangles displayed inside the window are guides. ForTV some information can be cropped off your image. So it is safest to keep your titles inside the boxes. On the web this isn’t as important since we see the entire video. But it’s probably a good rule to at least stay within the second box and not let your type go right to the edge. Use the tools at the left for creating shapes as well as type.TheT tool for type, the arrow tool for moving your type around. On the far right is a long list of attributes you can change - color, size, spacing, etc. At the bottom are some preset effects - drop shadows, glow, colors. LESS IS MORE. Don’t go overboard with gimmicks. Once you’ve finished a title, drag it from the Projects folder onto the top video layer of your timeline. To make changes, double click on the clip and reopen theTitle editing window. Exporting The last step is to export your video. Creating a playable movie file for all the world to see. File>Export>Media... or M The export window is big and complicated. There are MANY options for exporting your video and the settings depend on what you need. Are you creating a high quality archive for your flies? Do you need to post to a specific site such asYouTube,Vimeo or our Commedia web-
  • 31.
    Editing With AdobePremiere Pro Tips & Tricks Penn State College of Communications updated August 2014 31 site? Is it for broadcast on television? Do you have a client with a specific need? All of these will influence how you export your video. Step one is deciding what to export. Do you want to export everything on the timeline, or just part of a project. Premiere lets you designate a ‘work area’ on the timeline. By dragging the yellow tabs you can select part of your timeline.This can be useful if you want to export a test of your project, or to just make sure you’re only exporting the right part of the timeline. • A common mistake when exporting is to forget about clips you’ve left at the end of a timeline. Maybe you dragged them there ‘just in case’. Those ‘orphaned’ clips will make your export time very long, and create much em- barrassment when you play back your piece and odd clips appear after the show is sup- posed to end. Setting a work area guarantees only what you want is exported • • A work area can also be used when rendering. If you need to render a piece of your project, set the work area.This will allow you to render more quickly, by only rendering what you need at the moment. •
  • 32.
    Editing With AdobePremiere Pro Tips & Tricks Penn State College of Communications updated August 2014 32 Source Range: Work area will export what you have designated. Other option includes Entire Sequence to simply export the whole timeline. Output Name: Click to rename and set a destination for your video file. IF you’re organized, you’ll have an ‘output’ folder, in your project folder. Save your finished video there and you and your teacher can find it! Format & Preset: Establishes the the file type for your exported movie. For Penn State Communication students, use one of the presets we’ve created, depending on your need: ComMedia CMS 2013 – for posting to the Commedia website • Export settings specific to the workflow in the classroom. FOR COMM 481 Export your videoTWICE Once for showing in class and once for posting to Commedia 1. FOR CLASS Use Quicktime Select ‘Hi-Res Archive’ preset 2.For Commedia: Use h.264 Select ComMedia Preset Other Export presets: Select H.264 Vimeo - specific for posting to Vimeo orYouTube
  • 33.
    Editing With AdobePremiere Pro Tips & Tricks Penn State College of Communications updated August 2014 33 Hi-Res Archive – a high quality version for Comm 481 classes TVControlRoom – specific to the needs in the Innovation Park control room Vimeo/YouTube – an HD setting suitable for online services. Video Codec and BasicVideo Settings: If you want to change the presets, adjust settings here. Queue vs. Export To start the export process, select either Queue or Export. Export will start exporting immediately, using Premiere.This means you won’t be able to do anything else in Premiere until exporting is complete. Queue will open Adobe Media Encoder, a separate program.You can load up multiple exports (for example, you want a highest quality version for yourself, and a lower quality version forYouTube).You can then start Media Encoder and continue working in Pre- miere. When it’s finished exporting, watch it!! Make sure there are no mistakes including, but not limited to: typos dropped audio gaps between clips uneven audio bad edits bad color/toning extra clips at the end missing lower thirds missing titles missing credit things you don’t like Go back, fix them, rexport, and watch it again. When it’s perfect, youre done!!
  • 34.
    Editing With AdobePremiere Pro Tips & Tricks Penn State College of Communications updated August 2014 34 ADVANCED AUDIO Live Adjustments You can adjust audio ‘live’, adding fades and adjusting levels while the track is playing. (And then fine tune it afterwards) For the track you wish to adjust, select “ShowTrack Keyframe” Change your Workspace to Audio: Window>Workspace>Audio
  • 35.
    Editing With AdobePremiere Pro Tips & Tricks Penn State College of Communications updated August 2014 35 In the Audio workspace, make sure it is set to Keyframe Mode Latch, then select the ‘write keyframes’ button. vWhile playing the track, use the volume control slider to adjust the audio ‘on the fly’. When you stop the track, you will see that keyframes have been generated to match the changes you made. Each keyframe can be manually adjusted or deleted to tweak what you’ve done. To delete multiple keyframes (or all the keyframes and ‘undo’ what you’ve done) use the Pen tool to click and drag and select a range of keyframes.Then hit delete. • The adjustments you are making this way are applied to the track NOT to the audio itself. If you decide to change audio (for example, it’s a music track and you decide to substitute a different piece of music) the fades and adjustments will remain attached to the track. •
  • 36.
    Editing With AdobePremiere Pro Tips & Tricks Penn State College of Communications updated August 2014 36 SizingVideo & Stills Sometimes it is necessary to change the size of your video or photographs. Remember that your timeline is set up for a particular size – usually 1920 pixels x 1080 pixels. If you import a high resolution still photo it will look cropped on the timeline and need to be resized. You may also want to crop a video clip, or resize it for another reason. The technique is the same for stills & video In this example, I imported a photo, 09.29.2013.tif. You can see the whole image in the Source window on the left. Placed on the timeline, it doesn’t fit.The high resolution image has many more pixels than the 1920x1080 timeline. Notice the ‘fit’ button in the program window.This sets the window to fit the screen NOT the image itself. We want to resize the image to fit the timeline.
  • 37.
    Editing With AdobePremiere Pro Tips & Tricks Penn State College of Communications updated August 2014 37 We want to resize the window so we can see the boundary of the entire image. Click the ‘Fit’ button and change it to 10% Double click on the image click and drag a corner of the white box to resize your image
  • 38.
    Editing With AdobePremiere Pro Tips & Tricks Penn State College of Communications updated August 2014 38 MOST photos are a different shape than our video.You’ll probably need to crop a little off the top or bottom. Don’t show the black around the photo in the video window.We don’t want distracting black borders showing up in our video. Drag the white cropping tool just to the edge of the video window. Re-select ‘Fit’ to make the video window big again. Voila, you’re done!