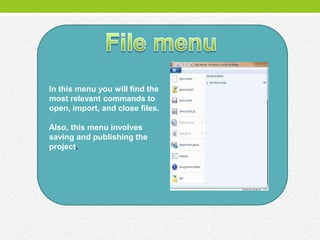
Windows live movie maker is one of the
multimedia authoring tools. It is a video
 creating/editing software that is a part
of Microsoft's Windows Live initiative. It
 is intended to replace Windows Movie
     Maker that is currently included
           in Windows Vista.
It allows you to create proficient video in
    great looking and share it with your
  family and friends across a TV, PC, or
   mobile phone. Windows Live Movie
   Maker allows users to publish videos
             to Windows Live
      SkyDrive, Facebook, YouTube,
 and Flickr, as well creating HD videos.
Main toolbar


Preview pane          Storyboard
                         pane


                              Time scale zoom
In this menu you will find the
most relevant commands to
open, import, and close files.

Also, this menu involves
saving and publishing the
project.
Clipboard:
It contains Cut, Copy, and paste
option. By using these icons you can
copy image, text, or video from
various sources and paste them in to
the storyboard pane.
Add box contains adding
video, photo, and music
option.
Also, in add box there is button
called Webcam video that allows
you to record video from your
laptop camera.
In addition, there button called
snapshot that allow you to
snapshot of the current frame
of your project to use in your
movie.
Add title: this icon used to add a title or
other text that stands alone as a new slide


Add caption: this icon used if you want to
add a caption to a photo or segment of
video

Add credits: this icon used when you
indicate to something. You can add a
Credits, Director, Starring, and Location
with this icon.
In the home tab, also you
will find different types of
themes. These themes used
to add some effects when
the movie move from part to
another part. For example,
when it moving from video
to picture and so on.
Try to think what is the
purpose of each icons of
these????
These icons used if
you want to share
your movie to other
by uploading it via
Facebook, YouTube,
Flickr and so on
Try to discover
what can this
button do ?
You can add transition to your project by selecting one
from the Transitions gallery on the Animations tab.
These transitions used when you want to add some
animations between images and so on.
The duration button used if you want
to control the period of viewing the
transition.


And Apply to all button, used if you
want to apply the transition that you
did to all images.
According to the
previous slide, what is
the purpose of Pan and
Zoom box????
In visual effects tab, you will find all effects that you want to
add to your movie including Blur, Edge detection, and Black
and White effects.
Also, in visual effects tab you will find
brightness button that is used to
control the brightness of the effects
that you apply it.


Apply to all button used when you want
to apply the effects to all image and
video.
If you insert audio to your
project, audio option will appear
directly in the project tab. This option
allows you to control the audio that
you inserted by mixing it with the
video or playing the sound only
without the sound of the video.
This option allows you to fit your
project to the music.
You can set project your project
aspect ratio by choosing one of two
option appear on the Project tab.
Most older video cameras shoot in
4:3 aspect ratio. Most modern ones
use 16:9.
Zoom in icon used if you want to
view your project in more details.


Zoom out icon allows you to view
more of the items in your project
on a larger time scale.
Reset icon used to set the
storyboard to the default zoom
level.
This button allows you to change the
size of thumbnails on the storyboard.
This button used if you want to view
your project in full screen
You can use this button to
change the volume of the
selected video. That’s means,
you can increase or decrease
the volume of the video using
this button
By these two buttons, you can
choose how fast to fade out or
in the audio in your project.
This button used if you want to
change the background color
of the text item.


Try to practice what you learn
above by your own.
This button used when you want
to change the speed of the video.
This button used if you want to
control the photo or back ground
duration.
This button used if you want to
divide your video into two items at
specific point.
You can trim the video to hide any
unwanted parts by using Trim tools
or, you can directly select start and
end point by clicking on Set start and
end point buttons at the appropriate
point..
Try to insert text item and then apply all this option on it.

WLMM Interface

  • 2.
    Windows live moviemaker is one of the multimedia authoring tools. It is a video creating/editing software that is a part of Microsoft's Windows Live initiative. It is intended to replace Windows Movie Maker that is currently included in Windows Vista.
  • 3.
    It allows youto create proficient video in great looking and share it with your family and friends across a TV, PC, or mobile phone. Windows Live Movie Maker allows users to publish videos to Windows Live SkyDrive, Facebook, YouTube, and Flickr, as well creating HD videos.
  • 4.
    Main toolbar Preview pane Storyboard pane Time scale zoom
  • 5.
    In this menuyou will find the most relevant commands to open, import, and close files. Also, this menu involves saving and publishing the project.
  • 6.
    Clipboard: It contains Cut,Copy, and paste option. By using these icons you can copy image, text, or video from various sources and paste them in to the storyboard pane.
  • 7.
    Add box containsadding video, photo, and music option.
  • 8.
    Also, in addbox there is button called Webcam video that allows you to record video from your laptop camera.
  • 9.
    In addition, therebutton called snapshot that allow you to snapshot of the current frame of your project to use in your movie.
  • 10.
    Add title: thisicon used to add a title or other text that stands alone as a new slide Add caption: this icon used if you want to add a caption to a photo or segment of video Add credits: this icon used when you indicate to something. You can add a Credits, Director, Starring, and Location with this icon.
  • 11.
    In the hometab, also you will find different types of themes. These themes used to add some effects when the movie move from part to another part. For example, when it moving from video to picture and so on.
  • 12.
    Try to thinkwhat is the purpose of each icons of these????
  • 13.
    These icons usedif you want to share your movie to other by uploading it via Facebook, YouTube, Flickr and so on
  • 14.
    Try to discover whatcan this button do ?
  • 15.
    You can addtransition to your project by selecting one from the Transitions gallery on the Animations tab. These transitions used when you want to add some animations between images and so on.
  • 16.
    The duration buttonused if you want to control the period of viewing the transition. And Apply to all button, used if you want to apply the transition that you did to all images.
  • 17.
    According to the previousslide, what is the purpose of Pan and Zoom box????
  • 18.
    In visual effectstab, you will find all effects that you want to add to your movie including Blur, Edge detection, and Black and White effects.
  • 19.
    Also, in visualeffects tab you will find brightness button that is used to control the brightness of the effects that you apply it. Apply to all button used when you want to apply the effects to all image and video.
  • 20.
    If you insertaudio to your project, audio option will appear directly in the project tab. This option allows you to control the audio that you inserted by mixing it with the video or playing the sound only without the sound of the video.
  • 21.
    This option allowsyou to fit your project to the music.
  • 22.
    You can setproject your project aspect ratio by choosing one of two option appear on the Project tab. Most older video cameras shoot in 4:3 aspect ratio. Most modern ones use 16:9.
  • 23.
    Zoom in iconused if you want to view your project in more details. Zoom out icon allows you to view more of the items in your project on a larger time scale.
  • 24.
    Reset icon usedto set the storyboard to the default zoom level.
  • 25.
    This button allowsyou to change the size of thumbnails on the storyboard.
  • 26.
    This button usedif you want to view your project in full screen
  • 27.
    You can usethis button to change the volume of the selected video. That’s means, you can increase or decrease the volume of the video using this button
  • 28.
    By these twobuttons, you can choose how fast to fade out or in the audio in your project.
  • 29.
    This button usedif you want to change the background color of the text item. Try to practice what you learn above by your own.
  • 30.
    This button usedwhen you want to change the speed of the video.
  • 31.
    This button usedif you want to control the photo or back ground duration.
  • 32.
    This button usedif you want to divide your video into two items at specific point.
  • 33.
    You can trimthe video to hide any unwanted parts by using Trim tools or, you can directly select start and end point by clicking on Set start and end point buttons at the appropriate point..
  • 34.
    Try to inserttext item and then apply all this option on it.