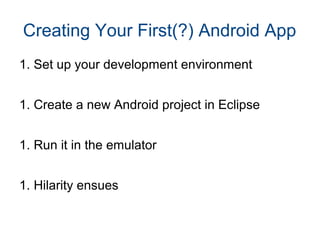
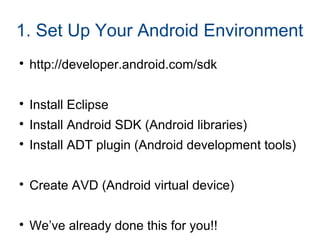
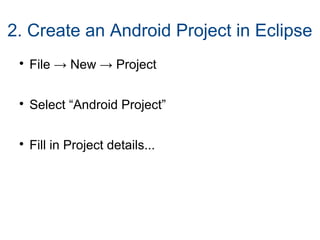
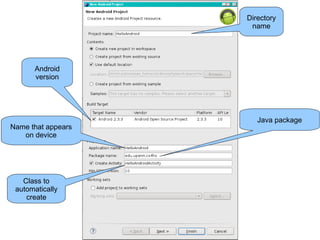
Android Application 
Development
Overview 
 What is Android? 
 Why teach Android? 
 What do you need in order to teach Android? 
 Hello, Android 
 Basic Android graphics 
 Lunch 
 Part 2: More Android!
What is Android?
What is Android? 
An open source Linux-based operating system 
intended for mobile computing platforms 
 Includes a Java API for developing applications 
 It is not a device or product
Why teach Android?
NYC High School Girls Build Android Apps
Engaging Students with Android 
 Android has a lot of “buzz” now 
– Newness 
– Coolness 
– Googleness 
 UI and graphics made simple(r) 
 Advanced Java skills
What Skills Will Students Learn? 
 Reinforce the basics: OOP, decomposition, etc. 
 Separation of UI design and functionality 
 XML and resource files 
 Events and Listeners 
 Callback methods 
 Threads
Android vs. iPhone 
 Java vs. Objective-C 
 Direct install vs. Marketplace vs. App Store 
 Open source?
What do you need in order 
to teach Android?
What Should Students Already Know? 
 Java! 
– inheritance, method overriding 
– interfaces, casting 
– exceptions 
– debugging 
– reading API documentation 
 Eclipse 
– easy to pick up quickly, though
Do I Need Phones? 
 The emulator that is part of the Android toolset for 
Eclipse is quite good (though a bit slow) 
 You may be able to get free “developer phones” 
from Google
Online Resources 
 developer.android.com 
 code.google.com/p/apps-for-android/ 
 stackoverflow.com 
 videos from Google I/O conferences
“Hello, Android”
Creating Your First(?) Android App 
1. Set up your development environment 
1. Create a new Android project in Eclipse 
1. Run it in the emulator 
1. Hilarity ensues
1. Set Up Your Android Environment 
 http://developer.android.com/sdk 
 Install Eclipse 
 Install Android SDK (Android libraries) 
 Install ADT plugin (Android development tools) 
 Create AVD (Android virtual device) 
 We’ve already done this for you!!
2. Create an Android Project in Eclipse 
 File → New → Project 
 Select “Android Project” 
 Fill in Project details...
Name that appears 
on device 
Directory 
name 
Class to 
automatically 
create 
Java package 
Android 
version
3. Run the Android Application 
 Run → Run (or click the “Run” button) 
 Select “Android Application” 
 The emulator may take a few minutes to start, so 
be patient! 
 You don't need to restart the emulator when you 
have a new version of your application
Source 
code 
Auto-generated 
code 
UI 
layout 
String 
constants 
Configuration
HelloAndroid.java 
1 public class HelloAndroid extends Activity { 
2 /** Called when the activity is first created. */ 
3 @Override 
4 public void onCreate(Bundle savedInstanceState) 
5 { 
6 super.onCreate(savedInstanceState); 
7 setContentView(R.layout.main); 
8 } 
9 }
main.xml 
1 <?xml version="1.0" encoding="utf-8"?> 
2 <LinearLayout 
3 xmlns:android="http://schemas.android.com/apk/res/android" 
4 android:orientation="vertical" 
5 android:layout_width="fill_parent" 
6 android:layout_height="fill_parent" 
7 > 
8 <TextView 
9 android:layout_width="fill_parent" 
10 android:layout_height="wrap_content" 
11 android:text="@string/hello " 
12 /> 
13 </LinearLayout>
strings.xml 
1 <?xml version="1.0" encoding="utf-8"?> 
2 <resources> 
3 <string name="hello">Hello World, HelloAndroid! 
4 </string> 
5 <string name="app_name">Hello, Android</string> 
6 </resources>
AndroidManifest.xml 
1 <?xml version="1.0" encoding="utf-8"?> 
2 <manifest 
3 xmlns:android="http://schemas.android.com/apk/res/android" 
4 package="edu.upenn.cis542" 
5 android:versionCode="1" 
6 android:versionName="1.0"> 
7 <application android:icon="@drawable/icon" 
8 android:label="@string/app_name"> 
9 <activity android:name=".HelloAndroid" 
10 android:label="@string/app_name"> 
11 <intent-filter> 
12 <action 
13 android:name="android.intent.action.MAIN" /> 
14 <category 
15 android:name="android.intent.category.LAUNCHER"/> 
16 </intent-filter> 
17 </activity> 
18 </application> 
19 </manifest>

Synapseindia android apps application

  • 1.
  • 2.
    Overview  Whatis Android?  Why teach Android?  What do you need in order to teach Android?  Hello, Android  Basic Android graphics  Lunch  Part 2: More Android!
  • 3.
  • 4.
    What is Android? An open source Linux-based operating system intended for mobile computing platforms  Includes a Java API for developing applications  It is not a device or product
  • 6.
  • 7.
    NYC High SchoolGirls Build Android Apps
  • 8.
    Engaging Students withAndroid  Android has a lot of “buzz” now – Newness – Coolness – Googleness  UI and graphics made simple(r)  Advanced Java skills
  • 9.
    What Skills WillStudents Learn?  Reinforce the basics: OOP, decomposition, etc.  Separation of UI design and functionality  XML and resource files  Events and Listeners  Callback methods  Threads
  • 10.
    Android vs. iPhone  Java vs. Objective-C  Direct install vs. Marketplace vs. App Store  Open source?
  • 11.
    What do youneed in order to teach Android?
  • 12.
    What Should StudentsAlready Know?  Java! – inheritance, method overriding – interfaces, casting – exceptions – debugging – reading API documentation  Eclipse – easy to pick up quickly, though
  • 13.
    Do I NeedPhones?  The emulator that is part of the Android toolset for Eclipse is quite good (though a bit slow)  You may be able to get free “developer phones” from Google
  • 14.
    Online Resources developer.android.com  code.google.com/p/apps-for-android/  stackoverflow.com  videos from Google I/O conferences
  • 15.
  • 16.
    Creating Your First(?)Android App 1. Set up your development environment 1. Create a new Android project in Eclipse 1. Run it in the emulator 1. Hilarity ensues
  • 17.
    1. Set UpYour Android Environment  http://developer.android.com/sdk  Install Eclipse  Install Android SDK (Android libraries)  Install ADT plugin (Android development tools)  Create AVD (Android virtual device)  We’ve already done this for you!!
  • 18.
    2. Create anAndroid Project in Eclipse  File → New → Project  Select “Android Project”  Fill in Project details...
  • 19.
    Name that appears on device Directory name Class to automatically create Java package Android version
  • 20.
    3. Run theAndroid Application  Run → Run (or click the “Run” button)  Select “Android Application”  The emulator may take a few minutes to start, so be patient!  You don't need to restart the emulator when you have a new version of your application
  • 22.
    Source code Auto-generated code UI layout String constants Configuration
  • 23.
    HelloAndroid.java 1 publicclass HelloAndroid extends Activity { 2 /** Called when the activity is first created. */ 3 @Override 4 public void onCreate(Bundle savedInstanceState) 5 { 6 super.onCreate(savedInstanceState); 7 setContentView(R.layout.main); 8 } 9 }
  • 24.
    main.xml 1 <?xmlversion="1.0" encoding="utf-8"?> 2 <LinearLayout 3 xmlns:android="http://schemas.android.com/apk/res/android" 4 android:orientation="vertical" 5 android:layout_width="fill_parent" 6 android:layout_height="fill_parent" 7 > 8 <TextView 9 android:layout_width="fill_parent" 10 android:layout_height="wrap_content" 11 android:text="@string/hello " 12 /> 13 </LinearLayout>
  • 25.
    strings.xml 1 <?xmlversion="1.0" encoding="utf-8"?> 2 <resources> 3 <string name="hello">Hello World, HelloAndroid! 4 </string> 5 <string name="app_name">Hello, Android</string> 6 </resources>
  • 26.
    AndroidManifest.xml 1 <?xmlversion="1.0" encoding="utf-8"?> 2 <manifest 3 xmlns:android="http://schemas.android.com/apk/res/android" 4 package="edu.upenn.cis542" 5 android:versionCode="1" 6 android:versionName="1.0"> 7 <application android:icon="@drawable/icon" 8 android:label="@string/app_name"> 9 <activity android:name=".HelloAndroid" 10 android:label="@string/app_name"> 11 <intent-filter> 12 <action 13 android:name="android.intent.action.MAIN" /> 14 <category 15 android:name="android.intent.category.LAUNCHER"/> 16 </intent-filter> 17 </activity> 18 </application> 19 </manifest>