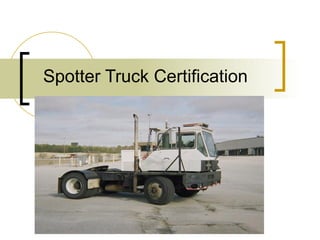
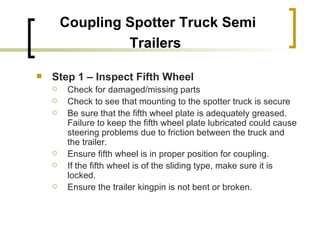
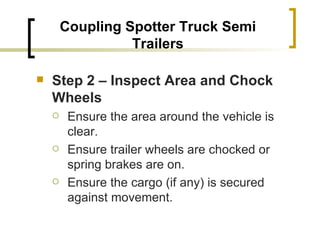
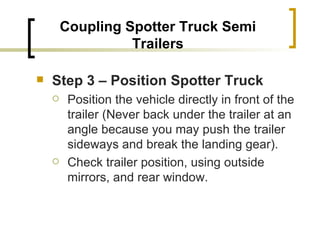
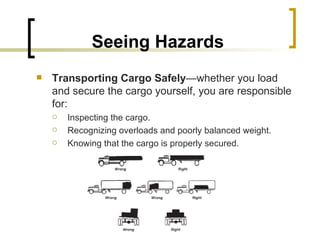
Spotter Truck Certification
Purpose This program is designed to provide employee’s who are currently certified, or are to be certified as  Spotter Truck Operators  that detailed information which is necessary to safely carry out assigned duties, recognize hazards, and develop skills that will safe guard personnel, and property from damage.
Scope and Application To meet those Federal, State, and local laws, standards, and regulations that is applicable to  Operators ,  Types of Vehicles ,  Inspections  and  Methods of Training and Certification  for spotter truck operators.
Responsibilities Employer —shall ensure that those duties, roles and responsibilities of spotter truck operators are clearly defined and communicated to those employees who may be impacted by those processes requiring specialized skills.
Responsibilities Employee/Operator —shall ensure that by accepting the responsibility of being a spotter truck operator, operators must continually familiarize themselves and understand the programs, policies and working limits of the equipment they operate.
Description of Procedures Vehicle Inspections  the most important aspect of operator safety for you and others is that each operator personally inspects the vehicle prior to use. Federal and state law requires these daily written inspections, and that an employer retain these inspections. Completing a vehicle condition inspection listing any problems not only ensures a safe vehicle for everyday use, but also allows an employer to determine and ensure that any vehicle repairs/needs are completed.
Tire Problems Too much or too little air pressure Bad wear. You need at least 4/32 inch tread depth on front wheels and 2/32 inch depth on rear. Cuts or other damage Tread separation
Wheel and Rim Problems Damaged rims Rust around wheel nuts may mean the nuts are loose Missing clamps, spacers, studs or lugs
Bad Brake Drums or Shoes Cracked drums Shoes or pads with oil, grease, or brake fluid on them.
Steering System Defects Missing nuts, bolts, cotter keys or other parts Bent loose or missing parts Steering wheel play of more than 10 degrees If power steering equipped—check hoses, pumps and fluid levels
Suspension System Defects Cracked or broken spring hangers Broken or missing leaves in any leaf spring. If ¼ or more are missing the vehicle  must  be placed out of service. Leaking shock absorbers. Any loose, cracked, broken or missing frame members
Exhaust System Defects Loose, broken or missing mounting brackets, clamps, bolts or nuts. Exhaust system parts rubbing against fuel system parts, tire, or other moving parts of the vehicle. Exhaust system parts that are leaking.
Emergency Equipment Fire extinguisher Spare electrical fuses Warning devices Engine block electrical heater cord ( must  be plugged in when vehicle is not in use during cold weather).
Method of Inspection   Each and every spotter truck operator shall perform a pre-inspection the same way each time, so that everyone will learn all the steps and are less likely to forget.
Approaching the Vehicle   Notice the general condition. Look for damage or the vehicle leaning to one side. Look under the vehicle for fresh oil, coolant, grease or fuel leaks.
Review Last Inspection Report   Operators should review prior inspection reports to ensure reported repairs are completed
Check that Parking Brakes are on and/or Wheels are Chocked   Operators should open the engine compartment door and check the following: Engine oil level Fuel level must not get below ¼ of a tank. Call if fuel is needed. Coolant level in radiator; condition of hoses Power steering fluid level Windshield washer fluid level Battery fluid level, connections and tie downs Automatic transmission fluid level Check belts for tightness and excessive wear Cracked, or worn electrical wiring insulation Leaks in the engine compartment
Get in and Start Engine Make sure parking brake is on Start engine; listen for unusual noises
Look at Gauges Oil Pressure —should come up to normal within seconds after engine is started. Ammeter and/or Voltmeter —should be in normal ranges. Coolant Temperature —should begin gradual rise to normal operating range. Warning Lights and Buzzers —oil, coolant, charging circuit warning lights should go out right away.
Check Condition of Controls   check all of the following for looseness, sticking, damage or improper setting; Steering wheel Clutch (if equipped) Accelerator (gas pedal) Brake controls Transmission controls Horn Lights
Check Mirrors and Windshield   Inspect mirrors and windshield for cracks, dirt, illegal stickers, or other obstructions to vision.  Clean and adjust as necessary
Turn off Engine and Check Lights   Make sure the parking brake is set, turn off the engine, and take the key with you. Turn on headlights (low beams) and four-way flashers, and get out. Go to front of the vehicle and check that low beams are on and both of the four-way flashers are working. Push dimmer switch and check that high beams work. Turn off headlights and four-way hazard warning flashers. Turn on parking, clearance, side-marker and identification lights. Turn on right turn signal and start walk-around inspection.
Perform Walk-around Inspection General Walk around and inspect. Clean all lights, reflectors and glass as you go along
Perform Walk-around Inspection Left Front Side Driver’s door glass should be clean. Door latches or locks work properly. Left front wheel. Left front suspension Left front brake
Perform Walk-around Inspection Front Condition of front axle. Condition of steering system. Lights and reflectors. Right front turn signal light clean, operating and proper color.
Perform Walk-around Inspection Right Side Passenger door glass should be clean Door latches or locks work properly (if applicable) Right fuel tank. Condition of all visible parts.
Perform Walk-around Inspection Right Rear Condition of wheels and rims Condition of tires Suspension Brakes Lights and reflectors
Perform Walk-around Inspection Rear Lights and reflectors License plate present (if applicable) Splash guards present, not damaged
Perform Walk-around Inspection Left Side Check all items as completed on right side.
Check Signal Lights Get in and Turn off Lights Turn off all lights Turn on stop lights (apply trailer hand brake or have someone press the brake pedal). Turn on left turn signal lights. Get out and Check Lights Left front turn signal light clean, operating and proper color. Left rear turn signal light and both stop lights clean, and proper color. Get in vehicle Turn off lights not needed for driving. Start the engine.
Start Engine and Check Brake System Test for Hydraulic Leaks   if the vehicle has hydraulic brakes, pump the brake pedals three times.  Then apply firm pressure to the pedal and hold for five seconds.  The pedal should not move.
Start Engine and Check Brake System Test Parking Brake Fasten safety belt Allow vehicle to move forward slowly Apply parking brake If it does not stop vehicle. It is faulty, get it repaired
Start Engine and Check Brake System Test Service Brake Stopping Action Go about 5 mph. Push brake pedal firmly “ Pulling” to one side or the other can mean brake trouble Any unusual brake pedal “feel” or delayed stopping action may mean trouble
Basic Vehicle Control   To drive a spotter truck safely an operator must be able to control its speed and direction. Safe operation of a spotter truck requires skills in: Accelerating Steering Backing Braking
Accelerating   DO NOT  roll back when you start.  You may hit someone behind you.  Speed up smoothly and gradually so the vehicle does not jerk.  Rough acceleration can cause mechanical damage. When pulling a trailer, rough acceleration can damage the coupling. Speed up very gradually when traction is poor, as in rain or snow.  If you use too much power, the drive wheels may spin.  You could lose control.  If the drive wheels begin to spin, take your foot off the accelerator.
Steering   Hold the wheel properly.  Hold the steering wheel firmly with both hands.  Your hands should be on opposite sides of the wheel.  If you hit a curb or a pothole (chuckhole), the wheel could pull away from your hands.
Backing Safely   Because you cannot see everything behind your vehicle,  backing is always dangerous .  When you have to back, follow these safety rules.
Look at Your Path   Look at your line of travel before you begin.  Get out and walk around the vehicle. Check your clearance to the sides and overhead in and near the path your vehicle will take.
Back Slowly   Always back as slowly as possible. Use the lowest reverse gear so you can more easily correct any steering errors.  You can also stop quickly if necessary.
Back and Turn toward the Driver’s Side   Back to the driver’s side so you can see better. Backing toward the right side is very dangerous because you cannot see as well.  If you back toward the driver’s side, you can watch the rear of the vehicle by looking out the side window.
Use a Helper   Use a helper when you can.  There are blind spots you cannot see. The helper should stand near the back of the vehicle where you can see the helper.  Before you begin backing, work out a set of hand signals that you both understand. Agree on a signal for “stop”.
Backing with a Trailer   when backing a car, straight truck, or bus, turn the top of the steering wheel toward the direction you want to go.  When backing a trailer, turn the steering wheel  in the opposite direction .  Once the trailer starts to turn, you must turn the wheel the other way to follow the trailer.  When you must back with a trailer, try to position your vehicle so that you are backing in a straight line.  If you must back on a curved path, back to the driver’s side so you can see.
Backing with a Trailer Back Slowly —this will let you make corrections before you get too far off course. Use the Mirrors —the mirrors will help you see whether the trailer is  drifting  to one side or the other. Correct Drift Immediately —as soon as you see the trailer getting off the proper path, correct it by turning the top of the steering wheel in the direction of the drift. Pull Forward —when backing a trailer, make pull-ups to reposition your vehicle as needed.
Right Turns   Following are rules to help prevent right-turn accidents and/or incidents. Turn slowly to give yourself more time to avoid problems. If you cannot make a right turn without swinging into another lane,  turn wide  as you complete the turn. Keep the rear  of the vehicle close to the curb.
Left Turns   On a left turn, make sure you have reached the center of the intersection before you start the left turn.  If you turn to soon, the left side of the vehicle may hit another trailer or damage property because of off tracking.
Seeing Hazards Coupling and Uncoupling —knowing how to couple and uncouple correctly is basic to the safe operation of spotter vehicles. Wrong coupling and uncoupling can be very dangerous. General coupling and uncoupling steps:
Coupling Spotter Truck Semi Trailers   Step 1 – Inspect Fifth Wheel   Check for damaged/missing parts Check to see that mounting to the spotter truck is secure Be sure that the fifth wheel plate is adequately greased. Failure to keep the fifth wheel plate lubricated could cause steering problems due to friction between the truck and the trailer. Ensure fifth wheel is in proper position for coupling. If the fifth wheel is of the sliding type, make sure it is locked. Ensure the trailer kingpin is not bent or broken.
Coupling Spotter Truck Semi Trailers Step 2 – Inspect Area and Chock Wheels   Ensure the area around the vehicle is clear. Ensure trailer wheels are chocked or spring brakes are on. Ensure the cargo (if any) is secured against movement.
Coupling Spotter Truck Semi Trailers Step 3 – Position Spotter Truck   Position the vehicle directly in front of the trailer (Never back under the trailer at an angle because you may push the trailer sideways and break the landing gear). Check trailer position, using outside mirrors, and rear window.
Coupling Spotter Truck Semi Trailers Step 4 – Back Slowly   Back until fifth wheel just touches the trailer. Do not hit the trailer
Coupling Spotter Truck Semi Trailers Step 5 – Secure Spotter Truck   Put on the parking brake. Put transmission in neutral/park.
Coupling Spotter Truck Semi Trailers Step 6 – Check Trailer Height   The trailer should be low enough that it is raised slightly by the spotter truck when the truck is backed under it. Raise or lower the trailer as needed. Check that the fifth wheel and the kingpin are properly aligned.
Coupling Spotter Truck Semi Trailers Step 7 – Connect Air Lines to Trailer   Check glad hand seals and connect truck emergency air line to trailer emergency glad hand. Check glad hand seals and connect truck service airline to trailer service glad hand. Ensure airlines are safely supported where they will not be crushed or caught while truck is backing under the trailer.
Coupling Spotter Truck Semi Trailers Step 8 – Supply Air to Trailer   From the cab, push in “air supply” knob” or move truck protection valve control from the “emergency” to the “normal” position to supply air to the trailer brake system. Wait until the air pressure is normal. Check brake system for crossed air lines. Ensure air pressure is up to normal.
Coupling Spotter Truck Semi Trailers Step 9 – Lock Trailer Brakes   Pull out “air supply” knob or move truck protection valve control from “normal” to “emergency”.
Coupling Spotter Truck Semi Trailers Step 10 – Back Under Trailer   Use lowest reverse gear. Back truck slowly under trailer to avoid hitting the kingpin too hard. Stop when the kingpin is locked into the fifth wheel.
Coupling Spotter Truck Semi Trailers Step 11 – Check Connection for Security   Raise trailer landing gear slightly off ground. Pull truck gently forward while trailer brakes are still locked to check that the trailer is locked onto the truck
Coupling Spotter Truck Semi Trailers Step 12 - Secure Vehicle   Put the transmission in neutral/park. Put parking brake on. Shut off engine and take key with you so someone else will not move truck while you are under it.
Coupling Spotter Truck Semi Trailers Step 13 – Inspect Coupling   Use a flashlight if necessary. Make sure there is no space between the upper and lower fifth wheel. If there is space, something is wrong (kingpin may be on top of closed fifth wheel jaws; trailer would come loose very easily). Go under trailer and look into the back of the fifth wheel. Make sure the fifth wheel jaws have closed around the shank of the kingpin. Check that the locking lever is in the “locked” position. Check that safety latch is in position over the locking lever (on some fifth wheels, the latch must be put in place by hand). If the coupling is not right, do not drive the coupled unit, report this issue, so that it may be repaired.
Coupling Spotter Truck Semi Trailers Step 14 – Connect the Electrical Cord and Check Air Lines   Plug the electrical cord into the trailer and fasten the safety latch. Check both airlines and electrical line for signs of damage. Ensure air and electrical lines will not hit any moving parts of the truck.
Coupling Spotter Truck Semi Trailers Step 15 – Raise Front Trailer Supports (Landing Gear)   Use low gear range (if equipped) to begin raising landing gear. Once free of weight, switch to high gear range. Raise landing gear all the way up (never drive with landing gear only partly raised). Secure landing gear crank handle safely. When full weight of trailer is resting on truck: Check for enough clearance between rear of the truck frame and landing gear (when the truck turns sharply it must not hit landing gear). Ensure that there is enough clearance between the top of the tractor tires and the nose of the trailer.
Coupling Spotter Truck Semi Trailers Step 16 – Remove Trailer Wheel Chocks   Remove and store wheel chocks in a safe place.
Uncoupling Spotter Truck Semi Trailers   Step 1 - Position Rig Ensure parking area surface can support the weight of the trailer. Have truck lined up with trailer (pulling out at an angle can damage landing gear).
Step 2 – Ease Pressure on Locking Jaws Shut off trailer air supply to lock trailer brakes. Ease pressure on fifth wheel locking jaws by backing up gently (this will help release the fifth wheel locking lever). Put on parking brakes while tractor is pushing against the kingpin (this will hold rig with pressure off the locking jaws).  Uncoupling Spotter Truck Semi Trailers
Uncoupling Spotter Truck Semi Trailers Step 3 – Check Trailer Wheels Chock the trailer wheels if the trailer does not have spring brakes or if you are not sure (the air could leak out of the trailer air tank, releasing its emergency brakes. Without chocks the trailer could move).
Uncoupling Spotter Truck Semi Trailers Step 4 – Lower the Landing Gear   If trailer is empty, lower the landing gear until it makes firm contact with the ground. If trailer is loaded, after the landing gear makes firm contact with the ground, turn crank in low gear a few extra turns. This will lift some weight off the tractor ( DO NOT  lift the trailer off the fifth wheel). This will make it easier to unlatch the fifth wheel and easier to couple next time.
Uncoupling Spotter Truck Semi Trailers Step 5 – Disconnect Air Lines and Electrical Cables Disconnect air lines from trailer. Connect air line glad hands to dummy couplers at the back of the truck, or couple them together. Hang electrical cable with plug down to prevent moisture from entering it. Ensure lines are supported so they will not be damaged while driving the truck.
Uncoupling Spotter Truck Semi Trailers Step 6 – Unlock Fifth Wheel Raise release handle lock. Pull the release handle to “open” position. Keep legs and feet clear of the rear tractor wheels to avoid serious injury in the event the trailer moves.
Uncoupling Spotter Truck Semi Trailers Step 7 – Pull Truck Partially Clear of Trailer   Pull truck forward until fifth wheel comes out from under the trailer. Stop with truck frame under trailer (prevents trailer from falling to the ground if the landing gear should collapse or sink).
Uncoupling Spotter Truck Semi Trailers Step 8 – Secure Truck Apply parking brake. Place transmission in neutral/park.
Uncoupling Spotter Truck Semi Trailers Step 9 – Inspect Trailer Supports Ensure ground is supporting trailer. Ensure landing gear is not damaged
Uncoupling Spotter Truck Semi Trailers Step 10 – Pull Truck Clear of Trailer   Release parking brakes. Check the area and drive the truck forward until it clears
Seeing Hazards   A hazard is any condition that is a possible danger.  Seeing hazards allows an operator to be prepared and to have more time to act before a hazard becomes an emergency.  When you observe a hazard think about the emergencies that could develop and figure out what you would do .  Always be prepared to take action based on thought out plans.
Seeing Hazards Skidding—a skid happens whenever the tires lose their grip on the road. This is caused in one of four ways: Over – braking. Braking too hard and locking up the wheels. Skids also can occur when using the speed retarder when the road surface is slippery. Over – steering. Turning the wheels more sharply than the wheels can turn. Over – acceleration. Supplying too much power to the trucks drive wheels causing them to spin. Driving to fast. Most serious skids result from driving too fast for road conditions.
Seeing Hazards Transporting Cargo Safely —whether you load and secure the cargo yourself, you are responsible for: Inspecting the cargo. Recognizing overloads and poorly balanced weight. Knowing that the cargo is properly secured.
Seeing Hazards Air Brakes —Use compressed air to make the brakes work.  Air brakes are an efficient means of stopping large and heavy vehicles when the brakes are used properly. Air brake systems combine three braking systems; service, parking, and emergency brake systems
Seeing Hazards Air Brakes   The  service brake  system applies and releases the brakes when you use the brake pedal during normal driving. The  parking brake  system applies and releases the parking brakes when you use the parking brake control. The  emergency brake  system uses parts of the service and parking brake systems to stop the vehicle in the event of a brake system failure.
Trailers Air/Electric Connections Ensure that trailer air connections are sealed and in good condition. Ensure glad hands are locked in place, free of damage or air leaks. Ensure trailer electrical plug is firmly seated and locked in place
Trailers Header Board If equipped, check the header board to see that it is secure, and free of damage. On enclosed trailers, check the front area for signs of damage such as cracks, bulges, or holes.
Trailers Landing Gear Check that the landing gear is fully raised has no missing parts, crank handle is secure, and the support frame is not damaged. If power operated, check for air or hydraulic leaks.
Trailers Doors Ensure doors are not damaged. Check that doors open, close, and properly from the outside.
Trailers Frame Look for cracks, broken welds, holes or other damage to the frame, cross members, box and floor.
Training Nothing is more important to the safe operation of spotter vehicles than a well trained knowledgeable operator.  Operators must be safety conscious, responsible, and reliable.  Merisant shall comply with all federal, state, and/or local regulations requiring operators to complete an instruction in formal instruction and testing and the completion of practical training.
Training Following control skills must be utilized during practical applications for operator initial certification, recertification, and applicable refresher training.
Training Stop at line —bringing the vehicle to a complete stop as close as possible to a boundary marked end line.
Training Straight line backing —backing the vehicle in a straight line without touching and/or crossing set boundaries.
Training Alley dock —Sight-side back the vehicle into an alley, bringing the rear of the vehicle as close as possible to the rear of the alley
Training Parallel park (drivers side) —operator must drive past the parking space and back into it bring the rear of the vehicle as close as possible to the rear of the space without crossing side or rear boundaries.
Training Parallel Park (conventional) —operator must drive past the parking space and back into it bringing the rear of the vehicle as close as possible to the rear of the space without crossing side or rear boundaries.
Training Measured right turn —operator must drive forward and make a right turn bringing the right rear tires of the vehicle as close to the base of the cone as possible without hitting it.
Questions?

Spotter Truck Certification

  • 1.
  • 2.
    Purpose This programis designed to provide employee’s who are currently certified, or are to be certified as Spotter Truck Operators that detailed information which is necessary to safely carry out assigned duties, recognize hazards, and develop skills that will safe guard personnel, and property from damage.
  • 3.
    Scope and ApplicationTo meet those Federal, State, and local laws, standards, and regulations that is applicable to Operators , Types of Vehicles , Inspections and Methods of Training and Certification for spotter truck operators.
  • 4.
    Responsibilities Employer —shallensure that those duties, roles and responsibilities of spotter truck operators are clearly defined and communicated to those employees who may be impacted by those processes requiring specialized skills.
  • 5.
    Responsibilities Employee/Operator —shallensure that by accepting the responsibility of being a spotter truck operator, operators must continually familiarize themselves and understand the programs, policies and working limits of the equipment they operate.
  • 6.
    Description of ProceduresVehicle Inspections the most important aspect of operator safety for you and others is that each operator personally inspects the vehicle prior to use. Federal and state law requires these daily written inspections, and that an employer retain these inspections. Completing a vehicle condition inspection listing any problems not only ensures a safe vehicle for everyday use, but also allows an employer to determine and ensure that any vehicle repairs/needs are completed.
  • 7.
    Tire Problems Toomuch or too little air pressure Bad wear. You need at least 4/32 inch tread depth on front wheels and 2/32 inch depth on rear. Cuts or other damage Tread separation
  • 8.
    Wheel and RimProblems Damaged rims Rust around wheel nuts may mean the nuts are loose Missing clamps, spacers, studs or lugs
  • 9.
    Bad Brake Drumsor Shoes Cracked drums Shoes or pads with oil, grease, or brake fluid on them.
  • 10.
    Steering System DefectsMissing nuts, bolts, cotter keys or other parts Bent loose or missing parts Steering wheel play of more than 10 degrees If power steering equipped—check hoses, pumps and fluid levels
  • 11.
    Suspension System DefectsCracked or broken spring hangers Broken or missing leaves in any leaf spring. If ¼ or more are missing the vehicle must be placed out of service. Leaking shock absorbers. Any loose, cracked, broken or missing frame members
  • 12.
    Exhaust System DefectsLoose, broken or missing mounting brackets, clamps, bolts or nuts. Exhaust system parts rubbing against fuel system parts, tire, or other moving parts of the vehicle. Exhaust system parts that are leaking.
  • 13.
    Emergency Equipment Fireextinguisher Spare electrical fuses Warning devices Engine block electrical heater cord ( must be plugged in when vehicle is not in use during cold weather).
  • 14.
    Method of Inspection Each and every spotter truck operator shall perform a pre-inspection the same way each time, so that everyone will learn all the steps and are less likely to forget.
  • 15.
    Approaching the Vehicle Notice the general condition. Look for damage or the vehicle leaning to one side. Look under the vehicle for fresh oil, coolant, grease or fuel leaks.
  • 16.
    Review Last InspectionReport Operators should review prior inspection reports to ensure reported repairs are completed
  • 17.
    Check that ParkingBrakes are on and/or Wheels are Chocked Operators should open the engine compartment door and check the following: Engine oil level Fuel level must not get below ¼ of a tank. Call if fuel is needed. Coolant level in radiator; condition of hoses Power steering fluid level Windshield washer fluid level Battery fluid level, connections and tie downs Automatic transmission fluid level Check belts for tightness and excessive wear Cracked, or worn electrical wiring insulation Leaks in the engine compartment
  • 18.
    Get in andStart Engine Make sure parking brake is on Start engine; listen for unusual noises
  • 19.
    Look at GaugesOil Pressure —should come up to normal within seconds after engine is started. Ammeter and/or Voltmeter —should be in normal ranges. Coolant Temperature —should begin gradual rise to normal operating range. Warning Lights and Buzzers —oil, coolant, charging circuit warning lights should go out right away.
  • 20.
    Check Condition ofControls check all of the following for looseness, sticking, damage or improper setting; Steering wheel Clutch (if equipped) Accelerator (gas pedal) Brake controls Transmission controls Horn Lights
  • 21.
    Check Mirrors andWindshield Inspect mirrors and windshield for cracks, dirt, illegal stickers, or other obstructions to vision. Clean and adjust as necessary
  • 22.
    Turn off Engineand Check Lights Make sure the parking brake is set, turn off the engine, and take the key with you. Turn on headlights (low beams) and four-way flashers, and get out. Go to front of the vehicle and check that low beams are on and both of the four-way flashers are working. Push dimmer switch and check that high beams work. Turn off headlights and four-way hazard warning flashers. Turn on parking, clearance, side-marker and identification lights. Turn on right turn signal and start walk-around inspection.
  • 23.
    Perform Walk-around InspectionGeneral Walk around and inspect. Clean all lights, reflectors and glass as you go along
  • 24.
    Perform Walk-around InspectionLeft Front Side Driver’s door glass should be clean. Door latches or locks work properly. Left front wheel. Left front suspension Left front brake
  • 25.
    Perform Walk-around InspectionFront Condition of front axle. Condition of steering system. Lights and reflectors. Right front turn signal light clean, operating and proper color.
  • 26.
    Perform Walk-around InspectionRight Side Passenger door glass should be clean Door latches or locks work properly (if applicable) Right fuel tank. Condition of all visible parts.
  • 27.
    Perform Walk-around InspectionRight Rear Condition of wheels and rims Condition of tires Suspension Brakes Lights and reflectors
  • 28.
    Perform Walk-around InspectionRear Lights and reflectors License plate present (if applicable) Splash guards present, not damaged
  • 29.
    Perform Walk-around InspectionLeft Side Check all items as completed on right side.
  • 30.
    Check Signal LightsGet in and Turn off Lights Turn off all lights Turn on stop lights (apply trailer hand brake or have someone press the brake pedal). Turn on left turn signal lights. Get out and Check Lights Left front turn signal light clean, operating and proper color. Left rear turn signal light and both stop lights clean, and proper color. Get in vehicle Turn off lights not needed for driving. Start the engine.
  • 31.
    Start Engine andCheck Brake System Test for Hydraulic Leaks if the vehicle has hydraulic brakes, pump the brake pedals three times. Then apply firm pressure to the pedal and hold for five seconds. The pedal should not move.
  • 32.
    Start Engine andCheck Brake System Test Parking Brake Fasten safety belt Allow vehicle to move forward slowly Apply parking brake If it does not stop vehicle. It is faulty, get it repaired
  • 33.
    Start Engine andCheck Brake System Test Service Brake Stopping Action Go about 5 mph. Push brake pedal firmly “ Pulling” to one side or the other can mean brake trouble Any unusual brake pedal “feel” or delayed stopping action may mean trouble
  • 34.
    Basic Vehicle Control To drive a spotter truck safely an operator must be able to control its speed and direction. Safe operation of a spotter truck requires skills in: Accelerating Steering Backing Braking
  • 35.
    Accelerating DO NOT roll back when you start. You may hit someone behind you. Speed up smoothly and gradually so the vehicle does not jerk. Rough acceleration can cause mechanical damage. When pulling a trailer, rough acceleration can damage the coupling. Speed up very gradually when traction is poor, as in rain or snow. If you use too much power, the drive wheels may spin. You could lose control. If the drive wheels begin to spin, take your foot off the accelerator.
  • 36.
    Steering Hold the wheel properly. Hold the steering wheel firmly with both hands. Your hands should be on opposite sides of the wheel. If you hit a curb or a pothole (chuckhole), the wheel could pull away from your hands.
  • 37.
    Backing Safely Because you cannot see everything behind your vehicle, backing is always dangerous . When you have to back, follow these safety rules.
  • 38.
    Look at YourPath Look at your line of travel before you begin. Get out and walk around the vehicle. Check your clearance to the sides and overhead in and near the path your vehicle will take.
  • 39.
    Back Slowly Always back as slowly as possible. Use the lowest reverse gear so you can more easily correct any steering errors. You can also stop quickly if necessary.
  • 40.
    Back and Turntoward the Driver’s Side Back to the driver’s side so you can see better. Backing toward the right side is very dangerous because you cannot see as well. If you back toward the driver’s side, you can watch the rear of the vehicle by looking out the side window.
  • 41.
    Use a Helper Use a helper when you can. There are blind spots you cannot see. The helper should stand near the back of the vehicle where you can see the helper. Before you begin backing, work out a set of hand signals that you both understand. Agree on a signal for “stop”.
  • 42.
    Backing with aTrailer when backing a car, straight truck, or bus, turn the top of the steering wheel toward the direction you want to go. When backing a trailer, turn the steering wheel in the opposite direction . Once the trailer starts to turn, you must turn the wheel the other way to follow the trailer. When you must back with a trailer, try to position your vehicle so that you are backing in a straight line. If you must back on a curved path, back to the driver’s side so you can see.
  • 43.
    Backing with aTrailer Back Slowly —this will let you make corrections before you get too far off course. Use the Mirrors —the mirrors will help you see whether the trailer is drifting to one side or the other. Correct Drift Immediately —as soon as you see the trailer getting off the proper path, correct it by turning the top of the steering wheel in the direction of the drift. Pull Forward —when backing a trailer, make pull-ups to reposition your vehicle as needed.
  • 44.
    Right Turns Following are rules to help prevent right-turn accidents and/or incidents. Turn slowly to give yourself more time to avoid problems. If you cannot make a right turn without swinging into another lane, turn wide as you complete the turn. Keep the rear of the vehicle close to the curb.
  • 45.
    Left Turns On a left turn, make sure you have reached the center of the intersection before you start the left turn. If you turn to soon, the left side of the vehicle may hit another trailer or damage property because of off tracking.
  • 46.
    Seeing Hazards Couplingand Uncoupling —knowing how to couple and uncouple correctly is basic to the safe operation of spotter vehicles. Wrong coupling and uncoupling can be very dangerous. General coupling and uncoupling steps:
  • 47.
    Coupling Spotter TruckSemi Trailers Step 1 – Inspect Fifth Wheel Check for damaged/missing parts Check to see that mounting to the spotter truck is secure Be sure that the fifth wheel plate is adequately greased. Failure to keep the fifth wheel plate lubricated could cause steering problems due to friction between the truck and the trailer. Ensure fifth wheel is in proper position for coupling. If the fifth wheel is of the sliding type, make sure it is locked. Ensure the trailer kingpin is not bent or broken.
  • 48.
    Coupling Spotter TruckSemi Trailers Step 2 – Inspect Area and Chock Wheels Ensure the area around the vehicle is clear. Ensure trailer wheels are chocked or spring brakes are on. Ensure the cargo (if any) is secured against movement.
  • 49.
    Coupling Spotter TruckSemi Trailers Step 3 – Position Spotter Truck Position the vehicle directly in front of the trailer (Never back under the trailer at an angle because you may push the trailer sideways and break the landing gear). Check trailer position, using outside mirrors, and rear window.
  • 50.
    Coupling Spotter TruckSemi Trailers Step 4 – Back Slowly Back until fifth wheel just touches the trailer. Do not hit the trailer
  • 51.
    Coupling Spotter TruckSemi Trailers Step 5 – Secure Spotter Truck Put on the parking brake. Put transmission in neutral/park.
  • 52.
    Coupling Spotter TruckSemi Trailers Step 6 – Check Trailer Height The trailer should be low enough that it is raised slightly by the spotter truck when the truck is backed under it. Raise or lower the trailer as needed. Check that the fifth wheel and the kingpin are properly aligned.
  • 53.
    Coupling Spotter TruckSemi Trailers Step 7 – Connect Air Lines to Trailer Check glad hand seals and connect truck emergency air line to trailer emergency glad hand. Check glad hand seals and connect truck service airline to trailer service glad hand. Ensure airlines are safely supported where they will not be crushed or caught while truck is backing under the trailer.
  • 54.
    Coupling Spotter TruckSemi Trailers Step 8 – Supply Air to Trailer From the cab, push in “air supply” knob” or move truck protection valve control from the “emergency” to the “normal” position to supply air to the trailer brake system. Wait until the air pressure is normal. Check brake system for crossed air lines. Ensure air pressure is up to normal.
  • 55.
    Coupling Spotter TruckSemi Trailers Step 9 – Lock Trailer Brakes Pull out “air supply” knob or move truck protection valve control from “normal” to “emergency”.
  • 56.
    Coupling Spotter TruckSemi Trailers Step 10 – Back Under Trailer Use lowest reverse gear. Back truck slowly under trailer to avoid hitting the kingpin too hard. Stop when the kingpin is locked into the fifth wheel.
  • 57.
    Coupling Spotter TruckSemi Trailers Step 11 – Check Connection for Security Raise trailer landing gear slightly off ground. Pull truck gently forward while trailer brakes are still locked to check that the trailer is locked onto the truck
  • 58.
    Coupling Spotter TruckSemi Trailers Step 12 - Secure Vehicle Put the transmission in neutral/park. Put parking brake on. Shut off engine and take key with you so someone else will not move truck while you are under it.
  • 59.
    Coupling Spotter TruckSemi Trailers Step 13 – Inspect Coupling Use a flashlight if necessary. Make sure there is no space between the upper and lower fifth wheel. If there is space, something is wrong (kingpin may be on top of closed fifth wheel jaws; trailer would come loose very easily). Go under trailer and look into the back of the fifth wheel. Make sure the fifth wheel jaws have closed around the shank of the kingpin. Check that the locking lever is in the “locked” position. Check that safety latch is in position over the locking lever (on some fifth wheels, the latch must be put in place by hand). If the coupling is not right, do not drive the coupled unit, report this issue, so that it may be repaired.
  • 60.
    Coupling Spotter TruckSemi Trailers Step 14 – Connect the Electrical Cord and Check Air Lines Plug the electrical cord into the trailer and fasten the safety latch. Check both airlines and electrical line for signs of damage. Ensure air and electrical lines will not hit any moving parts of the truck.
  • 61.
    Coupling Spotter TruckSemi Trailers Step 15 – Raise Front Trailer Supports (Landing Gear) Use low gear range (if equipped) to begin raising landing gear. Once free of weight, switch to high gear range. Raise landing gear all the way up (never drive with landing gear only partly raised). Secure landing gear crank handle safely. When full weight of trailer is resting on truck: Check for enough clearance between rear of the truck frame and landing gear (when the truck turns sharply it must not hit landing gear). Ensure that there is enough clearance between the top of the tractor tires and the nose of the trailer.
  • 62.
    Coupling Spotter TruckSemi Trailers Step 16 – Remove Trailer Wheel Chocks Remove and store wheel chocks in a safe place.
  • 63.
    Uncoupling Spotter TruckSemi Trailers Step 1 - Position Rig Ensure parking area surface can support the weight of the trailer. Have truck lined up with trailer (pulling out at an angle can damage landing gear).
  • 64.
    Step 2 –Ease Pressure on Locking Jaws Shut off trailer air supply to lock trailer brakes. Ease pressure on fifth wheel locking jaws by backing up gently (this will help release the fifth wheel locking lever). Put on parking brakes while tractor is pushing against the kingpin (this will hold rig with pressure off the locking jaws). Uncoupling Spotter Truck Semi Trailers
  • 65.
    Uncoupling Spotter TruckSemi Trailers Step 3 – Check Trailer Wheels Chock the trailer wheels if the trailer does not have spring brakes or if you are not sure (the air could leak out of the trailer air tank, releasing its emergency brakes. Without chocks the trailer could move).
  • 66.
    Uncoupling Spotter TruckSemi Trailers Step 4 – Lower the Landing Gear If trailer is empty, lower the landing gear until it makes firm contact with the ground. If trailer is loaded, after the landing gear makes firm contact with the ground, turn crank in low gear a few extra turns. This will lift some weight off the tractor ( DO NOT lift the trailer off the fifth wheel). This will make it easier to unlatch the fifth wheel and easier to couple next time.
  • 67.
    Uncoupling Spotter TruckSemi Trailers Step 5 – Disconnect Air Lines and Electrical Cables Disconnect air lines from trailer. Connect air line glad hands to dummy couplers at the back of the truck, or couple them together. Hang electrical cable with plug down to prevent moisture from entering it. Ensure lines are supported so they will not be damaged while driving the truck.
  • 68.
    Uncoupling Spotter TruckSemi Trailers Step 6 – Unlock Fifth Wheel Raise release handle lock. Pull the release handle to “open” position. Keep legs and feet clear of the rear tractor wheels to avoid serious injury in the event the trailer moves.
  • 69.
    Uncoupling Spotter TruckSemi Trailers Step 7 – Pull Truck Partially Clear of Trailer Pull truck forward until fifth wheel comes out from under the trailer. Stop with truck frame under trailer (prevents trailer from falling to the ground if the landing gear should collapse or sink).
  • 70.
    Uncoupling Spotter TruckSemi Trailers Step 8 – Secure Truck Apply parking brake. Place transmission in neutral/park.
  • 71.
    Uncoupling Spotter TruckSemi Trailers Step 9 – Inspect Trailer Supports Ensure ground is supporting trailer. Ensure landing gear is not damaged
  • 72.
    Uncoupling Spotter TruckSemi Trailers Step 10 – Pull Truck Clear of Trailer Release parking brakes. Check the area and drive the truck forward until it clears
  • 73.
    Seeing Hazards A hazard is any condition that is a possible danger. Seeing hazards allows an operator to be prepared and to have more time to act before a hazard becomes an emergency. When you observe a hazard think about the emergencies that could develop and figure out what you would do . Always be prepared to take action based on thought out plans.
  • 74.
    Seeing Hazards Skidding—askid happens whenever the tires lose their grip on the road. This is caused in one of four ways: Over – braking. Braking too hard and locking up the wheels. Skids also can occur when using the speed retarder when the road surface is slippery. Over – steering. Turning the wheels more sharply than the wheels can turn. Over – acceleration. Supplying too much power to the trucks drive wheels causing them to spin. Driving to fast. Most serious skids result from driving too fast for road conditions.
  • 75.
    Seeing Hazards TransportingCargo Safely —whether you load and secure the cargo yourself, you are responsible for: Inspecting the cargo. Recognizing overloads and poorly balanced weight. Knowing that the cargo is properly secured.
  • 76.
    Seeing Hazards AirBrakes —Use compressed air to make the brakes work. Air brakes are an efficient means of stopping large and heavy vehicles when the brakes are used properly. Air brake systems combine three braking systems; service, parking, and emergency brake systems
  • 77.
    Seeing Hazards AirBrakes The service brake system applies and releases the brakes when you use the brake pedal during normal driving. The parking brake system applies and releases the parking brakes when you use the parking brake control. The emergency brake system uses parts of the service and parking brake systems to stop the vehicle in the event of a brake system failure.
  • 78.
    Trailers Air/Electric ConnectionsEnsure that trailer air connections are sealed and in good condition. Ensure glad hands are locked in place, free of damage or air leaks. Ensure trailer electrical plug is firmly seated and locked in place
  • 79.
    Trailers Header BoardIf equipped, check the header board to see that it is secure, and free of damage. On enclosed trailers, check the front area for signs of damage such as cracks, bulges, or holes.
  • 80.
    Trailers Landing GearCheck that the landing gear is fully raised has no missing parts, crank handle is secure, and the support frame is not damaged. If power operated, check for air or hydraulic leaks.
  • 81.
    Trailers Doors Ensuredoors are not damaged. Check that doors open, close, and properly from the outside.
  • 82.
    Trailers Frame Lookfor cracks, broken welds, holes or other damage to the frame, cross members, box and floor.
  • 83.
    Training Nothing ismore important to the safe operation of spotter vehicles than a well trained knowledgeable operator. Operators must be safety conscious, responsible, and reliable. Merisant shall comply with all federal, state, and/or local regulations requiring operators to complete an instruction in formal instruction and testing and the completion of practical training.
  • 84.
    Training Following controlskills must be utilized during practical applications for operator initial certification, recertification, and applicable refresher training.
  • 85.
    Training Stop atline —bringing the vehicle to a complete stop as close as possible to a boundary marked end line.
  • 86.
    Training Straight linebacking —backing the vehicle in a straight line without touching and/or crossing set boundaries.
  • 87.
    Training Alley dock—Sight-side back the vehicle into an alley, bringing the rear of the vehicle as close as possible to the rear of the alley
  • 88.
    Training Parallel park(drivers side) —operator must drive past the parking space and back into it bring the rear of the vehicle as close as possible to the rear of the space without crossing side or rear boundaries.
  • 89.
    Training Parallel Park(conventional) —operator must drive past the parking space and back into it bringing the rear of the vehicle as close as possible to the rear of the space without crossing side or rear boundaries.
  • 90.
    Training Measured rightturn —operator must drive forward and make a right turn bringing the right rear tires of the vehicle as close to the base of the cone as possible without hitting it.
  • 91.