Snake Face
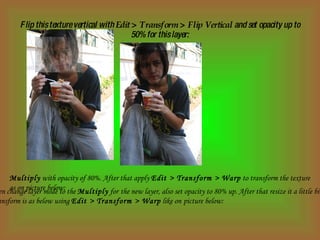
Flip this texture vertical with  Edit > Transform > Flip Vertical  and set opacity up to 50% for this layer: Multiply  with opacity of 80%. After that apply  Edit > Transform > Warp  to transform the texture as on picture below: then change layer mode to the  Multiply  for   the new layer, also set opacity to 80% up. After that resize it a little bit and  transform is as below using  Edit > Transform > Warp  like on   picture below:
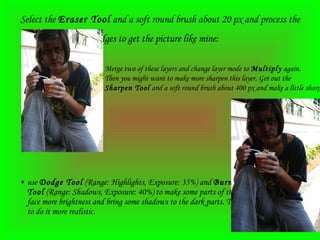
Select the  Eraser Tool  and a soft round brush about 20 px and process the edges to get the picture like mine:   use  Dodge Tool  (Range: Highlights, Exposure: 35%) and  Burn Tool  (Range: Shadows, Exposure: 40%) to make some parts of the face more brightness and bring some shadows to the dark parts. Try to do it more realistic.   Merge two of these layers and change layer mode to  Multiply  again.  Then you might want to make more sharpen this layer. Get out the  Sharpen Tool  and a soft round brush about 400 px and make a little sharpen work:
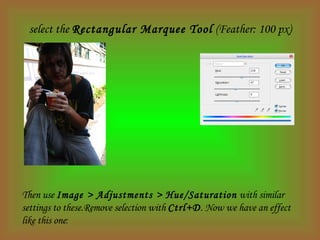
select the  Rectangular Marquee Tool  (Feather: 100 px) Then use  Image > Adjustments > Hue/Saturation  with similar settings to these.Remove selection with  Ctrl+D . Now we have an effect like this one :

Snake Face

  • 1.
  • 2.
    Flip this texturevertical with Edit > Transform > Flip Vertical and set opacity up to 50% for this layer: Multiply with opacity of 80%. After that apply Edit > Transform > Warp to transform the texture as on picture below: then change layer mode to the Multiply for the new layer, also set opacity to 80% up. After that resize it a little bit and transform is as below using Edit > Transform > Warp like on picture below:
  • 3.
    Select the Eraser Tool and a soft round brush about 20 px and process the edges to get the picture like mine: use Dodge Tool (Range: Highlights, Exposure: 35%) and Burn Tool (Range: Shadows, Exposure: 40%) to make some parts of the face more brightness and bring some shadows to the dark parts. Try to do it more realistic. Merge two of these layers and change layer mode to Multiply again. Then you might want to make more sharpen this layer. Get out the Sharpen Tool and a soft round brush about 400 px and make a little sharpen work:
  • 4.
    select the Rectangular Marquee Tool (Feather: 100 px) Then use Image > Adjustments > Hue/Saturation with similar settings to these.Remove selection with Ctrl+D . Now we have an effect like this one :