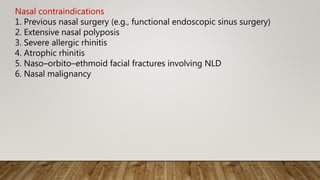
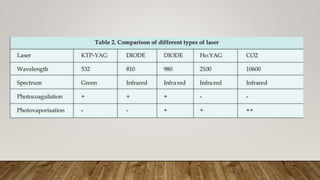
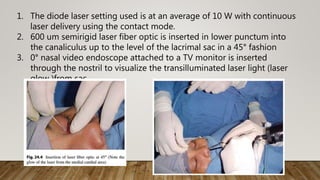
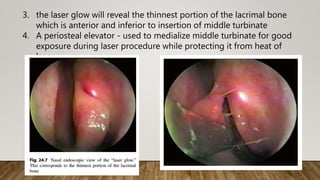
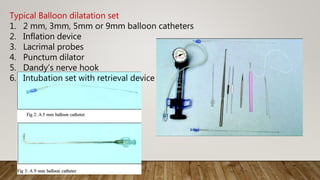
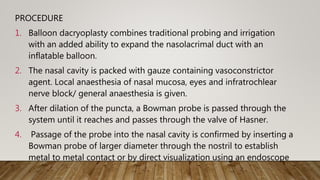
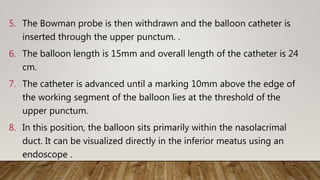
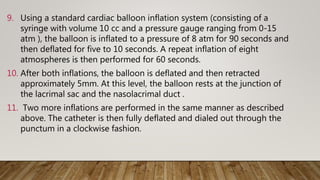
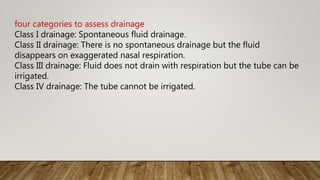
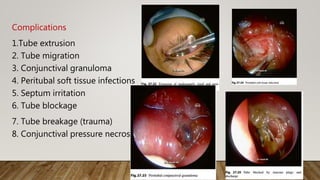
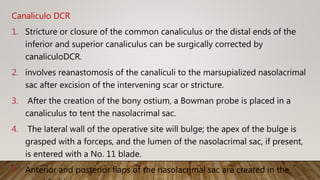
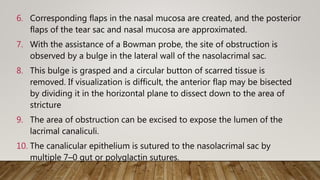
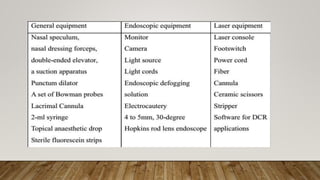
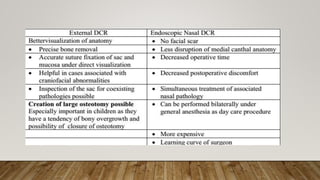
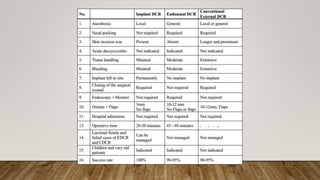
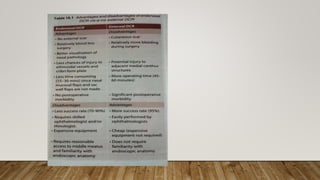
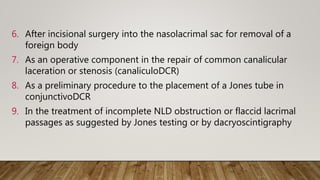
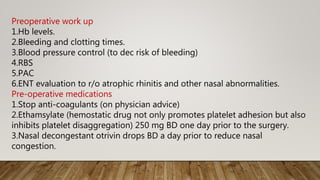
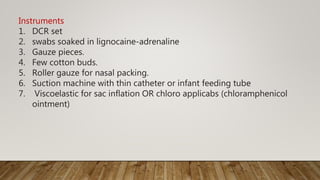
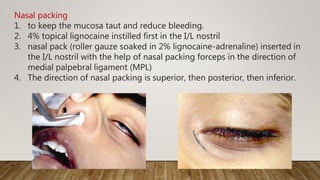
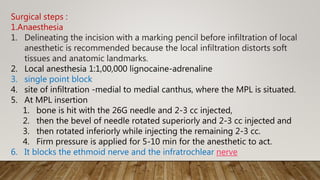
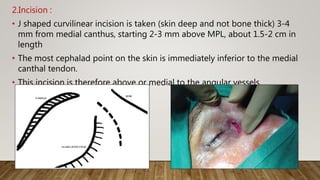
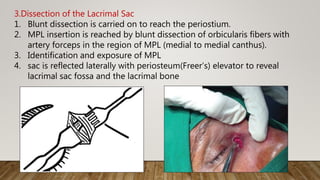
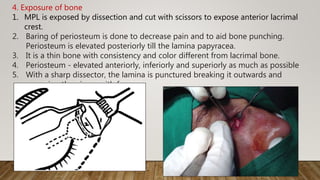
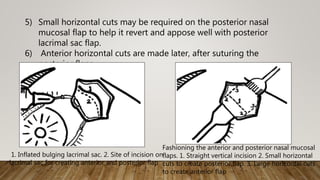
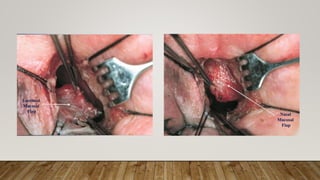
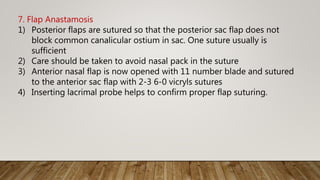
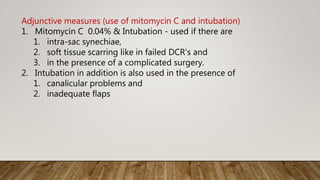
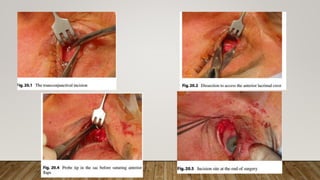
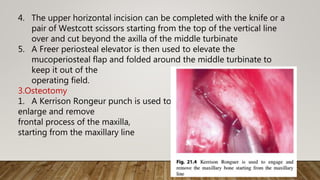
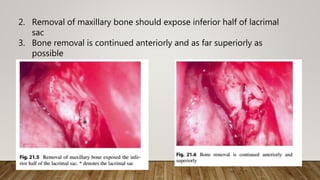
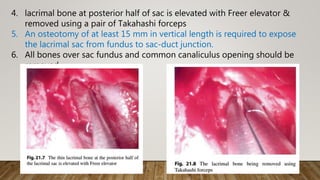
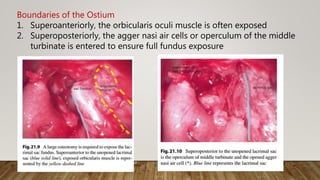
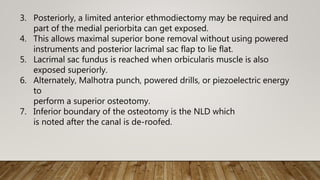
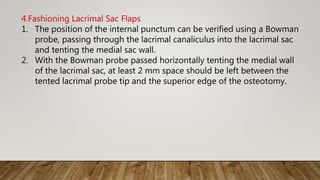
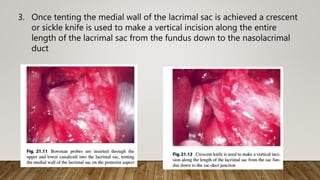
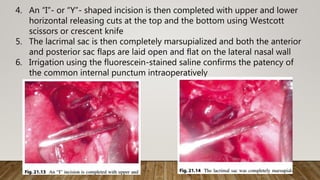
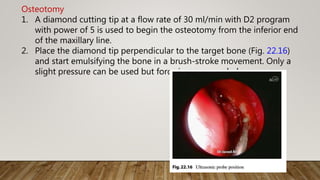
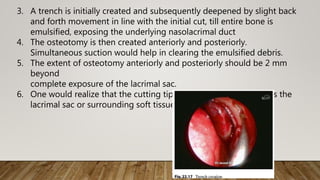
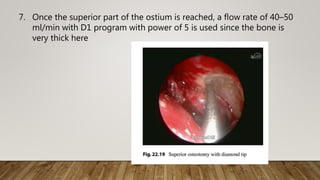
The document discusses recent advances in the management of obstruction of the lacrimal drainage system. It describes the history and evolution of various surgical techniques for treating this obstruction, including external dacryocystorhinostomy (DCR), endoscopic endonasal DCR, ultrasonic endoscopic DCR, non-laser endonasal DCR, endocanalicular laser DCR, and balloon-assisted DCR. It then provides details on the surgical procedure for external DCR, including patient preparation, instrumentation, osteotomy creation, flap formation, flap anastomosis, wound closure, and post-operative management. Potential complications are also briefly mentioned.

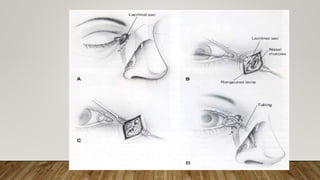
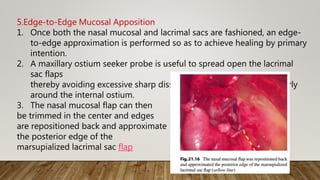


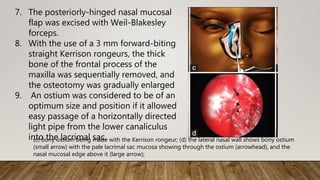
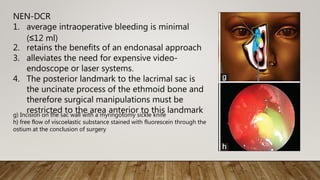
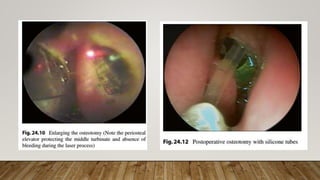
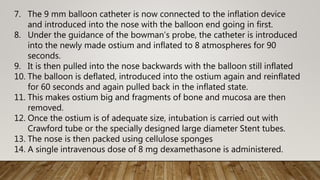
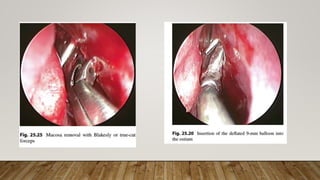
![7. Finally, the medial wall of the
lacrimal sac was incised with a
myringotomy sickle knife to
create a marsupialized sac
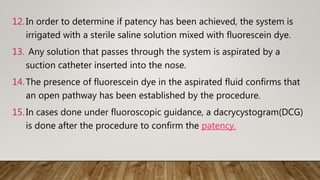
8. Irrigation through the lower
canaliculus confirmed patency
of the drainage system [Figure
2]h.
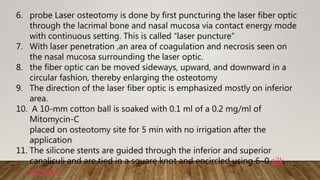
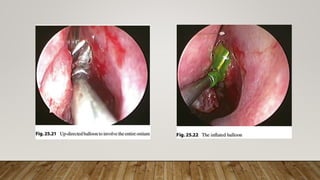
9. Mitomycin C (MMC) 0.04% was
applied for 3
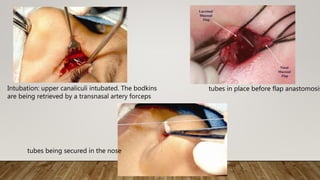
10. Bi-canalicular silicone tubes
were introduced and secured in
all patients.
e) transillumination of lacrimal sac after bony osteotomy; (f and g) Incision on the sac wall with a
myringotomy sickle knife](https://image.slidesharecdn.com/recentadvancesindcr-180512161614/85/Recent-advances-in-dcr-65-320.jpg)