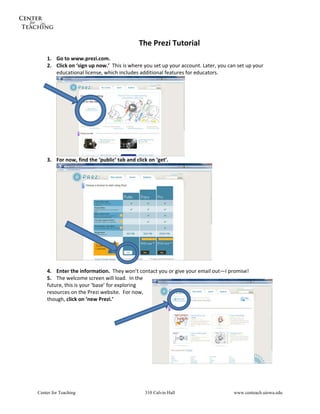
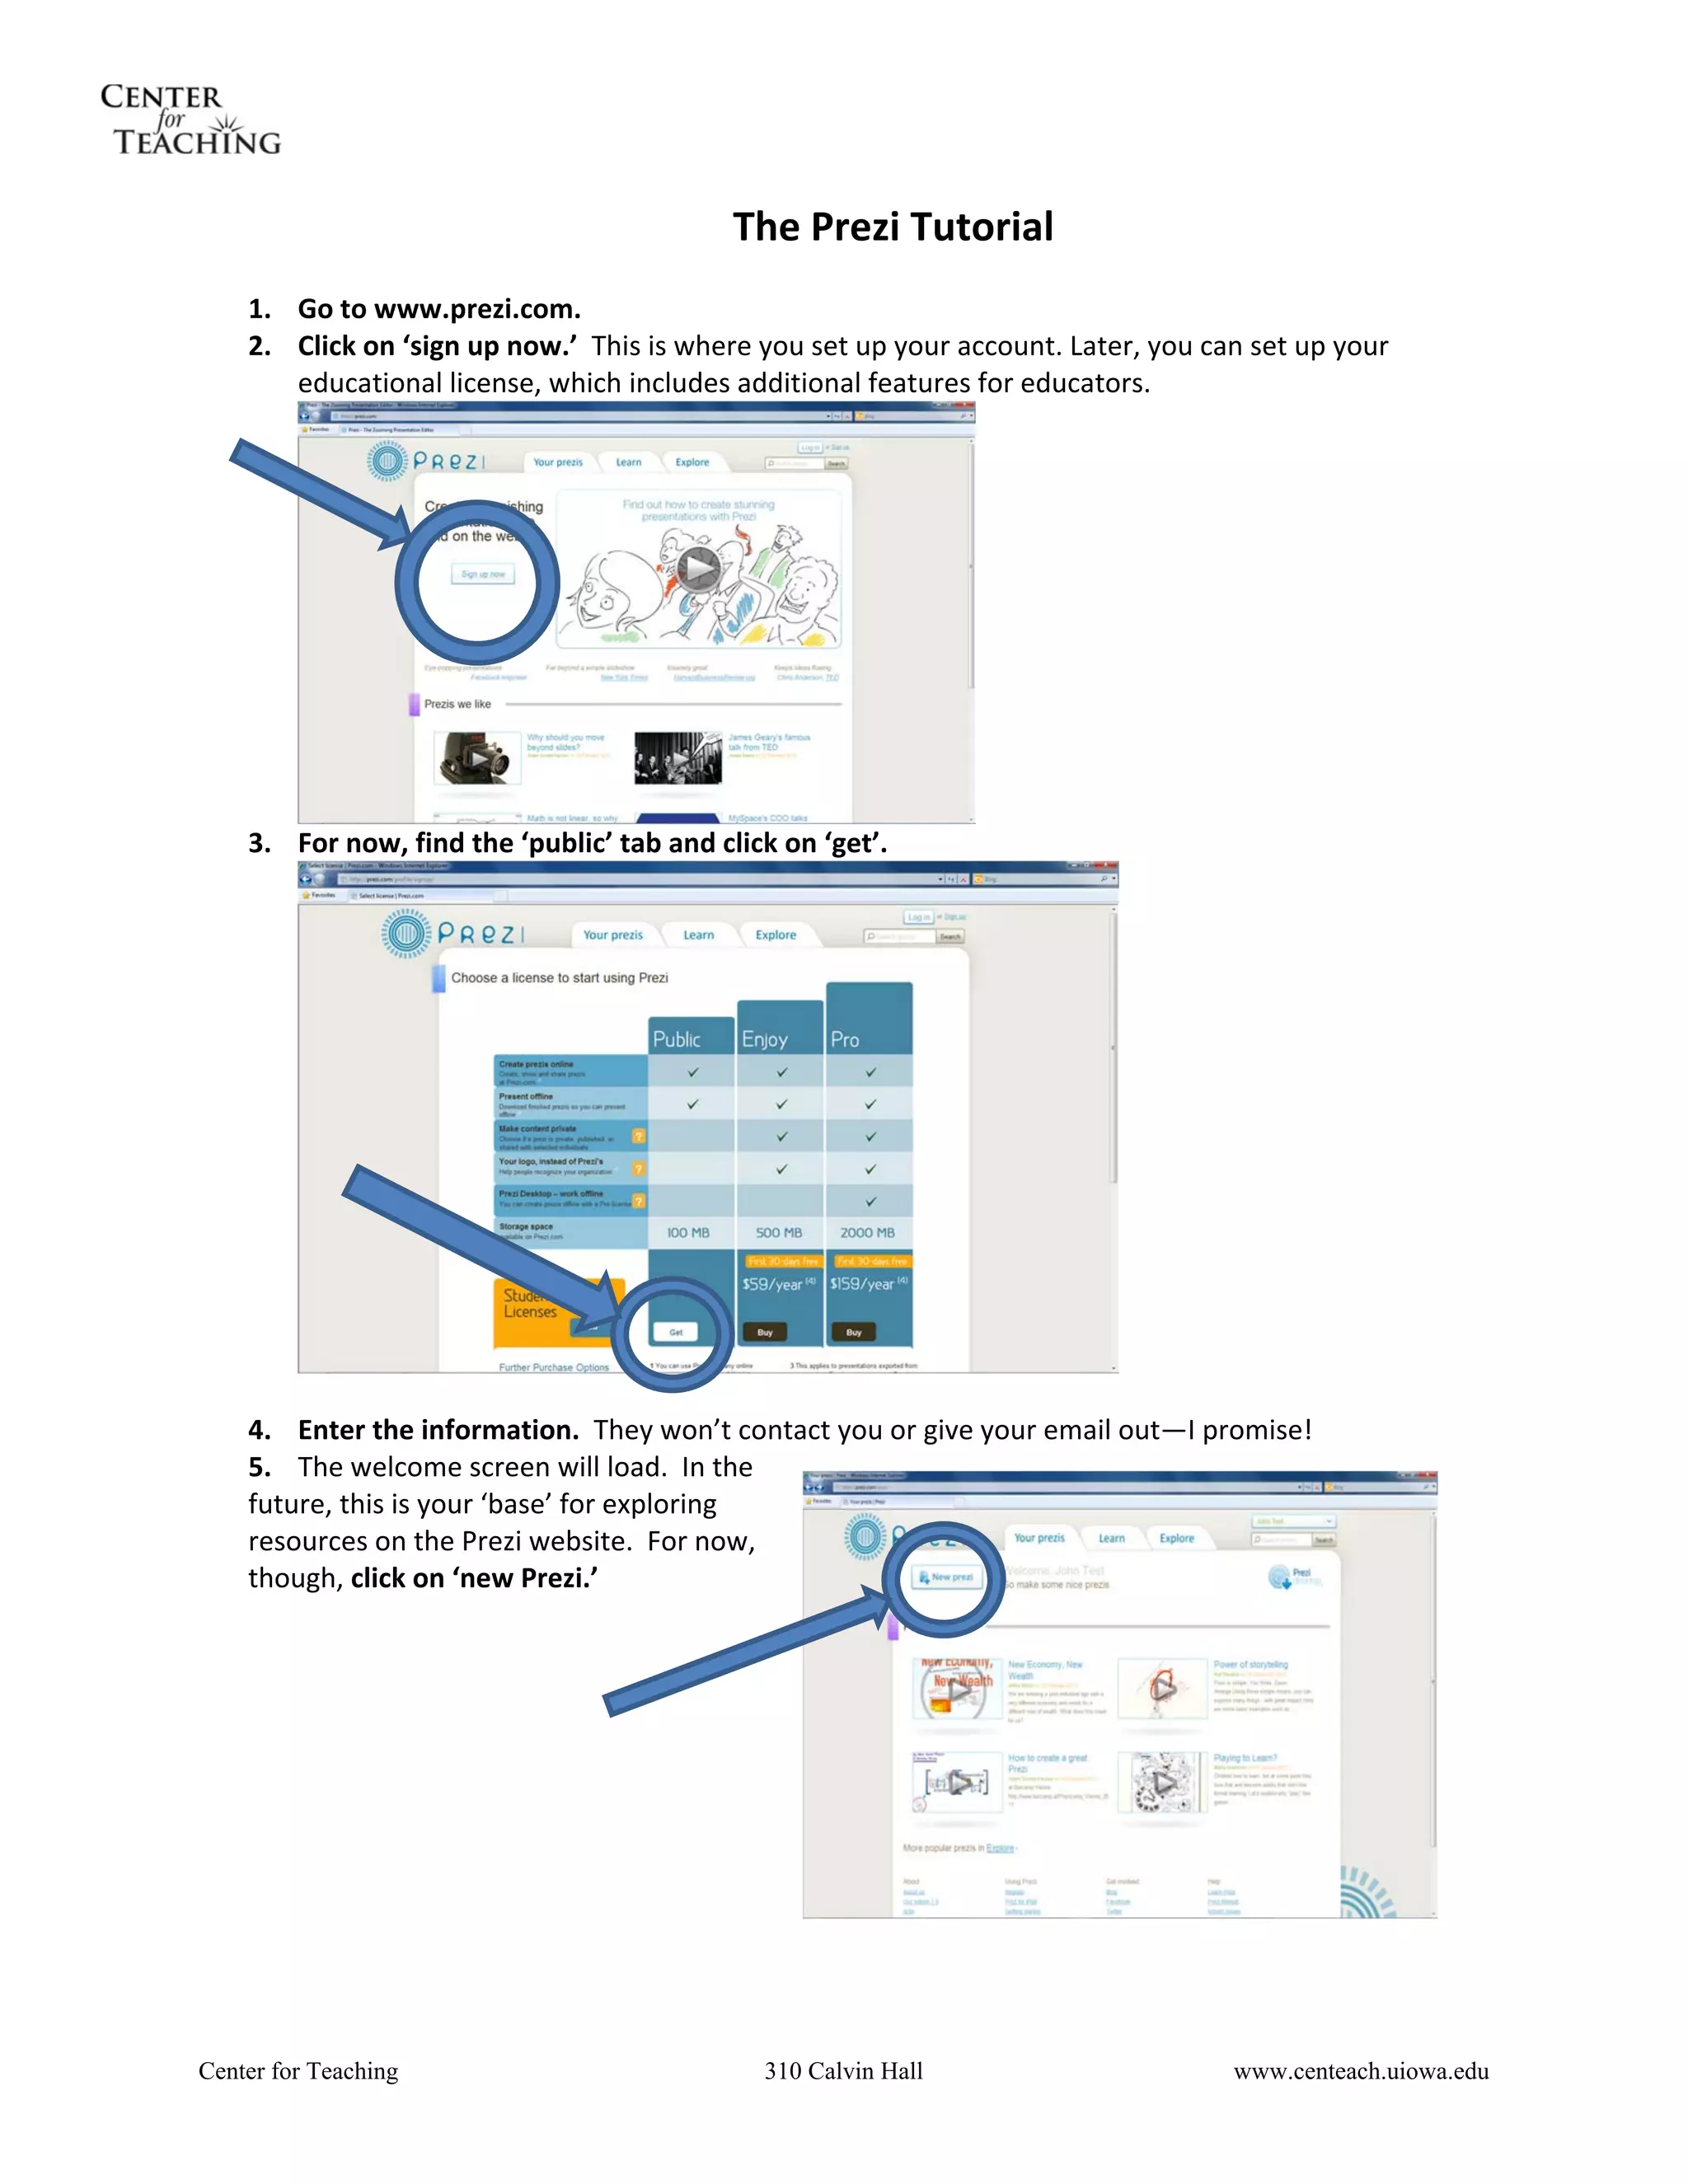
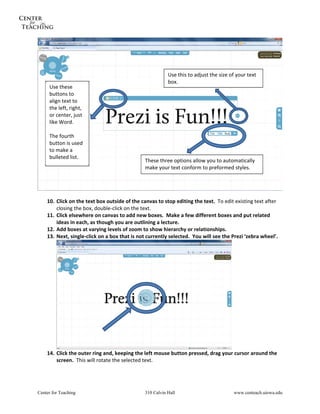
The document provides a 30 step tutorial for creating a presentation using the online program Prezi. It outlines the basic functions for setting up an account, adding text boxes and content to the canvas, formatting text, embedding images and videos, drawing arrows and shapes, and establishing a presentation path by connecting ideas in a specified order.
A computer security risk is any event or action that could cause a loss of or damage to computer hardware, software, data, information, or processing capability.
with Melissa Morgan (www.ememdesign.com)
An introduction to gauging the impact of social-media on society in this media saturated, hyper-networked, über-techie, digitally innovative world.
Online scams and frauds are one of the oldest tools in the box of cybercriminals. In this presentation, we help you understand:
a. The various types of online scams
b. Tips to stay safe from such scams
c. How Quick Heal can help prevent such scams
Advantages and disadvantages of social mediaAlan Raj
an interesting show about social media that you can find all the information and it also contains an interesting video with voice so u can understand what is the advantages and disadvantages of social media very clearly....................................................................................................................................................u just need to watch this u will be interested ,iam sure about that
ToonDoo - how to use this exciting cartoon creator in your classroomNicole Barnes
ToonDoo is a creative way to introduce multiliteracies into your classroom. ToonDoo is a specific genre of cartooning, a web comic, a comic book designed to be viewed online. Through using ToonDoo, students are able to create multimedia-rich digital stories in a Web comic format.
A Complete Guide To Creating Effective And Engaging Presentations With PreziAif Abadicio
A beginner's guide to creating an effective and engaging presentation using Prezi for industries, education, entertainment or for personal presentations.
Best PowerPoint Presentation Tips to Make More Creative Slideshows 2
How to Make a PowerPoint Presentation 3
1. Open a blank presentation again or start from one you've already created. 3
2. Choose a theme or create your own. 3
3. Create a variety of slides for different purposes. 3
4. Use the Duplicate Slides feature to save you time. 4
5. Add transitions to your slides (optional). 4
6. Add animations to your slides (optional). 4
7. Save your presentation. 5
8. Run your presentation. 5
9. Advance the slides. 5
PowerPoint Style 6
PowerPoint Design 11
PowerPoint Process 15
Your Next Great PowerPoint Presentation Starts Here 18
Become Part of our Team to make money online without investment, for more details visit
www.jobiworld.com
Best PowerPoint Presentation Tips to Make More Creative Slideshows
This guide will help students to create/develop a useful power point presentations. But our support is not limited to this – you may also directly contact us if you need any support related to power point designs and other assignments development.
Creating a great PowerPoint presentation is a skill that any professional can benefit from. The problem? It’s really easy to get it wrong. From poor color choices to confusing slides, a bad PowerPoint slideshow can distract from the fantastic content you’re sharing with stakeholders on your team.
That’s why it’s so important to learn how to create a PowerPoint presentation from the ground up, starting with your slides. Even if you’re familiar with PowerPoint, a refresher will help you make a more attractive, professional slideshow. Let’s get started.
Open Microsoft PowerPoint.
If a page with templates doesn't automatically open, go to ‘File’ at the top left of your screen and click ‘New Presentation’.
To use a template, either click the ‘Design’ tab or go to ‘File’ again and click ‘New from Template’.
1. Insert a new slide by clicking on the ‘Home’ tab and then the ‘New Slide’ button.
2. Consider what content you want to put on the slide, including heading, text, and imagery.
3. Keep the amount of text under 6-8 lines (or 30 words) at a minimum of size 24 pt.
4. Add images by clicking ‘Insert’ and clicking the ‘Pictures’ icon.
Add other elements by using features in the ‘Home’ and ‘Insert’ tabs on the top ribbon.
5. Play around with the layout by dragging elements around with your mouse.
I like to think of Microsoft PowerPoint as a test of basic professional skills. To create a passing presentation, I need to demonstrate design skills, technical literacy, and a sense of personal style.
If the presentation has a problem (like an unintended font, a broken link, or unreadable text), then I’ve probably failed the test. Even if my spoken presentation is well rehearsed, a bad visual experience can ruin it for the audience.
Expertise means nothing without a good PowerPoint presentation to back it up. For starters, grab your collection of free PowerPoint templates below.
PowerPoint is a presentation software package. With PowerPoint, you can easily create slide shows. Trainers and other presenters use slide shows to illustrate their presentations.
1. The Prezi Tutorial
1. Go to www.prezi.com.
2. Click on ‘sign up now.’ This is where you set up your account. Later, you can set up your
educational license, which includes additional features for educators.
3. For now, find the ‘public’ tab and click on ‘get’.
4. Enter the information. They won’t contact you or give your email out—I promise!
5. The welcome screen will load. In the
future, this is your ‘base’ for exploring
resources on the Prezi website. For now,
though, click on ‘new Prezi.’
Center for Teaching 310 Calvin Hall www.centeach.uiowa.edu
2. 6. Type a name and description for your Prezi. This will
put it in Prezi’s searchable database. When you have
an educational license, you won’t have to make your
Prezis public.
7. Close the tutorial Box.
8. The canvas!
‘Save’ – Saves your Prezi.
Arrows – ‘Undo’ or ‘redo’ – use to experiment
and fix mistakes.
Meeting – Online meeting functions.
Print – Prints out a PDF as a lecture
The Prezi Wheel –
accompaniment (one slide per ‘step’).
We’ll discuss this later. Help – Opens up a help menu.
Exit – Quits Prezi.
Navigation Menu
House – Centers on entire Prezi.
Magnifying glasses – Use to zoom in
and out.
9. Click anywhere on the canvas to add text. Type something.
Center for Teaching 310 Calvin Hall www.centeach.uiowa.edu
3. Use this to adjust the size of your text
box.
Use these
buttons to
align text to
the left, right,
or center, just
like Word.
The fourth
button is used
to make a
bulleted list.
These three options allow you to automatically
make your text conform to preformed styles.
10. Click on the text box outside of the canvas to stop editing the text. To edit existing text after
closing the box, double‐click on the text.
11. Click elsewhere on canvas to add new boxes. Make a few different boxes and put related
ideas in each, as though you are outlining a lecture.
12. Add boxes at varying levels of zoom to show hierarchy or relationships.
13. Next, single‐click on a box that is not currently selected. You will see the Prezi ‘zebra wheel’.
14. Click the outer ring and, keeping the left mouse button pressed, drag your cursor around the
screen. This will rotate the selected text.
Center for Teaching 310 Calvin Hall www.centeach.uiowa.edu
4. 15. Click the middle ring and, keeping the left mouse button pressed, drag your cursor around the
screen. This will change the size of the selected text.
16. Click the vertical lines in the center of the text and, keeping the left mouse button pressed,
drag your cursor around the screen. This move the text.
17. You can still copy and paste things using the right mouse button.
18. Click on the ‘Insert’ button in the top‐left corner
of the screen.
19. Three ‘sub‐options’ will appear in its place.
a. ‘File’ enables you to embed any image
from your hard drive into your Prezi.
b. ‘Youtube’ enables you to embed any
Youtube video directly from the Internet.
c. ‘Shapes’ opens up a sub‐menu with
three drawing options: a highlighter, a
pen, and an arrow.
20. Click on ‘shapes’ and use arrows to connect
your ideas. Draw lines and use the highlighter
to show relationships or highlight important ideas.
21. Click on the ‘back’ arrow in the upper left hand corner for your ‘shapes’ bubble to back up to
the previous menu. Do this again so that you are back on the ‘write’ bubble.
22. The next menu option is ‘frame.’ Frames do two things. First, and most simply, they can be
used as shapes. Click on ‘Frame’ and experiment with the first three types: circles, brackets,
and squares.
23. However, frames can also be used to provide anchors for your ‘path.’ Specifying a ‘path’ is how
you design a presentation. Much like going from slide to slide, Prezi will go from object to
object in a way that you specify. Here’s how.
24. Click on the ‘Path’ bubble. You may have to click the little arrow in the upper‐left hand corner
of the screen to return to the main ‘Write’ bubble first.
25. Click on the most important word or object on your screen. Then click on the next one.
Notice that Prezi draws a line between them with ‘1’ and ‘2’. This shows the order in which
Prezi will focus on these things in presentation mode. Each mouse click will bring you from ‘1’ to
‘2’ and so on (remember—we aren’t in presentation mode yet).
26. Keep adding destinations to your path, as
though you are making a presentation.
27. You can drag numbers around, changing Path objects ‘1’ and ‘2,’ respectively.
their order.
28. You can also click on the unnumbered dots
in the middle of the lines to insert new
numbers.
29. Finally, let’s say that you want to show
multiple objects at once. This is where you
use frames!
30. Click on ‘Present’ (in the main menu
bubble) to present! Use this to insert new numbers in
the middle of a path.
Center for Teaching 310 Calvin Hall www.centeach.uiowa.edu